Chuck
-
Posts
9,717 -
Joined
-
Last visited
Content Type
Profiles
Forums
Gallery
Events
Everything posted by Chuck
-
 Drillbitsunlimited.com And home depot or Lowes for MinWax wipe-On Poly satin finish Chuck
- 1,051 replies
-
- 5
-

-
- cheerful
- Syren Ship Model Company
- (and 1 more)
-
The carriages on the contemporary model in the Rogers collection is very similar except for the super tiny trucks. I pretty much used the plan I showed which is a really good fit and more traditional. But there are many many variations. I would love to see someone have a go at the more wacky concepts used on revenue cutters. There are plenty.

- 1,051 replies
-
- 8
-
-
- cheerful
- Syren Ship Model Company
- (and 1 more)
-
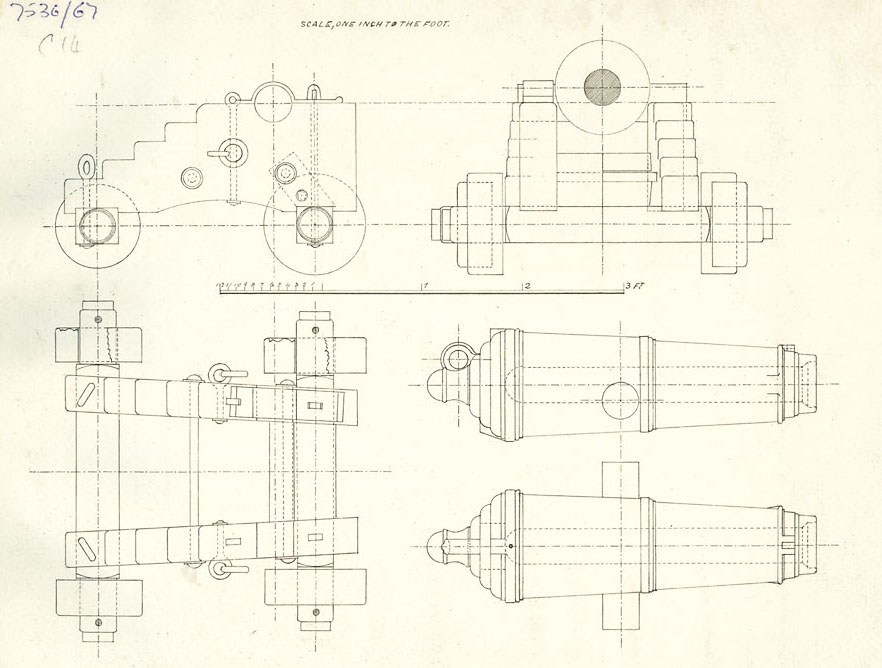
Most of the revenue cutters had them this wayafter 1800 or even a weirder looking carriage. This was the most normal.. Here is a plan detail of ZAZ6992 which actually says its for carronades on revenue cutters circa 1812. Its a little weird but its one of those things that make it interesting. This is from the NMM collection.

- 1,051 replies
-
- 12
-
-
- cheerful
- Syren Ship Model Company
- (and 1 more)
-
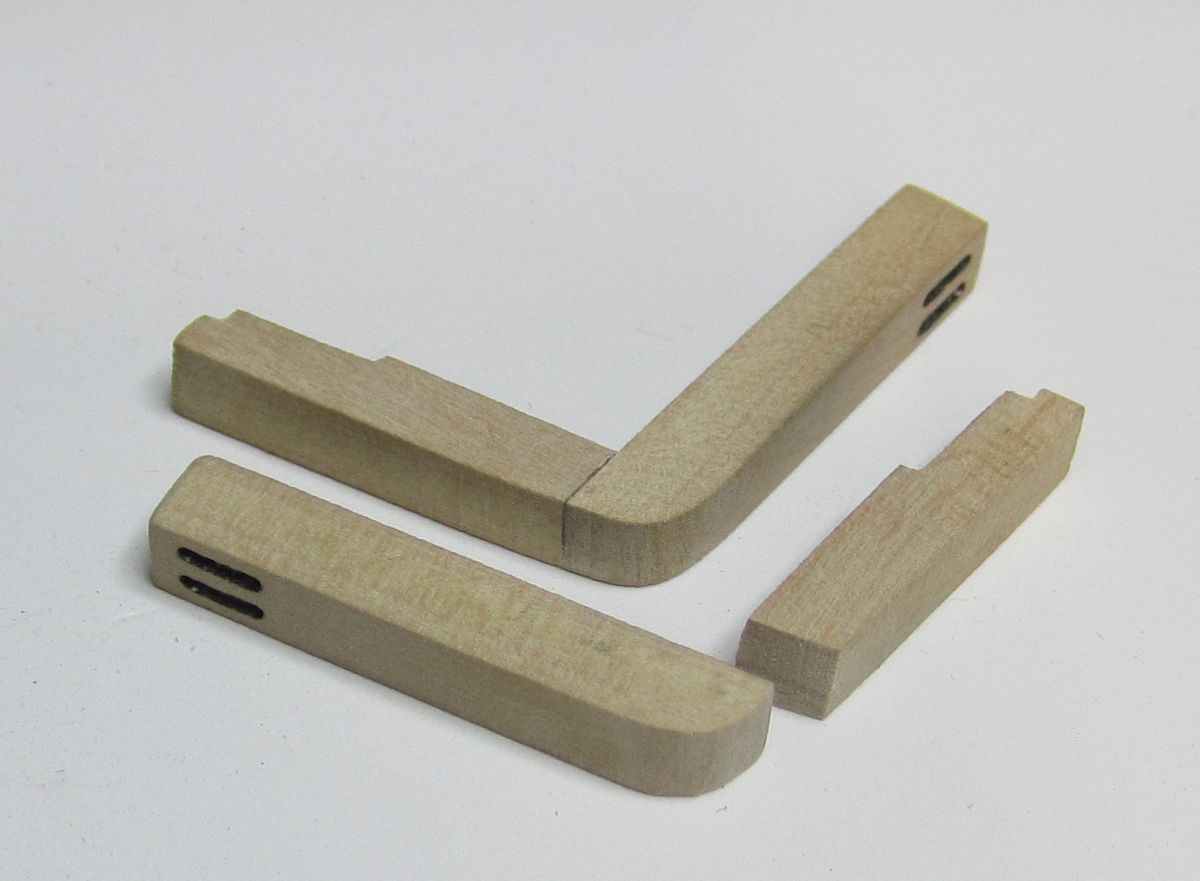
Yes I did...and a simple sanding stick. I started with a square stick of boxwood 3/64" x 3/64". It actually goes pretty quick once you get into it. Chuck
- 1,051 replies
-
- 6
-
-
- cheerful
- Syren Ship Model Company
- (and 1 more)
-
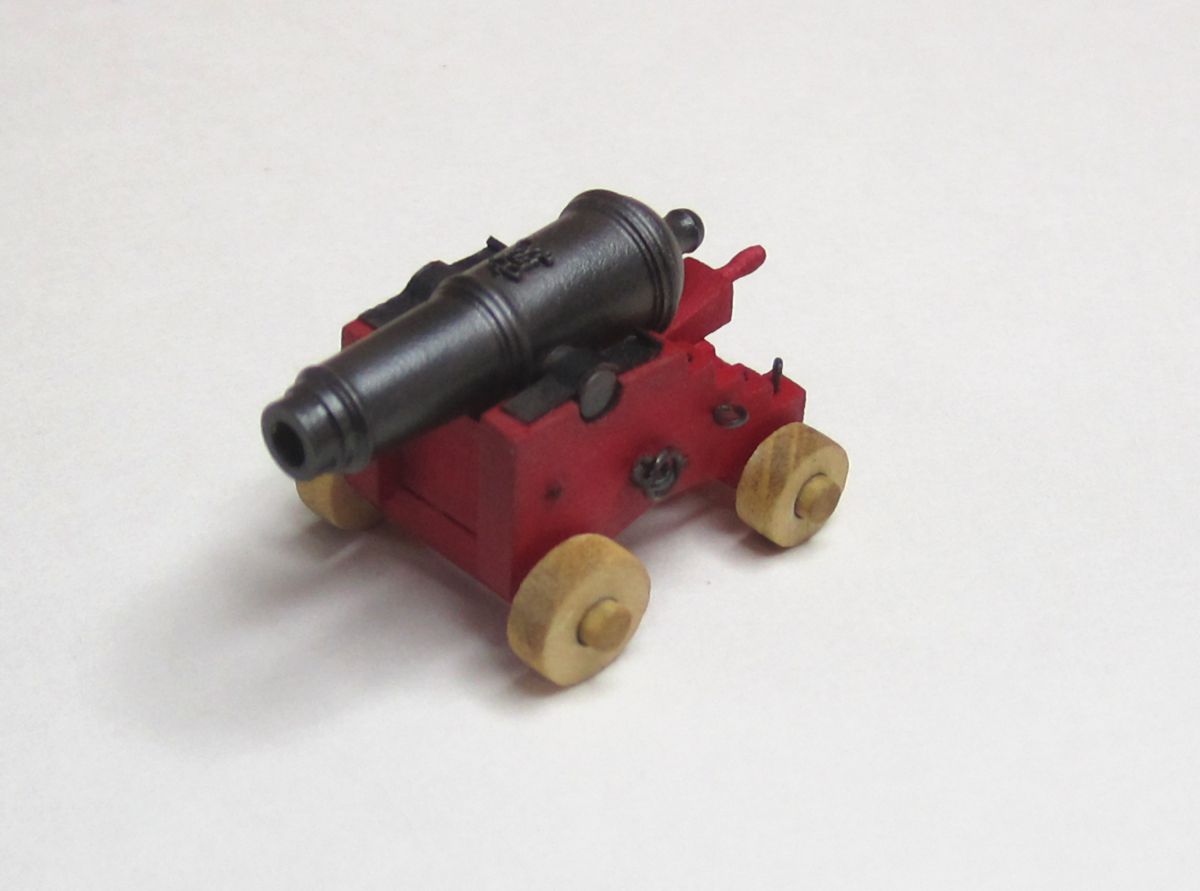
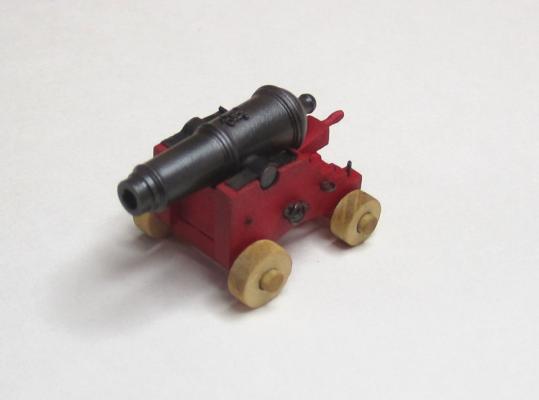
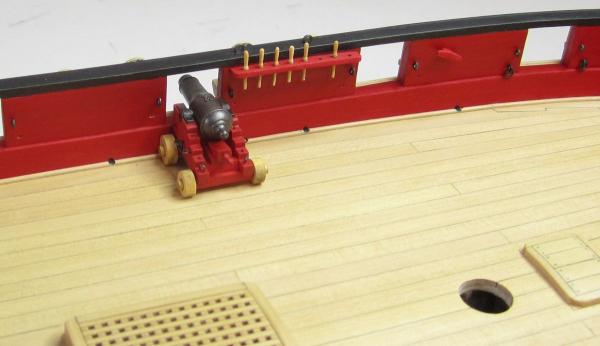
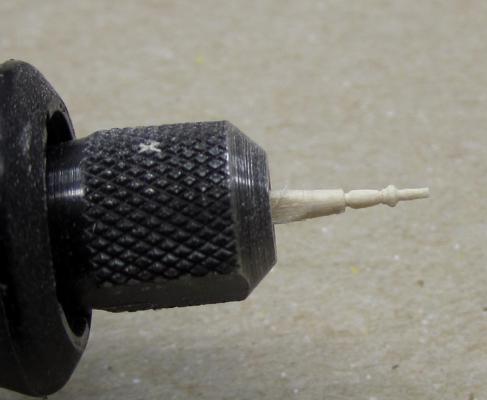
Thank you very much I decided to make one carronade with all of the details. This way I could find out what is in store for me. Now I can more comfortably finish up the remaining 11 guns. I will describe how with a step-by-step once I get started. But for now..here is what the completed gun looks like. I also finished making the belaying pins. They were made from boxwood. I dislike the brass belaying pins available because they are just the wrong proportions. With only about 16 pins needed I decided to make my own. If you are a heavy handed rigger....someone who likes to pull theit rigging lines super tight like a guitar string then you should probably stick to the brass. Otherwise give this a try. I just chucked up a thin boxwood strip in my dremel and went to work. The same method was used to make the quoin handle for the carriages. Image is below. Chuck


- 1,051 replies
-
- 40
-
-
- cheerful
- Syren Ship Model Company
- (and 1 more)
-
Cutter Cheerful 1806 by rafine - FINISHED
Chuck replied to rafine's topic in - Build logs for subjects built 1801 - 1850
Looks great Bob... One Note however. The 5 hole deadeye should be the other way around. ...but that has long since been corrected. It was mistakenly flipped at some point on my plan and I never noticed. I am referring to the deadeye itself......the holes are correctly aligned but the grooves in the deadeyes should go the other way around.....just letting everyone know. But either way it looks fantastic. Well done. Chuck- 525 replies
-
- 6
-
-
- cheerful
- Syren Ship Model Company
- (and 1 more)
-
That is looking really sharp. Well done John. Chuck
- 745 replies
-
- 4
-
-
- francis pritt
- mission ship
- (and 1 more)
-
Yupp, Thats how I do it. Then the slot is rounded off into the holes so the sheave actually looks rounded. To finish it off I use a sharp pencil to darken the sheave.
- 1,051 replies
-
- 5
-
-
- cheerful
- Syren Ship Model Company
- (and 1 more)
-
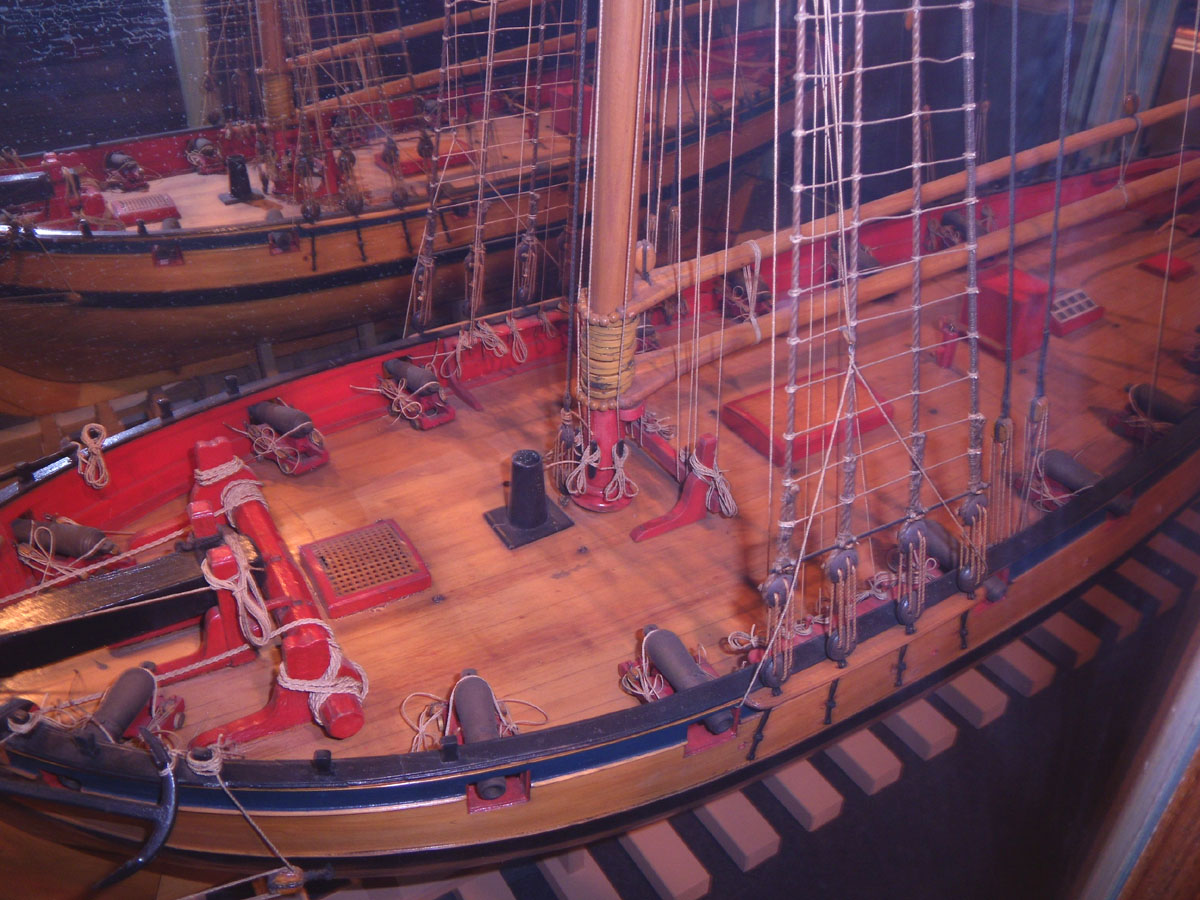
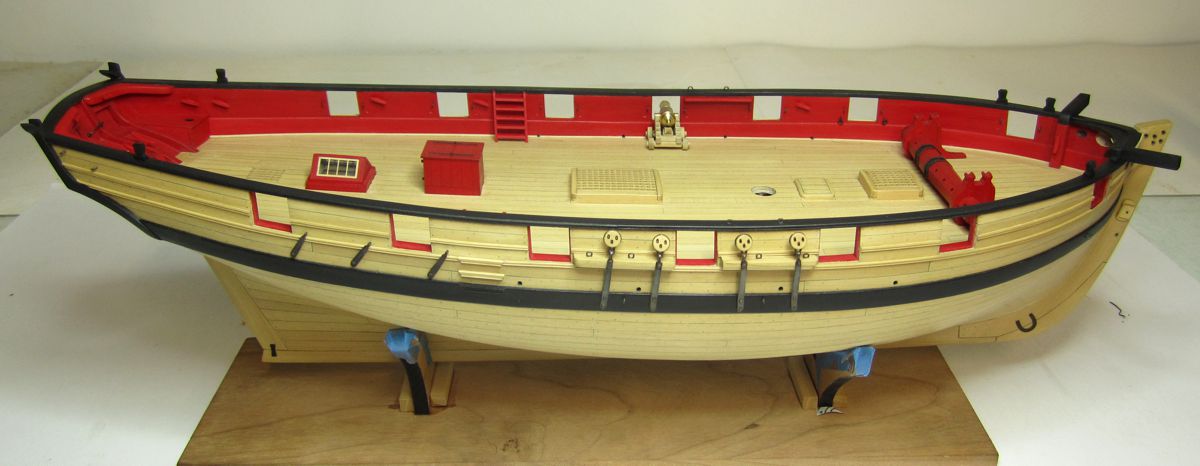
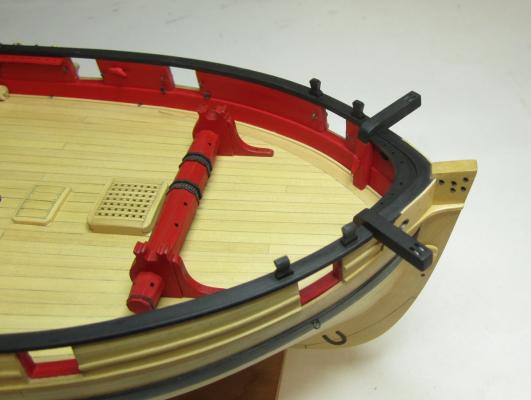
Today I finished up the bulwark details. All of the cleats and the pinrails have been added. I also made the catheads. These warrant special note. These were made in two pieces. They were shaped from a 3/16" x 3/16" strip. Care was taken to shape the inboard leg of the cathead to fit snug against the bulwarks. It had to be shaped to fit around the waterway and spirketting. The top portion had its two sheaves simulated in the usual manner. The cap rail was then notched out to accept the cathead and the two sections of the catheads were fit together ahead of time. After the notched cap rail was ready...the two parts were tweaked until they fit well. Only then were they glued together and painted. Hopefully sometime this week I will begin putting the gun carriages together or maybe make the belaying pins. I dont need that many belaying pins for this model so why not make them from scratch as well. Chuck


- 1,051 replies
-
- 39
-
-
- cheerful
- Syren Ship Model Company
- (and 1 more)
-
Thank You.... Its just a matter of slowing down and taking your time. Not rushing is a huge part of it. I think everyone can do the same but I see so many folks running through their projects like they are in a race. Should parts not fit correctly...throw them away and do it again. It took me about 2 hours to paint the stern after making the seats and adding the cleats. It took me about 1 hour to just paint one ladder after making it. Many thin coats being careful not to get any dust on it. Sanding carefully when imperfections and brush strokes take place. The key in my mind is to just slow down....my best advice for any model builder. Chuck
- 1,051 replies
-
- 42
-
-
- cheerful
- Syren Ship Model Company
- (and 1 more)
-
At some point it does get ridiculous. Again I reiterate how I wanted this to be a scratch/semi-scratch project. But it all depends on how much demand there is for the pesky parts nobody likes to build from scratch. I have basically kept all of the laser cutting files for each element of the project just in case. If a lot of folks want these to be available I will certainly add them to the list of parts available. I use the laser cutter like anyone else would use any other tool. So its easy enough to do. Mike is in my local club for example...so I usually cut double the amount and I will give him some ladder kits tonight when I see him. Chuck
- 1,051 replies
-
- 9
-
-
- cheerful
- Syren Ship Model Company
- (and 1 more)
-
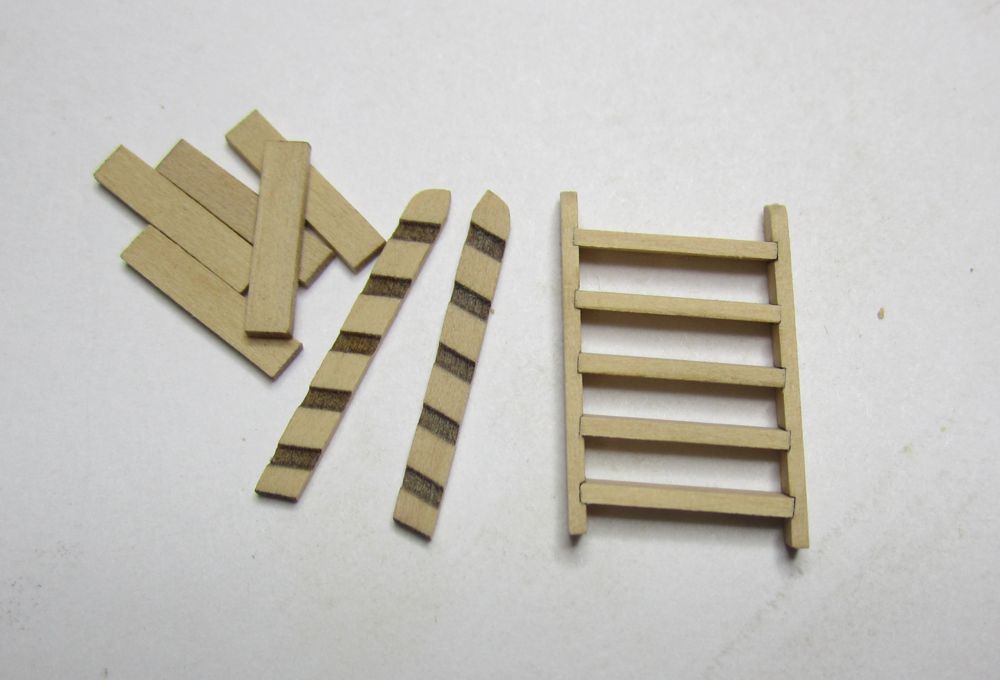
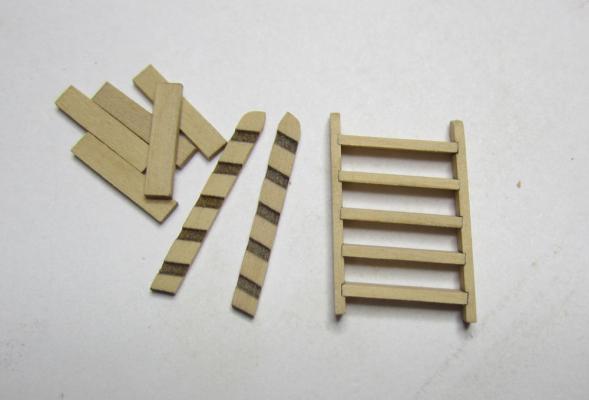
Making ladders now. They are usually very annoying to make in any scale. I quickly drafted some laser cut plans. Makes it much easier. I laser etched slots to take each step. Note the angle to the completed ladder. It follows the sheer of the deck fore and aft and therefore is askew. Otherwise it would look funny. These will be painted red. Chuck
- 1,051 replies
-
- 21
-
-
- cheerful
- Syren Ship Model Company
- (and 1 more)
-
Here is a photo of my 1/4" and 1/2" version of the pinnace. I have highlighted in blue on the smaller version to show the slight subtle "s" shape at the bow. This is done to keep the caprail relatively flat at the stem. Chuck
-
That is correct....but also remember that at the bow where the sheer meets the stem, the sheer should be flat or almost level. Not angled upward. To do this you must create a subtle "S" bend in that top plank to establish the proper run of planks.
-
Yes there would have been a discharge hole through the counter but it is rarely modeled. You can absolutely choose to show it if you want. Chuck
- 1,051 replies
-
- 6
-
-
- cheerful
- Syren Ship Model Company
- (and 1 more)
-
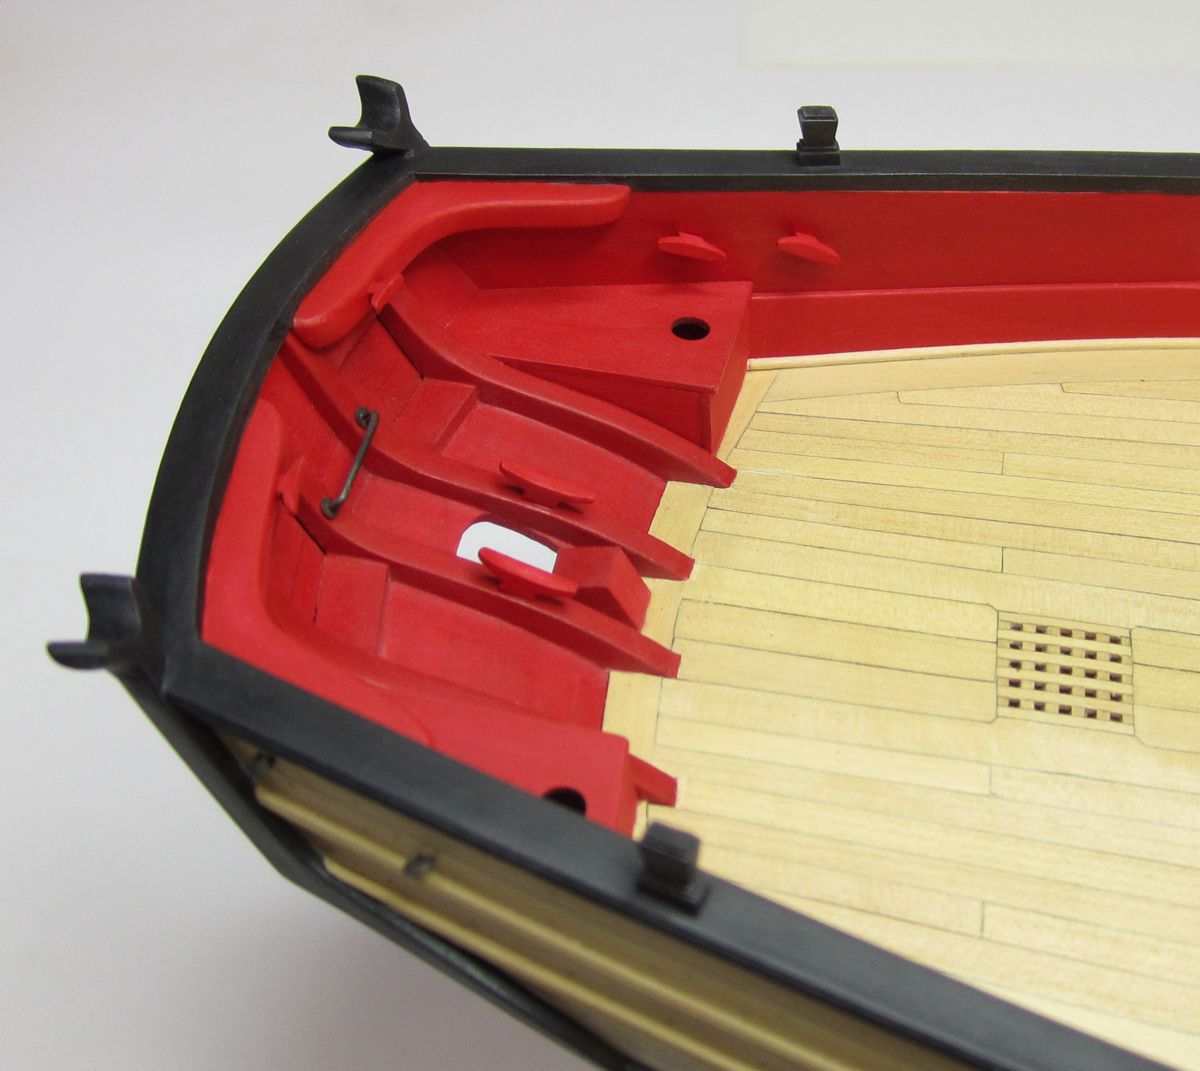
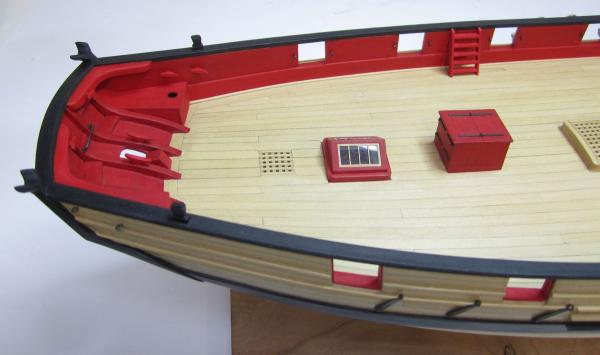
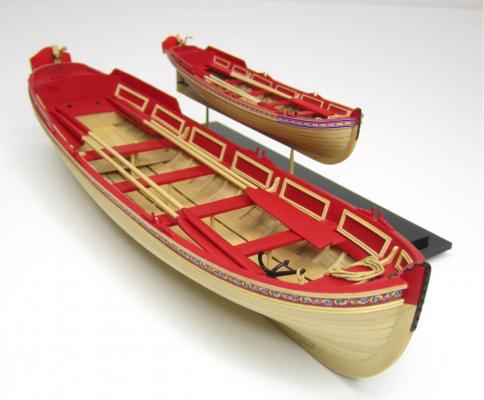
Just a small update. I worked on the inboard stern details. The seats are completed. Card templates were made first using the plans as a guide. Then they were tweaked to get a nice tight fit with the parts. Cleats were added...these are all laser cut Syren cleats (5, 7, and 9mm). All that was needed to do was sand them a bit to shape and then add a piece of wire as a pin. Then they were glued into place. I decided to paint these bulwark red also to match the many contemporary models I have seen. Finally....the horse was added for the boom sheet. This was just a small piece of wire bent to shape. Two small washers laser cut from paper were added to finish it off nicely on each end. They were painted to look like metal. I should have dusted the model better before taking the pics....next time I will now continue my way forward along the bulwarks adding eyebolts, cleats, ladders and pin rails. Chuck


- 1,051 replies
-
- 36
-
-
- cheerful
- Syren Ship Model Company
- (and 1 more)
-
Cutter Cheerful 1806 by rafine - FINISHED
Chuck replied to rafine's topic in - Build logs for subjects built 1801 - 1850
Nicely done......have fun with the serving machine....after a while you will wonder what all of the fuss is about. Serving is easy enough and it adds a great deal to the models look. Yours is certainly looking good.- 525 replies
-
- 8
-
-
- cheerful
- Syren Ship Model Company
- (and 1 more)
-
That is looking so nice. Very clean and precise. Can you place a ruler along side for a better grasp at just how large this model is? Thanks Chuck
- 641 replies
-
- 6
-
-
- greenwich hospital
- barge
- (and 1 more)
-
That would be a bit risky.....i wouldnt do it...you would have more control just doing it by hand. Chuck
- 1,051 replies
-
- 4
-
-
- cheerful
- Syren Ship Model Company
- (and 1 more)
-
Just click the start new topic button....the rules are all about how to name your build log in the topic title. Just go to the list of build logs and you will see the start new topic button. Its above the list of logs. Right hand side. Chuck
-
Just catching up with this project. You are doing a fantastic job on this model.
-
Cutter Cheerful by iosto - 1/4" scale
Chuck replied to iosto's topic in - Build logs for subjects built 1801 - 1850
Looking good!!! Wonderful. -
That looks great. I wouldnt worry about the frames being another wood. Very little of the frames will be visible once the model is completed. Chuck