Chuck
-
Posts
9,719 -
Joined
-
Last visited
Content Type
Profiles
Forums
Gallery
Events
Everything posted by Chuck
-
 Nicely Done Toni!!!! Very finicky work and the pictures dont show how small those pieces actually are to work with.
 -
Yes I buy them online here..... http://www.hobbylinc.com/cgi-bin/s8.cgi?str_s=k%26s+bar Yes you can use the wider sheets and strips to make scrapers. They dont last forever but get the job done for me. Chuck
- 1,051 replies
-
- 3
-

-
- cheerful
- Syren Ship Model Company
- (and 1 more)
-
I must say that it looks lovely as is Ryland. Very nice work. Chuck
-
That is great news Bob!!!
-
Thank you very much....your comment alone makes it all worthwhile.
- 1,051 replies
-
- 7
-
-
- cheerful
- Syren Ship Model Company
- (and 1 more)
-
Thank you gents!!! Hopefully get the other side done this weekend and start on the deadeyes and chainplates.
- 1,051 replies
-
- 6
-
-
- cheerful
- Syren Ship Model Company
- (and 1 more)
-
Write a proposal and send it to me as described here..... http://www.thenrg.org/nrg-ship-model-research-grant.php Chuck
-
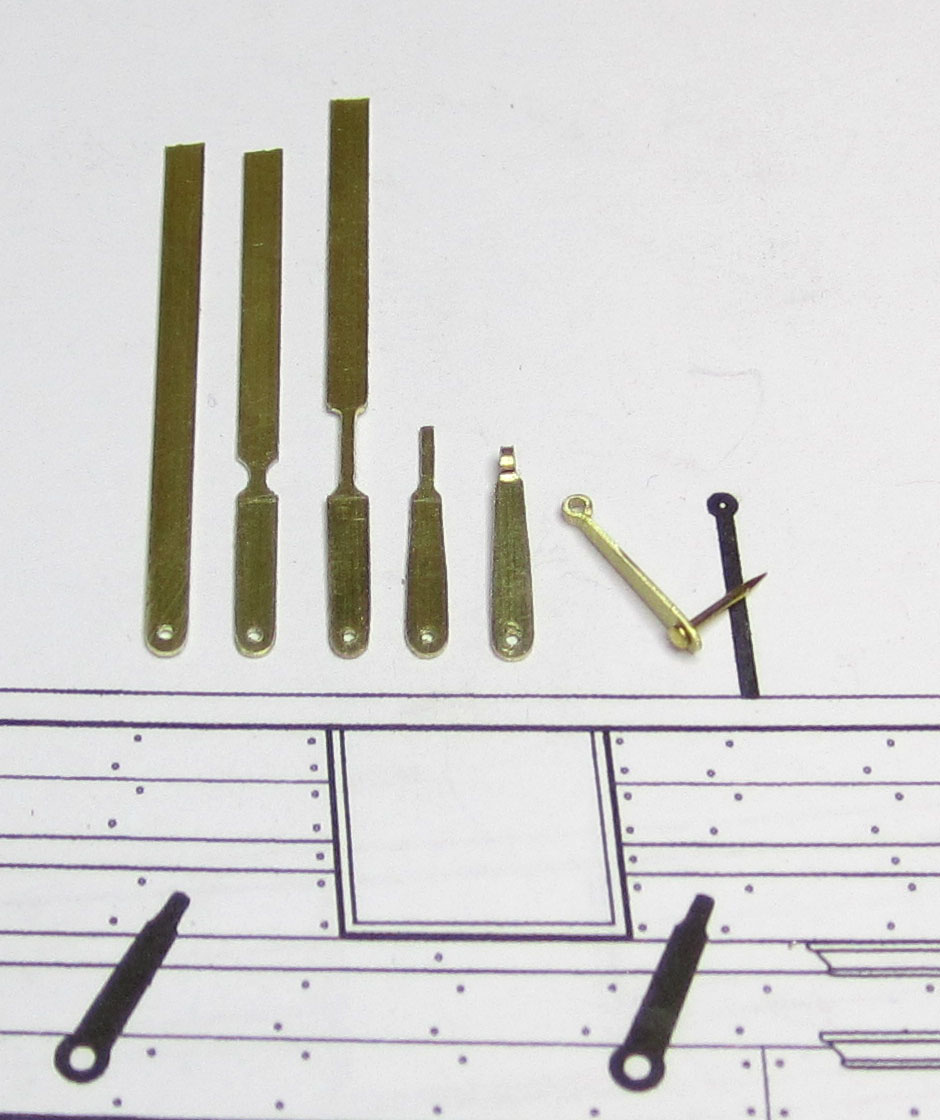
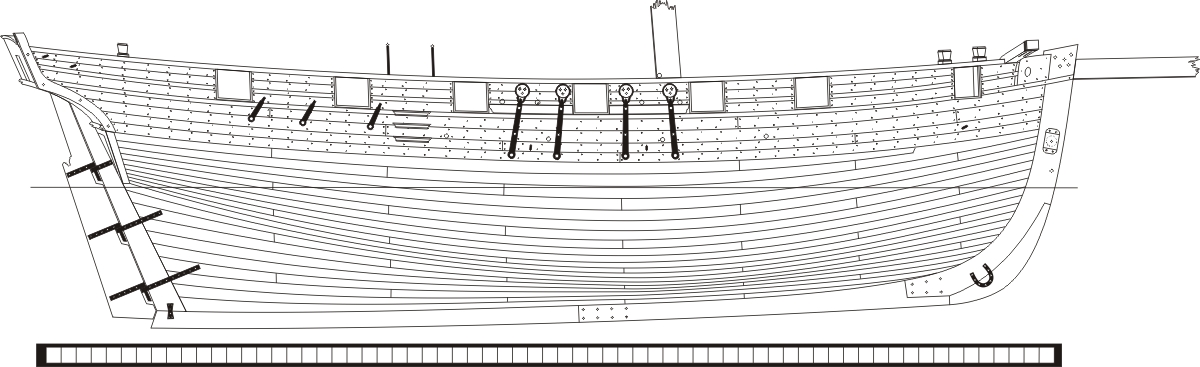
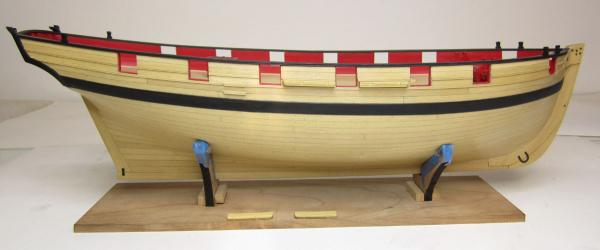
The channels are in and I added the eyebolts to the exterior of the hull. I also drilled the scuppers which was pretty straight forward. Then I started to fabricate the plates for the backstays. These were made using 1/64" x 3/32" brass strips. The K&S strips are soft and can be filed easily to shape. You can see the progression of steps used to make them. There will be three chainplates on each side of the hull. I started by drilling the hole at the bottom and rounding it off. Then I used a round file to notch the strips on both sides as shown in step two. This will be the top of the chain plate where it gets thinner. In step three I used a flat file to extend that thinner portion on top so I could bend it into a loop like making an eyebolt. Step four is where I cut off the top excess strip and tapered the bottom portion so it got slightly narrower as it worked its way to the top. The last two examples show the chainplate completed with the thin portion of the brass on top bent into a loop. This will get a hooked tackle when it comes time to rig the back stays. I used small little brass pins....you know the ones...they come in every kit and I have a whole bunch of them. Next its on to the deadeyes and chainplates for the channels. Its really the same procedure to make those except we will add a stroped deadeye to the top of each. The outboard details are almost all complete. Once the deadeyes are completed there is only the rudder and fixed block on the stem. Then we finish up inboard!!!!


- 1,051 replies
-
- 44
-
-
- cheerful
- Syren Ship Model Company
- (and 1 more)
-
It looks very good. That is a very simple way and a clean way to do it. Chuck
- 222 replies
-
- 4
-
-
- 18th century longboat
- model shipways
- (and 2 more)
-
Thats a very nice shop...glad you are jumping back into the workshop. Start making some sawdust!!!!
-
Good luck with the build and I hope you enjoy the project. Dont hesitate to ask me any questions along the way!!!
-
Look at this shop.....particularly Albion brass tubes....crazy small sizes I use this stuff almost exclusively and it works well. You cant cut it with a nippers or saw. Its so small that you roll a sharp #11 blade over it and make clean precise cuts. http://www.hobby-time.com/index.php?main_page=index&manufacturers_id=1026&zenid=924sarv0jl7nbi1sglngeu21r2
-
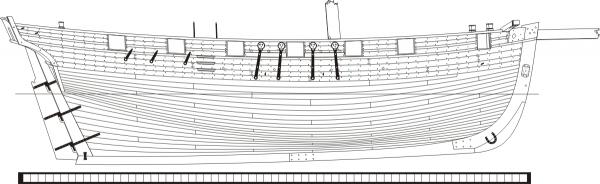
Probably....or the parts were cut wrong. Just measure the scale bar on the plans. Each segment should be 1/4" long.
- 162 replies
-
- 2
-
-
- 18th century longboat
- model shipways
- (and 1 more)
-
See attached....sheet two. 26ftlaunchsheettwo.pdf
- 162 replies
-
- 1
-
-
- 18th century longboat
- model shipways
- (and 1 more)
-
Its really difficult for me to say other than to measure from the plans. Did your kit come with the plans. You should be able to measure from the sheave holes to where the bands are located.
- 162 replies
-
- 1
-
-
- 18th century longboat
- model shipways
- (and 1 more)
-
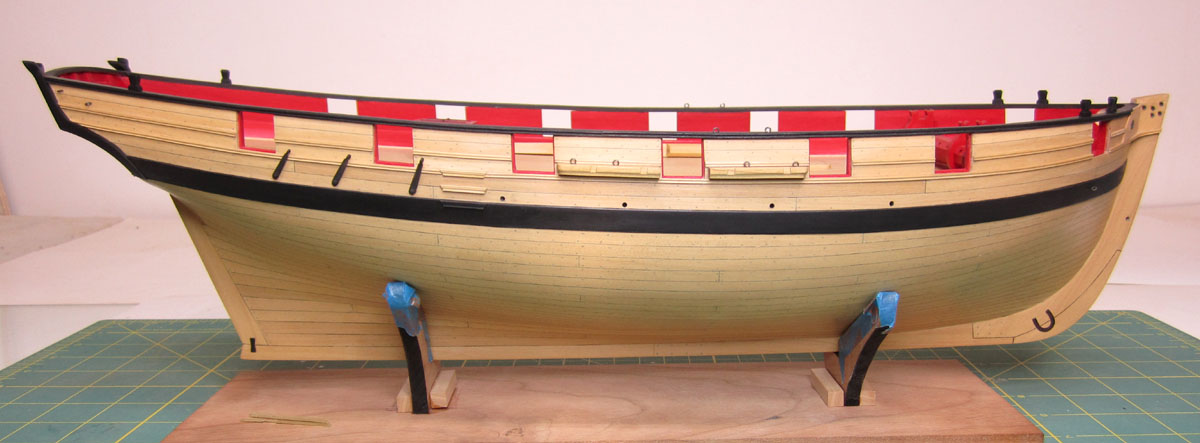
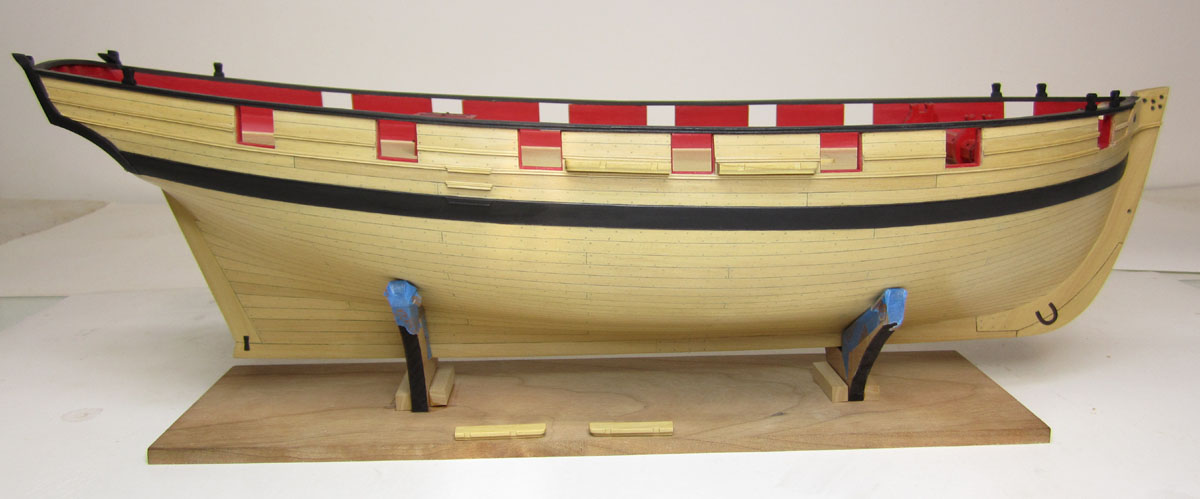
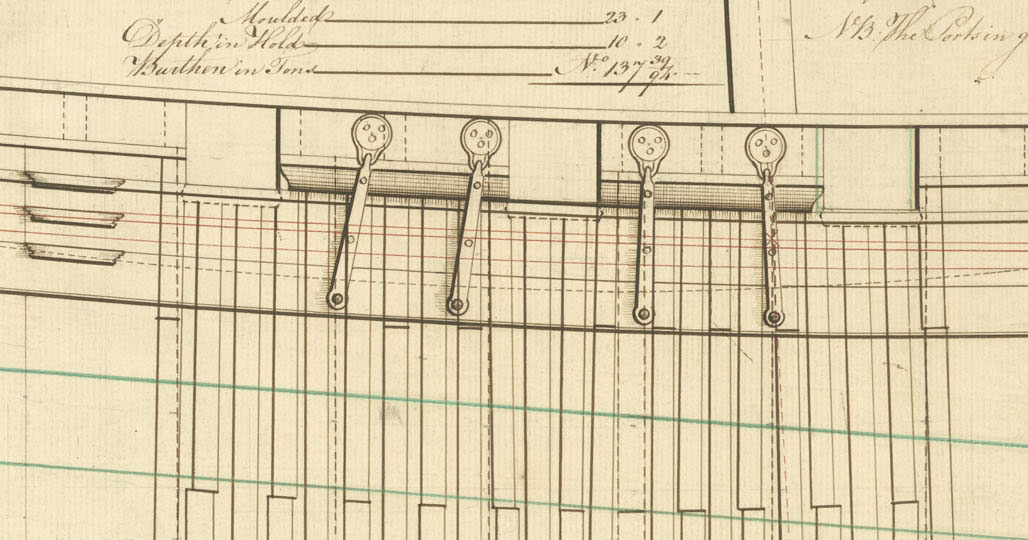
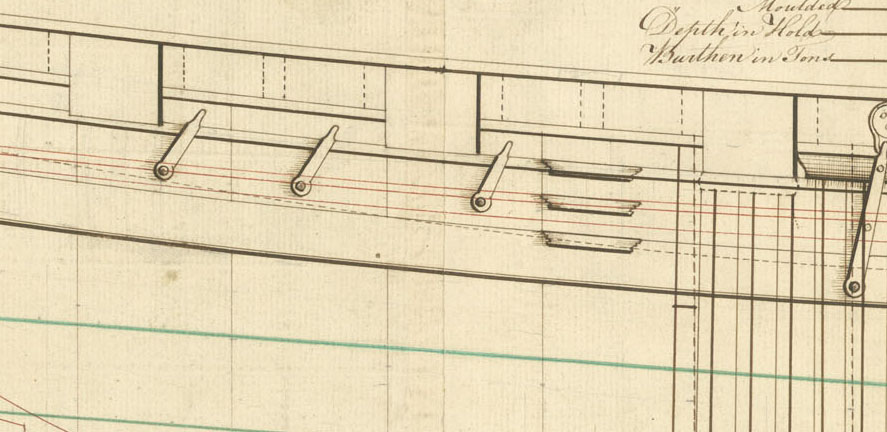
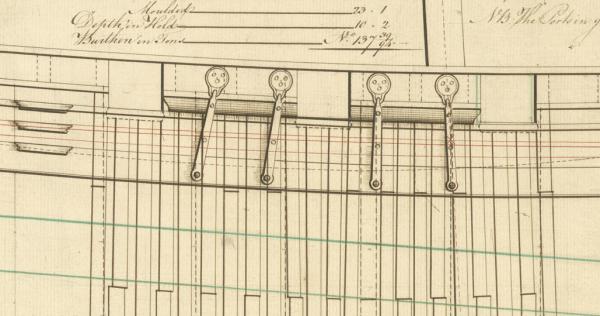
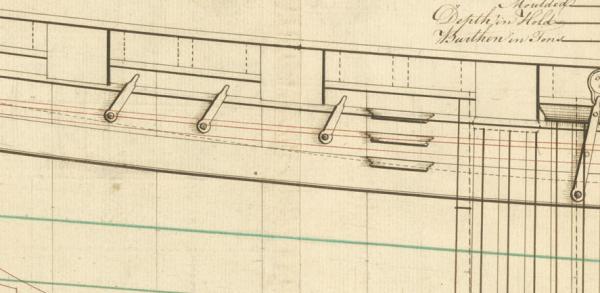
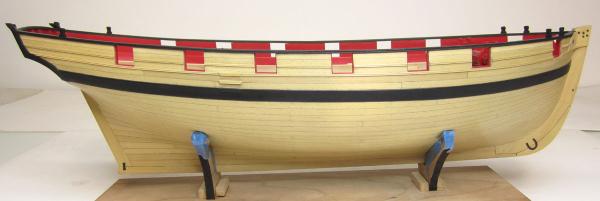
Today I tackled the channels. No easy way to make these. You just have to go old school. These are unlike the channels most have grown accustomed to. These are much thicker (5/32") and they are not as wide. When viewed from the side they gradually get thinner buy a little bit. The bottom is beveled or angled so the outboard edge is just 1/8" thick. Maybe a hair thicker. Note how the usual cover or cap molding isnt shown. Basically small notches are filed into the edge and the chainplates will be bolted to the edge. Many cutters show this feature but there are other arrangements too. But I figure the original draft should be followed here. Its an interesting feature. Then the profile along the edge is made old school with a round file, sanding sticks or whatever you are comfortable with. Note how the gunport splits the channel in two lengths and the edges in the break are not profiled. I had hoped to make the eyebolts and chainplates today but I dont have enough brass strip so it has been ordered. While I wait I will continue finishing up the outboard details like the scuppers and rudder. The channels are not glued on yet as I await arrival of more material. They will be finished up first with eyebolts. The outboard details shouldnt take very long to do.


- 1,051 replies
-
- 27
-
-
- cheerful
- Syren Ship Model Company
- (and 1 more)
-
I am just following the original draft. Its identical. I dont want to make stuff up, I am being 100% faithful to the original draft. I agree but it seemed to have not bothered the designer.
- 1,051 replies
-
- 10
-
-
- cheerful
- Syren Ship Model Company
- (and 1 more)
-
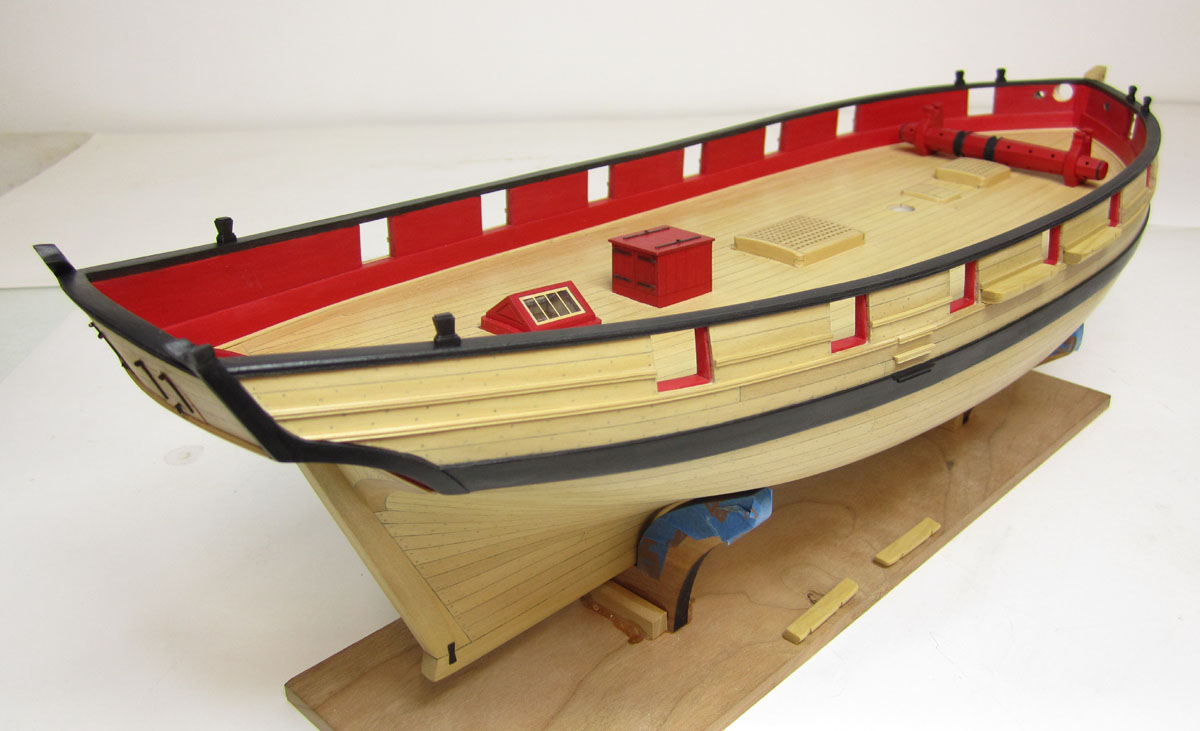
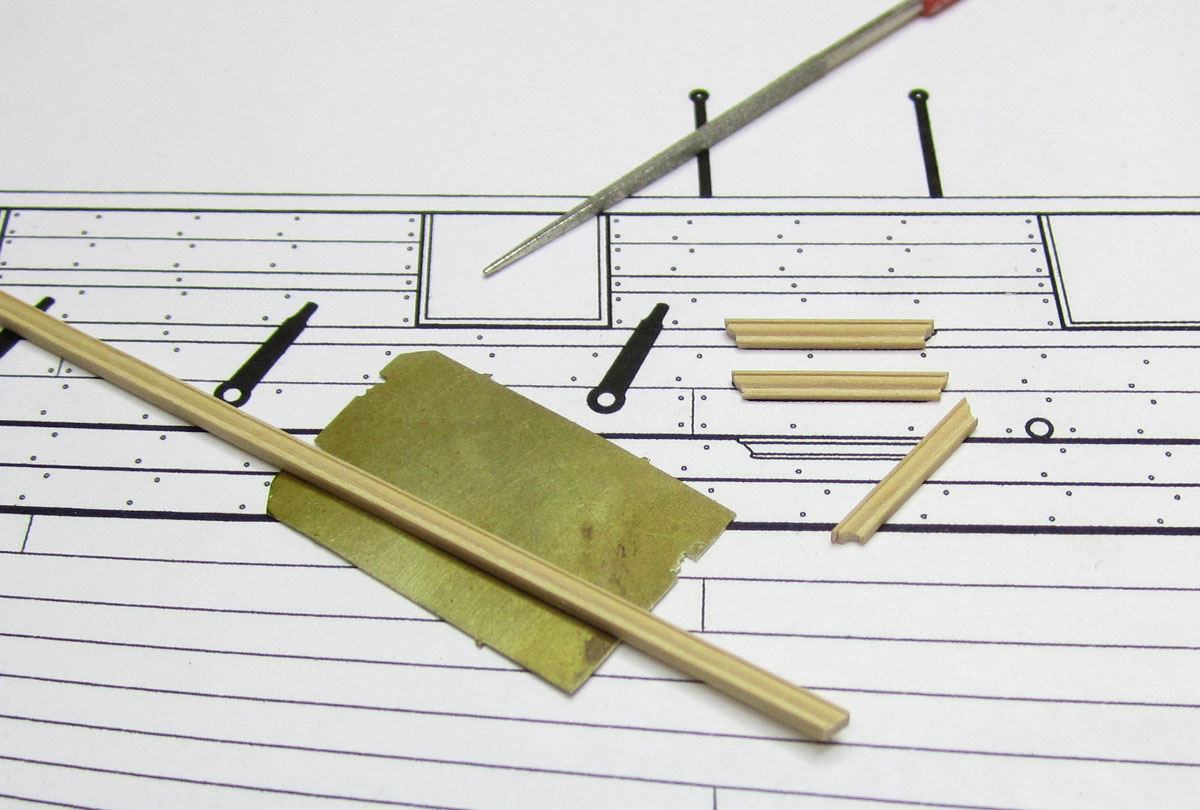
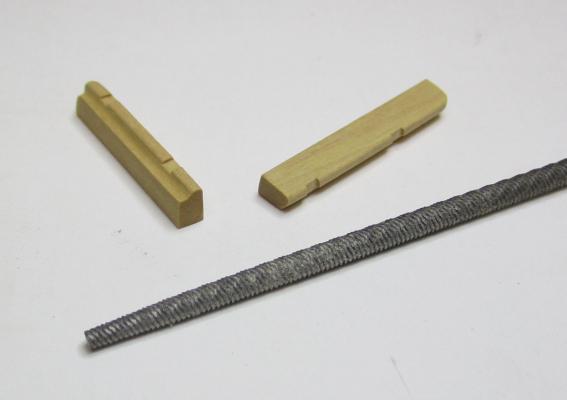
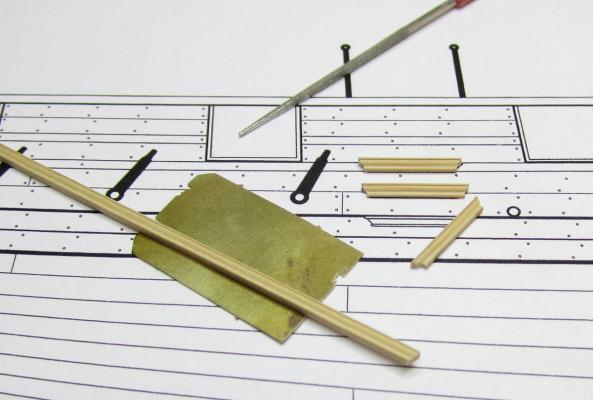
I did start working on the model again today. Nothing big. I just fabricated the boarding ladder steps today. I made a scraper with the profile I wanted and then cut the steps from the strip. I was careful to angle the back side so the top of each step was flat and not angled once held against the hull. There are three steps per side although one is on the wales so its impossible to see after you paint it black. Maybe if I adjust the camera settings a bit. The sides of each step were filed to mimic the front profile and then they were glued into position. I had to cut away some molding for the top step. The top of each step is deeper than the bottom. I started with a 3/32" x 3/32" boxwood strip. Chuck
- 1,051 replies
-
- 25
-
-
- cheerful
- Syren Ship Model Company
- (and 1 more)
-
Cutter Cheerful 1806 by rafine - FINISHED
Chuck replied to rafine's topic in - Build logs for subjects built 1801 - 1850
No...I will ship mine to Bob and he can finish it all up!!!!- 525 replies
-
- 10
-
-
- cheerful
- Syren Ship Model Company
- (and 1 more)
-
Cutter Cheerful 1806 by rafine - FINISHED
Chuck replied to rafine's topic in - Build logs for subjects built 1801 - 1850
Nicely done Bob You will be passing me by in no time. Chuck- 525 replies
-
- 5
-
-
- cheerful
- Syren Ship Model Company
- (and 1 more)
-
2015 NRG Conference Update - MYSTIC
Chuck replied to Chuck's topic in NAUTICAL RESEARCH GUILD - News & Information
San Diego -
Guys.....please quit with the metric vs. imperial bickering please. It is what it is.....for Christs sake!!!! Its like watching my kids argue about who would win in a fight......Superman or Batman........its beyond silliness and gets heated everytime. I have deleted the last few posts because if read by anyone I can just see them shaking their heads...WOW!!!!! Plus....we all know that after the alien invasion the entire world will have to convert over to fractenoids anyway!!! Chuck
- 85 replies
-
- 11
-
-
Shrouds are .021 black rope.....I prefer a dark brown however but ME didnt have any. from the instructions... Rigging the shrouds… The shrouds are seized to the mast in pairs. Seize the shroud around the masthead with .021 black rope. Then seize a deadeye on the bottom of each shroud so they are both an equal distance from the deadeyes on the chainplates. A lanyard will be rigged between both deadeyes as shown in the illustration. ....also, when looking up this info I found my master word doc which I believe is un -edited by ME. I have uploaded that to my pinned log topic. Maybe it will clear up some wackyness from all the ME edits and changes over the years.
- 33 replies
-
- 6
-
-
- model shipways
- 18th century longboat
- (and 1 more)
-
Beautiful work Brian!!!!!! Really outstanding.
- 831 replies
-
- 5
-
-
- Armed Virginia Sloop
- Model Shipways
- (and 1 more)