


Chuck
-
Posts
9,455 -
Joined
-
Last visited
Content Type
Profiles
Forums
Gallery
Events
Posts posted by Chuck
-
-
What are you building? And thanks in advance.
Does your kit have a parts list that inventories the amount of rope supplied?
Thats the first place to start.
Chuck
-
There are many way to do this...I just described the one that I use. I find it easier to fair a bit before gluing. Especially when you have the angles pre-determined somewhat. Then do the last bit once the are glued into position. I find it easier to do when I can hold the bulkheads in my hand to tweak them. But it is of course no the only way. I dont think anyone should read a "how-to" and feek it is the only way. Just one written example of how one person did it. You should always try the method that is most comfortable for you.
Chuck
-
-
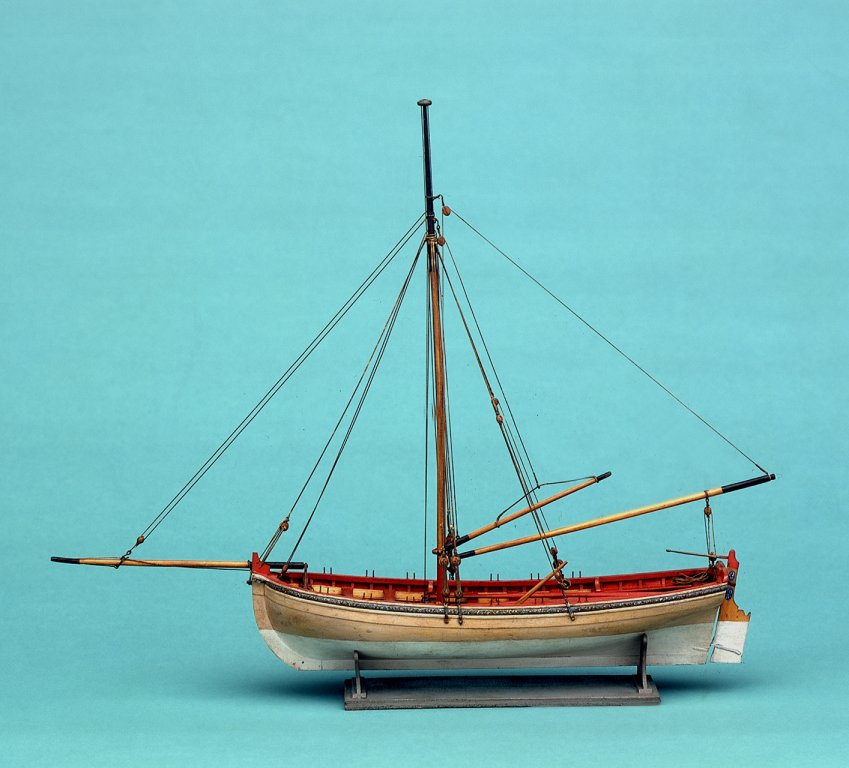
There are too many contemporary models that show this feature for it to be incorrect. In fact, You would be hard pressedto find any where the the horse goes over the tiller. I have only seen one.. The way I understand it, this is the way they did it up to around 1780. And after that they switched to make the horse go over the tiller. Prior to that it was done both ways.
It is odd but I find it hard to believe every contemporary model is incorrect.
-
Thank you very much...I will certainly add it to the database as well.
Chuck
-
It is absolutely correct historically.....

Take a look at the contemporary model images I posted.
-
Looks real good to me ...well done.
Chuck
-
Yes ...just butt it against the stem. Also, since you will be painting the wales, teh butt seams wont show through. At least like I usually paint them. That is your choice actually. You can plank in individual segments or with one continuous strip. It just depends on whether or not you want to paint it so the seams show through or not. For example....see my Winchelsea model...no butt seams show up at all. In fact, when its all painted with the final finish you probably wont be able to even see the individual strakes. Its just a personal preference thing.
Chuck
-
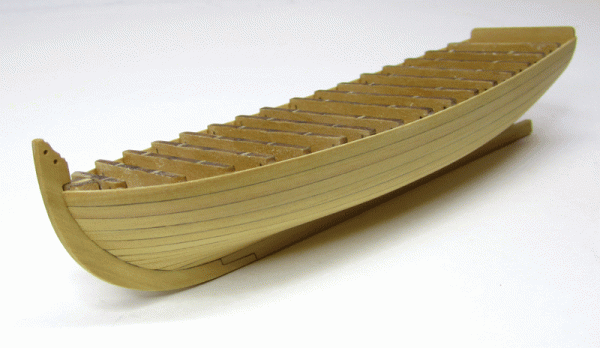
It looks very good Bob. The skeleton is the most difficult part. Once you start putting the skin on those ones she will be a most enjoyable project.
Chuck
-
-
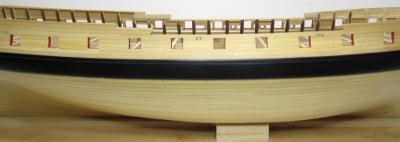
I would stagger them accross two bulkheads in the standard four butt shift pattern. But dont do it at every bulkhead...stagger them at every other bulkhead so the distance between each plank butt is not too close.
You can see on my Winchelsea that in each new strake the butts are shifted to the next second bulkhead edge. Rather than use the very next one...this would have made the butts to close to each other in each strake. I hope that makes sense.
- WackoWolf and fnkershner
-
 2
2
-
Looking good!!! Enjoy the pinnace model. I am building one again as well. Or trying to find the time. Building it in all holly.
I hope you enjoy it.
Chuck
-
Thats looking fantastic so far....really clean rigging so far.
-
-
Fantastic work so far. Its really most important to just give it a try and stick with it. Many dont even try to line off the hull or shape their planks. Having tried it you are half way there. Its now only a matter of finding those little tricks and techniques that will work best for you personally. The principle is there and I am sure you will find your own process to do it. Mine is just one of many.
I think you will have a new outlook on the planking process once this hull is planked. You will soon be telling yourself how ludicrous it is to double plank a hull. Why do the job twice? If you can just take your time and do it well the first time around.
Chuck
- PaddyO and Elmer Cornish
-
2
-
It really turned out beautifully. I do hope you enjoyed it as much as I did. It was a fun project.

Chuck
-
-
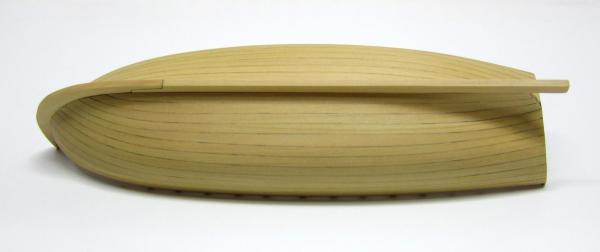
You should keep those safety timbers on at all times...no reason to remove them until you are done planking above the wales....TRUST ME....you never know when your sleeve will get caught on one of them. Just having them in place keeps your loose clothes from catching on them. It also helps strengthen the whole thing when it comes time to flip the hull over from time to time.
Nice work so far...
- augie, JonVonWeston, mobbsie and 1 other
-
4
-
Try this site....Its the same blocks and deadeyes as Jerzy. By the way....Jerzy's site is now back up but nothing is in stock...maybe someone bought him out???
http://www.shipmodels.com.ua/eng/accessories/index.htm
Chuck
-
-
Thats too bad....I know Sam worked really hard on that kit. I do hope that all of the issues get worked out soon. I would imagine it would stand a better chance if you folks with a kit would post this info on the Essex kit launch topic. I think Eric would likely see it more readily and see the need to make amends more timely.

-
-
-
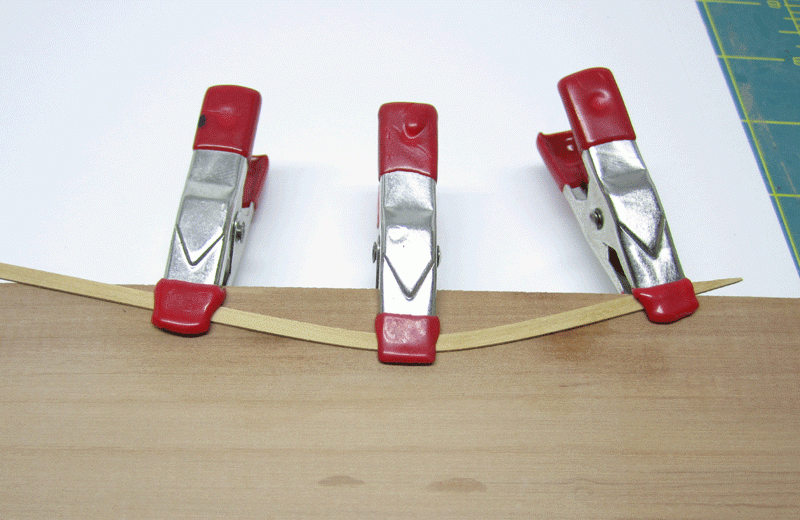
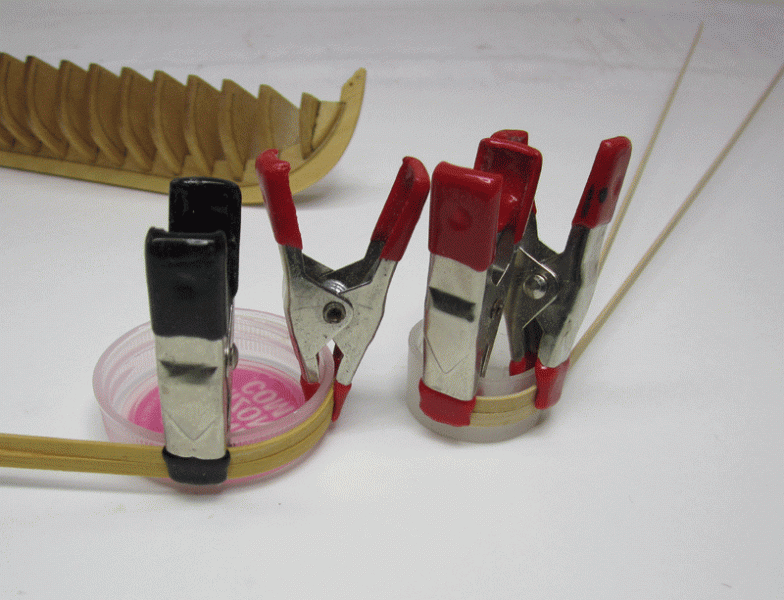
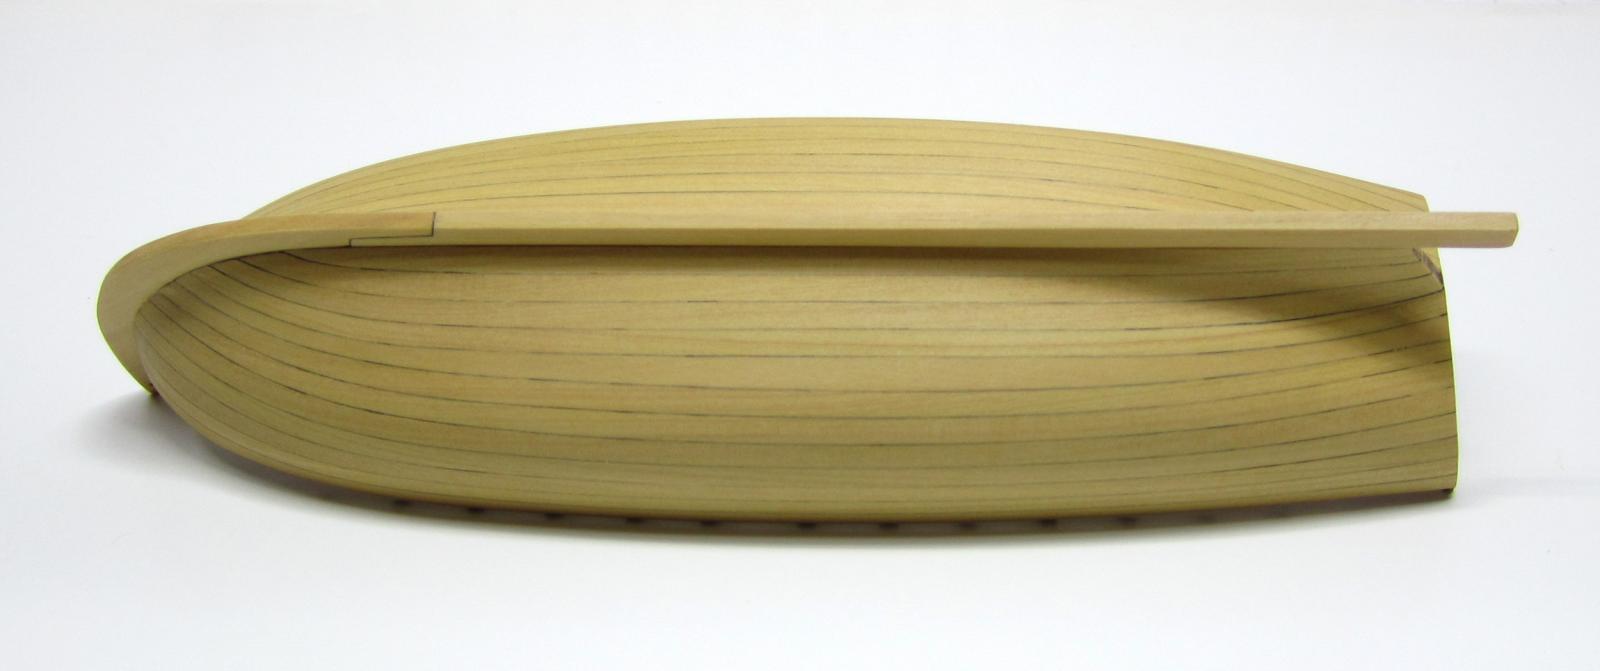
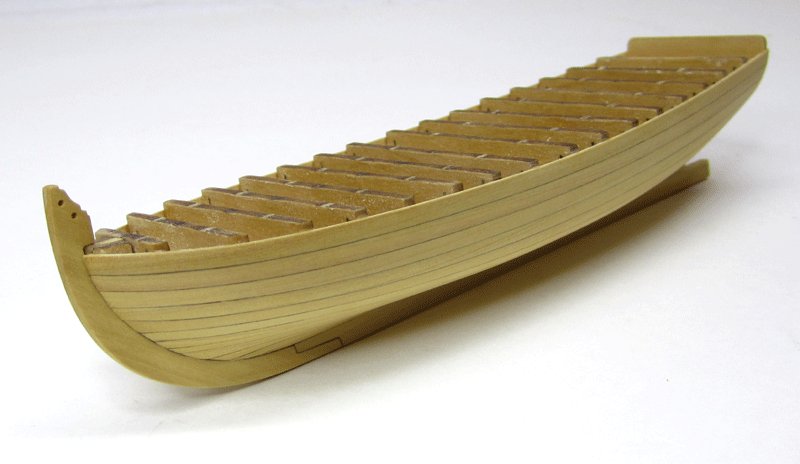
The run doesnt look too bad. Its just that the curve at the bow in your next few planks didnt curve enough to fit properly against the garboard. Here is a look at my hull and you can see the garboard is almost identical. You can see how different it looks once the boat is lipped right-side up too. That curve is not as drastic as you think. But it does take a lot of practice to make it bend like that. Because it does taper as well. When you are sanding in the taper you can create a more drastic curve than you attained with just bending. OR, If you are cutting those planks from a wider sheet...I would suggest using a stiff card as a test first. Once you have the shape that fits, simply trace it on the wood and cut it out.
Chuck
- fatih79, Mirabell61, michael mott and 2 others
-
5
18th Century Longboat by Maury - FINISHED - Model Shipways
in - Kit build logs for subjects built from 1751 - 1800
Posted
That came out just wonderful. Makes a really nice give, very nice presentation!!!