HOLIDAY DONATION DRIVE - SUPPORT MSW - DO YOUR PART TO KEEP THIS GREAT FORUM GOING! (Only 24 donations so far out of 49,000 members - C'mon guys!)
×


gak1965
-
Posts
720 -
Joined
-
Last visited
Content Type
Profiles
Forums
Gallery
Events
Everything posted by gak1965
-
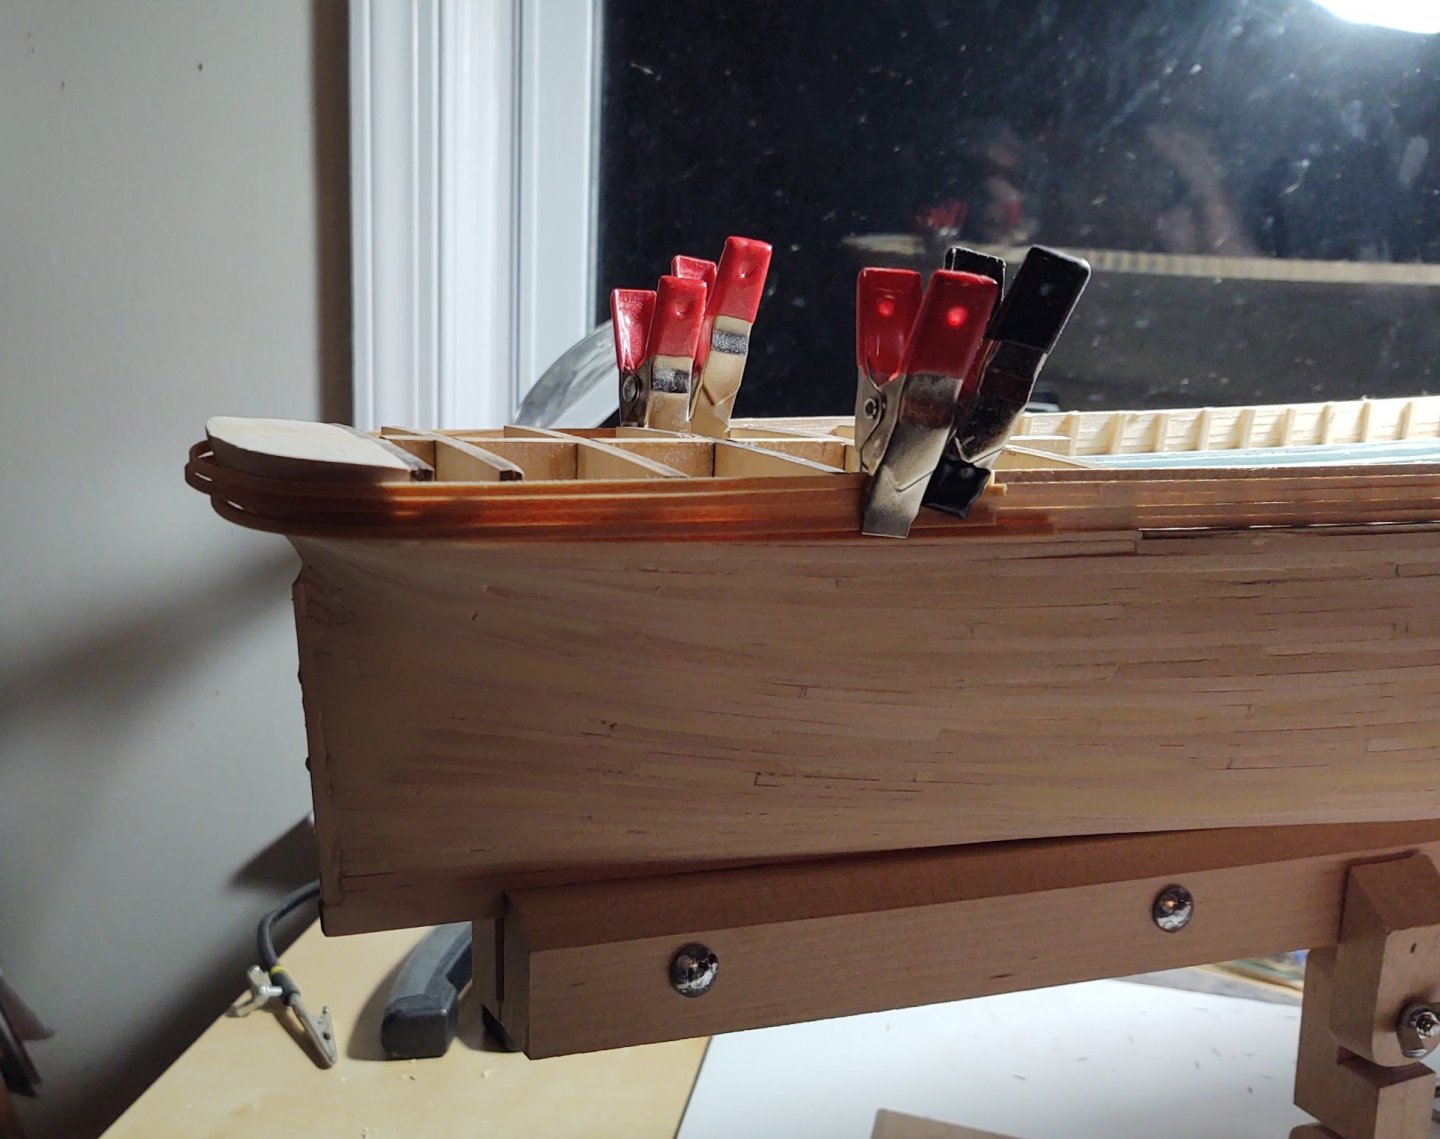
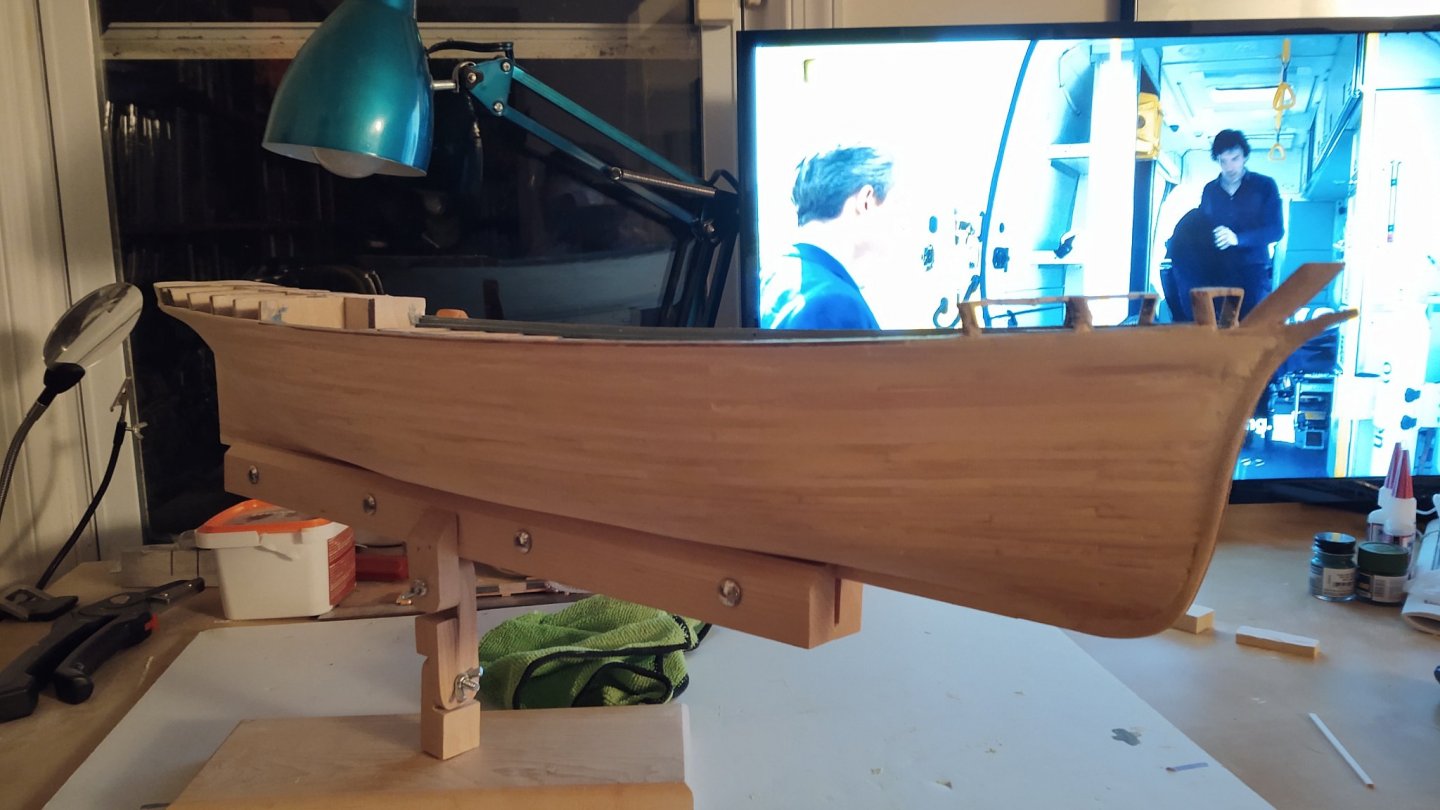
 Hello all. FIrst thank you for the assistance and the encouragement, it has been very helpful. Over the last couple of days I carved and attached the covering board/main rail. There are two laser cut pieces, everything else needs to the bent or carved. The laser cut pieces are 1/4 inch and are supposed to project 1/16 of an inch, so I marked 3/16" in from the edge of the counter and aligned the laser cut pieces on them, which alas left a gap that needed filling with a piece of cut 1/4 x 1/16 wood. The covering board remains 1/4" x 1/16 until just abaft of bulkhead 14 (where there will be an edge board, supported by a set of knees eventually. This is straight enough to manage with some bending. It shrinks to 3/16" by 1/16" from there to bulkhead 5, and this could be handled with a bit of bending. The remaining sections (6 all told) had to carved in matching pairs from 1/2" x 1/16" stock. Two sections from bulkhead 5 to bulkhead 2, two from bulkhead 2 to bulkhead A, and then a final set of segments that reach around the knightheads (and had to be carved around them). A bit of sanding to resolve some minor shaping issues on the poop deck, some stain and we get the following: I also took the opportunity to put some ceiling planks under the forecastle. I painted these white rather than the grey used elsewhere because I expect it to be dark in there, and want as much light as possible reflecting off any internal details. I was disappointed at how differently the various basswood strips took the stain. It's less obvious than the photos tend to show, and will likely be even less so once the topgallant rails are on. I am putting additional coats of stain on the lighter rails in hopes of balancing them a little more. Nevertheless, I may yet paint it buff or brown rather than leave it bright (at least on the inner sides) as the instructions suggest. George K
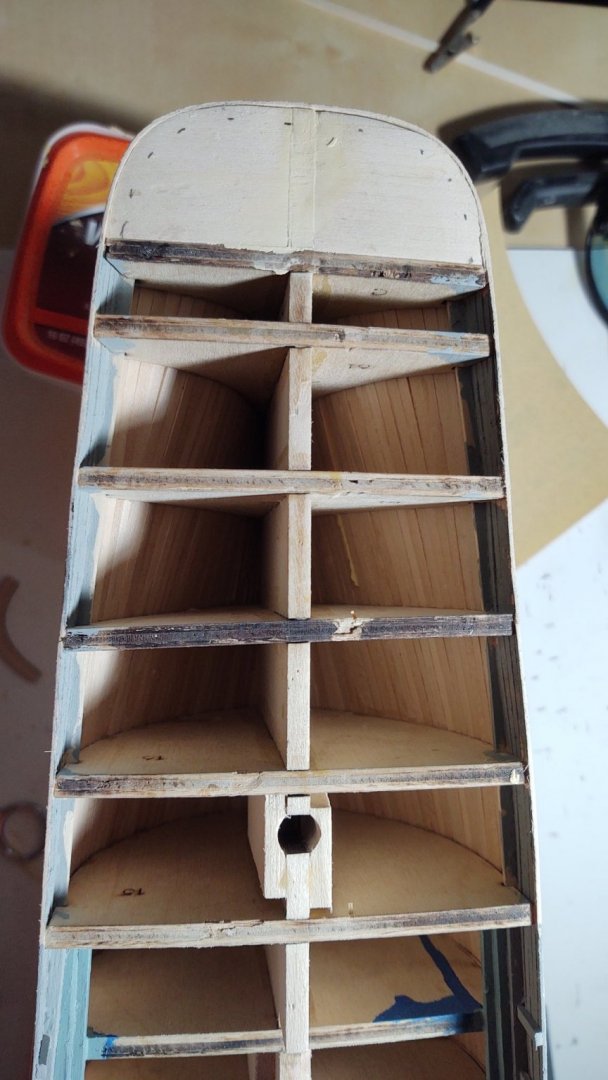


- 602 replies
-
- 4
-

-
- Flying Fish
- Model Shipways
- (and 2 more)
-
You are selling yourself way too short. I would be thrilled if my efforts were half as "crude" as yours...
- 602 replies
-
- 3
-
-
- Flying Fish
- Model Shipways
- (and 2 more)
-
Yep. I tend to associate holystoning with naval vessels rather than commercial ships, the former carrying way more crew per unit weather deck than a commercial vessel. USS Constitution, a vessel of similar length, had a crew of 450 versus what, maybe 25-50 on a typical clipper? Frequent holystoning apparently damages the deck; there is a reference in Wikipedia about the US Navy at some point saying stop because it was damaging the decks of the battleships (even the Iowa's had teak decks). Amusingly, in the early 1970's novelization of the Star Trek episode "City on the Edge of Forever", Edith Keeler mentions how clean Spock and Kirk have made the storeroom, and Kirk thinks that something finally came from doing all that holystoning as a midshipman.
- 602 replies
-
- 2
-
-
- Flying Fish
- Model Shipways
- (and 2 more)
-
Thank you all for the kind words and the encouragement. I've followed your various builds ( @Vladimir_Wairoa your Cutty Sark, @mbp521 your USS Cairo and @Keithbrad80's Flying Fish) with interest. Since at least two of you are further with the Fish than I am, a question, did you bend a 1/16 by 3/16 strip to make the main rail or carve it out of something like a 1/16 x 1/14? I don't think I'll need to do anything special for the covering board at the poop - it's pretty straight except where there is a laser cut section - and there is a lot of surface for the adhesives to grab on to. The forecastle covering board may also be okay with a bit of a bend, so long as I start at the forecastle. I think that the main rail will probably be fine with some bending (or maybe some bending, but in two sections) but would be curious how you handled it. On a related note, to any of the clipper folks out there, the decks of the Fish were listed as white pine. Anyone have any notion of how or if they were finished, if at all? Just wondering to decide what kind of stain to put on the deck planks. I can use 'pine' stain, but if they used some treatment that made it darker, it would be nice to know. @Keithbrad80 had a great method for making his deck look a bit worn, but I like to build the ships as if they are headed out on their maiden voyages, so curious what they would have looked like new.
- 602 replies
-
- 2
-
-
- Flying Fish
- Model Shipways
- (and 2 more)
-
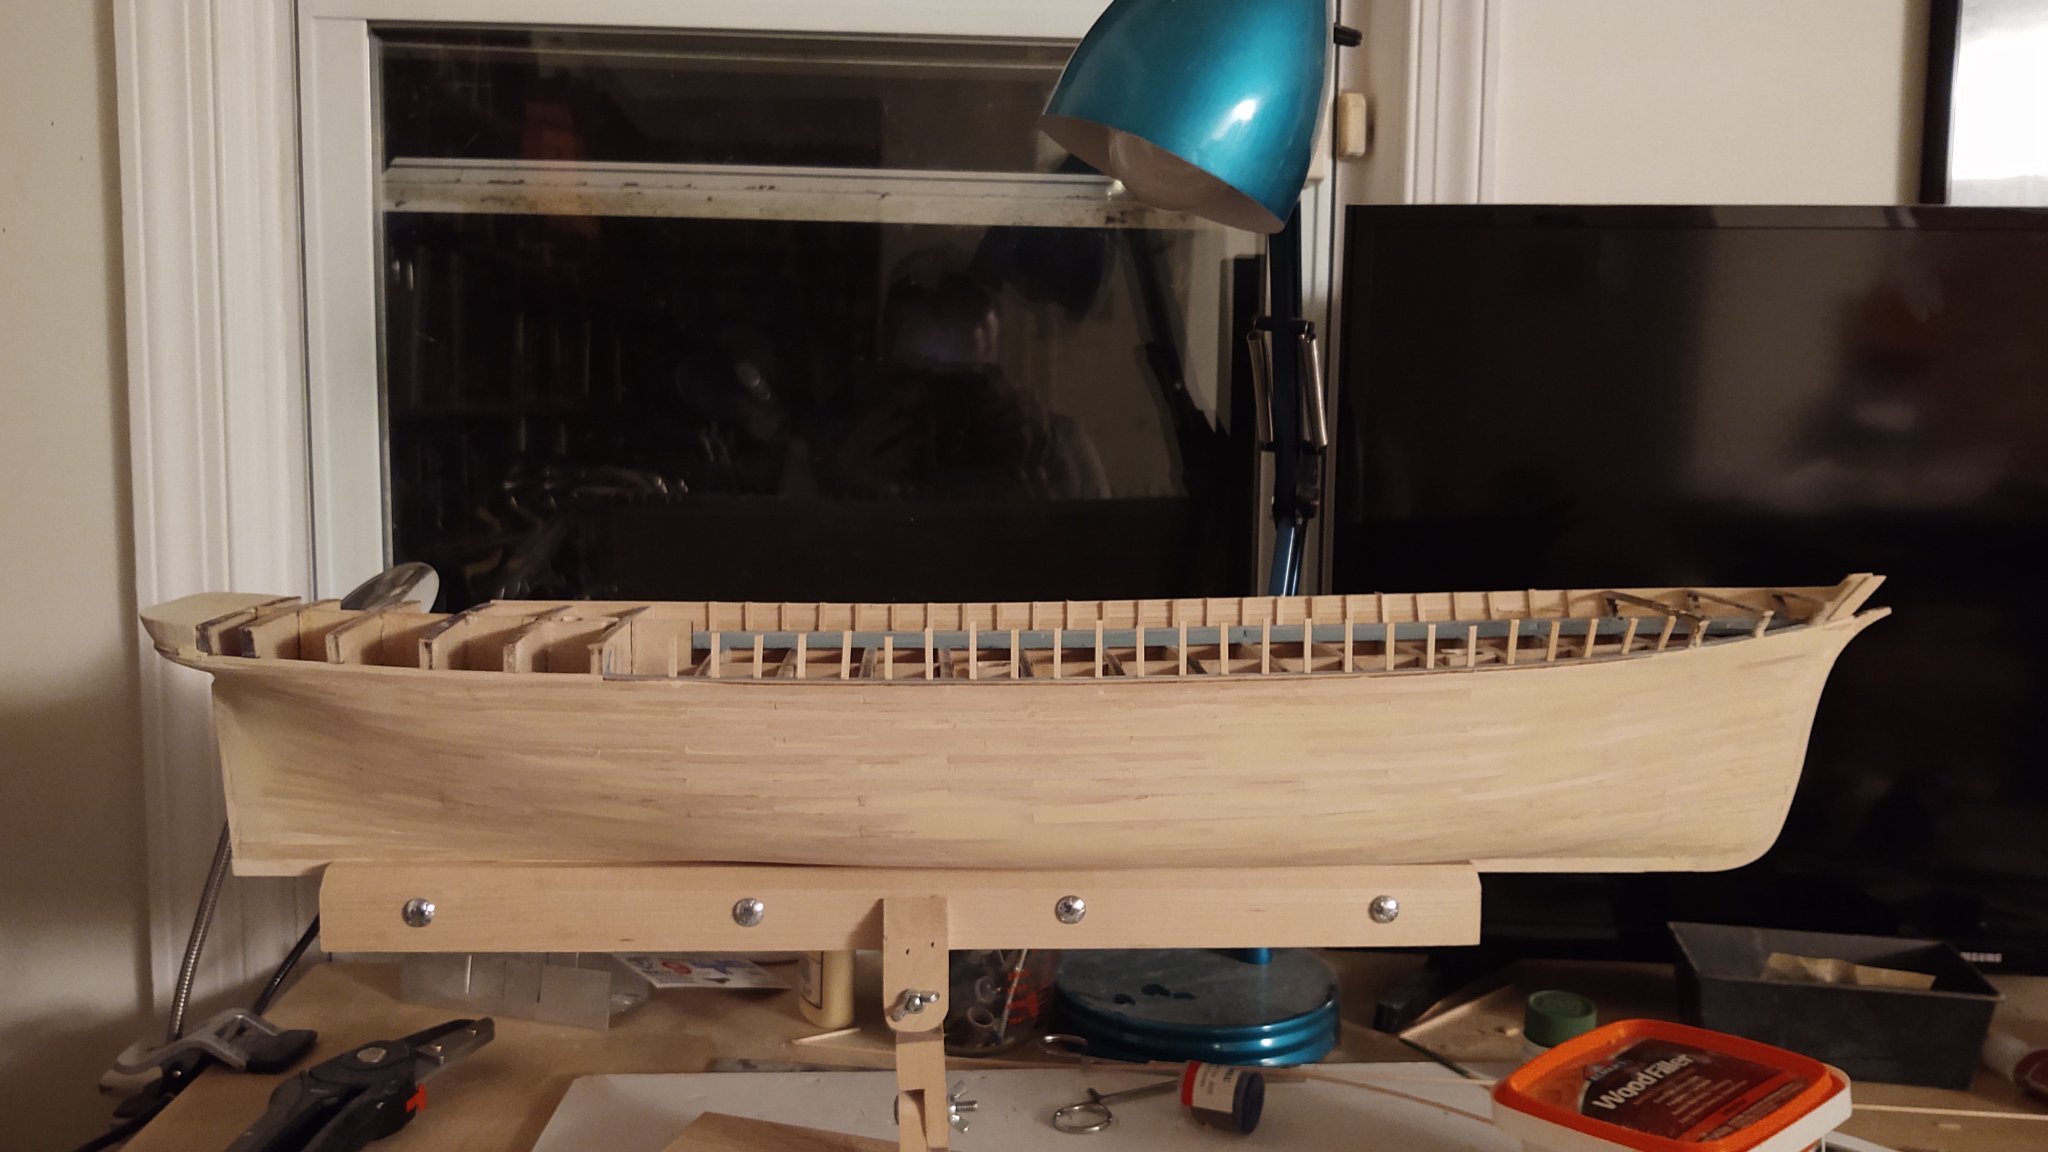
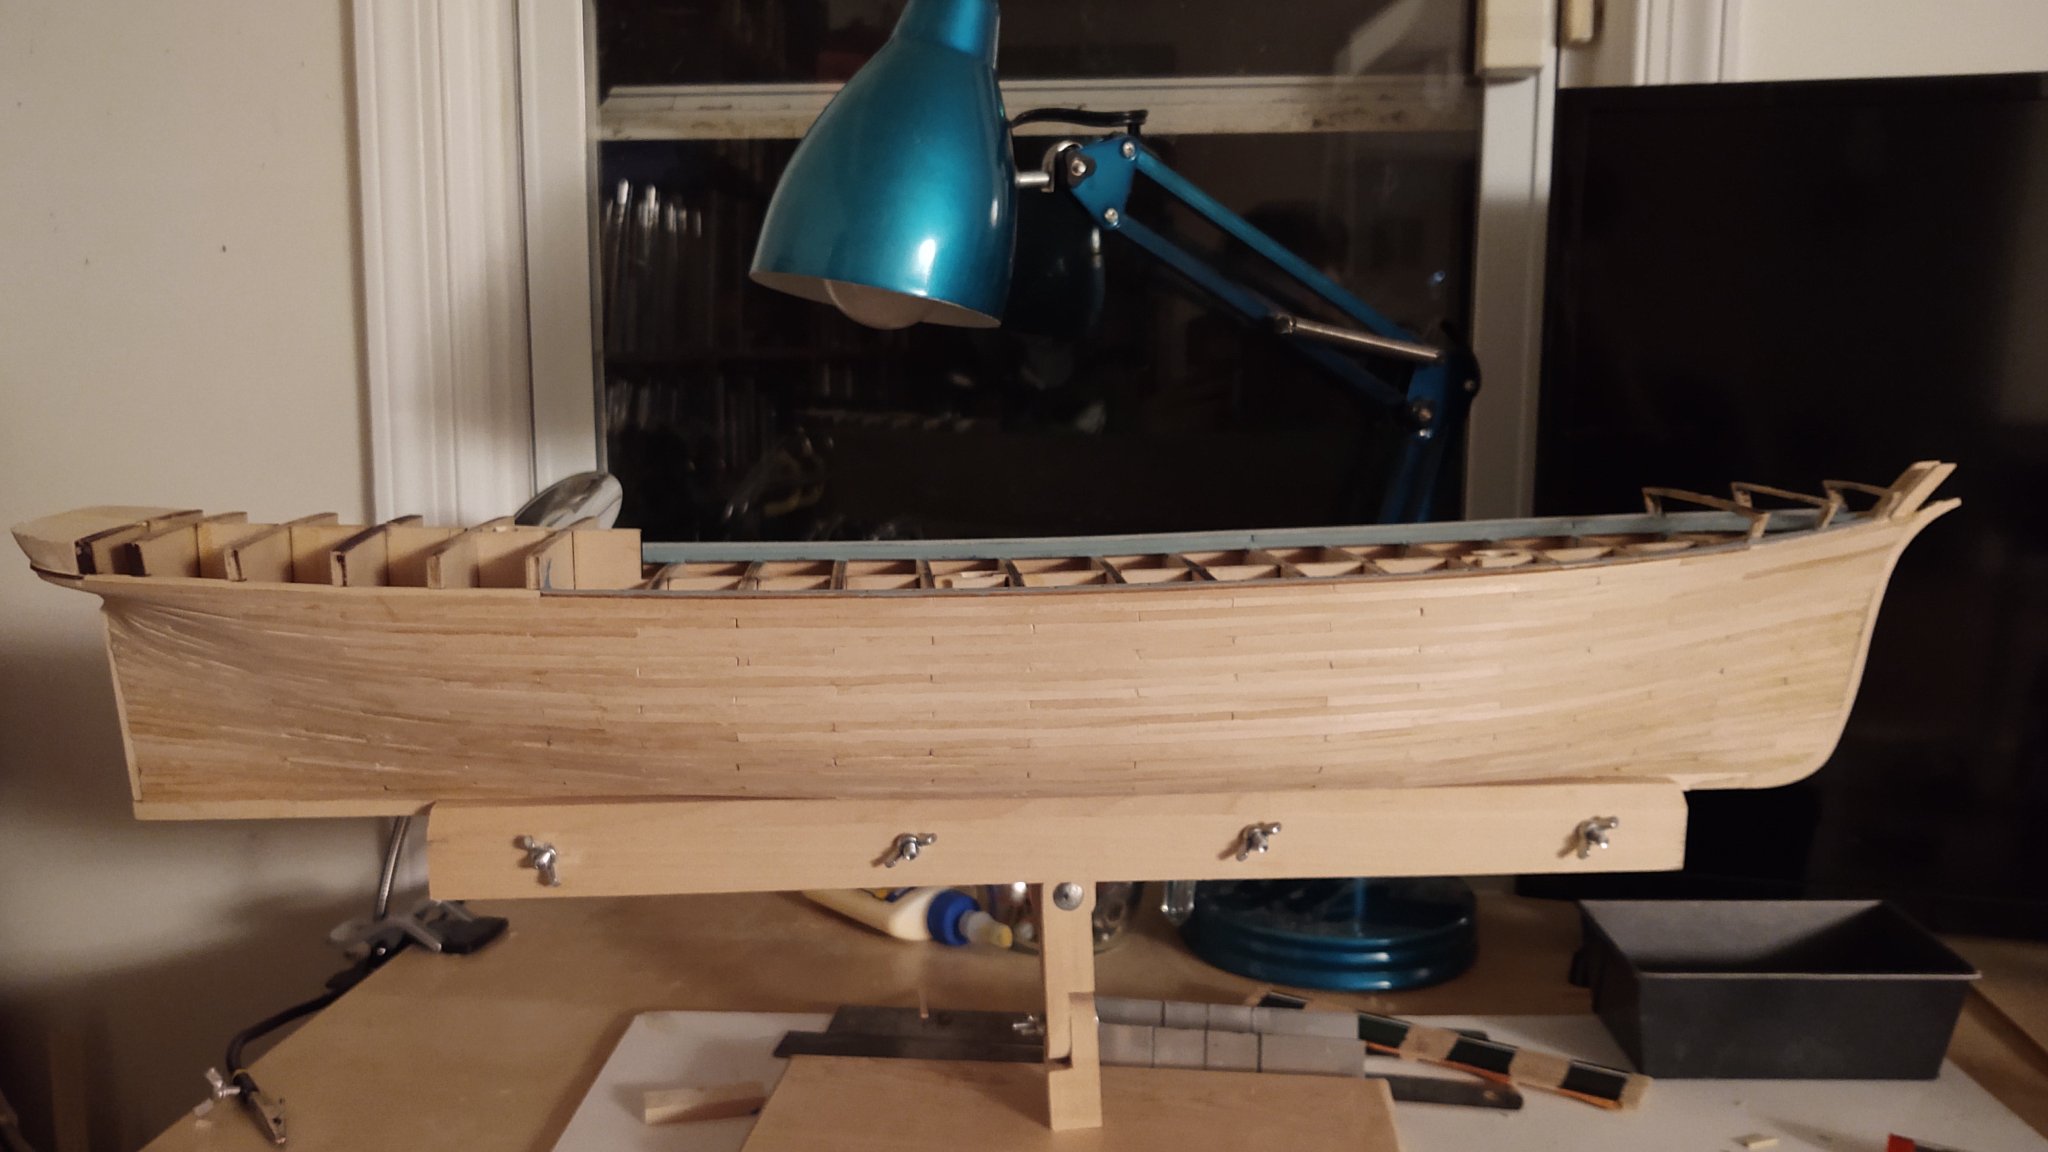
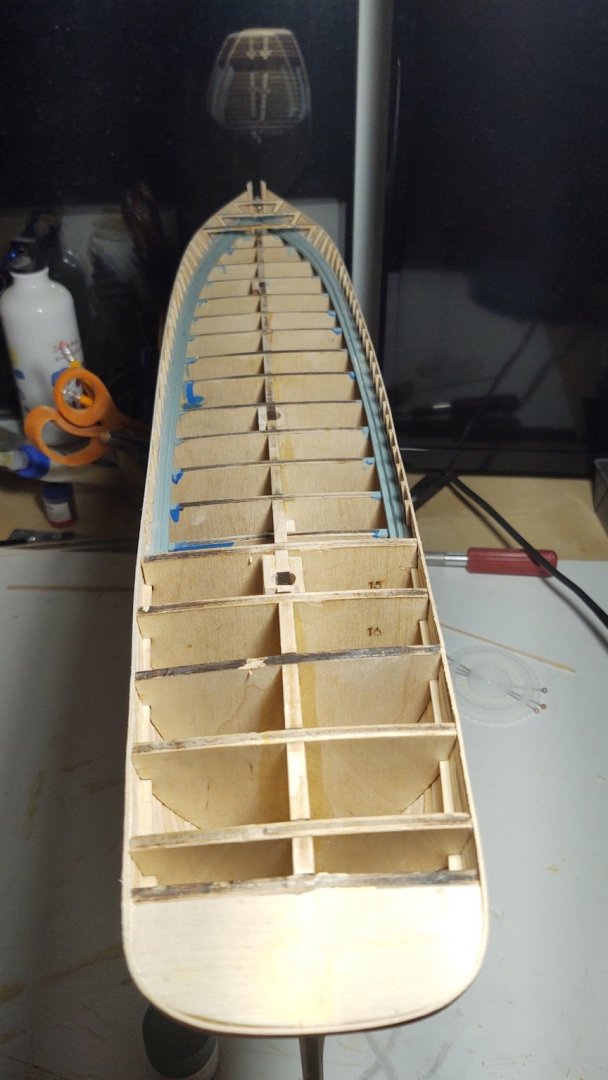
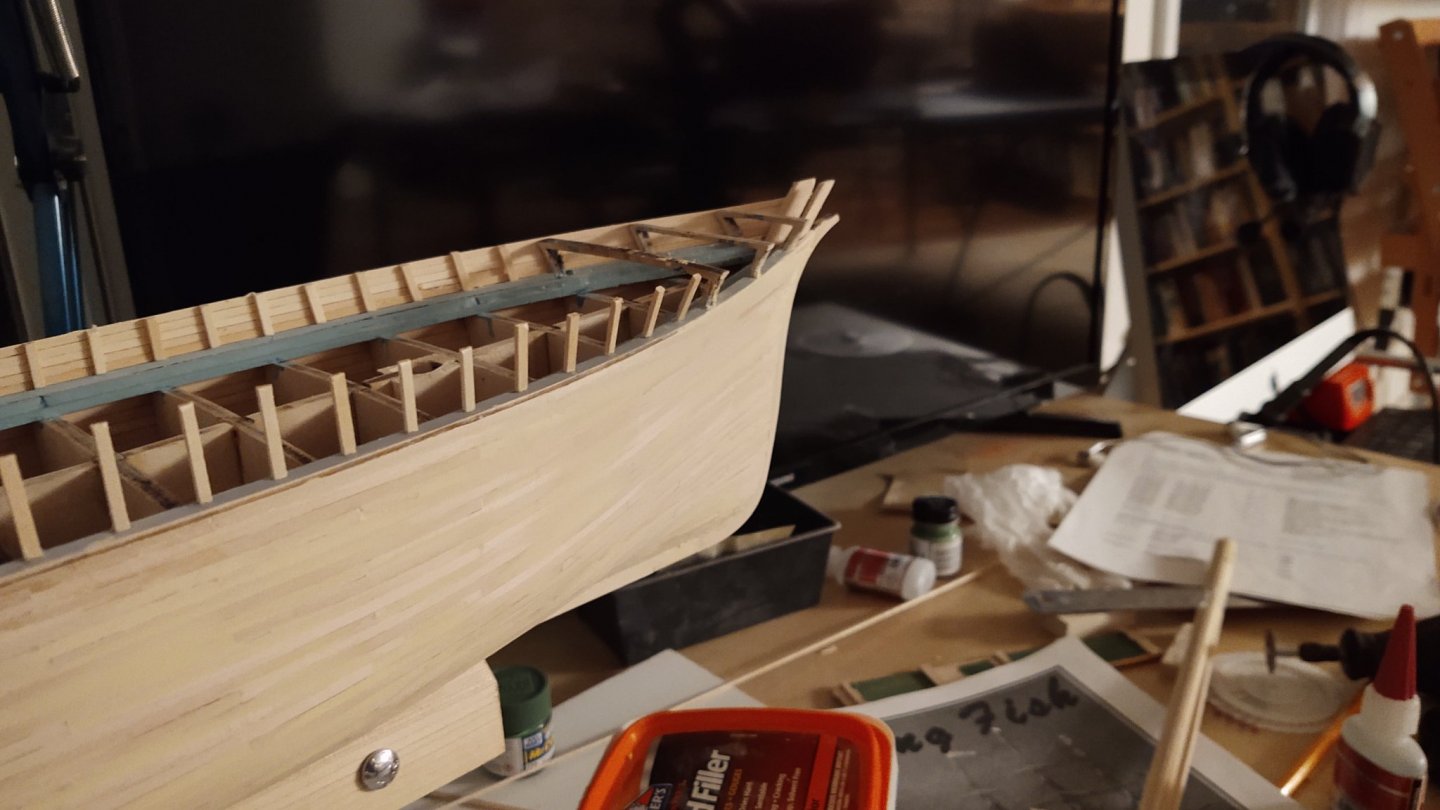
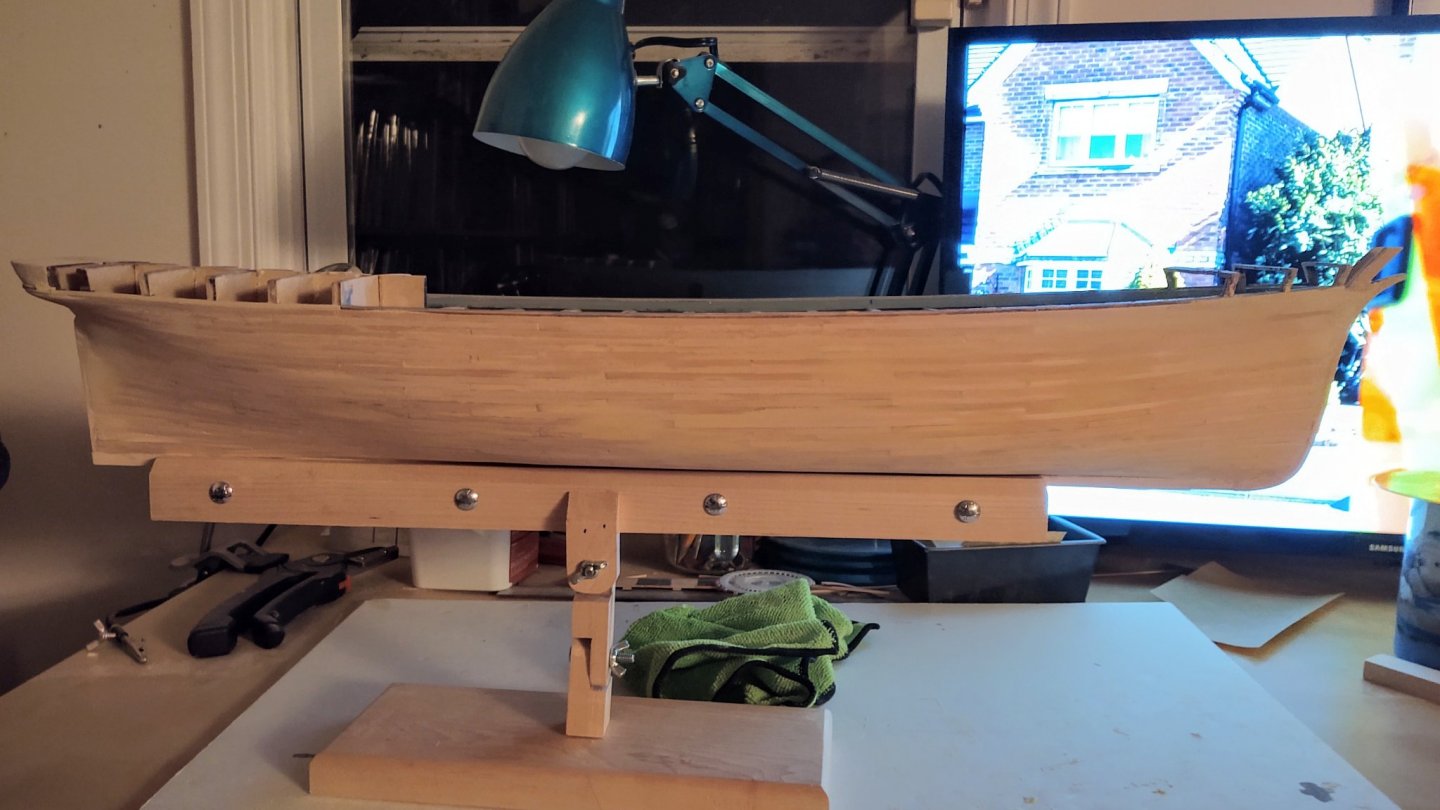
Okay, well I've put the starboard bulwarks in place. In order to get the stern bulwarks to fit well, I soaked them in boiling water so that they would become ductile, and then fitted them as tightly on stern as I could realistically do with just the clamps and no glue, and then let them dry overnight so that when I did apply them they wouldn't create large gaps as they became less waterlogged. The next day, I had a nice set of U-shaped planks. The next step was to attach the planks, and then start the process of final hull and bulwark shaping. That is not yet complete, but here are a couple of views of the ship to date: Ultimately I did not build up the bulkheads to even the poop and the bulwarks, but rather sanded it down because I thought it would give a better look. This seems to be the case, and I'm glad I took that path. I've tried to tread lightly with filler on the bulwarks as it would be bad to have a bunch of it oozing through any gaps and appearing on the open waist of the ship. One nice thing about warships is that they have ceiling planks all along the bulwarks that hide all kinds of gaps. For the clipper history buffs, a quick question. Does anyone know if the stanchions on the Fish were extensions of the frames, or whether they were floating stanchions fitted between the frames? It doesn't matter to the model, I'm just curious. When I got some initial information on Discovery I learned about the floating stanchions that were apparently common on a lot of later wood construction, but I don't know when the transition occurred, and I still find it interesting for some obscure reason. George K


.thumb.jpg.97e0ee2fda46726480d23e514cac5266.jpg)
- 602 replies
-
- 5
-
-
- Flying Fish
- Model Shipways
- (and 2 more)
-
Wow. Looking forward to the new photos! George
-
Hi Brad, haven't seen an update in a couple of weeks. How is everything going? George K
-
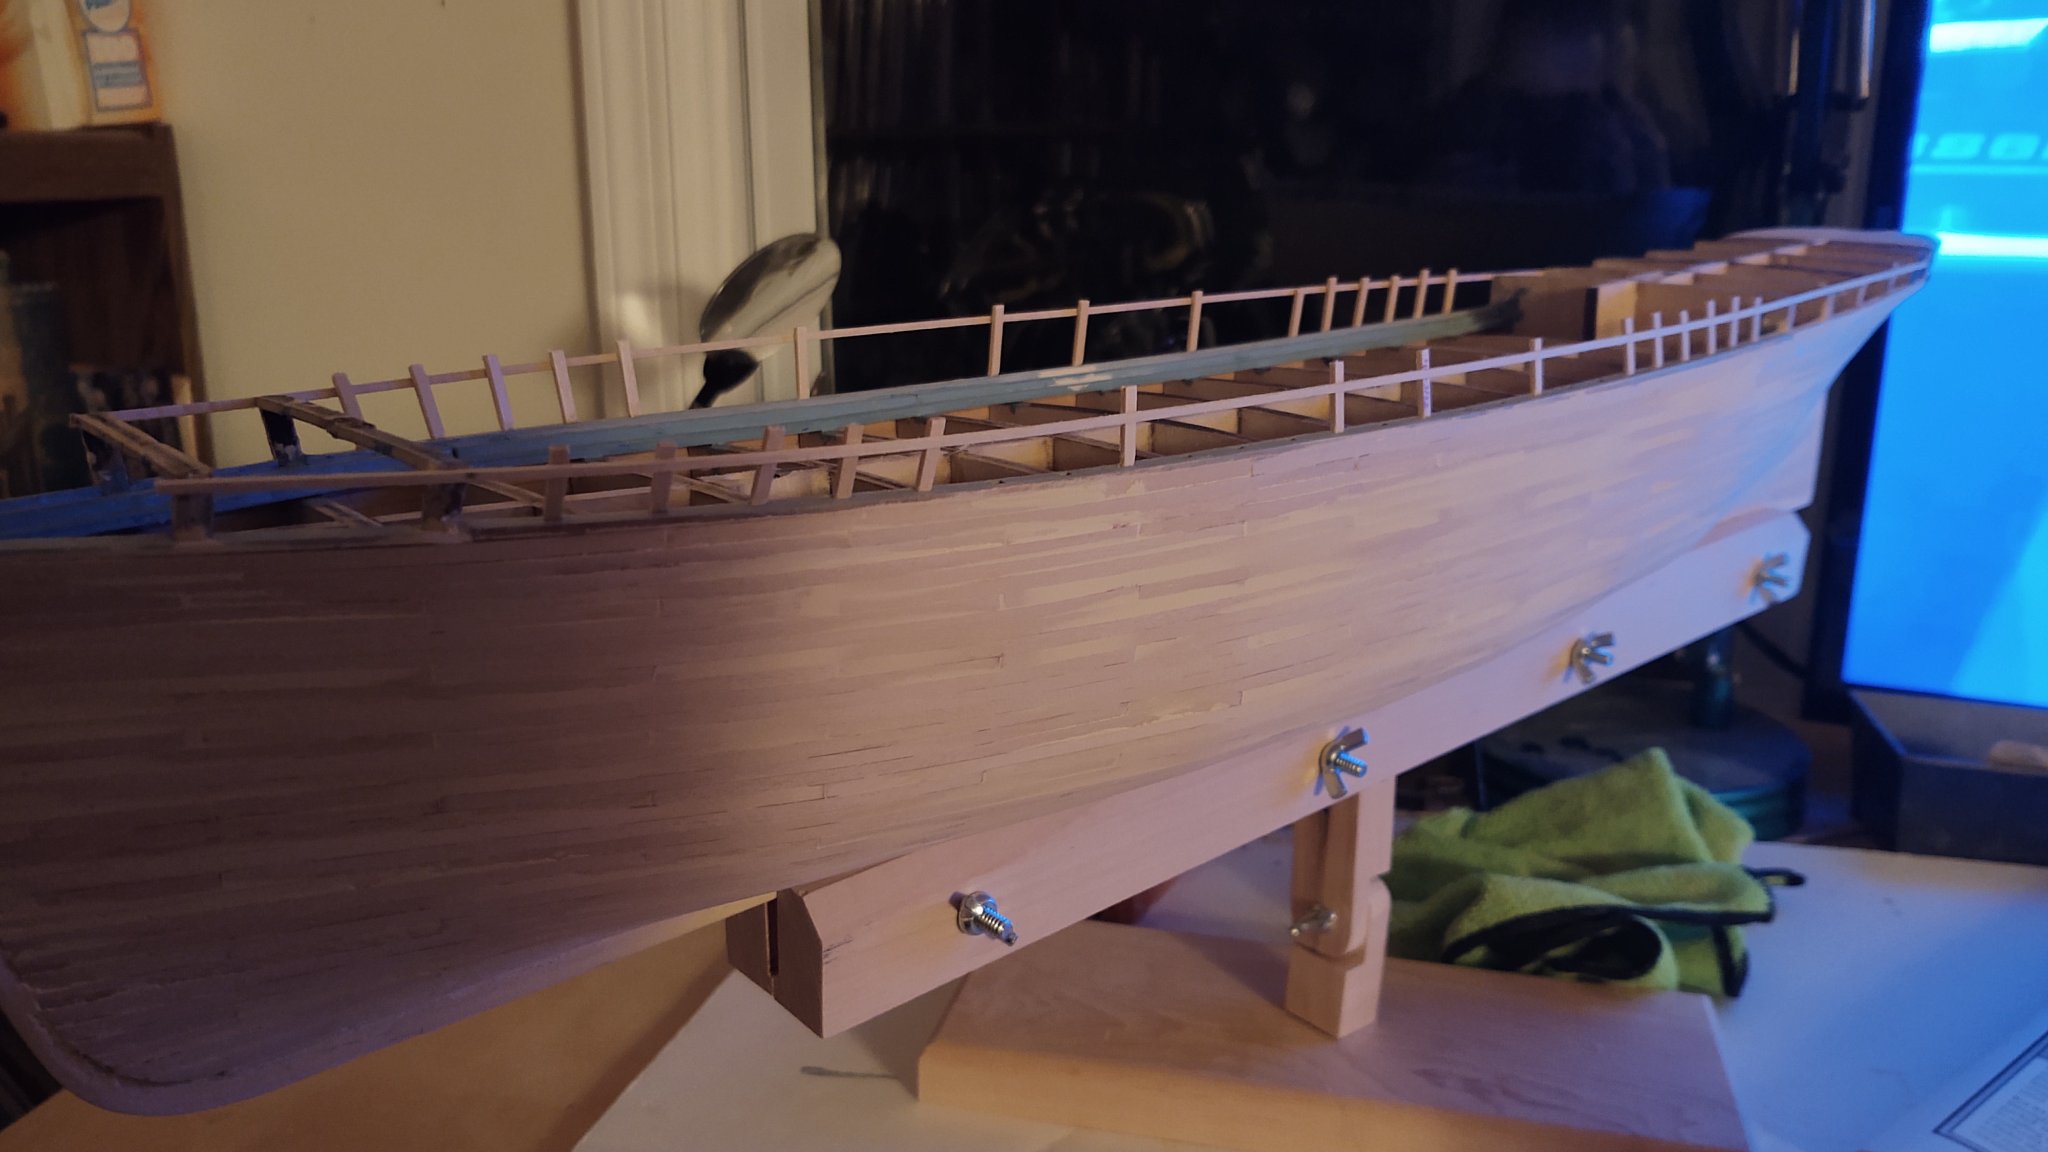
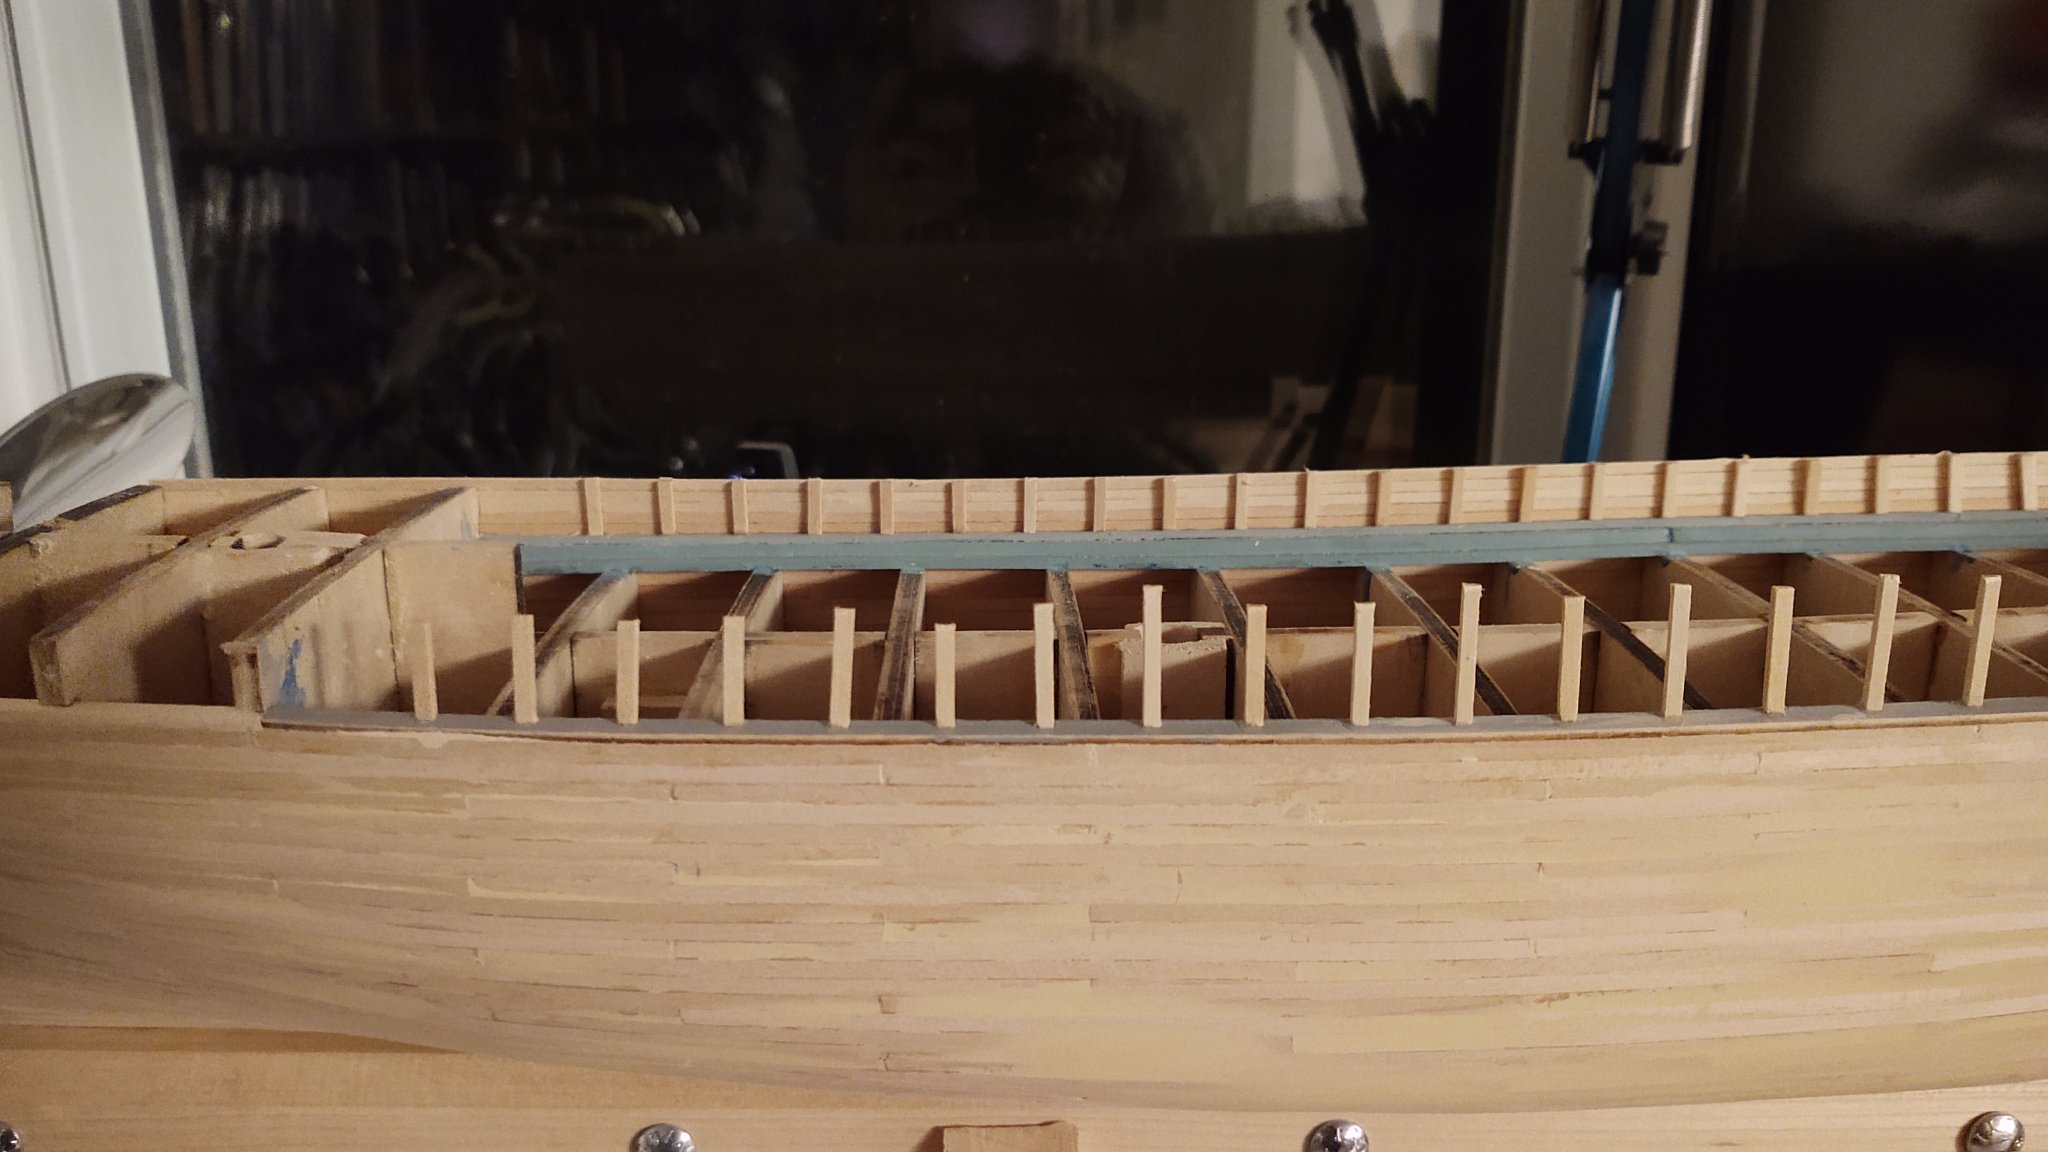
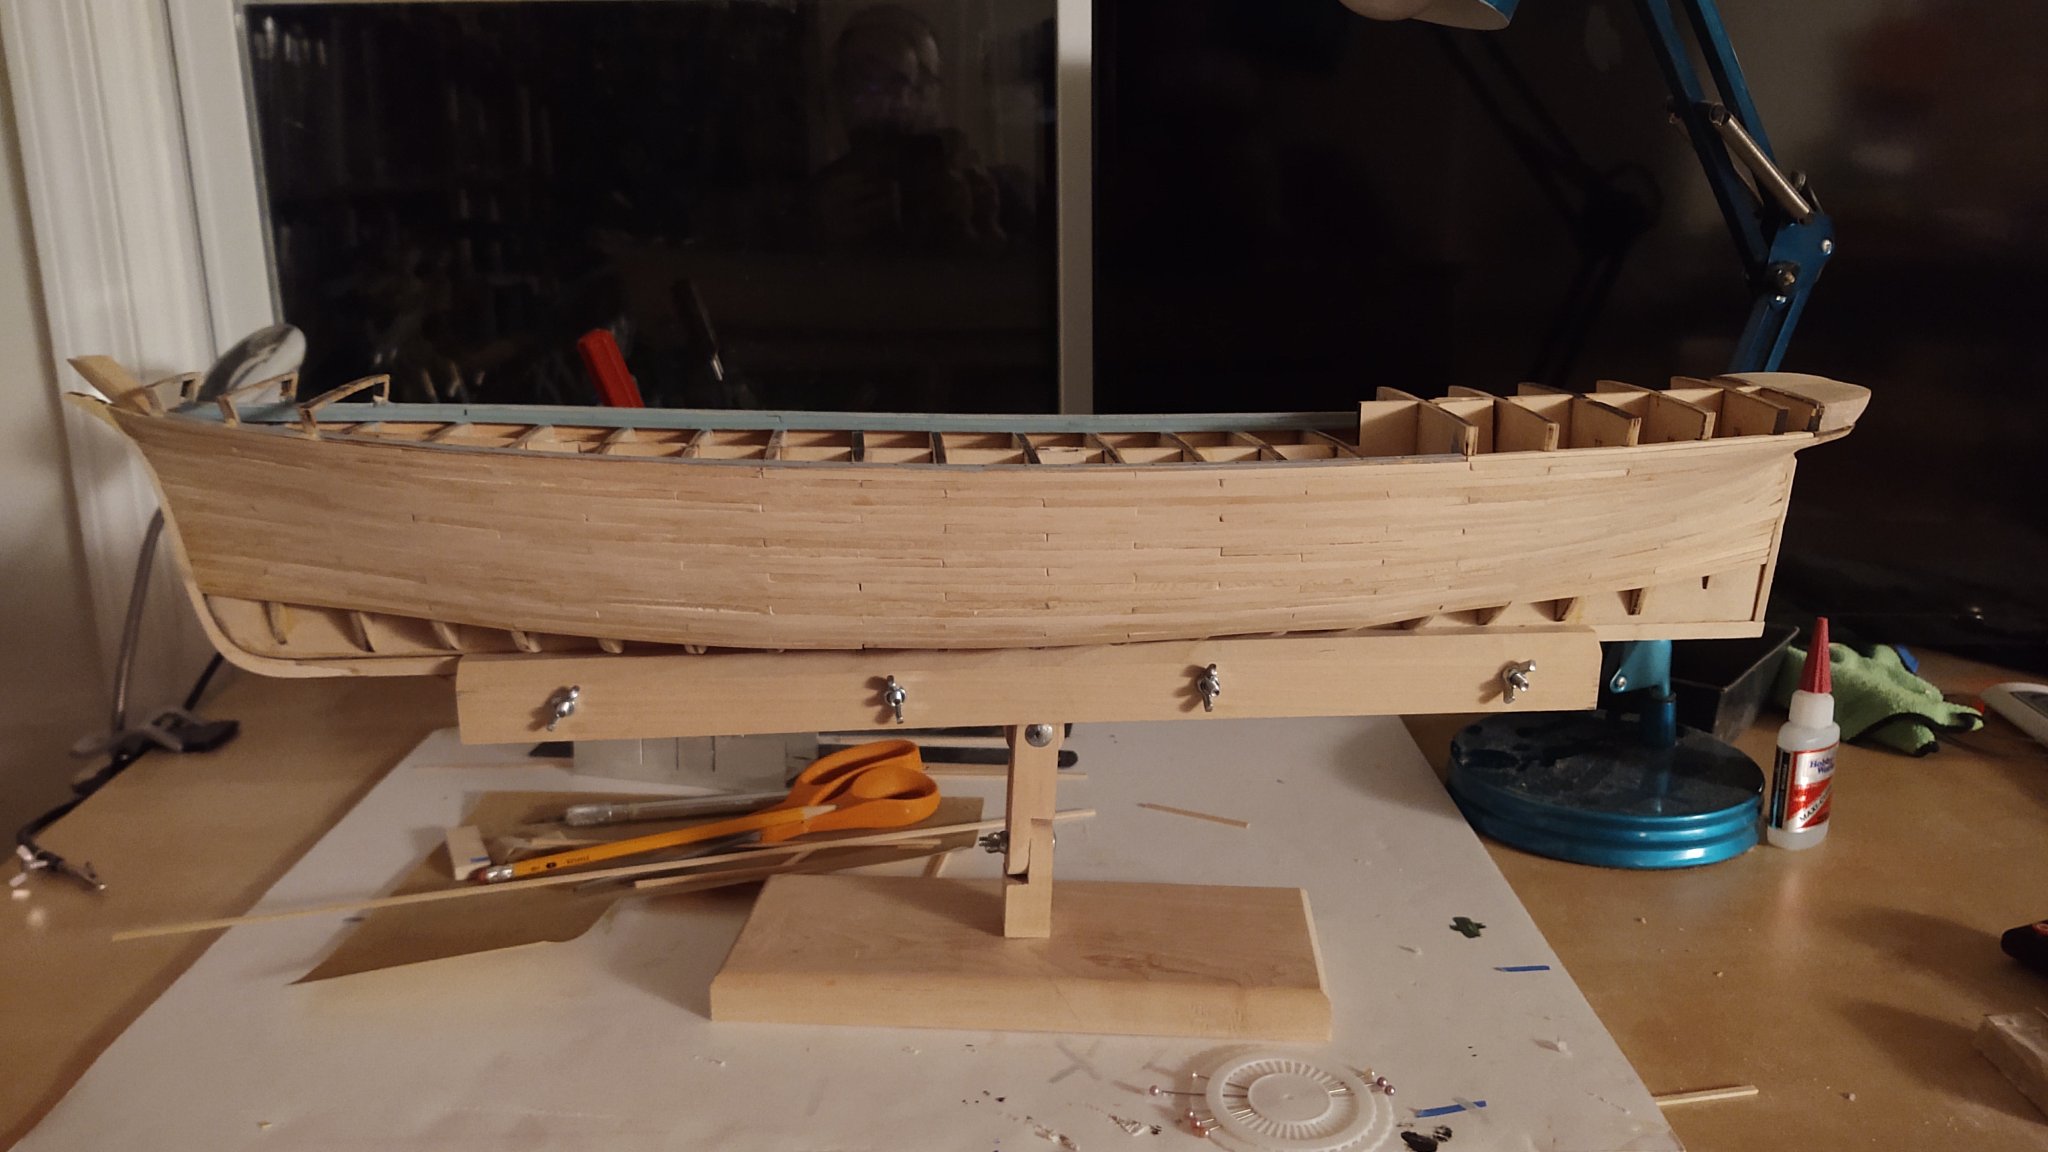
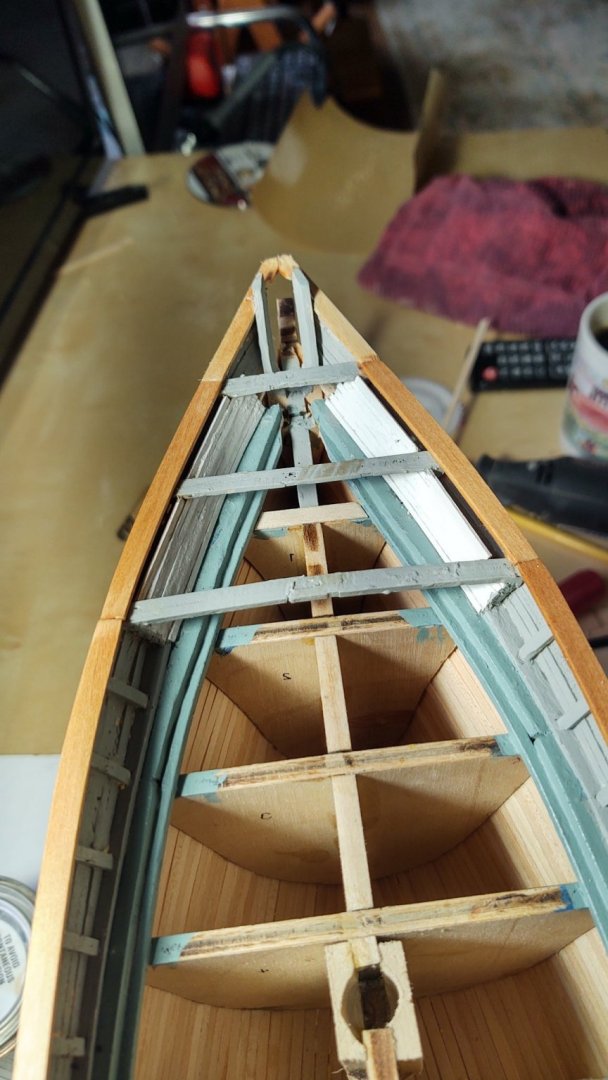
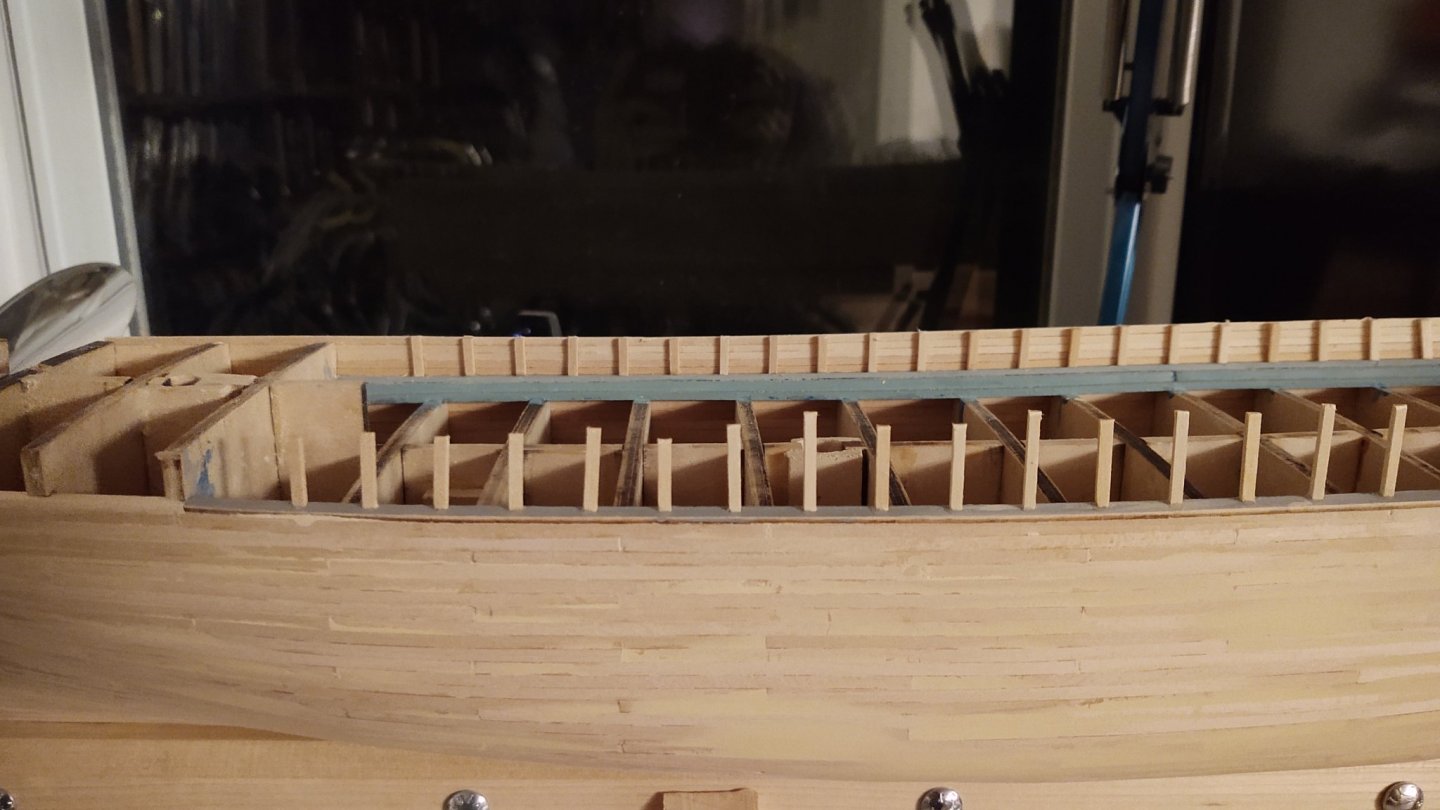
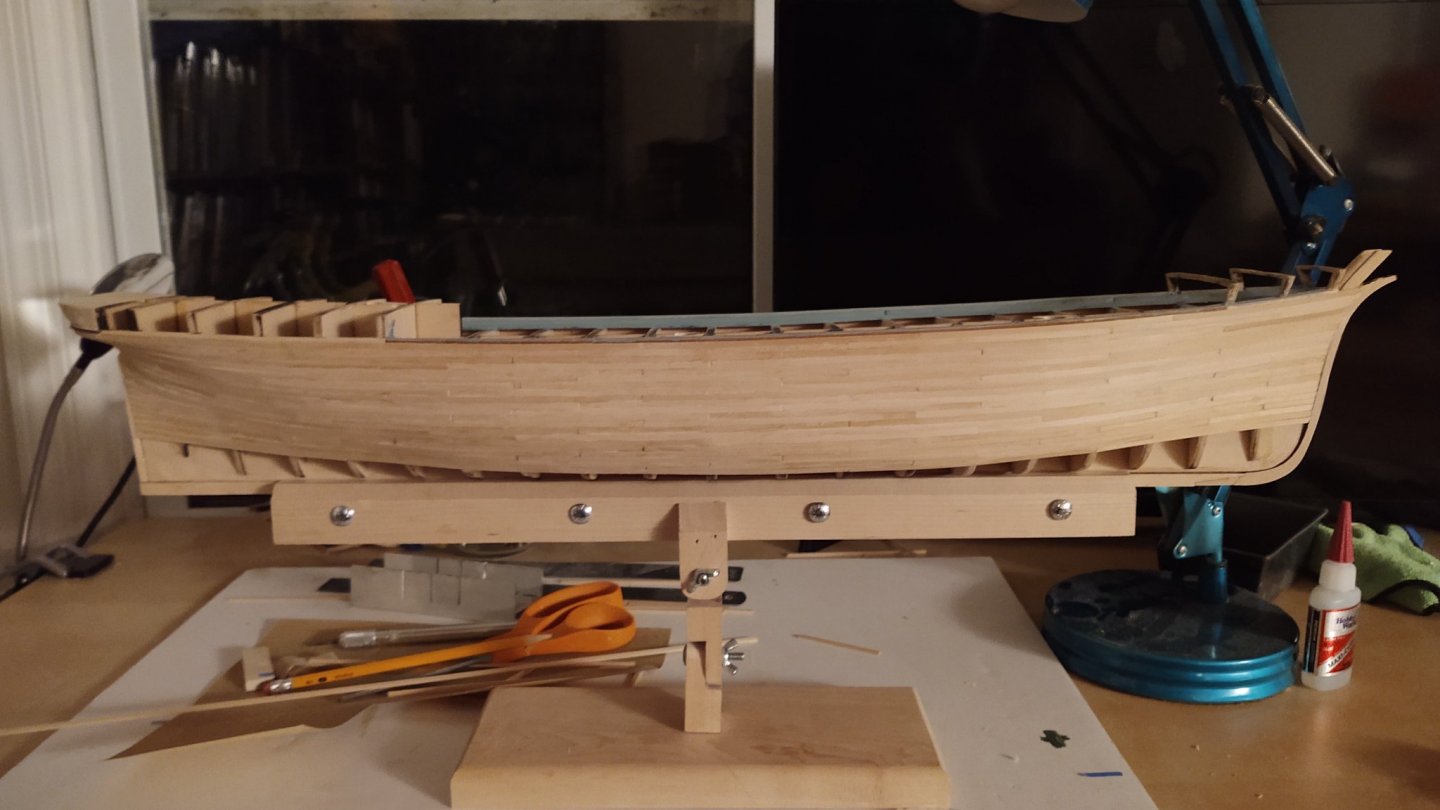
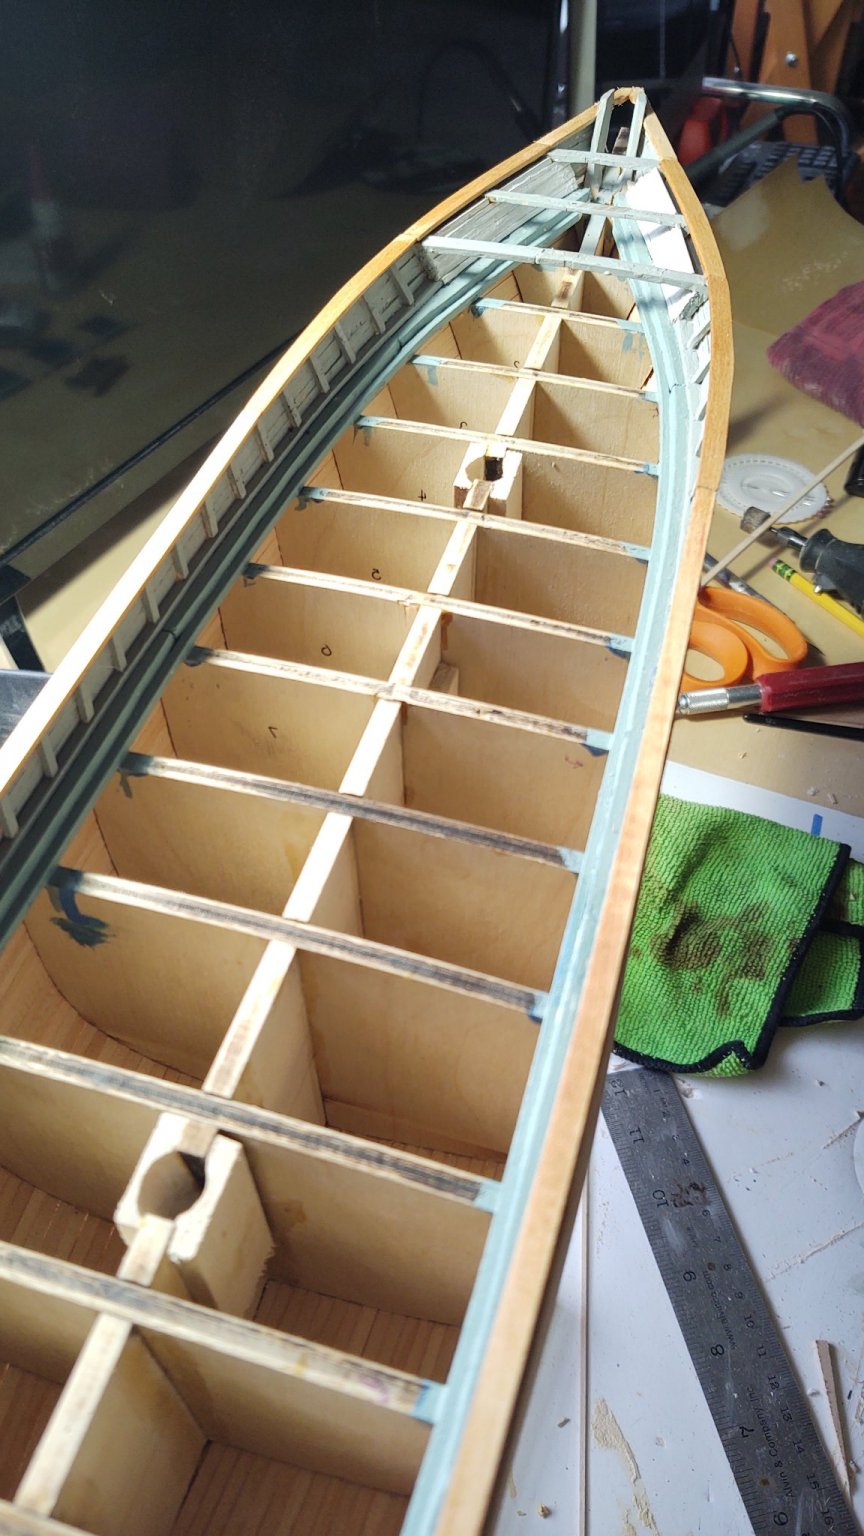
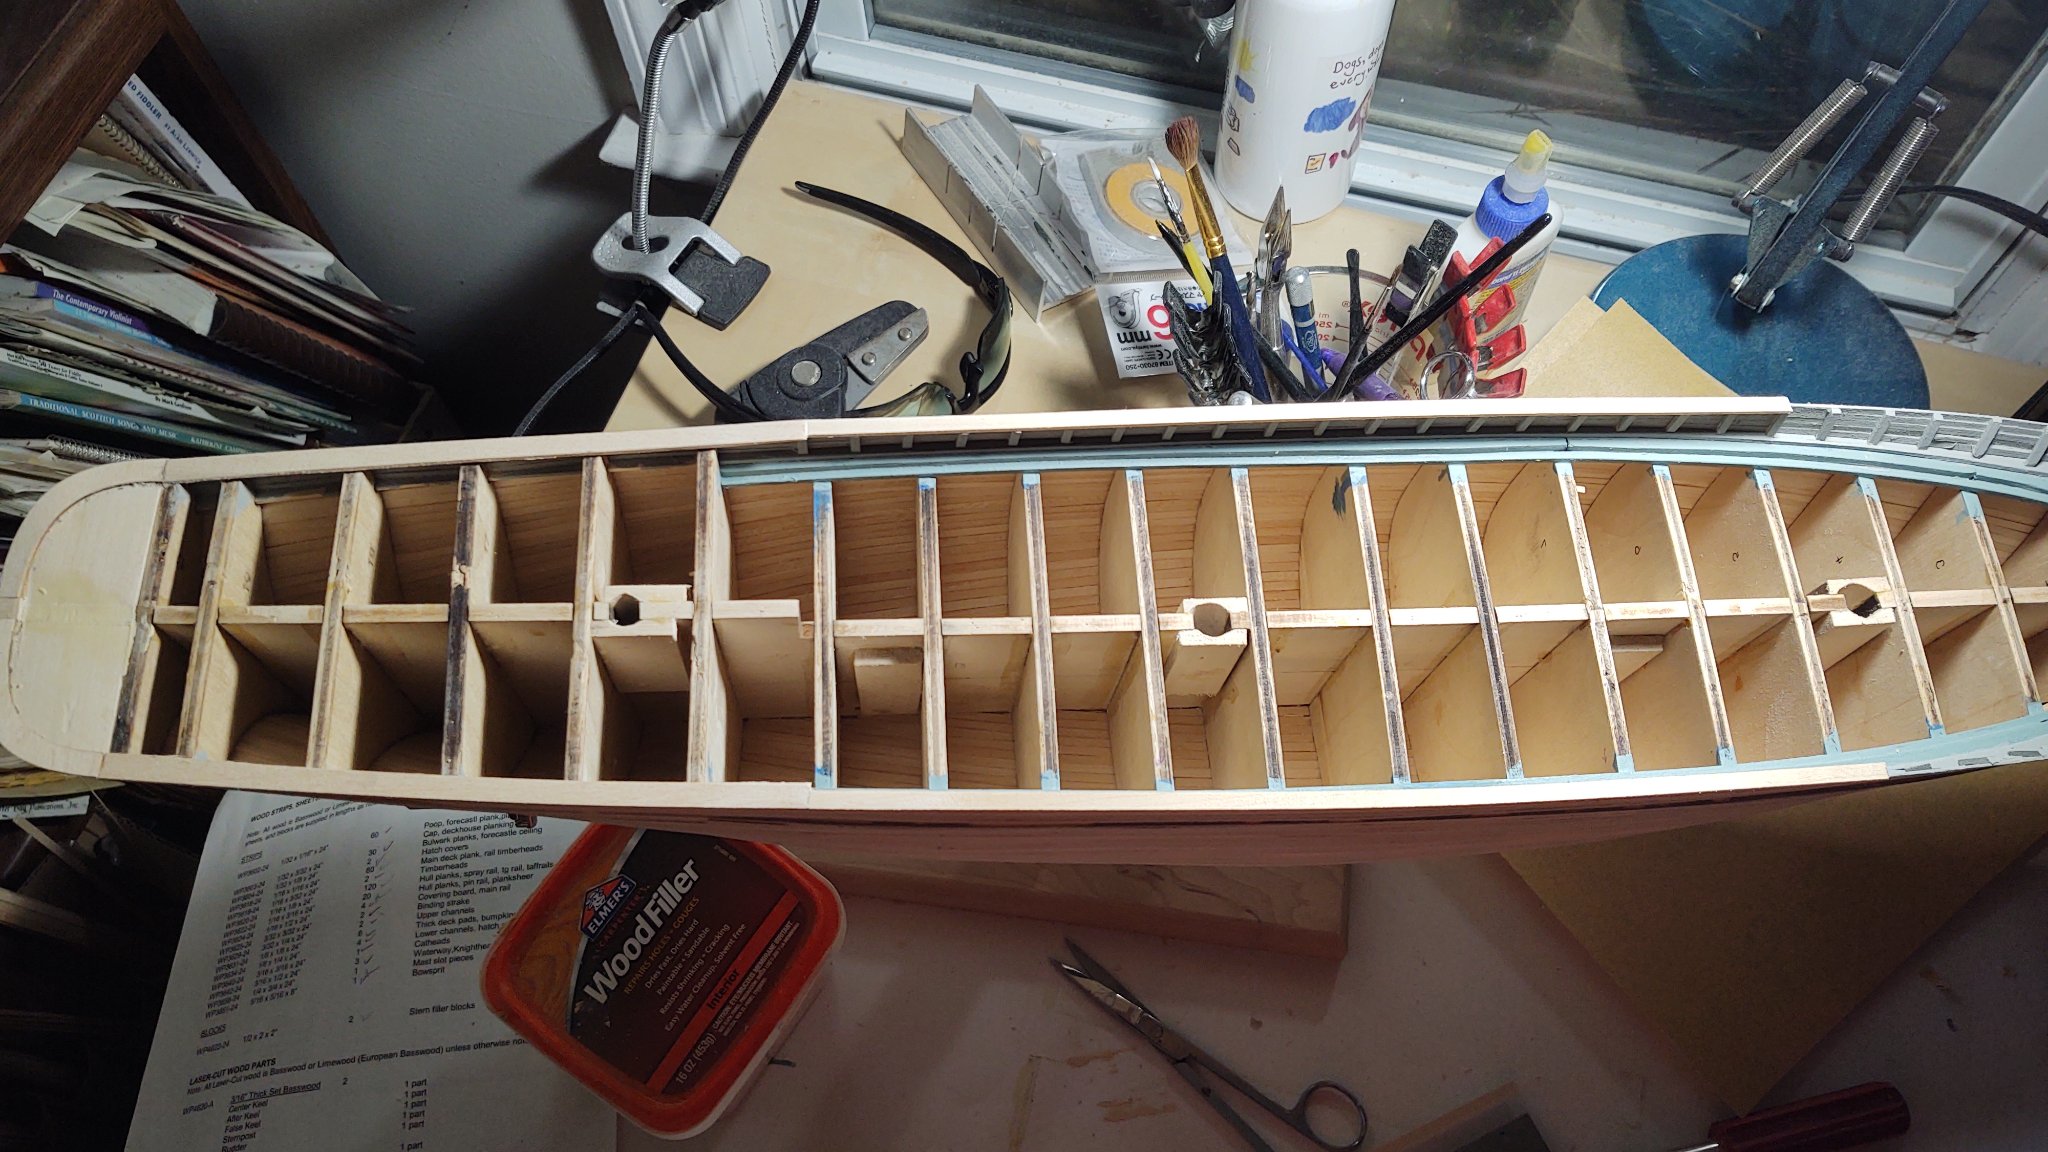
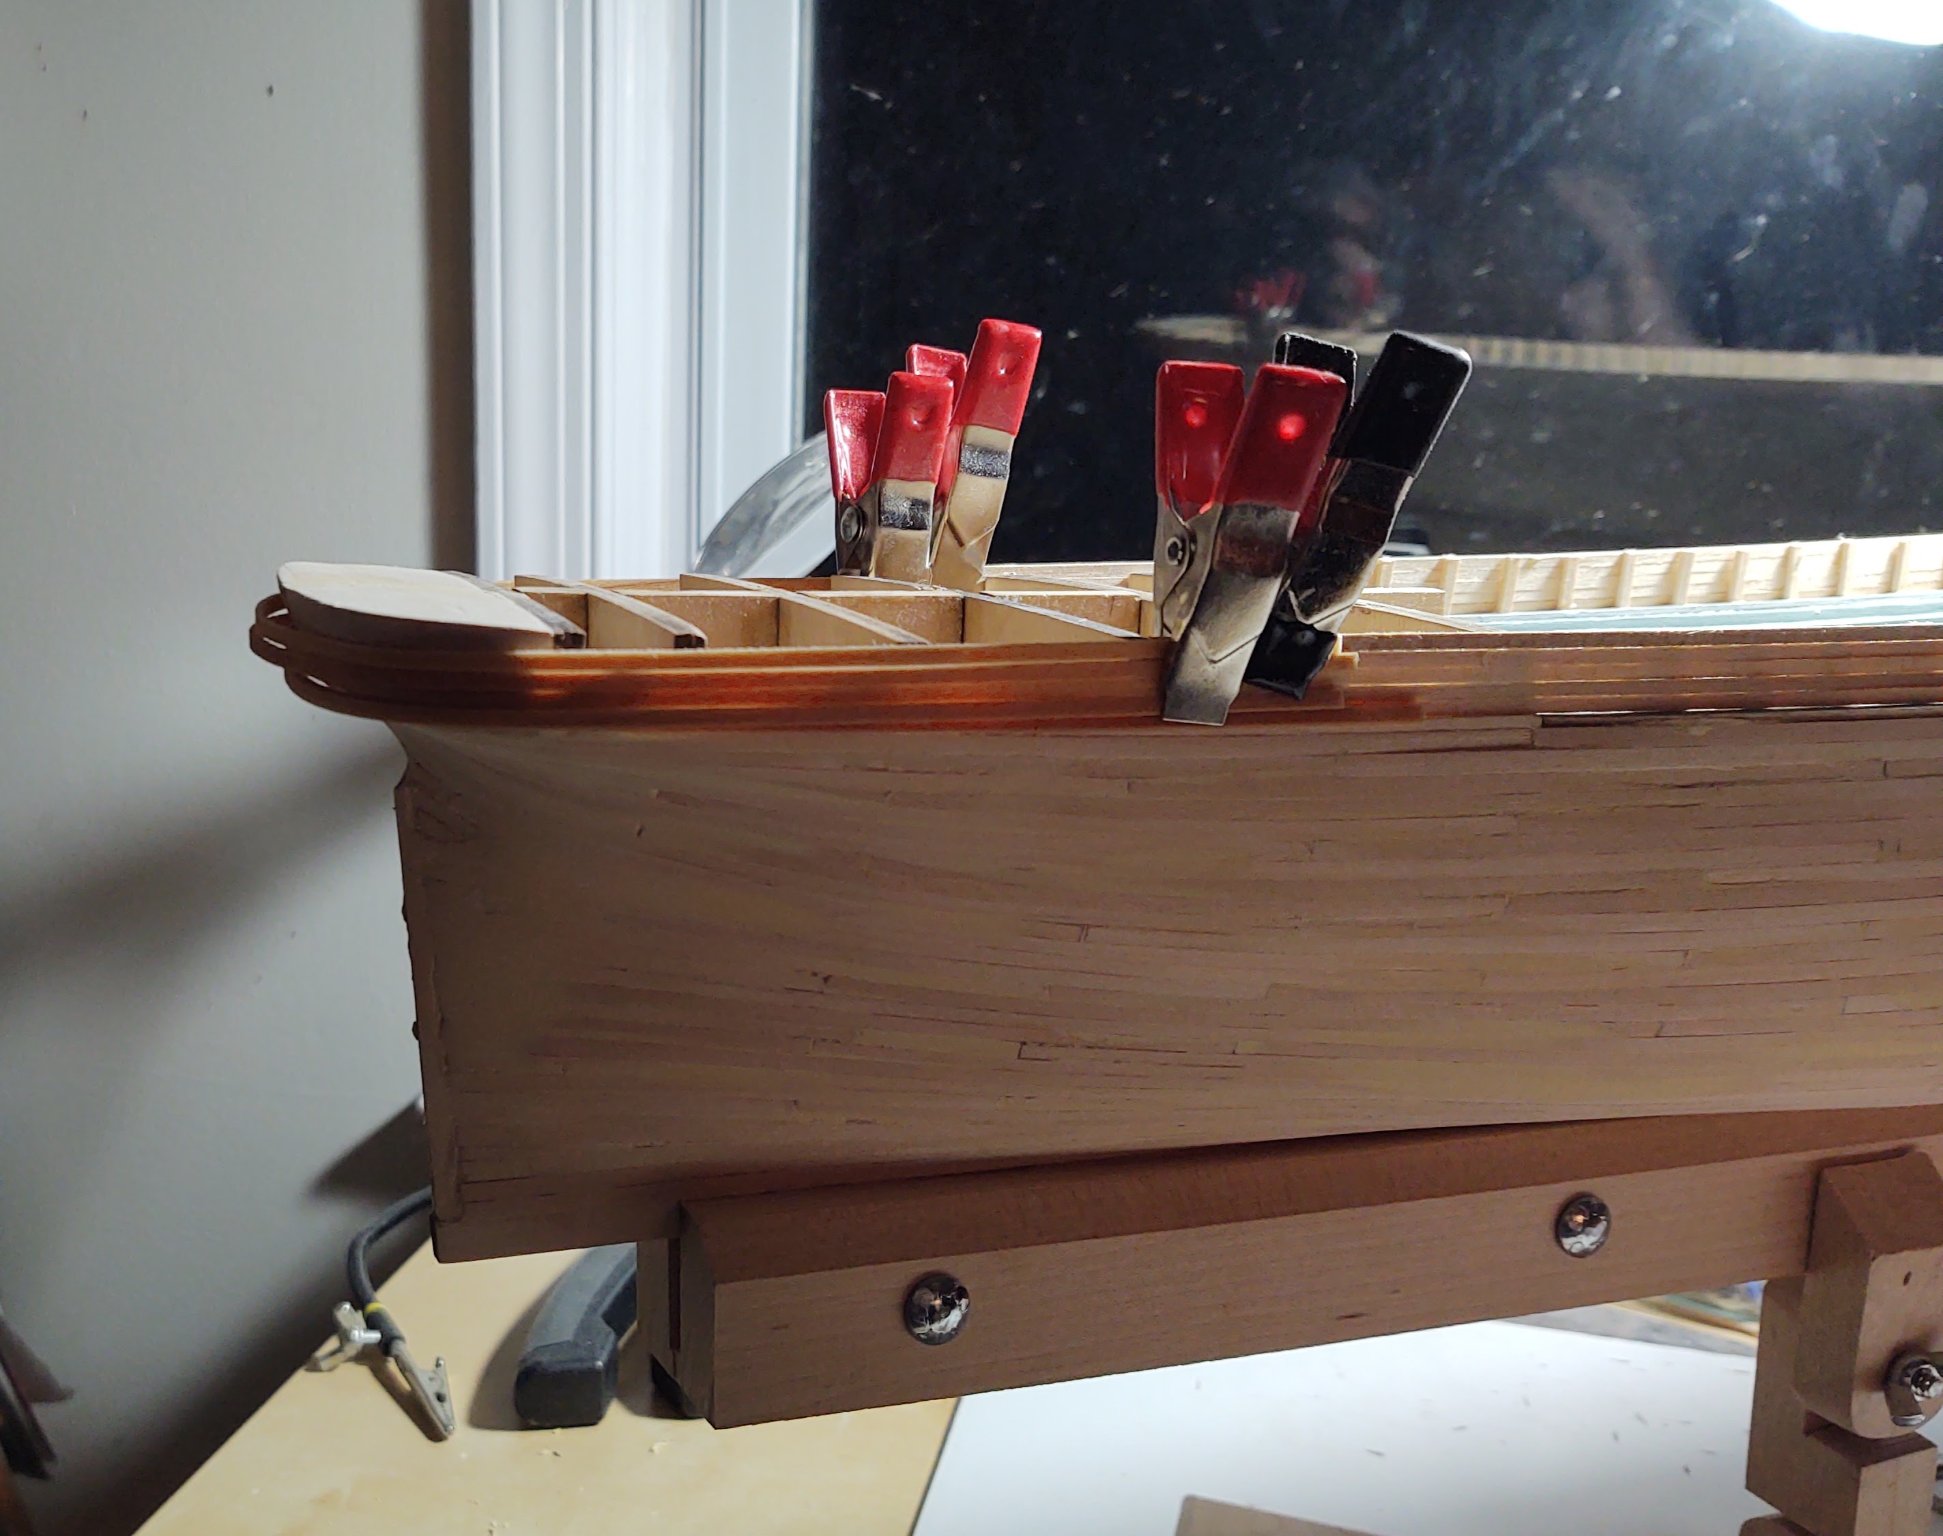
Thanks for the visits and the likes. I've started on the bulwarks, putting a temporary batten in place to position the stanchions and then securing the bases with CA glue. The somewhat eclectic order of stanchion installation was (at least in theory) to prevent pressure on the batten from causing deformation - I put a number on each end and then installed port and starboard pairs where I thought they might do the most good in terms of maintaining the 'natural shape'. As with most people, I mad the stanchions longer than necessary with the intention of cutting them down to size. Once all the stanchions were in place, I started putting the bulwarks on. Before I could do that, I realized that I needed the planksheer to extend all the way to the knightheads (otherwise there was a gap between the garboard strake and the forecastle bulwark, so I fabricated two planksheer extensions. The bulwarks are made with 1/32 by 3/32 planks. I've only completed one, and have not yet completed the section around the stern, which is going to require some serious steam bending. After the planks were in place, I used my Dremel to cut the stanchions down to size, and used a bit of filler to fill any gaps. You may note that the final plank extends a bit over the stern bulkheads. It looks like that is not the case uniformly across the after bulkheads. The further aft, the more it appears that the 5 planks will reach the top of the bulkhead pretty exactly. I'll need to see how many bulkheads are impacted. If it's only one or two, I will build up the bulkhead with some scrap to level it off. If it's most of them, I'll sand down the bulwarks until it runs smoothly to the forecastle. Honestly, my suspicion is that I will do the former. I think it much more likely that I will get an even set of bulwarks if I add 2 or three extensions to the bulkheads rather than try to sand them down well into the waist (the forecastle looks pretty good - no serious mismatches there. That may mean adjusting the aft cabin when it is installed, but I'll at least be aware of it ahead of time. One thing to keep reminding myself is that building a ship is a question of making the adjustments when things don't follow the plans exactly. Every ship I've ever made has required some adjustment in order to make it work. The Niagara needed a huge adjustment on the gunports. If you had followed the plans exactly you would wind up with carronades that hit the ceiling of the gunports. Evolve and adapt.


- 602 replies
-
- 5
-
-
- Flying Fish
- Model Shipways
- (and 2 more)
-
BTW, you will see many more defects than anyone else looking at the model. A) you know where they are and b) every builder is the most critical judge of their own work. And 1/32 inch is what, 6 inches at full scale (it’s 1:192 I think)? At the rate they turned those Casablanca class jeeps out, it wouldn’t surprise me if they had a sponson or two off way more than 6 inches... I’ve wondered on more than one occasion if some of our models are more perfect than the original ships.
- 25 replies
-
- 3
-
-
- Gambier Bay
- BlueJacket Shipcrafters
- (and 1 more)
-
The thing that amazes me about McKay and his cohorts in the late 18th through mid 19th century is the degree to which they kind of intuited the kind of engineering concepts we get today through controlled experimentation and/or computer modeling. They were experimenting, but with the full size ship (or bridge, or building, or whatever). By the turn of the century, navies at least were testing models in large tanks (the US Navy built its first basin in 1896, and Robert Massie discusses how the RN designers tested a number of hull models when designing HMS Dreadnought in 1905 - finding a hull form that allowed for adding additional armor while keeping the powerplant and speed the same). But McKay, Palmer, Griffiths, and, heck, Humphreys, Pook, Eads, etc. had none of those advantages and still made great ships. I'm not saying we don't have people like that around now (I'm trying to restrain myself from moving into 'get off of my lawn territory' as I head into my late 50s), but modern engineers can model and have a much higher chance of finding the fatal flaw before they build the thing. Gotta admire their guts though. And McKay in particular, who I think bet the firm at least twice on his design being successful.
- 602 replies
-
- 2
-
-
- Flying Fish
- Model Shipways
- (and 2 more)
-
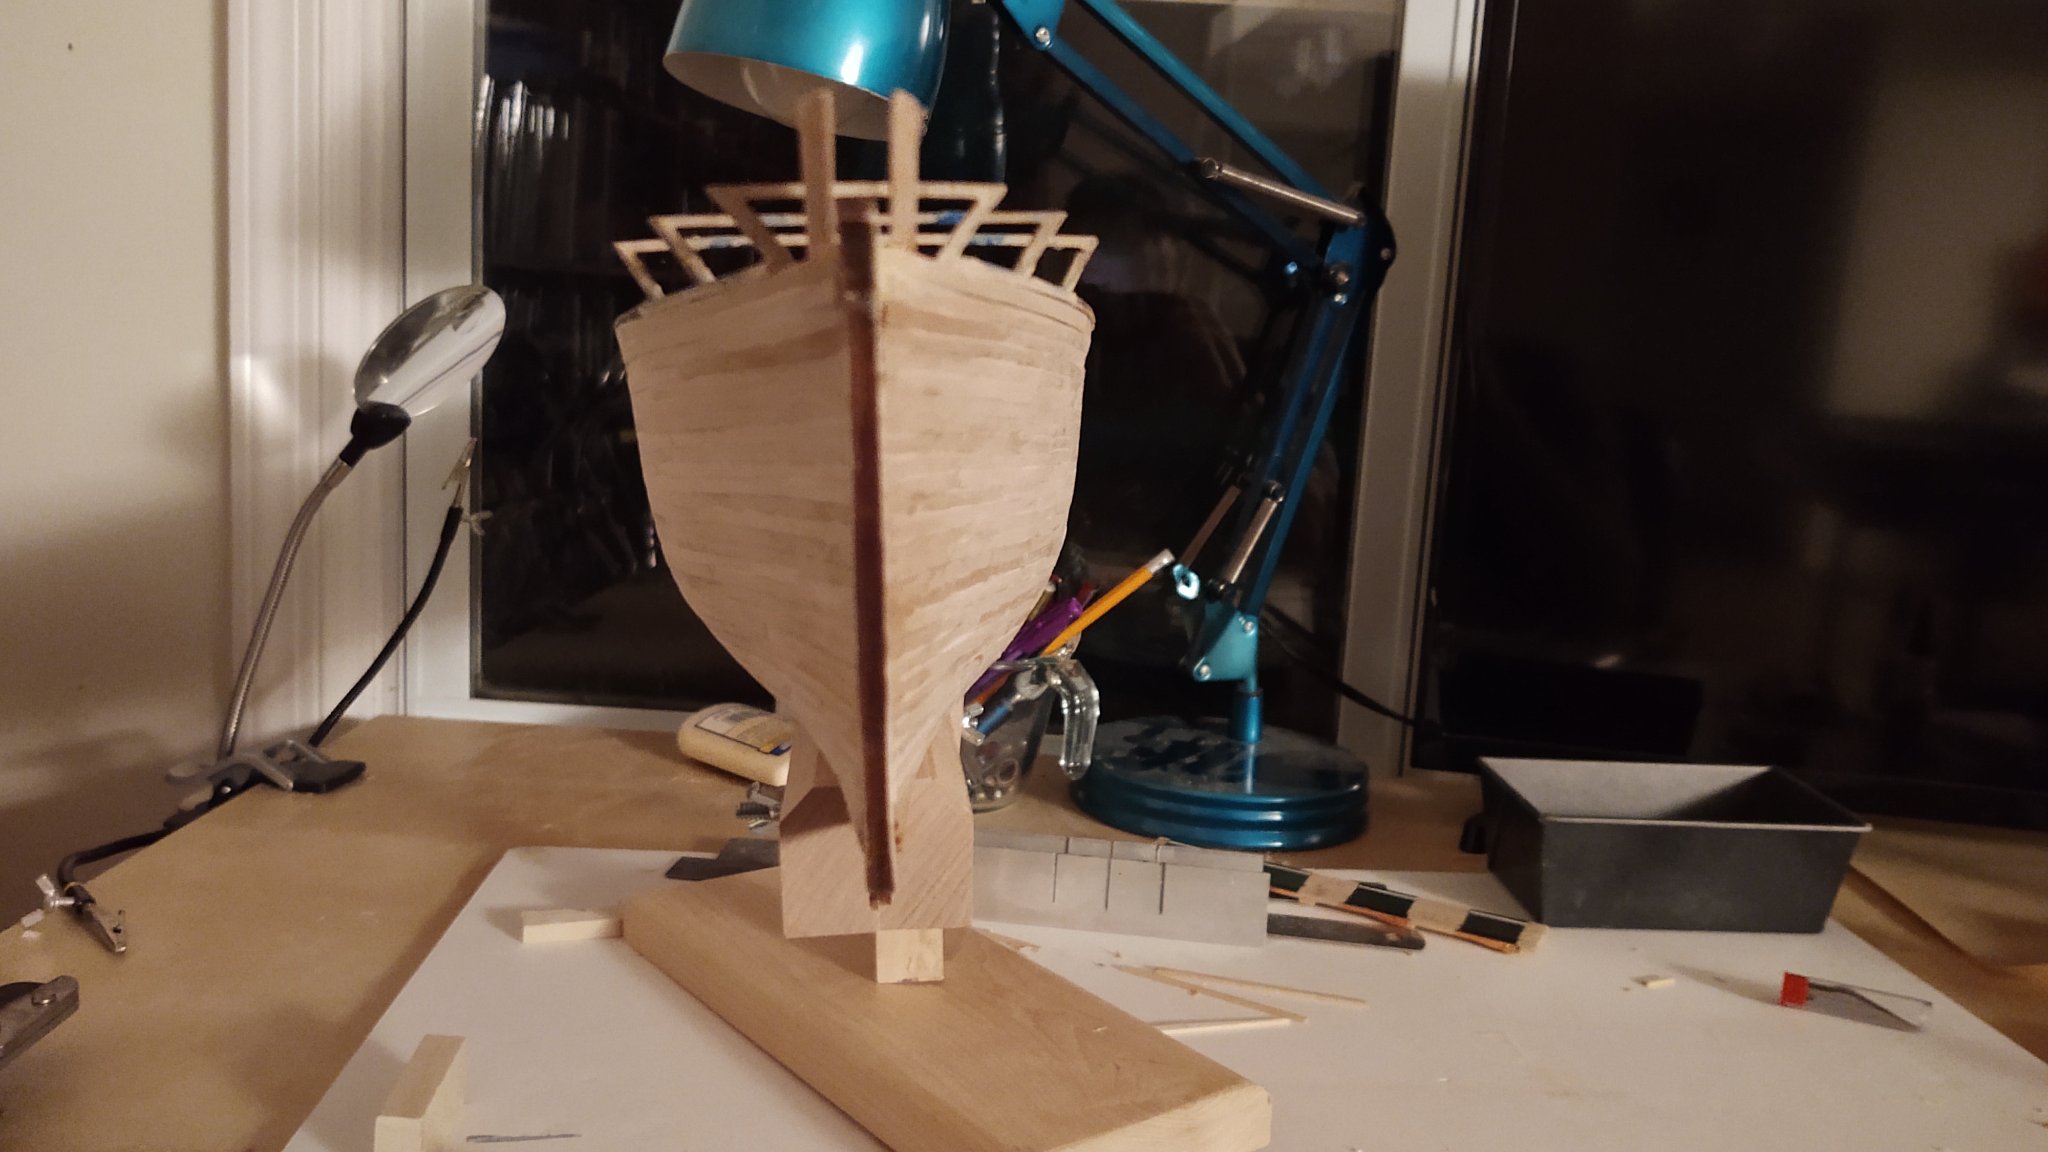
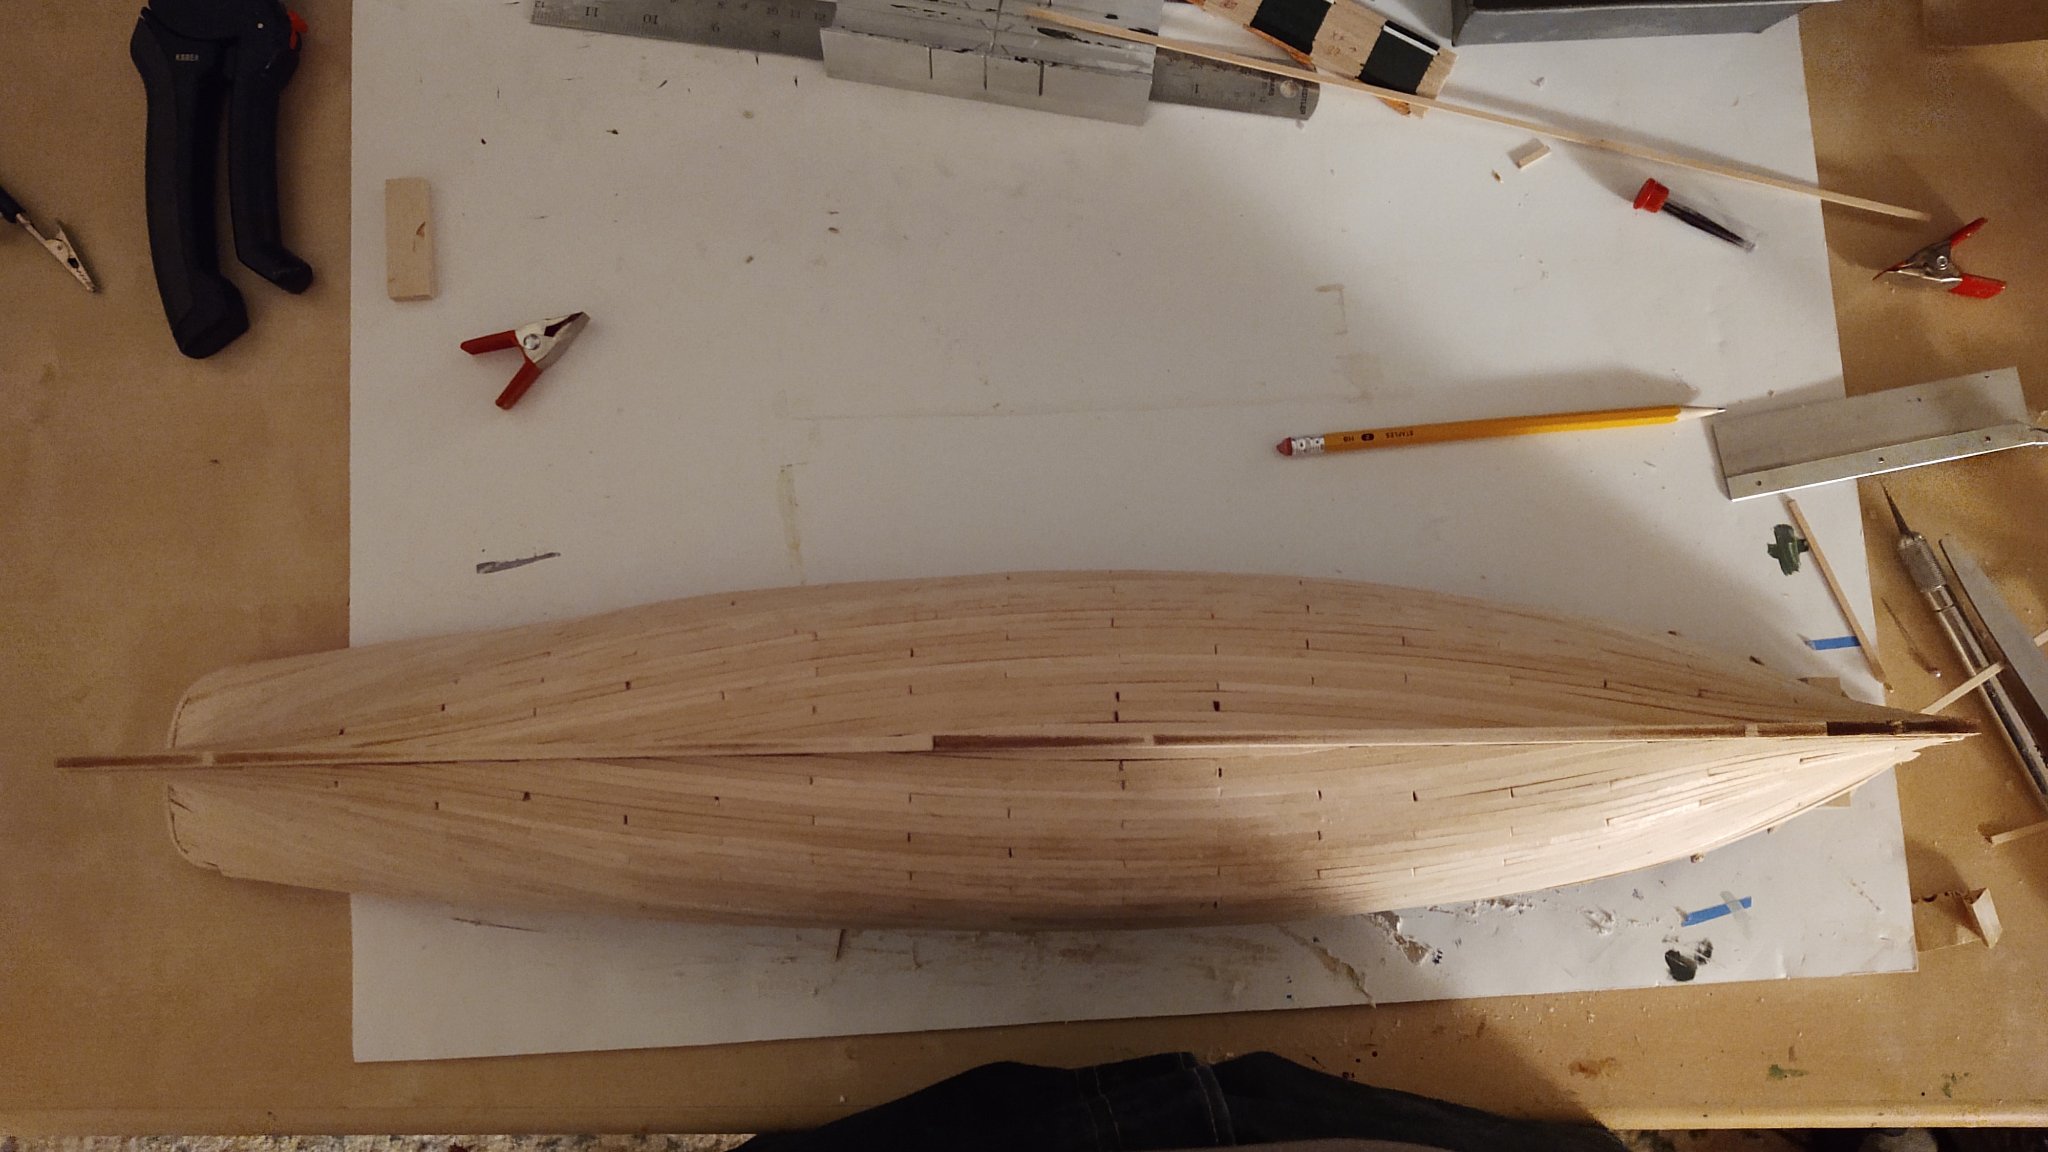
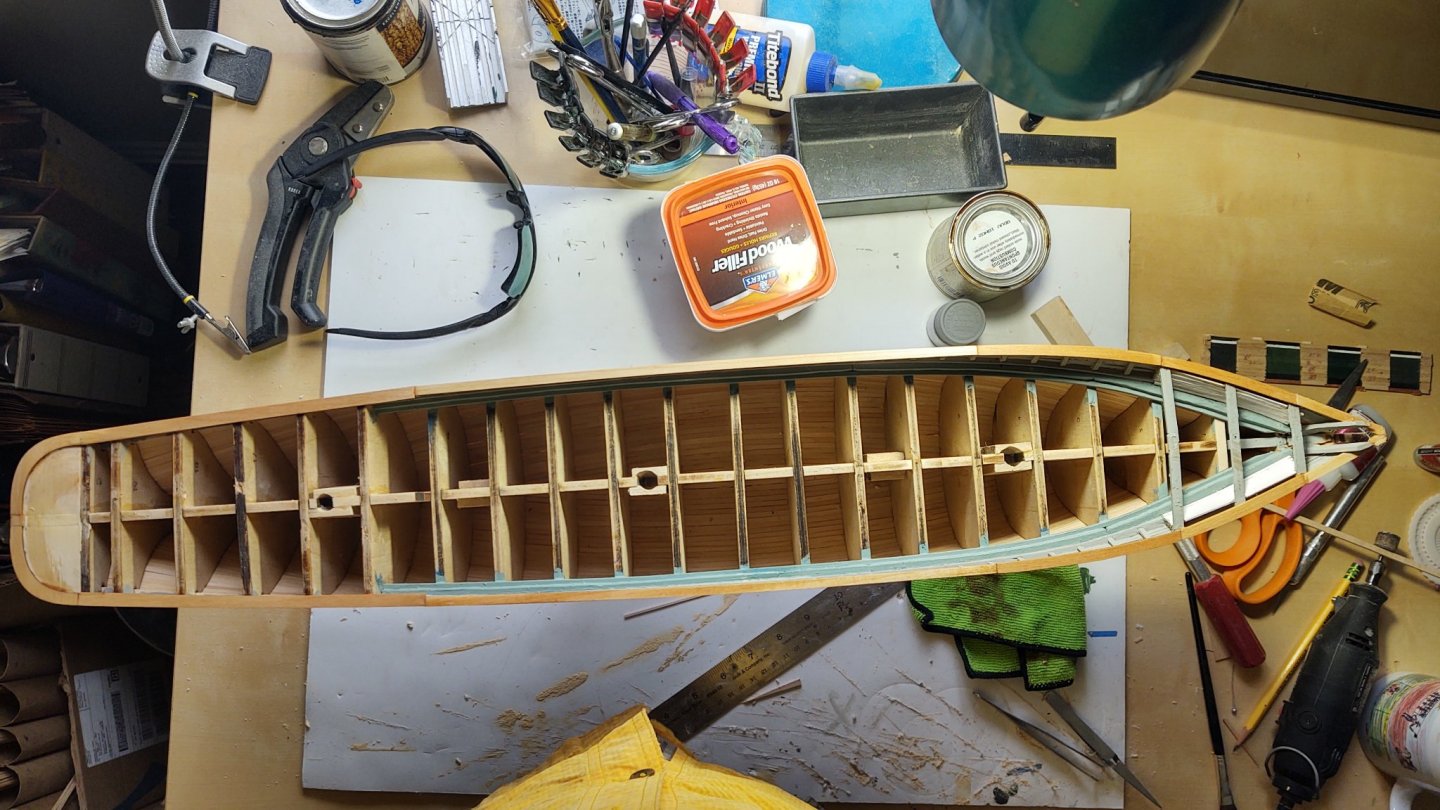
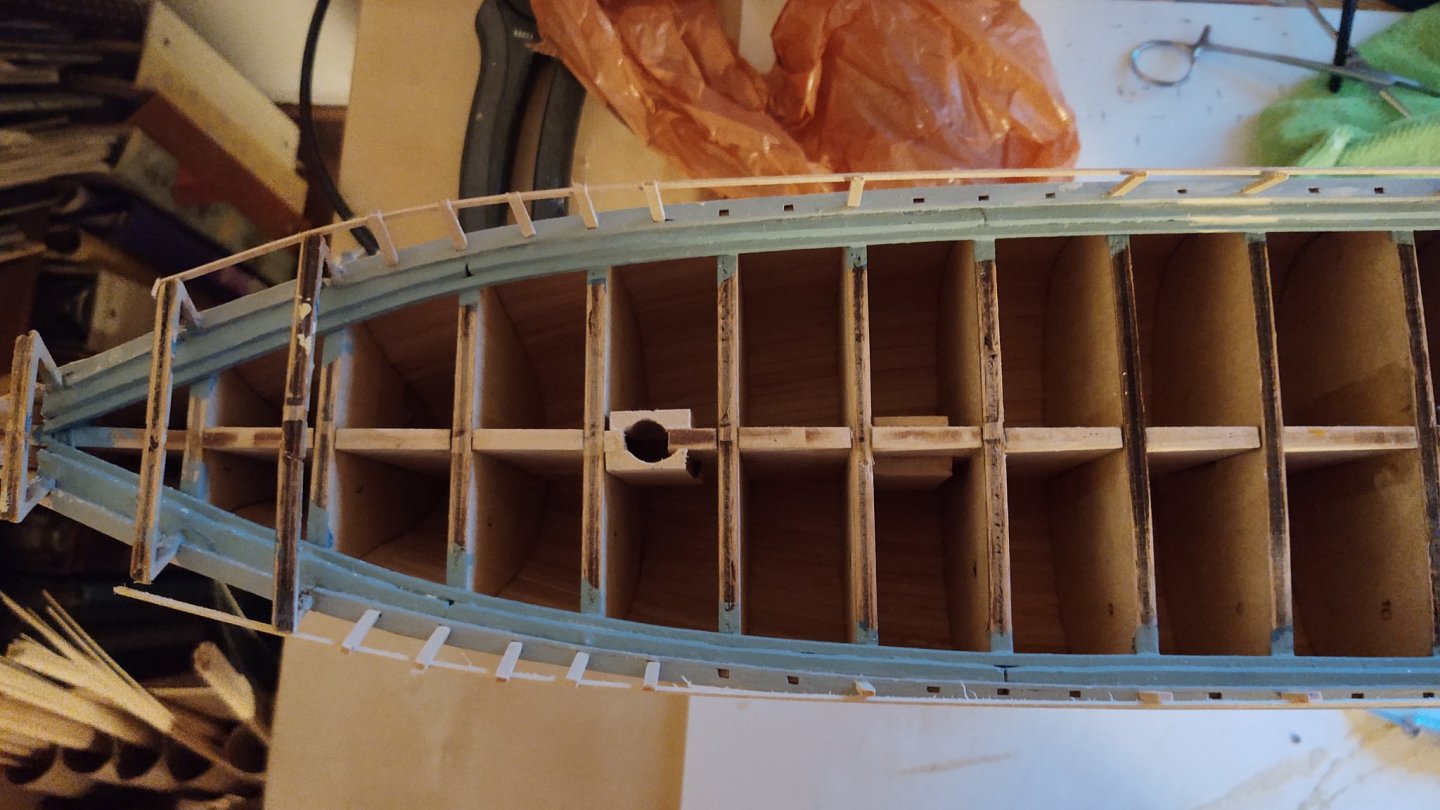
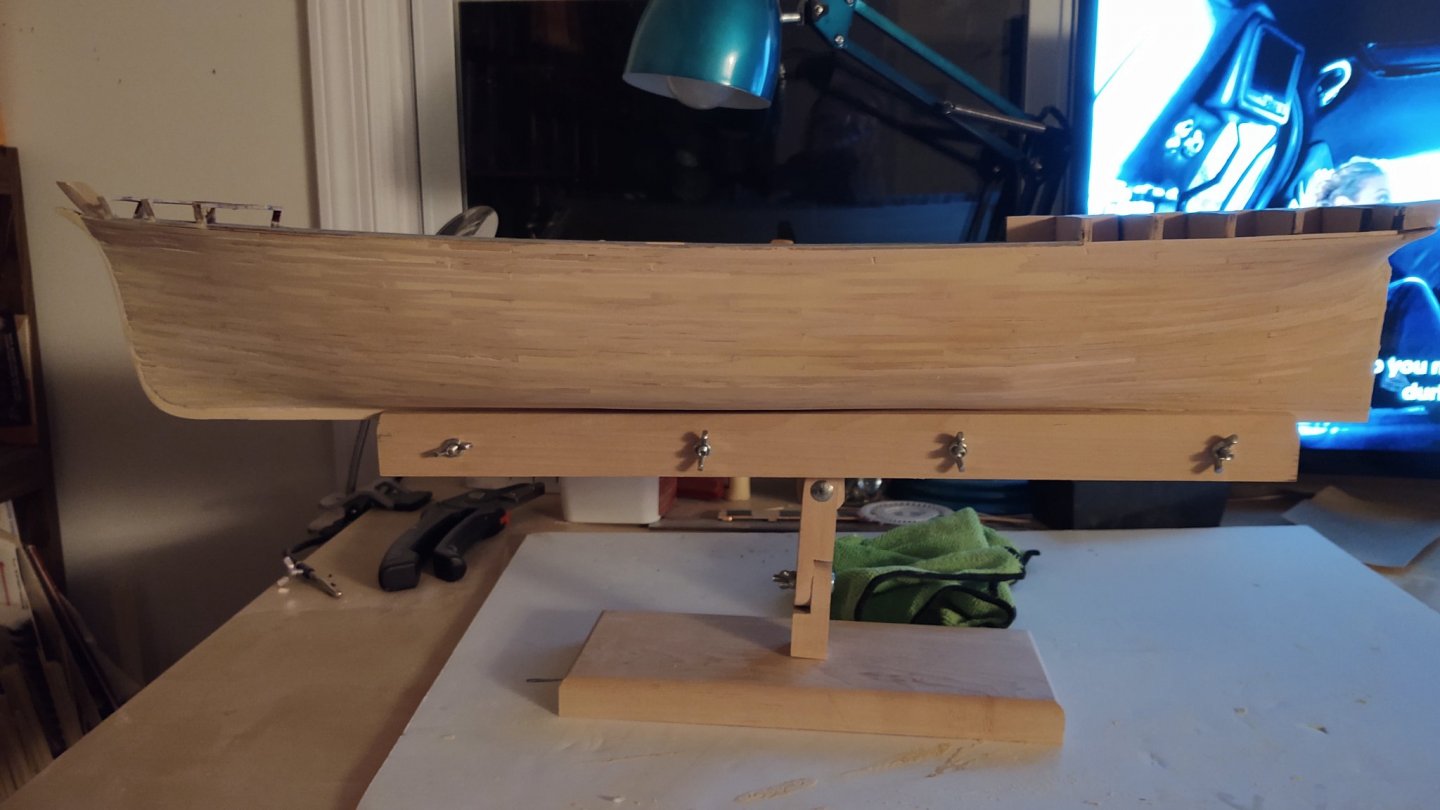
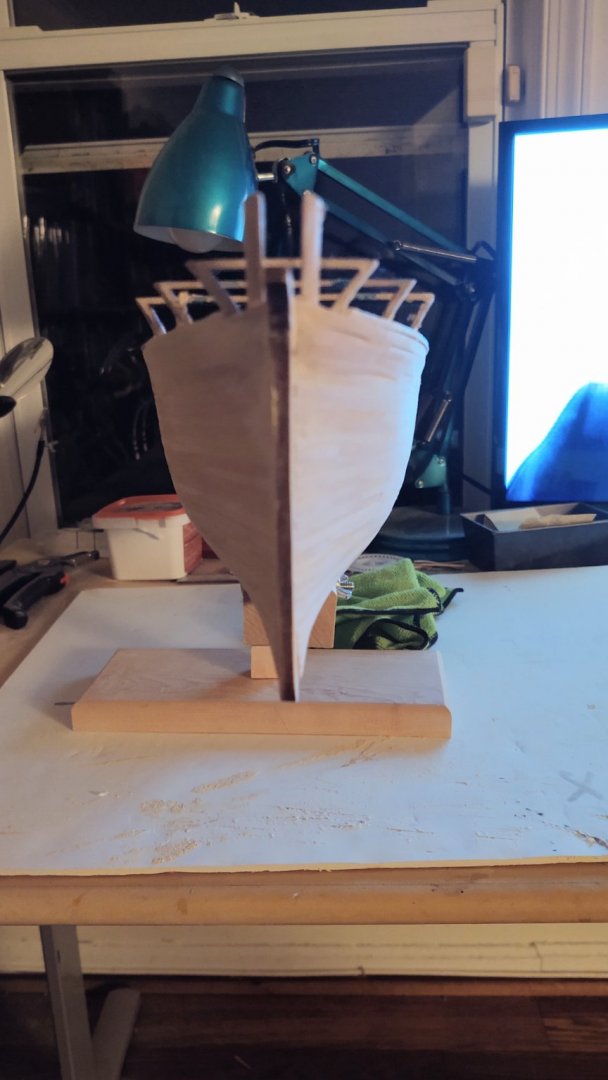
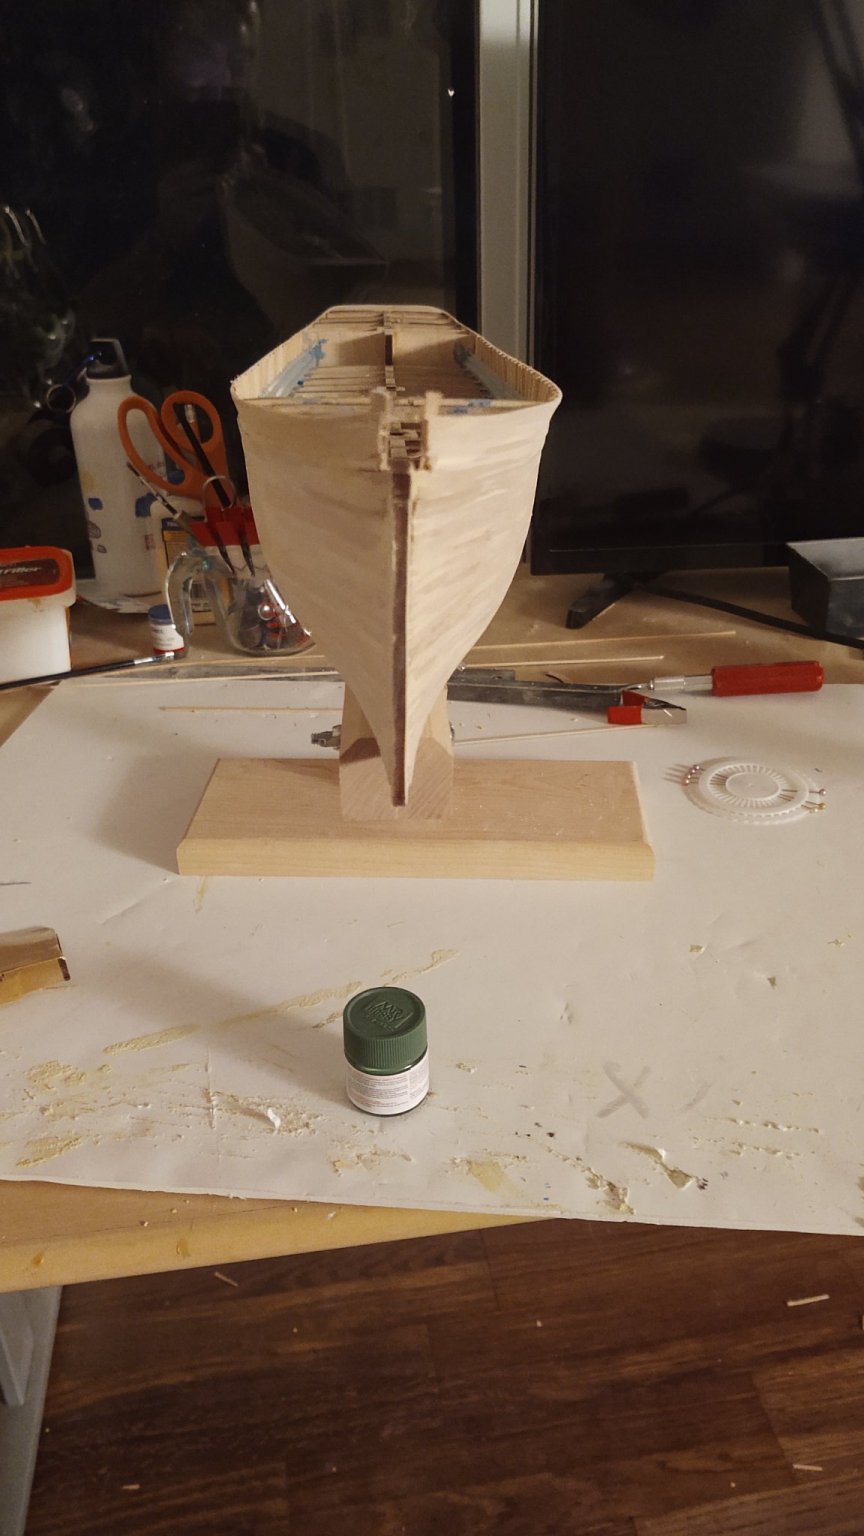
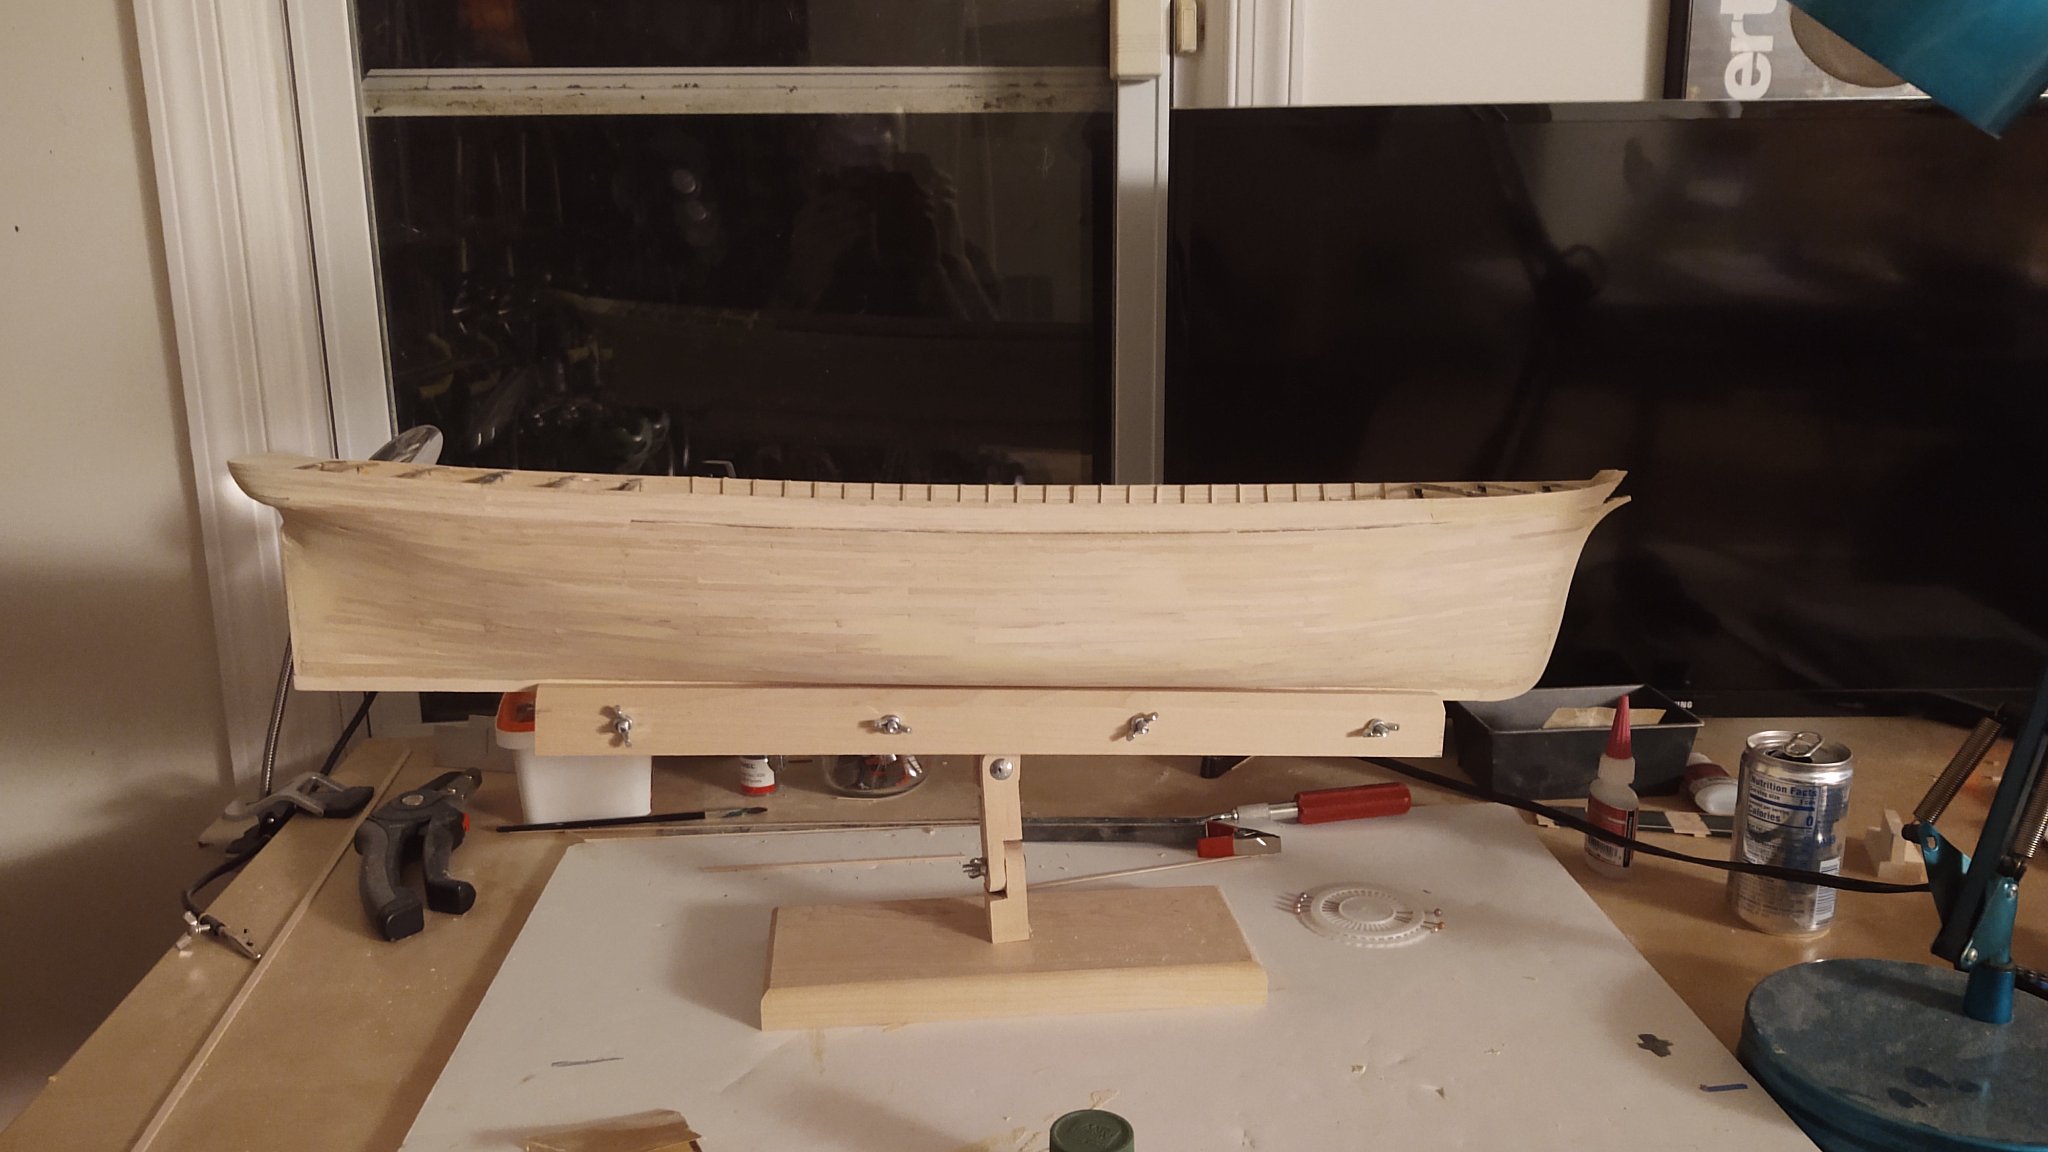
Thanks for the likes and for following along. The hull planks are in place. The first three shots show the hull before any serious fairing work, the next photos are after the application of some filler and some elbow grease with 150 grit sandpaper (or at least I hope that is the order that they show up - I have a very hard time getting the files to load in the order I want, but I digress. Tomorrow and over the weekend, I will continue the sanding, fill in a couple of remaining gaps and then give it a nice sanding with 220 grit to get a decently smooth surface. Once that is complete, I'll get the stanchions and the bulwarks and the forecastle ceiling planks and it will be time to paint the hull. I like to put the hatch coamings and then plank the decks, so paint before deck. Two other quick observations. First, you can now get Tamiya tape again at my local store. Hopefully that means vaccinations and recovery. Second, it is interesting to compare and contrast the hull forms of the ships I've built over the years. Despite being a fast sailer, this has a really deep and flat bottomed hull compared to say, a Baltimore Clipper like the Pride of Baltimore, but very similar to Passat. USS Constitution has the deep draft, but is beamer compared to its draft and has a more V shaped bottom; Niagara is both shallower draft and way beamier, and has a less flat bottom than the Fish. It's not really surprising I suppose, since form follows function, but it is still interesting. Enjoy your weekend all, George K


- 602 replies
-
- 6
-
-
- Flying Fish
- Model Shipways
- (and 2 more)
-
Yeah, it's an amazing story. The two halves getting smacked by a hurricane while it was at Ingalls was sort of the capstone. 'Hardluck Ironclad' indeed.
-
Concur on the great work! For some reason the capstan bars seem to be an occasional plastic ship thing, they are on the Revell Constitution and United States too (although not on the Heller Passat, go figure).
-
Same here. Your hull looks much better than mine does. Great start! George
-
Fantastic job! This ship is special to me, because my paternal grandmother came to the US from Greece, third class, on the Normandie in late '35. She was a subsistence farmer on Rhodes, who in the space of a couple of weeks went from a part of the island with no electricity or running water to Piraeus in Athens and thence to La Havre and New York City to be met by my grandfather, a man she had not seen for several years while he saved up the money to bring her to the states. The culture shock must have been unbelievable.
- 55 replies
-
- 6
-
-
- Blue Ridge Models
- Normandie
- (and 2 more)
-
Thanks for the vote of confidence! I visited Vicksburg National Military Park when we were moving from Los Angeles to DC and saw the Cairo there. It is a great subject and easy to understand how it catches people's imagination.
- 602 replies
-
- 2
-
-
- Flying Fish
- Model Shipways
- (and 2 more)
-
Ed Bearrs who wrote Hardluck Ironclad and was part of the recovery team just died last September (he was 97).
-
This is an example of someone who did an amazing job on the Revell USS Constitution with the thermoplastic sails. WAY out of my league: https://modelingmadness.com/review/misc/ships/carcon.htm.
-
And another brief update. Planking is proceeding apace. I've added a few steelers in the stern to reduce the amount of bend required. Should be done in another week or so, followed by an extended session with wood filler and a number of grades of sandpaper.


- 602 replies
-
- 3
-
-
- Flying Fish
- Model Shipways
- (and 2 more)
-
I've seen people do good things with thermoplastic sails, but not me. I left them out of my Connie and there weren't any in the Passat.
-
This is a bit late, but... There may be some records in the National Archives from the Army Quartermaster General's office with the receipts (in any case, Ed Bearss cited records indicating that Eads had submitted receipts. And, if you look at Hard Luck Ironclad, the Ingalls Shipbuilding examination of the Cairo listed the exterior as 'black', interior as 'white washed', with colored identification bands on the stacks. The ship looks great - and not convinced I would do anything about it.
-
Are you planning to rig with sails? And if not, are you going to rig the bunts and leeches? Unlike Preussen, my Passat's instructions didn't include the bunts and leeches. I did put the blocks on - that gave it some visual interest without overly cluttering things up at 1:150.
-
Hi Brad, For my future reference was the fit tight vertically, horizontally, or both? Either way, looking great!


.jpg.dbf86fd488173011830179bd7fd94908.jpg)