


donrobinson
-
Posts
1,909 -
Joined
-
Last visited
Reputation Activity
-

 donrobinson got a reaction from popeye the sailor in Barque Stefano by Heronguy - MarisStella - 1:63
Looks like you are getting it done, good stuff.
-
 donrobinson got a reaction from Elijah in Barque Stefano by donrobinson - MarisStella - 1:63
Hello everyone, I'm hoping you are all having a good day and your shipyards are active.
I have been busy planking the hull and now the deck, two layers, for what now seems a eternity so yesterday I decided to turn my attention to something required further on in the build.
The aft cabin has a rail on top of it that needs to have stanchions, these are made from 3 mm dowel and then shaped accordingly. Although nothing real fancy or anything, I thought you may want to see how I made them.
3 mm dowel in chuck
First cut is made, .100 from the end and .021 deep
second cut made, .460 from the end and .01 deep
Shaping is done using a sanding stick on the backside
Final shaping done and parting groove is cut at .560 from the end. Final parting was done with a razor saw, with lathe turned off
Culling out the rejects, on the left
Length when parted from lathe is .560 inches or approximately 14 mm, which allows for 1 mm to be sanded off each end to arrive at a final measurement of 12 mm. When I tried to make these at the exact length the 1 mm collar would chip or break so making them longer prevented this. I used a Byrnes disc sander for sanding the ends which made this part of the job very easy.
As you can see nothing out of the ordinary but it was lots of fun, and Doug(Heronguy), if you are reading, this is the reason you NEED a lathe
For anyone considering buying a mill, having a DRO(digital read out) really helps for something like this when there are repetitive cuts. It saves on mistakes and time, I would defiantly recommend buying one when ordering a mill.
You all have fun and enjoy the weekend. It's snowing here now so it looks like I'll be storm stayed for the weekend , luckily enough the food and refreshment fridges are both well stocked!!
-
donrobinson got a reaction from Elijah in Barque Stefano by donrobinson - MarisStella - 1:63
Good morning all, thanks for the comments, likes and visits.
Since my last post the hull planking has been completed. I stained and put a coat of wipe on poly on the starboard side to see how the beech would look, I'll let you be the judges. Next was removing the bulkhead extensions, cleaning up the freeboard(bulwarks), then carving out the stern area down to deck level.
Here are the pictures:
Here is the beech stained and a coat of wipe on poly. I used a water based stain and only one coat of it. another coat may have improved the look or possibly a coat of sanding sealer. Overlooking the obvious glue stains you can see it does not take stain very evenly. My conclusion is that beech looks better without a stain, should be left clear or painted, which is coming up soon
Removing the bulkhead extensions using a veneer saw. These came off quite easily and posed no problems, the veneer saw is defiantly the tool for this job.
About to start the removal of the stern filler block
Filler block removed, filler was later applied to floor and sides. The important part here is to maintain the curvature and rise of the deck, this simply done by laying a plank along the bulkhead tops and watching how it is lays. Much the same as you would do when fairing a hull.
These last pictures are showing the cleaning of the freeboard, they will be eventually painted, and the fairing of the bulkhead tops. When fairing the bulkhead tops it is again important to maintain the curve and also to have a consistent height from the top of the bulkhead to the to of the freeboard.
That's all for now, next is the first layer of planking on the deck.
See You soon
-
 donrobinson got a reaction from John Allen in HMS Greyhound by Old Collingwood - Corel
I agree with Zappto, great work on the painting!
-
 donrobinson got a reaction from thibaultron in Royal Navy Ship of the Line Cross-Section by DocBlake - FINISHED - based on Mamoli's "Constitution" - 1:93 scale
Nice work Dave, I just bought the plans for this model so I'll be watching close to what you are doing
-
 donrobinson got a reaction from Dee_Dee in Glad Tidings by Dee_Dee & Glacial Boat Works - Model Shipways - 1:25
To finish planking a hull is always a good feeling.
-
donrobinson got a reaction from Elijah in Barque Stefano by donrobinson - MarisStella - 1:63
Doug and Mike: Thanks guys
-
donrobinson got a reaction from popeye the sailor in HMS Fly by Johnnyreg - Amati/Victory Models - Scale 1:64
Thanks to Mike I also put supports under mine. I used "T" supports to strengthen mine
-
 donrobinson got a reaction from Johnnyreg in HMS Fly by Johnnyreg - Amati/Victory Models - Scale 1:64
Thanks to Mike I also put supports under mine. I used "T" supports to strengthen mine
-
 donrobinson got a reaction from Landlubber Mike in Eagle of Algier 1753 by Mirabell61 - FINISHED - 1:48 - Chebec - Nils Langemann
It all looks so fine Nils, fantastic work. So many things to look at and admire it's hard to find appropriate words to describe it all
-
 donrobinson got a reaction from zappto in Nuestra Senora del Pilar de Zaragoza by marktiedens - FINISHED - OcCre - scale 1:46
Do you use ordinary household bleach? Those sails look good. As you say the deck will be fine once filled up with furniture and everything else.
-
donrobinson got a reaction from thibaultron in Swampscott Dory by Oldguydory - FINISHED - BlueJacket Shipcrafters
Looks very sharp, good work!
-
 donrobinson got a reaction from marktiedens in Nuestra Senora del Pilar de Zaragoza by marktiedens - FINISHED - OcCre - scale 1:46
Do you use ordinary household bleach? Those sails look good. As you say the deck will be fine once filled up with furniture and everything else.
-
donrobinson got a reaction from popeye the sailor in Syren by JesseLee - FINISHED - Model Shipways - scale: 1:64
Sorry to hear that, losing a dog is very painful. I feel for you. Take care
-
 donrobinson got a reaction from MarisStella.hr in Barque Stefano by donrobinson - MarisStella - 1:63
Doug and Mike: Thanks guys
-
donrobinson got a reaction from marktiedens in Friesland 1663 by zappto - FINISHED - Mamoli - 1:75 - Dutch 80 gun ship
The stern is looking brilliant, great work
-
 donrobinson got a reaction from Canute in Syren by JesseLee - FINISHED - Model Shipways - scale: 1:64
Sorry to hear that, losing a dog is very painful. I feel for you. Take care
-
 donrobinson got a reaction from EJ_L in Barque Stefano by donrobinson - MarisStella - 1:63
Doug and Mike: Thanks guys
-
 donrobinson got a reaction from CaptainSteve in Barque Stefano by donrobinson - MarisStella - 1:63
Hello everyone, I'm hoping you are all having a good day and your shipyards are active.
I have been busy planking the hull and now the deck, two layers, for what now seems a eternity so yesterday I decided to turn my attention to something required further on in the build.
The aft cabin has a rail on top of it that needs to have stanchions, these are made from 3 mm dowel and then shaped accordingly. Although nothing real fancy or anything, I thought you may want to see how I made them.
3 mm dowel in chuck
First cut is made, .100 from the end and .021 deep
second cut made, .460 from the end and .01 deep
Shaping is done using a sanding stick on the backside
Final shaping done and parting groove is cut at .560 from the end. Final parting was done with a razor saw, with lathe turned off
Culling out the rejects, on the left
Length when parted from lathe is .560 inches or approximately 14 mm, which allows for 1 mm to be sanded off each end to arrive at a final measurement of 12 mm. When I tried to make these at the exact length the 1 mm collar would chip or break so making them longer prevented this. I used a Byrnes disc sander for sanding the ends which made this part of the job very easy.
As you can see nothing out of the ordinary but it was lots of fun, and Doug(Heronguy), if you are reading, this is the reason you NEED a lathe
For anyone considering buying a mill, having a DRO(digital read out) really helps for something like this when there are repetitive cuts. It saves on mistakes and time, I would defiantly recommend buying one when ordering a mill.
You all have fun and enjoy the weekend. It's snowing here now so it looks like I'll be storm stayed for the weekend , luckily enough the food and refreshment fridges are both well stocked!!
-
donrobinson got a reaction from John Allen in Barque Stefano by donrobinson - MarisStella - 1:63
Hello everyone, I'm hoping you are all having a good day and your shipyards are active.
I have been busy planking the hull and now the deck, two layers, for what now seems a eternity so yesterday I decided to turn my attention to something required further on in the build.
The aft cabin has a rail on top of it that needs to have stanchions, these are made from 3 mm dowel and then shaped accordingly. Although nothing real fancy or anything, I thought you may want to see how I made them.
3 mm dowel in chuck
First cut is made, .100 from the end and .021 deep
second cut made, .460 from the end and .01 deep
Shaping is done using a sanding stick on the backside
Final shaping done and parting groove is cut at .560 from the end. Final parting was done with a razor saw, with lathe turned off
Culling out the rejects, on the left
Length when parted from lathe is .560 inches or approximately 14 mm, which allows for 1 mm to be sanded off each end to arrive at a final measurement of 12 mm. When I tried to make these at the exact length the 1 mm collar would chip or break so making them longer prevented this. I used a Byrnes disc sander for sanding the ends which made this part of the job very easy.
As you can see nothing out of the ordinary but it was lots of fun, and Doug(Heronguy), if you are reading, this is the reason you NEED a lathe
For anyone considering buying a mill, having a DRO(digital read out) really helps for something like this when there are repetitive cuts. It saves on mistakes and time, I would defiantly recommend buying one when ordering a mill.
You all have fun and enjoy the weekend. It's snowing here now so it looks like I'll be storm stayed for the weekend , luckily enough the food and refreshment fridges are both well stocked!!
-
 donrobinson got a reaction from md1400cs in Nuestra Senora del Pilar de Zaragoza by marktiedens - FINISHED - OcCre - scale 1:46
Planking looks great, I'm interested in seeing how it will look with a coat of finish
-
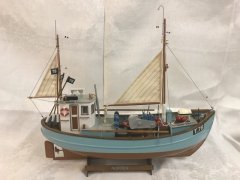
donrobinson got a reaction from popeye the sailor in Krabbenkutter by Heronguy - Billing Boats Nr 457&458 - Scale 1:30
Nice touch Doug
-
 donrobinson got a reaction from Seventynet in Barque Stefano by donrobinson - MarisStella - 1:63
Hello everyone, I'm hoping you are all having a good day and your shipyards are active.
I have been busy planking the hull and now the deck, two layers, for what now seems a eternity so yesterday I decided to turn my attention to something required further on in the build.
The aft cabin has a rail on top of it that needs to have stanchions, these are made from 3 mm dowel and then shaped accordingly. Although nothing real fancy or anything, I thought you may want to see how I made them.
3 mm dowel in chuck
First cut is made, .100 from the end and .021 deep
second cut made, .460 from the end and .01 deep
Shaping is done using a sanding stick on the backside
Final shaping done and parting groove is cut at .560 from the end. Final parting was done with a razor saw, with lathe turned off
Culling out the rejects, on the left
Length when parted from lathe is .560 inches or approximately 14 mm, which allows for 1 mm to be sanded off each end to arrive at a final measurement of 12 mm. When I tried to make these at the exact length the 1 mm collar would chip or break so making them longer prevented this. I used a Byrnes disc sander for sanding the ends which made this part of the job very easy.
As you can see nothing out of the ordinary but it was lots of fun, and Doug(Heronguy), if you are reading, this is the reason you NEED a lathe
For anyone considering buying a mill, having a DRO(digital read out) really helps for something like this when there are repetitive cuts. It saves on mistakes and time, I would defiantly recommend buying one when ordering a mill.
You all have fun and enjoy the weekend. It's snowing here now so it looks like I'll be storm stayed for the weekend , luckily enough the food and refreshment fridges are both well stocked!!
-
donrobinson got a reaction from CaptainSteve in Barque Stefano by donrobinson - MarisStella - 1:63
Good morning all, thanks for the comments, likes and visits.
Since my last post the hull planking has been completed. I stained and put a coat of wipe on poly on the starboard side to see how the beech would look, I'll let you be the judges. Next was removing the bulkhead extensions, cleaning up the freeboard(bulwarks), then carving out the stern area down to deck level.
Here are the pictures:
Here is the beech stained and a coat of wipe on poly. I used a water based stain and only one coat of it. another coat may have improved the look or possibly a coat of sanding sealer. Overlooking the obvious glue stains you can see it does not take stain very evenly. My conclusion is that beech looks better without a stain, should be left clear or painted, which is coming up soon
Removing the bulkhead extensions using a veneer saw. These came off quite easily and posed no problems, the veneer saw is defiantly the tool for this job.
About to start the removal of the stern filler block
Filler block removed, filler was later applied to floor and sides. The important part here is to maintain the curvature and rise of the deck, this simply done by laying a plank along the bulkhead tops and watching how it is lays. Much the same as you would do when fairing a hull.
These last pictures are showing the cleaning of the freeboard, they will be eventually painted, and the fairing of the bulkhead tops. When fairing the bulkhead tops it is again important to maintain the curve and also to have a consistent height from the top of the bulkhead to the to of the freeboard.
That's all for now, next is the first layer of planking on the deck.
See You soon
-
 donrobinson got a reaction from robdurant in Barque Stefano by donrobinson - MarisStella - 1:63
Doug and Mike: Thanks guys