CDW
-
Posts
7,760 -
Joined
-
Last visited
Content Type
Profiles
Forums
Gallery
Events
Everything posted by CDW
-
 I should have mentioned earlier...these are home made turn buckles. Twisted micro wire gets inserted and glued into micro brass tubing. Flying wires are seized onto the twisted wire loops. Easy peasy.
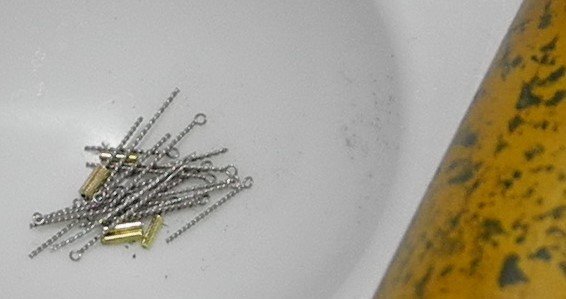

-
Thanks to both of you for your comments. Yes, the tops of the top and bottom wings will receive the same color combination.
-
Worked on the stabilizers tonight with color coats. Not much, really.


-
When you watch that video, you'll see the '60's sidewinders must acquire the target at less than 20 degrees from the afterburner, and everything is within visual range... Today, weapons systems can track, lock, and fire upon multiple targets at once, many many miles beyond visual range. Aspect angle is not even a thing anymore compared to what it once was. A modern fighter can lock on and fire upon a target at any angle. Now as to whether or not the F-8 could maneuver sufficiently to gun fight a modern aircraft, that's another story.
-
All that hard work is going to produce outstanding results. The photo etch is beautiful.
-
Yesterday's weapon systems cannot favorably compare to today's weapons systems, period. It would be a turkey shoot.
-
Wasn't that at a time when the USN decided their new aircraft must have two engines rather than one? It made the Super Crusader a non-contestant.
-
Around here, those little local household stores have closed their doors, particularly the ones owned by moms and pops. Except for (maybe) the stores we once had called "Radio Shack", I don't ever recall seeing fuse wire for sale in a store in my area.
-
Is that the software that comes with the decal-making and paper package, Denis?
-
Nice work, OC. Where do you acquire your fuse wire? I love keeping stuff like that fuse wire on hand...it always comes in handy for modeling projects. I often strip all the wires out of old appliances and computers to later strip away the insulation and use the stranded wire inside for similar things as you are doing here.
-
Do you have a small compressor and airbrush? If so, that should blow the dust off. if not, like you said, the aerosol cans used for dusting computer components will work. Just be careful not to blow away and lose small components that may not be securely glued down.
- 1,306 replies
-
- 5
-

-
- syren
- model shipways
- (and 1 more)
-
I sure do admire the way you took on this difficult project Phil, and the work you have done on it.
- 355 replies
-
- 2
-
-
- prince de neufchatel
- schooner
- (and 3 more)
-
Lou, JCT, Denis and Vossie...thanks much for your comments. Much appreciated. It's really weird the way yellow looks black with that old film.
-
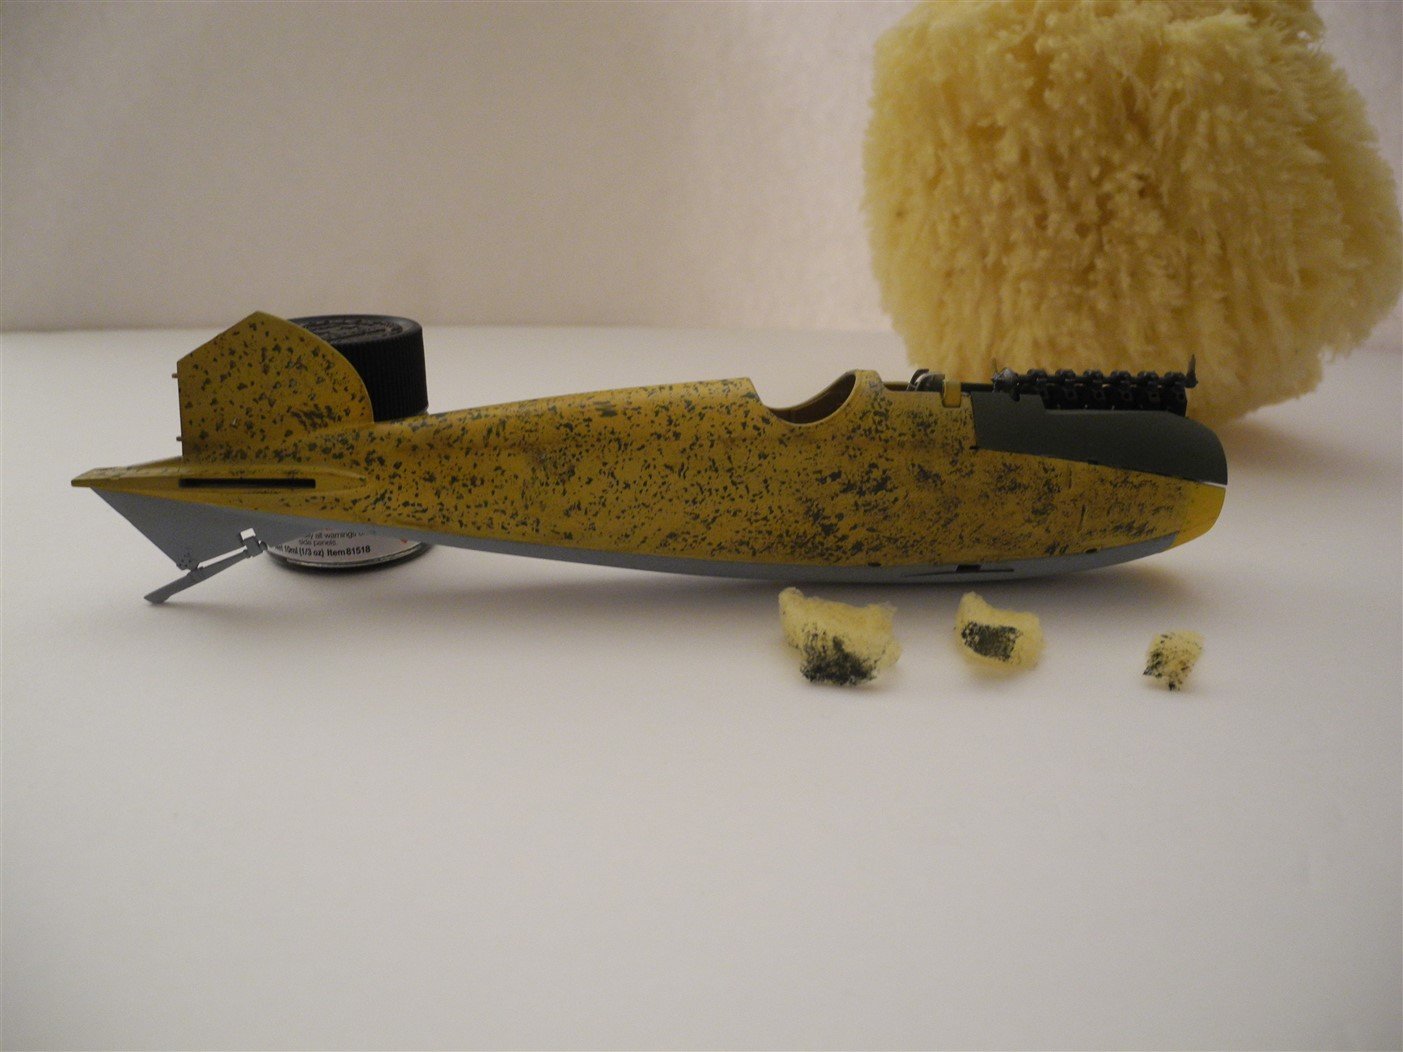
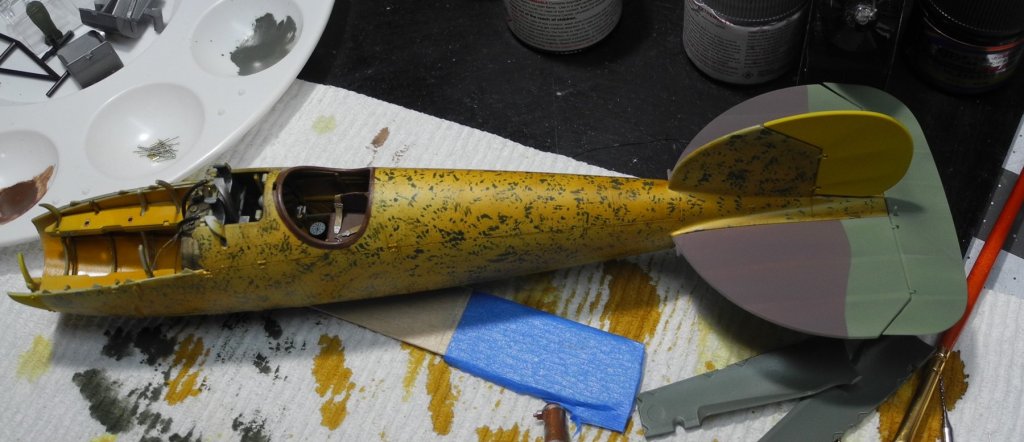
photo is from Wingnut Wings Here is an actual black and white photo of Hagenmuller with his Albatros D.V The photo shows (to my eye anyway) the field applied loofa sponge mottle, showing up as the darker color. I love the way the artist rendered his drawing as I think it is very aesthetically pleasing, but the actual photo makes me think it looked different in real life. I think in retrospect, I should have toned down the suggested mottle color a little with a drop or two of white paint mixed in with the green. At this point, I may decide to cover the whole fuselage with a highly diluted (1:8 paint to thinner ratio) green tint just to take some of the edge off the mottle.
.thumb.jpg.723570c4f54b2dde67d745d2355792a9.jpg)
-
I must now hide my face in shame (just kidding)...I have two more copies of this kit, so at some point, I will attempt the "barber pole" paint job. I was hoping to have this model finished by/before April 27th, but I may not have enough time to finish it as it is. The regional event is coming up then. There were so many interesting Albatros paint schemes, I could build a dozen of them and not cover all the schemes I like.
-
Yes, that same picture is what gives me a little discomfort as well. However, you need to keep in mind that is not a photo of the actual plane but rather an artist rendering, IE: his interpretation (artistic license) of what the plane looked like. If you look at actual photos (black and white) of planes that had this field applied camo, then take into consideration how the paint was a applied in the field, with loofa sponges, it makes you realize there's no way in the world it would have looked as fine or as pretty as the artist rendering. My instruction sheet has some black and white photos of the actual plane and it does not resemble the artist rendering. This WW1 game is full of speculation in many areas of discussion, particularly when it came to colors.
-
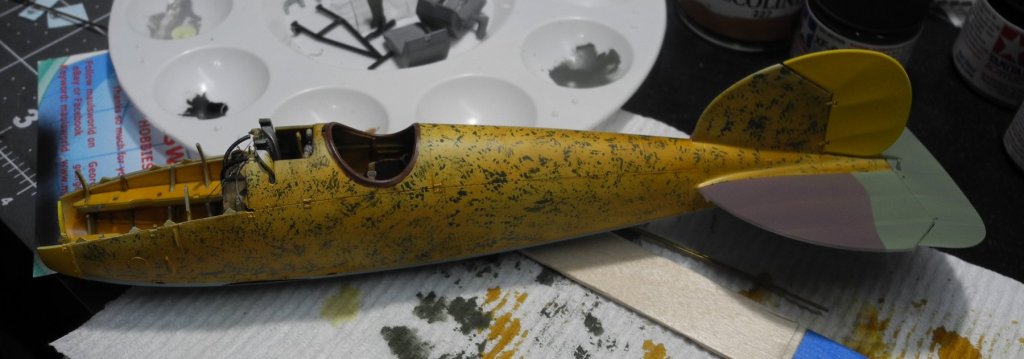
Thanks JCT. This photo (courtesy of Fine Scale Modeler) is the scheme I originally had in mind. I thought my decal sheet included the black stripes, but I was mistaken. It did include the stripes for the horizontal stabilizer, but not the fuselage. Maybe it's just me, but the masking required to recreate the fuselage pattern looks like a nightmare to get it right.

-
Thanks OC. I'm a little on the fence right now over whether I like it or not. Maybe once I apply the markings and assemble the other differently painted parts it will grow on me a bit. The one scheme provided in the markings for this aircraft that I liked the most required far too much masking at very specific spacing intervals. I was concerned I would screw that scheme up for sure and didn't attempt it. With this fuselage being cigar shaped like it is, it makes for a tough masking job.
-
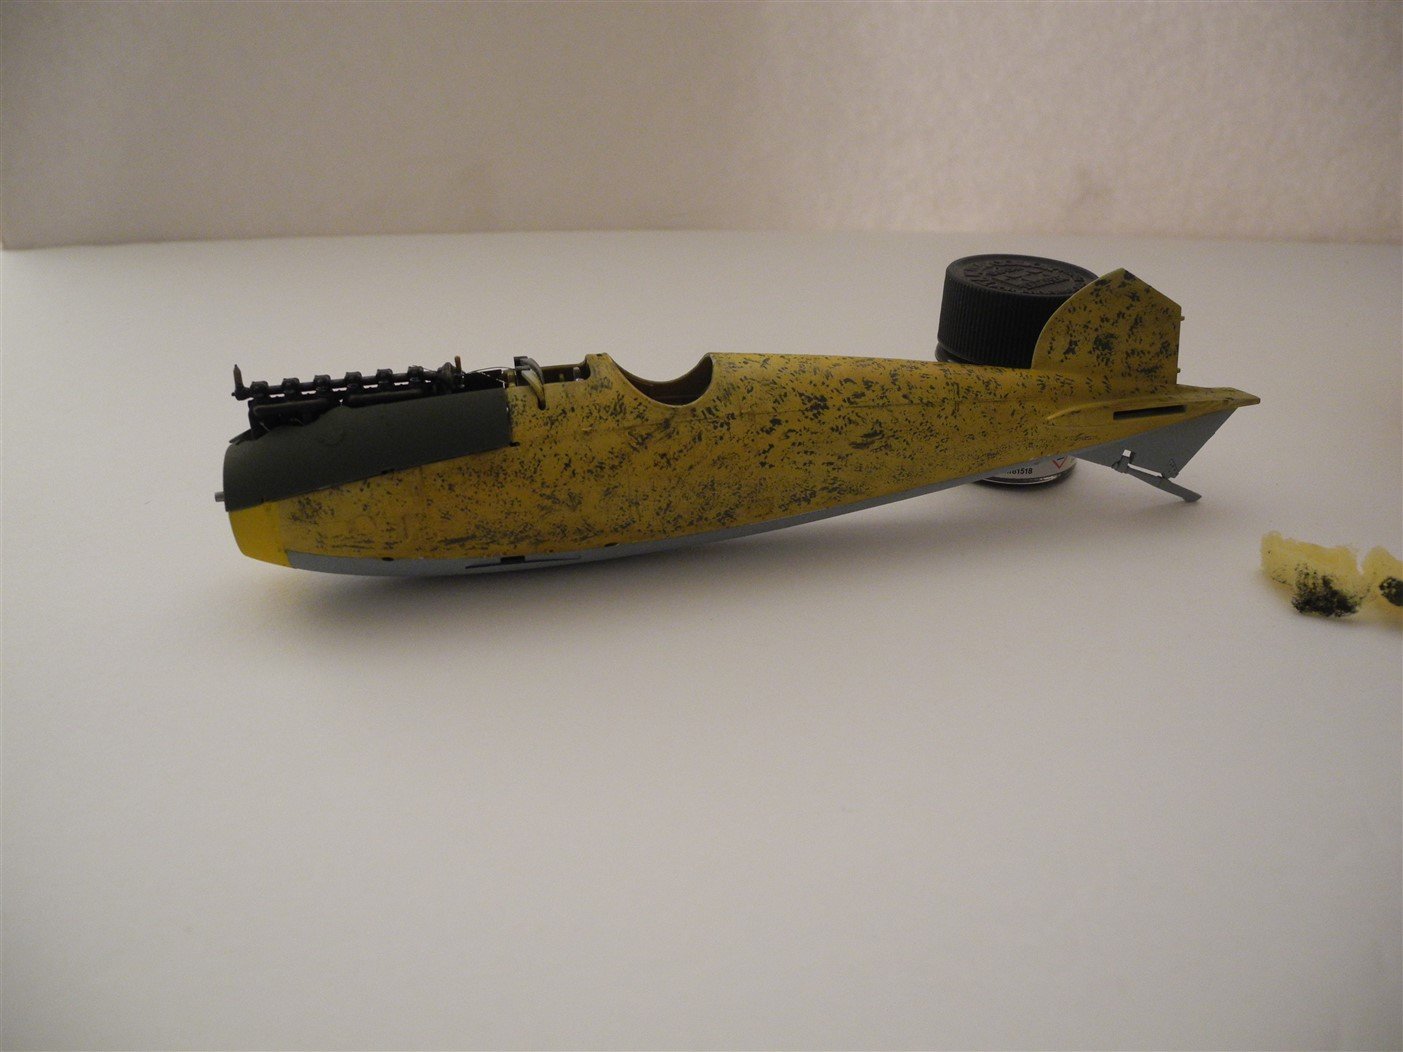
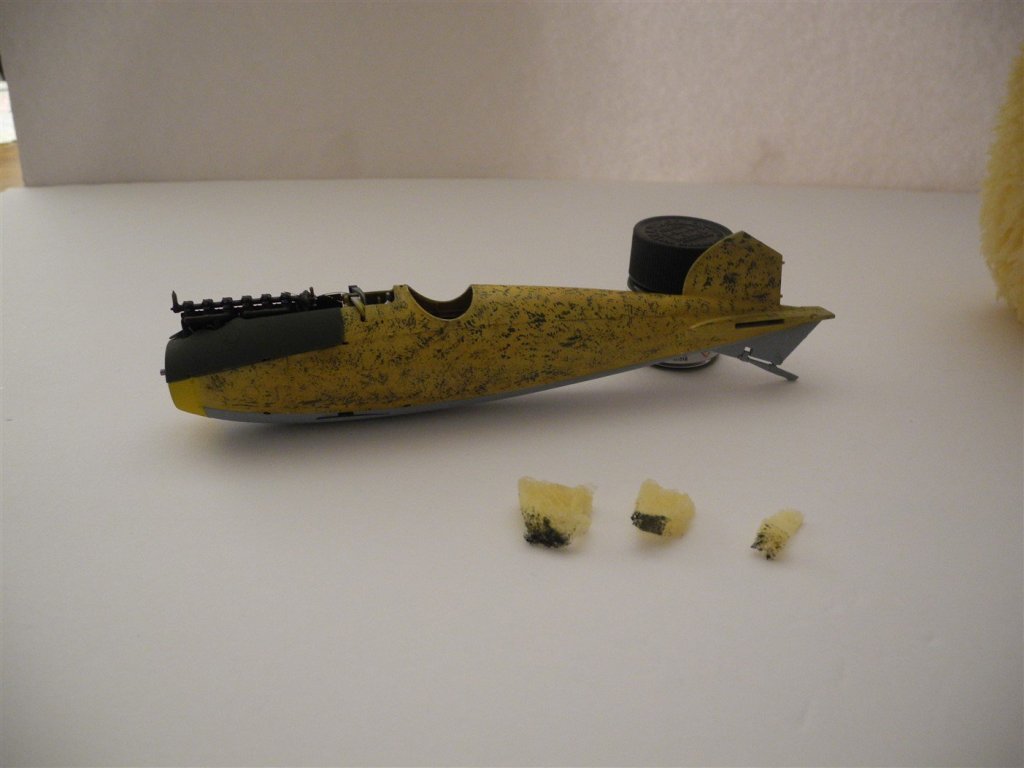
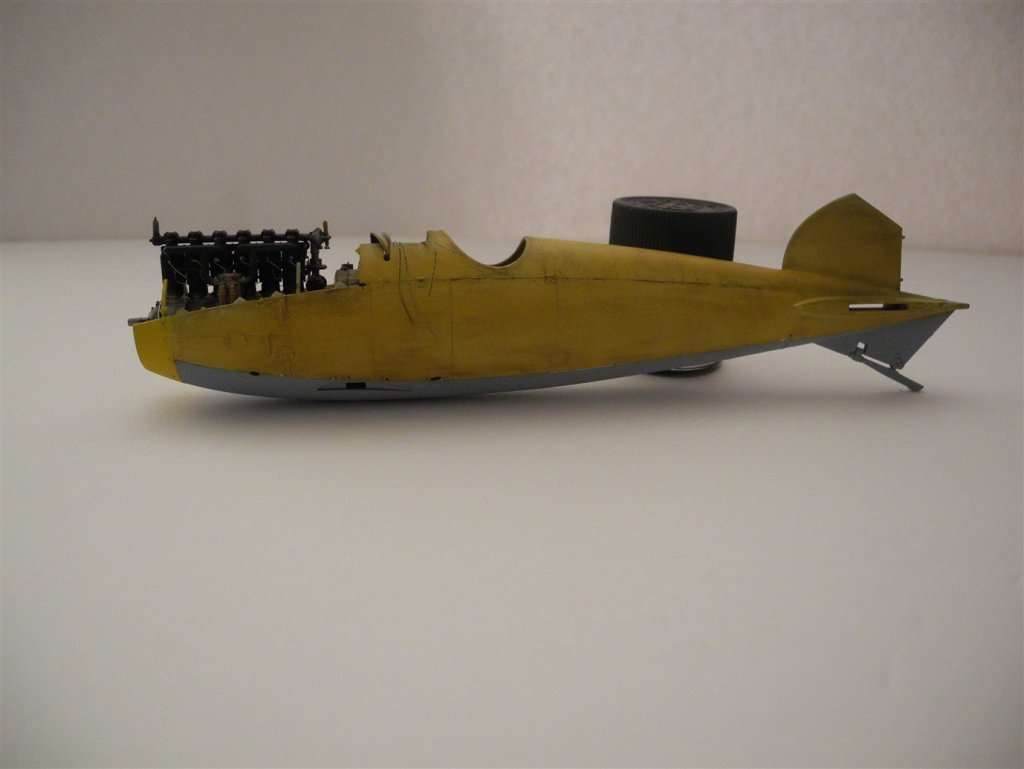
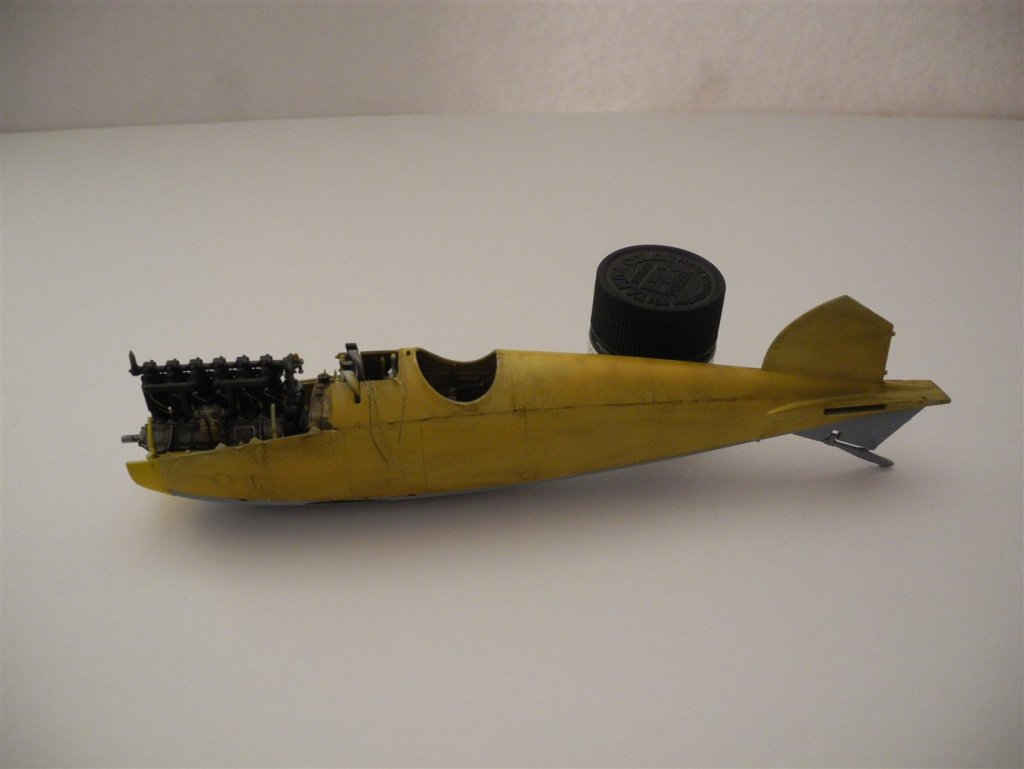
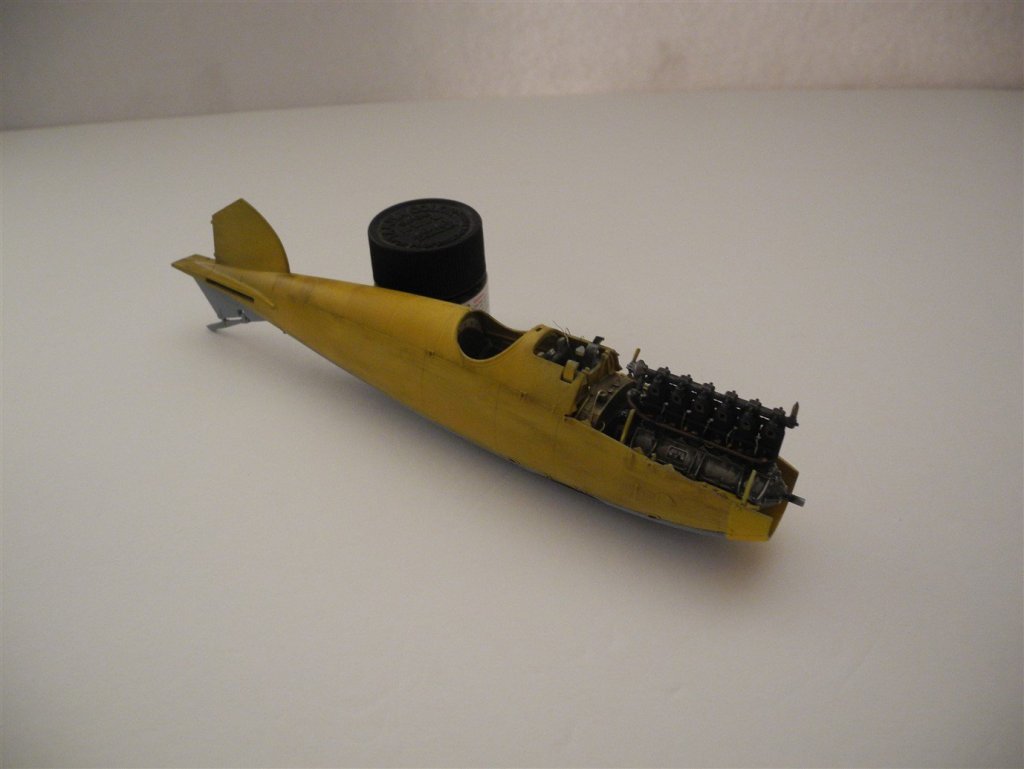
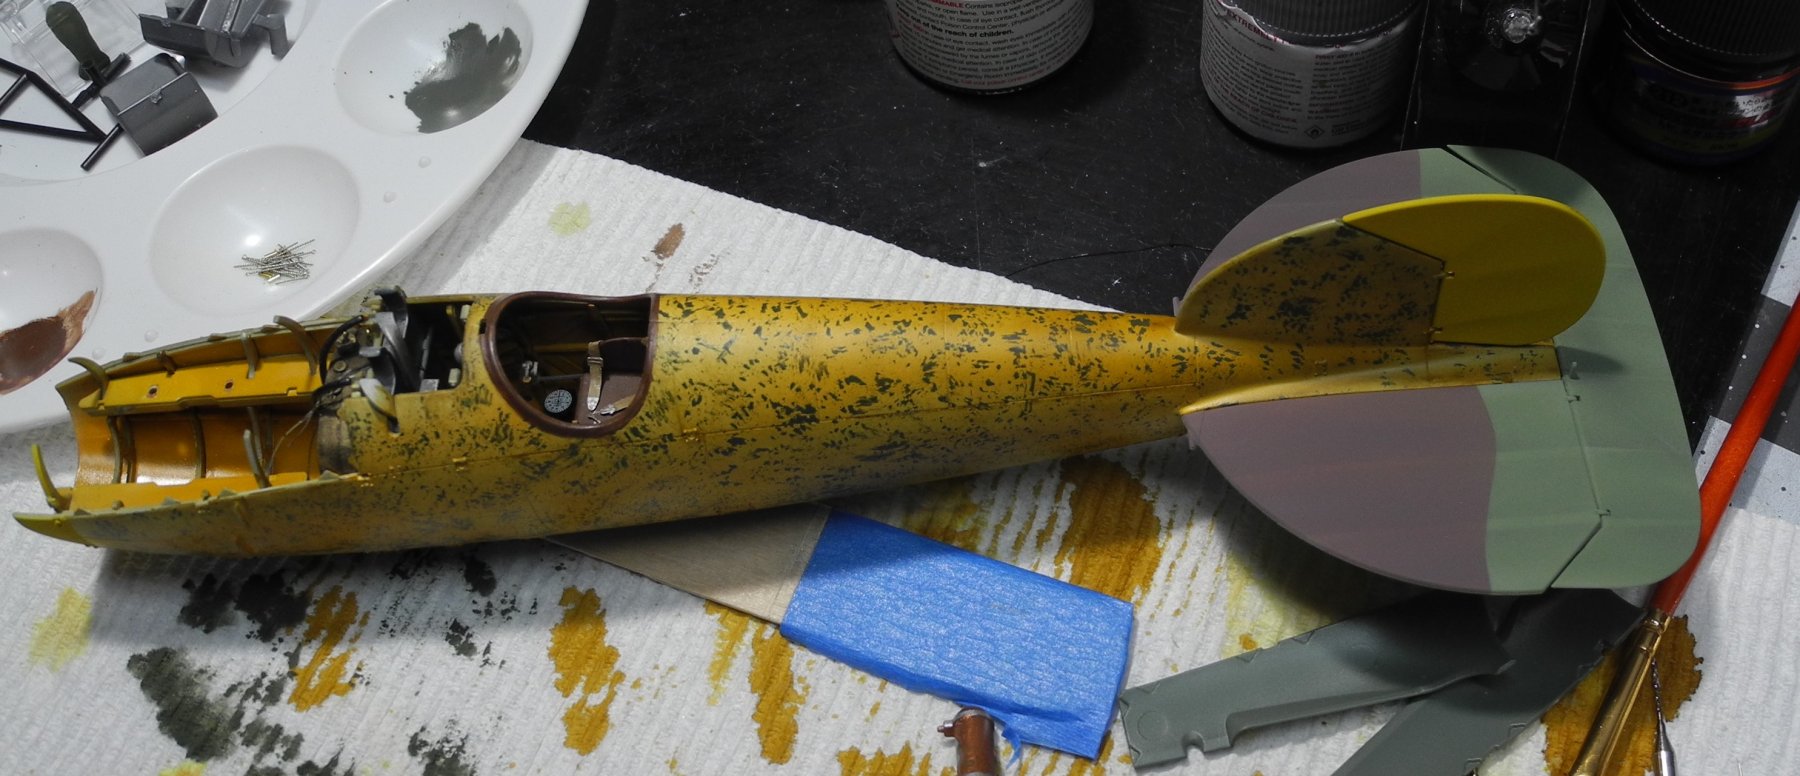
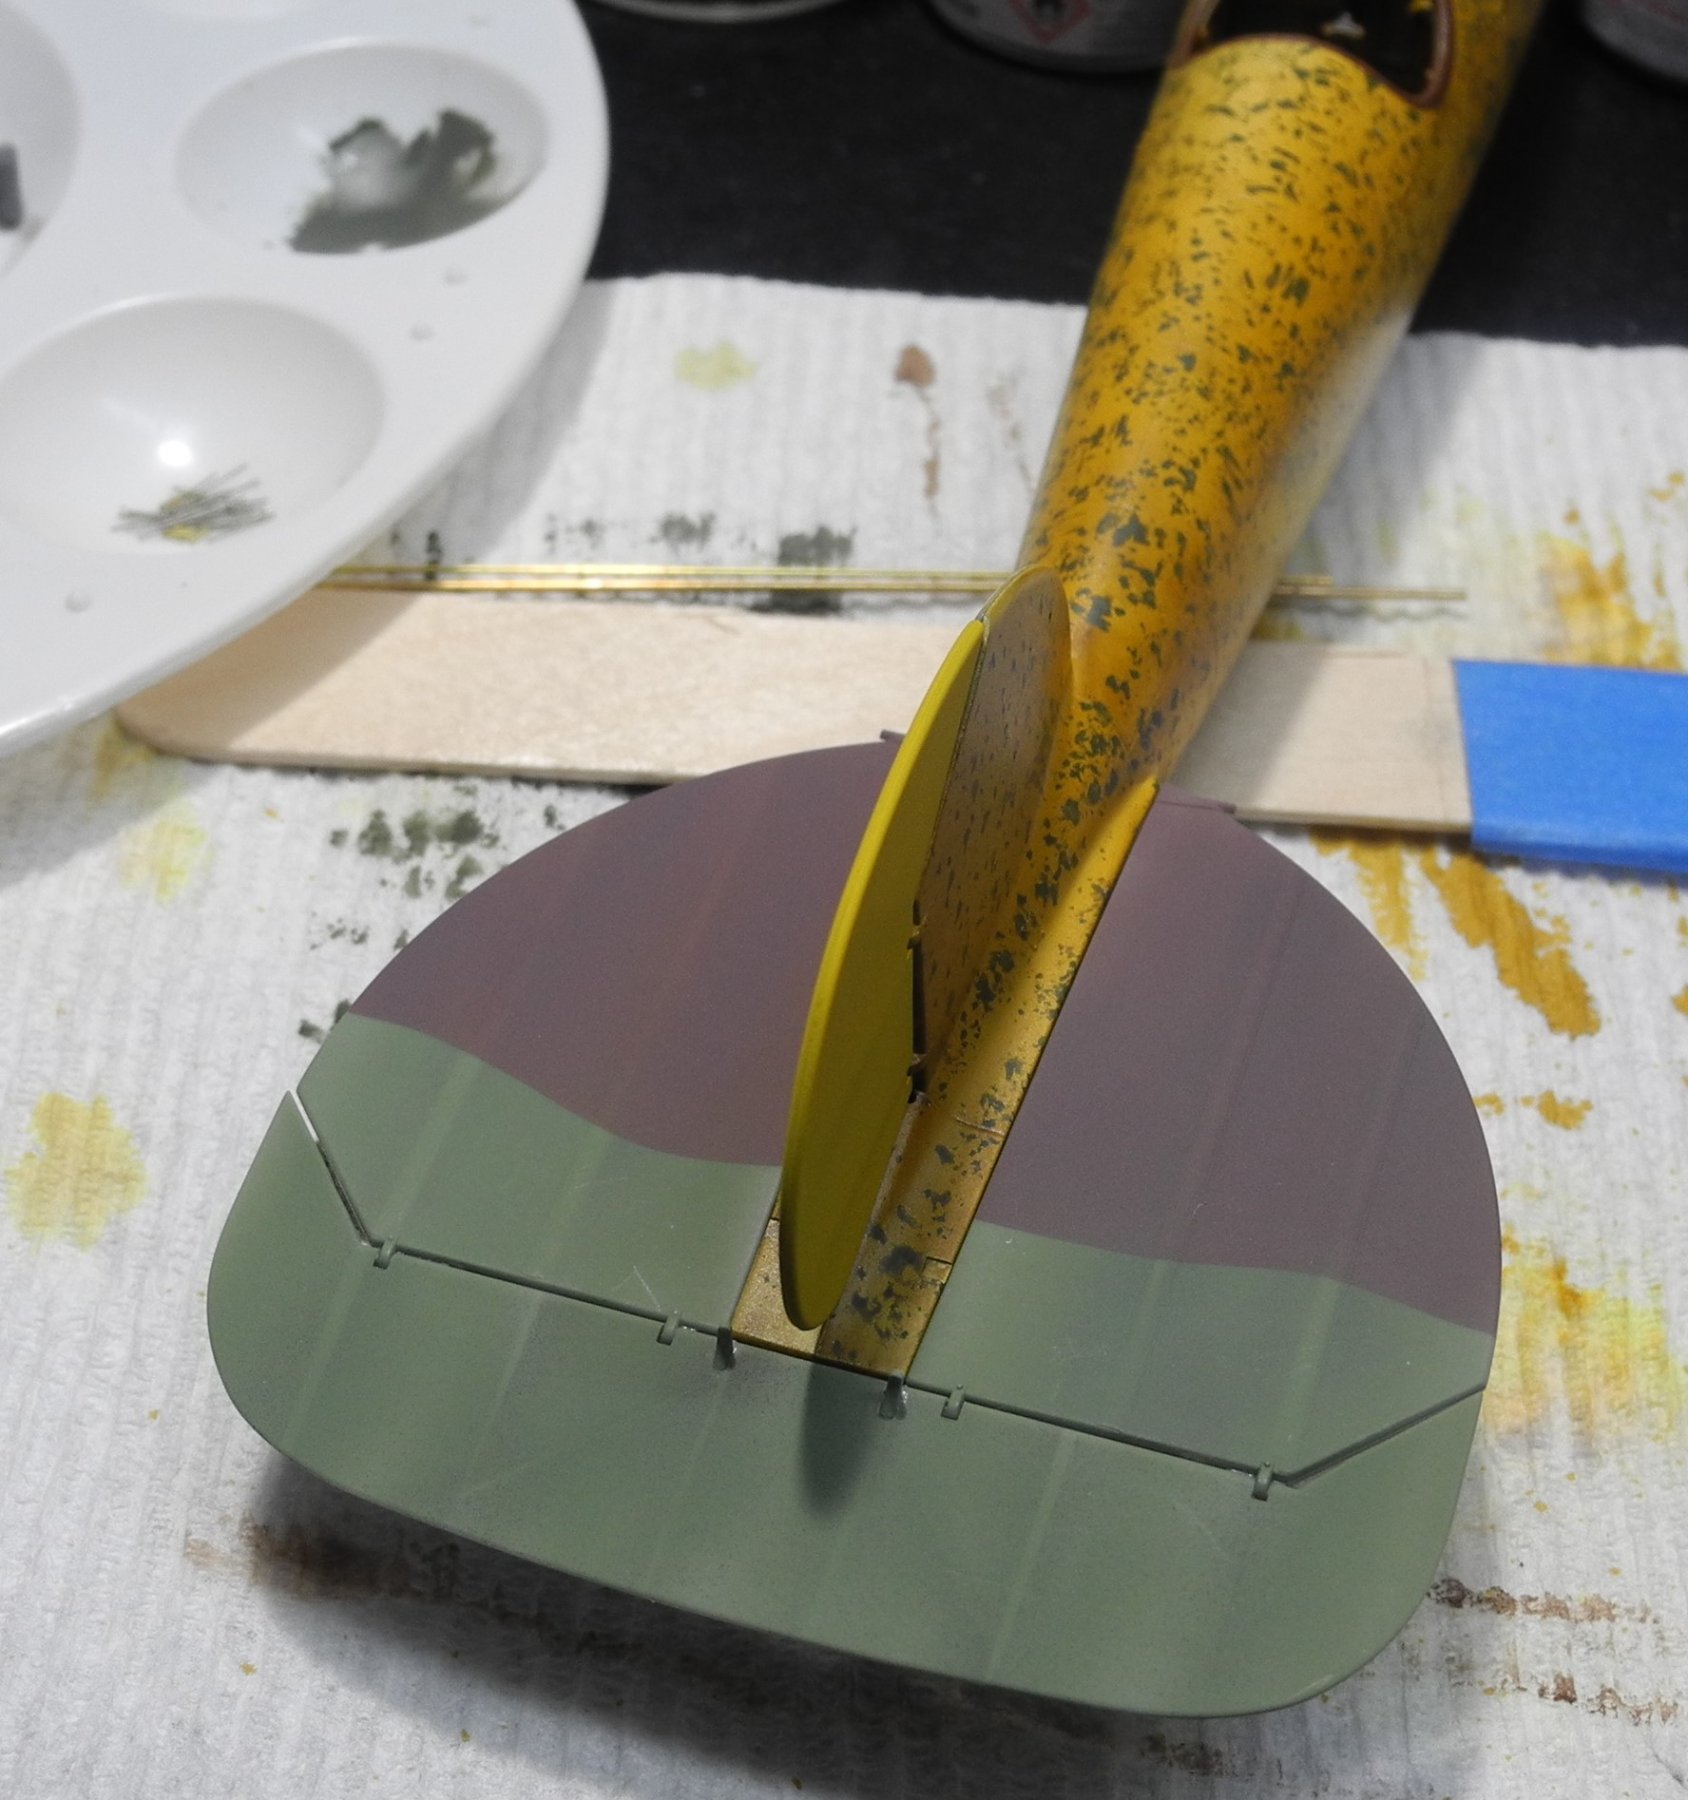
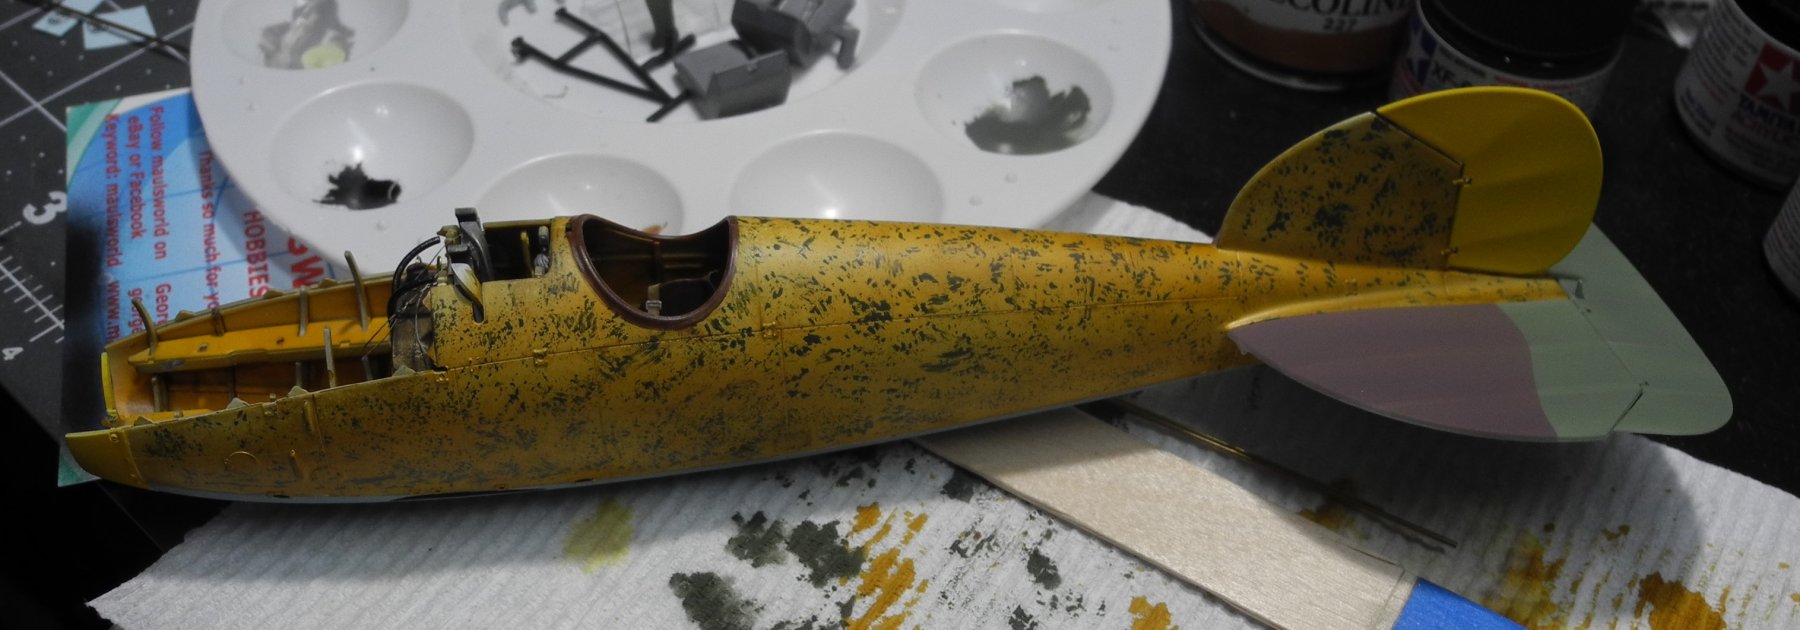
Here's my feeble attempt at that field applied mottle camo. Heck, it's got to be close to right...I even used a loofa sponge to apply it. 🙂 I need to apply the remainder of the chrome yellow cowl ring to the engine panels.


- 165 replies
-
- 12
-
-
Thanks for stopping by, Denis. With this being an early D.V, there's really no wrong way to model it as far as the extra strut is concerned. Unless the pilot died prior to the introduction of the strut modification, it could be done either way and still be okay.
-
Earlier when you asked this question, I mistakenly answered, negative. Upon painting operations and a closer examination of the parts trees, I realized today the kit does indeed offer two different sets of wing struts. One set without the small strut, and one set with the small strut, giving the builder the option to include it or not.
-
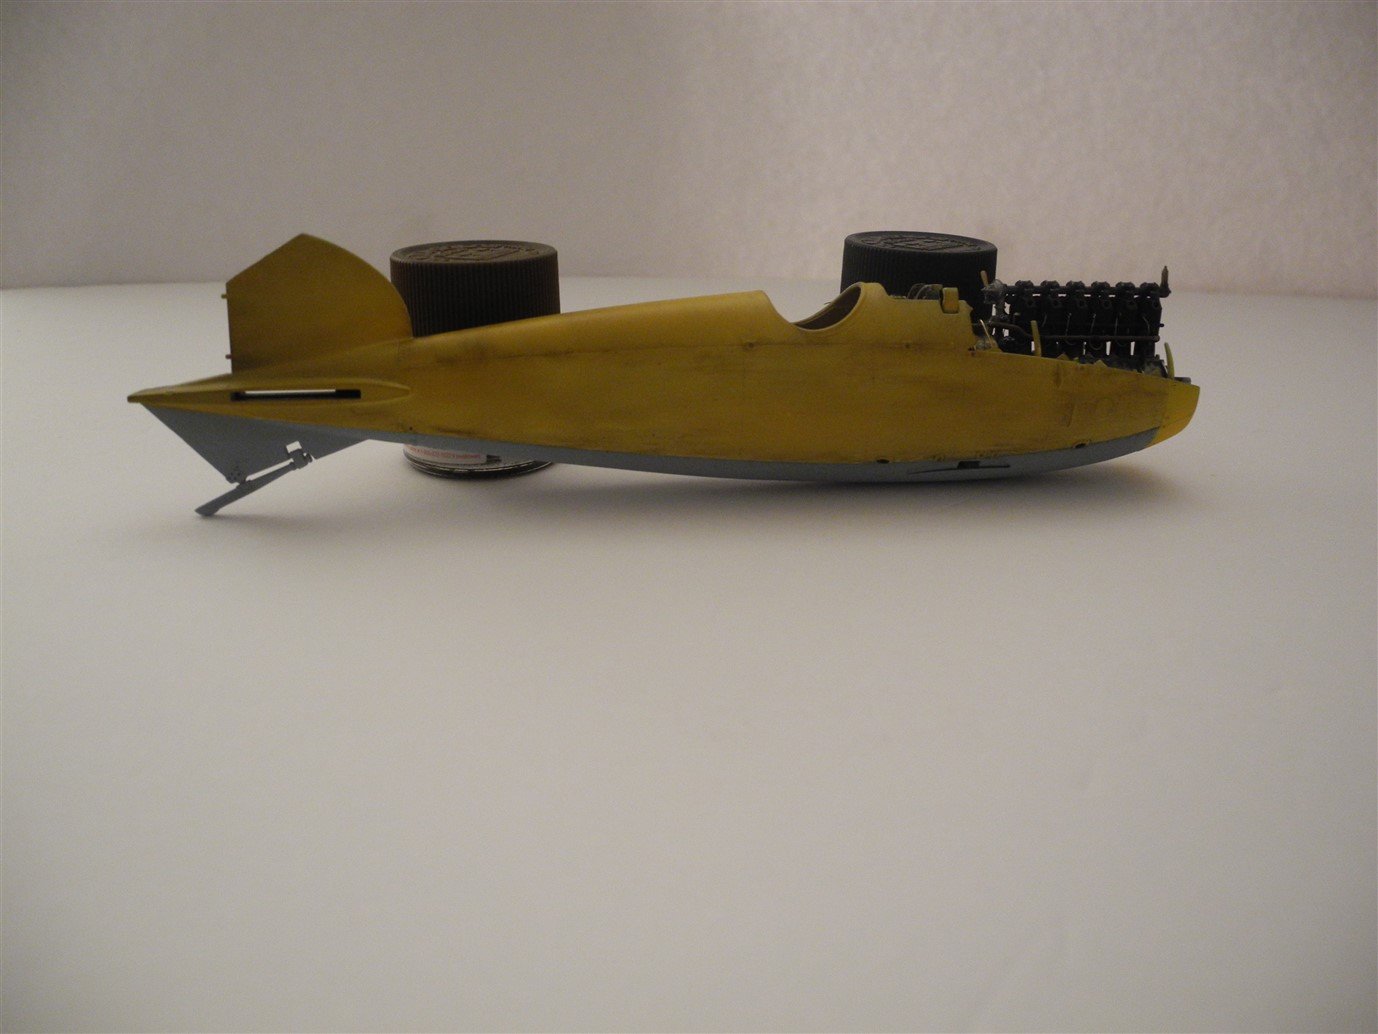
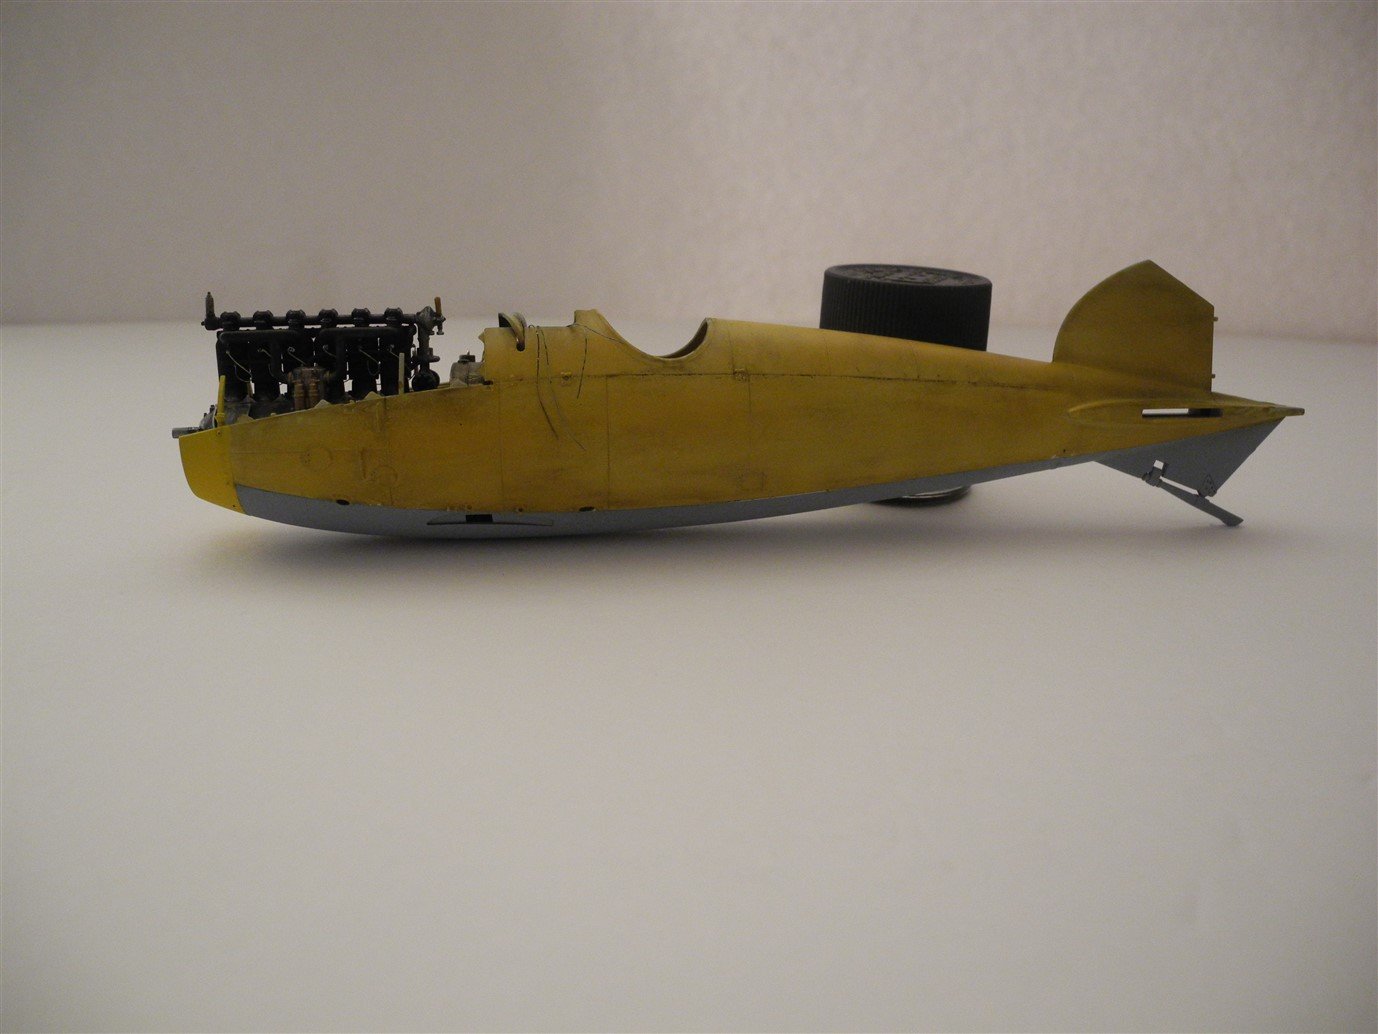
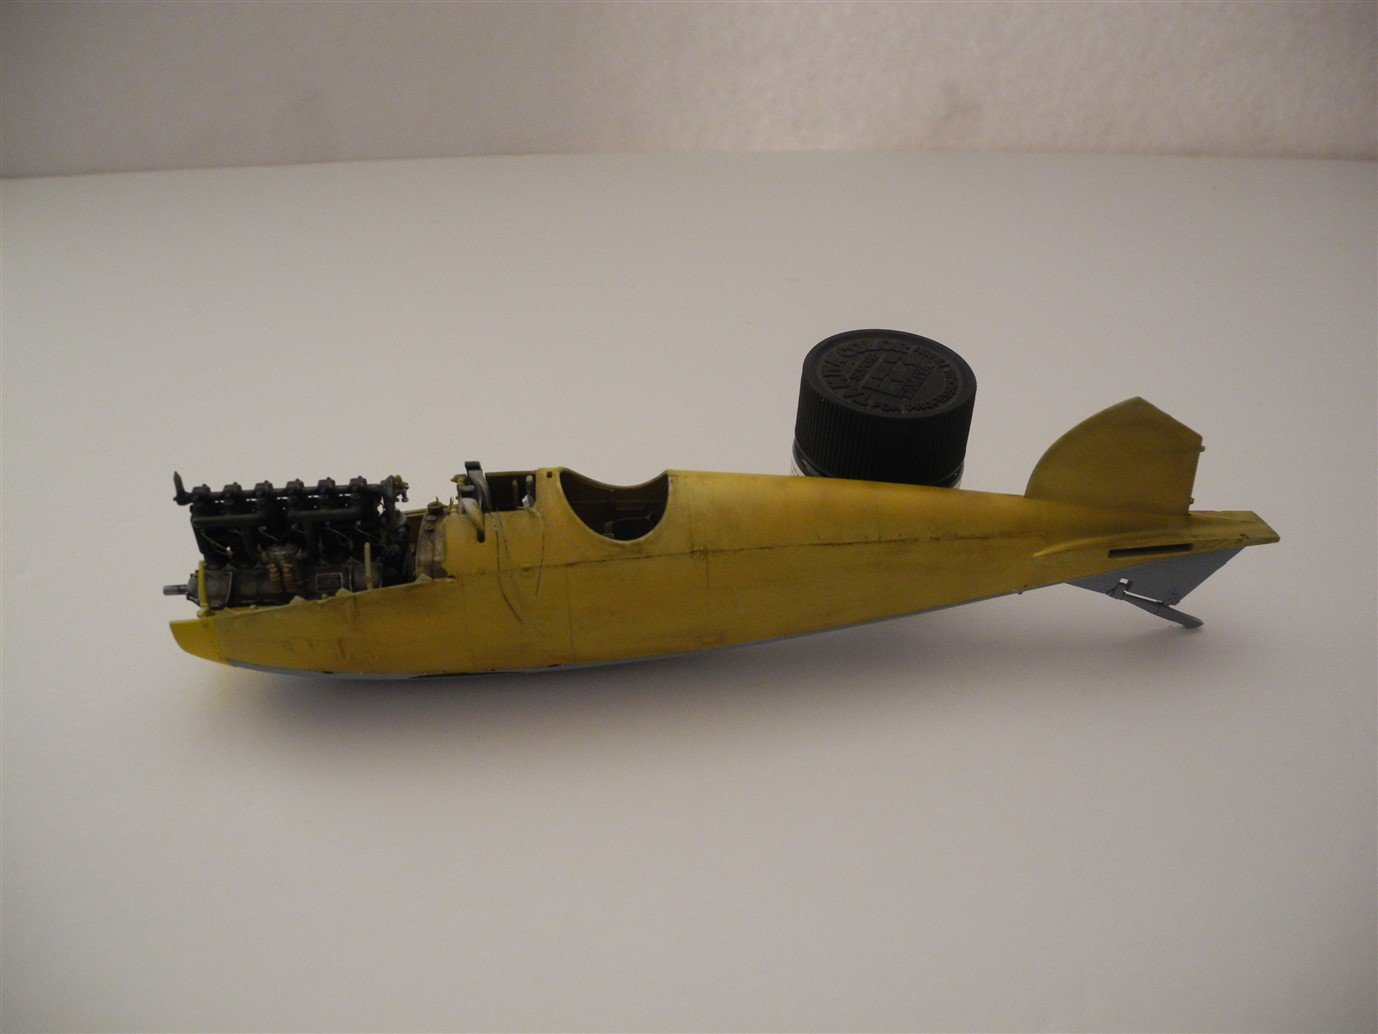
I settled in on modeling the aircraft of Ottomar Hagenmuller, MFJ 1, late 1917. Hagenmuller was killed in action December 5, 1917. The fuselage is overall, doped plywood. Accent colors are a chrome yellow rudder, nose band, and wheels. The plywood fuselage had a field applied "loofa sponge" mottled green camouflage. I will be experimenting with a technique to capture (hopefully) the look of the loofa mottle green camo.

-
Very nice. She is very much looking the part of the infamous scourge of the seas, the Black Pearl.
-
The work you've done to open the vents on the hull looks great so far. Photo etch is very nice as well.

.jpg.581937771385e557d6ee07ee4daf11f6.jpg)