CDW
-
Posts
7,730 -
Joined
-
Last visited
Content Type
Profiles
Forums
Gallery
Events
Everything posted by CDW
-

Hawker Typhoon 1b "Car Door" by AJohnson - Airfix - 1:24
CDW replied to AJohnson's topic in Non-ship/categorised builds
Does any company make the fishplates in photo etch? There is a nasty seam through the middle of the fishplates. Would be better to remove and replace them as cleaning up that seam will be a big hassle. -
Hawker Typhoon 1b "Car Door" by AJohnson - Airfix - 1:24
CDW replied to AJohnson's topic in Non-ship/categorised builds
Oh wow, looking forward to this! Which Eduard PE set is that? Coincidentally I just placed an order with Hannants last night for some extras for my Airfix bubble top. -
Renault RE20 Turbo by DocRob - FINISHED - Tamiya - 1/12
CDW replied to DocRob's topic in Non-ship/categorised builds
Top Studio offers a variety of hose, hose joints, connections and clamps to enhance the appearance of the various hoses found on race cars. These come to mind when considering additional detail added to these 1:12 scale Tamiya F-1 cars. All these fittings and hoses are generic and will work with any of the cars. -
Renault RE20 Turbo by DocRob - FINISHED - Tamiya - 1/12
CDW replied to DocRob's topic in Non-ship/categorised builds
Excellent. Looking forward to this build. Will you be using any aftermarket upgrades or scratch built upgrades? I have a small collection of 1:12 Tamiya F-1 kits and like Yves, particularly interested in this one because it's one I have considered adding to my collection. PS: The new release of this kit includes photo etch. Does your version have photo etch included? -
Curtiss BF 2C-1 by CDW - FINISHED - Hasegawa - 1:32 scale
CDW replied to CDW's topic in Non-ship/categorised builds
Thanks Alan -
Vincent Black Shadow by CDW - Revell - 1:12 Scale
CDW replied to CDW's topic in Non-ship/categorised builds
Hurricanes should be fewer and further between this year. We are in an El Niño year and that makes winds in the upper atmosphere unfavorable for hurricanes. It tears them apart. -
Vincent Black Shadow by CDW - Revell - 1:12 Scale
CDW replied to CDW's topic in Non-ship/categorised builds
My family came to the Tampa area in the 1880’s. They came to Florida in 1820, initially in the area now known as Tallahassee…near the panhandle. Many stories passed down about the early Florida wilderness and what it was like to live in those times. -
Vincent Black Shadow by CDW - Revell - 1:12 Scale
CDW replied to CDW's topic in Non-ship/categorised builds
Thanks Allan. Glad to see you are back and hope you are doing well. I feel for you, out working long hours in this heat. -
Grumman F4F-4 Wildcat by ccoyle - FINISHED - WAK - 1/33 - CARD
CDW replied to ccoyle's topic in Non-ship/categorised builds
The engine cylinders were as much a puzzle as they were a model kit. In the end, it looks great. -
Alfa Romeo Spider Touring Gran Sport by CDW - Pocher - 1:8 Scale
CDW replied to CDW's topic in Non-ship/categorised builds
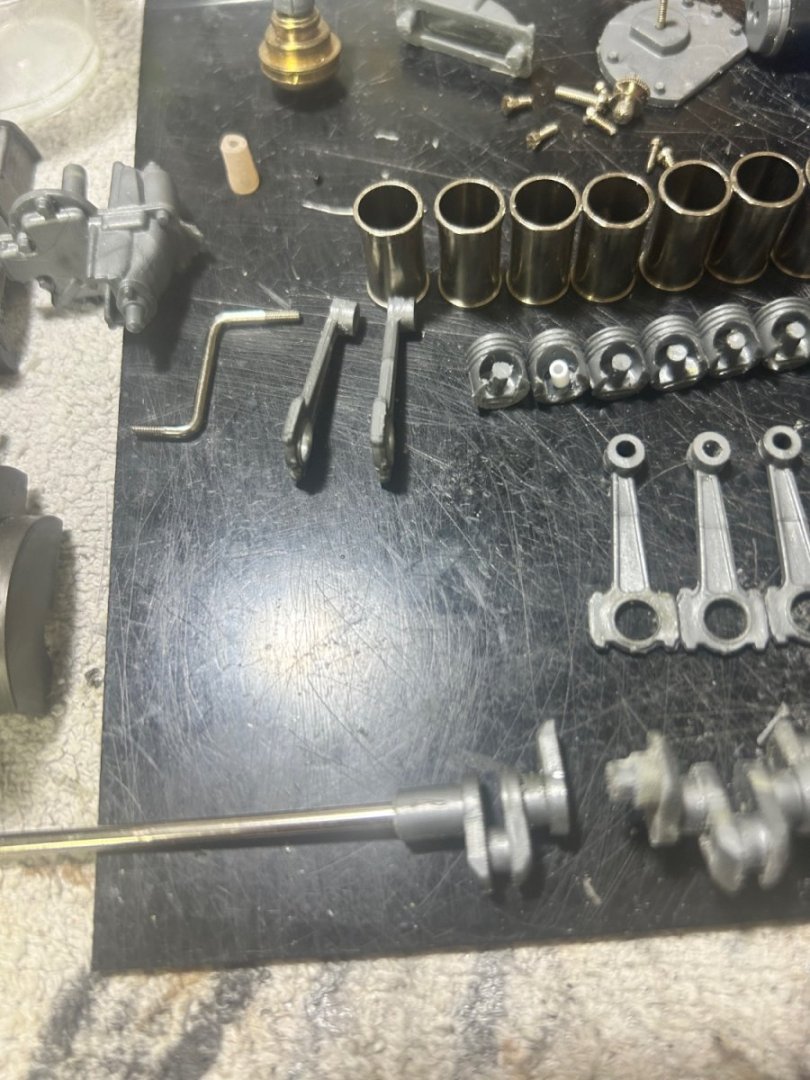
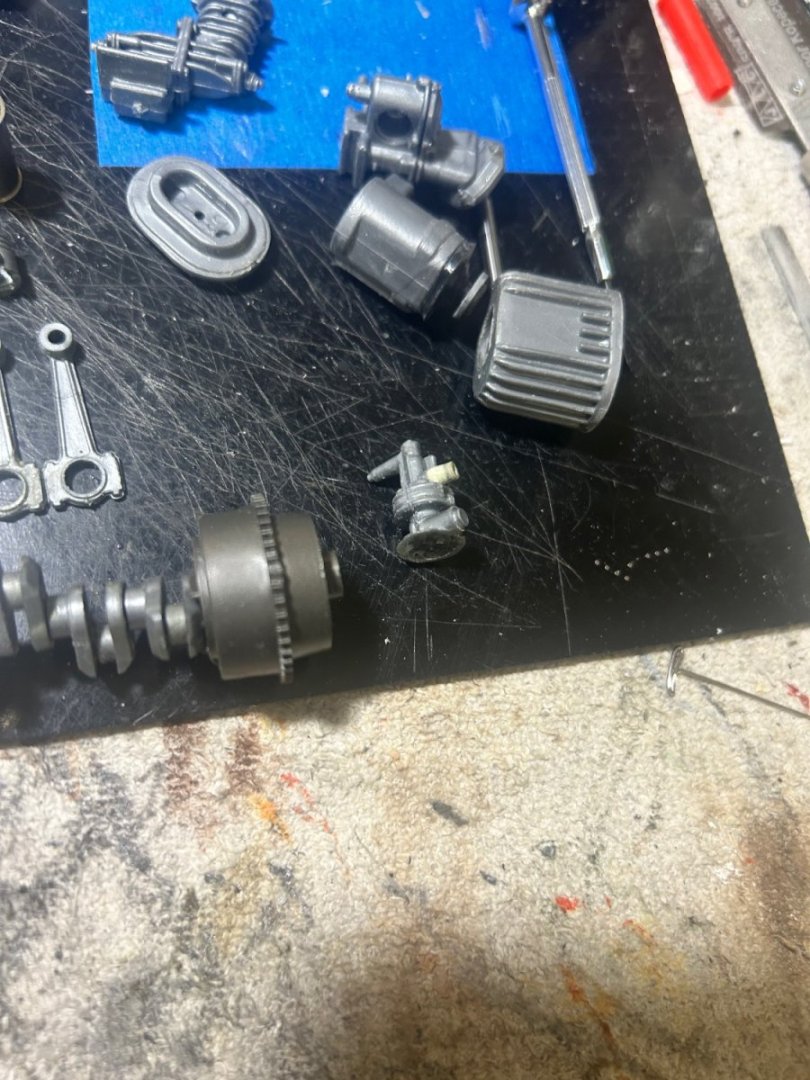
Building this kit up will probably be a once in a lifetime affair for me as it's not practical to envision doing another of the same kit. Because of this I want to add upgraded parts where it seems they provide a significant level of detail to help the finished model look like the real thing. It gets pricey though. Here is what I intend to add to the engine assembly at this time: Nickel plated acorn nuts for the cam covers: Nuts - Acorn - Nickel Plated Brass 1.0 mm - A007n – Model Motorcars (model-motorcars.myshopify.com) Upgraded water pipes, hose, and hose clamps: Alfa Water Pipes - A024 – Model Motorcars (model-motorcars.myshopify.com) Distributor linkage kit: Distributor Linkage Kit - A005 – Model Motorcars (model-motorcars.myshopify.com) Spark plugs Spark Plugs - Z008 – Model Motorcars (model-motorcars.myshopify.com) ignition wire Ignition Wire - Z038 – Model Motorcars (model-motorcars.myshopify.com) Plug wire boots Boots - Z039 – Model Motorcars (model-motorcars.myshopify.com) In addition to the above parts, I may add some 3D printed resin parts as well depending on price and availability (waiting on word back from Paul Koo) All through the building of this kit, there are a large number of upgrade options to consider. All will require time and money to go that route but in some cases it seems worth it. I don't intend to rush to finish this kit, just going to do it one sub-assembly at a time.- 51 replies
-
- 10
-

-
Alfa Romeo Spider Touring Gran Sport by CDW - Pocher - 1:8 Scale
CDW replied to CDW's topic in Non-ship/categorised builds
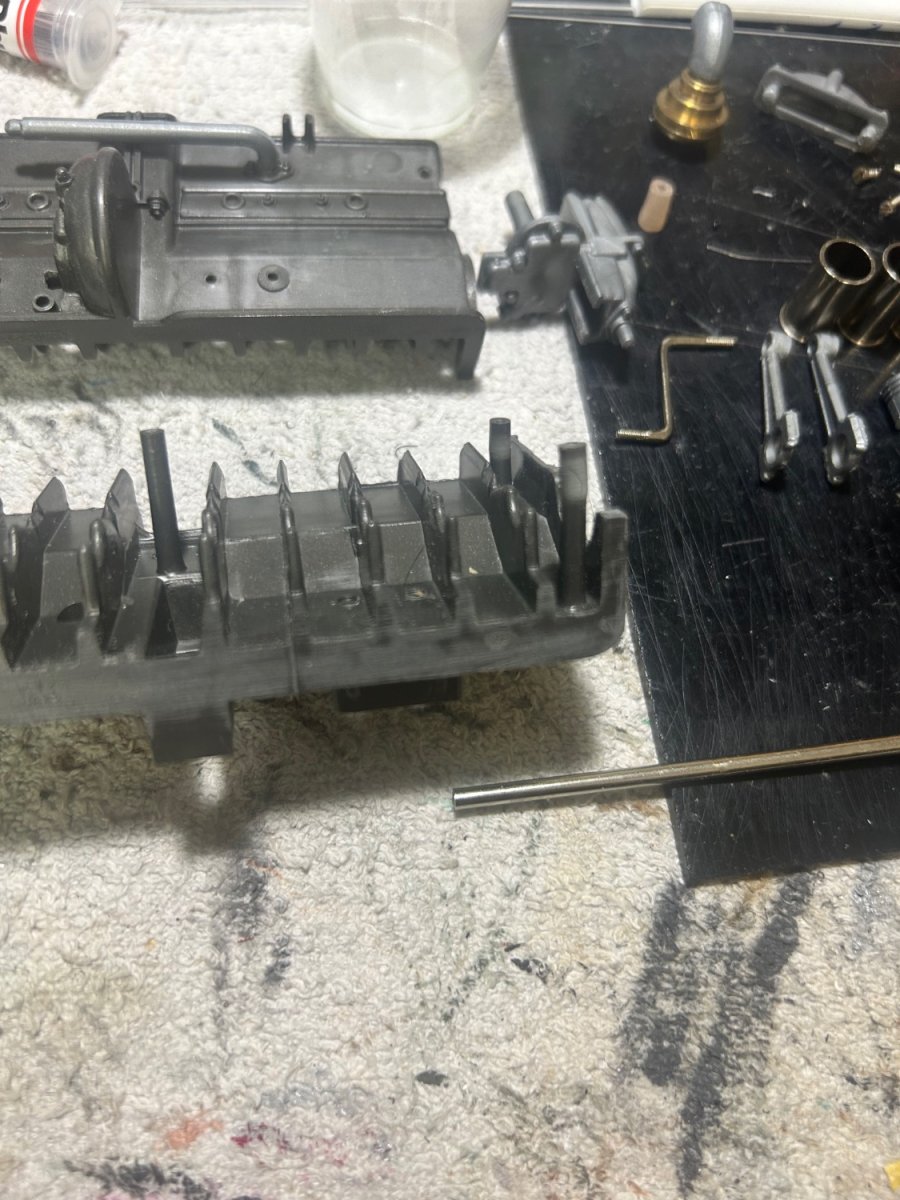
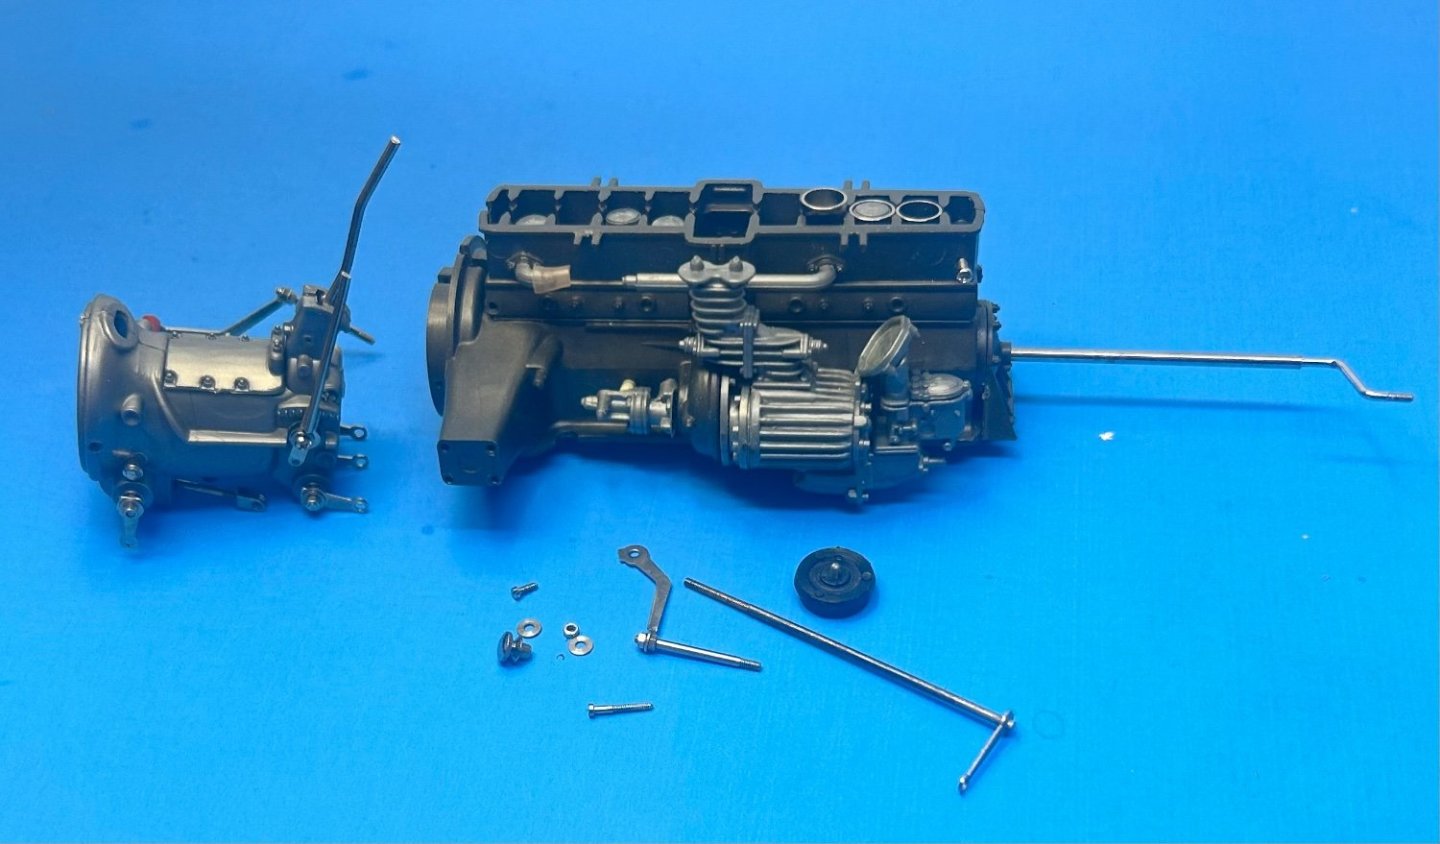
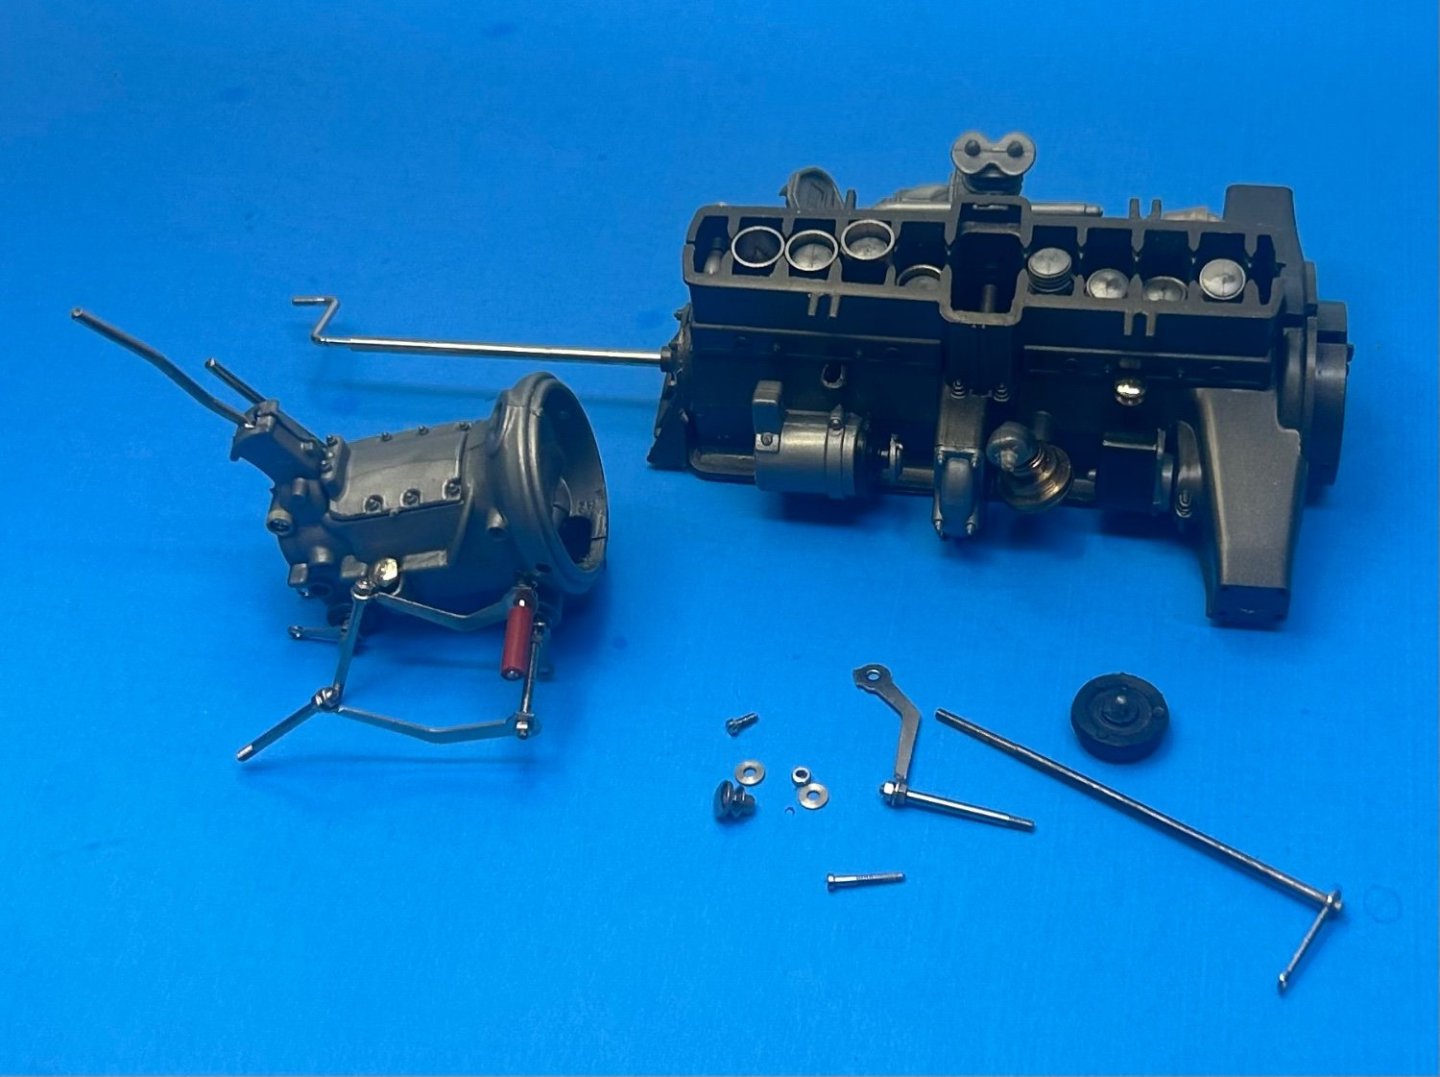
I sure am glad that the former owner only started the engine and transmission. It is a mess to say the least. Connecting rods facing in wrong positions; cylinder sleeves upside down in several places; none of the parts were properly prepared before assembling. This is a rescue project in the pure sense of the word. Because of the glue, the crank shaft was cracked in several places where I had to separate the journals in order to release the connecting rods and place them facing in the correct direction. I carefully sanded, shaped and glued the broken pieces back together. I'm not too worried about the repaired pieces as all are internal and will not be seen once the engine is painted and reassembled. I have lots of cleanup and careful fitting to do before putting any of it back together.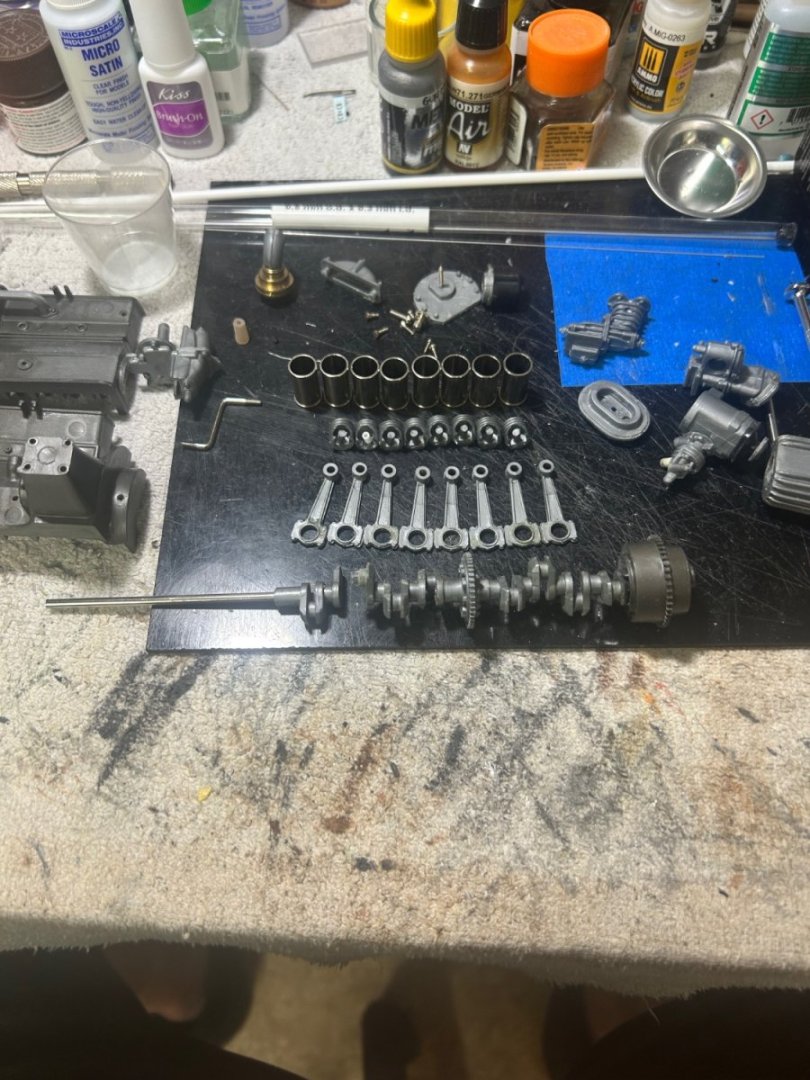

- 51 replies
-
- 16
-
-

-
Alfa Romeo Spider Touring Gran Sport by CDW - Pocher - 1:8 Scale
CDW replied to CDW's topic in Non-ship/categorised builds
When I received my kit, the previous owner had started the engine and transmission. The subassemblies and other loose parts were inside a sealed baggie. I’m going to start by disassembling what was started then looking to see what pieces may be damaged or missing. Will follow Paul Koi’s guide when reassembling and upgrade pieces where it seems worthwhile.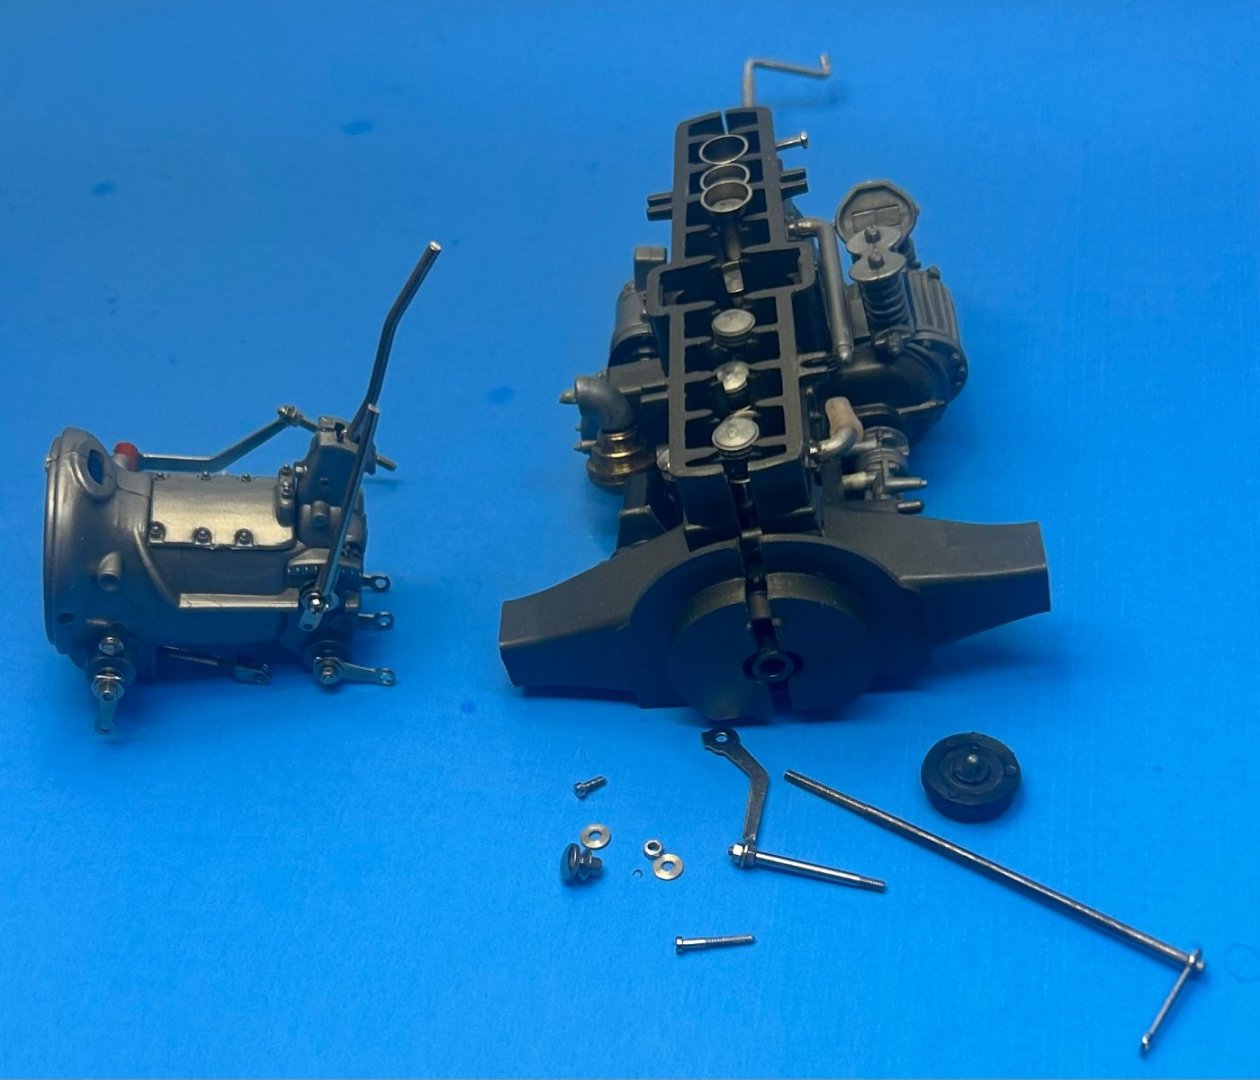
- 51 replies
-
- 18
-
-
-
Vincent Black Shadow by CDW - Revell - 1:12 Scale
CDW replied to CDW's topic in Non-ship/categorised builds
Those videos are addictive. Thanks for sharing the link. Informative. -
Vincent Black Shadow by CDW - Revell - 1:12 Scale
CDW replied to CDW's topic in Non-ship/categorised builds
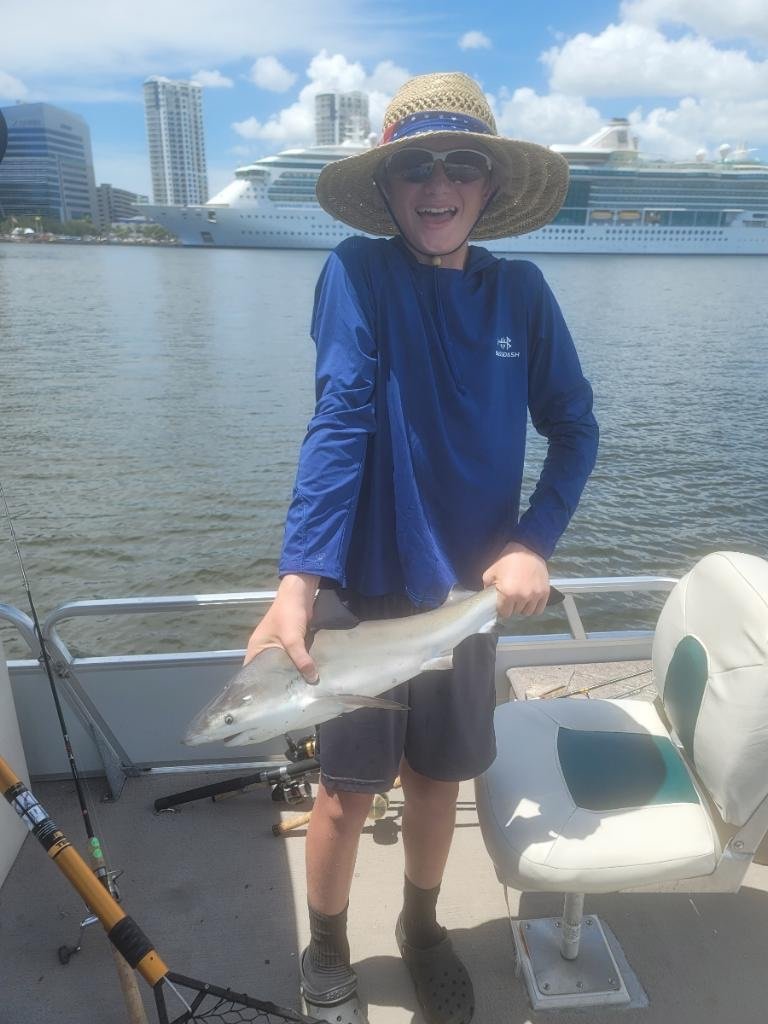
Son and grandsons were catching sharks today. Baby bull sharks? Not sure.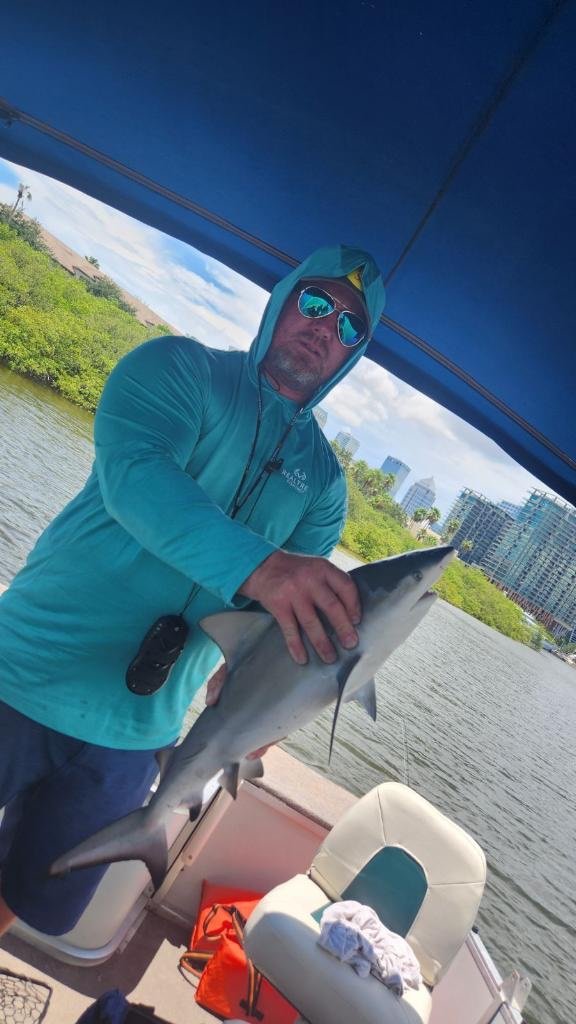


-
Vincent Black Shadow by CDW - Revell - 1:12 Scale
CDW replied to CDW's topic in Non-ship/categorised builds
On the top of each push rod is a large hex nut/cover. One at the rear side of the front cylinder looks like there is an oil line going to it. The kit does not provide this line but I can add it. Are these large hex covers for valve adjustment access? Yes, there is a lot of color variation to be added before it's finished. Don't want to add some of this until I get a little further along in the assembly of it all. There are also prominent hex nut/covers on the gear box (starboard) and primary cover (port). I imagine one is for gear oil but what about the one on the primary cover? I'm assuming the engine had a primary chain and cover like the Harley Davidson but I'm assuming. -
Very nice!
-
Just now found your build log Denis. Looking forward to following along and learning something about trailers. You're the perfect teacher for this.
-
Vincent Black Shadow by CDW - Revell - 1:12 Scale
CDW replied to CDW's topic in Non-ship/categorised builds
Cleaning up parts, painting, working on sub assemblies. The Black Shadow is mostly black. Imagine that. 🤣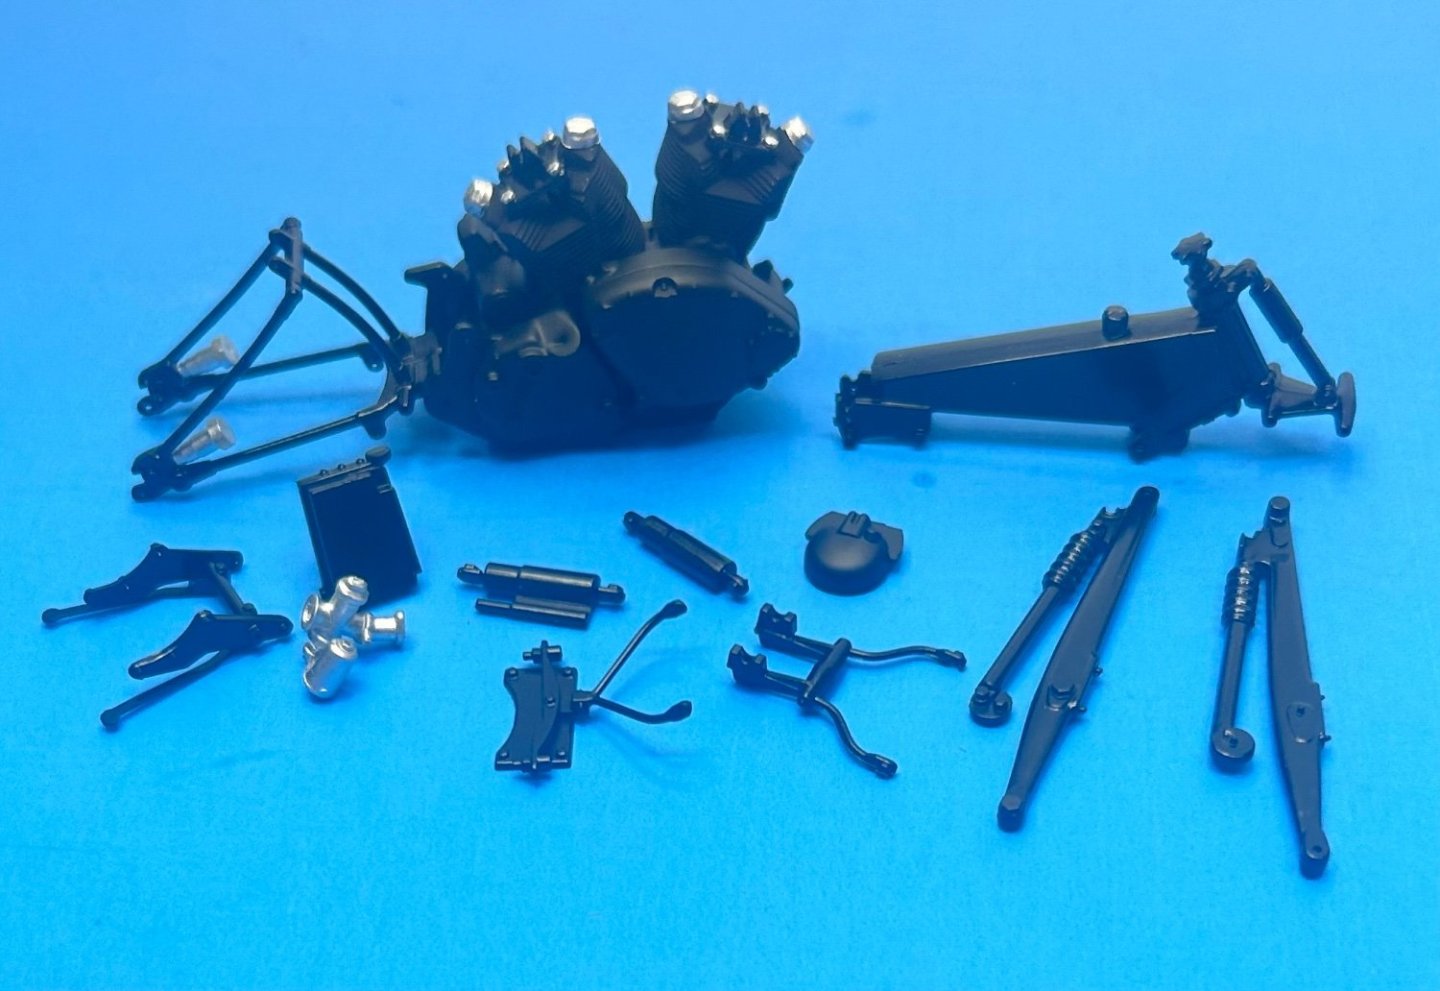
- 62 replies
-
- 12
-
-
Loads of detail there. Looks great.
-
That's an awesome model Mike!
-
Loarre Castle (Spain) by King Derelict - Aedes Ars 1/200
CDW replied to king derelict's topic in Non-ship/categorised builds
As hot as it has been lately, Alan may be second-guessing his decision to move to Florida. Feels-like temperature will reach 110+ today according to the forecast. Humidity is terrible. Just like you, I have been wondering how Alan is doing and hope all is well. -
Very very nice model, she looks all business. She would have been a ground targets worst nightmare.
-
I visited the Smithsonian museum in 2016 but I don't recall seeing the Arado 234 on my visit. Maybe it was there and I just missed it. I was rather rushed through the visit because my wife, daughter, and granddaughter were with me and as one can imagine, their interest in aircraft didn't nearly match my own. One can spend several days in DC and never begin to make a detailed study of the sites to be seen there. The air and space portion needs at least a full day all on its own. What he was telling me about, in general, was how the canopy sections fit together and the black gasket material that was between the sections. There was more, but I just don't recall everything he said about it.