DONATION DRIVE - SUPPORT MSW - DO YOUR PART TO KEEP THIS GREAT FORUM GOING! (91 donations so far out of 49,000 members - C'mon guys!)
×


JeffT
-
Posts
2,552 -
Joined
-
Last visited
Content Type
Profiles
Forums
Gallery
Events
Everything posted by JeffT
-
 I think its just technique and practice. I think over time we'll get better at it 🙂
 -
-
-
Pavel Nikitin 1:32 Captain John Smith's Shallop - Ships of Pavel Nikitin
JeffT replied to James H's topic in REVIEWS: Model kits
The viking is the one I've had my eye on. -
Welcome!
-
Very sad ☹️
-
Found it in glennards build log. The piece goes underneath the gallery.
-
USS Constitution - alignment and rake of masts
JeffT replied to Usgecko's topic in Nautical/Naval History
Same as usedtosail. I just took the angles from the plans. Definitely not the same for all. -
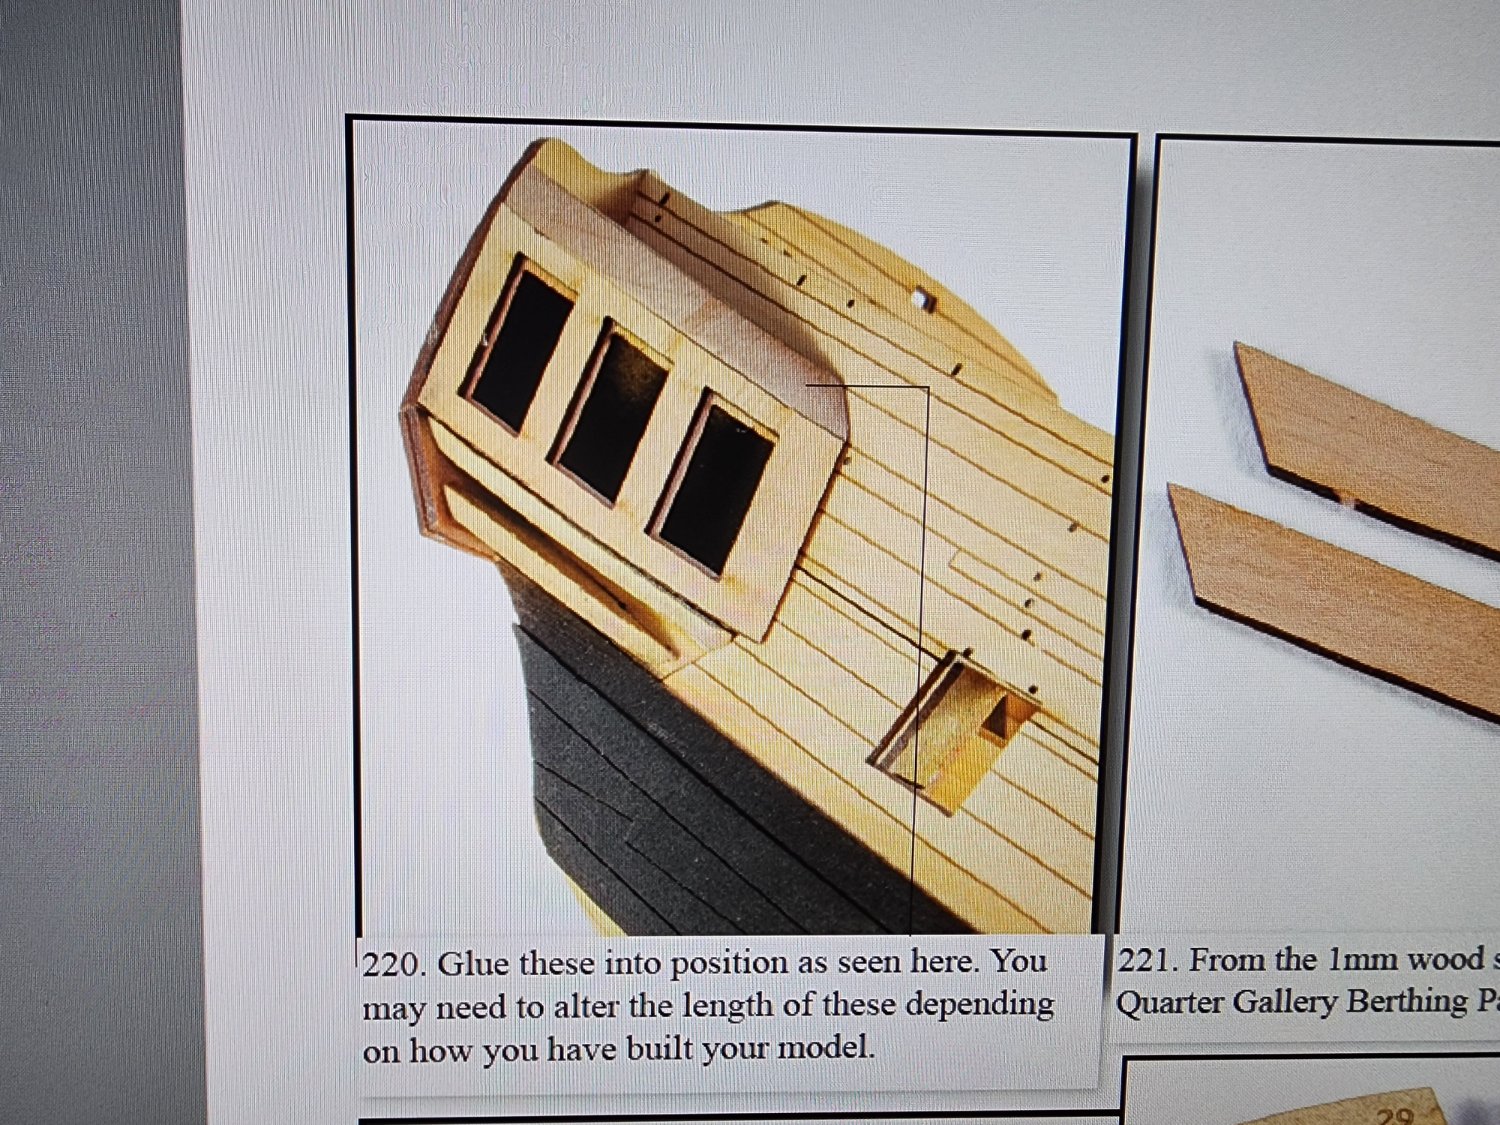
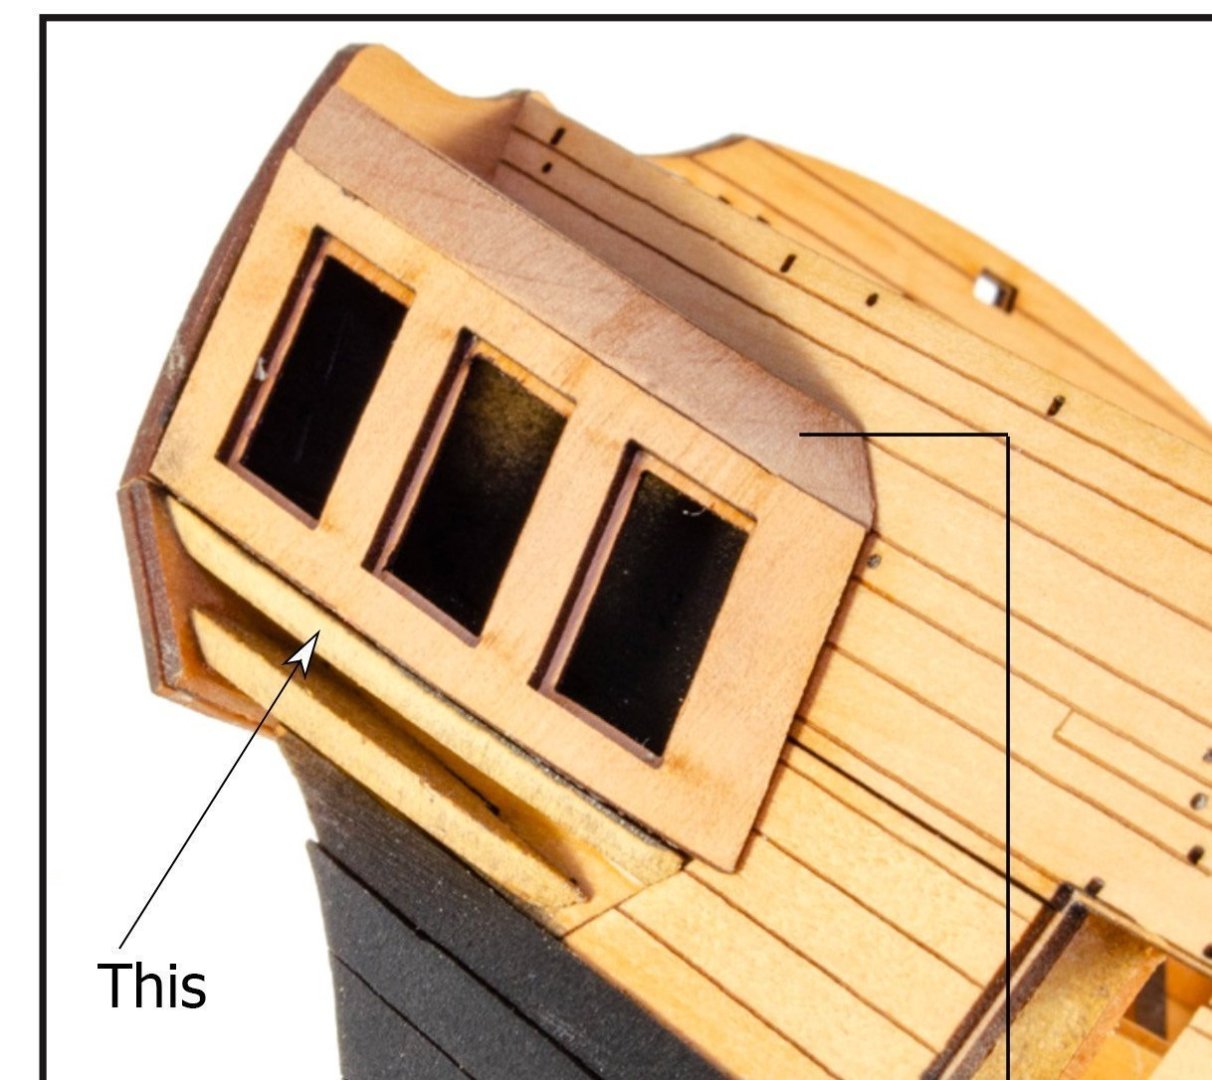
Thanks hollowneck. Are you referring to the placement of the stern fascia? I saw the note in the instructions and noted the issue in the build logs. I do think I have everything positioned correctly or close to it. I'm getting ready to attach those parts soon. I was confused by the picture in step 220 as part 45c doesn't appear to be there.
-
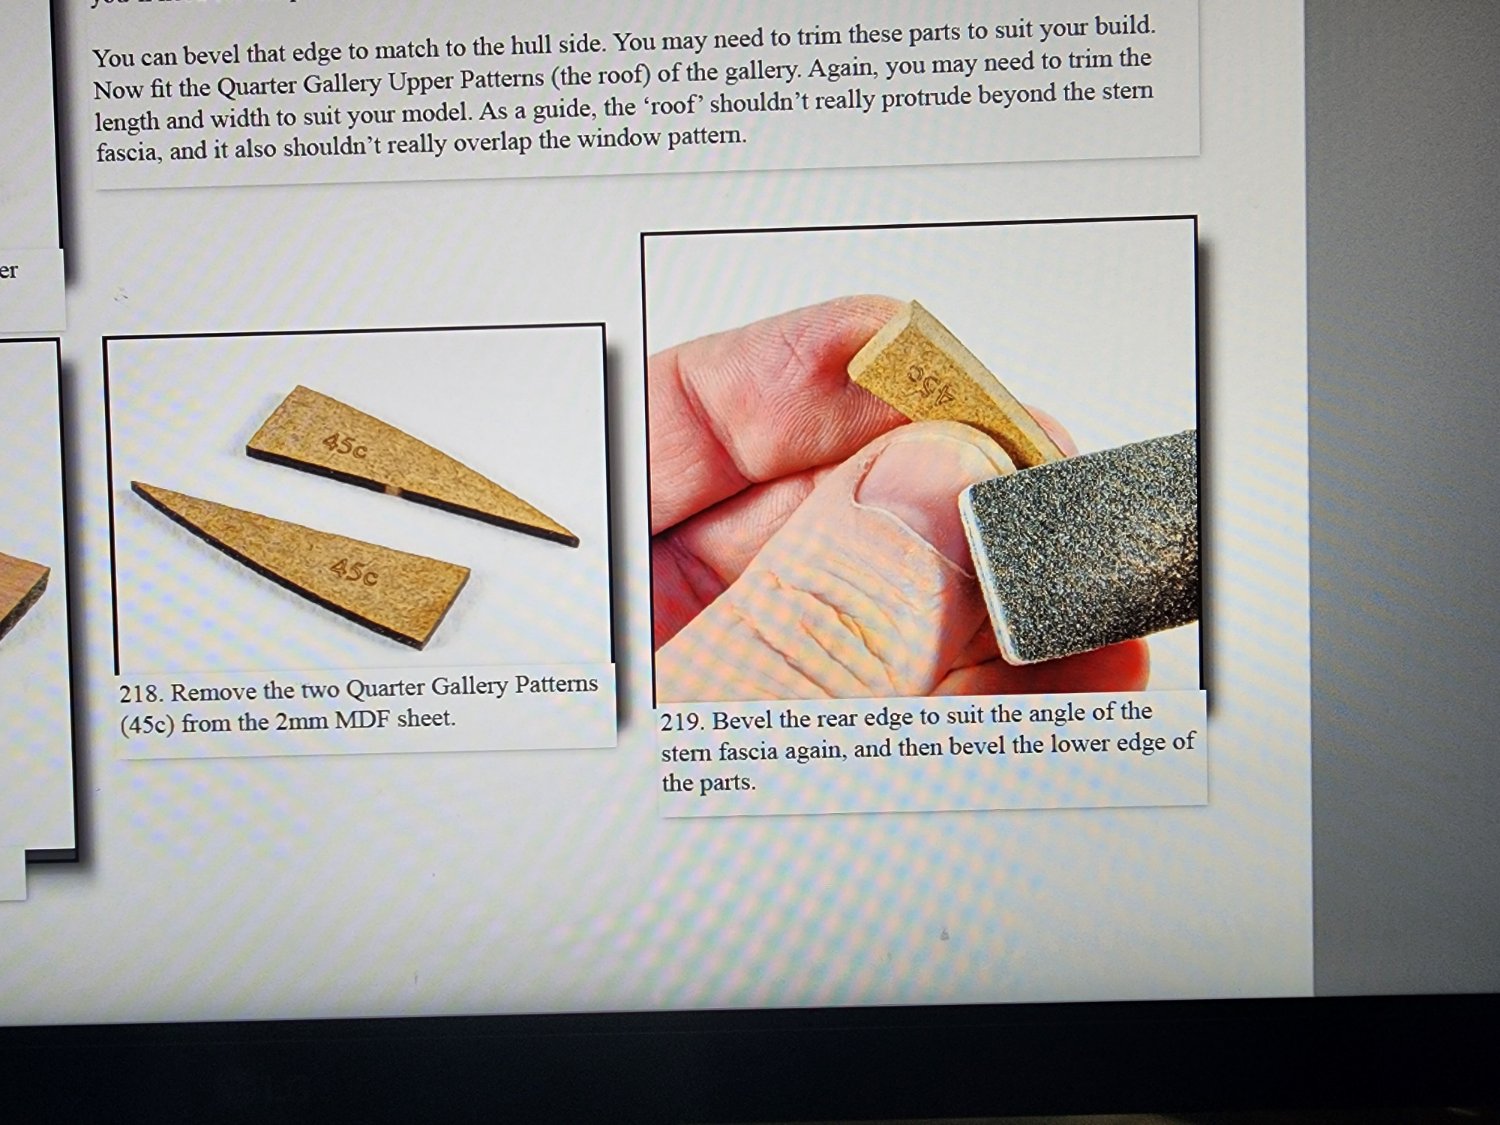
A question for those whomever have built the sphinx. Maybe mentioned somewhere already but I may have missed it. Is part 45c used? The part pictured below in the second picture is from a previous step. See pictures from the instructions below


-
Thanks Ron. I decided to plank it also.
-
From out of the shadows ...my first post!
JeffT replied to RobTBay's topic in New member Introductions
No problem if its an in progress build Rob. Go ahead and start the build log. -
Watching your videos on youtube. I haven't made it to this part yet but it looks great.
-
Hi Tom. Nice looking model.
-
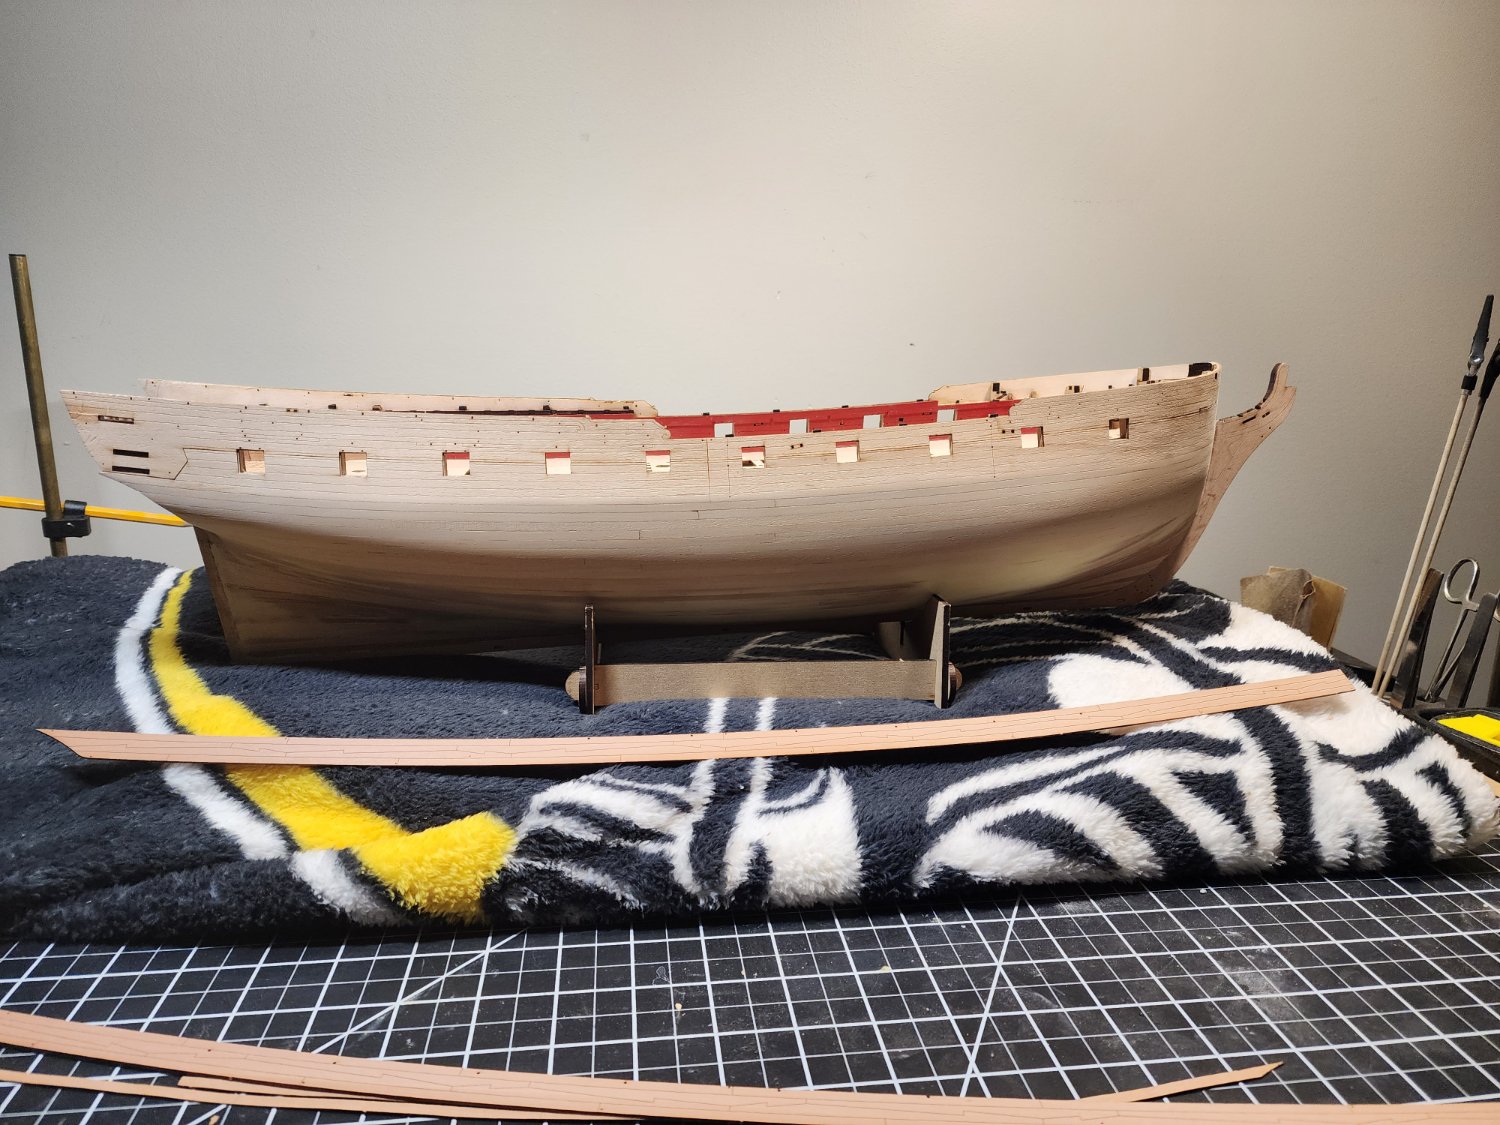
A quick update. I finished the second layer of planking (finally). Added some filler in the area where it will be painted and sanded smooth, nothing too exciting. The next part is, at least for me. Laying in the foreground is the main wale piece. I don't trust my skills on trying to glue this on in one big piece. I'm going to use a scalpel and try very delicately to separate it into 3 pieces. The idea is to cut along the engraved lines to hide it as best as possible. If that doesn't work out I will just plank the wales with planking material. Onward and upward.

-
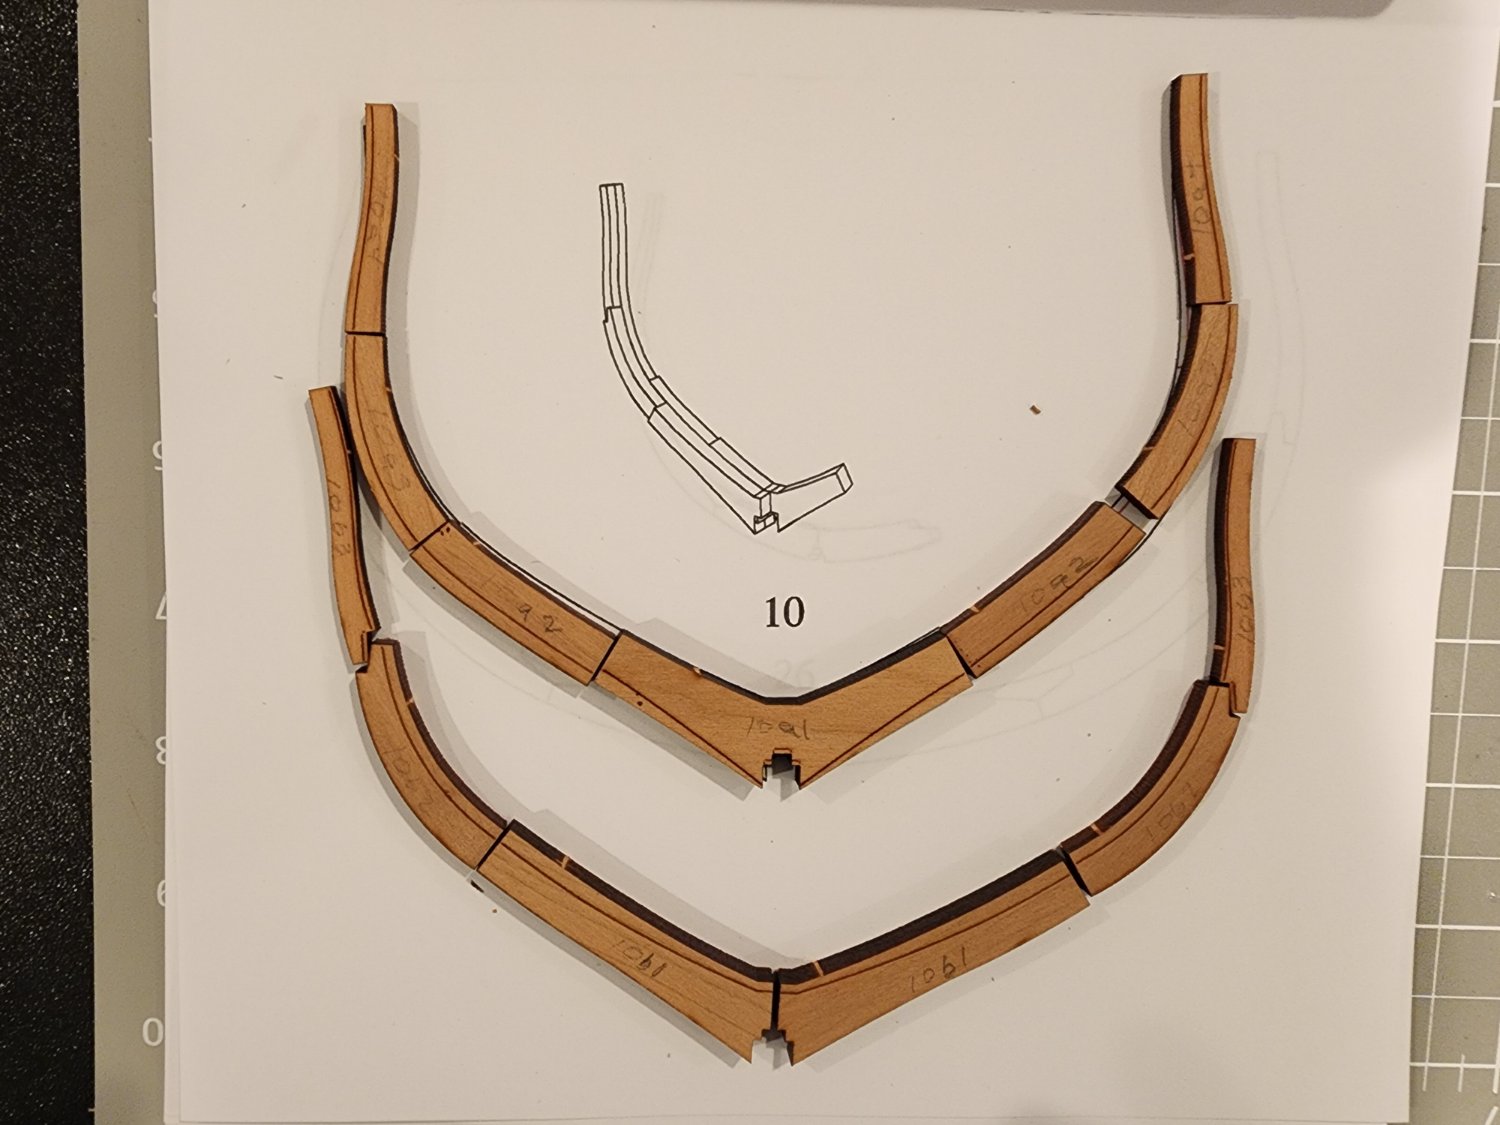
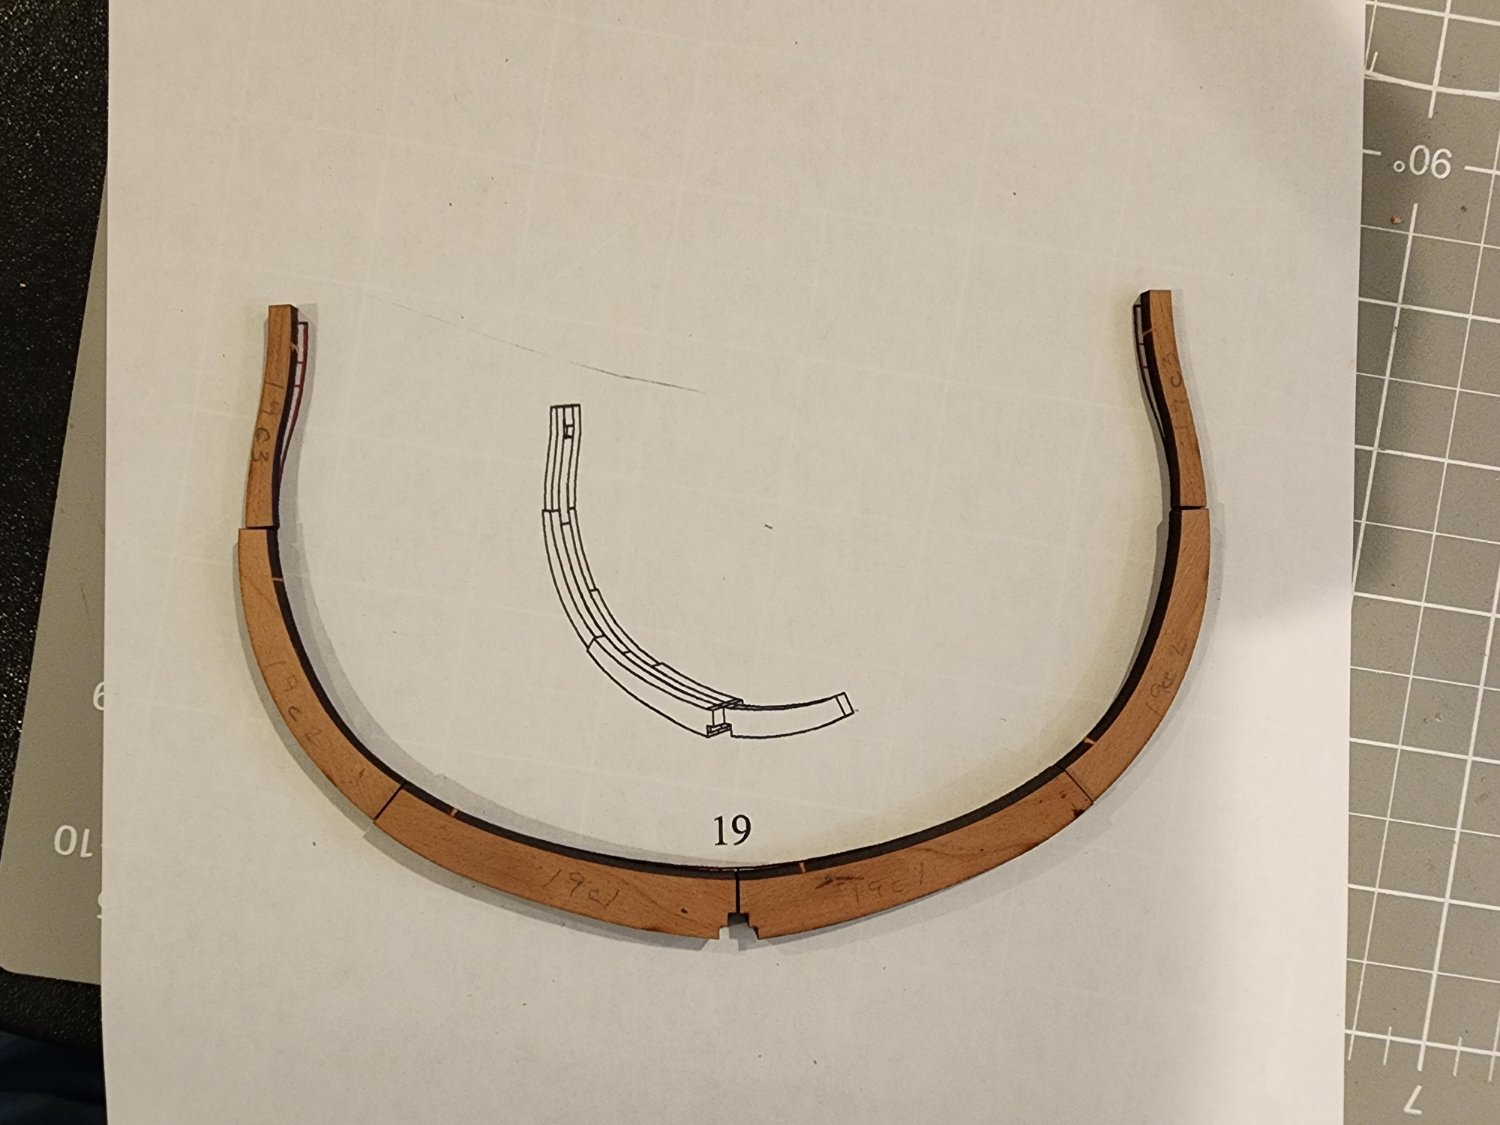
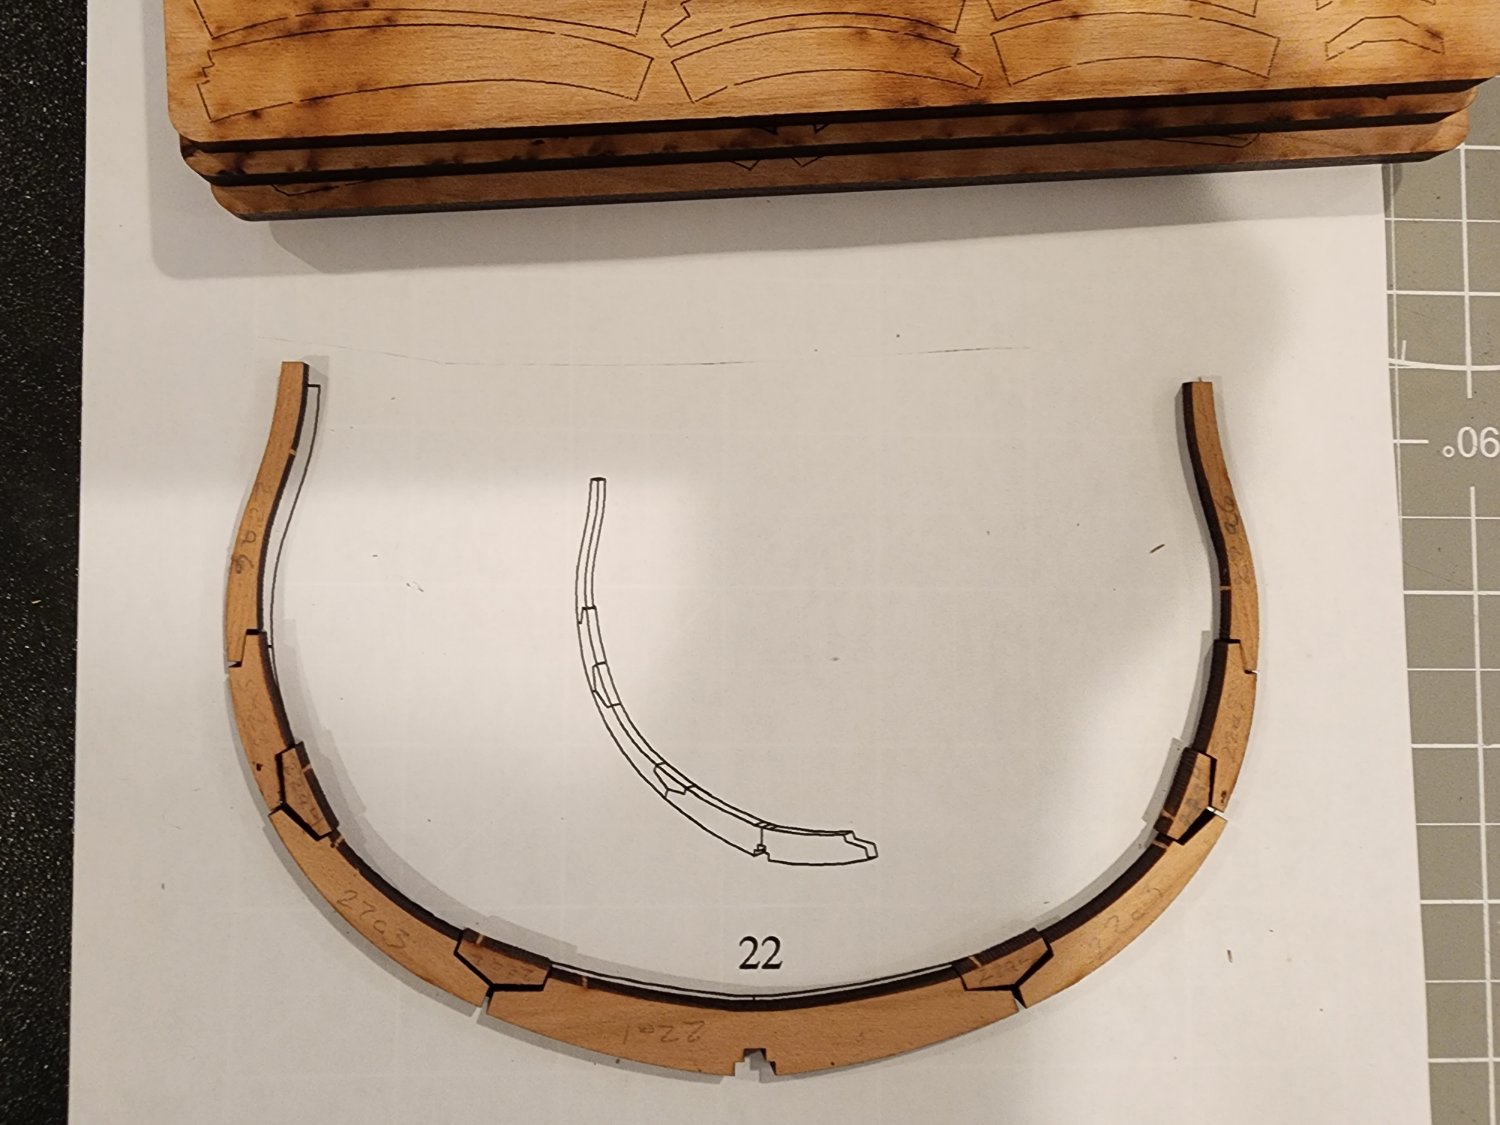
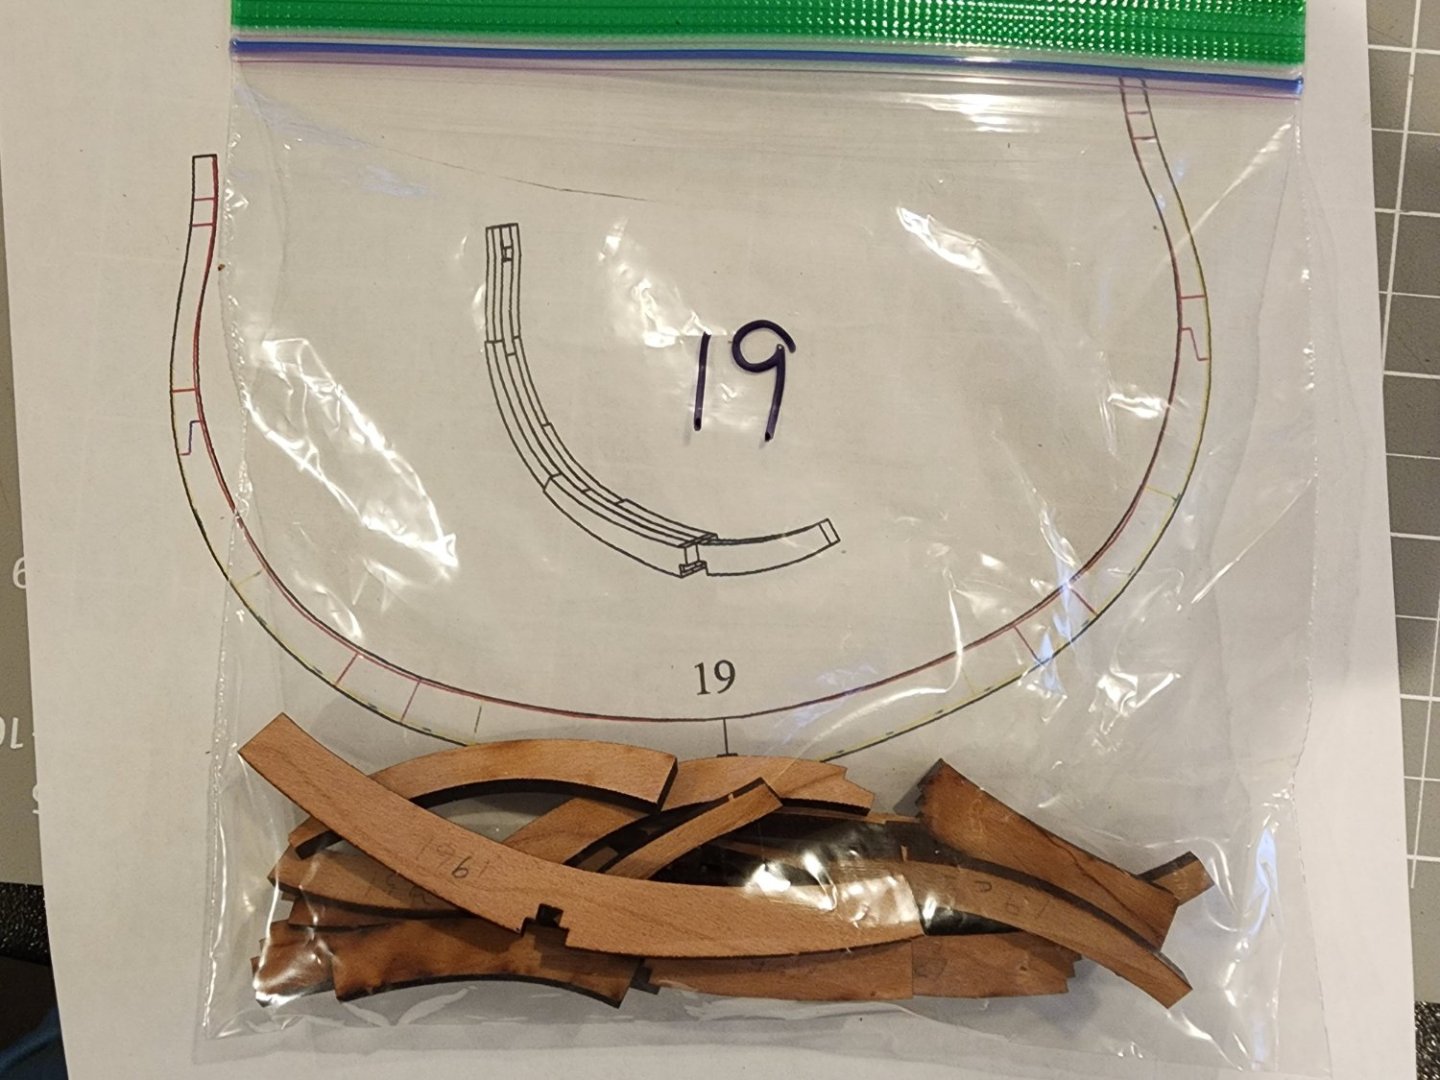
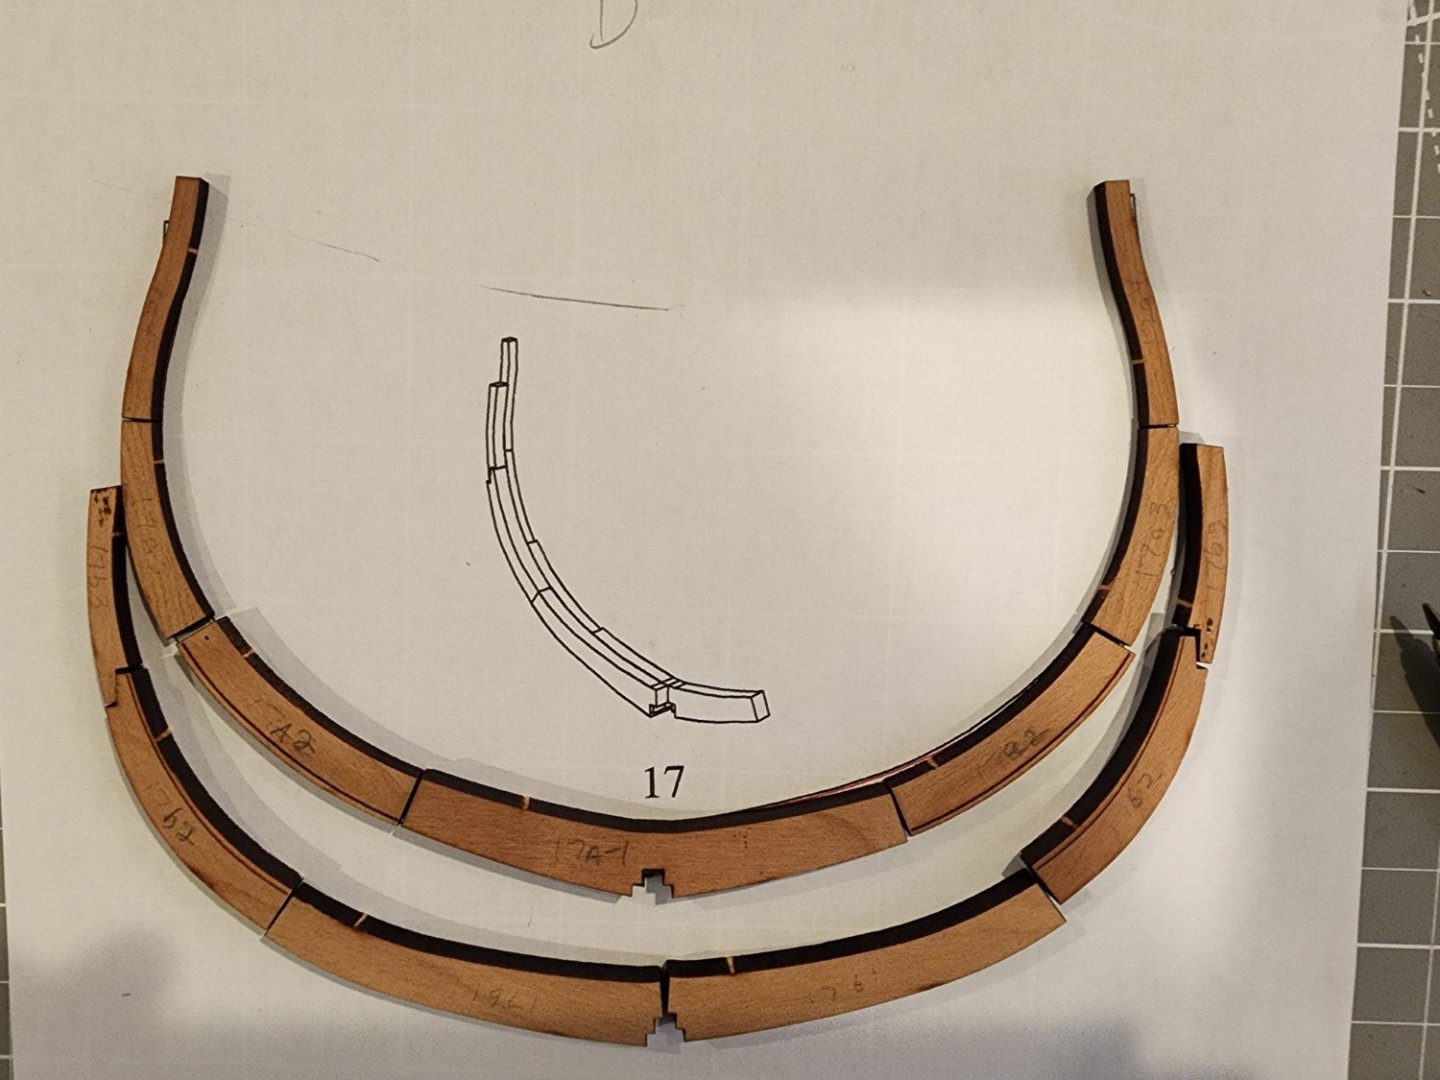
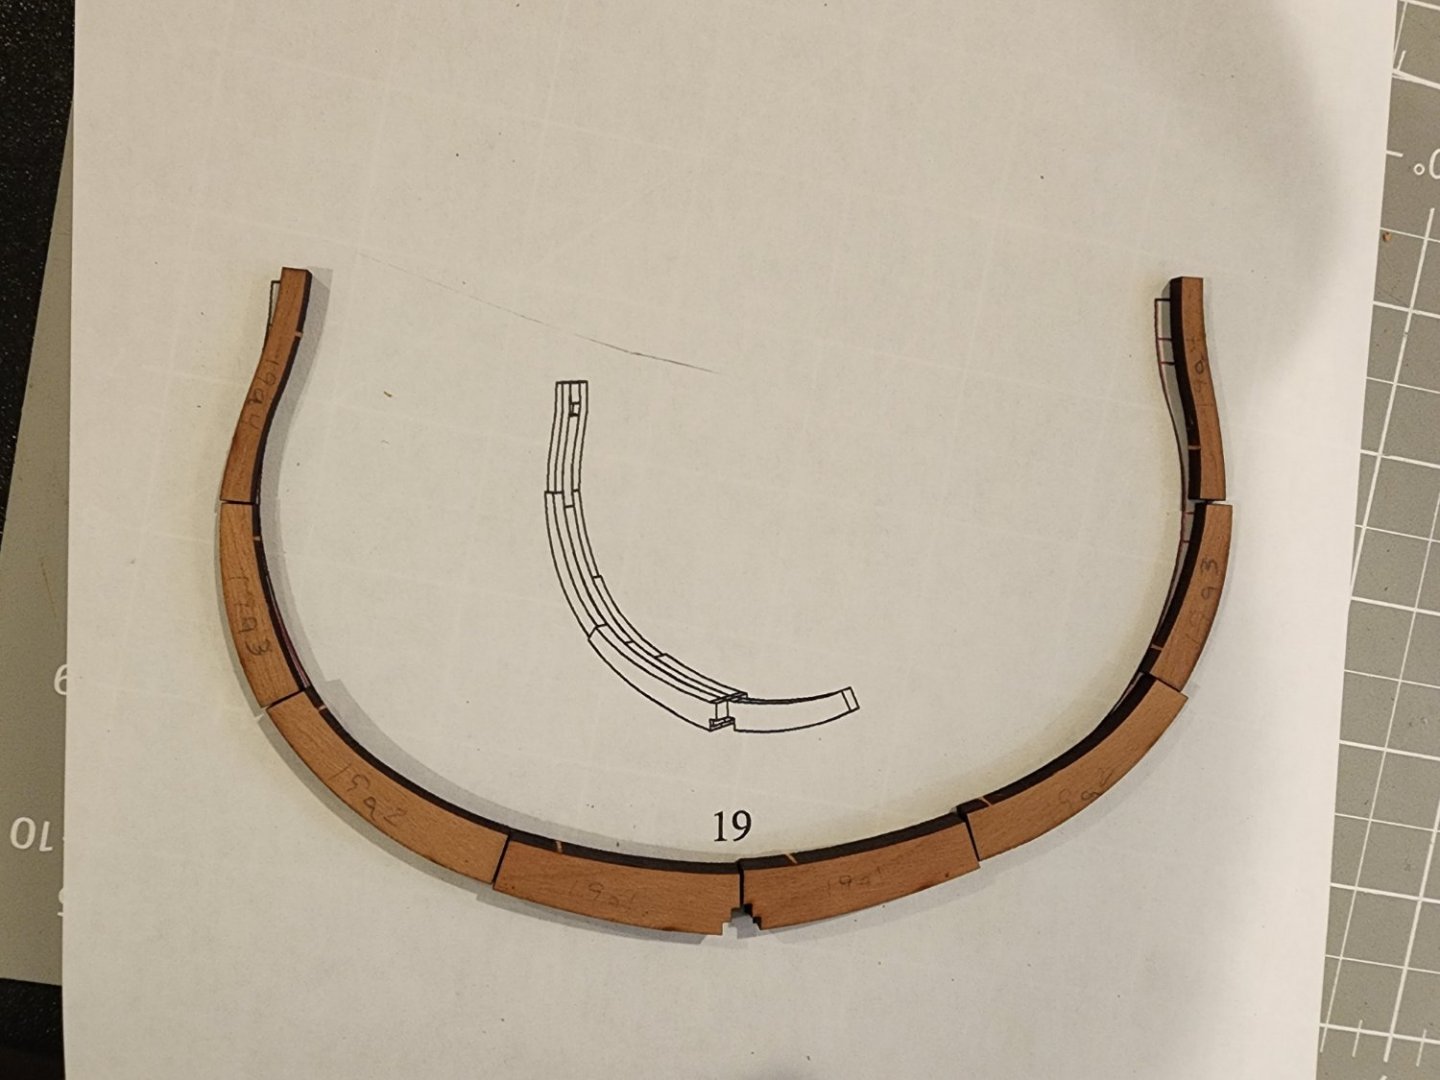
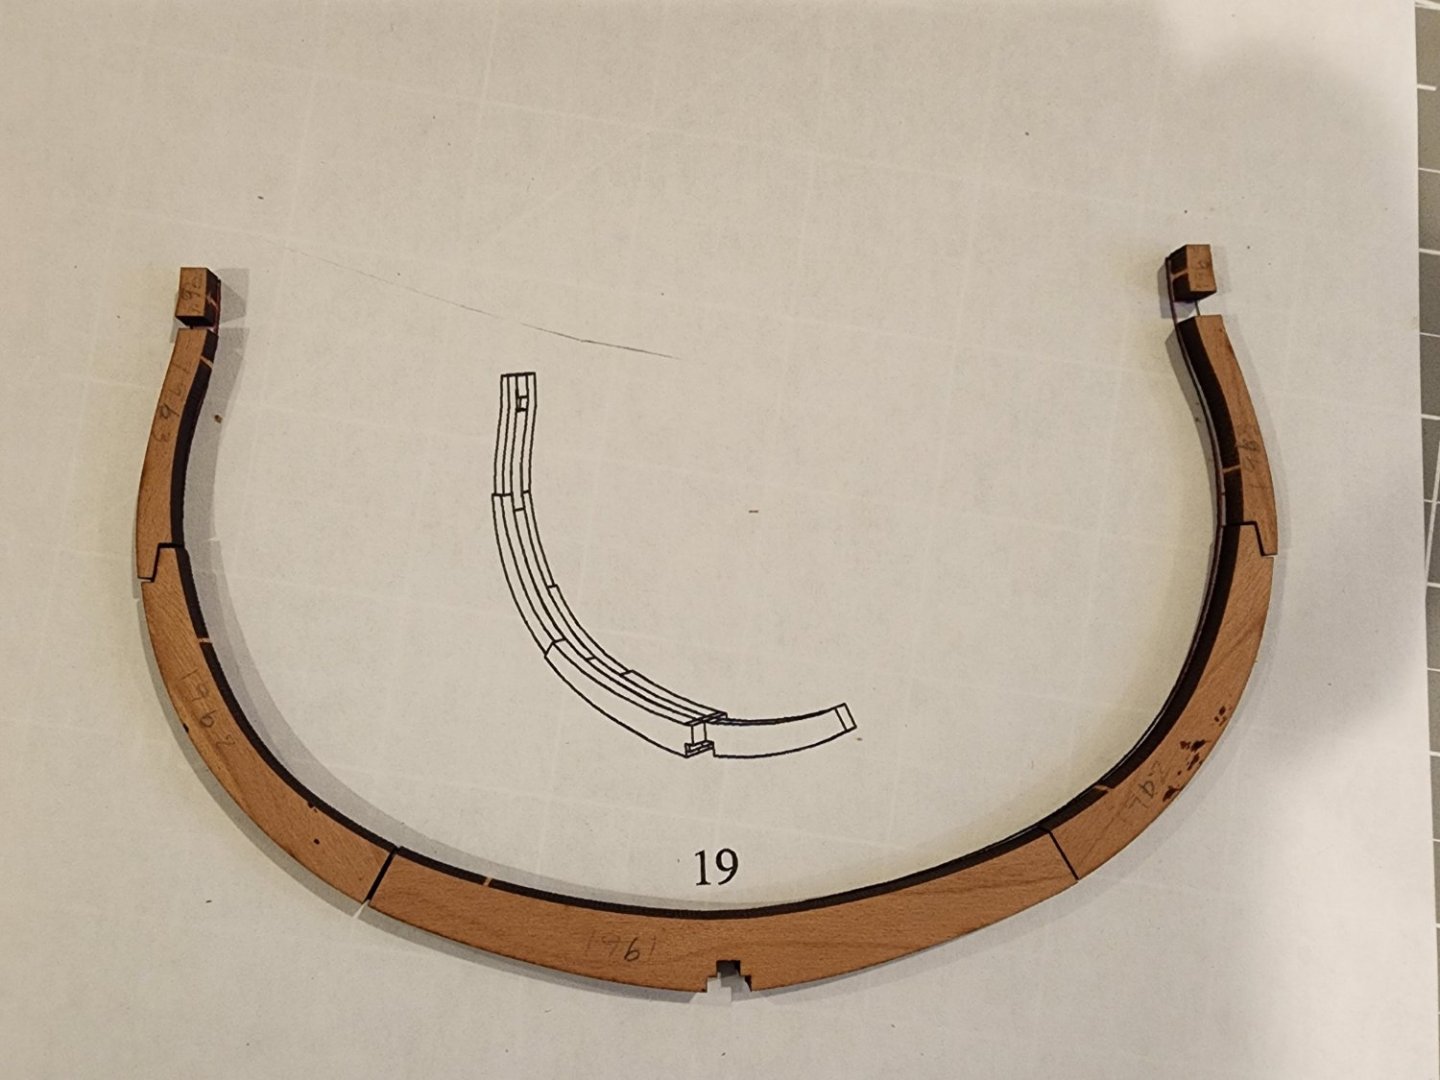
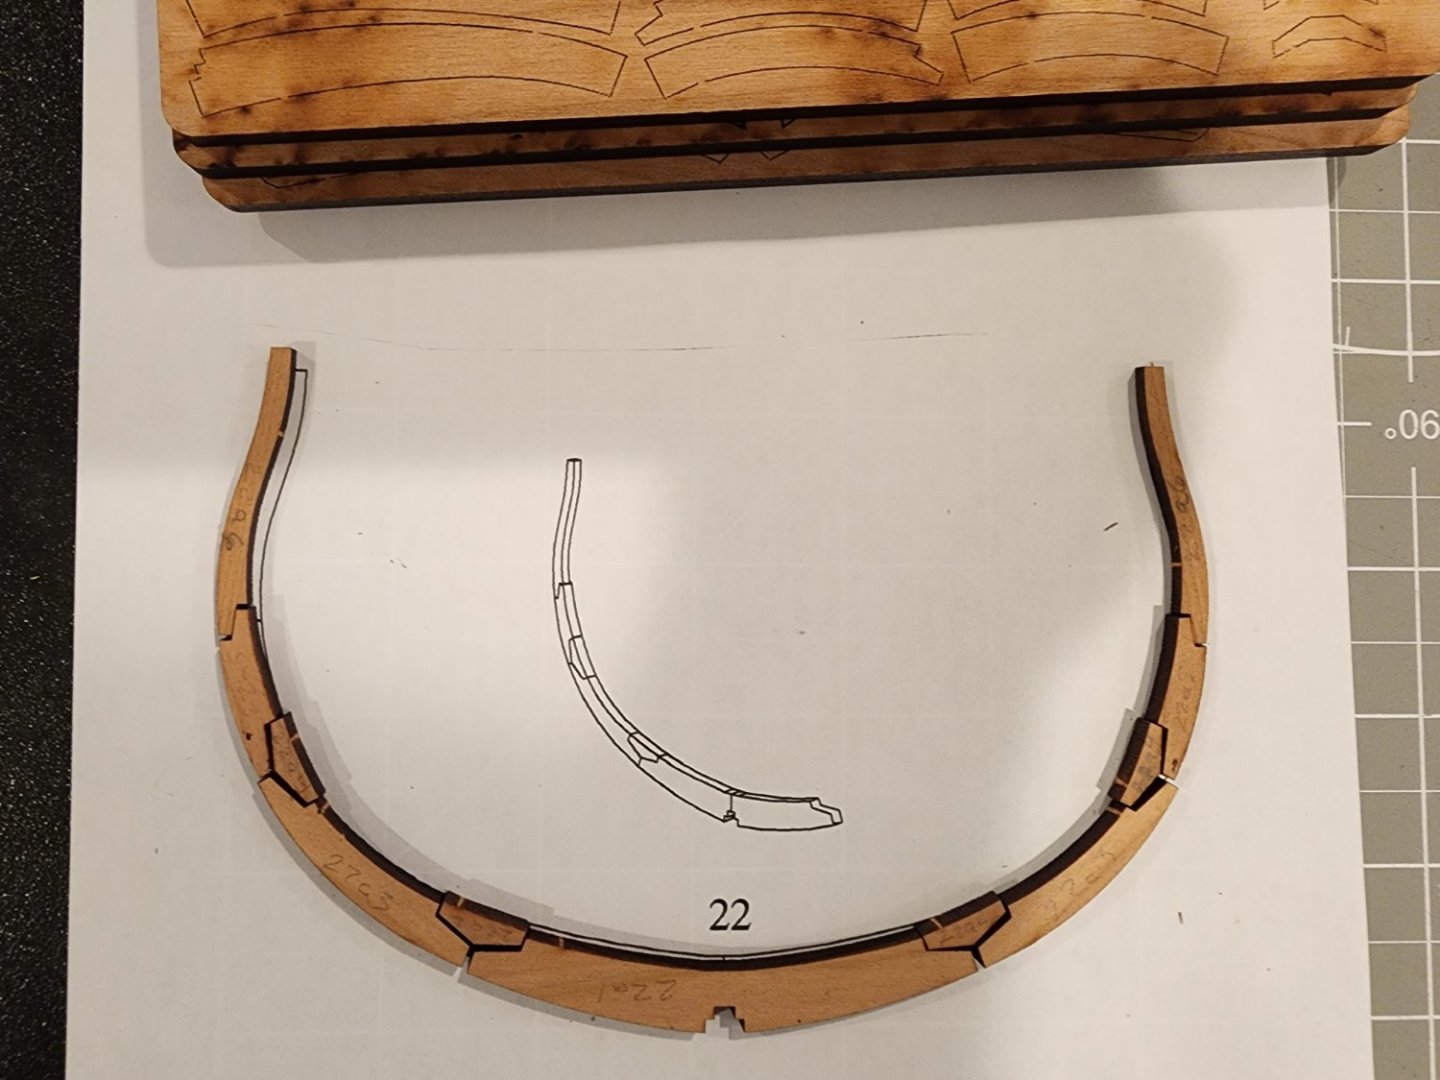
Finally an update. I said this would be slow and I wasn't kidding. I've started to cut out the frame parts in preparation for assembly. There are 2 types of frames; single layer, double layer and triple layer. Here are some pictures to show an example of each. There are 53 total frames to build. This will take some time. I cut up the frame drawing to separate each frame drawing and then made a copy of them all. This is a single frame. Not much to say here other than its unique method of assembly. As you can see there is quite a bit of laser burn to clean up. I'm going to need to come up with a very cautious way of doing that. When its time to assemble I'll put some double sided tape on the plan to hold the pieces in place in order to make sure all the parts are lined up correctly. Here are a couple of examples of a double layer frame. This first one is frame 10. The parts are marked a and b to eliminate confusion. a is the front facing layer I think and b aft facing. I need to be sure I have that right. Note the handy bevel lines. I need to be sure I glue these together in the correct orientation. I think the bevel lines on the a-layer should face forward and the bevel lines on the b-layer face aft. I hope I'm right. Please correct me if I'm wrong. The a-layer faces front and the b-layer faces aft. That's clear on the profile drawing. Also note the bevel line on the mating surface of part10b3 where it attaches to part b2. Those two mating surfaces need to be beveled before joining together. I'll need to brush up my beveling skills, they're not good. I'm also debating on whether I should prebevel or bevel after the frames are glued on during the fairing process. Either way, the bevel lines need to disappear. Or should this be done before the layers are glued together? These frames have steps also. There some spacers supplied in the kit to help with that. Its important to get that right. The steps can be seen on the plans so that's helpful. This one is frame 17. I'm a bit puzzled by the bevel lines here as its only on 4 parts so not sure how to proceed. I'm assuming there is just some minor beveling needed so may just let that go until its on the model. And finally a triple layer frame. The next 3 pics are frame 19. No beveling needed here apparently. Not too difficult , just make a sandwich, a on top of b on top of c. These frames also have steps but it will be a little easier to deal with since the middle layer b provides a flat surface to glue the other two layers to. I'm cutting all the parts out and storing in sandwich bags so none of the parts get mixed up. I did mark each part on pencil with its part number also.


-
To be honest, I don't know which is which. They both look good to me.
-
Totally understandable considering the amount of time and effort required to cut just one kit. Not to mention maintenance on the laser cutter.
-
kit review 1:48 San Bartolome by Pavel Nikitin
JeffT replied to James H's topic in REVIEWS: Model kits
Looks to be an impressive kit. -
Look for the 3 dots in the upper right corner of the post. Click and select edit. Also, send me a pm with a link to your finished logs so I can update the index.
-
Welcome to MSW