HOLIDAY DONATION DRIVE - SUPPORT MSW - DO YOUR PART TO KEEP THIS GREAT FORUM GOING!
×


JeffT
-
Posts
2,551 -
Joined
-
Last visited
Content Type
Profiles
Forums
Gallery
Events
Everything posted by JeffT
-
Hello Robert. Welcome to MSW.
-
Hello and Welcome to MSW
-
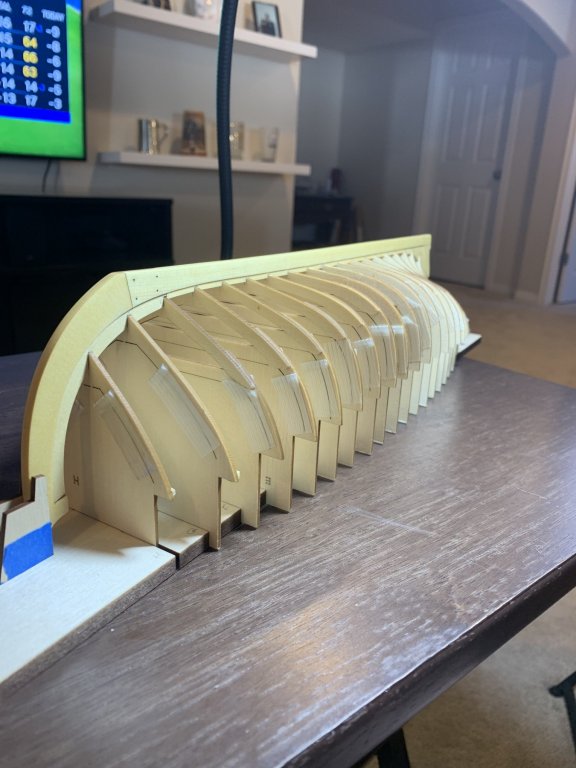
 All glued up and ready for fairing. As before, I waited until the keel was set into position before gluing the transom in place, Its easier to square it with the 12th frame. I was a little over zealous with the fairing last time I think, so I'll need to pull back on the reins a little to keep from over sanding. Particularly where the transom and the frames join the keel..
-
Hello and welcome to MSW 🙂
-
Hello and welcome to MSW
-
Thanks Jonathan
-
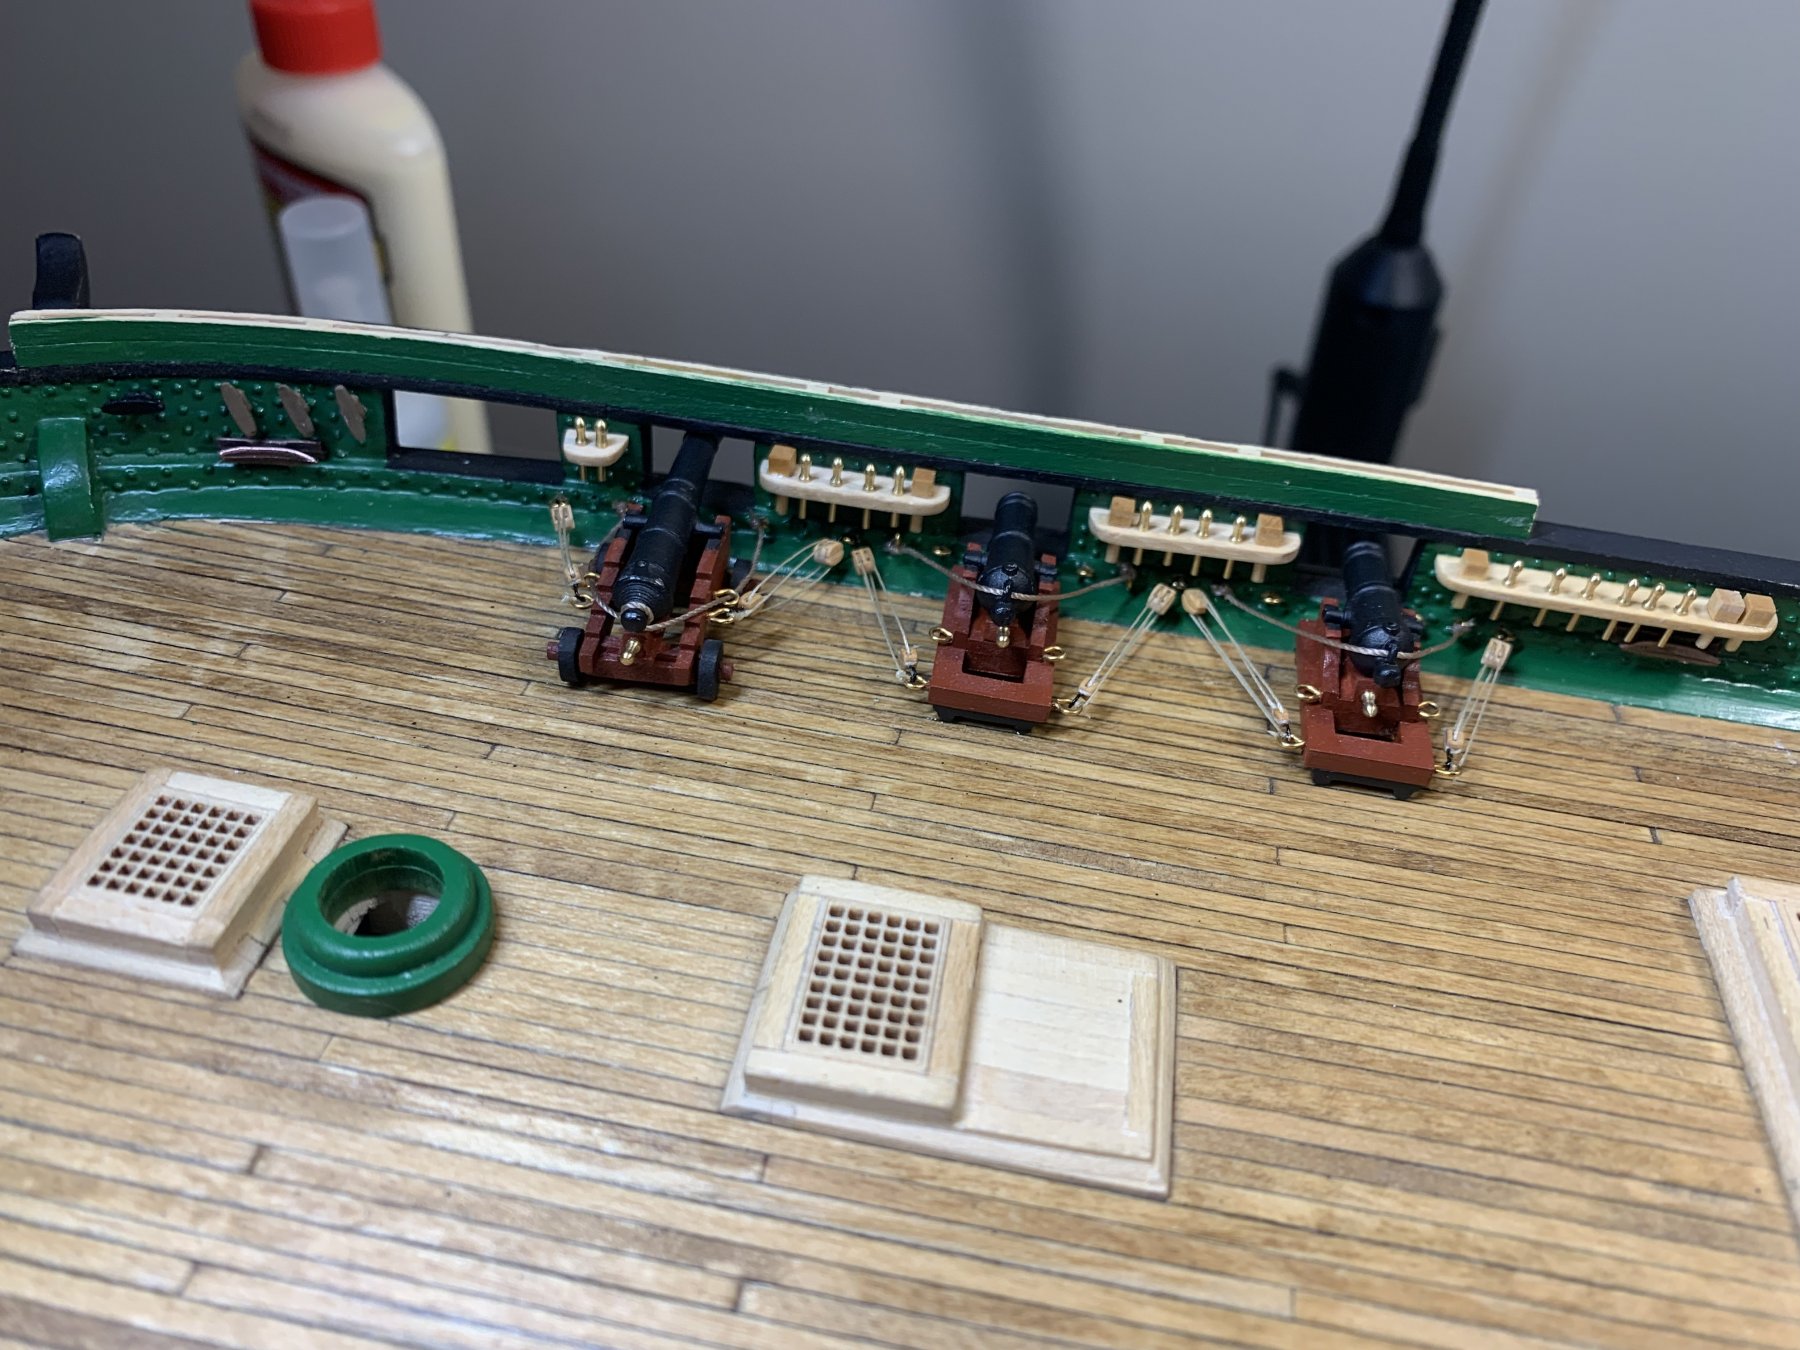
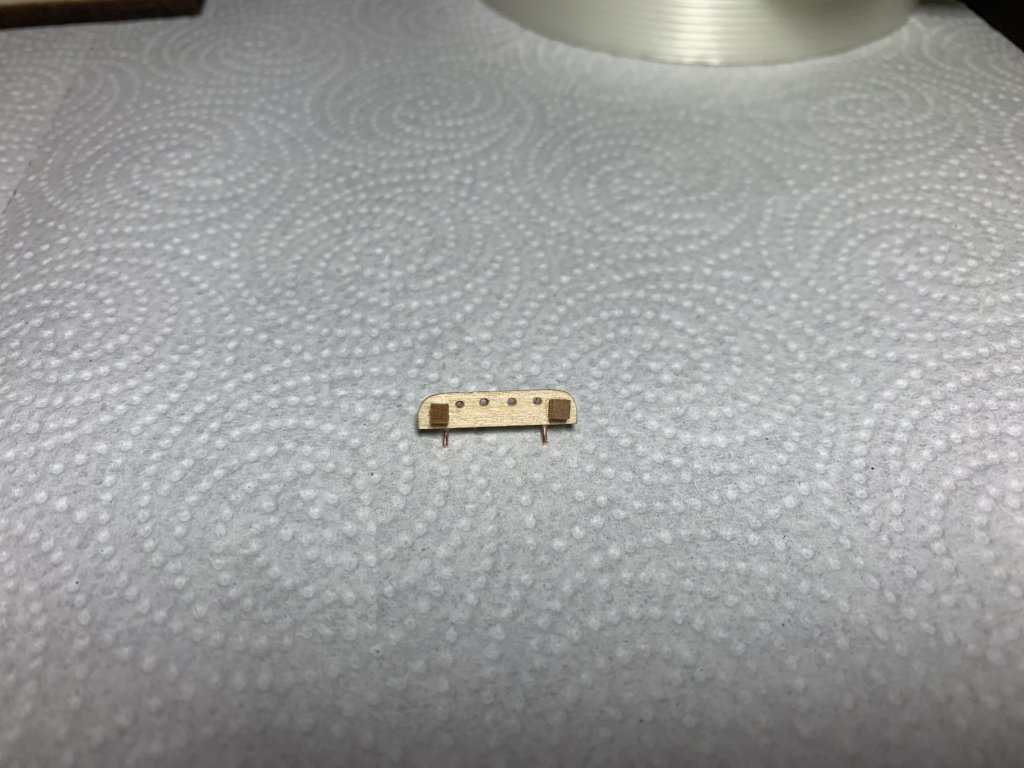
Finished up the 3 guns at the starboard bow, the pin racks and also installed some cleats. There were no cleats included with the kit for some reason. The ones I used are some I bought from model expo a few years ago. I'm going to jump over to my medway longboat for a bit and then work on the port side bow guns. The belaying pin racks have to be scratch built as once again there aren't any parts in the kit. I put little metal pins in the racks to help secure them to the model. I was worried that they would fall off.

-
I'm in Utah and received mine in about a week.
-
Been waiting for the amati version. Caldercrafts is a good one though if you can't wait.
-
New Ship Builder Old retired concrete buider
JeffT replied to jimbobuild's topic in New member Introductions
Hi Jim and welcome to MSW -
Welcome to MSW
-
Hell and welcome to MSW
-
Hello Erik. Welcome to MSW
-
You're welcome. They have youtube videos of the La Couronne kit build you should take a look at also.
-
Welcome to MSW
-
I haven't bought from them but they are legit. Here is a review of one of their kits:
-
My Alert kit arrived today. The box survived the long journey and was in good shape. Everything inside the box looks excellent and I love the instructions.
-
Mischief managed. It was more difficult than I expected. The hook is in a little too far in the block and is blocking the hole near the hook on the blocks. It took some work but finally got the rigging through. Luckily the wire is soft and I was able to drill through it with a mini drill bit. I suspect I'm going to have this problem with more of my blocks with hooks installed. Live and learn.

-
Thanks Thomas. That makes sense. Luckily only two guns need fixed.
-
I used CA to glue the carriages to the deck.
-
The warner blocks only had one set of holes to pass through. If that's the right way to do it then I'll have to fix that.
-
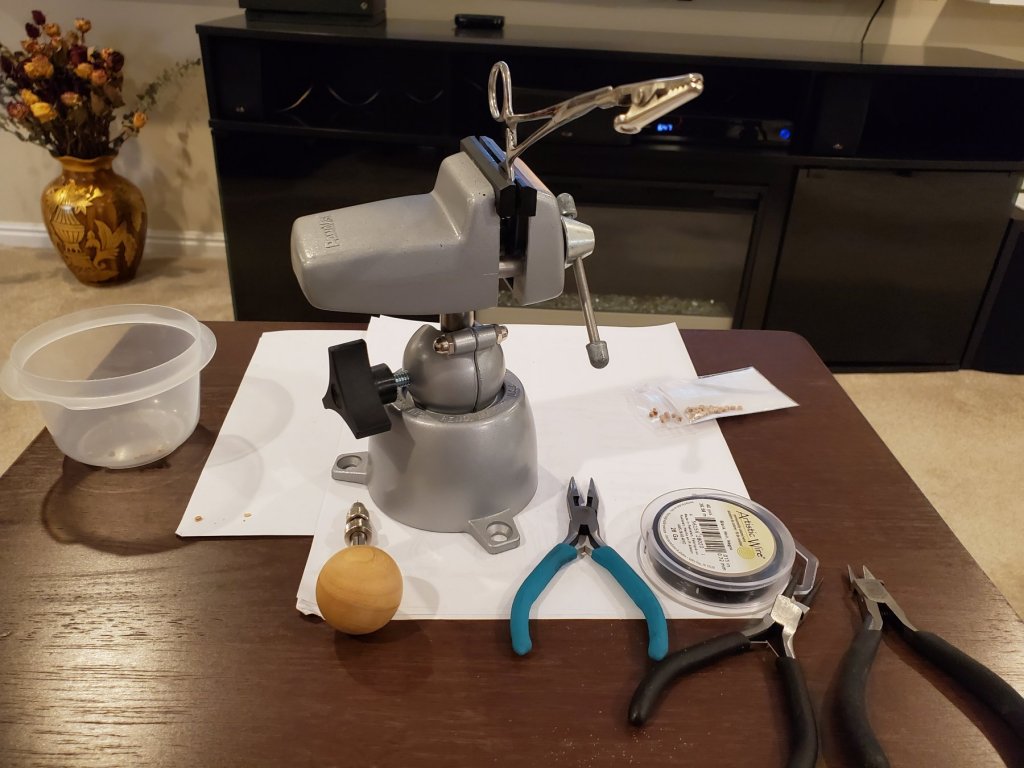
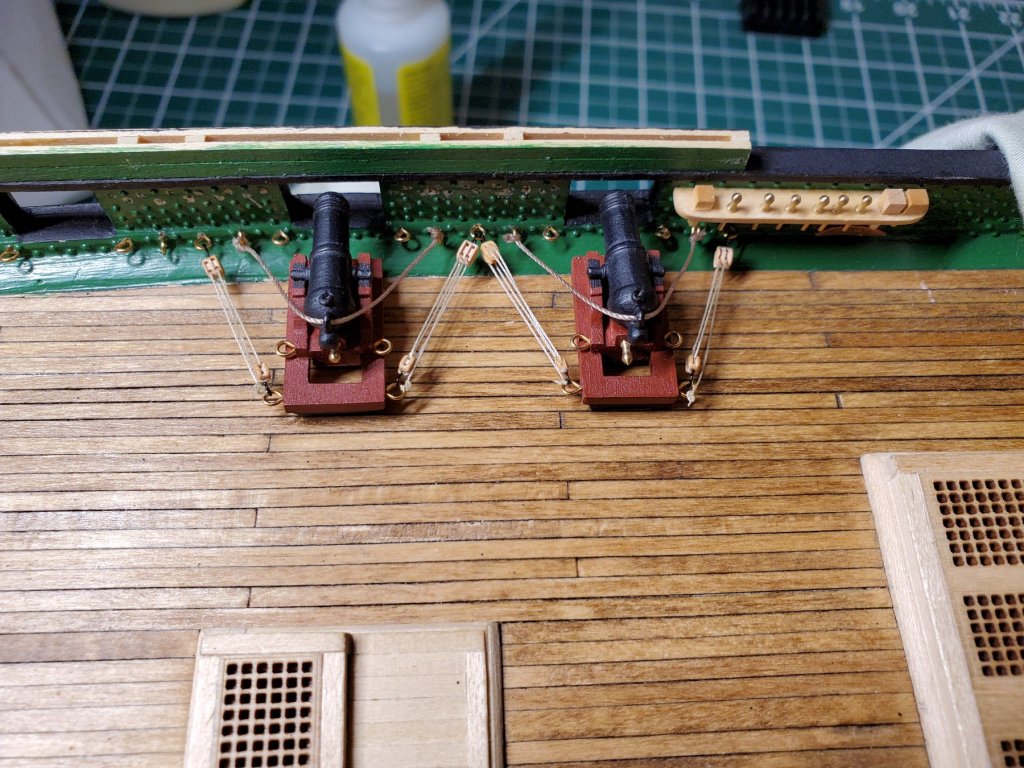
Finally an update! I've been working multiple projects so progress is a little slow. I managed to get all the hooks on the blocks. I ended up drilling them since Chucks blocks were a lot easier to drill. I had to figure out a way to hold everything in place while I drilled. I ended up using a vice with hemostats and an alligator clip to hold the blocks. I tried to use just the hemostats at first but they clamp to tightly and end up breaking blocks. I don't want to bore you with a bunch of rigged gun picks but here is where I am at the moment. Here is my setup: Here I finished rigging the first gun. You can see the difference between the warner blocks on the left and Chucks blocks on the right. Chucks blocks have nicer detail IMHO and are easier to work with, particularly when drilling. Two guns complete, twenty to go. I'm also working on installing the pin racks simultaneously. As you can see I have to pop out some of the rivets to install the racks. I need to touch up the paint there. Hopefully I can find the color since I no longer have any. I'm pretty sure it was either floquil or badger reading green. Hopefully I can still find some.