HOLIDAY DONATION DRIVE - SUPPORT MSW - DO YOUR PART TO KEEP THIS GREAT FORUM GOING! (Only 13 donations so far - C'mon guys!)
×

Bob Fraser
-
Posts
291 -
Joined
-
Last visited
Content Type
Profiles
Forums
Gallery
Events
Everything posted by Bob Fraser
-
 Darryl- sorry to see this, accidents happen and if you're not happy with it then it's your choice of what to do. My own = unlogged = build is abandoned for much the same reasons (damaged by cats knocking it off its shelf several times and losing pieces, bad paint) but at a lesser point than yours. Leave the log as it is, but amend the title with "Abandoned" on the end. Let it act as a positive reference - there's lots of useful info in there. I've enjoyed watching along and will look forward to following your new build when you feel ready. All the best,
- 248 replies
-
- 1
-

-
- Cutty Sark
- Revell
- (and 2 more)
-
Not much done - a bit of sanding but then had the space taken over. Daughter had created a character, costume and storyline for it for a book, and wanted a costume for Liverpool ComiCon. A Mushroom hat needed to be made, 2'6" diameter with gills and inkdrops. This is how it all turned out. She wanted some selfies with other people, but it turned out more wanted a picture with her! Big brother took her, and they both ended up as one of the days star costumes Go to page 3

- 9 replies
-
- 5
-
-
- Cutty Sark
- Mini Mamoli
- (and 1 more)
-
Looking a nice crisp build, Good catch. I thought you meant a sideways slip 😃
-
Close ups like this are so enlarged every little imperfection is shown. I see that in my build and hopfully I'll do better with the next one. Someone standing 3 feet away is highly unlikely to spot those. When it comes down to it we are own worst critics! Something I've told myself to do too!
-
This thread has a lot of suppliers - Wood Suppliers you should be able to find one in there 😃 Take a break, do something else, refresh yourself and your mind, look again with new eyes - I found it helped me - and some new skills. Have you seen this very detailed thread ? Sainsmart 3020 setup by thibaultron lots of setup info. Looking forward to the rest of the build when you come back. Take care,
- 132 replies
-
- 1
-
-
- King of the Mississippi
- Artesania Latina
- (and 1 more)
-
Darryl, have you seen @Kevin-the-lubbers photos? Using them and a ruler, given that the deadeye is 10", the tail that is siezed appears to measure out at 4 or 5 feet on the lower ratline shrouds and mast stays alongside them. That'll give you 15mm length for the 3 small siezes and the lanyard lock turns. Bruma has a closeup of them here Maybe Kevin or @shipman can jump in here as you've seen them in the flesh, to confirm or otherwise please?
- 248 replies
-
- 1
-
-
- Cutty Sark
- Revell
- (and 2 more)
-
Hi Daryl According to Campbell and Longridge the fore and main lower shrouds are 5" circumference. This translates to 1.59155" diameter and gives 0.4211mm at 1/96th. The main and fore stays are also 5" circumference, but the mizzen lower shrouds and stay are 4" circumference, or 0.3369mm at 1/96th All the measurements for stays and shrouds are given inside the hull on his rigging plan. Looking good BTW, wish mine was even half as good! (It's staying put for a good while yet) Cheers
- 248 replies
-
- 2
-
-
- Cutty Sark
- Revell
- (and 2 more)
-
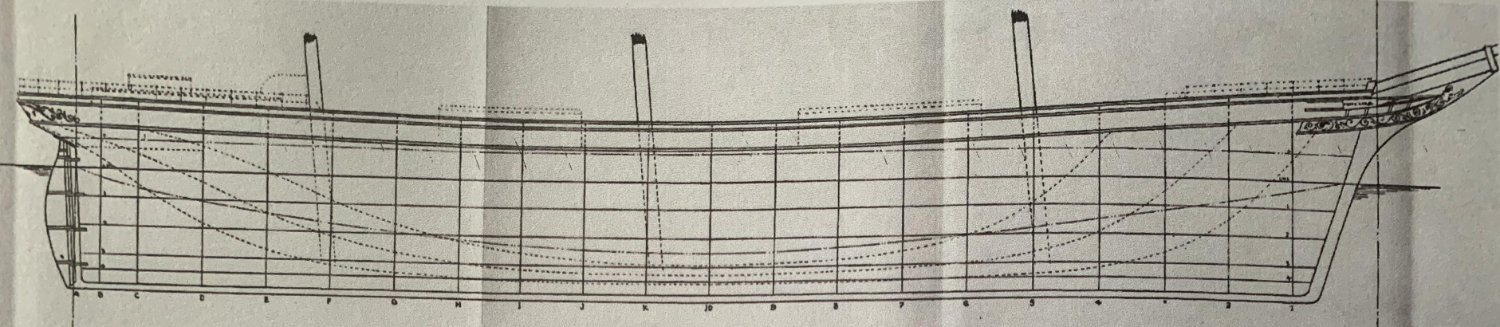
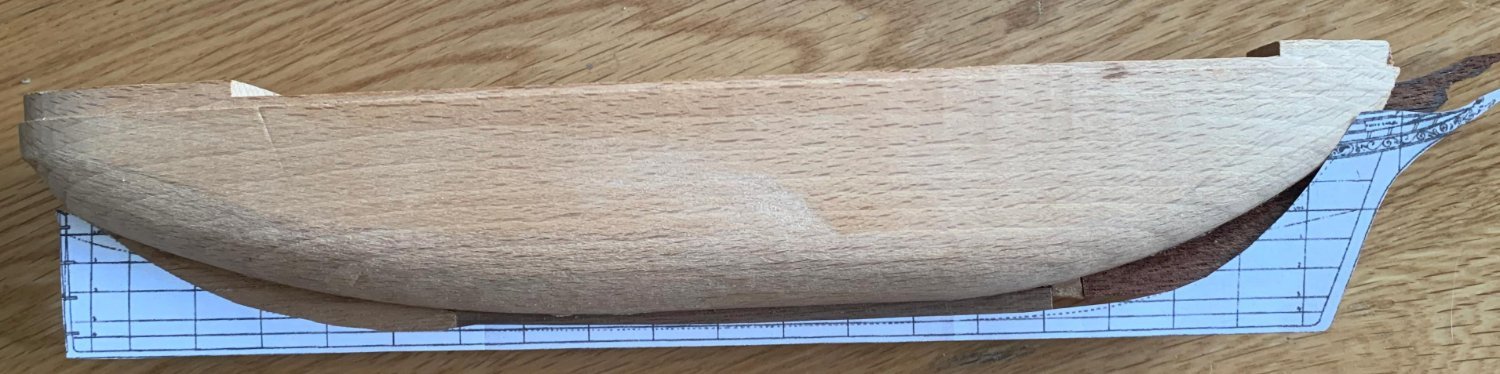
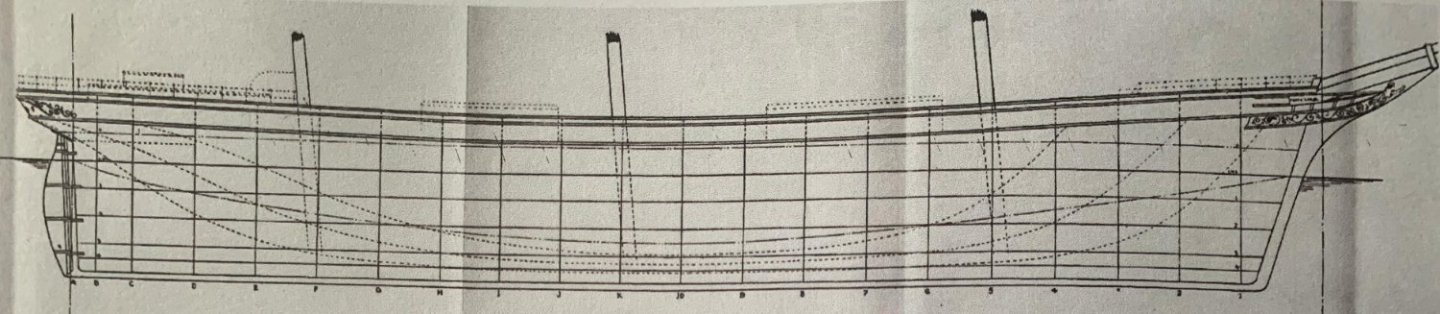
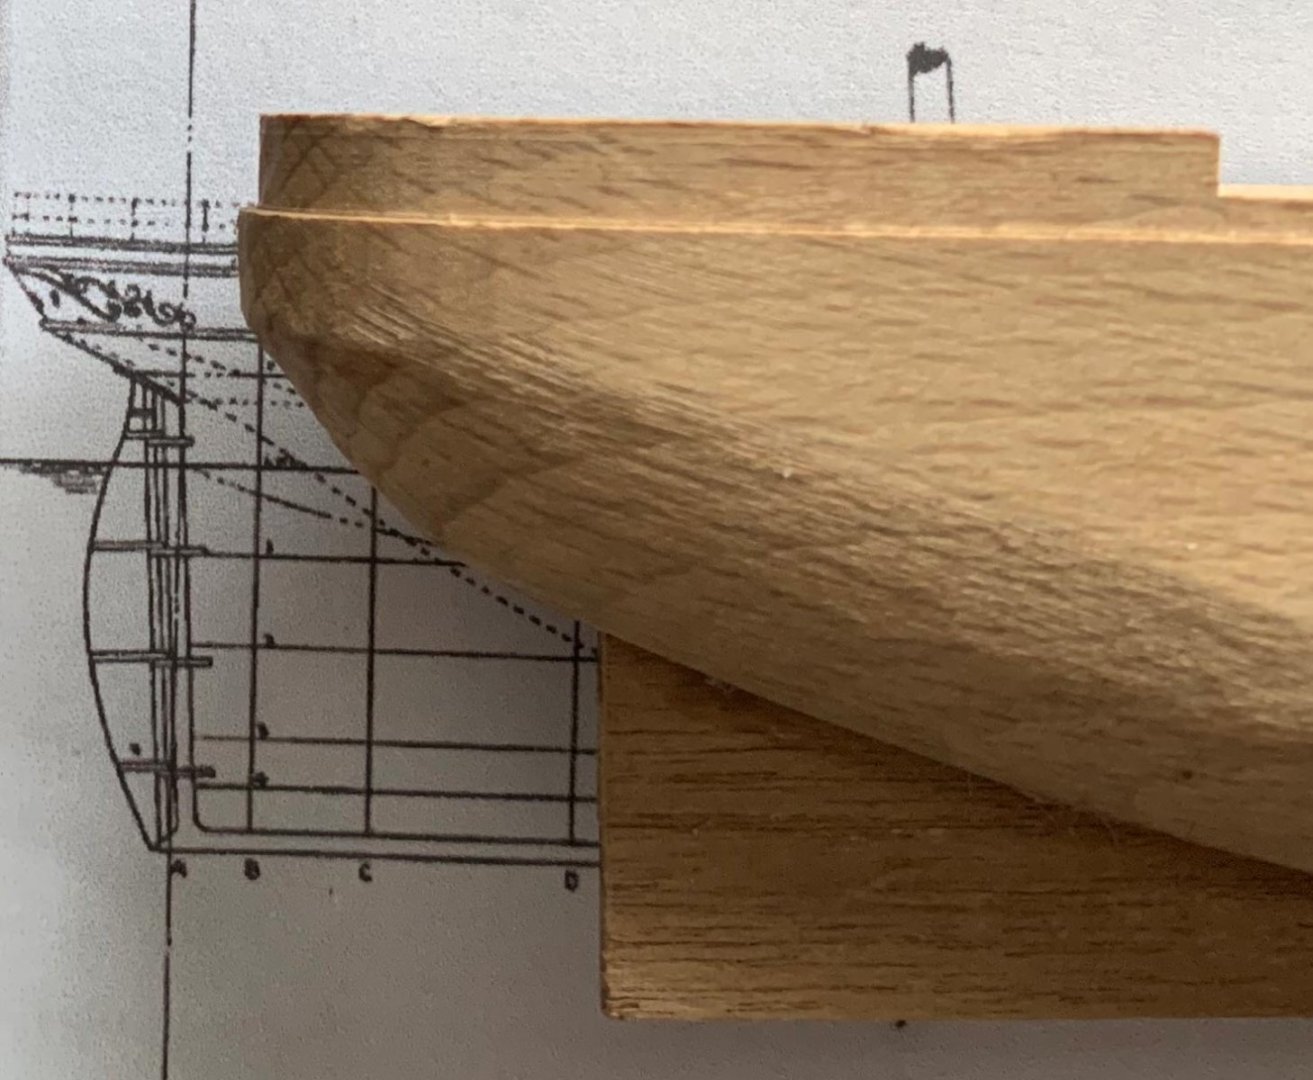
Not much done - some comparisons to Longridges plans showing how far off this hull really is. Scanned and scaled to size - I know the creases affect the drawing slightly, but these pics are waay bigger than the model. Cut from the profile showing how the hull shape differs Midships section is just on correct but -> Shows how much extra needs to be added. Some shaping required! I'm also using the 1/96th Revell hull as a visual guideline. Let's see how I go from here - first job fix the keel, stem and stern pieces and sort the profiling after.


- 9 replies
-
- 3
-
-
- Cutty Sark
- Mini Mamoli
- (and 1 more)
-
Definately looking good!
-
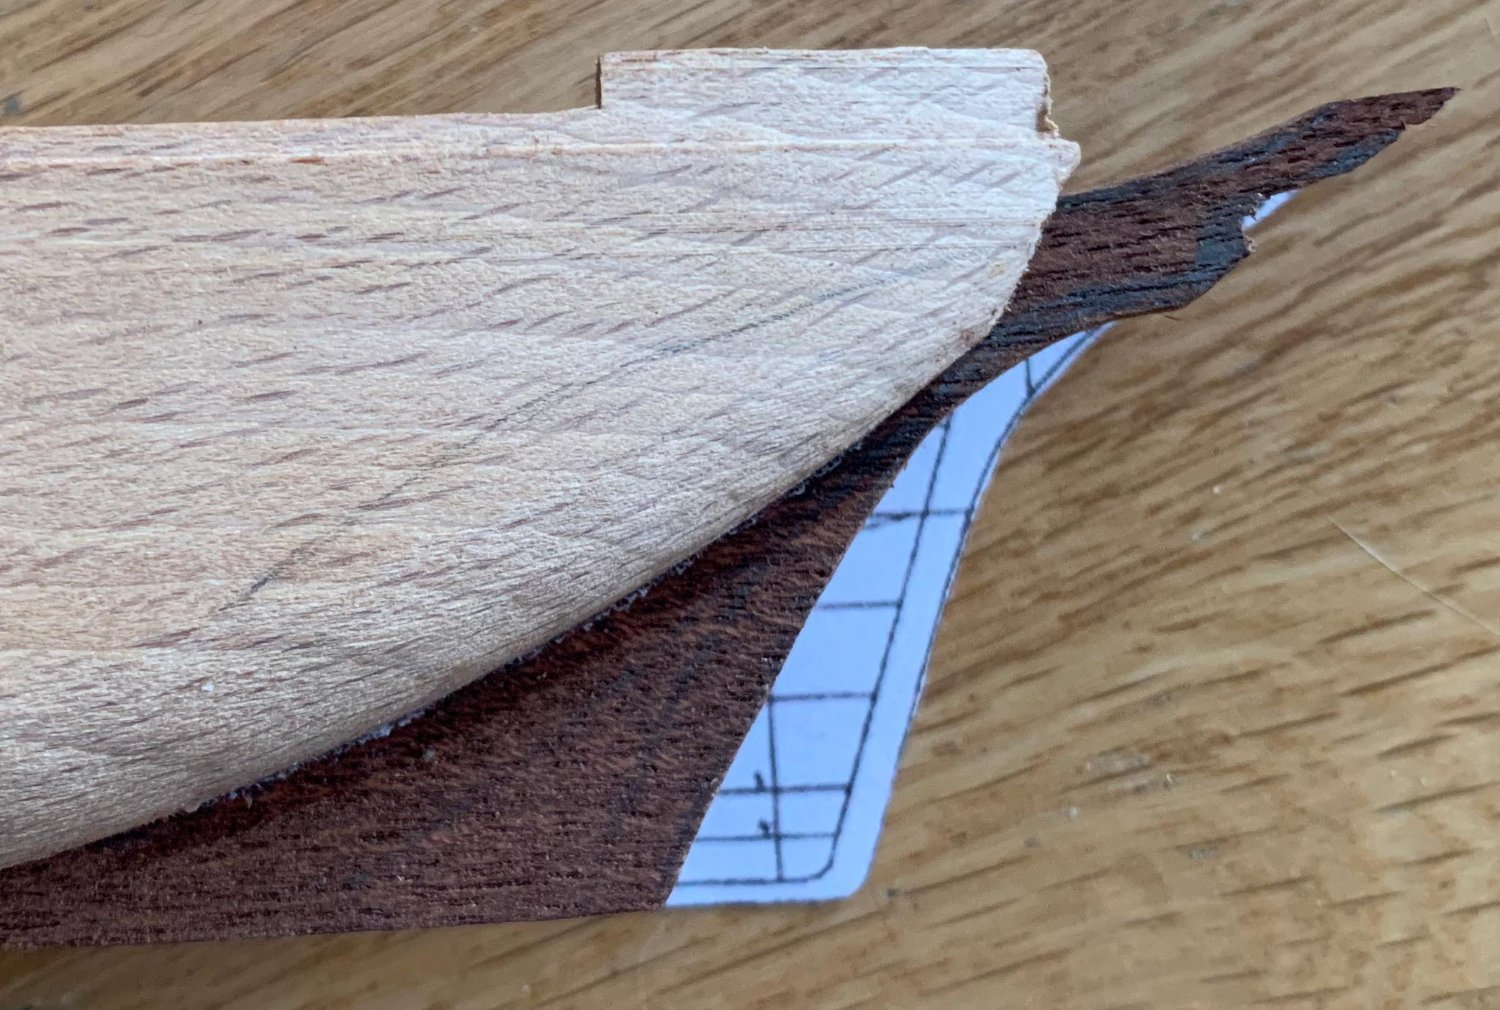
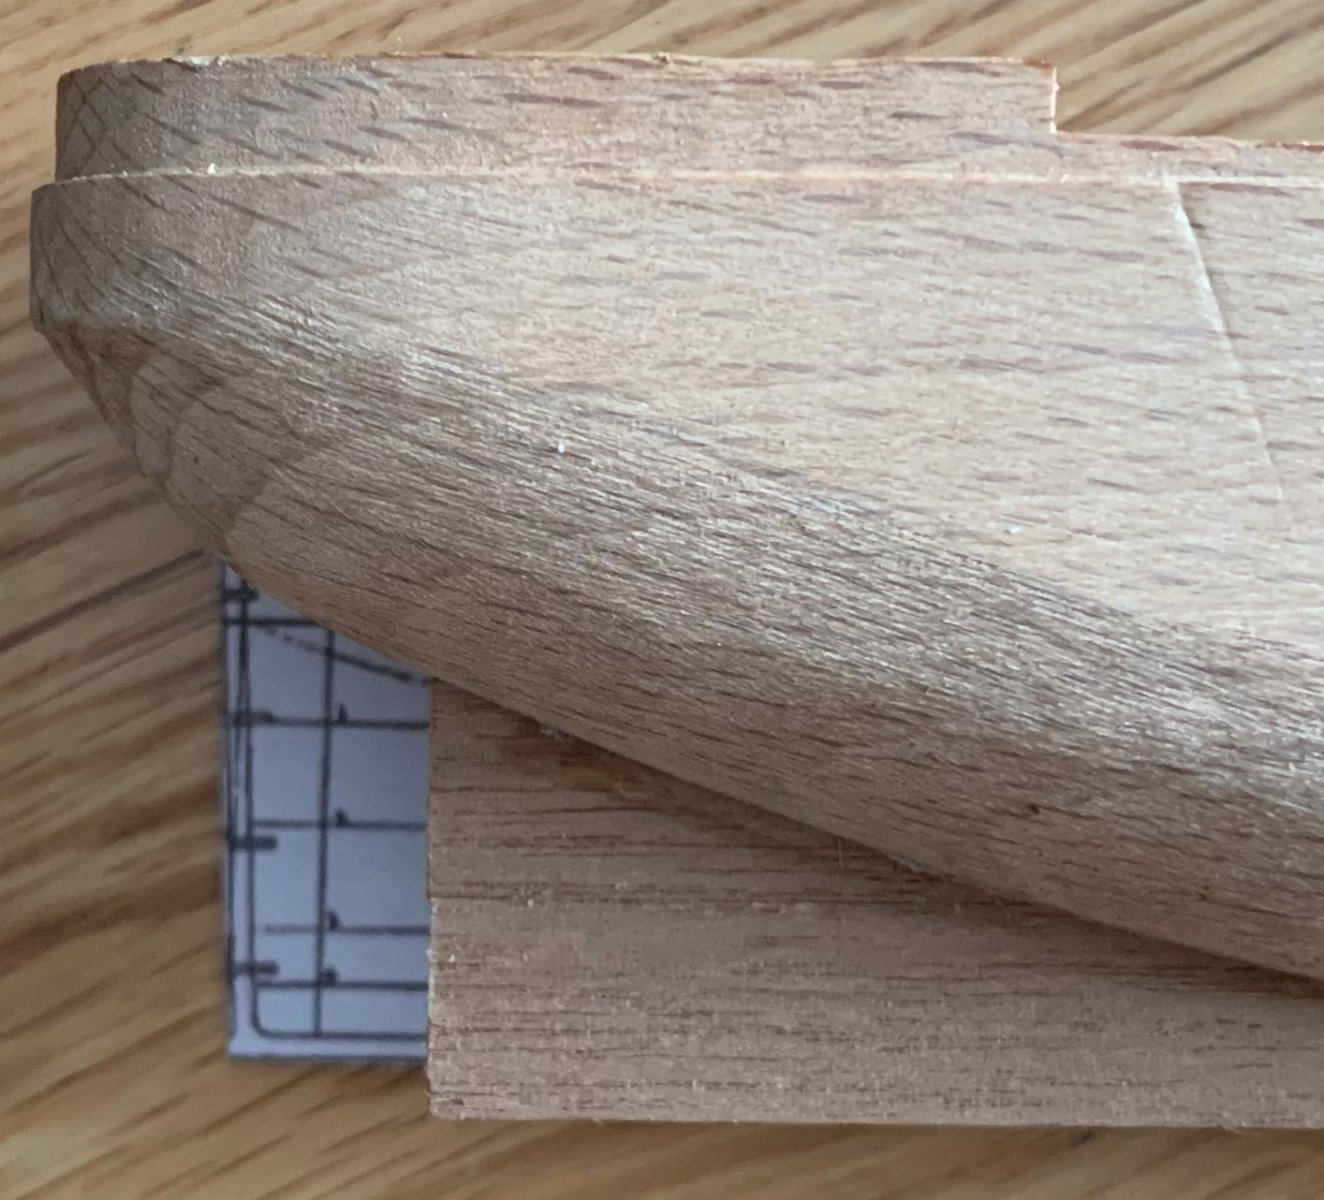
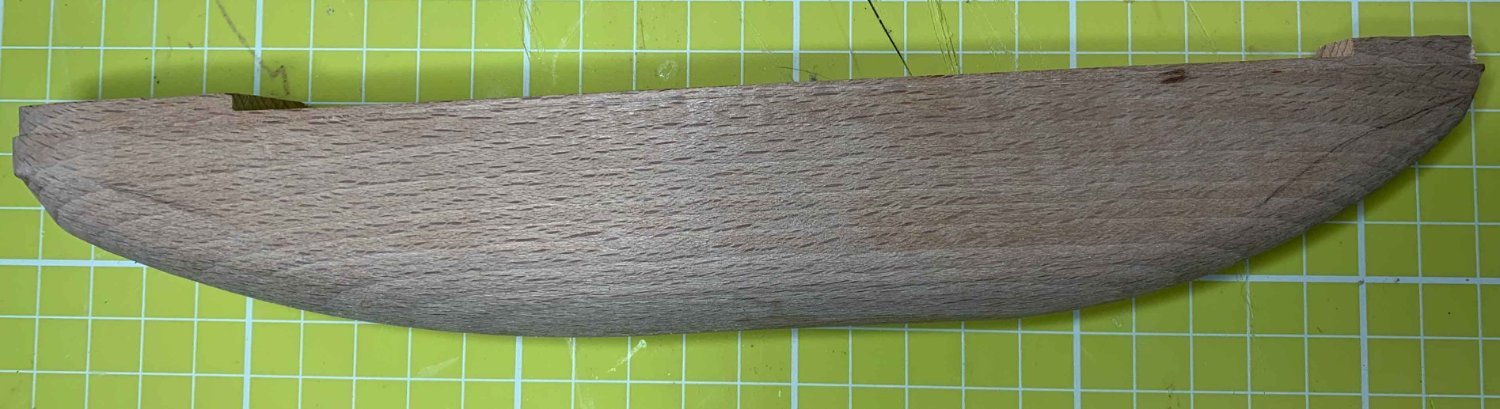
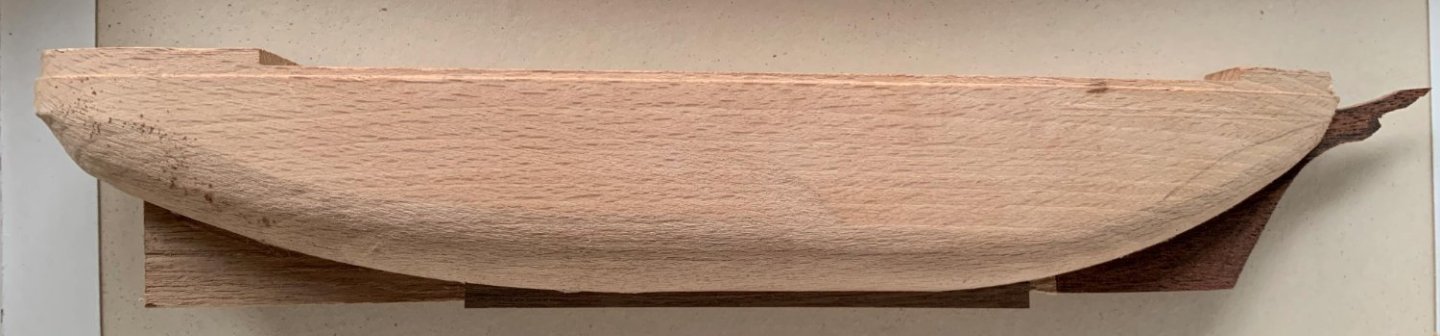
Great minds and all that 😄 I've had this stashed away for just over 11 years. Way back then I made some notes on the instructions about using pins for the stanchions. I've some very this beading wire for the rails. Never thought about beads for deadeyes though - good idea that, cheers! (Even the largest 10" deadeyes come out at only 1mm diameter) I'll try mounting one into an eyebolt for the lower as an experiment. Got some more shaping on the hull to do yet, and as you suggest wood filler (got none - need to buy some!) to smooth the lines off. I've added the keel, stemson and stern deadwood with an initial shaping. Now that they're in place I can recheck their length and shape ( stem not quite as sharp as it should be and deadwood not as far back as it needs to be I think), and the hull is still too convex. More work tomorrow, as other duties call today. Cheers for now,
- 9 replies
-
- 3
-
-
- Cutty Sark
- Mini Mamoli
- (and 1 more)
-
That's my excuse too, and I'm sticking to it - it's the differences that make it yours alone, amd stand out from the rest. Good catch!
-
Once again, Thank you all for everything. Next up - A small version of the Cutty Sark! for a fun build 🤣
- 86 replies
-
- 2
-
-
- king of the mississippi
- artesania latina
- (and 2 more)
-
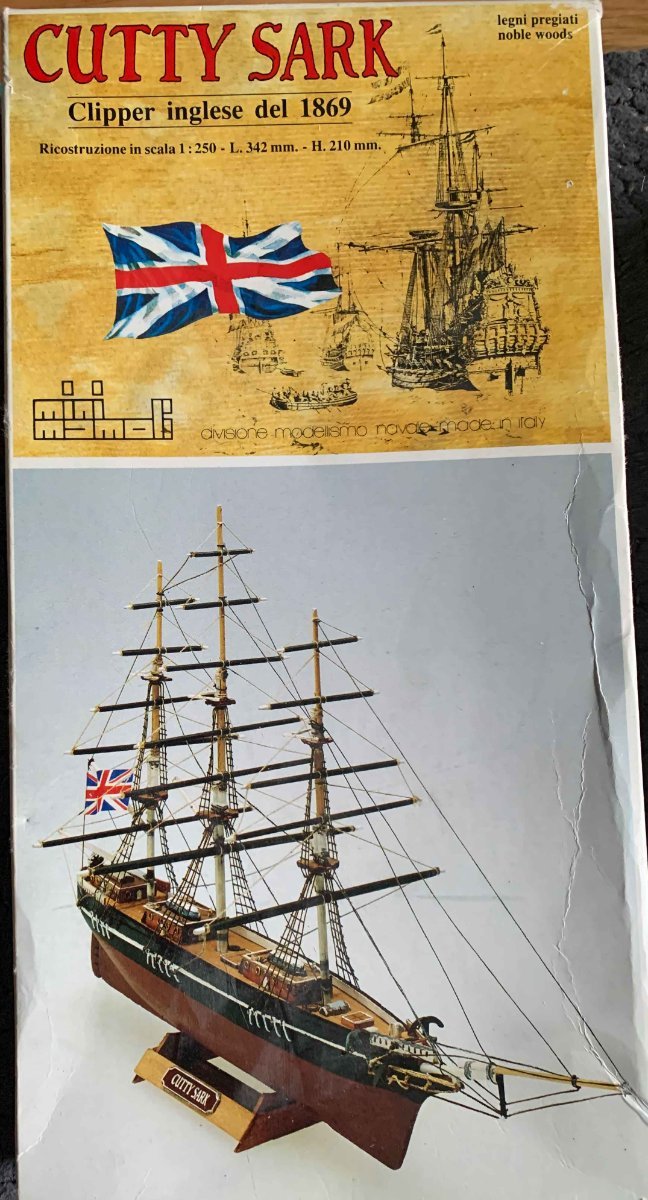
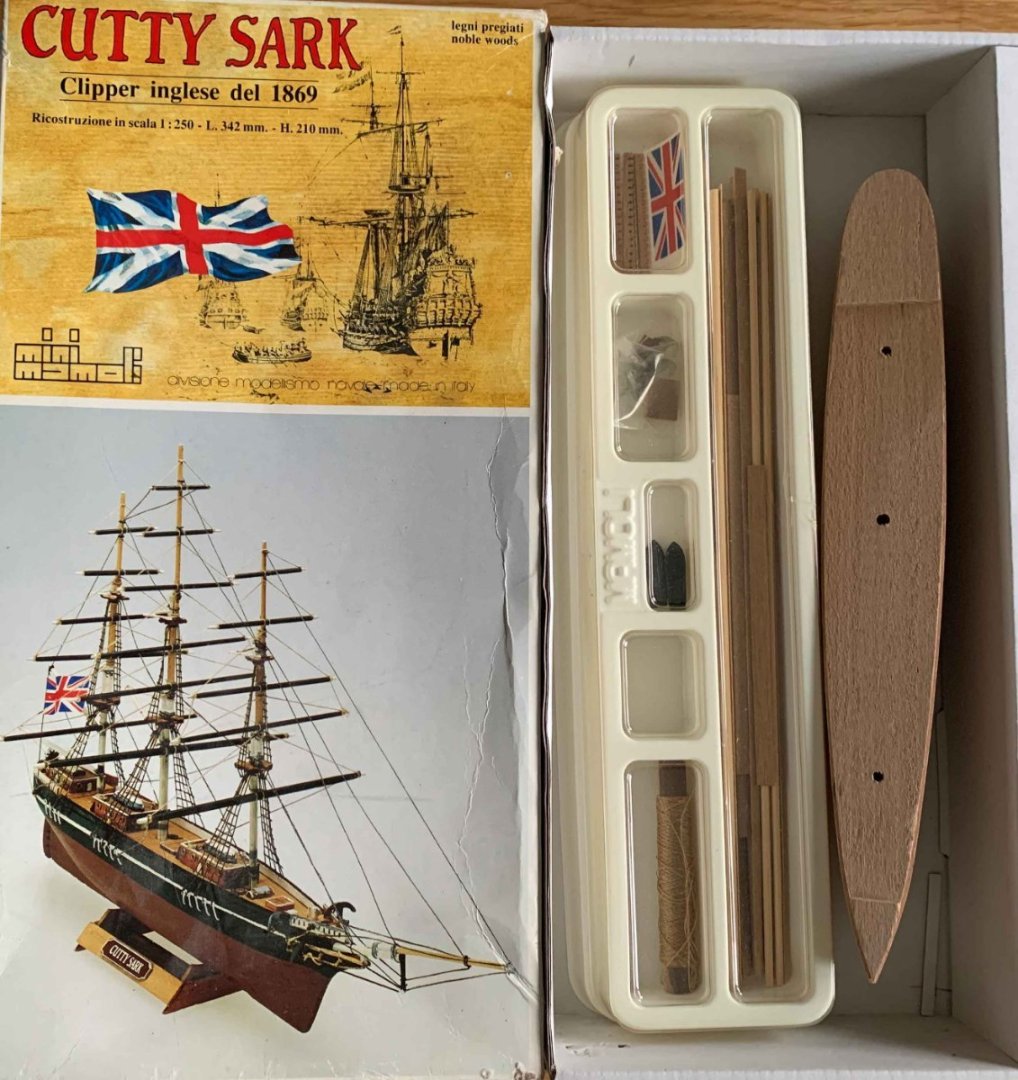
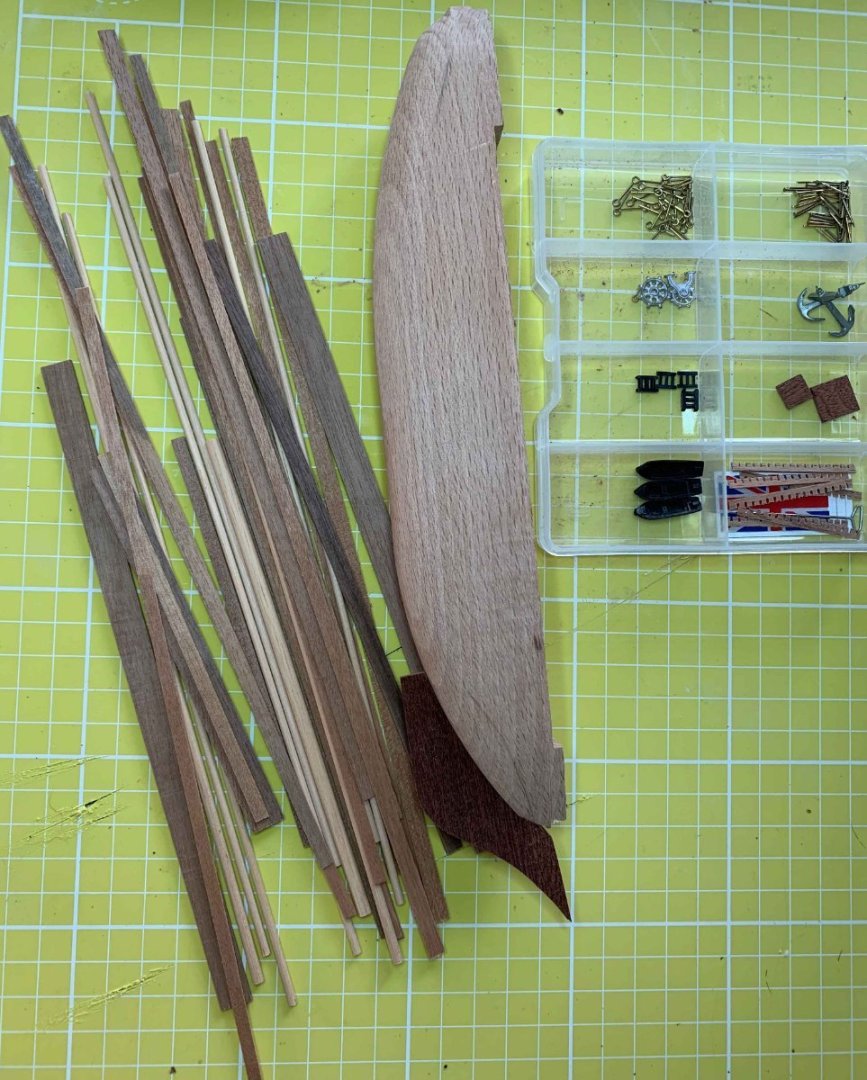
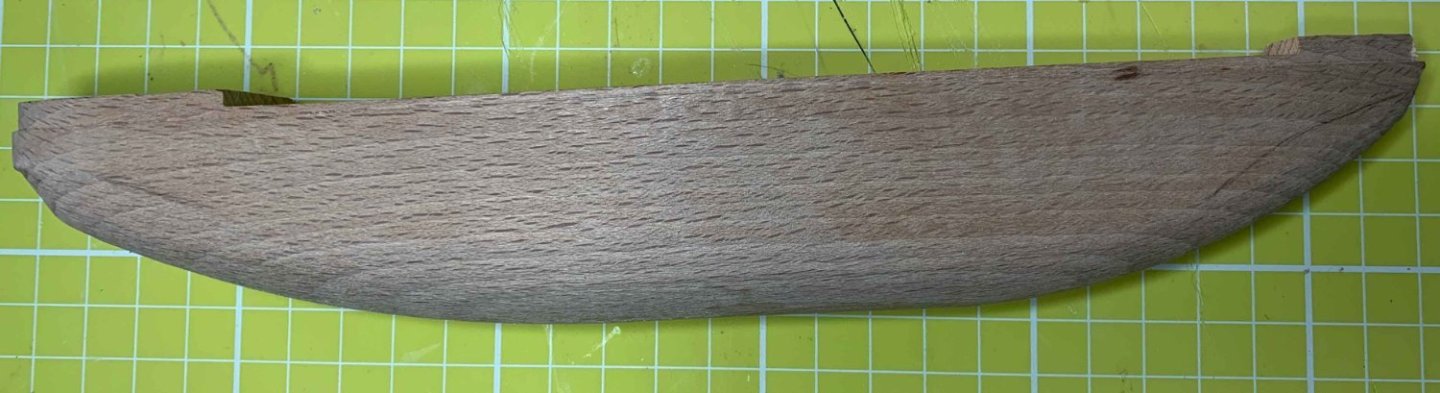
Decided on this from my small stash of models as it looks like as fun build without too much detail. As you can see, it's an older version - This is NOT the Dusek version which is much better. Box contents - not a huge amount! Solid hull will need some shaping. Wheel all wrong, added 1 ships boat, eyes, pins and 2 more ladders to the contents. The slotted pieces usually used for gratings are meant to be the guard railings. A small start, but much to do to get a reasonable shape 😅 With a bit of luck I may be able to pull this off - Lets see!

- 9 replies
-
- 5
-
-
- Cutty Sark
- Mini Mamoli
- (and 1 more)
-
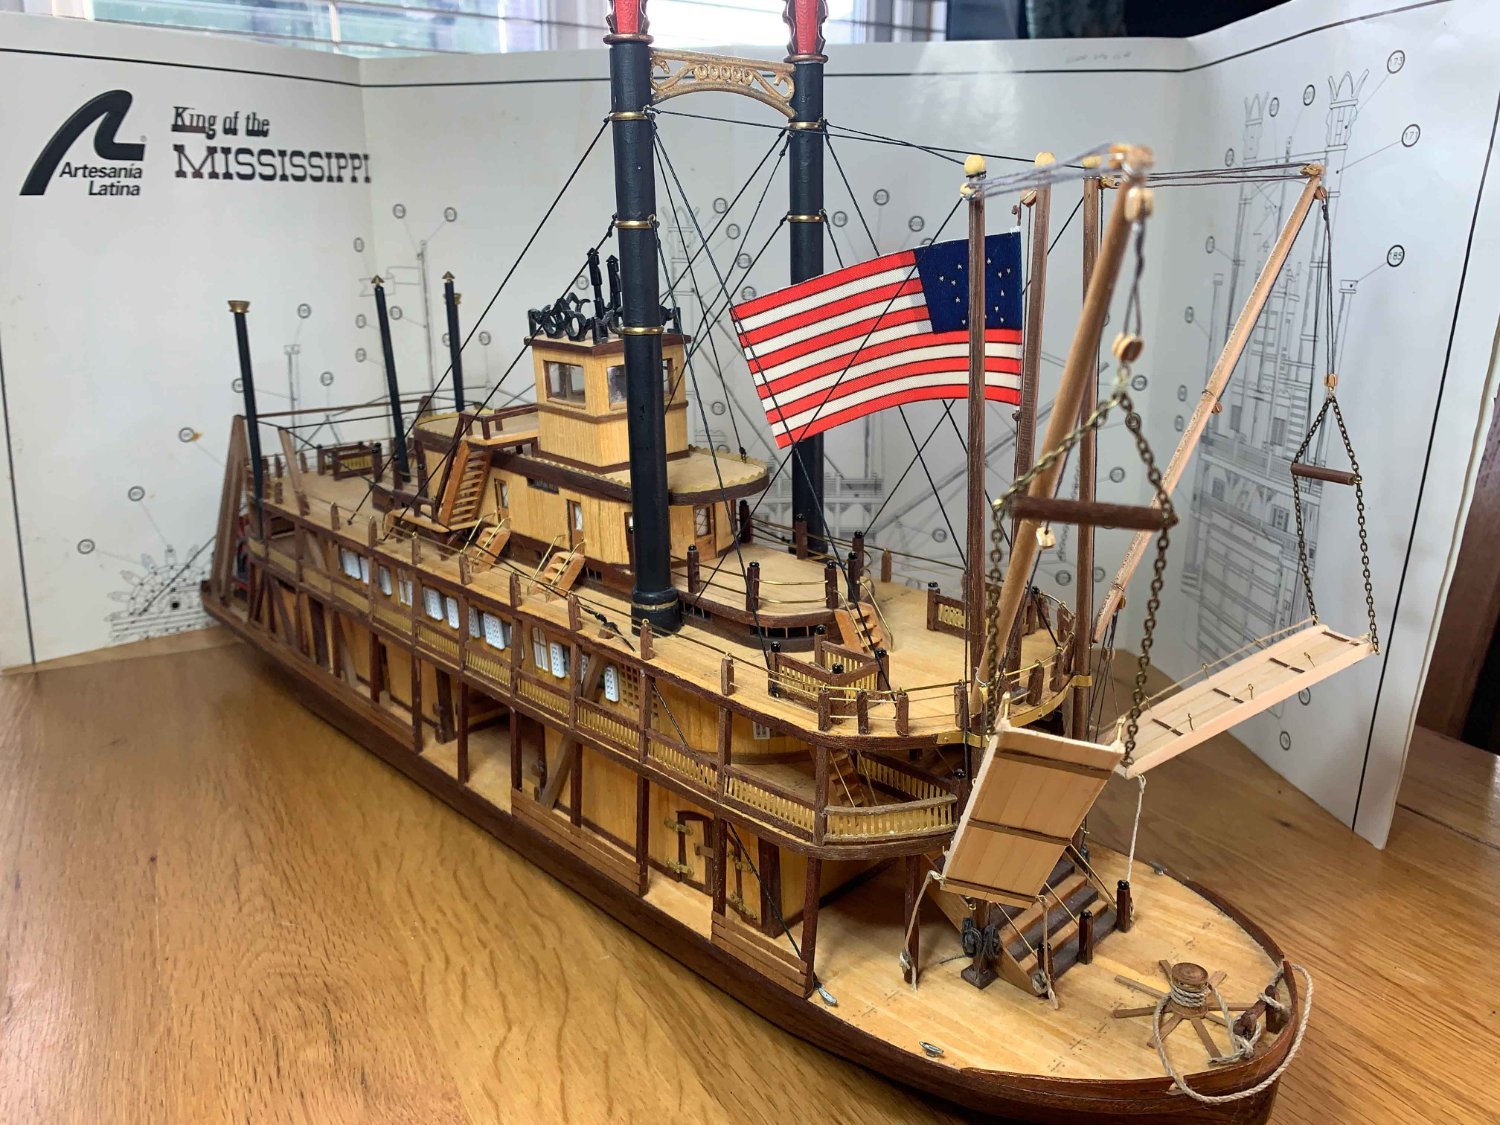
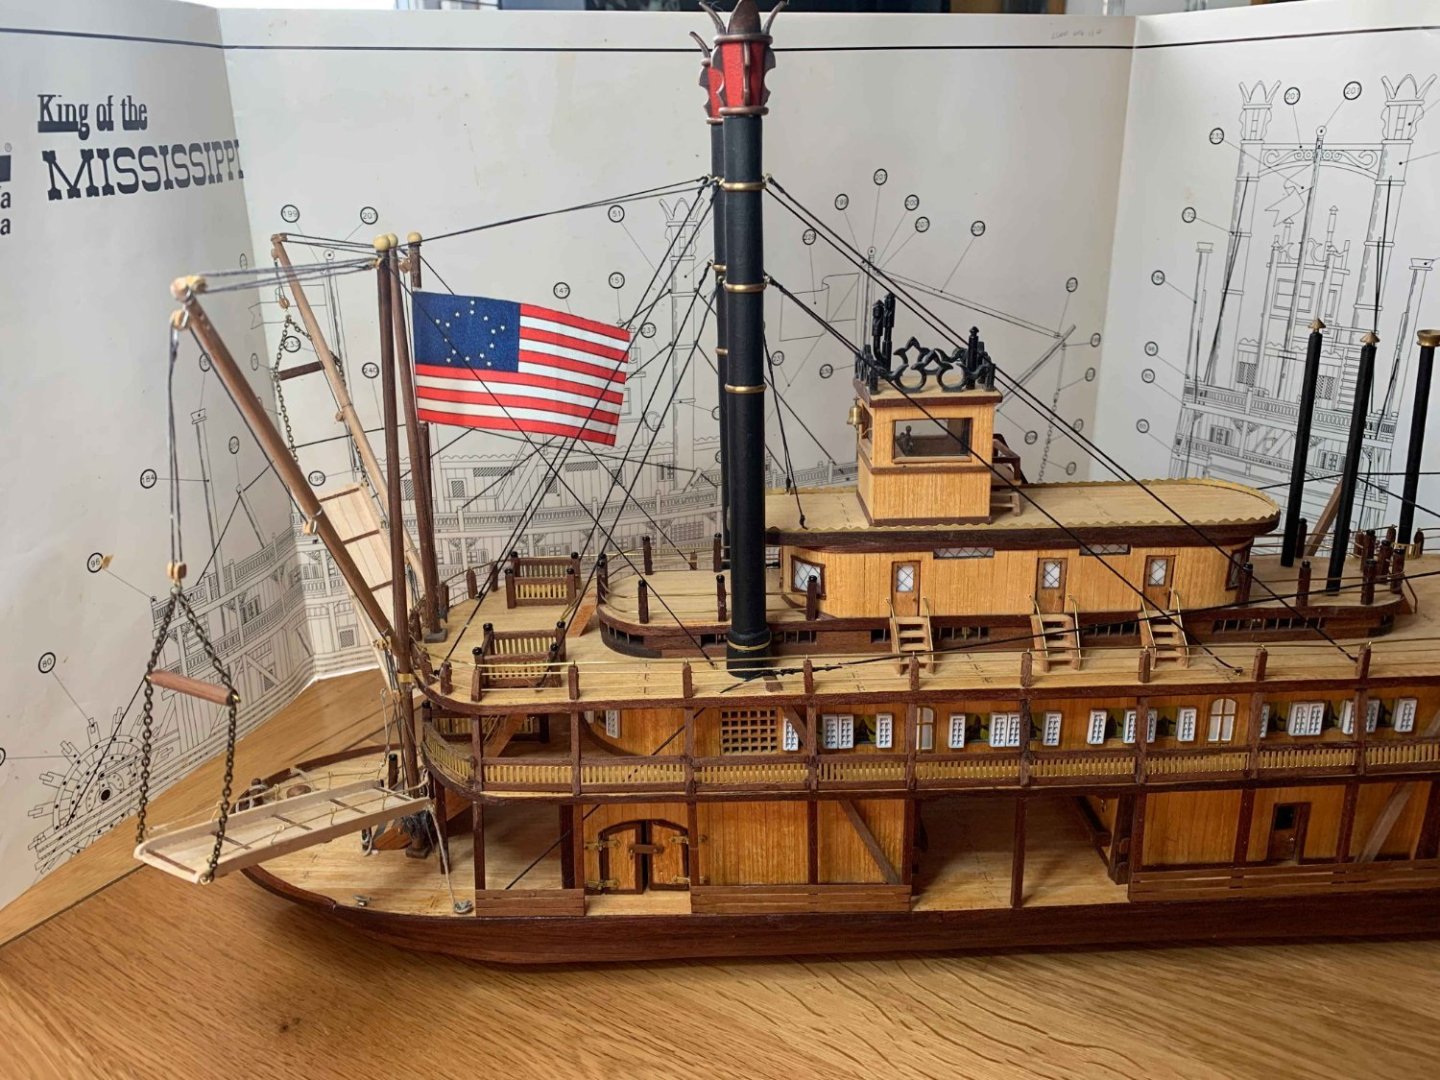
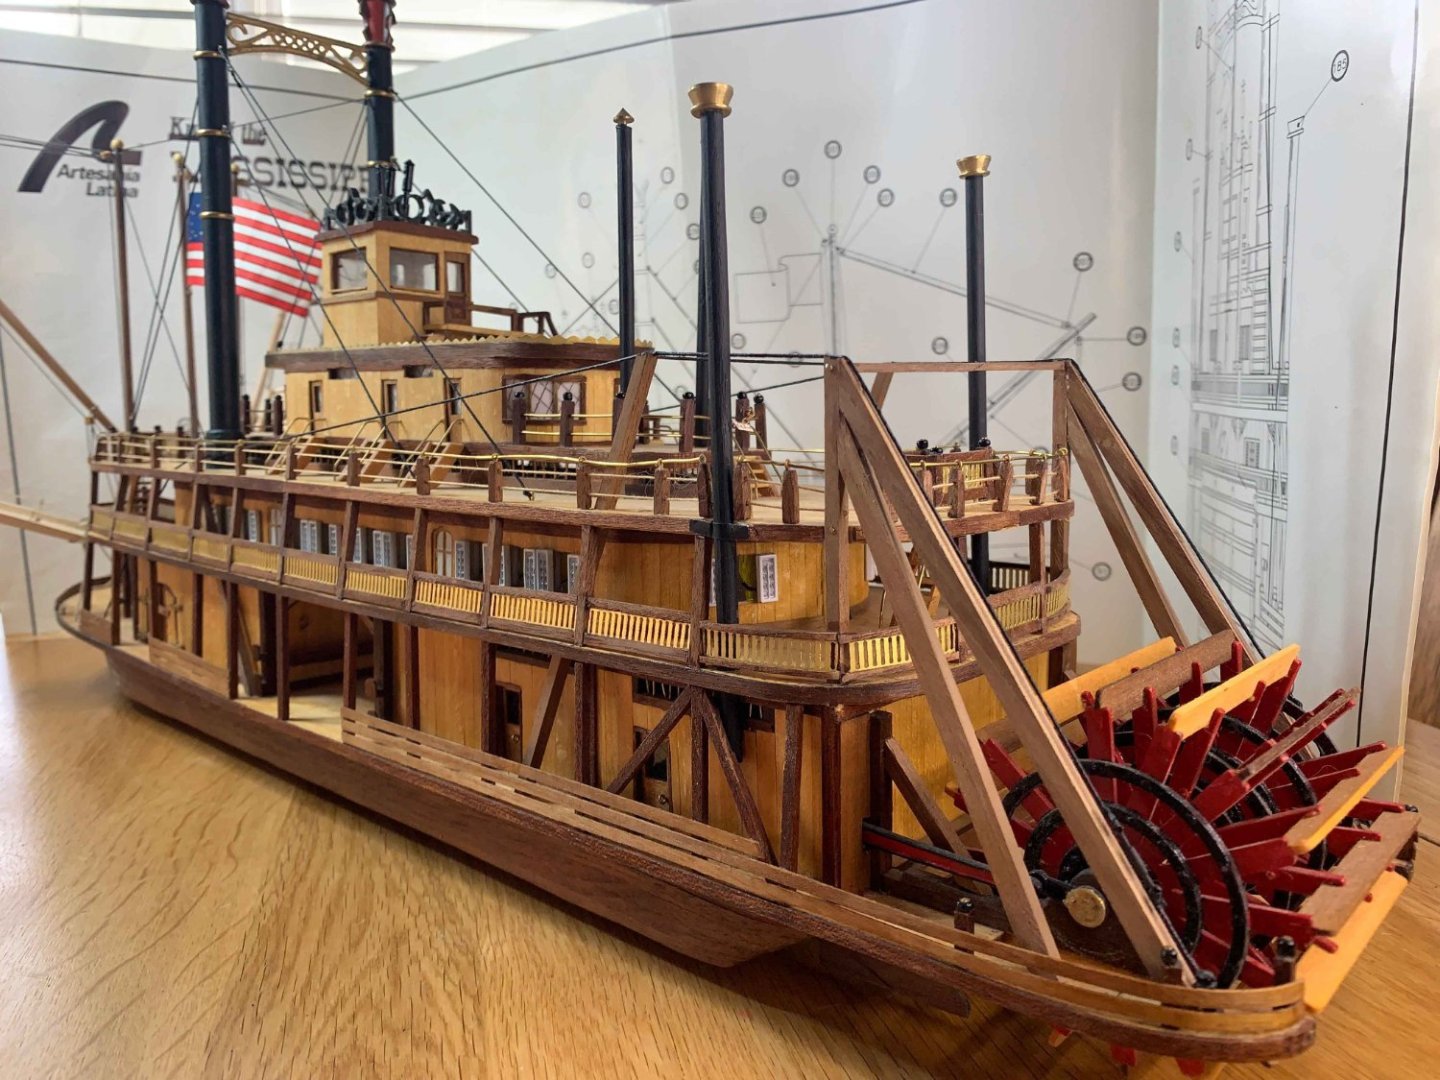
After2 years almost to the day since starting this log, I'm calling this finished. The upper deck brass rail was done in a single run which shows up a few flaws in the height of the posts and ended up pulling some of the loops off the top of the posts, as well as a few posts off the deck on the bow due to having to pull the curve back through the straight run and reproduce the new curve as it went through. The kinks in the straights have been sorted. The benches are a bit clunky, and the extra decorative works are a bit too fancy for my liking, so she's now a passenger / cargo boat. As a first build the things I've learned are many, as were the mistakes 😱. (Too many to list!) First and foremost, don't be afraid to ask for help or take advice from others who are more knowledgeable. Save all your scraps, you never know when they'll come in handy! Be patient, especially when bending things! Measure a number of times before cutting. Don't be afraid to make changes to something already made to make it look better. Walk away when it frustrates you - it'll come right later with fresh eyes. Try new things to extend your skill level, even if only a little you'll enjoy the challenge. If it's a generic model lidy who has looked in, liked, commented, given advice and helped me along the way, it's been greatly appreciated.


- 86 replies
-
- 13
-

-
-

-
- king of the mississippi
- artesania latina
- (and 2 more)
-
That's a very smooth hull there! Got me looking for this- hope I've got it correct. The original prototype build log by Chuck when designing this model had the frames as 1/32"sq. Doing a side a time he placed a stopper length of 1/32sq along the keel to help hold the ribs in place. The entire longboat build is pages 421 - 444 in the pdf available in the resources, Chucks prototype log, which I've got to help with myself understanding build processes. I've just read the official Syren instructions as well. I think you may have the same image retention for numbers as me, as on page 67 the 1/16 refers to the max thickness of the boats hull, and the next paragraph says to use the 1/32sq for the keel rib and side ribs just as the prototype log says, and is shown on the photo on p69. First time I read it I carried the 1/16 forward for the rib size. I've jumped in with both feet before and used the wrong thickness planking before reading at the next step about the right one. 😬 It'll be easier to bend the 1/32sq stuff 😃
-
Good idea @Auger ! I just have so many kit supplied "nails" I put one of those in and cut the head off, (I forgot on the stairs) plus I don't have a drawplate! 🤣
- 86 replies
-
- 1
-
-
- king of the mississippi
- artesania latina
- (and 2 more)
-
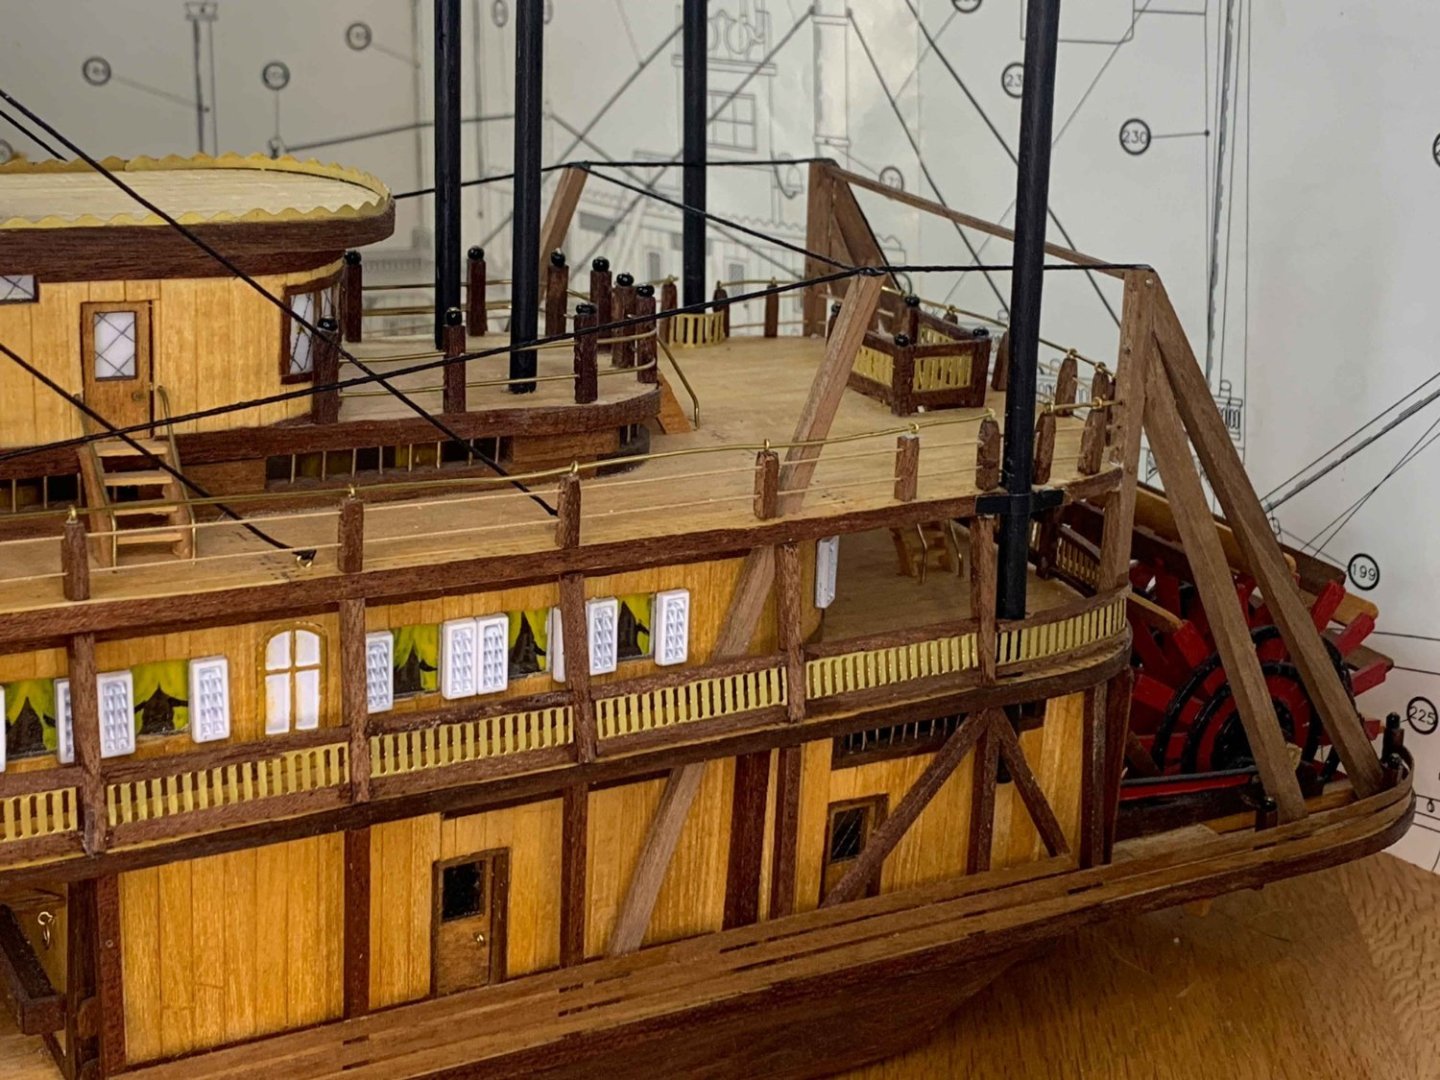
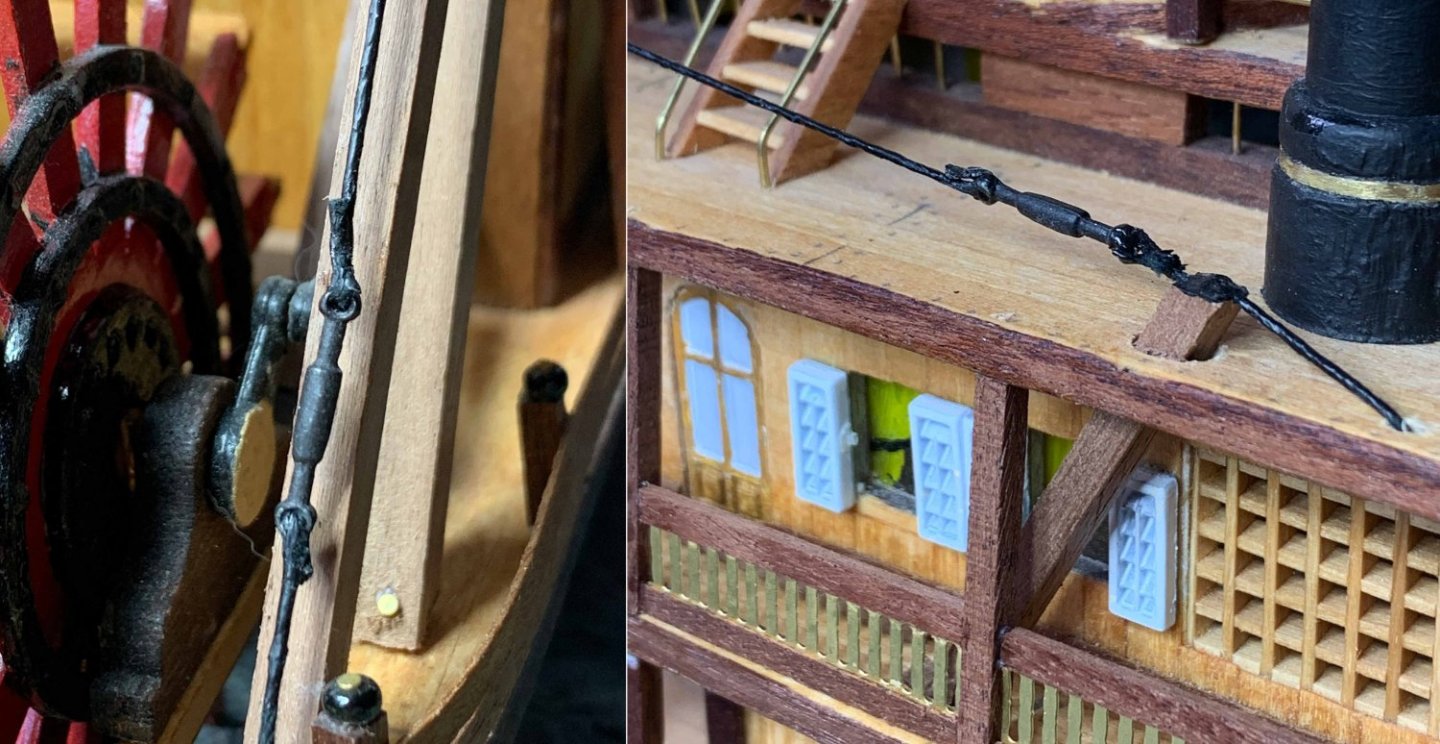
Thanks for the looks and likes. Thanks Bob - Inspiration, advice and ideas from others have all helped along the line, not forgetting the kind comments and encouragement too! Plus wanting to make this as individual as I could. Latest updates - not much! After installing the second crane I added a scrap strip of brass as a strengthener across them both using some copper pins I found. Whilst doing that I damaged the star newel post, which I didn't notice! (visible in both photos, now fixed) Second crane and stage added, lower angle to show it off a bit better. Tied off on one side at the deck edge. I've also made up and drilled out a further 17 posts, making 30 in all to be installed on deck 3. Cheers for now,

- 86 replies
-
- 3
-
-
- king of the mississippi
- artesania latina
- (and 2 more)
-
Looking good there. I like the door windows and vents .
-
Looking good there Jerry.👍 Not an electronics expert, but you may want to put a resistor in series to drop the voltage to the motor so it runs slower if you can still access the power line. The catching may be due to a sideways slip on the axle? Such a legend - I've watched many a program about him and his work. On a side note, I had to look up Falmouth, MA, just in case. A relative burned the original Falmouth, Massachusetts - now Portland, Maine, in a 1775 attack on the revolutionists of the town.
-
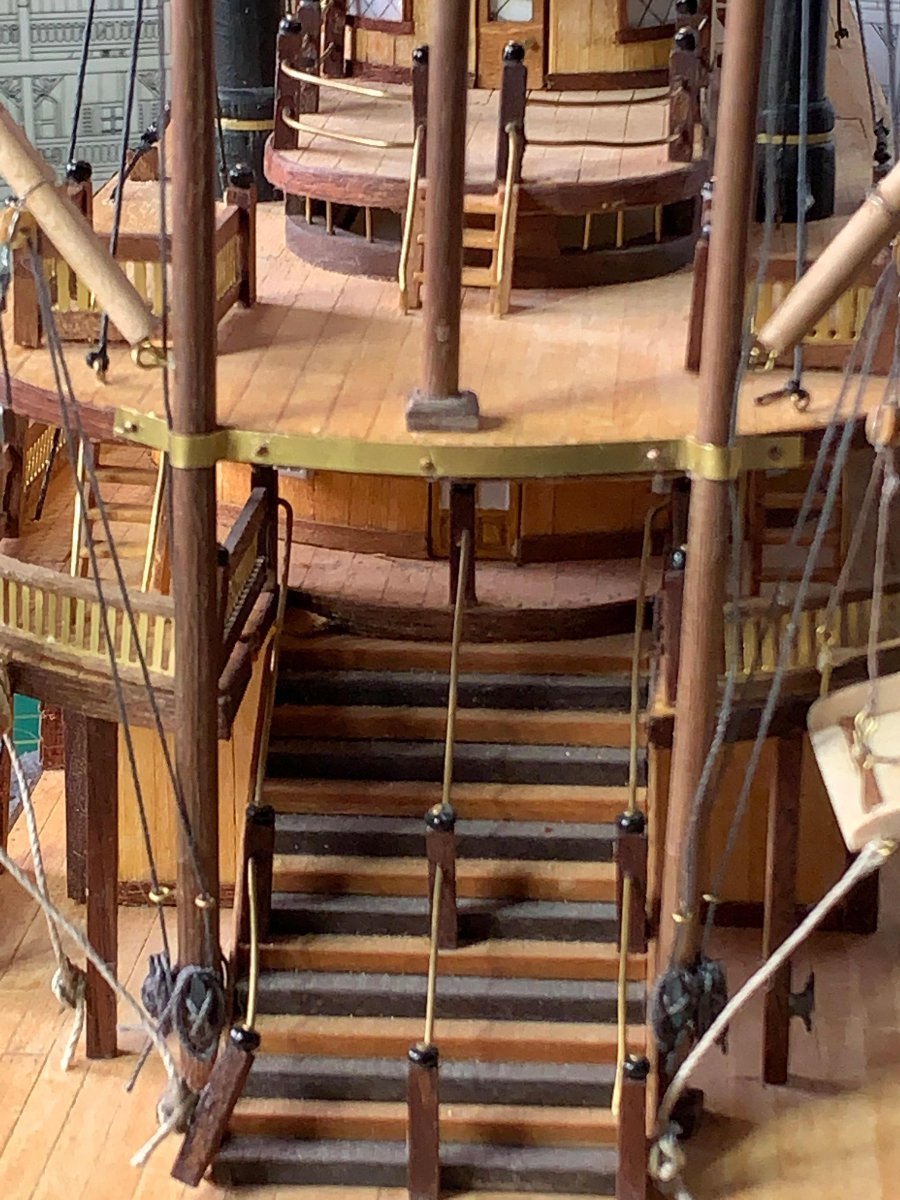
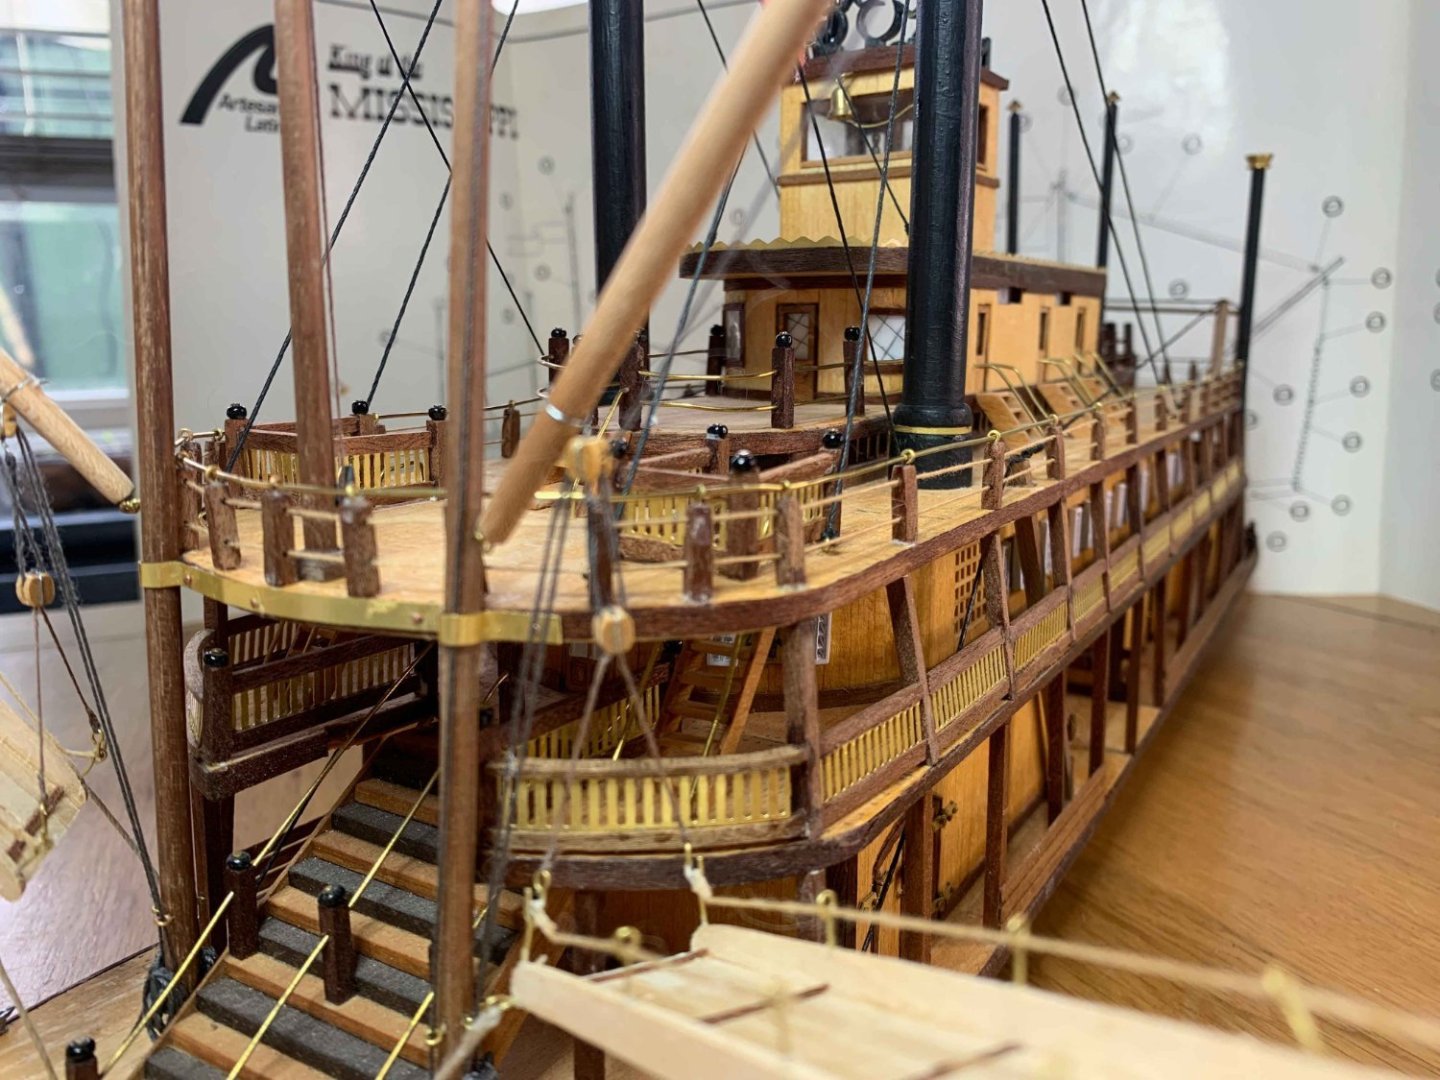
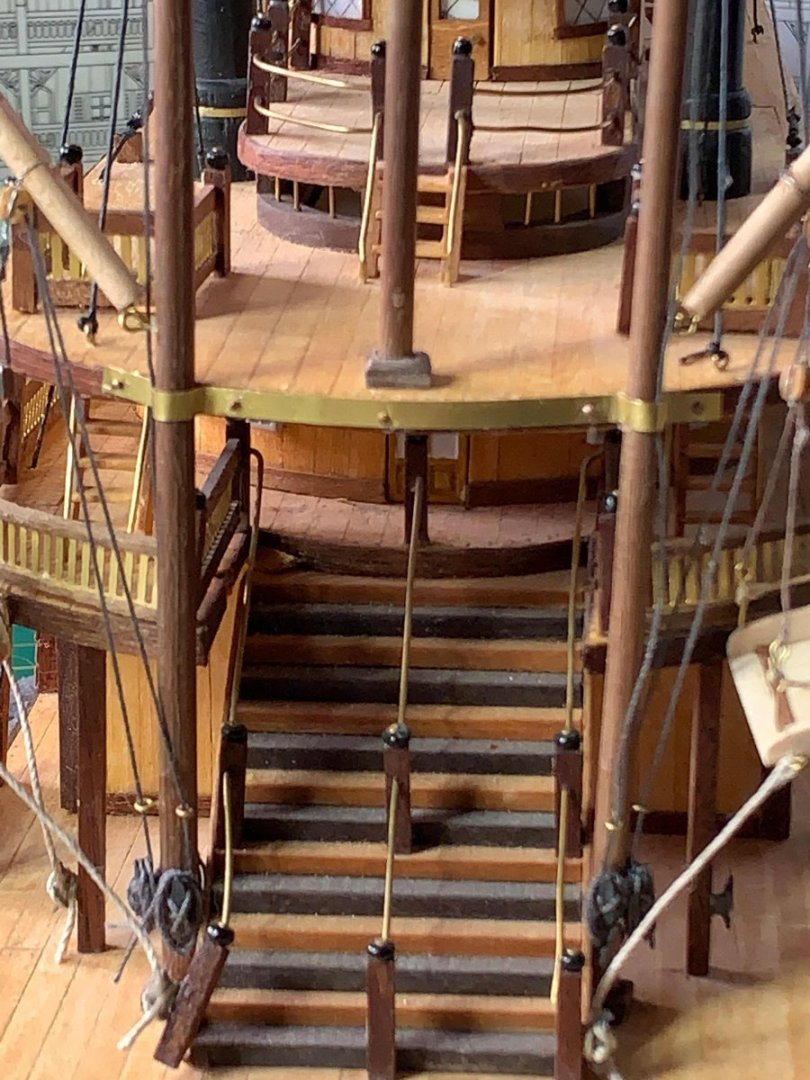
For the longer stair handrails I made a small jig, which kind of worked out but needed a tweak as the angles weren't quite the same everywhere. The smaller ones were bent by eyeball and pliers. The handrails round the deck - this was done by hand. When pinning the newels to the deck the ones on the curve were angled for the curve. I used a wire straightener and just started at one end, feeding the wire through and giving a slight tweak on the bend to help it round. Once fed through I found it only needed another slight curve with fingers. It's not perfect but it works for me. Still got to check out my newels for proper height ( I'm using HO scale figures for this. AL do have a set of period figures for the King now), and hole levels 😵 for the rest of the deck. Should have made a jig in the first place!
- 86 replies
-
- 3
-
-
- king of the mississippi
- artesania latina
- (and 2 more)
-
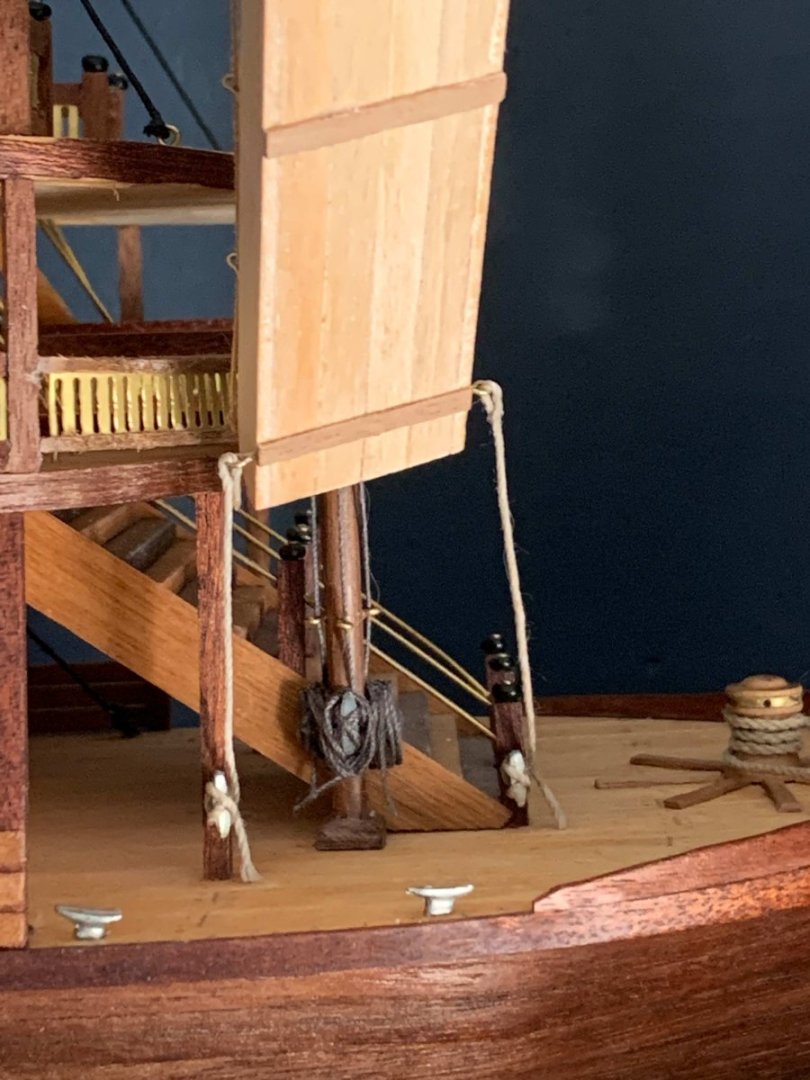
Attatching the blocks to the masts. My lesson learned - don't use wire - it's too stiff to allow the blocks to move, and will snap at the twists. I used it as what I thought would be a quick and secure method, but rope would have taken around the same time and probably looked better. Simply put, the block is attached to the masts by a rope that goes around the outside of it (strop) which can be fitted with an eye or hook as needed, and the rope you pull goes through the hole (sheave). Sorry if above sounds a bit simplistic. Looking through other logs here the simplest method is to put an eye into the mast to tie the block to, or after fixing the rope to the block tying it straight to the mast. How realistic you get is all down to yourself. I'm not at that stage yet, and still learning. There are many masters of this art, but I'm not one of them! Check some of the other King build logs, or logs for the Victory, Pegasus, Cutty Sark etc for ideas on ways to do it or I've put some links below on on previous questions. Link to logs on Seizing , link to logs on Stropping many of which show real world and on model worked examples. The blocks AL supplies are not the best, look at Chucks Syren Blocks if you want realism! I was lucky and found some half decent blocks in my spares, and I put a slight groove in the sides to take the strop so it wouldn't slide off.
- 132 replies
-
- 2
-
-
- King of the Mississippi
- Artesania Latina
- (and 1 more)
-
Tips for the Second-Time Model Builder
Bob Fraser replied to Melissa T.'s topic in Wood ship model kits
Excellent list! Might I add another or two? Learn from any mistakes made in your previous or current model. If you're offered advice on a specific that you don't know or are unsure about for your model by someone, look into it , and don't be afraid to go back and re-do or change if applicable and possible. I know I'm still only on my first, but both have very much applied to me! 🤣 -
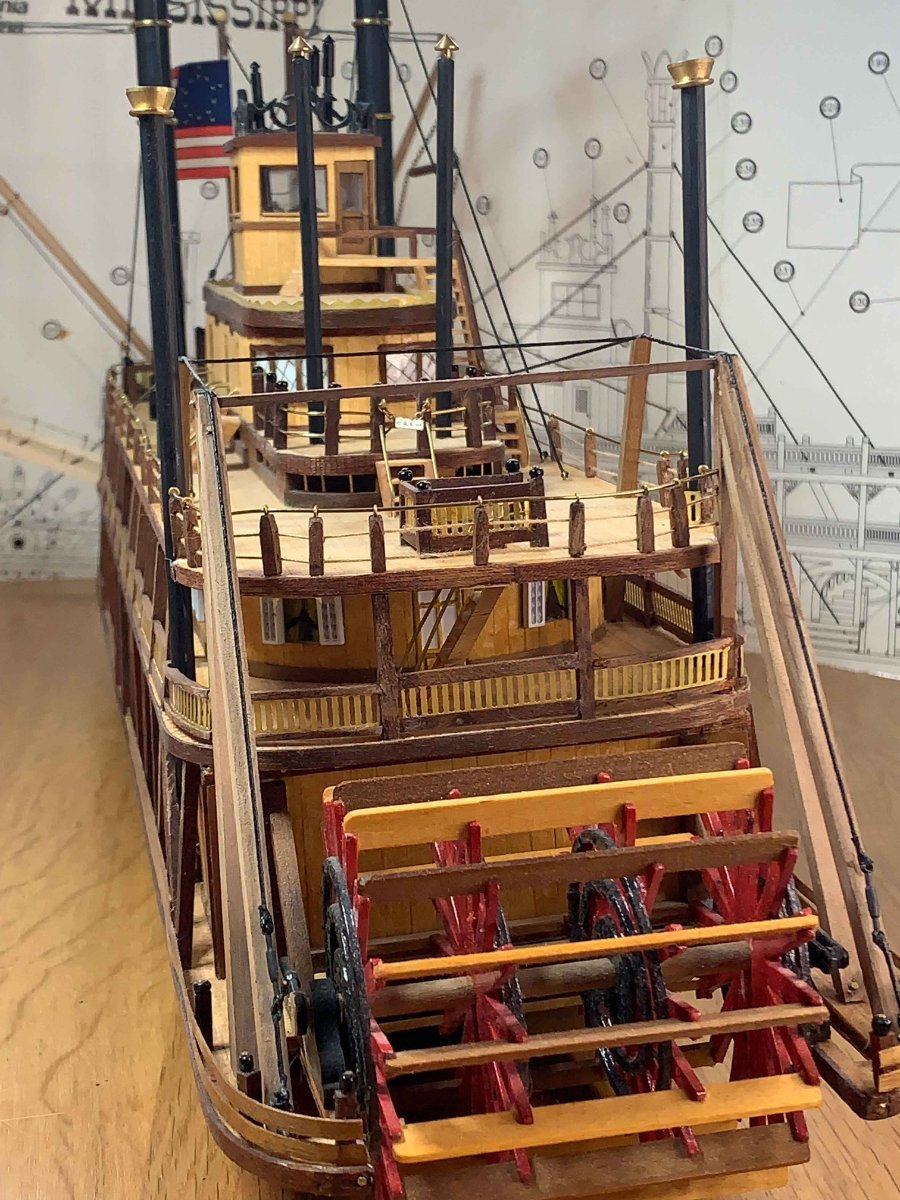
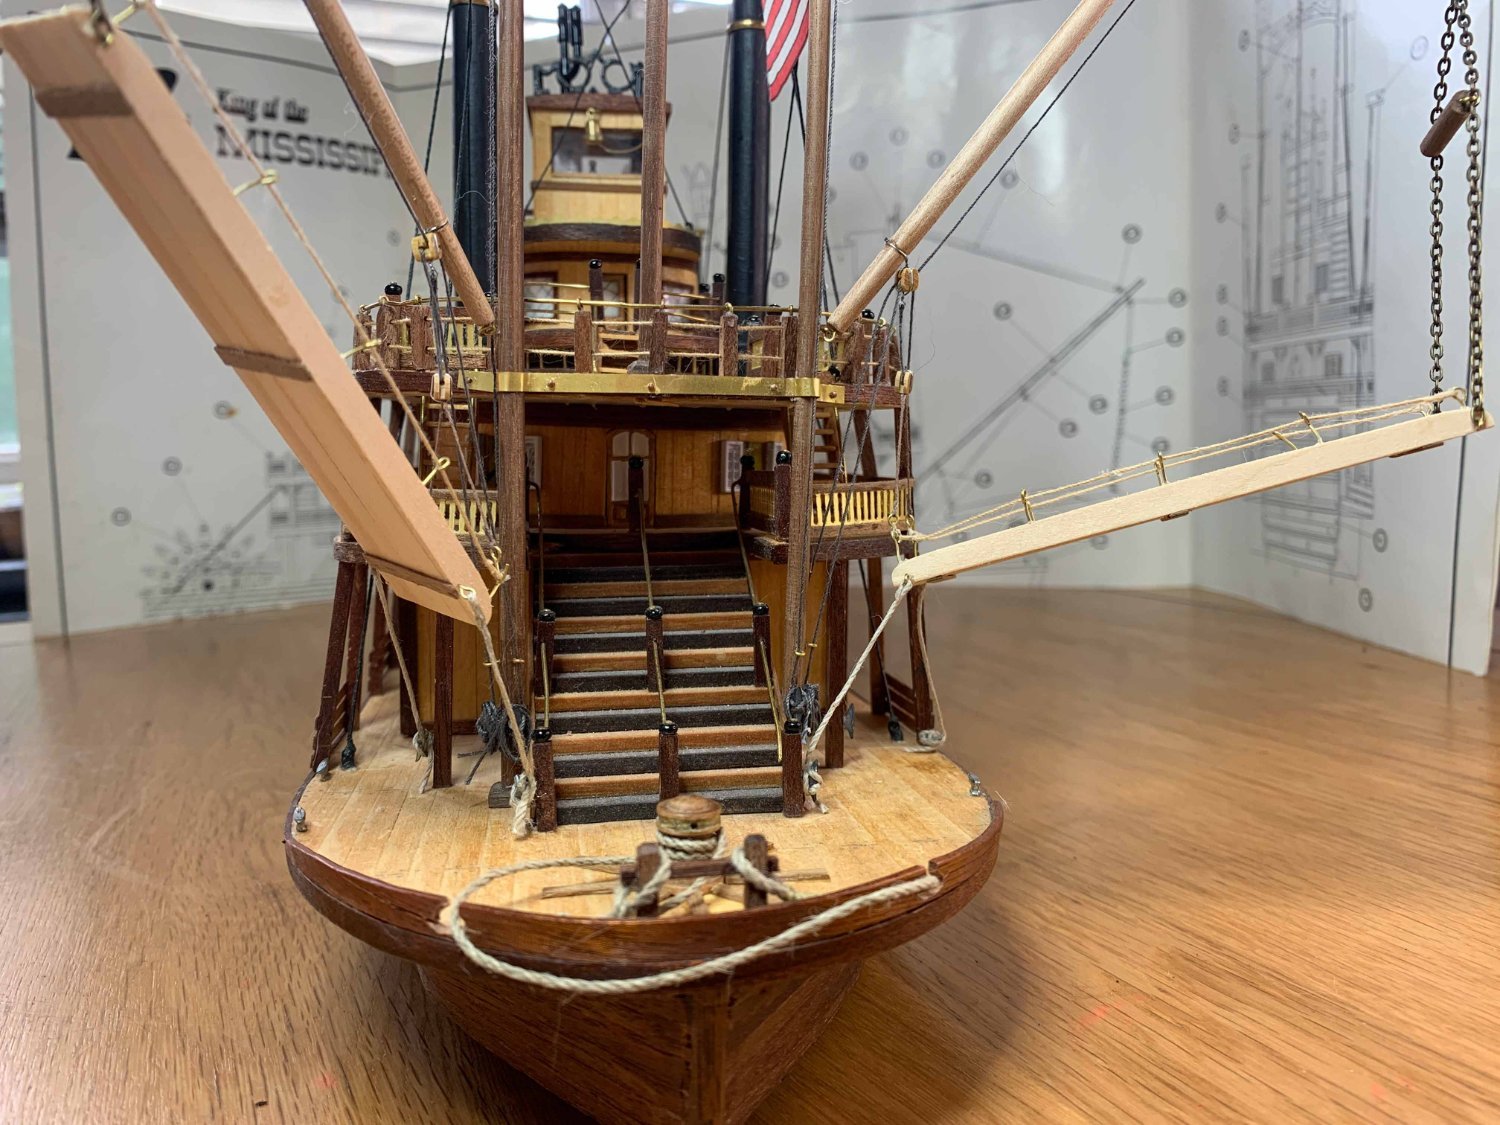
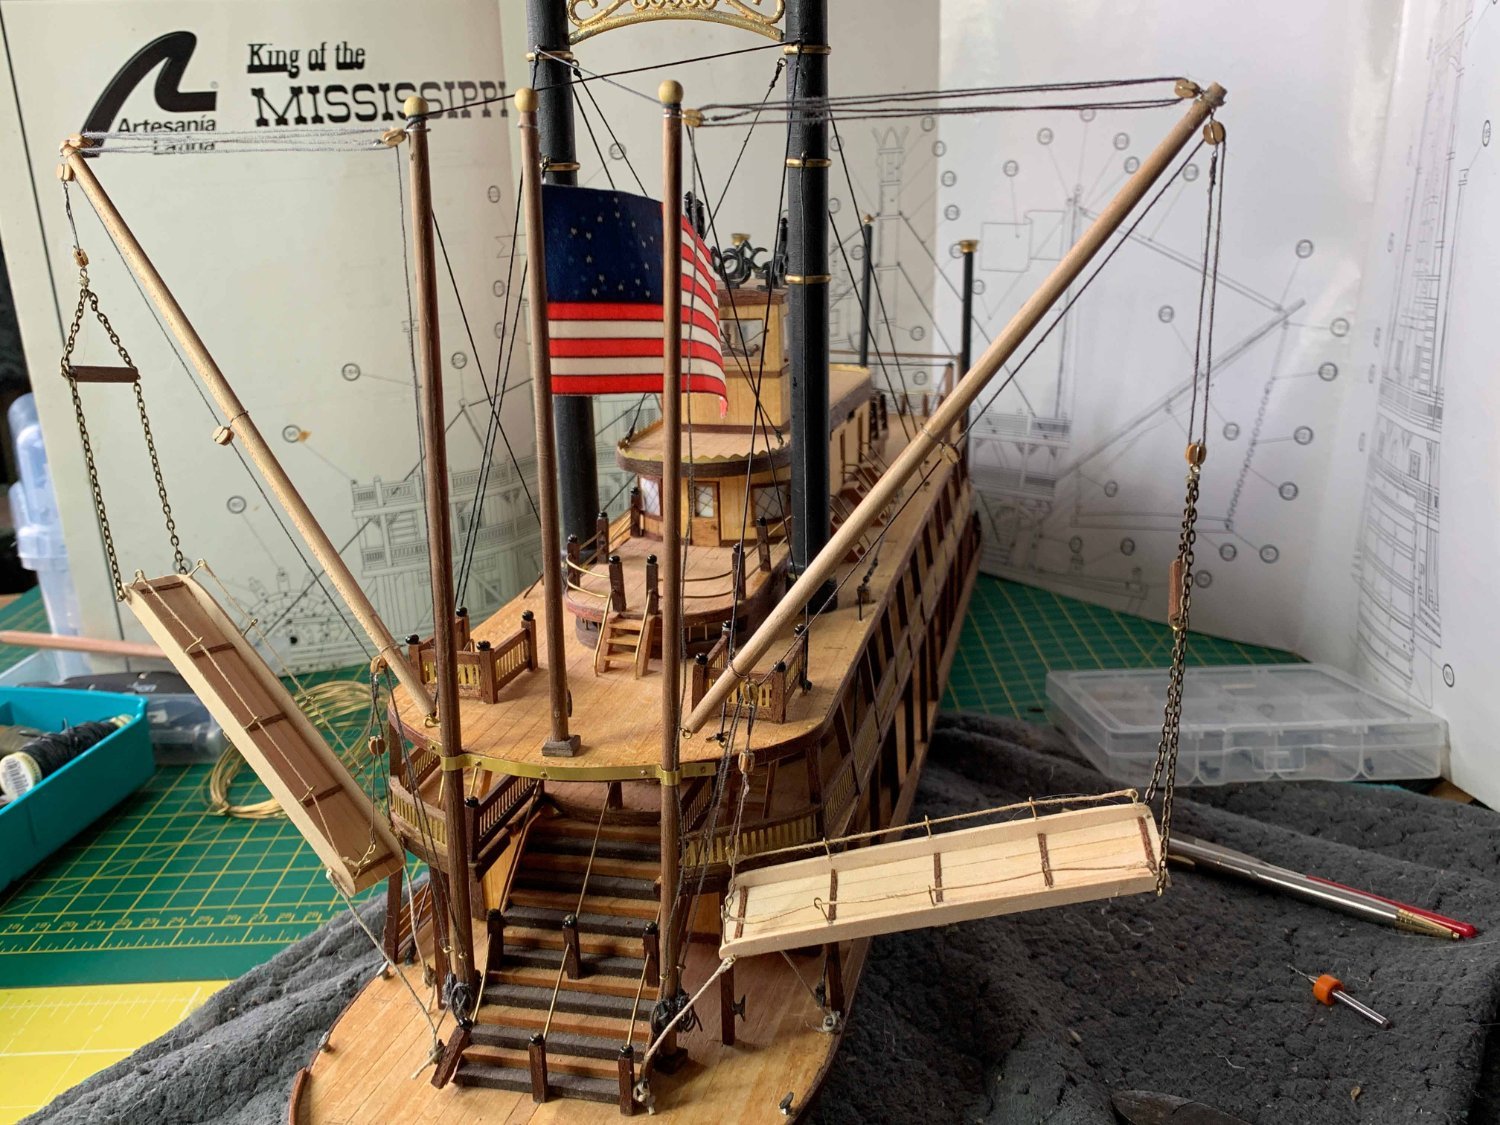
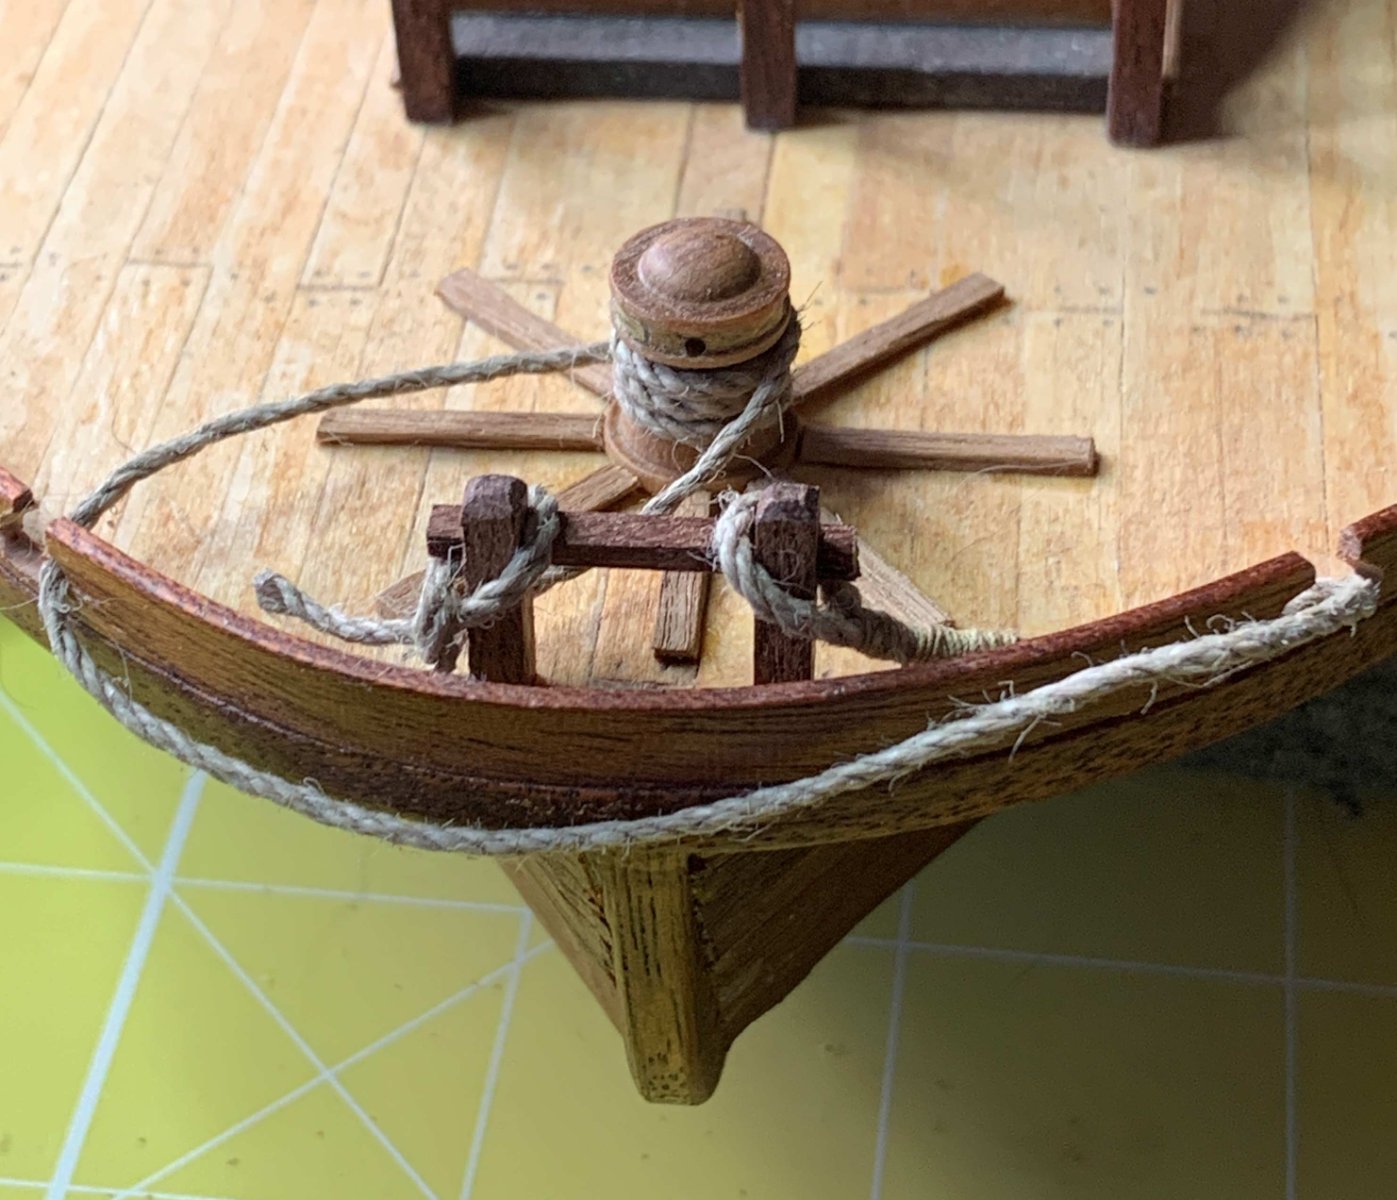
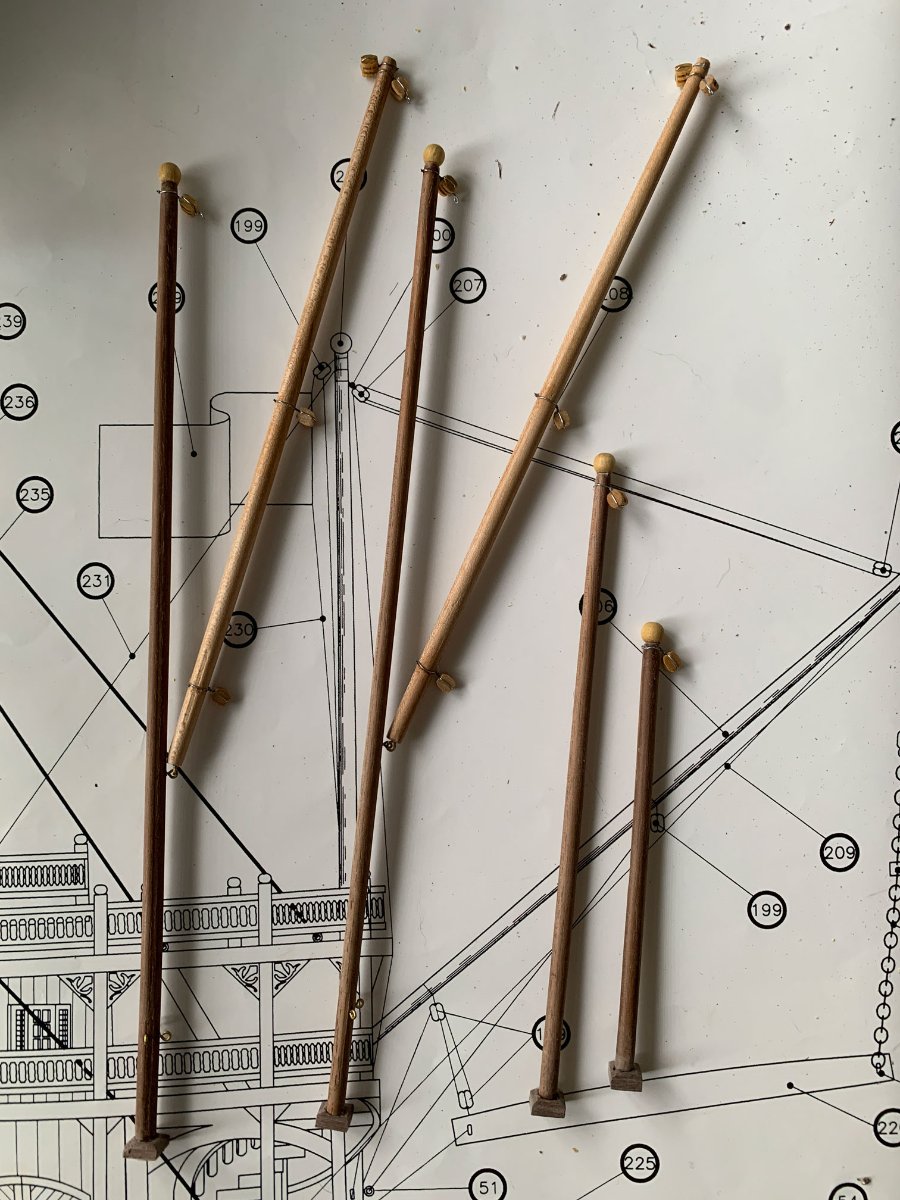
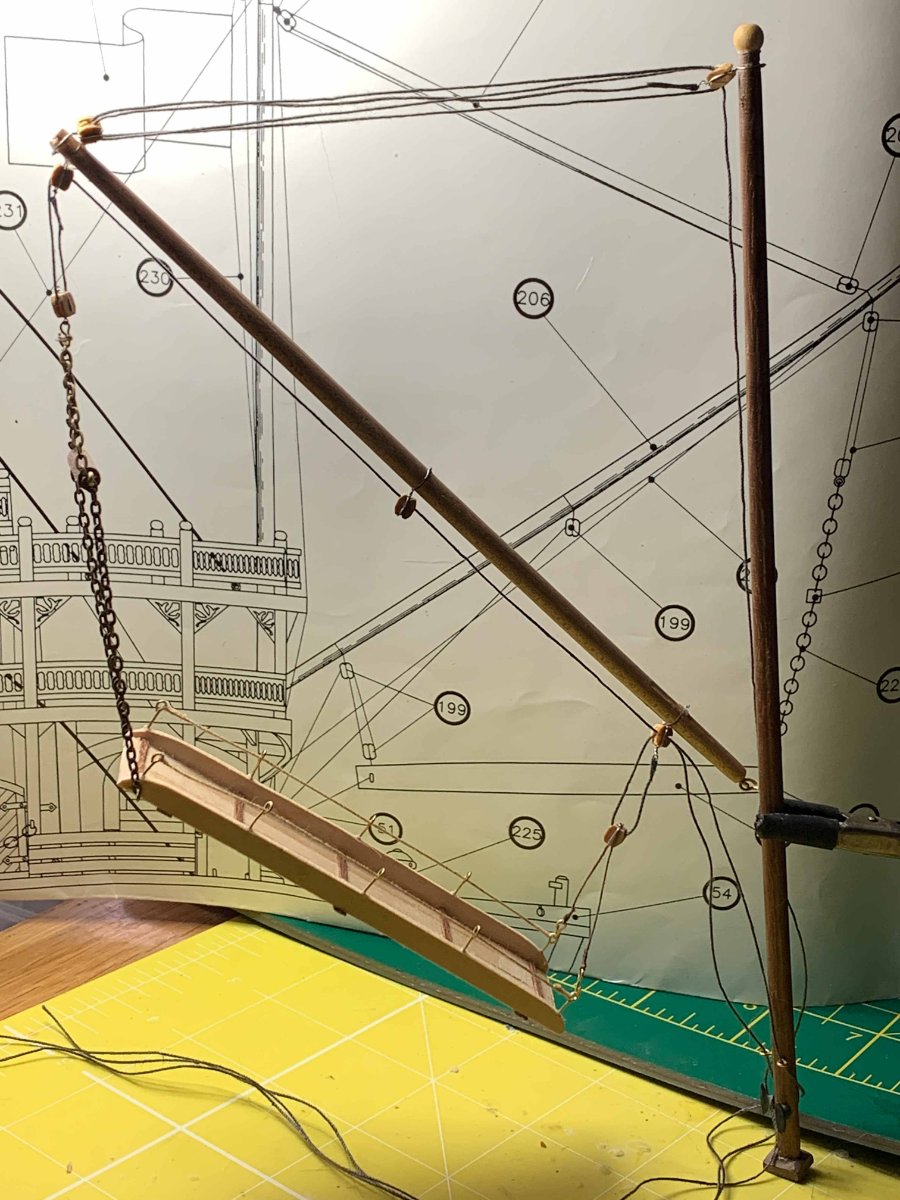
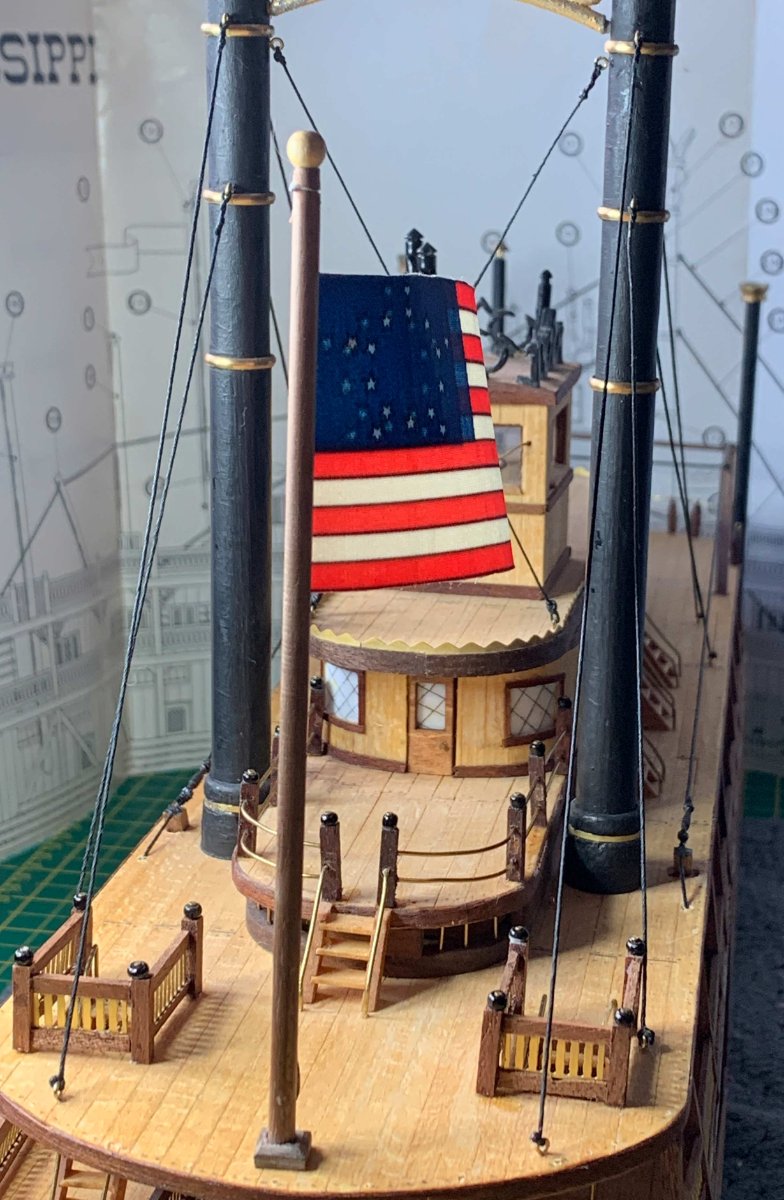
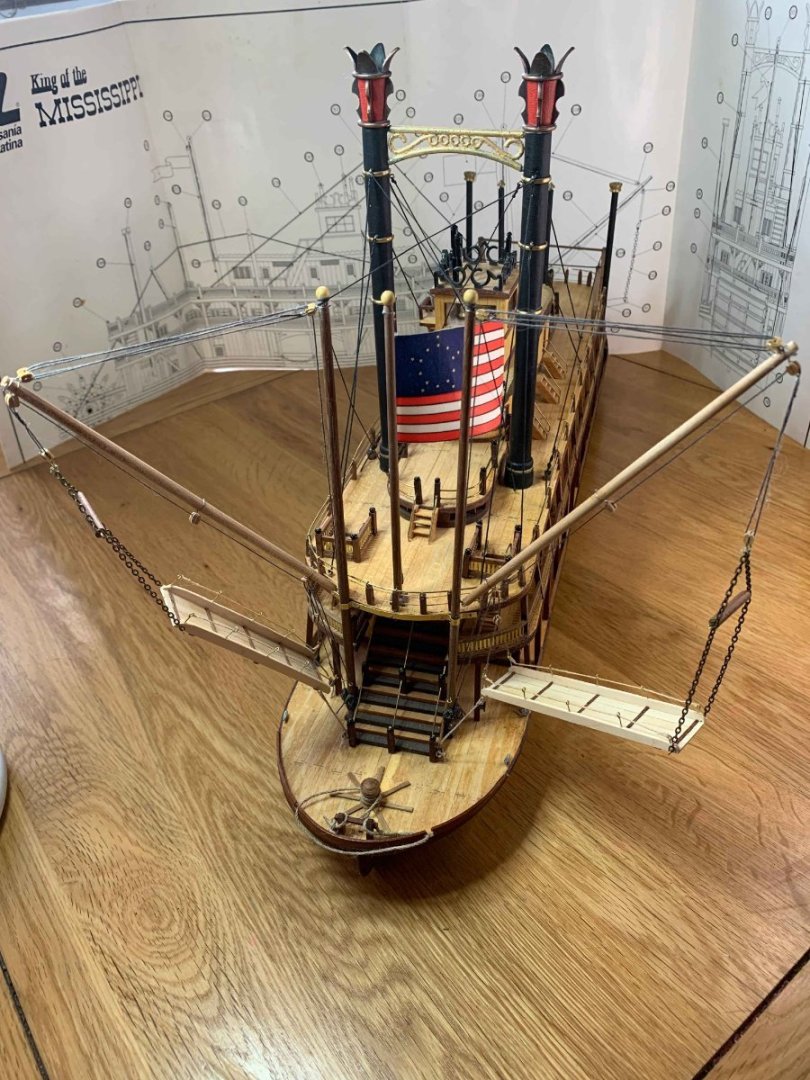
So a weeks gone by, but not quite bye-bye 😄 I did the bow area - capstan, and bitts made up the stage cranes and masts The lower part of the stage is connected to the haul with a removable double hook lift to allow for stowing to th mast after lowering - gets it out of passengers way. Added cleats instead of the rings AL say to use. I didn't really like the clunky crimps on the ropes so they're all replaced - cats had had a chew again anyway! Resited the cleat for the flag to tighten the rope, and installed the flagpole. Another change - I found some turnbuckles in my stash of spare bits I'd bought many years ago and forgotten about. These have now been added into the hog chains. One each fore and aft. Also installed the stage crane on one side Added the stage bracing ropes, changed the eyes for cleats on the uprights and lashing points on deck. Tried to do a proper job on the cleat lashings and coils, they look better from a normal viewing distance. 😂 Thanks for looking in!


- 86 replies
-
- 5
-
-
- king of the mississippi
- artesania latina
- (and 2 more)
-
You could try adding some 0.5mm planking round the wheelhouse top just wide enough to hide the largest gap. I put in some clear plastic sheet into a rebate in the walls, but that was before the window lining went on. Its going to be an awkward job with everything put together. That just makes it your ship, and different to all the others! I think I recall mine not fitting too well, best bet could be to sand the partners thinner all round to get them to fit. It could be the photo and my eyesight, but is the upper deck not quite centred? I do like the bronzing accent to the whistle - makes it stand out.
- 132 replies
-
- 2
-
-
- King of the Mississippi
- Artesania Latina
- (and 1 more)