DONATION DRIVE - SUPPORT MSW - DO YOUR PART TO KEEP THIS GREAT FORUM GOING!
×


Bob Fraser
-
Posts
291 -
Joined
-
Last visited
Content Type
Profiles
Forums
Gallery
Events
Everything posted by Bob Fraser
-
 Hi Peter I'm along to watch as I've this one on the shelf at the moment, at the same stage as yourself with the hull. Complete lack of time at the moment means all my builds are on hold. :-( I don't know if you've looked at the NMM site but they have 14 technical drawings and a 1947 model that show a lot of detail. Link -> Endeavour at NMM Anatomy of the Ship Endeavour by Marquardt (Conway Press) is a good book, but you'll need to look around for a reasonable price near you as they're going for £35 to an incredible £230! All the best, Bob
 -
A nice clean job, well done. Looks really good and the people do bring it to life!
-
Well done! Tricky them there stairs..... even AL has discontinued them and brought back the straight ones again.
-
My bad - It must have been perspective (or my old eyes 😀 )! As you said, only just perceptible when pointed out. The stern of the Mersey Ferry used to be my favourite place to be when travelling to work, watching the wake and the gulls, not to mention the other shipping. Gave me vertigo if I looked down for too long!
- 109 replies
-
- 1
-

-
- Finished
- Artesania Latina
- (and 1 more)
-
Looking the part, Bob. I think a lot of others have had such rants - let off a bit of steam and you definately feel better! 🤯 😁 Wood shortage and poor instructions seem to have been an AL consistency, and I think I had 3 goes at getting those staterooms right! Maybe a little late for you now, but I found that the sideways tilt on the chimneys was caused by the upper crossbeam on the metal part being too long as it hits the fixing spike of the crowns. As Mr Punch would say when he triumphs "That's the way to do it!" Cheers, Bob
- 109 replies
-
- 2
-
-
- Finished
- Artesania Latina
- (and 1 more)
-
That's great news, and a fast response too! The AL instructions say 66 railings (part 211) are needed and I counted 70 in the PE sheets. That should leave me with 8 spares - lets see what happens. All the best!
-
Hi Bob. Did you get two PE sheets of railings, one large sheet, one small? Let me count how many are needed for the 1st and 2nd decks, and I can send you the spares I have, if this helps any. As you know I messed up the third deck myself, and it has no PE on it. It'll be tomorrow as I can't pull the bits out at the moment.
-
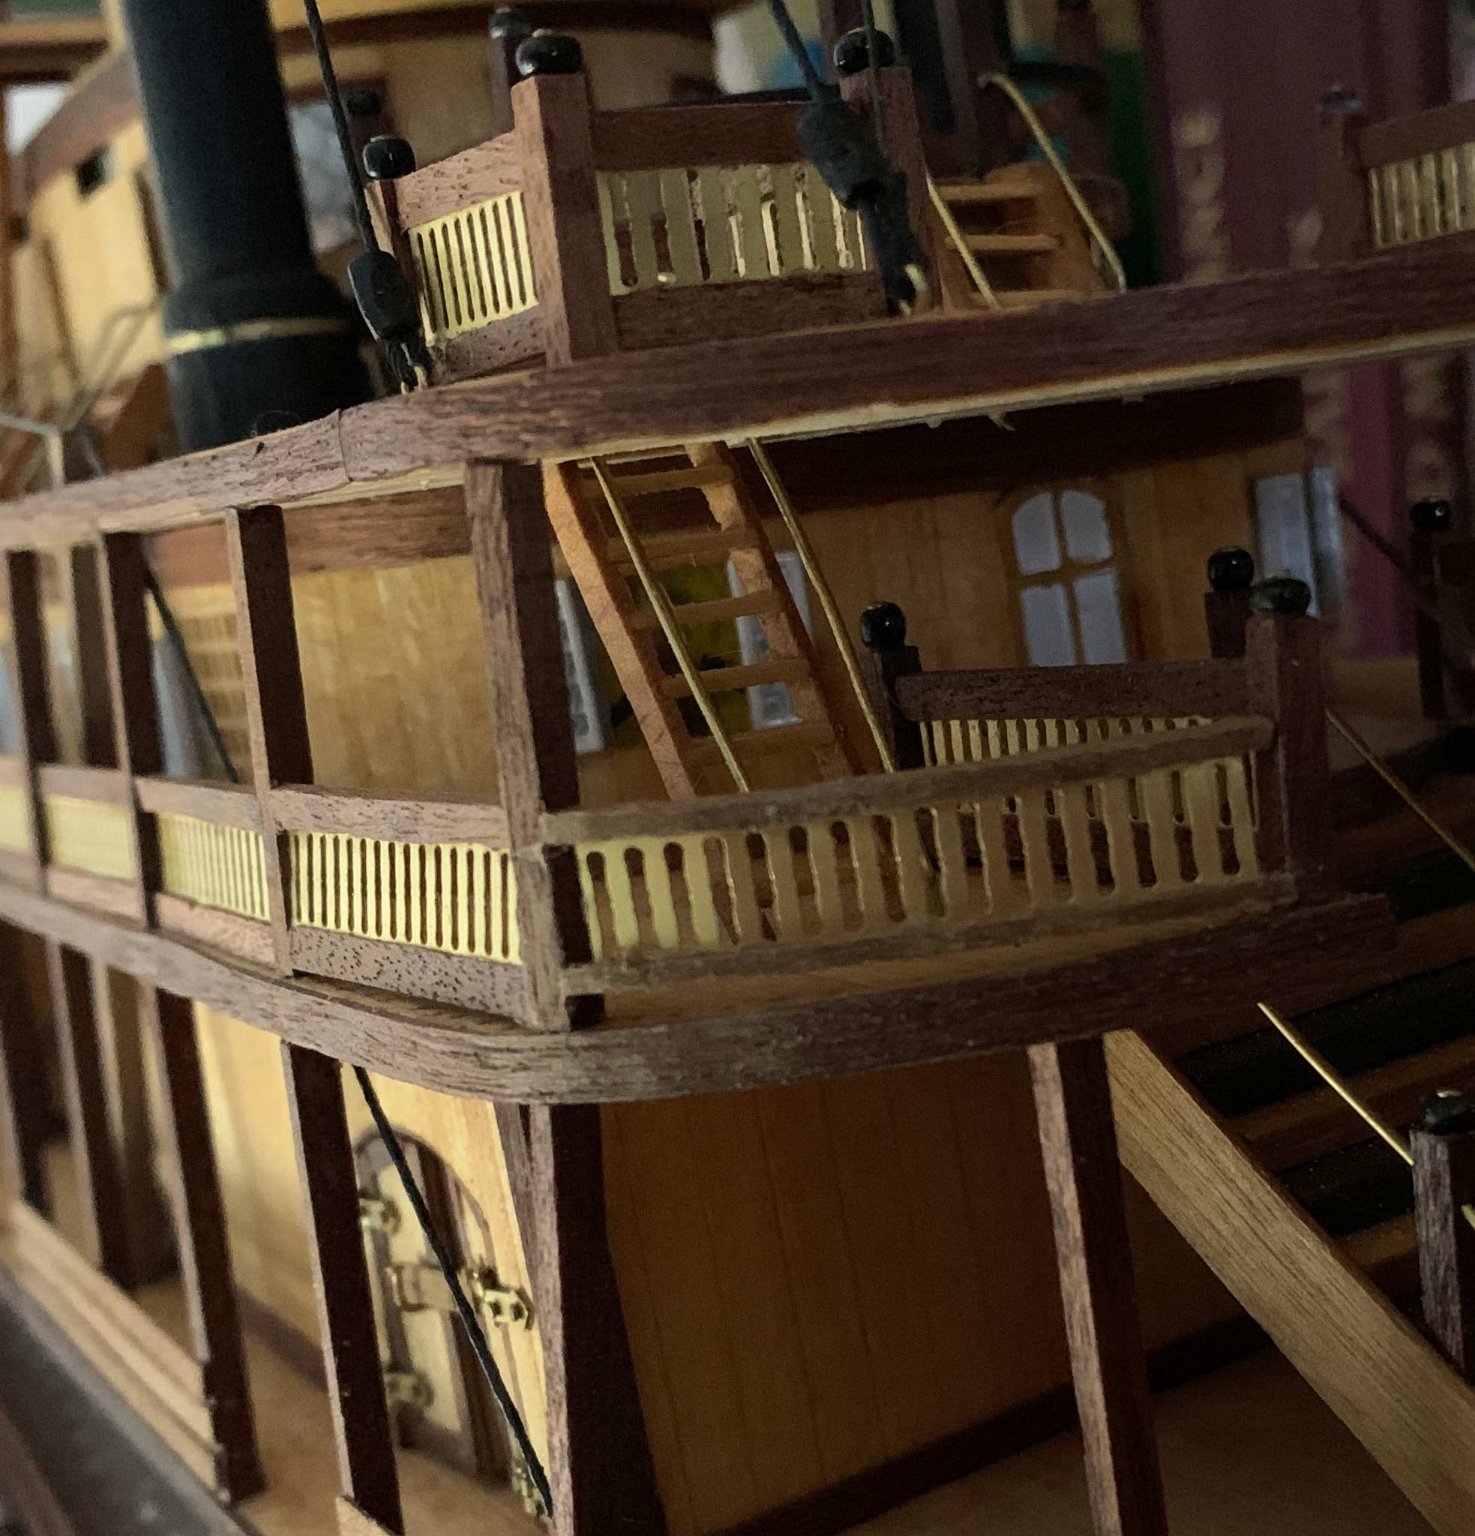
The wire is hard to get straight, especially if it's kinked. You've the same rolling tool I used to do the job. Some I've read have advocated rolling it between two glass plates to remove kinks. Getting those angles is a pain too, even using a template. They're all looking real good. Looks like you've framed around the base of the stairwell railings? As long as the enjoyment is there, whatever the "flaws" (call them changes, adjustments, amendments, enhancements, scratch build opportunities), things are going well. It's a pleasure to watch your model come alive.
- 109 replies
-
- 1
-
-
- Finished
- Artesania Latina
- (and 1 more)
-
Look at mine - I did something similar and missed out the PE stuff altogether! 👍 Made to your own design - what captain wouldn't want that? 🙂 If you need a piece pm me your address and I'll send some over - having messed up the top tier I do believe I'll have some to spare! Cheers, Bob
- 109 replies
-
- 1
-
-
- Finished
- Artesania Latina
- (and 1 more)
-
Thanks for the reply and info. The Preiser figures are expensive and hard to find period ones too, but they are really good. Shortage of wood is something AL are/were usually known for, fortunately I was able to pick up some part done kits just for the wood at cheap prices many years ago. It's come in handy for other small projects too. Stairs look good, now the body is together it'll start to take on it's own life, and look more like the riverboat. Have had to put mine on hold for now - the workspace and time are now taken up by giant lollipops and sweets being made for doorscaping, as well as the big teddy bears 🤯 😀 (Also got double barrelled by a big old horse (16h+) on my right arm yesterday, looked like Popeyes arm after spinach 🙂 - fortunately no break but badly bruised and sore to move.) Cheers for nnow, Bob
- 109 replies
-
- 1
-
-
- Finished
- Artesania Latina
- (and 1 more)
-
Shame about the lack of wood, but gives the tim to do other things. I'd leave the curved sections until after the stairs are fitted, as this leaves you space to put them in. It's looking really neat - how did you get the triangle embellishments to stay up please? And yet another question, are the haybales and horses Prieser or another make? I've 2 crew figures but haven't thought about the passengers or animals yet. Cheers, Bob
- 109 replies
-
- 1
-
-
- Finished
- Artesania Latina
- (and 1 more)
-
Don't know about a chuck key, but a tutor I had at college, many years (46) ago, had a large dent in his forehead where a piece of skull had been removed. This was the result of a broken piece of lathe flying off and hitting him. Not his fault, but certainly a learning experience for his pupils! (Although strangely NOT an engineering course)
-
One method would be to put the window material on the outside and use a raised external framework to cover the edges. Another might be to put an internal framework to hold the window and then add a secondary frame to hold it in place, or instead of an internal framework carefully thin out the wall around the edge of the window and use a frame to the inside edge of that to hold it in place. As for the next layer of railings, the method you used for the stairwell ones looks good. It's all looking good and coming together. The next model, I feel, should always try and stretch what you can do. That one's a nice looking ship too. She's credited with firing the first naval shot in the war - a Confederate (distant cousin) relative of mine is credited with firing the first cannon shot of the war ! 😀
- 109 replies
-
- 2
-
-
- Finished
- Artesania Latina
- (and 1 more)
-
That's nice work on the stairs and the surrounds. Did you paint the railings? Just noticed the pins too, nice touch. Cheers, Bob
-
Nicely done Dale, good to see one of these finished, so many fall by the wayside because of the way De-Agostini sold these as an "easy" build. Well done! Bob
-
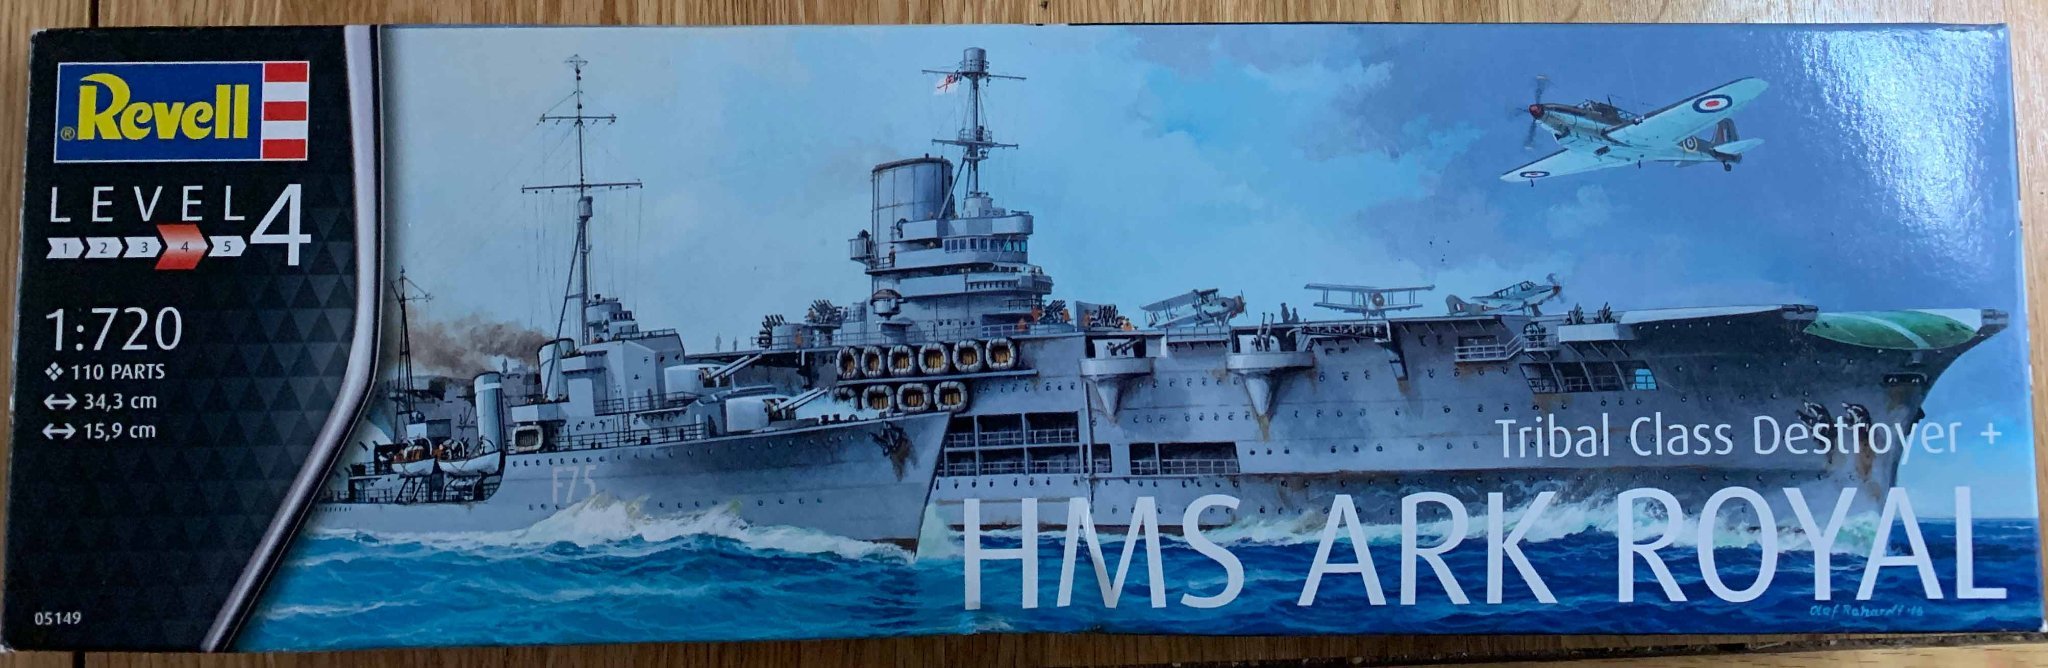
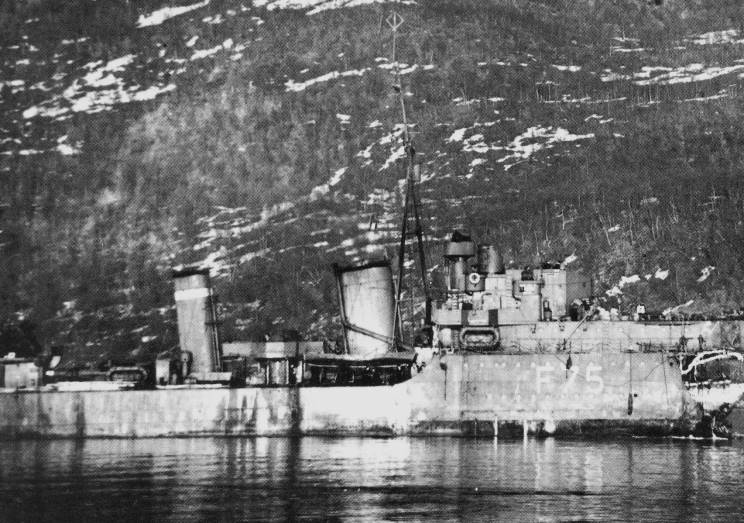
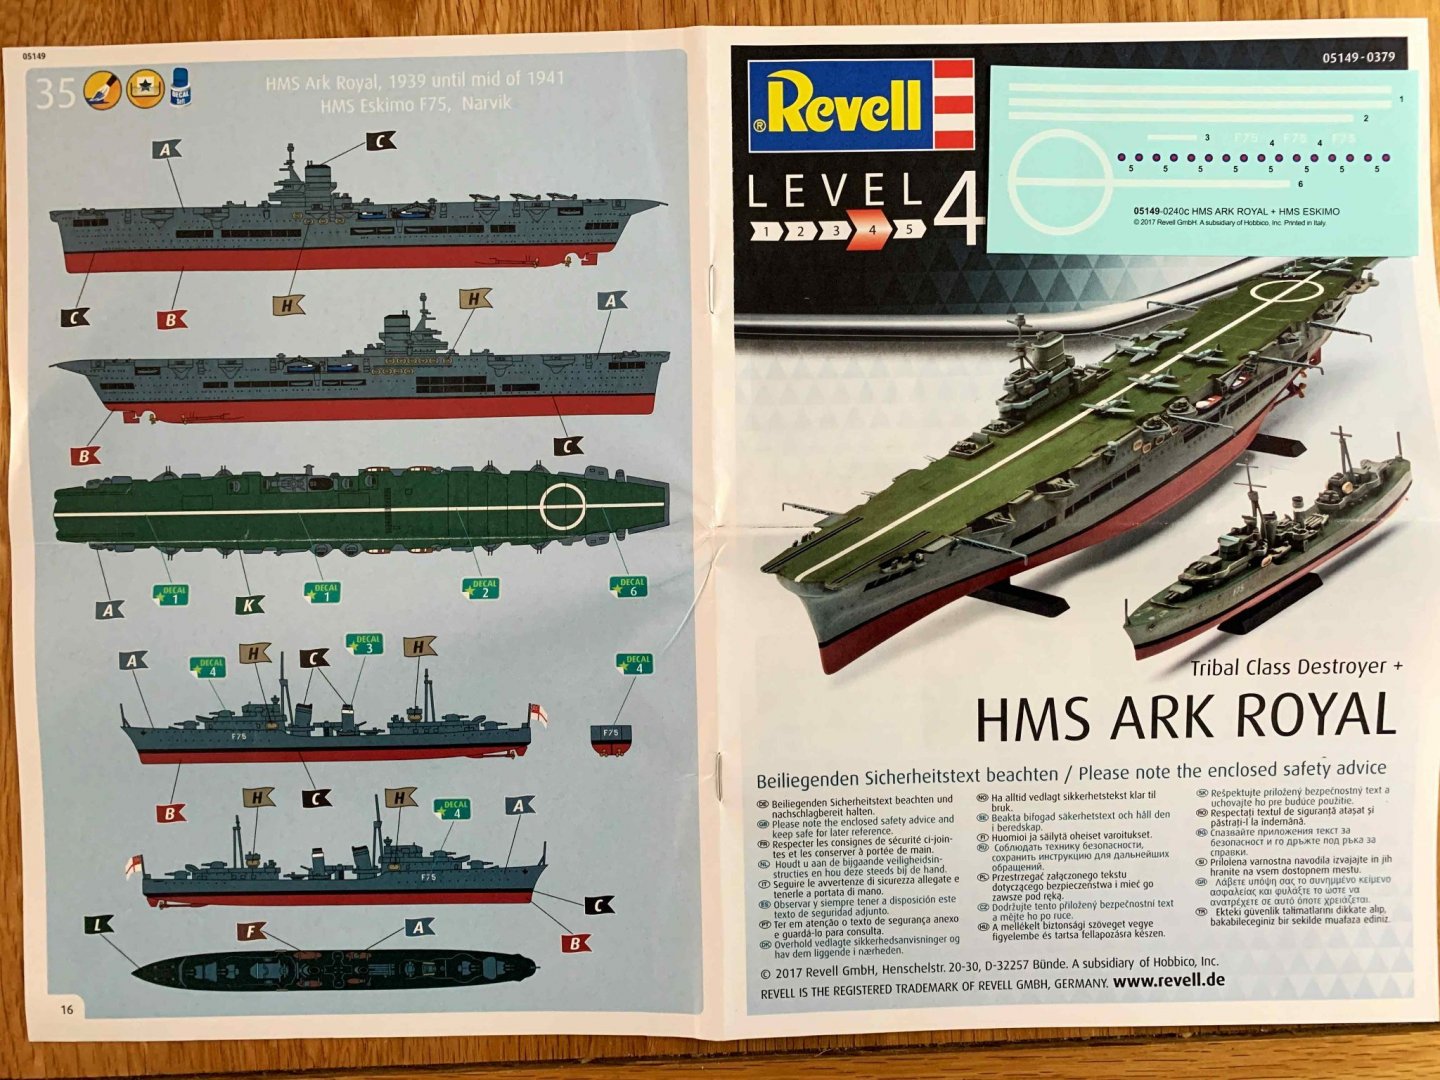
Hi OC thanks, that was the bit I (mis)read, but even at 120 miles off on the 25th that was still 13 days after Eskimos torpedoing. HMS Eskimo 13th April 1940 after being torpedoed on the 12th. From the Imperial War Museum and other photo collections Eskimo is in operations with Victorious at home in 1942, Pedestal in 1942, North Africa 1942, and with escort carriers Khedive, Speaker and Slinger in 1945. I just cannot find a close escort as described except to these other carriers. I think Revell just threw in the destroyer as an extra, the art on mikegr's box has to be of Legion or Laforey at that particular moment in time, both L-class destroyers with only 1 funnel, so wrong again by Revell. Seems like Revell need to do some checks before committing to names on their boxes 😀 This was just a bit of fun on my part to see if they should be displayed as on the box, or as seperate items. They're being done to be shown as a memoriam set because the 15 year partner of the wifes best friend (who gave them as the present) has just died of complete organ failure due to Covid only 2 weeks after contracting it (no vaccines), she was fine (all vaccines). Cheers for now, Bob
-
Nicely done! Looking at photos of pilot houses they're all different. The only thing I found in common was larger windows to the front, some just one pane, some with thin vertical mullions and some with thin square mullions, just as long as the viewing was good. The sides were all thicker in most cases. I suppose it depended on how much they wanted to spend on glass - smaller = cheaper 🙂 I just left mine as the large panes - it was easier, although I did line the interior with sapele planking.
- 109 replies
-
- 2
-
-
- Finished
- Artesania Latina
- (and 1 more)
-
Waiting for paint to dry, I did a little digging around t'internet. Revell.de say that this model represents Eskimo at Narvik, correctly as F75 . The Tribal model therefore shows Eskimo as F75 up to 13 April 1940 when her bows were blown off by a torpedo from a German destroyer. After her refit she became G75, and the major differences are the number of portholes at the bows - these were reduced, and a change of guns on the X platform. Ark Royal arrived at Narvik on 29th April 1940, 2 weeks after Eskimo had been torpedoed, having left the Med on the 16th April and Scapa on the 27th. So the modern box art, while looking good, is a work of fiction - if Eskimo did serve with Ark it could have been with Force H or the 10th Destroyer Flotilla, but with her new bows. I'm sure there are people out there with vastly more knowledge than myself on this subject, this is only a quick skim of details, so if you can correct this, please do so. Cheers, Bob
-
Hi Chris. I've looked at the Scalemates boxart timeline and prior to 1973 the destroyer is unnamed on the box, then an Ashanti rebox in '73 to '79 when it's again unnamed until Eskimo in a 2017 re-box. Looking on Wiki both ships are never mentioned together, unless Eskimo, as part of the 10th destroyer flotilla served with her in the Med between Jan '41 and Jul '41 when the 10th was disbanded. Even on the Ark Royal wiki it doesn't mention any destroyer except for Laforey (G99) and a photo of Legion (G74) alongside when listing. Looked these bits up as an interesting aside earlier this morning It's going to be a fun build anyway! Cheers, Bob
-
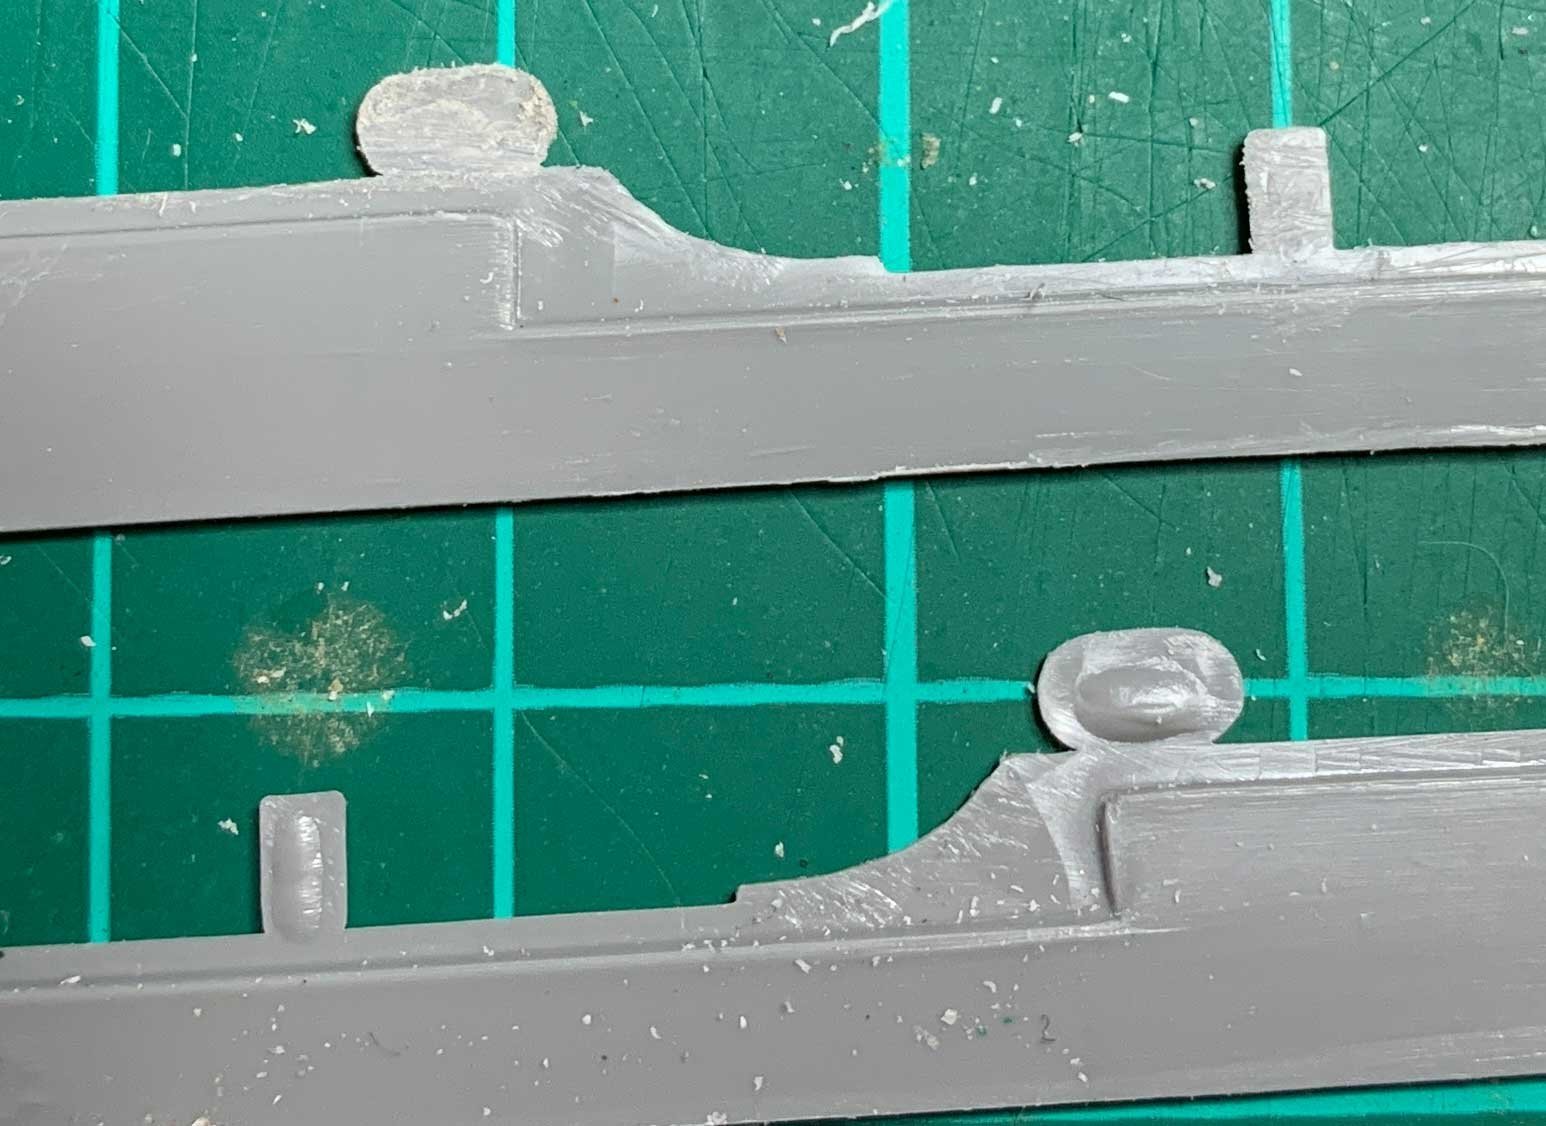
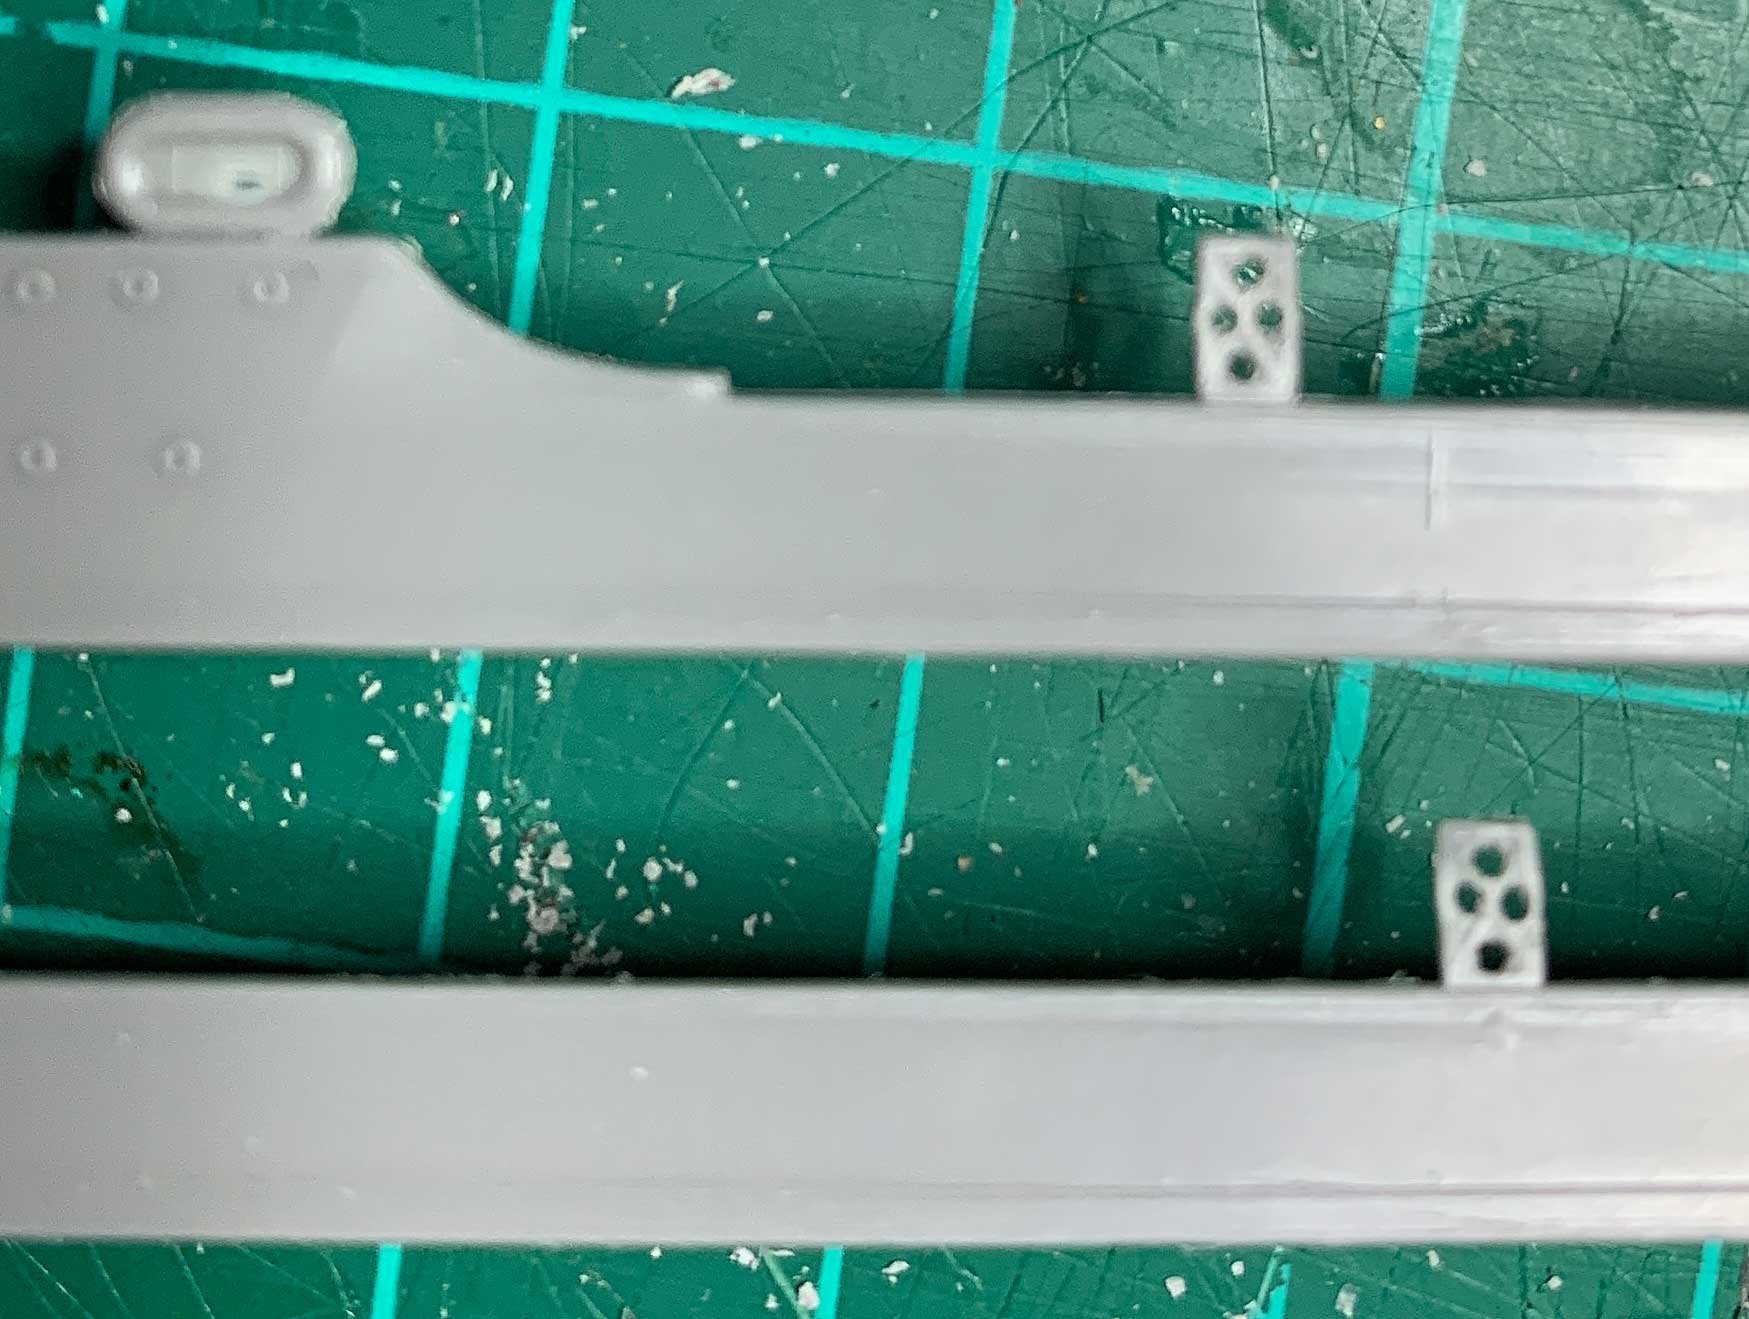
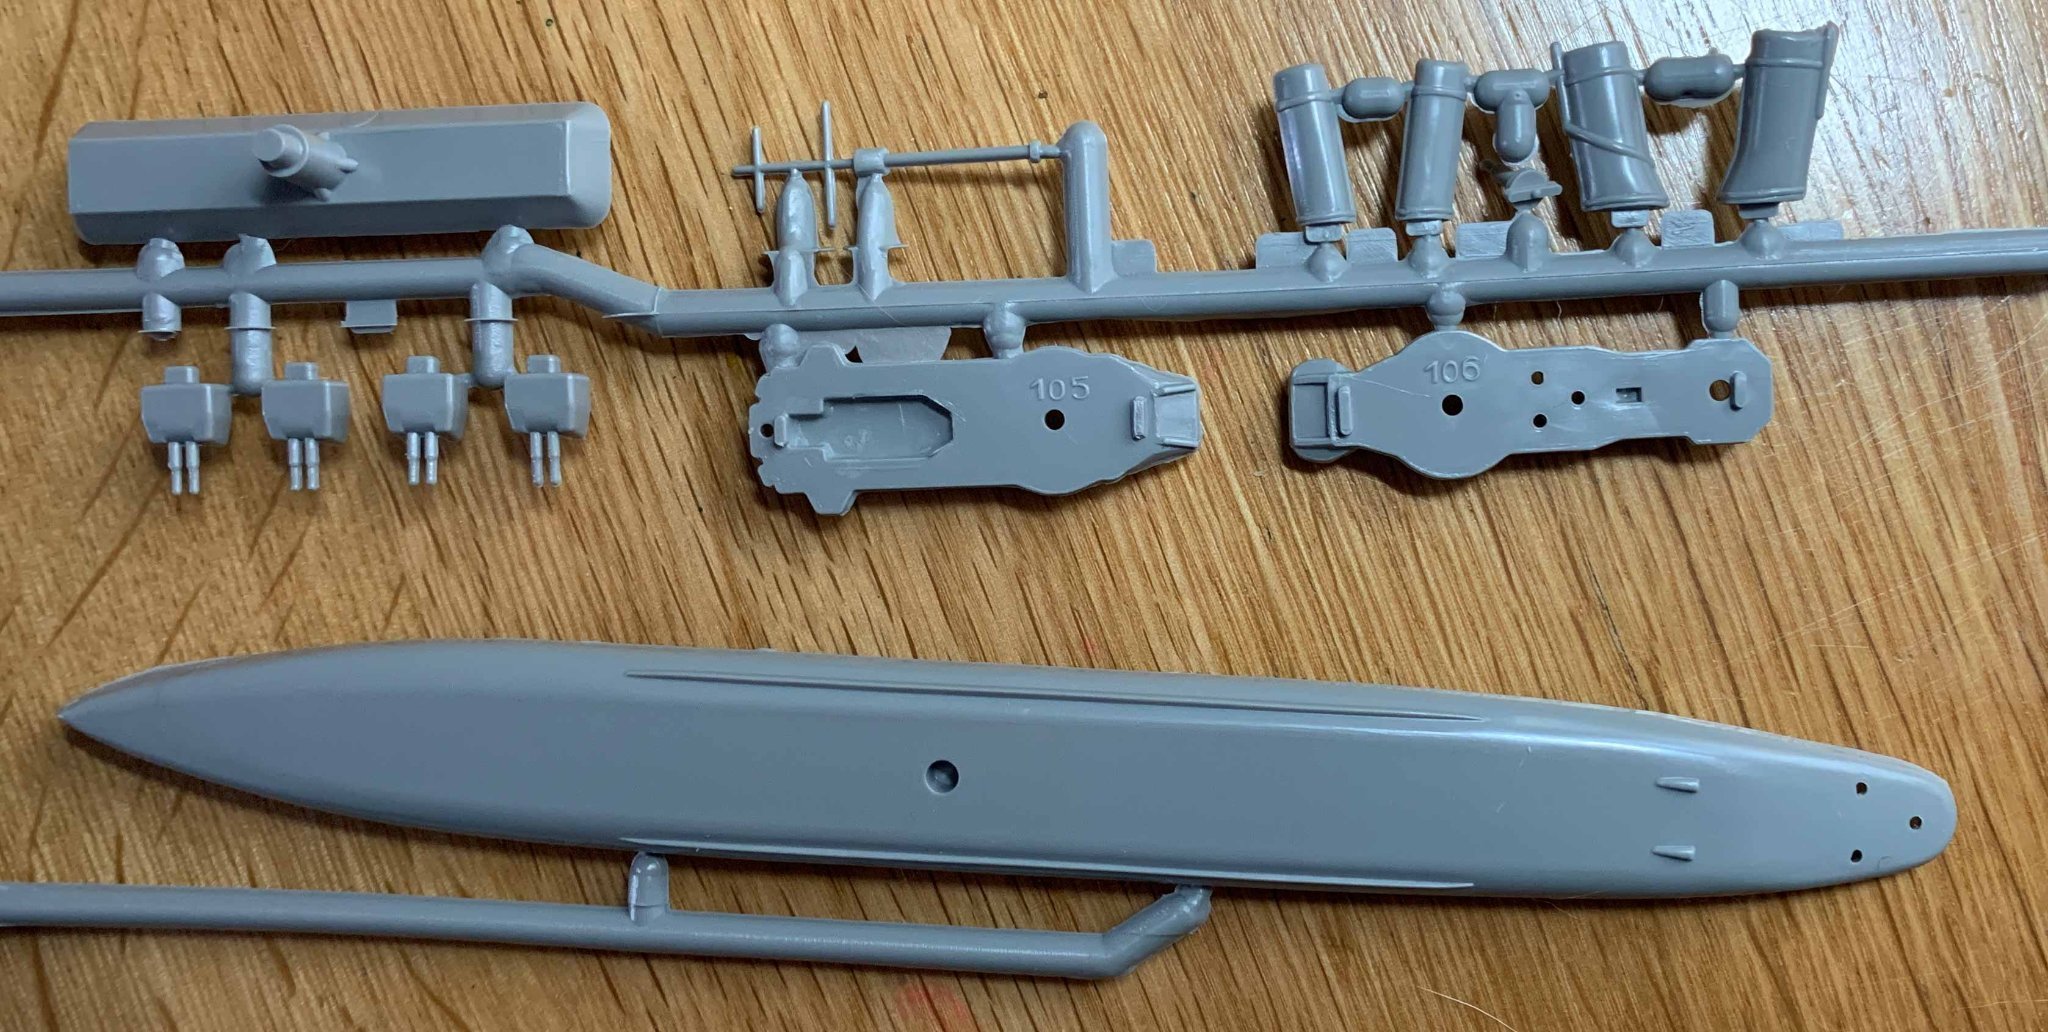
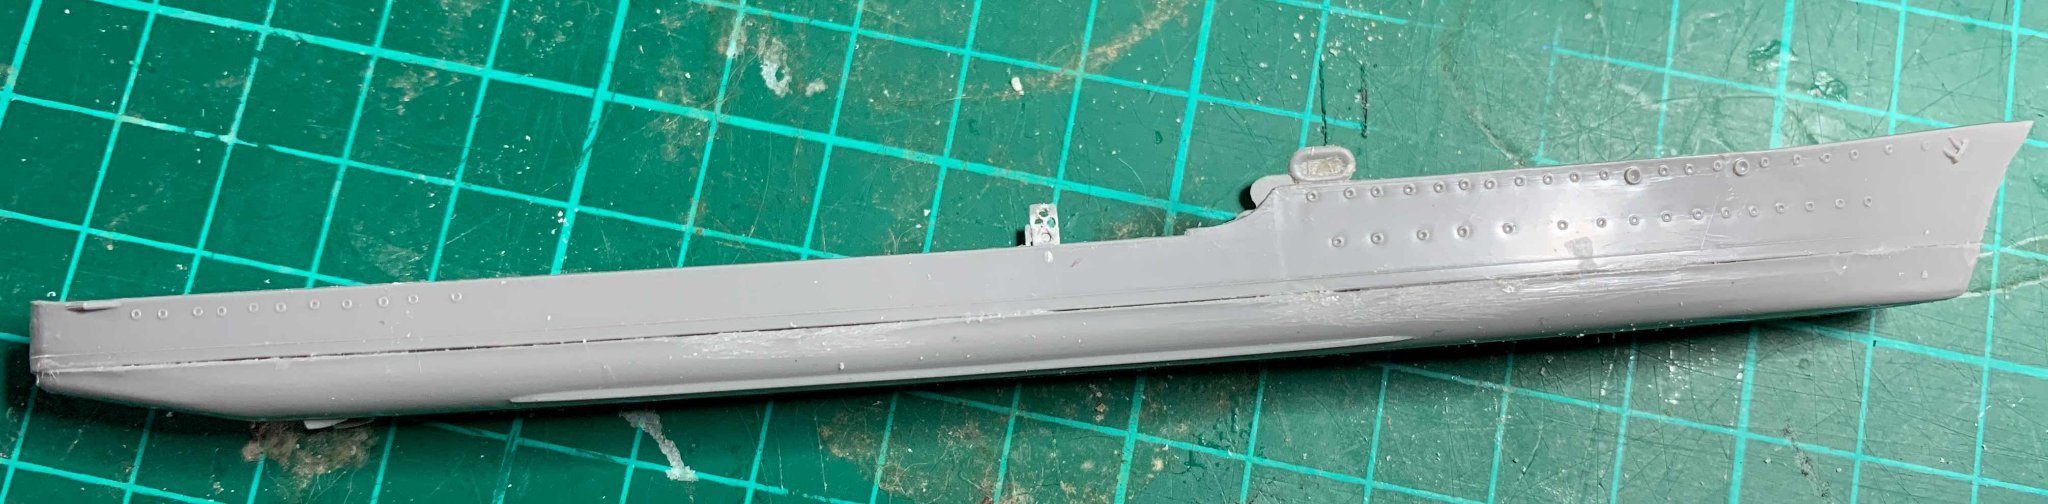
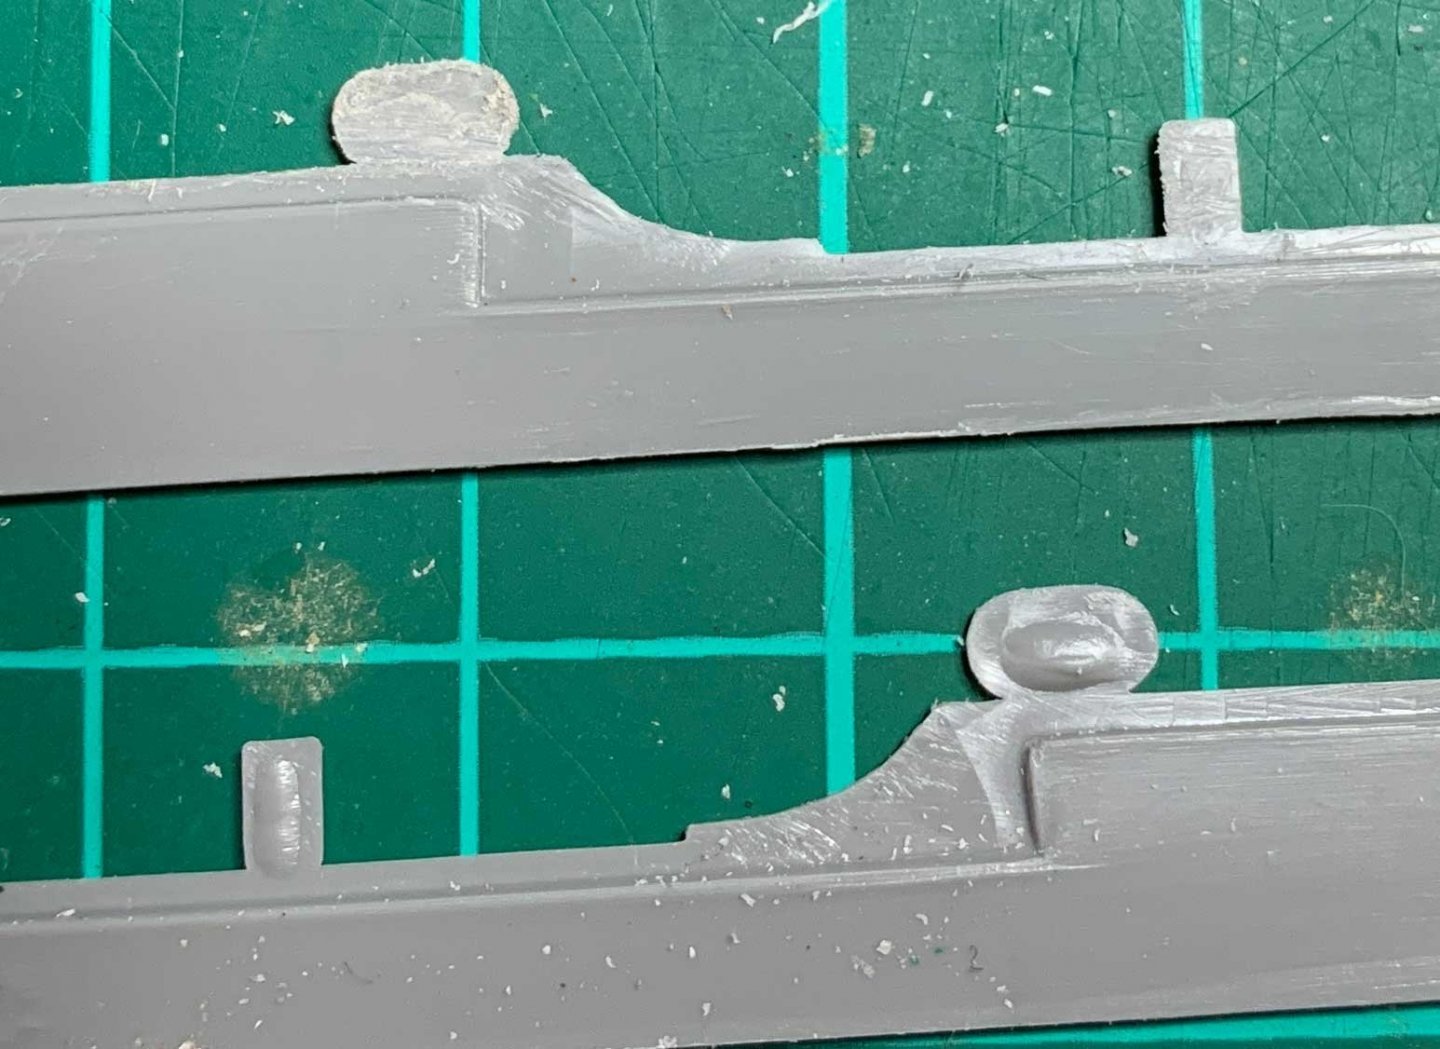
Right - I decided to start with the smaller model, the Tribal class destroyer. This is on 2 small sprues Picked out the sides and after a flash cleanup the wing stanchions and rafts have obvious big excess mouldings. I thinned hese down somewhat And then drilled out the stanchion holes - I know, they're round I did try with a triangle diamond file, but the're too fragile to do much more. If you look hard enough you can see the mouldings aren't accurate either! Sides glued to the bas - gaps very evident. I tried the Revell Plasto filler - I might as well have used the glue to fill them. Maybe it was me, but they didn't come out too well. I had better finishes using the cement and plastic filings to gill gaps on some model cars I did all that time ago. Ah well, hopefully sanding and painting will make them look acceptable, we'll see. I'll be trying another first, the Tamiya masking tape to create the black waterline. Bob


-
OK, so, a little diversion from wood building. I haven't done much plastic in 40 years, so basically back to the beginning. I was given this little duo kit as a Christmas present last year. It'll be an OOB build with no extra PE, but if i can do an enhancement here and there I'll give it a go. It'll be as accurate as Revell make it. Box art. And full colour instructions - at least front and back 🙂 Comes with 4 sprues of grey parts, and a sheet of decals. Although the box art shows swordfish and various railings these aren't included! Bob


-
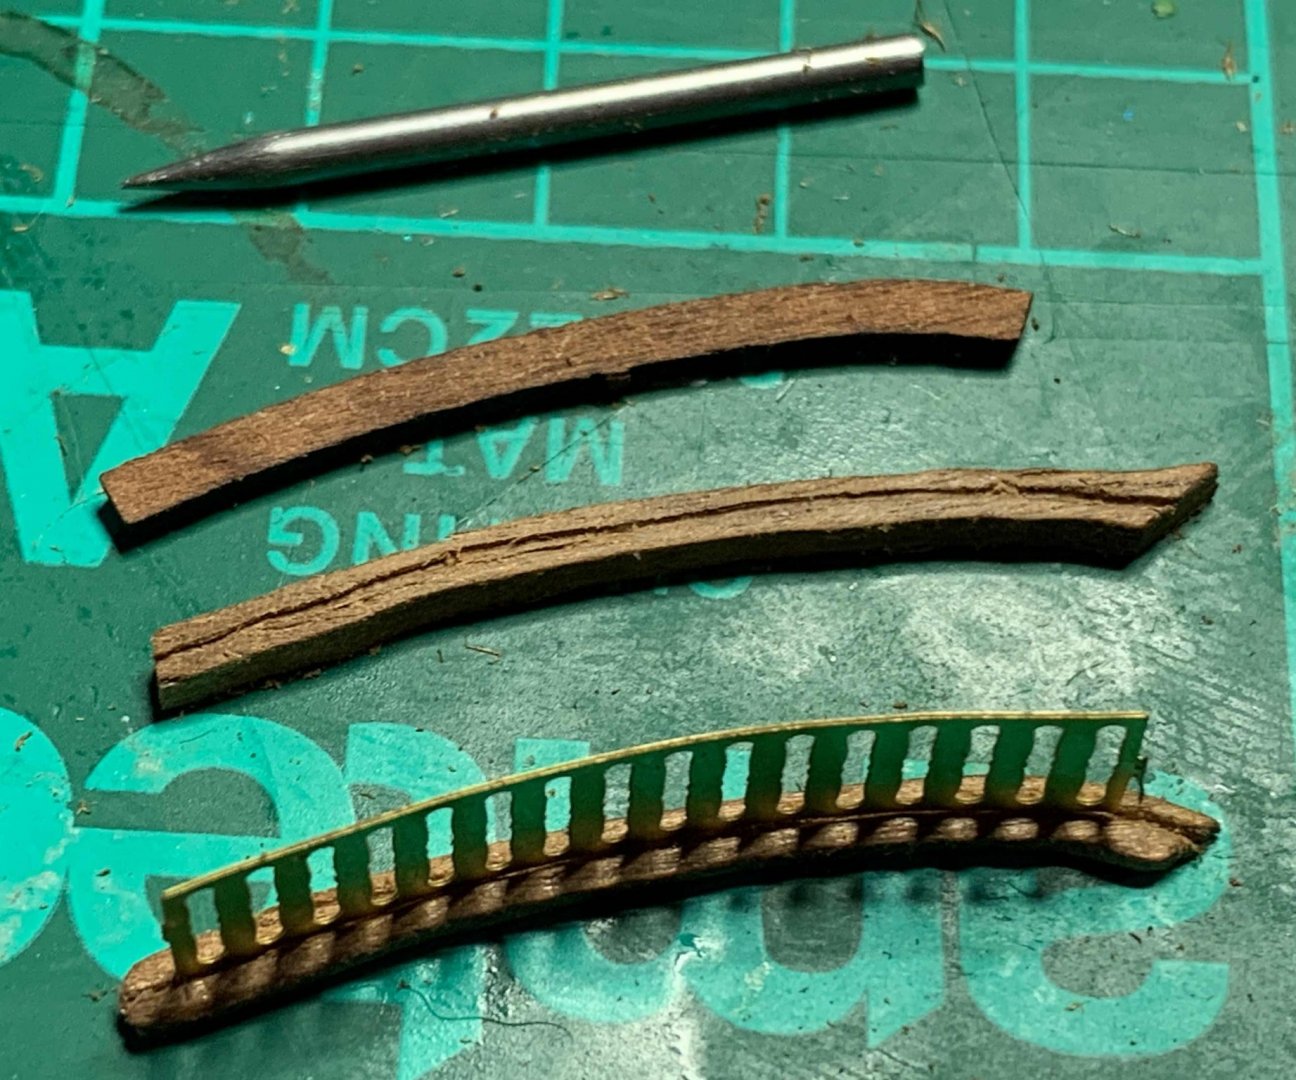
Been a while - apologies. Had to make the front curved rails, as only one was present. Used this as a template to draw round and cut out. Original, roughed out with slot, brass railings in slot ready for top piece and trial fit before final shaping. Added one of the curved front rails Cheers for now, Bob

- 86 replies
-
- 4
-
-
- king of the mississippi
- artesania latina
- (and 2 more)
-
Those benches look way better than the pics in the instruction booklet, and the figures really bring them to life!
- 109 replies
-
- 2
-
-
- Finished
- Artesania Latina
- (and 1 more)
-
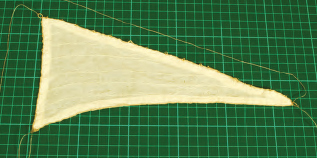
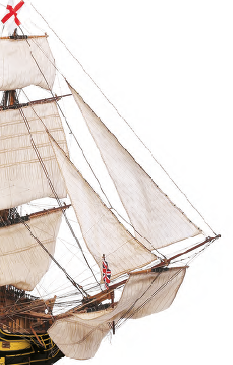
Hi Ian. I have this one to one side, waiting to be started. Nice catch on this, but in Dales defence - Dale has followed the De-Ag instructions, as per the booklet provided, to the letter, and the mistake is De-Ags. De-Ags mistake is hard to spot unless pointed out or you've had experience in fitting sails (which I certainly don't!). Spotting this took a while and a hard look. Page 437 has this picture, showing the jib sails the right way, and page 452 in the instructions, where it describes how to fit them, this one with the rings on the wrong edge. If you look at the sail stitching this is the only way to tell their mistake. Hope this helps, Bob
- 59 replies
-
- 1
-
-
- DeAgostini
- Victory
- (and 1 more)
-
😀 certainly is - knocked a few uprights off or found the uprights on the stair barriers almost inacessible. BTW don't loose any beads, I think there are just enough and no more. With the smaller posts it'll make them sturdier to drill them and the deck to pin them in place with cut off nails. Nicely done on the stern upright, that at least gives enough room for crew to access the wheel area between the room and the fencing. Looking clean and fresh. 👍 Bob