HOLIDAY DONATION DRIVE - SUPPORT MSW - DO YOUR PART TO KEEP THIS GREAT FORUM GOING! (Only 13 donations so far - C'mon guys!)
×


Bob Fraser
-
Posts
291 -
Joined
-
Last visited
Content Type
Profiles
Forums
Gallery
Events
Everything posted by Bob Fraser
-
From a distant relatives naval biography - "subject of this memoir is the eldest surviving son of Hugh Fraser, Esq., surveyor of the Customs at Lerwiek, in Shetland (and 5th in lineal descent from William, second sonn of Thomas Fraser, of Strichen, Esq., second son of Alexander fifth Lord Lovat, who died in 1558), by Jane, daughter of Rev. Thomas Linning, of Walstein. His maternal grandmother was eldest daughter of John Hamilton, of Gilkersclengh, Esq., descended from the first Marquis of Hamilton. Our officer was born about the year 1761, and when only nine years of age, entered the naval service on board the Fly sloop, commanded by the late admiral Gayton, with whom he served at the reduction of Belleisle" And from th US Powder Monkeys
-
 Hi Jerry Looking good. Your new windows are far better than the original metal ones. Those stairs are everyones bugbear with this kit. If you go to your 1st post and click the three dots on the right you can edit the topic title to change your name.
 -
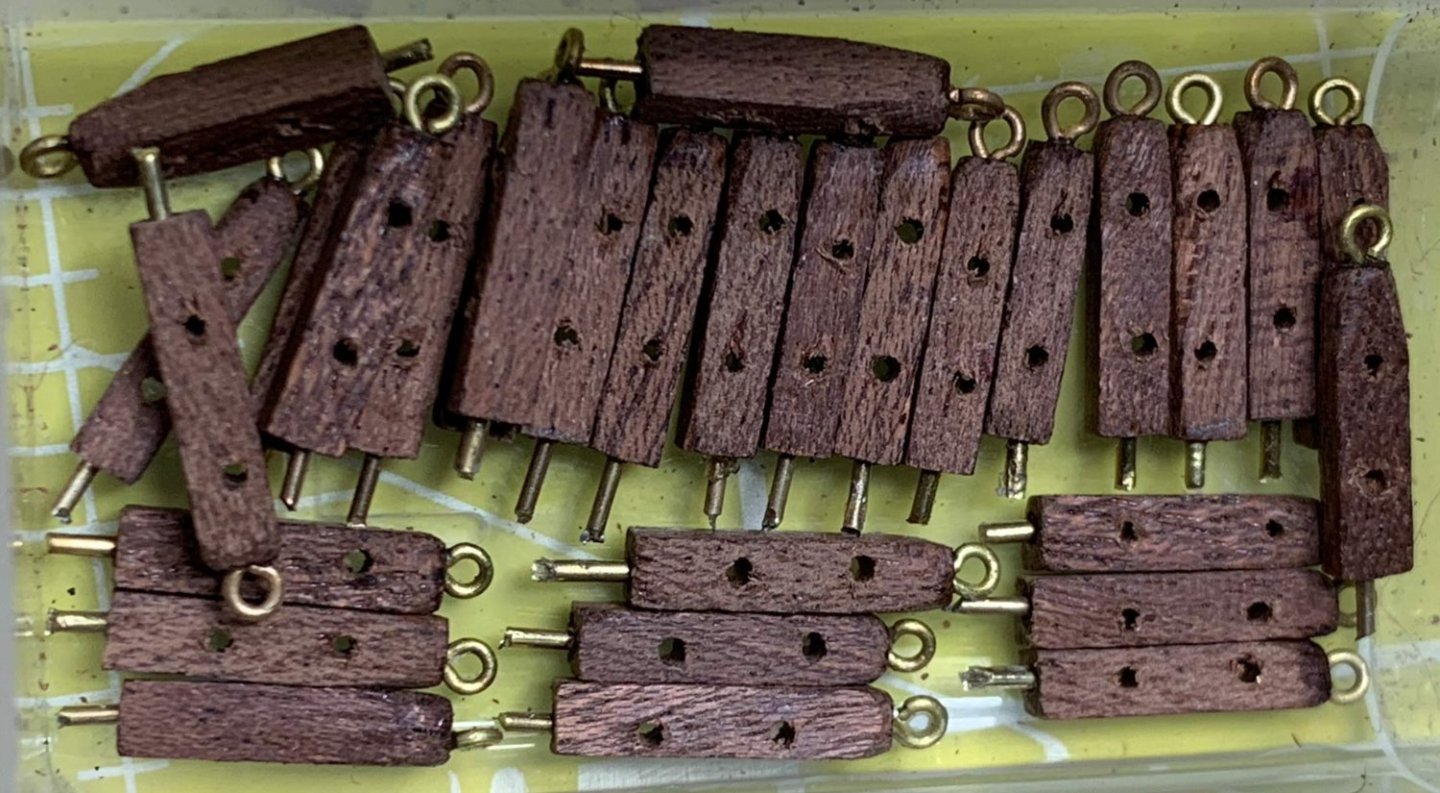
The parts list carries on at page 25! I had these poles explained to me by @Cathead. They are anti-hogging devices to stop the ship bending up or down at either end when riding over waves that leave it unsupported for some part of its length at one or both ends Parts 202, 203 and 204 labelled "mast turn-buckles" and are 4mm diameter. Those holes are awkward to get right! I ended up replanking parts as i did it differently. Looking at the pictures in the colour booklet the rope runs in a hole drilled through each, front to back at 3, 4 and 5mm from the top measured on the big picture, otherwise it doesn't say! The rope is item 240, called "cable turn-buckle" in the parts list. In real life, from old photos I used for reference, it was usually iron rods connected by turnbuckles for tightening as required, fitted to the mast top. The 2 posts at the stern are part 184, 5mm x 145mm, the steam stacks. I know this is a test fit, but they ony go halfway down the lower deck wall and need to look as if they go into the engine room. Only you'll know, and I doubt very much anyone is going to notice the difference! AL give you only the bare minimum of wood so it's likely there's no spare. She is looking good, the most boring part is yet to come, all those posts and PE fitting. All the best,
- 132 replies
-
- 1
-

-
- King of the Mississippi
- Artesania Latina
- (and 1 more)
-
Just pulled out my Underhill Vol1. Page 159 gives the following - "In the lower third are three sheaves, representing the old-fashioned 9 pin blocks: a purchase could be rove through one of these sheaves and then more room could be gained for the crew to heave on it." He shows 3 sheaves in the front pinrail pillars, and one in the pillars aft of the foremast, and 3 sheaves in the mainmast front pillars. None on the mizzen. Also noted is that more than one rope was used per belaying pin - could they have been used then to help identify the haul?
- 248 replies
-
- 2
-
-
- Cutty Sark
- Revell
- (and 2 more)
-
Looking good there Jerry. As you build, unless you've plenty of spare, keep all the usable sized scrap wood as AL are very "careful" with the amount they give you.
-
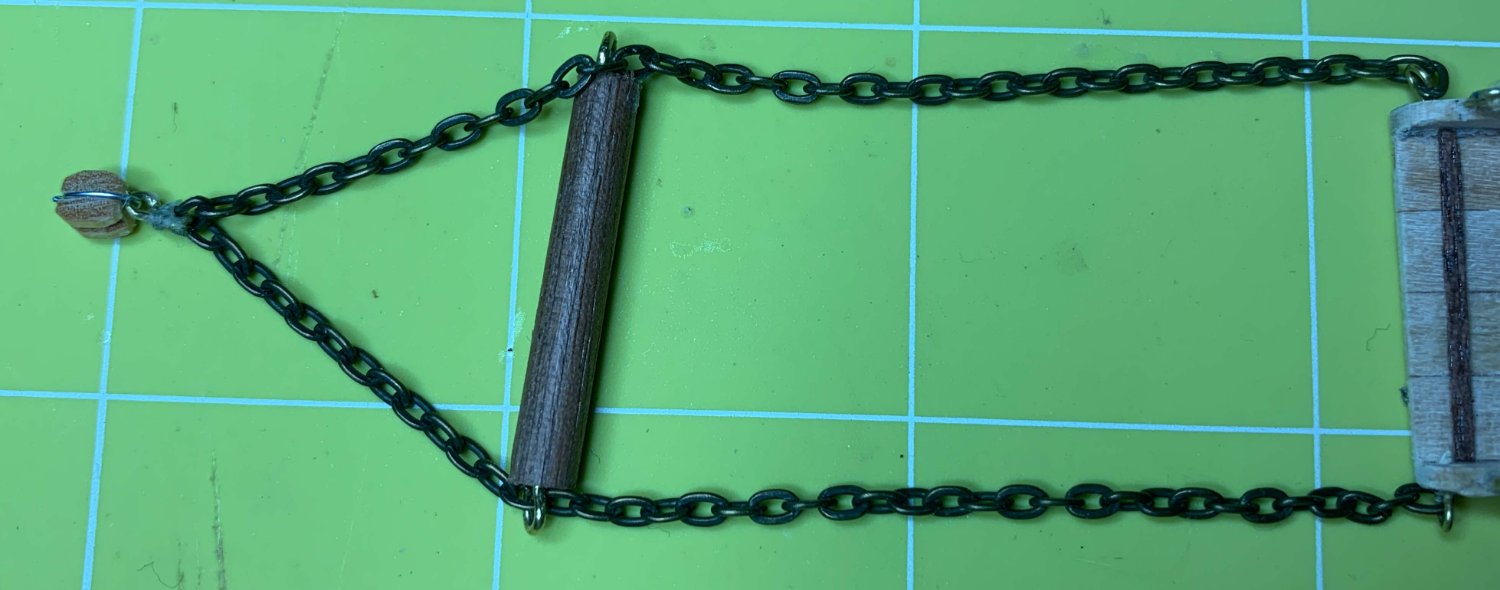
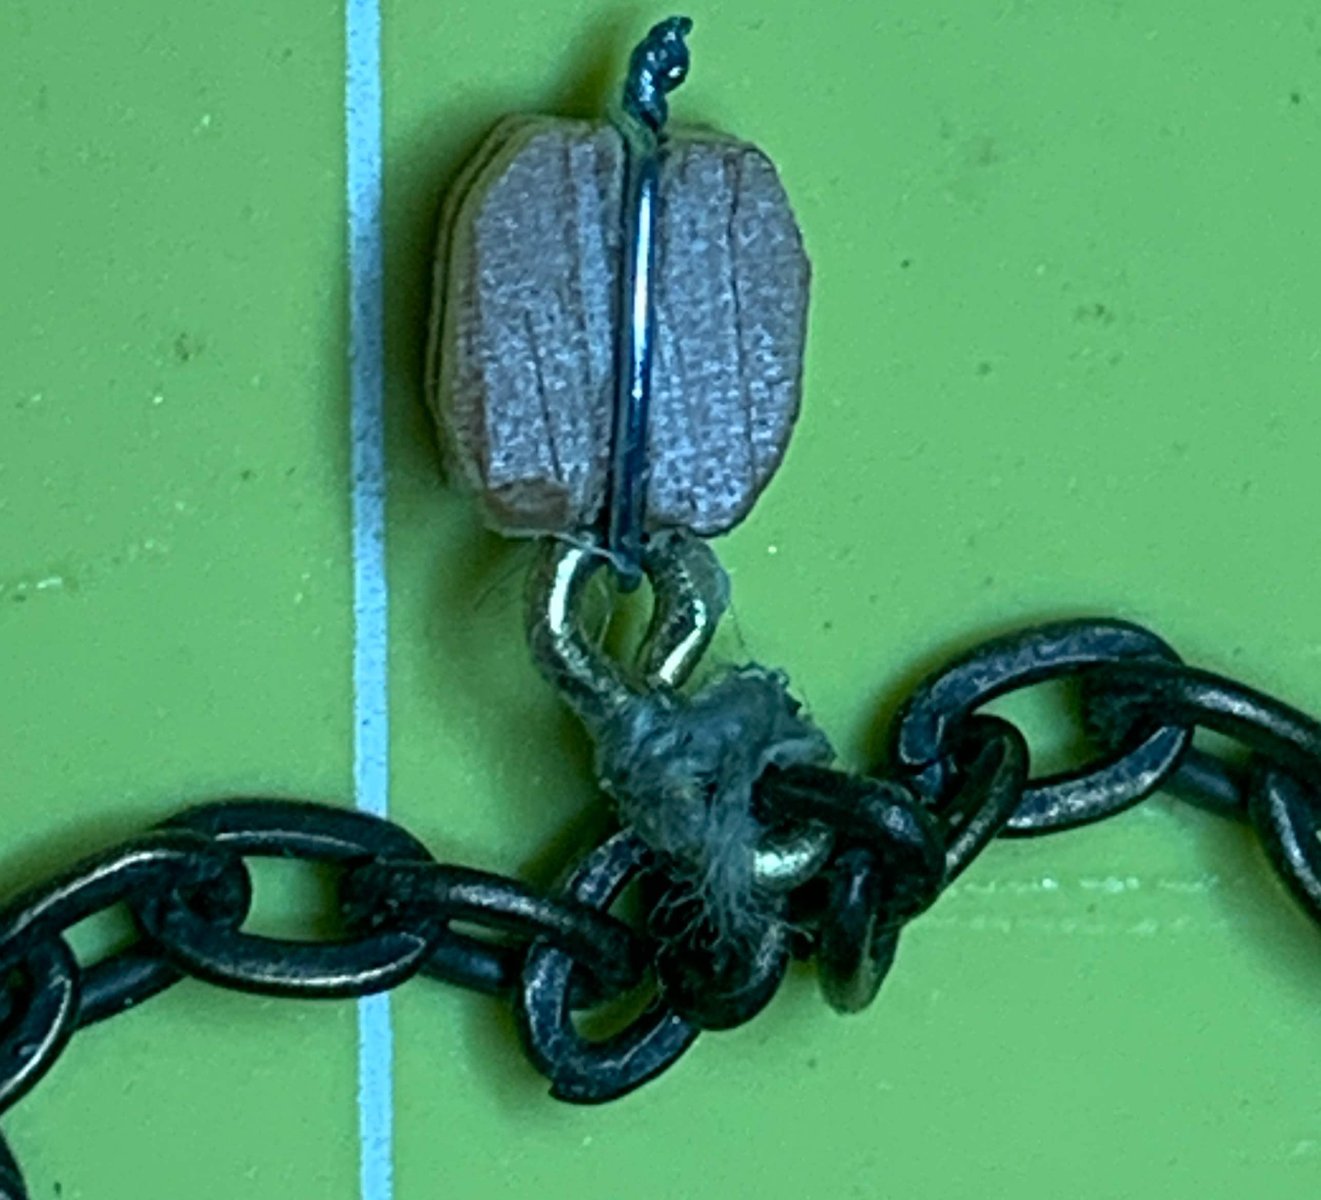
Thanks for looking in and the likes. Two things today. Foremast and flag. Added a cleat to replace the eye, loops top and bottom of flag, and toggles to the halyard. It can be raised or lowered. Second, one set of stage lifting chains. I chose a different chain with smaller links, and to make it out of one piece with a round seperator. And attached a 2mm single block with a hook stropped and jaws lashed with 0.05mm thread. First attempt at something like this The close up shows just how bad my ropework is! Chainwork still to do on the second stage, and the lower lift attachment on both. Cheers for now.


- 86 replies
-
- 1
-
-
- king of the mississippi
- artesania latina
- (and 2 more)
-
Cheers Eric. As a long time user of the Mersey Ferries (maybe 25 years) in my youth, I went with the terminology we used. The stage (landing stage) is the floating dock at the end of the bridges, and the ramp is lowered onto the ferry from the stage. At one time, back in the 30s to 60s, in their heyday, they used to have to use three ramps, two on the lower deck - one on, one off, and an off on the upper deck. During busy times you had to guess which ramp was going to be the off one, and start queing half way across the river!
- 86 replies
-
- 1
-
-
- king of the mississippi
- artesania latina
- (and 2 more)
-
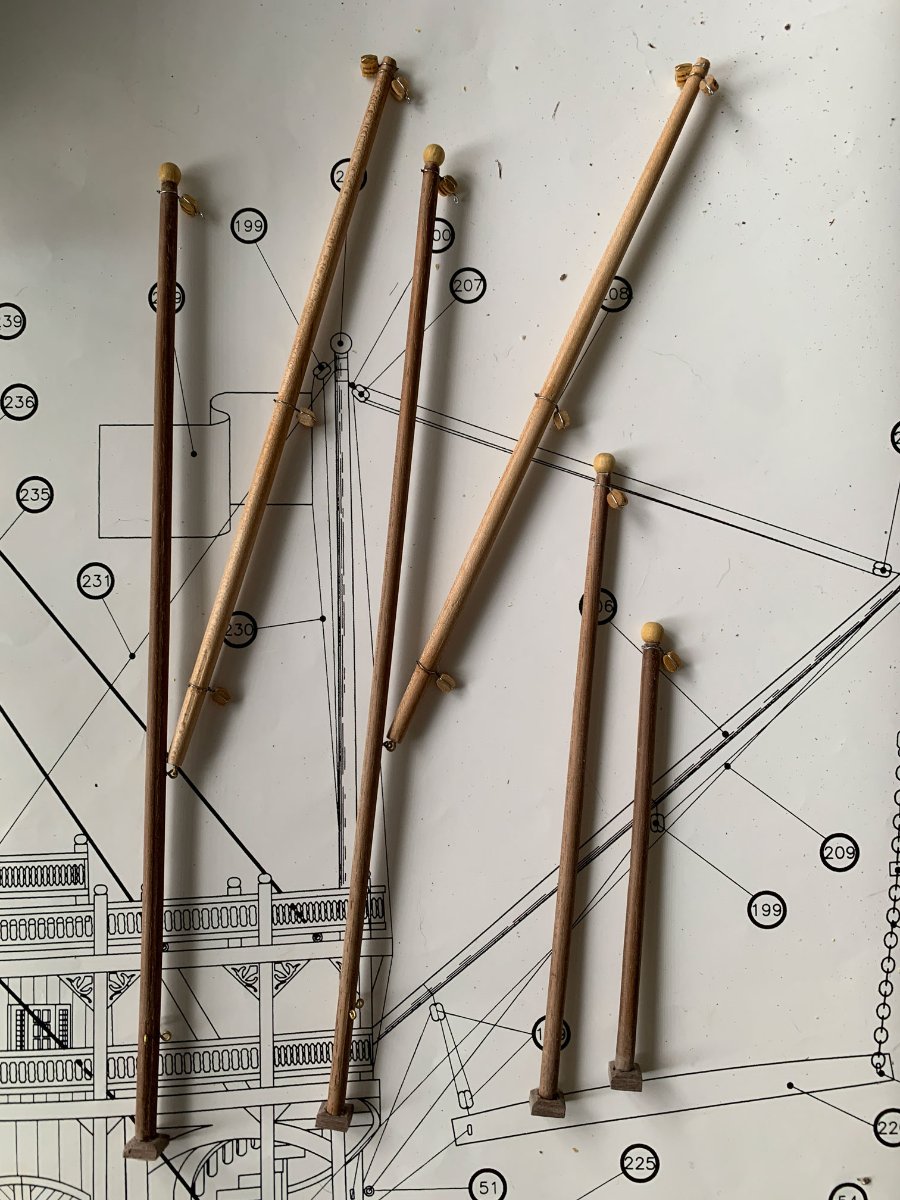
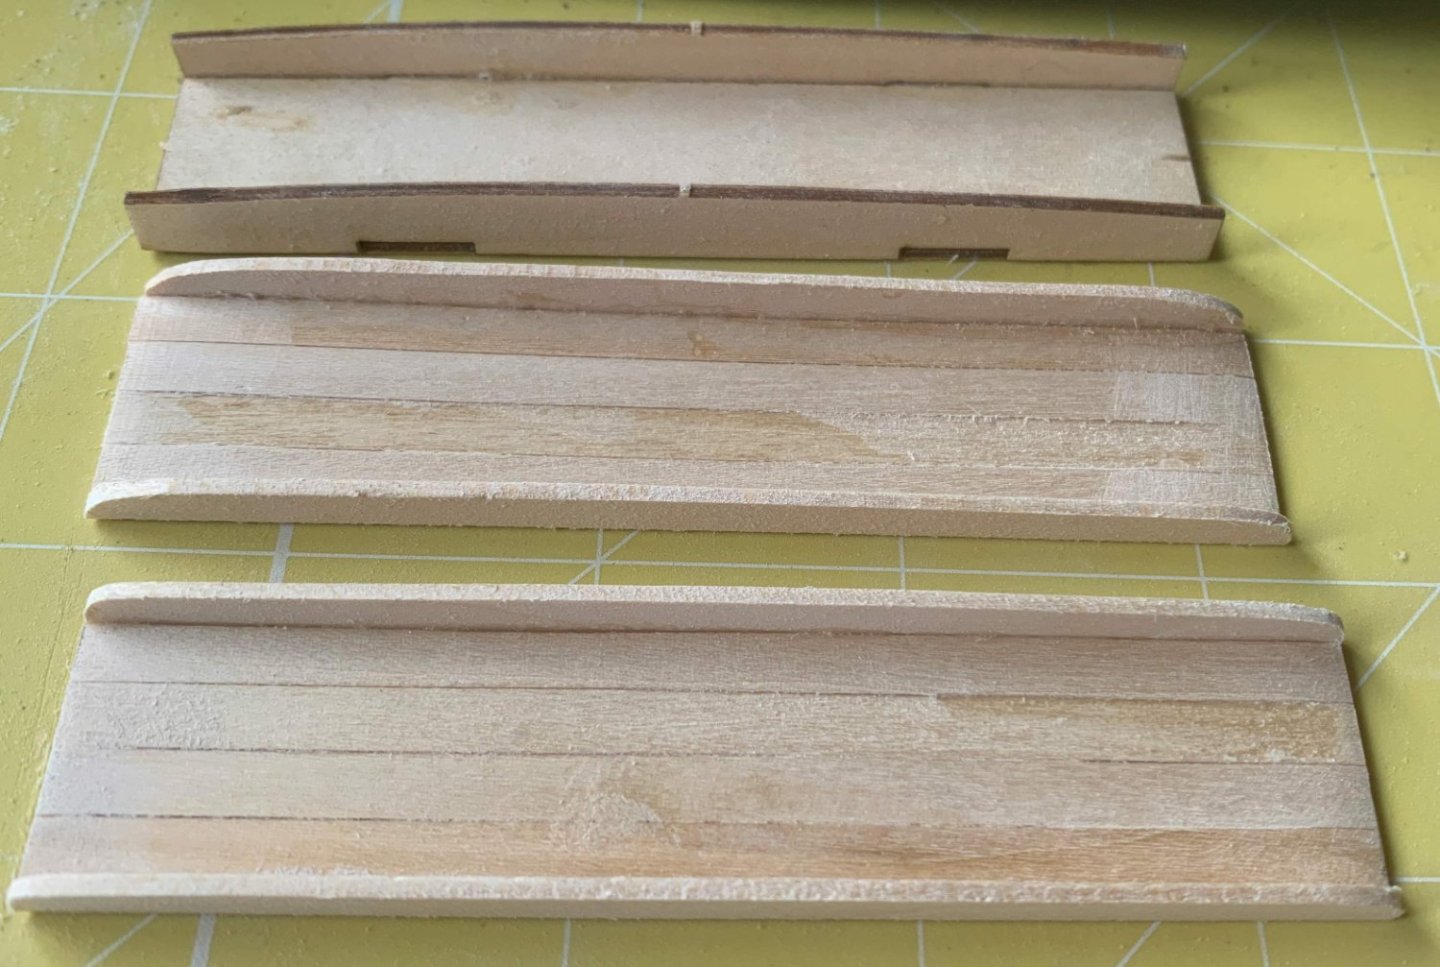
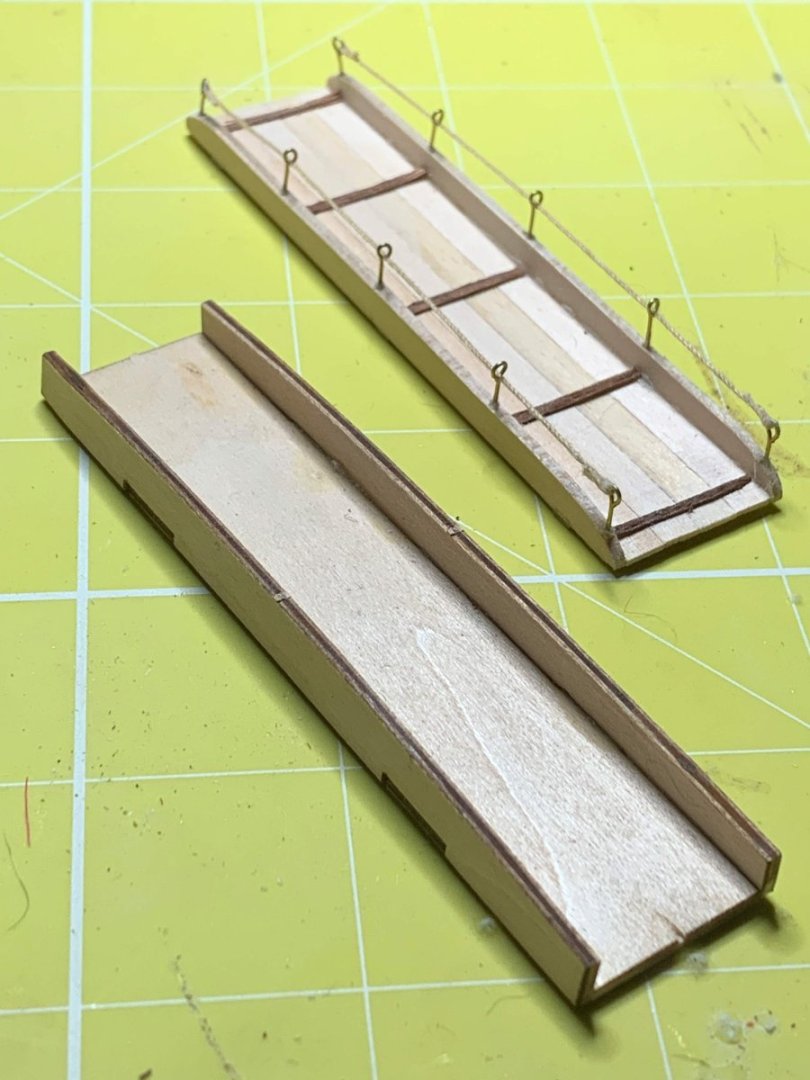
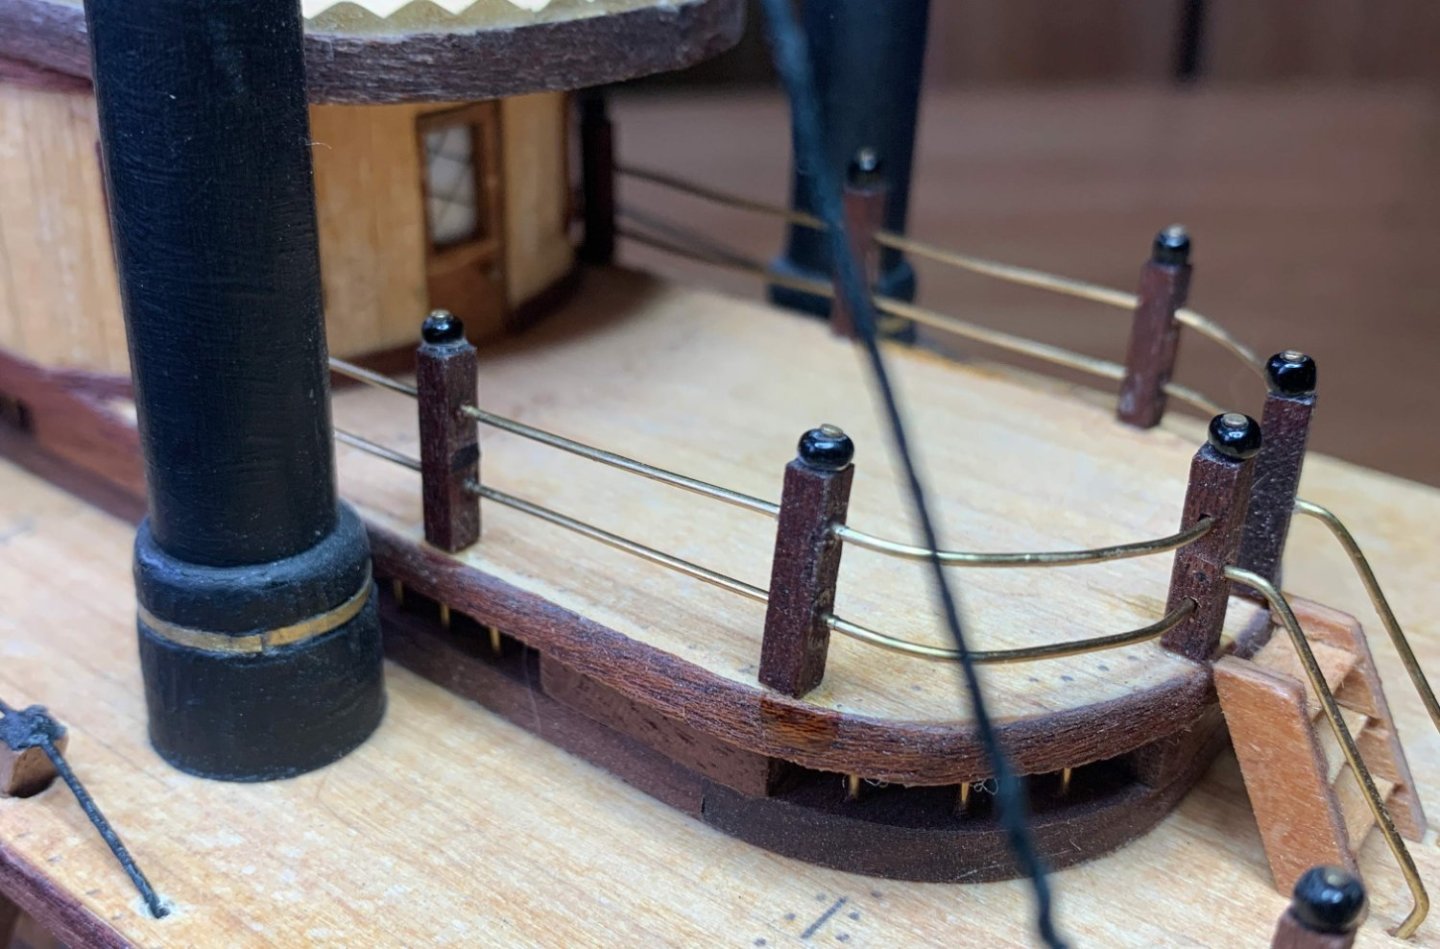
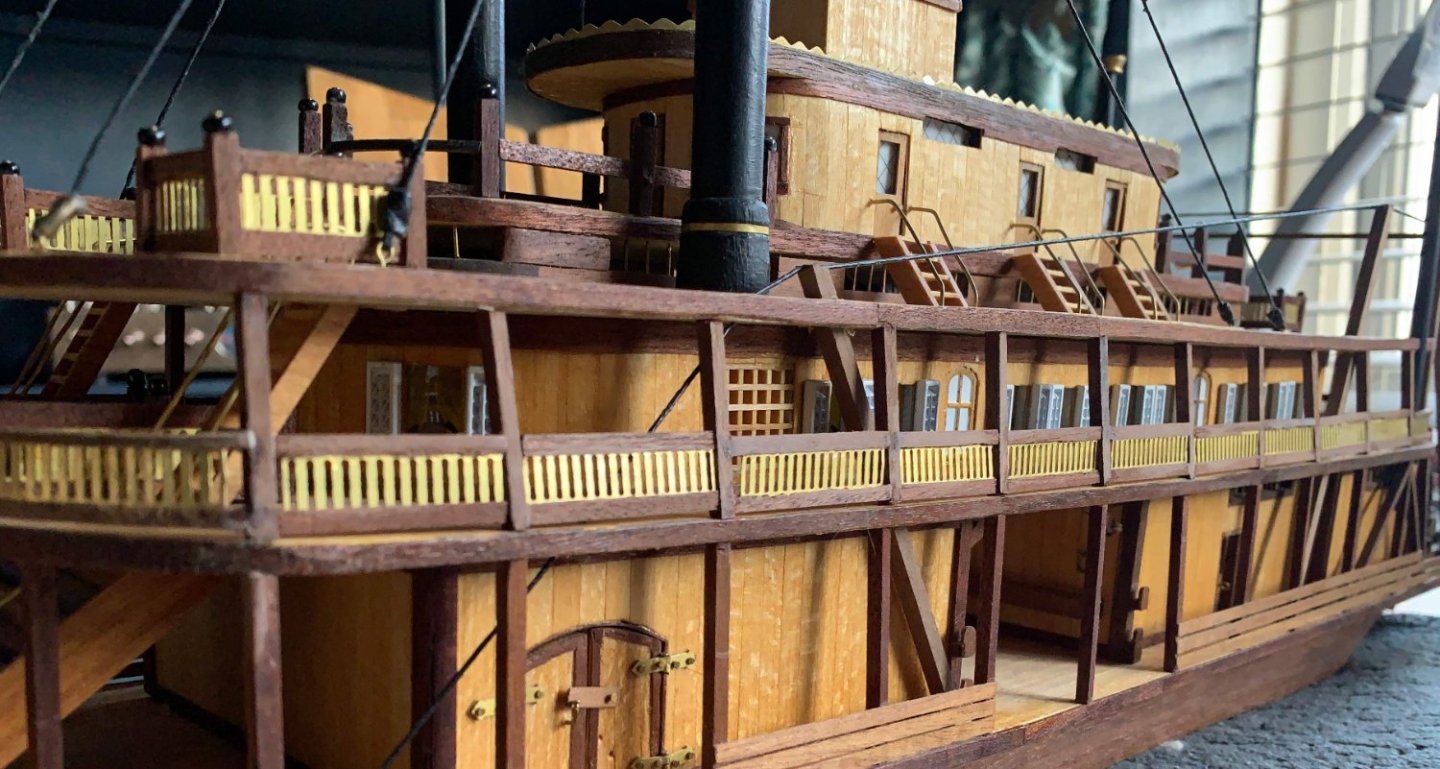
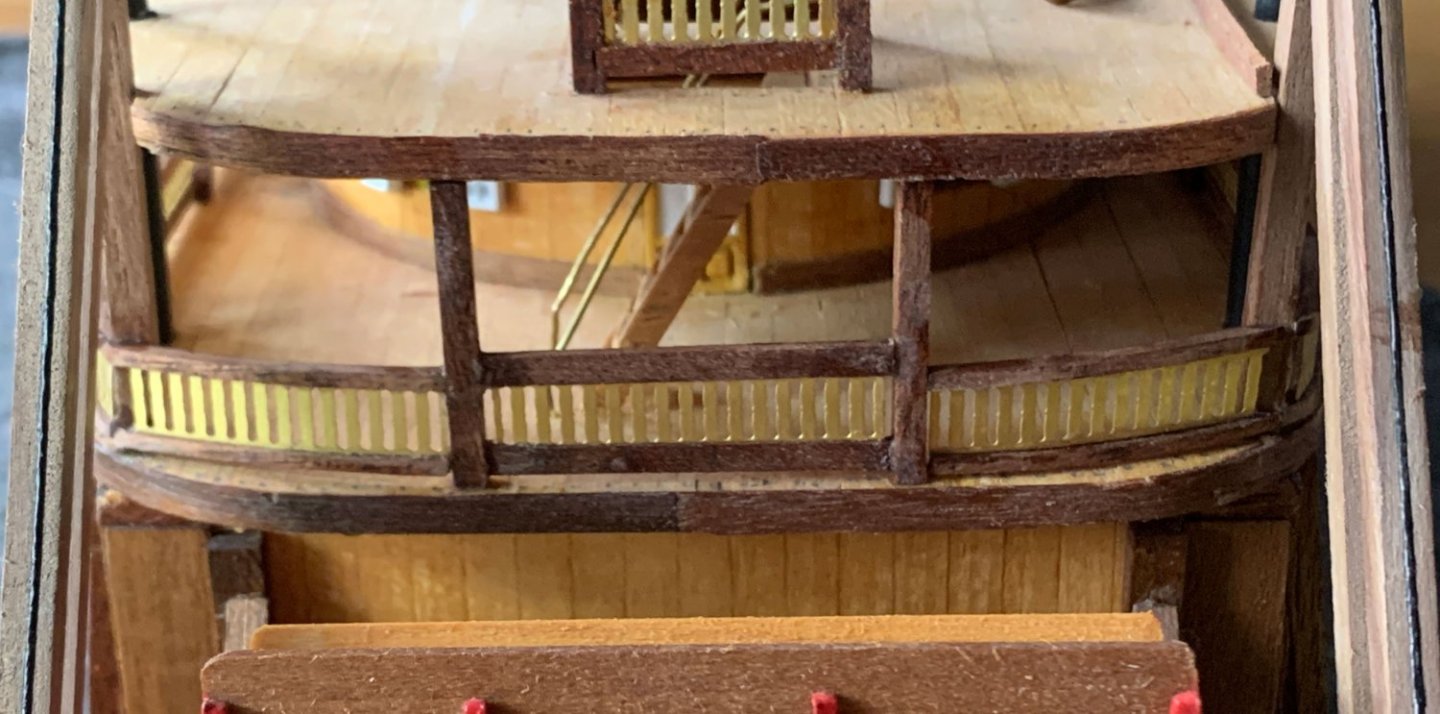
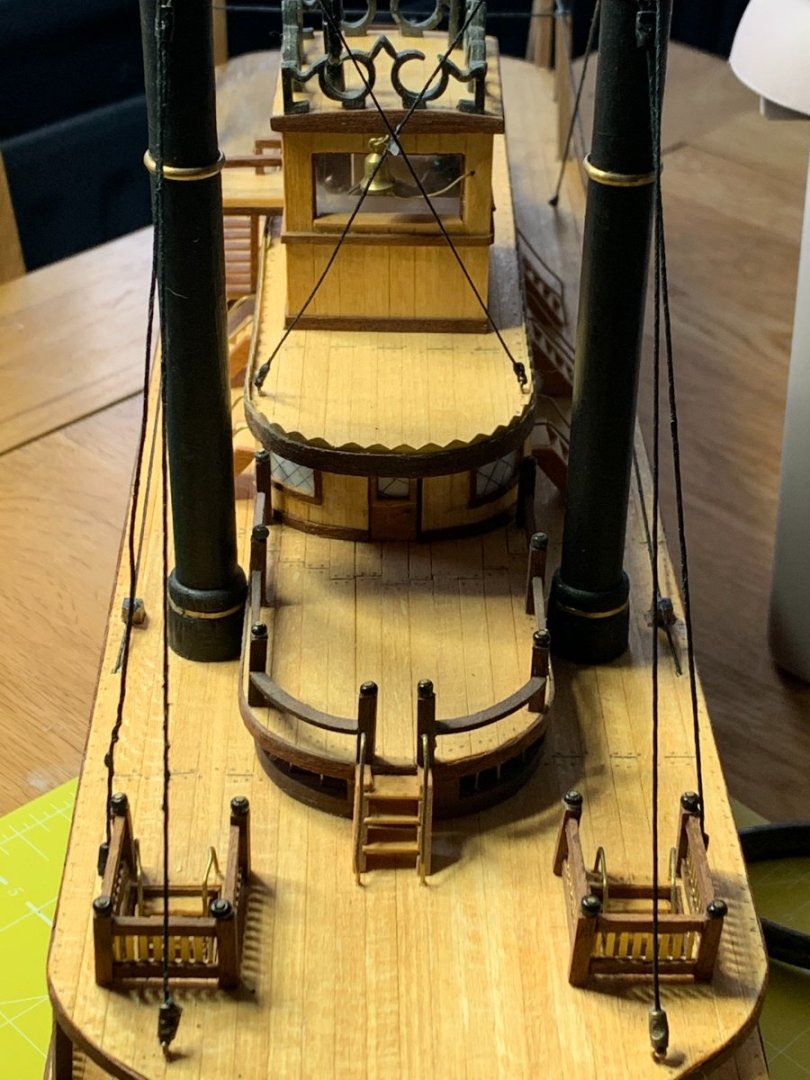
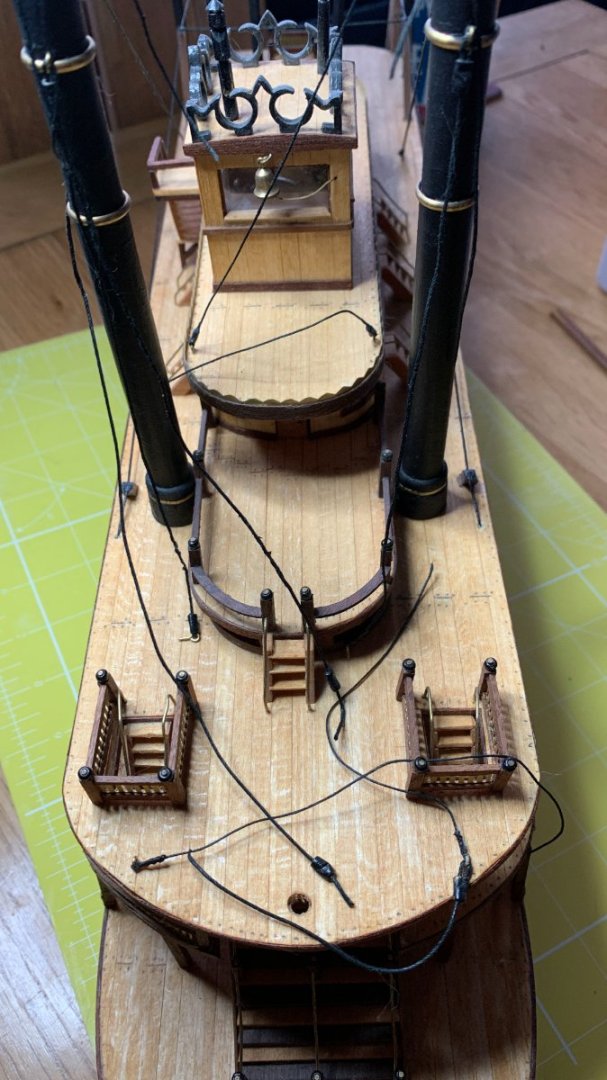
OK - did have a day or two off. Resized the height a touch more and installed the brass top rail. Not perfect, but as close as I'm going to get! Decided to give the stanchions a rest, and to make the boarding ramp cranes, masts and ramps. 2 cranes as I'ved done the straight stairs, not the spirals. Realised I need to change those mast rings for cleats, and first single block on the arm for a double for the second lift rope to travel through. The ramps - At the back is the ramp AL want you to use, basic plywood. New ones made from 1mm x 5mm planks, with side pieces 2mm x 5mm shaped. Finished ramp again compared to ALs. Anti-Slip pieces added, as are strengthening cross members underneath. Still need to add the eyes for the lift and swing ropes.

- 86 replies
-
- 3
-
-
- king of the mississippi
- artesania latina
- (and 2 more)
-
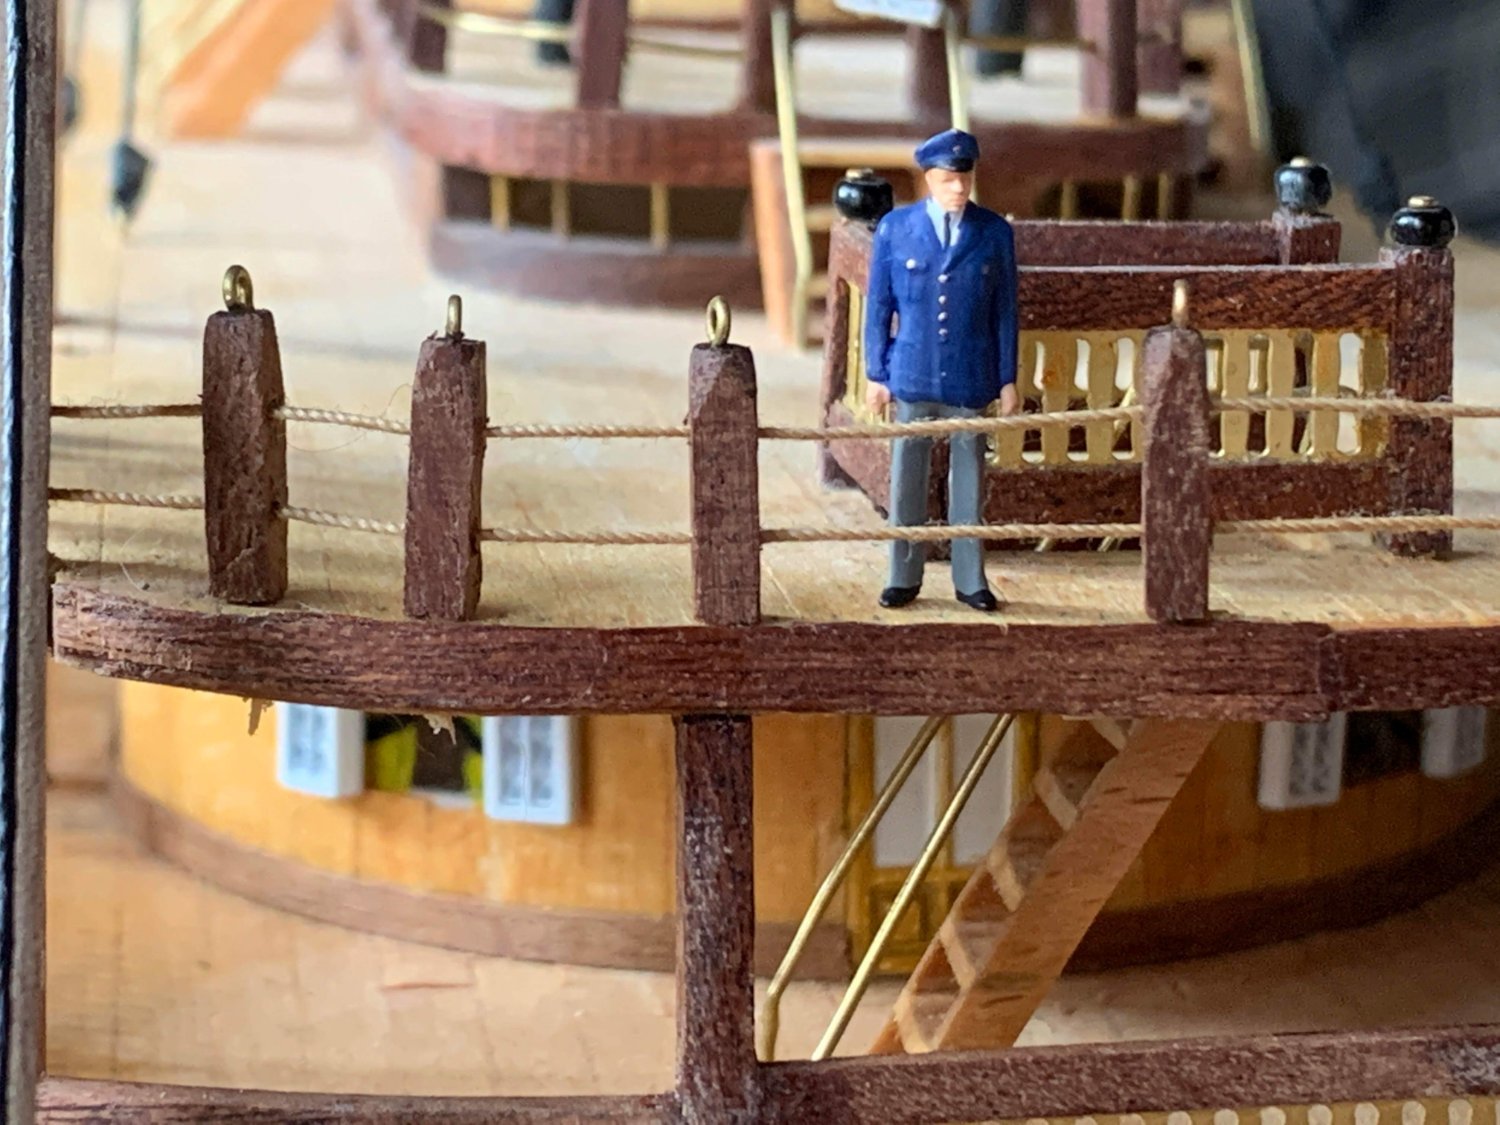
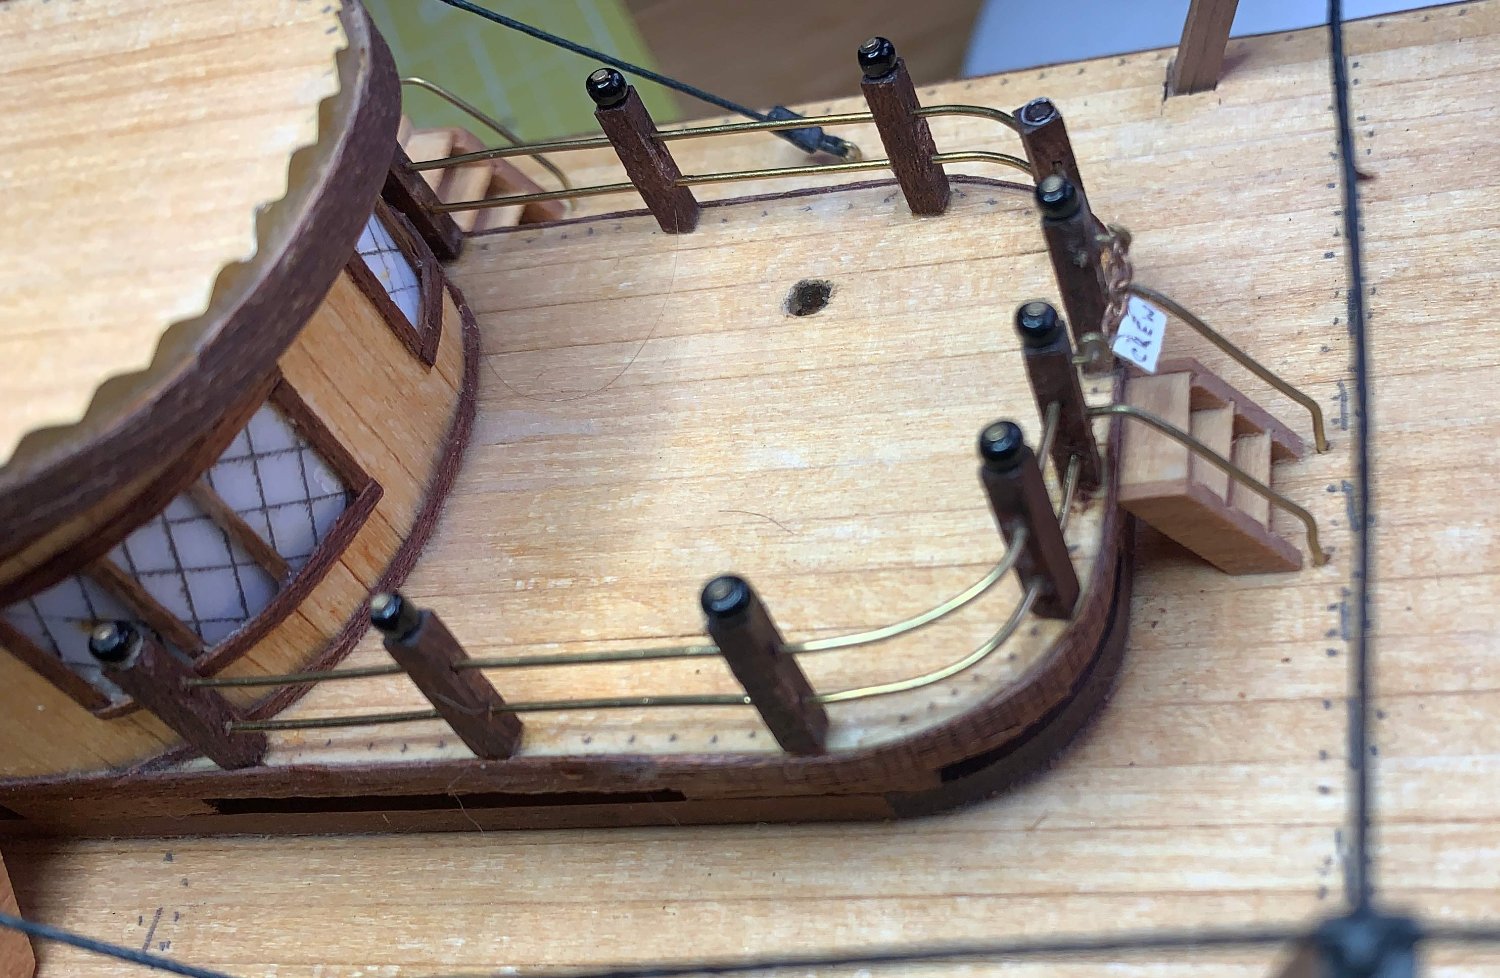
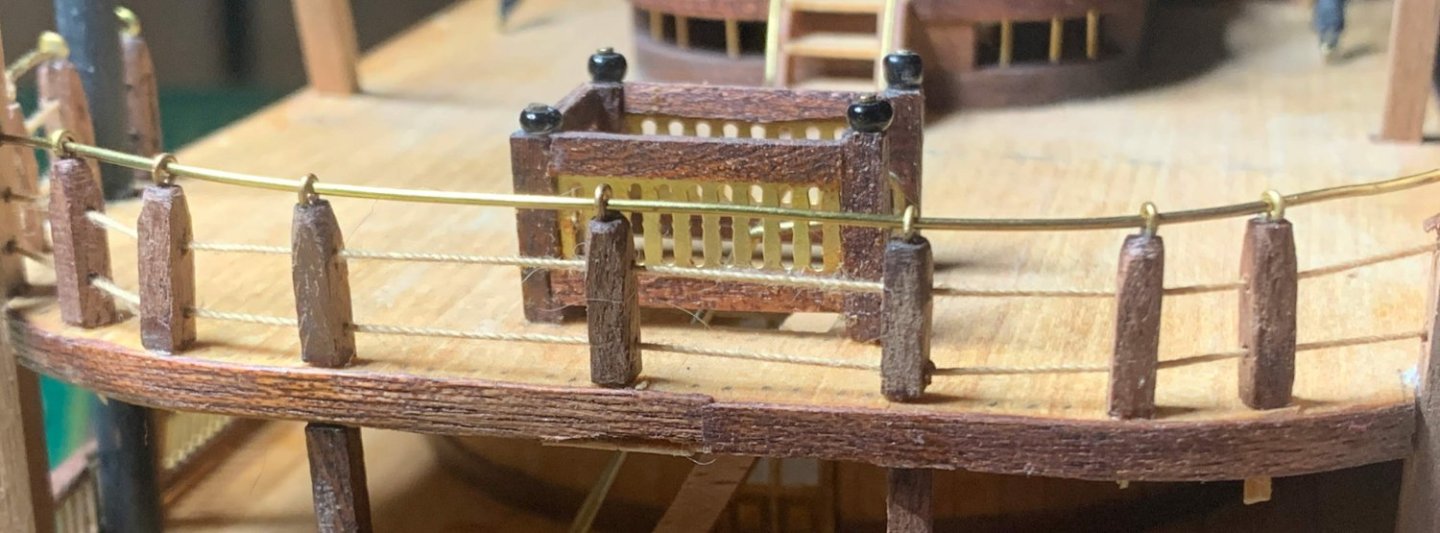
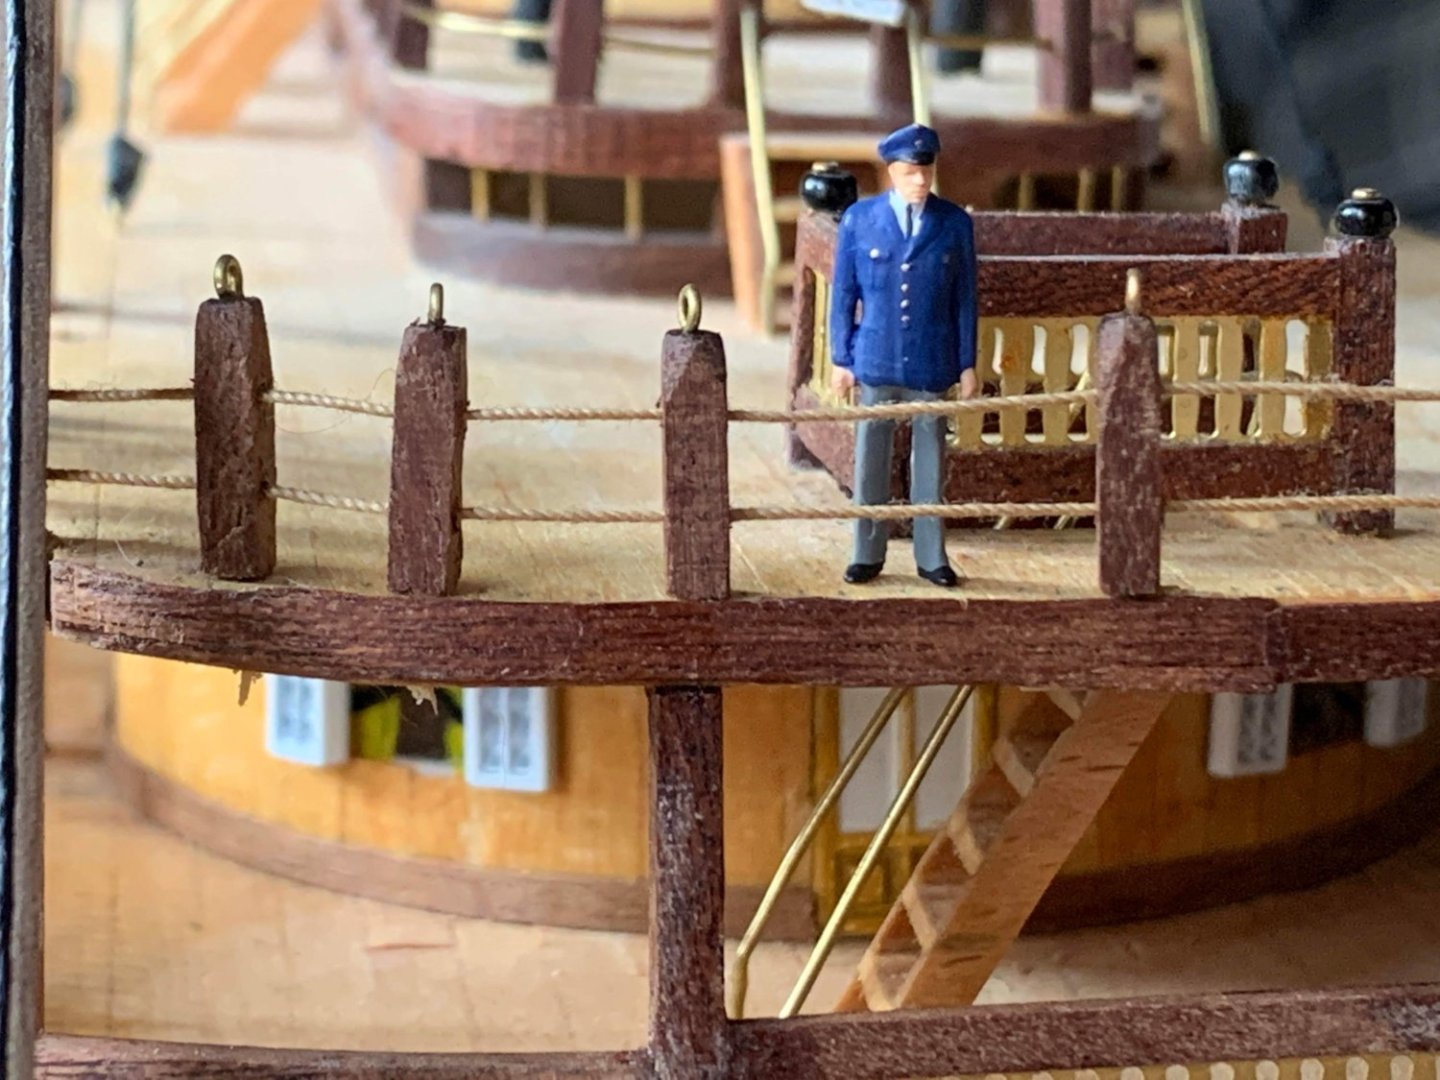
Stanchions resized, threaded and temporary brass rail added for indicator. "Well Mr Mate," says the Captain, leaning against the railings "what do you think?" "Well Cap'n," says Mr Mate, who knows nothing is fixed in and is standing well back, "they seem OK to me from back here!" More later.

- 86 replies
-
- 2
-
-
- king of the mississippi
- artesania latina
- (and 2 more)
-
So before I made more I decided to try - just as well. Used the CA needle method to thread the ropes, posts aren't fixed in place yet. They look too high as a brass rail will be fitted through the rings so off they will come. Bottom pins to be removed, holes aligned and sanded shorter for a retry 😅
- 86 replies
-
- 3
-
-
- king of the mississippi
- artesania latina
- (and 2 more)
-
Hi Daryll. The thread looks good. If you wanted to replace with wire then any good jewelry / haberdashery should have it in. Another builder, Bill97, queried about the run of the anchor chains because of the bend around the hatch. See my reply with photos from another member of the way it goes, Anchor Chain Run, so it doesn't rip the hatch apart and is helped into the chain ports when being raised / lowered.
- 248 replies
-
- 2
-
-
- Cutty Sark
- Revell
- (and 2 more)
-
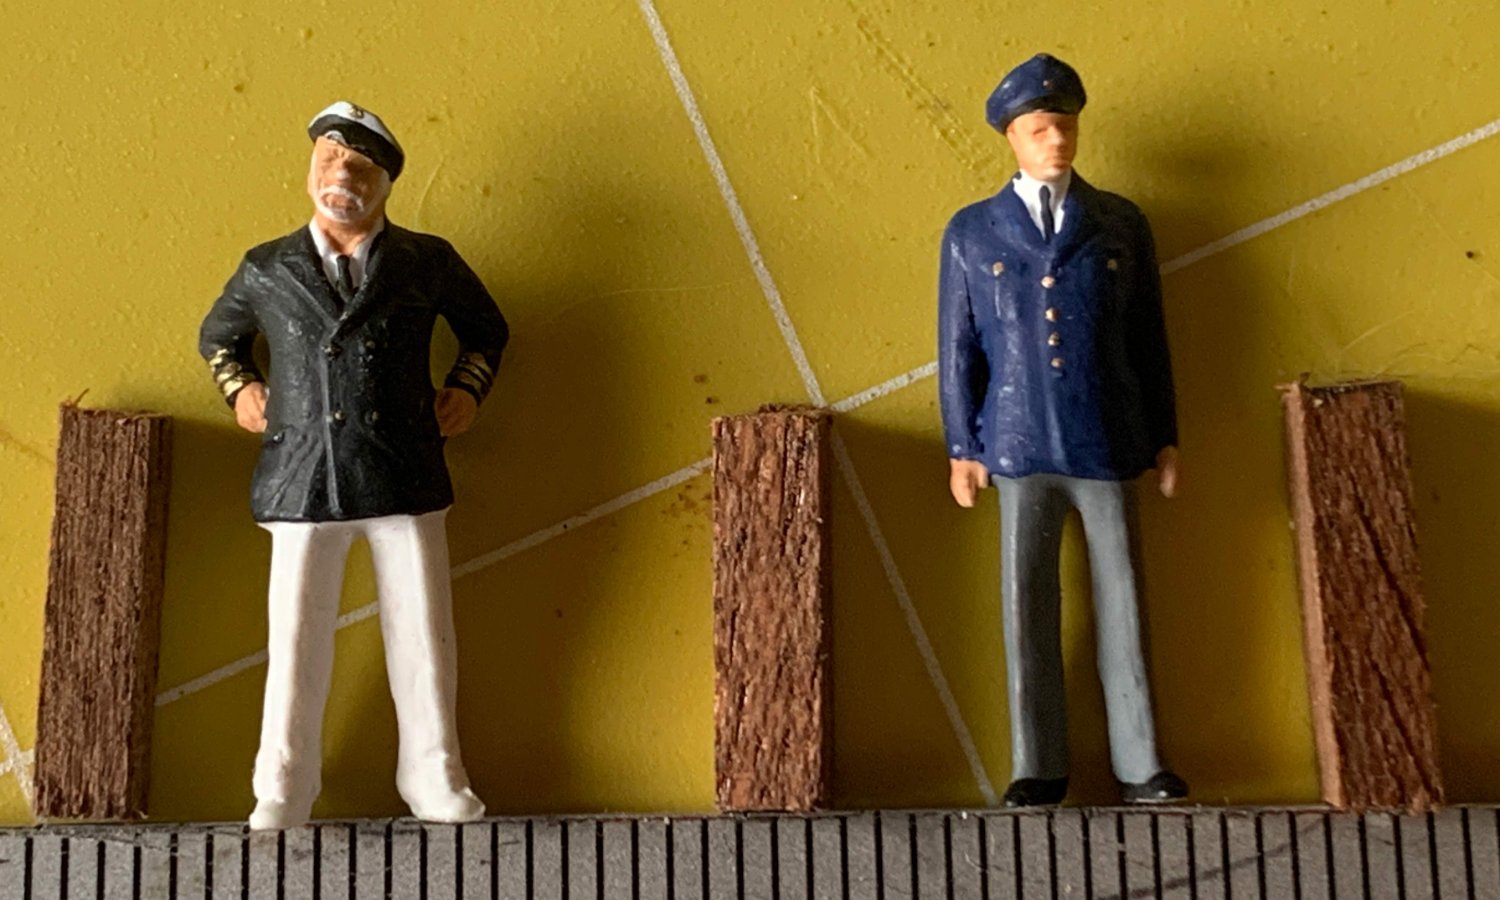
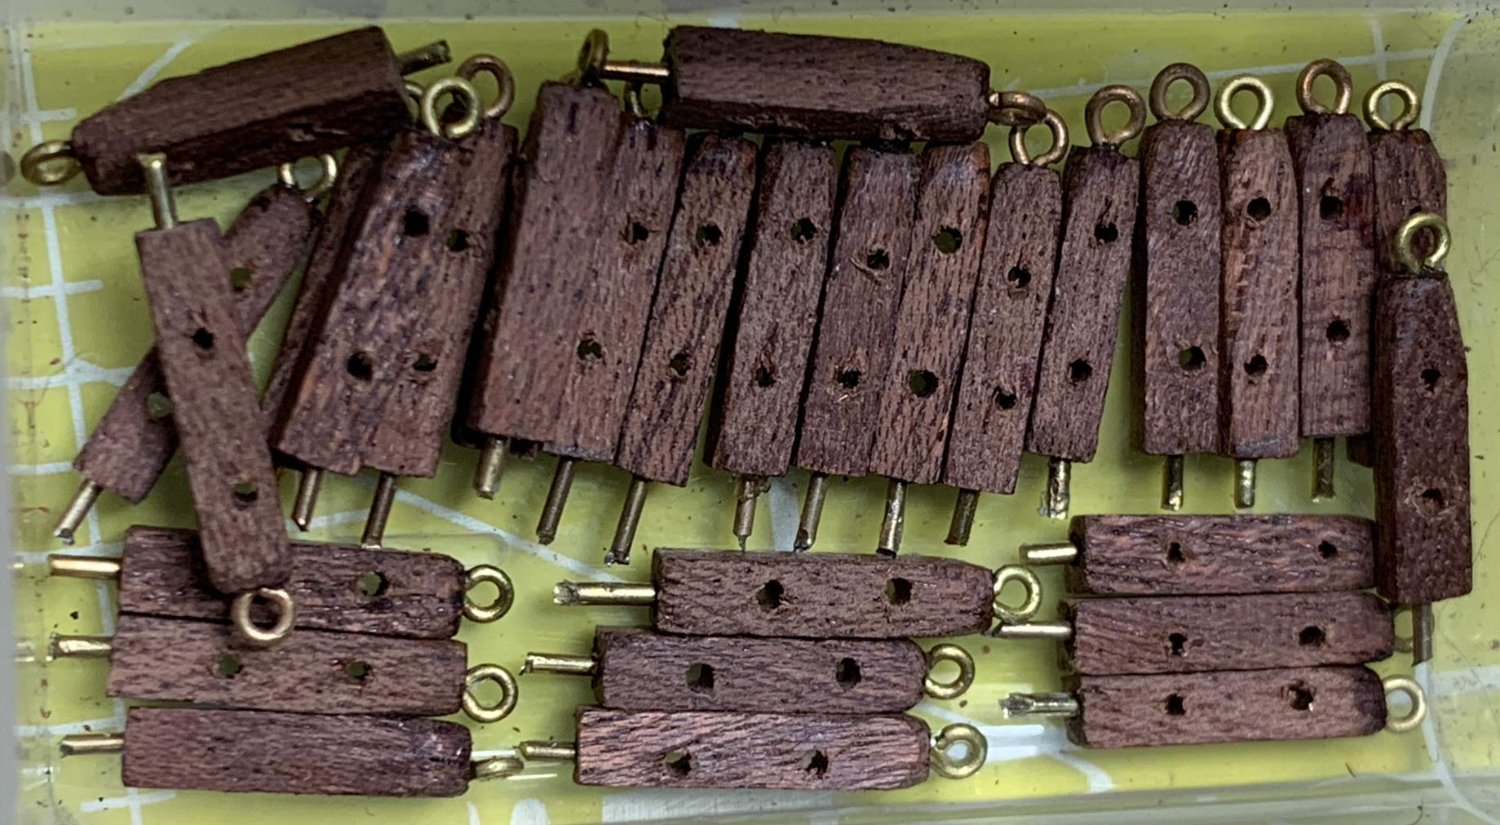
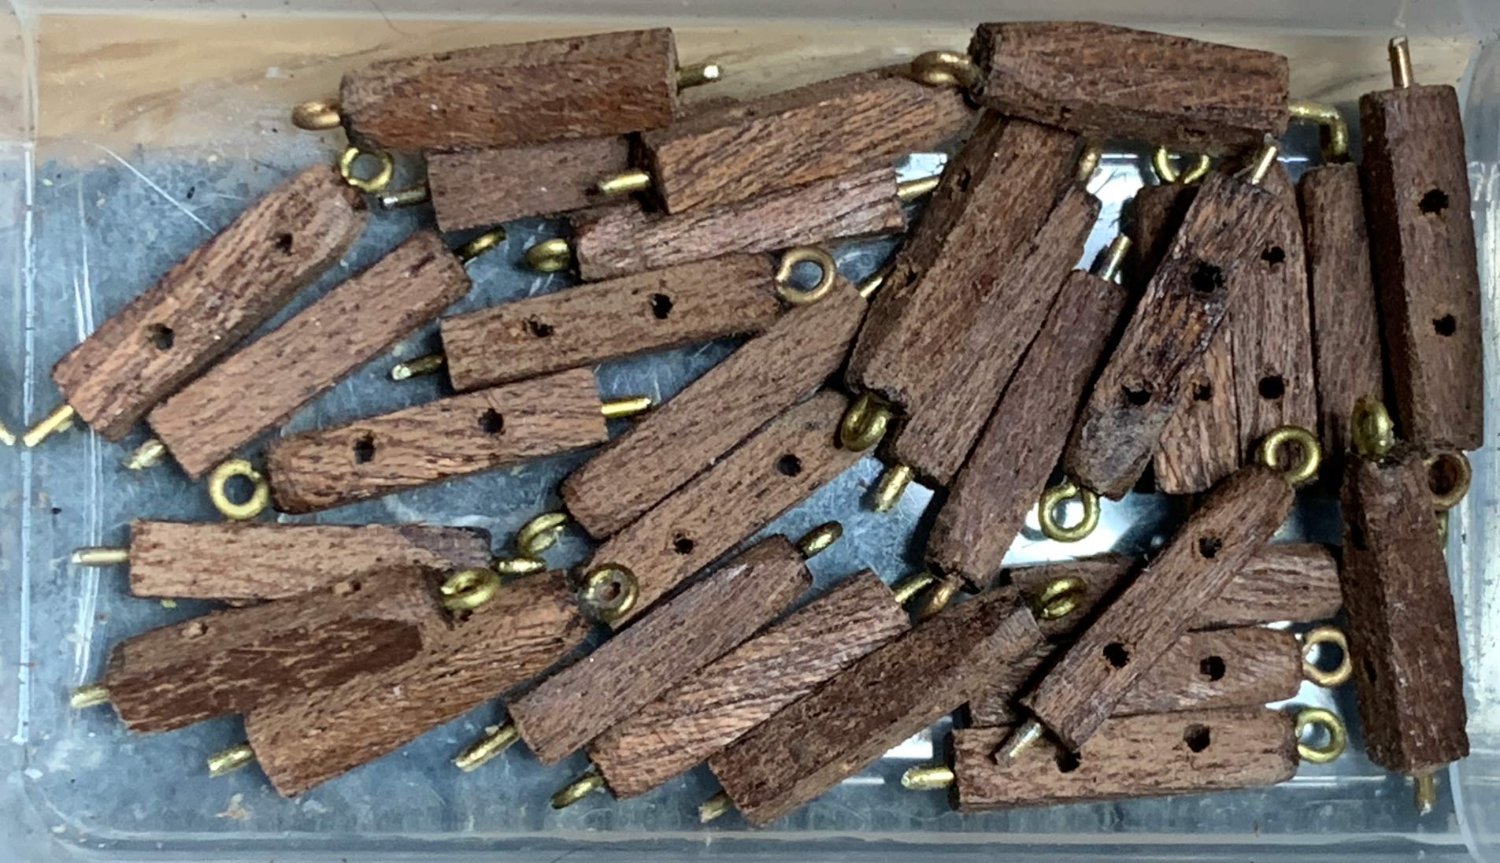
Bad weekend - ill for 3 days, almost recovered now, and car broke on Friday. New alternator and serpentine belt, pick it up in the morning. Also had the grandkids Friday night to Sunday Night! However, today I managed the upper deck posts - Measured against the crew for height they made 12mm. 30 of them cut, rough shaped and drilled for eyes, pins and rails. Final shape. Holes reamed, pins straightened, cut to short length and filed. These posts will be pinned to the deck for security as they are an easy knock. Started to drill the deck to take the pins. Realised that, even an overmake of 30 isn't enough to take care of the curves required. Back to make another 10 tomorrow - I hope! - after taking the cat for neutering and picking the car up. Cheers for now!


- 86 replies
-
- 5
-
-
- king of the mississippi
- artesania latina
- (and 2 more)
-
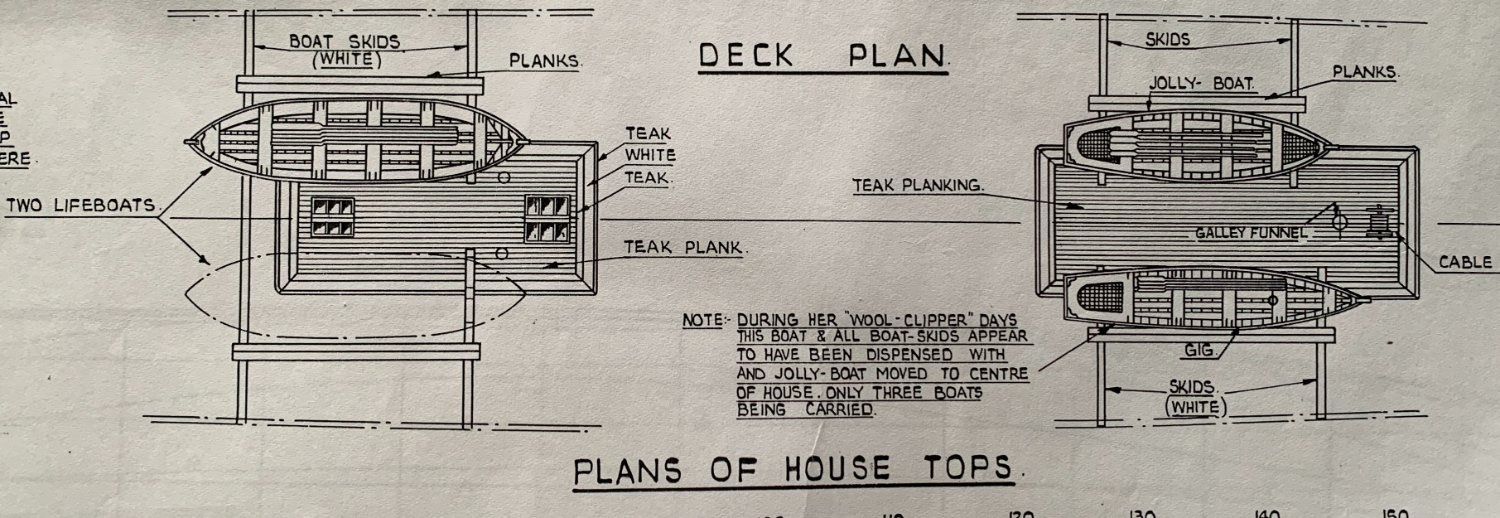
Hi Daryll maybe they were going to go with the original - 4 boats stored the right way up - but changed their minds. It's looking good!
- 248 replies
-
- 1
-
-
- Cutty Sark
- Revell
- (and 2 more)
-
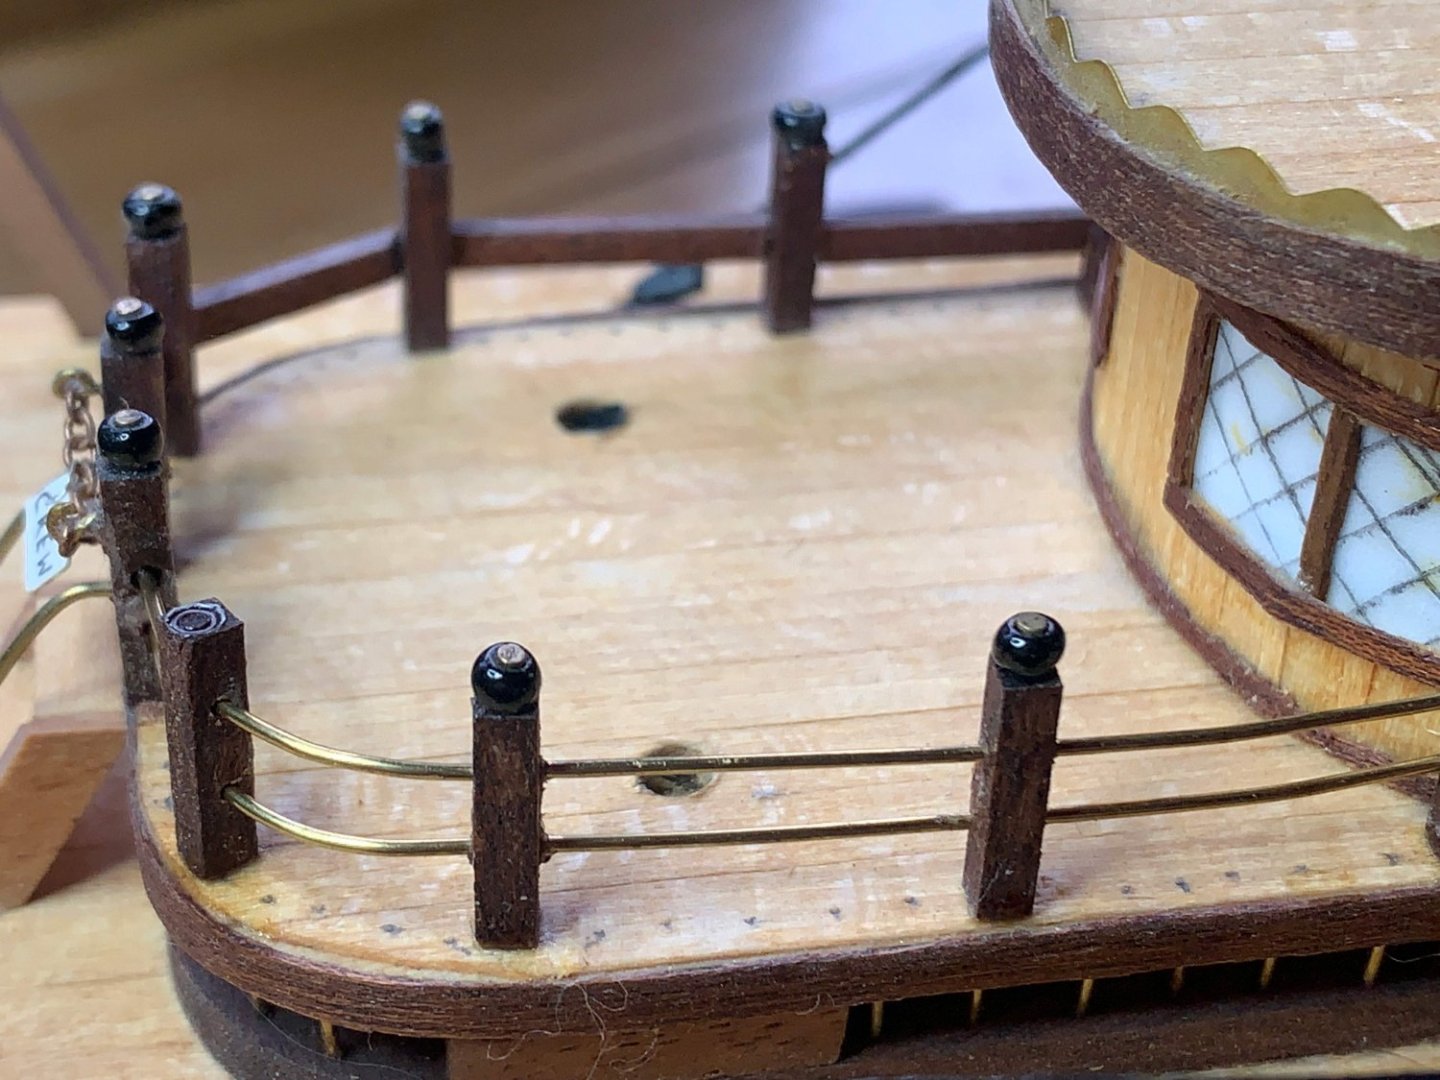
Thanks for the looks and likes, appreciated! Ok - best laid plans and all that meant I didn't sand and oil. I did fix the middle deck railings though! Instead I decided I didn't like the wooden rails on the upper deck. I wasn't really enamoured of them in the first place. Off they came and have been replaced with shiny new double brass rails. Showing the contrast between the original and new. A lot cleaner and neater lines, pleasanter to view. Cheers for now!

- 86 replies
-
- 5
-
-
- king of the mississippi
- artesania latina
- (and 2 more)
-
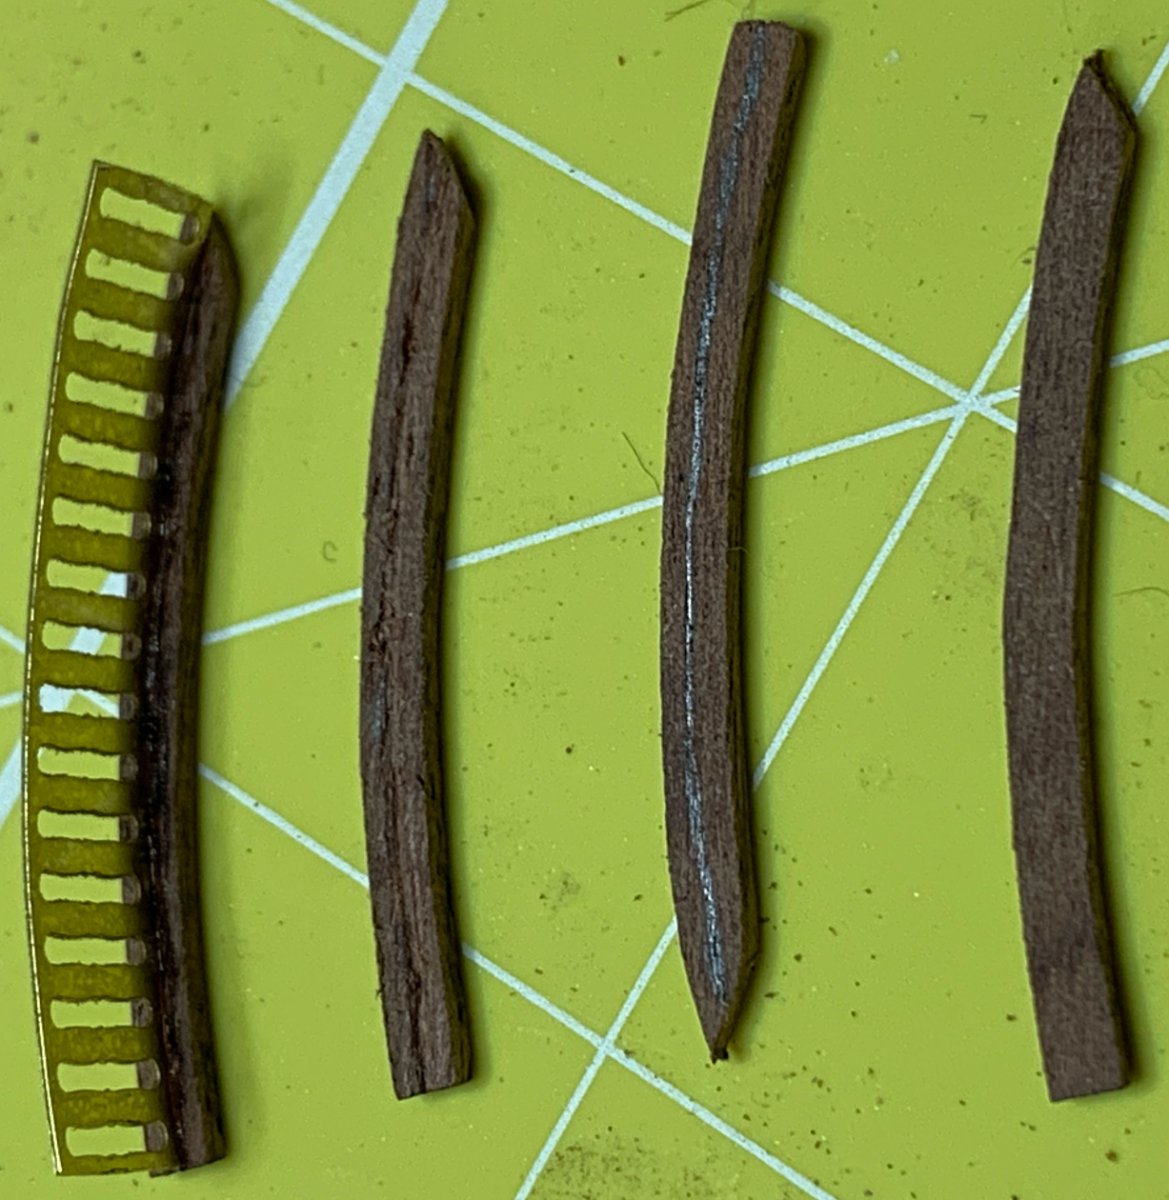
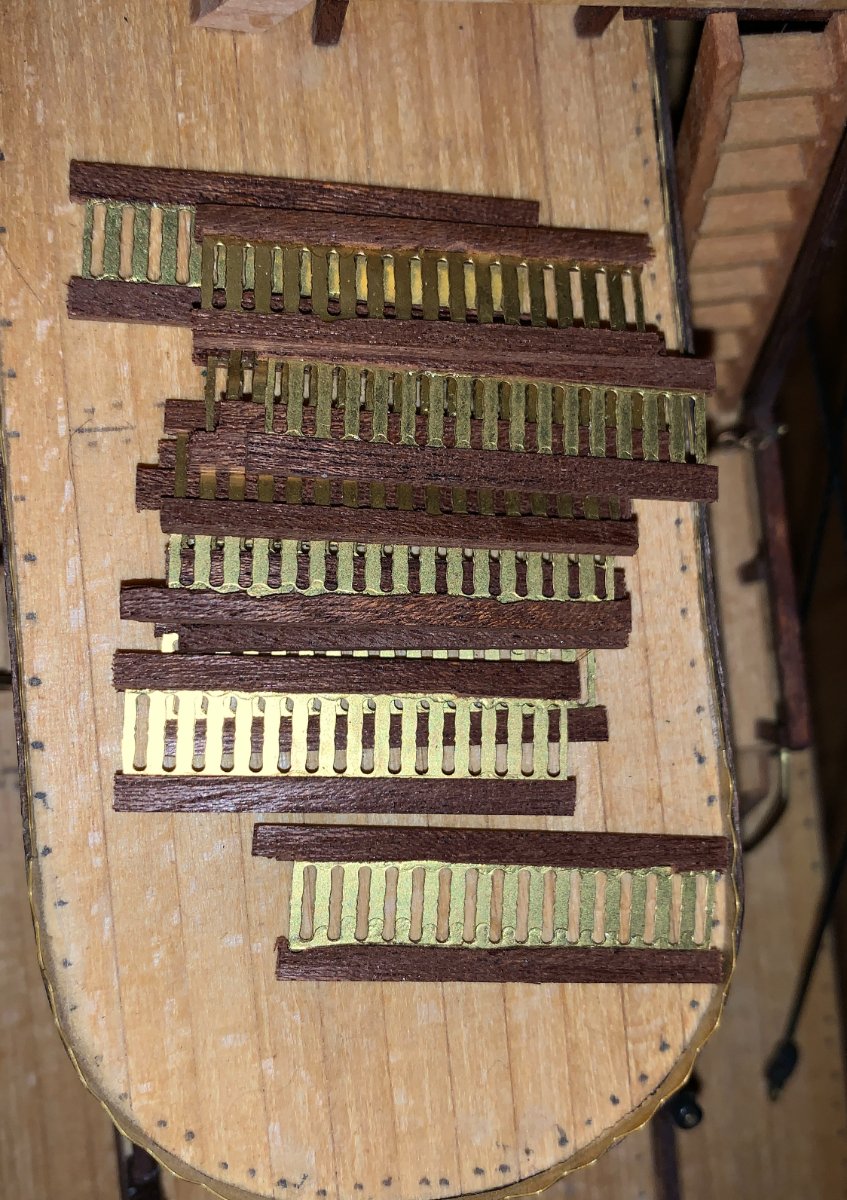
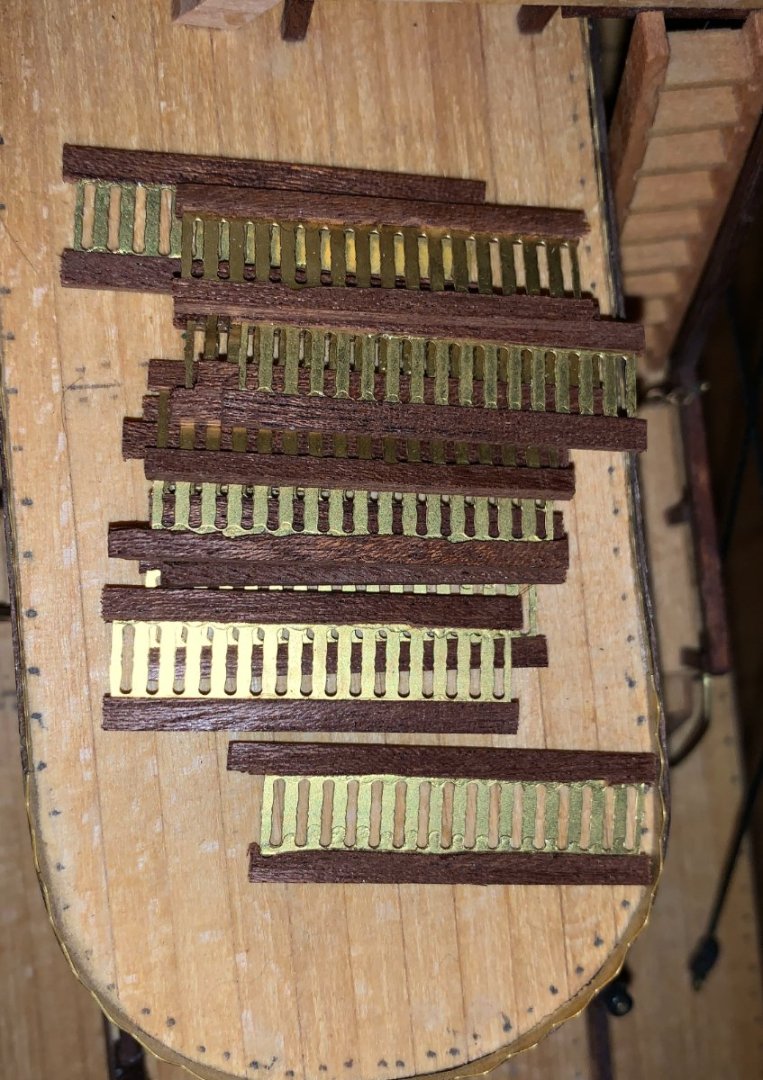
Building continues - delay due to lack of pics. First up the second deck side railings. I made a mistake - nothing new there then you might say! When I measured the height of the uprights I measured vertically and forgot they are angled inwards 😒 Fortunately I had only cut the one length, so each was measured with eyeball MK2 - glasses 😄 All the railings had been made up previously so it was a case of line up the posts and fit them in. Then came the stern railings The central two uprights and single railing were fitted into place to give, as much as possible, a central single rail instead of the two in the instructions. After that the curved sections to connect to the sides. Once the 4 curves were selected from the box the were roughly shaped and angled to fit don't forget that this is not as AL intended! Right to left - As is after preliminary shaping, marked for grooving, grooved using a pointed diamond file, flat pointed file and the corner of a razor saw to cross the grain, and finally the PE fitted in. Finished items fitted - just noticed I need to adjust that right hand one, it's dropped, as has one one the side! Doesn't look like much but it was close to 8 hours. Once the drops are fixed a touch of sanding and then oil the bare woods to match the old ones. Upper deck railings after that - don't think I'll be using the PE work. Each deck will be different so i've got something in mind, just need to think about working it out. Thanks for following along, more mods on the bow to come to individualise the build further later on Cheers!.

- 86 replies
-
- 5
-
-
- king of the mississippi
- artesania latina
- (and 2 more)
-
Hi Jerry. Sorry, I'm not much help. It looks like I did a Captain Kirk and cheated - it's so long back I can't recall if I made a mistake, or probably just decided that the 1.5 was too thick for the railings to start with. Part 90 is 1.5mm x 3mm. Scale 1:80 -> 1mm = 80mm, 1.5mm = 120mm = 4.7" approx thick. I used 0.5mm x 3mm (1:80 = 40mm = 1.5" approx thick) which seems more appropriate for the planked railings - even farm fences aren't as thick as AL want to to use! To bend the wood Al use I have used a plank bender that puts indents - cuts - onto the inside of the plank for the radius of the curve needed. Unfortunately these will still be visible once bent. I have also made a pinboard with the radius and hot soaked 'til pliable enough and put it into the curve until dry enough to keep its shape and test fit. You could try one of the other guys who've finished their build tho - @bobandlucy is the most recent.
-
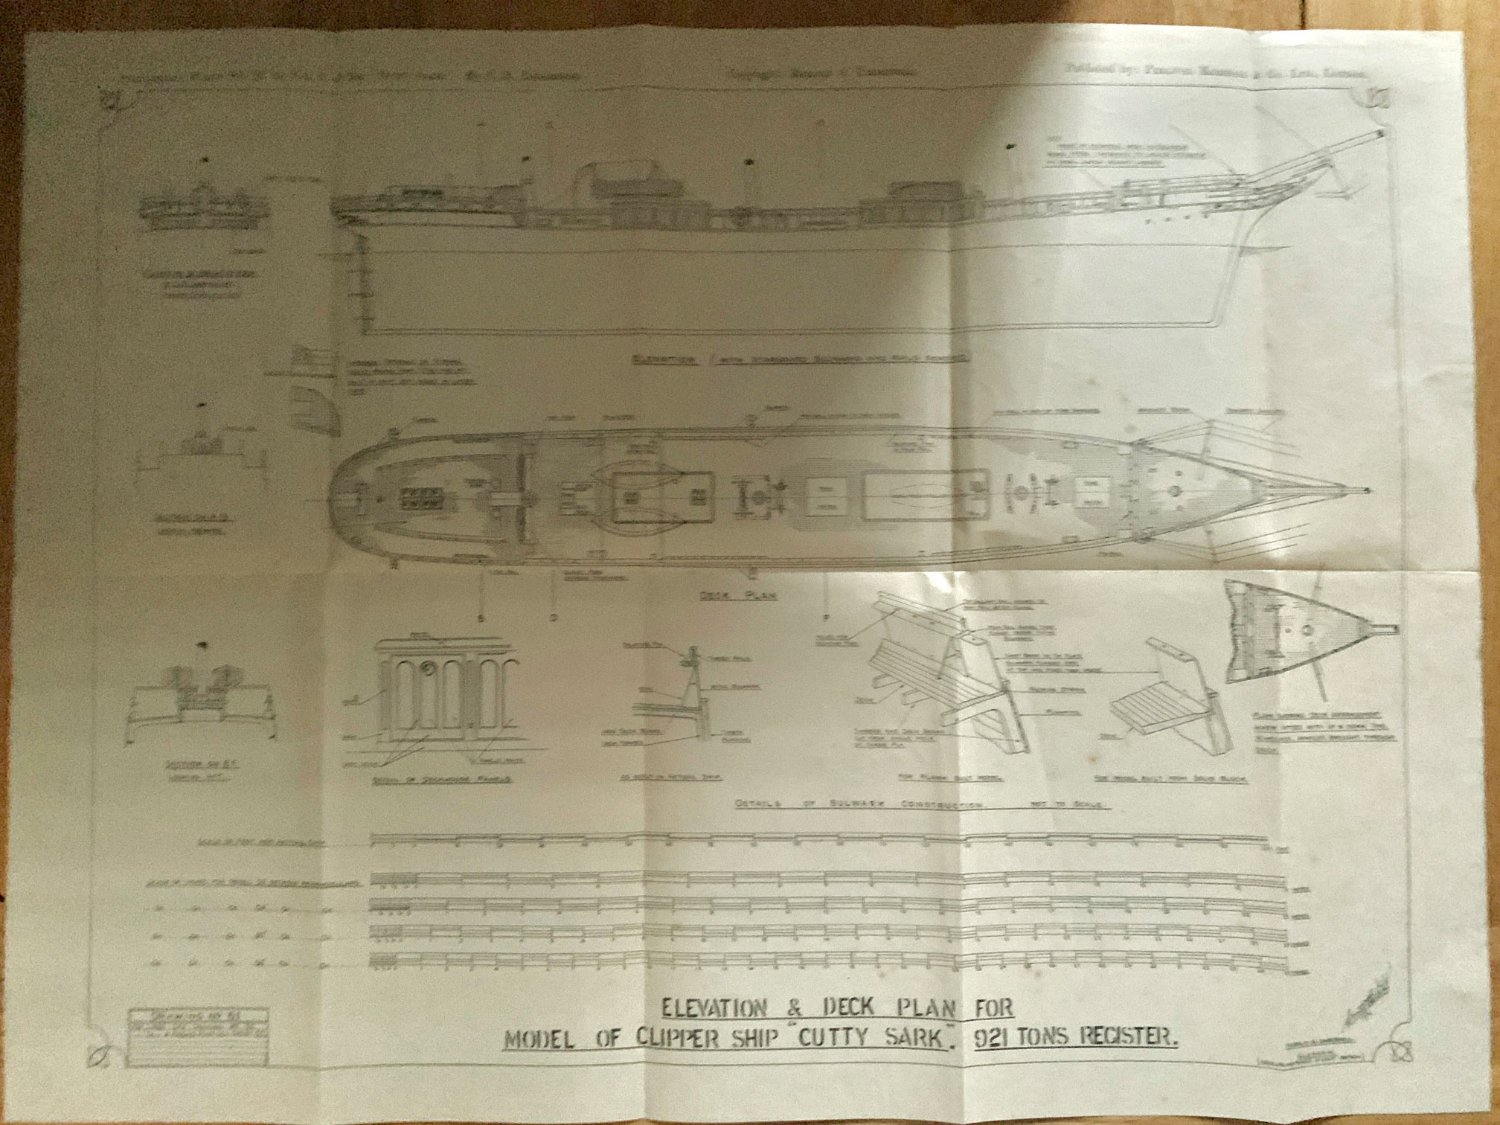
Campbells drawings have the info on chain and wire runs and he gives dimensions, but you'll need a magnifying glass to read some of them!
- 248 replies
-
- 1
-

-
- Cutty Sark
- Revell
- (and 2 more)
-
Hi Cleat. As Cathead (Eric) suggested soak it and flatten between layers with a heavy weight on top - it should flatten well. With the windows I fitted the plastic inside and made a frame for the outside to hide the ply edges. To hide the gaps top and bottom I used spare (not from this model!) 0.5mm x 3mm planking to form a contrasting skirting.
- 132 replies
-
- 2
-
-
- King of the Mississippi
- Artesania Latina
- (and 1 more)
-
It looks like there are 12 packs - 96 installments at 8 packs a delivery hence the high monthly cost. NO magazines, just the PDF downloads. Here's a link to the finished version on thier modelspace forum, what they call an Official Build , of only 3 builds It's done by a subscriber and is itself a modified build. Hope this helps.
-
Thanks guys, life in my house ad the needs of otherfamilymembers gets in the way a lot, but she was staring at me ad the other thingshave quietened down for now, so onwards we go! 👍
-
☹️ Congratulations on your new youngster, and the residency! Add those to a new house and it all takes time away from time needed for other things, as I know all too well. Like me, you'll get back to it when you can. Looking forward to any updates! All the best, Bob
-
Pin rails look good, Daryll. Are they HisModel? I've dug my Underhill plans out, and they're the same scale as the Campbell ones. There are several differences between the Revell model, Underhill and Campbell, notably the number and position of boats, and Underhill has 3 different forecastle arrangements depending on date. The original specs that I have a typed copy of call for the Revell and Campbell layout of the forecastle, and this is the way she was restored originally as noted on Underhills 3rd drawing. My own model, started OOB, is laid up for the time being as it was knocked from a shelf and has a few bits gone missing and broken. 😭 I'll get back to her one day soon. If you need any info from the big Underhill plans let me know. Cheers, Bob
- 248 replies
-
- 1
-
-
- Cutty Sark
- Revell
- (and 2 more)
-
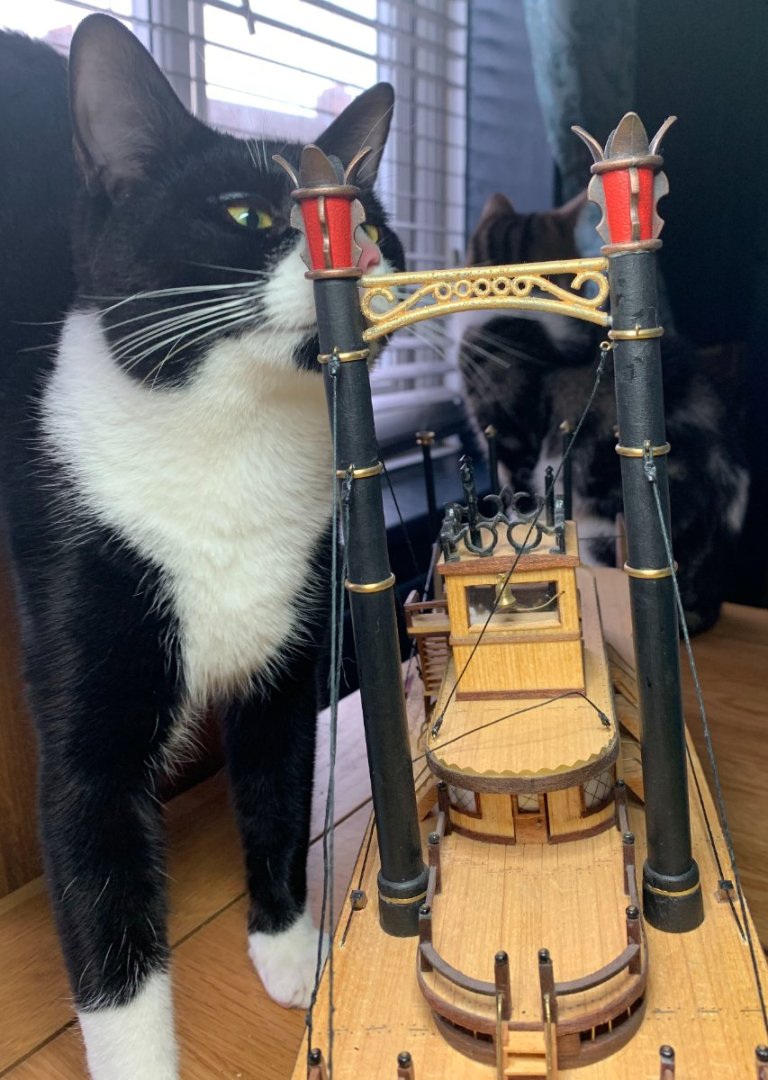
So - after a year and a half of upheaval, (whole house redecorated, some rooms twice, more cupboards and shelves built into all rooms and kitchen, craft room for SHWMBO, garden levelled and tiered, grass replaced with astroturf and polytunnel greenhouse installed), I've finally got somewhere to work again, albeit the dining table! During this break the ships cat has been hard at work re-arranging the tensioning rigging for the Chimneys. The captain examines the damage - 8 ropes cut! Says "You should fire that ships cat!" Ships cat, Cooper, in the background not impressed, his new first mate, Styx, checks out the ongoing repairs. Rope repairs done, and railings refixed that came off whilst repairs were being done. Next job - more railings. 12 made up for the stern and other side, ready for exact fitting as each upright is fitted. Uprights measured and 5 different heights for 11 of them due to the curve of the decks. More soon!

- 86 replies
-
- 4
-
-
- king of the mississippi
- artesania latina
- (and 2 more)
-
Hi Daryll Have you seen Sailcats CS ? The Noel Hackney book is available at Alibris AbeBooks and is the most expensive of his set. In the Longridge books Underhills plans are 50cm x 39cm and are dated 1974 in the edition I have. In the intro to the book by Longridge, dated 1933, he says that Underhill did indeed alter his original plans to take into account the new research in the book. From the RMG the original date is 1932 for the Underhill drawings, and Campbells are the 1950s. (I do have both sets on modern printings) Each drawing has the original scale, and then 4 more scales below for the modeller to upscale for different sizes of model. Pic from the book insert. If you wanted to go really mad the RMG has drawings going to 1/12 scale but has a Set at 1/96th done in 1922. Drawing list is lower on the page. These would be a special order though, as they haven't yet been digitised, and likely at a higher cost. From the restoration dates the 1922 / 1932 plans could well be the closest to the original, with Campbells possibly being based on the 1950s restoration. Hope this helsps a little, Bob

- 248 replies
-
- 3
-
-

-
- Cutty Sark
- Revell
- (and 2 more)
-
Hi both The largest B size is B0, which isn't quite big enough to make them 1/96. ☹️ By my maths, admittedly a bit shakey, At 1/128 they'd need to be scaled up by 1.3333 and the paper size to fit that is 2A0 (5'6 x 4')😲 There'd be a fair margin to cut off though! You could always measure off the plan and multiply. Longridge must have used Underhills drawings for his model, as they are the ones provided in the book. Another book to look for could be the Noel Hackney one for the Airfix smaller scale model which gives quite a few changes and upgrades for it.
- 248 replies
-
- 2
-
-
- Cutty Sark
- Revell
- (and 2 more)