HOLIDAY DONATION DRIVE - SUPPORT MSW - DO YOUR PART TO KEEP THIS GREAT FORUM GOING! (Only 75 donations so far out of 49,000 members - C'mon guys!)
×


Bob Fraser
-
Posts
291 -
Joined
-
Last visited
Content Type
Profiles
Forums
Gallery
Events
Everything posted by Bob Fraser
-
 Hi Cleat. I used wire to attach the blocks to the mast. My mistake, I'd advise against it as the wire snapped easily when tightening it up to the mast. Your photo shows the wire running through the hole. It, or the rope to attach the block to the mast, should run round the groove on the outside - the hole is for the rigging to run through. The blocks, - 1 hole is a single block, 2 holes is a double block. Have a look here - Working with small blocks has some tutorials on attaching blocks. Hope this helps.
- 132 replies
-
- 2
-

-
- King of the Mississippi
- Artesania Latina
- (and 1 more)
-
It's what I used too. Lay the wire along the length of it, fold the thing back into a triangle, squeeze it tight and pull the wire. First pull will work with thinner wire, thicker may require 2 or more. If there's still a curve to it do another pass with the curve pointing to the floor, but don't squeeze as tight.
- 132 replies
-
- 1
-
-
- King of the Mississippi
- Artesania Latina
- (and 1 more)
-
Nicely done! Noticed the pins in the bottom of the uprights - they helped me a lot in keeping stuff fixed in place 😃 Cheers,
-
Looking nice and neat!
-
I have one of these - very useful for a quick change and no need to change the collet. It's permanently fitted unless a bigger shaft collet is needed. The only thing I would add is that if you have a Dremel then buy the Dremel accessory, not one that is compatible. More money, but I found the compatible one I bought had a slightly different thread and would have re-threaded the Dremel if I had forced it on. On the other hand, a compatible flexible shaft fitted perfect 😵
-
I used superglue for most jobs on my Mississippi, with PVA / white / wood glues where stuff needed a little joggling about to fix. In hindsight I found superglue - CA - soaks into the wood, especially the wider grained ones like mahogany, and causes discolouration. Next proper build it will be alphatic or white wood glues, and spend a bit more time clamping and waiting, with CA only where absolutely needed. When rigging a touch of CA on the end of the rope, cut to an angle, makes a great needle point for threading blocks etc. You're right, building these isn't a race. Someone on here has the tagline "wood is patient" and it's right. Not sure about Occre, but AL only supplied just enough wood without allowing for mistakes, save the offcuts as they can be used to plank the cabin walls. Cheers,
-
Pulling up a chair too! Looking nice and neat. The AL Mississippi was my first build. I think the hardest part was getting all the stanchions to fit properly.
-
Looking good - I do like the lit look. They do make the cabins look a lot better too .... I did top and bottom, it hides a lot of things! 🤣
-
Size of a printer needed
Bob Fraser replied to Frank Burroughs's topic in Modeling tools and Workshop Equipment
Had mine for about 4 years now, with no real issues, just an occasional head clean. -
Just caught up with you and following along. Looking good! As you say, a fun model to build, and your windows and lighting changes certainly enhance the model. I found AL only supply just enough wood strips with no leeway for mistakes or alterations.
-
Danny Vadas' masting and rigging spread sheet
Bob Fraser replied to allanyed's topic in Masting, rigging and sails
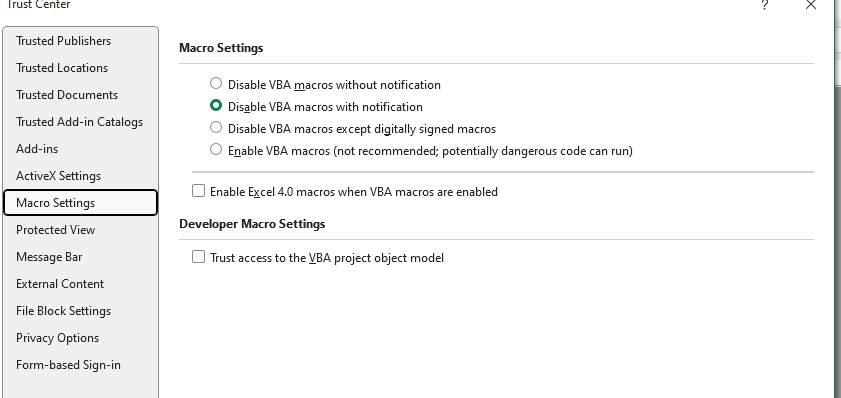
I got a notice that Macros were blocked due to trust issues, but was able to enable them from the notice displayed above the spreadsheet. You can also try this. Go to File -> Options. Select Trust Center. Click on Trust Center Otions. Select Macro Settings, then select which setting you wish. As you can see I have Disable with notifications set. This will give the "enable notification" You can also set trusted locations so macros should work without issues. Hopfully this will help.
-
Kaolin and Morphine over the counter for upset stomach. People were getting hooked on it as it was cheap until the Morphine addiction was realised and it was banned!
-
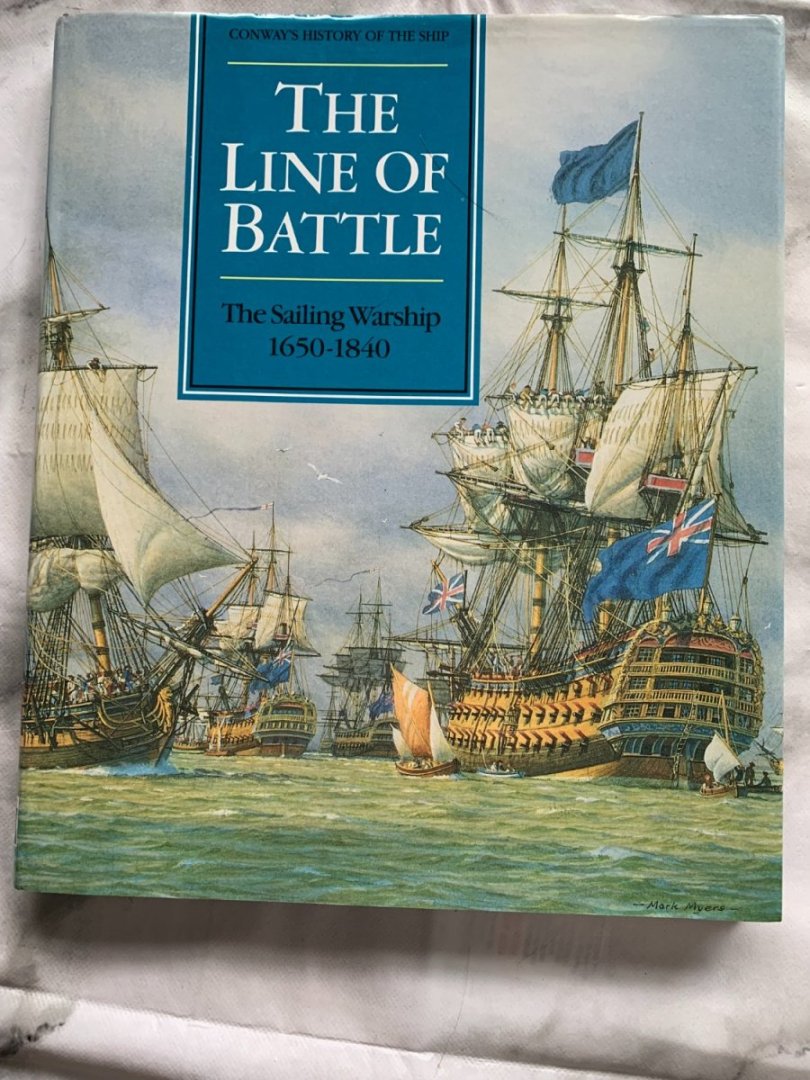
Edited by Robert Gardiner with consultant editor Brian Lavery. Published 1992, reprint 1993 and 1994 (My copy) Priced at £28 when printed, Amazon today new at £30. With contributions by writers the editor, Lavery and Marquardt, he book brings together a general history of ships that sailed both in and out of the "line of battle" with each chapter is written by a different person on varying types of ships over the time period. There are also chapters on construction and fitting, again each written by someone knowledgable in that area. Based around the Royal Navy it does ave passing mentions to other nations particularly where their designs influence British ones. The chapters are specific to what they are titled, each giving an overall picture of the subject through the time period. The photographs are black and white, and there are many drawings and plans included to illustrate each subject. Being general it doesn't go into great detail on each subject, but covers it deep enough to pique your interest into looking deeper with the books listed in the bibliography (seperate ones for each chapter). Written 30 years ago it doesn't have references to any of the more recent books on specific subject matter that contain newer or different updated information. It is an easy to read large format book that if you look around can be found at reasonable price point second hand, and I believe worth adding for general reference with leads to more specific resources.


-
- 5
-
-
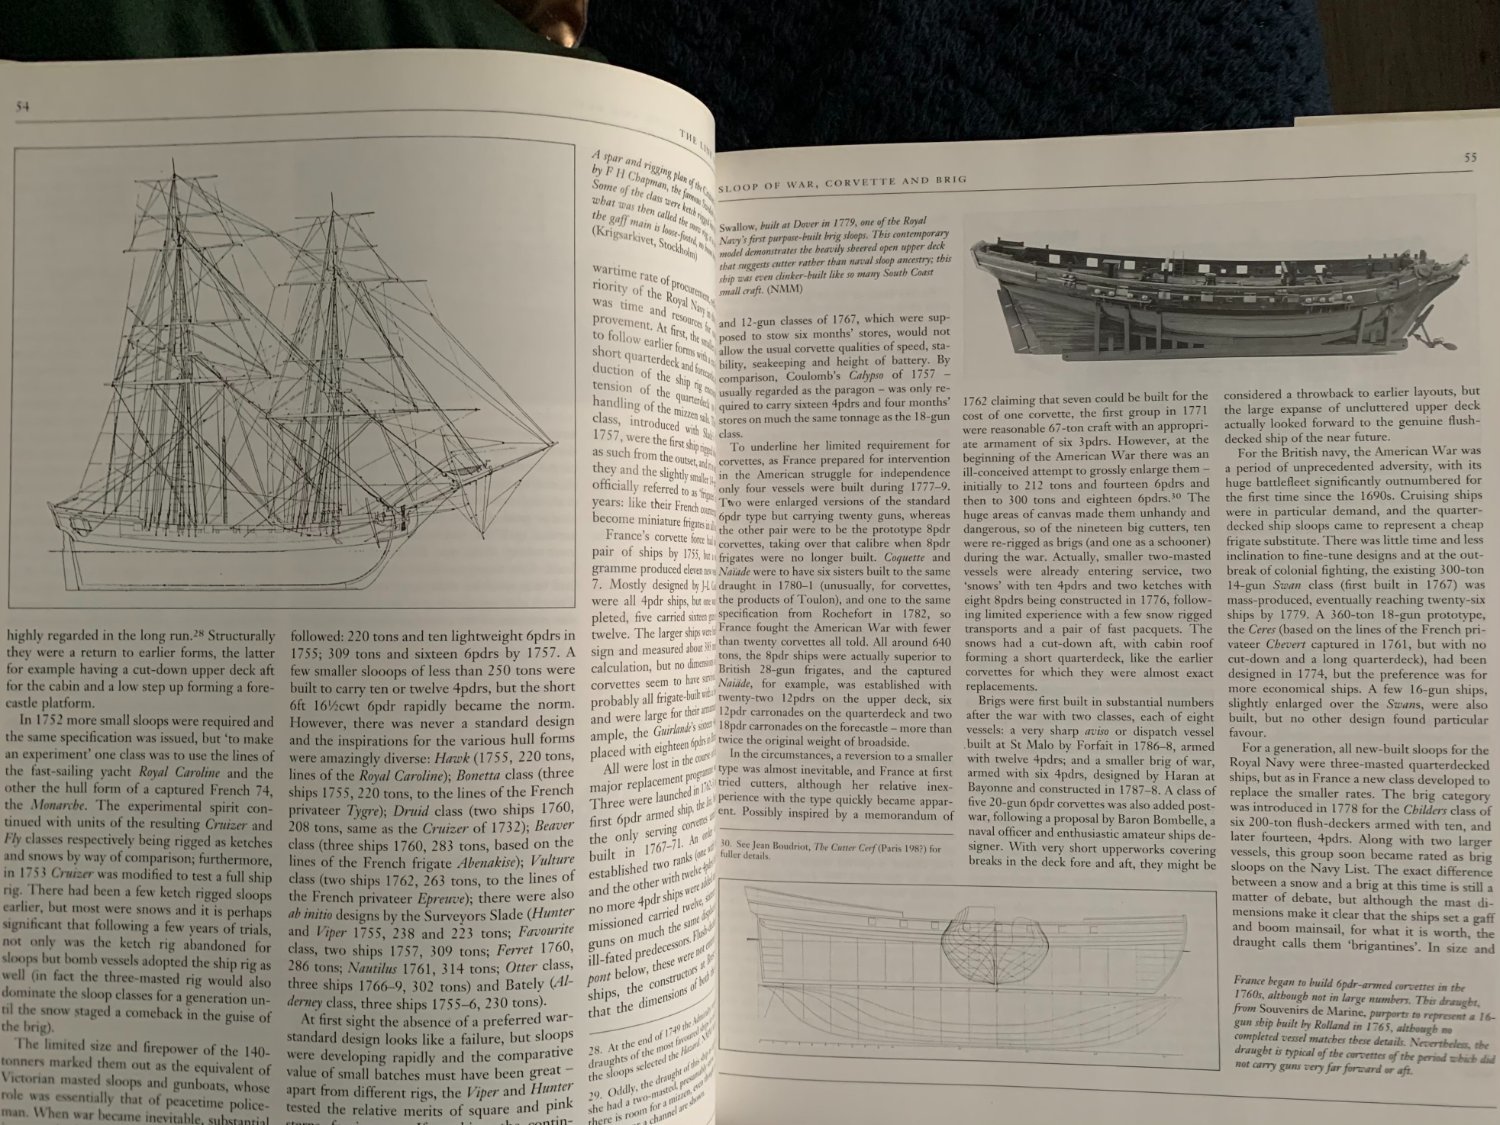
Not a problem. he seems a very amenable guy. I have, however, accidentally misspelled his name - its McLaughlan 🙄 The development of the Sloop of War is probably a niche market within the niche of Age of Sail. From my own limited research, online primary from RMG and secondary from books, for a snow rigged sloop of 1756, one of the Thomas Slade classes ofter he became Surveyor, the RN designs for the sloop of war at that time are getting bigger. They are also starting to become 3 masters, with the largest classed as a small 6th rate, losing the oars over the years, quarterdeck getting longer, losing the tiller etc over various classes. Books on specific classes appear to be what most modellers want, such as David Antscherl and Greg Herberts Swan class series, and the lesser known one on the Cruiser class (Building Plank on Frame Models) by McCarthy, and of course the multitude on the Victory. A large project you've outlined there, one that would need considerable time and access to original sources, some knowledge of the types being researched, someone to co-ordinate, and of course someone, or a collaboration, to put it all together into a coherent readable book or books that a publisher would want. Like yourself the only one I could think of was Seawatch, but maybe Conway too. We can but live in hope. Distance and cost, with a lack of expertise puts me out the frame for any of the above jobs. Just my 2p worth of thoughts.
-
I was going to look my copy up and check before saying something similar. It's (the Frigates, Sloops and Brigs version) an amalgamation of two books. Still an interesting read though!
-
I've had a reply from the author Ian McLaughlin and summarised below with permission. "... I spoke with the publisher of the existing volume. He intimated that it is now difficult, from a commercial point of view, to publish and sell books on the age of sail. There are other factors as well, one that I am now partially disabled and getting to the National Archives, the Caird Library and Chatham would be difficult not to mention the exhorbitant cost of staying in the London area whilst I read into the subject. .... no volume about the period 1763 - 1850 would make sense without a serious American input, since the contribution the the Americans made to the concept of the Sloop of War was massive. The French contribution came in the form of Brigs and Cutters but more significantly in their privateers, many of which were captured by the Royal Navy and classed as Sloops." So, sadly, from the author there will be no more follow up volumes as he is personally unable to the research, cover the cost of research, and get the publisher interested. He is, however, the chairman of the Society of Model Shipwrights, based in the UK.
-
On the forward winch behind the hatch there are two 4 spoke "cogs" over which the chain was placed, matching the "cogs" on the winch under the foredeck. This lifted them over the hatch and made for an easier run into the chain pipes behind the winch.
- 444 replies
-
- 1
-
-
- Cutty Sark
- Revell
- (and 2 more)
-
Not sure if there will be a follow up. The Author would now be approaching 83 and is a member here who last visited in 2021. I've PM'd him just in case he's still recioeving emails.
-
Having just recieved this book I can agree it is a very useful book for anyone interested in the smaller unrated sloops and their development. Full of useful information, even to giving some tables of how well some of the classes sailed, and how their rigging differed to non-RN ships of the same type. If you have an interest in the sloop classes it is a worthwhile addition to your library. Mine is the later snow rigged sloops. At the moment it is offered ay 63% off its £40 rrp at Naval-Military-Press plus postage. (I have no connection)
-
Thomas - looking really neat!
-
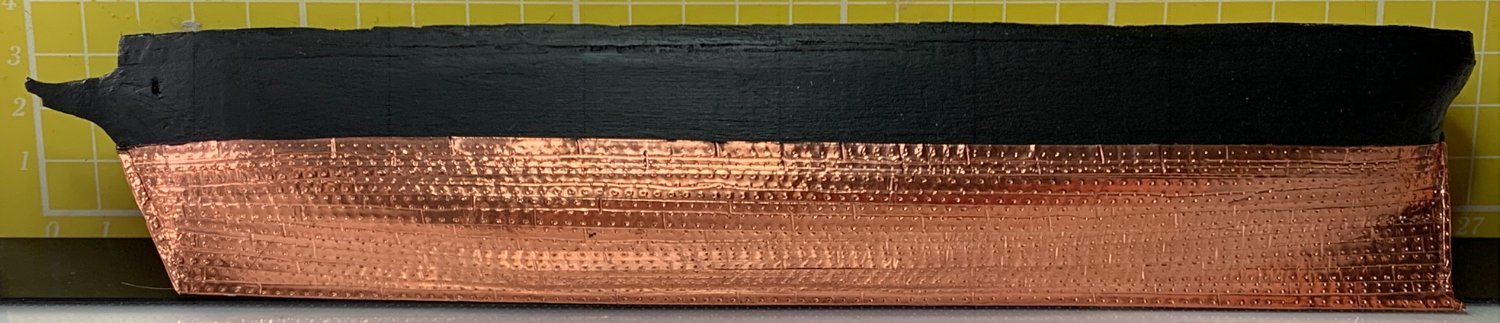
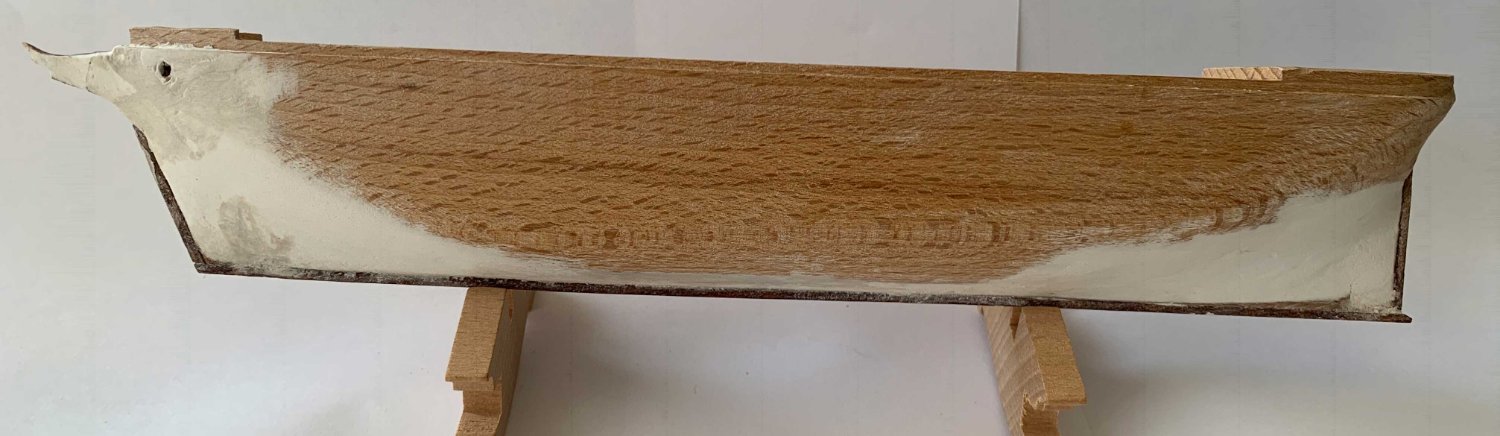
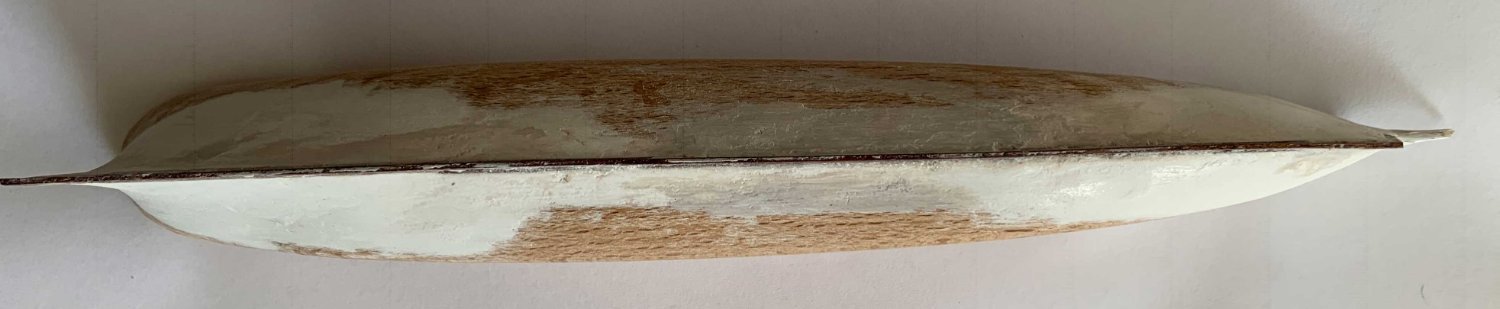
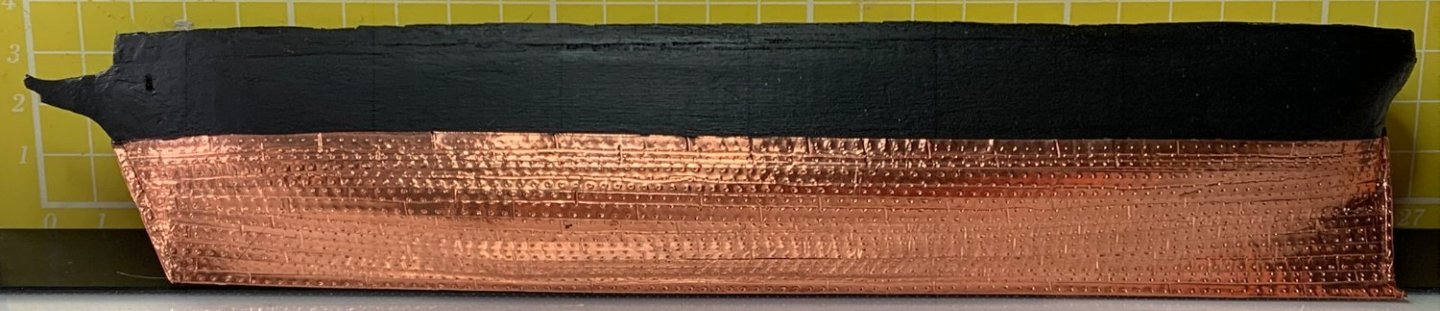
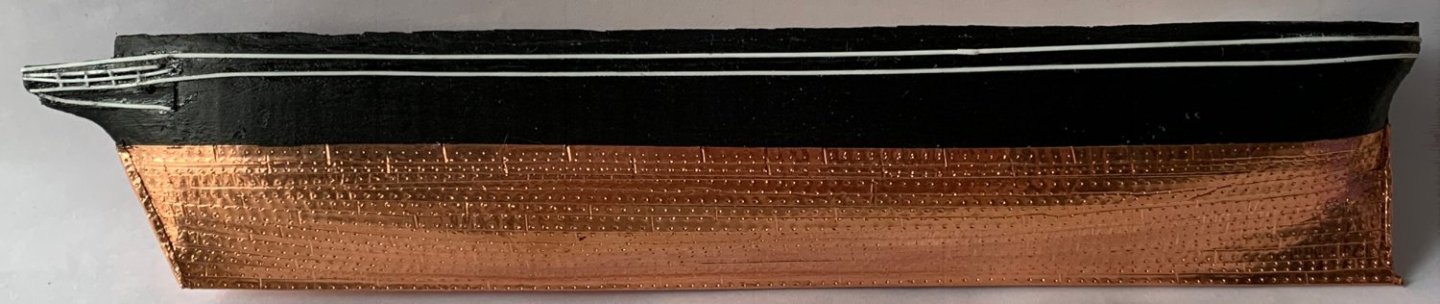
Thanks for the looks and likes! As usual other things really slowed this down, however some updates. I started to paint the coppered hull, but it looked awful. So i tried copper tape rivetted with a pounce wheel. At this scale the proper look was a bit too tiny for me, but I think this looks ok-ish. (The pic is much larger than the model!) For the rubbing strakes I used Evergreen strips of varying thickness, 0.5mm x 0.2 or 0.1 Not perfect, but a little better than the slab of wood with painted rope that the instructions say. Next job, try and fit a bulwark rail :-) and the rudder to fit. Cheers for now,
- 9 replies
-
- 6
-
-
- Cutty Sark
- Mini Mamoli
- (and 1 more)
-
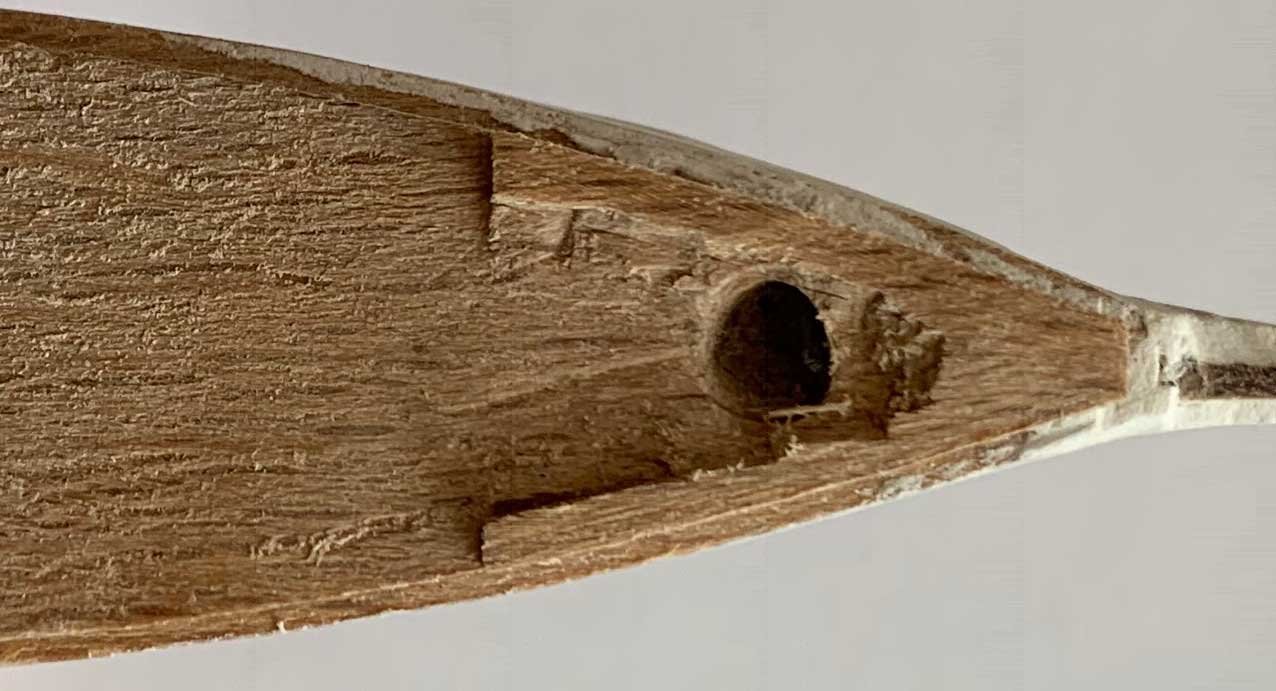
Long delay- lots of filling, waiting 24hs, sanding, repeat. Break beakhead, fix, repeat. We're just about right I think. Added a new false keel, sternpiece and stempiece, shaped the beakhead and cut out the forecastle to make and fit an approximation of the anchor winch. Looks smooth until you get to the close up shot! Needs a final sand and smoothing with 1000grit before painting, plus the sides raising. Spare time not wasted - NO measurements given for any of the deck houses so I've measured them on the 1/96th and converted to 1/250th, or as close as I can cut 😅 ! I can post them if anyones interested. Going out of my comfort zone after the hull is finished with enhancement ideas. Got some Evergreen strips to see about simulating at least some of the door frames and mouldings. Portholes - instructions say glue little rings meaning eyelets. For the moment they'll be drilled out although I have an idea for proper looking ones using drilled out plastic sprue to give an outer ring. We'll see. I've also measured for the spreaders and main tops for scratch build. And to top it all I've had to redo my PC from scratch. Cheers for now,


- 9 replies
-
- 4
-
-
- Cutty Sark
- Mini Mamoli
- (and 1 more)
-
My plastic building days are long behind me, so I'm just about starting from scratch again nearly 40 years later, setting a little time aside each day when possible. Something I was very guilty of - rushing in the "need" to get things done fast and the model finished. One thing this forum has taught me is that it isn't a race 🐌 🐢 🐇, but a hobby. Definately the hull when put together and fit issues sorted, probably the deck, maybe the other bits if it won't cover the detailing. Not to mention the washing in soapy water first! Me too. One thing that wasn't around years ago, and one of the greatest sources to enable as much detail as wished for in any model. All the best
- 248 replies
-
- 1
-
-
- Cutty Sark
- Revell
- (and 2 more)
-
Hi Darryl I knew I had this somewhere you jogged my memory with the mention of paints. Don't know if it's any use to you - It's a Revell specific "how to" by a builder who doesn't give a name, I just can't recall where I picked it up from, and gives the paints (NOT Revell!) and methods he uses, also variations from the Revell instructions. Cutty Sark.pdf Cheers,
- 248 replies
-
- 1
-

-
- Cutty Sark
- Revell
- (and 2 more)
-
Nicely done!