HOLIDAY DONATION DRIVE - SUPPORT MSW - DO YOUR PART TO KEEP THIS GREAT FORUM GOING! (Only 13 donations so far - C'mon guys!)
×

Bob Fraser
-
Posts
291 -
Joined
-
Last visited
Content Type
Profiles
Forums
Gallery
Events
Everything posted by Bob Fraser
-
 Two others that come up are "The Anatomy of Nelsons Ships" by Longridge, and "18th Century Rigs and Rigging" by Mardquart although Lees covers this and a wider time period. "Building Plank on Frame Ship Models" by McCarthy, books by Keith Julier and Scott Robertson have lots of general info and particular model info depending on the book - should be reasonably priced, and then if you have a particular ship in mind, the "Anatomy of the Ship" book for it will help with the details. Forgot to add - "The Sloop of War 1650 - 1763" by Ian McLaughlan I found it a great reference for research on these smaller unrated ships.
 -
@shipmanI have all of Lou's photos, but they are copyright him, so I'm not sure about being able to share them. They are a total of 1.4Gb, around 12Mb each. Unfortunately the link shared in his original post is no longer working. I know he last logged on April this year, so maybe PM him to ask if he has an updated link? From the pics in the 1957 pamphlet it seems the roof colours changed over the years, wood, white, or white edged wood, as did the deckhouses themselves, all wood, or wood with white panelling. The boat chocks always seem to be white though. So again, whatever way you decide to go, it's right for part of her life. Have you seen rwiederrich's build of her as the Ferreira?
-
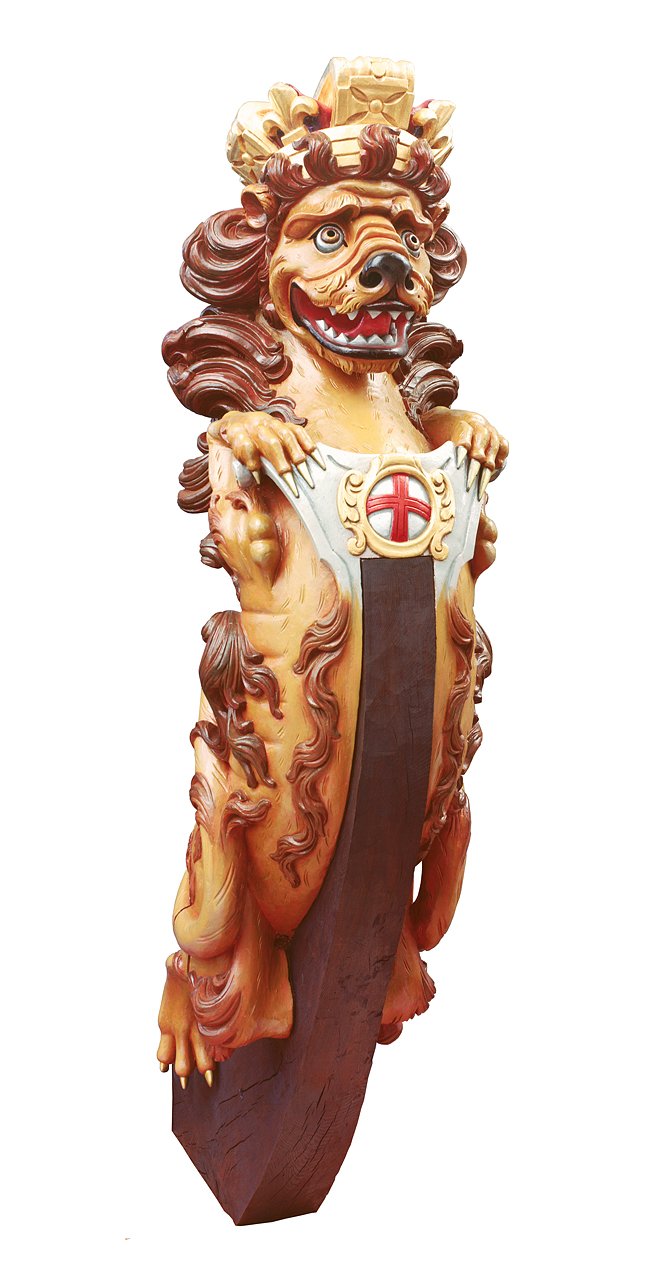
Hi Halfdan, I think it's meant to be a lion. The Admiralty passed several edicts about paint and figureheads. The basic RN figurehead was the rampant lion, and even this was "banned" from the lower rates during the mid 1700s because of the cost. If a captain wanted fancy paintwork, scrolls and figureheads he had to pay out of his own pocket. From the RMG Website, good description given. Figurehead Looking good though! Cheers, Bob

-
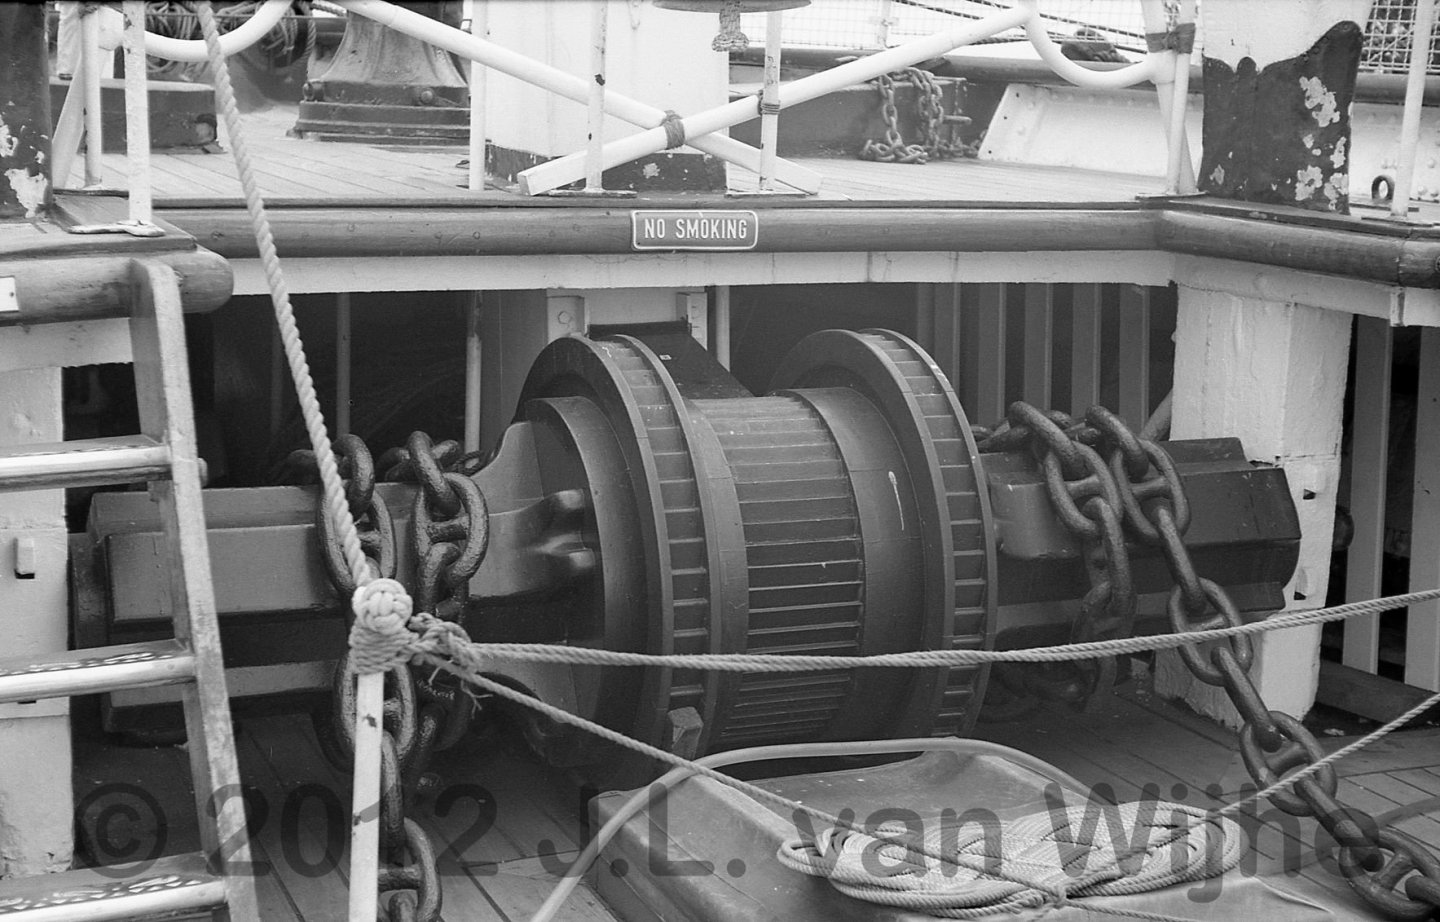
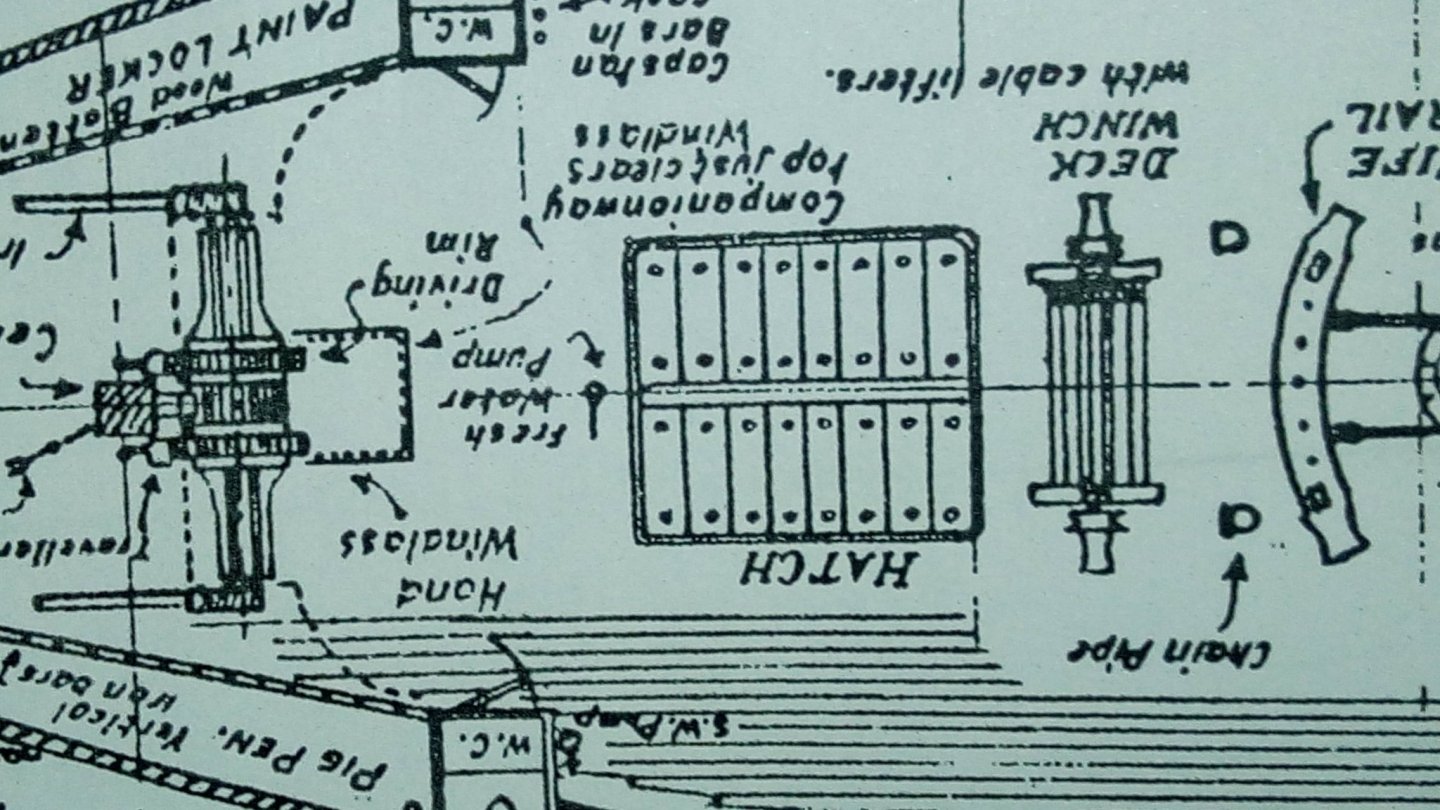
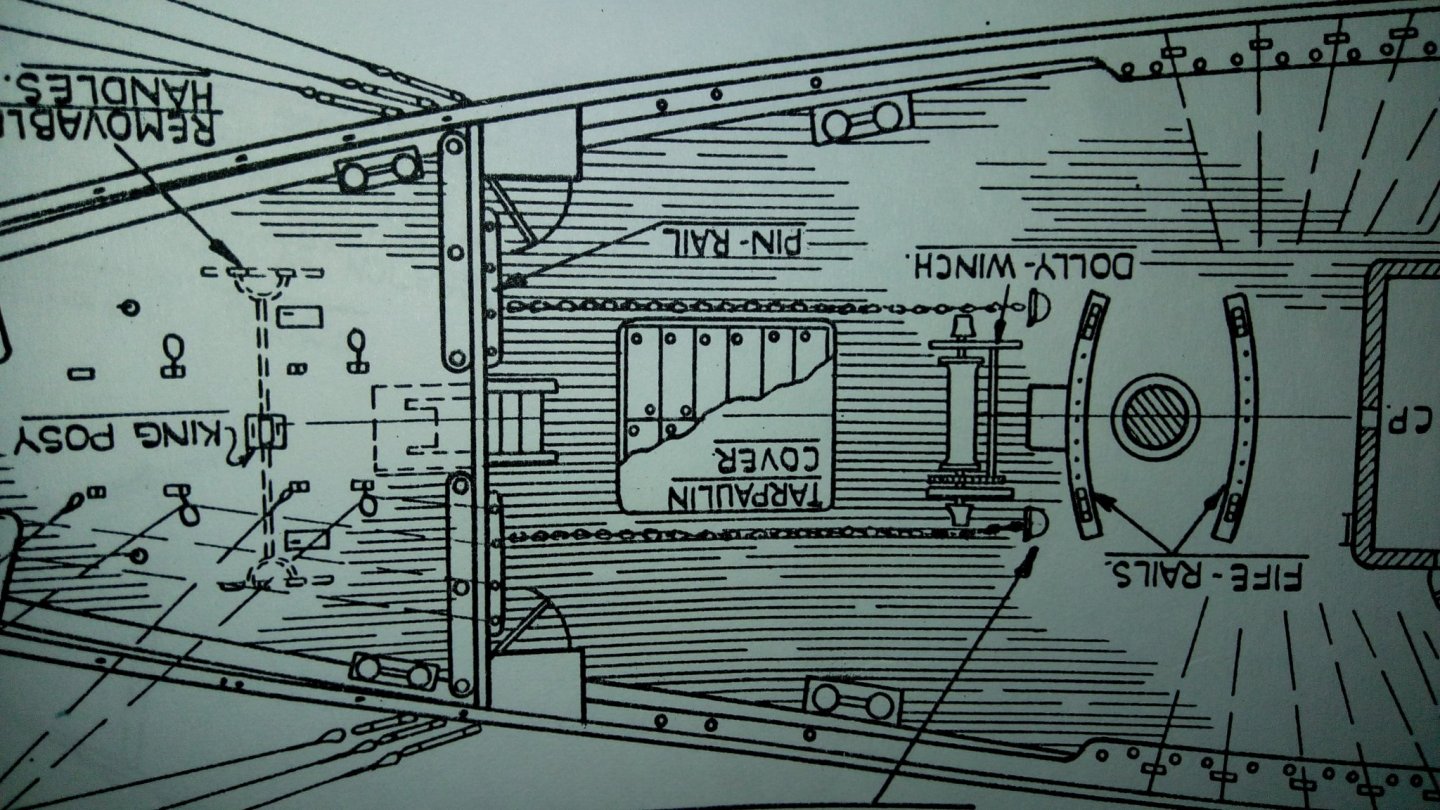
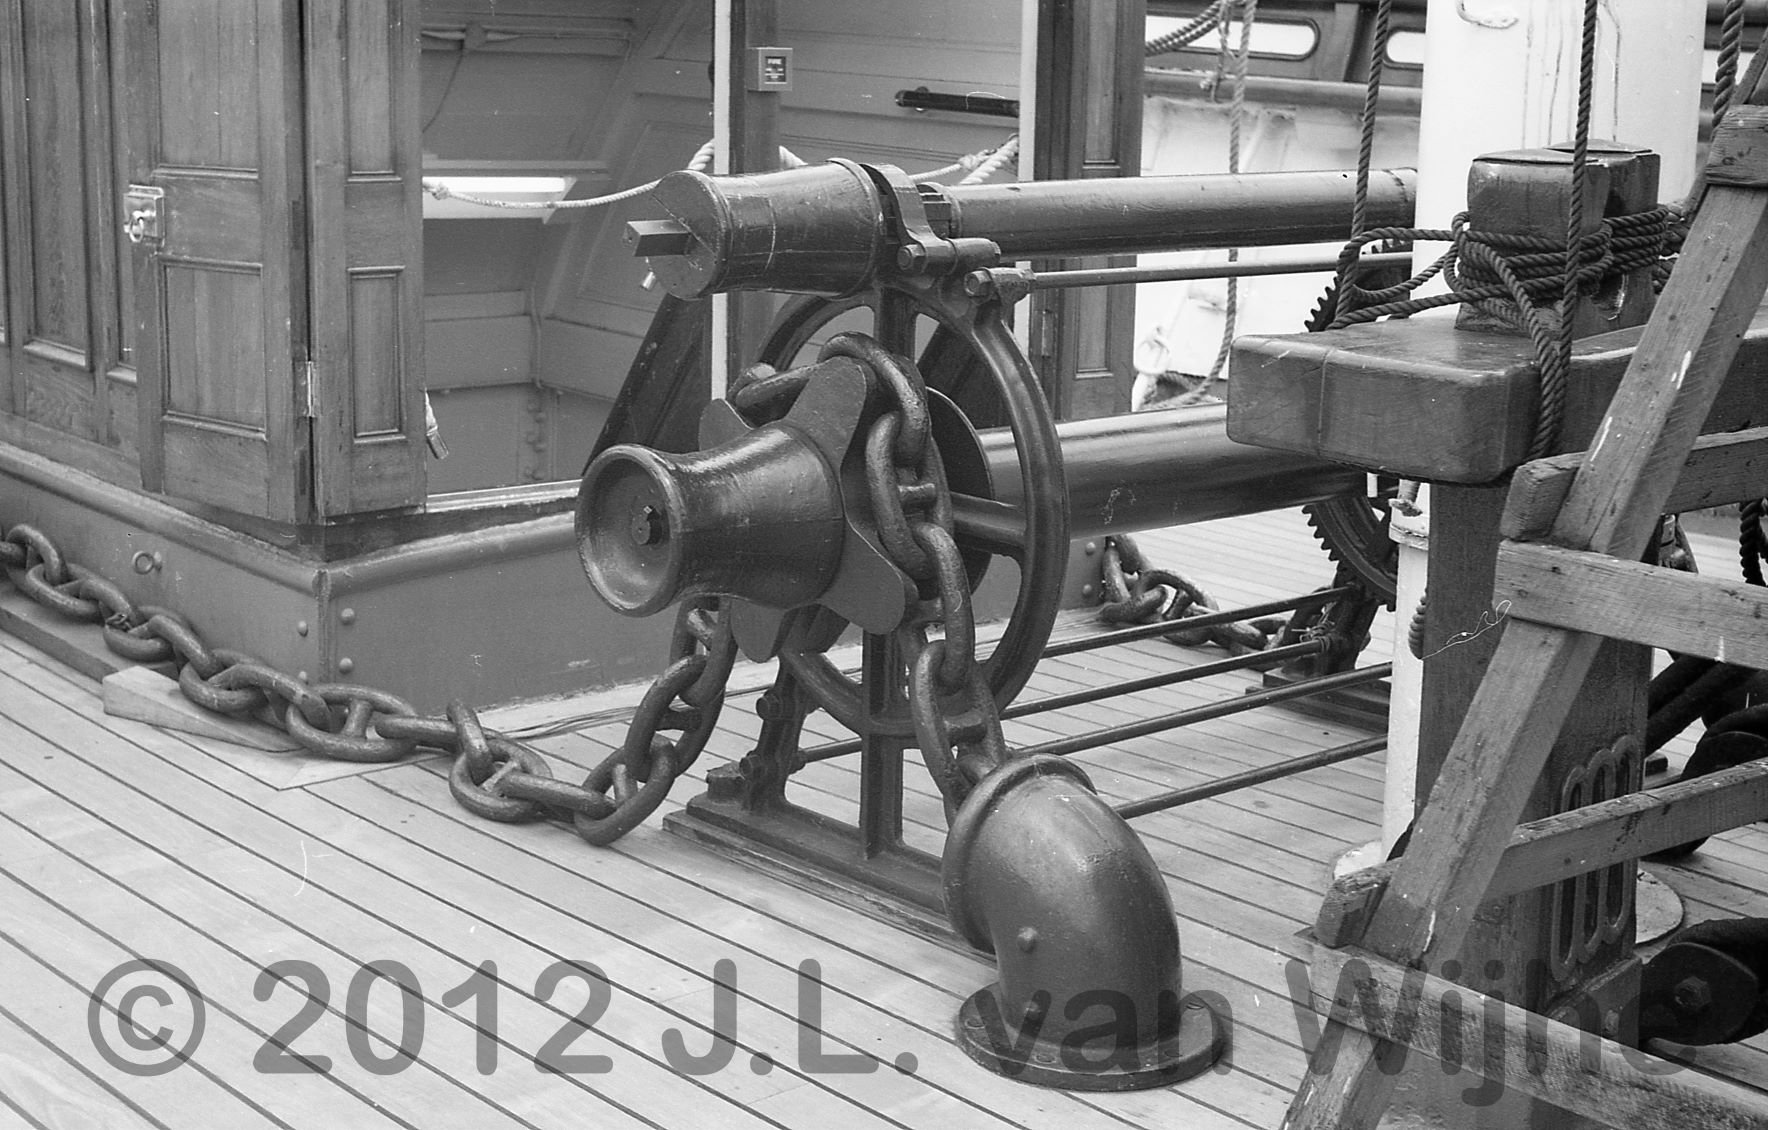
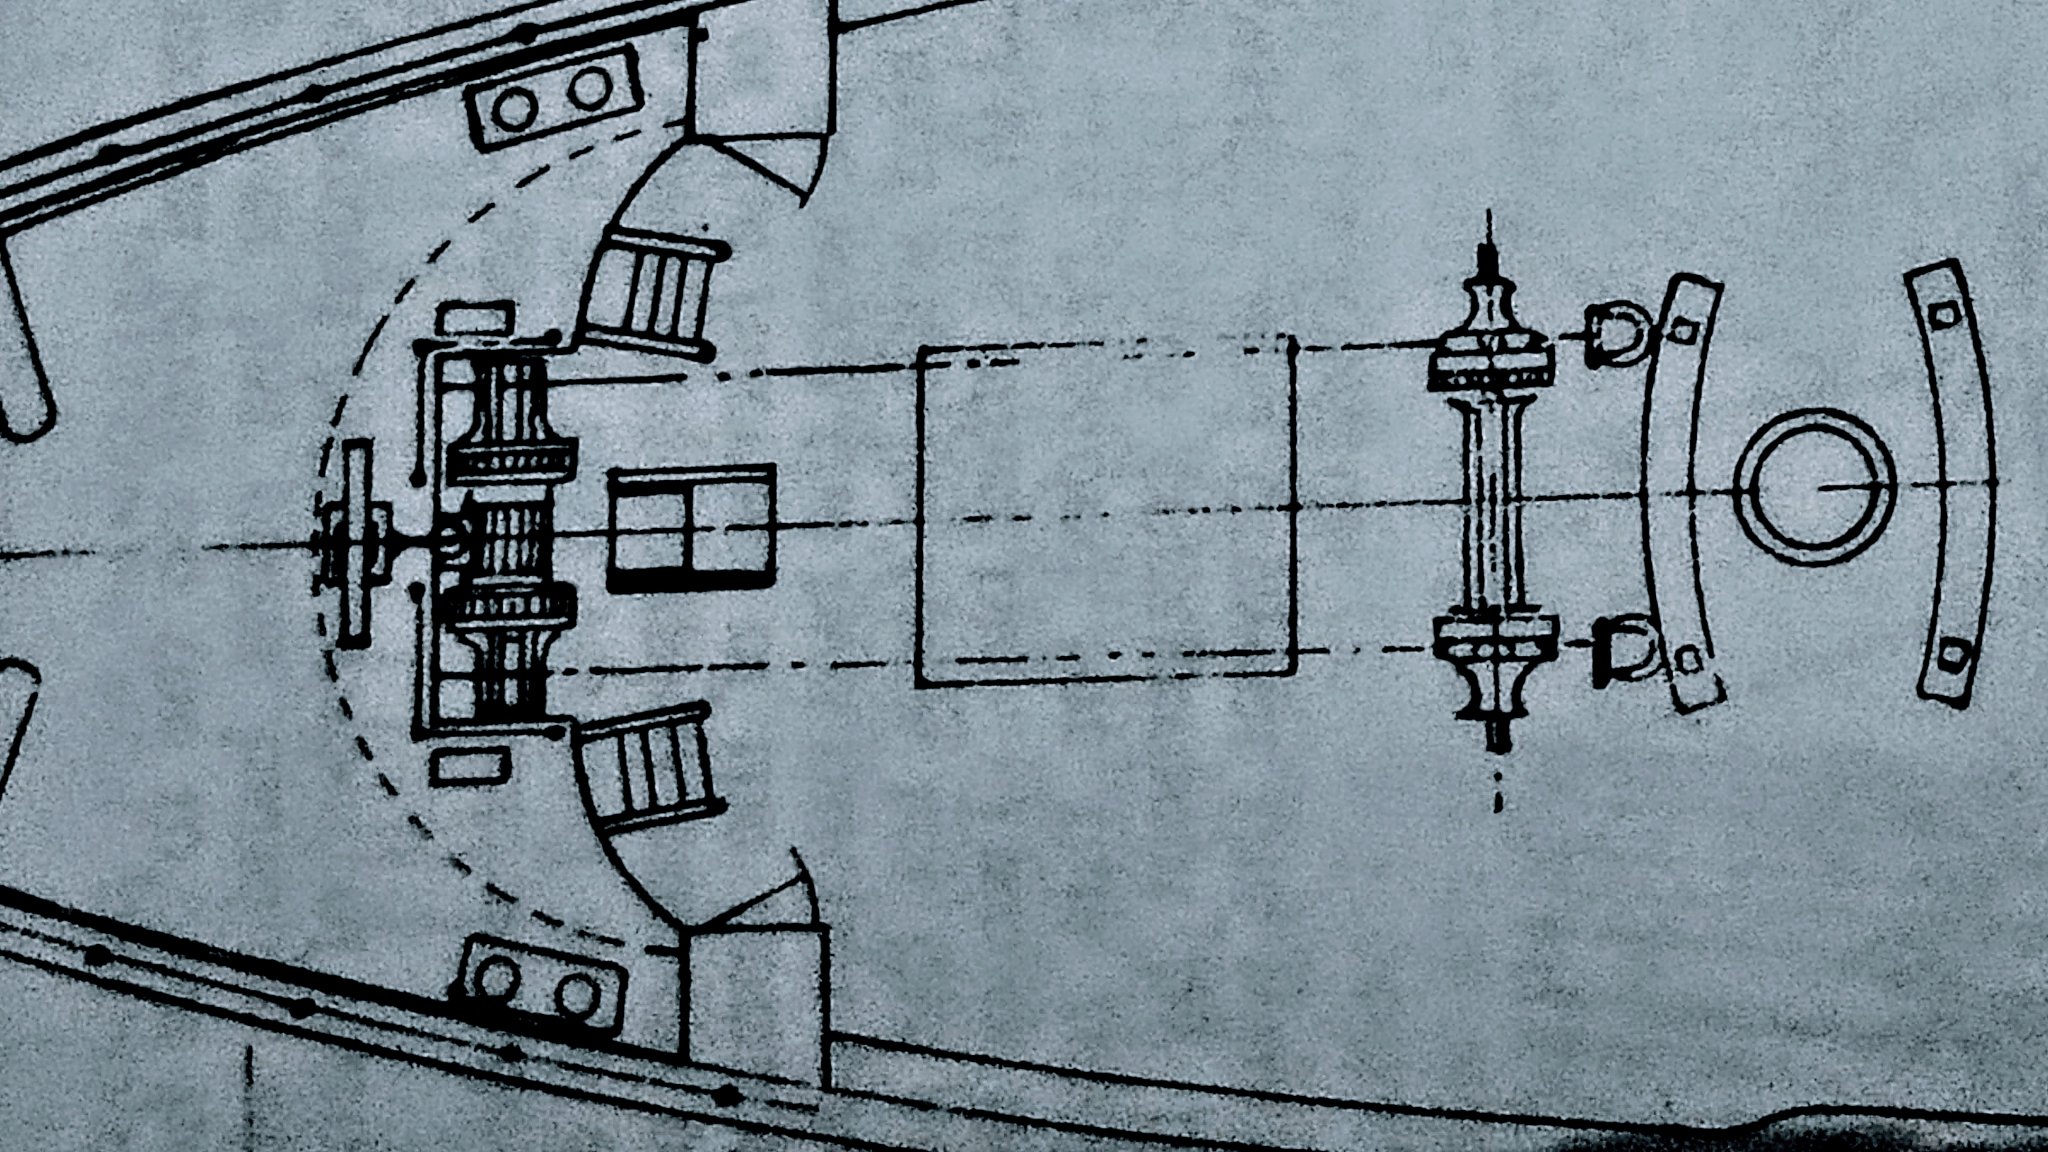
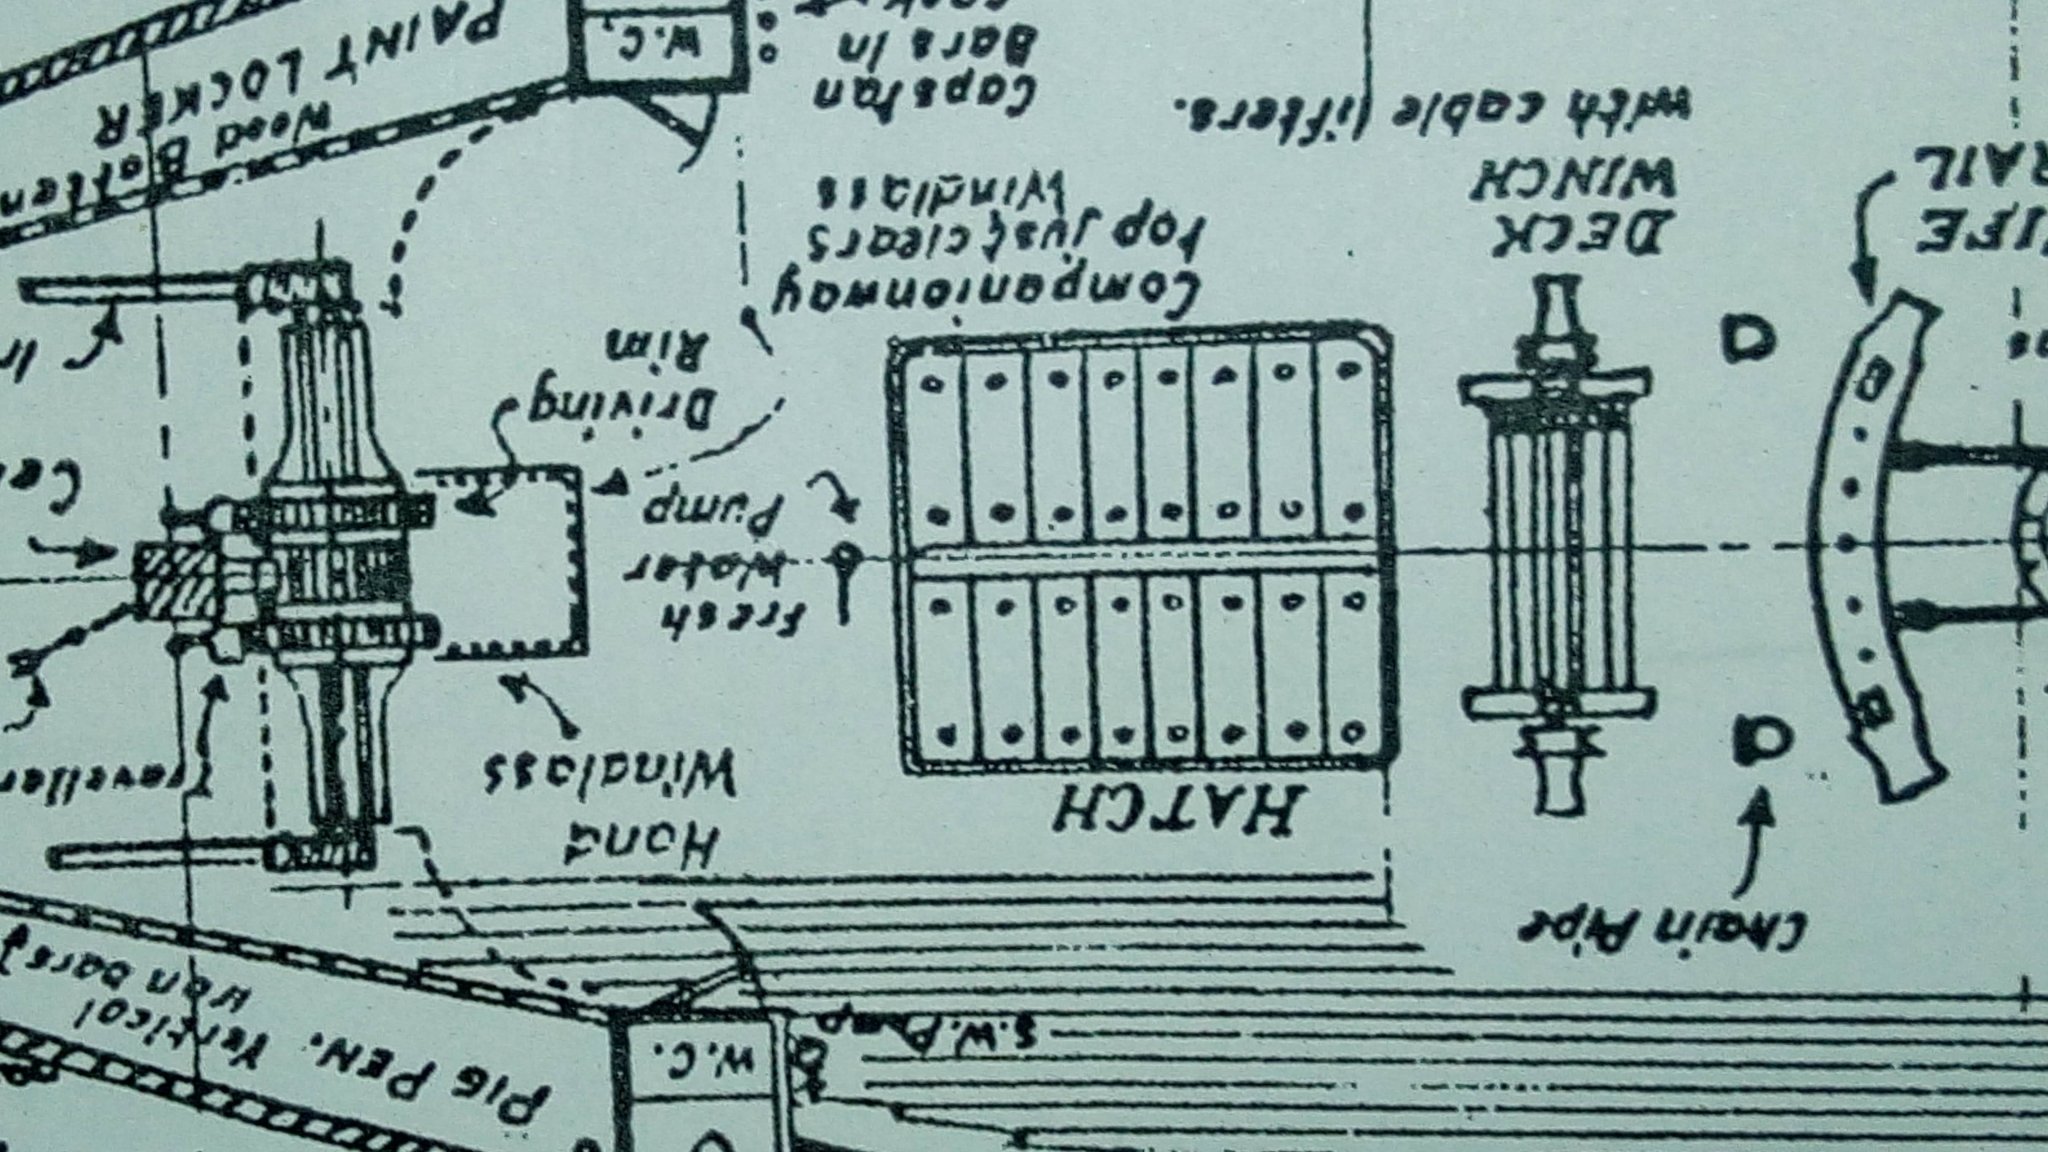
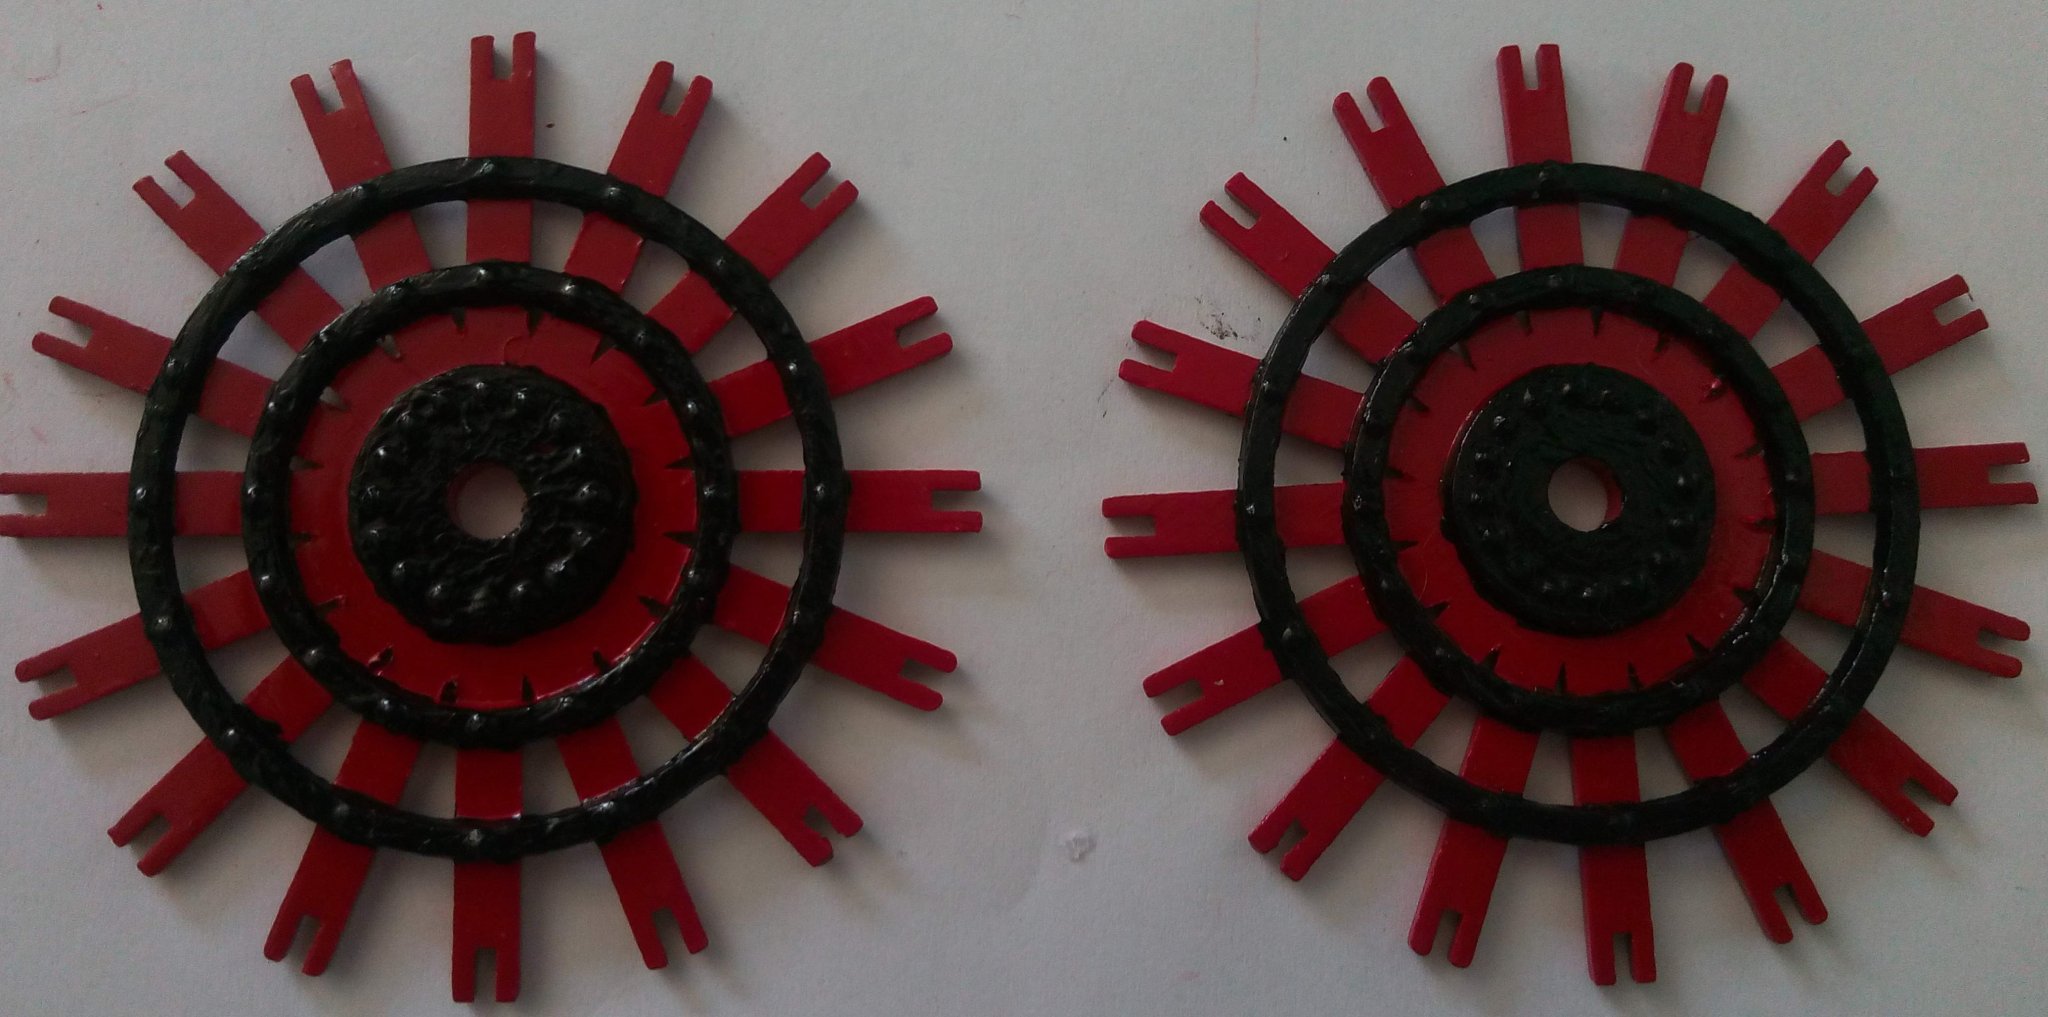
Hi Bill, found something that you might like to see. A contributor here, Lou van Wijhe, (Thanks Lou!) took some high resolution photos back in 2012 and kindly made them available to us. The mention of the "Cable Lifter" as "a sprocket wheel on the winch spindle with large teeth to fit the links of the anchor cable" got me thinking and I remembered these photos. Here's exactly what it is Showing the run of the anchor chain around the hatch, but going behind the spokes that fit into the gaps between links, which would raise it above the hatch when raising or lowering. No need to weather your hatch! 😄 This detail IS on the winch assembly for the model, easily overlooked without a magnifier 🙁 but might well be over large for the chain provided. There's another good one of the windlass showing the chain coming off the top of it, again providing lift to clear the hatch! Keep up the good work she's looking good. Cheers, Bob

-
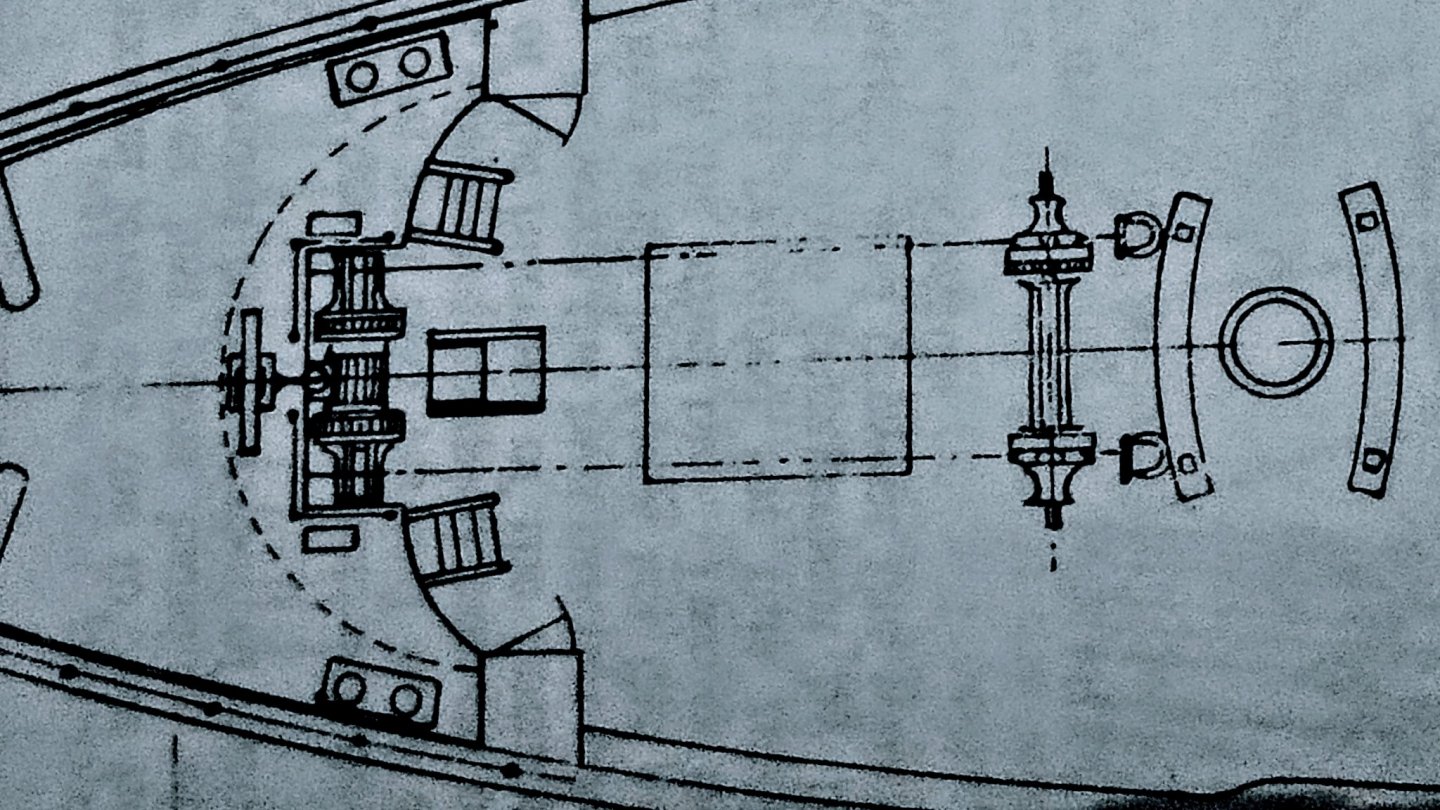
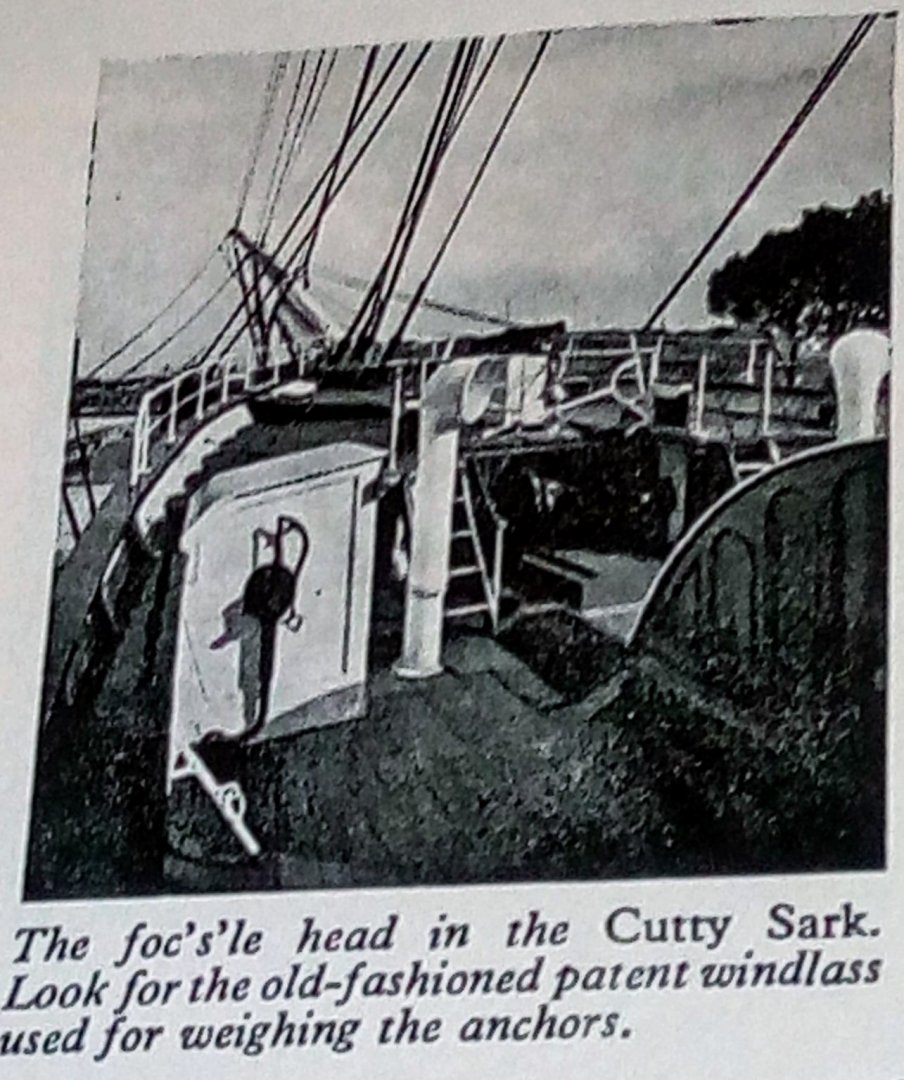
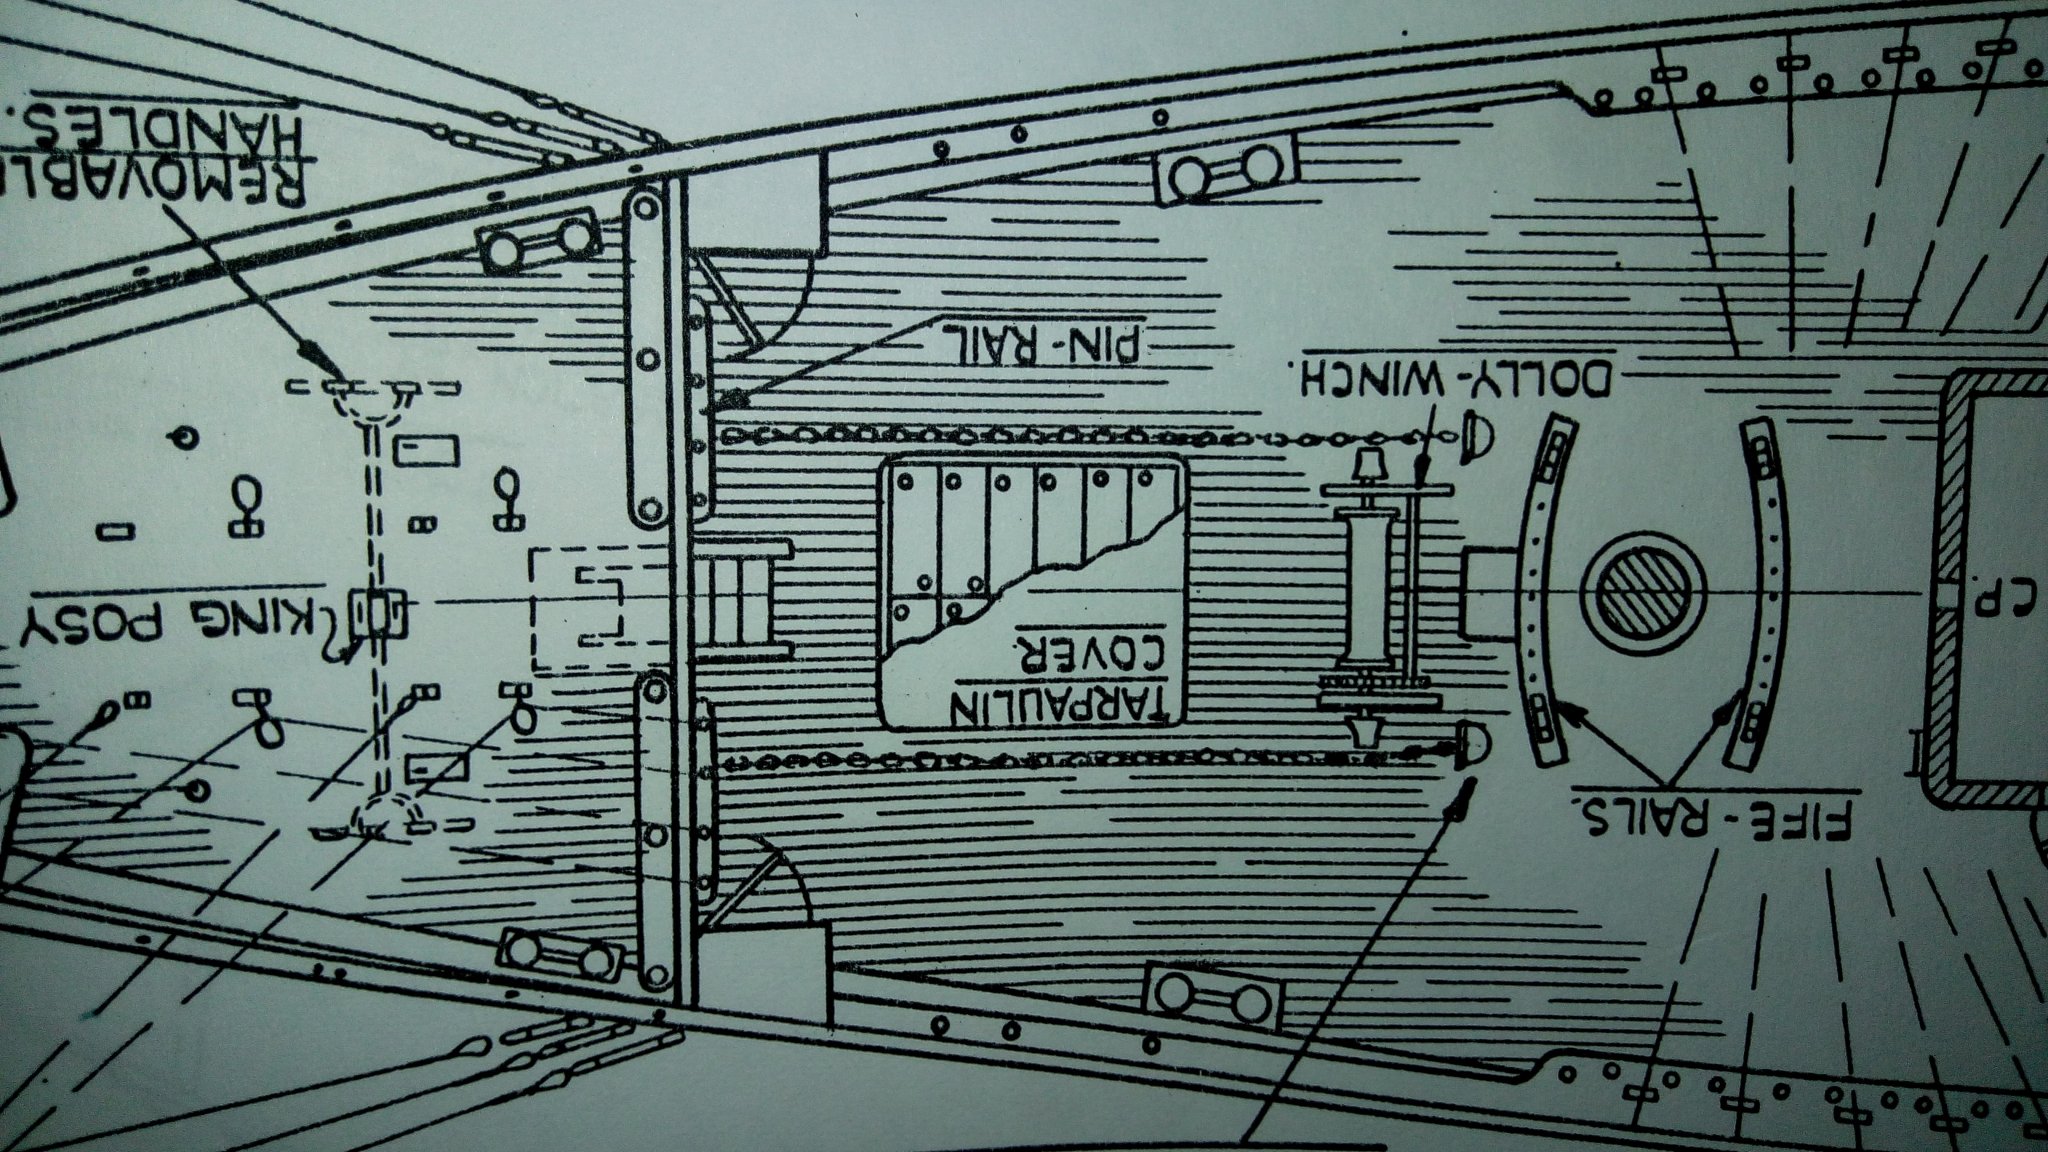
Hi Bill. Forgot I had Longridges books! I also have Modelling the Cutty Sark by Edward Bowness, 1959, and The Cutty Sark and the Days of Sail by Frank G G Carr, 1957 for the Cutty Sark Preservation society. The first shows this, but doesn't say where he got the drawings from other than mentioning Underhill revised his original drawings later on, so I suspect his model is from them. which shows what looks to be a sliding hatch forward of the cargo hatch and the anchor run. In the glossary he also mentions a "Cable Lifter" as "a sprocket wheel on the winch spindle with large teeth to fit the links of the anchor cable" This could be to lift the chain clear of the cargo hatch? This one from the Carr book showing the forward area is completely different. Unfortunately no date for the photo. Note the cowls, the anchor chain running alongside the (now boxed in) cargo hatch a through a tunnel, and the small hatchway in front of the windlass. As Shipman said, she changed a lot over the years, so it would seem that no matter which plans you follow you'll get a good representation of her at some point in her life. I have this model myself (which is why I have the plans and books), half built, but our ever helpful remodelling cats have sent her off the shelf a couple of times resulting in parts broken off and damaged so she's laid up while I consider my options. Have you seen this build by Sailcat? Quite an amazing transformation. I could only wish for the skills he shows. @shipman All the photos in the Carr booklet show white rails, including the photo of her after losing her rudder in 1872 All the best, Bob
-
Hi Bill. Here's two close ups from the Cutty plans. 1st is from Campbell, the plans are "as built 1870". This secong is from Underhill. Dated 1932 It would seem the Revell model is from the "as built" plans. Hope this helps, Cheers, Bob
-
Great start. I know what you mean about the painting, not so good myself. Good job on straightening the deck. I've the big brother waiting for me when I'm ready, but some wood projects to do in the meantime. There are quite a few Revell Constitution builds on the site. Lots of help about too if you need it. Stay safe, Bob
-
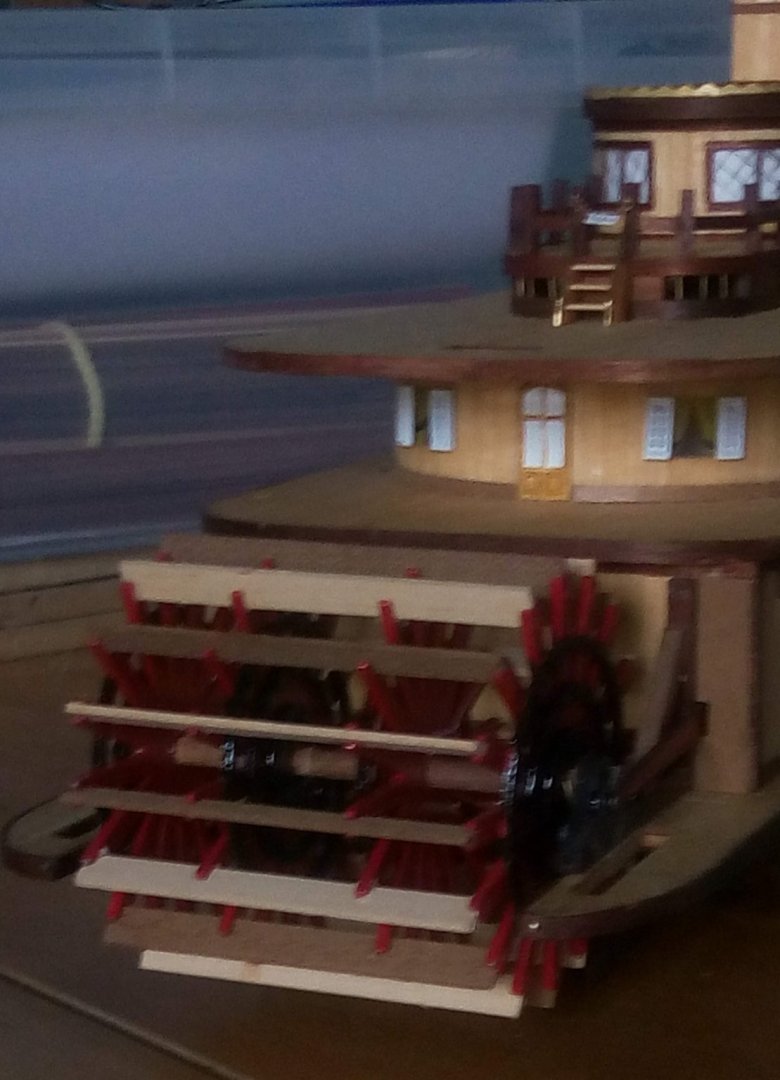
Managed to complete the sternwheel - eventually. Turns out the new one piece single laser cut parts need to be fitted further back than the pictures show to allow for the wheel to turn. (Or maybe that's just me?) Found some copper rivets for the piston arms, and blanked off the massive holes in the engine room. Wheel turns nicely. Sorry it's a bit fuzzy. Next adventure yet to come is the gangway. It doesn't fit where it should because of the stairs. The original model, and Occre's model, both have one each side, so I'll be following that when i get there. Cheers, Bob
- 86 replies
-
- 4
-

-
- king of the mississippi
- artesania latina
- (and 2 more)
-
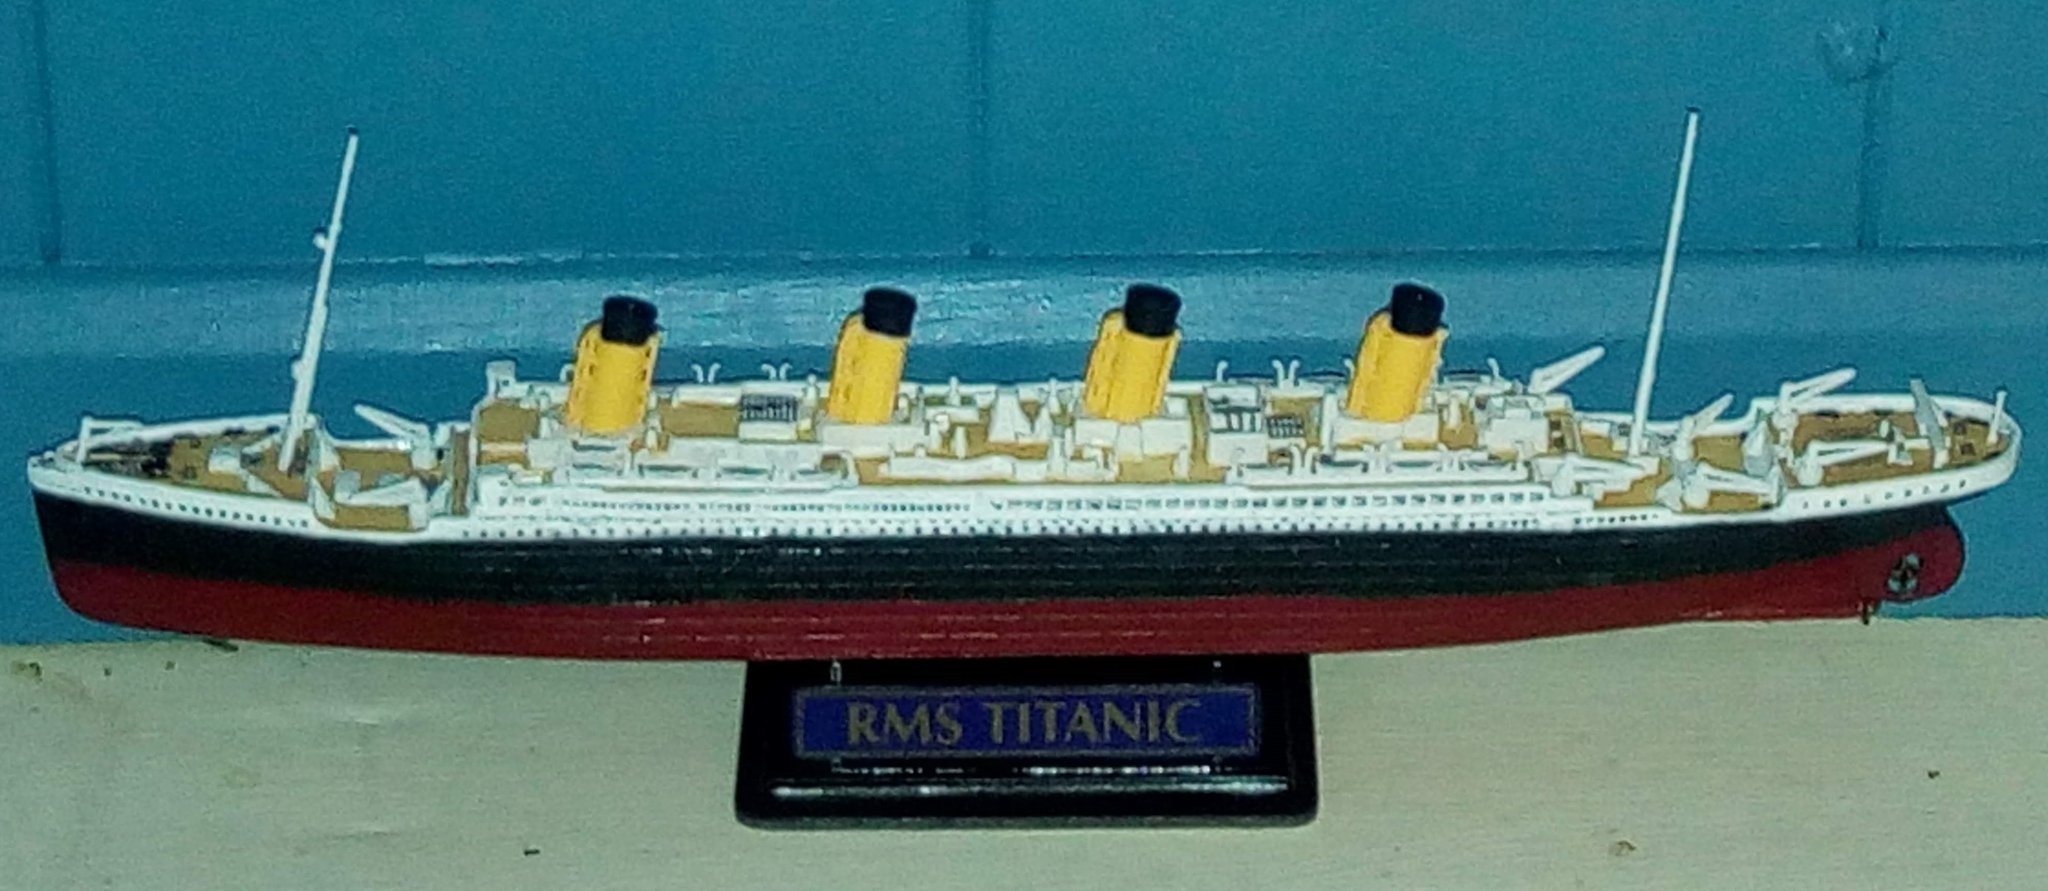
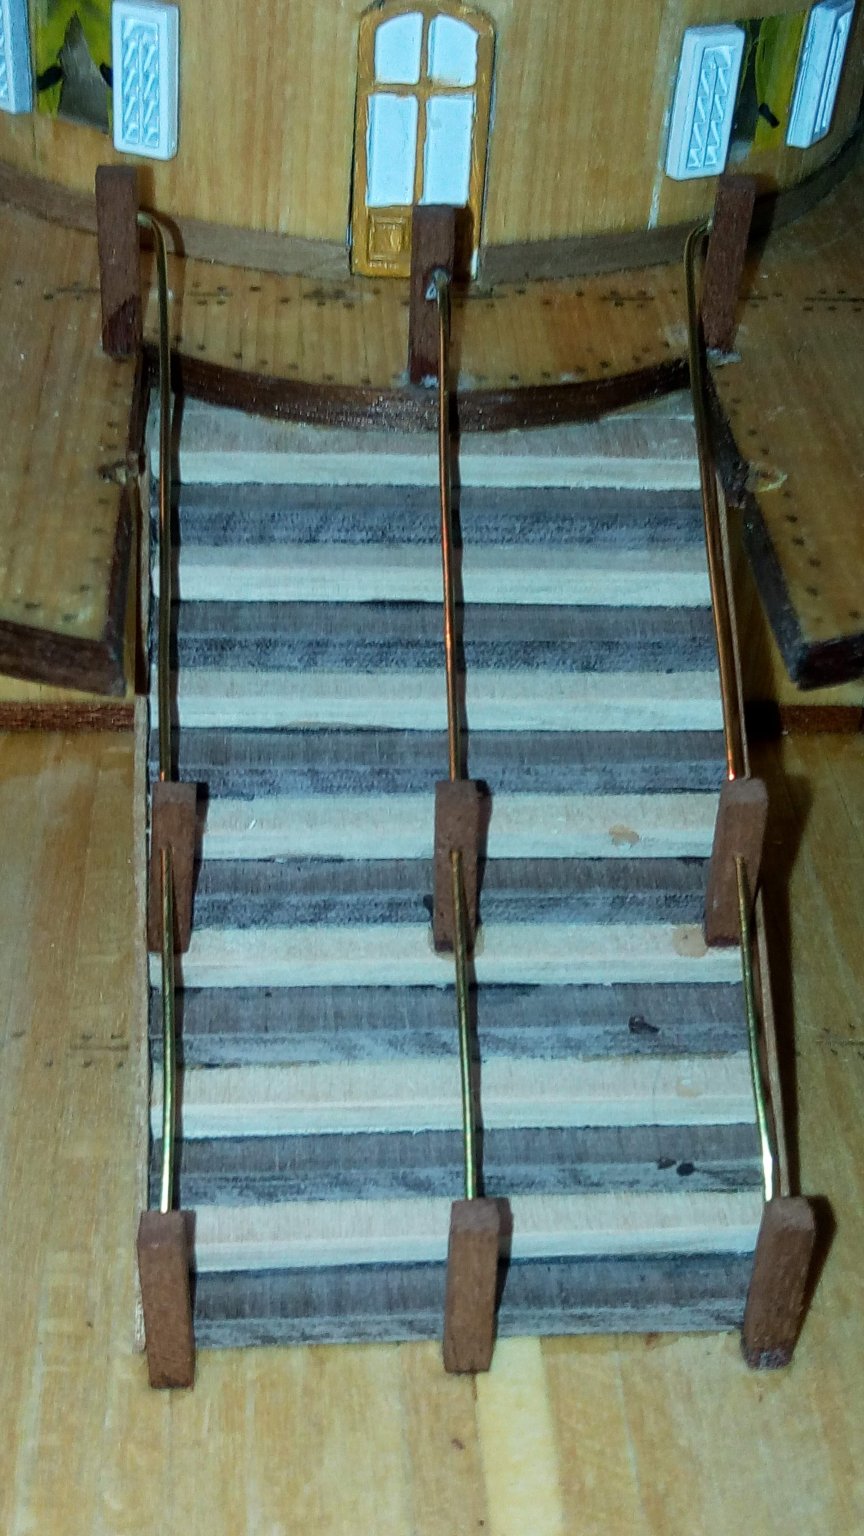
Whilst waiting for the wood to arrive for the new stairs I did this one. Revell Titanic at 1/1200. (Revell 1/570 waiting in the wings) Our 11 year old son is autistic and has had a fascination with the Titanic for over 5 years. Turns out his mum had a cousin (2nd turkish bath attendant) who went down with her. Not done a plastic kit in over 40 years, so thought I'd start small. Drilled all the upper portholes out and tried to seperate the pipes on the stacks. Need to learn the esoteric art of sprue stretching for the radio wires and rigging. Anyway, the wood arrived, new stairs cut out and put together. Brass wire railings added in keeping with the rest of the stairs. Cheers for now, stay safe and well, Bob


- 86 replies
-
- 5
-
-
- king of the mississippi
- artesania latina
- (and 2 more)
-
I found this too. Admiral says she wants normal stairs, so just waiting on the order delivery of sheet wood to make them. As for putting the railing bars width up - I think at least some of these boats were built to owners specs, and you're the owner! 😁 Keeps safe, Bob
-
Really nice and clean lines, I like it. I think every build of this model has been different - your own stamp on a model makes it yours, not just the way the manufacturer wants you to buid it. "Without the cardboard, the picture ends of me taking a picture of me." So there's a mirror behind - don't blame you for covering it, I hate picrures of me too. 😄 Looking forward to your next model. Take care, Bob
-
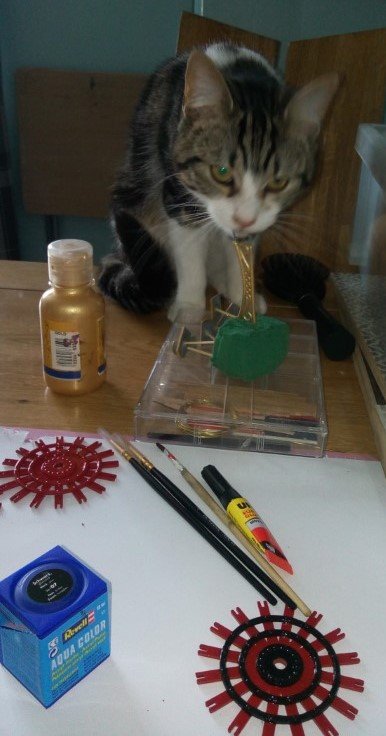
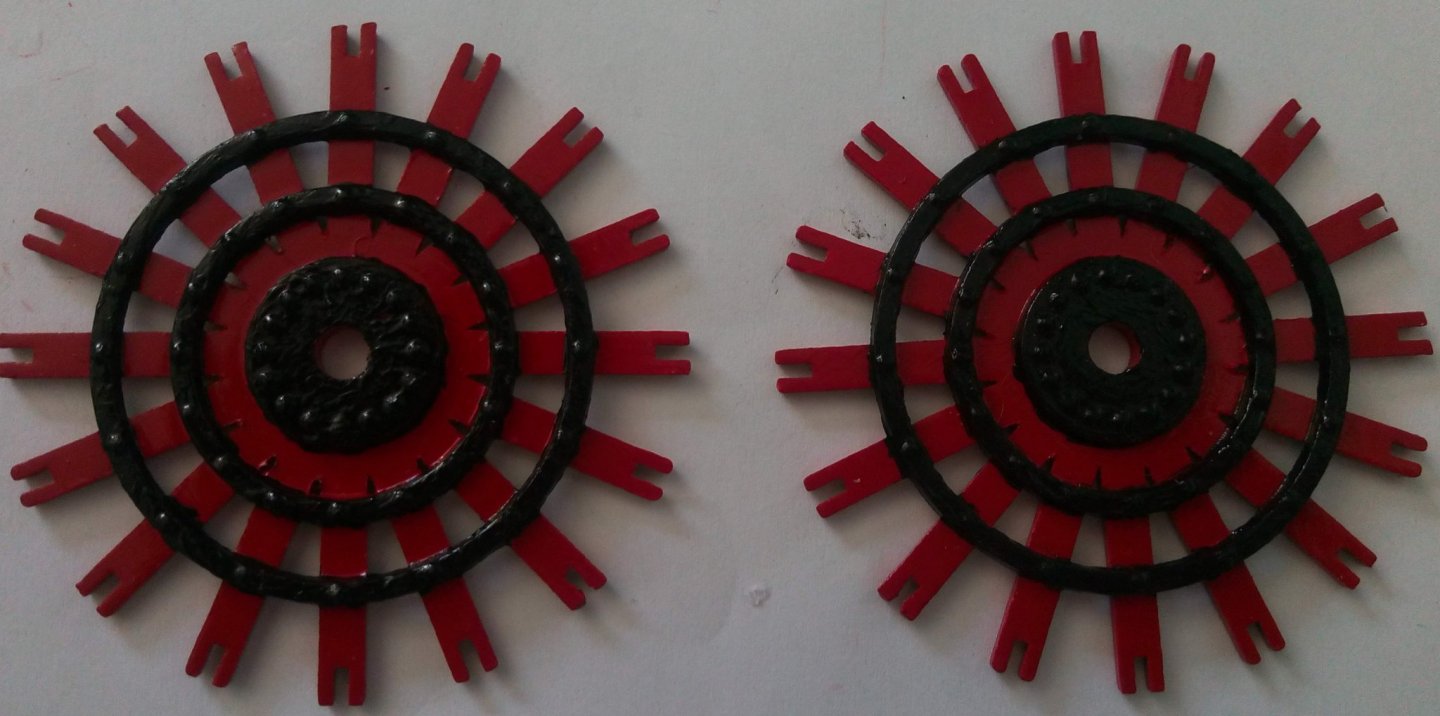
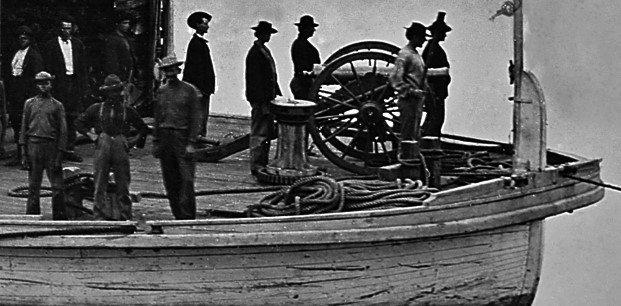
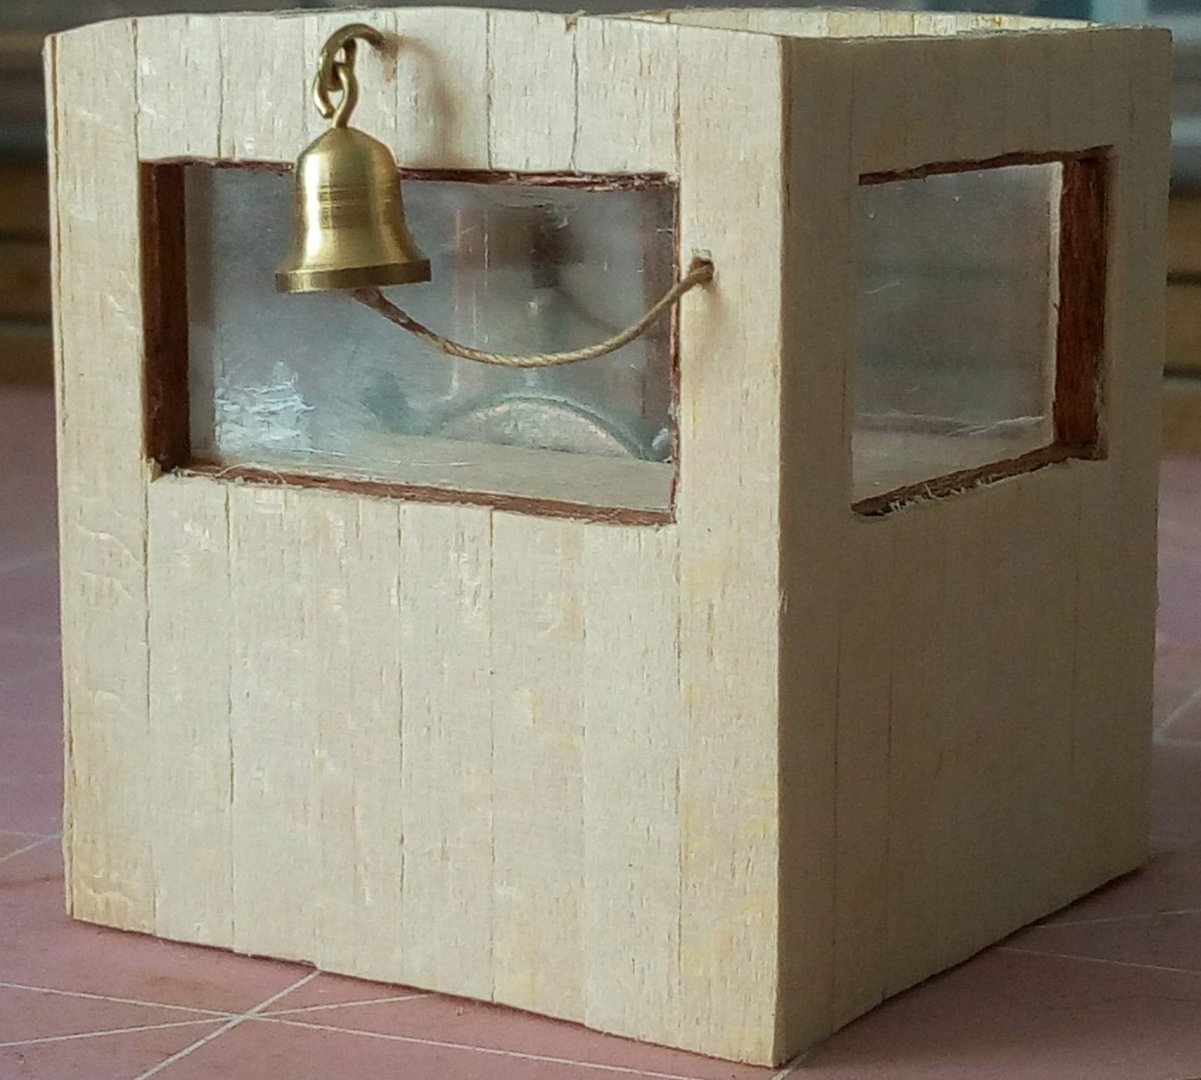
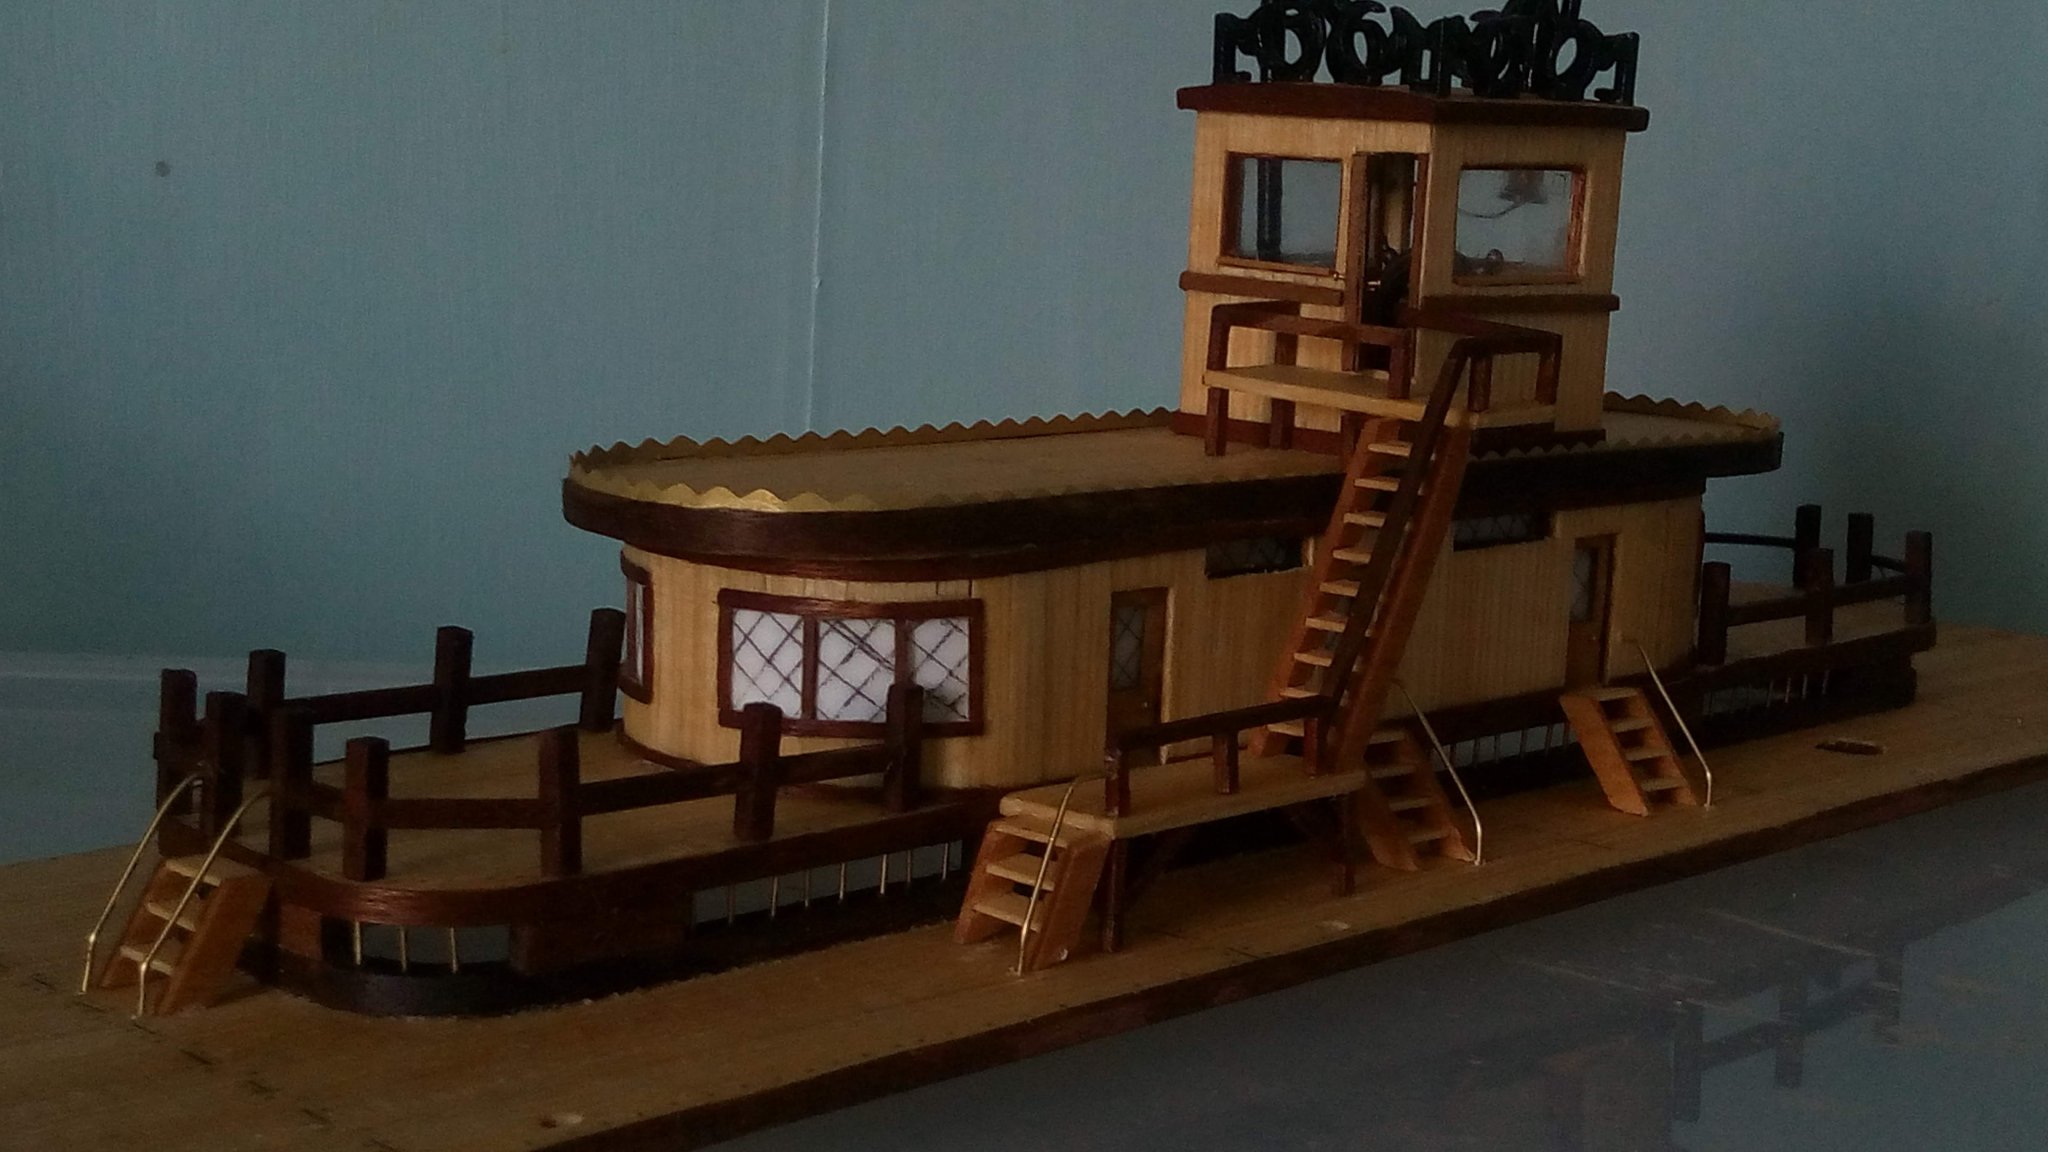
Cheers guys! Some more progress. Help from Cooper the cat again Eventually got them done The black paint is Revell Aqua Colour. It's gone a bit thick but it represents the thick bitumastic paint used on iron. That's my story and I'm sticking to it! 😁 Added the second handrail to the stairs, fitted the second deck doors and shutters. Made some chains for the "Crew Only" areas and fitted them with a notice. Did a bit of research on the use of the capstan in the bow. Turns out it's steam powered and used to tighten up the main mooring rope so the bow is tight to the dock. Where the instructions show a hawse hole there are rollers or a fairlead, another at the end of the bow plank, and bitts to the side (behind the 3 guys to the left) for other ropes. This is the steamer "Lookout". Here's the capstan AL provided, and the one I'm replacing it with. Brass band is from the scrap off the bridge deck scallops. Works almost at a halt now as it's been decided not to fit the spiral staircase, but to make a straight wide one. I've got to order in the sheet wood for this. More when I can, Look after yourselves, Bob
- 86 replies
-
- 5
-
-
- king of the mississippi
- artesania latina
- (and 2 more)
-
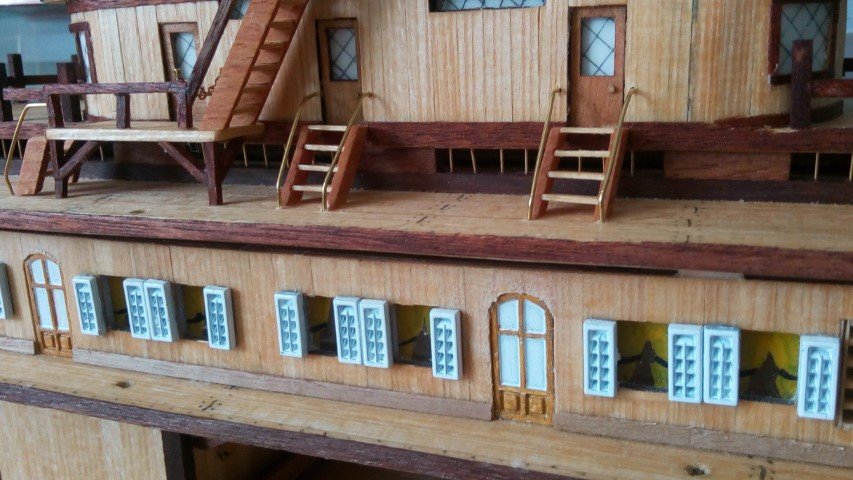
Thanks for the likes! Slow progress, but some! Added the brass scallops to the steering deck, and the fencing around the deck below. Since access to the steam pipe are would be crew only I fenced that off too, and added steps. To the steps I've added brass handrail made from 0.8mm beading wire. Not sure yet if the cabin stairs will remain one rail or to add the second. Cheers, Bob

- 86 replies
-
- 8
-
-
- king of the mississippi
- artesania latina
- (and 2 more)
-
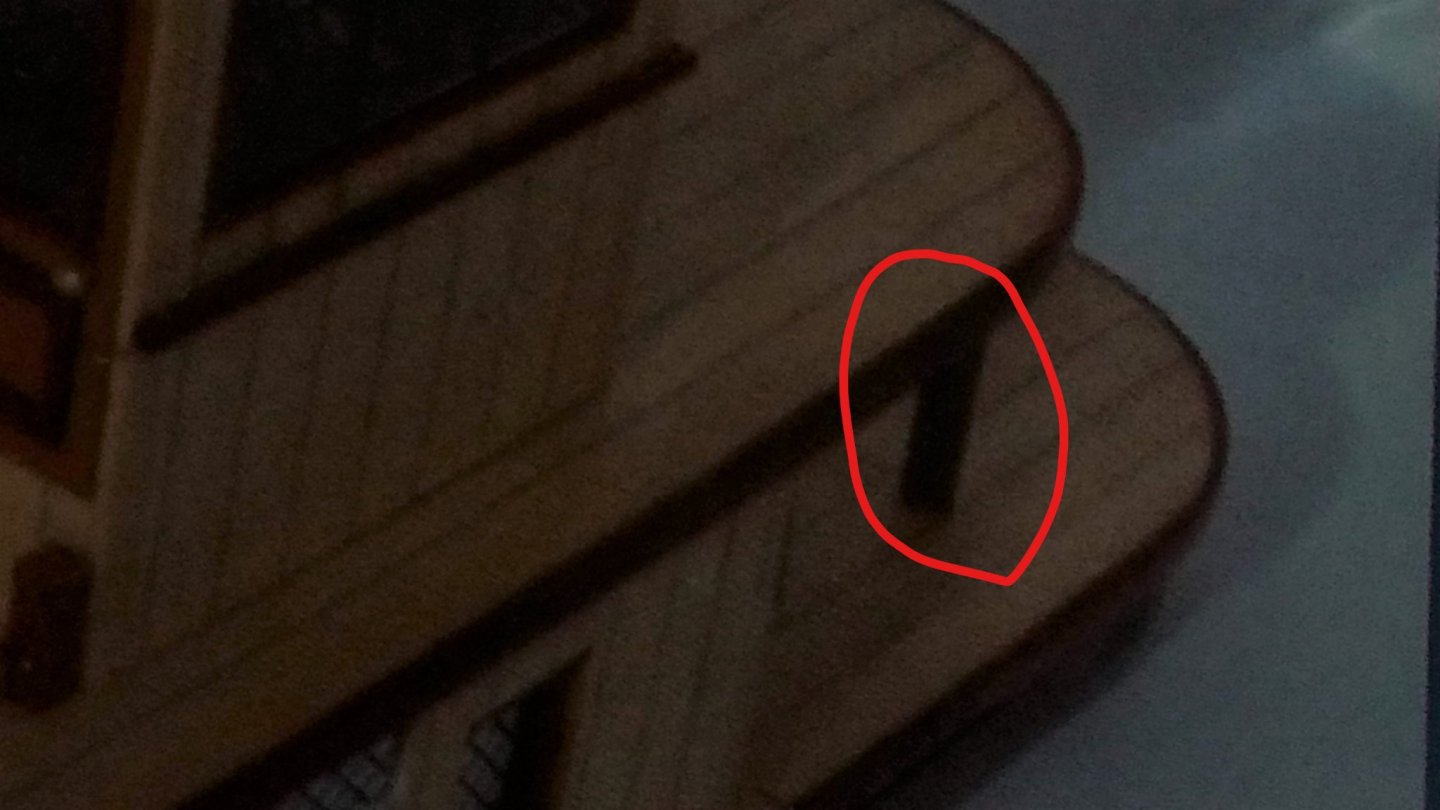
Quick update - sorry it's been a while. Life gets in the way sometimes. Almost done with the top deck and wheelhouse. Still got the brasswork and fences to install. Stair measurements given by AL don't match up to the actual real life sizes. One stair too few 🙁 when trying out the first one for size with the base at the same pictured plank distance in the instructions. Ladderway to the cabin house was still too short for the angle required at 9 steps, so had to put in an "under walkway strengthener" for it to rest on. Also noticed, missing in the written instructions but in the picture instructions and not labelled, stanchions under the forward end of the roof. Pics 54 and 55. This doesn't appear anywhere else thoroughout the booklet in any photos. There are photo's of this model with them installed out there, and there's also a version of this (old!) that has two gangways and a straight (not spiral) staircase. Dan Vadas did a re-build of this one a few years ago. KotM by Dan Vadas Cheers for now, Bob

- 86 replies
-
- 6
-
-
- king of the mississippi
- artesania latina
- (and 2 more)
-
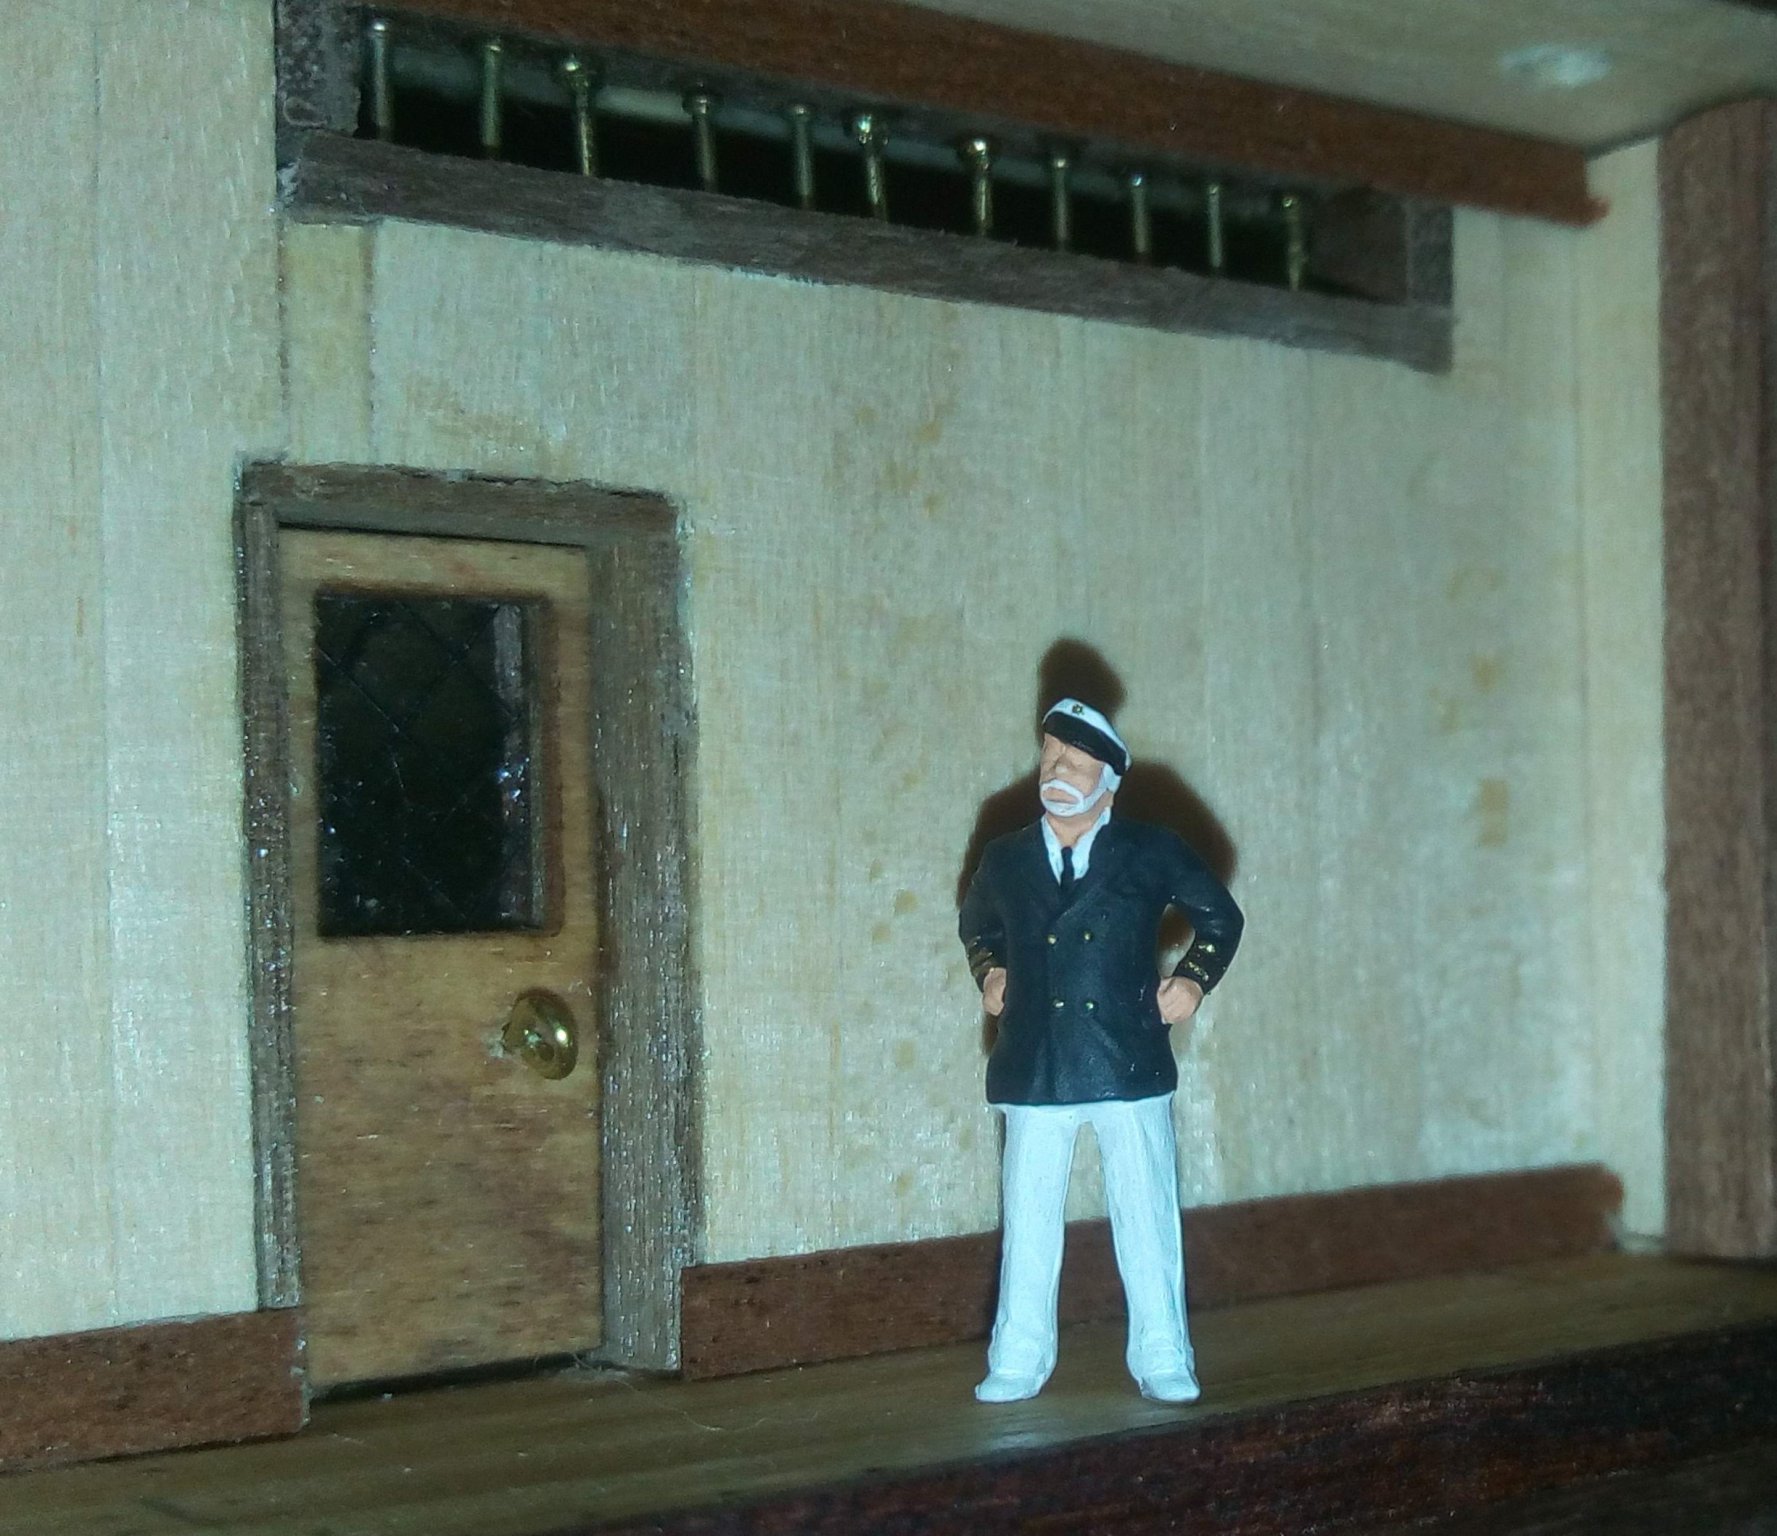
Some progress over the last few days. Captains cabin almost finished. Fitted the stove, roof and rail. Added edging boards to the roof. Added the ventilation gap to the upper deck. Remembered to drill and countersink the holes for the pins this time! 😼 That's all for now, Stay safe, stay well, Bob


- 86 replies
-
- 6
-
-
- king of the mississippi
- artesania latina
- (and 2 more)
-
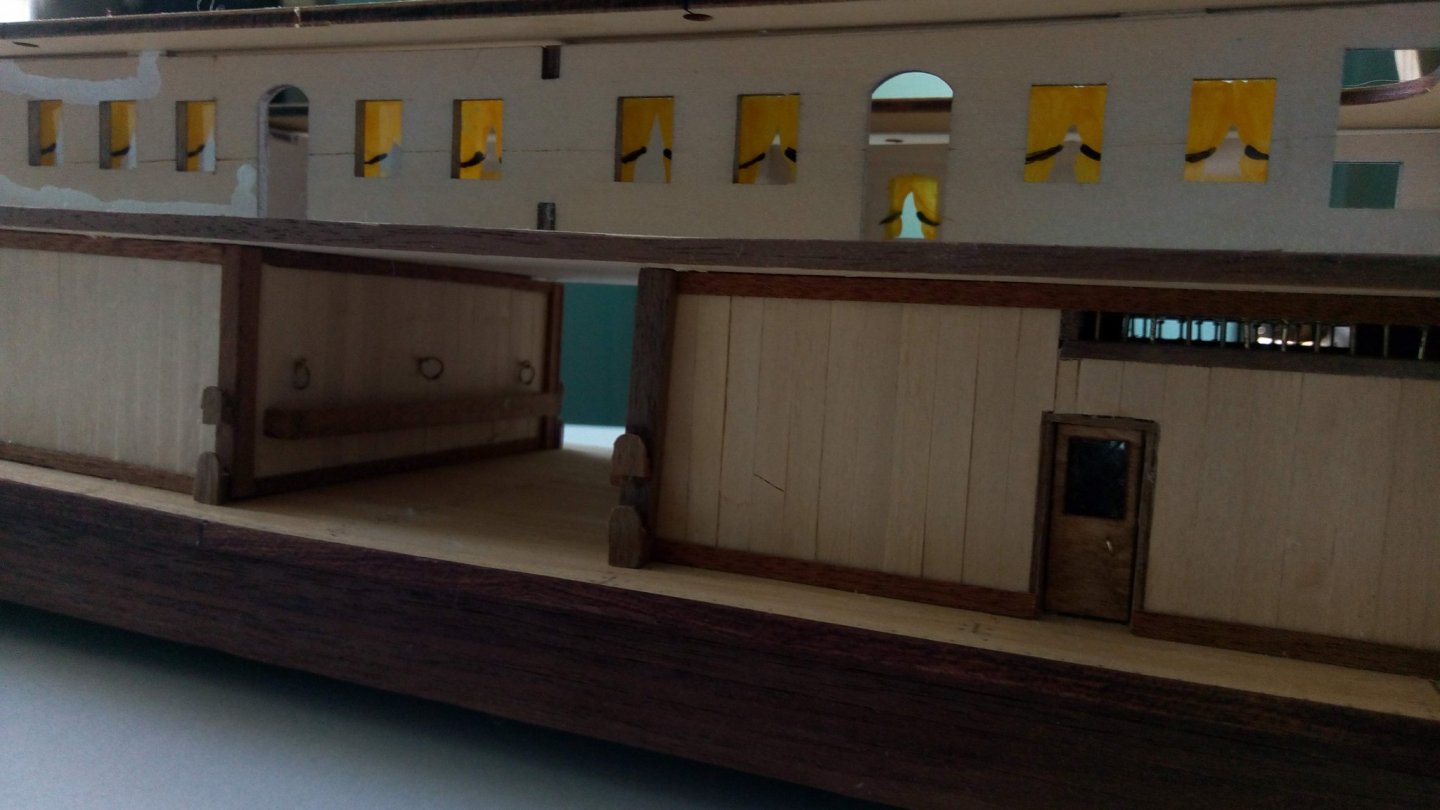
Hi John For scale furniture try searching for HO/OO scale stuff. It's 1/76 so very close. If you're going down that route don't use the dangling ring door handles as shown, except maybe on the "barn doors" of the stowage room, they're too large. Instead use one of the brass pins. The head on them is more to scale. Bob
-
Hi Kenneth. If you do a search in the search box for President and tick "titles only" you'll find 13 results. About half are for this model. I have one of these started as far as the hull planking, but am doing some research to kit bash into a real ship a distant relative was a lieutenant on. As said, Carronade didn't come into use until 1774, so cannon would be the correct item if you wanted some accuracy. The instructions are a little"sparse" shall we say 🤬. Have a look on here for the planking tutorials which are really good if you haven't already got past that stage. And as has been suggested, create a build log - so much help you won't get disheartened! Best wishes, stay safe, Bob
-
Glad to hear you're keeping safe. There are a few odd anomalies with sizes. Be aware when you come to the upper deck houses the plywood is so thin it can, and sometimes does, seperate when soaked to allow for bending the curves. Before you plank the hull or shape the bottom look at how the planks will fit - it's a job and a half if you curve the edges (at least it was for me😄!) Also the stem needs quite a bit of fettling to fit. Take good care, stay safe, Bob
-
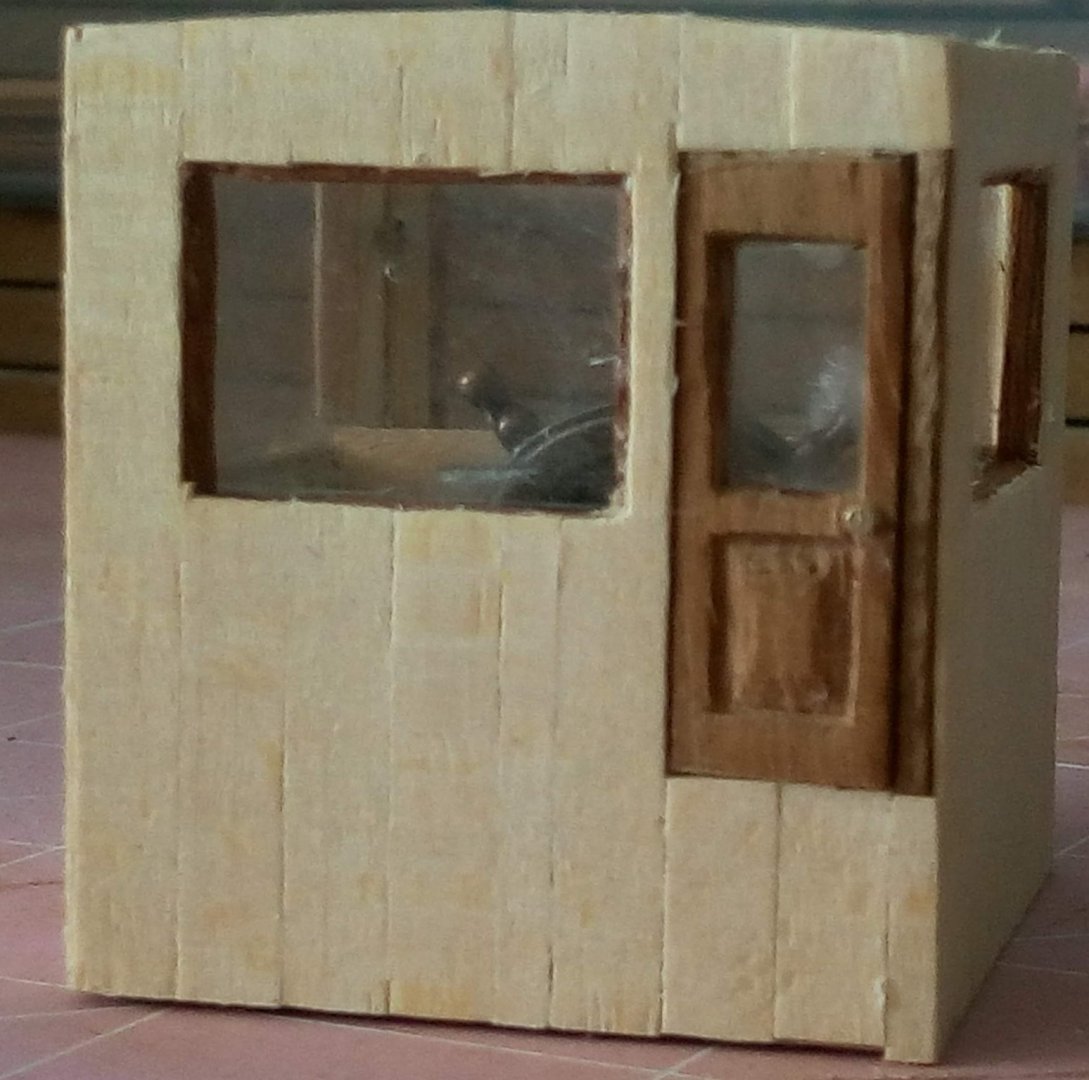
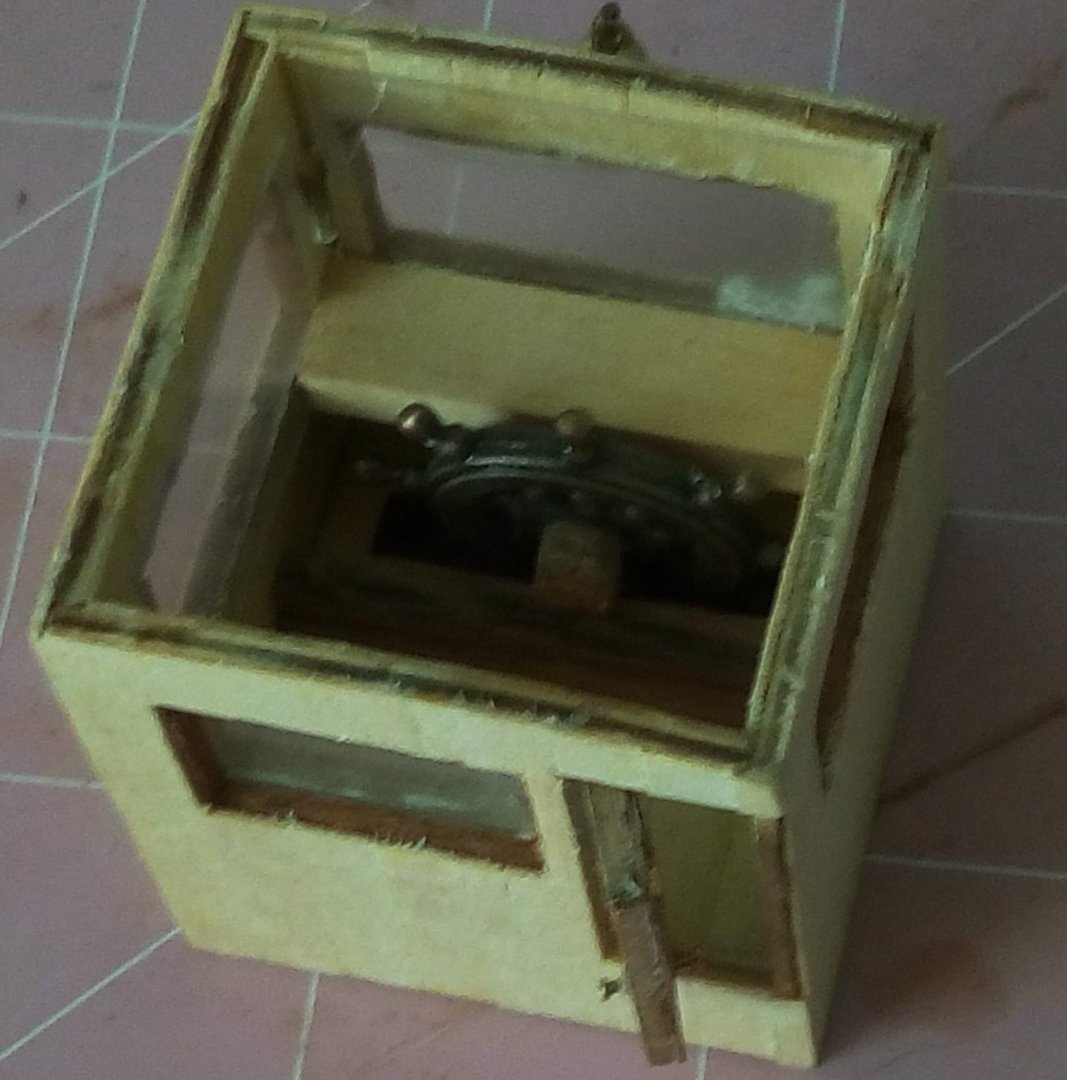
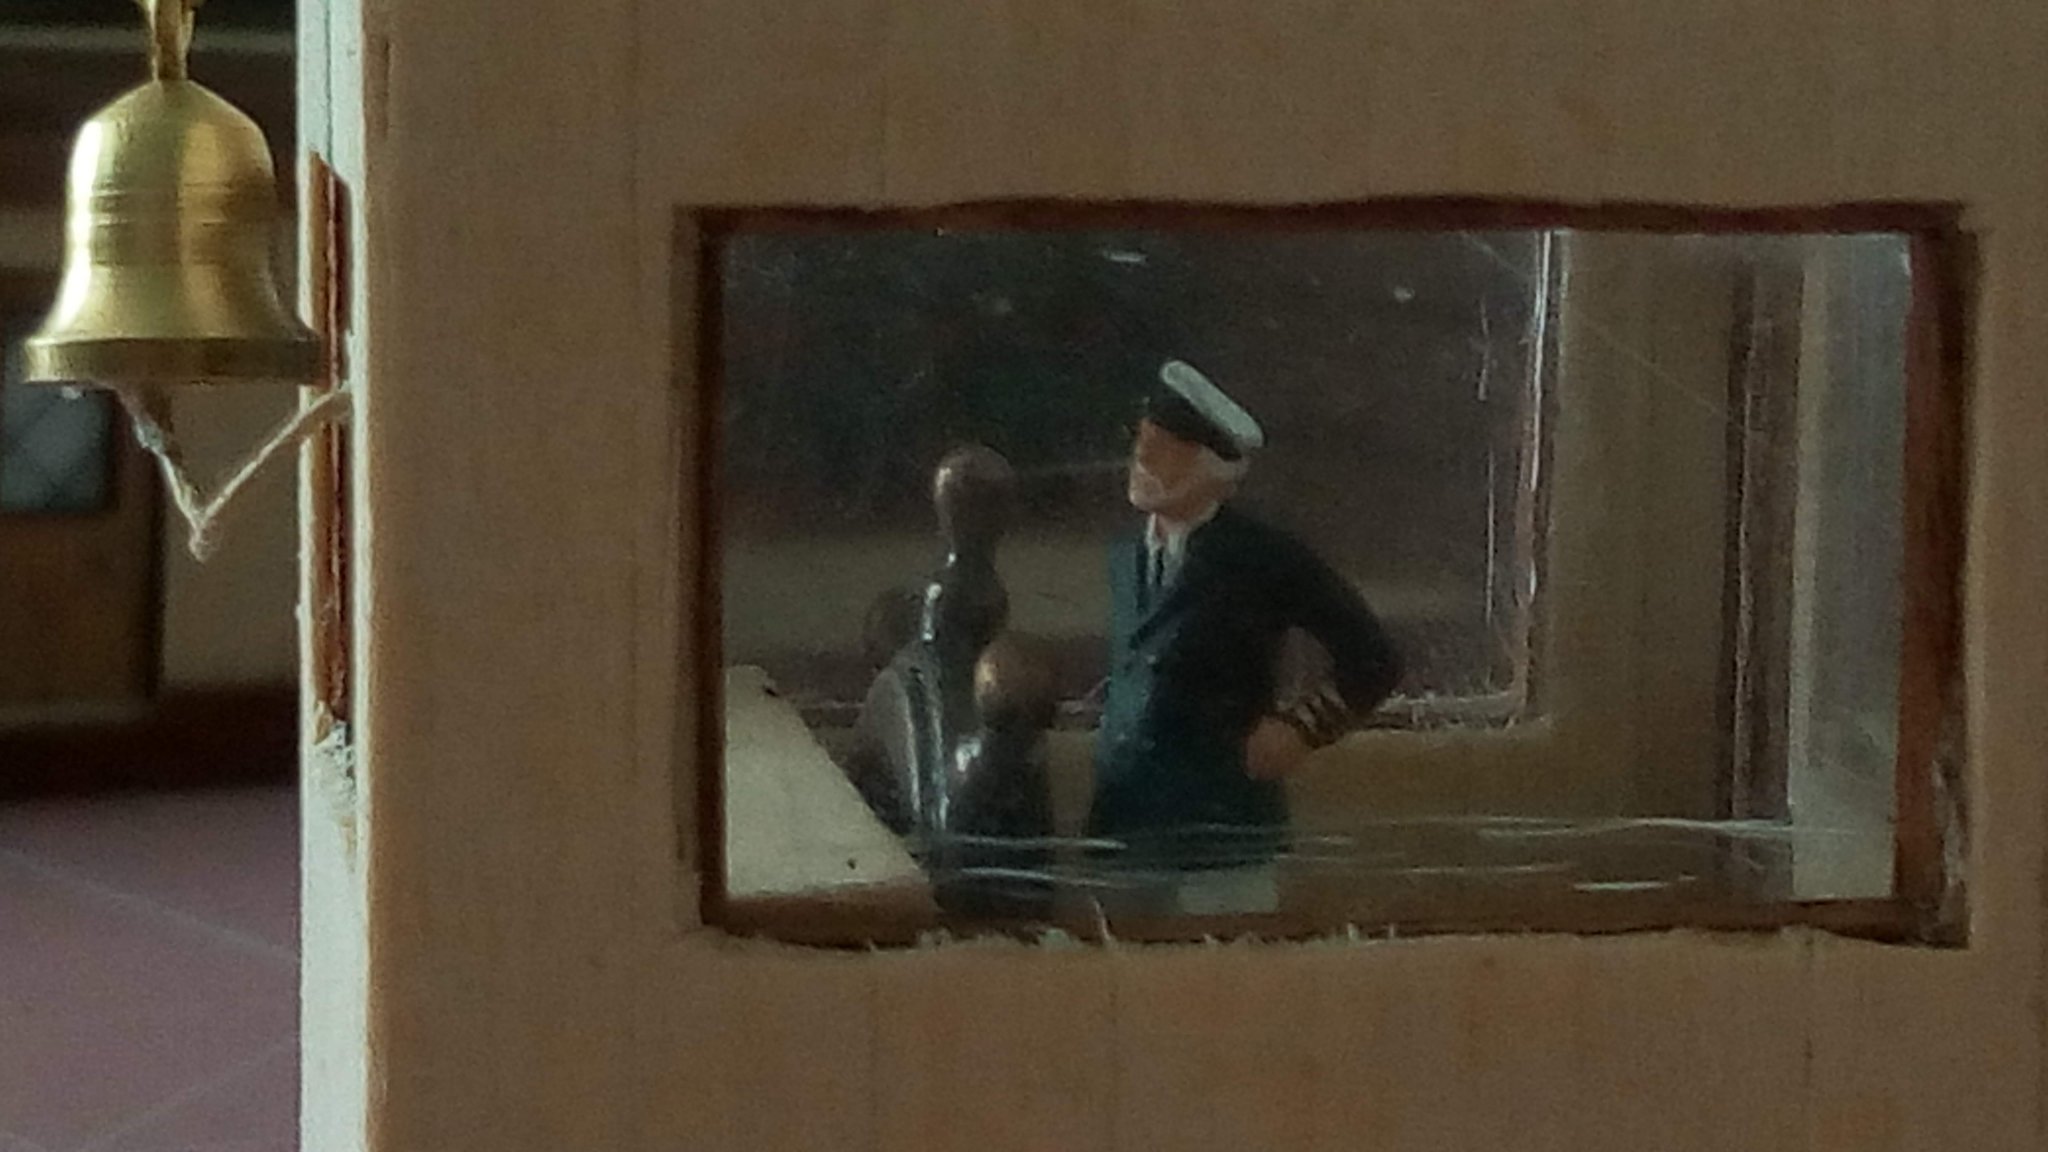
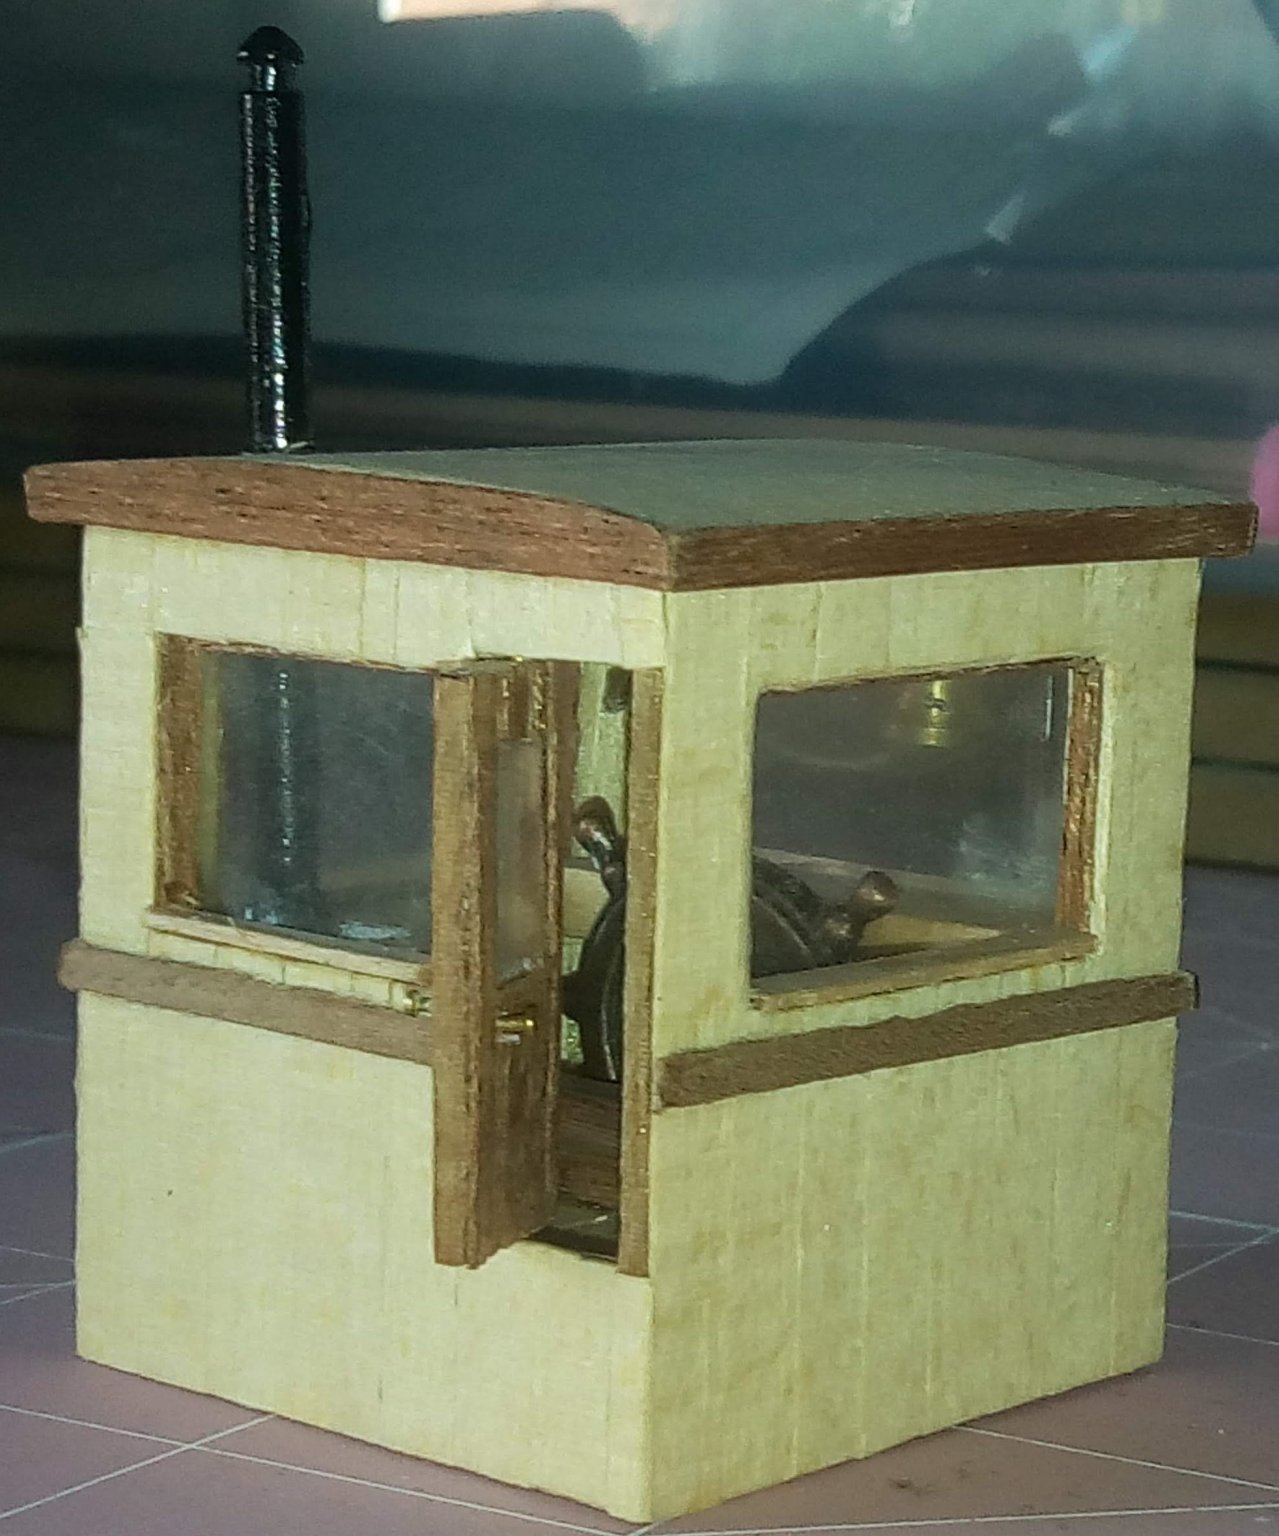
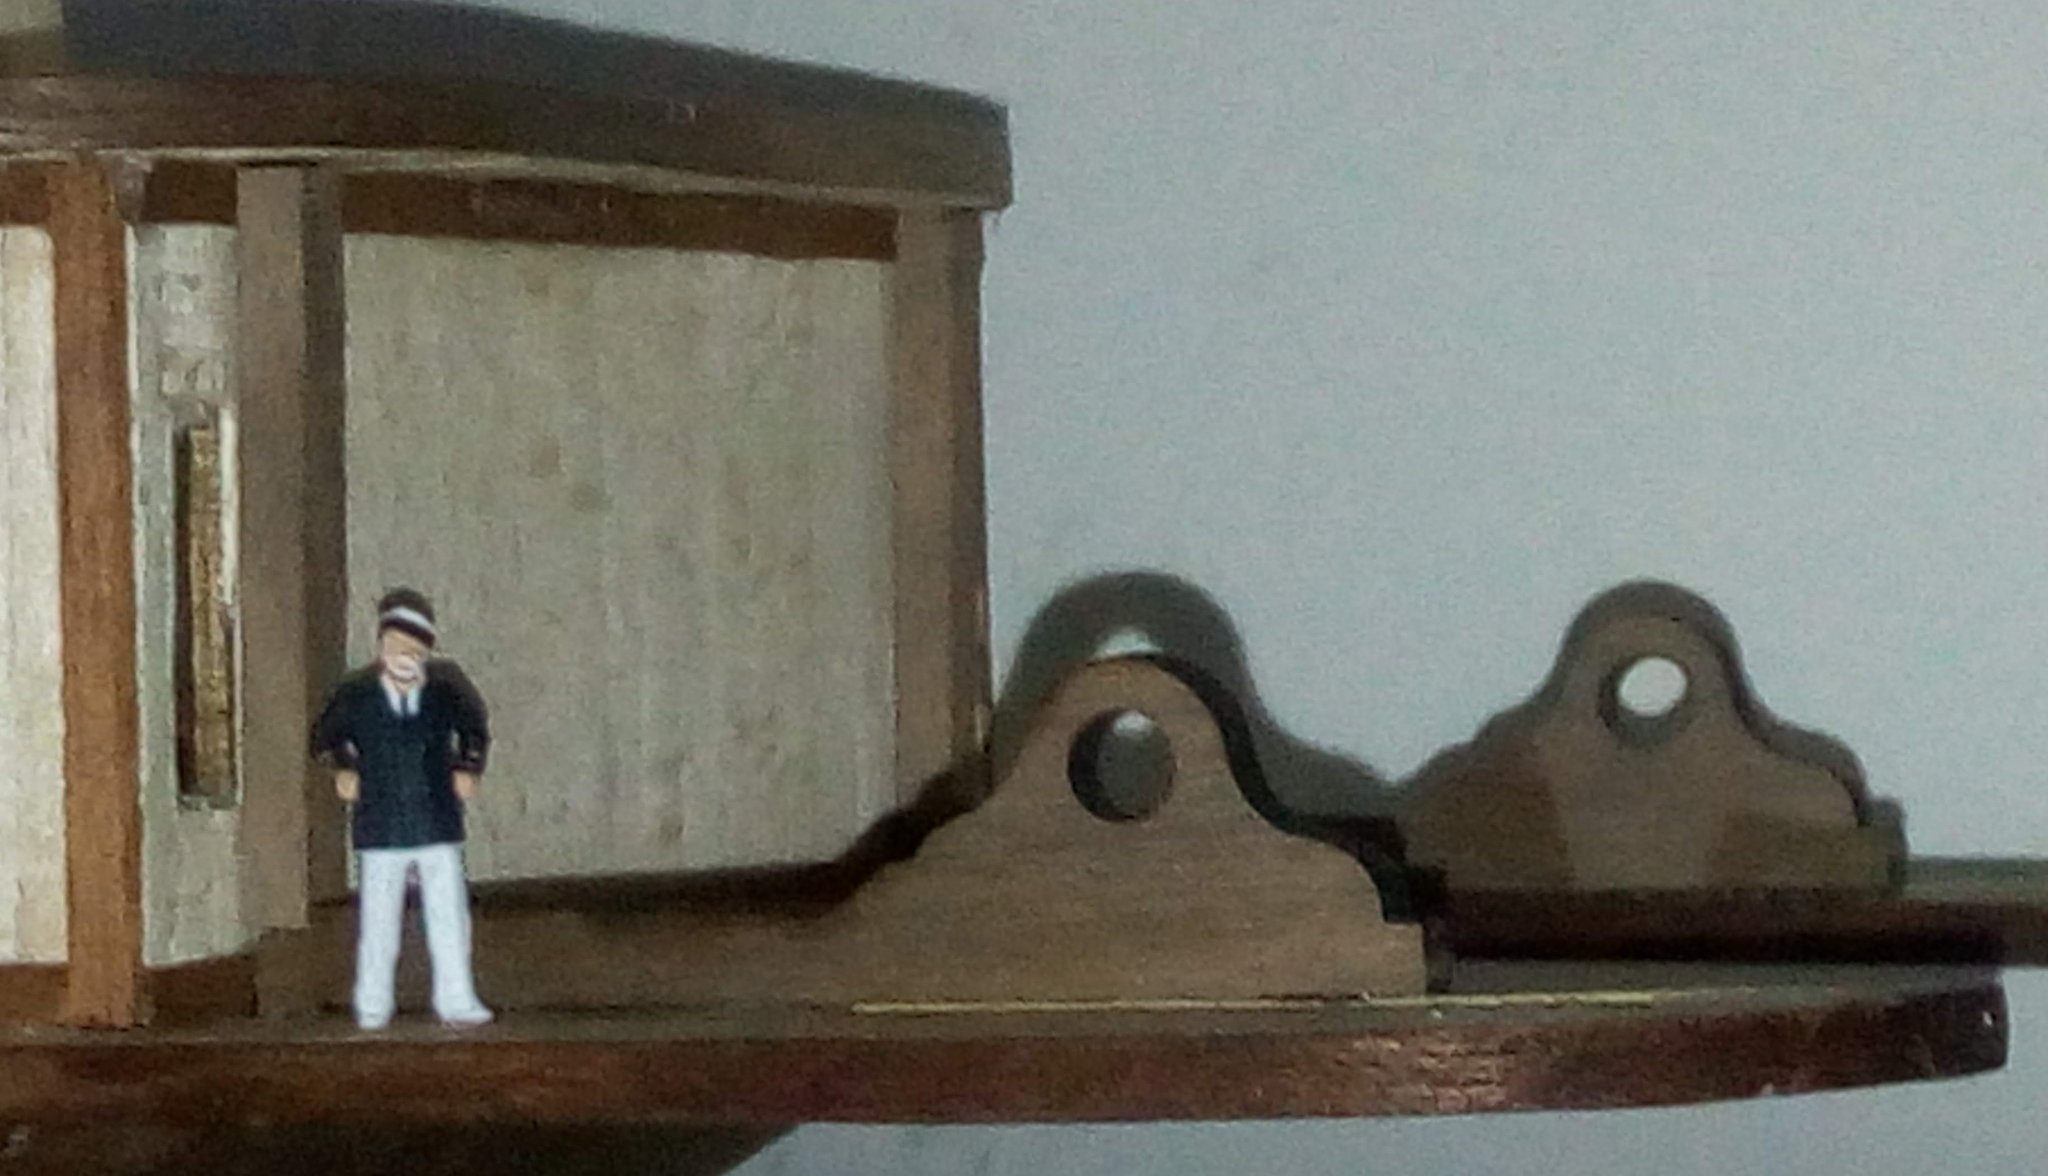
Some progress over the last week. Syrprising how small bits seem to take hours to do. Upper deck almost finished. Wheelhouse. As I'm adding a captain figure there's now a step and a paperwork / coffee / whisky shelf Didn't like the original plywood door, so had a play around and cut / carved this one. First time carving. Even managed to get the door to open and close on hidden hinges. using pins. Still got to fil a sill to the lower window edges to finsih them off. As usual, close ups show all the rough bits and small flaws 🙁 Stay safe, stay well Bob


- 86 replies
-
- 6
-
-
- king of the mississippi
- artesania latina
- (and 2 more)
-
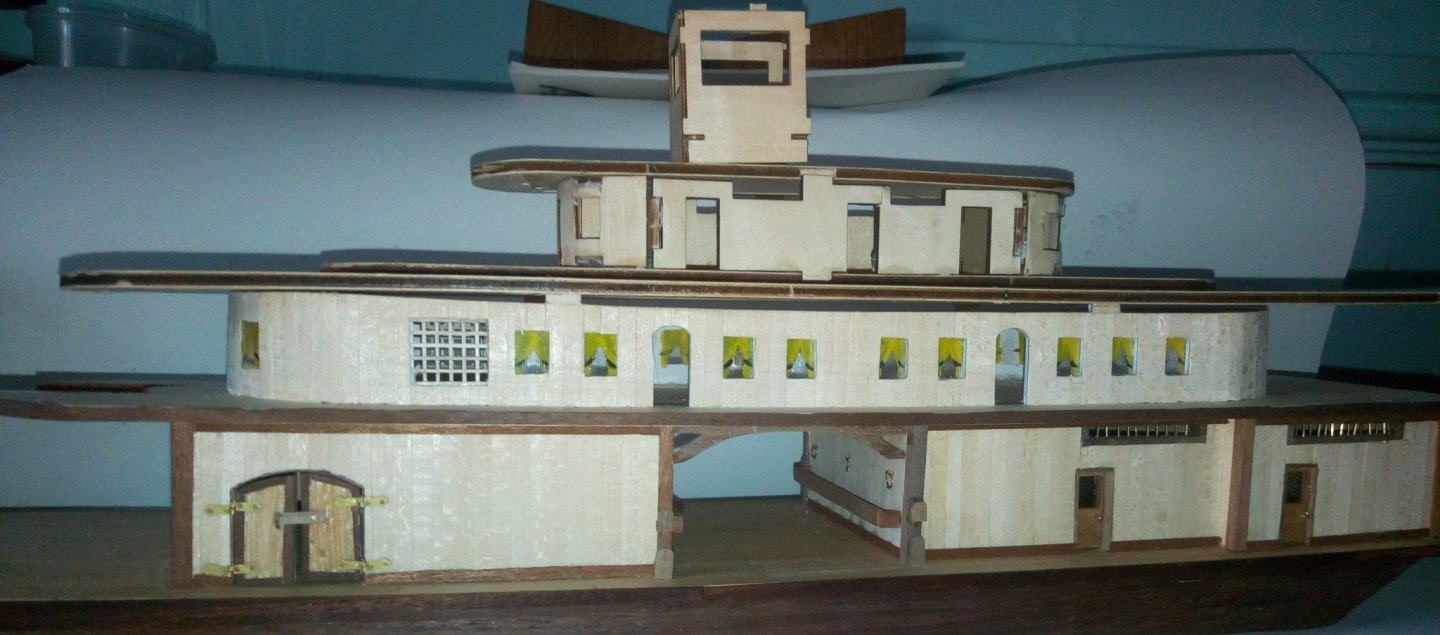
Decided to leave the spiral staircase for now, and do some of the long repetetive process of planking the large areas. Fair bit of progress, but not much to show for it. Fitted the second deck house and planked it. Remembered I'd got some photo-etched saws. Used the long thin one to saw the tops off the planking. Fitted the livestock arches. The pic shows it befor sanding. Planked the 3rd and 4th Decks, and made the 3rd deck house. Also made the wheelhouse. As she stands now And then the captain came to visit - "Big door handles!" he says. I'll have to look at changing them for something smaller. He then goes aft and wants to know where the paddlewheel is! Think I'll have to get a move on - he seems a bit impatient. That's all for now, Cheers, Bob


- 86 replies
-
- 7
-
-
- king of the mississippi
- artesania latina
- (and 2 more)
-
Thanks for the comments and likes. Another day creating sawdust. This is for the Admiral and she would like as much as possible in "proper" wood where it is visible, not ply. The livestock arches come in ply. Had a play around and managed to get these done. Edge glued to 10mm planks together and hand cut these. My skills aren't great, but they've been given the OK. Next sone is to figure out the spiral staircase! Cheers, Bob
- 86 replies
-
- 5
-
-
- king of the mississippi
- artesania latina
- (and 2 more)
-
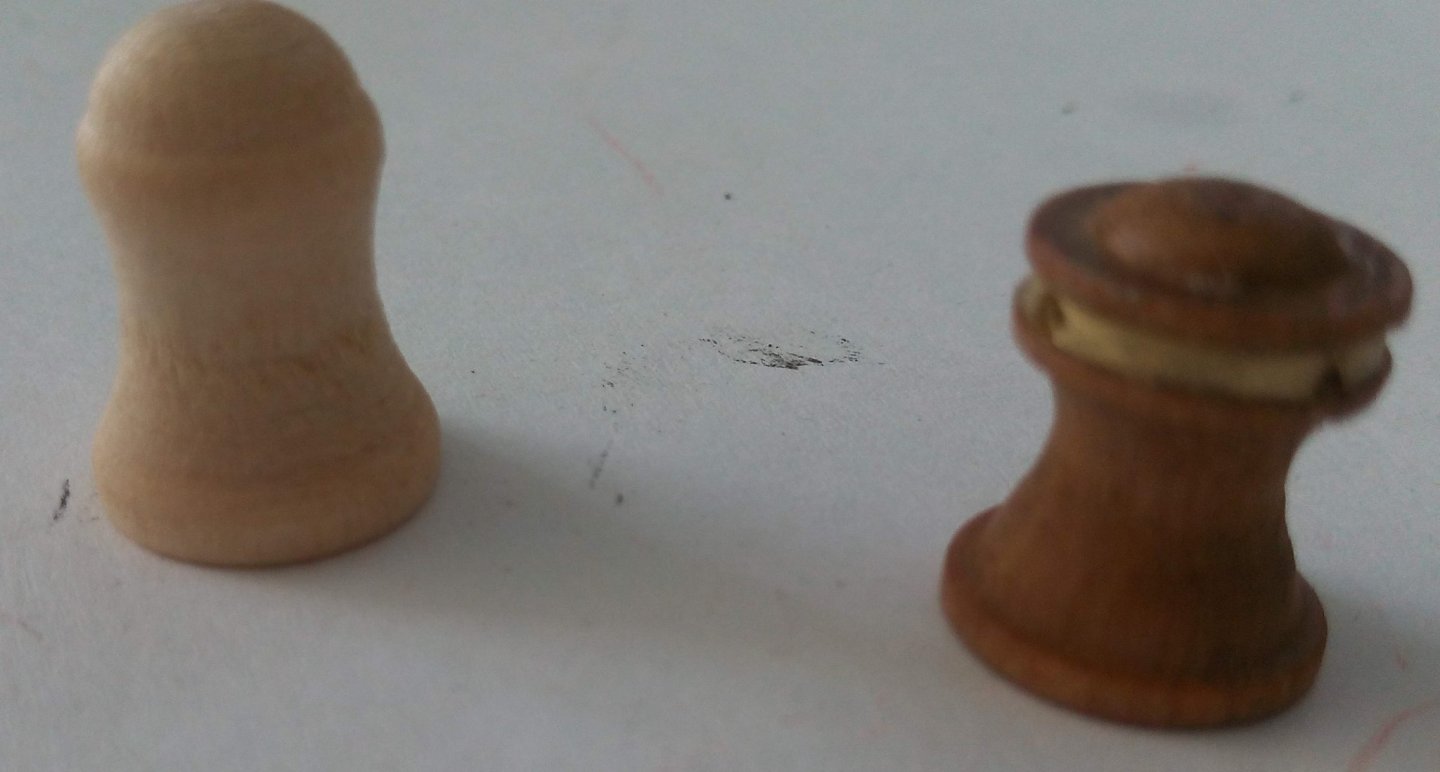
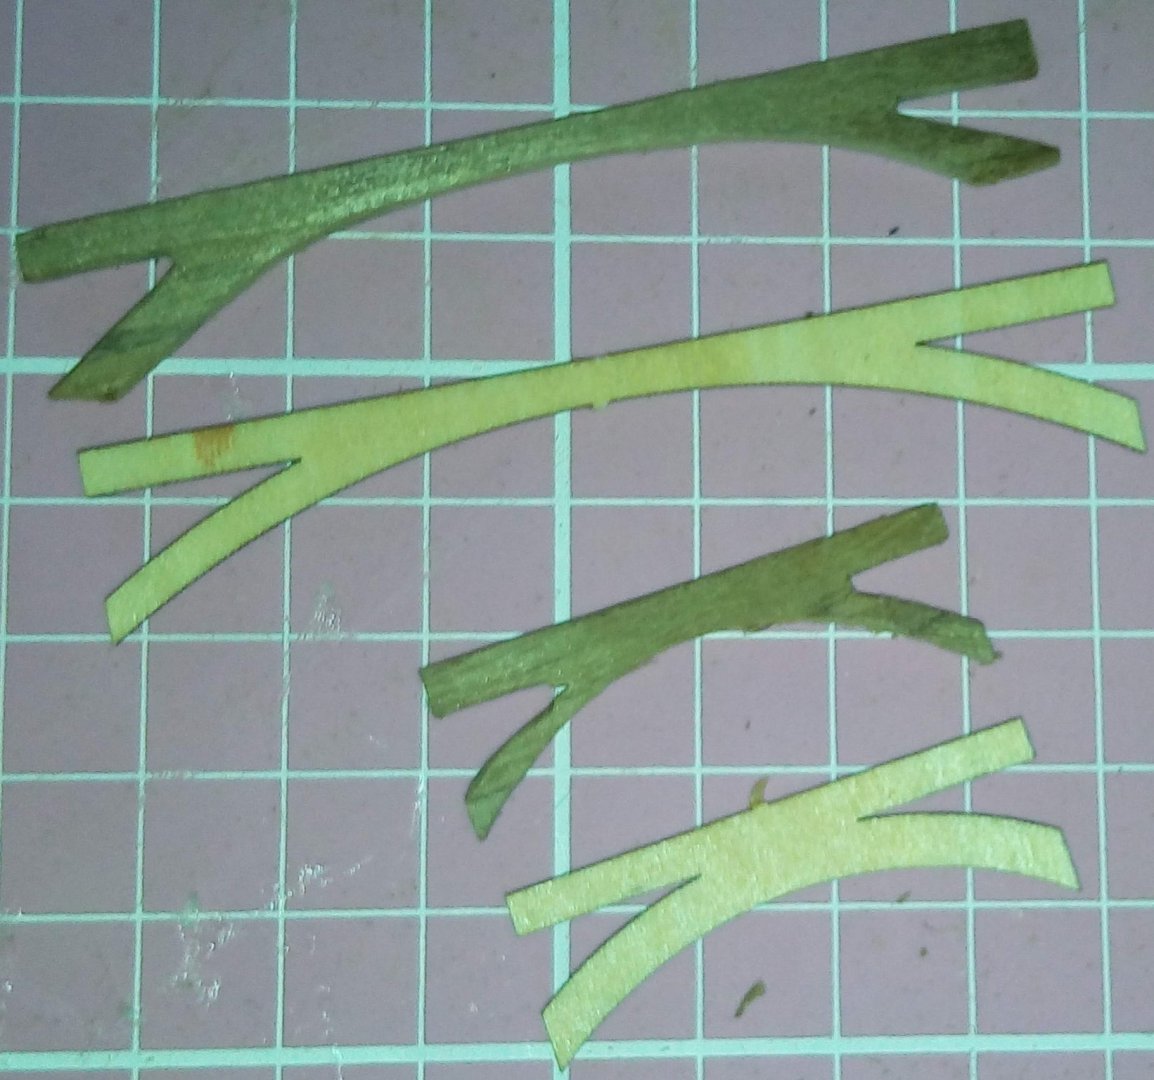
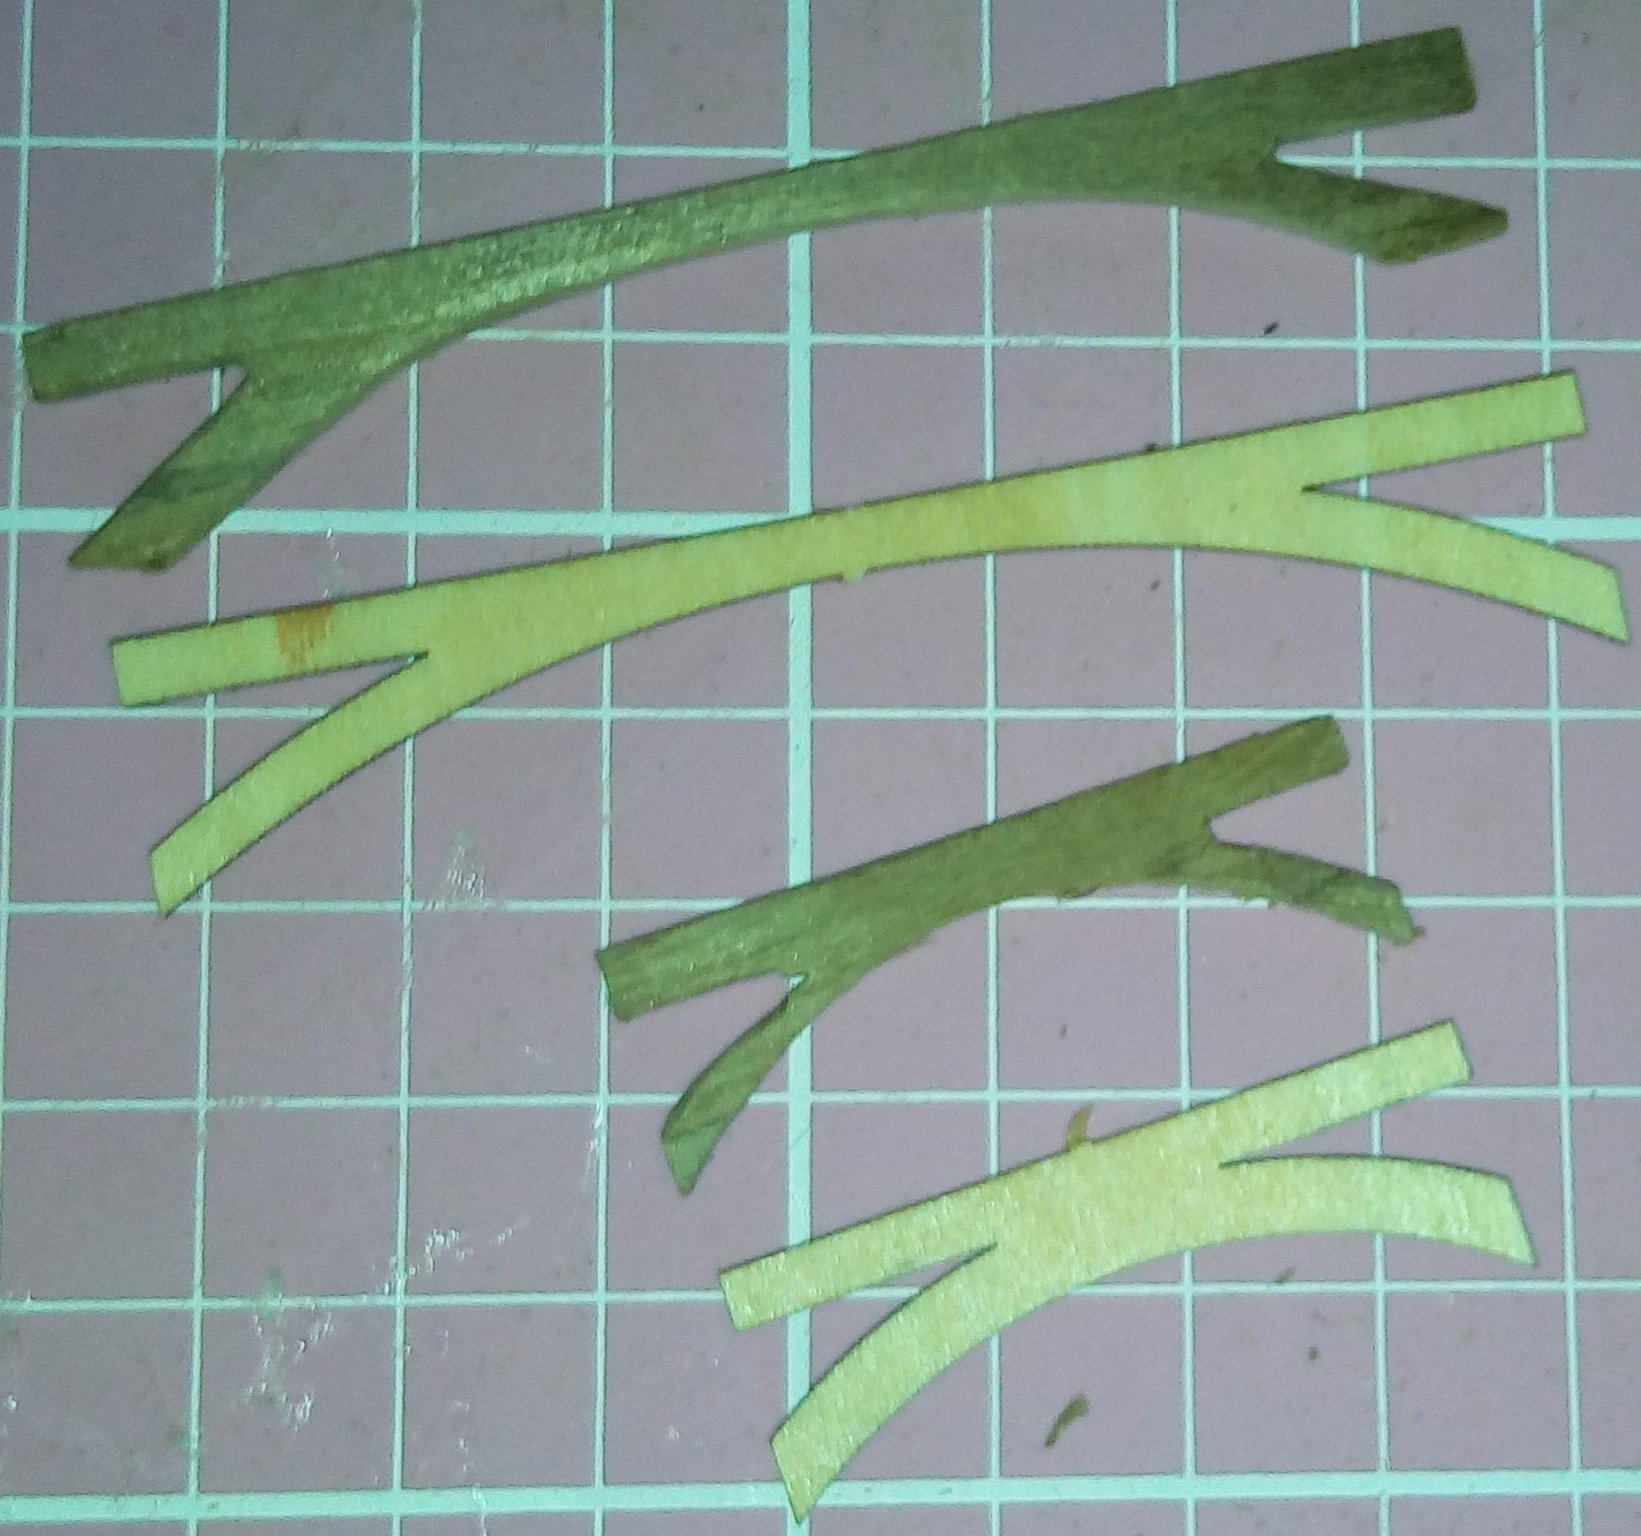
So, thought it time to make the rudders before getting too far ahead of the build. Picture in the book shows this - looks like mahogany, same shade as the dowel What you actually get is this - plywood One of my helpers thought this of them Found some scrap of the same depth and made these
.thumb.jpg.c41e76677c30a59eb10f7eb653b7b5a9.jpg)


- 86 replies
-
- 6
-
-
- king of the mississippi
- artesania latina
- (and 2 more)
-
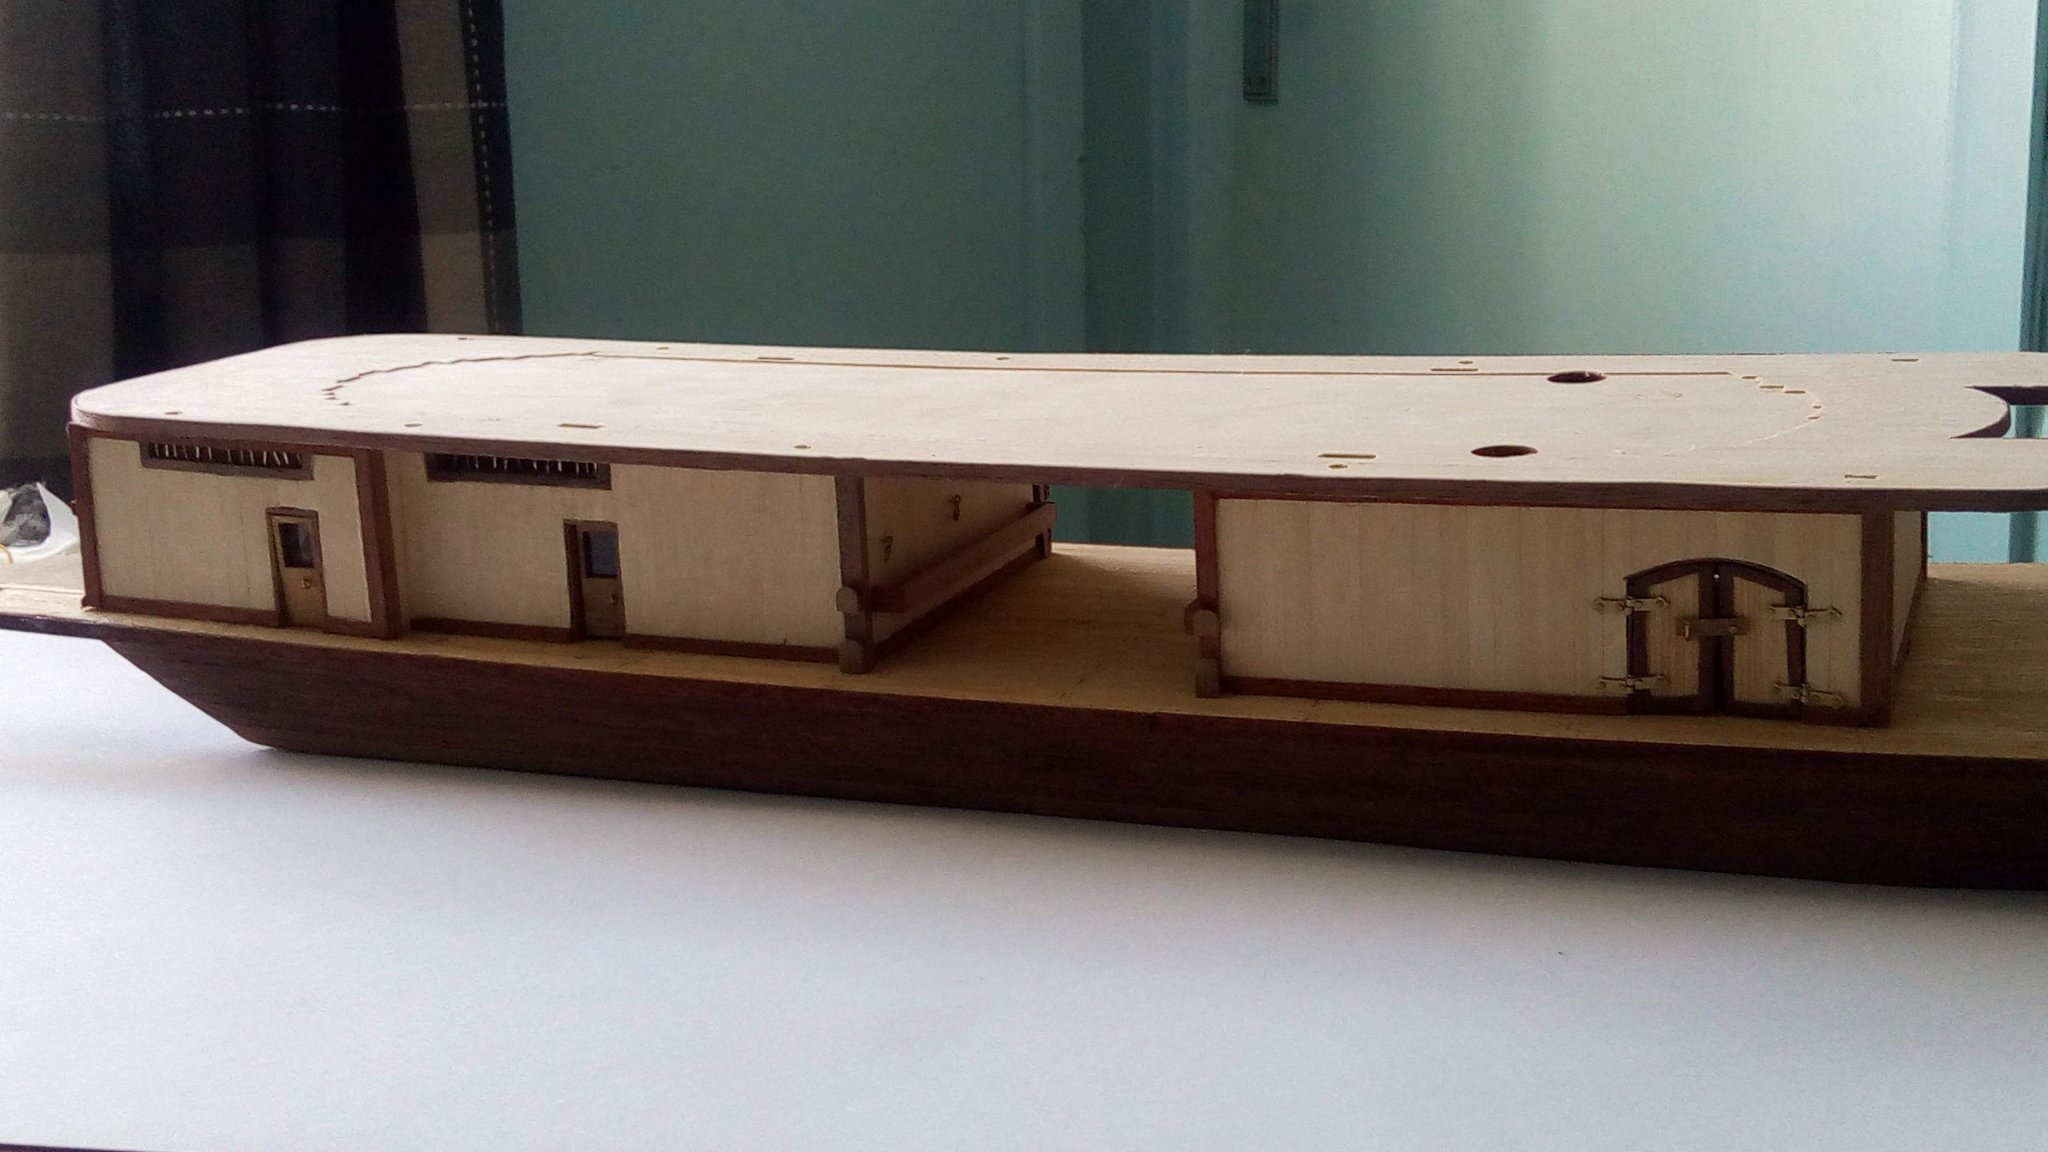
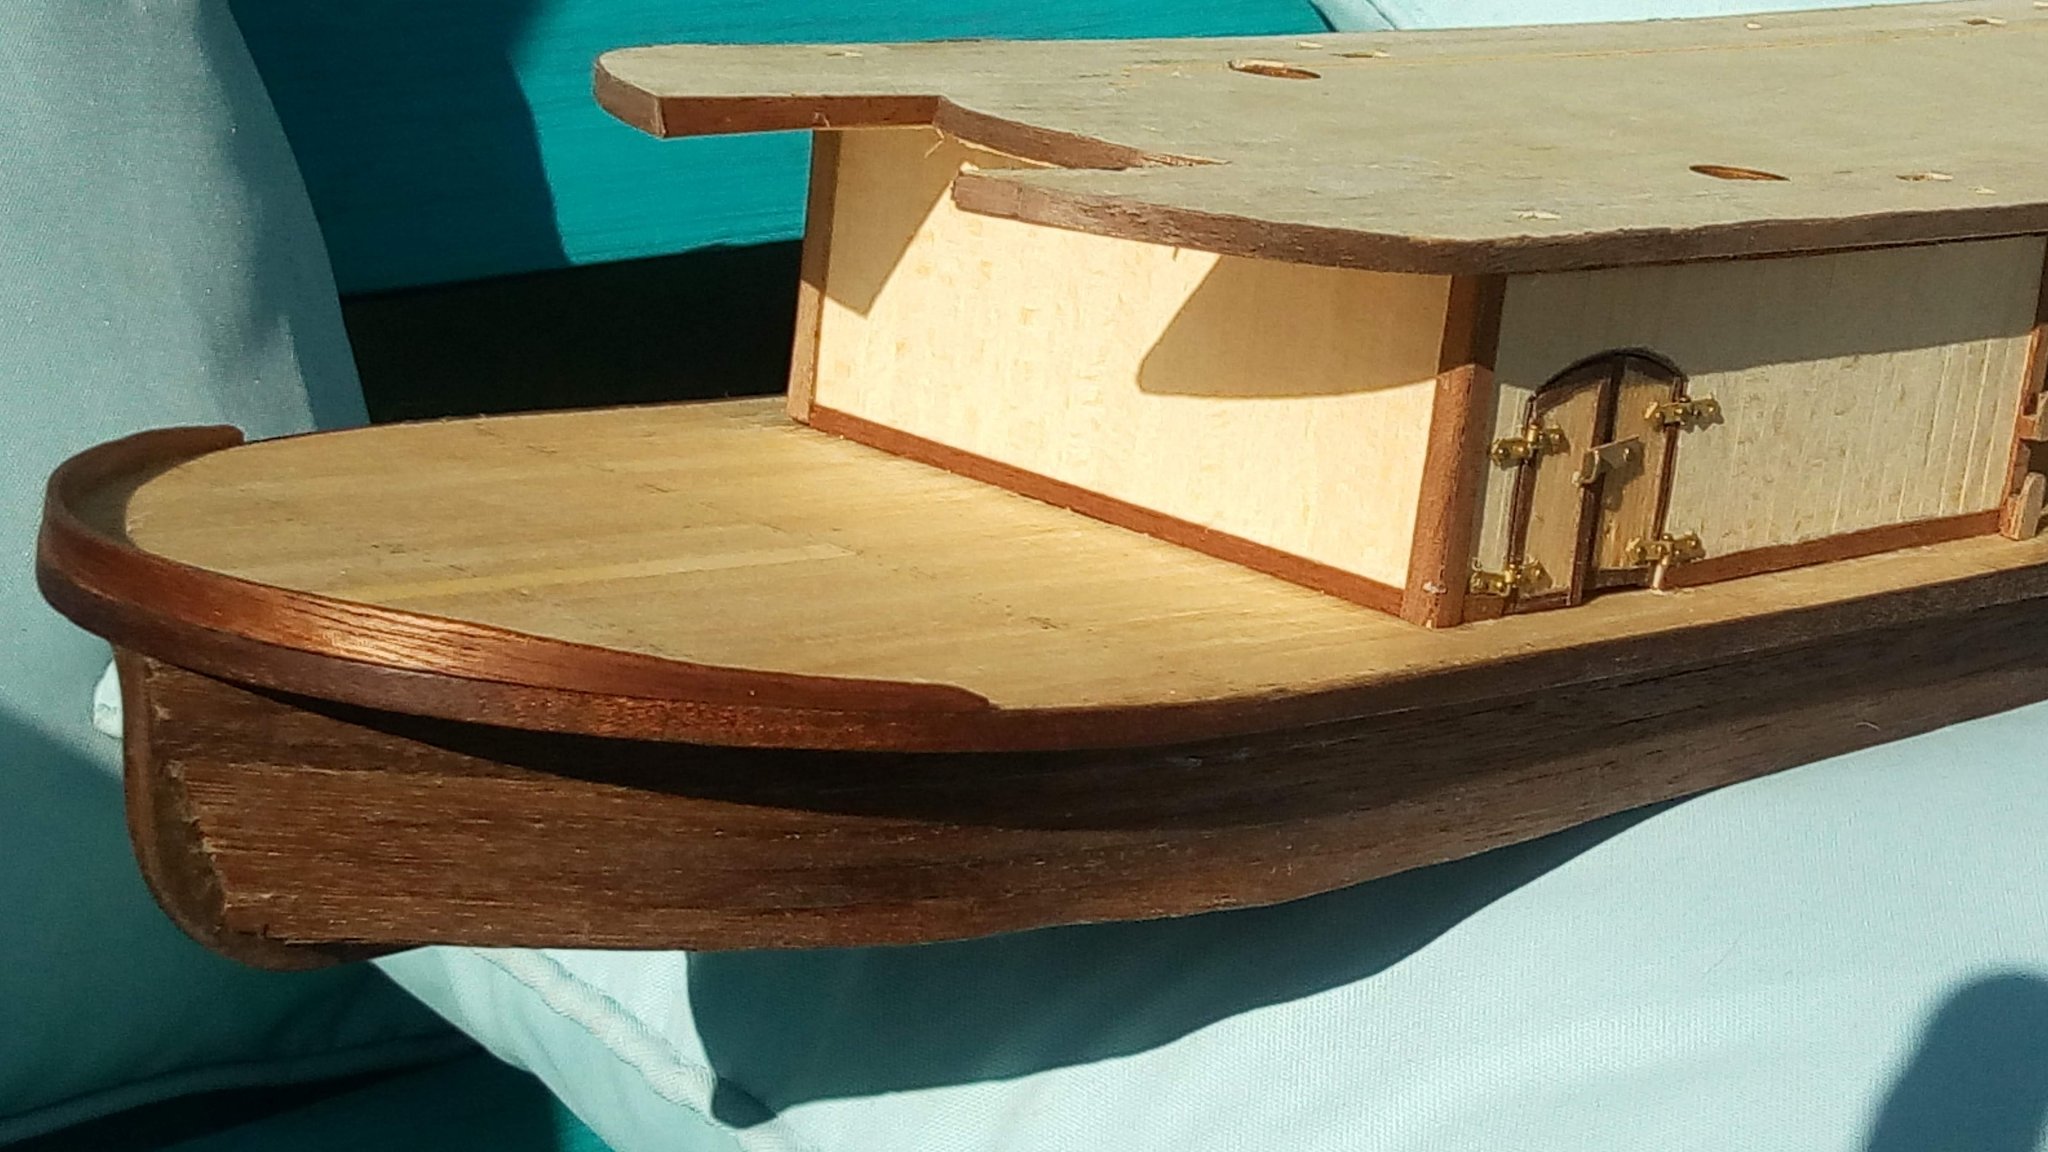
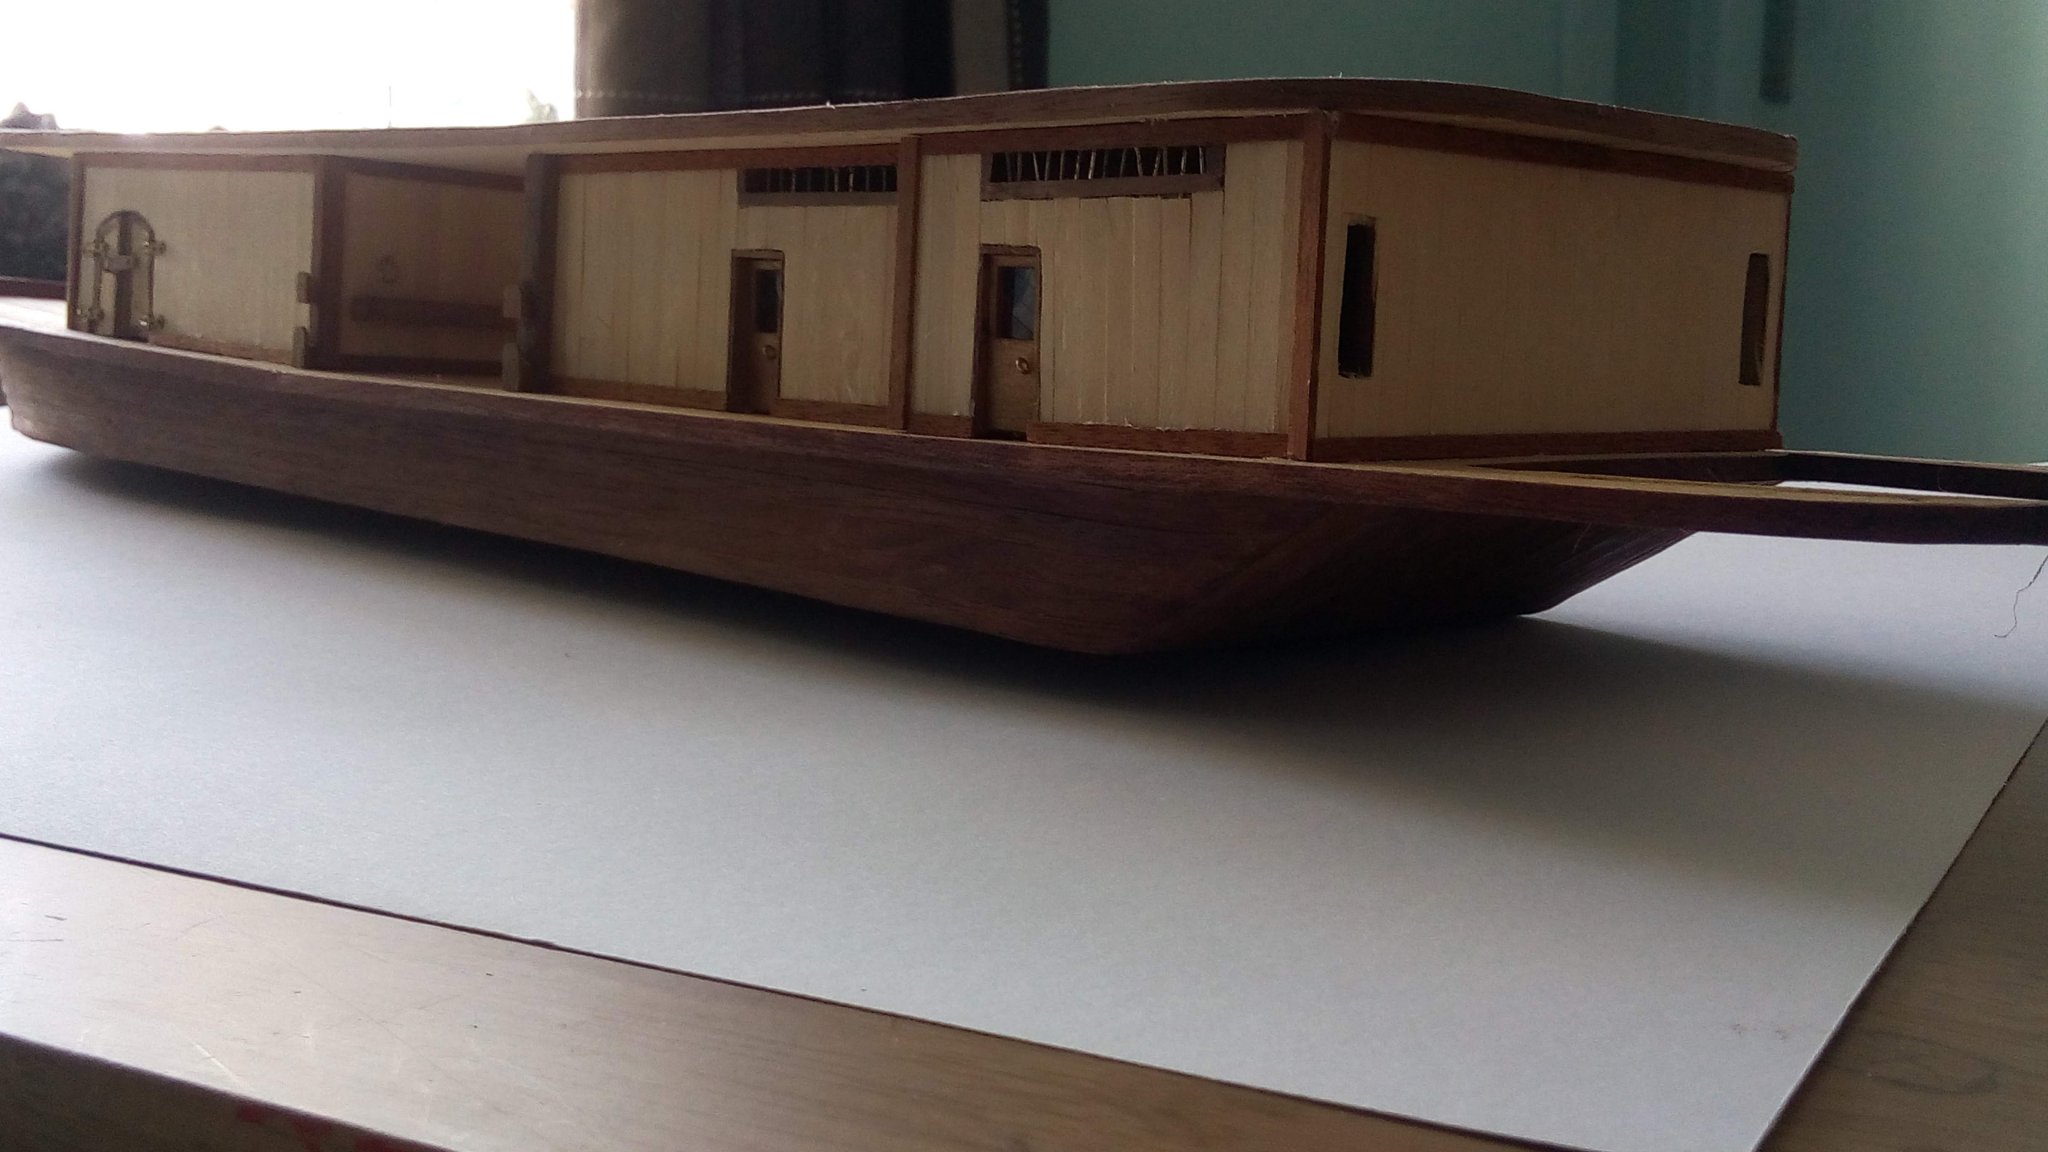
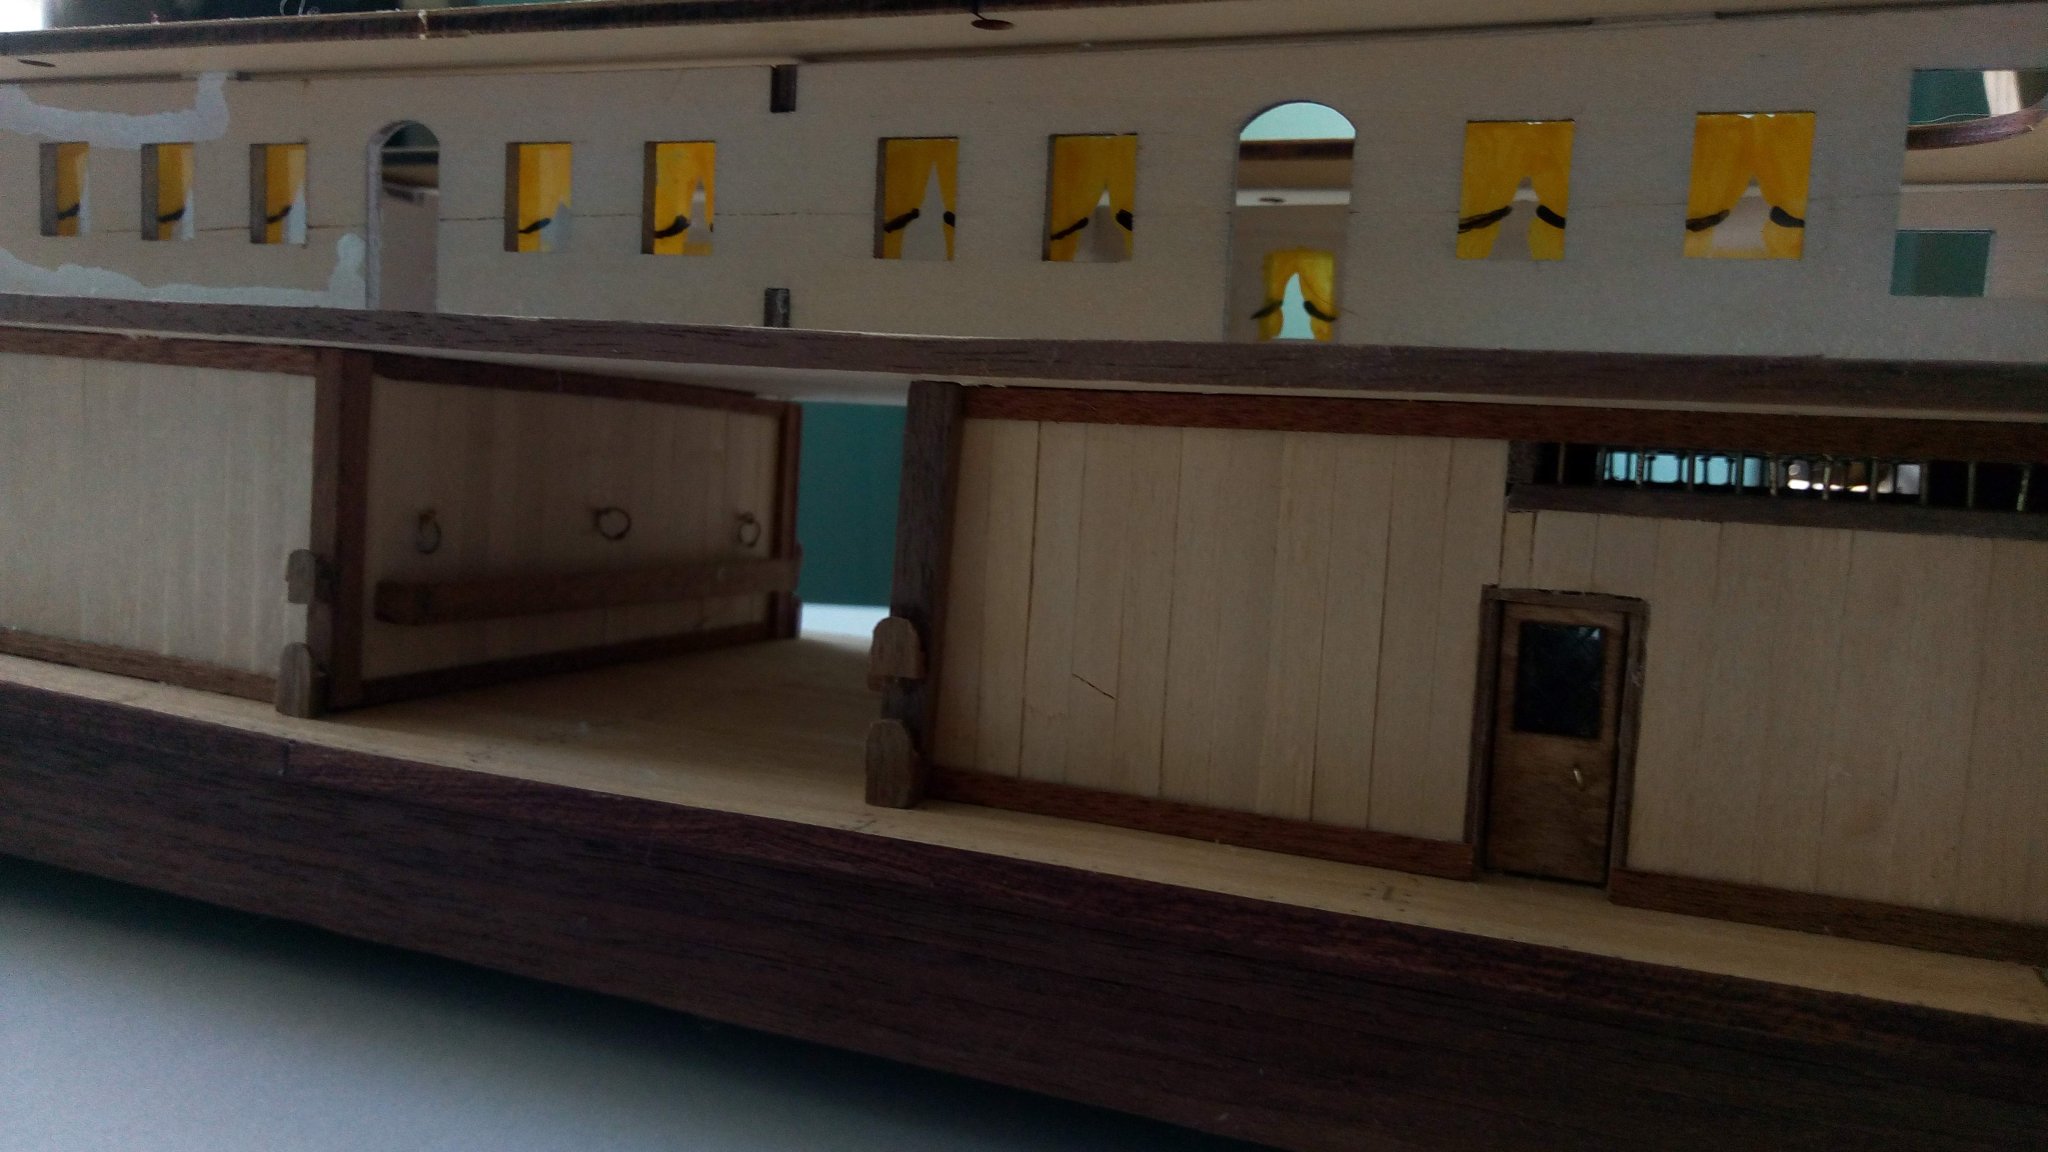
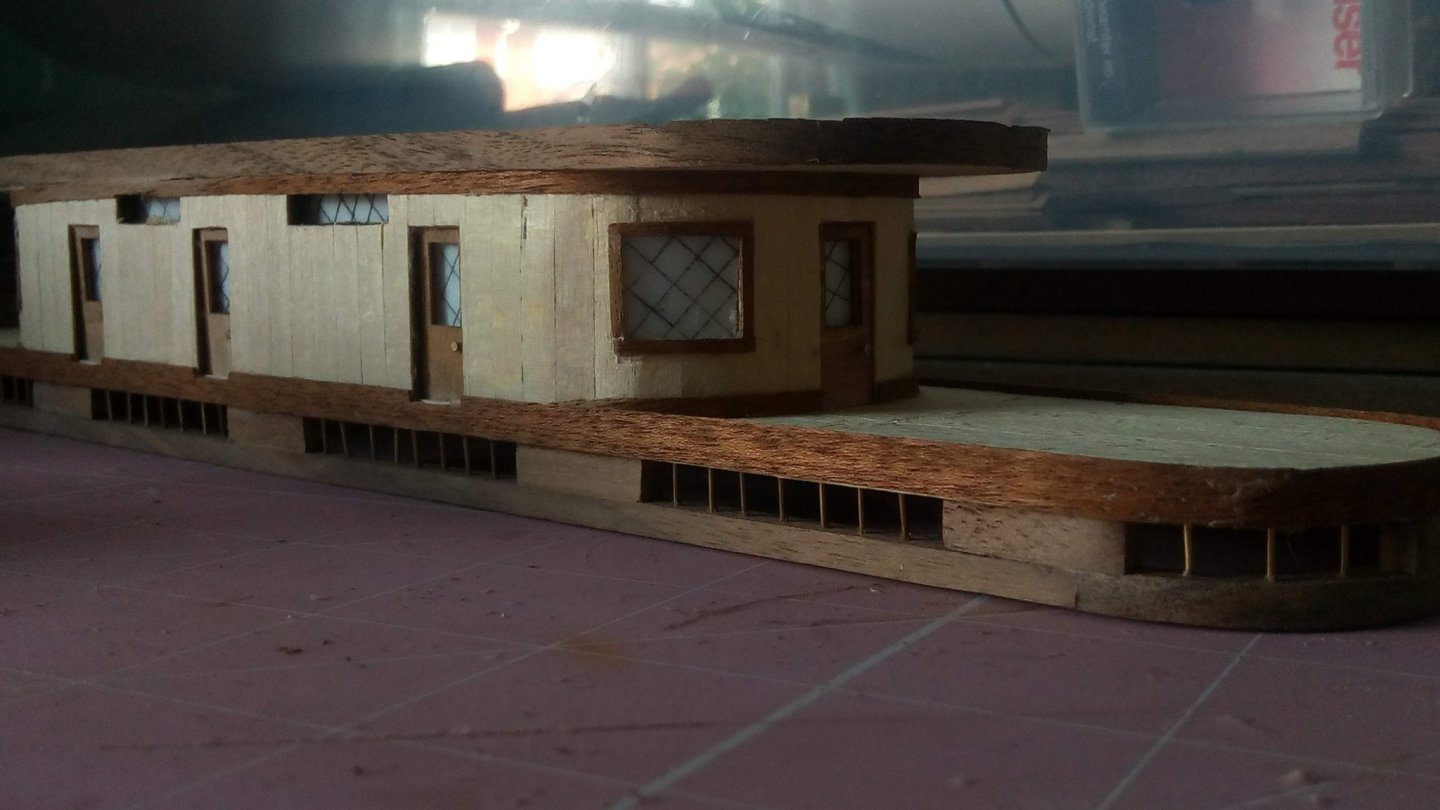
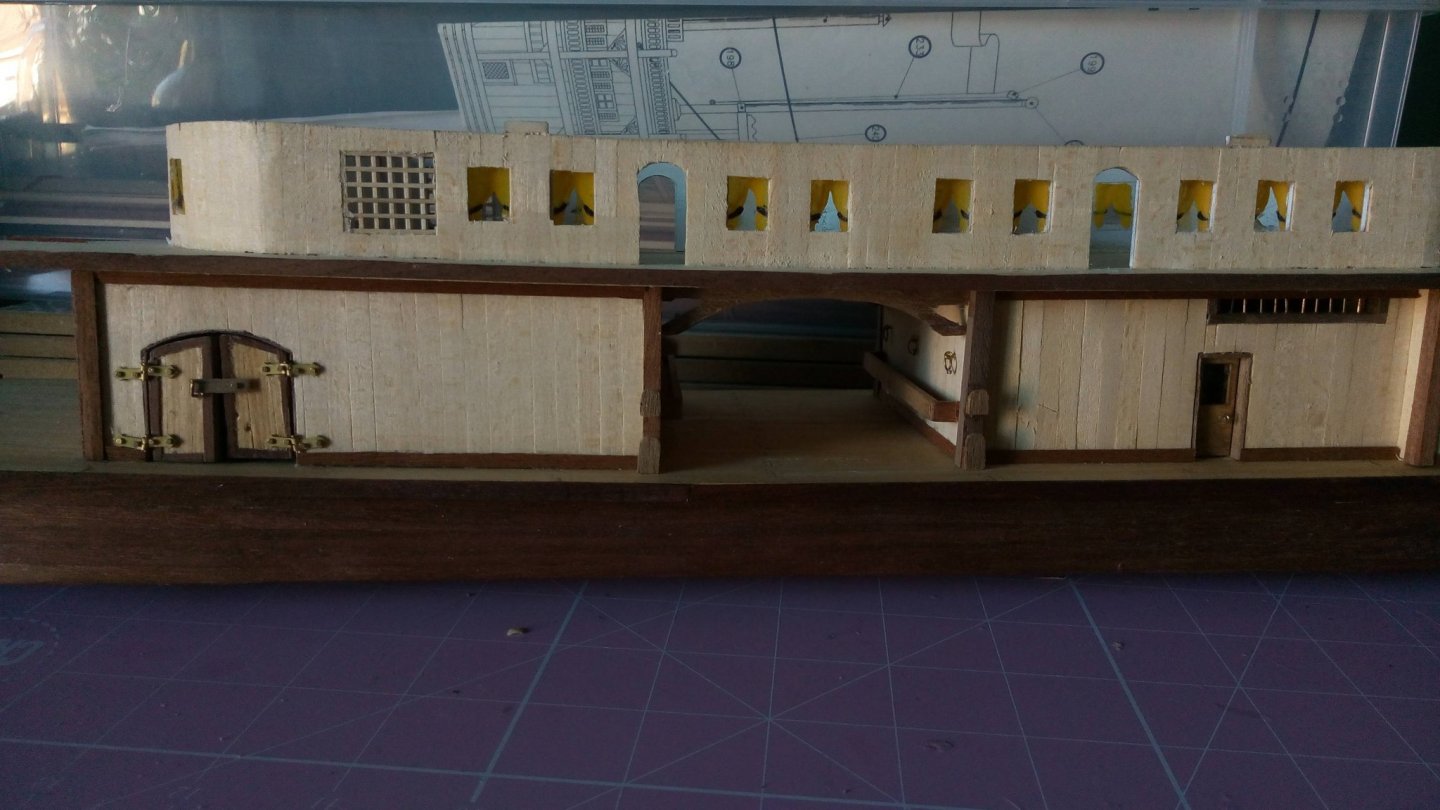
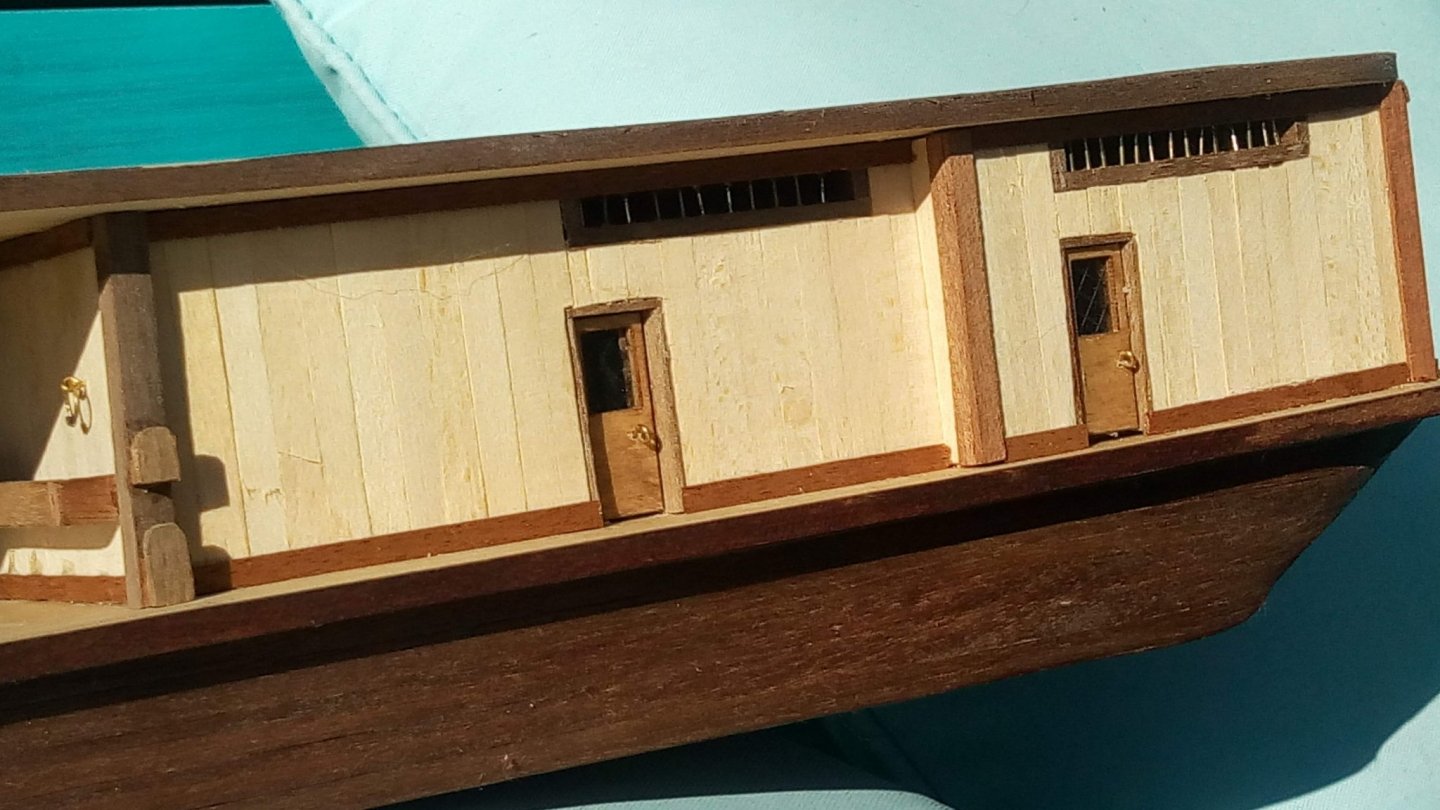
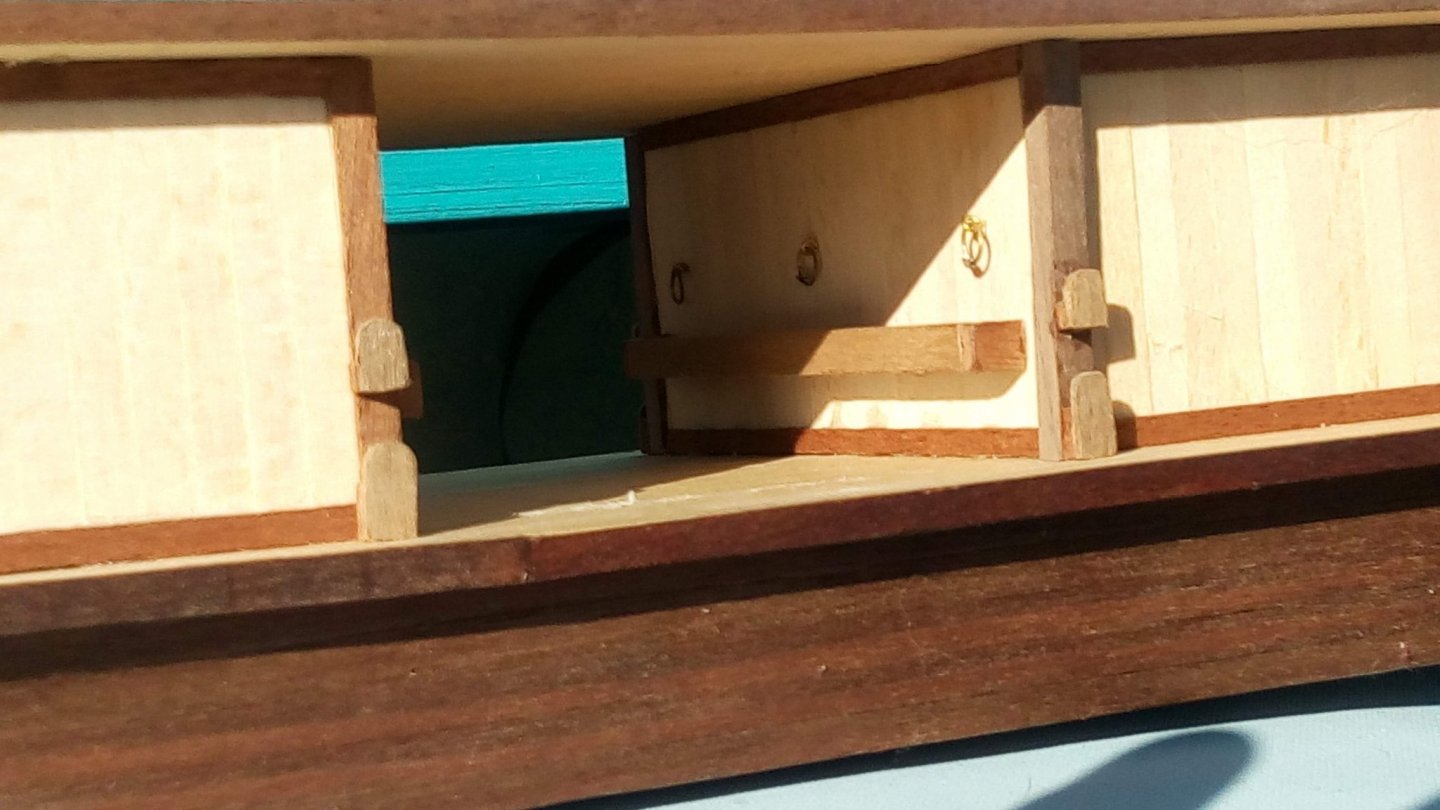
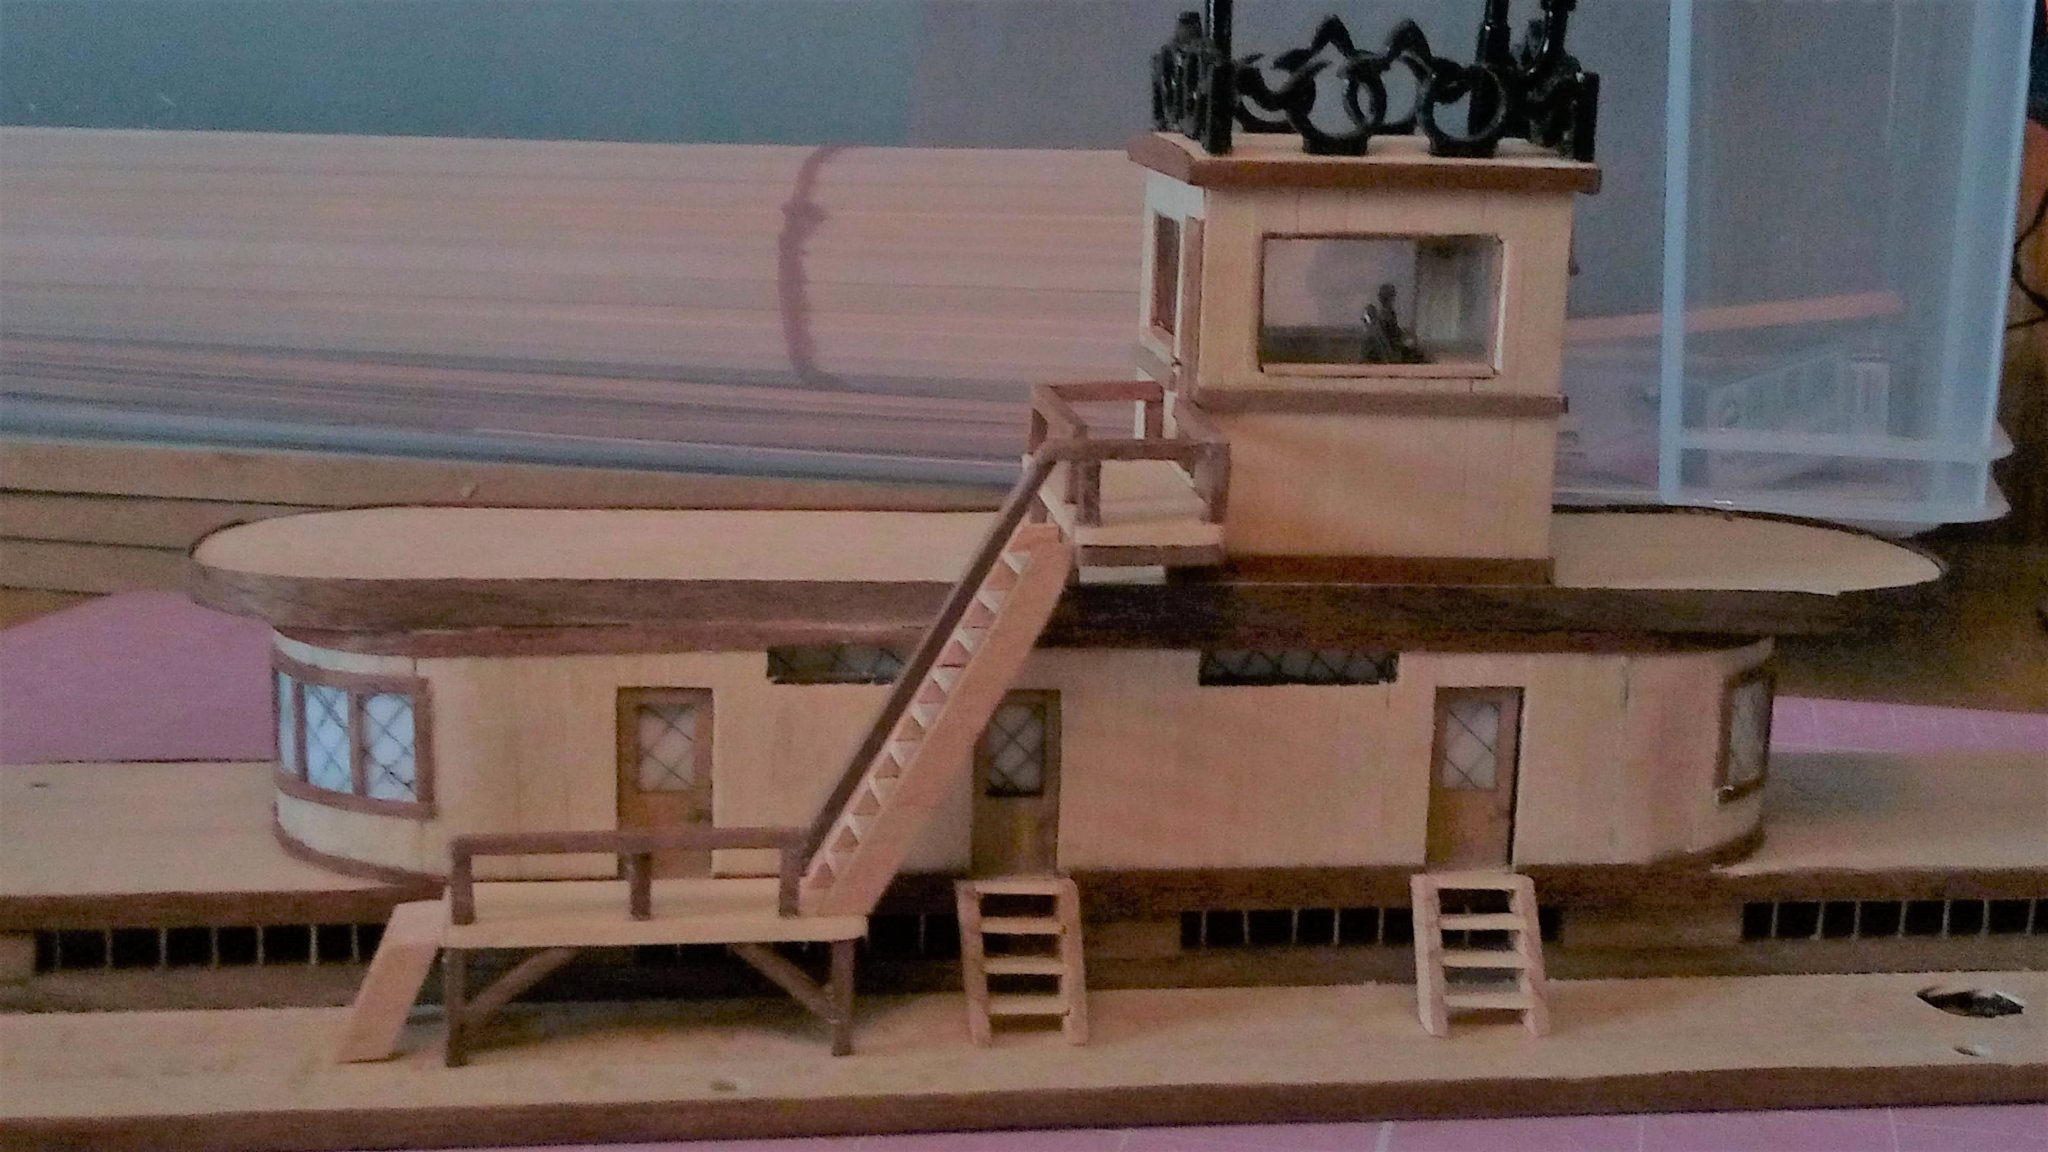
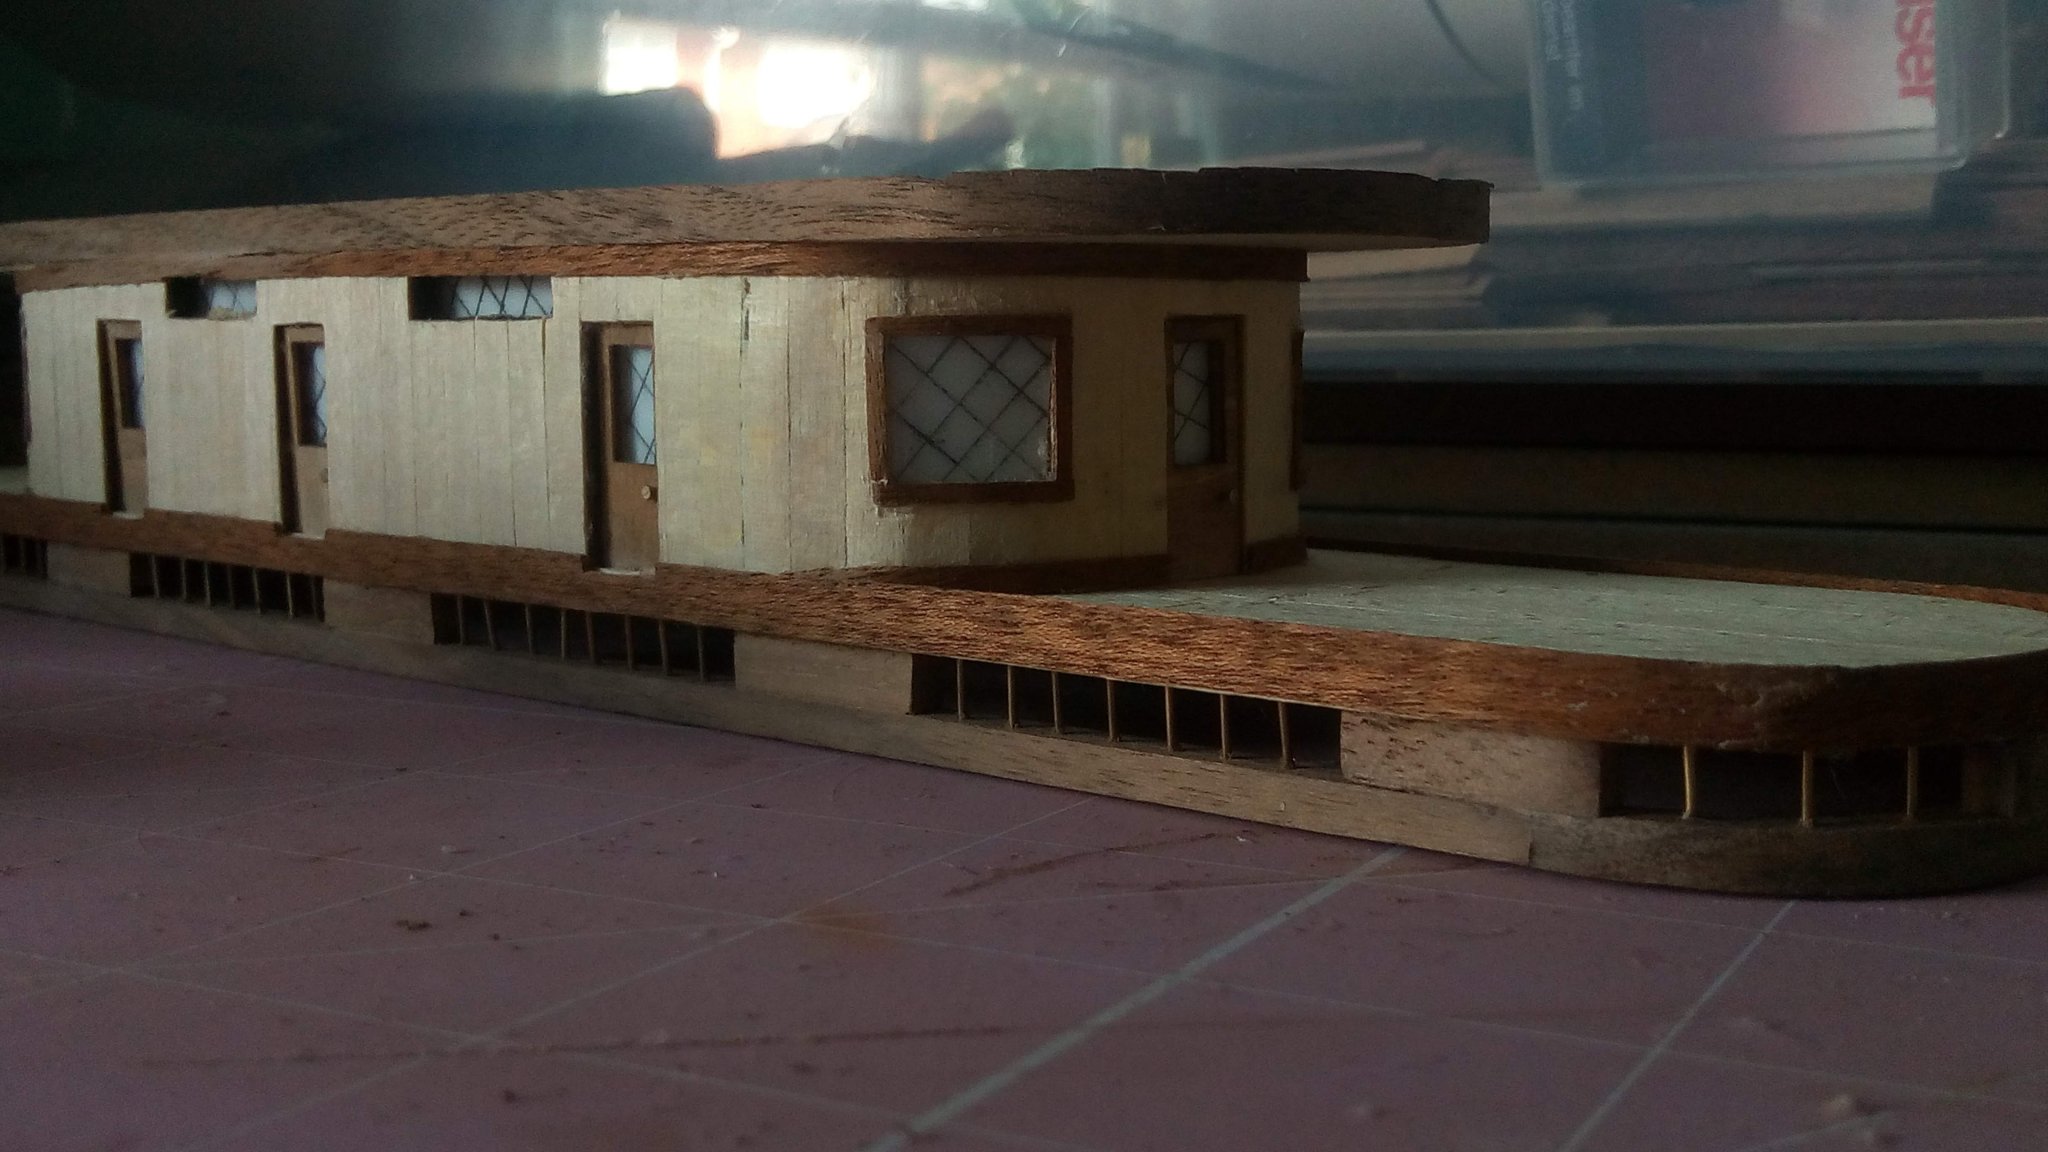
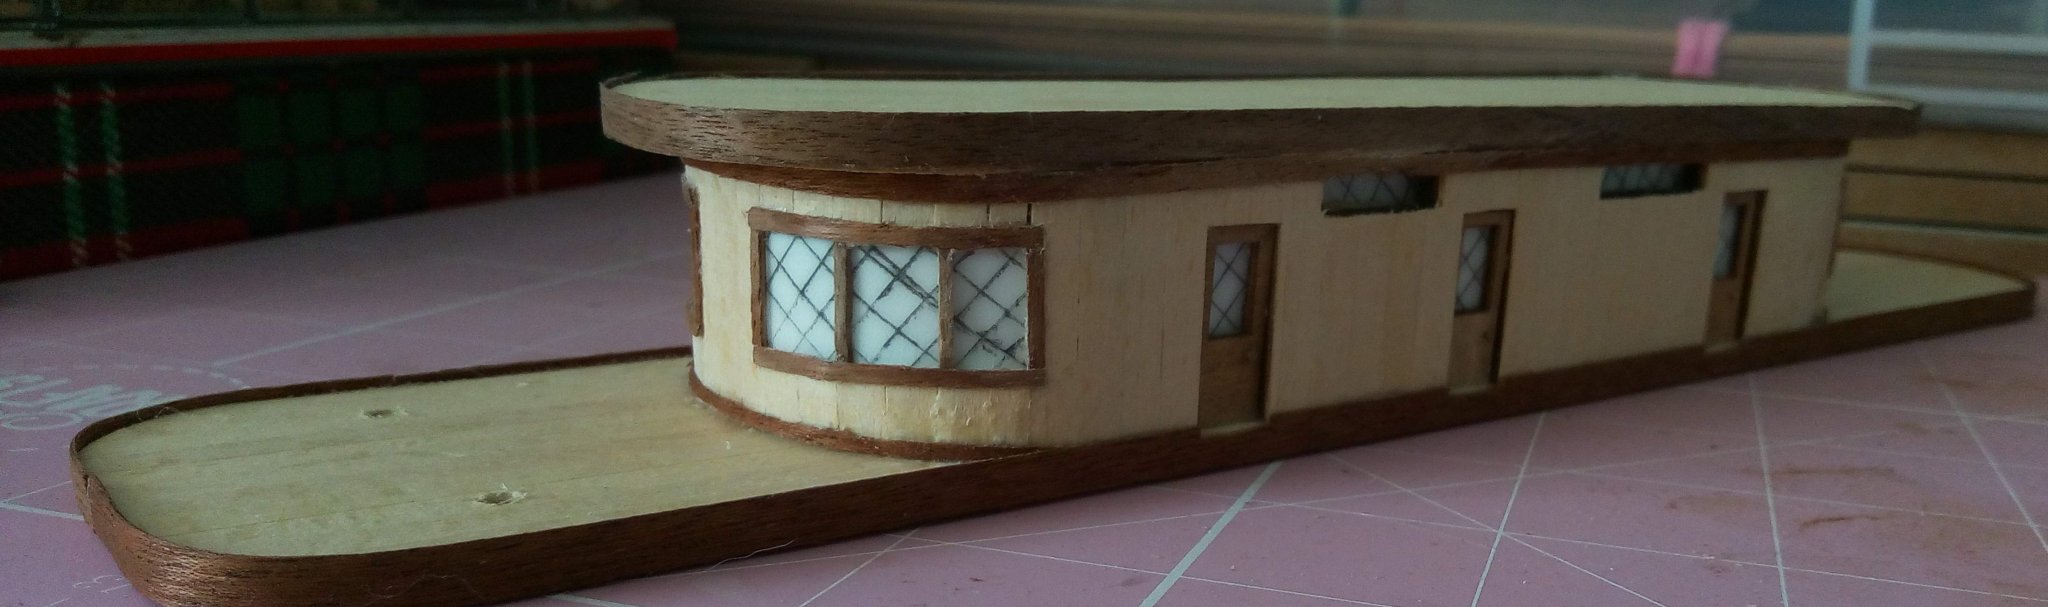
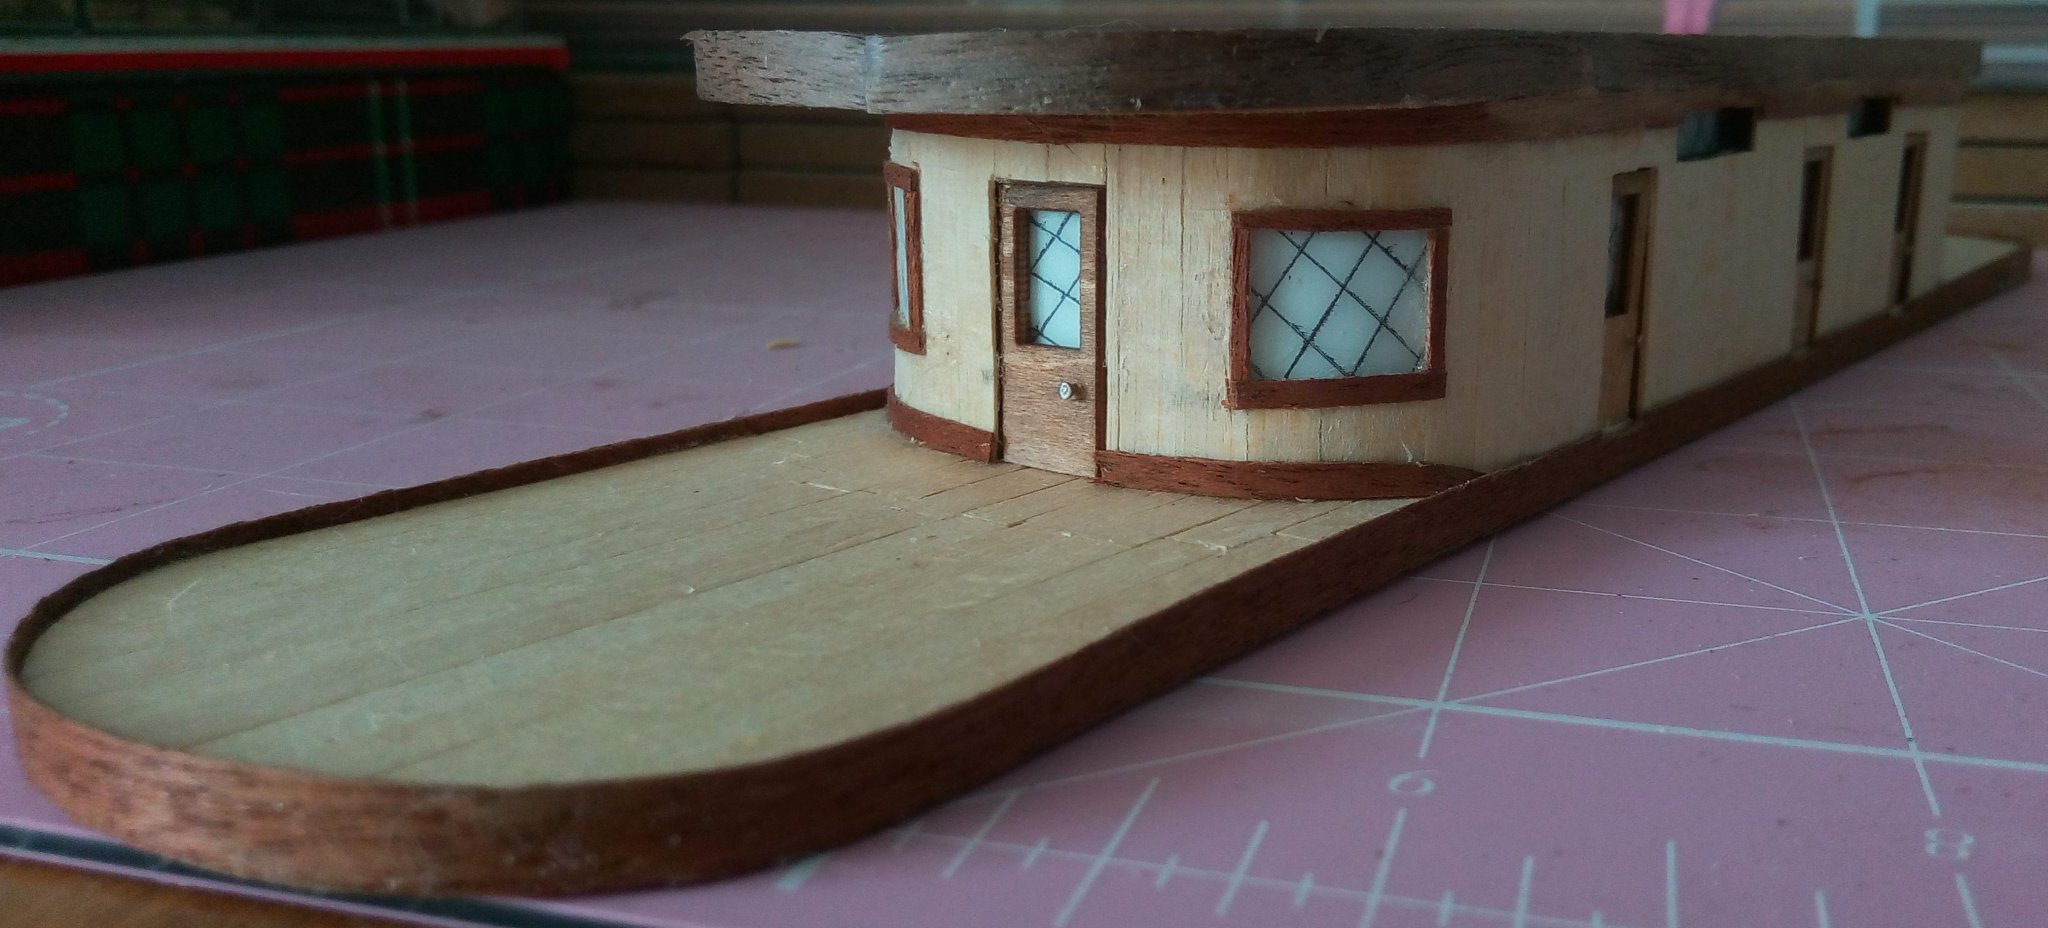
Some progress over the last few days. Small things, but lots of time taken to do them. Deck house and engine house doors fitted. Animal area bar holders fitted and adjusted - they were far too big for scale. Roof fitted after planking and edged, all deck houses edged top and bottom to hide the gaps. Decided not to go with the metal windows provided for the second deck. I glued plastic sheet over these and painted curtains with tie-backs. On the curved ends I cut out a depression and glued the painted plastic so it's flush with the curve. Not sure yet what I'm going to do with the doors. Cheers for now, Bob


- 86 replies
-
- 6
-
-
- king of the mississippi
- artesania latina
- (and 2 more)
-
John, on mine the slots are too far away! I can fit 1 but not both to hide the hole. Lots of dry fitting going on before gluing. However, "Ahem" despite that, I did make the reversal mistake fitting the lower deck houses reversed. fortunately the glue hadn't fully set and was able to recover. Customisation all the way - it's not a mistake it's a customised job! Cheers, Bob
-
John, when you were installing the lower deck houses were the tab slots out of alignment? This seems to have been the case with some of the other builders, and certainly is with mine. I was thinking of positioning as close as possible and putting on a skirting to hide the gaps. Just took a close look at yours and see you've done just that. Cheers, Bob


.jpg.9f13688ae1c278793a899551536f2c7c.jpg)