HOLIDAY DONATION DRIVE - SUPPORT MSW - DO YOUR PART TO KEEP THIS GREAT FORUM GOING! (Only 13 donations so far - C'mon guys!)
×


mikeaidanh
-
Posts
344 -
Joined
-
Last visited
Content Type
Profiles
Forums
Gallery
Events
Everything posted by mikeaidanh
-
 Alistair, Many thanks to you. I must confess to being pleasantly surprised by the praise for my Pinnace. Being fairly new to ship modelling it is gratifying to be tested by my peers and found satisfactory. If you are tempted to build this model just remember to take a deep breath before embarking on the triple planking! Thank you, Mike.
 -
Thank you Jay and Ian. Eamonn I will be starting a build log for the Gun Deck section next week. Mike.
- 49 replies
-
- 3
-

-
- lancia armata
- panart
- (and 2 more)
-
Thank you HSM, BE, Jas and Eamonn for your kind words. There is now a gap in my life which I must fill and I will be posting again soon! My next two projects will be models for friends, friends who do not know about my plans. The first is the Panart gun deck for an avid reader of period sea stories. He will be able to project his mind below decks as he reads. The second will be my first scratch build, a Sloup Coquillier, for a shanty man who loves Brittany. I had better be off to the workshop and get started! Mike.
- 49 replies
-
- 3
-
-
- lancia armata
- panart
- (and 2 more)
-
Jim Byrnes Model Machines
mikeaidanh replied to Mahuna's topic in Modeling tools and Workshop Equipment
Mick, Thats another Byrnes saw in the UK. You have joined the Enlightened Ones! Good luck, Mike. -
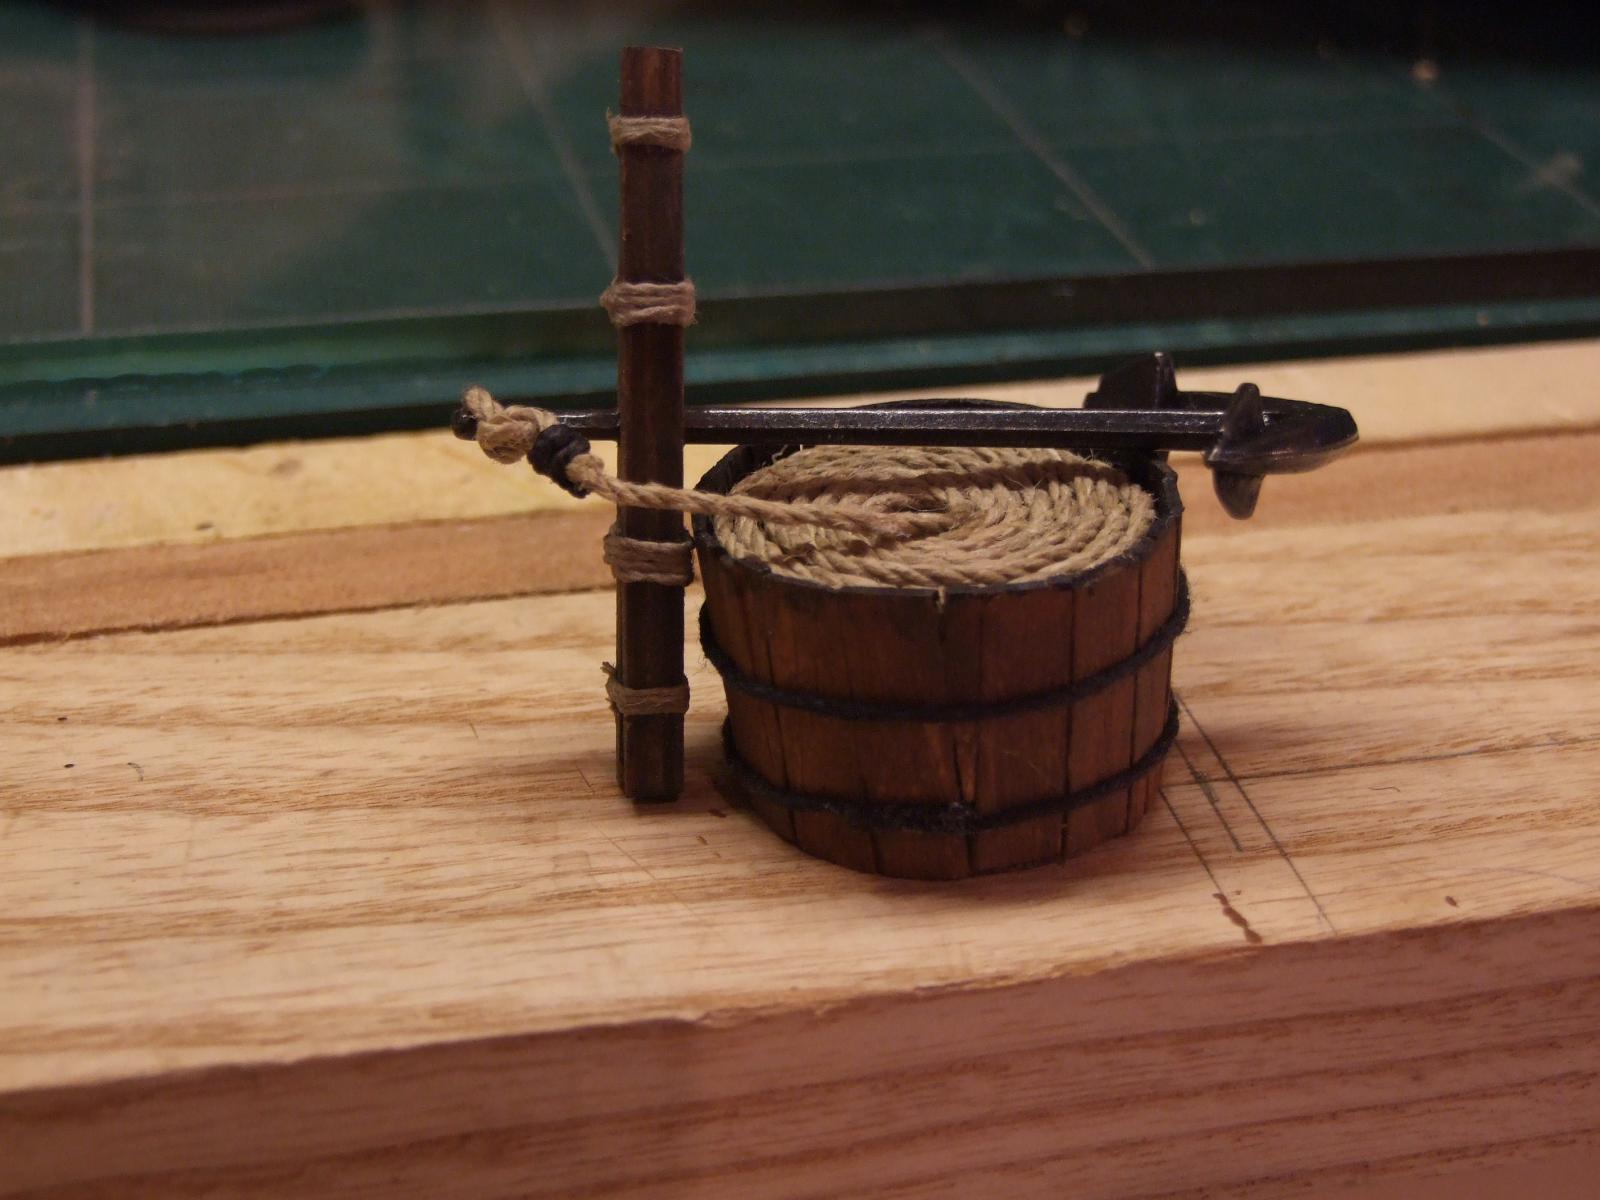
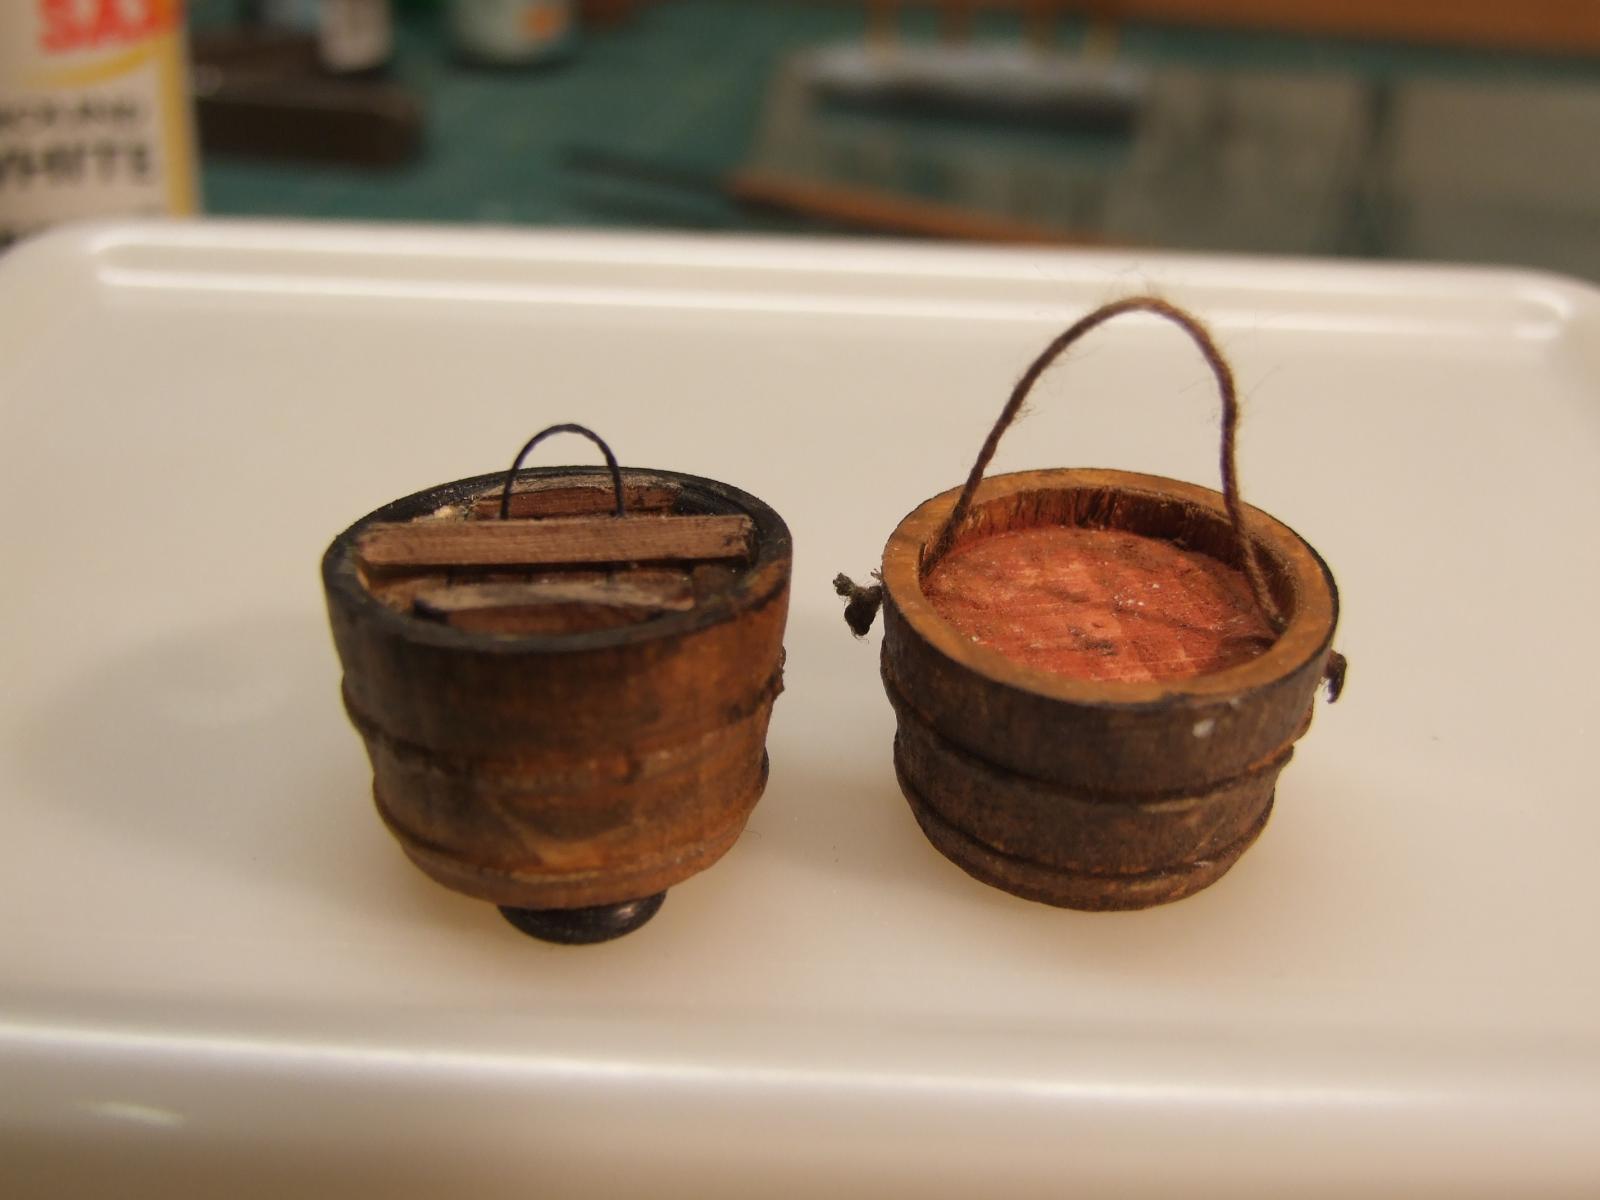
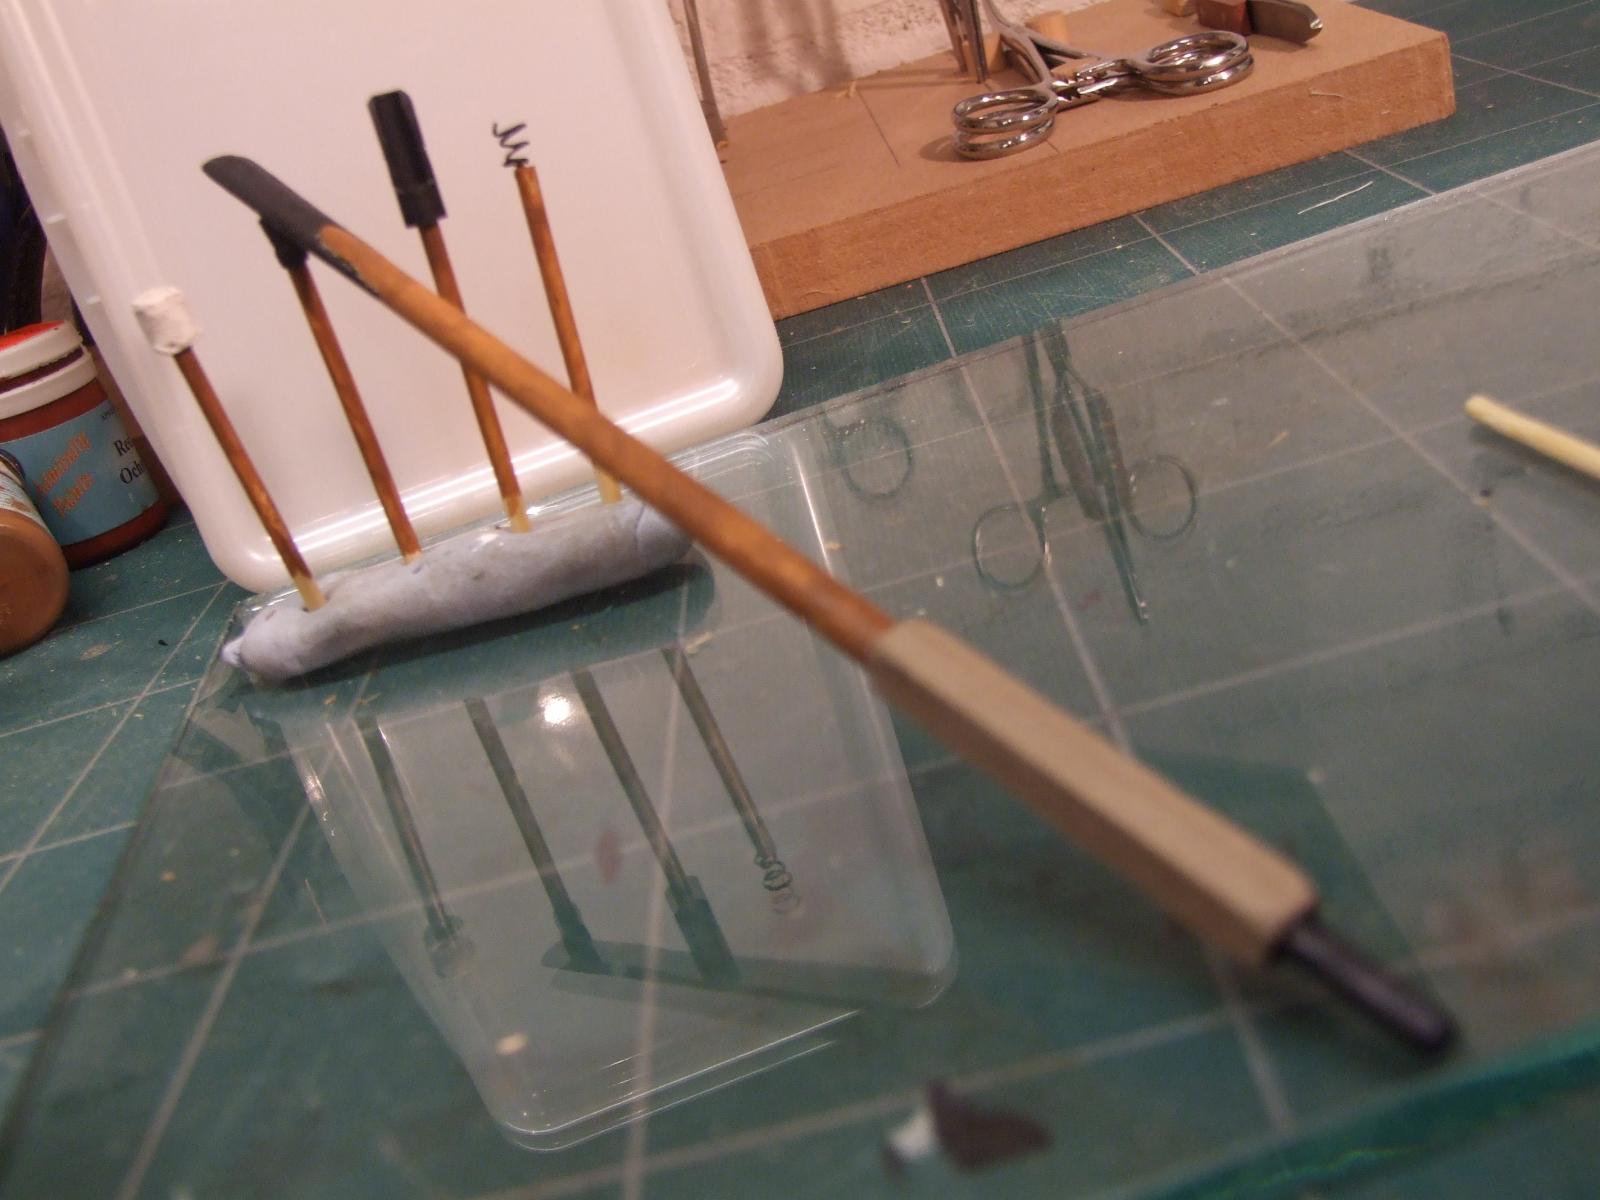
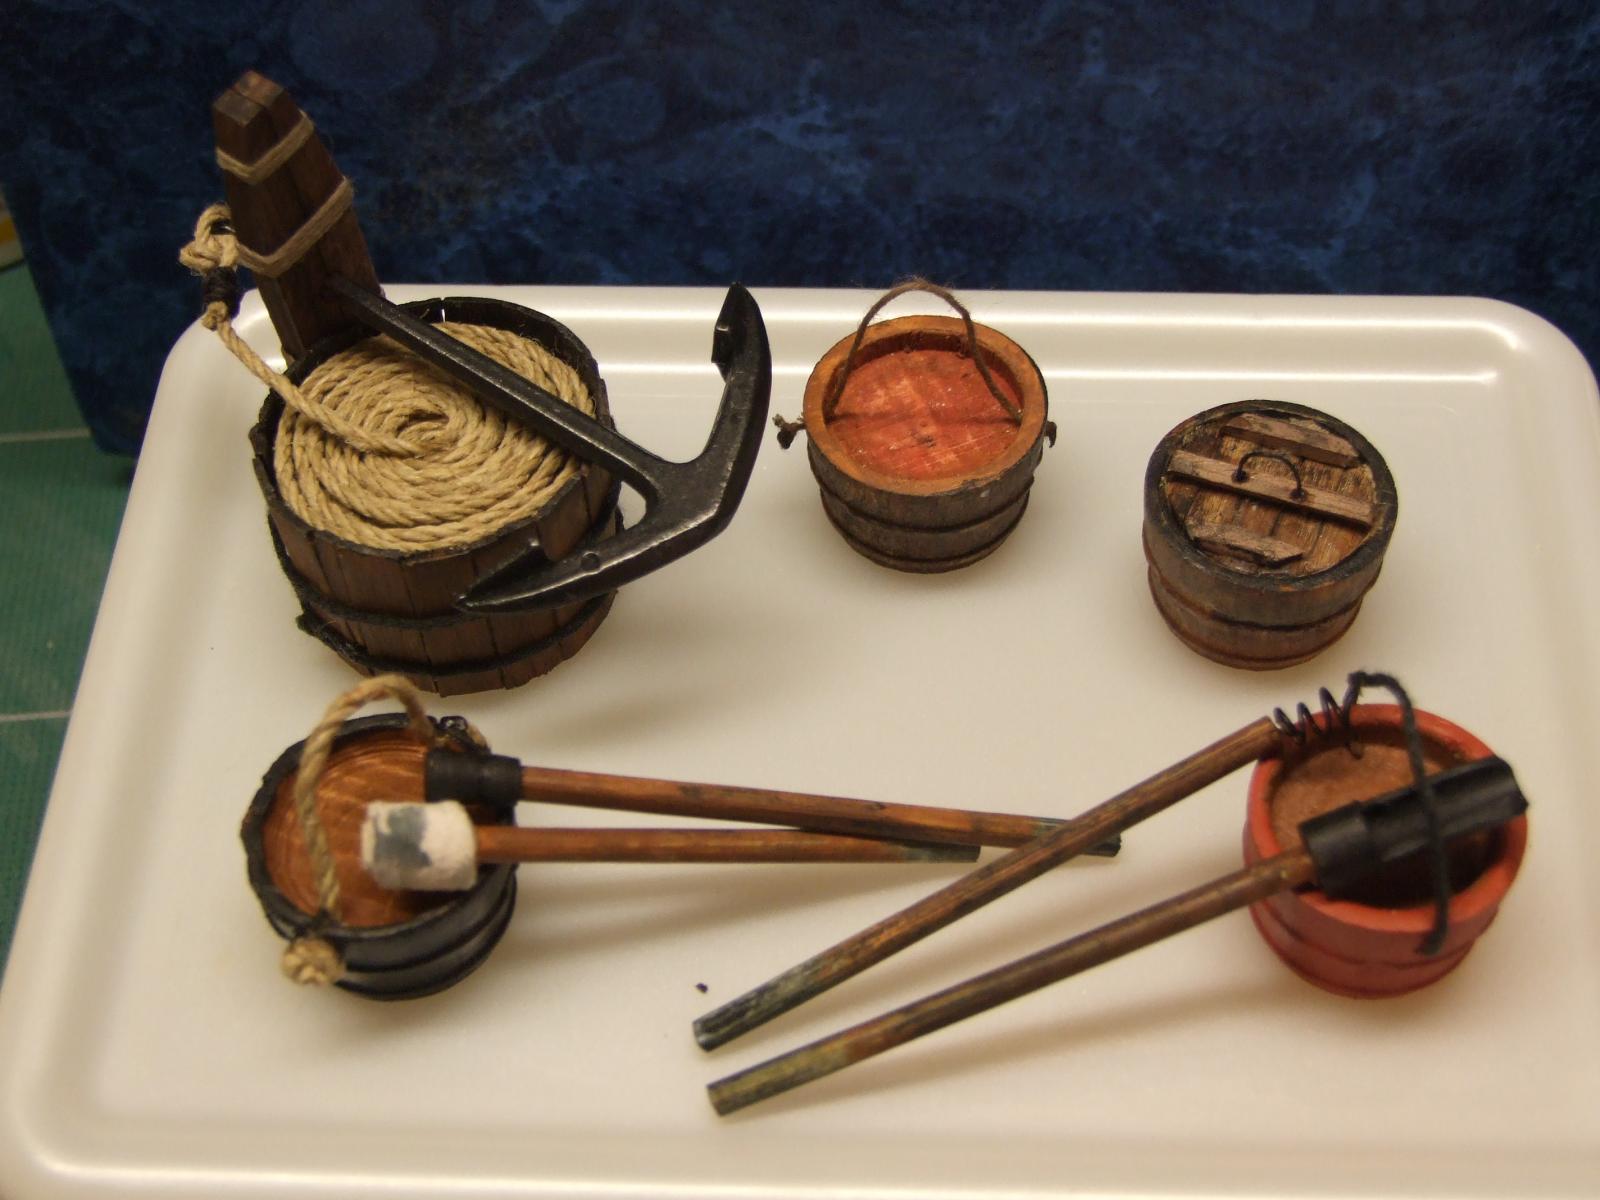
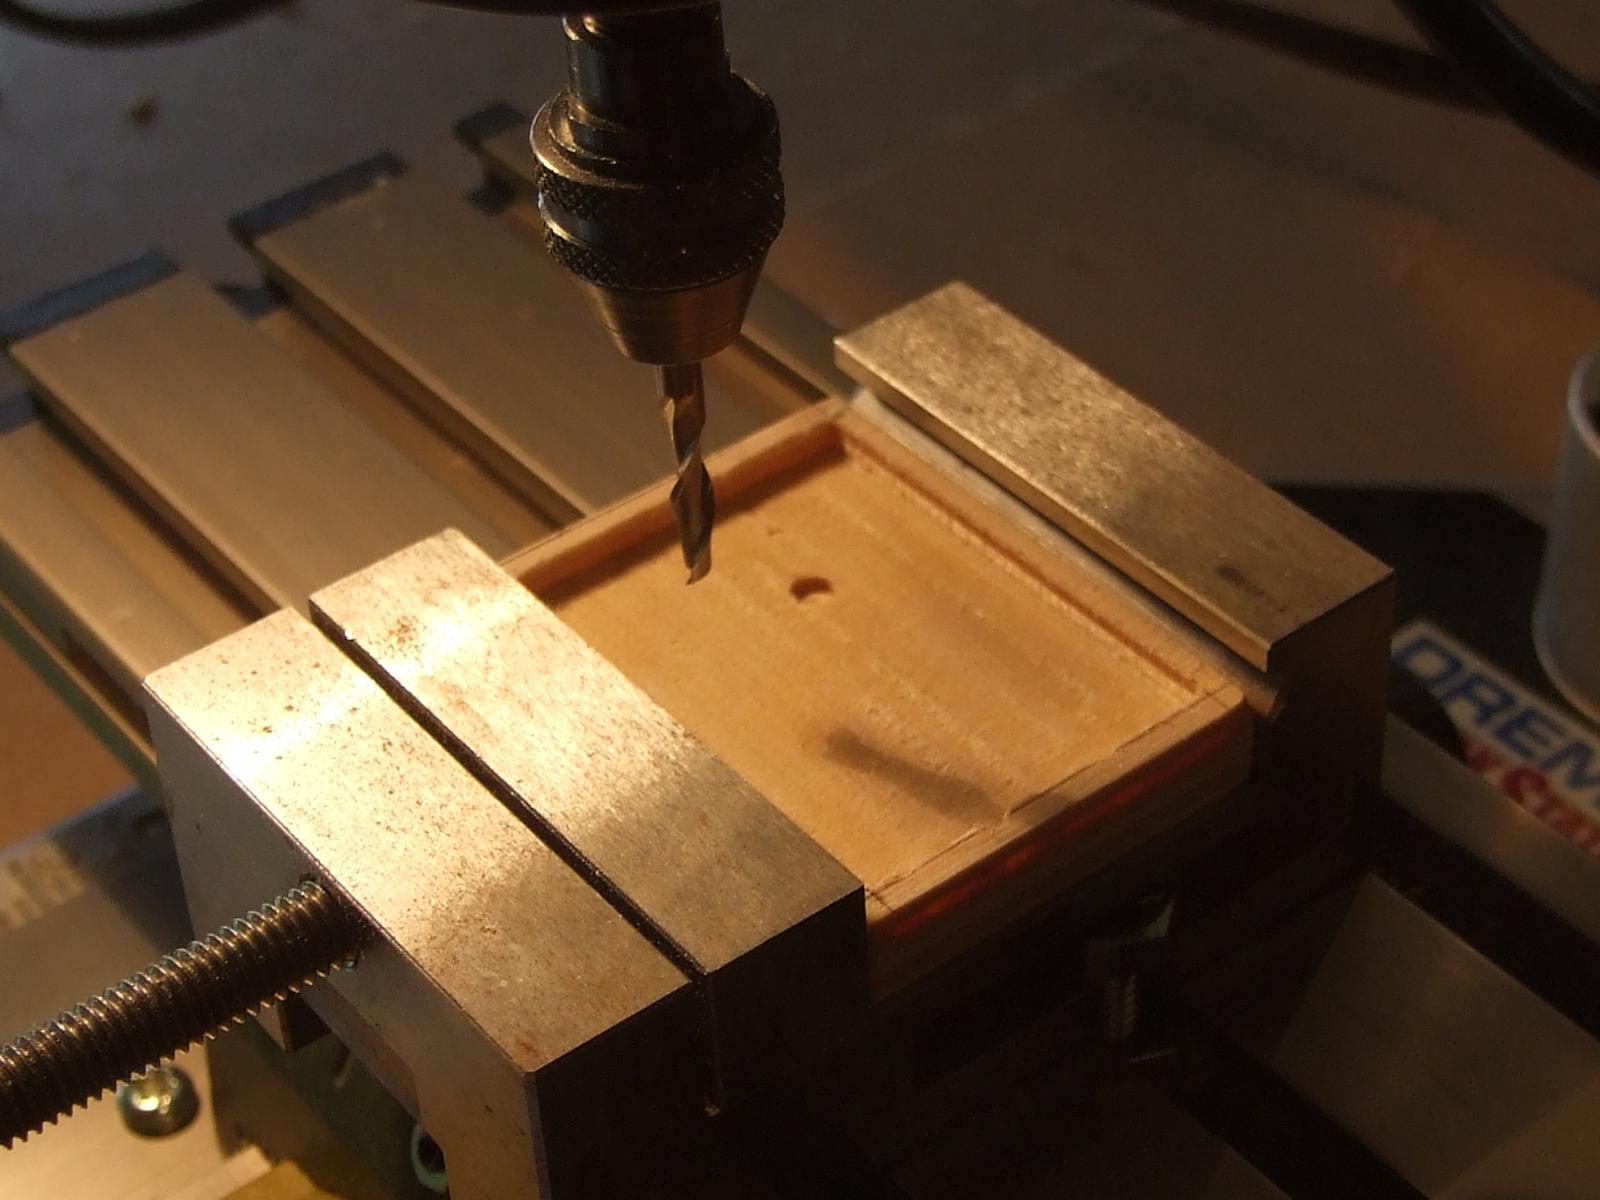
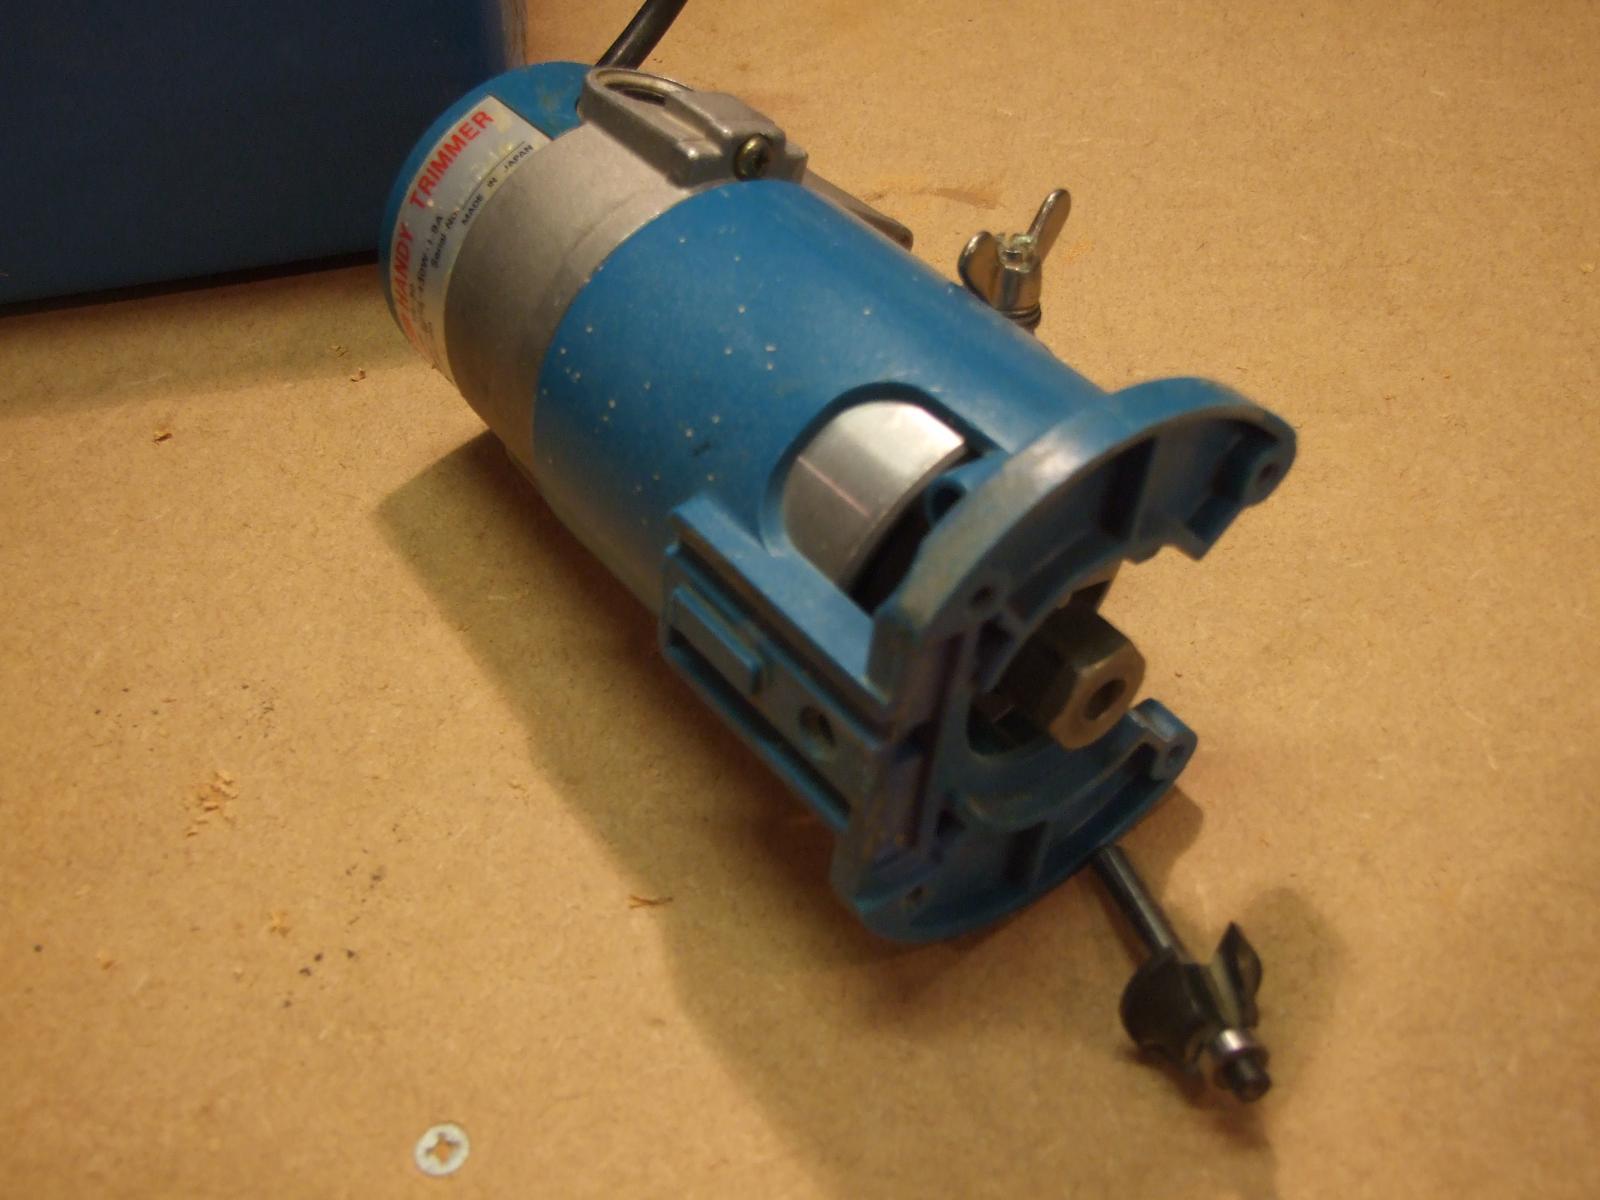
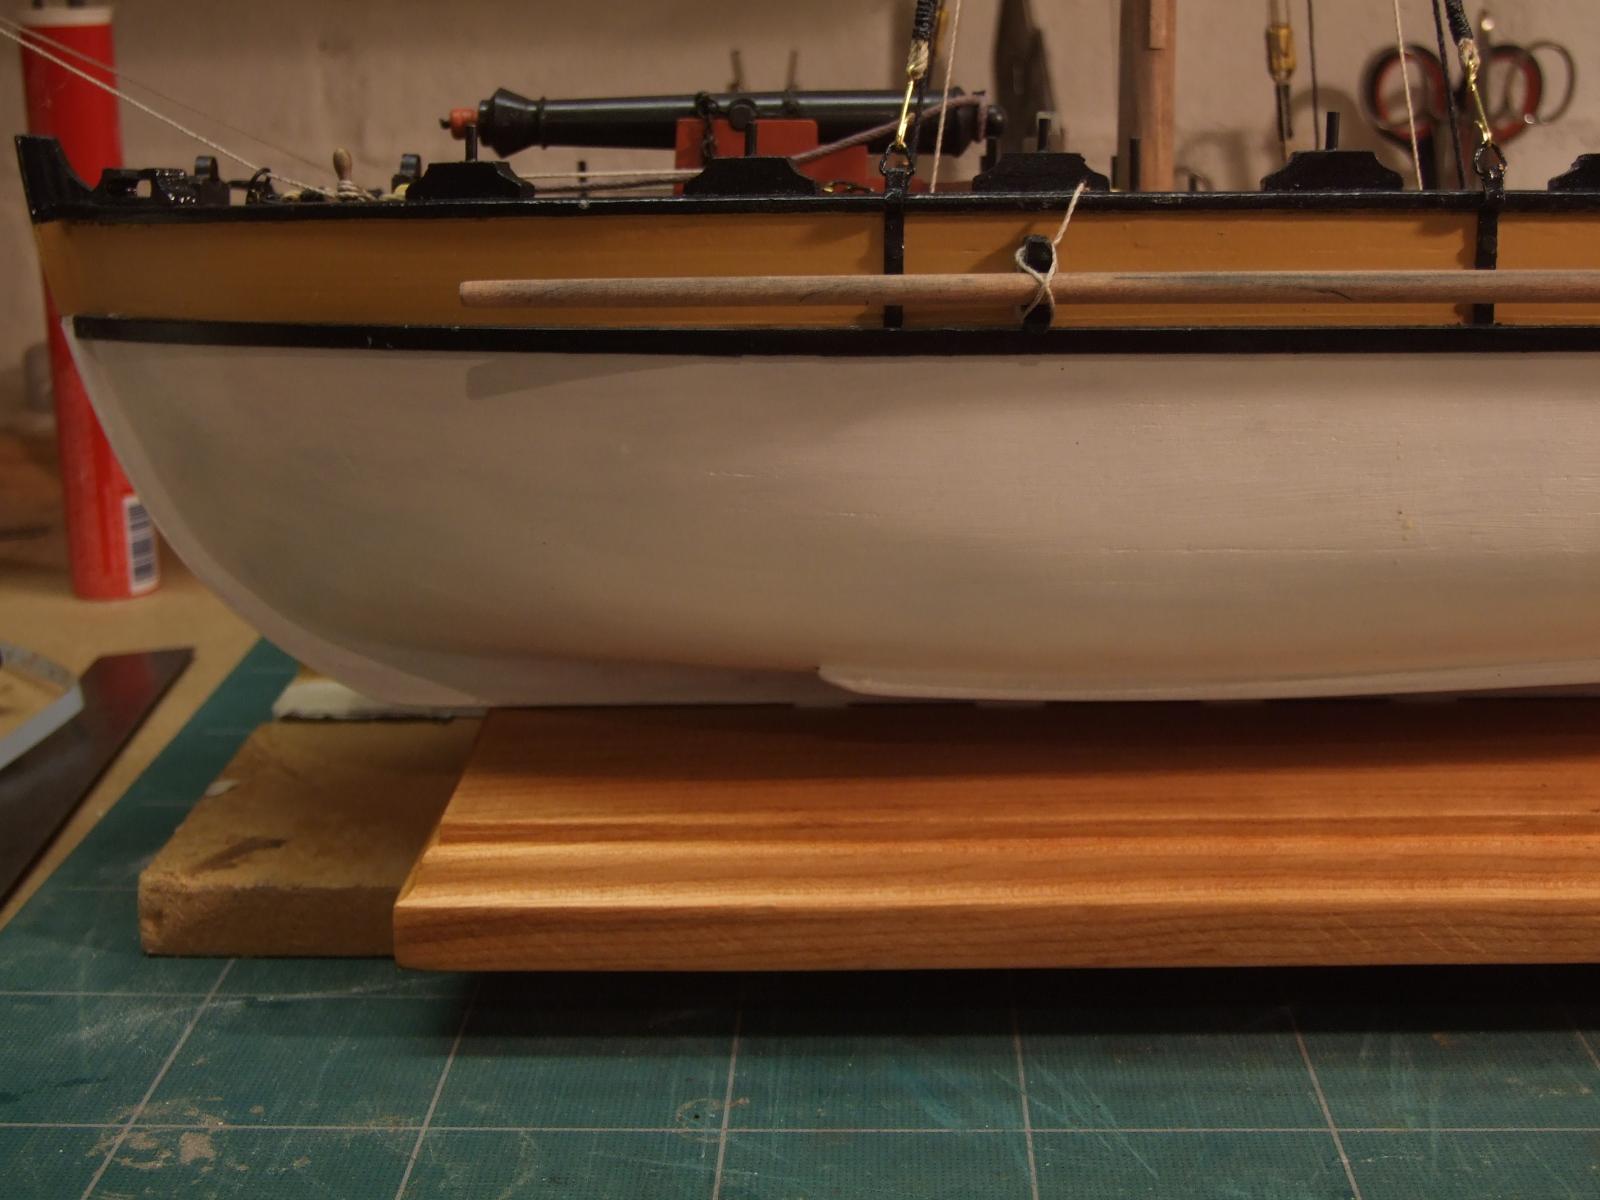
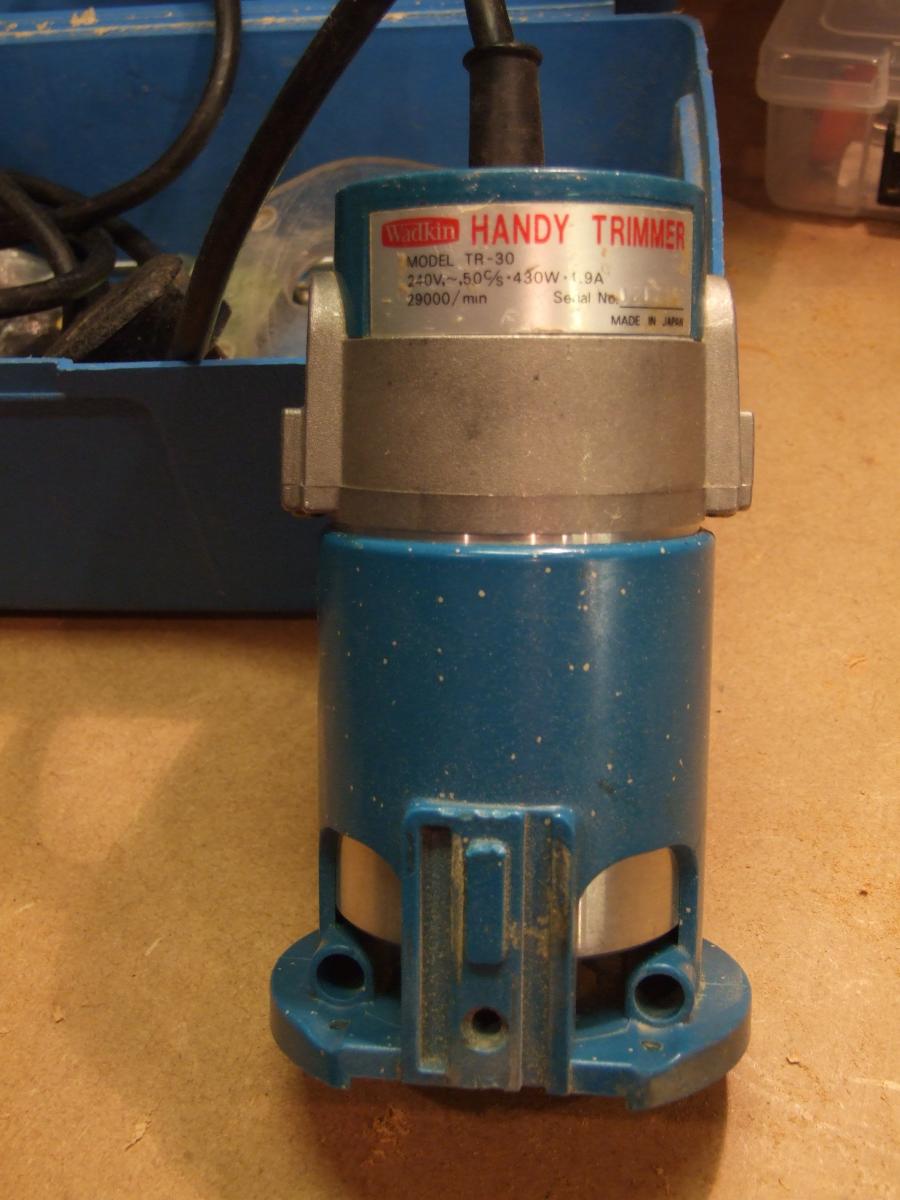
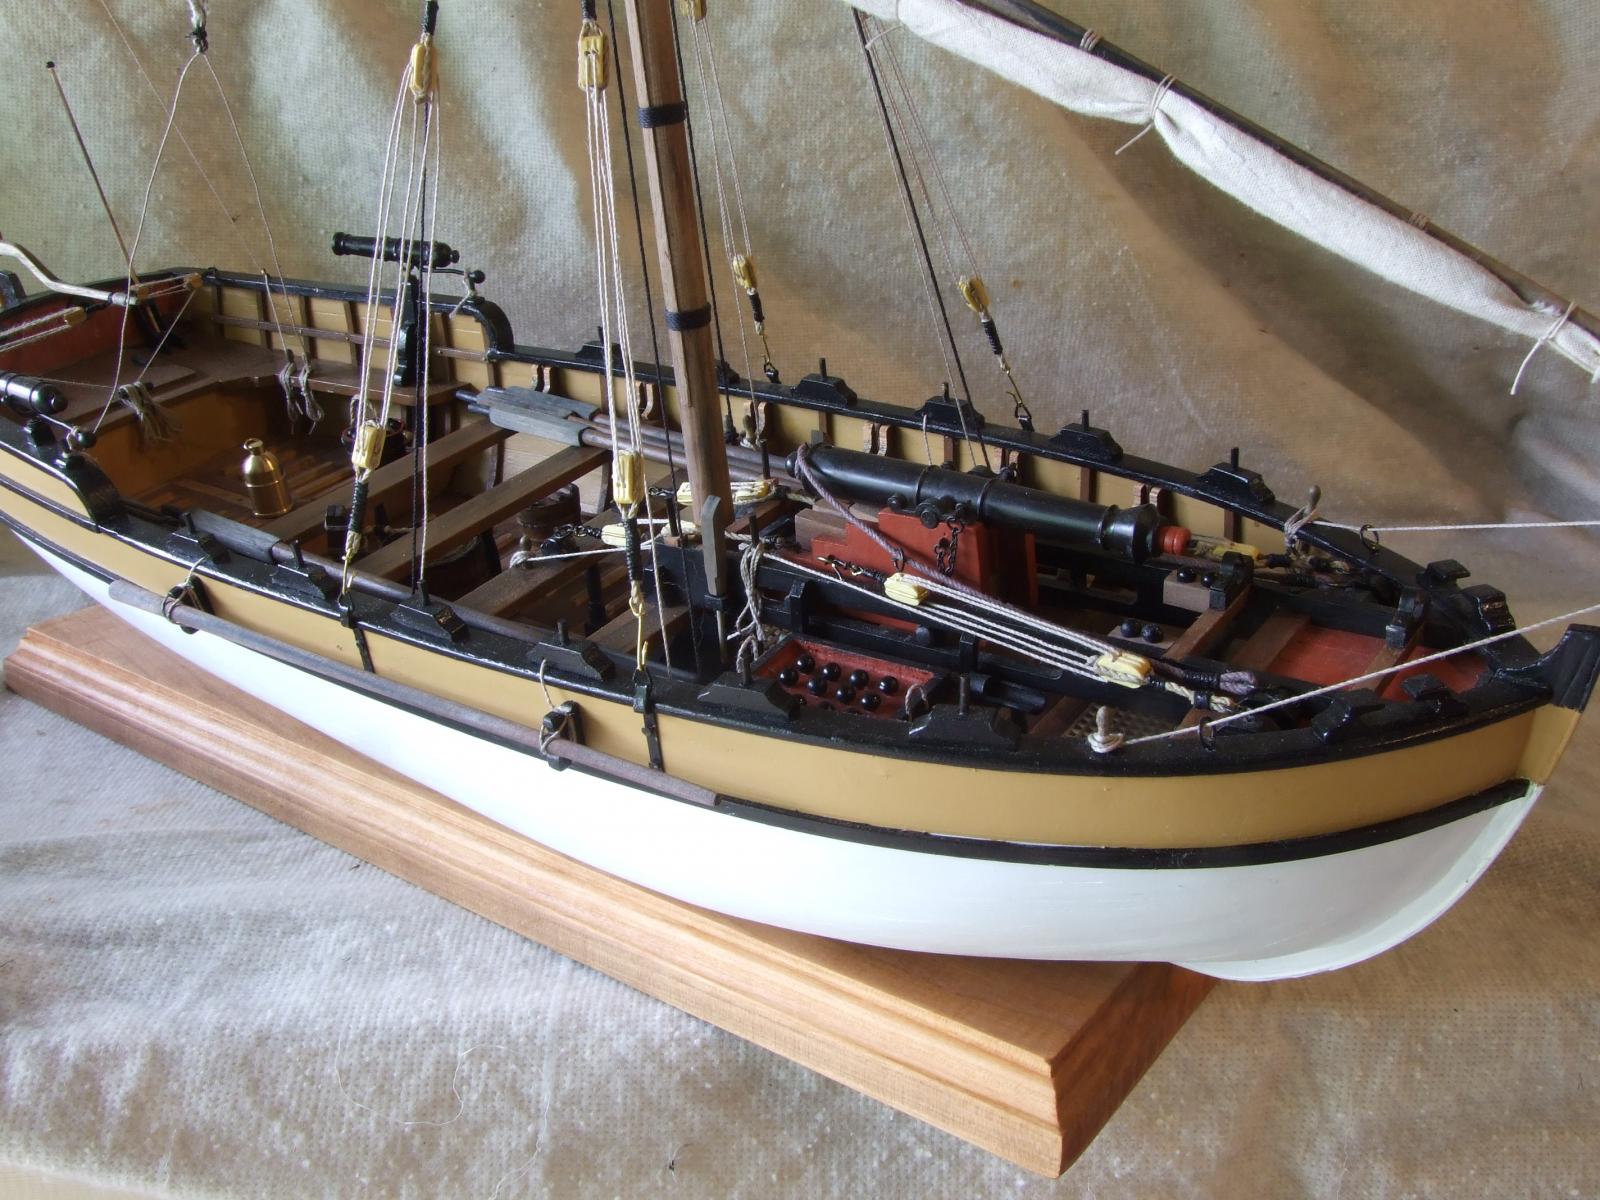
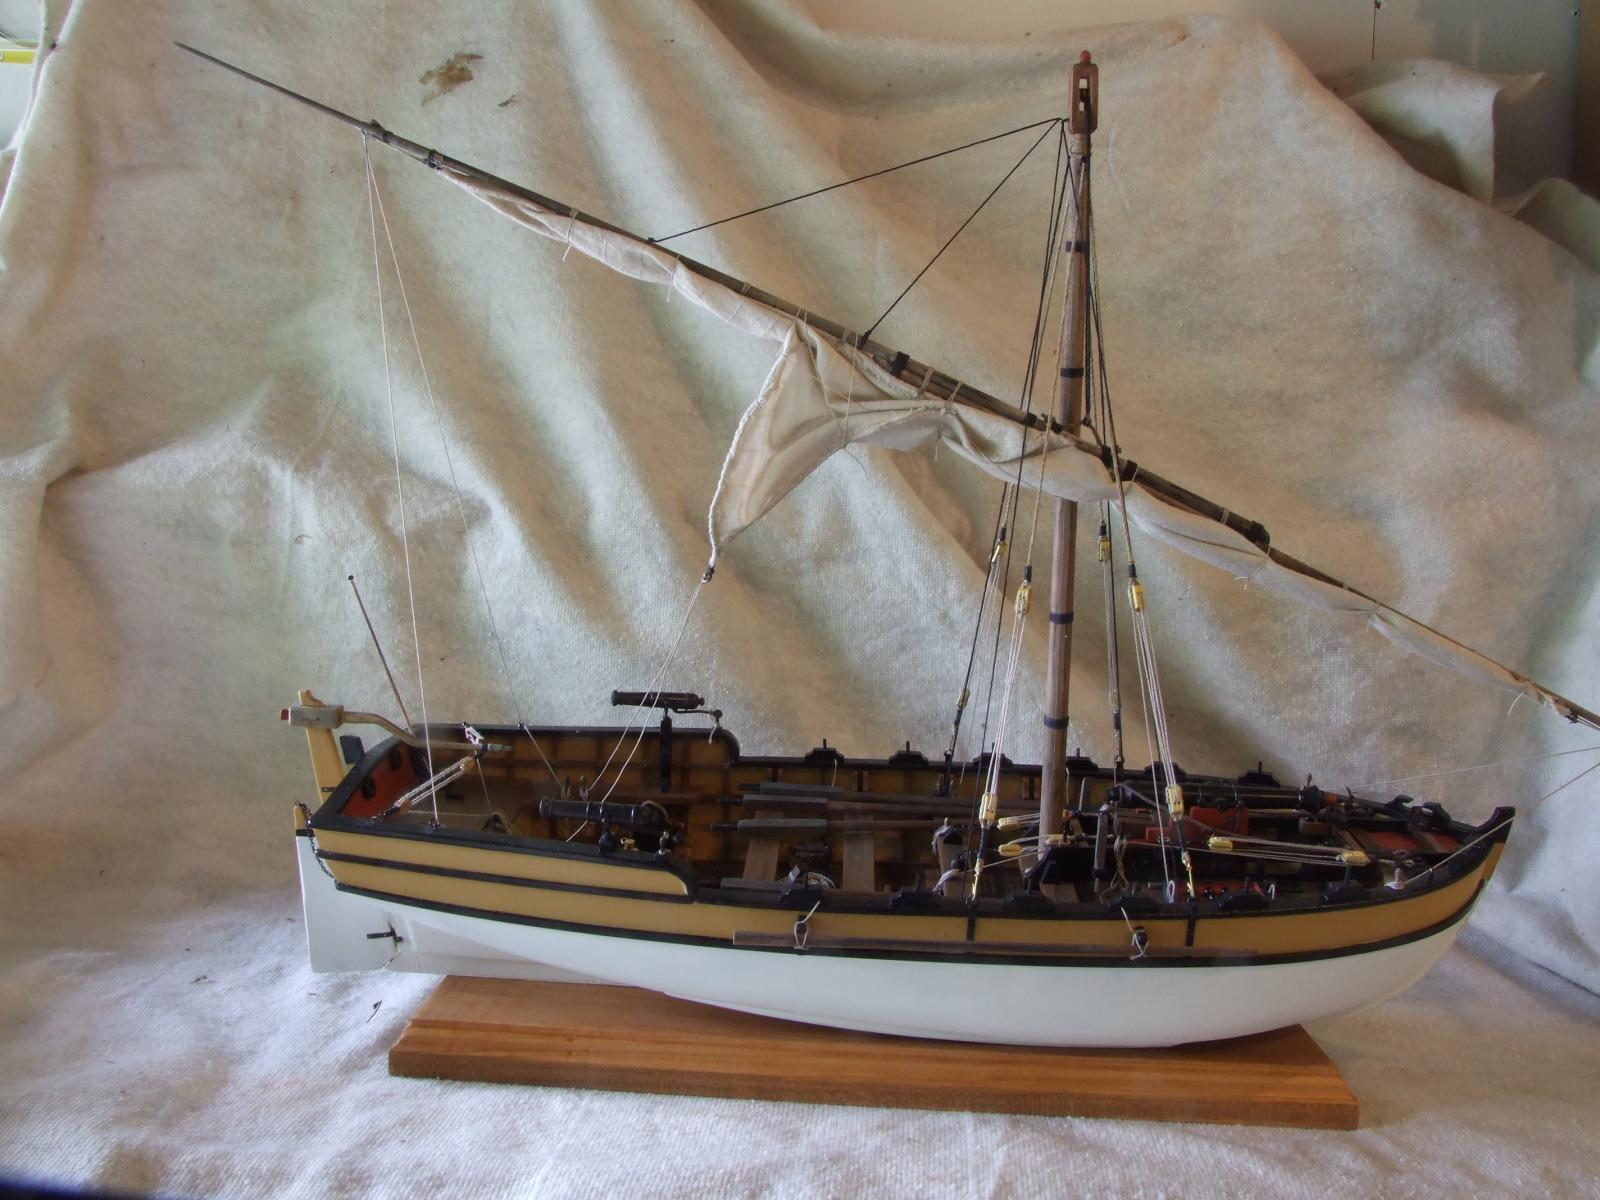
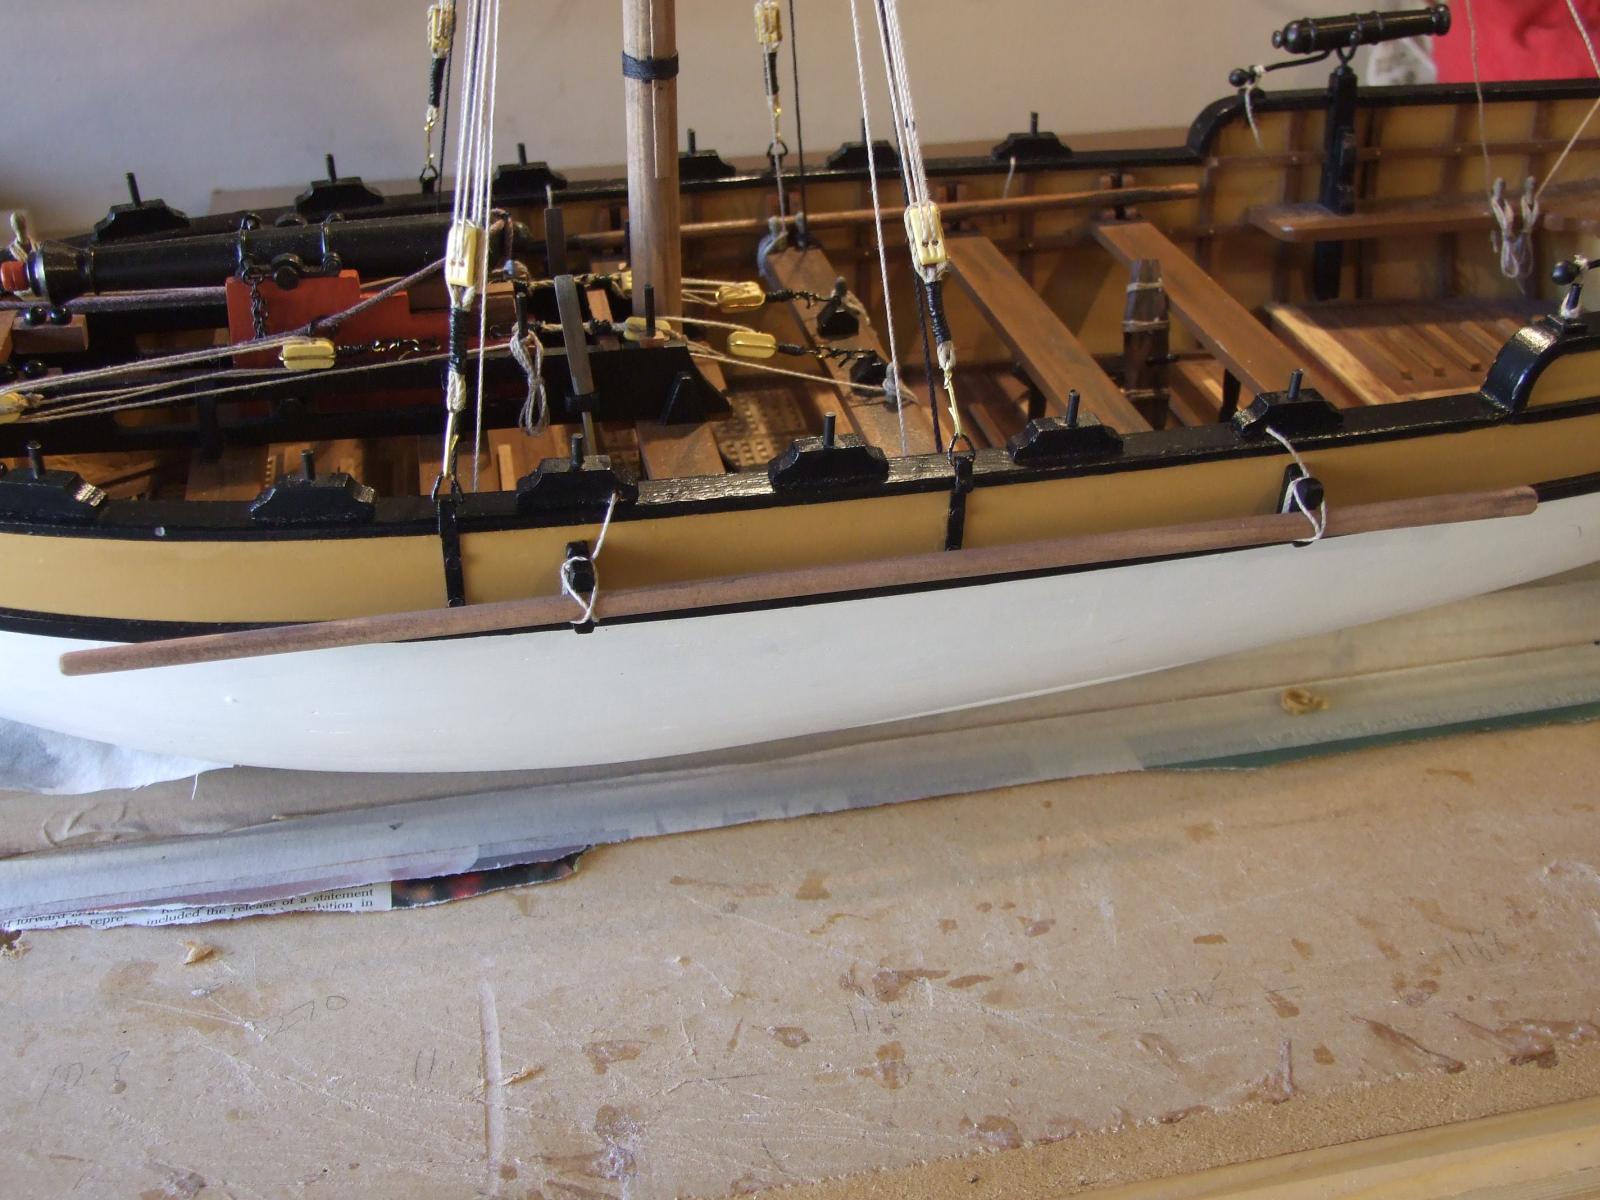
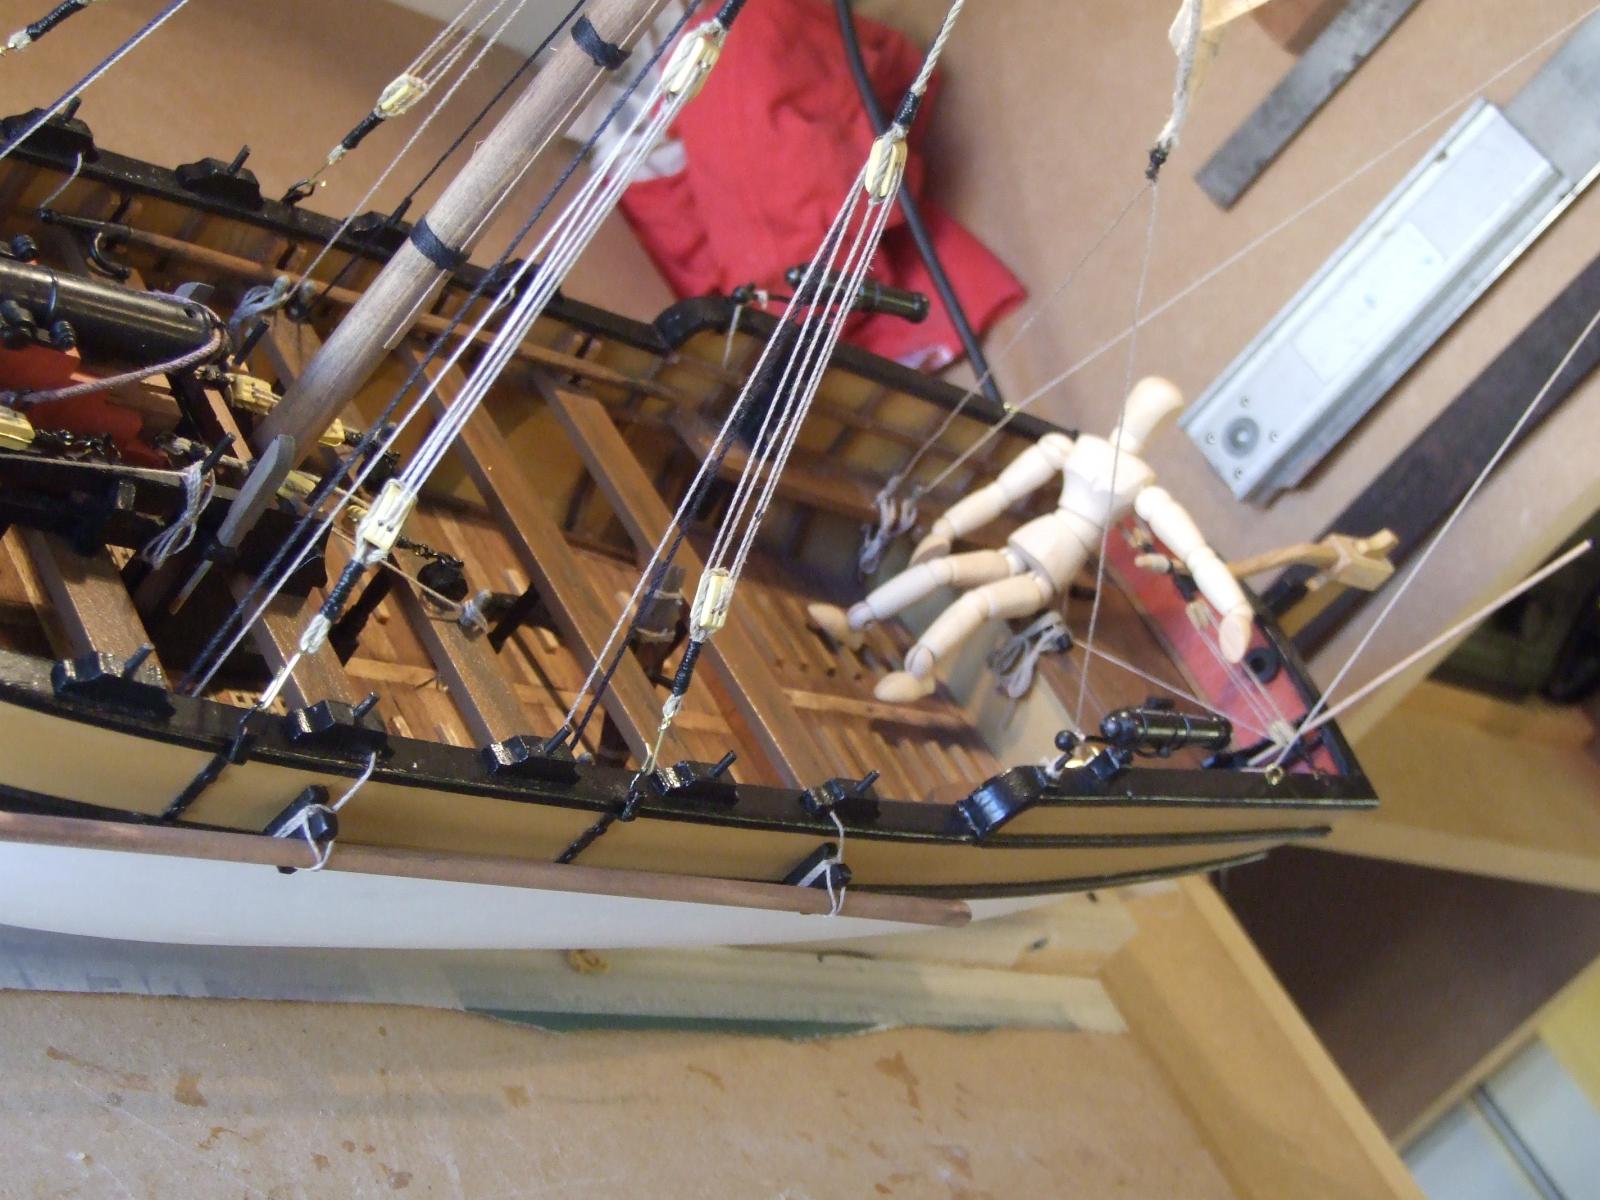
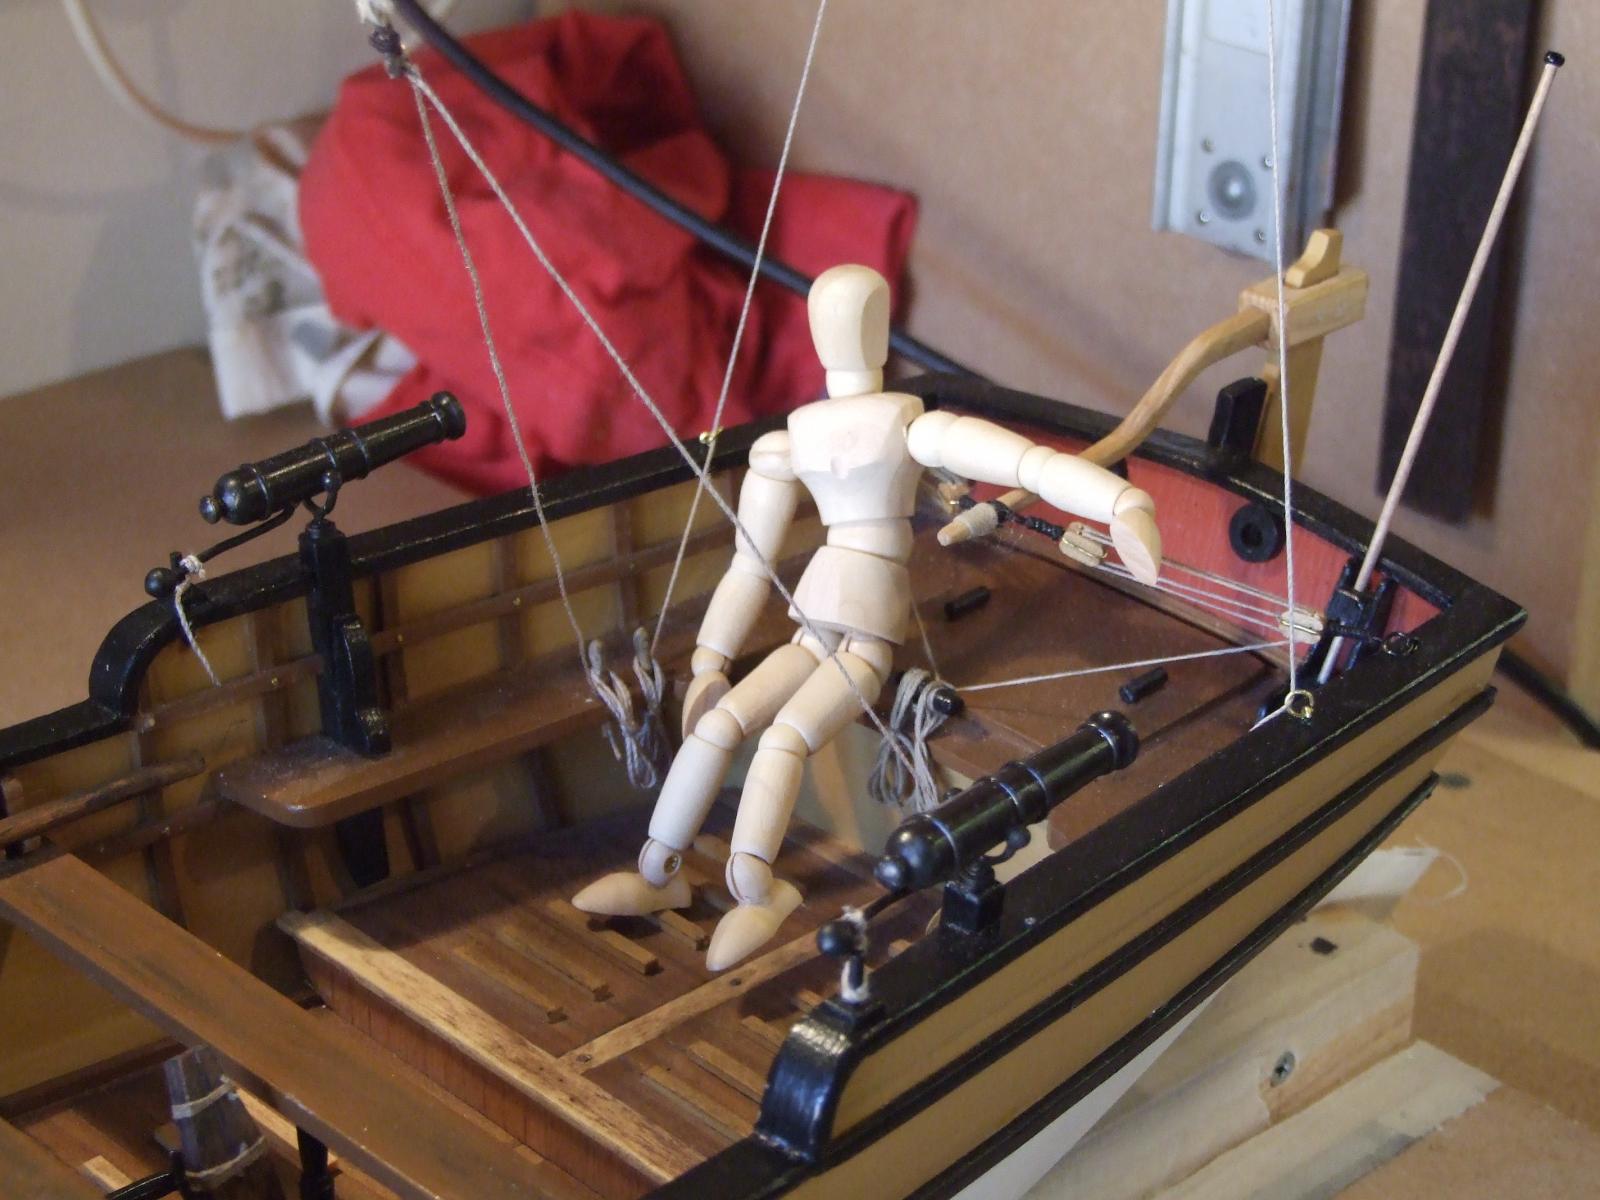
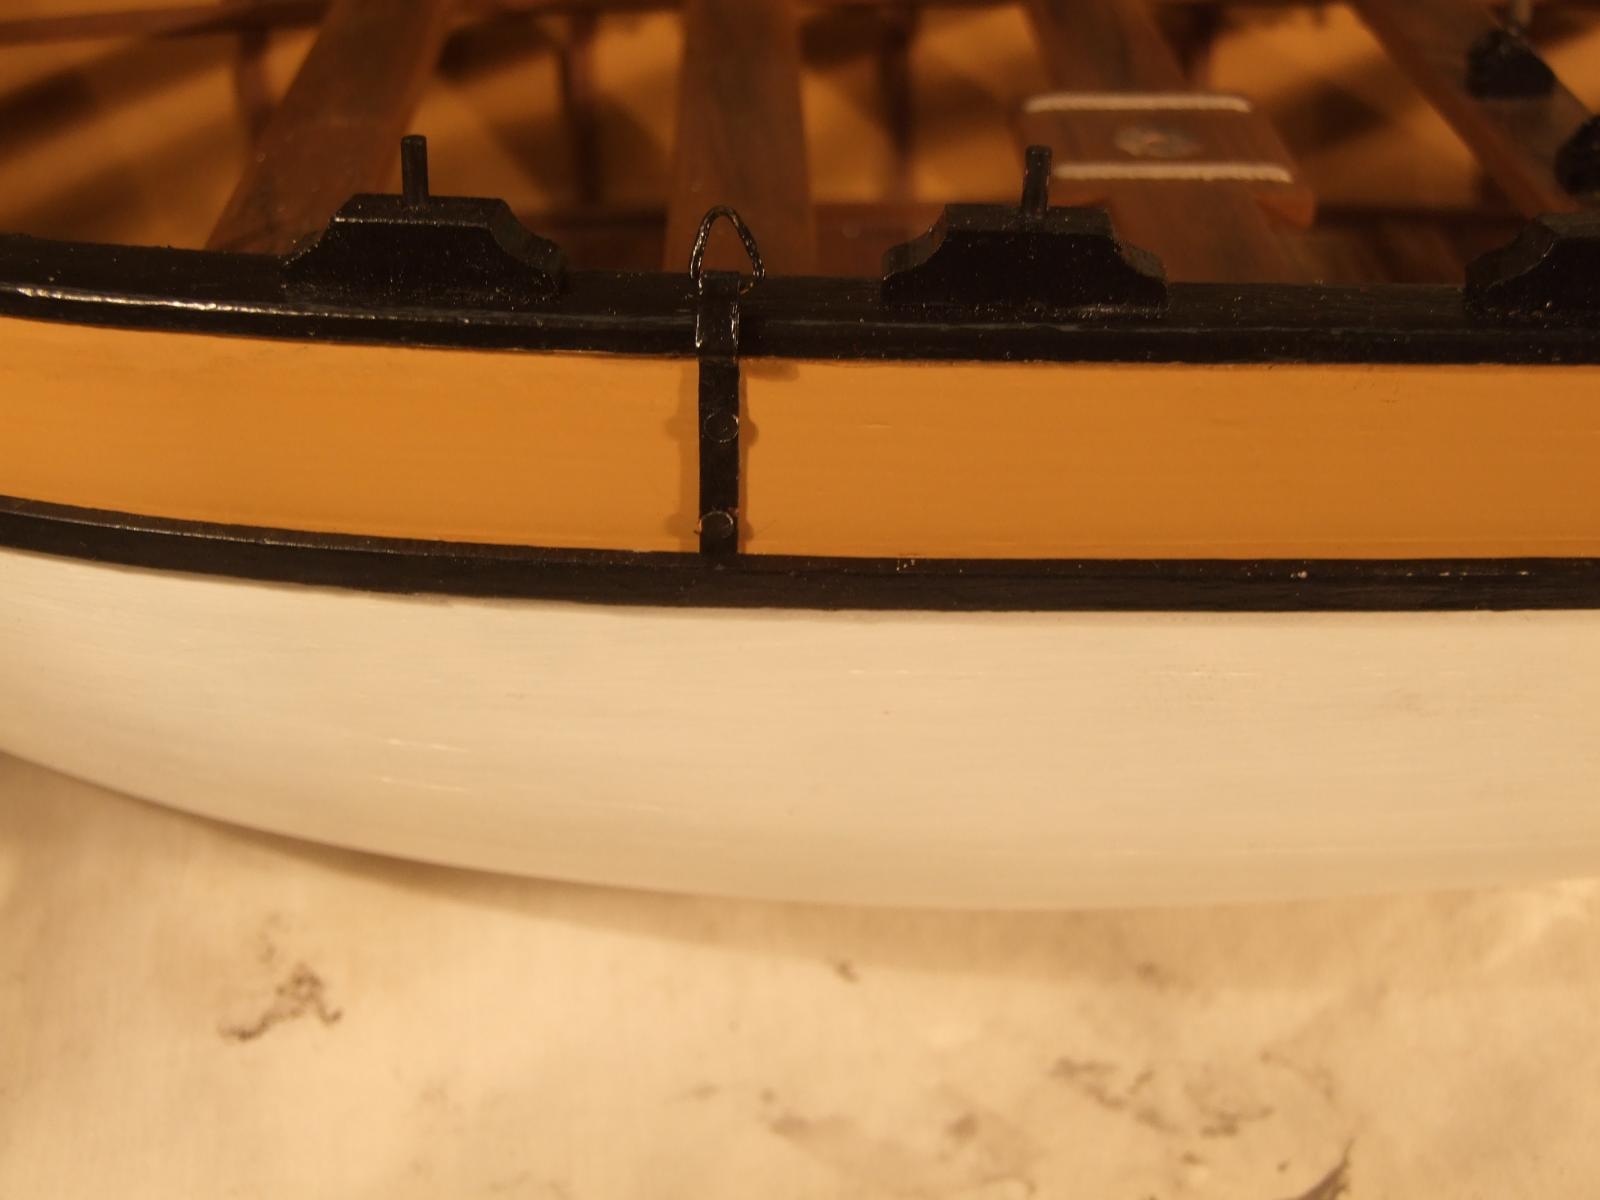
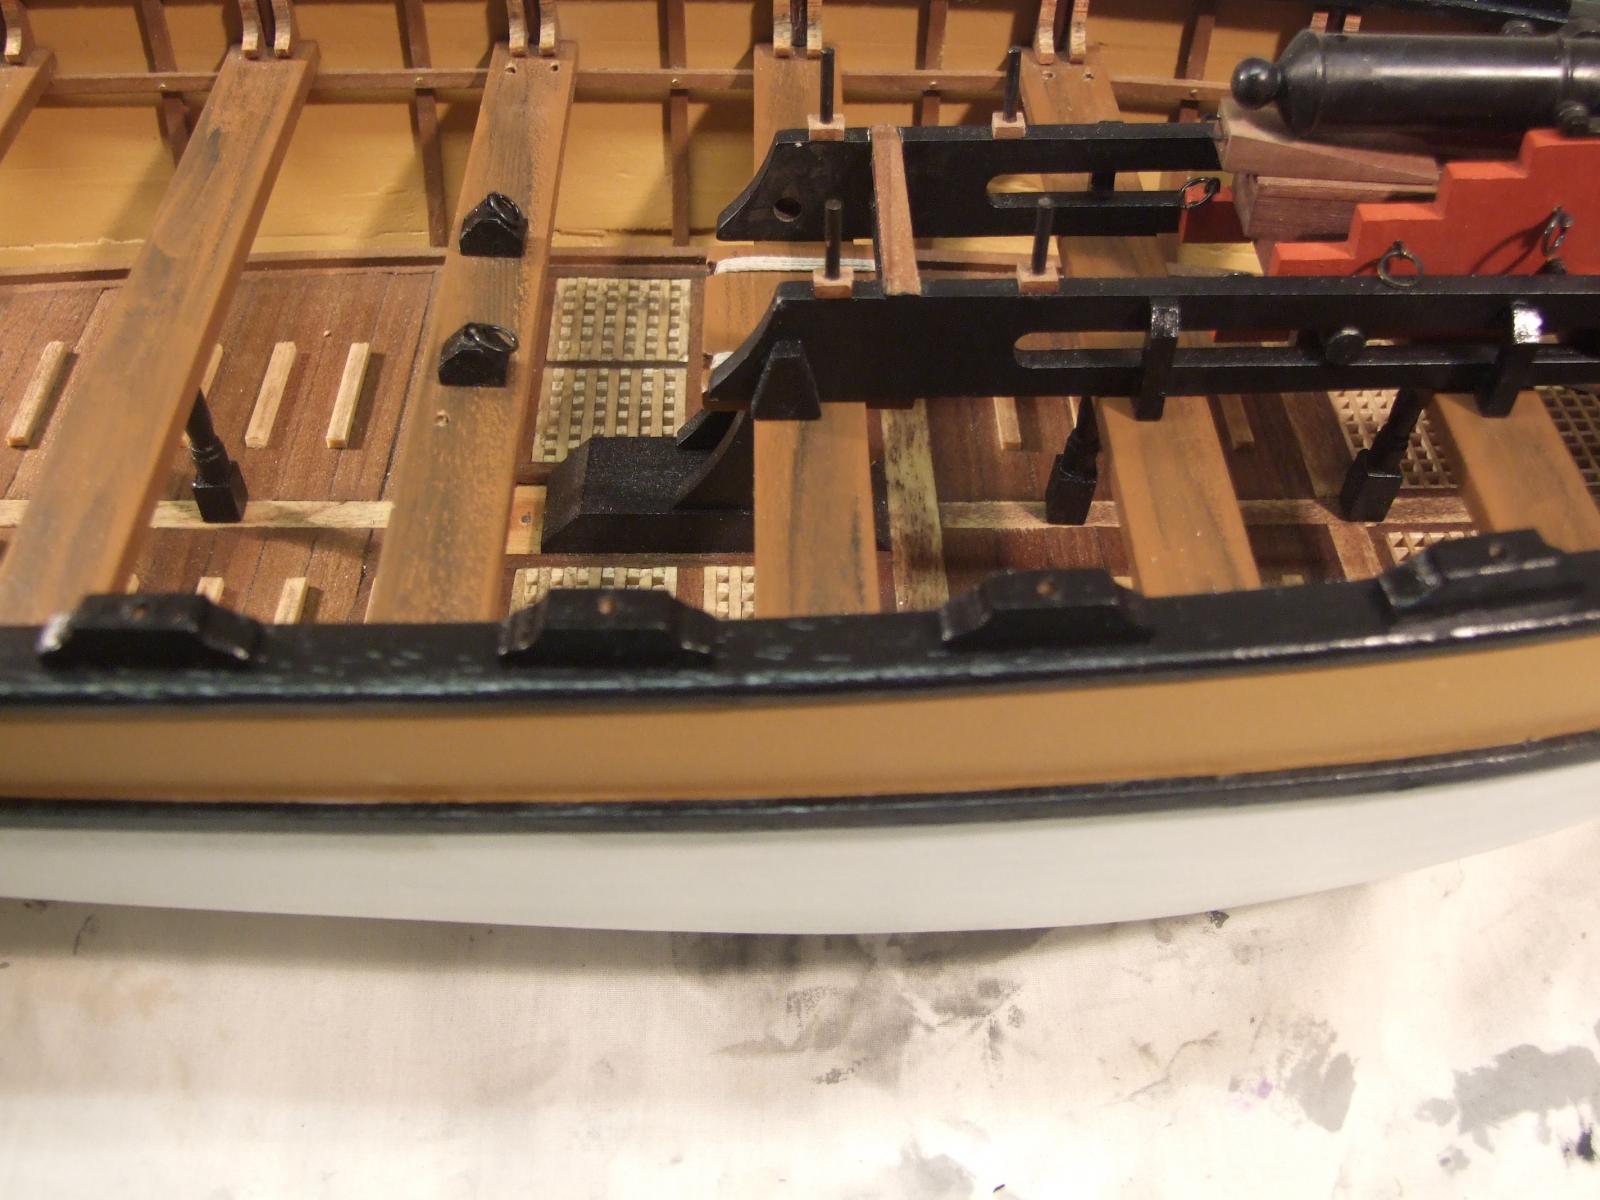
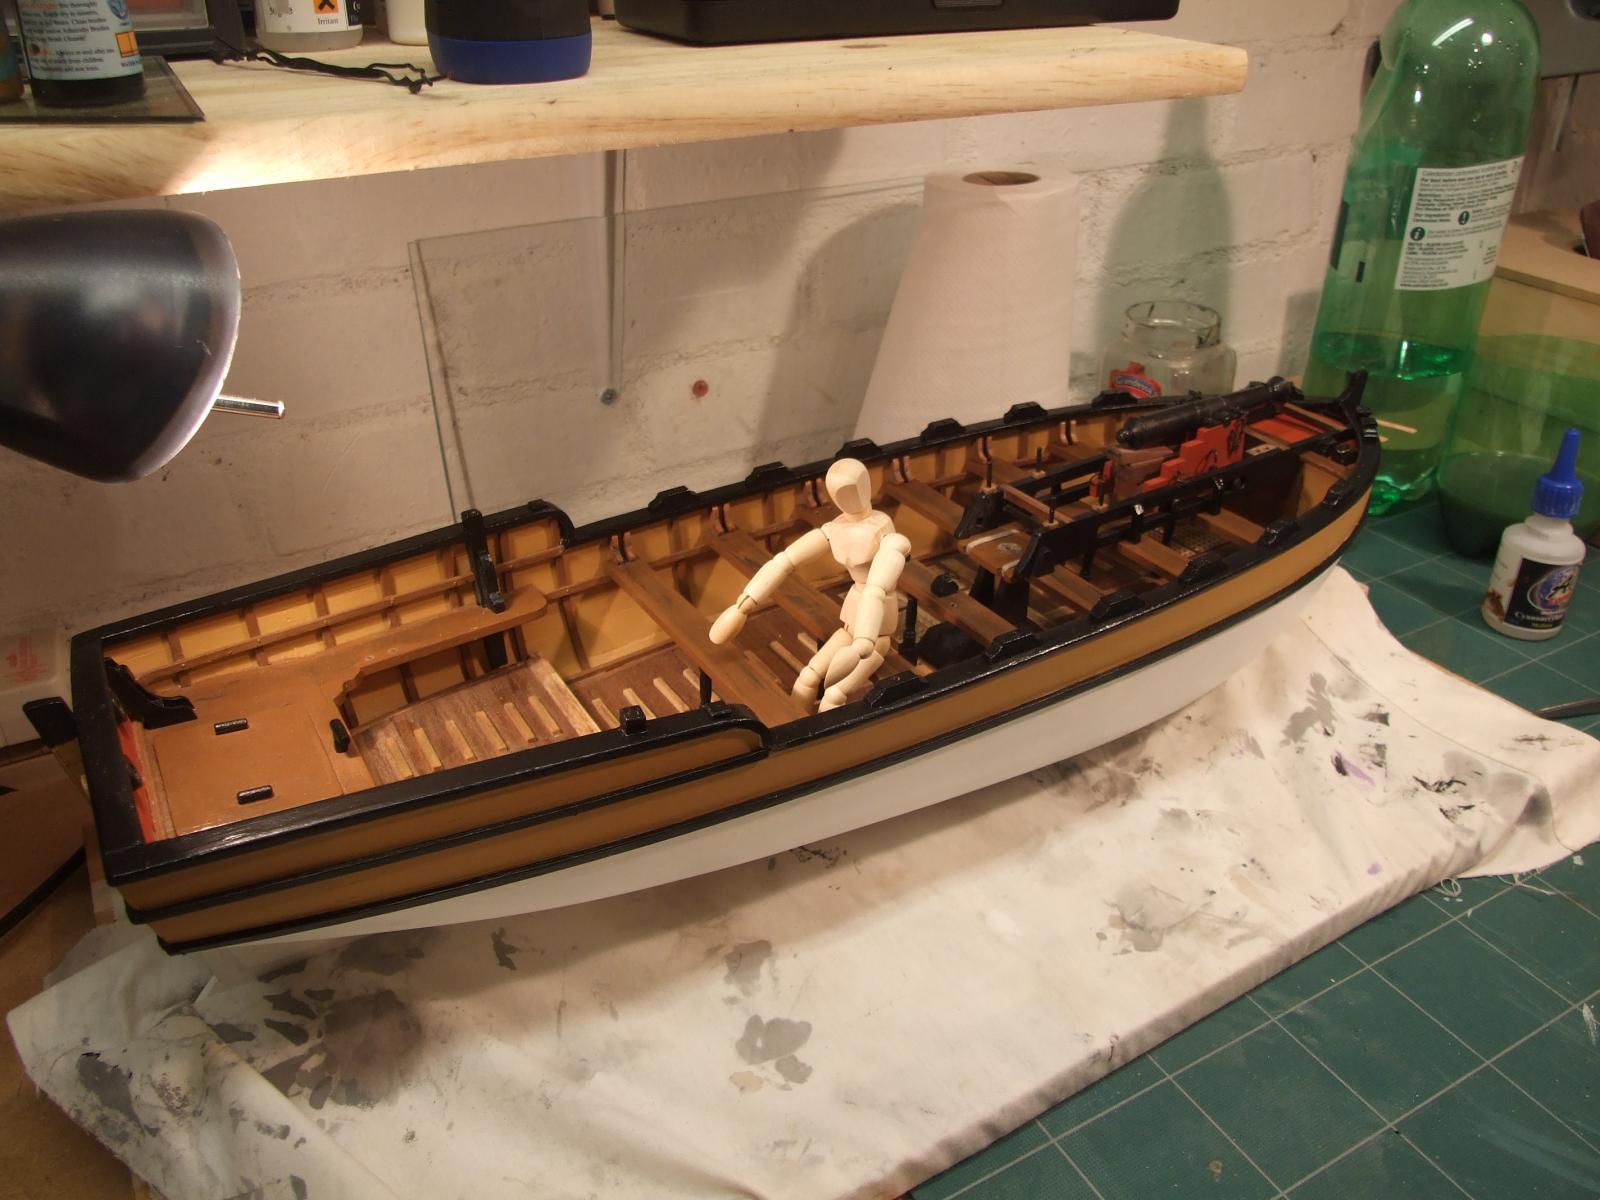
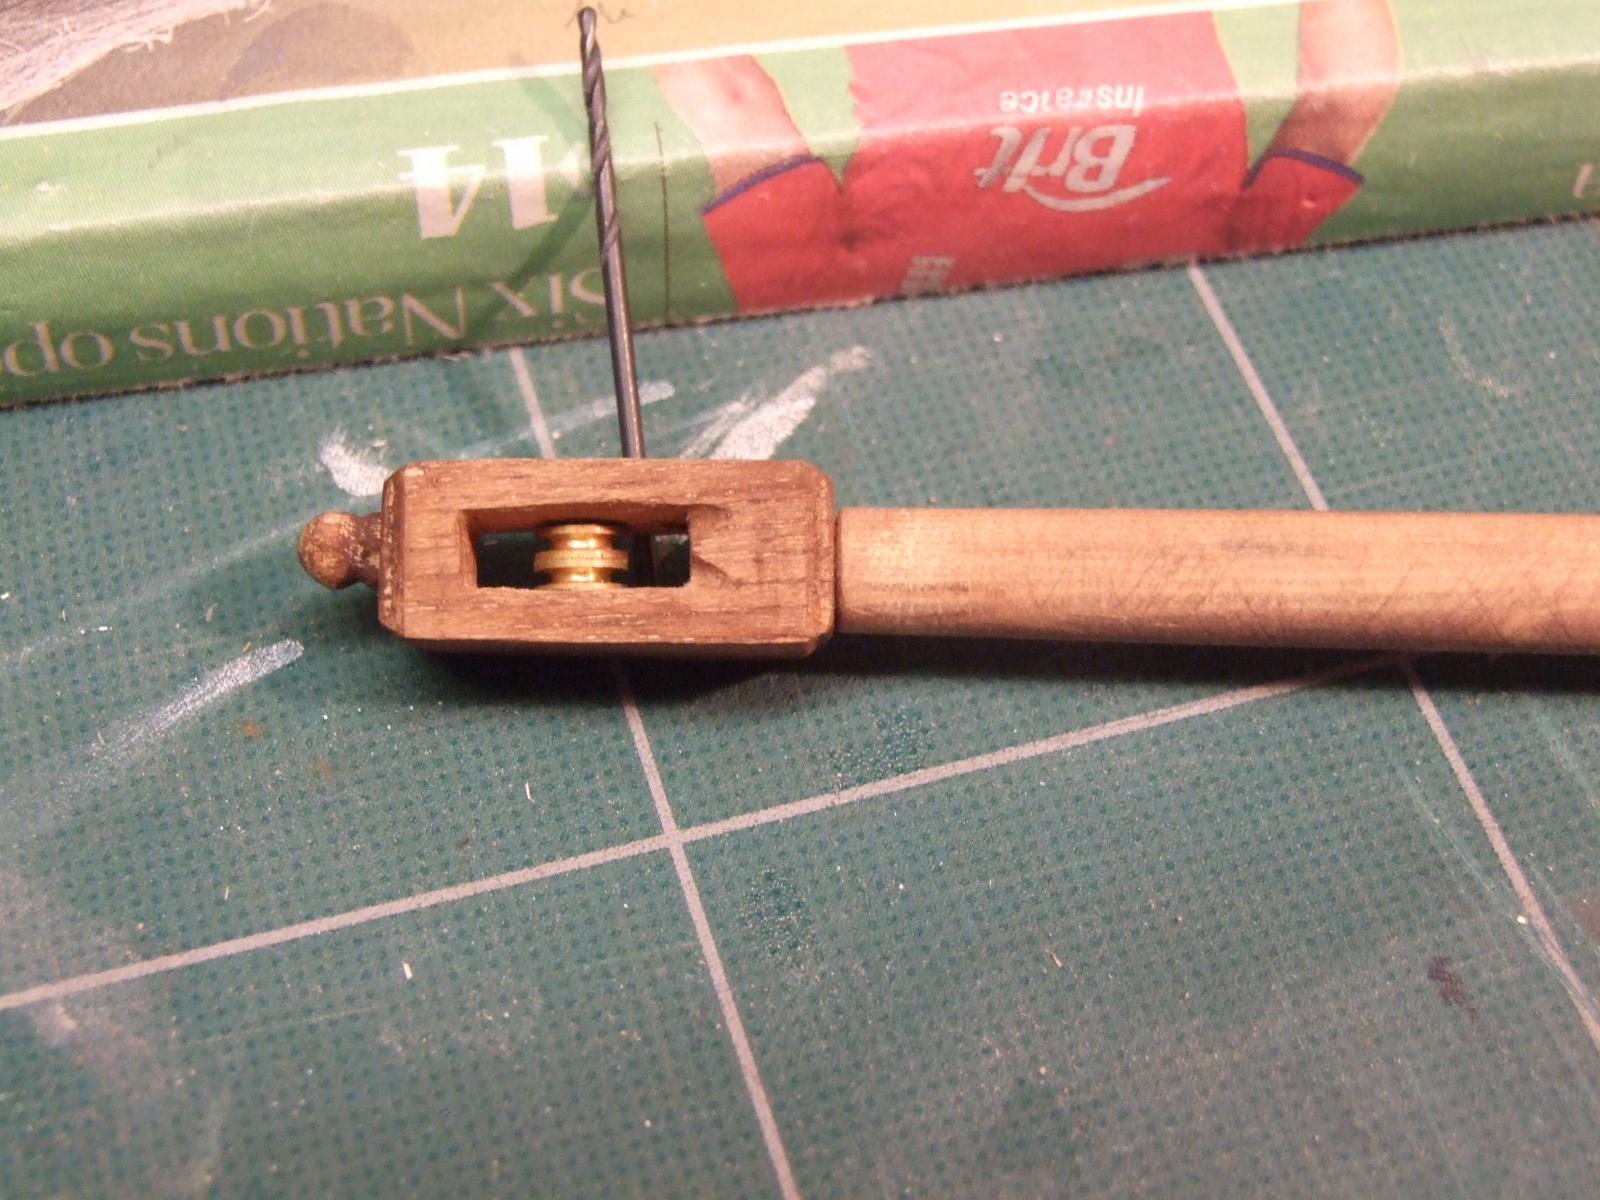
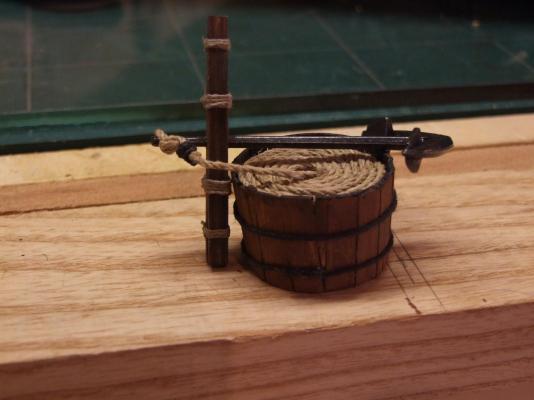
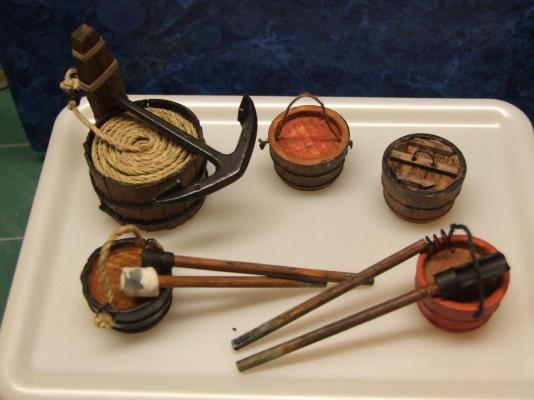
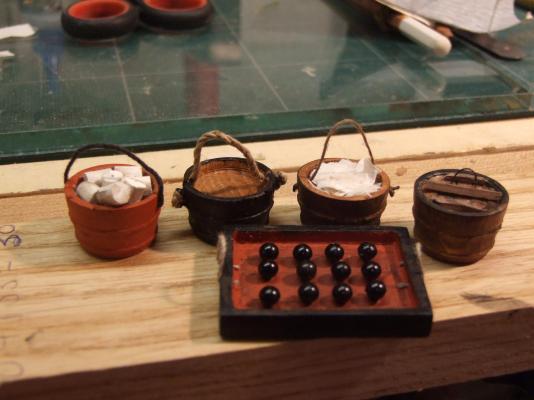
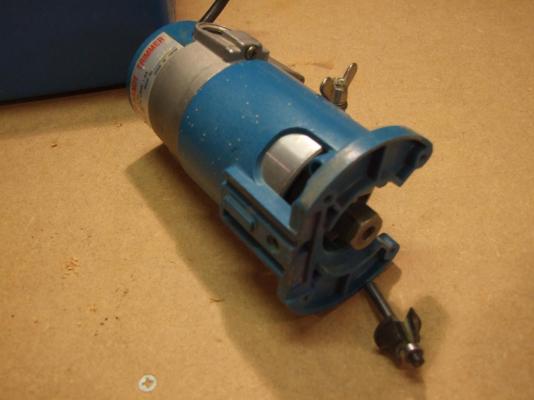
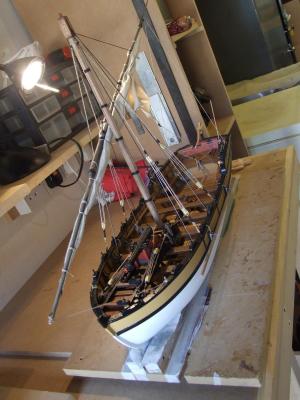
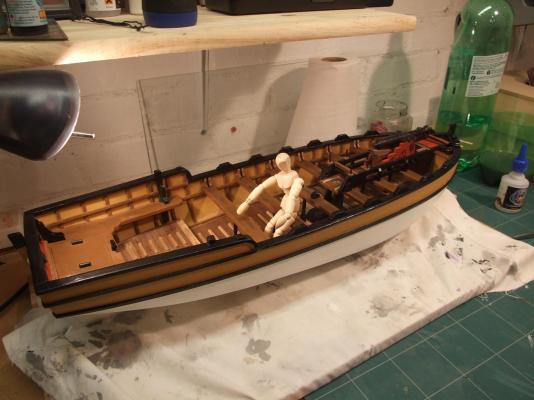
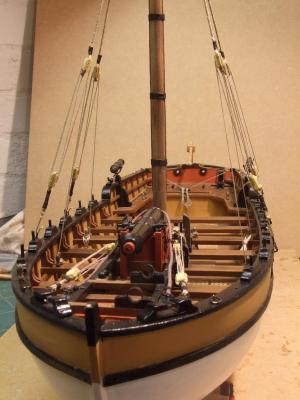
Here we are back again after knee surgery. This will be the final post for this build as the model is now in my study in its final position. Making the internal fittings and fixtures: The anchor and its rope and stowage. Two buckets made by parting a solid barrel and turning out a recess and adding a lid to one. This is not the LA method. The gun serving tools. There are also two smaller versions for the small cannons. One of six oars. General view of some of the internal kit. Milling the cannon ball tray. I thought I would try this rather than making a framed tray. The "milling machine" is a Dremel drill and stand above a Proxxon X-Y table. There is so much "slop" in this device that I hesitate to call it a milling machine but, with care, a result can be achieved. I must improve on this aspect of my tooling! The completed tray and some buckets with contents. The model on its display base. I have not mounted the vessel vertically but allowed it to come to rest on its port side skid.....it is on the beach. The profile on the base was made using my old and trusted Wadkins Handy Trimmer. I reckon I have had this for about 40 years. They were sold as laminate trimmers and came with a selection of jigs for that purpose. I have made lots of "special" and "one off" bases to enable various routing tasks to be performed. The unit is small and can easily be use one handed yet it is powerful enough to take most things in its stride. I reckon it will outlive me! The following images show the various internal fittings in situ: Thats it folks! Done and dusted. I am reasonably pleased with the result and my decision to make this model as a hard working boat. I could have gone further with the "distressing" work and I will once I have got to grips with weathering techniques and materials.....and that is an art within an art. I have greatly enjoyed this build with the possible exception of triple planking. I found the kit to be pretty good. The instructions were not great but the pictures told most of the story. The materials were ok and mostly sufficient with the exception of the sail cloth which was woefully short. To my mind this is a good kit to experiment with.The scale is large enough to encourage an individual approach rather than a slavish adherence to the build notes. I recommend it as a very interesting project. Mikeaidah. 11th July 2014.


- 49 replies
-
- 9
-
-
- lancia armata
- panart
- (and 2 more)
-
Exquisite. The only word that fits. Mike.
-
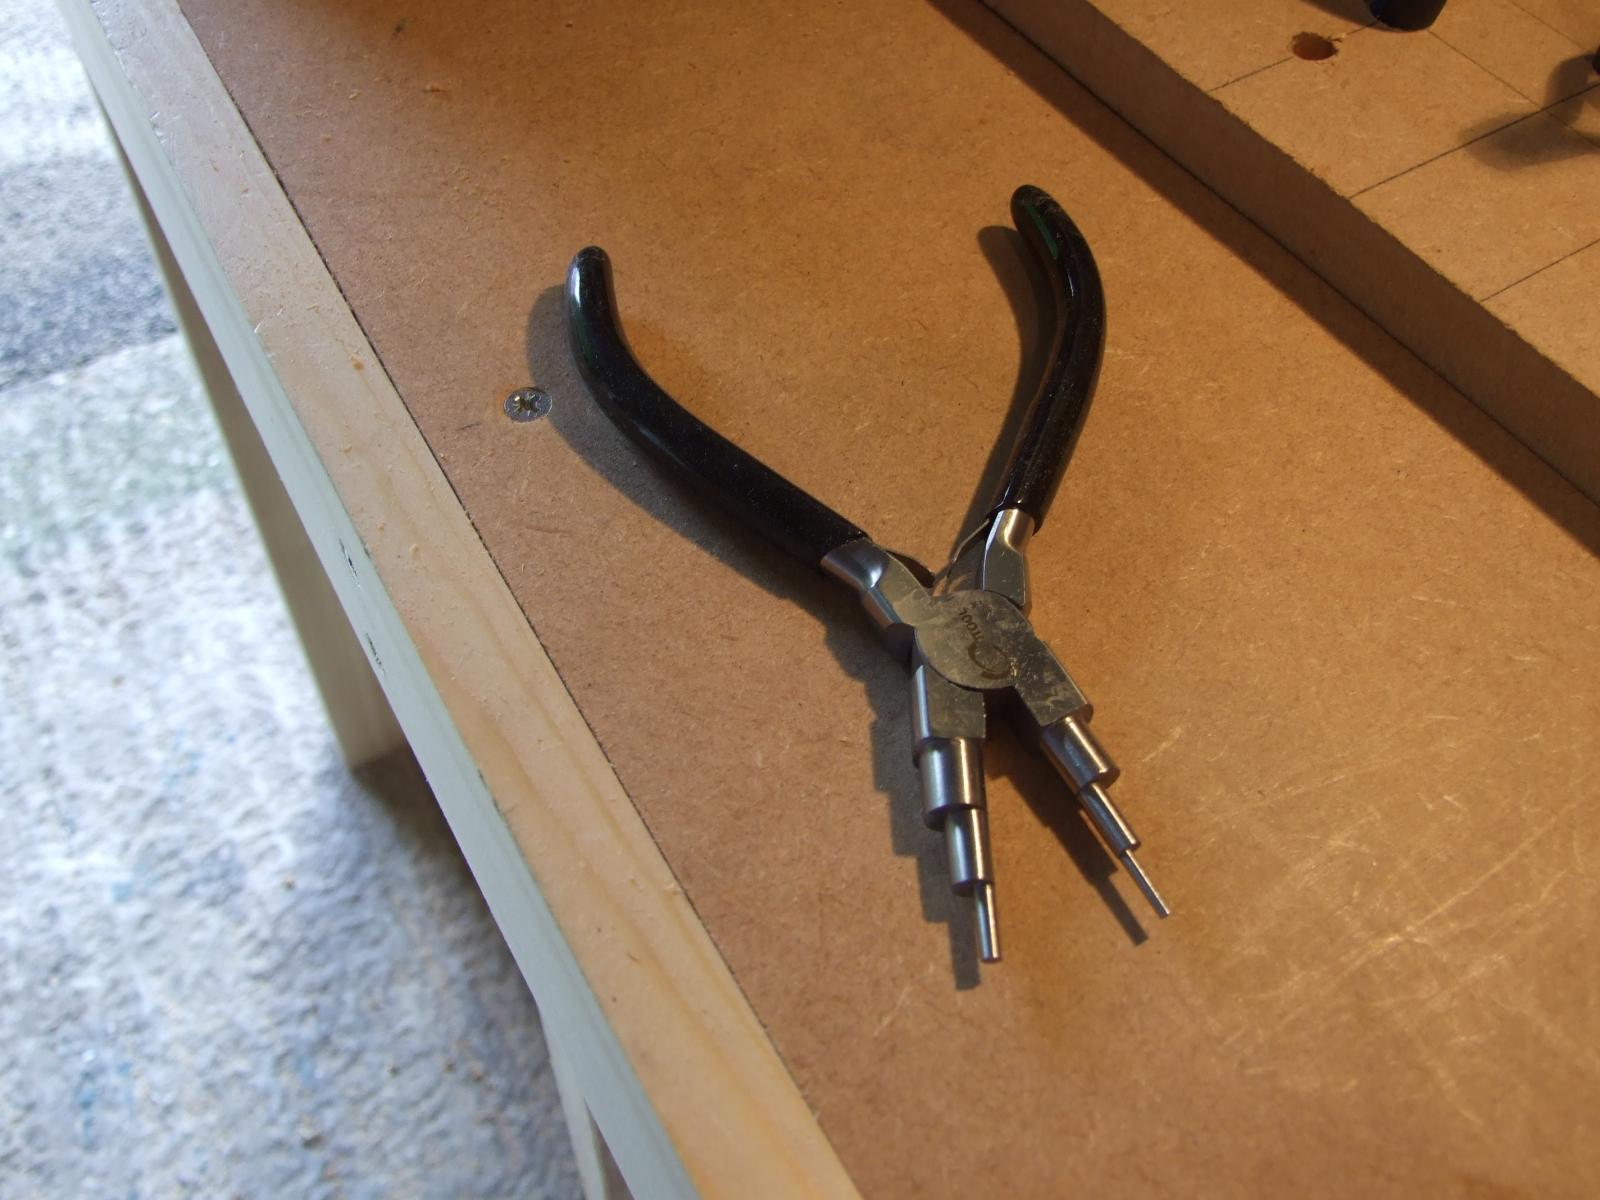
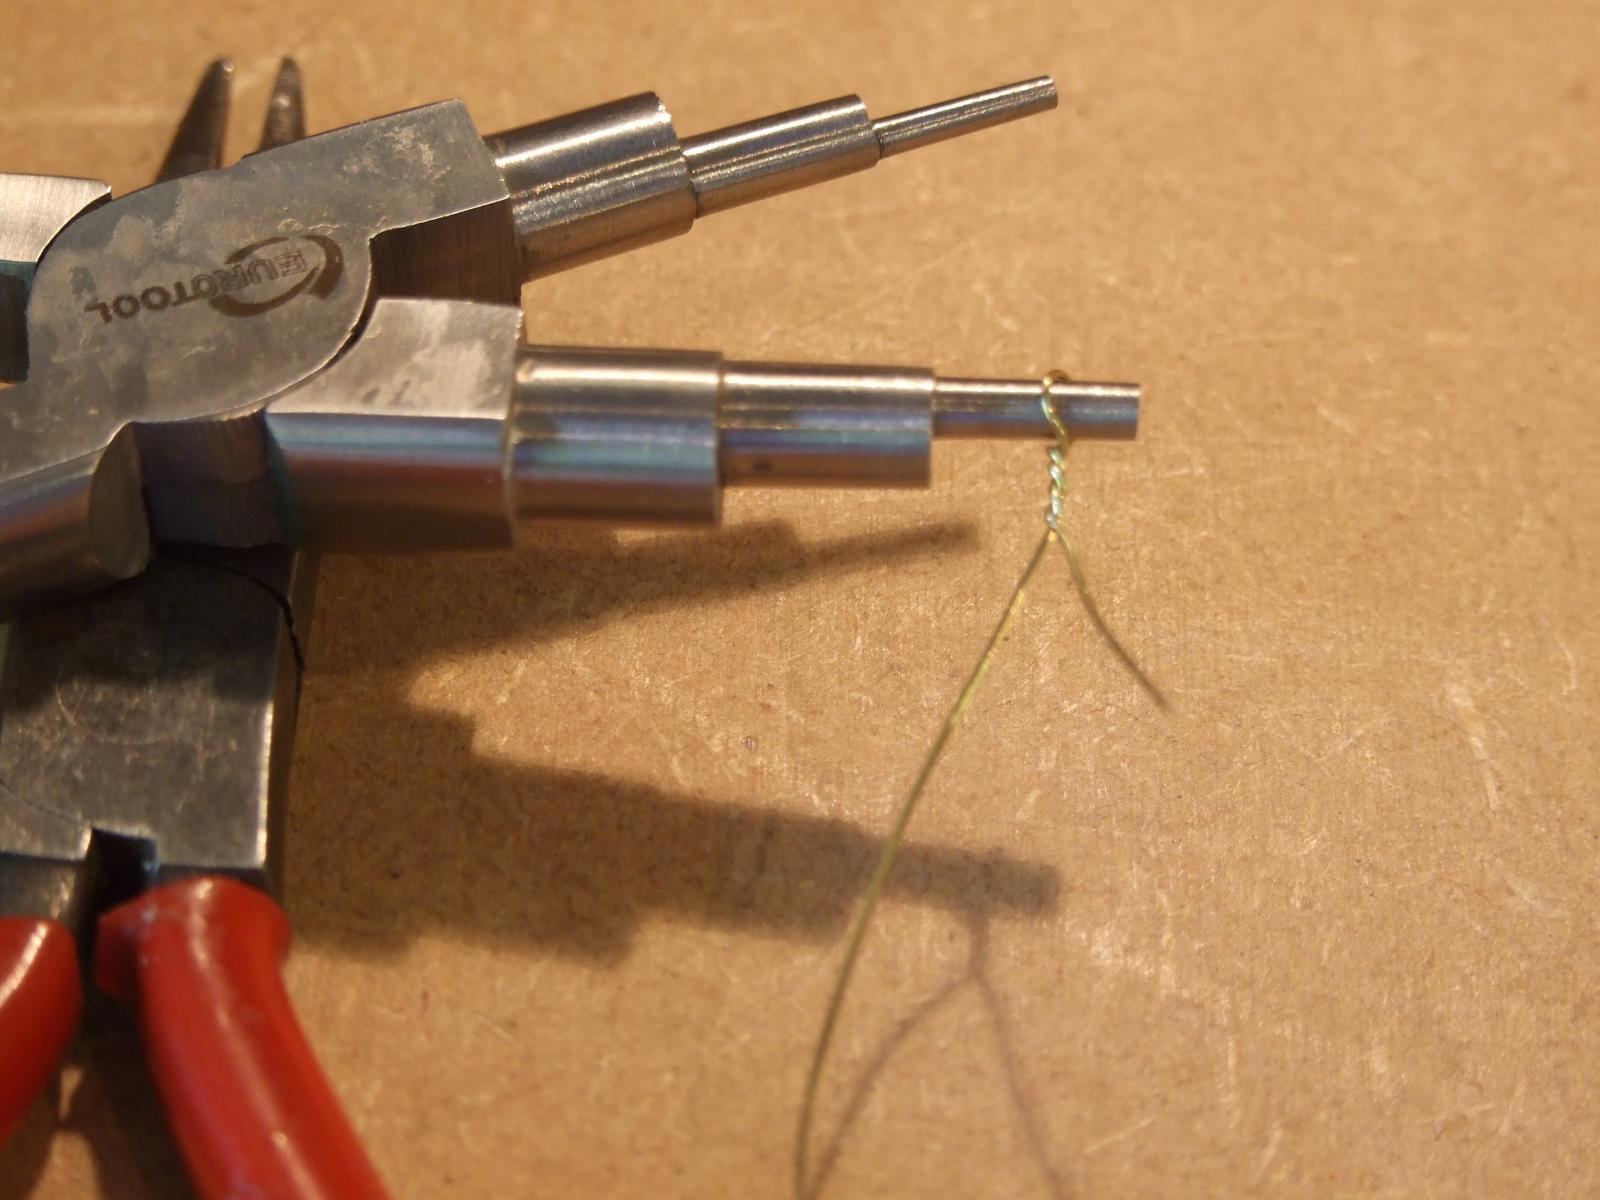
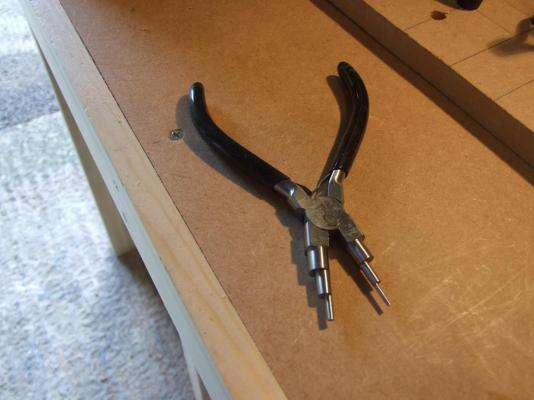
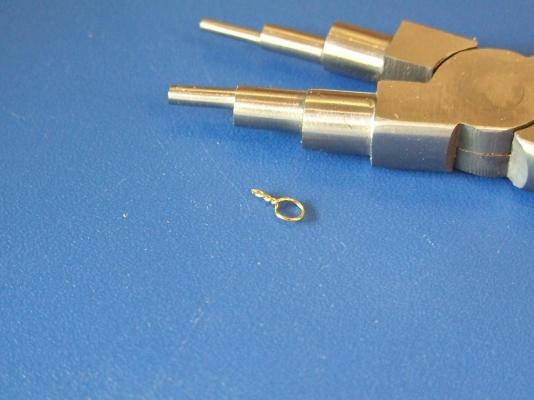
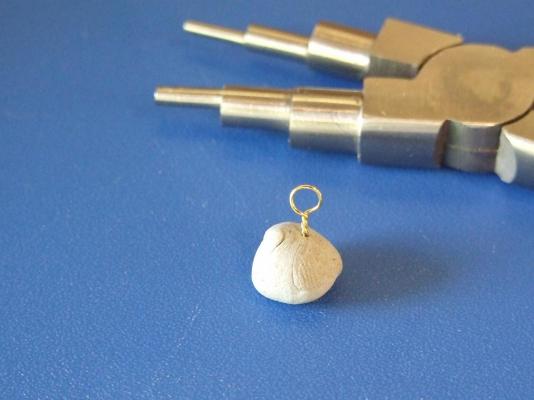
Vic, They were purchased through Amazon UK listed as "6 step multi size wire looping jewellery pliers". Mike.
-
Wefalk, That would be a very , very thin plier jaw! I doubt it would be viable. I am afraid it is back to 0.3mm drill in the vice me lad! Mike.
-
Thanks Antony. Saved to disc for later.
-
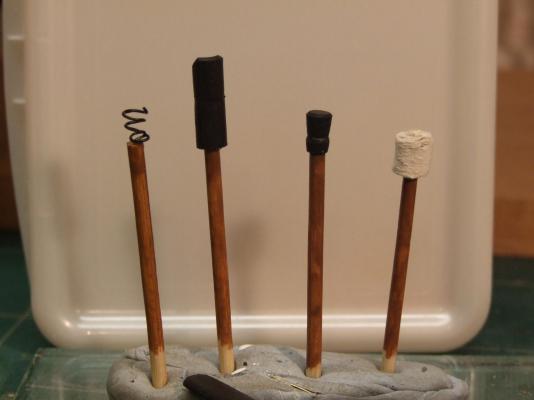
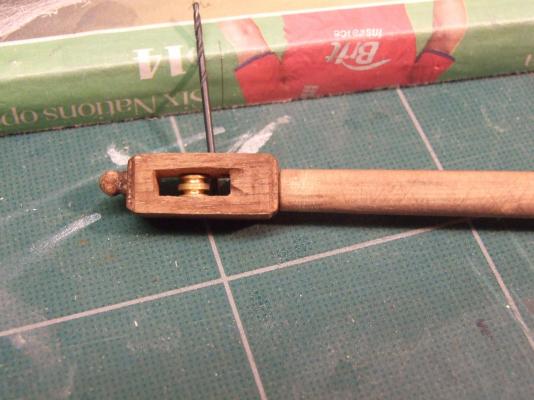
I have just bought a pair of these and wondered if anyone out there has experience of them. They come from the jewellery making world and are termed loop making pliers and are quite well made. the "jaws" will produce loops of 1.8/2.7/3.5/5.0/7.0/8.5 mm . It is likely that the larger jaws will be of limited use but I found making the loop shown to be very quick and easy to form as the plier grips the work as well as forming the shape. Mike.

-
Can anyone recommend a miniature hand plane?
mikeaidanh replied to Bettina's topic in Modeling tools and Workshop Equipment
What a fine example of seeking and acting on advice Bettina. Mike. -
WOW! And again, Wow! Mike.
-
I need advice on a rotary tool
mikeaidanh replied to jdiven's topic in Modeling tools and Workshop Equipment
I amplify what Casey has said about the little 7.2 Dremel. Good for getting into places where other tools fear to tread. I use mine a lot. Mike. -
That looks nice and rusty! Thanks Keith.
-
David, So sorry but I have only just seen your post requesting an image of my map pin cannon balls. If you are still looking there are a couple of jpegs on page 3 of my armed pinnace build log. Mike.
-
The history of the RNLI should be required reading for anyone wishing to understand the true meaning of bravery and selfless dedication. Mike.
-
Thanks Keith.
-
Keith, I could not copy the link due to the lpeg. can you try again please as i am particularly interested in this topic.
-
Cheers Eamonn. I believe there is dark medicine that is good for pain. Maybe I'll have some. Mike.
- 49 replies
-
- 1
-
-
- lancia armata
- panart
- (and 2 more)
-
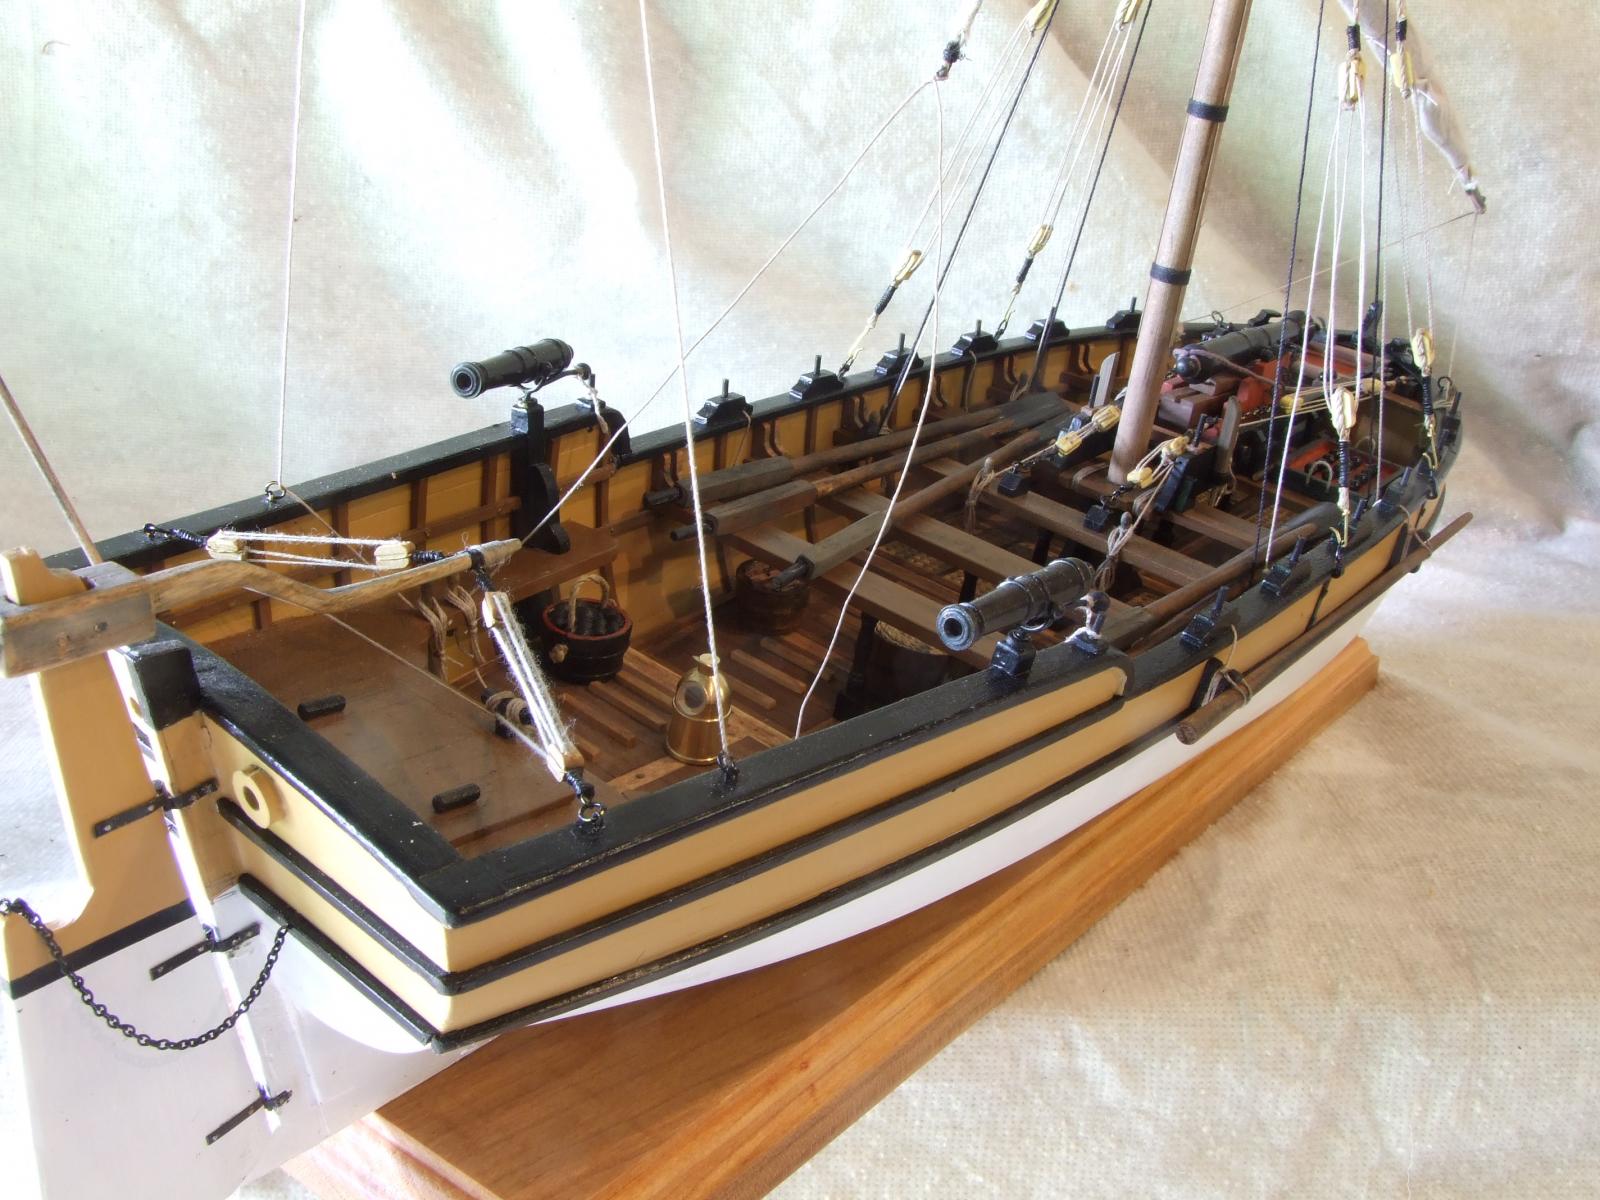
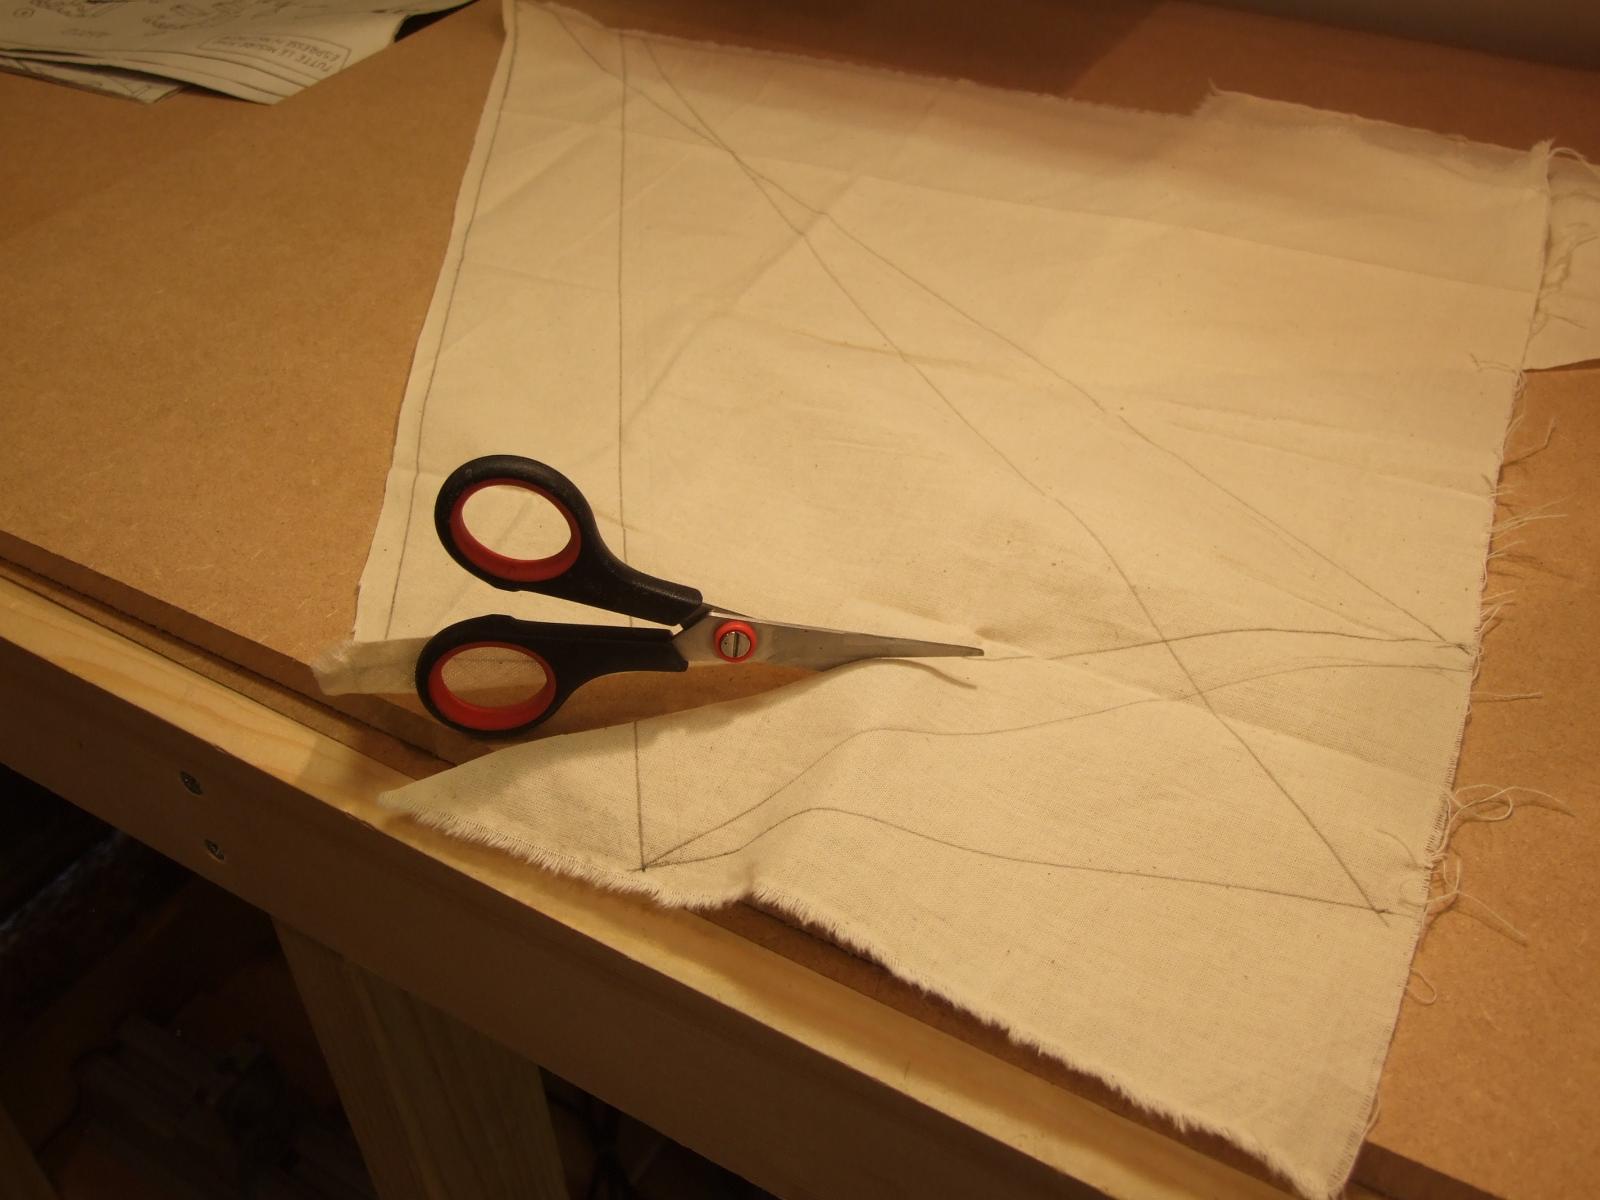
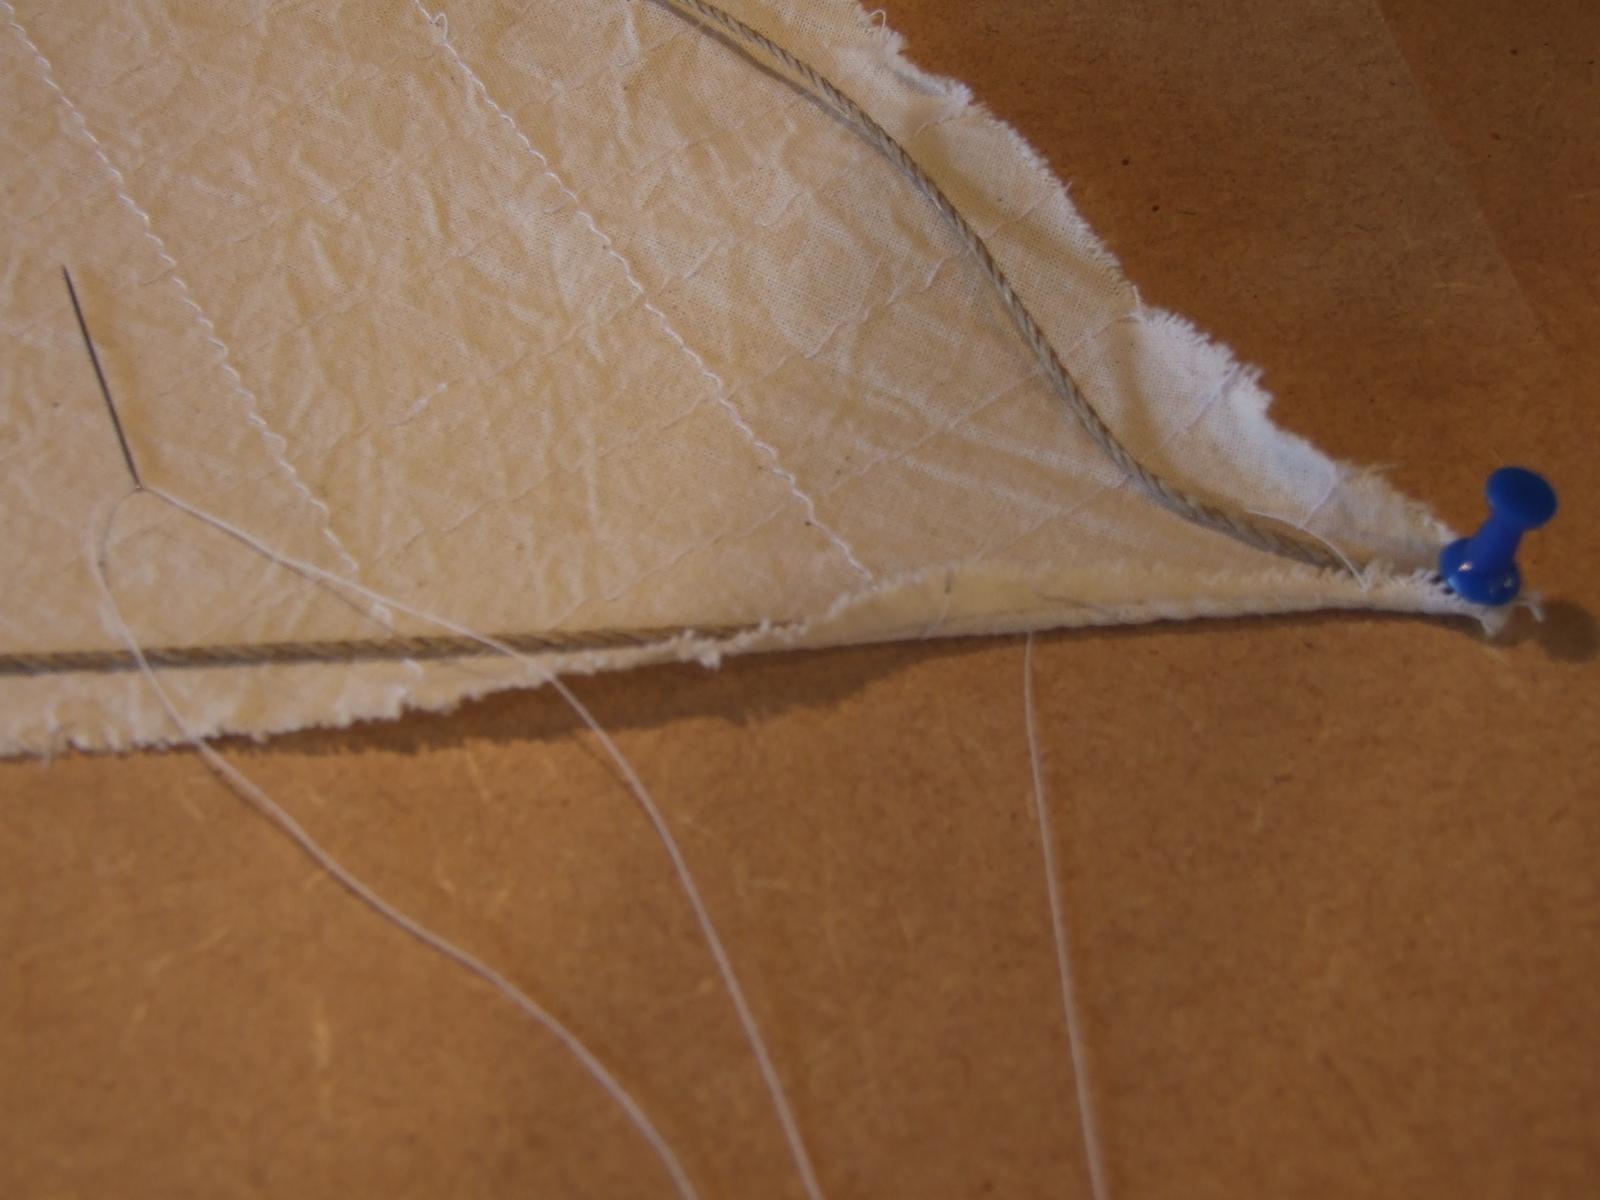
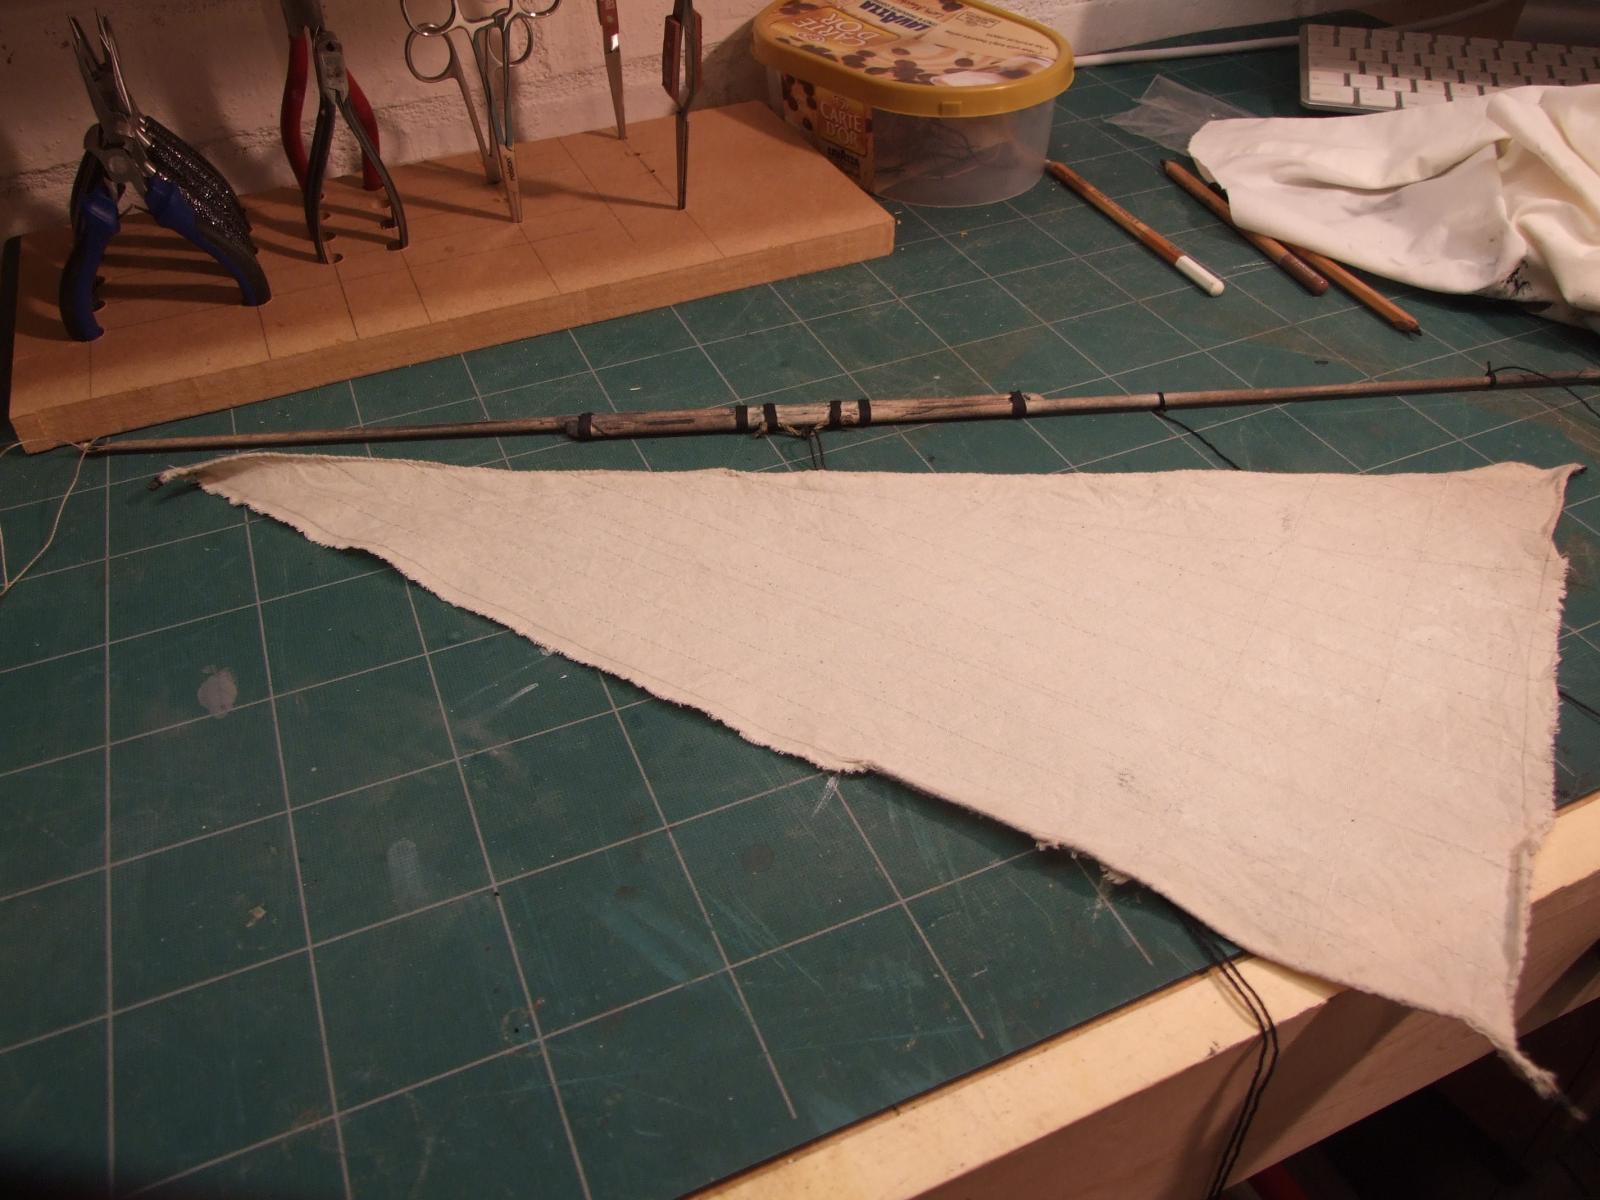
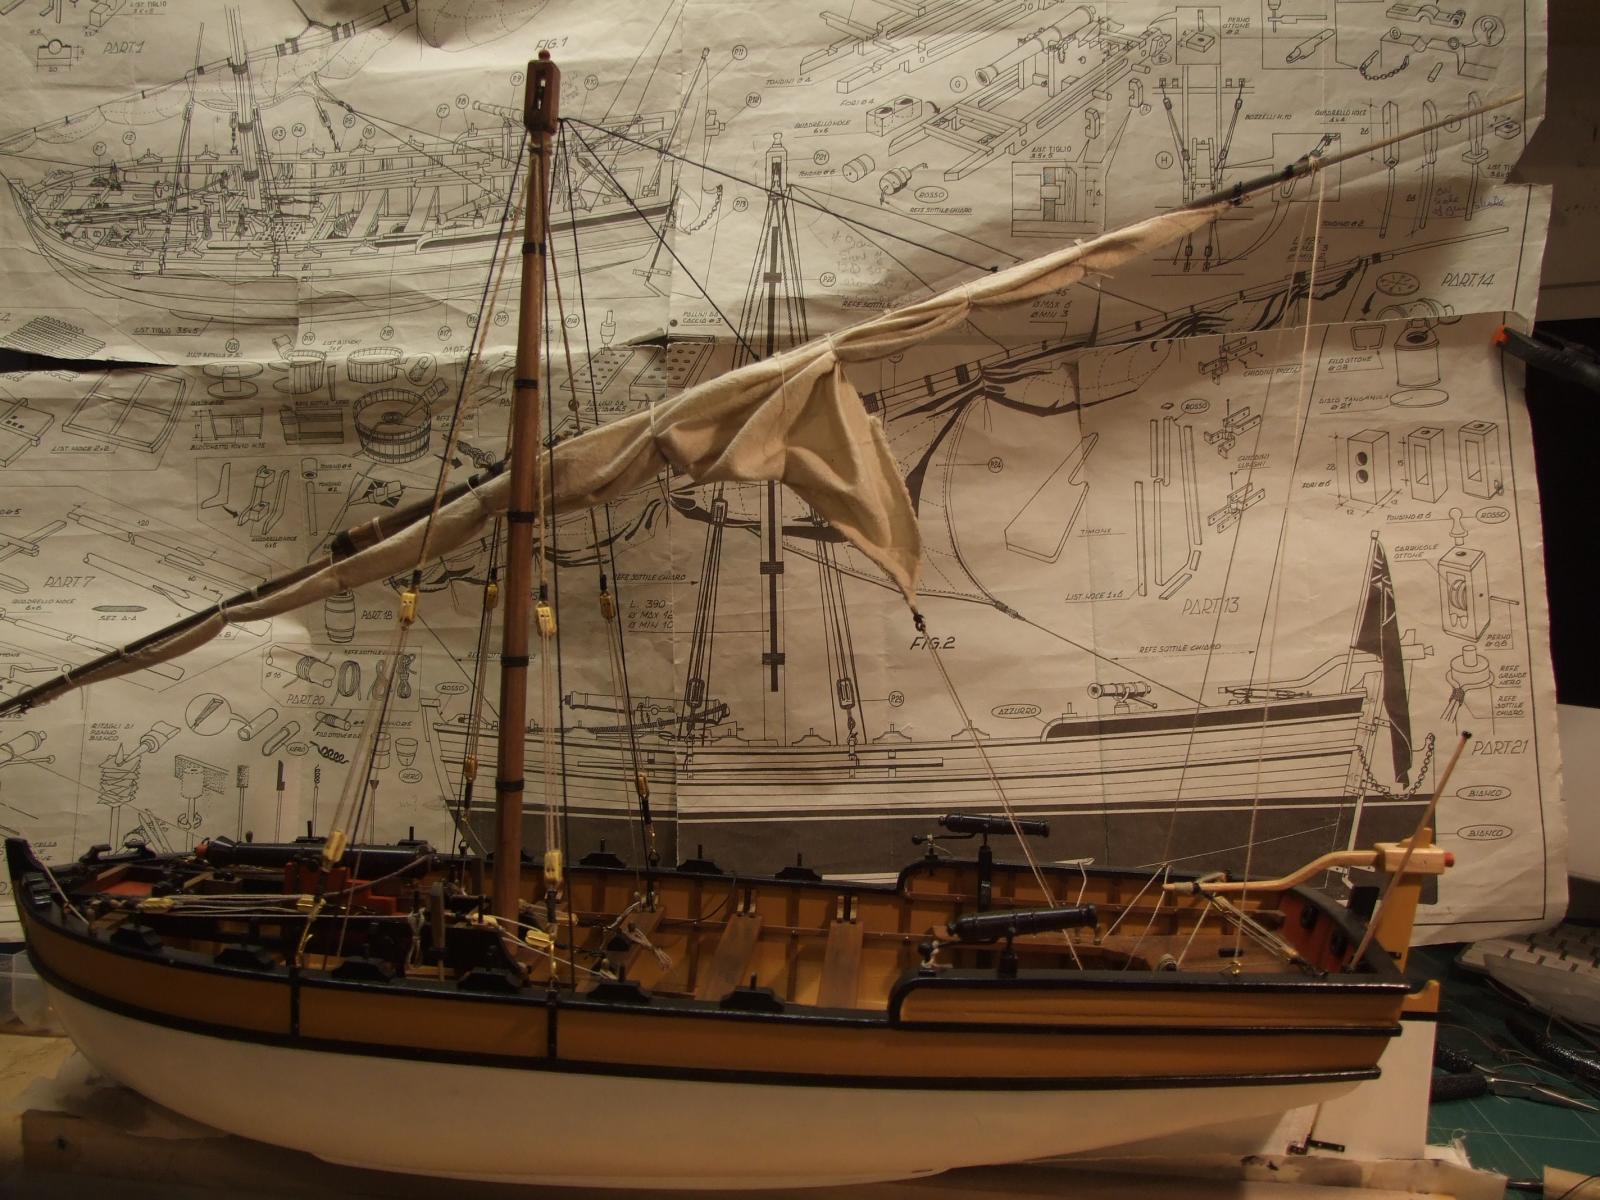
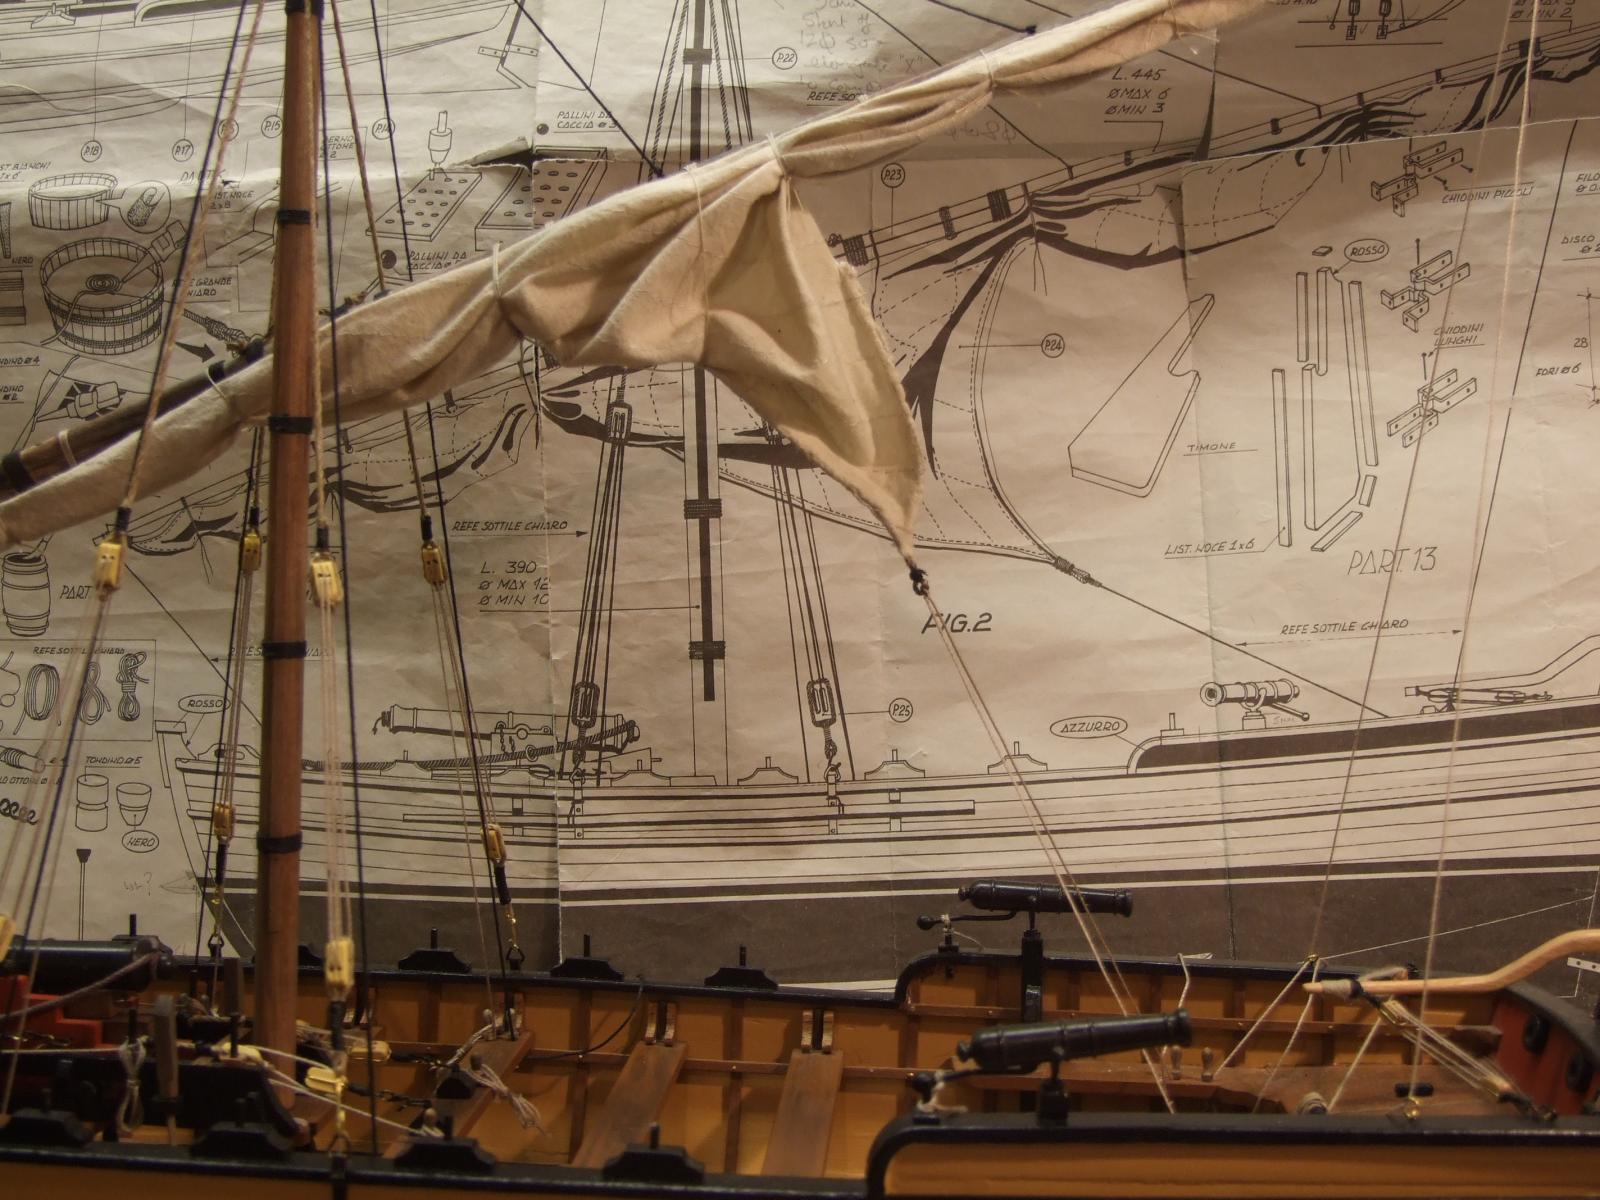
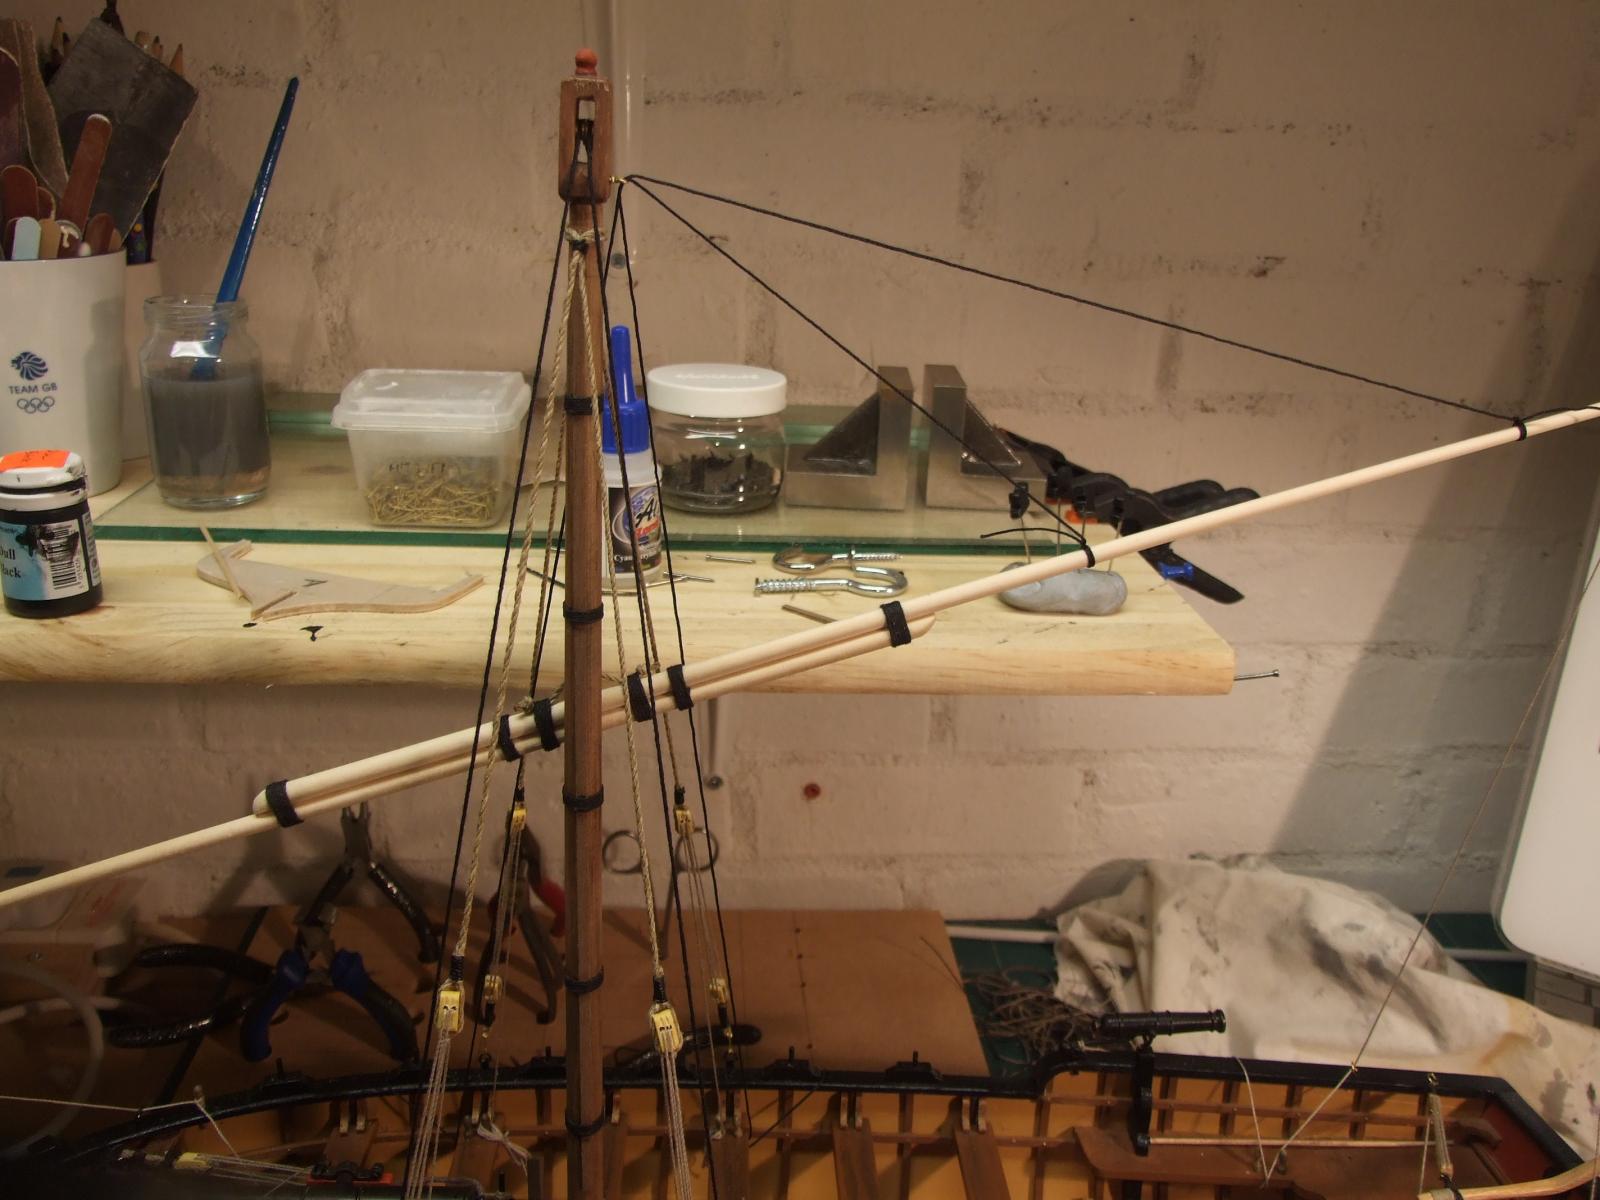
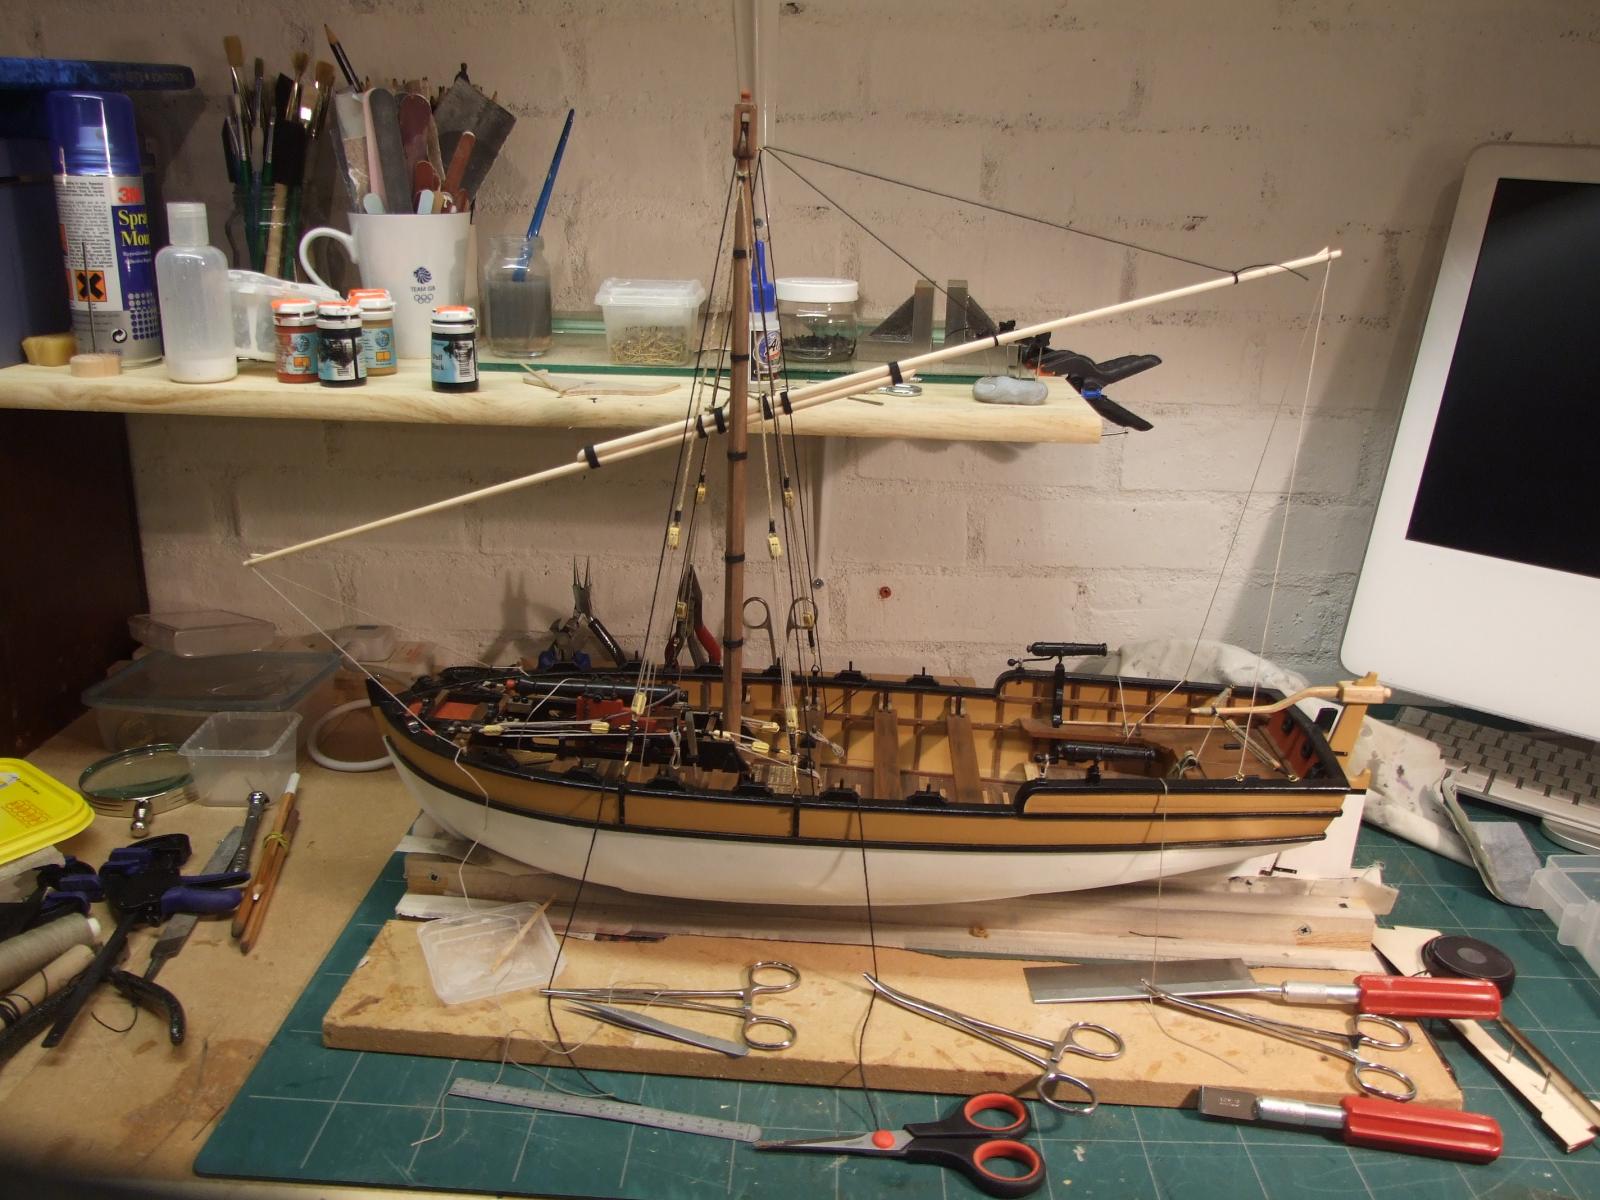
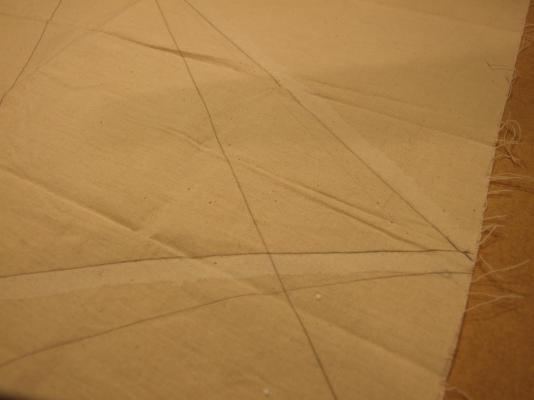
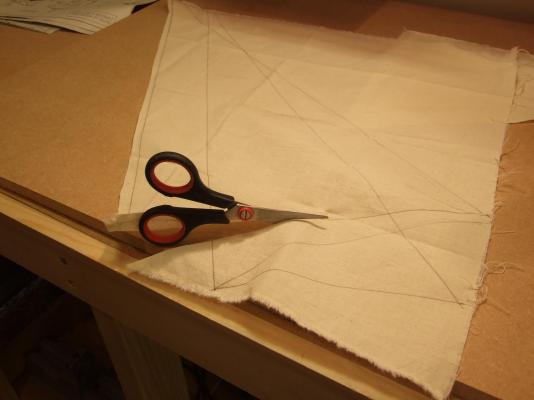
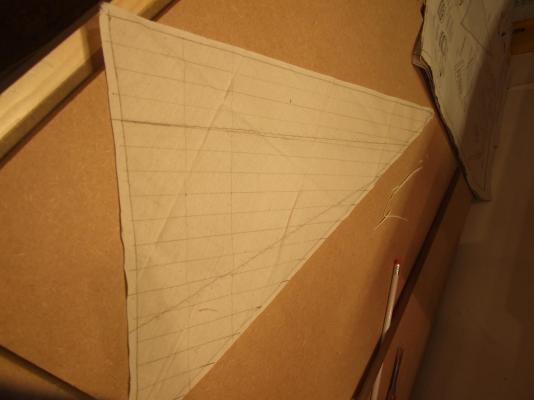
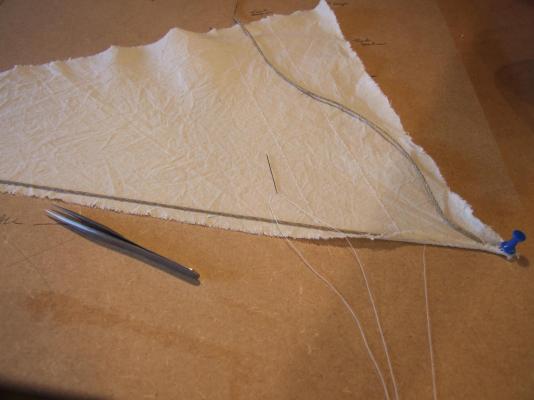
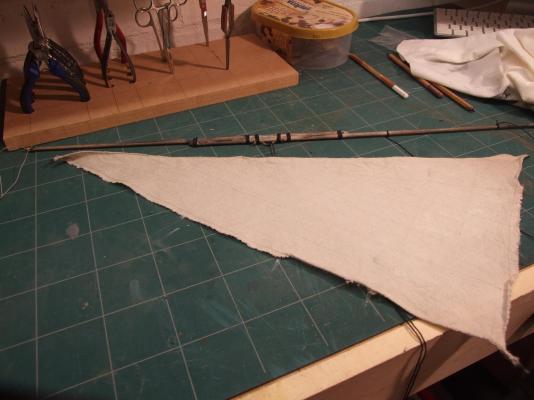
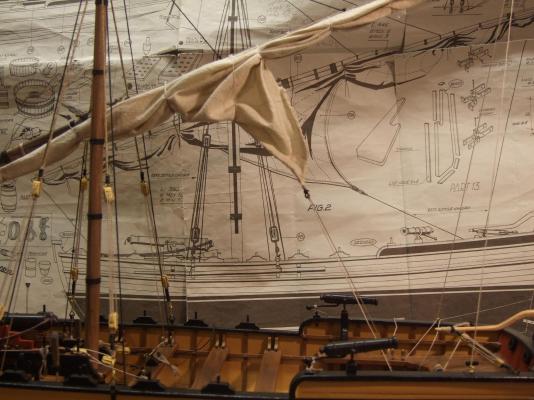
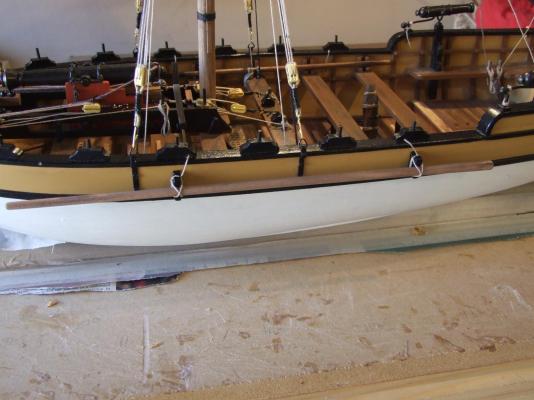
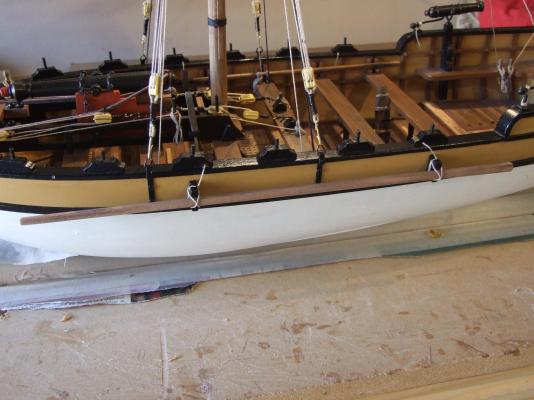
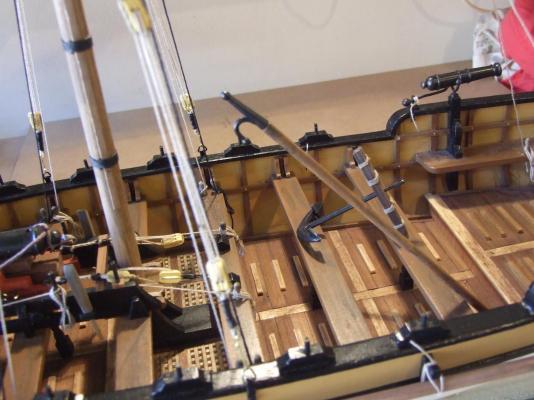
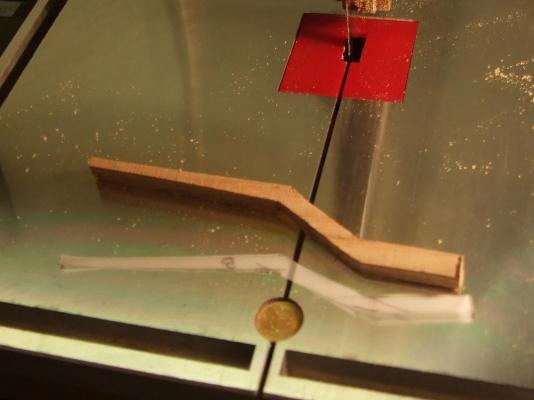
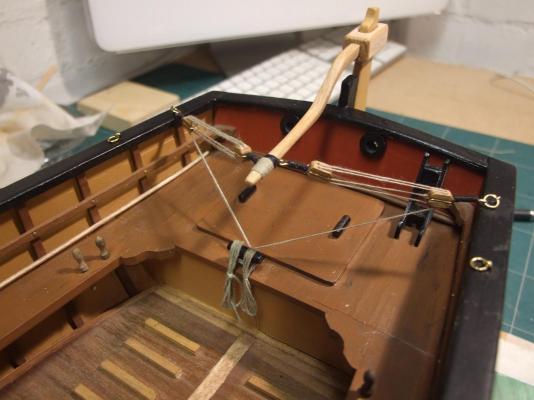
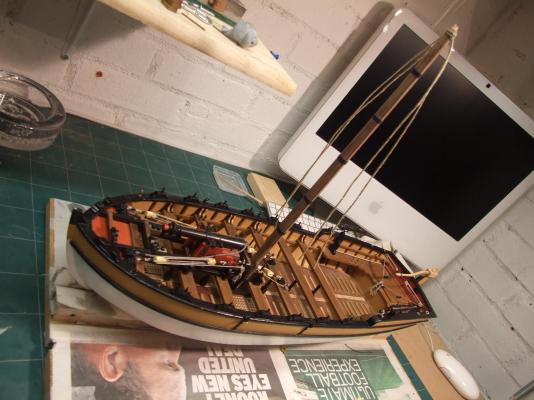
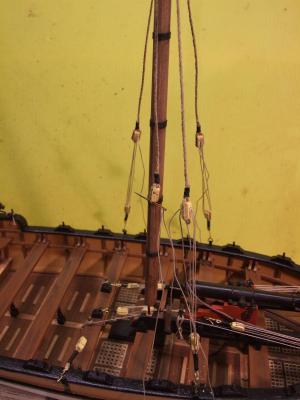
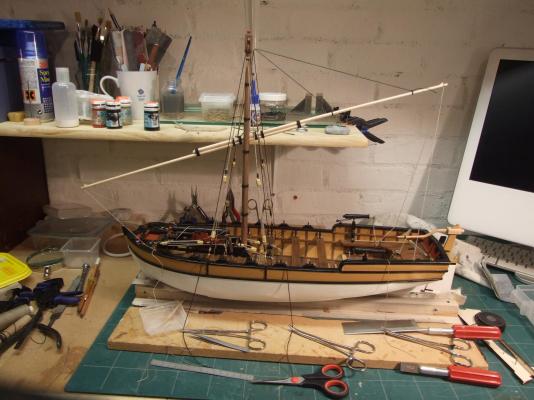
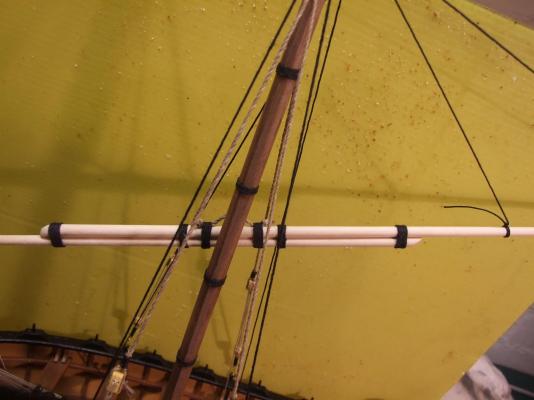
Early April '14 Must make bit more progress before an enforced break in proceedings so time to fake the furled sail, attach it to the lateen yard and rig both to the mast. First the sail was marked out on the material. The kit was short on material so this sail will look ok as presented but would not set correctly if one were to try. The edges that are to cut have been sealed with dilute PVA..... ....and the cloth is cut. The seams are sewn in on a sewing machine and the bolt rope is added. Because the sail will only ever be displayed furled I am only adding bolt rope to areas that will be seen. This is to make the attaching of the sail an easier task. In this last image ageing and dirt have been added to both sail and yard. Now the sail is attached to the yard..... ....and the yard to the mast. Now that all the rigging is in place some rope hanks are needed to finish off the belays. My method of fixing belays, for what it is worth, is to pass the line under tension through the belay pin hole then use the pin to lock it in place. Leaving a short length of line below the pin allows for future tensioning. The belay is then completed by hanging a shaped hank over the pin. The larboard boom cradles are fitted and the boom stowed. This repeated starboard side. The anchor is made but not stowed...... ...and the boat hook. Thats it for now. Just a few final up to date images and then I am off to the MSW Sick Bay (see) for month or two. Whilst laid up I shall ponder the Panart Gun Deck kit that is awaiting my attention and think about the Sloup Coquillier that I hope to scratch build after that. Bye for now, Mike.


- 49 replies
-
- 6
-
-
- lancia armata
- panart
- (and 2 more)
-
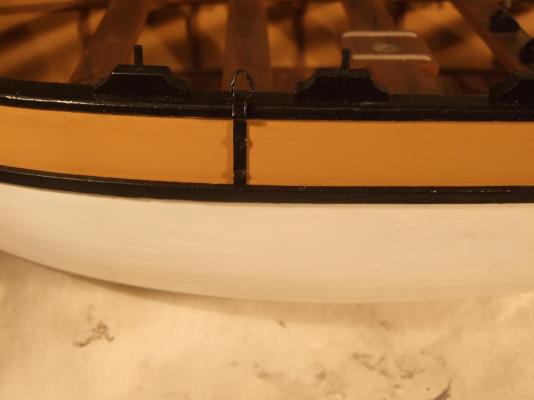
At 1:16 I have used 5mm black round head map pins. They do need dulling but to their credit they come with their own fixing spike. Mike.
-
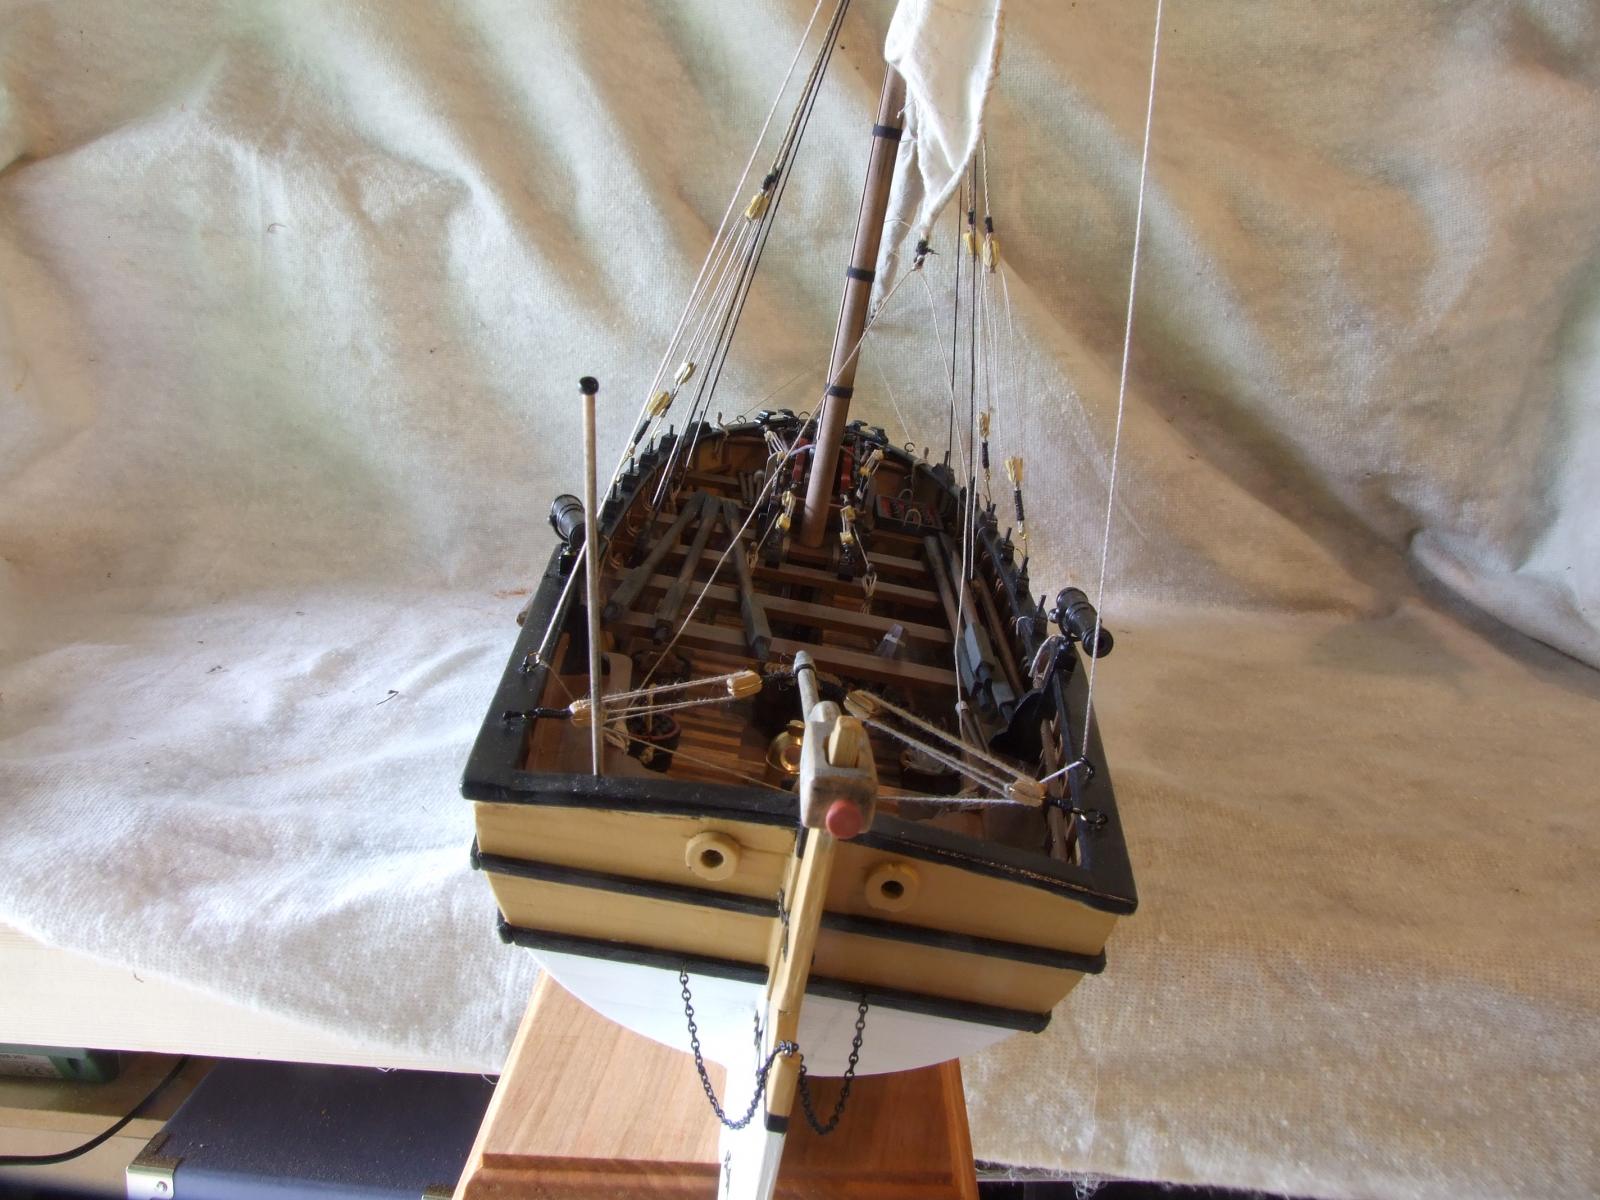
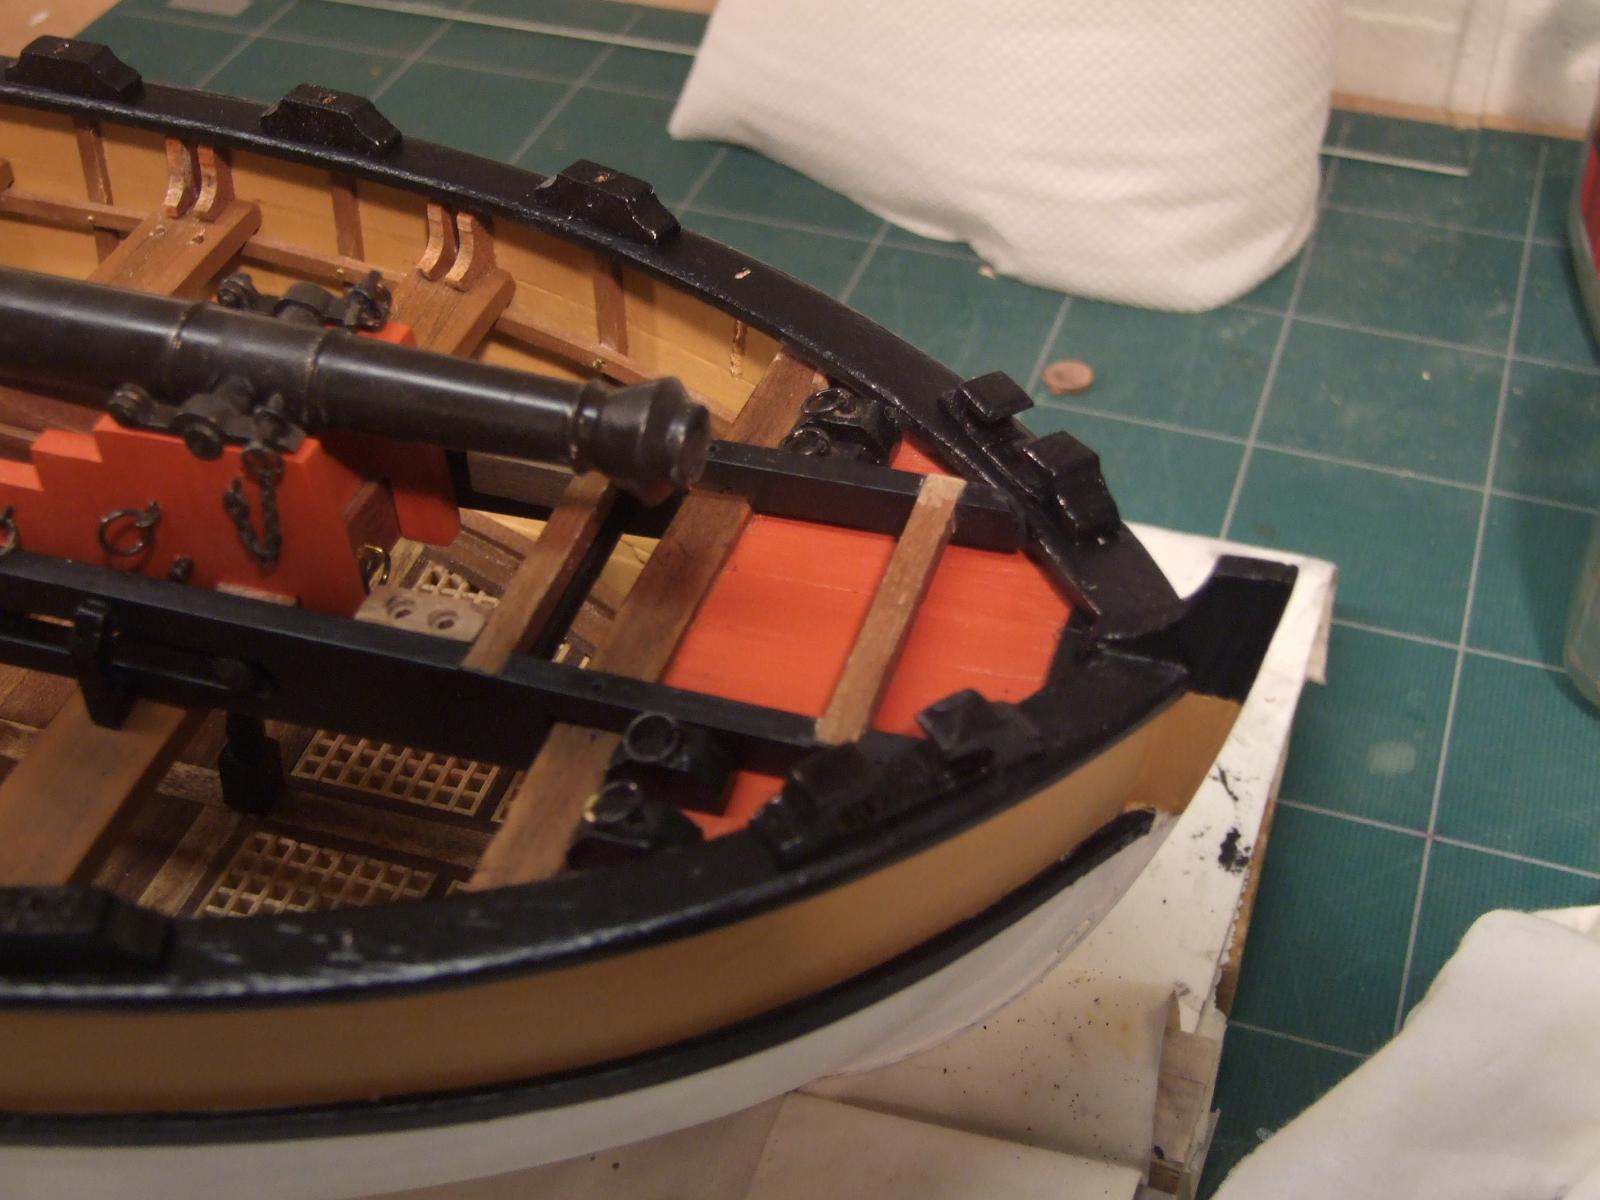
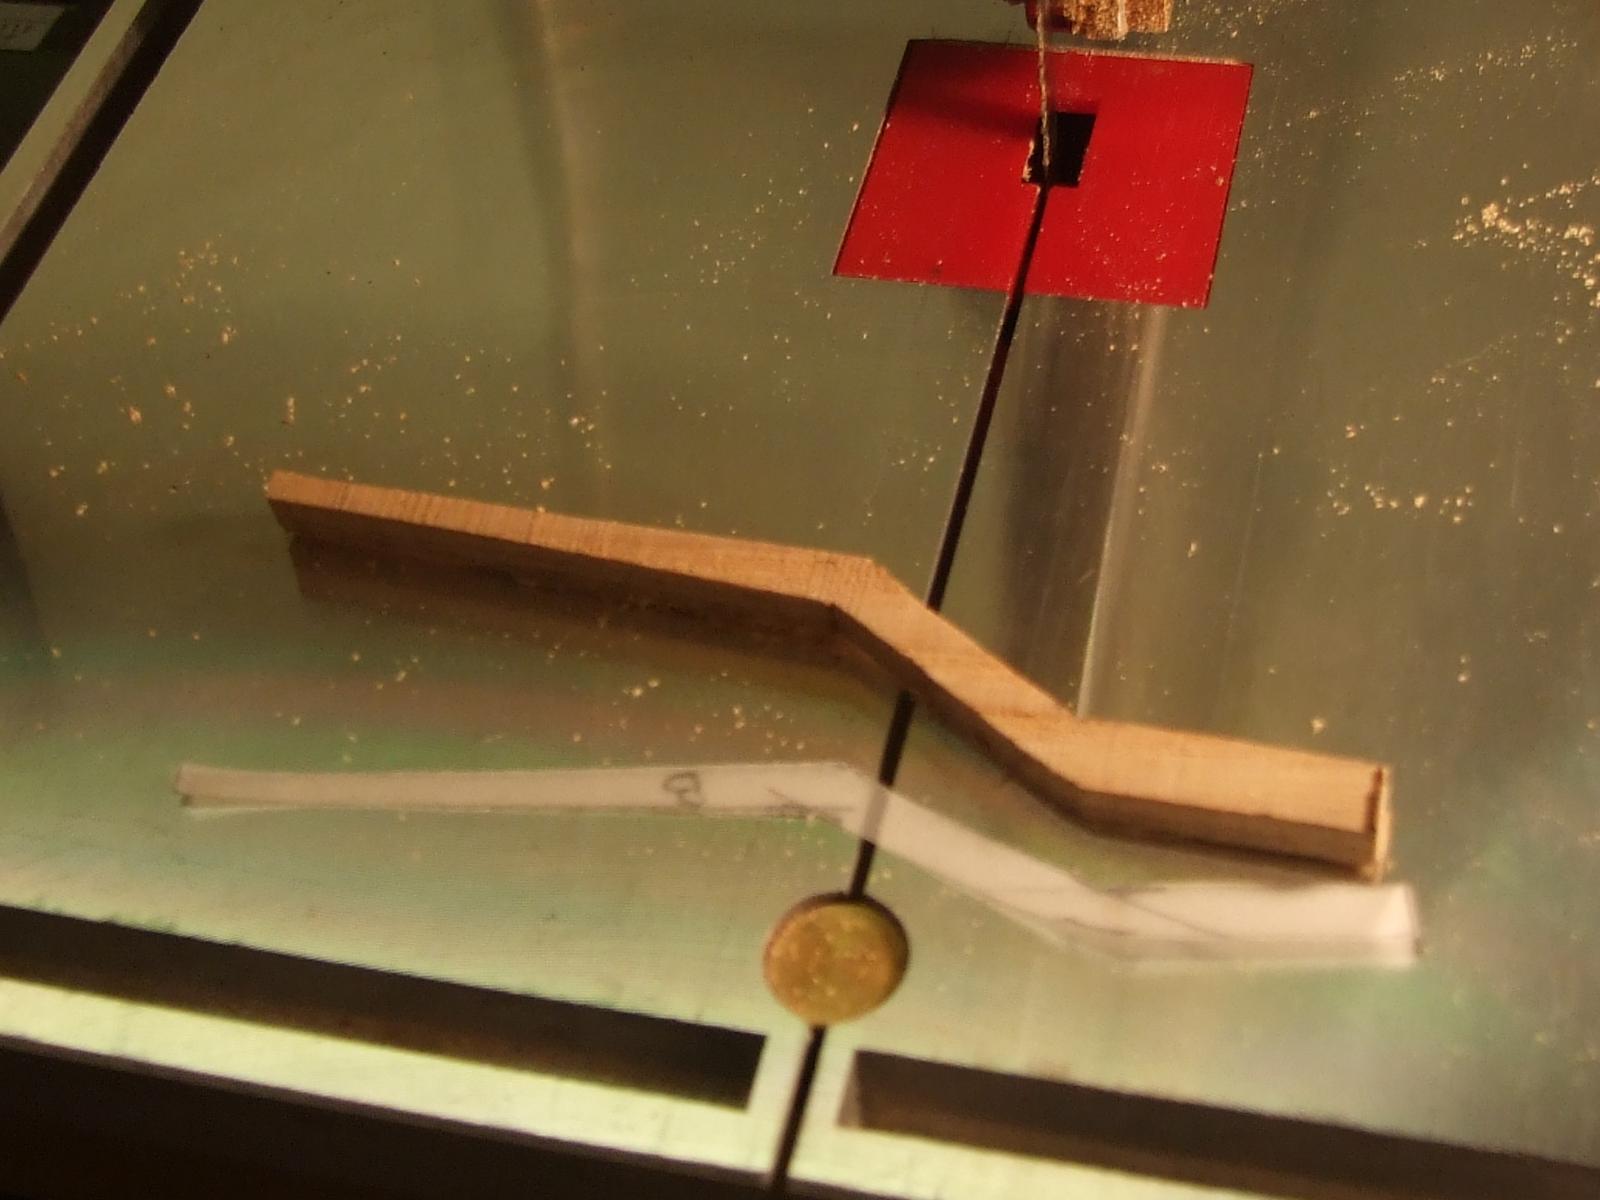
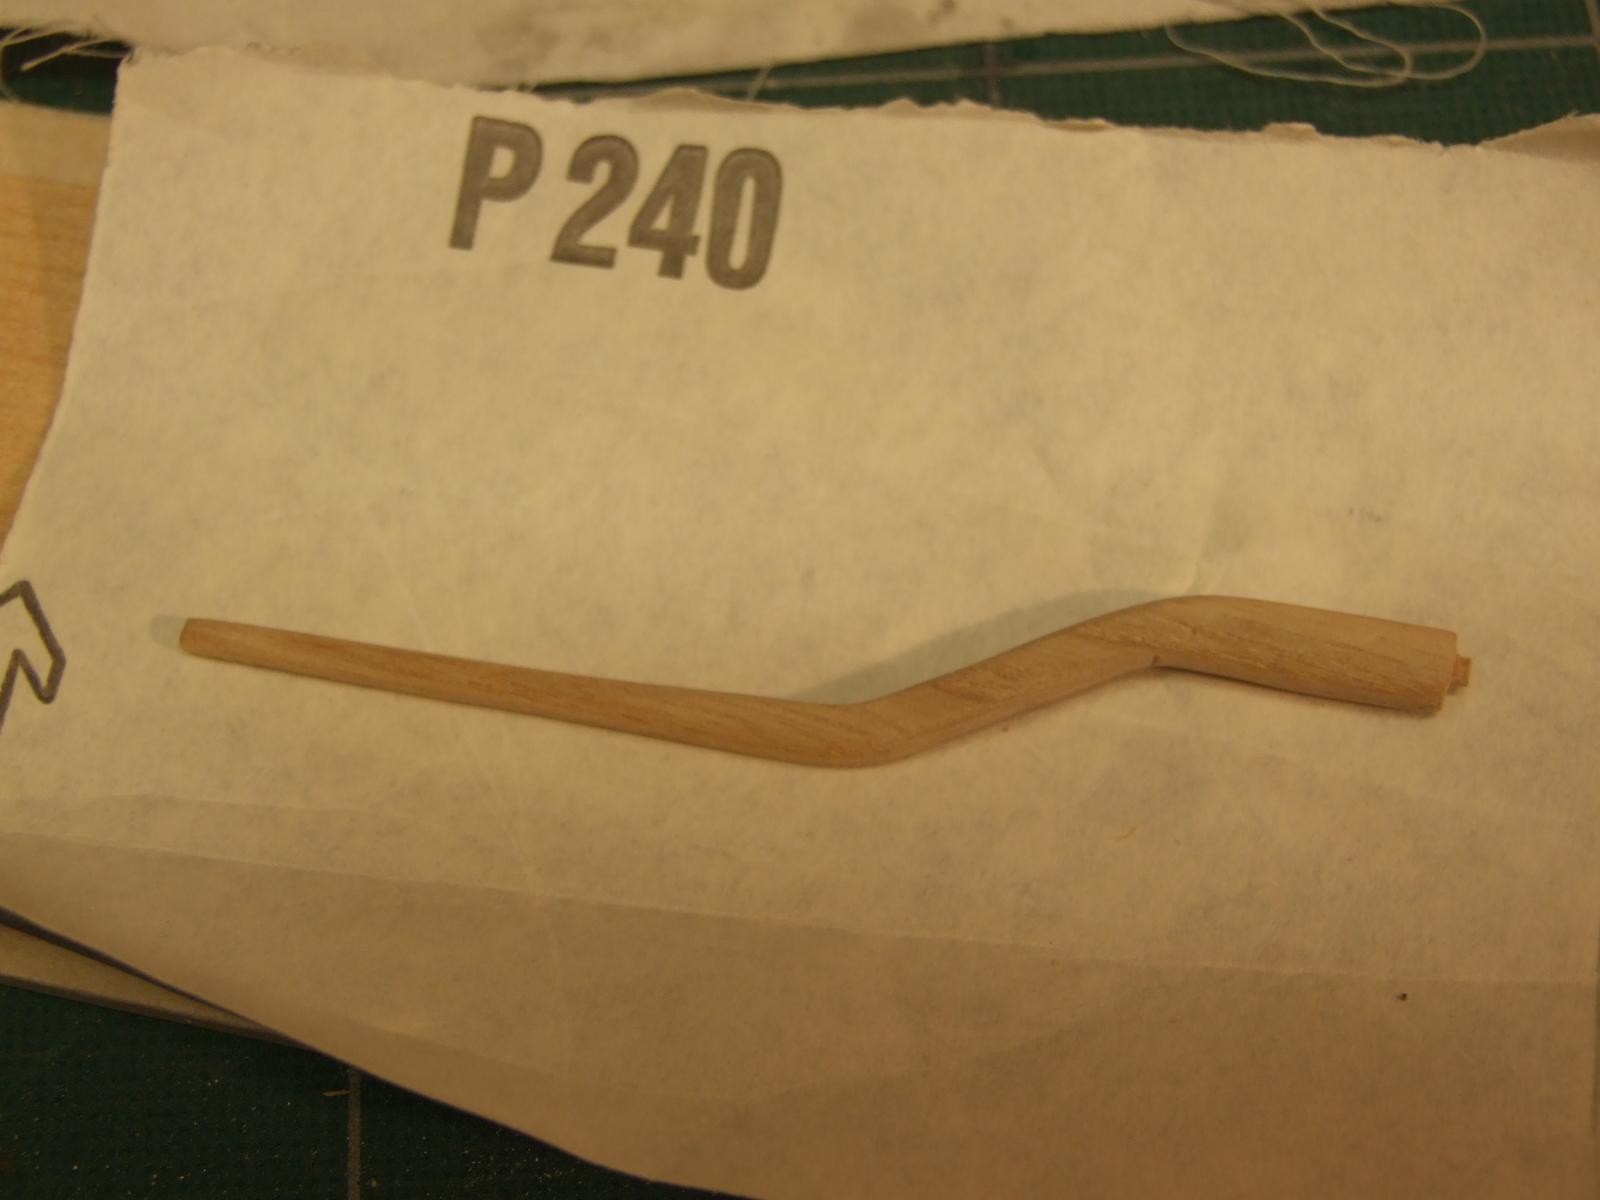
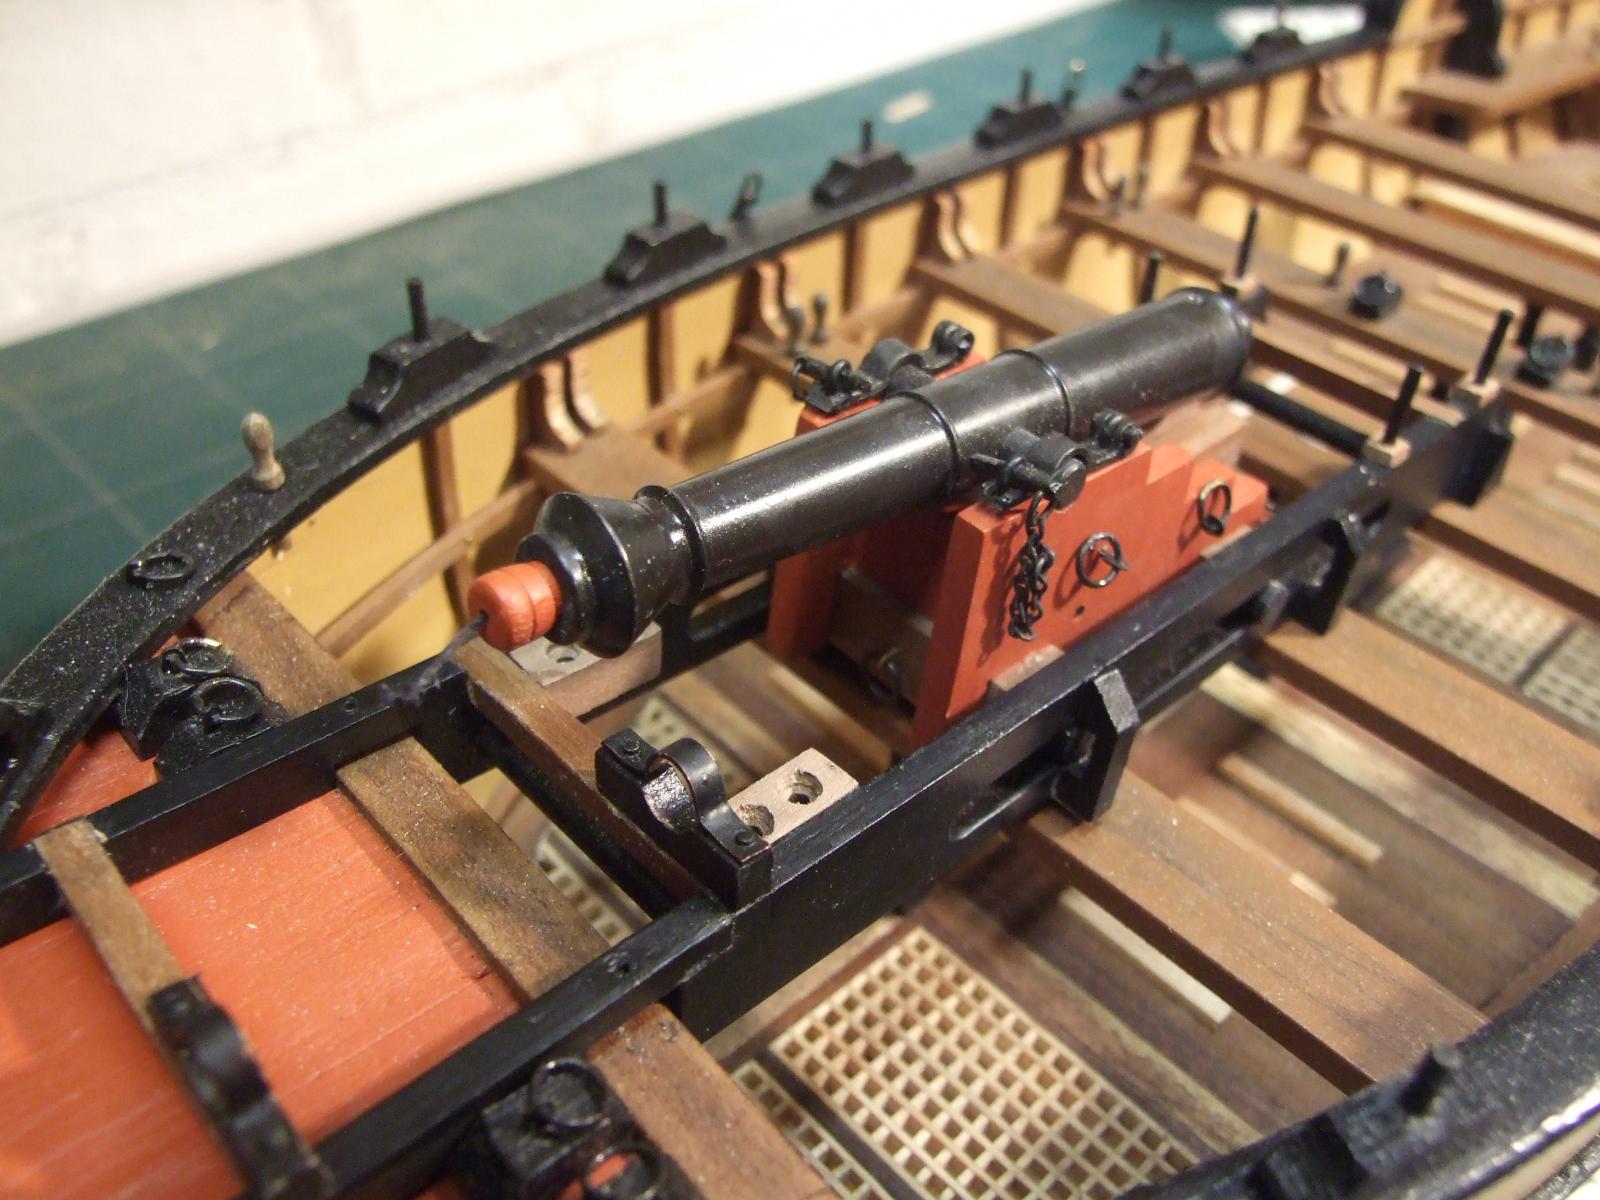
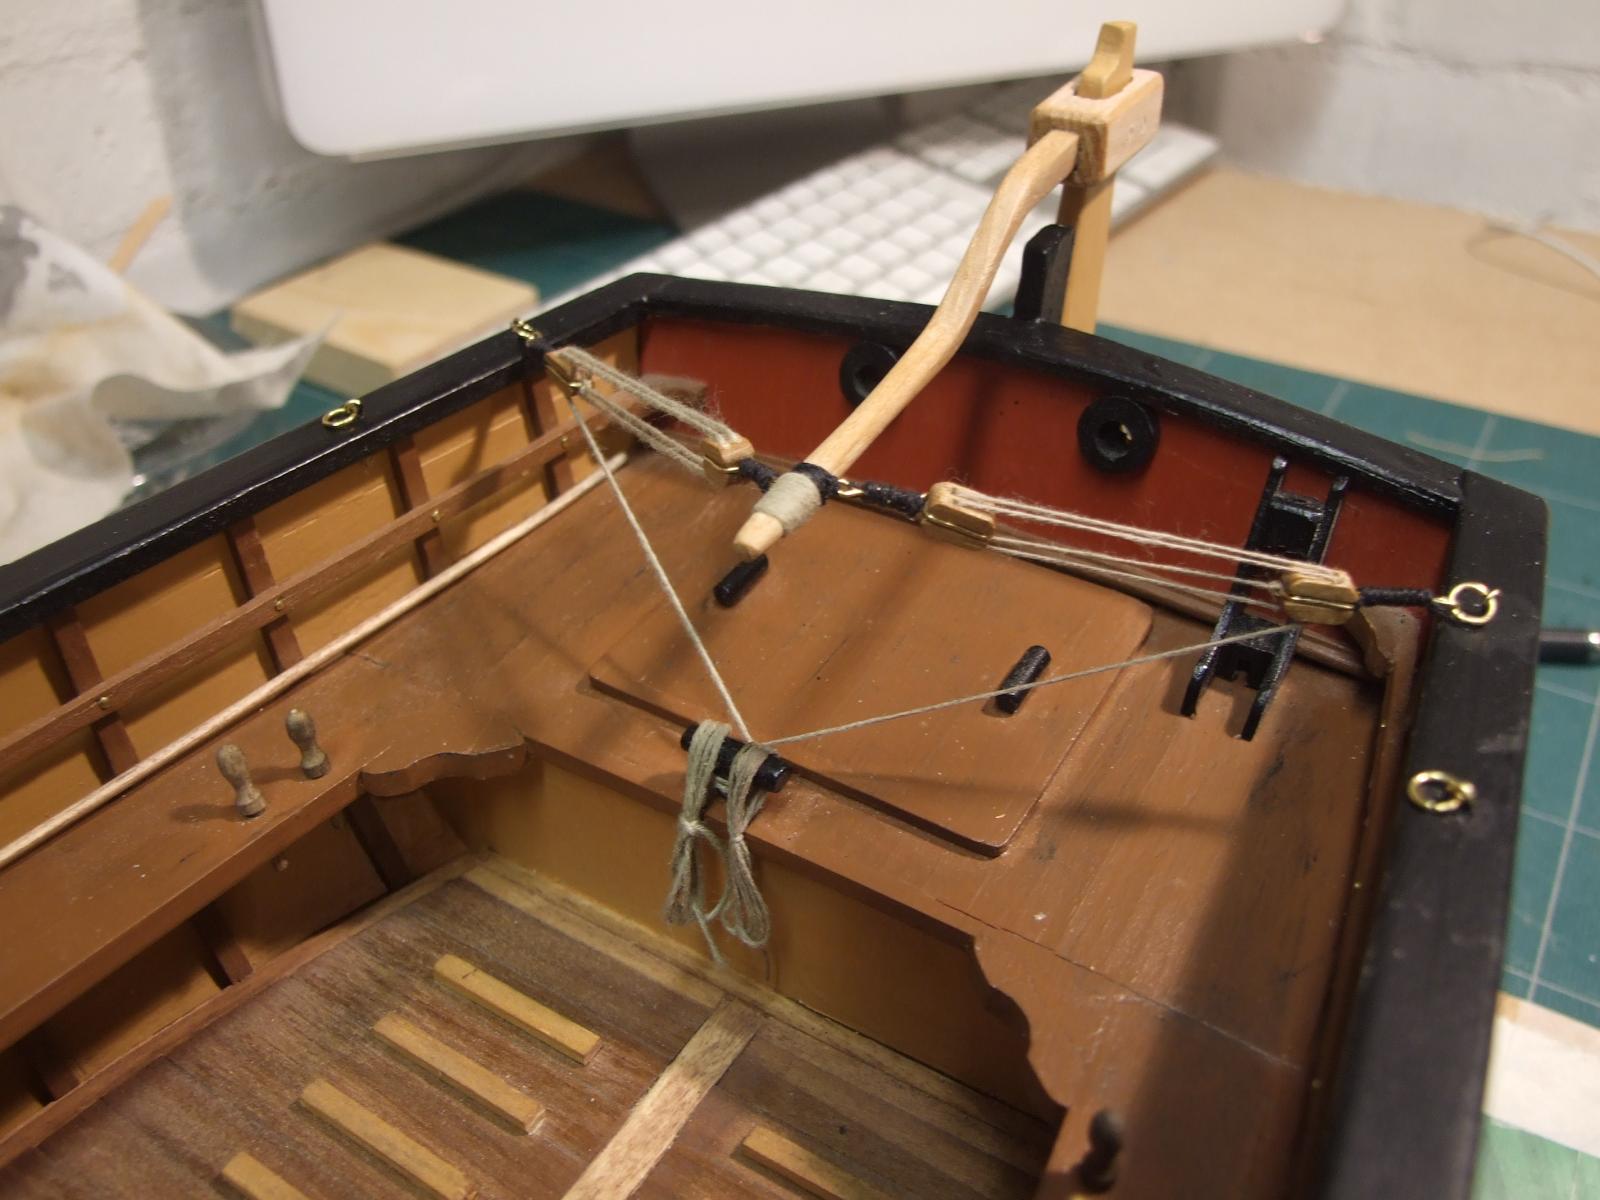
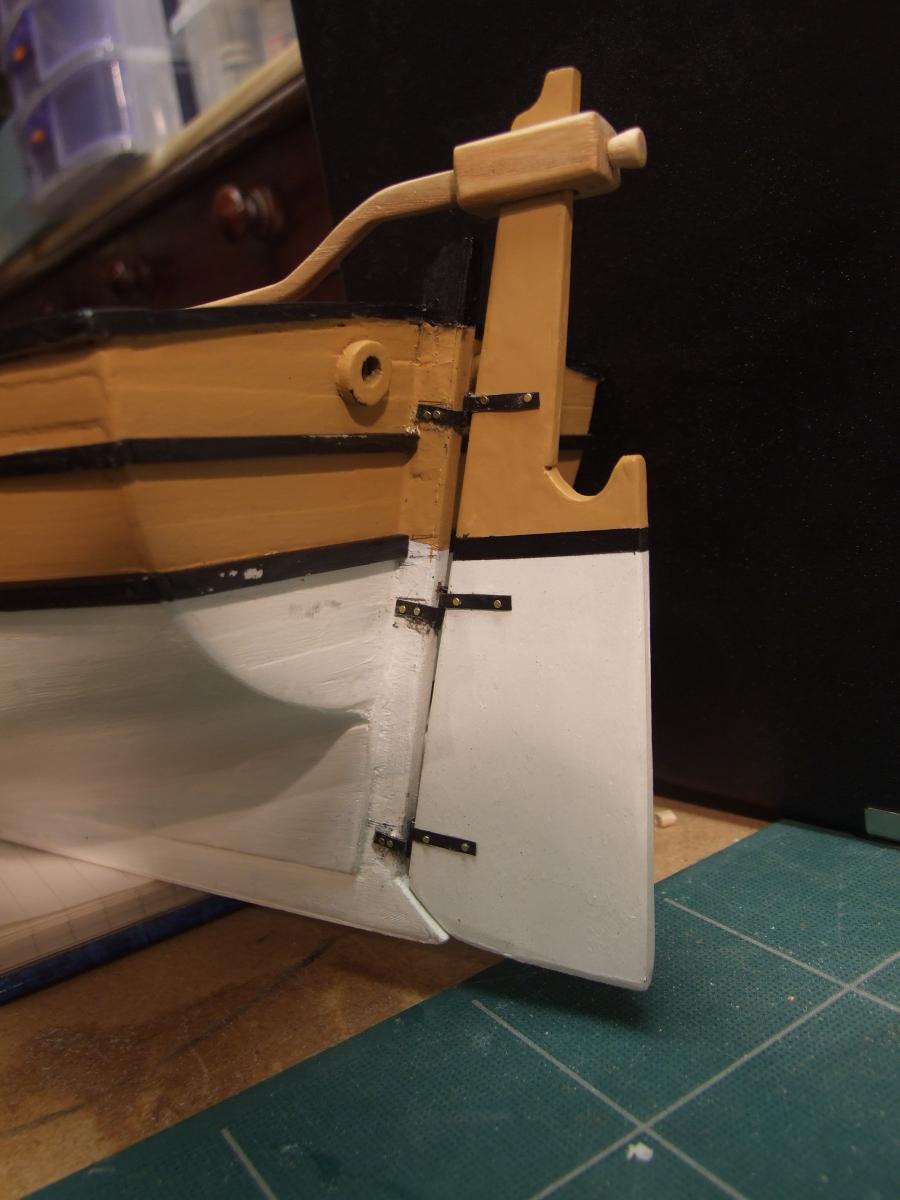
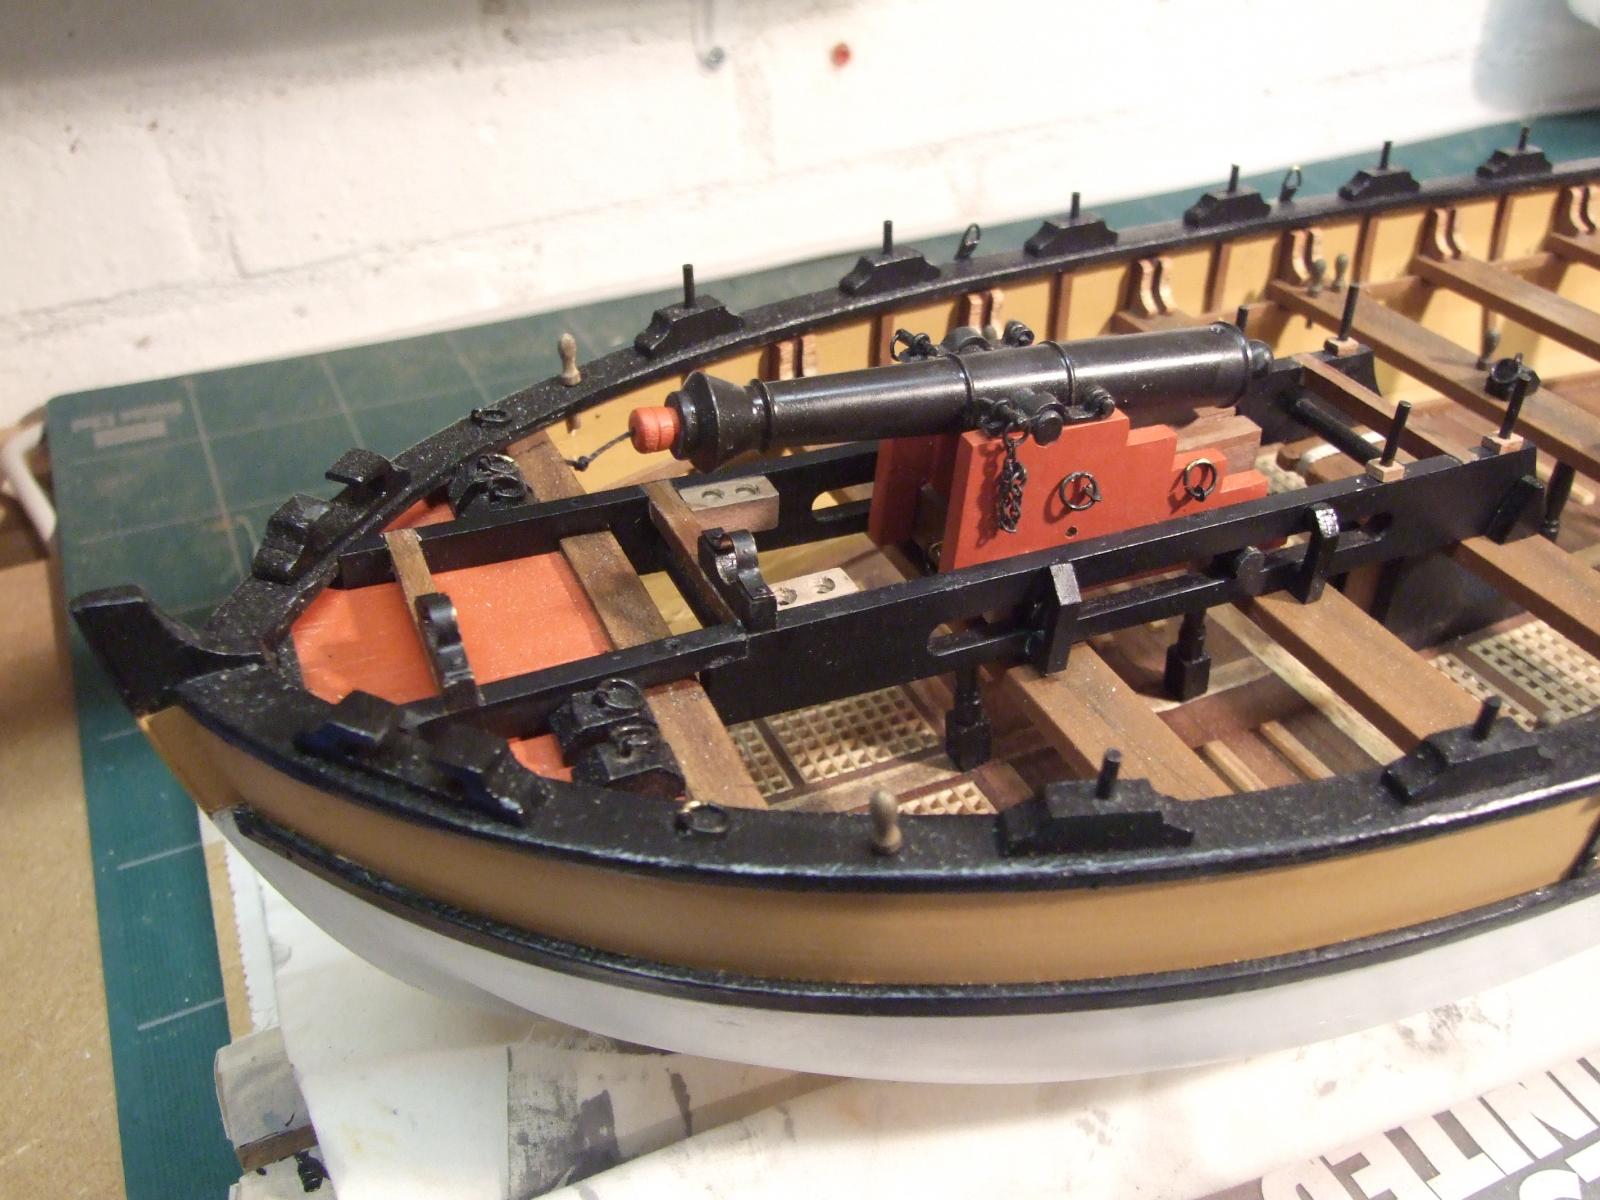
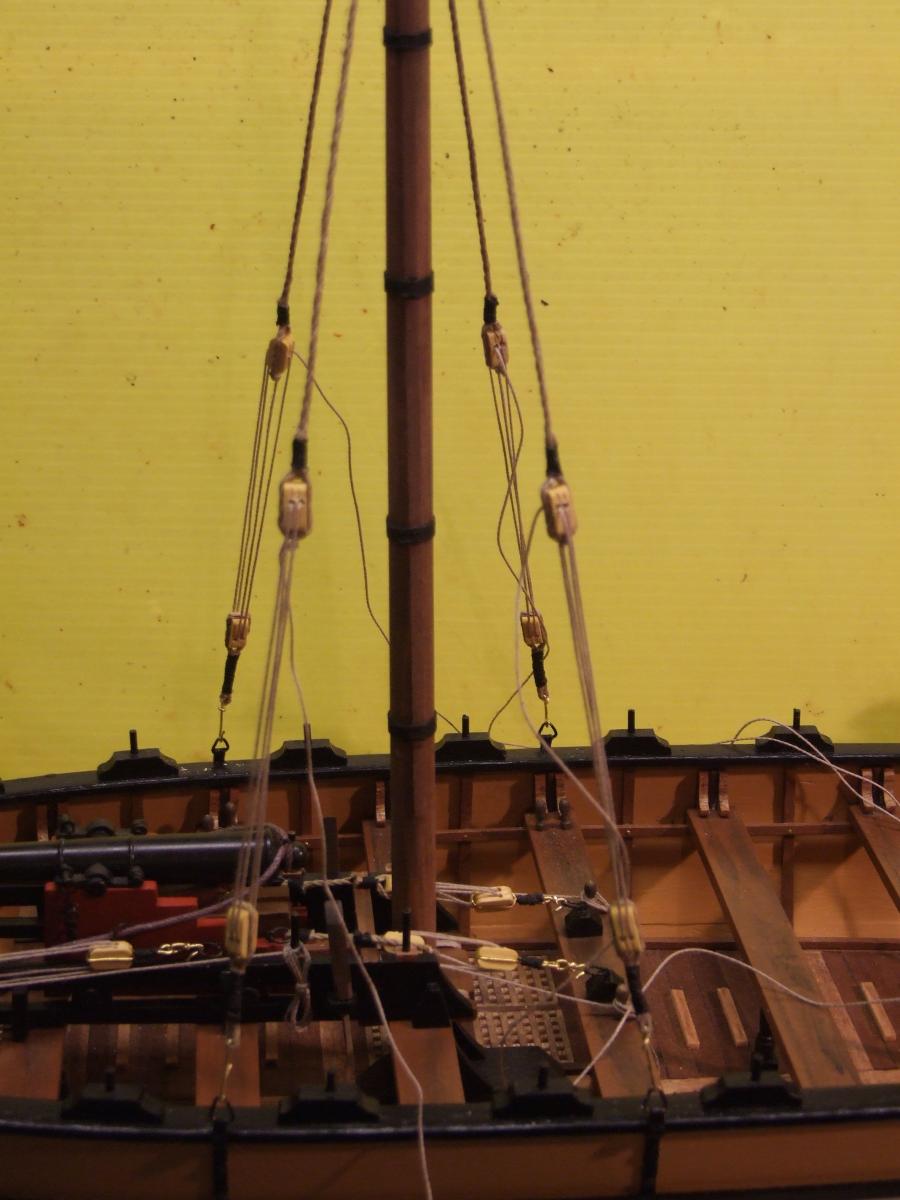
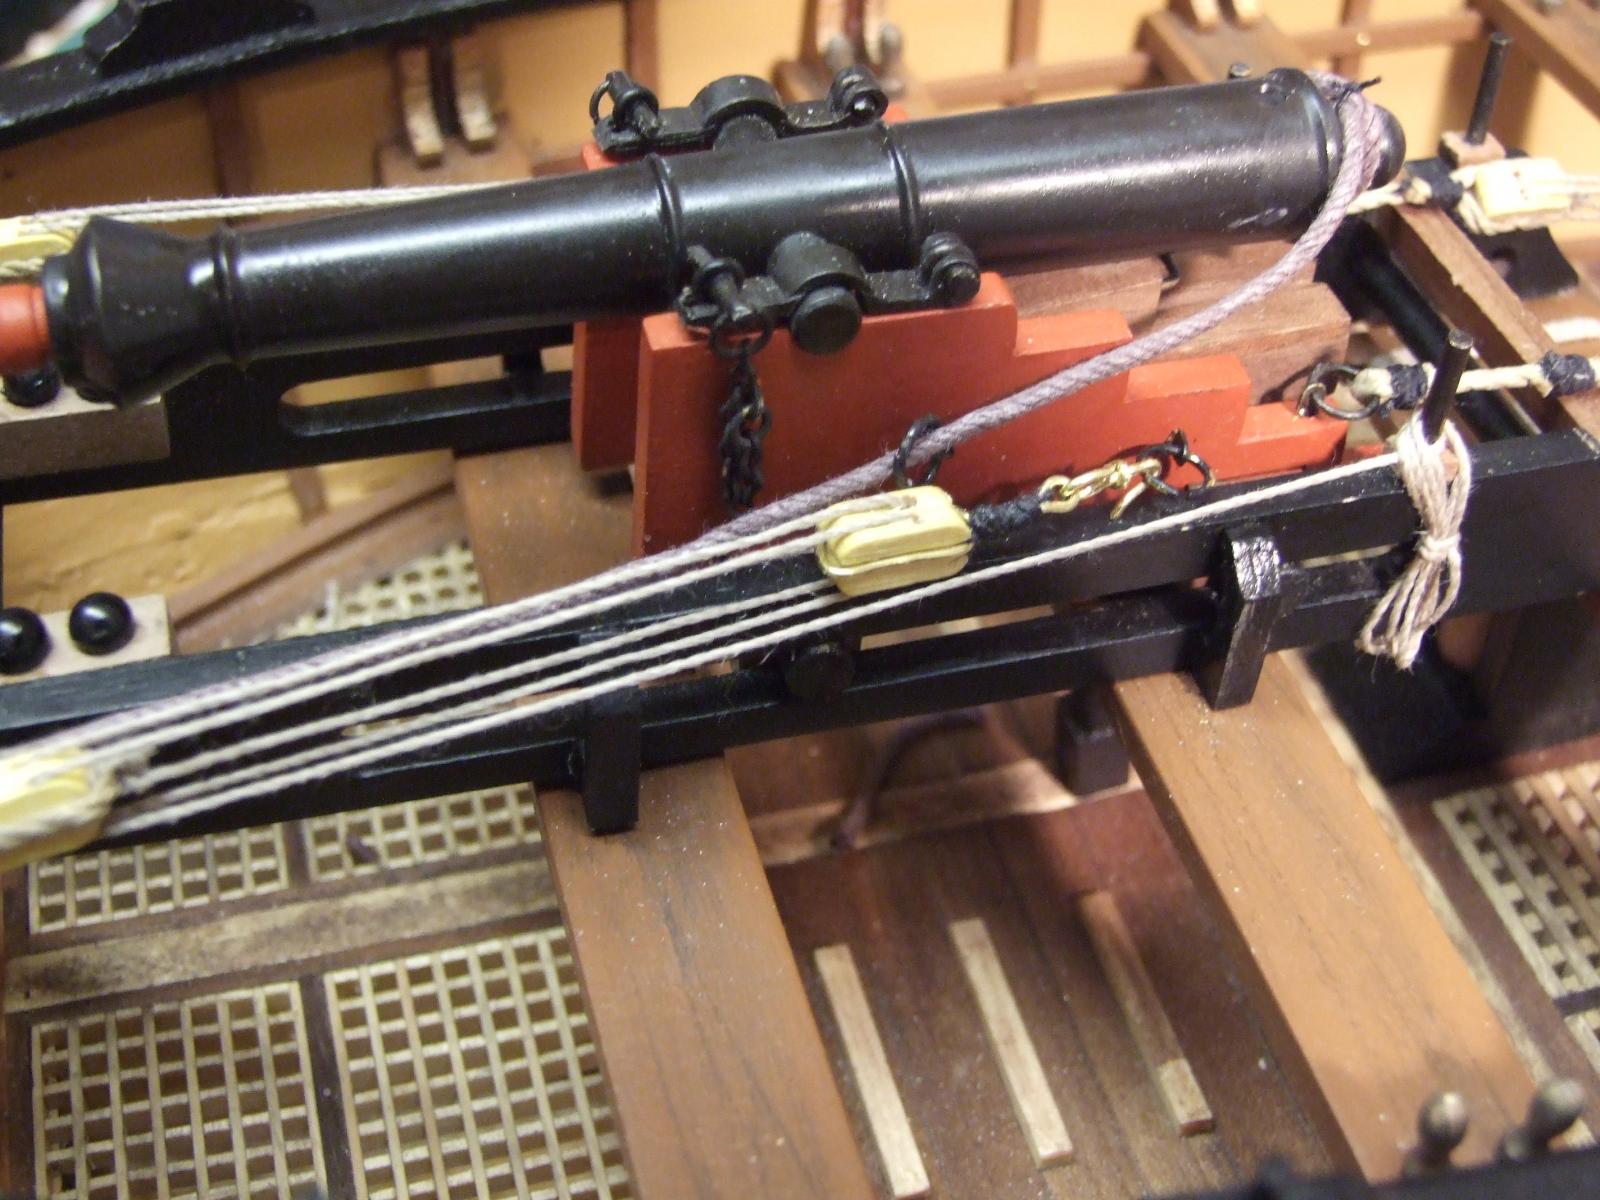
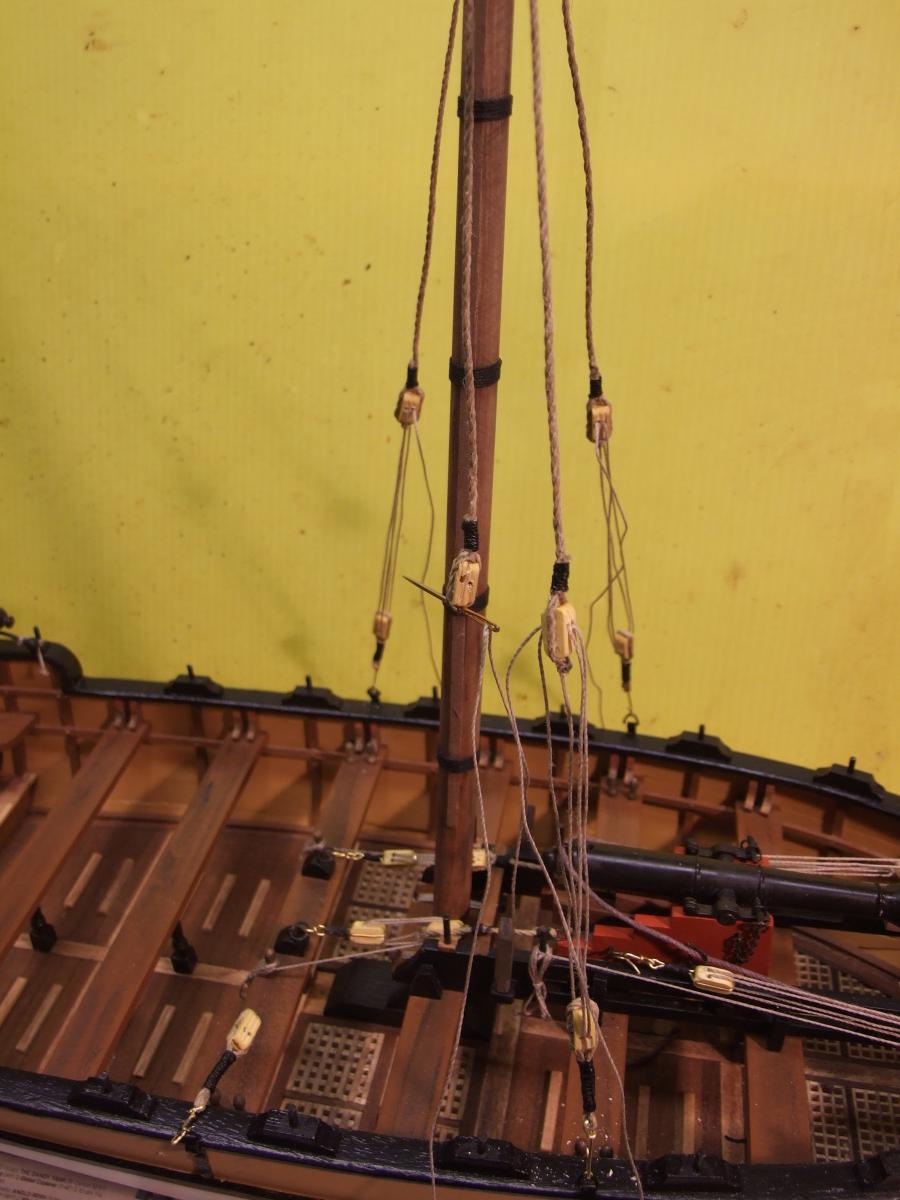
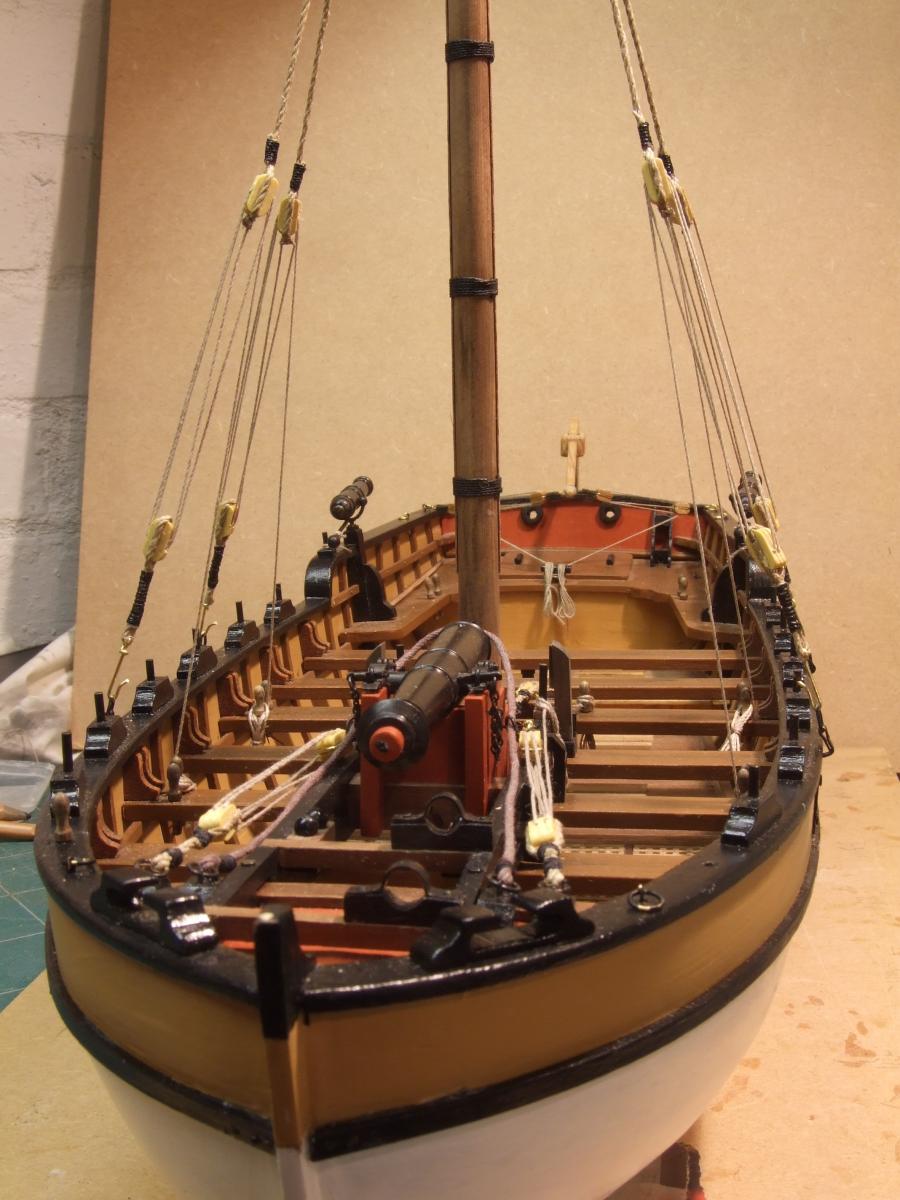
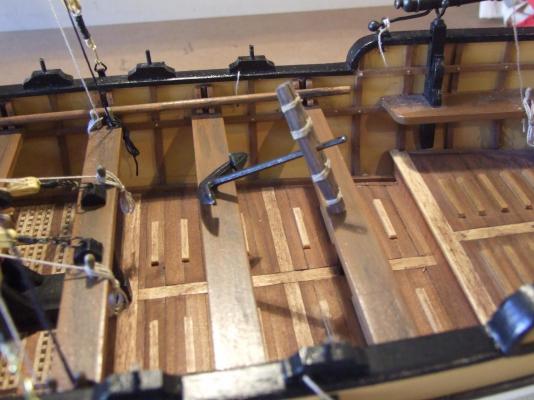
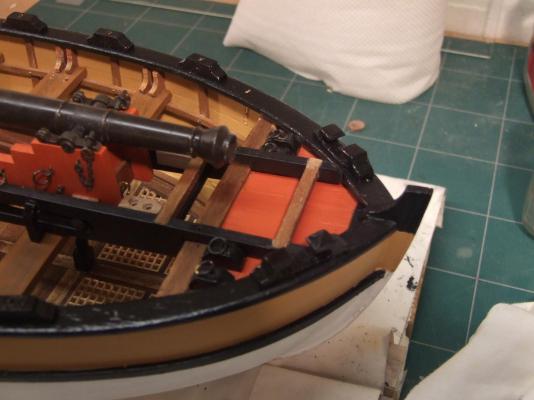
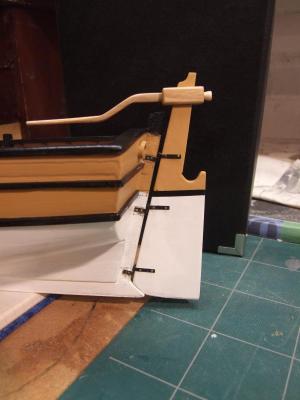
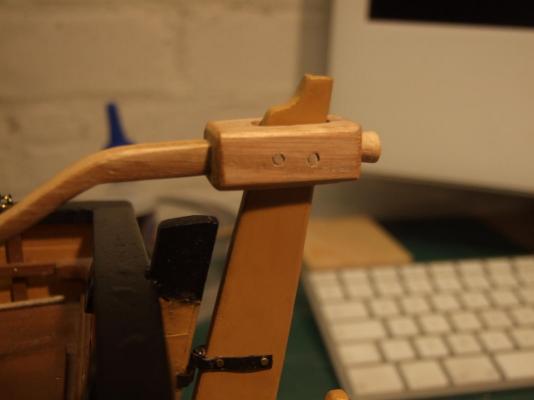
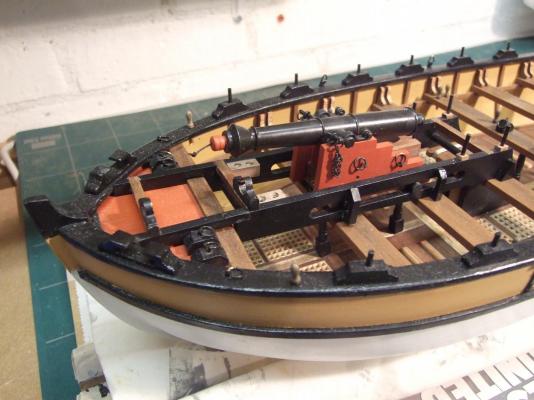
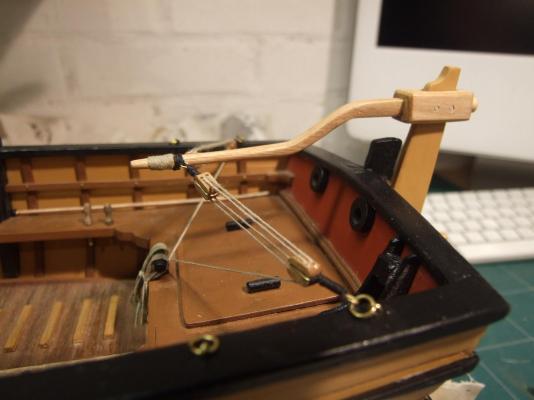
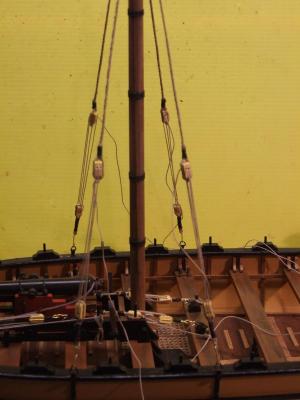
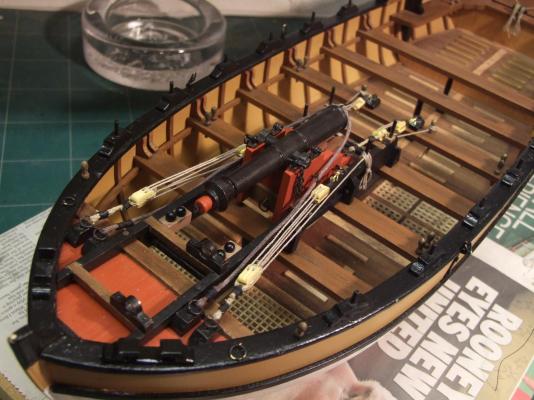
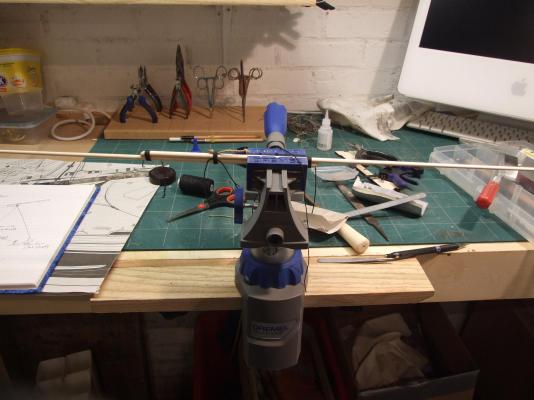
Back again at last but with a good deal of progress to log. I have just finished repairing this build log and my HMS Surprise log and I would like it known that i would prefer not to have to do that again! A complete pain in the fundament! The following images will illustrate progress on general hull fittings, mounting the large cannon in it's final position, hanging the rudder and making the tiller and rigging it. Hull fittings….. Tiller…. Big cannon……. Rudder and tiller….. Mast is tapered and top rigging sheaves fitted…... Rigging the cannon….. Fitting the mast…. Making the lateen yard……. Temporary fitting of yard….. That is all for now. The next task is to make the sail and then finally rig the yard. After that things will be on hold for a while as I am having knee replacement surgery on April 15th. See you next month! Mike.


- 49 replies
-
- 6
-
-
- lancia armata
- panart
- (and 2 more)
-
I agree with all that Tony has said. Buy Proxxon from Germany every time. Mike.
-
Good going Rob. I enjoyed building the Pickle. Have you read up on her voyage back from Trafalgar? Looking forward to the completed vessel. Mike.
-
Well done Tony, Keep spreading the word. Buy Proxxon from Germany and deprive the rip off UK companies of their excessive profits. I do not believe that one can defend conversion of Euro retail prices to GBP plus an additional markup to arrive at the GB retail price. I would love to know how much the UK companies pay in Euros to import these items. I agree with you that the standard of service is excellent. I began buying from TBS-Aachen after a UK company could not be bothered to sort out a problem with my order. Mike.