EJ_L
-
Posts
2,246 -
Joined
-
Last visited
Content Type
Profiles
Forums
Gallery
Events
Everything posted by EJ_L
-
 Haha! Honestly I hadn't thought of a display stand out of Legos but now I am! That wale has been bothering me also. It is one of dozens of issues that are annoying me. I made a bad decision early on and that was to trust in the false keel and bulkheads to be where I needed them to for the kit bashing I wanted to do. I found out quickly that there were going to be problems and I worked them out one at a time in small picture views, (one row of gun ports or stern view etc.) instead of the entire ship. Had I really stepped back and looked more fully at the overall project I would have made the decision to do away with the bulkheads as they were given to me and instead I would have cut them out to resemble actual framing. I also would have done the same to the false keel so that the entire interior of the ship would have been hollow. This would have forced me to design my own framing for the decks but, it would have allowed the decks to sit where they are supposed to be. I'm not saying the kit is no good. On the contrary, this kit can be made into a great model. What went wrong was when I started to detail out the interior cabins. The kit was never designed with actual interior decks in mind. Therefore the gun port layout and the wales positioning were not as important. When I designed the interiors it forced the exterior of the model to conform to actual interior spacing. This wouldn't have been such a big problem except that the false keel and bulkheads restricted where my decks could be placed which in turn has caused the gun ports to be re-positioned many times as well as the wales adjusted again and again. Hind sight being what it is, in order to build the ship the way I wanted to, I should have simply used the kit for materials and not relied on it for structure. This should have been basically a scratch build more than a kit build. I'm trying to fix these bad spots that have developed. Some will happen others, it may be too late. It will come down to how much I am willing to spend on materials to make it right. In any event, this is definitely the end of using plank on bulkhead kit framing as is. I like detailing the interiors and it has now firmly set in that in order to do that, I will need to build the interior decking and framing myself. Whether that means I take the leap fully into scratch building or if my kit bashing becomes more intensive is yet to be seen.
- 961 replies
-
- 10
-

-
Very nice case for an even nicer ship! I'm too busy looking at the model to notice the bolts.
- 473 replies
-
- 2
-
-
- greek bireme
- dusek
- (and 1 more)
-
Hi Matt! Looks like you are off to a great start! My first model ship was that same model kit. I've built it twice now as I gave one to my dad and kept the other for myself. It is a good kit and you will indeed learn a lot. While it does not do a lot to teach you the wood skills of a wooden build, it is great for painting and learning your way around a ship. Also the lessons from the rigging are invaluable. I'll pull up a seat and follow along on your build. I always enjoy watching this kit come together and see all the different ways people build it. Looking forward to sharing in your journey!
- 3 replies
-
- 1
-
-
- constitution
- revell
- (and 2 more)
-
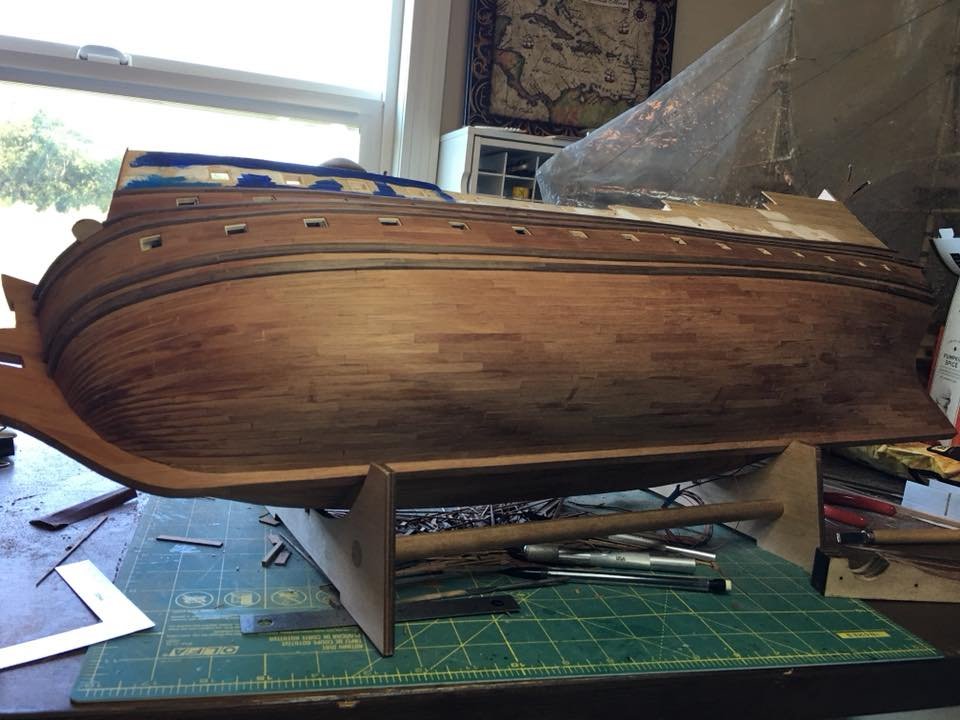
As promised I am back in the shipyard and working hard. I raised the planking up to the 6th wale. From here up the planking will be painted blue with the wales still in walnut. I plan on pre-painting the planks before I install them to help ensure clean lines where the paint breaks against the wales. I will also give the lower hull a good sanding and apply the first coat of finish. The break from the build was nice and refreshing but now I'm ready to get back to building. Now just hoping that whatever bug has the Admiral sick and in bed stays away from me!

- 961 replies
-
- 11
-
-
Welcome to MSW Philippe! Good to have you with us. Looking forward to seeing your work.
-
Welcome to MSW Jim! Nice painting! I look forward to seeing more of your work, both the models and the paintings!
-
Welcome to MSW Adrian! Just looked through your build log and you have some very nice work taking place there. Looks like a fun build I will stick around to watch.
-
Found your build log and I must say that it is very impressive! Nice work indeed! I will be sure to stick around and see how this one finishes up.
- 184 replies
-
- 4
-
-
- ruby & arthur reed
- lifeboat
- (and 1 more)
-
Welcome to MSW! I will agree with the sentiments of it being a smart move to start of with something simpler and smaller. Take your time on the build, be sure to read ahead in the instructions and plan sheets and don't be afraid of asking a "dumb" question. Most of all, have fun! Best of luck to you on your first build!
-
My dad and I did a similar thing when I was a kid. Then we both got into model railroading and those street scenes began to look a lot more real! I still have a huge box of Lego's at my dad's from childhood. Wish I would have taken better care of them growing up. I was rough on them and many found their way into air ducts, lost in the yard, swallowed a few, dog swallowed a few, left who knows how many at friends' houses and some I think just vanished like socks in a dryer. I can still recreate the majority of the structures, vehicles etc. that I once had but some will be missing a few pieces here and there. They are actually what got me started into model building. I was constantly trying to build more realistic cars and buildings out of Lego. Dad saw this and so when I was 8, he began buying me model car kits and buildings for our train. He would work with me on them, teaching me painting techniques and how not to get glue on everything. Of course those early models looked bad but, I learned a lot and with endless possibilities of things to model and ways to modify them, I quickly fell in love with model building. Still played with Lego (obviously ) but now I could really let my creativity come to life with the realism I wanted. Ok! I promise, ship building updates soon!
-
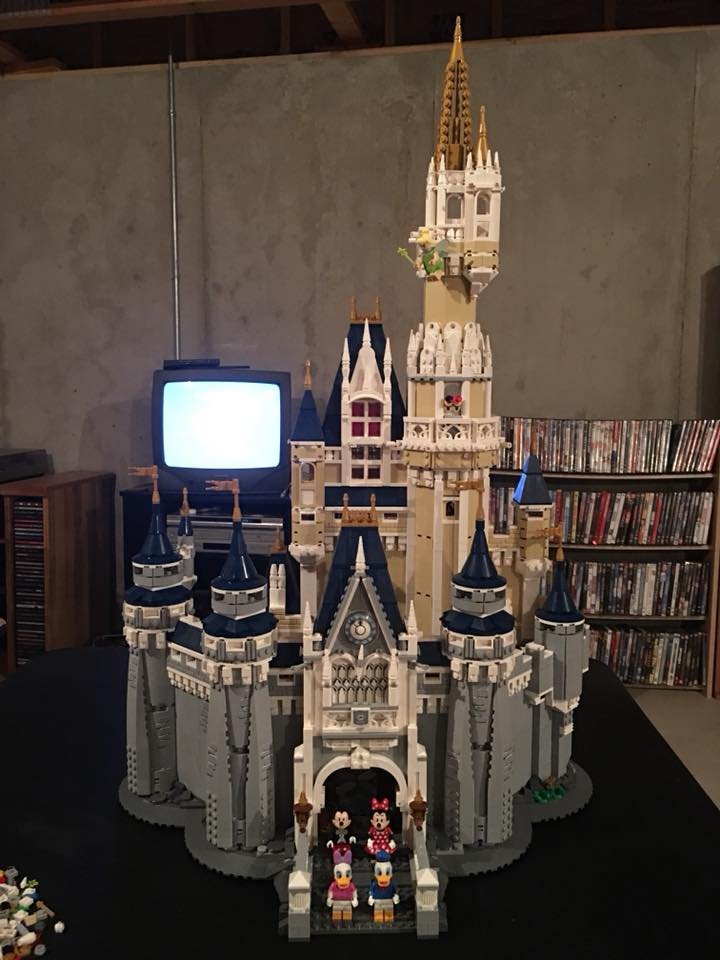
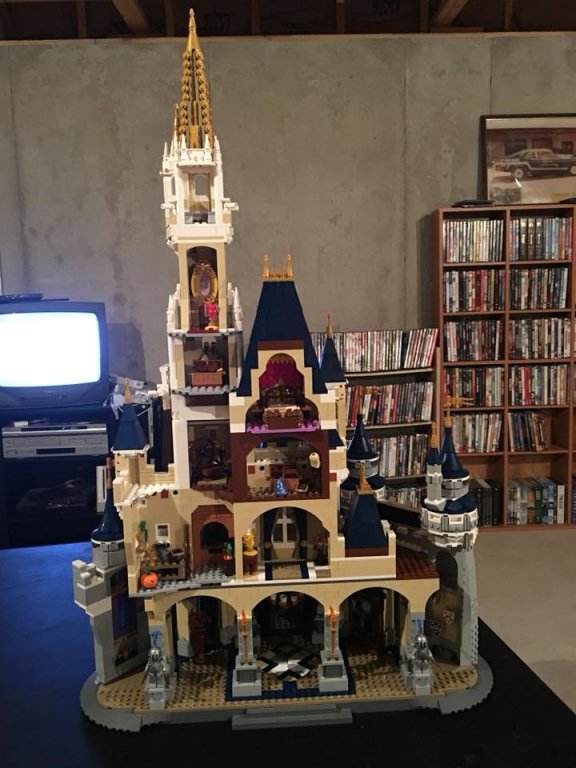
So I know I was planning on getting back to work on S.R. now that vacation is over but the past few days I have been distracted as my inner child got to play with his favorite toy. While on vacation I picked up the Lego Disney Cinderella's Castle. It is built with 4,080 pieces, stands 29 inches tall and 19 inches wide. Comes with 5 characters; Mickey, Minnie, Donald, Daisy and Tinkerbell and has an amazing collection of details from several Disney movies. As both the Admiral and myself are huge Disney fans this was a great addition to our collection. It took me 14 hours to build so that is what happened to my ship yard time since Saturday. Now I can get back to work on ship modeling as I shouldn't have any more distractions!!

- 961 replies
-
- 10
-
-
Very nice work. Clean and I like the extra details you added under the stern windows.
-
Very impressive Vic! Your rigging is turning out nice and knowing that it is functional makes it even greater. I like the canons. The firing action will be cool to see. I'm guessing that you only get the one shot from each barrel though till you bring her back in to port? I do not see a way to reload at sea. Better get that crew trained up to make each shot count! She really is awesome to look at. I bet she is even more impressive in person. Looking forward to seeing her sail!
- 213 replies
-
- 4
-
-
- la couronne
- 74 gun
- (and 2 more)
-
SOLEIL ROYAL 1669 by michel saunier
EJ_L replied to michel saunier's topic in - Build logs for subjects built 1501 - 1750
Beautiful! -
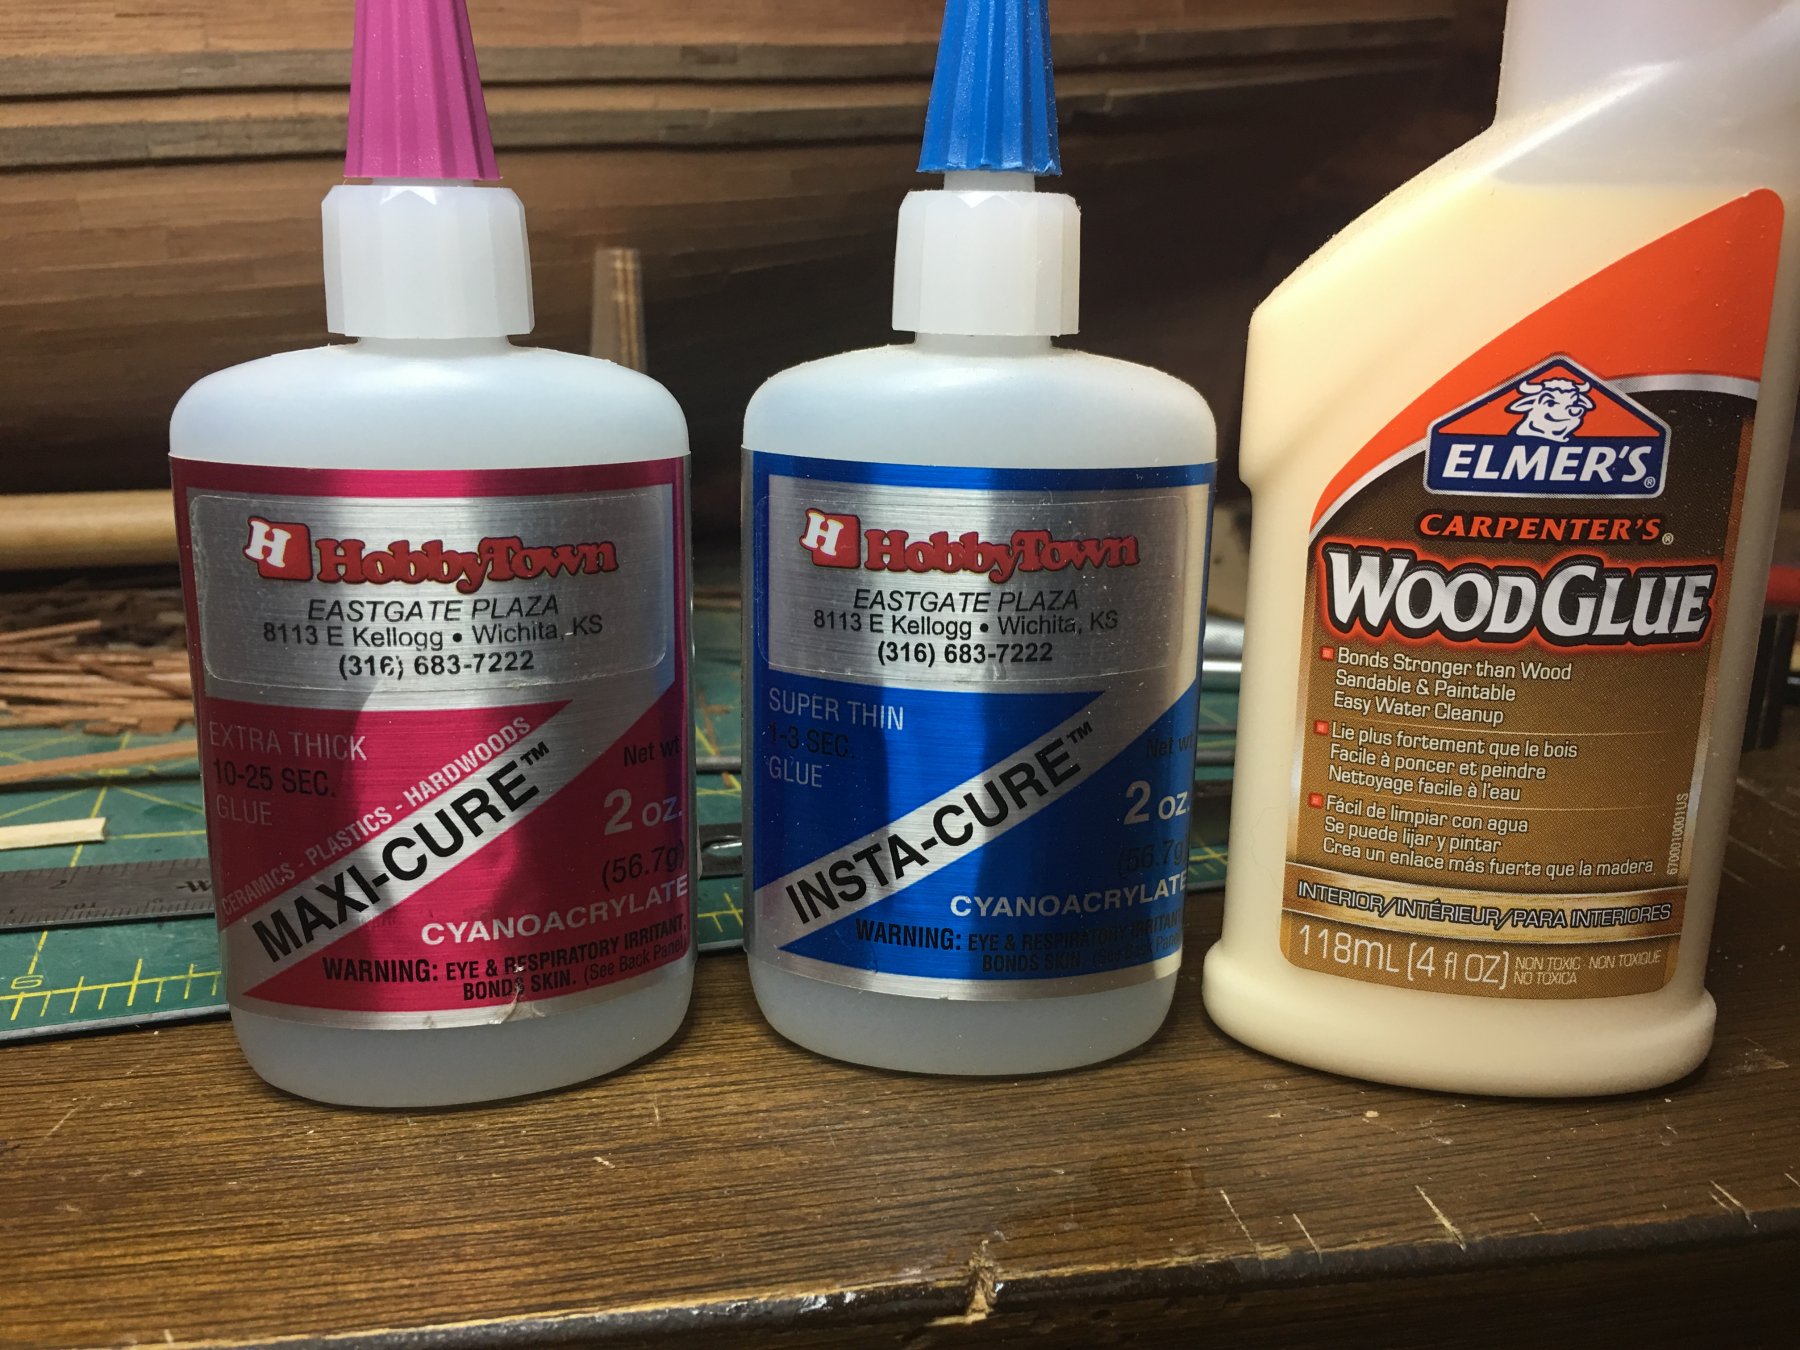
So here are the main glues that I use for the wood works. The wood glue is just readily available Elmer’s wood glue. I actually buy it in gallon size jugs and refill the smaller bottles as needed. The CA glue I use I buy at the Hobby Store and I get both the super thin and extra thick. The extra thick is the one I use one the majority of the CA needs. It is easily controlled so I can apply very small amounts easily. The super thin glue I like to use if the wood I’m using has tendencies to split easily when drilling or cutting. Since it comes out very runny and thin, it works great to cover a piece of wood in a thin layer of glue that holds the wood together to prevent splitting. Once he holes or final shape is cut, it sands off easily. I have some others I. The collection but most of my builds are done with just these.

-
I too am interested in the results. Always on the lookout for new things to try out. Would love to find a glue that doesn't bond to skin as each of these ships has literally taken pieces of me with them!
-
She is looking very nice Robin! Good job on your rigging. I'm liking the look of your sail also. She will be a great model to display with pride!
- 473 replies
-
- 1
-
-
- greek bireme
- dusek
- (and 1 more)
-
Planking is looking nice! Slow and steady is producing a nice hull. Filler blocks are a must do step for me on any P.O.B. build. The spacing between the bulkheads especially at the bow is just too great to support the planks properly without fillers. They are a life saver!
-
I do have good ventilation in the shipyard and for heavy amounts of it I go out to the garage. To me the fumes from Testors liquid cement are more potent than the CA that I am using. Maybe brands or I'm just used to them and don't notice anymore. My warning that the fumes are bad is when the Admiral starts complaining. She is the best hazard alert I have! Maybe need to pay a bit more attention to that though. Hate to cut modeling years short.... On happier note, thanks to all for the compliments and likes! My head is clear once again after vacation and I'm ready and motivated to keep on building! Should have another update in a few days.
-
I use a combination of CA and yellow wood glue. On flat runs or decks, basically anywhere I do not need to hold the piece in place I will use wood glue. On curves, vertical sections or anywhere that needs some pressure applied to hold the wood, I will use a thin layer of wood glue but will also add in some CA glue to help it bond and stay in place faster. That eliminates the need the need for clamps, nails or anything that may damage the finished surface. The reason I use both glues is that I have read a lot of people saying that the CA glue fails faster over time than the wood glue. While I have not personally experienced this with either glue if applied properly, I admit that there are a lot of people with far more experience than I and so I figured it was in my best interest to take precautions. Plus glue is relatively cheap so other than an extra minute of build time, I'm not really out anything. As for allergies, I've been fortunate in my life that so far I have only found that I have allergic reactions to Bubinga wood. Nothing in glue yet has bothered me. Wish I could say the same about the rest of my health but, be grateful for the good.
-
Thanks John. With P.O.B. kits I really need to stop trying to piece in the planking board by board for the first layer like I do on the second. The supports and frame structure are not very helpful for that style of planking. Instead, that first layer should be full length pieces which would give a much better appearance and smoother surface. Then I can plank piece by piece. I remain stubborn on doing it the harder way mainly because it is practice for me. My ultimate goal is to only have to do one layer of planking so I keep practicing and with each build I get a little better. I'm making my way through those 99 ways to do something wrong in order to find that one way of doing it right! I'm looking forward to being able to give her a good sanding and apply the finish coat. I did a small test sample and really liked the way t came out. Now I want to see it across the entire surface. Ready to see that wood coloring at it's best! Still a little way off but with the completion of the lower hull, it is a lot closer.
-
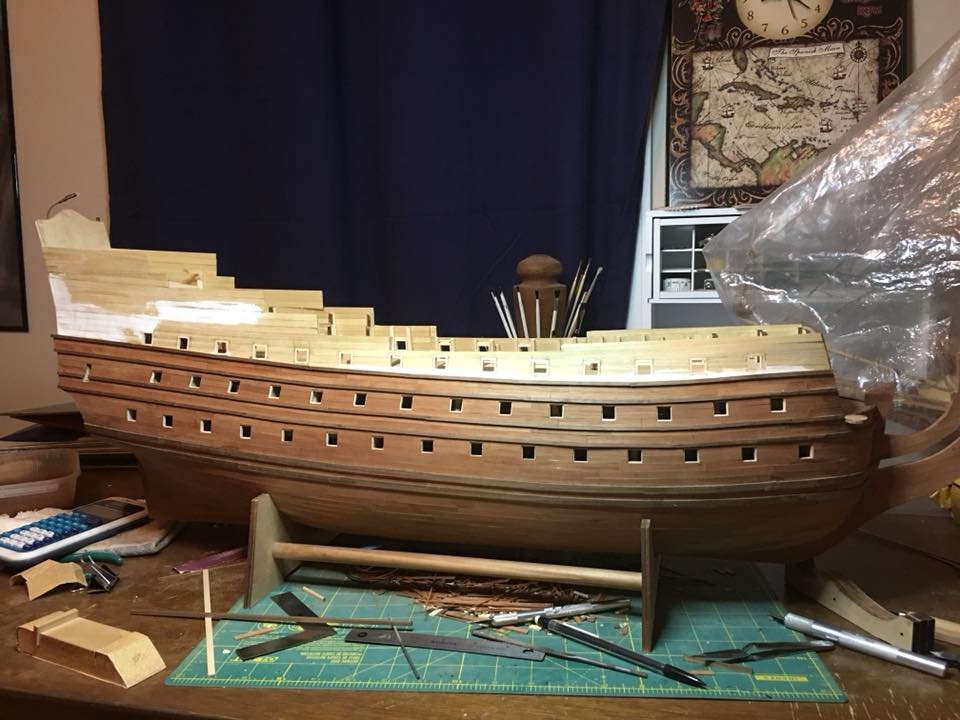
Finished planking the lower hull a few minutes ago! Some sanding to do but overall I'm happy with it. Now I will set her back right side up and continue the upward planking. Plus side is this is the easier planking as it is mostly straight runs with very little if any to bend. More to follow soon!
- 961 replies
-
- 16
-
-
I don't think there are enough ways to say congratulations on such a magnificent build! You did truly inspiring work on her Ken. Now it's time to just sit back celebrate and admire the work! Do you have a next project planned? This was such a great build I would hate to miss out on another.
- 481 replies
-
- 2
-
-
- rattlesnake
- model shipways
- (and 1 more)
-
Well I'm back from a very relaxing vacation and am back in the shipyard continuing planking. No picture tonight as I have not done much yet but I thought I would stop in to say that progress is again being made! Hopefully in the next couple of days I will have made some substantial progress and will update then. If I get really fortunate in my build time I may even finish the lower hull planking this weekend. That may be asking a lot though... Thank you to both Vic and Sjors for the kind words and encouragement on the planking. How I lay them down takes a long time but I think the end result is worth the effort. Plus it is fun to see people's faces when I tell them that I laid each plank individually and show the pictures proving it. That look of disbelief combined with the thoughts going through their heads thinking, "This guy is crazy" always makes me laugh. I am looking forward to moving upward again with the planking and also working on the final shape of the upper works. Then of course there is the stern galleys and decorations......
-
Beautiful model Ken. Well done!