


Torbogdan
-
Posts
252 -
Joined
-
Last visited
Reputation Activity
-

 Torbogdan got a reaction from Alex K. in Friesland by Alex K. - FINISHED - Mamoli - scale 1:75
Beautiful! Great work. I'm thinking of buying the kit but have not decided yet.
-
 Torbogdan got a reaction from FrankWouts in Friesland by Alex K. - FINISHED - Mamoli - scale 1:75
Beautiful! Great work. I'm thinking of buying the kit but have not decided yet.
-
 Torbogdan reacted to Roger Pellett in Greek Bireme by Torbogdan - FINISHED - Dusek - 1:72
Well done! It looks ready to venture forth to fight the Cyclops!
-
Torbogdan reacted to GrandpaPhil in Greek Bireme by Torbogdan - FINISHED - Dusek - 1:72
Congratulations! Well done!
-
Torbogdan reacted to Cathead in Greek Bireme by Torbogdan - FINISHED - Dusek - 1:72
Very nice! Thanks for sharing your work.
-
Torbogdan reacted to Louie da fly in Greek Bireme by Torbogdan - FINISHED - Dusek - 1:72
That looks really good, mate! A nice result.
Steven
-
 Torbogdan got a reaction from GrandpaPhil in Greek Bireme by Torbogdan - FINISHED - Dusek - 1:72
Finally, it is done! Yes, finished! A very "on and off" project. My plan was to build it from the box and fairly quickly, well that plan did not survive long
I´m satisfied with it. There are things I could have done better or "cleaner" ( no glue sloppiness) but all in all it is ok. Finishing models are important to me. if it is finished it is good. But I always find things I can improve on and do better next time. What bothered me quite a bit was the last finishing touches. It took forever get the shields and base plate. It is no fun when you just want to finish something and it takes forever to get the parts to do it.
The shields added a nice touch. The transfers were really easy to apply and gave some color to the model. Same with the shields and amphoras. I think it gives the model a more "lived in" look than a empty, sterile ship. Others have built the same model kit much better with much more historical accuracy, mine is more just out of the box with some added details, cause I like how it looks! . The sail should have been a centimeter or two longer towards the hull. I have no excuse, somehow my measuring skill abandoned me and I did not have the energy to sow a new one.
-
 Torbogdan got a reaction from boris279 in Greek Bireme by Torbogdan - FINISHED - Dusek - 1:72
Finally, it is done! Yes, finished! A very "on and off" project. My plan was to build it from the box and fairly quickly, well that plan did not survive long
I´m satisfied with it. There are things I could have done better or "cleaner" ( no glue sloppiness) but all in all it is ok. Finishing models are important to me. if it is finished it is good. But I always find things I can improve on and do better next time. What bothered me quite a bit was the last finishing touches. It took forever get the shields and base plate. It is no fun when you just want to finish something and it takes forever to get the parts to do it.
The shields added a nice touch. The transfers were really easy to apply and gave some color to the model. Same with the shields and amphoras. I think it gives the model a more "lived in" look than a empty, sterile ship. Others have built the same model kit much better with much more historical accuracy, mine is more just out of the box with some added details, cause I like how it looks! . The sail should have been a centimeter or two longer towards the hull. I have no excuse, somehow my measuring skill abandoned me and I did not have the energy to sow a new one.
-
 Torbogdan got a reaction from Cathead in Greek Bireme by Torbogdan - FINISHED - Dusek - 1:72
Finally, it is done! Yes, finished! A very "on and off" project. My plan was to build it from the box and fairly quickly, well that plan did not survive long
I´m satisfied with it. There are things I could have done better or "cleaner" ( no glue sloppiness) but all in all it is ok. Finishing models are important to me. if it is finished it is good. But I always find things I can improve on and do better next time. What bothered me quite a bit was the last finishing touches. It took forever get the shields and base plate. It is no fun when you just want to finish something and it takes forever to get the parts to do it.
The shields added a nice touch. The transfers were really easy to apply and gave some color to the model. Same with the shields and amphoras. I think it gives the model a more "lived in" look than a empty, sterile ship. Others have built the same model kit much better with much more historical accuracy, mine is more just out of the box with some added details, cause I like how it looks! . The sail should have been a centimeter or two longer towards the hull. I have no excuse, somehow my measuring skill abandoned me and I did not have the energy to sow a new one.
-
 Torbogdan got a reaction from Snug Harbor Johnny in Greek Bireme by Torbogdan - FINISHED - Dusek - 1:72
Finally, it is done! Yes, finished! A very "on and off" project. My plan was to build it from the box and fairly quickly, well that plan did not survive long
I´m satisfied with it. There are things I could have done better or "cleaner" ( no glue sloppiness) but all in all it is ok. Finishing models are important to me. if it is finished it is good. But I always find things I can improve on and do better next time. What bothered me quite a bit was the last finishing touches. It took forever get the shields and base plate. It is no fun when you just want to finish something and it takes forever to get the parts to do it.
The shields added a nice touch. The transfers were really easy to apply and gave some color to the model. Same with the shields and amphoras. I think it gives the model a more "lived in" look than a empty, sterile ship. Others have built the same model kit much better with much more historical accuracy, mine is more just out of the box with some added details, cause I like how it looks! . The sail should have been a centimeter or two longer towards the hull. I have no excuse, somehow my measuring skill abandoned me and I did not have the energy to sow a new one.
-
 Torbogdan got a reaction from gsdpic in Greek Bireme by Torbogdan - FINISHED - Dusek - 1:72
Finally, it is done! Yes, finished! A very "on and off" project. My plan was to build it from the box and fairly quickly, well that plan did not survive long
I´m satisfied with it. There are things I could have done better or "cleaner" ( no glue sloppiness) but all in all it is ok. Finishing models are important to me. if it is finished it is good. But I always find things I can improve on and do better next time. What bothered me quite a bit was the last finishing touches. It took forever get the shields and base plate. It is no fun when you just want to finish something and it takes forever to get the parts to do it.
The shields added a nice touch. The transfers were really easy to apply and gave some color to the model. Same with the shields and amphoras. I think it gives the model a more "lived in" look than a empty, sterile ship. Others have built the same model kit much better with much more historical accuracy, mine is more just out of the box with some added details, cause I like how it looks! . The sail should have been a centimeter or two longer towards the hull. I have no excuse, somehow my measuring skill abandoned me and I did not have the energy to sow a new one.
-
 Torbogdan got a reaction from bruce d in Greek Bireme by Torbogdan - FINISHED - Dusek - 1:72
Finally, it is done! Yes, finished! A very "on and off" project. My plan was to build it from the box and fairly quickly, well that plan did not survive long
I´m satisfied with it. There are things I could have done better or "cleaner" ( no glue sloppiness) but all in all it is ok. Finishing models are important to me. if it is finished it is good. But I always find things I can improve on and do better next time. What bothered me quite a bit was the last finishing touches. It took forever get the shields and base plate. It is no fun when you just want to finish something and it takes forever to get the parts to do it.
The shields added a nice touch. The transfers were really easy to apply and gave some color to the model. Same with the shields and amphoras. I think it gives the model a more "lived in" look than a empty, sterile ship. Others have built the same model kit much better with much more historical accuracy, mine is more just out of the box with some added details, cause I like how it looks! . The sail should have been a centimeter or two longer towards the hull. I have no excuse, somehow my measuring skill abandoned me and I did not have the energy to sow a new one.
-
Torbogdan reacted to Ian_Grant in Greek Bireme by Torbogdan - FINISHED - Dusek - 1:72
Very nice model! I agree with Steven, model galleys are way cool!
-
 Torbogdan got a reaction from Ian_Grant in Greek Bireme by Torbogdan - FINISHED - Dusek - 1:72
Finally, it is done! Yes, finished! A very "on and off" project. My plan was to build it from the box and fairly quickly, well that plan did not survive long
I´m satisfied with it. There are things I could have done better or "cleaner" ( no glue sloppiness) but all in all it is ok. Finishing models are important to me. if it is finished it is good. But I always find things I can improve on and do better next time. What bothered me quite a bit was the last finishing touches. It took forever get the shields and base plate. It is no fun when you just want to finish something and it takes forever to get the parts to do it.
The shields added a nice touch. The transfers were really easy to apply and gave some color to the model. Same with the shields and amphoras. I think it gives the model a more "lived in" look than a empty, sterile ship. Others have built the same model kit much better with much more historical accuracy, mine is more just out of the box with some added details, cause I like how it looks! . The sail should have been a centimeter or two longer towards the hull. I have no excuse, somehow my measuring skill abandoned me and I did not have the energy to sow a new one.
-
Torbogdan reacted to ccoyle in Greek Bireme by Torbogdan - FINISHED - Dusek - 1:72
Congratulations -- an excellent result!
-
 Torbogdan got a reaction from ccoyle in Greek Bireme by Torbogdan - FINISHED - Dusek - 1:72
Finally, it is done! Yes, finished! A very "on and off" project. My plan was to build it from the box and fairly quickly, well that plan did not survive long
I´m satisfied with it. There are things I could have done better or "cleaner" ( no glue sloppiness) but all in all it is ok. Finishing models are important to me. if it is finished it is good. But I always find things I can improve on and do better next time. What bothered me quite a bit was the last finishing touches. It took forever get the shields and base plate. It is no fun when you just want to finish something and it takes forever to get the parts to do it.
The shields added a nice touch. The transfers were really easy to apply and gave some color to the model. Same with the shields and amphoras. I think it gives the model a more "lived in" look than a empty, sterile ship. Others have built the same model kit much better with much more historical accuracy, mine is more just out of the box with some added details, cause I like how it looks! . The sail should have been a centimeter or two longer towards the hull. I have no excuse, somehow my measuring skill abandoned me and I did not have the energy to sow a new one.
-
Torbogdan got a reaction from Snug Harbor Johnny in Greek Bireme by Torbogdan - FINISHED - Dusek - 1:72
Amazing how things start to come closer to completion when you actually work on them! Having been home for a few days taking care of sick children have had the fortunate side effect of time to build. Still some work to be done but it is getting close to finished. I'm pleased so far with it. A nice base has been ordered from a friend who has a most impressive wood workshop.
The advice to make a sturdy base has been heard, I'll try to avoid it tipping over on 25 hand made oars...
Time to start on the sail.
-
Torbogdan got a reaction from Cathead in Greek Bireme by Torbogdan - FINISHED - Dusek - 1:72
Shields are on the way from Newline design. I hope they will fit the transfers I have. Mounting base also on the way from Cornwall ship models.
Everything should arrive this coming week. Then I can finally finish this model. In the first post I wrote this would be a quick build... I have learned that nothing is ever quick Mostly due to a long break when I did not feel like building. These last weeks it has been more or less waiting for parts. But... Soon... Done.
-
 Torbogdan got a reaction from chris watton in Greek Bireme by Torbogdan - FINISHED - Dusek - 1:72
The ship itself almost completely done. I need to scrounge up some lead foil for the ram. Then it is the shields (waiting for the transfers and the 3 d printed shields), Fix the spears and the amphoras (also waiting for the 3d prints) Finally the base.
The sail should have been maybe a centimeter or two longer but it is ok for me. As always the "floating" rigging kind of annoys me but not much can be done about it. Gravity does not work on very light items 😃
-
Torbogdan reacted to James H in 1:10 Blériot XI by Amati Model
1:10 Blériot XI
Amati Model
Catalogue # 1712/01
Available from Amati for €284.43
“England’s isolation has ended once for all!”, so was written in an English newspaper, on the day after Louis Blériot flew across the English Channel from France. The French aviation pioneer, in his modified type XI monoplane, took off from Les Baraques near Calais at 4.41am on July 25th 1909, and landed at 5.17am in Northfall Meadow, near Dover. The Bleriot XI made its debut at the Paris Salon de d’ Automobile et de l’ Aeronatique in December 1908, along with two other Bleriot planes; the type IX and the type X. In October 1908 the London Daily Mail had offered a prize of £1,000 to the first aviator to cross the Channel in either direction. Bleriot’s exploit was proceeded by the unsuccessful attempt of another aviation pioneer, namely Hubert Latham.
Designed by Louis Blériot and Raymond Saulnier, the Bleriot XI was a light, sleek monoplane built using oak and poplar wood with cloth-covered wings and was powered by the very reliable but simple Anzani 3-cylinder 25 HP engine. The plane's sporting achievements, robustness, functionality and piloting ease contributed greatly to its commercial success, and it was actually the first aircraft in the history of flight to be used in war, when Italian Capitano Piazza piloted a Bleriot during the Libyan campaign between 1911 and 1912.
Sourced from Amati and Wikipedia
The kit
This kit is certainly not a new release, but it is one for which you can’t really find an unboxing/summary/review. After talking with Amati, we thought we’d redress that issue and bring you an article on this kit, in the style of our regular ship reviews. As you would guess from a 1:10 aeroplane, the box for the Blériot isn’t too small, with it taking up a reasonable chunk of my worktop real estate. Whilst being fairly average in weight, it’s a little top heavy with the parts packing, so careful if you prop it up against a wall like I originally did! Amati always ship in beautiful boxes, and this sturdy and glossy crate is no exception, with a very nice photo of a finished Blériot model on the lid, along with a period photo and detail image. You’ll also get a good idea of the size of this project when completed, with the given sizes being:
Wingspan: 84cm Fuselage length: 80cm
A note of course that the timber parts within are all laser cut, as we’ve come to expect from this and many contemporary manufacturers. The box sides contain more imagery of the finished model at various angles.
Lifting the lid, you can see why the box is top heavy. Most of the parts are sitting on a card plinth within the base of the box, designed to stop the various elements rolling around within. Right on top is a large and thick cellophane sleeve containing all of the laser-cut wooden sheets, plus the two sheets of plans. We’ll look at the latter in a short while.
The fist 3mm thick ply sheet contains parts for the fuselage and tail frames, plus some jigs for creating those spoked wheels. Jig parts are also included for creating fuselage sections, ensuring that the various frames etc. are correctly aligned. As you can see from the sheet, none of the parts are numbered, as you wouldn’t want that with a model whose frames are very visible timber. These can be checked off against the supplied parts sheet. Laser cutting is also excellent with very minimal scorching. Being quite light, you will be advised to stain the frames when the time is appropriate.
This second sheet, again in 3mm ply, contains mostly parts for creating the wings and horizontal tailplane. Here you can see the various ribs with their notches for wing spars etc.
We have another ply sheet here, but this time in a much thinner 1mm material. The larger curved parts here are the enormous wingtips, with the thin material designed to be able to create the curved underside of the thin wing. The smaller parts are mostly infills, which will then sit on top of the moulded wingtip and pack its thickness up to a more realistic 2mm.
This small slip was packed into the sleeve, and it depicts the cut-outs needed in both dowel and strip for the main fixed tailplane section. This is supplied at full size for easy reference.
There are three trays of components in this release. This first tray is the most obvious as it contains the large propeller/airscrew. These are standard Amati trays and the packets and parts inside are held in situ by a clear plastic lid.
The prop/airscrew is finished in a dark varnish. Not sure how accurate this is, and I may consider stripping this and making it look laminated, along with a lighter varnish. The prop hub is a series of PE parts which need to be fitted.
We now have several frets of photo-etch, all individually packed in thick plastic sleeves. All PE is of different gauges, but the connection tabs are quite small, so it won’t take long to remove them from the frets. A small file can then we used to smooth off the connection points. You will note parts here for the engine and engine framework etc.
These are the cylinders, comprised of parts which stack upon one another, creating a cooling-fin effect. That should look quite nice when done, and beats using plastic where you’d need to remove an awkward seam.
This is the material for covering the wings, tail and part of the fuselage. After being cut to size, this is applied with PVA and CA before being painted all over in dilute PVA. This will give it a smoother and more drum-like surface and of course, pull it taught.
For a model which at first glance, appears to be mostly stick and string, there’s a surprising amount of photo-etch.
The second fittings tray. Let’s take a look…
As the aircraft has numerous pivoting surfaces and pipework, we are supplied with a range of both brass and copper tubes of various lengths and gauges.
You will of course need some nails too, and some eyelets for things such as rigging.
As well as brass eyelets, a bag of copper eyelets are also supplied. The bag of copper rods you see here are actually the wheel spokes, and they have a flat end on them to secure them in the jig whilst you assemble the wheels.
Yet more brass nails and also brass strip parts which appear to be undercarriage related.
Our last components tray.
In here, we have various brass eyelets, engine components such as cylinder heads, large turnbuckles, undercarriage suspension springs, brass rod, riggings cord, plumbing parts etc. Quite a few parts here are cast in zinc alloy as they are stronger and hold detail far better than white metal or Britannia metal fittings.
This little pack of curios contains parts in both timber of plastic. The cones form the ends of the large fuel tank for which you’ll need to construct a planked drum. Parts here exist for the control stick base, cylinder bases and the engine crankcase etc. Some minor clean-up of the plastic parts will be needed.
Injection moulded rims are supplied for the wheels, with two per wheel. These will be assembled on the jig, and along with the brass hubs, they will be spoked just like the real thing. Minor clean-up will be needed to remove the sprue attachment gates.
Large rubber rings are supplied for the tyres, and these will sit neatly into the recess between the two rings that make up each wheel.
Yet more brass and copper tubes/rod.
Of course, we can’t have a wooden model without timber strip. This will be used for some frames, wing/tail spars, leading edges etc. Timber quality is Amati standard, as always. Some flexible pipe is also supplied for plumbing the engine, fuel tank etc.
As always, Amati’s instructions are excellent and productions all of their own. This 62-page A4 (landscape format) manual is produced in full colour with photographs that describe the various stages, step by step. Whilst the text is in Italian, there is an English translated sheet for those who need it. As well as photographs, a series of illustrative drawings helps the modeller throughout, and everything is also annotated superbly. A parts list is supplied here, as it on the English translation.
Two plan sheets are included with one of these depicting various views of the Blériot for constructional reference, and also a sheet with plan parts supplied. These can be married up against the unnumbered parts on the laser-cut sheets.
Conclusion
Despite the minimalistic look of the Blériot, this isn’t a weekend project, by any means. There is still going to be a concerted effort needed, as with any model whose main assembly is in timber. Overall, the skeleton of the model is actually straightforward and only minimal tools will be required. Some care will be needed in covering the wings and tailplane, and you may opt to use an antique style material which is used for covering flying model aircraft wings and applied with an iron. Overall, the timber parts are superbly cut with little scorching, and the numerous PE sheets/frets will keep you entertained for many hours, as will those wheels which are built up from individual spokes. If you are a super-detailer, then you could also rig the fuselage with wire and use reproduction turnbuckles, instead of the supplied rigging cord. There are many possibilities, should you wish to deviate from an already excellent kit. You will need a large area to display this model, or it could hang from the ceiling in your study, recreating those stylish days of yesteryear. This kit is also very reasonably priced, so if those memories of the Flambards TV series or the original books by Kathleen Peyton etc. are what fire your imagination, give this kit a shot!
My sincere thanks to Amati for sending the kit you see under review here. To purchase directly, click the link at the top of this article.
-
 Torbogdan got a reaction from tlevine in A few pictures from the Vasa museum of ship models
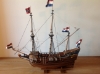
Yesterday me and my daughter went to the Vasa museum, at her insistence! I have been there several times but still like to go there. This time I took a few pictures of ship models. The first to are of the 1:10 scale model. It is absolutely huge (of course it is, it in 1:10 scale...😀) It must have taken quite some time and skill to build it.
The second model is of the ship slowly sinking. If you happen to visit Stockholm the museum is well worth a visit. You can easily spend a few hours there.
Children under the age of 18 is free admission.
-
Torbogdan reacted to Dziadeczek in A few pictures from the Vasa museum of ship models
Here are some more pics of this magnificent model. 😃
Photos of Vasa 1 : 10 scale model in the Vasa museum Stockholm (modelships.de)
-
Torbogdan got a reaction from chris watton in A few pictures from the Vasa museum of ship models
Yesterday me and my daughter went to the Vasa museum, at her insistence! I have been there several times but still like to go there. This time I took a few pictures of ship models. The first to are of the 1:10 scale model. It is absolutely huge (of course it is, it in 1:10 scale...😀) It must have taken quite some time and skill to build it.
The second model is of the ship slowly sinking. If you happen to visit Stockholm the museum is well worth a visit. You can easily spend a few hours there.
Children under the age of 18 is free admission.
-
 Torbogdan got a reaction from shipman in A few pictures from the Vasa museum of ship models
Yesterday me and my daughter went to the Vasa museum, at her insistence! I have been there several times but still like to go there. This time I took a few pictures of ship models. The first to are of the 1:10 scale model. It is absolutely huge (of course it is, it in 1:10 scale...😀) It must have taken quite some time and skill to build it.
The second model is of the ship slowly sinking. If you happen to visit Stockholm the museum is well worth a visit. You can easily spend a few hours there.
Children under the age of 18 is free admission.
-
 Torbogdan got a reaction from davyboy in A few pictures from the Vasa museum of ship models
Yesterday me and my daughter went to the Vasa museum, at her insistence! I have been there several times but still like to go there. This time I took a few pictures of ship models. The first to are of the 1:10 scale model. It is absolutely huge (of course it is, it in 1:10 scale...😀) It must have taken quite some time and skill to build it.
The second model is of the ship slowly sinking. If you happen to visit Stockholm the museum is well worth a visit. You can easily spend a few hours there.
Children under the age of 18 is free admission.