Trussben
-
Posts
1,995 -
Joined
-
Last visited
Content Type
Profiles
Forums
Gallery
Events
Everything posted by Trussben
-
 Good question Chuck - no easy answer to it though and I'm sure you have more things to worry about, but keep it in mind in case you do see something that catches your eye and you fancy building it.
 -
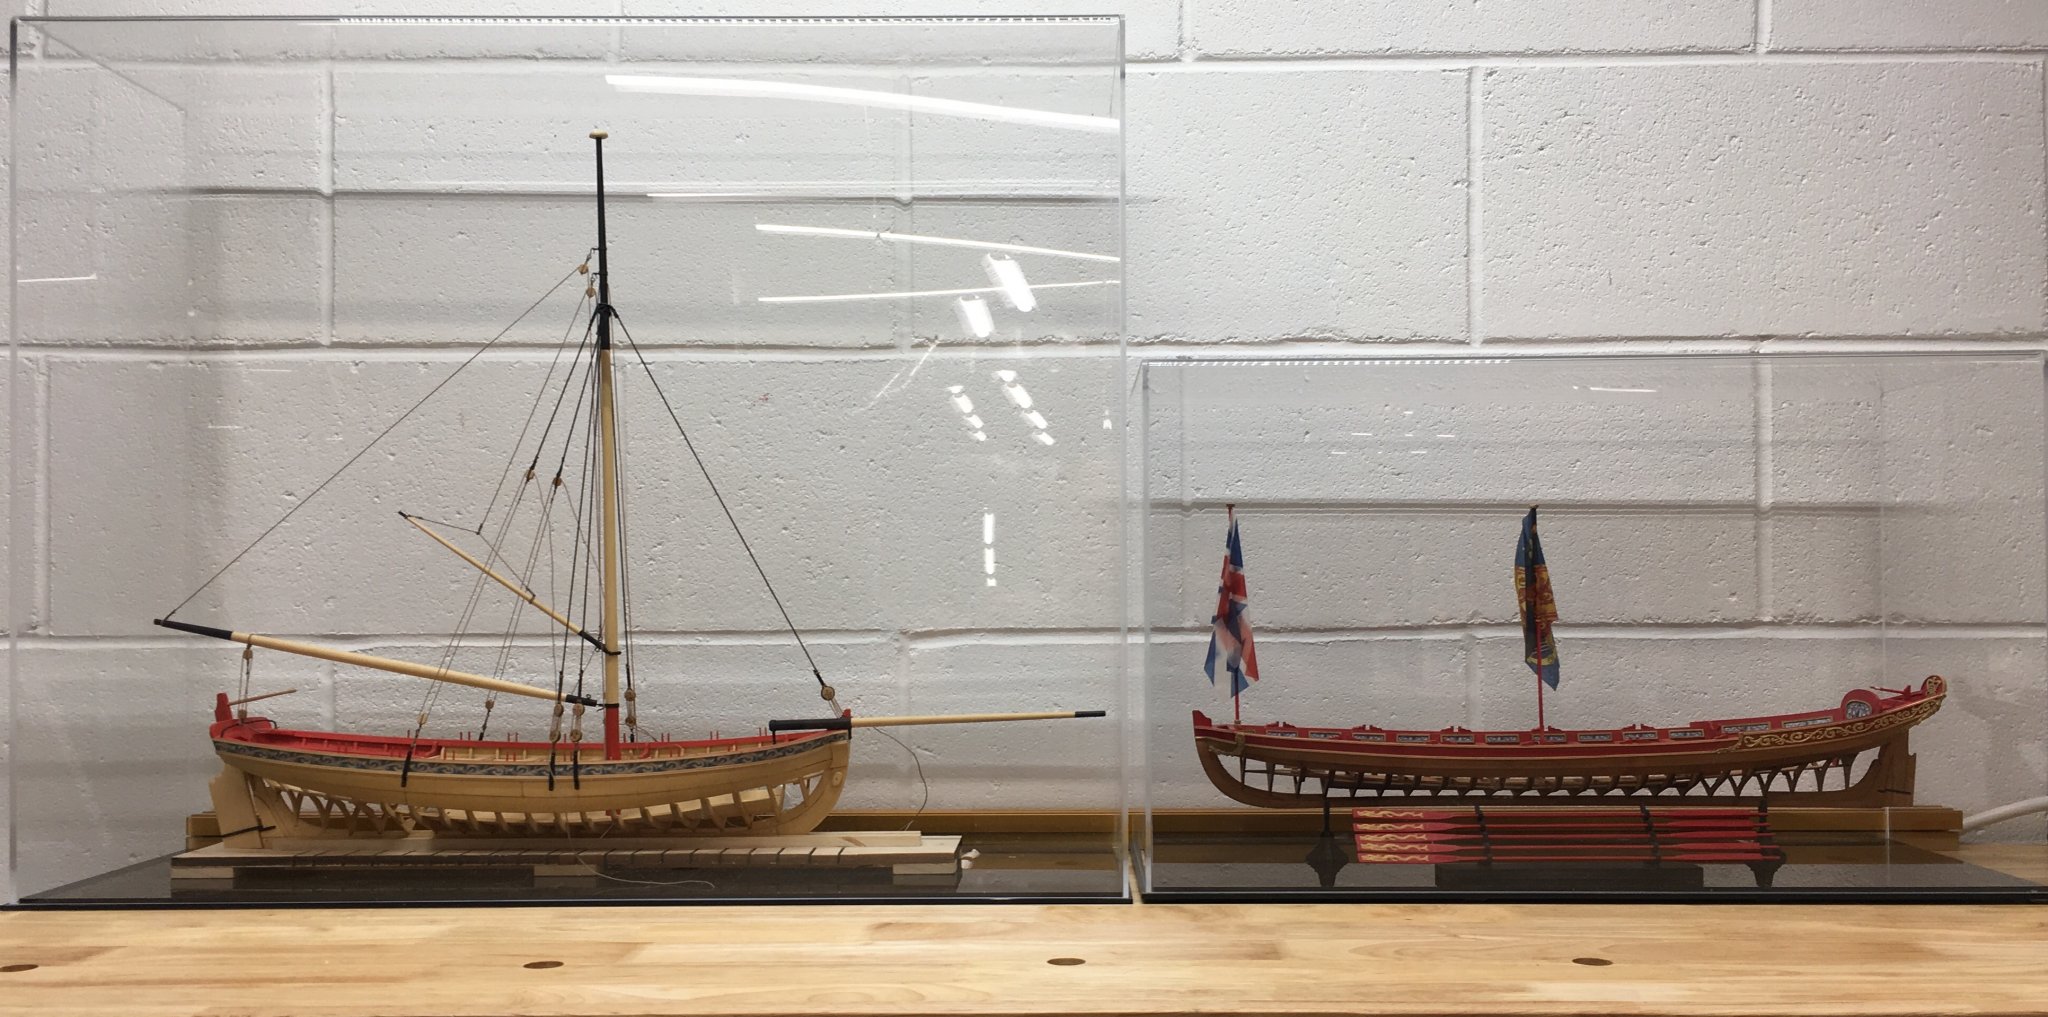
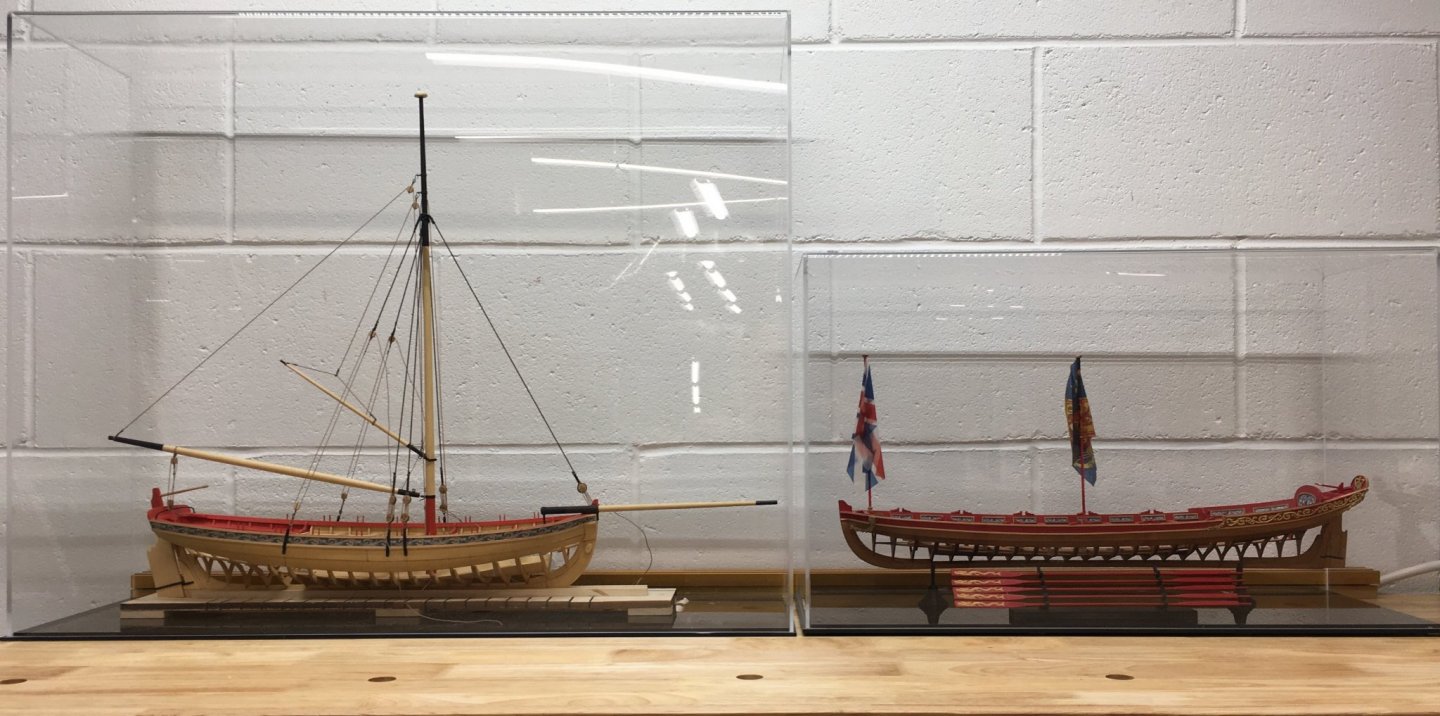
Just for Chuck, a picture of both of the projects together in their cases, thanks to him for creating these awesome kits and I hope he makes a few more of these larger scale small boats in the future, they sure are fun to build.
- 64 replies
-
- 11
-

-
- medway longboat
- Syren Ship Model Company
- (and 1 more)
-
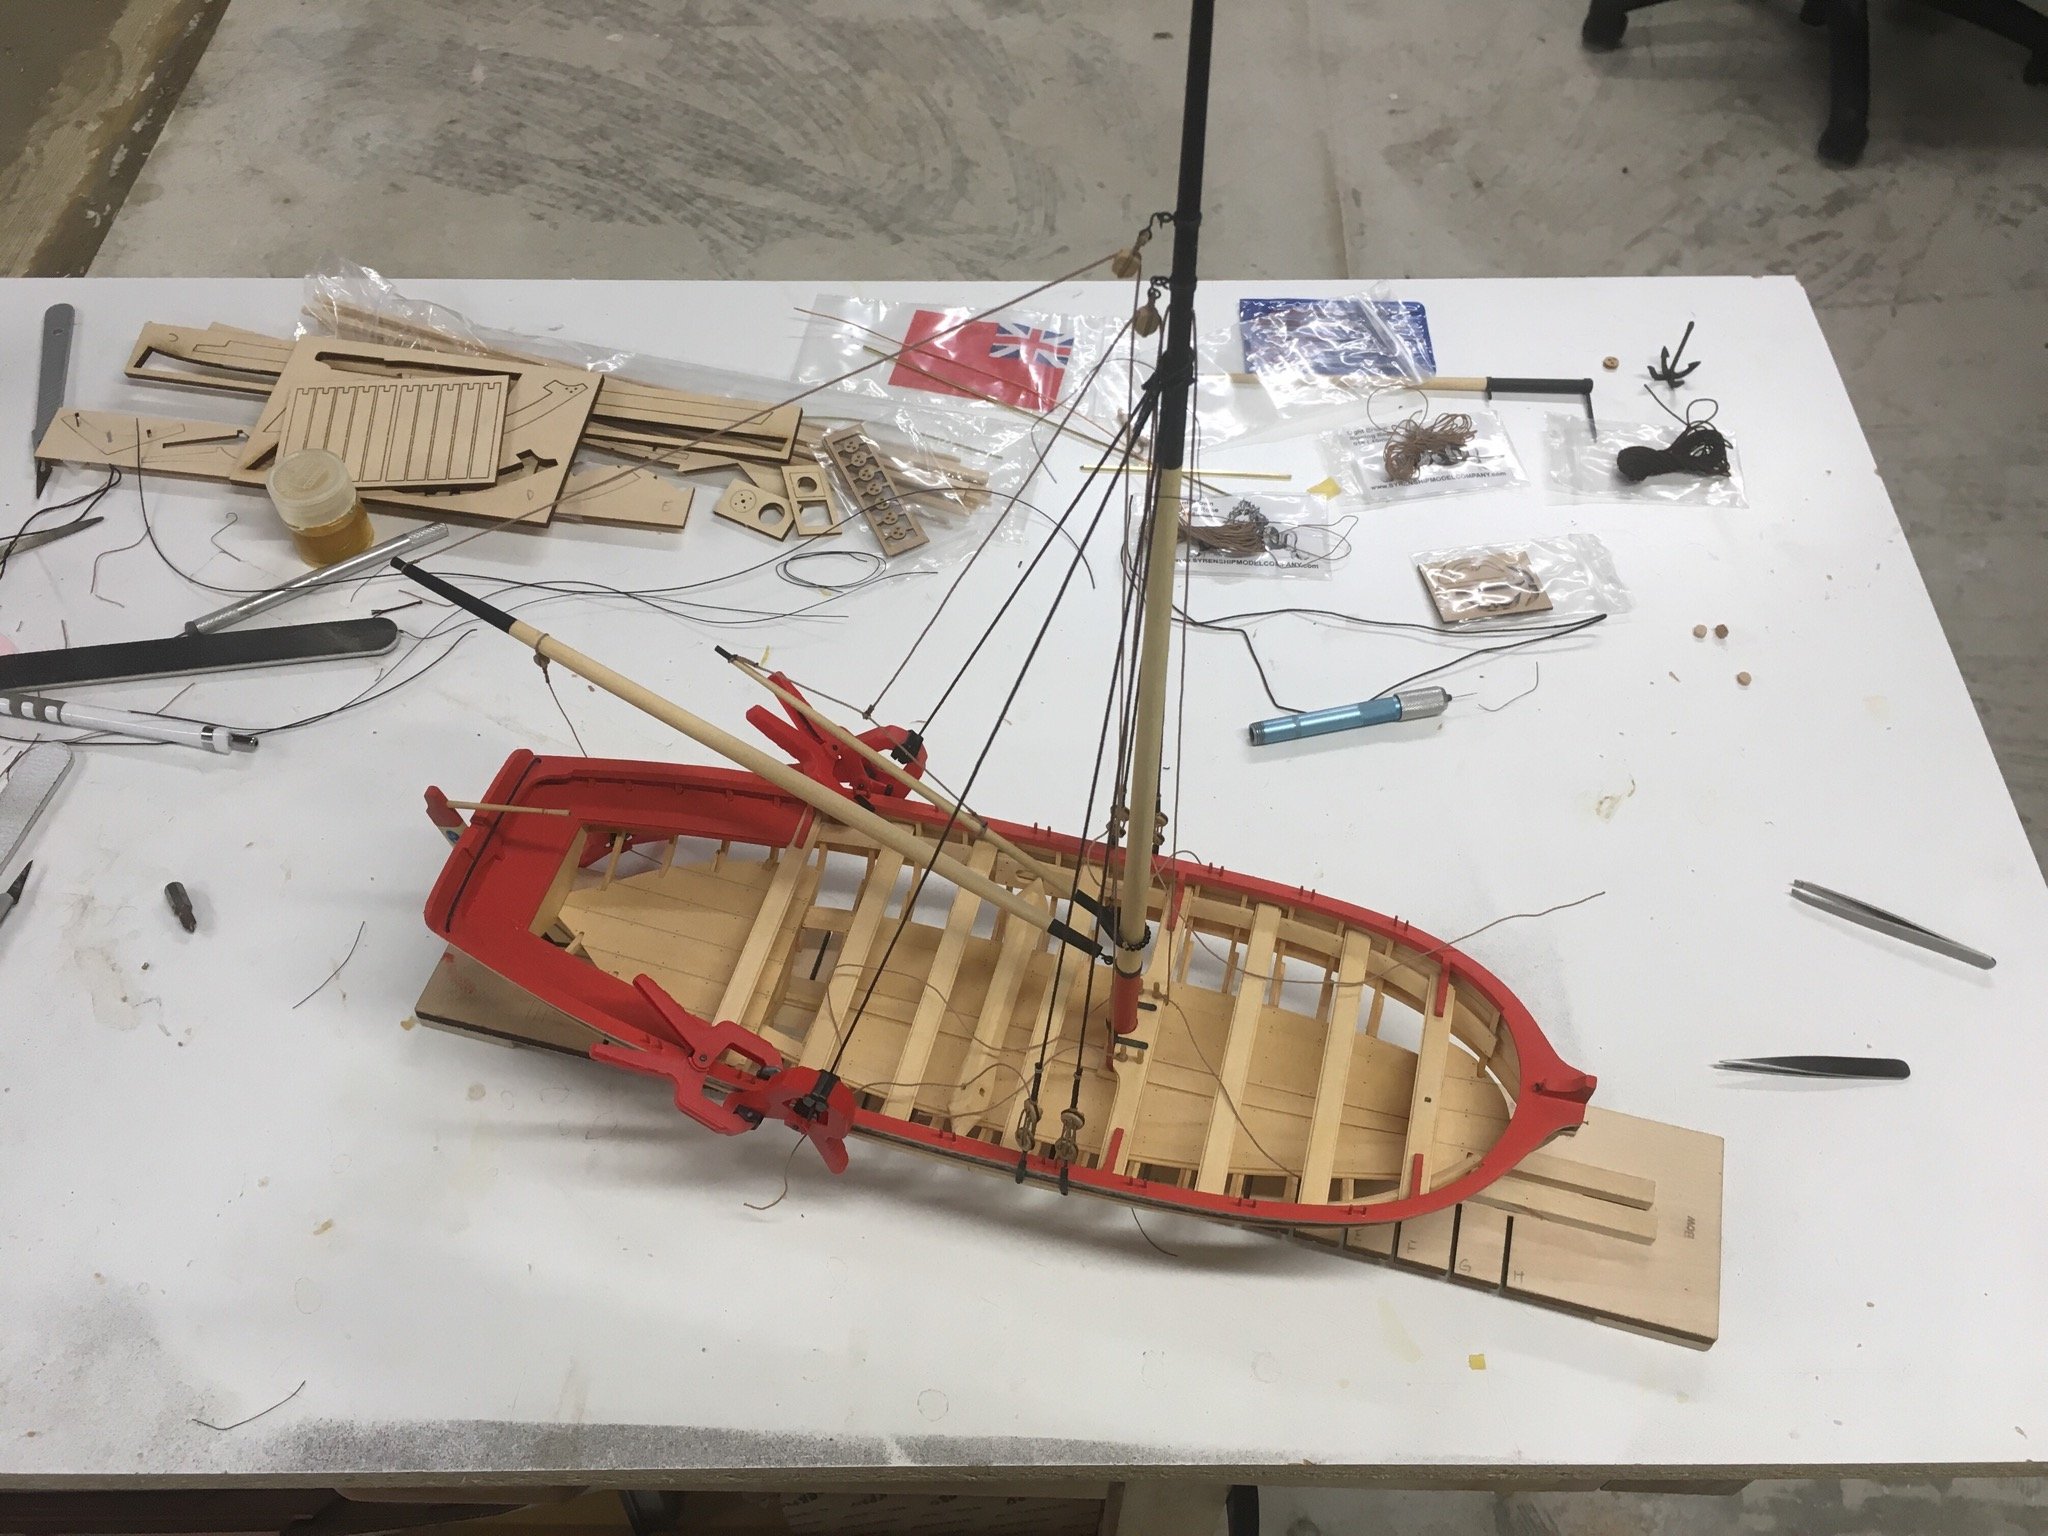
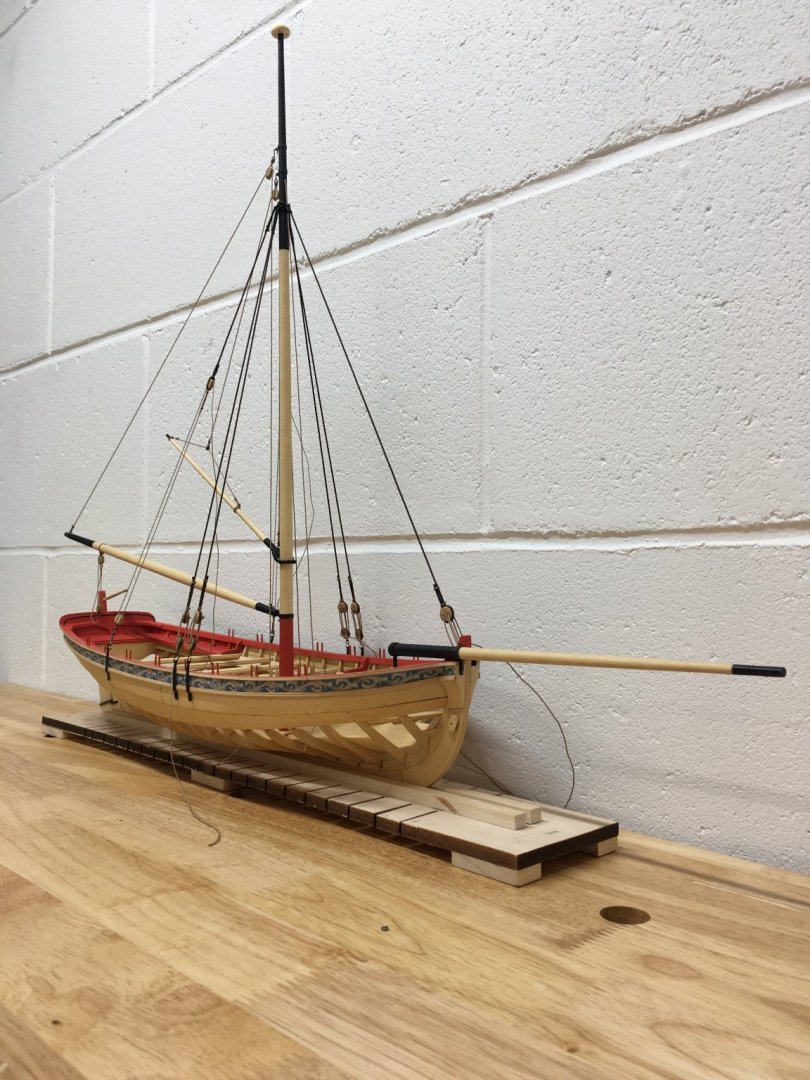
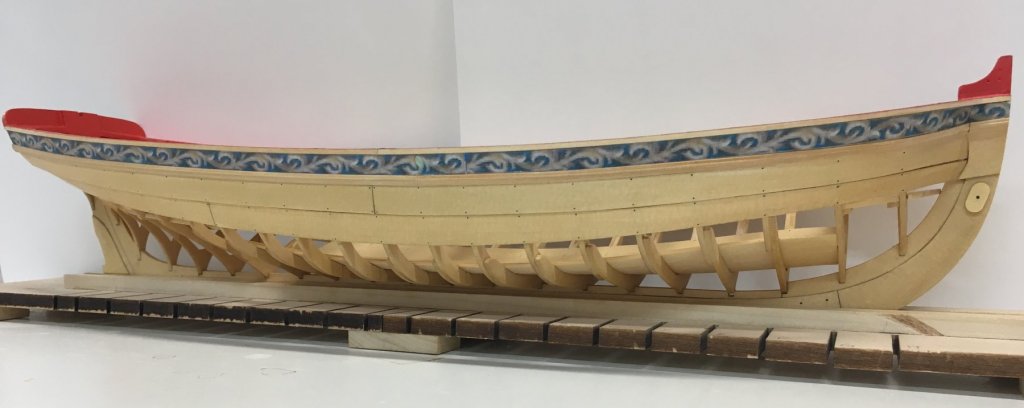
Stays have been completed and Bowsprit installed, only the Jib, Jib Halliard, Foresail Halliard and Flag Halliard left to rig. You can see I have left all the stays loose for the moment until I’m ready to do the final tensioning. I ran out of 0.025 light brown rope due to mistakes and had to order more from Chuck, hopefully complete this great little project in a few weeks after vacation. ben
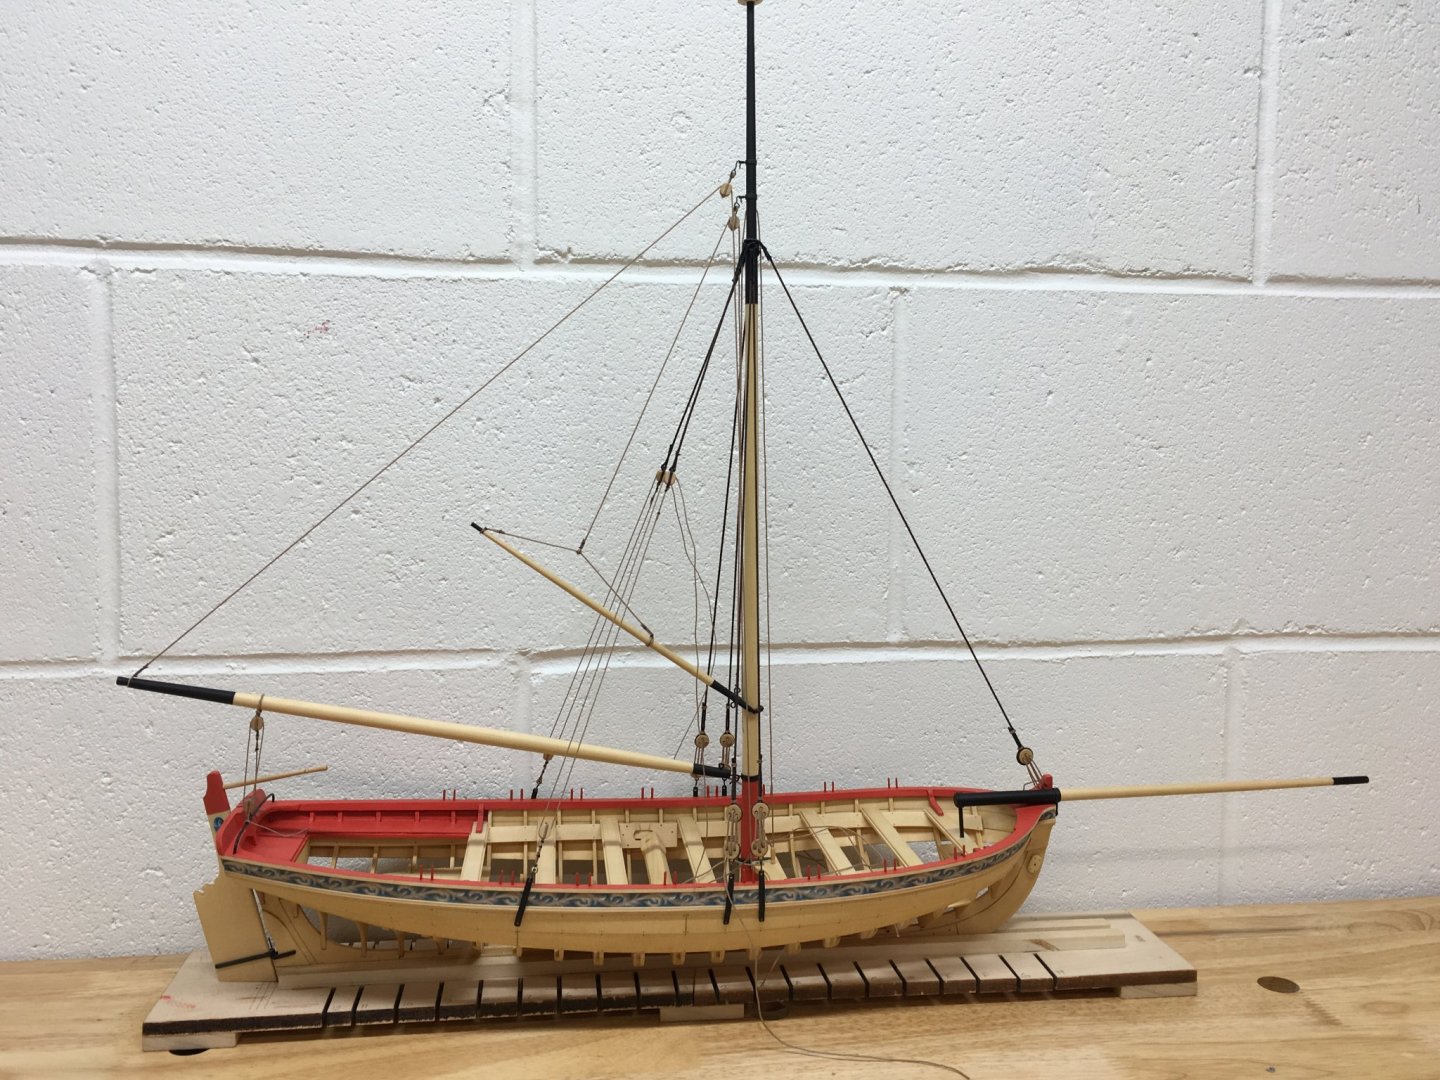
- 64 replies
-
- 12
-
-
- medway longboat
- Syren Ship Model Company
- (and 1 more)
-
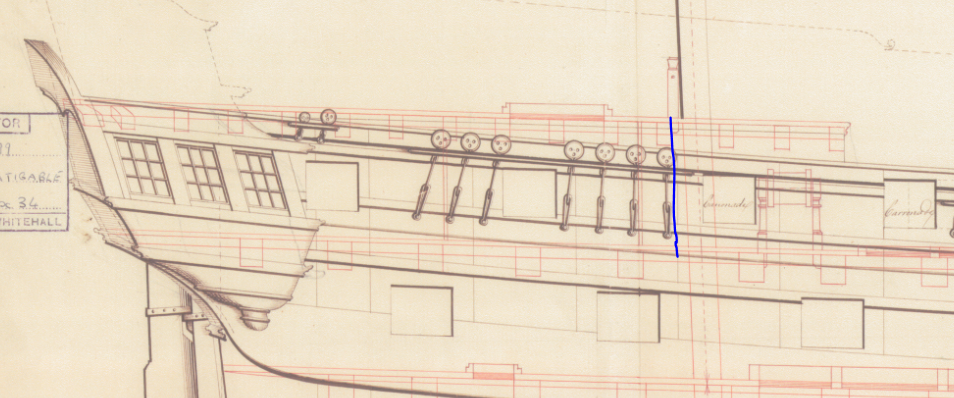
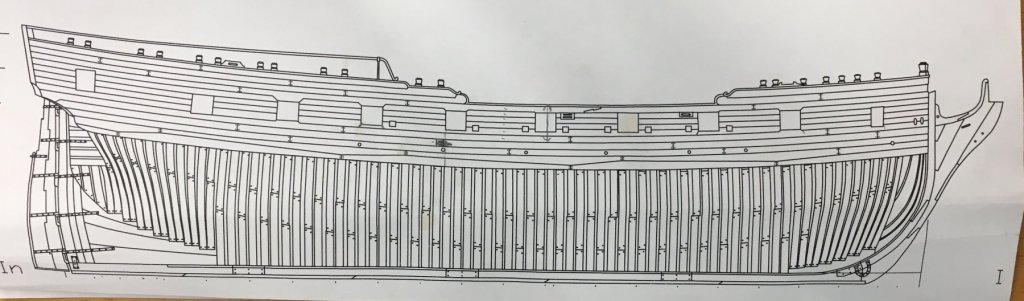
Chris - I would agree with you that decorations were proberbly kept to a minimum when she was cut down to reduce cost and speed up the work, another thing to remember that I found in my research is that Pellew ordered himself that the new poop deck be shortened to before the mizzen mast to reduce Top Hamper as compared to the Razee plans available from NMM that show the poop running further forward, see picture. This is documented in several places so I consider it to be trustworthy information but you may decide otherwise.
-
Chris - with regard to Indefatigable, I have made a set of POF plans myself in cad 1:48 in her 44 (50) razee guise as that is to be my next scratch fully framed build, I can tell you now that in all my research I could find no information on what figurehead she had even as a 64, I even contacted the Museum at Bucklers hard where she was built and they had nothing. Myself and John from Art of Age of sail ( he built a POF version ) discussed that because she was sister ship of the Agamemnon and they were both built at Bucklers at the same time they may have had similar figureheads but that’s pure speculation and it’s unknown if when she was razeed they even reused the original or went to one of those standard busts as it was after 1794 when they stopped decorating the ships so much. As for her stern decorations, there are several paintings depicting her with stern details shown ( a la vs Droits la homme) to get ideas from. if you do manage to dig up info on her figurehead I would love to hear about it. ben
-
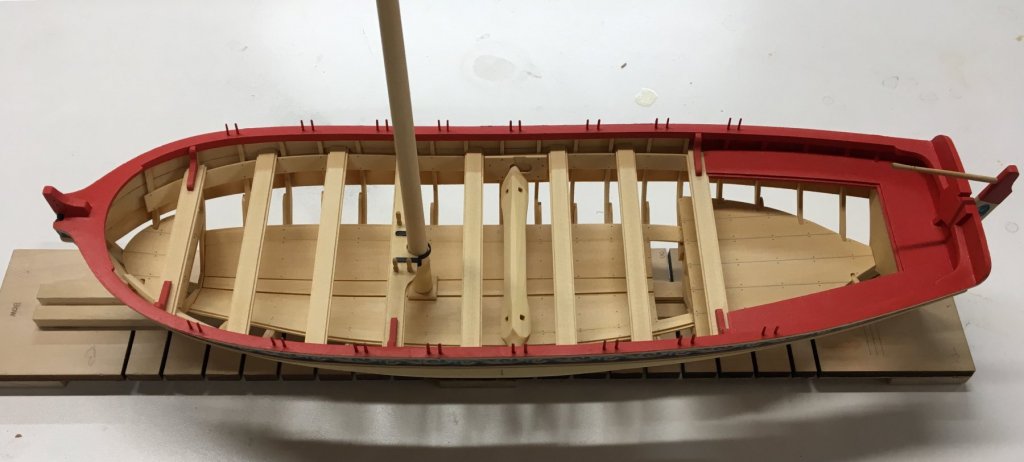
Thole pins, belaying pins installed. Mast turned to rough dimensions and mast step installed.
- 64 replies
-
- 13
-
-
- medway longboat
- Syren Ship Model Company
- (and 1 more)
-
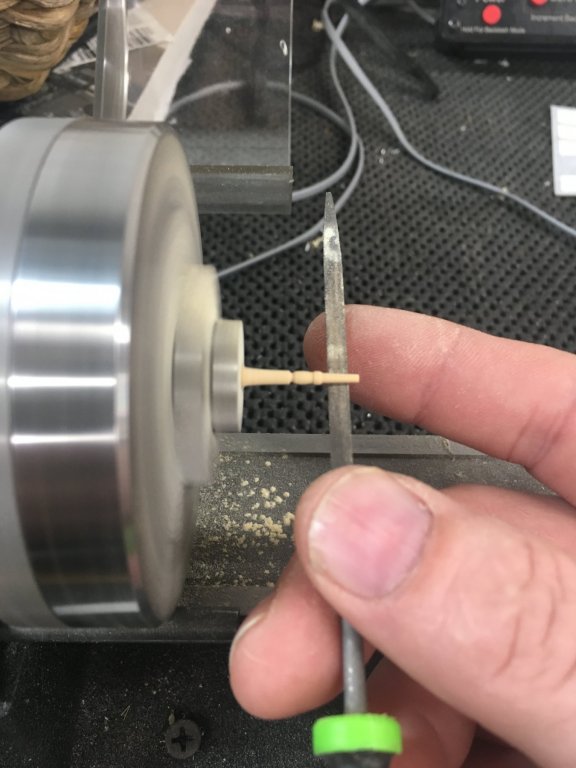
Making some belaying pins on my lathe out of boxwood.
- 64 replies
-
- 9
-
-
- medway longboat
- Syren Ship Model Company
- (and 1 more)
-
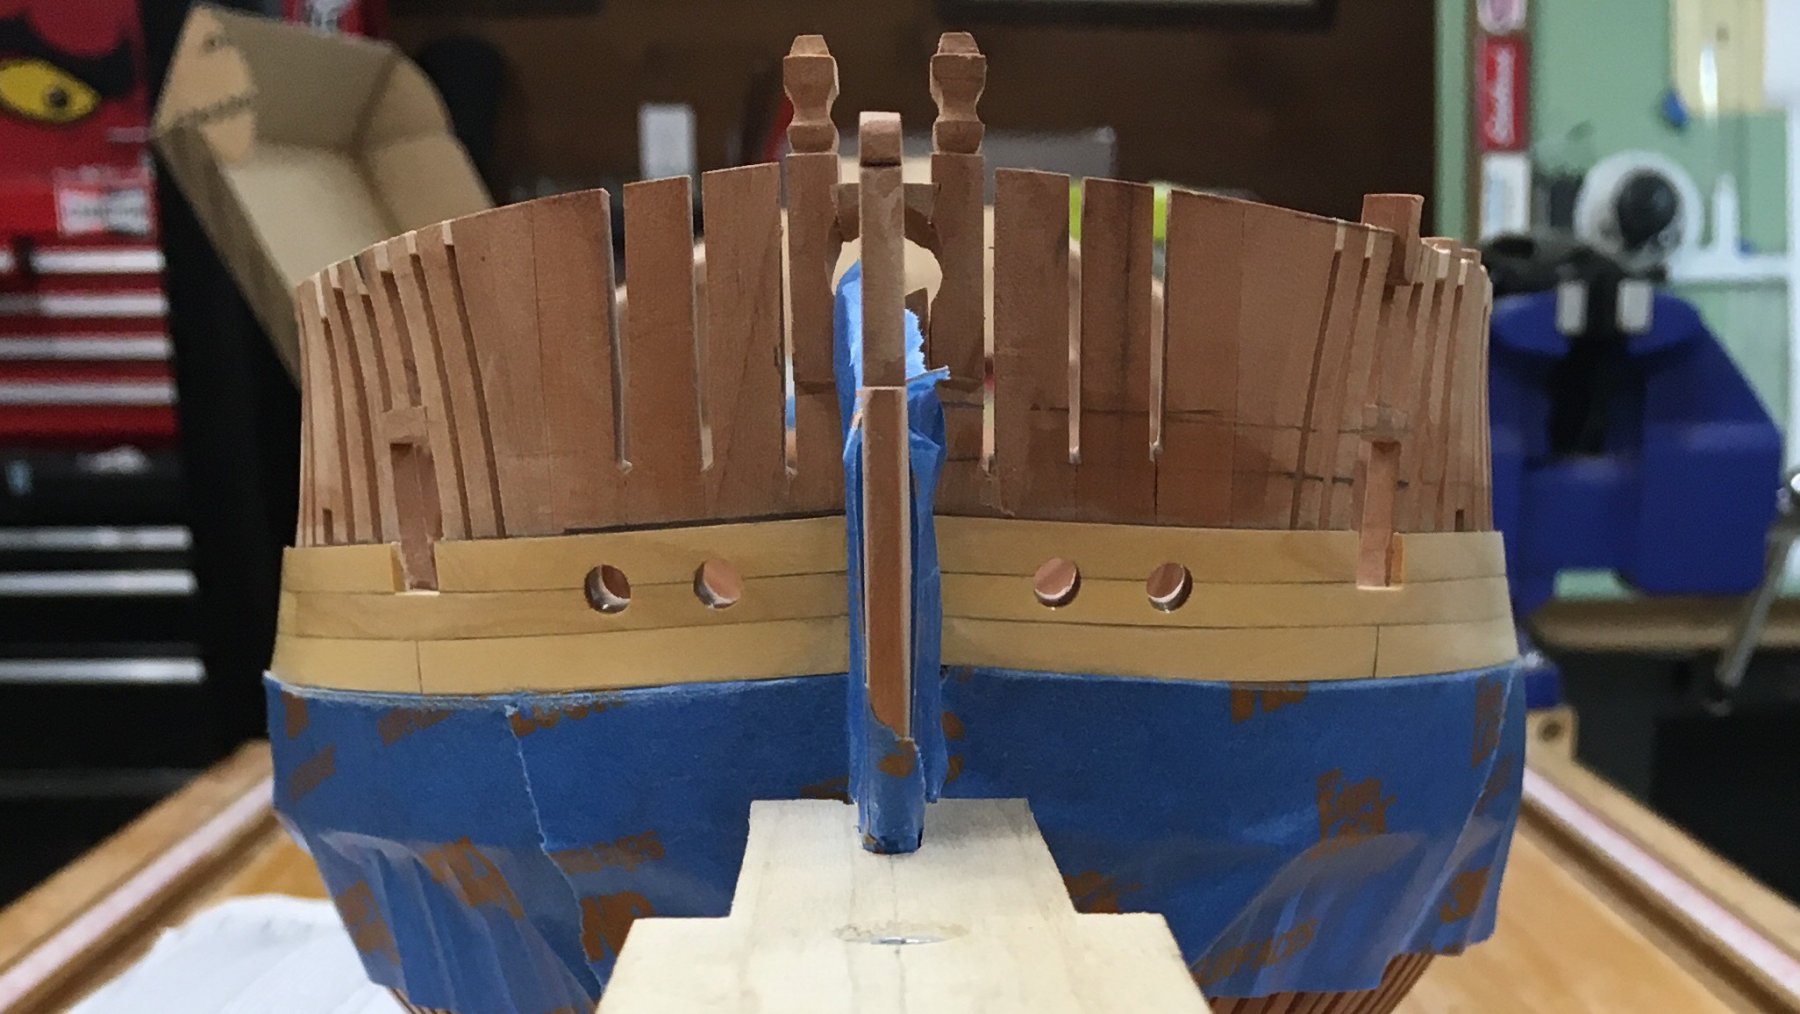
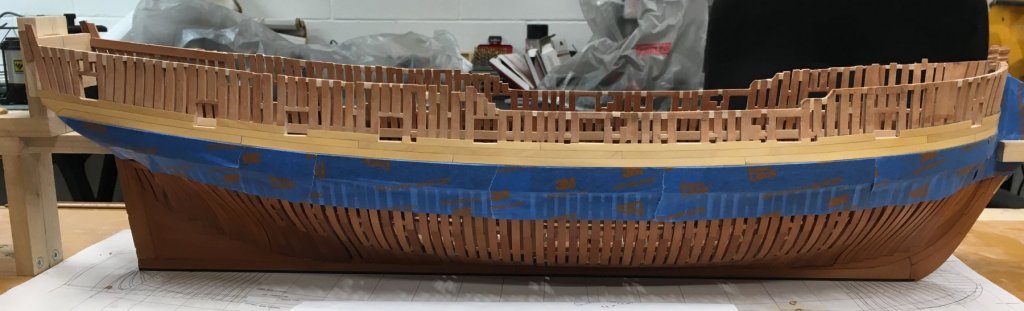
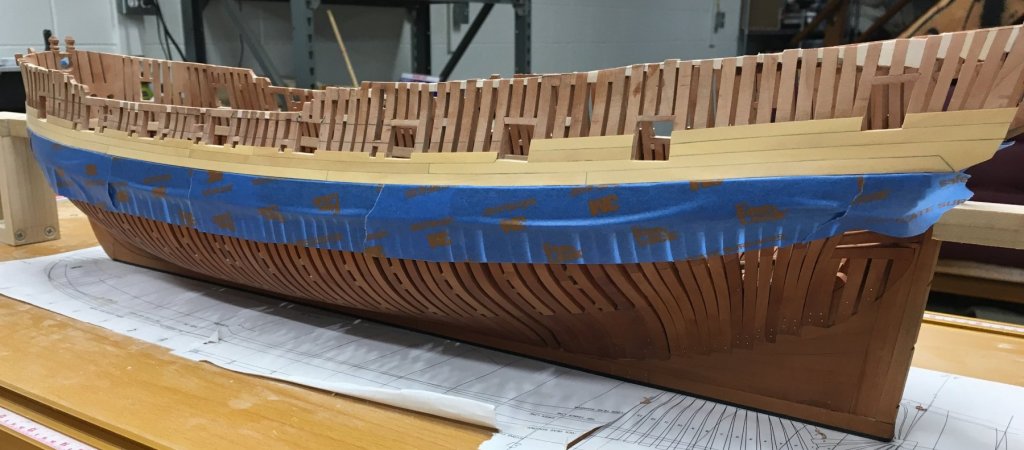
Thanks for all the likes and comments. I decided to start work on the exterior planking above the wales, the wales themselves were masked off as you can see to try and protect them somewhat. Im going to try and follow my planking plan as close as the hull allows. First 3 strakes completed and beginning on the fourth, and it’s quite close to plan so far. ben
- 889 replies
-
- 22
-
-
ancre Le Gros Ventre by ChrisLBren - 1/36
Trussben replied to ChrisLBren's topic in - Build logs for subjects built 1751 - 1800
I will sit in on this one too. ben -
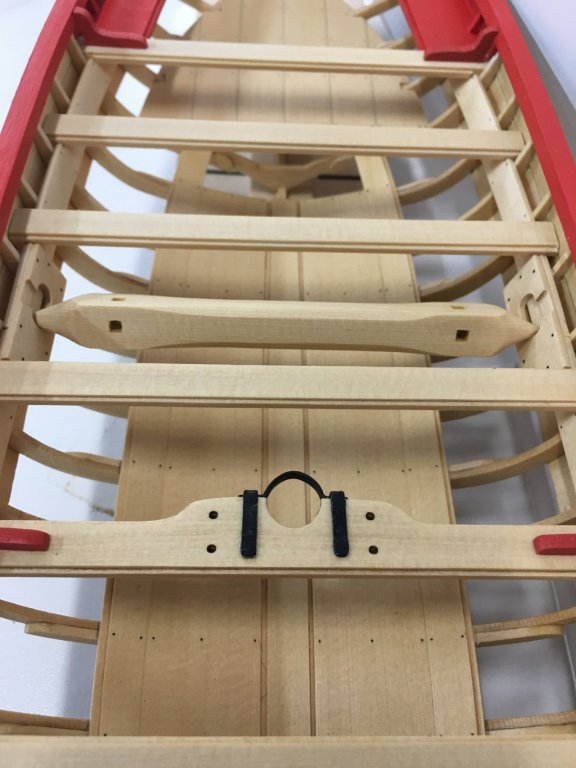
Completed installation of all the Thwarts, knees, windlass, mast iron work, and the sheeve. Time to start work on the Rudder, some thole pins, belaying pins. ben

- 64 replies
-
- 16
-
-
- medway longboat
- Syren Ship Model Company
- (and 1 more)
-
Test fitting of the cockpit seats and aft most thwart underway, any tiny little gaps will be filled before painting.
- 64 replies
-
- 14
-
-
- medway longboat
- Syren Ship Model Company
- (and 1 more)
-
Hey Rusty, Yep - it sure is. I like working on it alongside Pegasus to keep me a little sane, and Chucks kits are always a blast and turn into great looking models if you take a little time on them - Yours just goes to show what level of excellence can be achieved. ben
- 64 replies
-
- 2
-
-
- medway longboat
- Syren Ship Model Company
- (and 1 more)
-
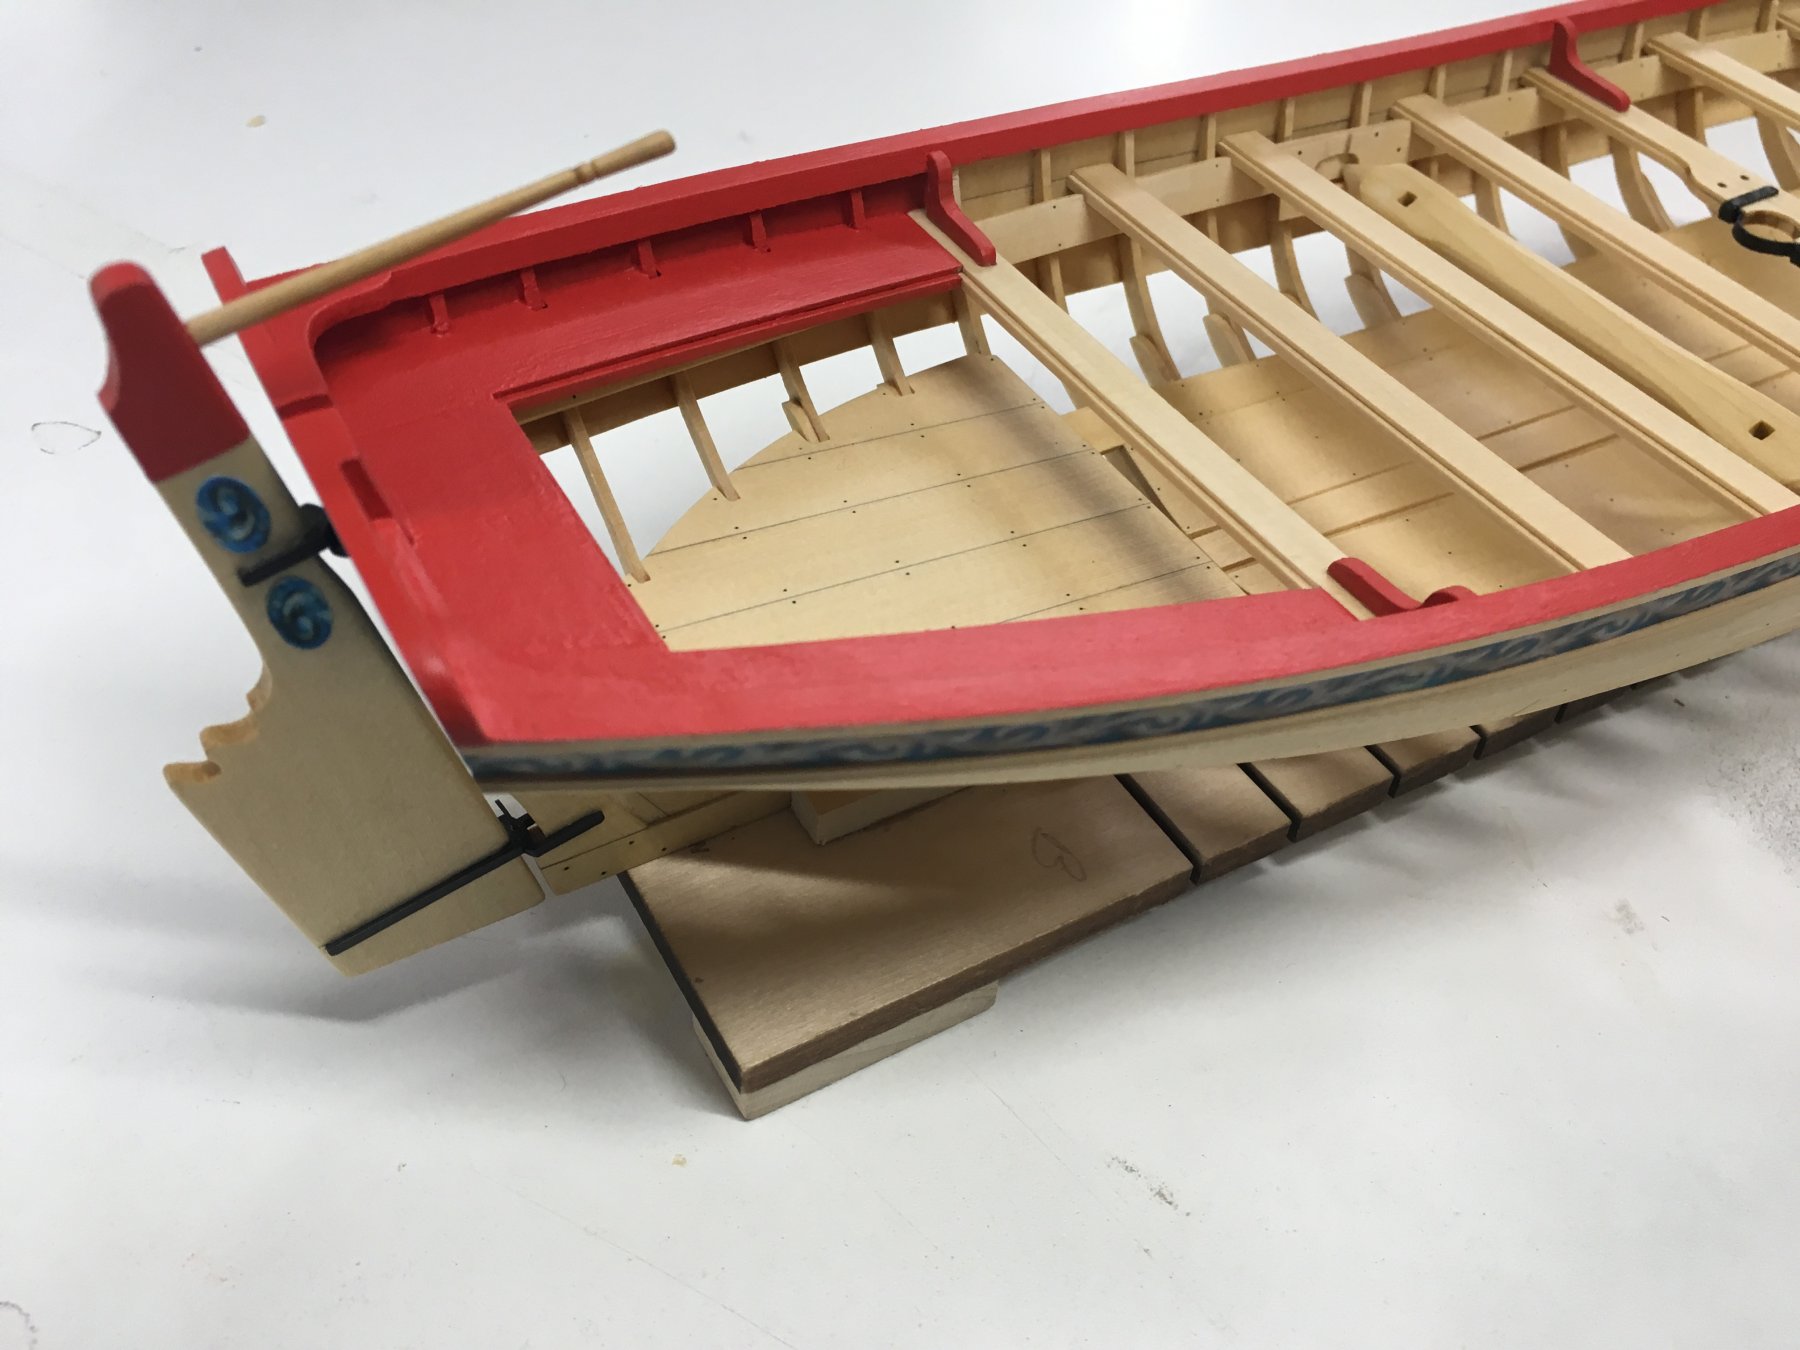
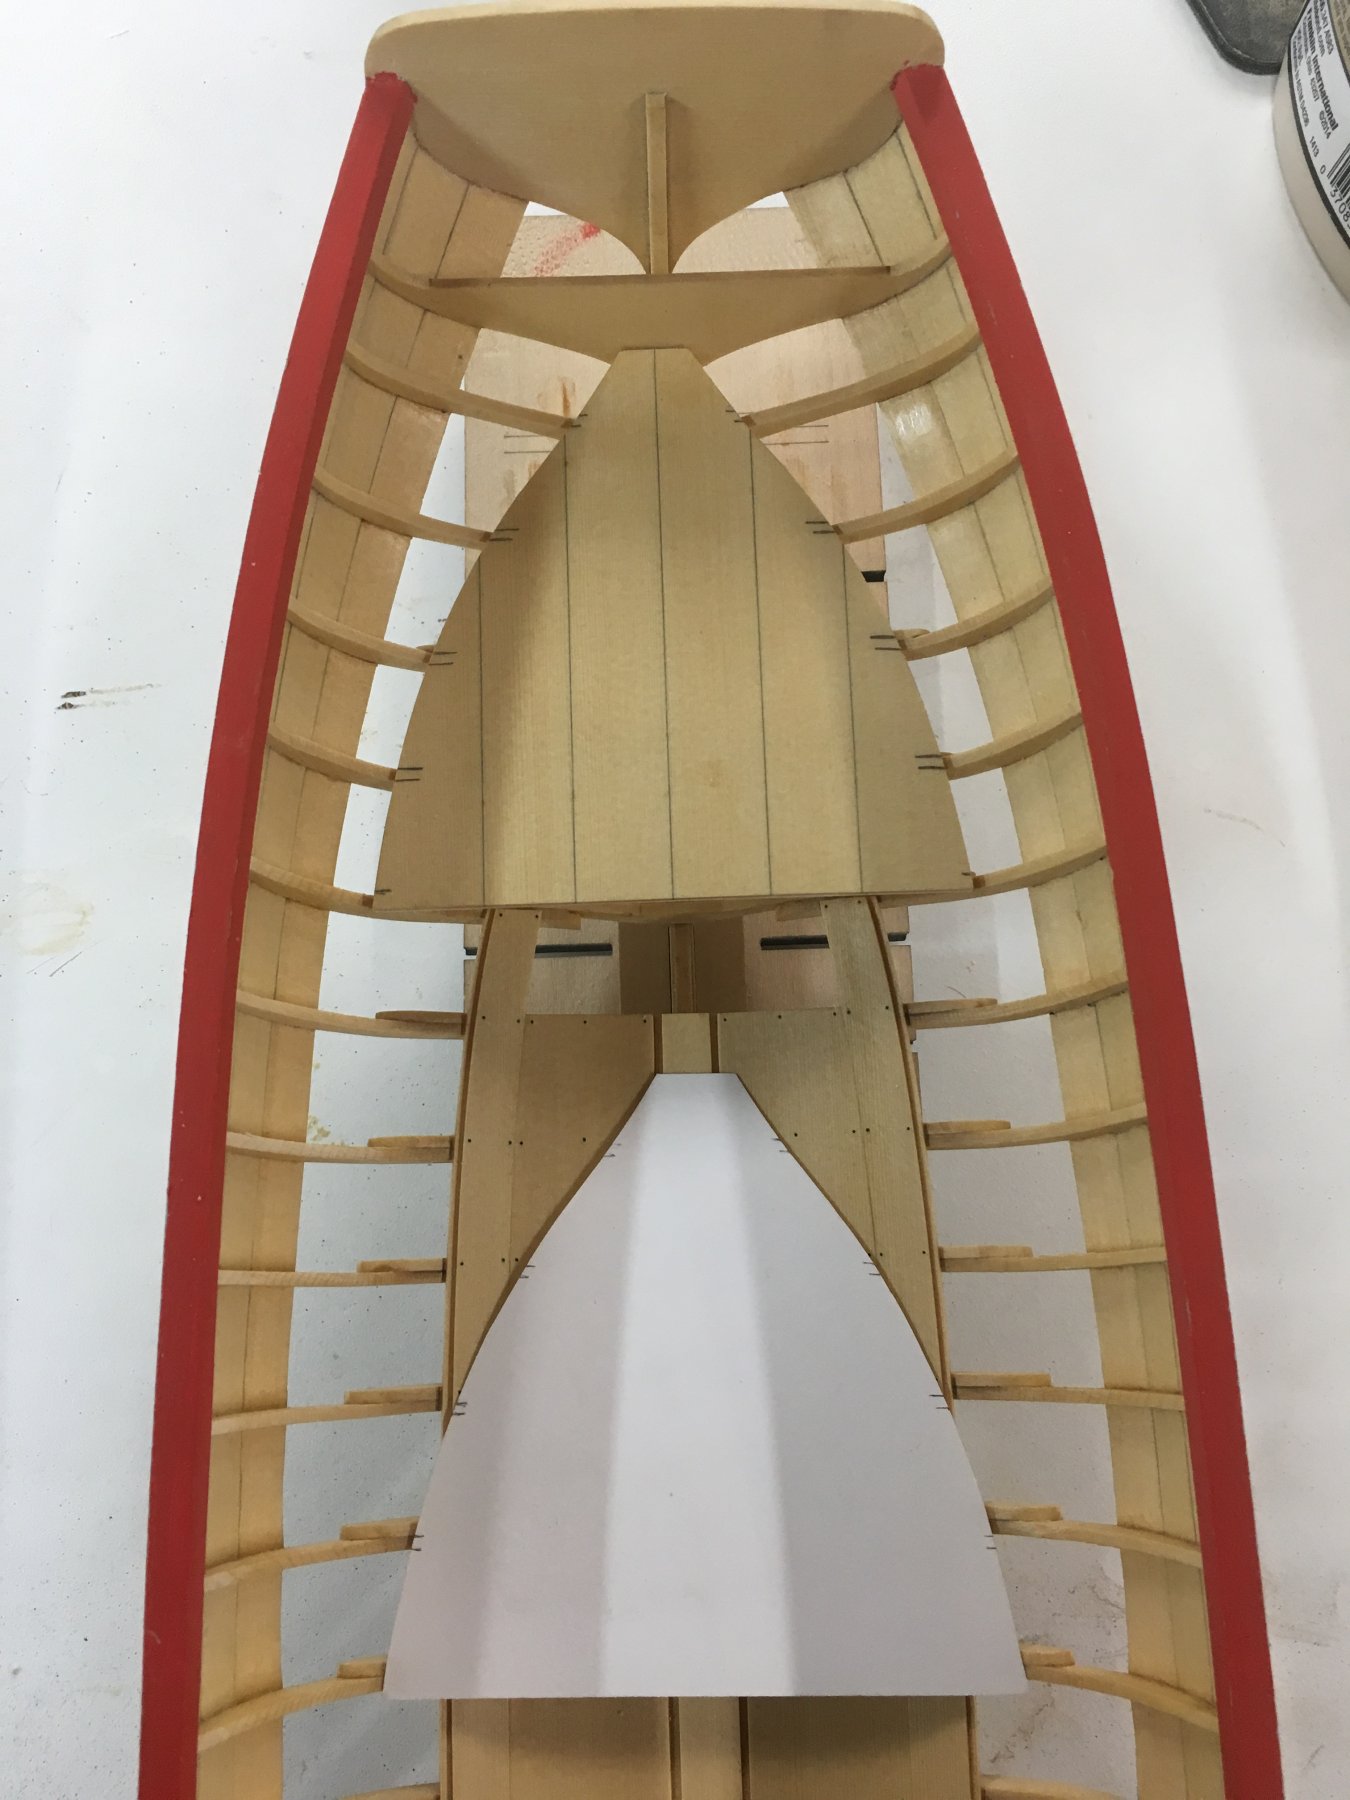
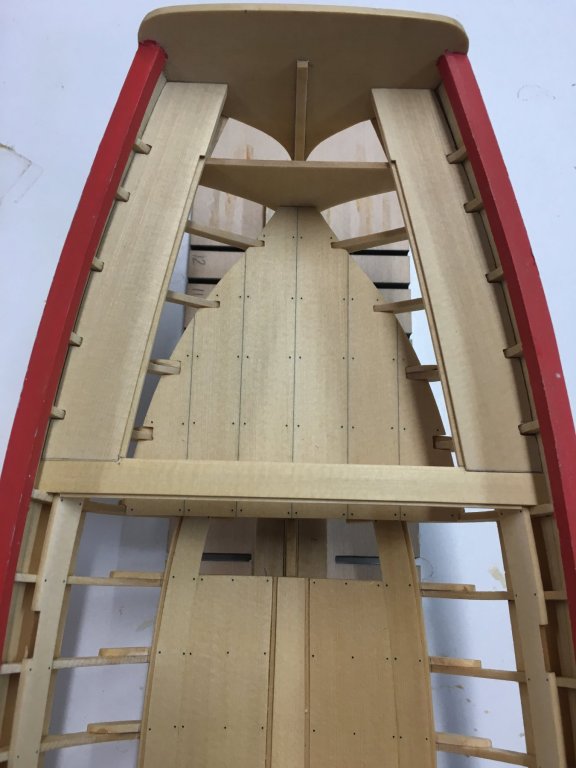
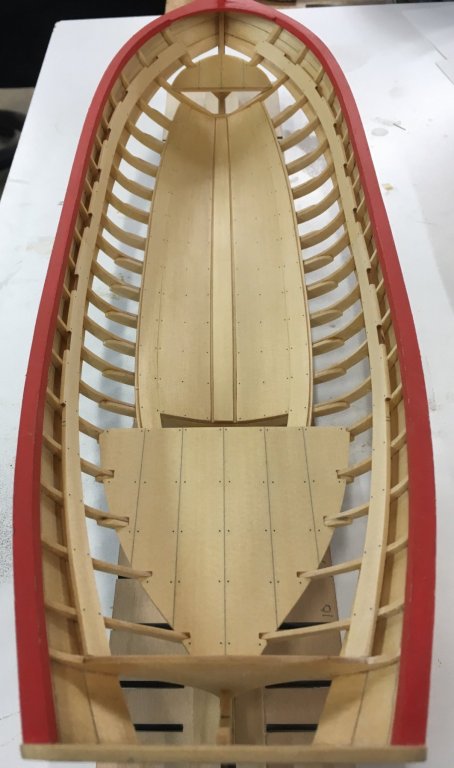
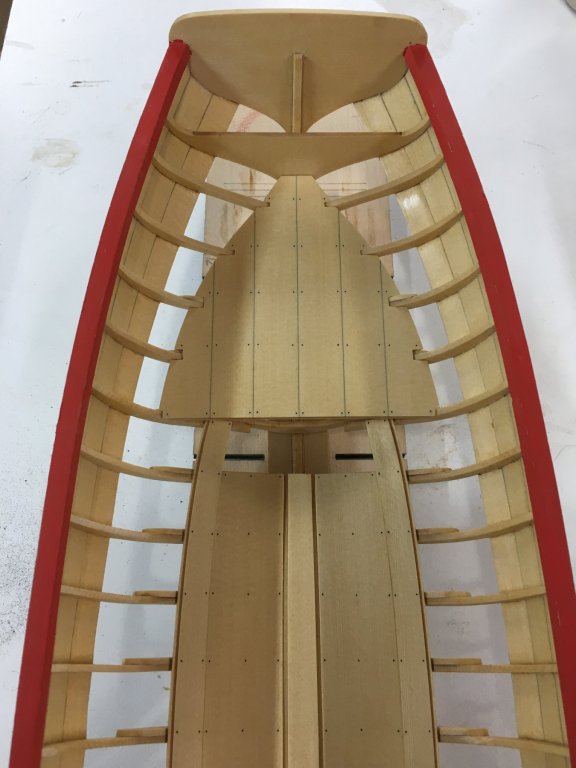
Hi Everyone, thanks for the comments and the likes. Here is the fore platform and the risers installed and “nailed”. Their positions were checked against the plans several times to make sure they were at the correct height and fore/aft position was good. Now onto the cockpit seats. ben

- 64 replies
-
- 12
-
-
- medway longboat
- Syren Ship Model Company
- (and 1 more)
-
Wow Rusty, yet another beauty to display. The dark side is waiting my friend! 😎
- 152 replies
-
- 1
-
-
- medway longboat
- Syren Ship Model Company
- (and 1 more)
-
Thanks for all the likes. Greg - no lower planking or ribands. Kenny - don’t follow me to closely as I might lead you down the wrong path 😳
-
Hey Mark, yeh - multi year builds are tough - that’s why I do some of ChuckP’s “kits” in between ( they are plenty interesting on their own I will tell you ) it takes some pressure off and makes me want to work better on Pegasus - that’s the key point for me these days - follow Remchoes mantra! Ben
-
Hi Pat, yeh - it’s kinda nice to see some coloring on her, I machined some boxwood today that I will use for upper planking, that creamy yellow really looks nice IMO next to that deep red/pink of the Swiss pear and the deep black of the dyed wales. as always - we shall see what next week brings - probably two steps forward and one back as usual. ben
-
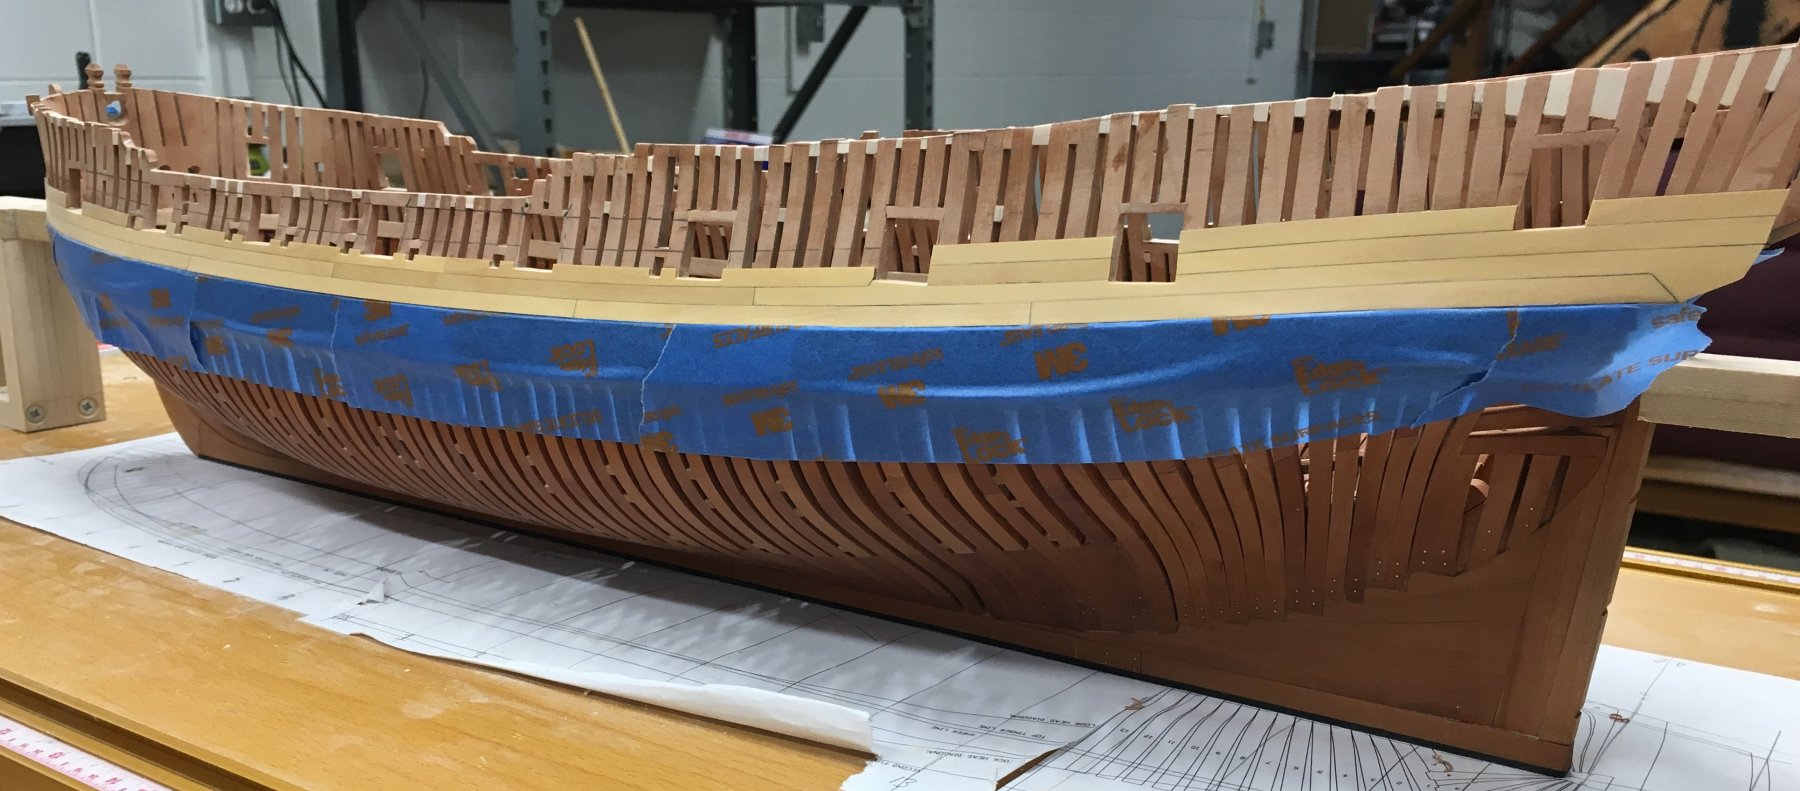
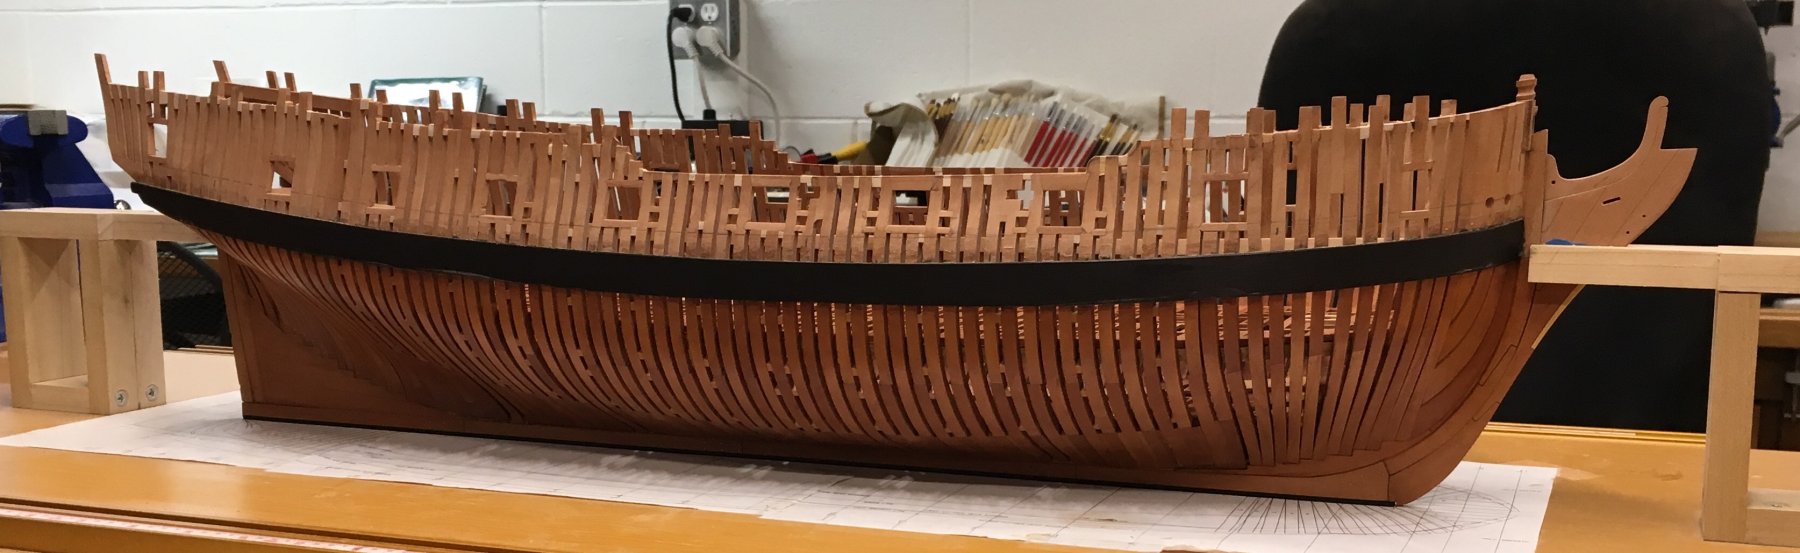
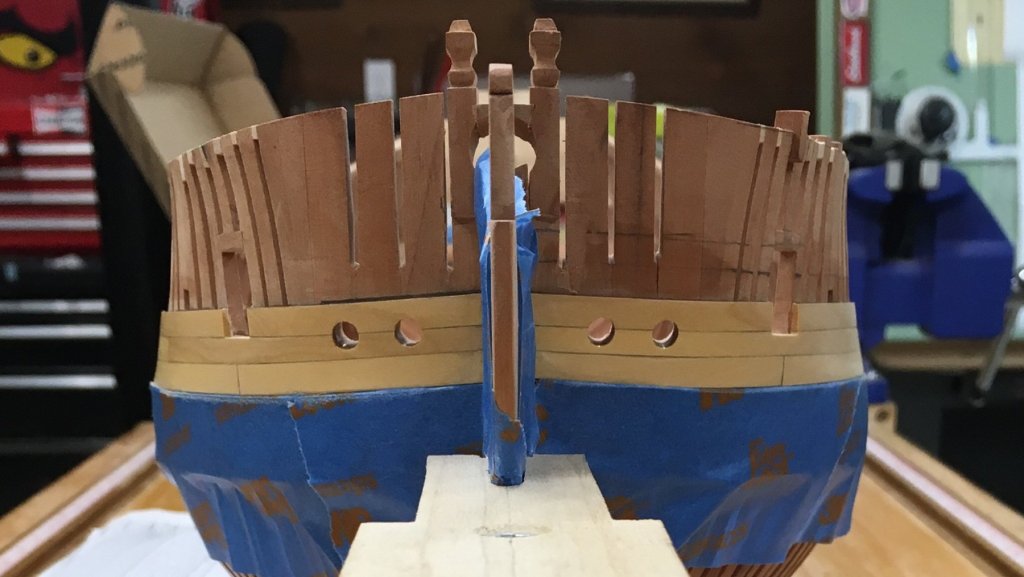
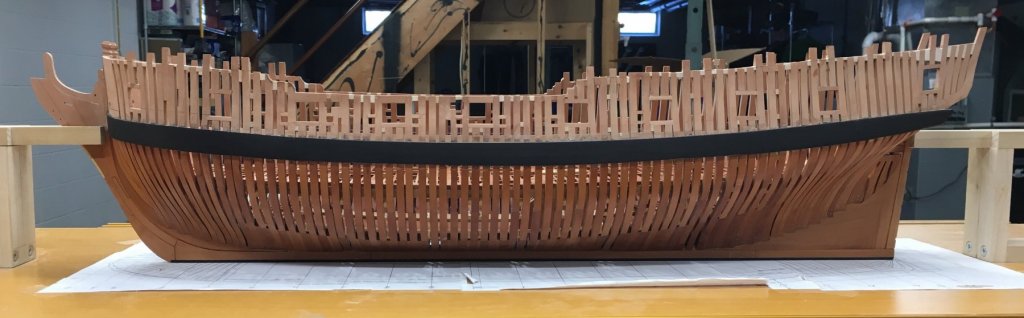
I decided to do a little work on the exterior, so the new Knee of the Head was made and installed, then final fairing and sanding to 220/400 was completed below the Wales and 1st coat of finish applied ( 50% danish oil / 50% mineral spirits ), the wales took some damage during sanding and will have to be re-dyed later on. Im quite happy with the color that the Swiss pear has taken on with this type of finish. Next up - remove the knight heads and fair the top timber line, then proberbly start the stern framing. ben

- 889 replies
-
- 33
-
-
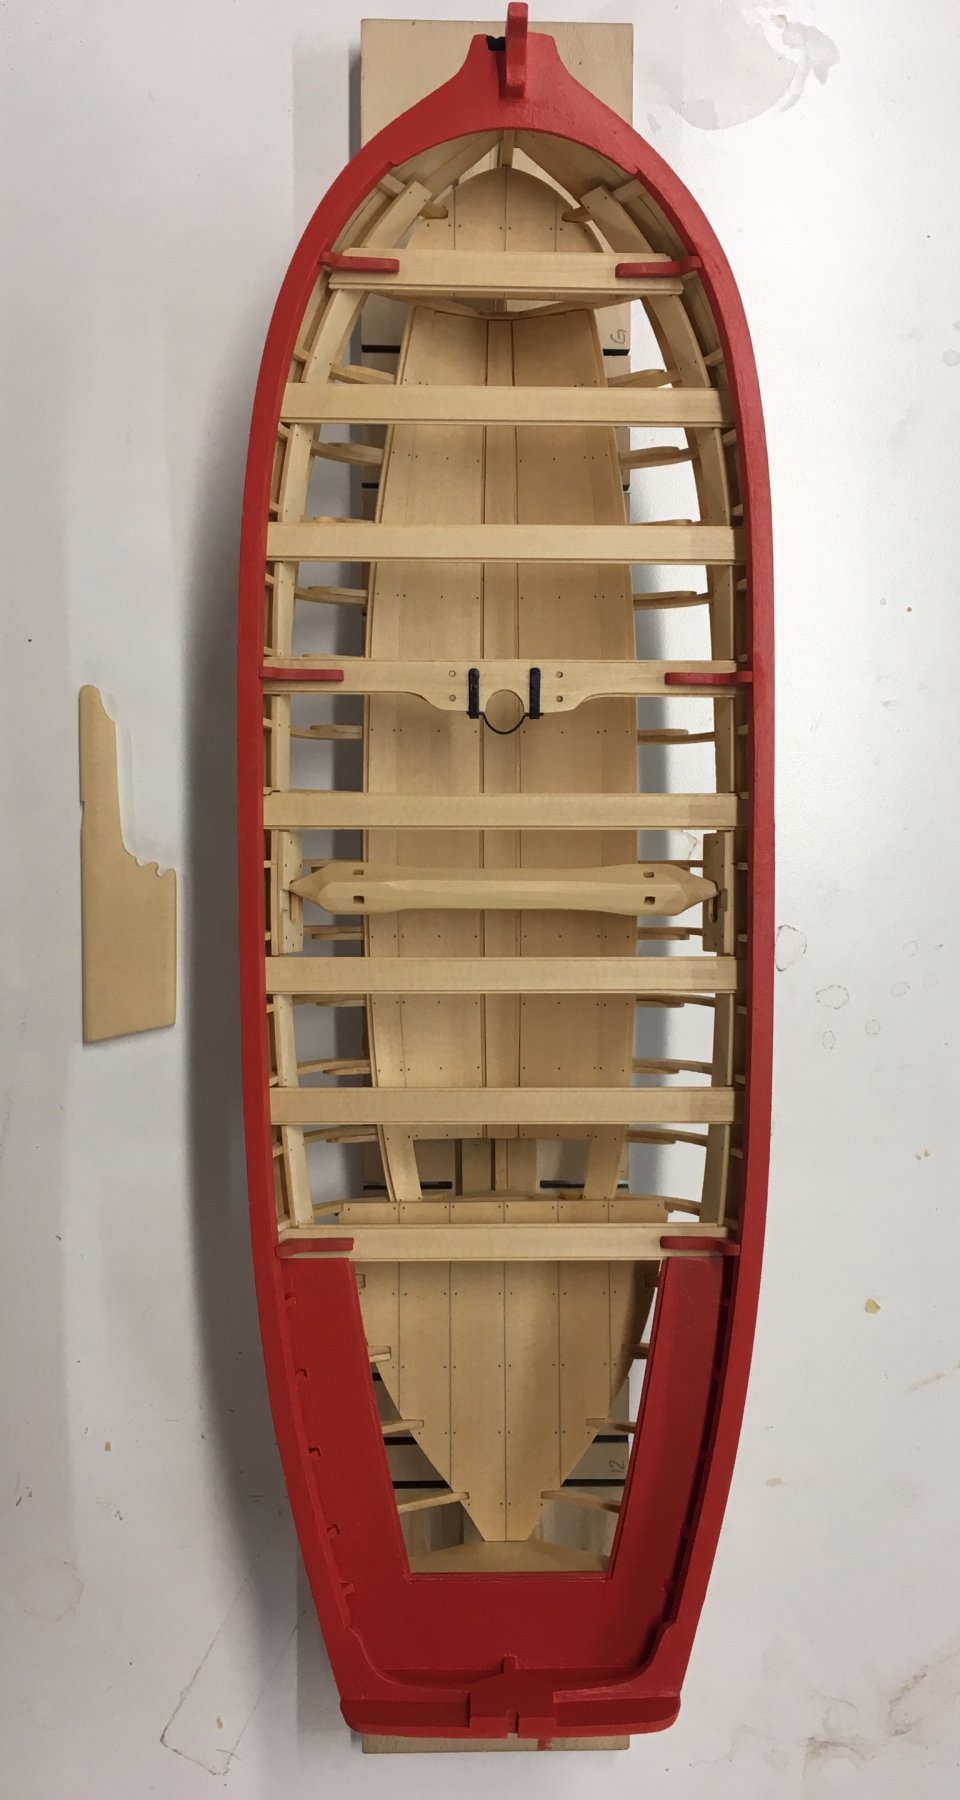
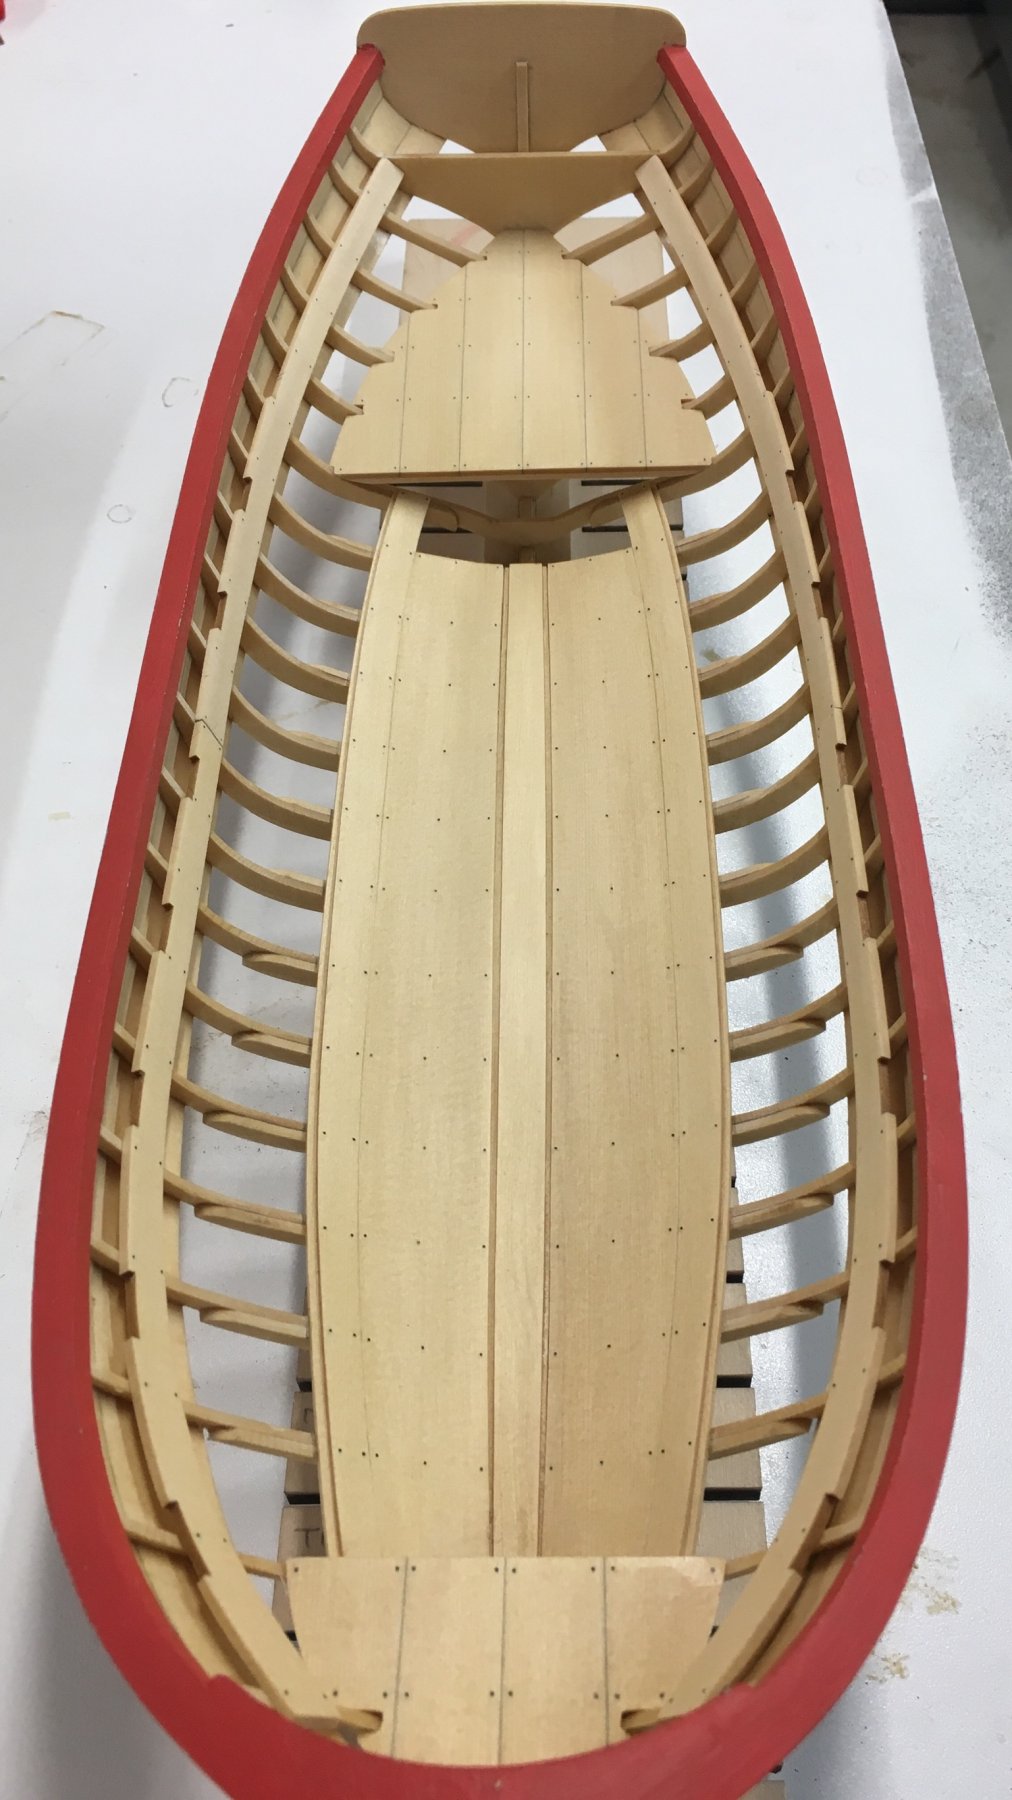
Finished looking, and then installing the aft platform, now onto the fore. ben
- 64 replies
-
- 8
-
-
- medway longboat
- Syren Ship Model Company
- (and 1 more)
-
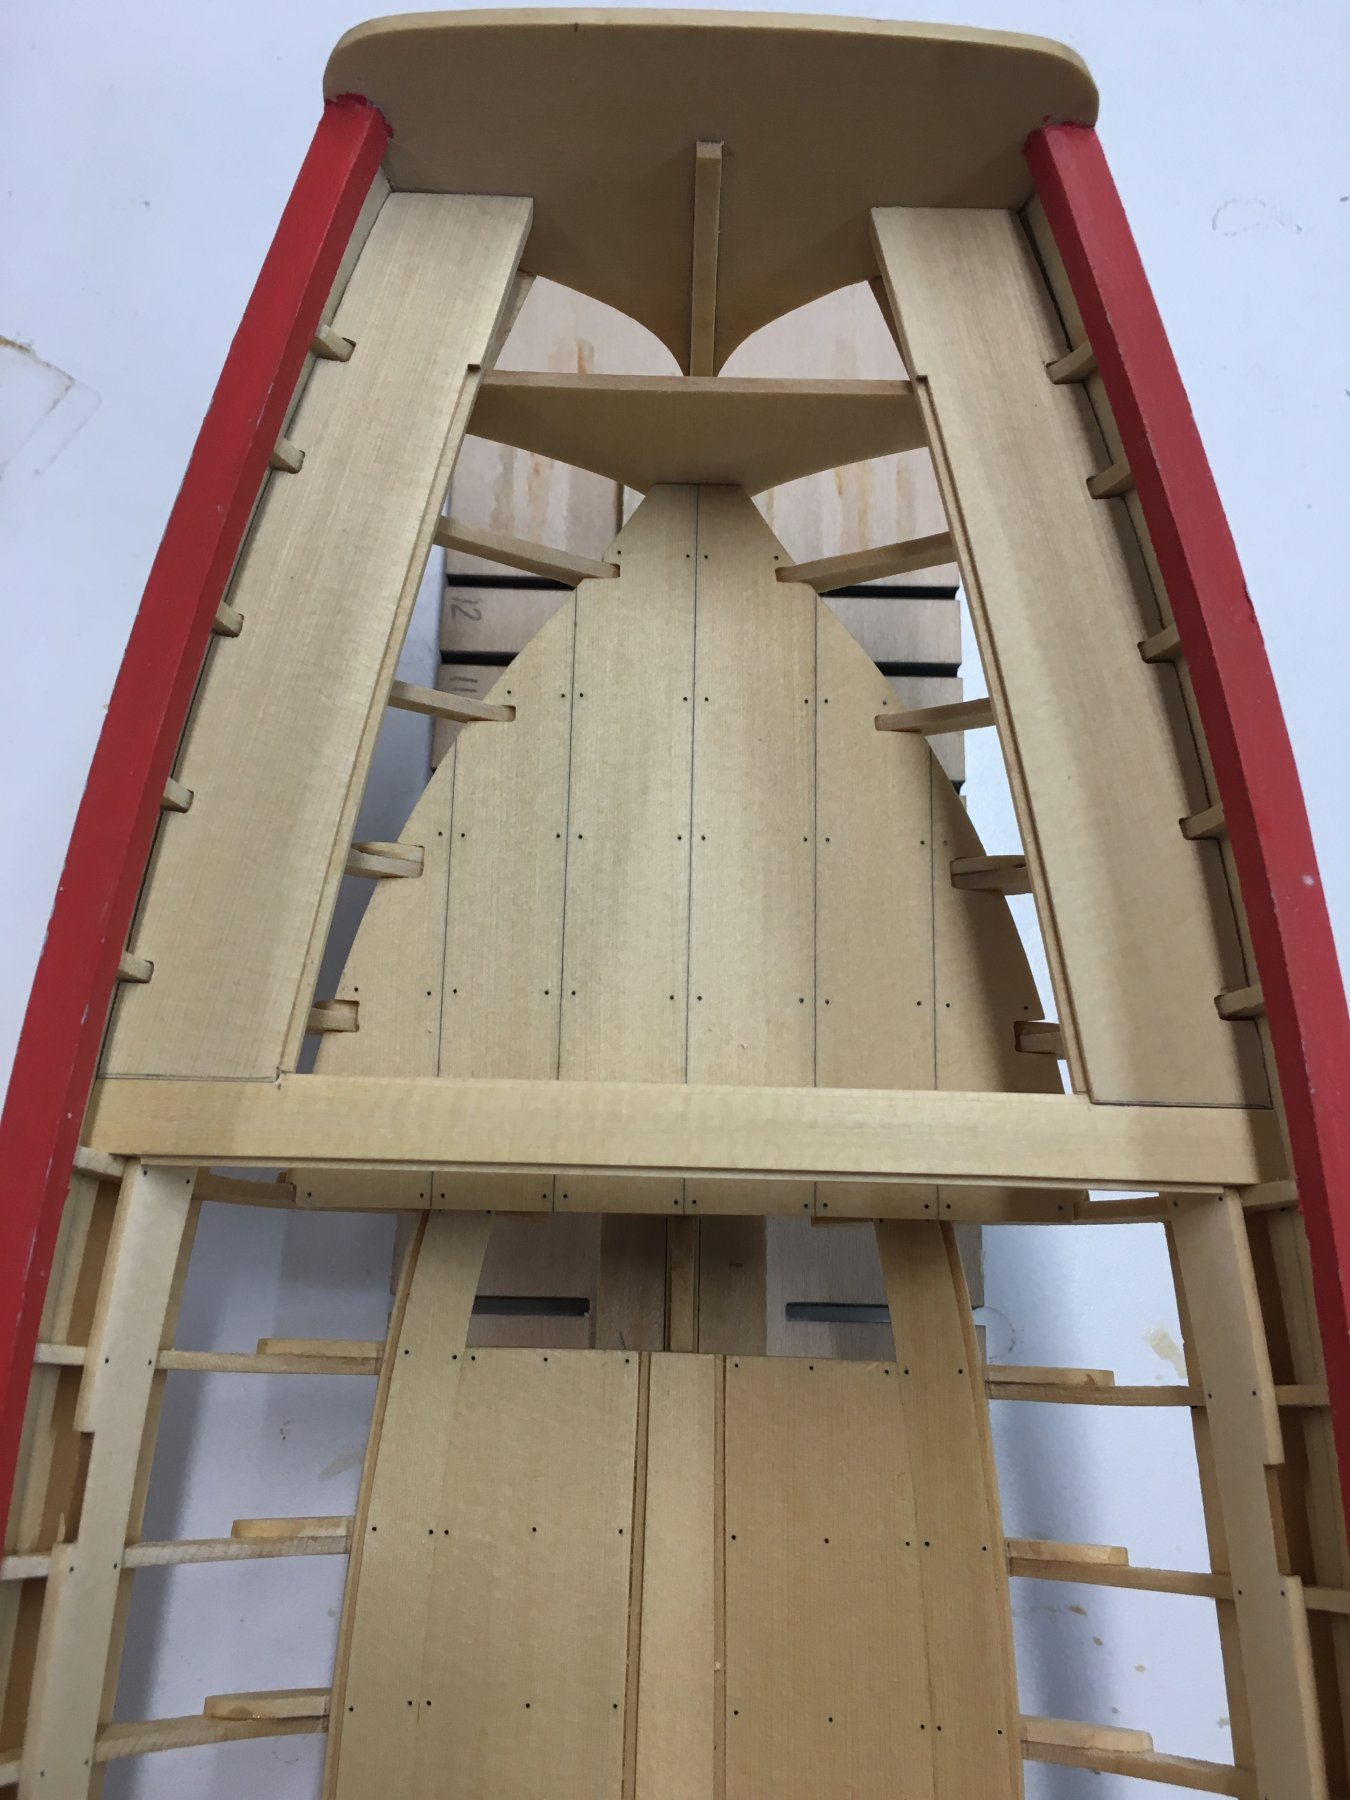
Looking at the notches on the aft platform.

- 64 replies
-
- 9
-
-
- medway longboat
- Syren Ship Model Company
- (and 1 more)
-
Hi Kenny, I’m not much of a one for giving other people advice, just take your time and try not to accept something that you know is not right. Getting the spacing and symmetry correct can be tough if you want a really good result - I can’t count how many times I remade things on the lower platforms and lower deck - but I’m now happy with my results. One thing I’m doing differently from now on is using Black fishing line instead of copper wire and LOS to simulate bolts, much easier and looks better and more consistent to me. ben