HOLIDAY DONATION DRIVE - SUPPORT MSW - DO YOUR PART TO KEEP THIS GREAT FORUM GOING! (89 donations so far out of 49,000 members - C'mon guys!)
×


Trussben
-
Posts
2,005 -
Joined
-
Last visited
Content Type
Profiles
Forums
Gallery
Events
Everything posted by Trussben
-
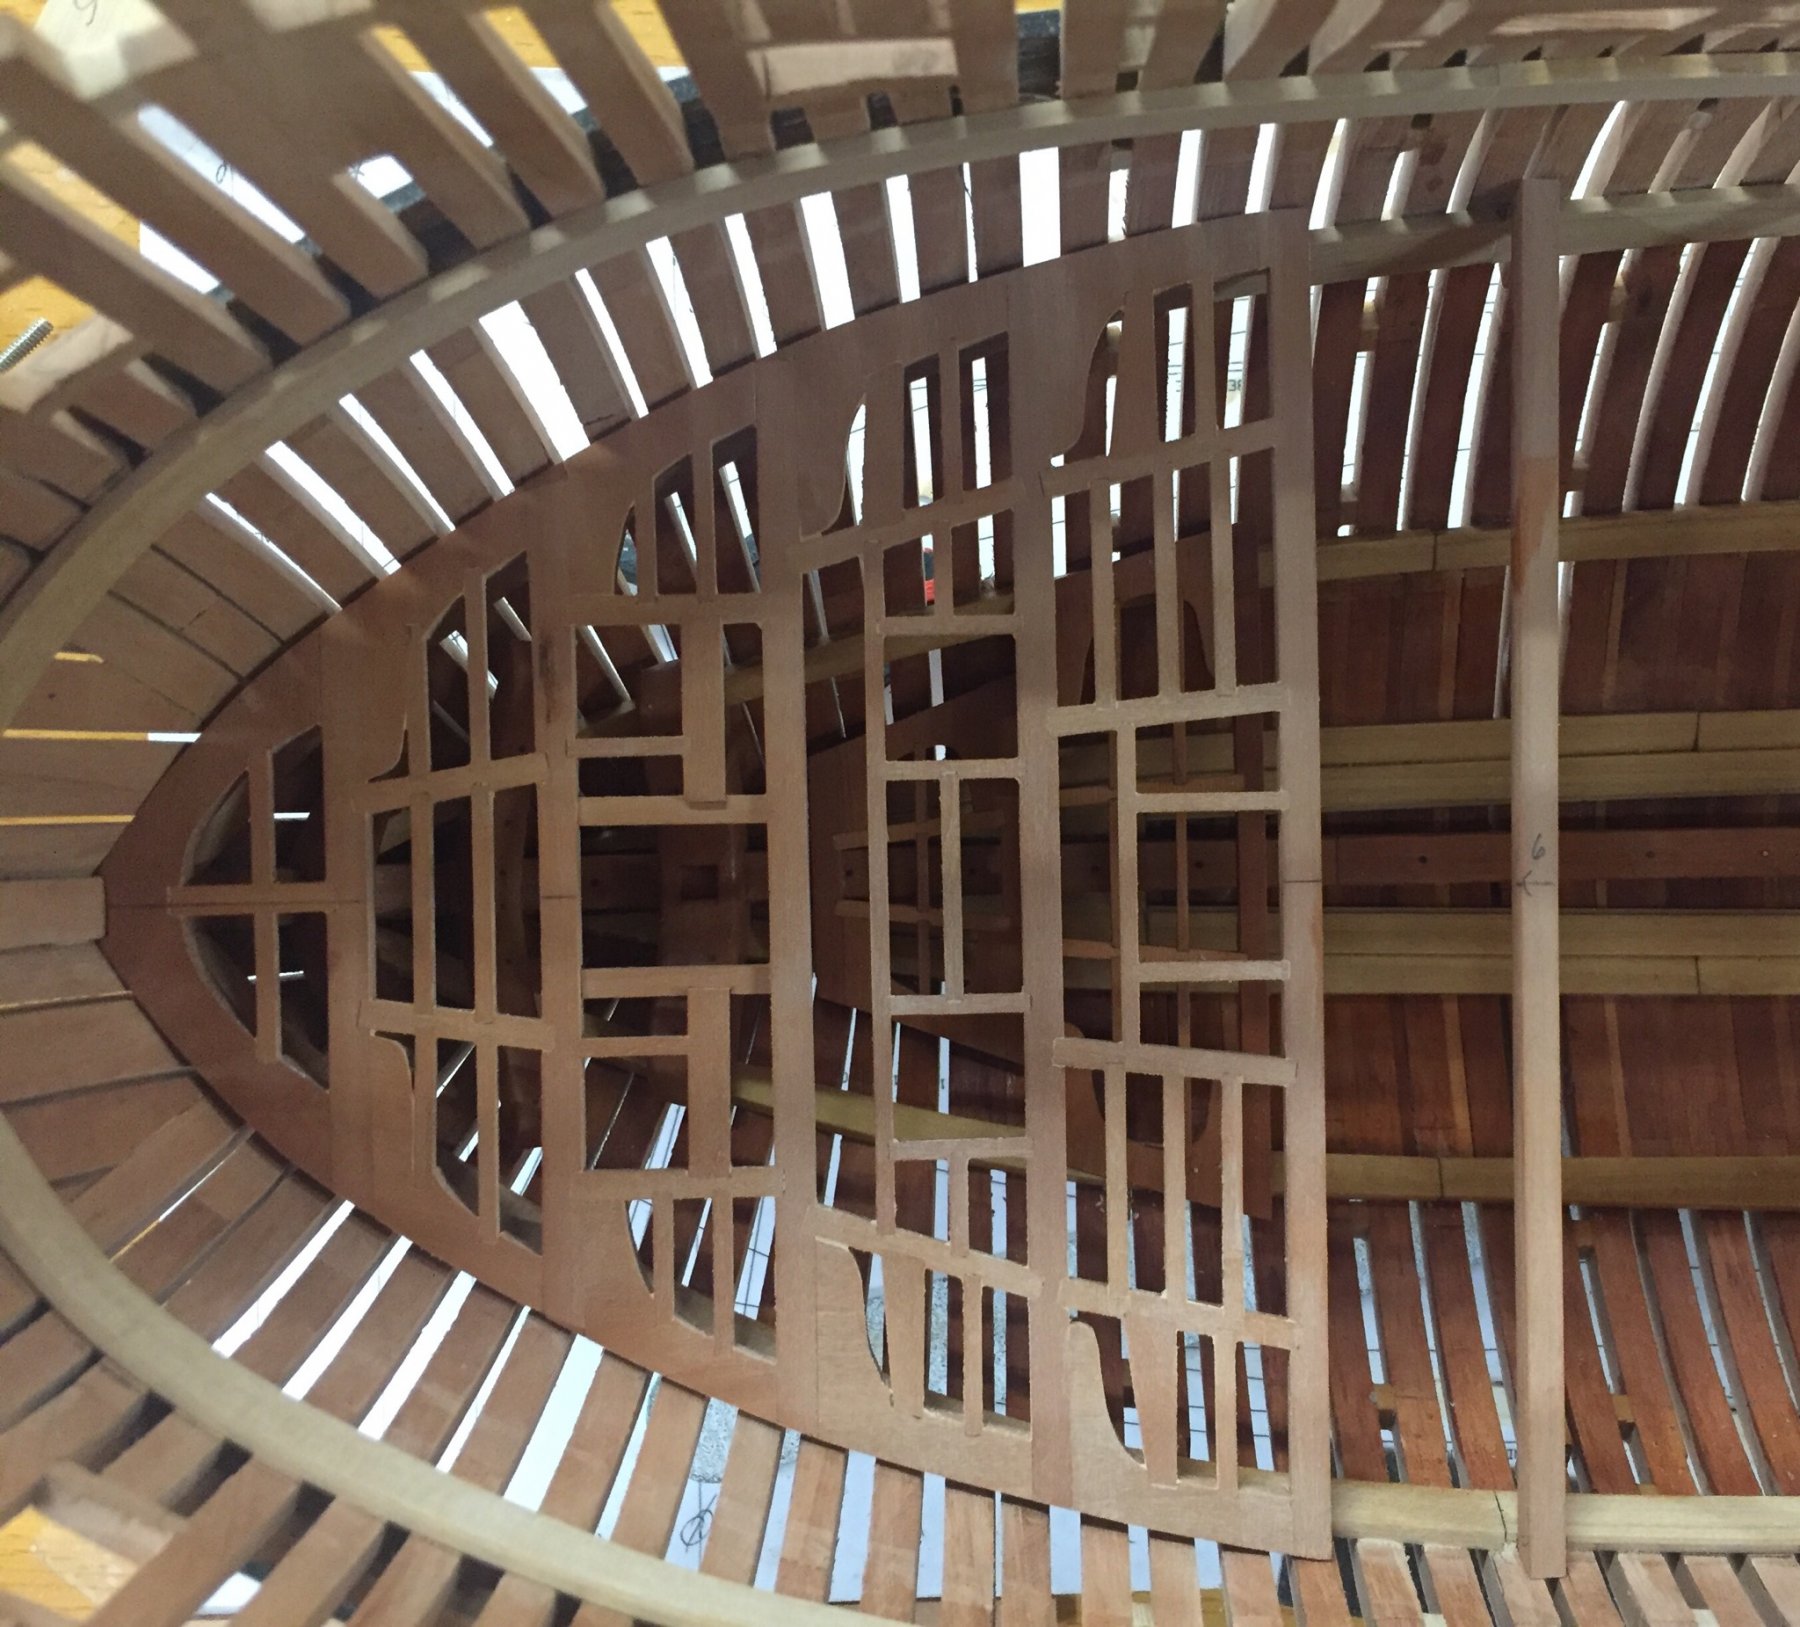
 So here are all the frames assembled and adjusted to fit in the build board. No issues seen at all, you just have to be careful to only glue one floor and futtock at a time to make sure they don’t get mixed up. Getting the loose but not too loose fit of the tabs into the build board just takes a little time and care to get just right. Next up will be glueing the keel assembly onto this framing. ben
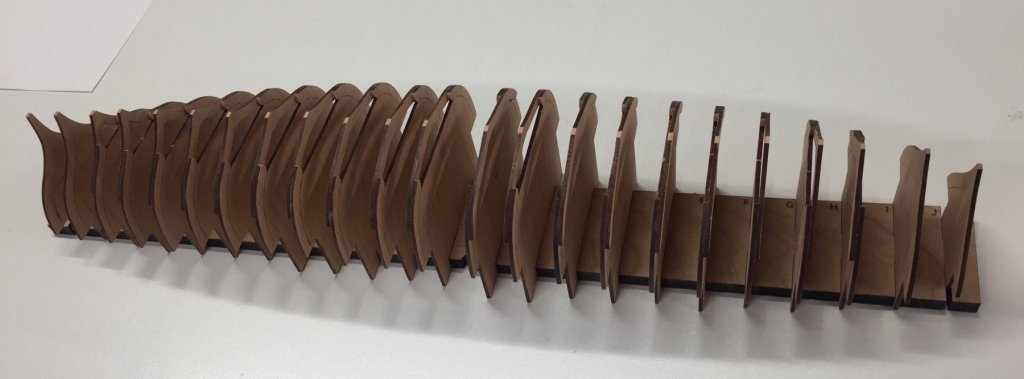
- 74 replies
-
- 14
-

-
- queen anne barge
- Syren Ship Model Company
- (and 1 more)
-
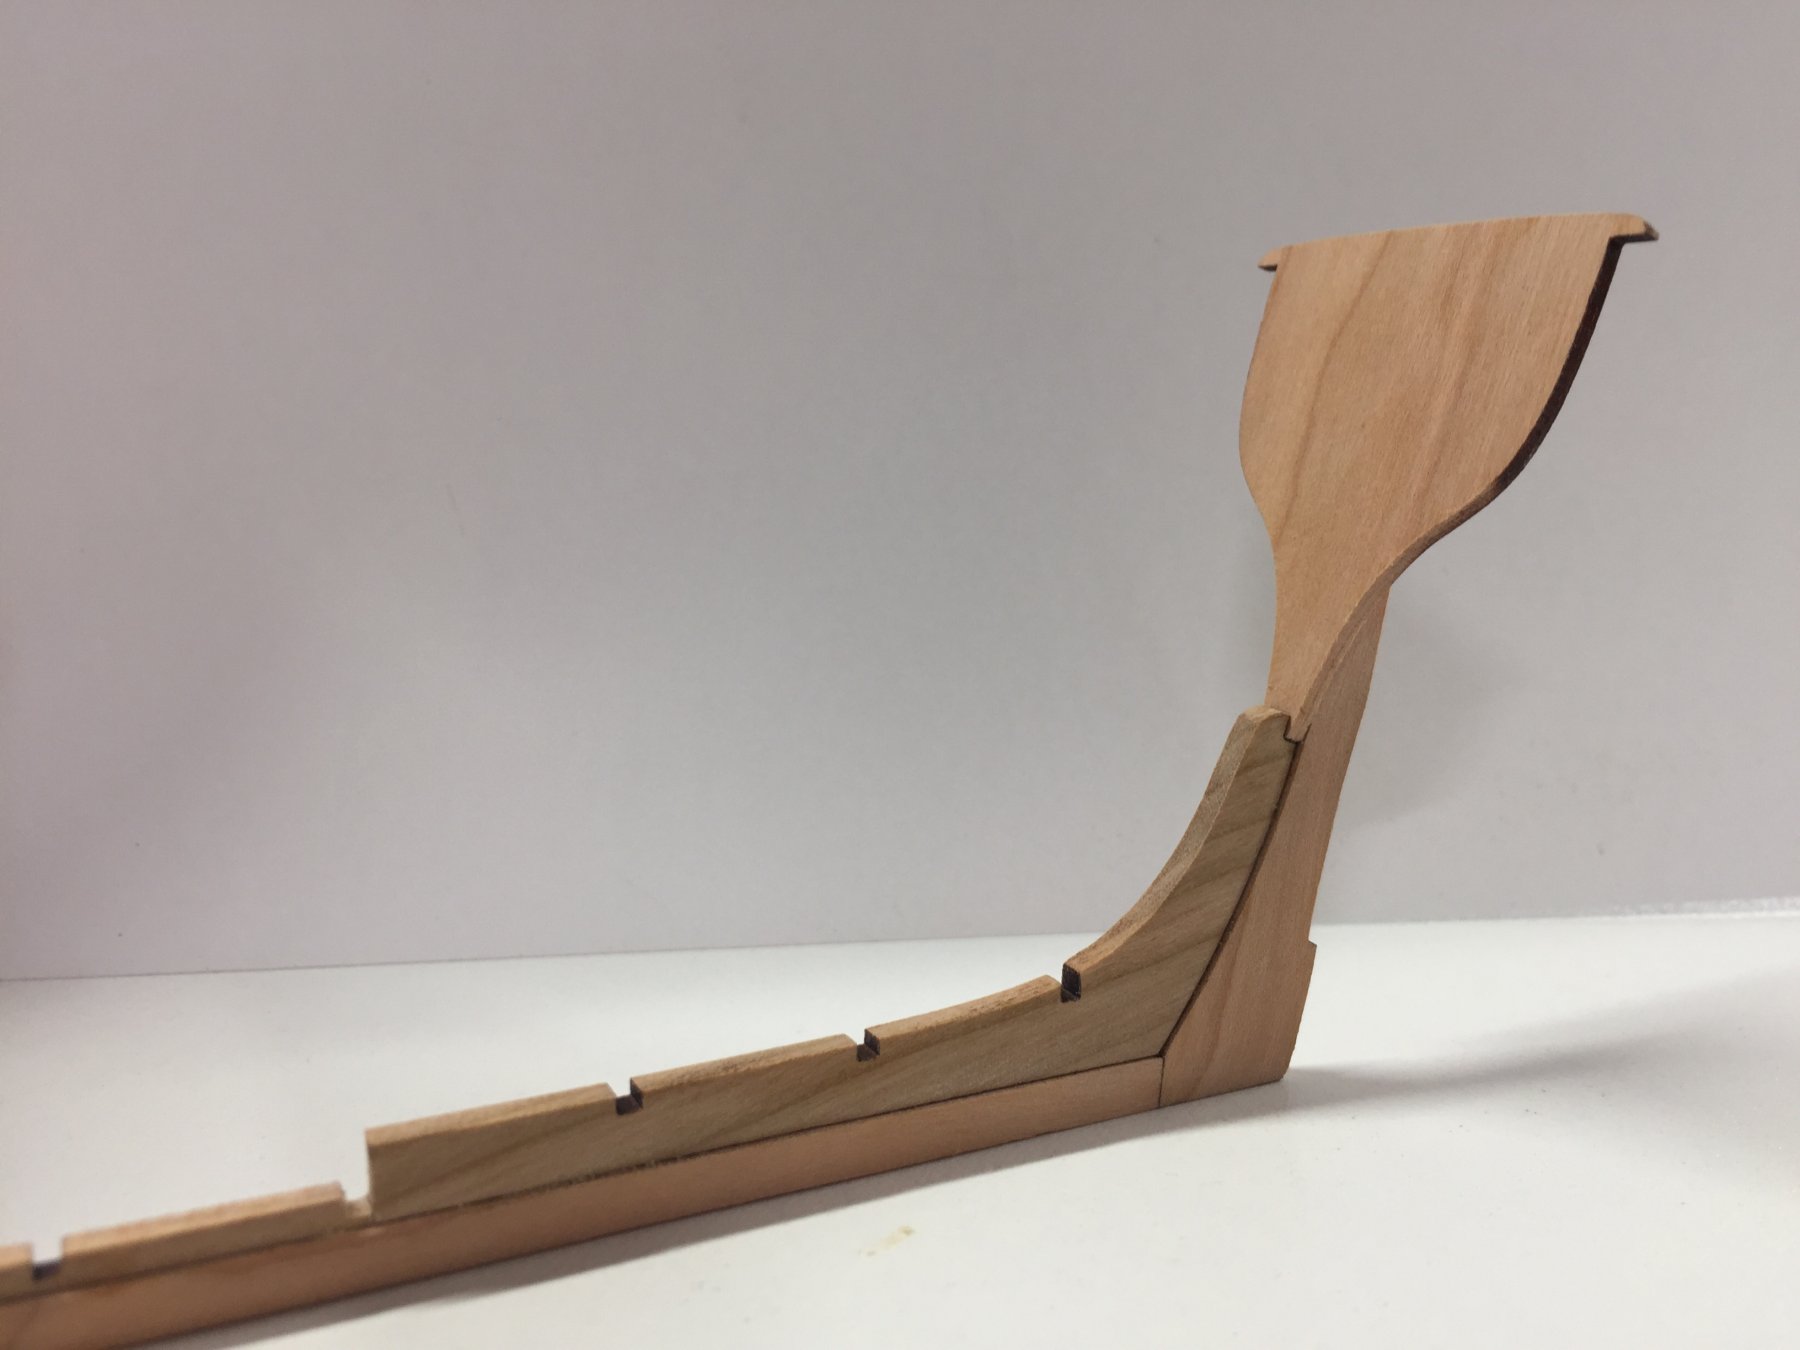
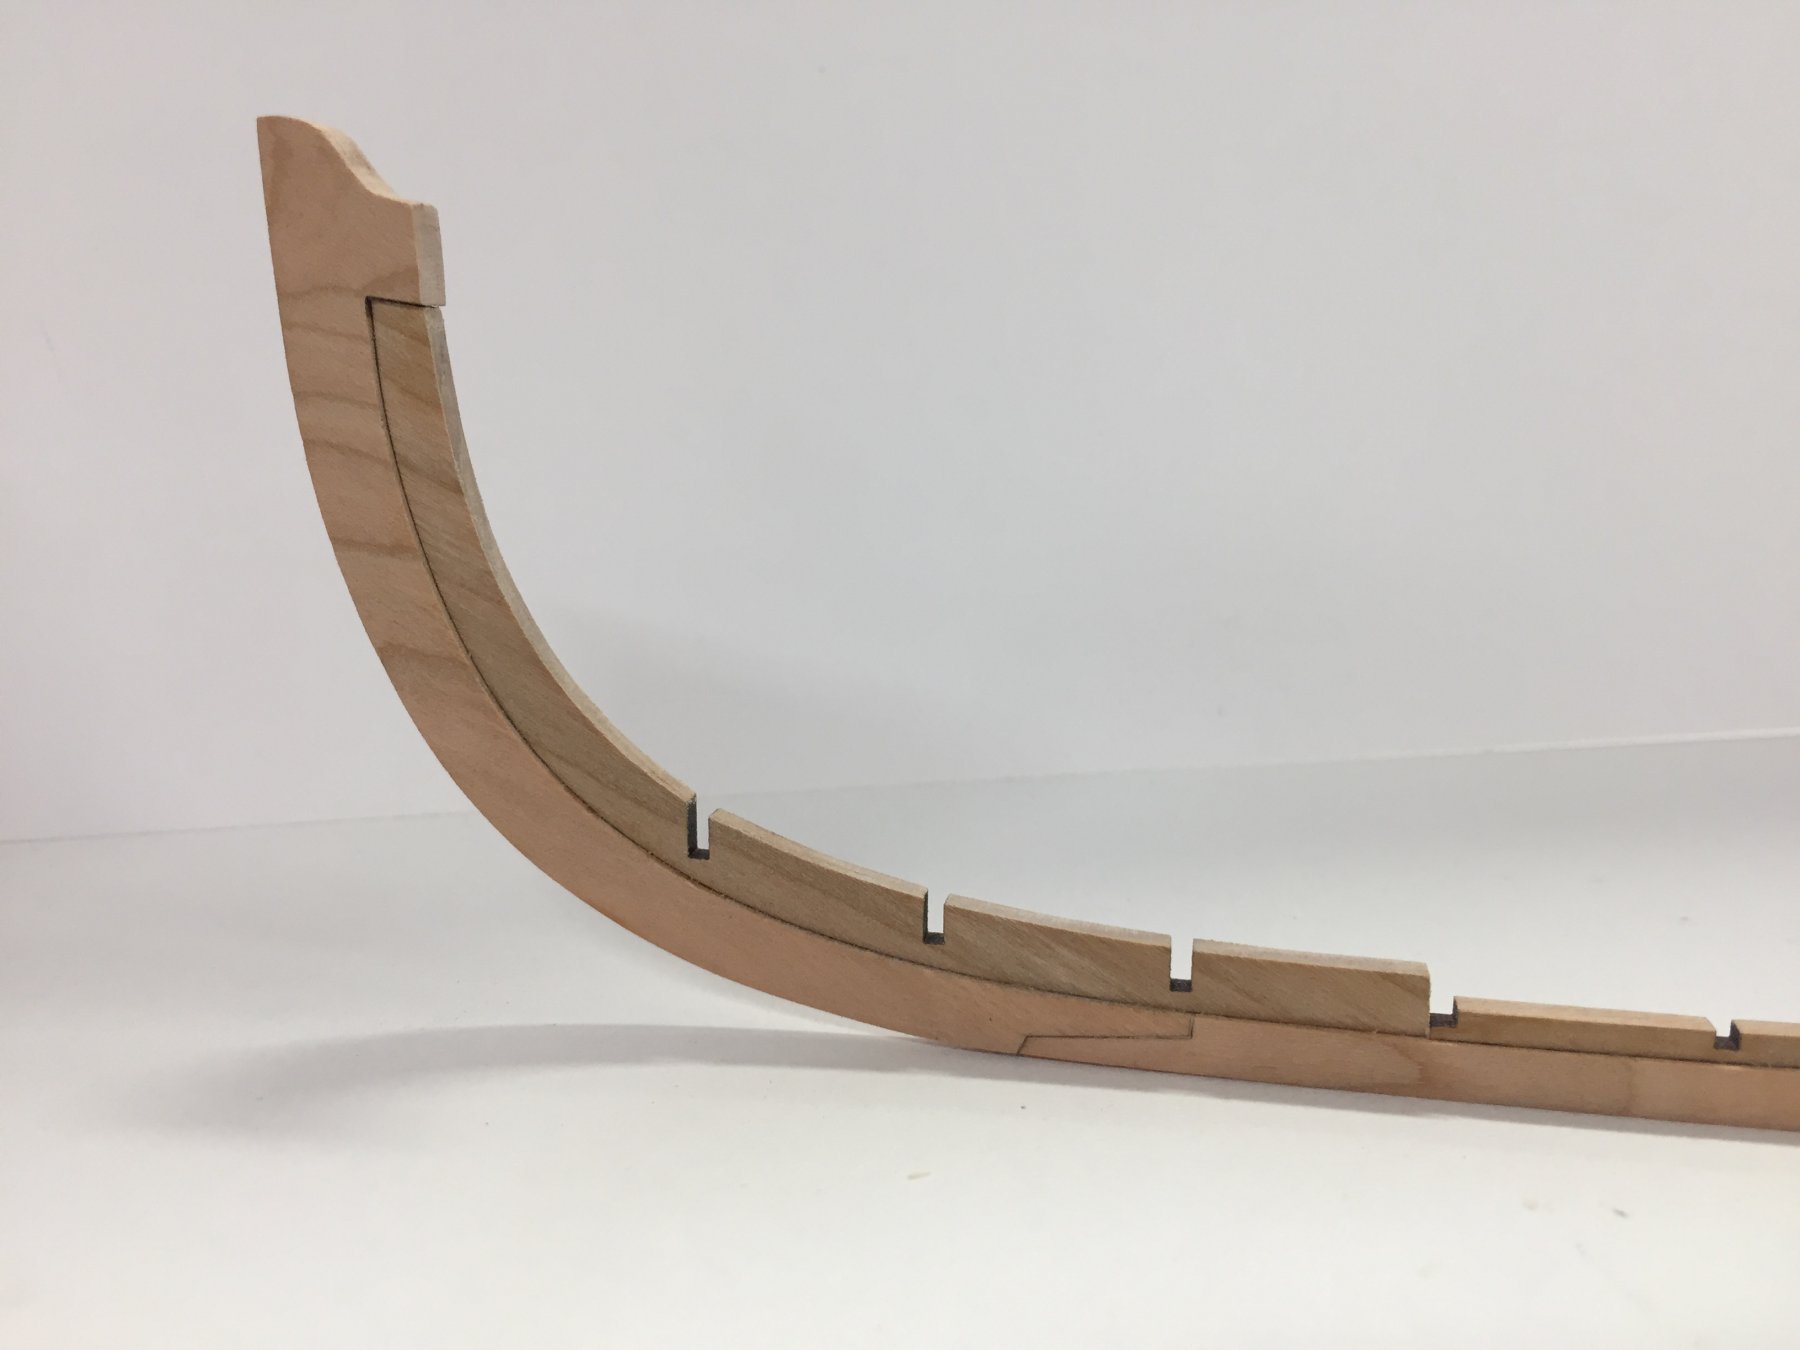
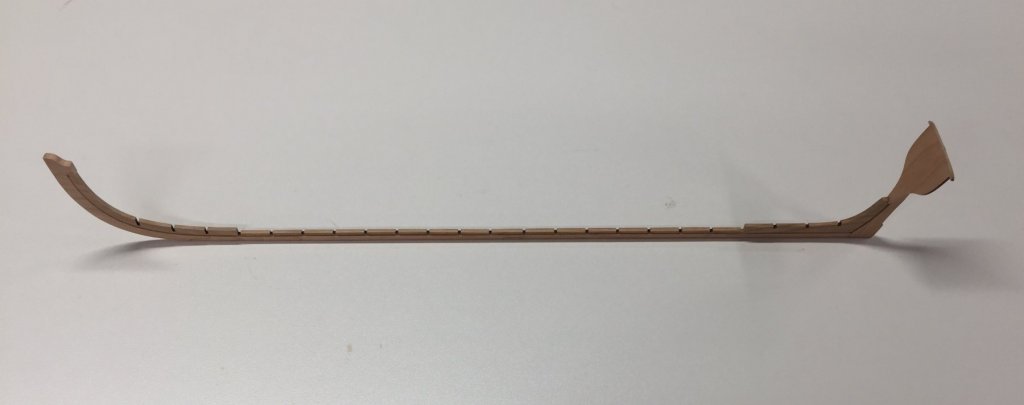
Hi, Ive decided to start a build log of the Syren Ship model, Queen Anne Barge at 1:24 scale that I managed to purchase from Chuck. The kit was purchased as a nice diversion away from my build of the Pegasus which has been slogging away for several years now and I wanted something that I could finish reasonably quickly. As of all things designed and produced by Chuck, I was not surprised on opening the box to be greeted by top quality components and plans, instructions were downloaded from his site. I shall not post pics of all the items as another builder ( Sam ) has already done that. I have started by completing the keel, all parts fitted together perfectly with no issues being seen so far, I will start putting together the frames and see how this unique approach that Chuck has devised for floor and futtock framing works. Ben


- 74 replies
-
- 26
-
-
- queen anne barge
- Syren Ship Model Company
- (and 1 more)
-
Are there any build logs of the Barge on the site, I don’t see one.
- 269 replies
-
- 6
-
-
- Queen Anne Barge
- Syren Ship Model Company
- (and 1 more)
-
Thanks for all the likes and comments. Meddo - the hinges are hammered copper which was then blackened using LOS ( liver of sulphur ). Ben
-
Rusty, I congratulate you on taking the big step of redoing the majority of the rigging all over again, it’s heartbreaking when our ships take damage, but your skill will make her whole again and better than ever. ben
-
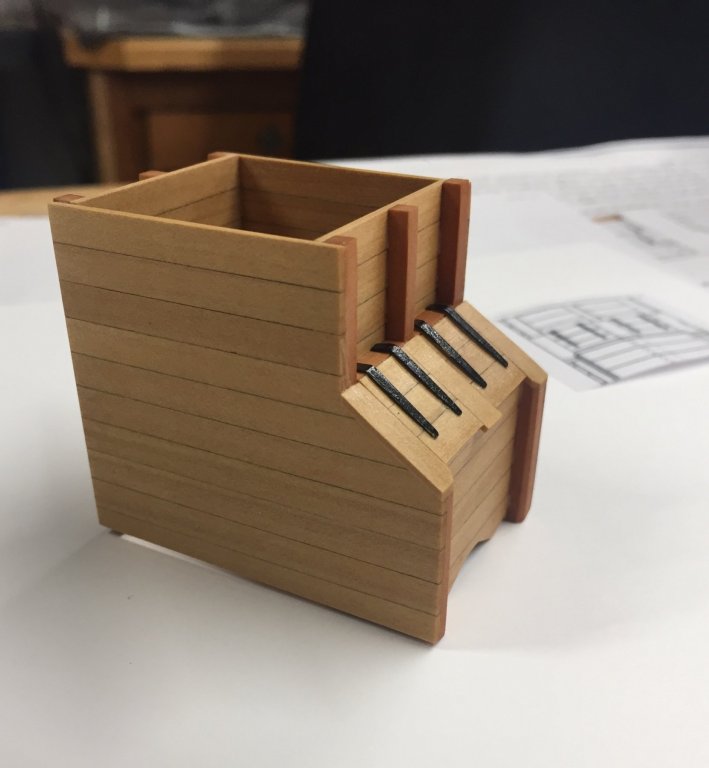
Here is my representation of the well and shot lockers, came out ok methinks so I may install it in the model. ben
- 889 replies
-
- 29
-
-
Chris, I use a Worksharp 3000 model electric sharpener designed for chisels and plane blades. Costs about $175. Comes with two glass plates and four grades of abrasive to stick to both sides of the plates, 100,400,1000,4000 grit. When I’m normally sharpening I’m just using the 4000 side and it takes the burr off the back with a separate piece of 4000 that it rests on. Has a rack that the back of your chisel rests on that has preset and repeatable angles set into it. You can also purchase a leather hone plate if you want to go to a pure mirror finish, however I find the 4000 is plenty sharp enough for almost anything I do and only takes a few seconds to maintain silly sharp edges. ben
-
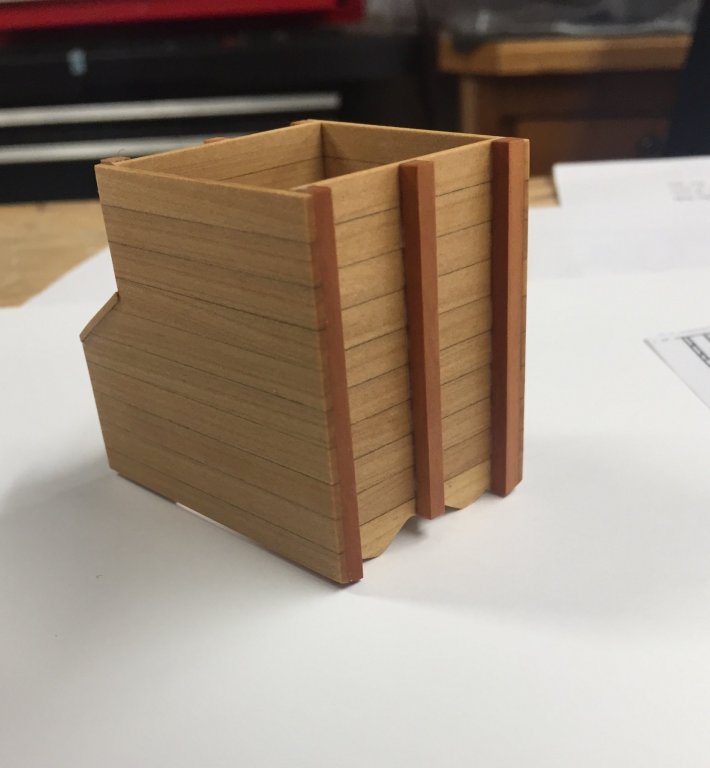
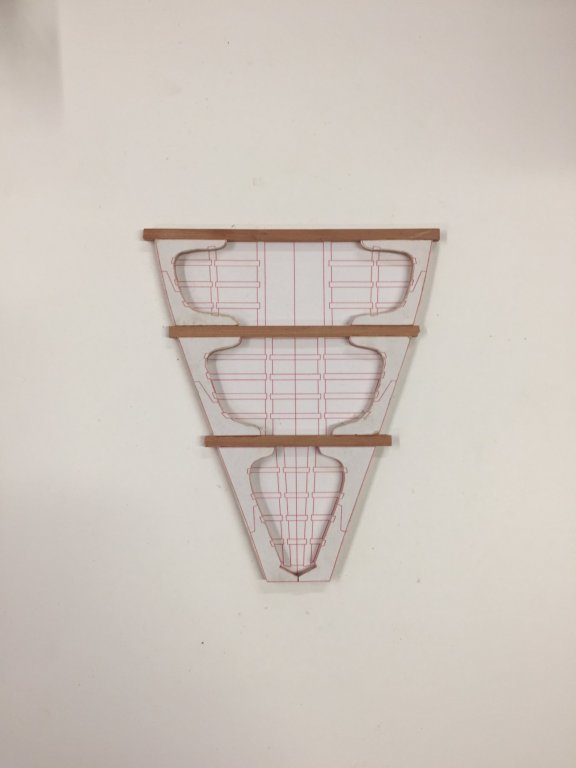
Thanks for all the likes. Im thinking of maybe including the well so I decided to do a size and position check using the TFFM example shown in the book, seems to be a good fit in my hull. ben
- 889 replies
-
- 19
-
-
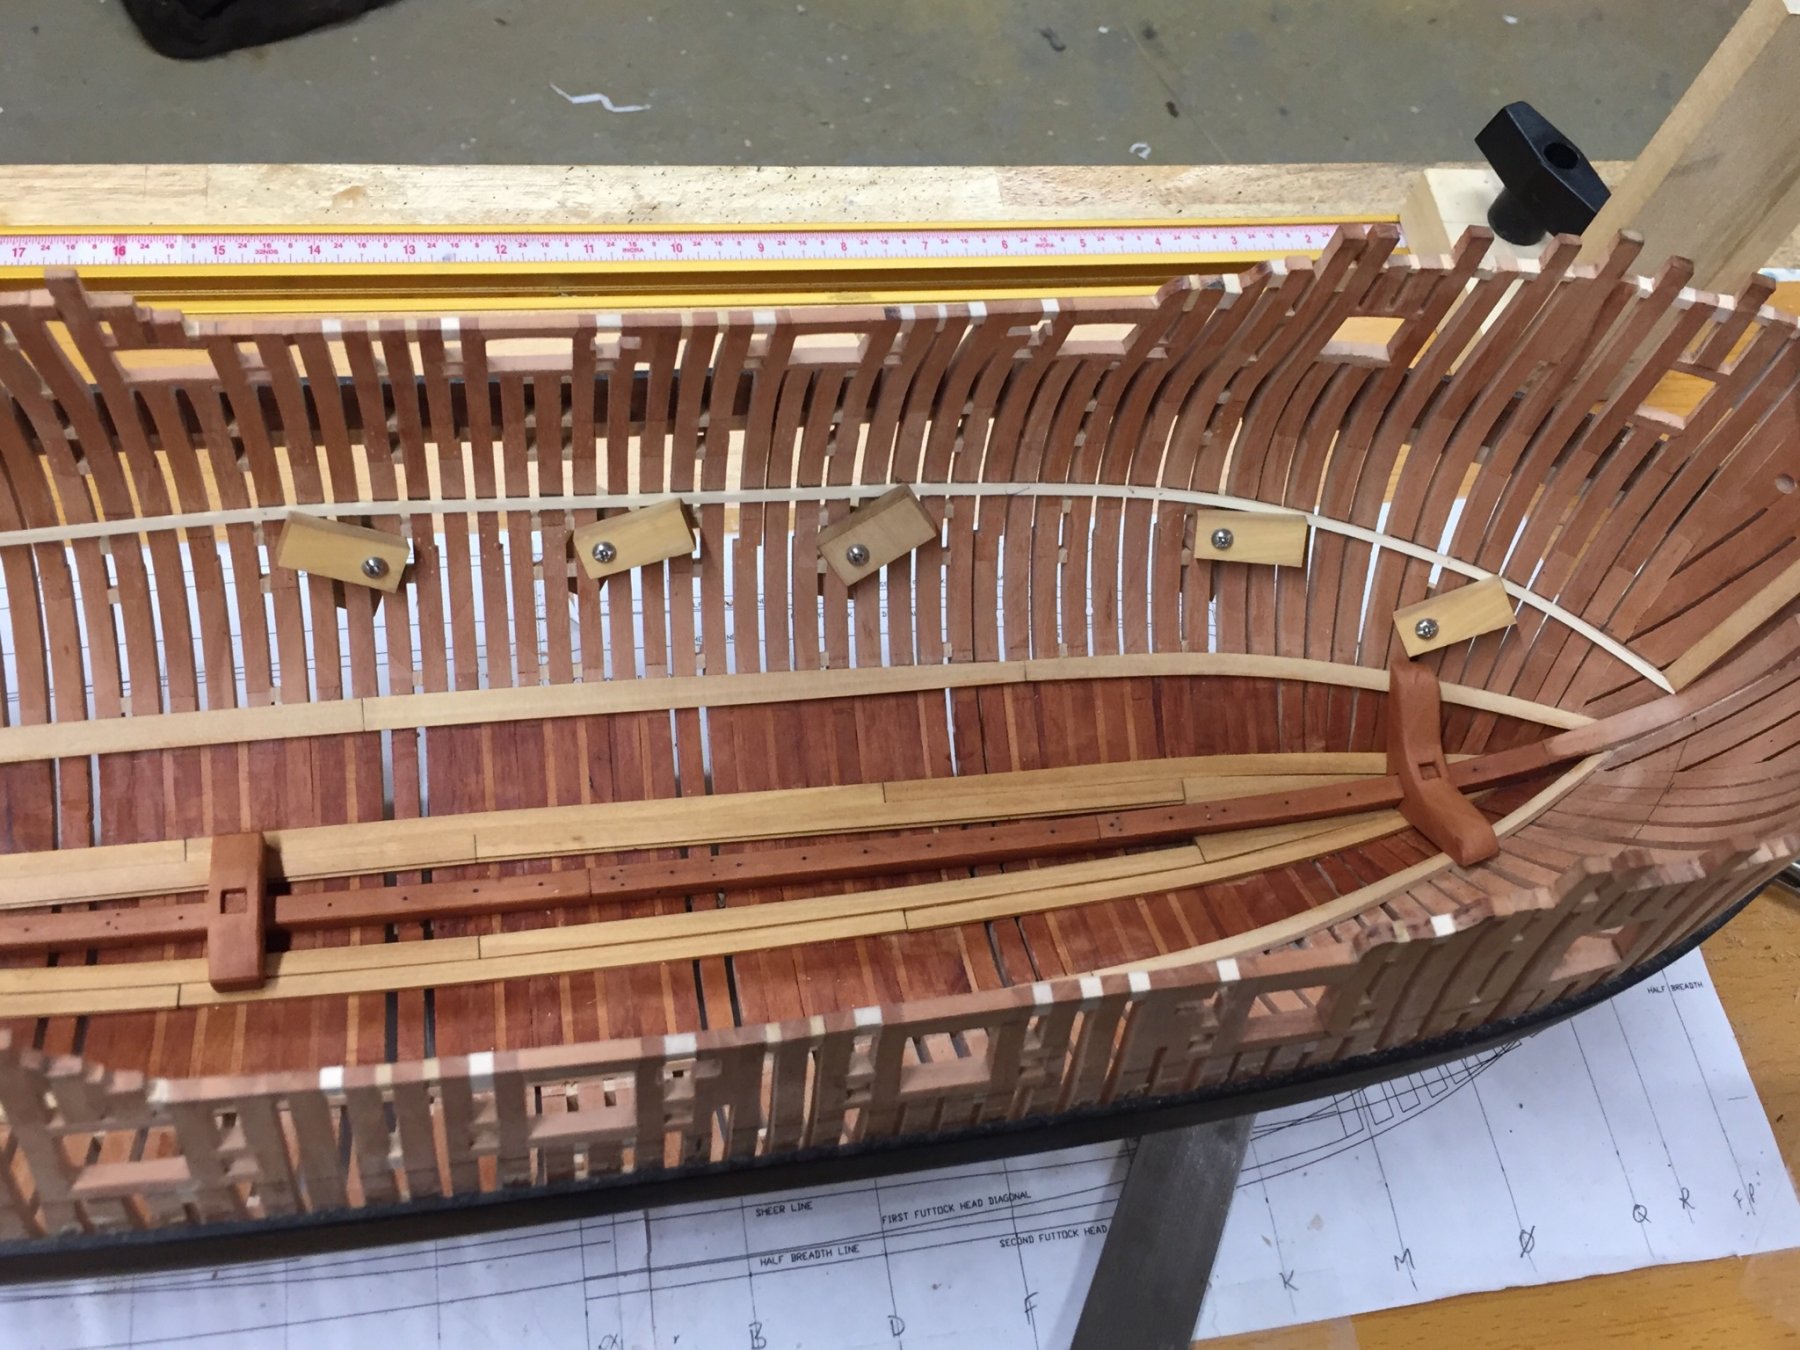
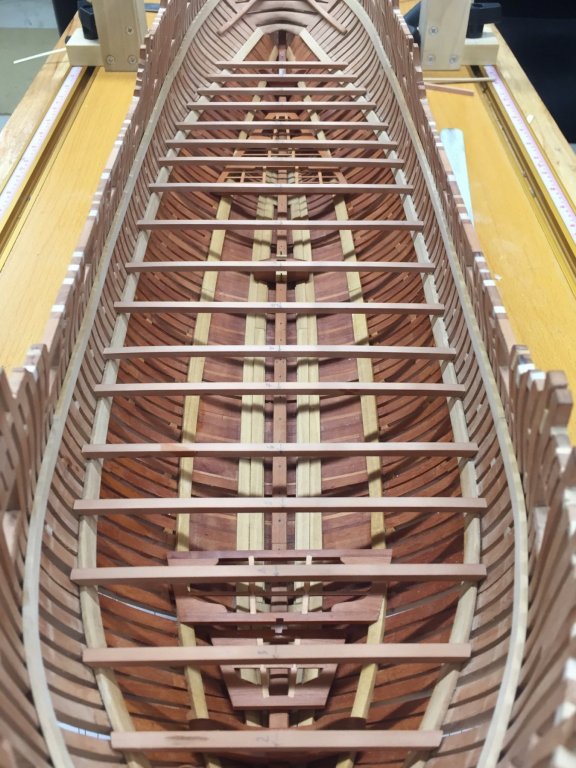
Here are the lower deck beams cut and shaped to length and temporarily installed so as to check positioning. I may remake a couple of them to get a better fit against the hull. You may also be able to spot the transom sleepers at the far end of the picture which still need their bolts to be complete. Happy Holidays to MSW. ben
- 889 replies
-
- 24
-
-
HMS Naiad 1797 by albert - FINISHED - 1/48
Trussben replied to albert's topic in - Build logs for subjects built 1751 - 1800
Beautiful joinery Albert. ben -
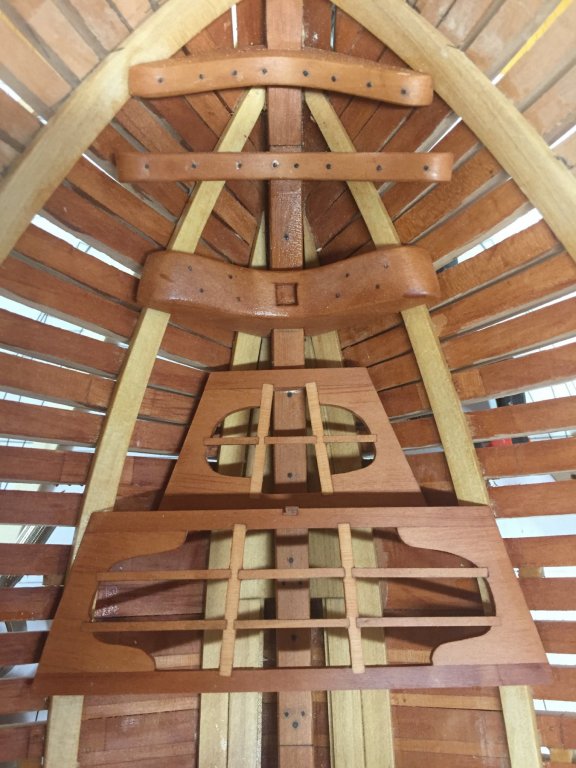
Thanks for all the likes and comments. Here are the two forward platforms, foremast step and the upper and lower breasthooks installed. ben
- 889 replies
-
- 27
-
-
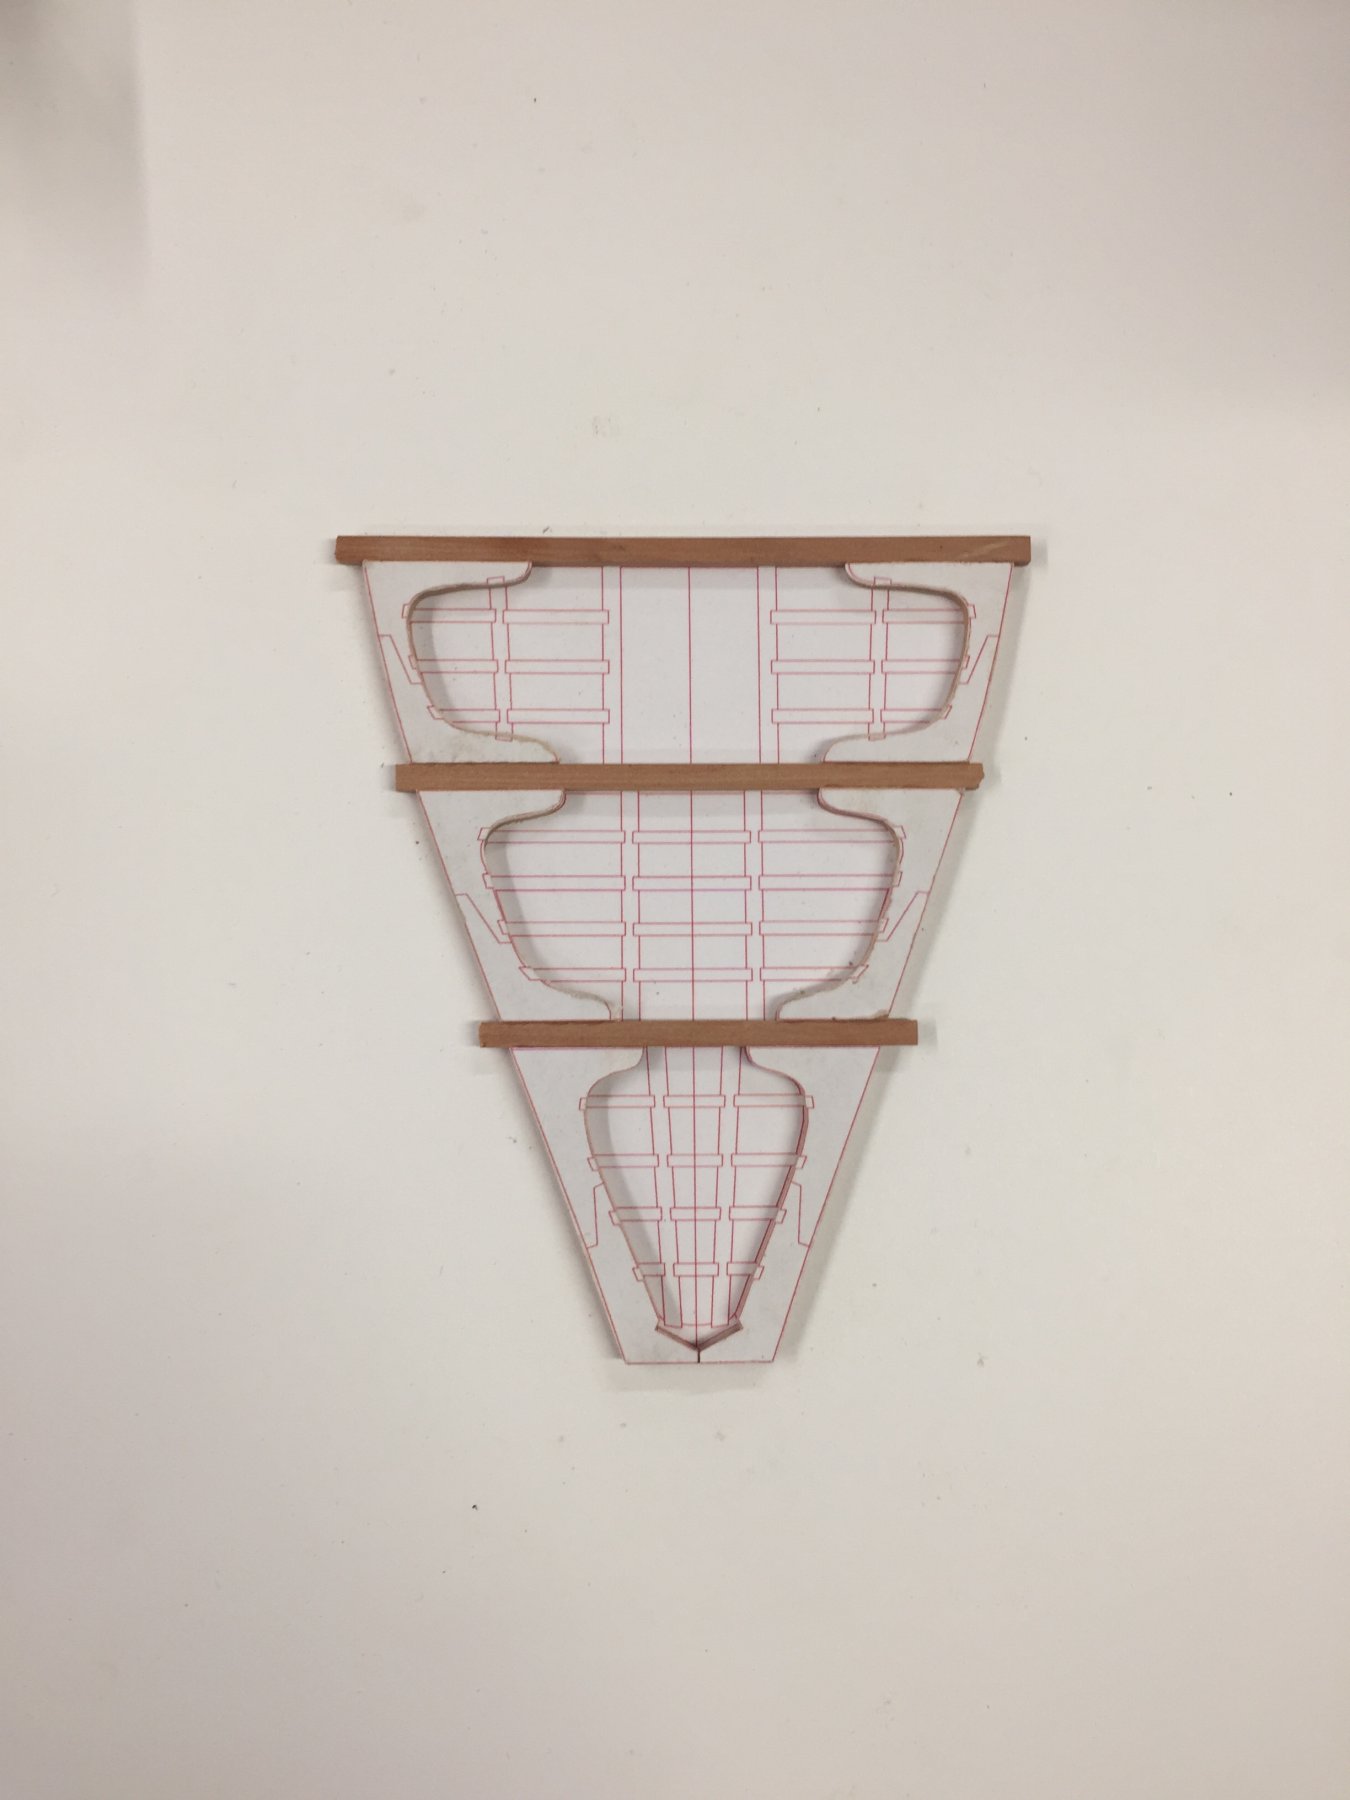
Aft platform and mizzenmast step completed and installed. The tenons for the carlings and ledges were fun to make at their size with a good fit. ben

- 889 replies
-
- 30
-
-
Stabilizing wood is basically under vacuum forcing CA glue or another medium into the wood sample. Used a lot in pen making with oddball wood species that do not turn well, makes it harder and better/easier to turn. ben
-
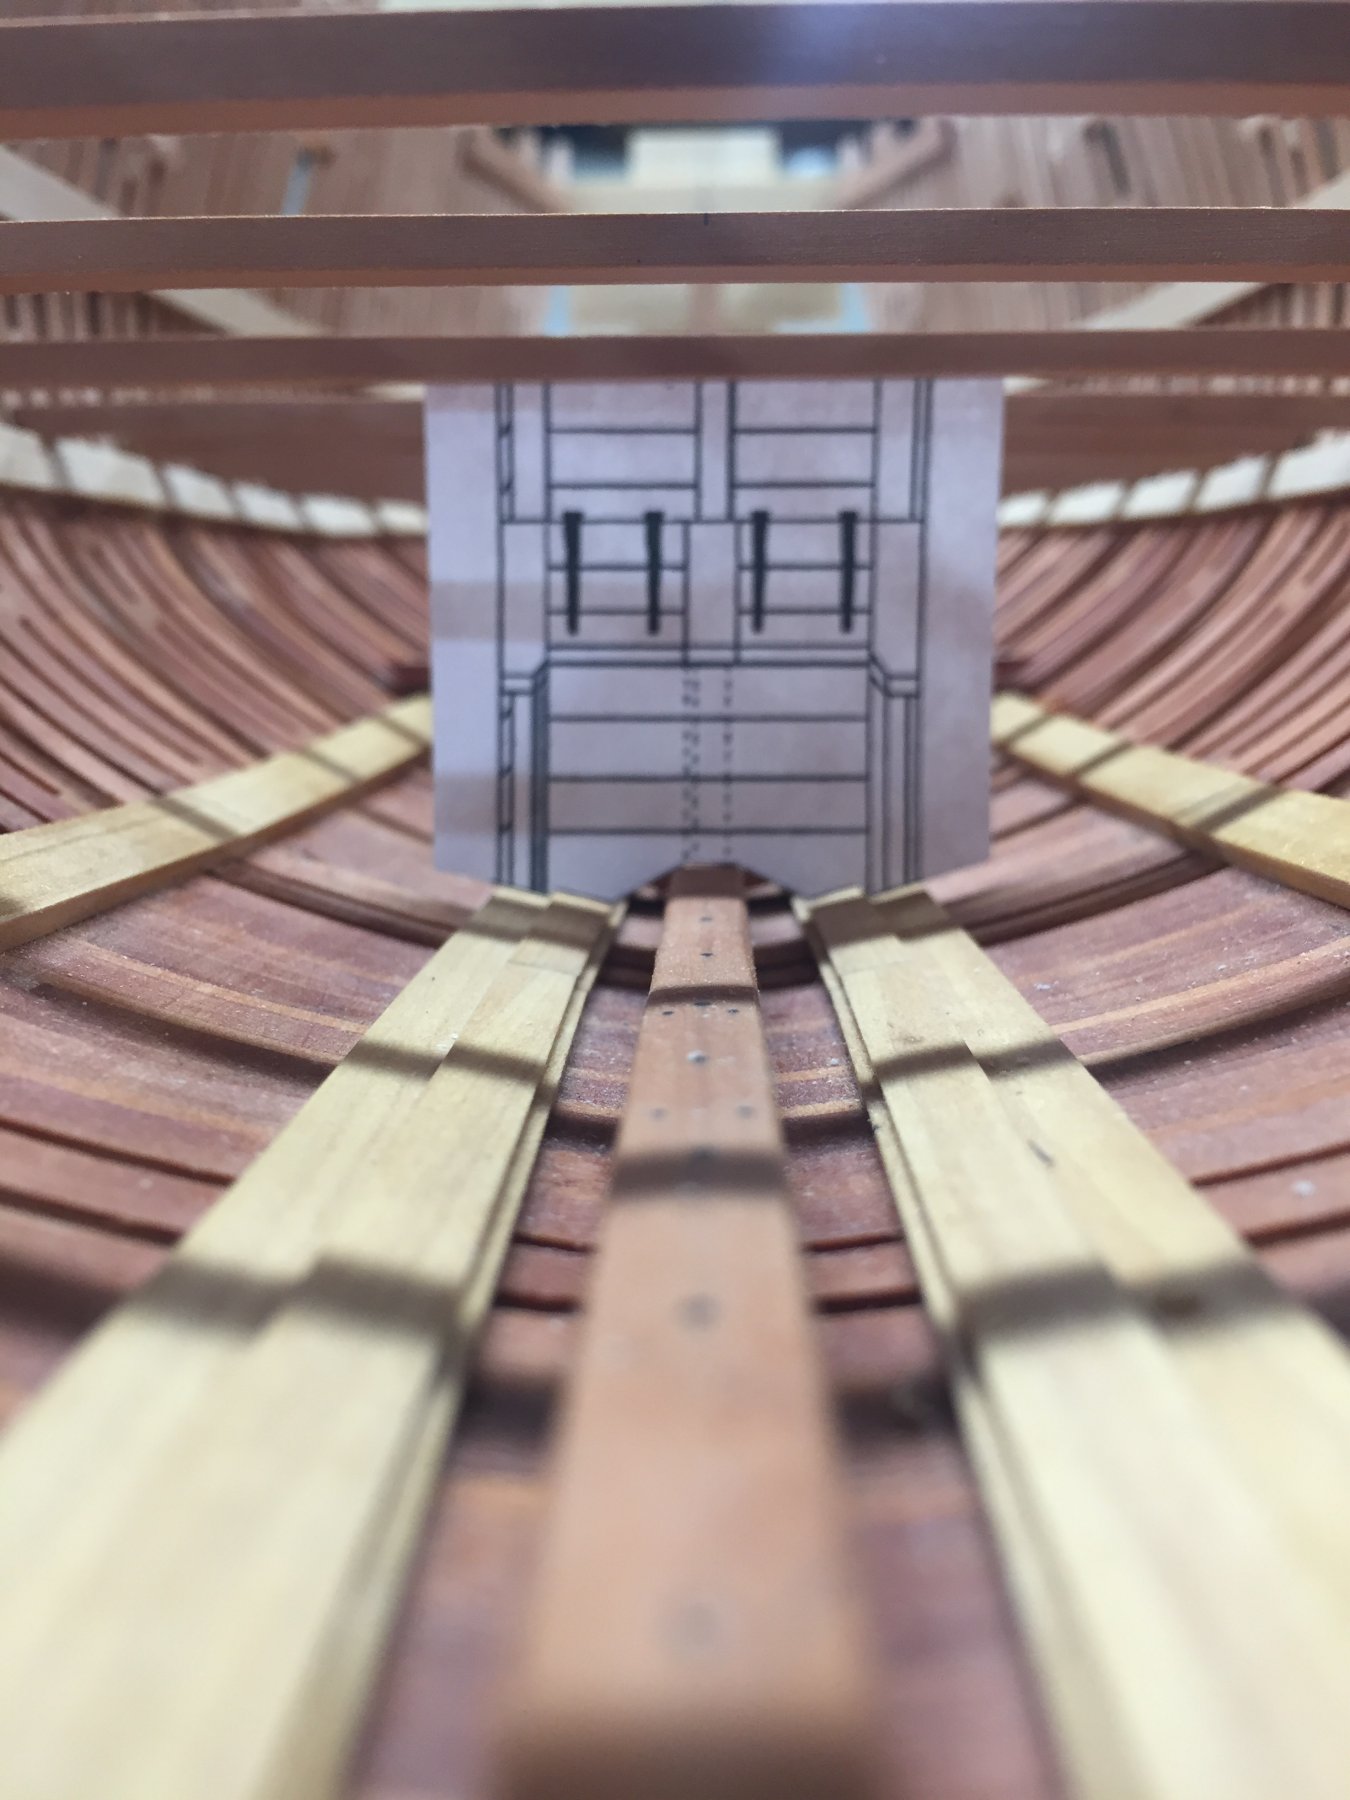
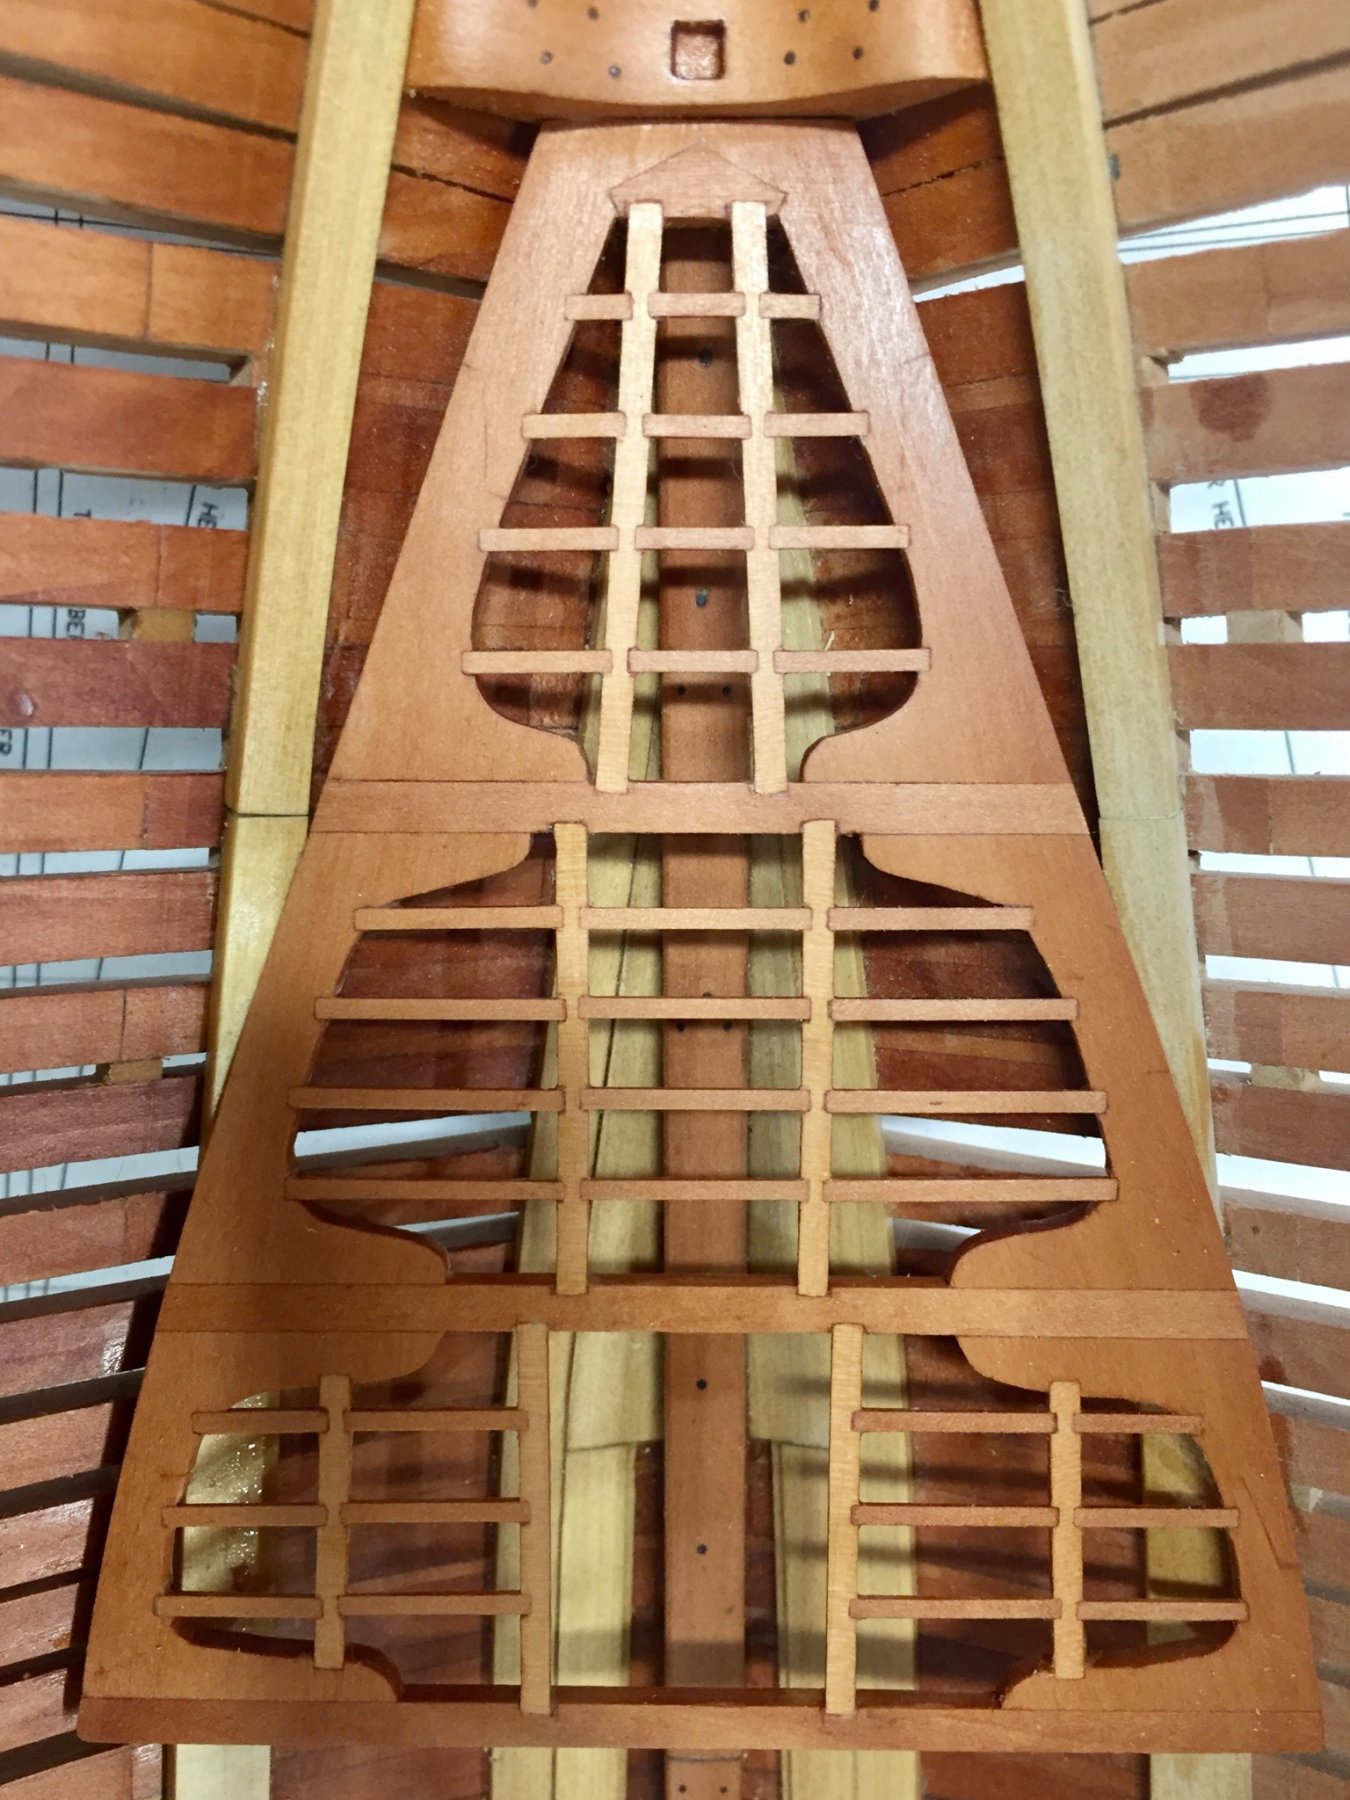
I’ve started playing around with the Aft platform, layout came from TFFM, Knee joints will be simulated on this version. ben
- 889 replies
-
- 16
-
-
Hi Graham, I’m enjoying your build, good luck with the Hawse timbers - they slowed me down on my Pegasus build. ben
-
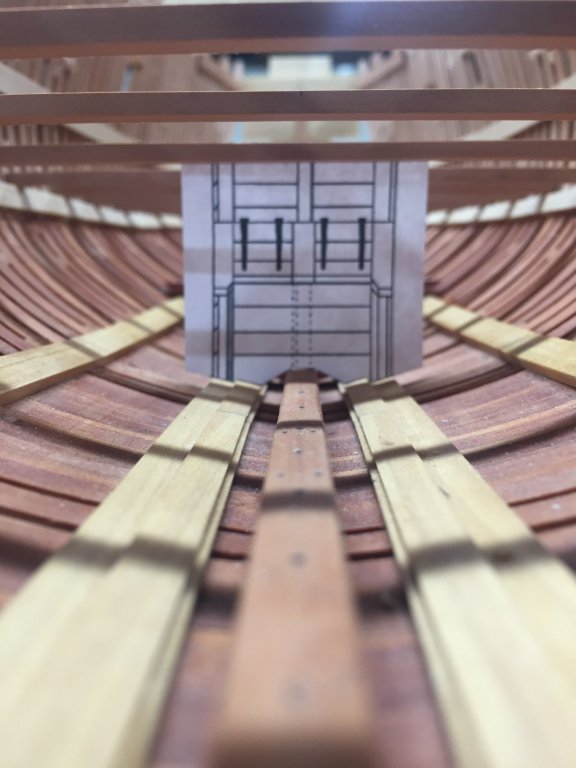
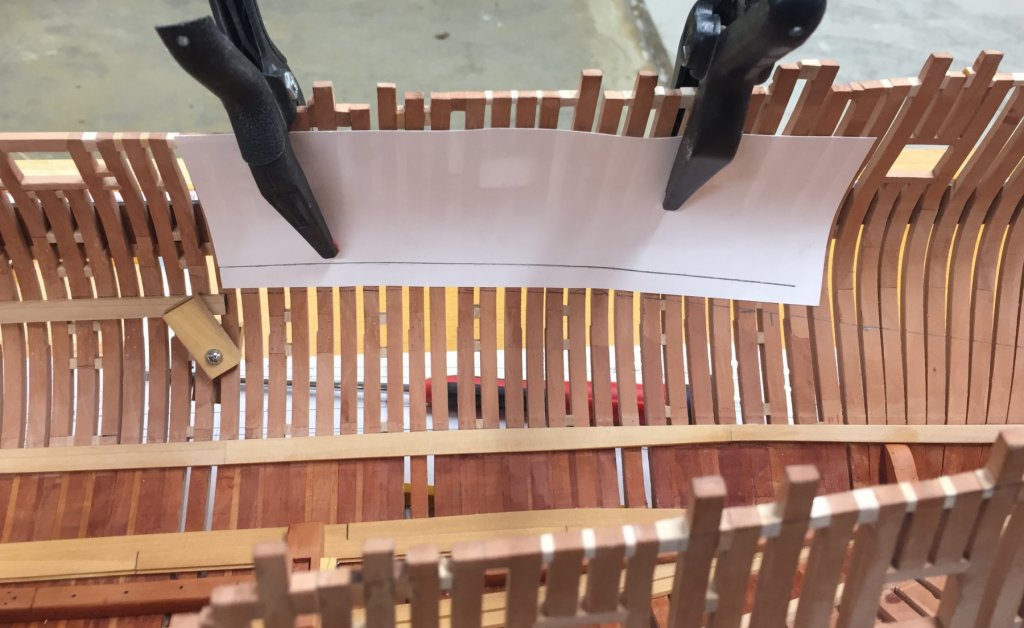
Here is how I do the spiling of the internal planking using card stock and a compass.
- 889 replies
-
- 19
-
-
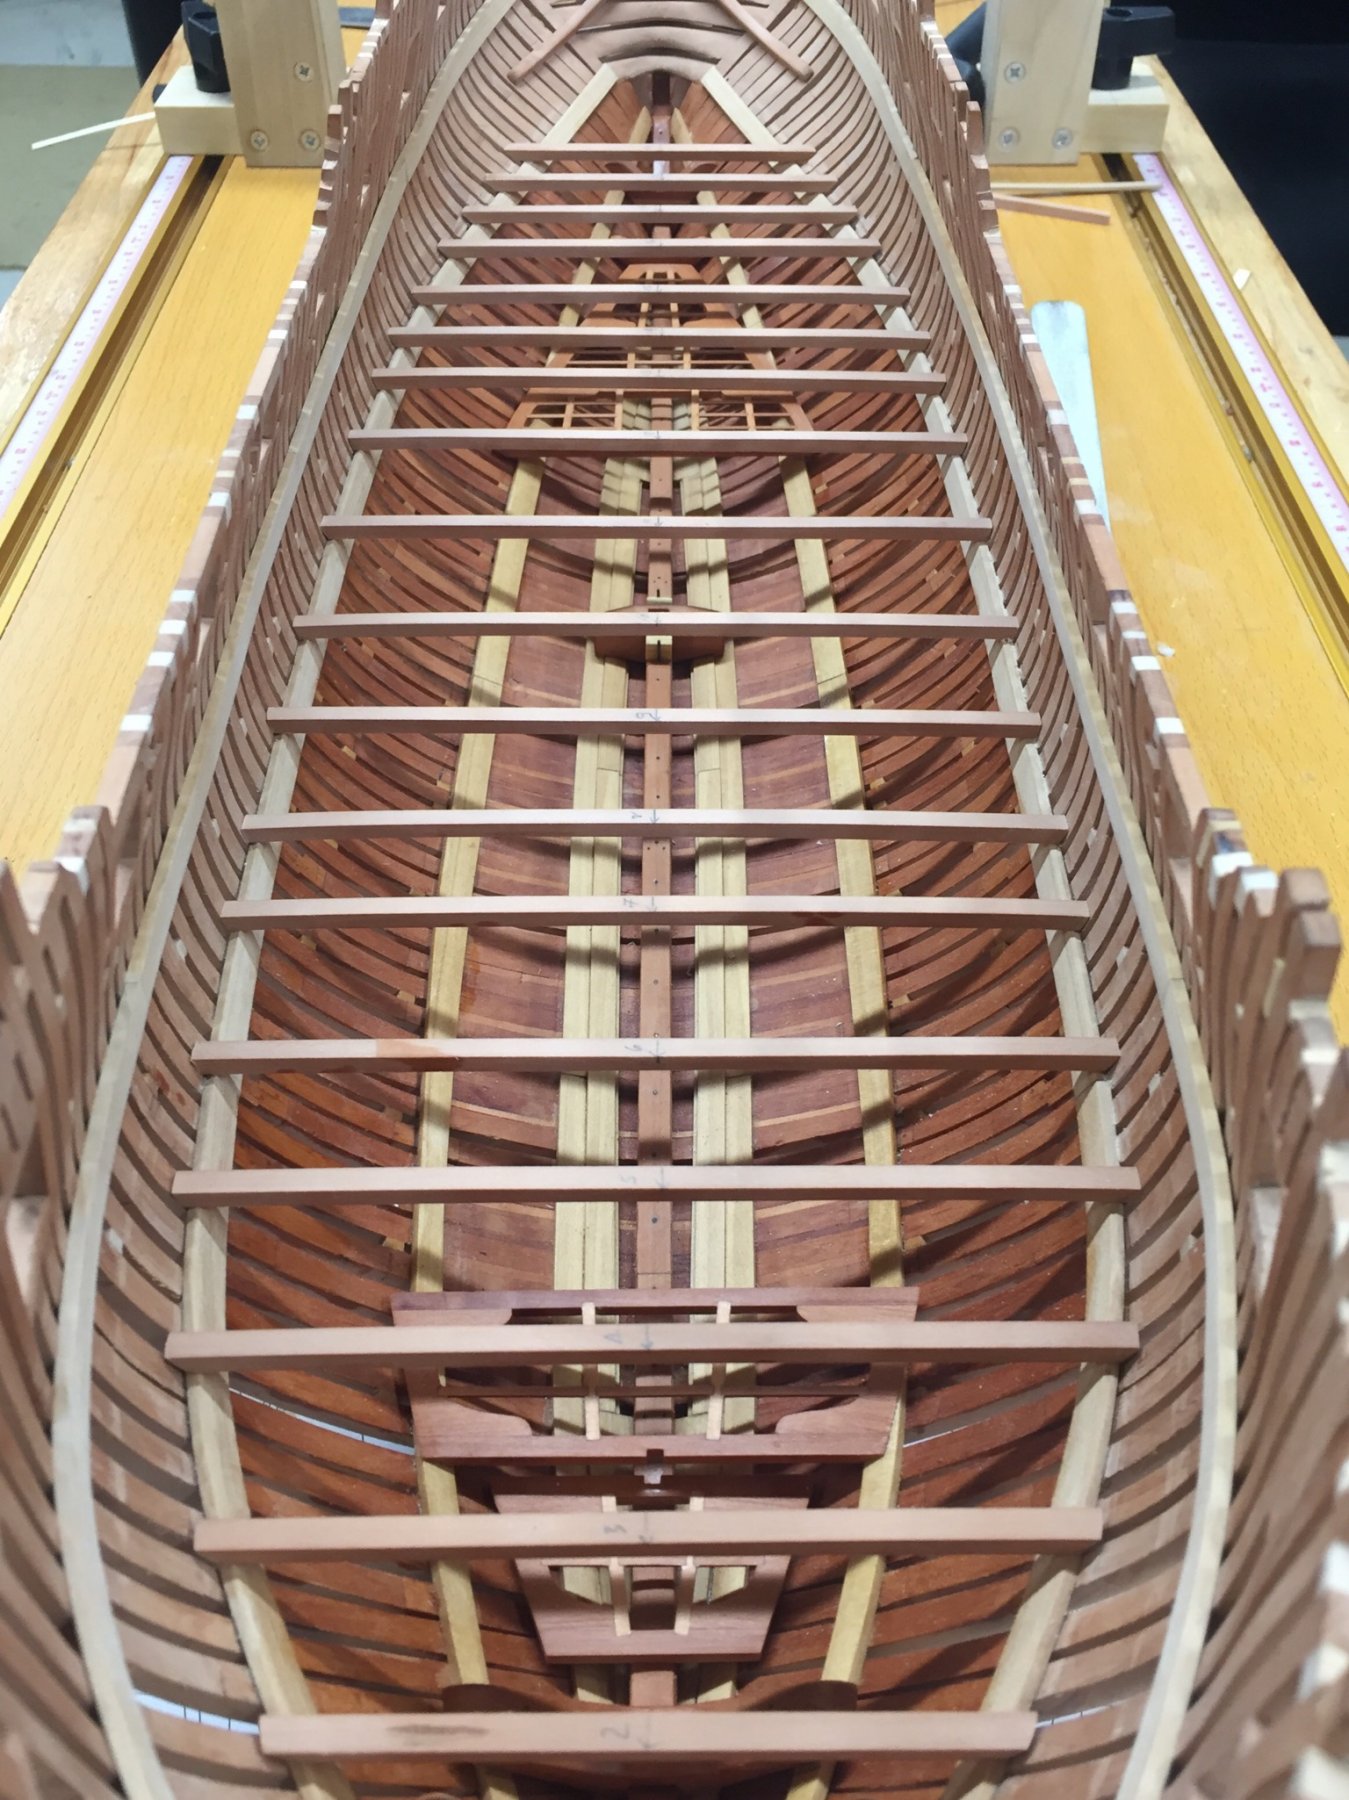
Work continues on the internal framing and mast steps. Im using a flexible Holly battern for marking out the height of the lower deck beam clamp in the picture. Im not going to follow the exact planking expansion for all the internal stuff that will disappear when the lower deck framing is installed - captains choice for a simpler and cleaner look to show more framing. ben

- 889 replies
-
- 24
-
-
She is very pretty Rusty. Up to your usual excellent standards. ben
- 310 replies
-
- 2
-
-
- cheerful
- Syren Ship Model Company
- (and 1 more)
-
Chris For Caulking, make sure you do some tests before committing to the model, some things will bleed ( sharpie, India ink ) especially on end grain, or when you put your final finish on. I tried black paper in keel scarphs originally but it makes the joints weaker. I’ve used pencil with great results as I don’t like my caulking to look too obvious and you can increase decrease the affect by putting pencil only on one edge or both. One thing I haven’t tried is the aforementioned colored glue. Looking good. ben