


Overworked724
-
Posts
1,263 -
Joined
-
Last visited
Content Type
Profiles
Forums
Gallery
Events
Everything posted by Overworked724
-
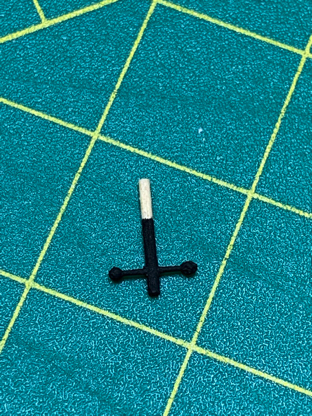
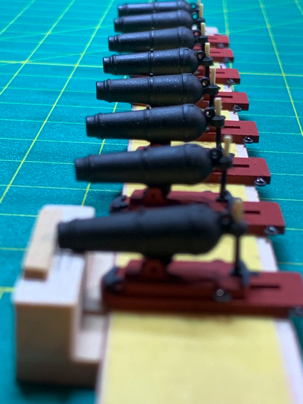
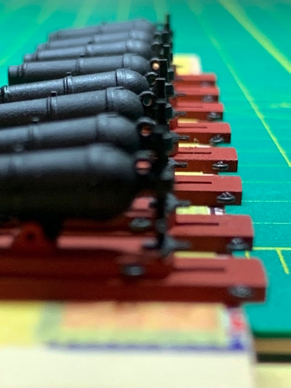
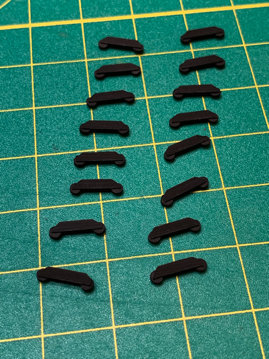
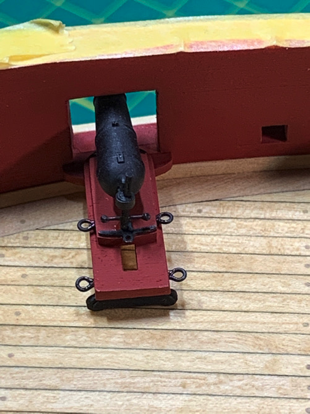
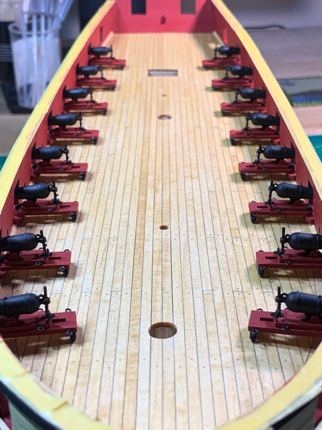
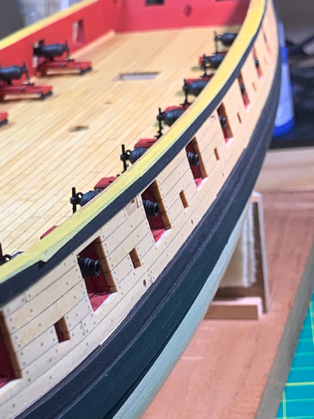
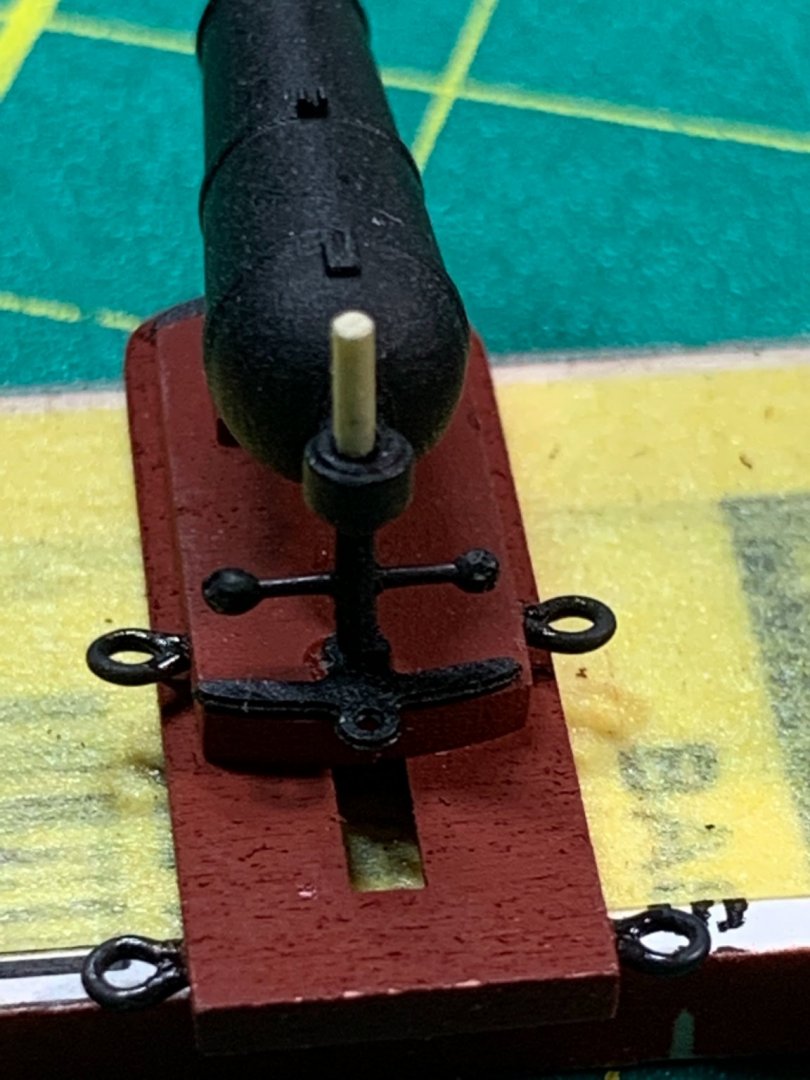
 Well...finally got around to finishing the carronade side project using the 3D printed cannon. They aren't perfect, and some are a tad tilted...But I did pretty good for my first attempt at cannons and it was fun working around the little problems. Drilled in the small holes in the elevation screws for the 'handles' and threaded them on a piece of wire. The used a touch of CA to lock each 'screw' as I slid them off and clipped them off the wire...taadaaa...instance handle. Used a little piece of wood to set the pieces in and 'glued' the little round handles on each end followed by painting. I left the upper part unpainted so I could thread the screw into the carronade when I was locking them in place. Got the metal pieces and eyebolts set in...then loaded up the carronades. After that, just touch up painted the tops of the elevation screws and reconsidered leaving the wheels brackets unpainted. The brackets themselves would have been metal, so decided to paint them black...which also gave it a cleaner look. Still glad I made my own wheel assemblies. The proof was in the pudding...using a little jig to ensure my cannon were set at the same depth/angle, as well as how the wheels assemblies were mounted gave a nice appearance. The pins in the front slide right into the little holes in the swivel brackets - so gluing them in later will be a breeze... Moving on to new challenges....!
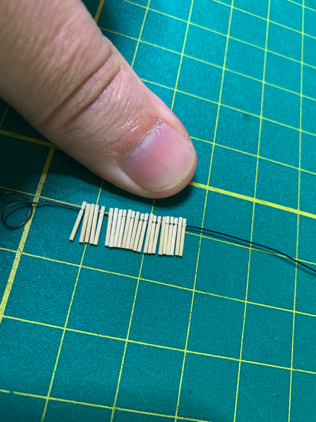

-
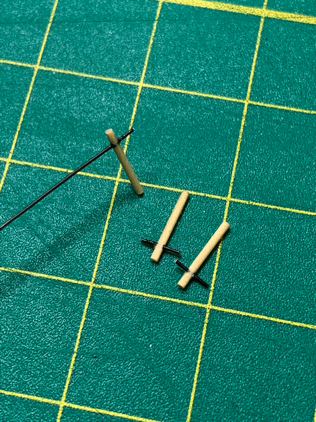
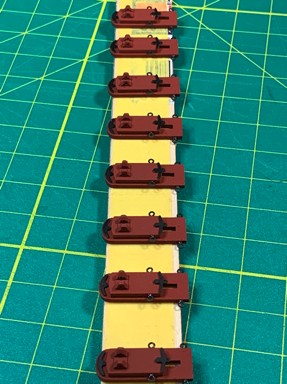
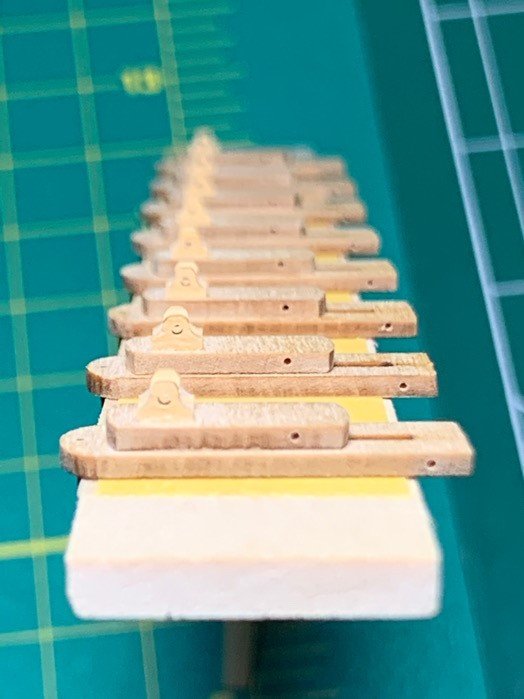
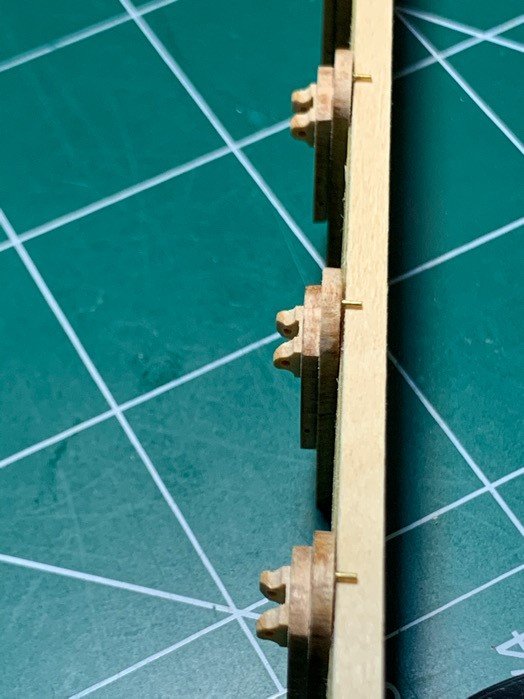
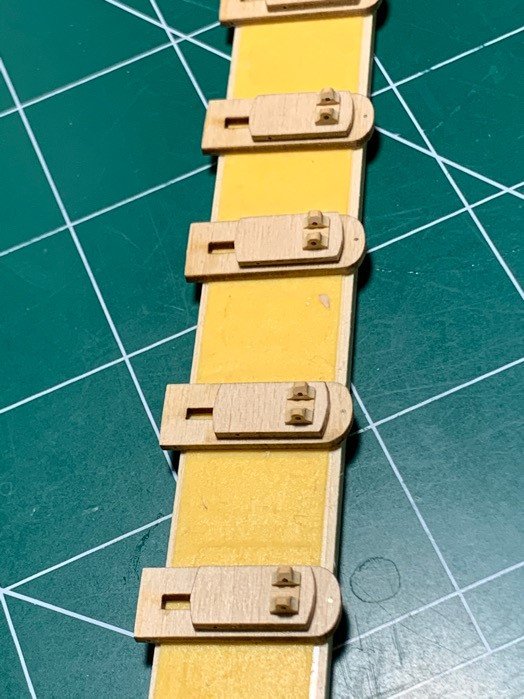
Well...life has certainly gotten in the way these past few months. But...no negative waves, just trying to focus on positives. I'm slowly plunking away at the carronades. Decided to mount the carronade brackets on the sleds and prep for painting. So Assembled the sleds and predrilled the eyebolt holes: You might notice I added a pin (used brass wire) in the front of the sleds to ensure when I glue them on the swivel brackets they are easy to align by setting the pin in the little hole in the swivel bracket. I also slightly sanded the inside edges of the carronade mounts to make the carronade fit a bit better....seems to look ok on my test carronade...but the proof will be in the pudding. Once painted (which is next), the photoetched sled components which are glued to the front of the sled (and also behind the carronade) will completely cover the brass pin (if it's even visible under the paint). I'm using double sided tape with Tamiya masking tape on top to make my 'painting board'. The parts come up easily and I don't need the bottom painted. Getting there...
-
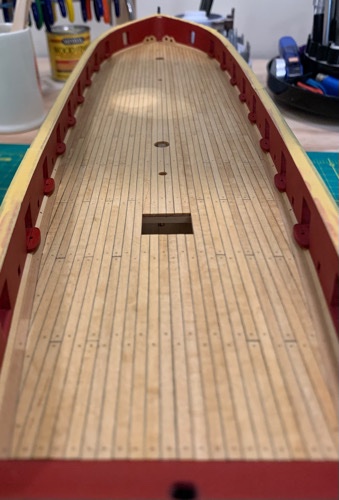
I think it's looking great, Bill! Keep in mind you'll be sanding/staining, adding the cap rails, channels, cat heads, port doors, carronades, etc. There a ton of visual noise which a viewer will see and ignore the small things. You see them because your are the modeler and you suffer the same curse as the rest of us...perfection is the only bar! 😃 But don't shoot for perfection....shoot for enjoyment....it's a lot more fun. You're doing superbly!!
-
MRI results indicate my pitching career may be over. Surgery next month and the 6 weeks in a sling. 😑 Only one thing to do...build as much as I can before the official downtime. 👍🏽
-
Taking a break due to work obligations and a bad shoulder. Will be making some progress shortly after an MRI...my Syren is sitting here making me feel guilty!!! 🤣
-
Excellent rope! One less thing you need to worry about!!! 😊
-
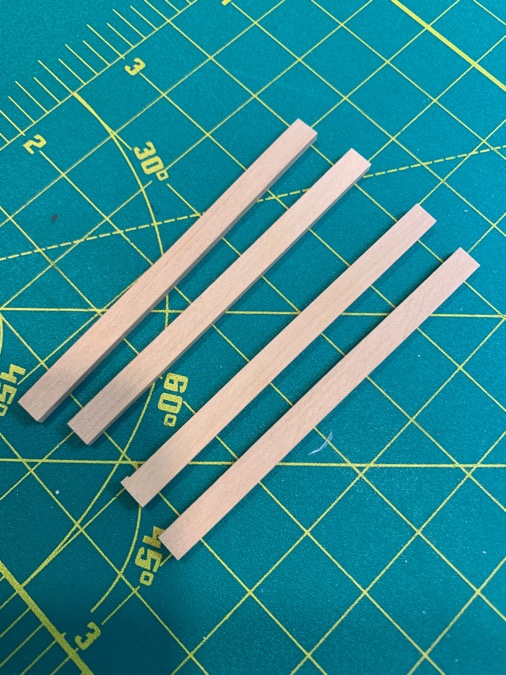
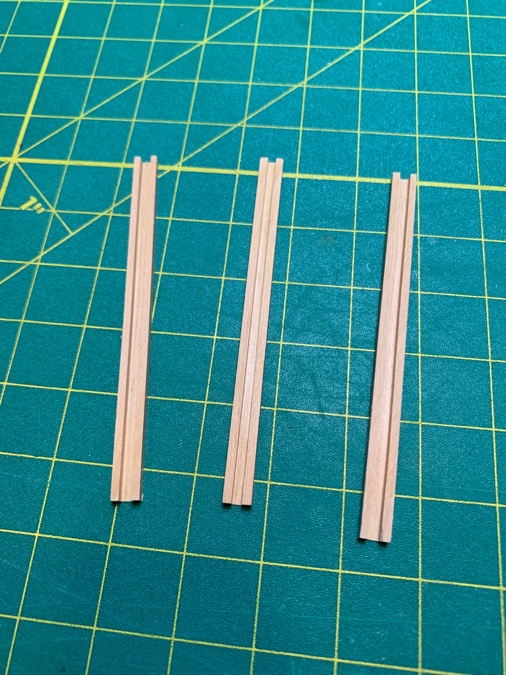
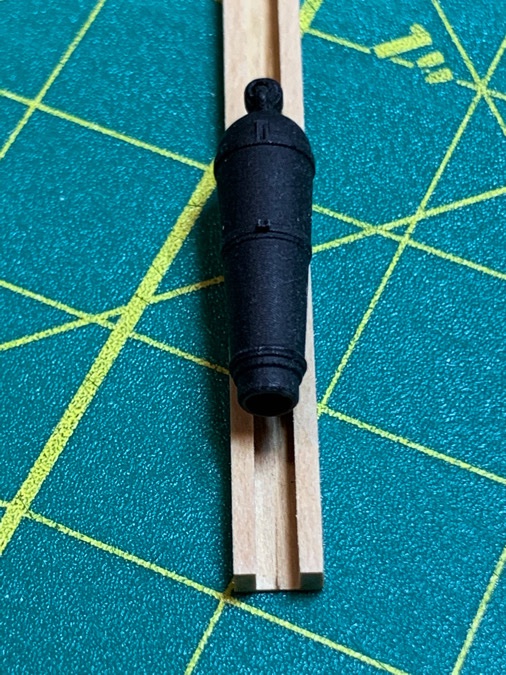
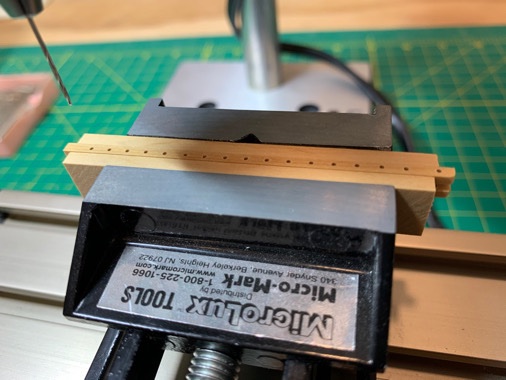
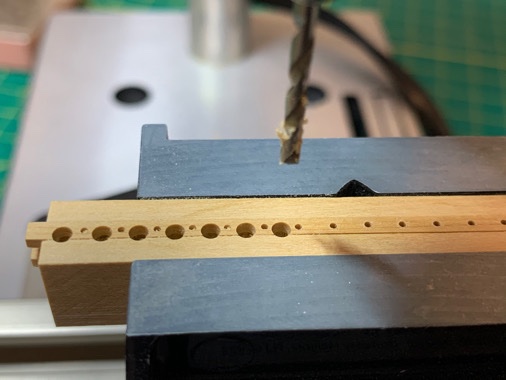
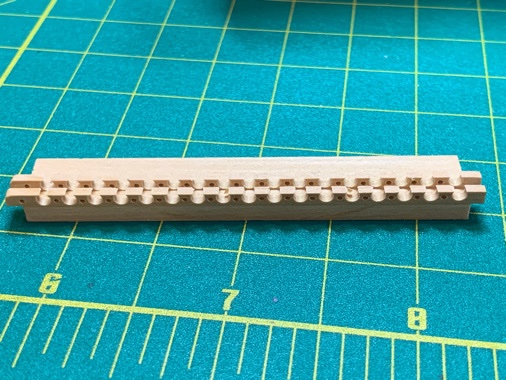
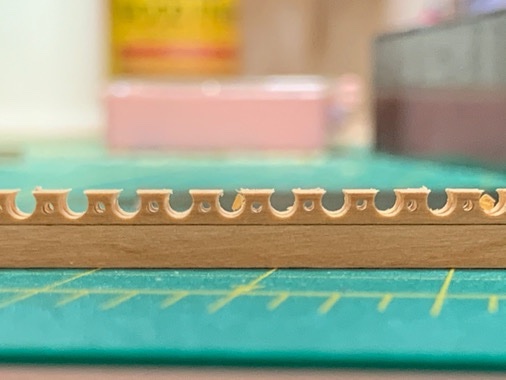
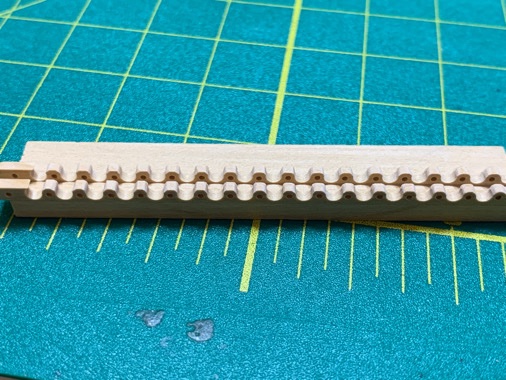
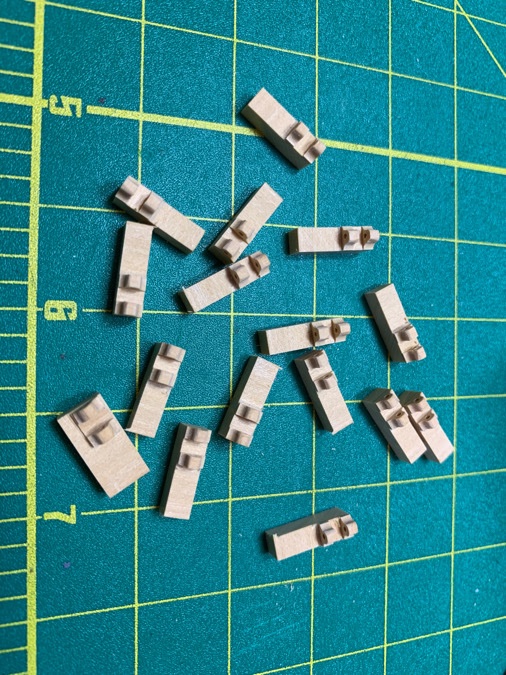
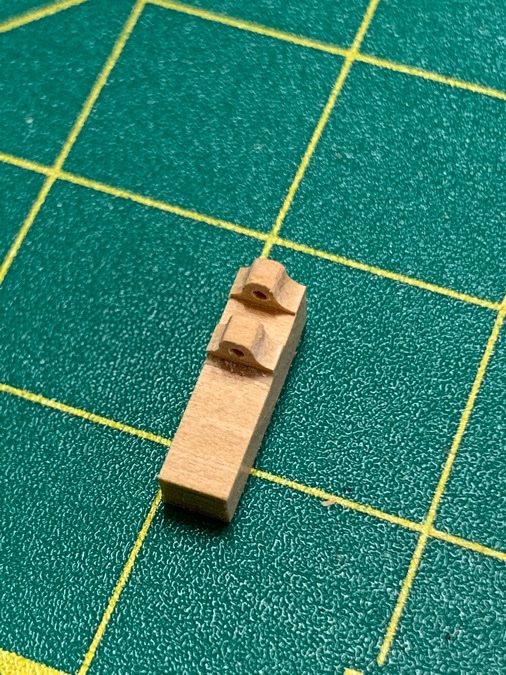
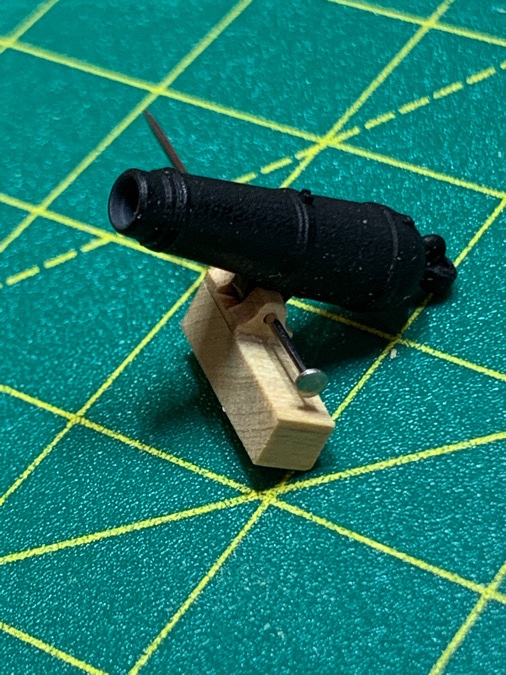
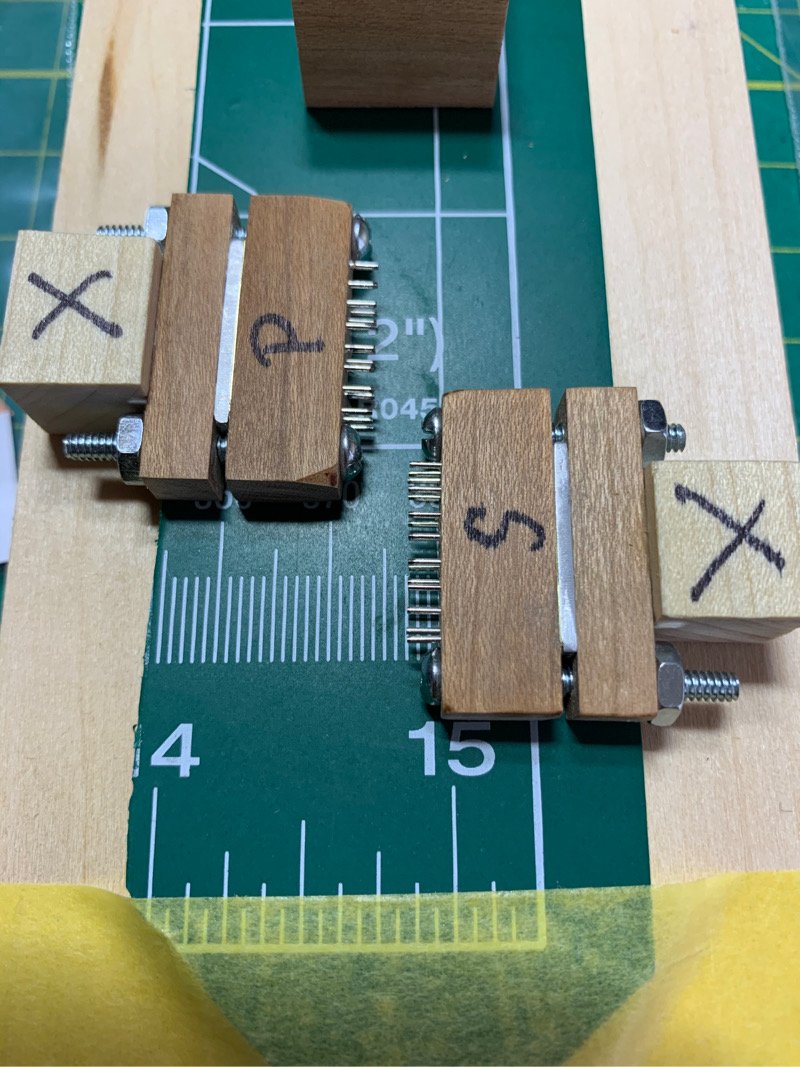
Time to log Ridiculous Idea #942...or somewhere around that number! Work has been getting in the way of the Syren, no surprise. Better busy than not, I reckon'. I've been noodling over the carronade mounts. And once my mind grabs onto a problem, it's like an irritating terrier which won't let go of a pant leg. So, I decided to try and replace those ridiculous laser cut things they call 'parts' that came with the kit. I know some have used them, but they are so damned small, and the laser char and wood seams are simply too difficult for me to manage. So I went off the beaten path to try and make my own. Got a fairly good result. Use some 3/32" thick, 3/16" wide boxwood strips. Cut a 1/16" groove through the center using my table saw, adjusted to just enough clearance to leave a bit of wood connecting the two sides. Made sure the wooden fin on the bottom of the carronade fit into the slot. Mounted the strips sideways between two pieces of wood. I used some double sided tape to adhere the strip to the side without the slot...reason for this...you'll see later. And drilled in the mounting pin holes. Next, I drilled some 1/16" holes on either side of the mounting pin holes. Then removed from the drill press. The wood without the double sided tape was discarded. The drilled boxwood strip stayed in place on the other support piece of wood via the double sided tape. (Yay!) I used a sanding stick to round off the 'tops' of the mounts. Then I cut them apart - bit by bit - with my mini table saw... Then I test fit one of the carronades with a pin (literally) to see if the thing would work. TaaaDaaa!!! Now I can paint/stain the mounts depending on my mood. Since the mounts have a single flat bottom, I can mount the carronade/mount together on the sled, or separately. I'll probably do separately, so I am sure of good alignment between the carronade sleds. The nice thing about this approach is that the mounts are much easier to handle. I'm not certain if there will be elevation issues due to that 'spare wood' adding some height (~0.3mm) to the mounts, but if there is, the discrepancy should be too small to notice. (He said hopefully) I'll make one more set of mounts for giggles...and move on to the pintles and gudgeons. I feel like I have a clear path to victory for completing my carronade sleds now. Moving on....ever so slooooowly!!!! Copper plates made and waiting.
-
Dave...that’s some beautiful work!!!!
-
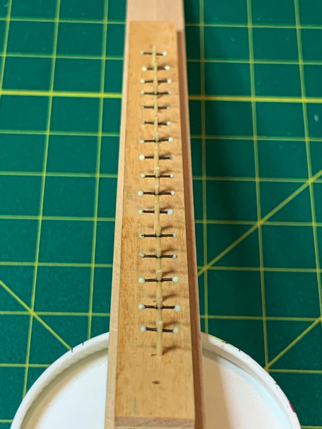
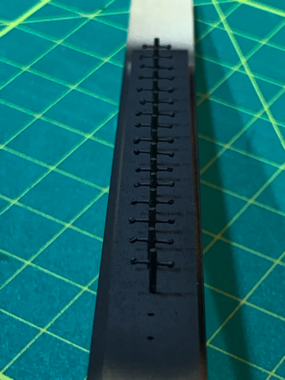
I made my stamps a while back. See my build log post #10-11, #37, and #76. I tried the drill press option but didn't get clean bolt impressions. Opted for the hammer method instead and got some good results. Work getting in the way of my beloved shipyard! Enjoy!!!!
-
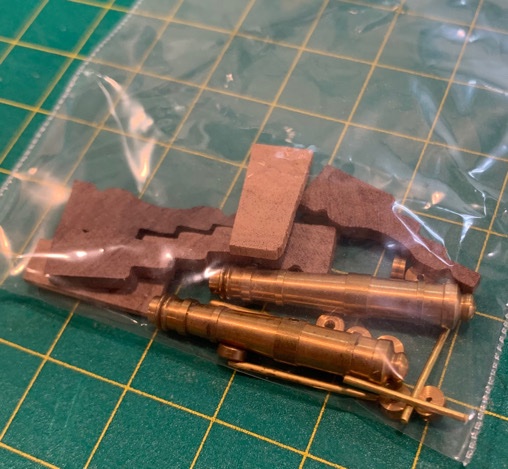
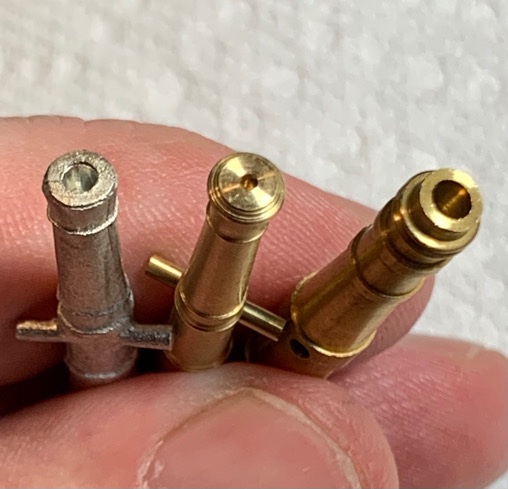
Well, the spare set I found are certainly largest in bore size. They are thicker but same relative length. The kit provided Britainnia piece is next largest. While the Syren provided one is same exterior dimensions as the kit provided cannon, but with a much smaller bore. In truth...I am thinking the Syren ones might be closest. But unless I could actually turn my own, I’m less inclined to try to mimic historical accuracy. So the Britannia pieces (no surprise...) are going in the trash. I’ll work up both the mystery cannon and the Syren cannon and see which look best. 😎
-
Gives new meaning to the term, “Clear the deck!”
-
Got the swivel brackets mounted. Was a bit finicky trying to get them mounted square...finally made a little mounting jig called a ‘stick’ to line them up on the edge of the ports.🤣 Moving on...
-
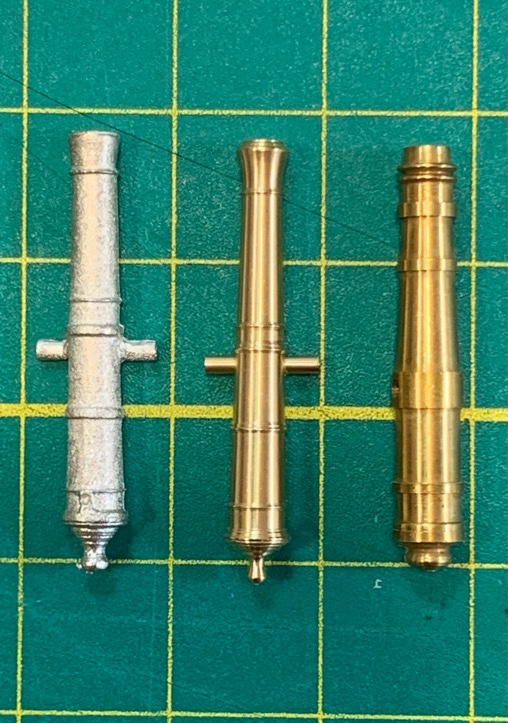
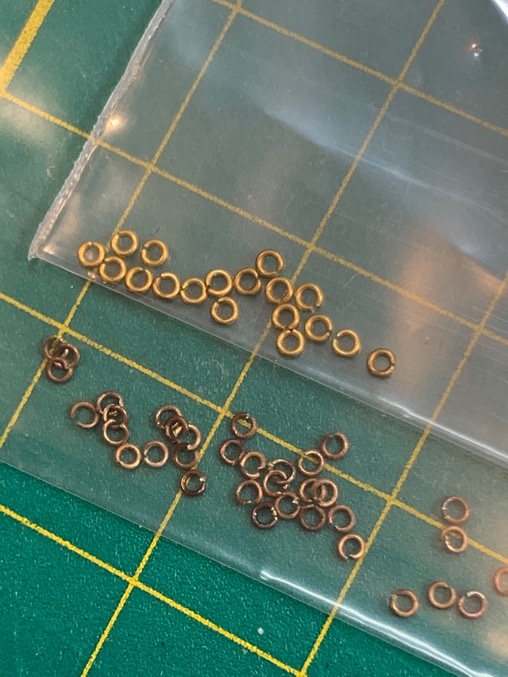
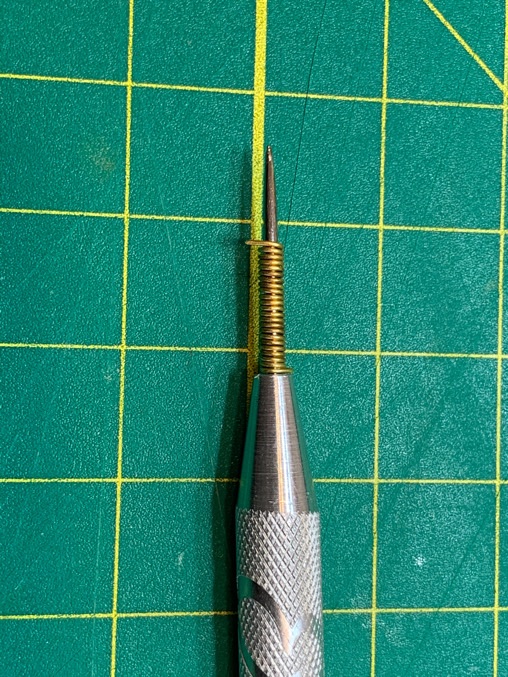
My super slo-mo build continues. Made some brass rings today. The kit only came with a small assortment of smaller rings, so used some 0.4mm thick brass wire and wrapped it around a #65 drill bit set in a pin vise. Clipped them out with a sprue cutter. Ready for blackening whenever...the brass wire I had was stiff...assumed it was annealed so used a lighter to heat up the wire first...then it bent like putty. Final outer diameter was 1.7mm. Same as the kit (shinier bits on top). Interesting find. In searching for wire, I found a set of cannon with walnut carriages and brass wheels. Compared them side by side with the Shipways kit on the far left (🤮), the Syren parts I ordered in the middle (👍🏽), and my find on the right (🤔). I can’t remember where I got that set...might have been a part of a drawing or find from my ship club, but I’m kind of liking the wider cannon. To be continued!!!
-
Awesome, Dave! You make really nice use of that lathe. The penny is a bit cheap...you should use a dime! 😎
- 389 replies
-
- 1
-

-
- bluenose
- model shipways
- (and 1 more)
-
Think you might be referring to another build log. The L method of making the triangular piece never gave me good results. That’s why I used two dowels glued together to hold the piece. ☺️ But as long as you got er’ dun that’s what counts! Looking good, Red!
-
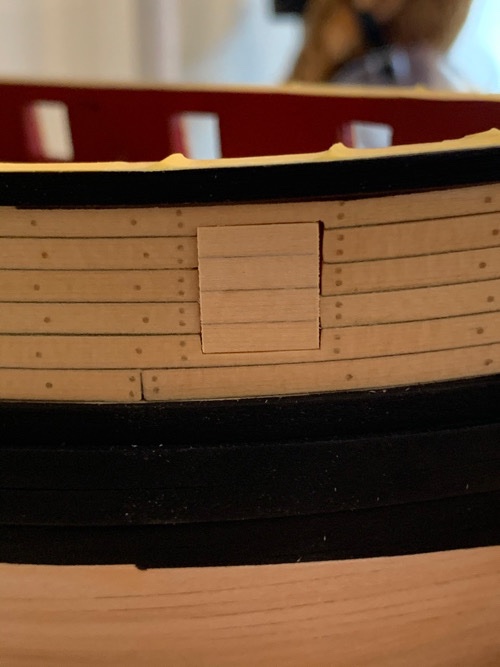
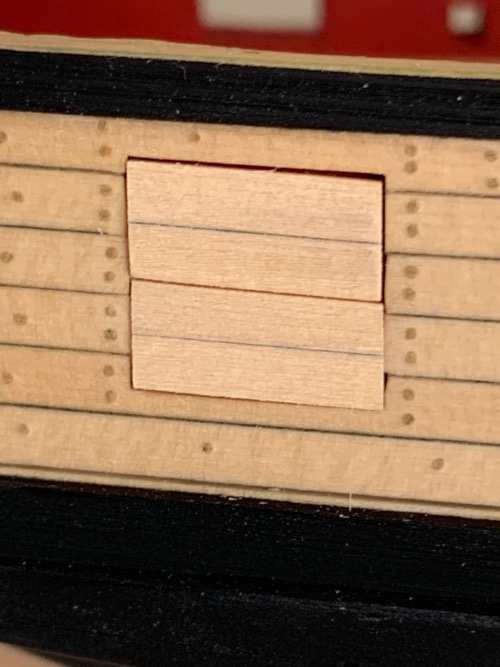
One thing to consider on my side has been the doors. More specifically, when to put them on. I mean, theoretically, they could go on last...like even after the flags. There is absolutely no interference from other elements in the build except the chain plates. Which is why I’m questioning when I should install them. So...once I’ve completed them, I’ll just number them up and wait a bit. My figuring here is that if you install them in the open position now, the chain plates become a bit more fussy to install later. It’s a tight fit...especially those two amidships on either side. I’m not certain if I’ll install them closed or open. My carronades fit the shape of the curved opening perfectly. So I might just remake them to fit closed...but it will depend on how well the carronades come out. So...I’ll be waiting a bit before I continue with the doors. ☺️ Decisions decisions.
-
@WalrusGuy Ok...that is definitely worth a gander. 🤔 Thank you!!!
-
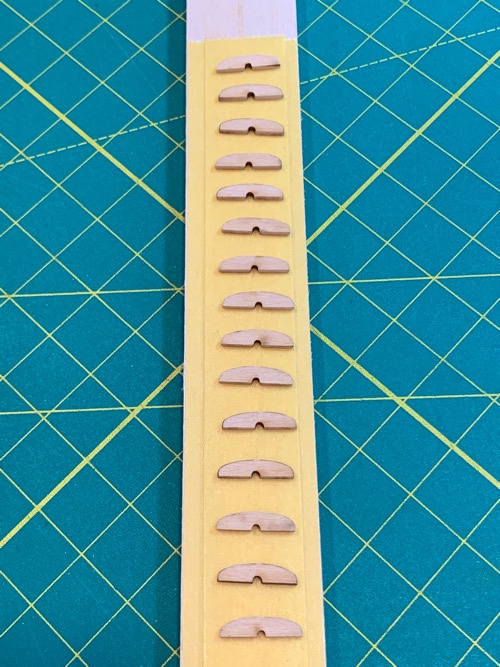
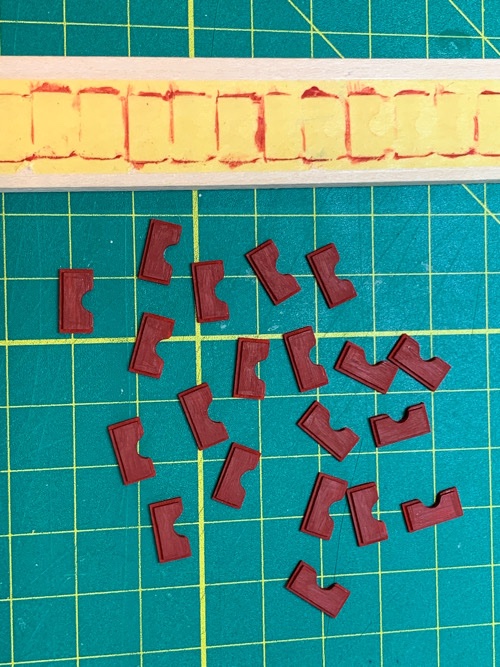
My super slow motion build continues. Work and some health issues keeping me from shipyard recently. Thought I’d post how I painted the little bits. Got the 1/2 doors for the gun ports painted, but the hinges/handles not installed yet. I secure them on a piece of Tamiya tape which is itself adhered to a wood support by some double sided scotch tape. It makes the painting quick. I plan to paint the carronade swivel brackets next, and start assembly of the carronades as a little side project. I did manage to complete but not yet paint the bow and stern bulkhead port doors. These are rough made and still need some work. I still need to make the stern port doors. Moving on...
-
The stern name plate method was mine. It was the only way I could think of to get the letters on in a consistent manner. 👍🏽
-
Take a look at my log - post #477. I provided the way I did it, and it was quick and easy. The triangular pieces actually turned out beautifully.
-
Turned out beautiful!
-
Dave, you are already miles ahead of me. ☺️ Besides, if my blog on the Sultana helps (not that you need it) than I’m a happy camper. 👍🏽


