HOLIDAY DONATION DRIVE - SUPPORT MSW - DO YOUR PART TO KEEP THIS GREAT FORUM GOING! (Only 20 donations so far - C'mon guys!)
×


Gerhardvienna
-
Posts
683 -
Joined
-
Last visited
Content Type
Profiles
Forums
Gallery
Events
Everything posted by Gerhardvienna
-
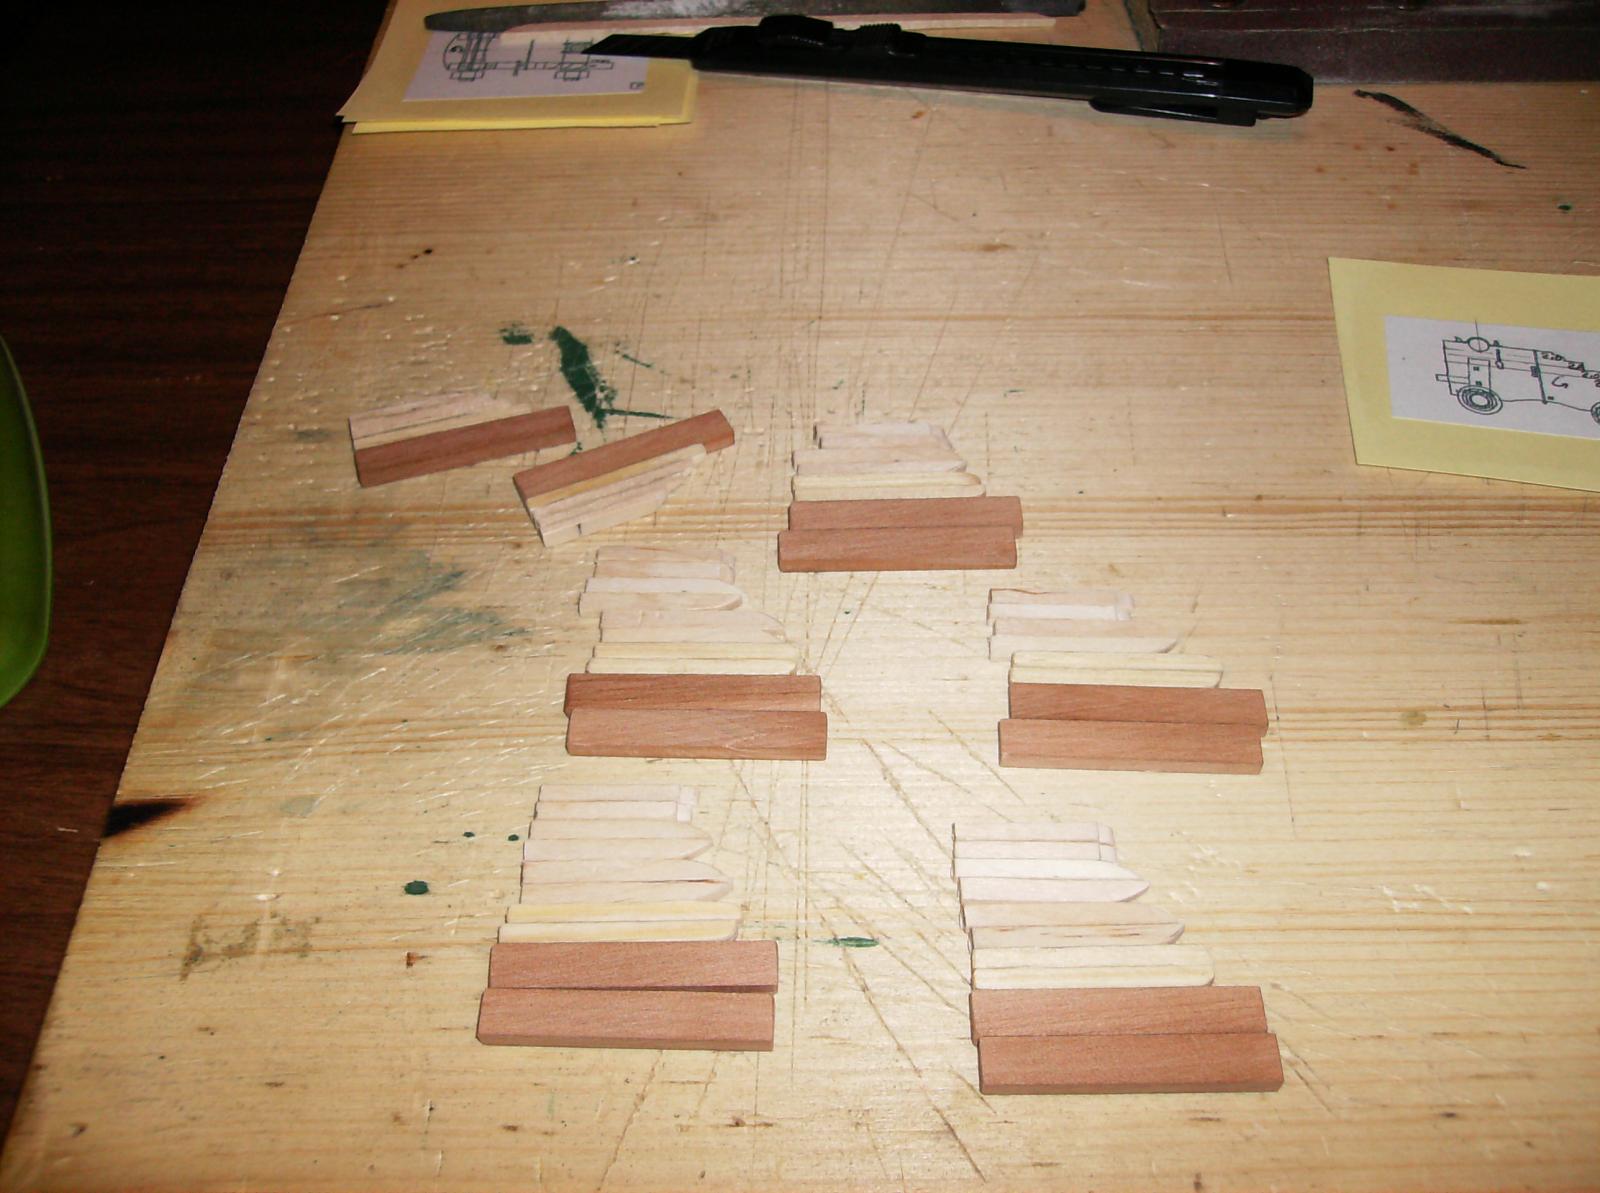
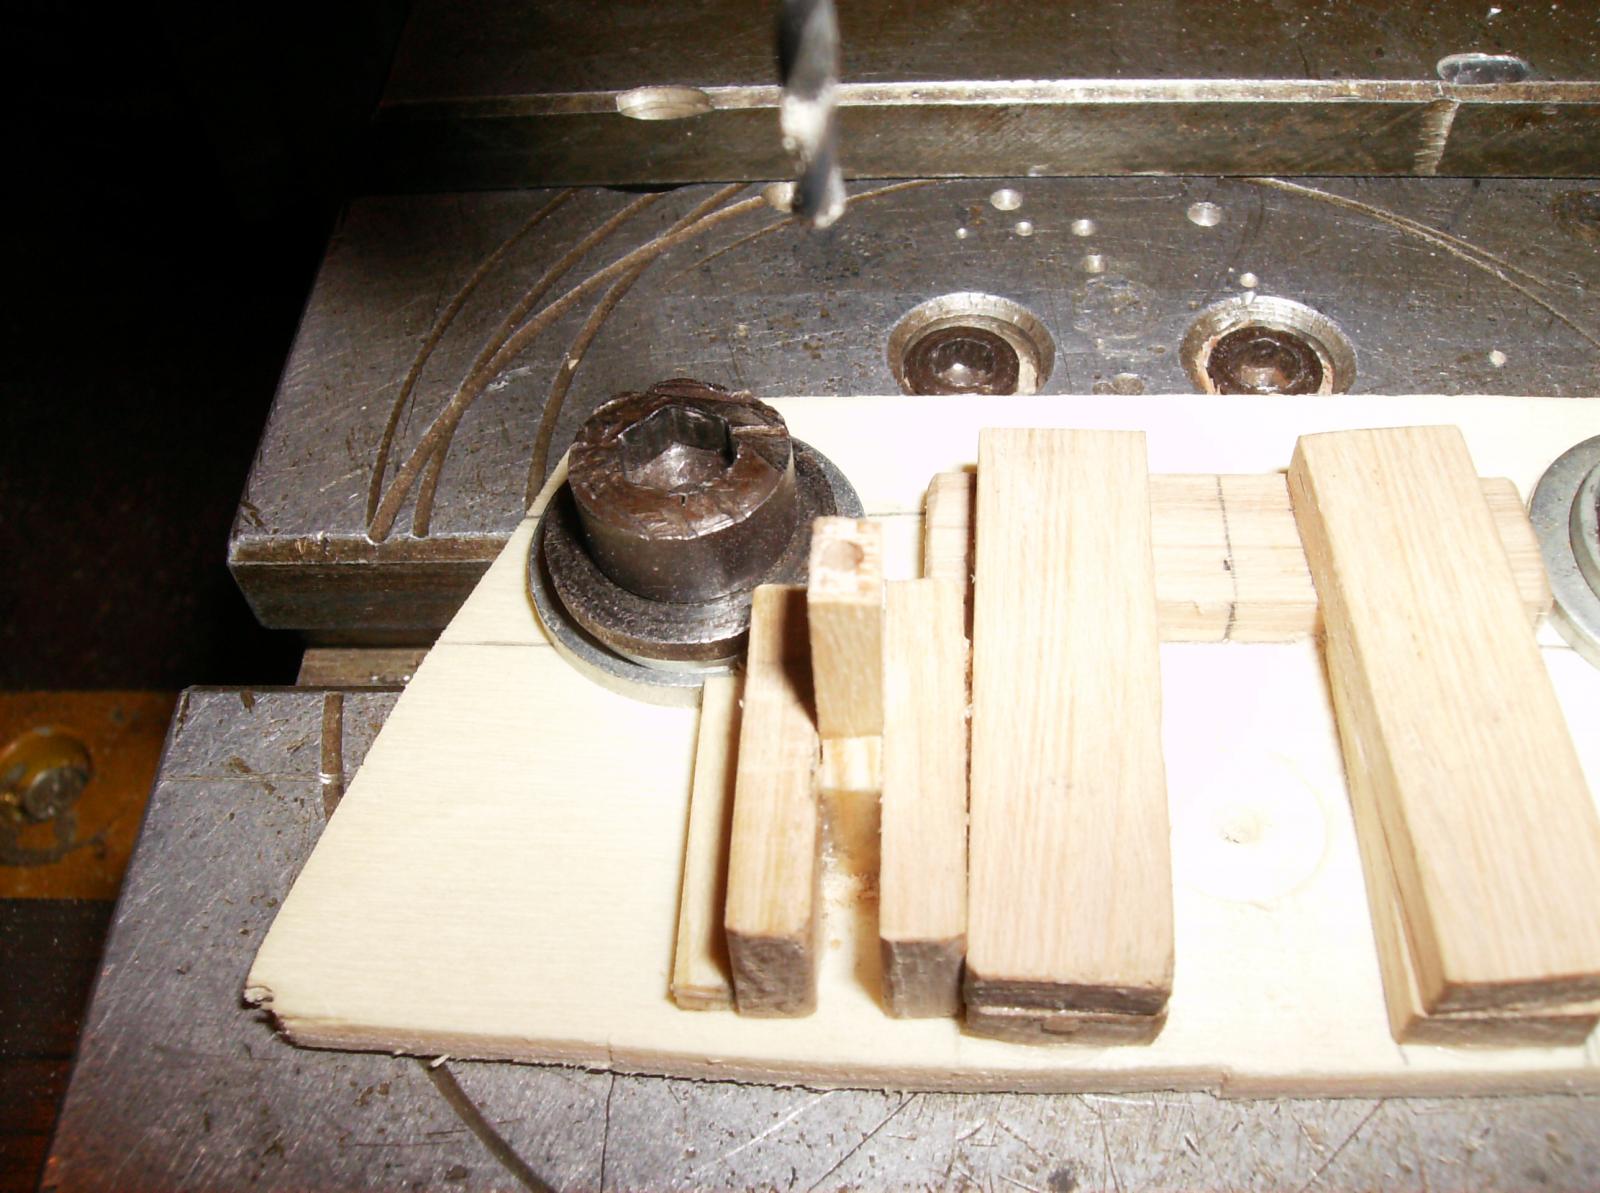
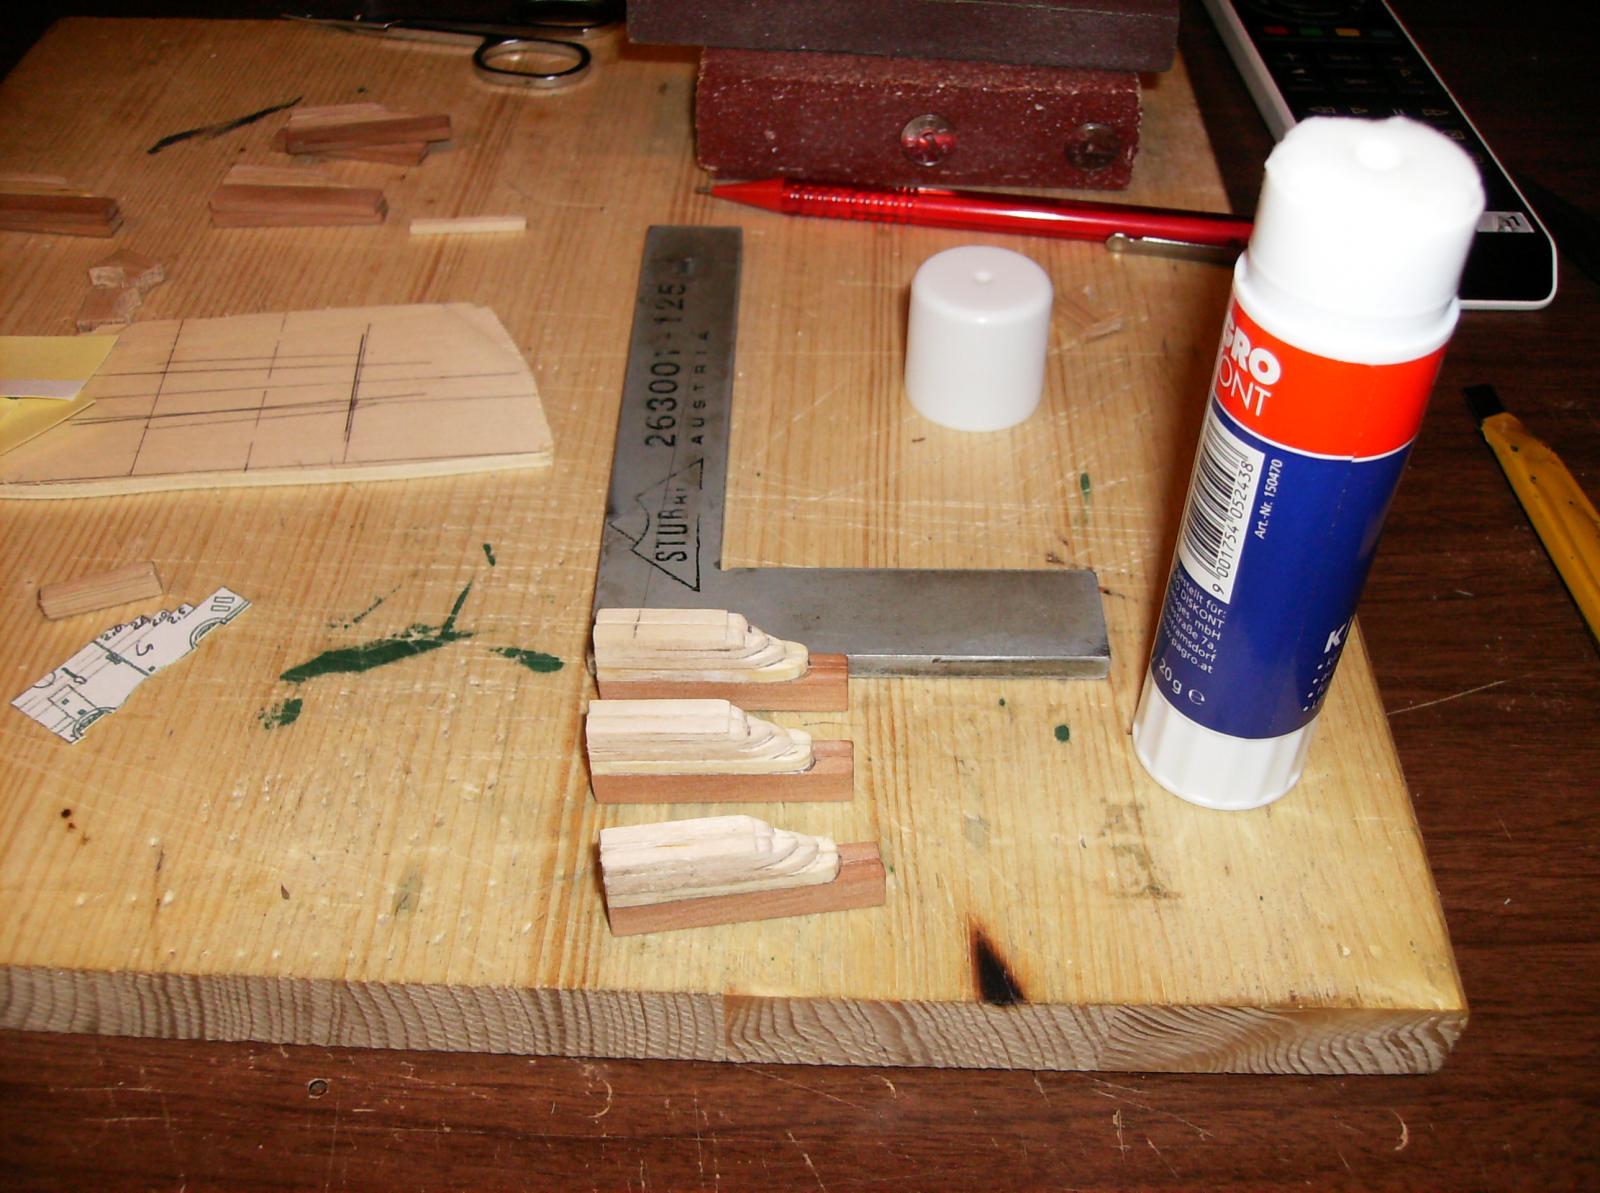
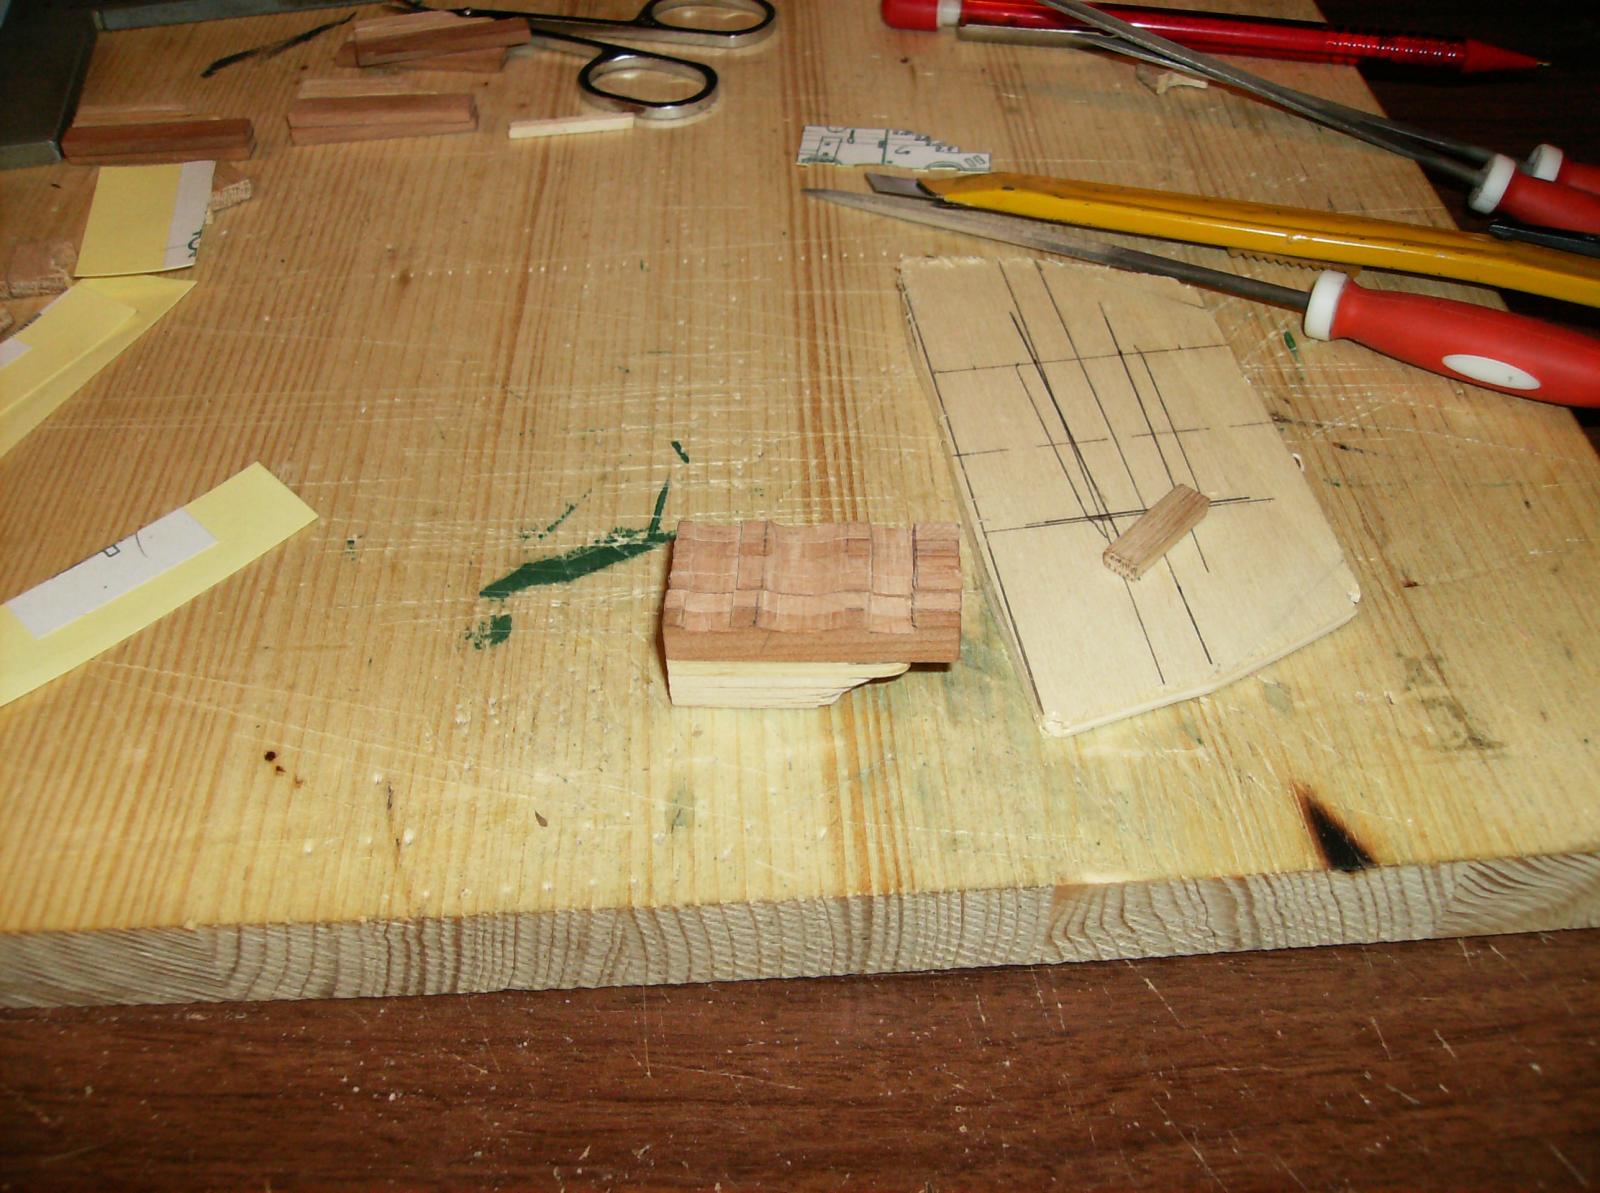
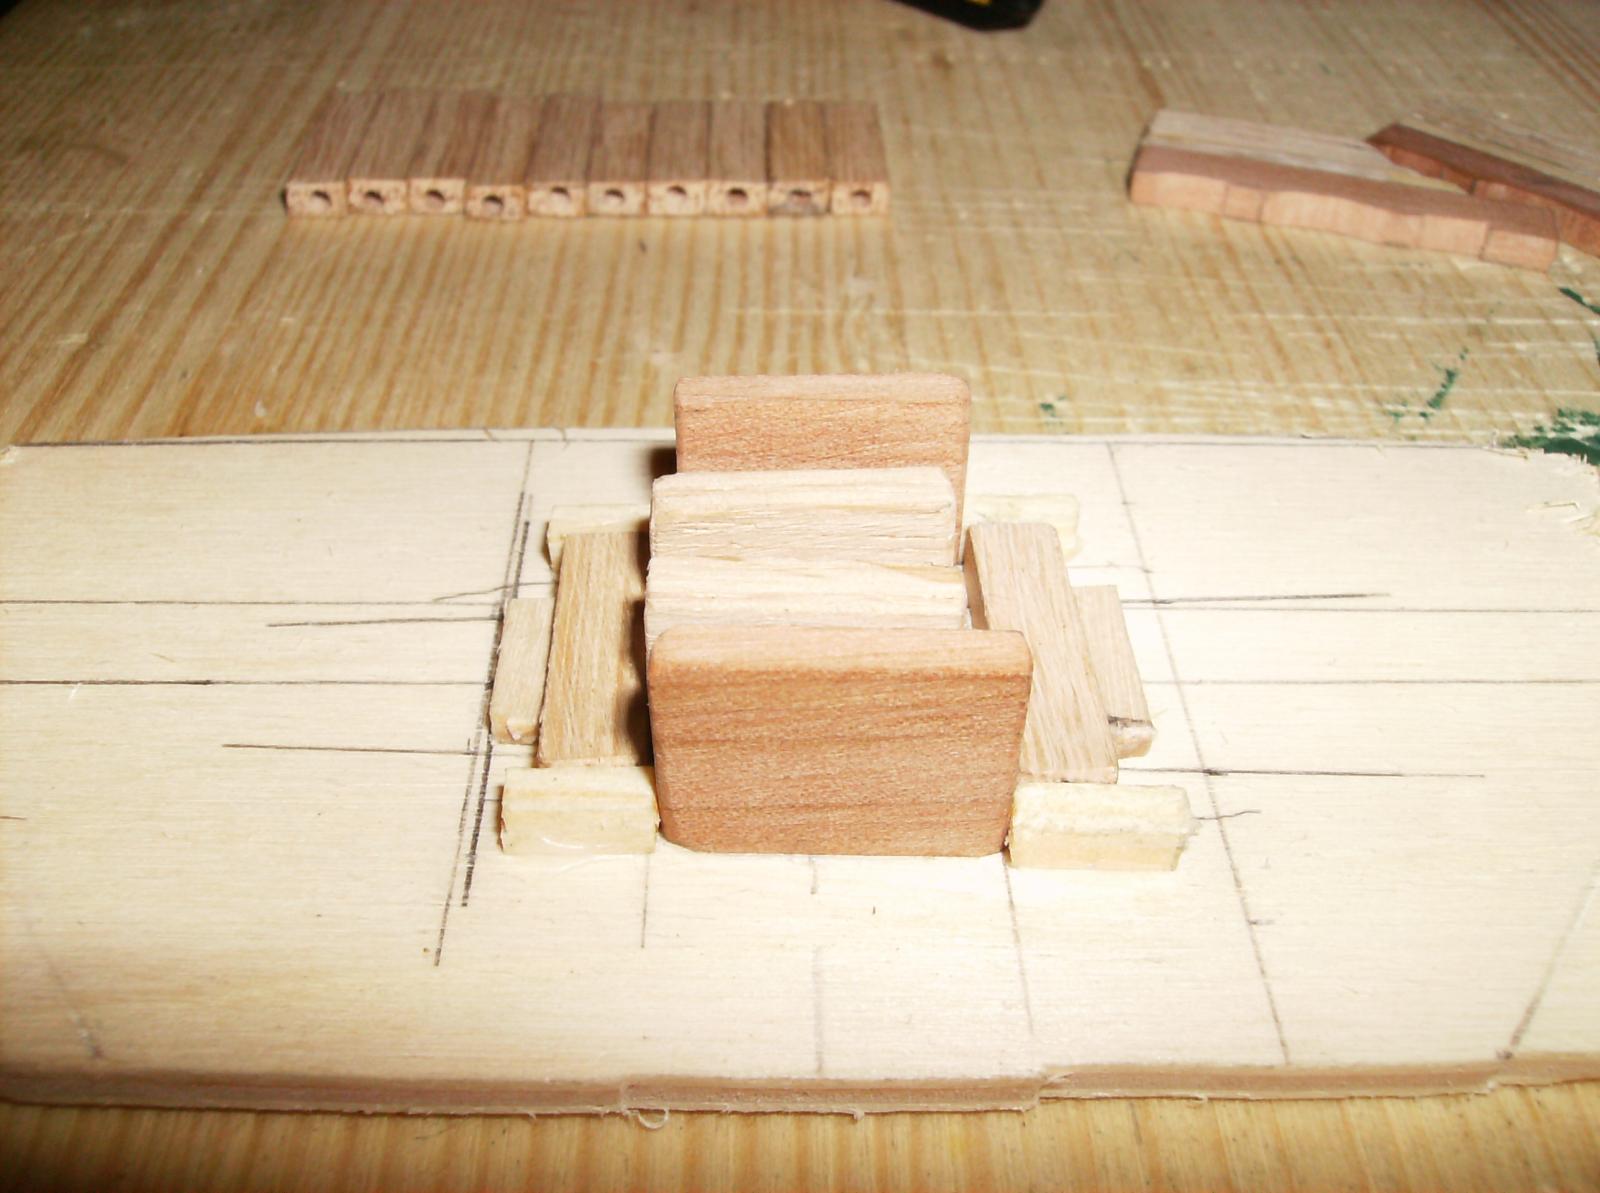
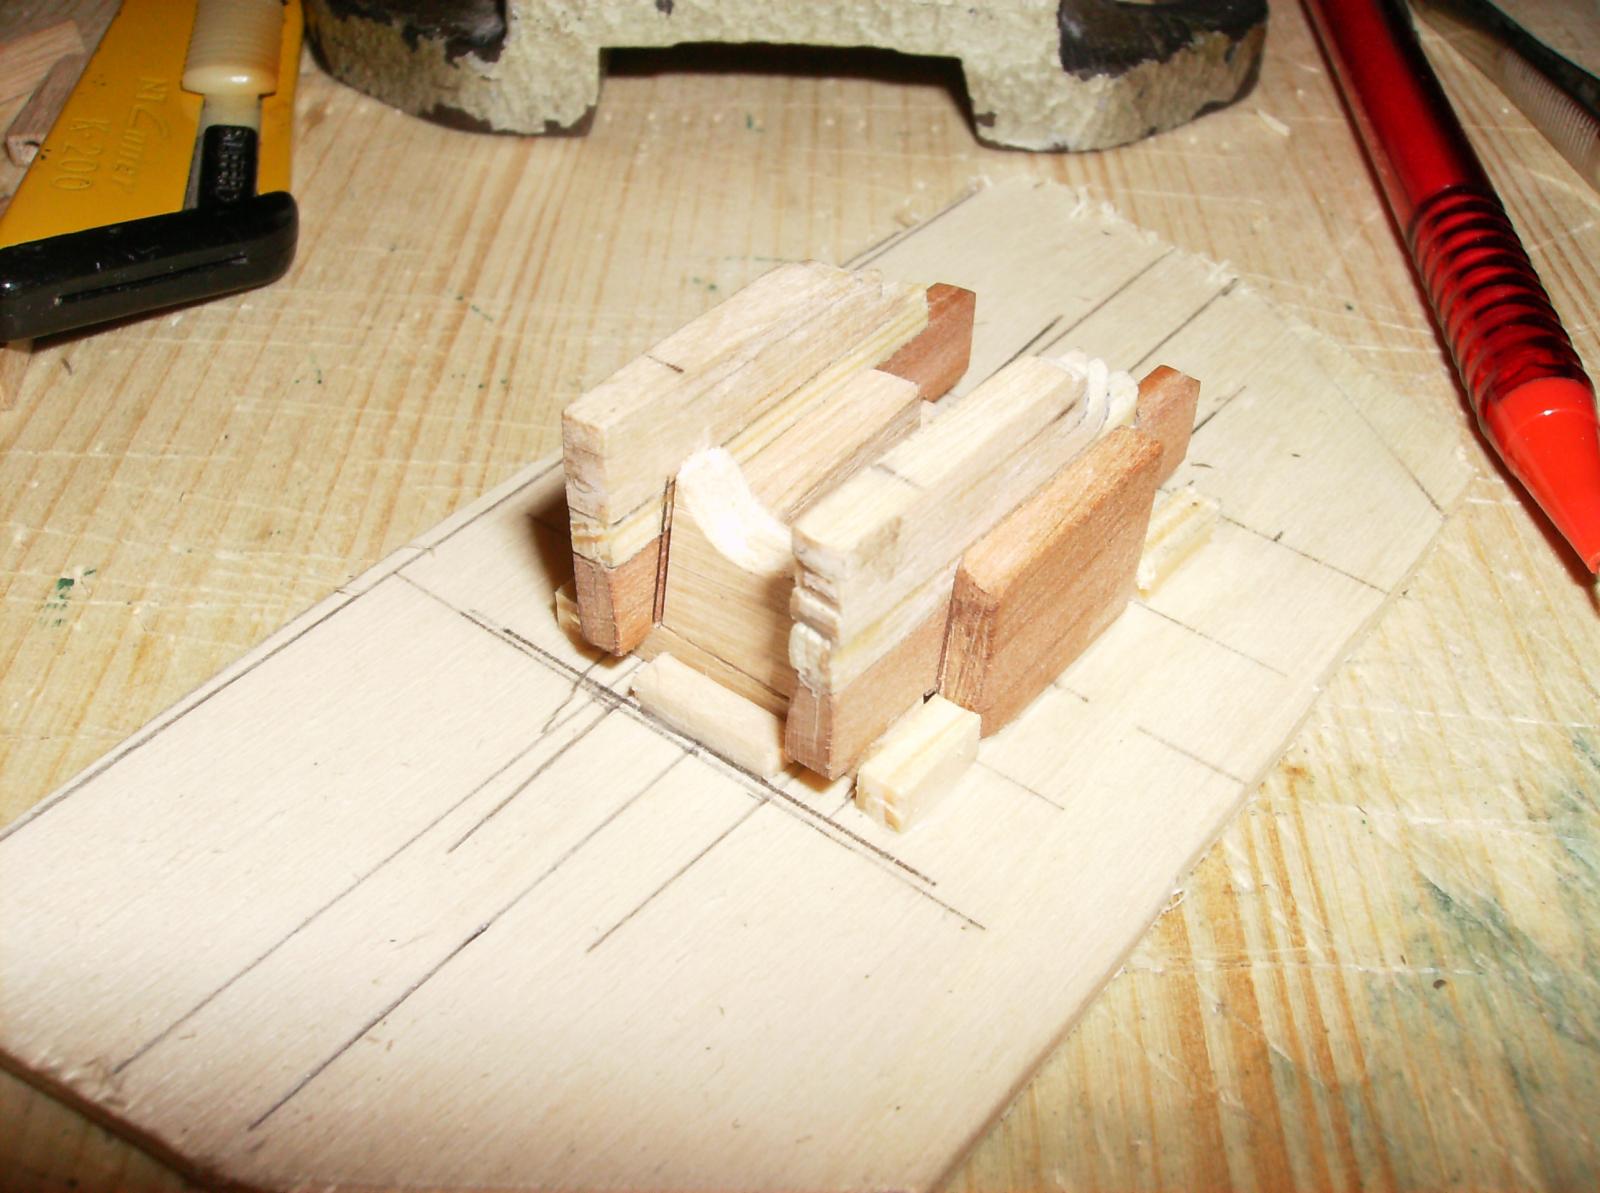
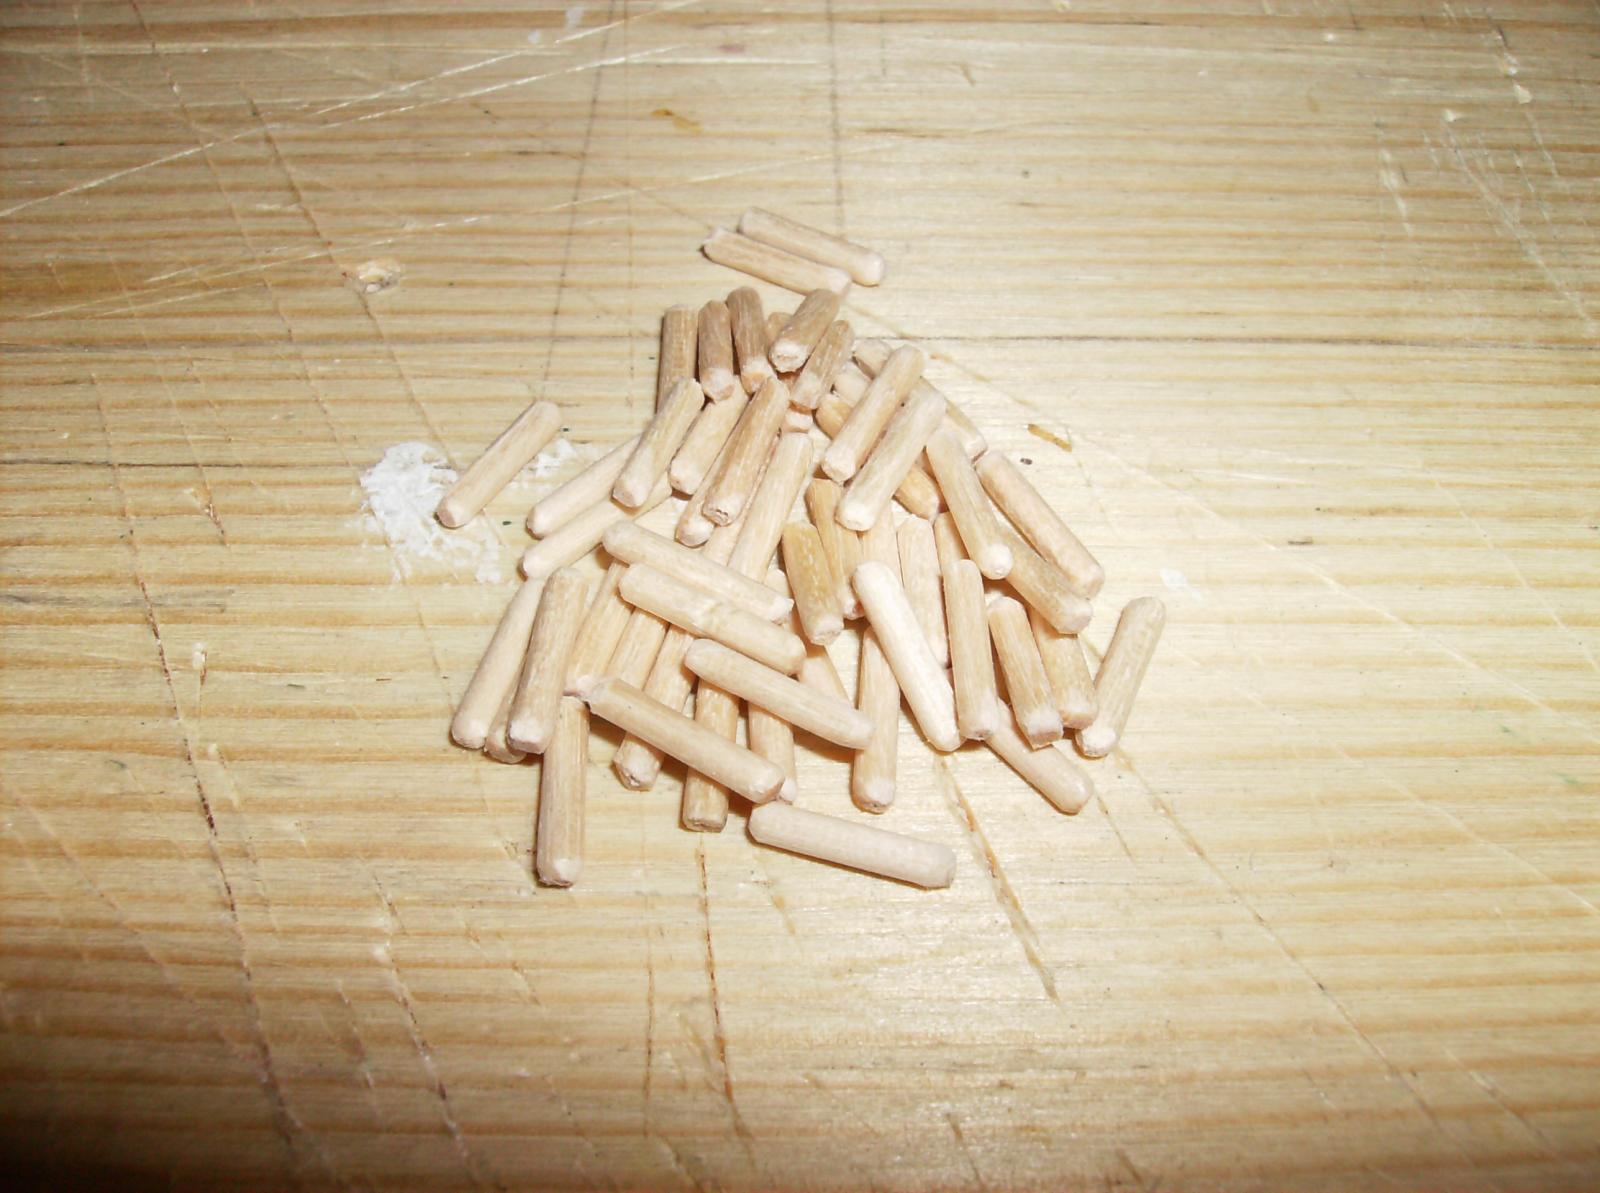
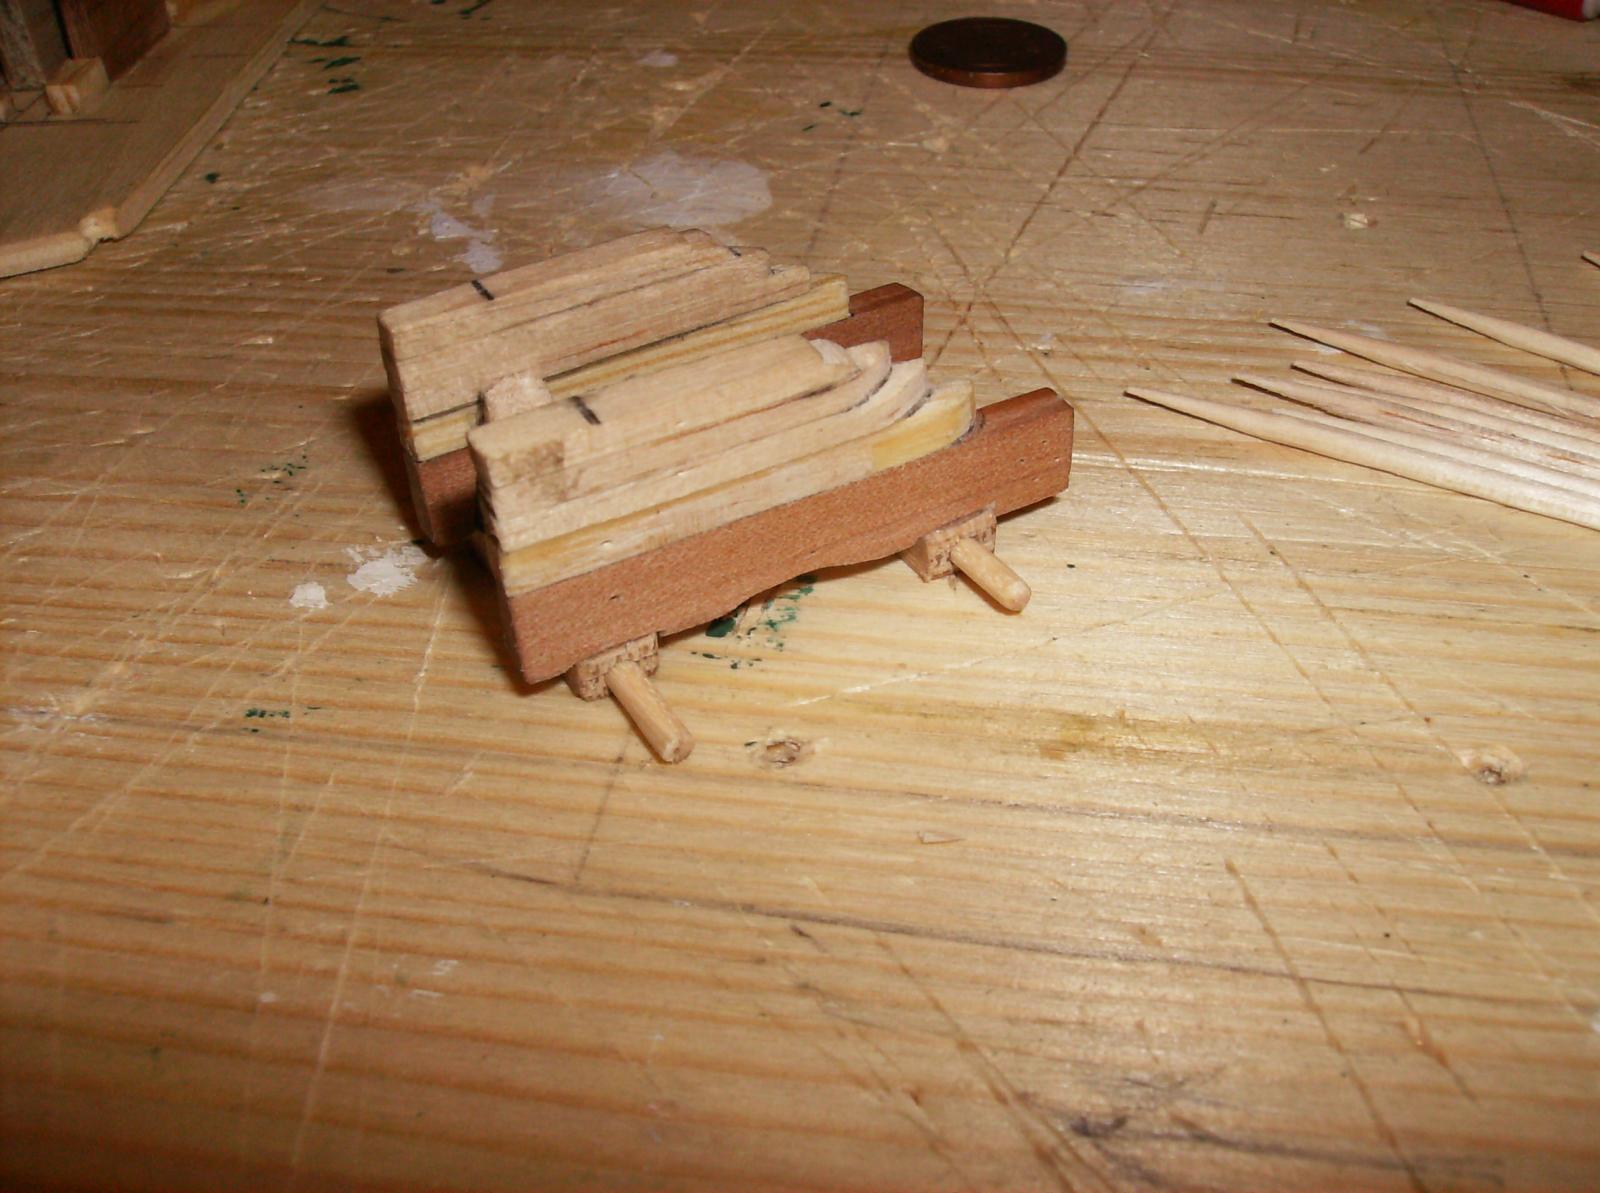
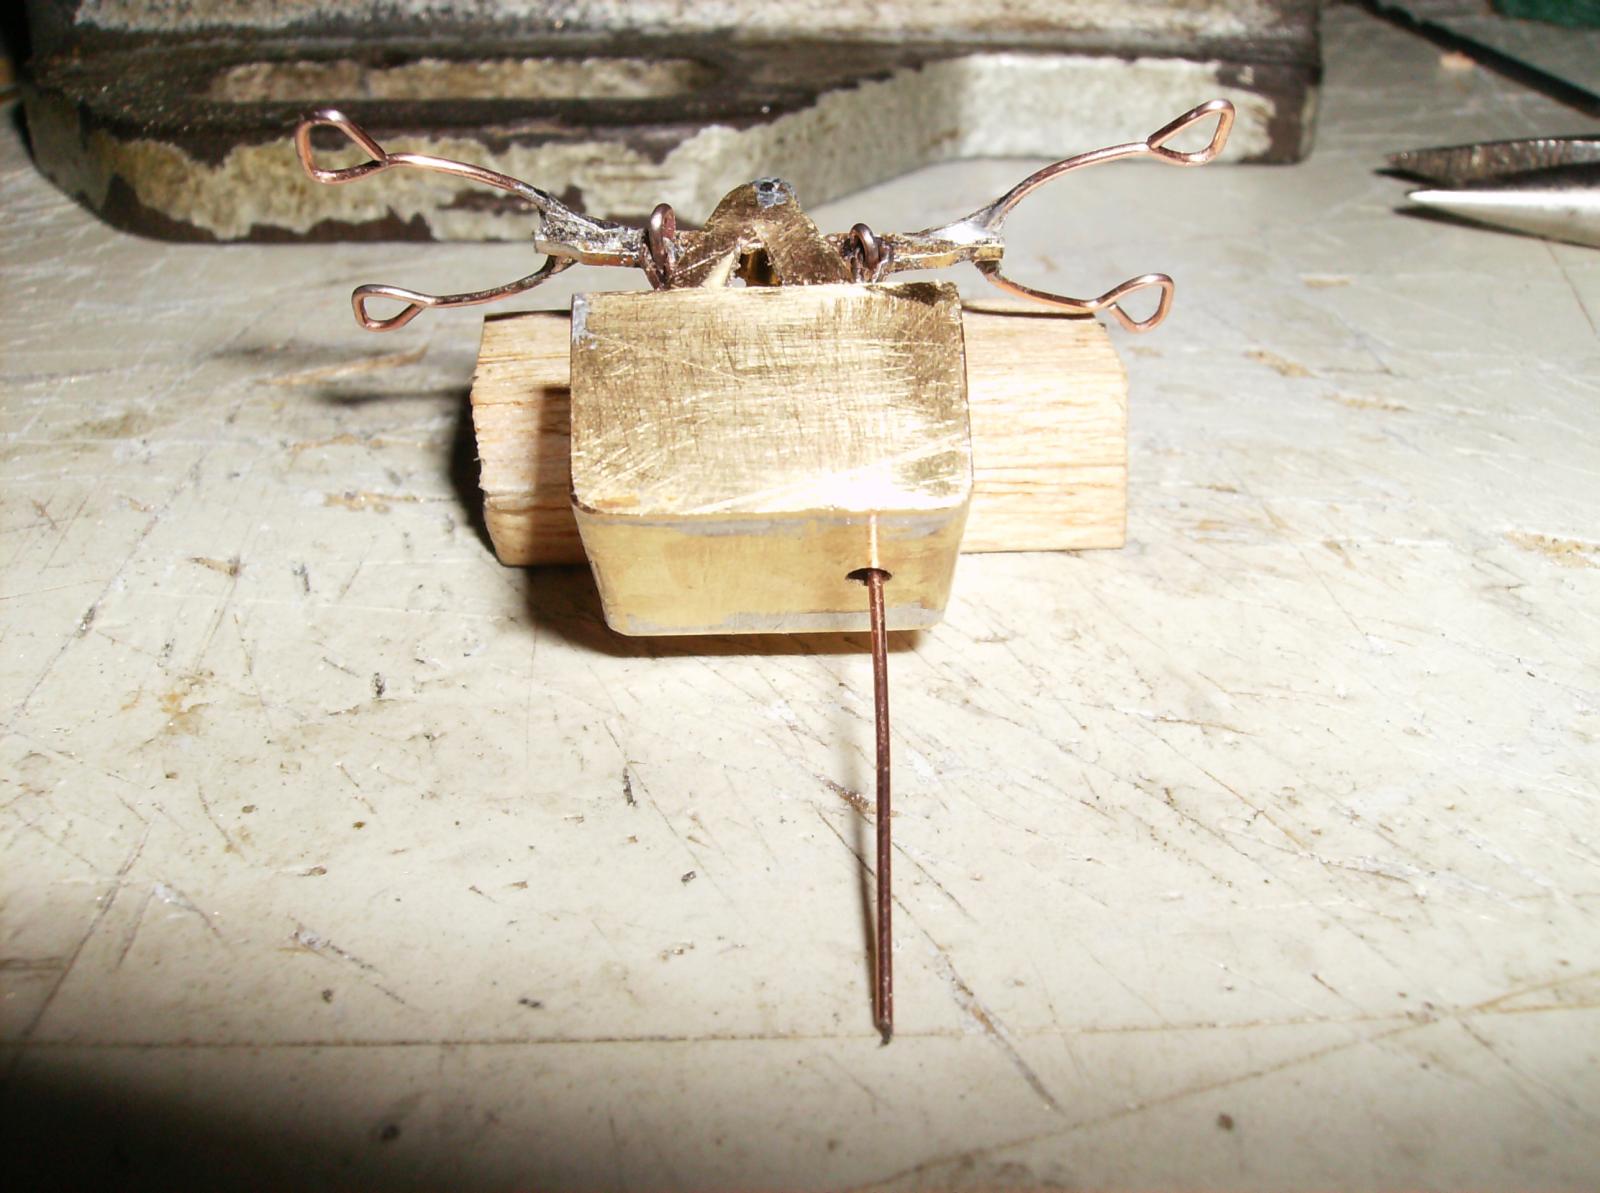
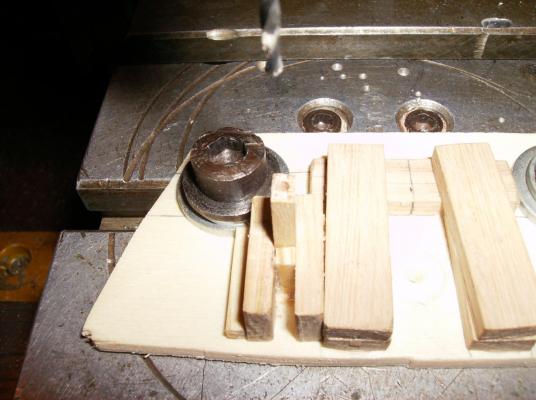
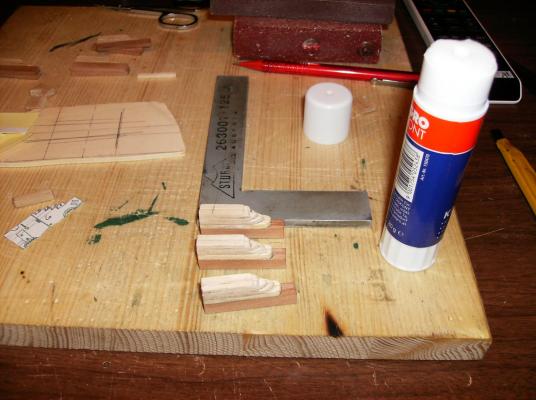
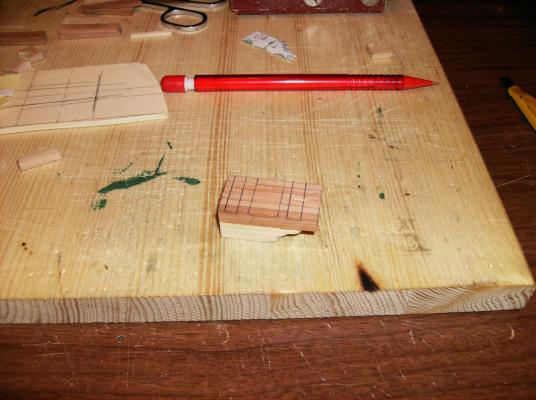
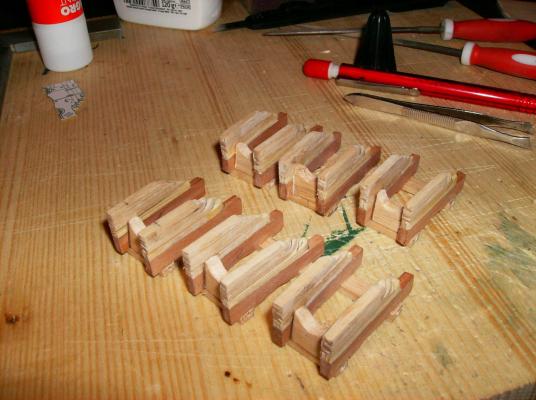
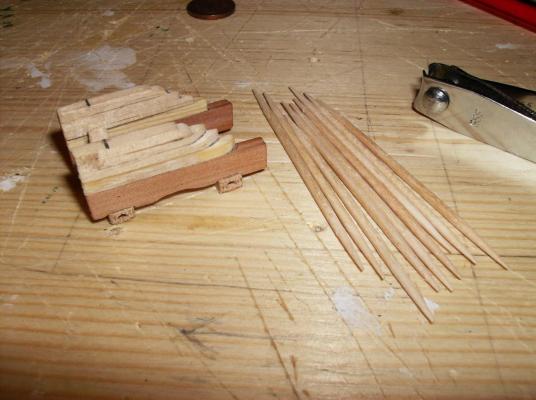
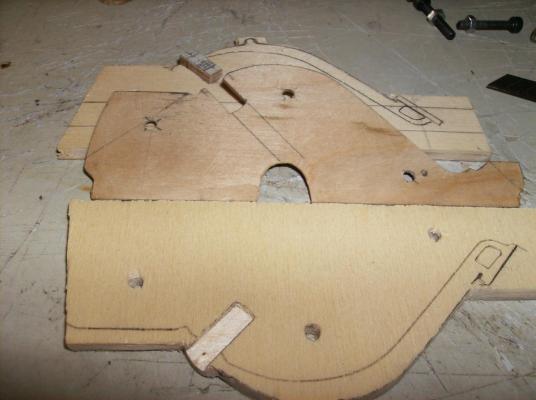
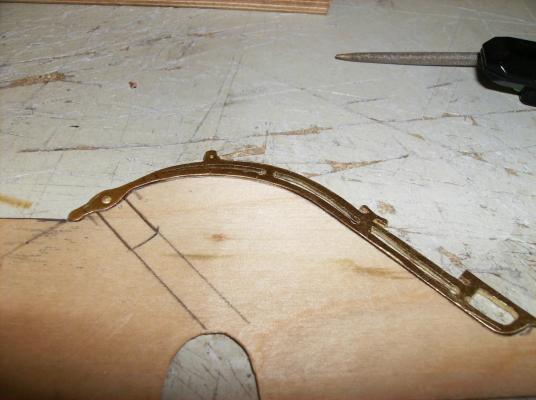
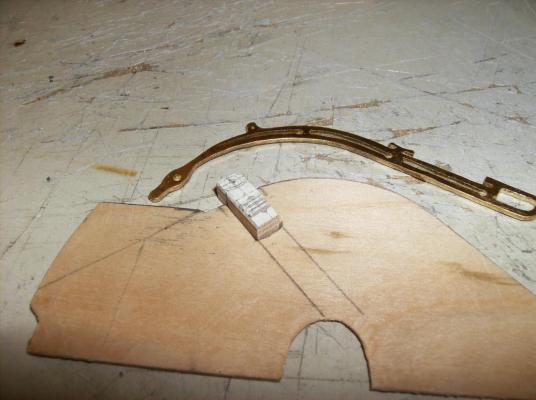
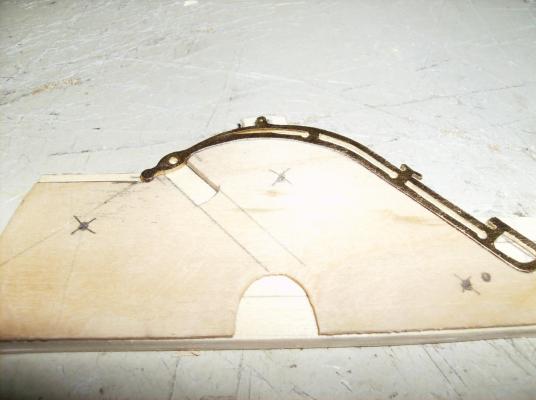
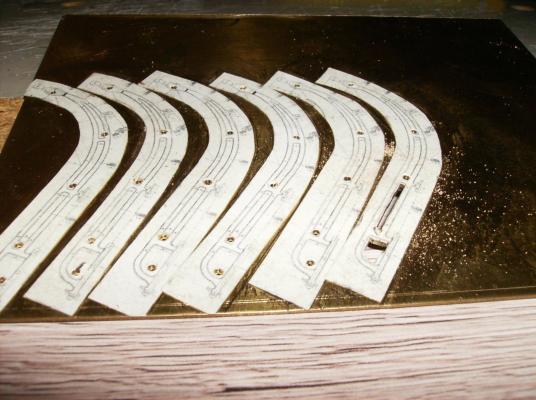
As I wrote earlier, I have done a bit of "prework" for the Cairo, the 6 larger carriages for the guns are made, but still without wheels, and some smaller parts also missing. But, It is a beginning! From this parts will 6 carriages be built, the first pair of sideplates is visible at the left side Holes for the axles are drilled in a form The completed side parts were glued together with a glue stick, this is strong enough to keep them togehter while milling the lower contour, and is easy to split after. Milled parts still stuck together. They can be split with a sharp knife without any damage The carriages were glued in a form, to get the same result for ever piece The axels were made from toothpicks There is more to come in the next post, hope you enjoy it.... Regards Gerhard


- 293 replies
-
- 10
-

-
Hi druxey It is getteing even better with every blink I risk. Regards Gerhard
- 641 replies
-
- 4
-
-
- greenwich hospital
- barge
- (and 1 more)
-
Hi Roger I have the Walking beam engine plans from Gerry Dykstra, in metric scale, and the Edgar T. Westbury plans for a pitman engine, from the Model Engineer Magazine from 1965 in inches. But no photo from the doctor. The Dykstra - engine will fit perfect to the model, as I think, and the Westbury is good in scale for the Cairo too. All this will be measured out, when I have the plans printed, I`ll give an update about this when measuring is done. Regards Gerhard Hi Ian I hope you will get that! Although I have been building some models at the time, I never have made a steamer like the CAIRO. There will be a lot of new mwthods of building for me, keep fingers crossed that all works fine, please! So a bit more of my intentions: I will try to build the boiler as the original one, this will make even more work than a "normally used" boiler, but there is not too much room under the casemate for usual boilers. It will all take some time, and some things are not cleared for me, how I should do them. All of that will be mentioned by time, I wont hurry too much! Regards Gerhard
-
Hi grsjax Thank you for joining in! I`ve downloaded this a year ago, as i wrote above, I always search a long time before I start with a new build. The publication is named "USS Cairo historic stucture report - National Park service", very interesting. There is also some good info to find at the library of the congress http://www.loc.gov/pictures/item/ms0291/ So, I have a lot of good infos to the ship and its history saved on my PC, including pics of the guns, the left parts of the whel, and the pitman engine. But not one single photo from "the doctor", this is, what I still miss for the build. Regards Gerhard
-
Hi Bob I hope it will be just that. Today I had time to scale all the plans to correct size, just not printed them. The next days will be filled up with calculating the woods for the frames, order some brass and aluminium for the engines, and there is still the DANZIG I want to continue. Regards Gerhard
-
Hi Cathead Great report to a great build! And the final post with the direct links to the different stages is really useful! Regards Gerhard
-
Hi Ken Welcome to the CAIRO , take place and hopefully enjoy! Hi Cathead Welcome too, photos from the Cairo are always welcome, thank you! Craftmanship is something to be always educated, every thing i do is something to learn more. Set your targets high, and results will come to the best. Hello to all again Some words to the plans I have for the USS CAIRO The ship will be built in 1:50 scale, and I will build bith engines to scale, the pitman engine and the grasshopper they called "the doctor". Both engines will run on live steam, but in addition to the original steering rudders I will possibly build a transvers rudder into the bow, this is meant for better steering. The model will be 1060 mm long, with about 330mm beam. I have made some smaller things a year ago, the carriages for the smaller guns are done. More about that will come in next post, I have to sort them out first. Currently I`m working on the plans to bring them to correct scale, then print them all, and check out the amount of wood I will need. Regards Gerhard
-
First of all, thank you so much for this great response! Hi Mark The scales that are drawn on this plans are not correct, I`ve tried them. So I must rescale the whole plans in 3D Cad V22, and print them then. I have done this before with other plans too, it works good. I will take the hull for measuring, thank you for that hint! Hi Jim The numbers on the plan must be numbers of frames. There are over 100 frames to make, this will be sometimes a bit boring to me, but if they were there, they must be in the model. Hi Glenn Great finds, just took a short look at this site. I must take more time for that! Thank you for your good wishes, I`m trying my best as always At his large amount of artefacts I`m sure it will take years to conserve, good luck for that. Hi Nenad Sit down and enjoy , as everyone else is welcome! Hi Cathead You are right, the scale bars are wrong. I will use the hull for a new measurement, but also have a look to the beam, if that fits to length when scaling the plans to size. As i saw, jim Bodnar used the same plans: http://www.modelshipbuilder.com/e107_plugins/forum/forum_viewtopic.php?5406.postfor his build. Hi Mark Thank you for this links, I have them all. I have been searching for the CAIRO for over a year, and collected everything I could find. Also a lot of photos from the internet, and from friends too are saved on my PC. When I intend to do a new build, first thing of all is to search what I can find, and save it all! Hi Roger The changes you mentioned, will not make an influence to the model. I must make the casemate removeable, so I can reach the engines and RC components. Maybe I will use a (not original) transvers thruster for better steering too, this will be cleared when the build is on the way. Thank you all again Regards Gerhard
-
Hi Glenn HERE it comes............ http://modelshipworld.com/index.php/topic/13282-uss-cairo-by-gerhardvienna-live-steam-radio/ Best regards Gerhard
-
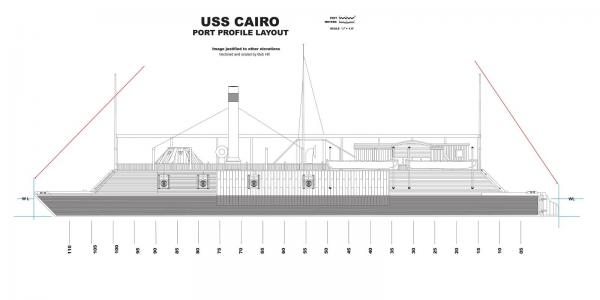
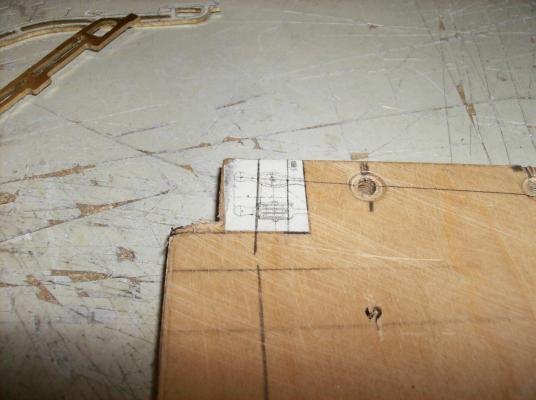
As I wrote here http://modelshipworld.com/index.php/topic/11538-western-river-steamboat-heroine-by-ggrieco-scale-124-1838-as-she-appeared-before-hitting-a-snag-in-the-red-river/?p=401974I plan to build the USS Cairo, as all my modelships in 1:50 scale. The history of the ship is well known, there are so many pages in the internet, so I will not bore you with that. But there is a big question I have. I have a set of the plans from bob hill, and I am not sure, where to measure the length of the ship. Is the lenght of 175 feet measured at the hull, or includes this the rudders between the blue lines on the plan? I have marked the lines with red arrows. Would be happy to get some info about that, so I can scale the plans and start with the ship. Regards, and thank you all Gerhard
-
NERVES??????? This is called steel wire It`s just my way to build models, try, if it does not fit to my requirement, try again! And this so many times till it fits. As I built my german Schnellboot TIGER, I made the hull twice, the first one was not good enough. The starboard side was about 1mm too narrow .............. Regards Gerhard
-
Hi Bob Just discovered your log, great build so far! I`ll stay tuned! Old steamers, if they are wheelers or screw driven, are my main interest. Regards Gerhard PS.:
- 348 replies
-
- 3
-
-
- pequot
- cable ship
- (and 1 more)
-
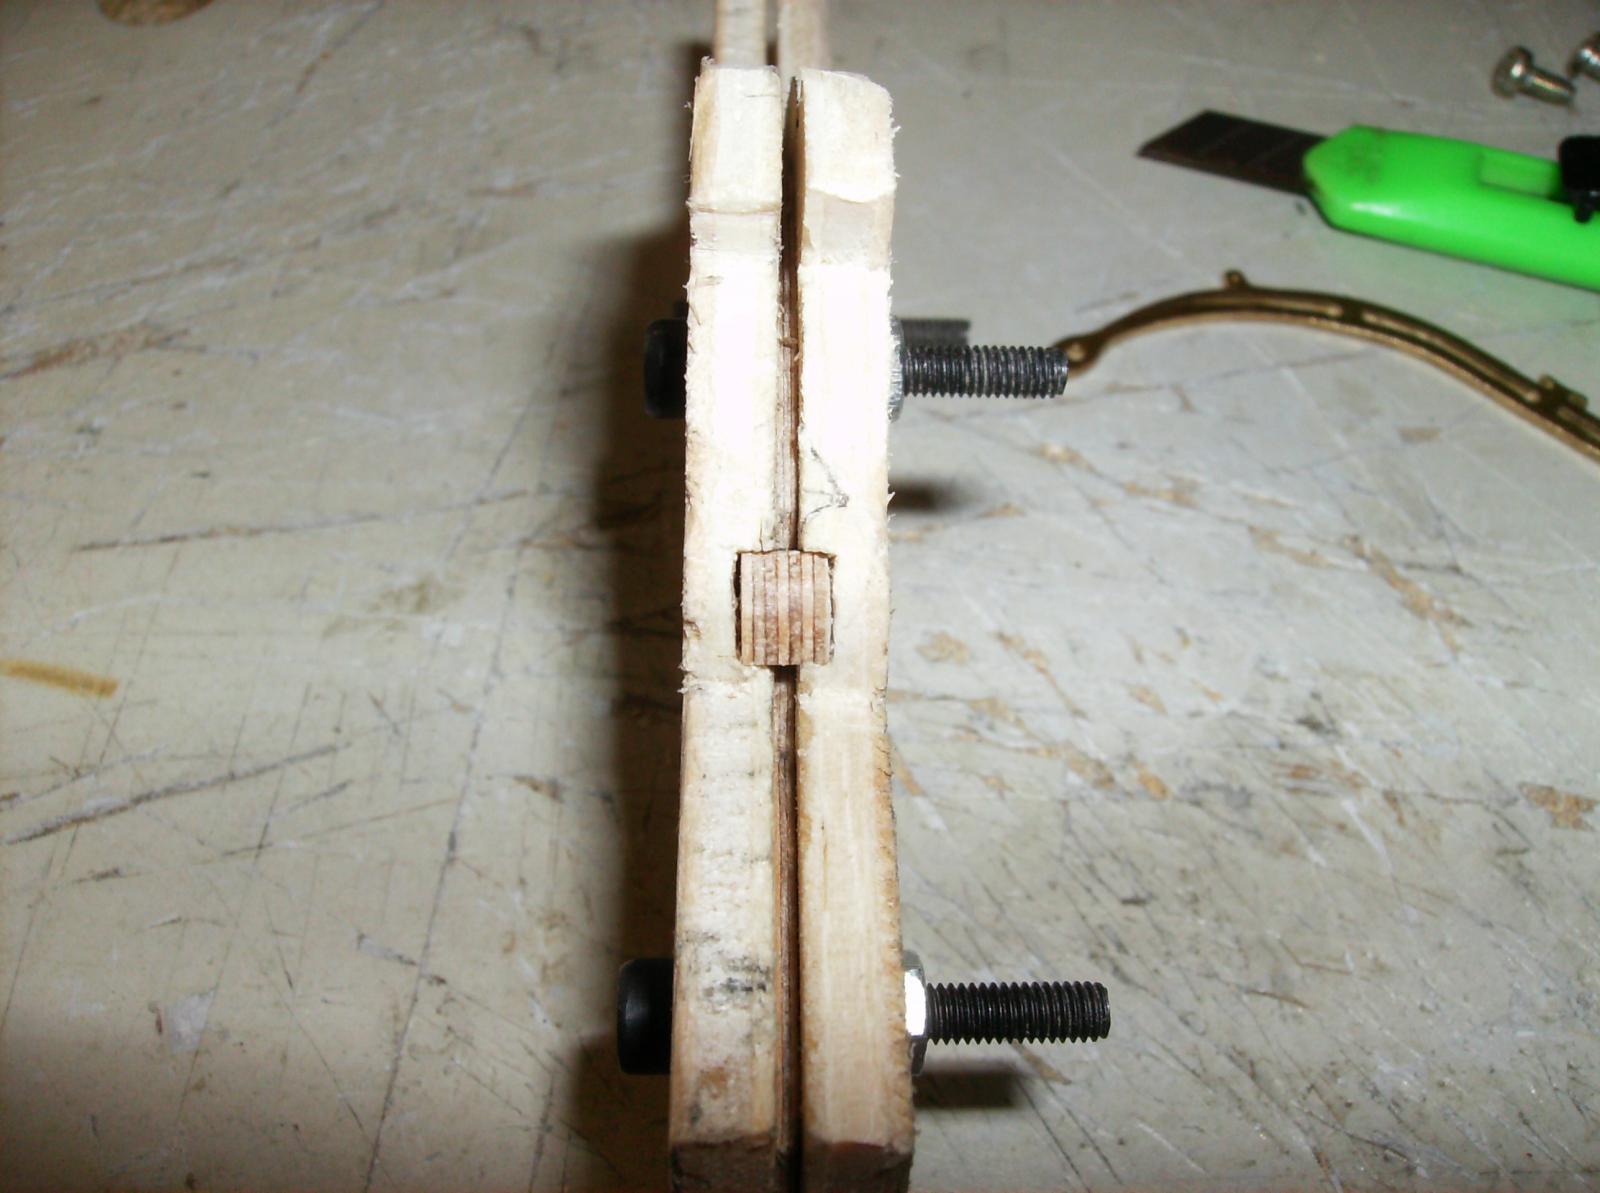
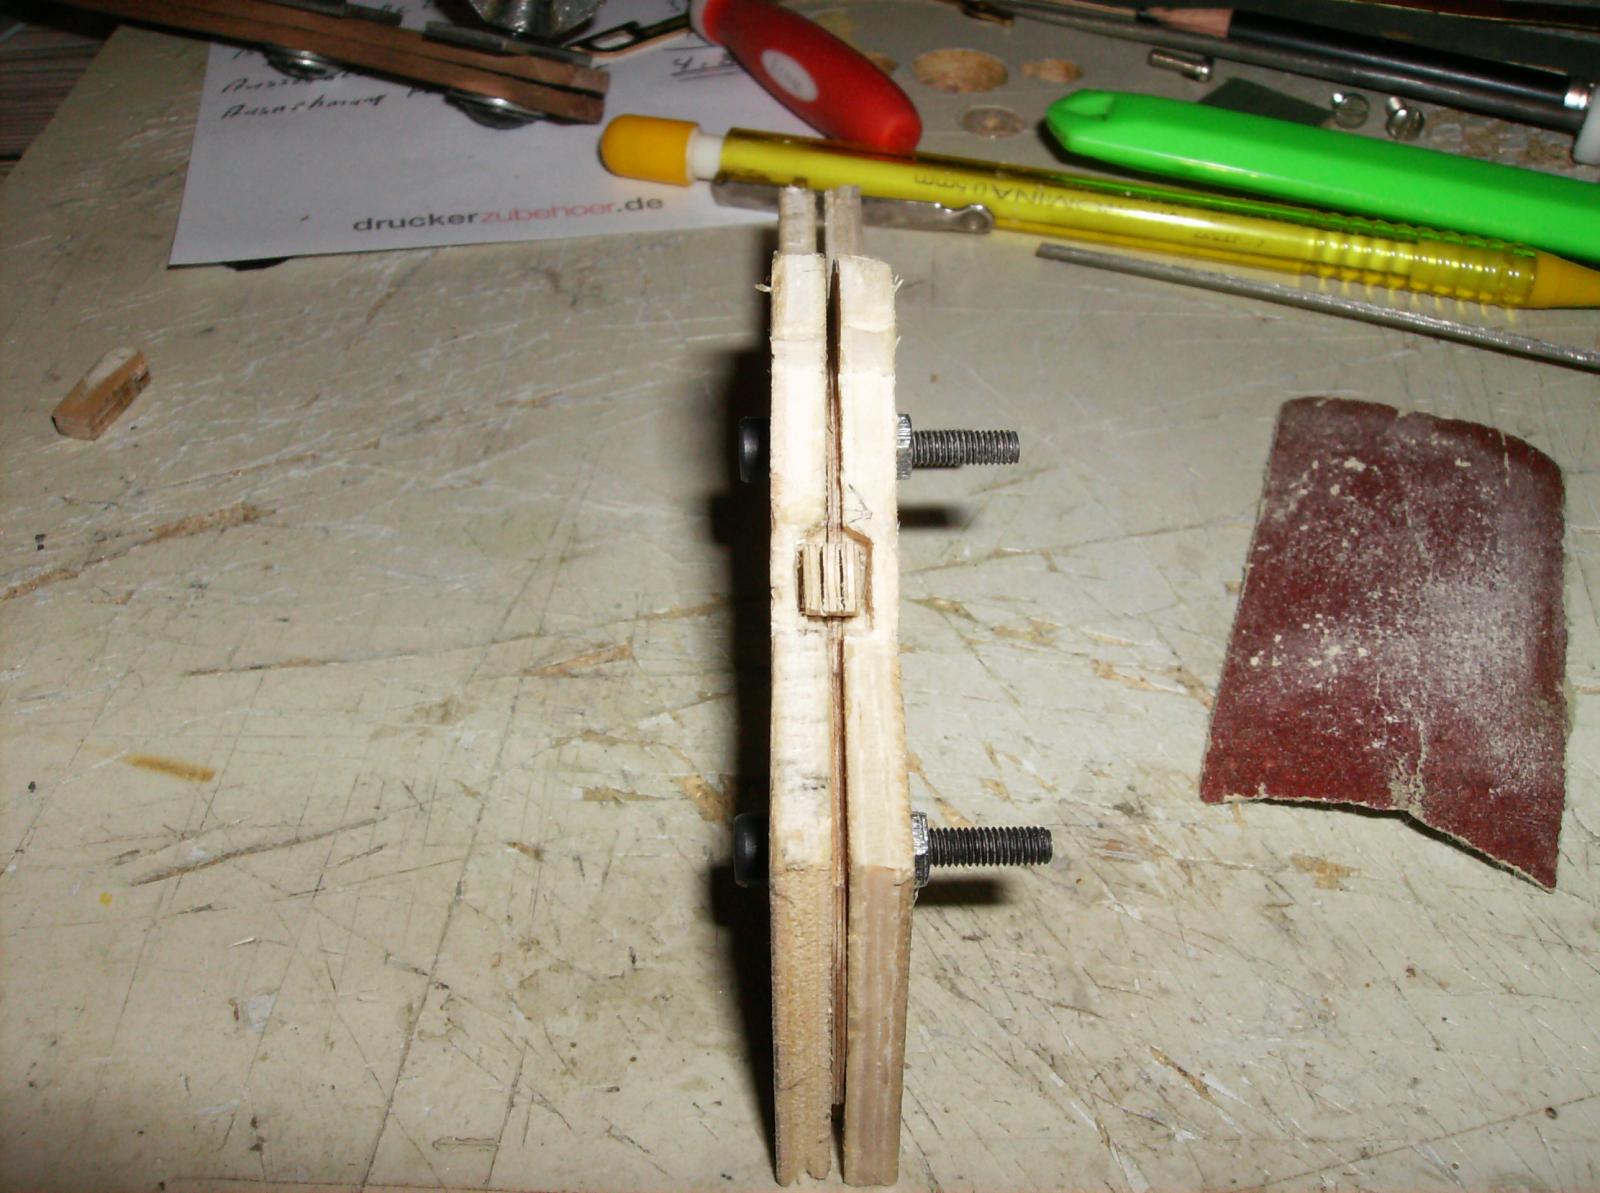
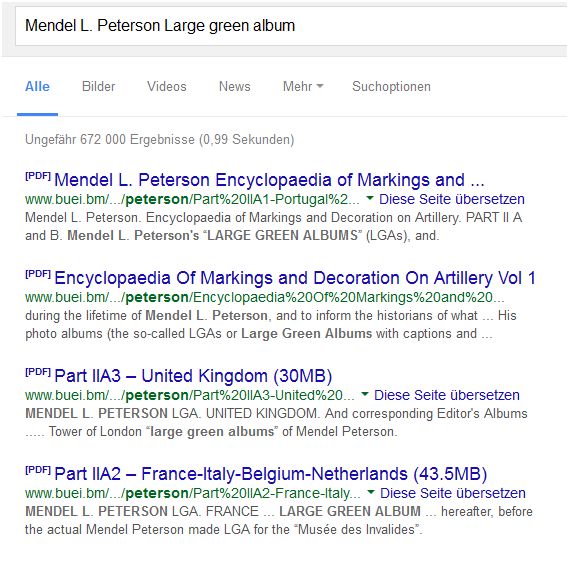
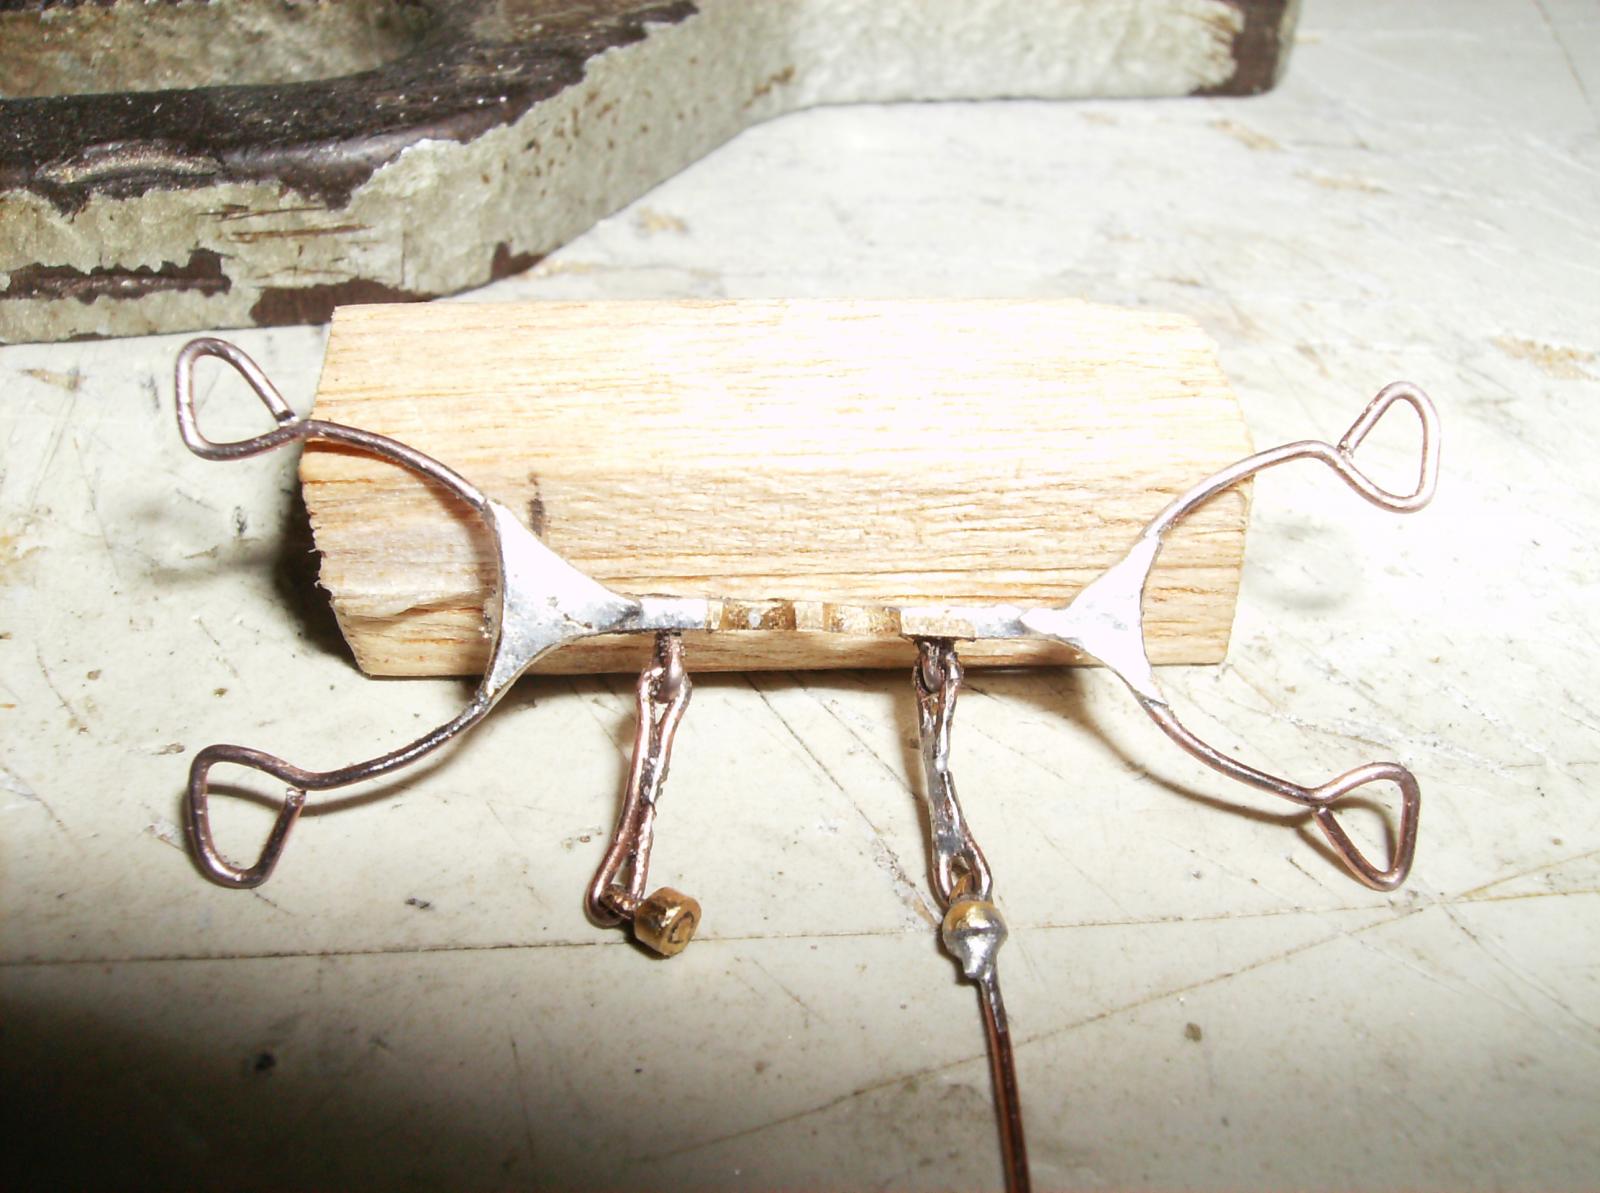
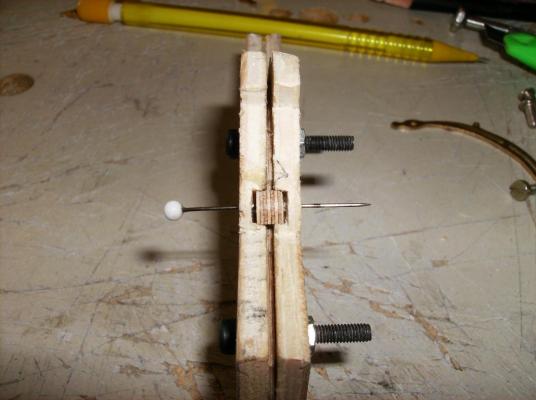
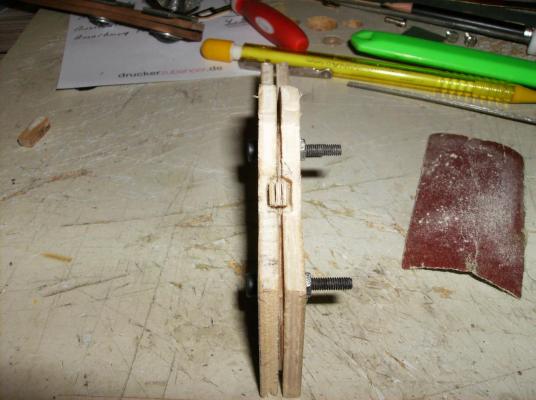
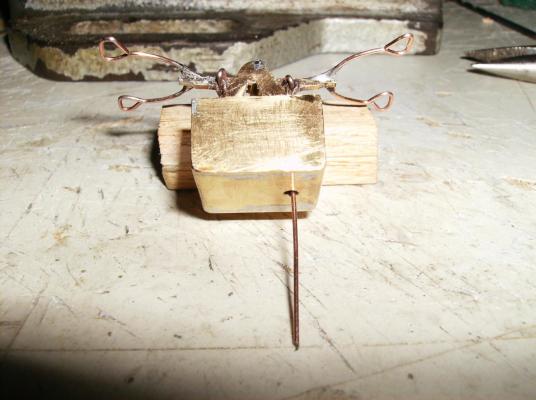
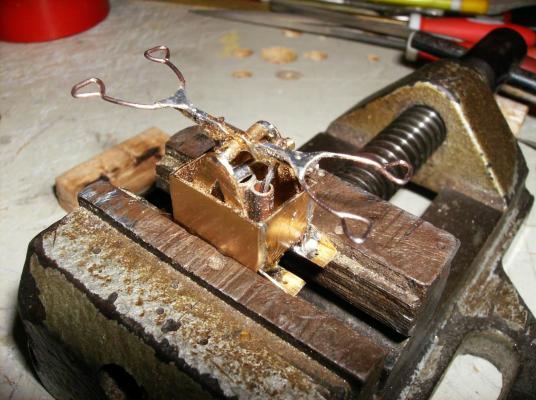
Hi again, and thank you all for watching, nice likes, and comments! Hello Joe Tutorial will follow, when this set of davits is finished, so I can copy everything into a new report. But it is still some way to go............. Today I finished the soldering form, so the next things to do will be the fabrication of the roller sheets. Every davit will carry 3 rollers of 3mm diameter, with 1,1mm width. More about that will follow soon. Grooves for the spacer cut into the outer form parts Spacer for rollers in place, no slashes cut at this time. That pin (with the white head) is important, it locates the place for the rollers axle! Slashes cut to the spacer. This slashes are necessary to place the roller distance sheets, distance between the sheets will be 1,2mm, the whole head of the davit is only 4,8mmwide. The inner sheets are 0,1mm, the outer ones 0,5mm thick. It took me 3 attempts to make the spacer, the smallest mistake will ruin the whole thing. Regards Gerhard

- 108 replies
-
- 11
-
-
Hi Jerry Just stumbled in to your log, really interesting! I`ll stay and follow.............. Regards Gerhard
-
The first attempts I made, were pure chaos, so don`t give up, when it looks really bad! Most important is not to be too fast, wait until the soldering iron is hot enough, and use soldering grease or liquid. I do it that way, and it works well for me. I`ll show what I do in one of the following posts, and maybe make a little tutorial about. Regards Gerhard
-
Hi Nenad This is all soldered with usual solder wire, silver soldering is something I`ve not tried til now. But I will have to learn that, when it comes to the boilers and steam engines. My equipment for the normal soldering is just a 30 watts electric soldering iron, and soldering wire for electronic devices from Stannol. Regards Gerhard
-
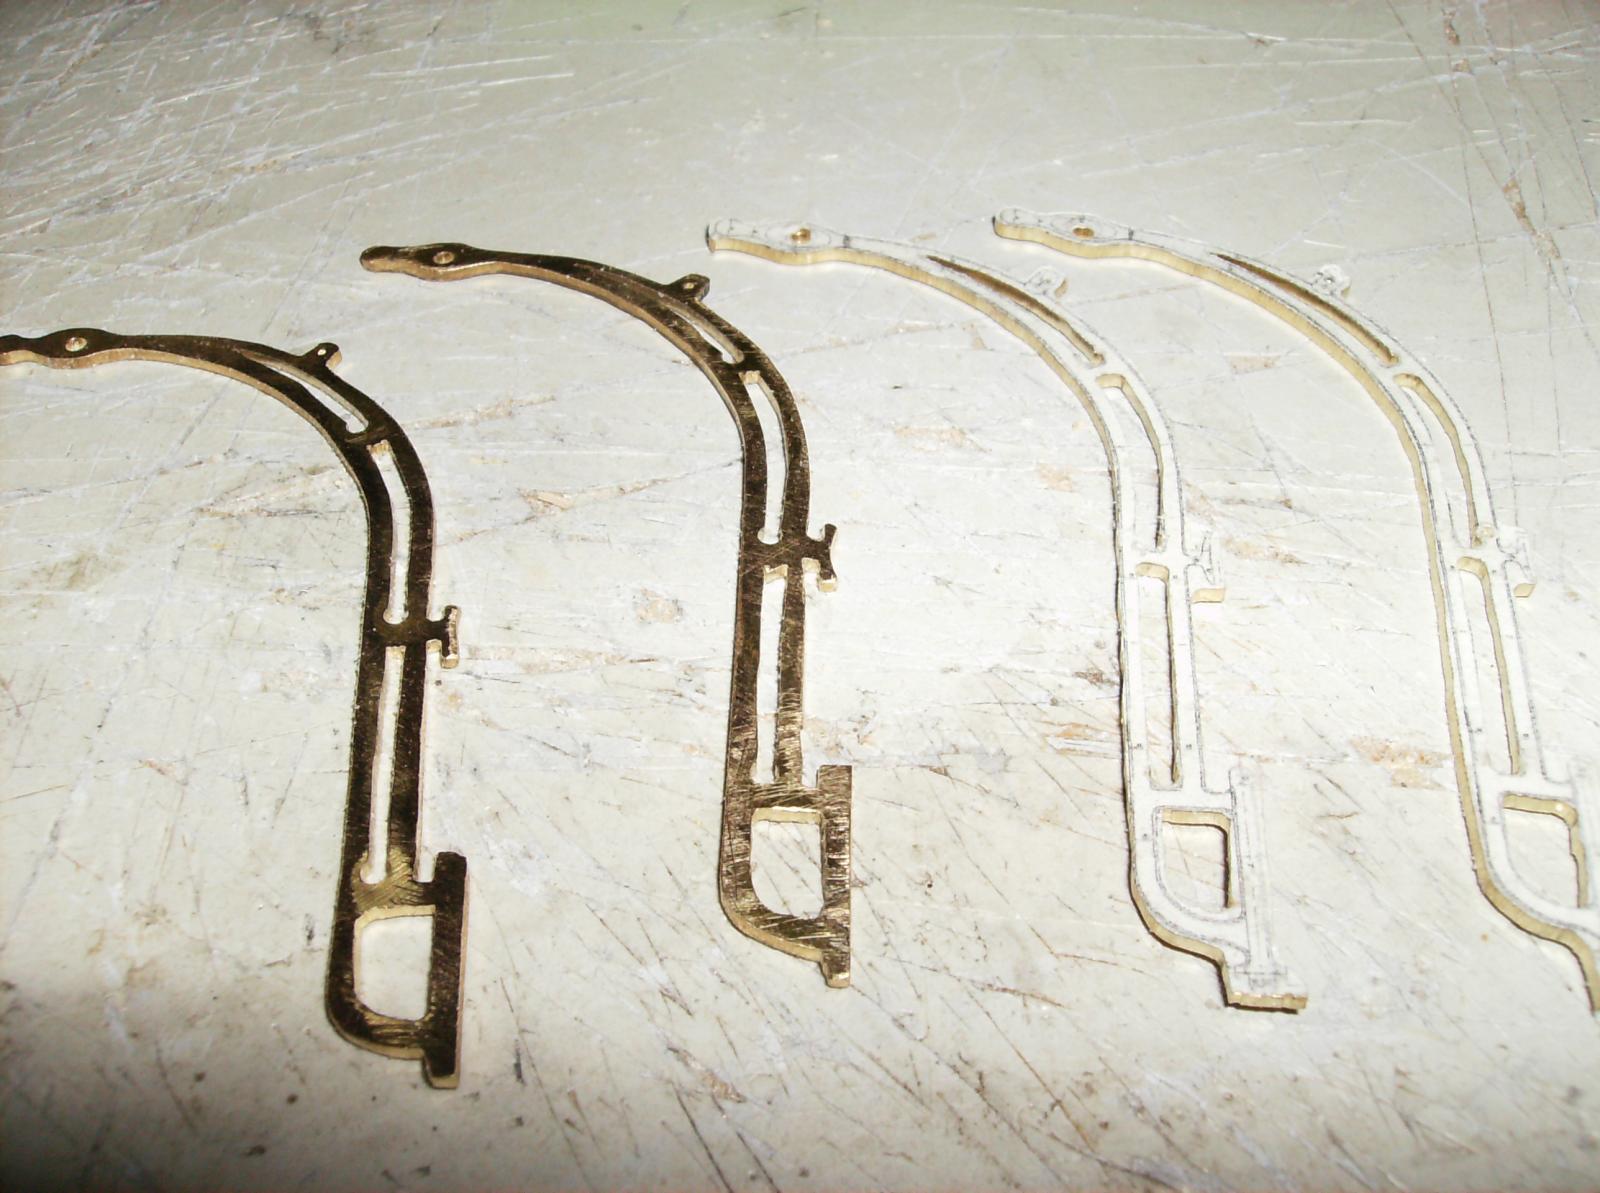
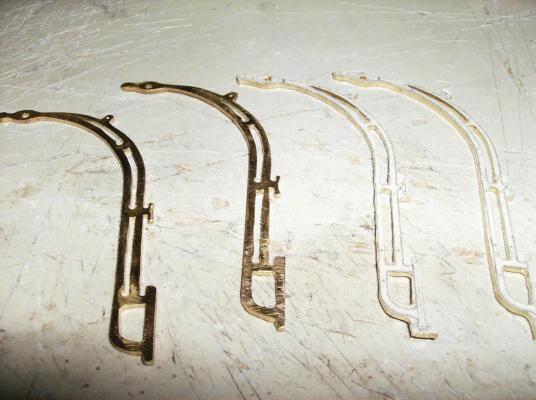
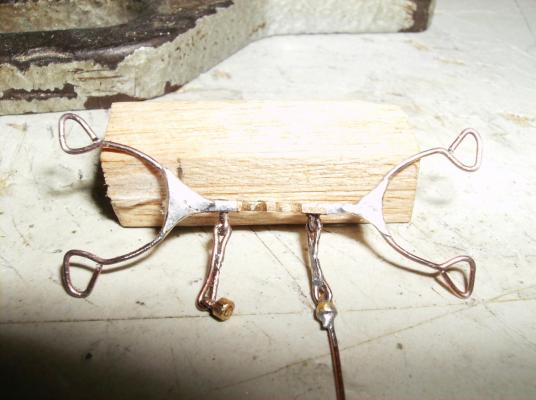
Hi Glenn Nice to have you here! So, sit down a little longer, and take another glass.............. Thank you all too for your nice likes! The last days were filled up with even more work for my home improvement, but I found some hours too for the SMS DANZIG. The four davits are finally cut, and the soldering form is almost done. Davits cut, two of them have still their paper sheets glued on. This will be removed after grinding and filing to final shape The soldering form, stages to make it. 1), draw the inner contour of the part you will have to solder. This inner form must be as thick as the part that will be set into the form, 1mm in this case. 2), make the spacer for the parts to be soldered in 3), cut the inner part of the soldering form, and the place for the spacer Outer parts of the soldering form follow the outer contour of the davit The second outer part of the form will be made today, even the cuttings to the spacer. Some holes will be drilled, they are important to fix the form as well as to place the thin metal sheets that will hold the rollers later. Will be continued..................... Regards Gerhard

- 108 replies
-
- 13
-
-
Cutty Sark by NenadM
Gerhardvienna replied to NenadM's topic in - Build logs for subjects built 1851 - 1900
Hi my friend The first one was good. BUT: These are phantastic! Regards Gerhard- 4,152 replies
-
- 9
-
-
- cutty sark
- tehnodidakta
- (and 1 more)
-
A Lorch Micro-Mill that never was ...
Gerhardvienna replied to wefalck's topic in Modeling tools and Workshop Equipment
Hi Eberhard I will be watching this , high interesting machine! Regards Gerhard -
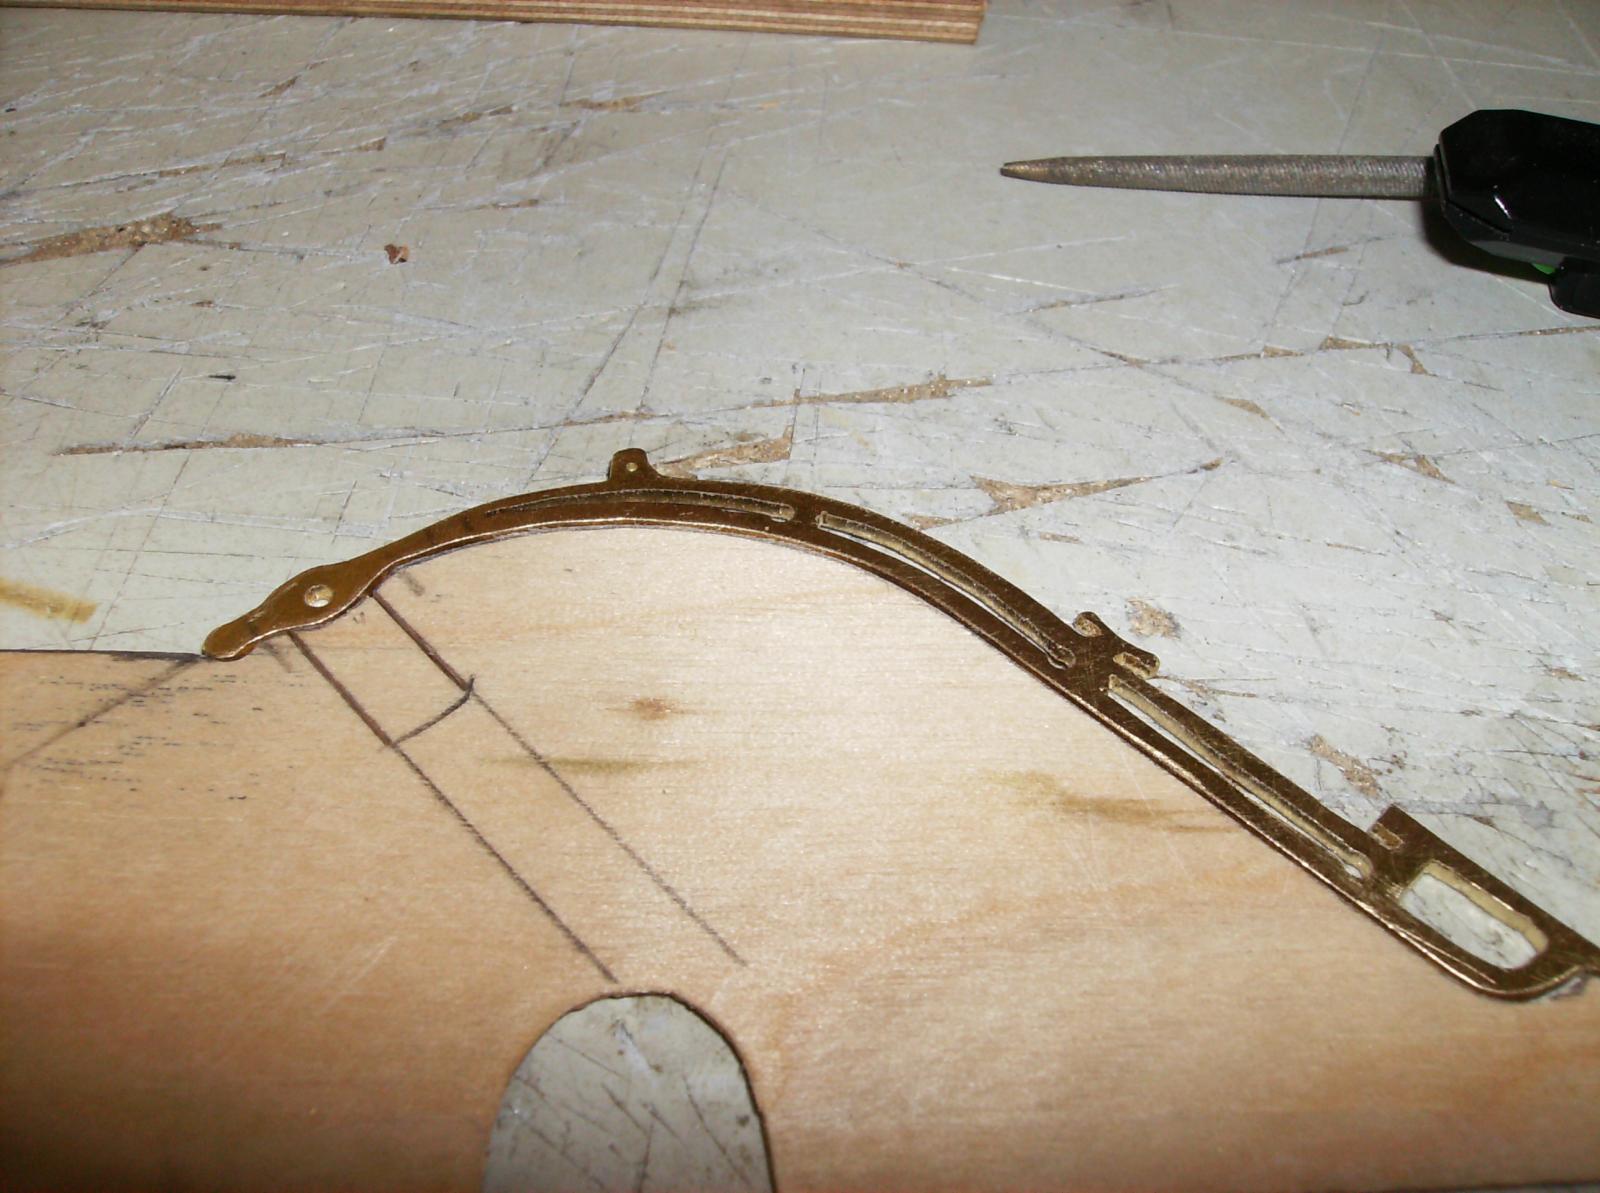
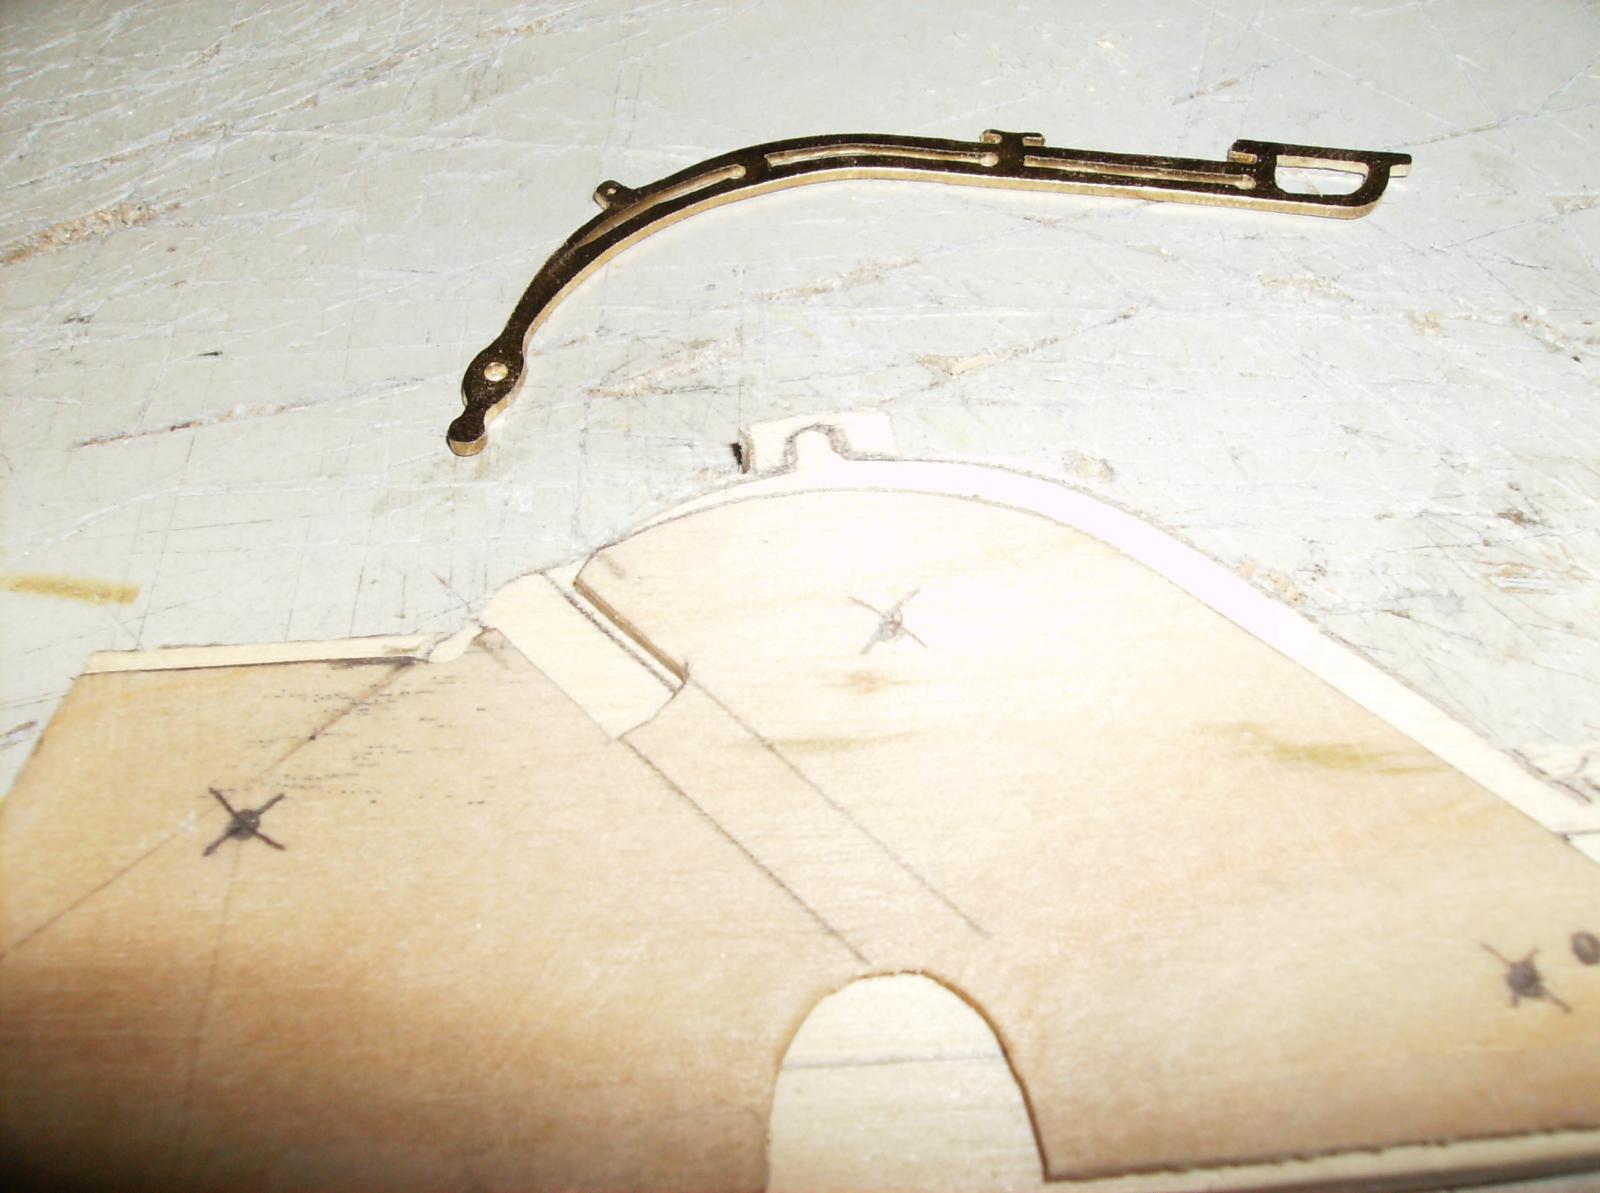
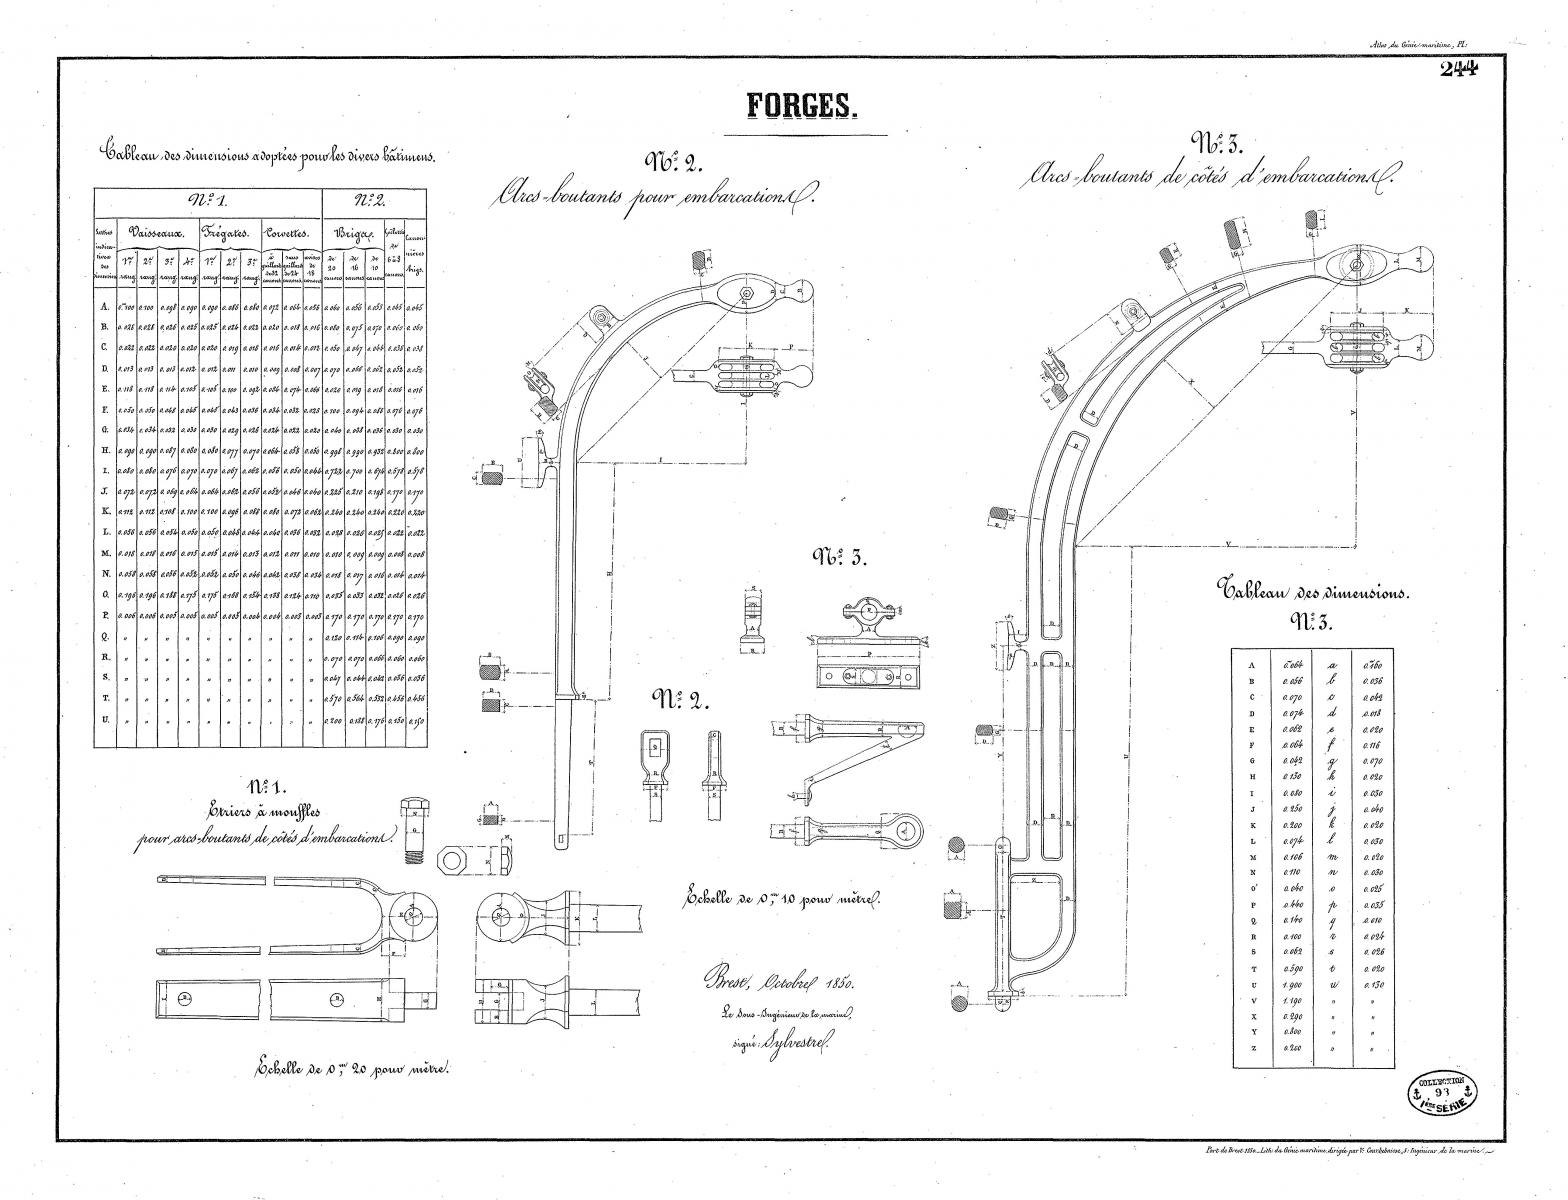
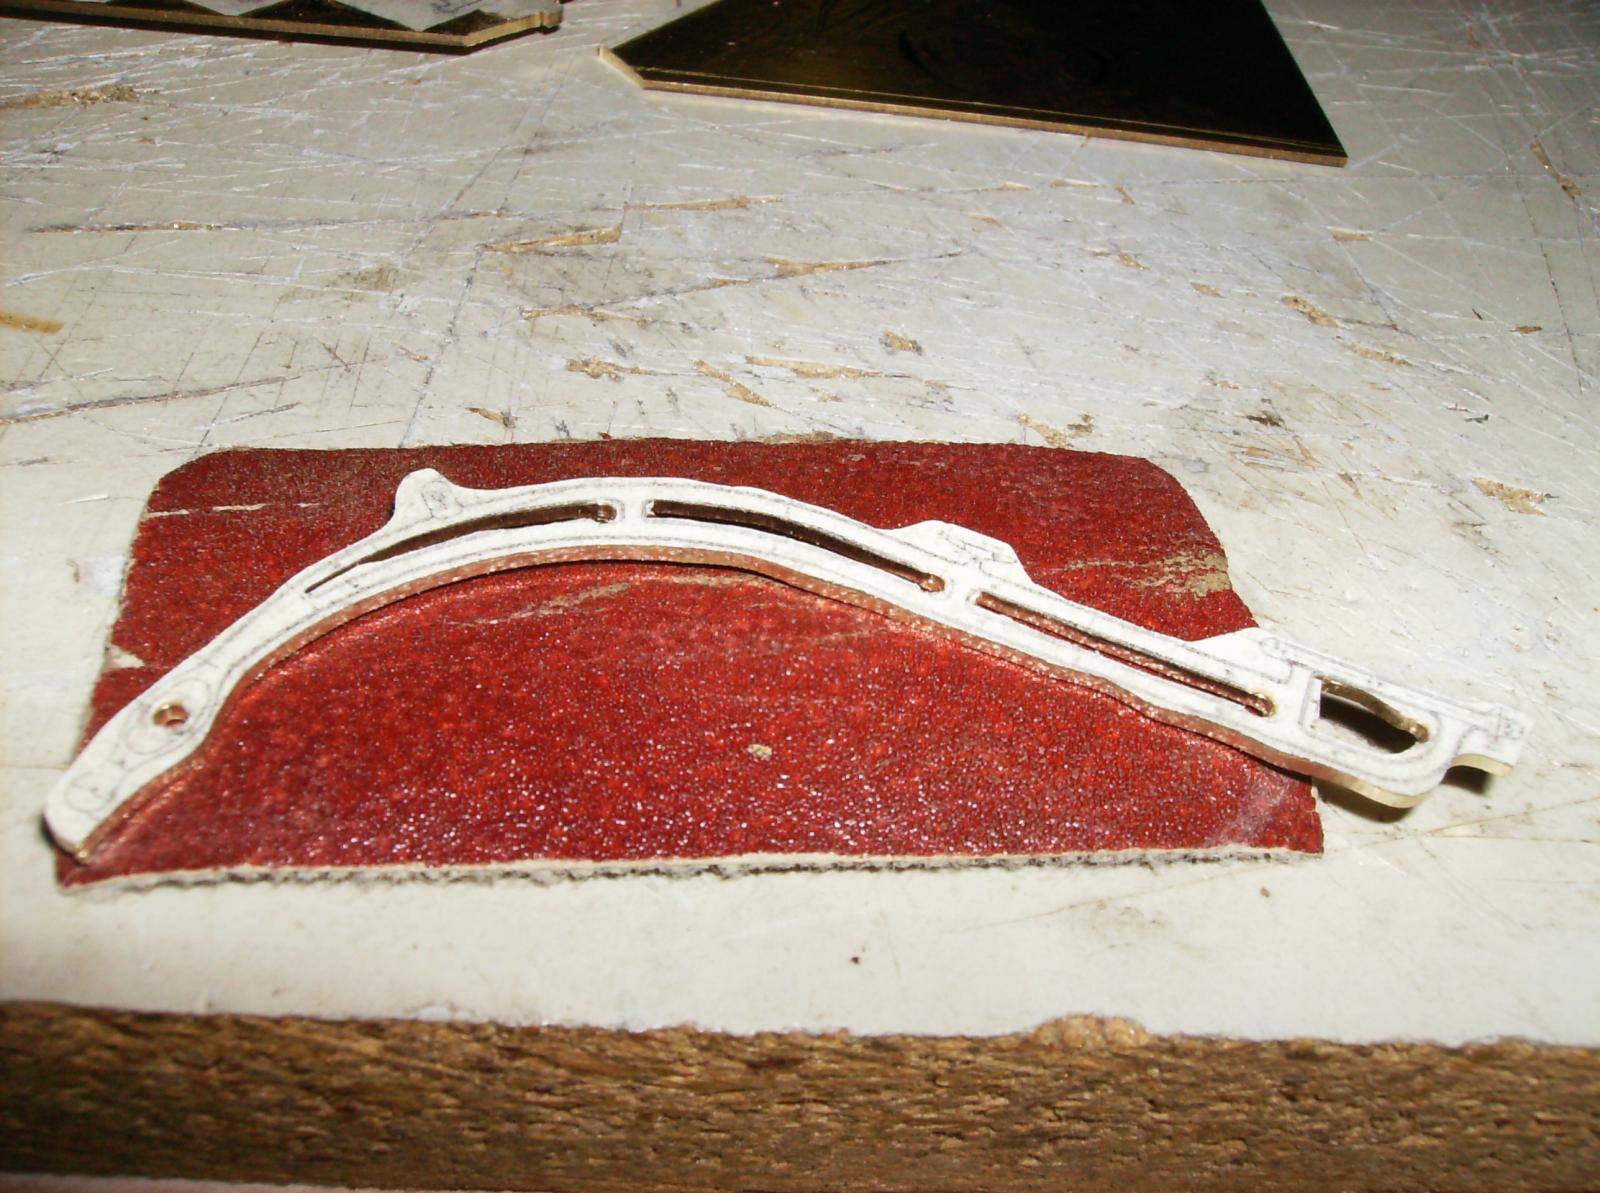
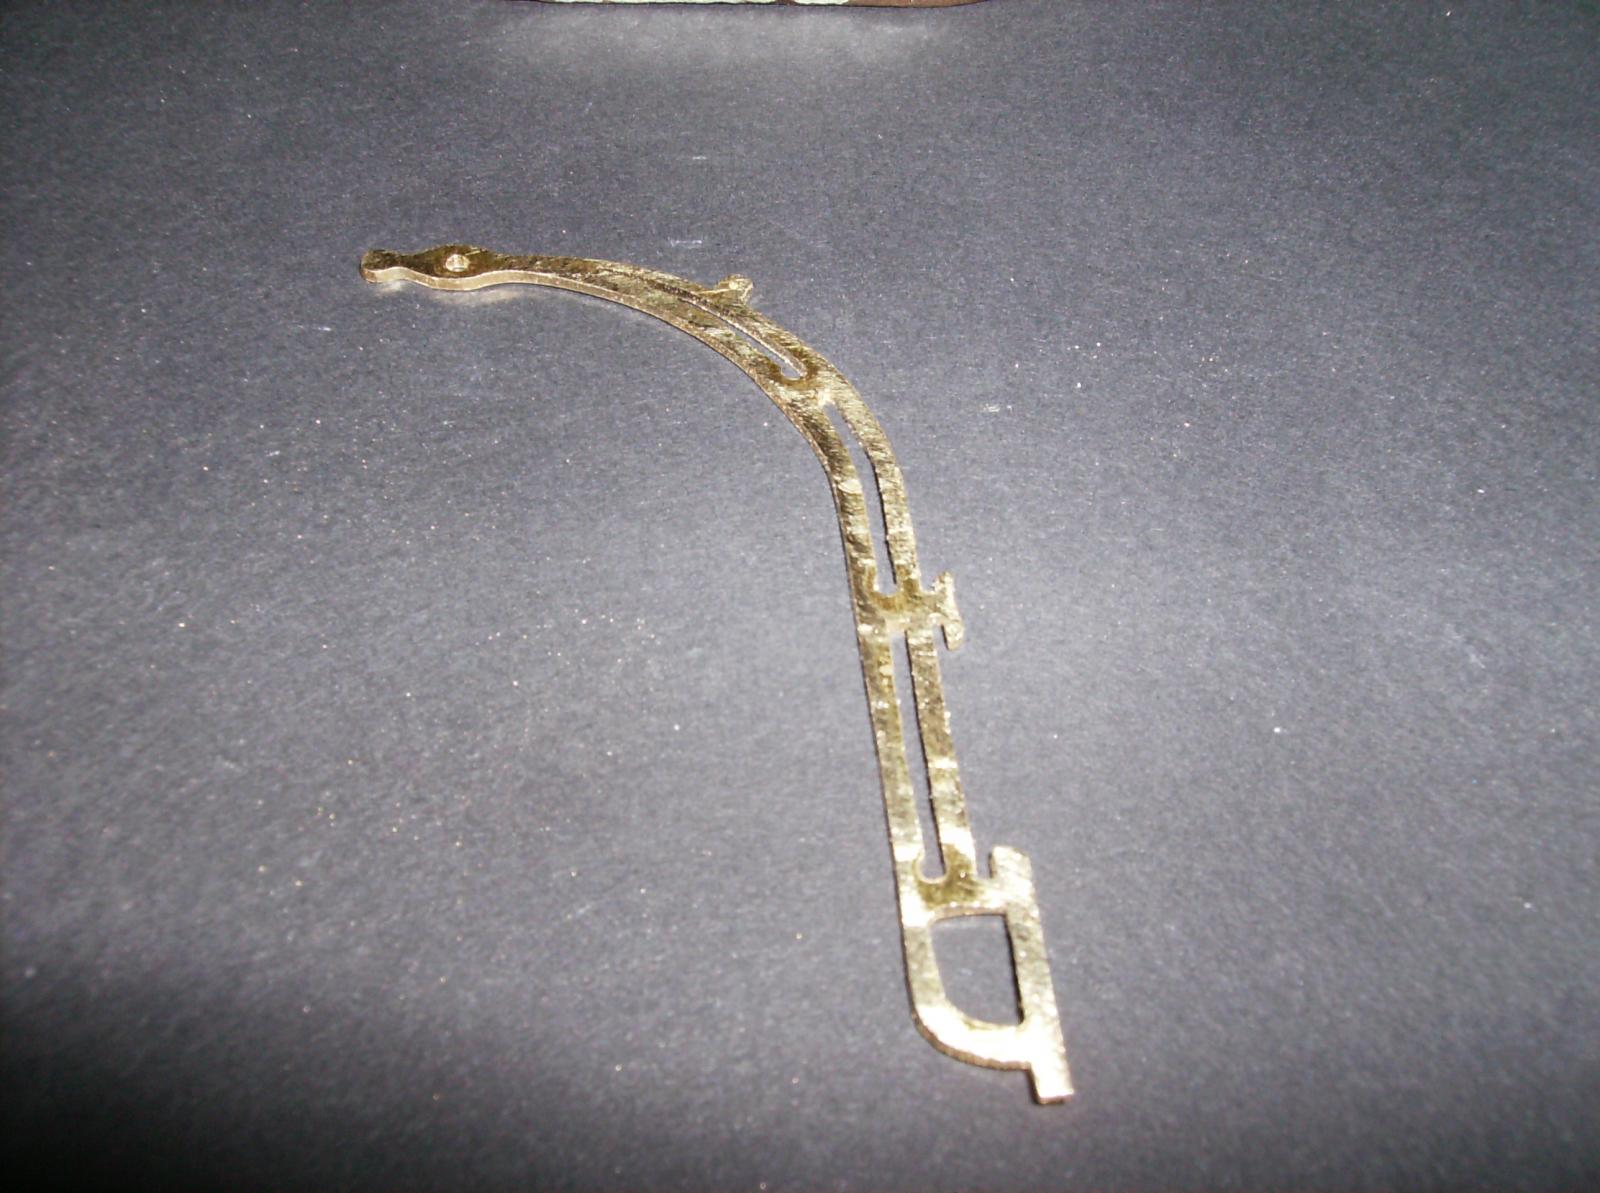
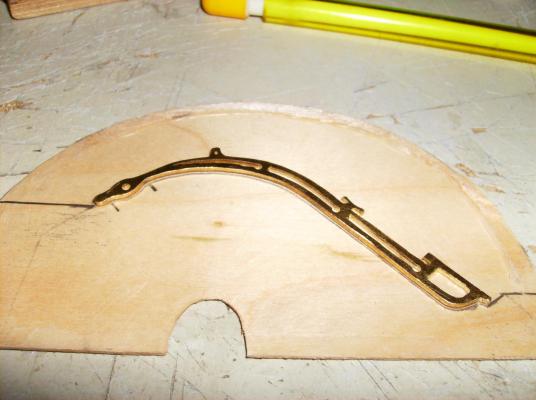
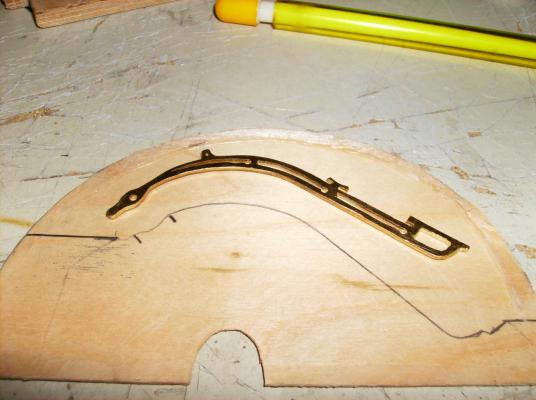
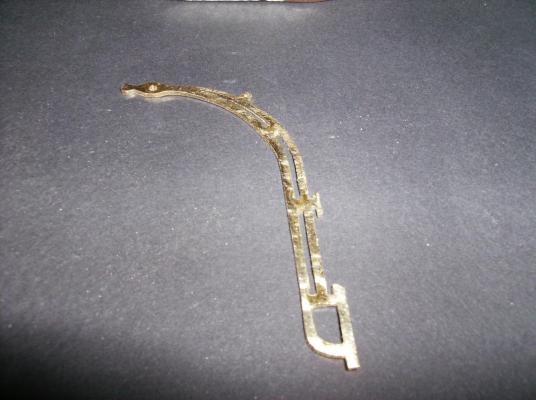
Hi Joe Thank you & thank all for your likes! I hope not to disappoint you with what comes next............... The next parts to make are the davits for the longboats, not easy to do. The plan comes again from the Atlas du Genie Maritime, as most of the parts I built for this model. The plans from the Atlas The copied forms, glued to 1 mm brass sheet. Two more glued to the brass for spare parts First raw cut with the jewellers saw The davit, cut and filed to shape. It took me about 2 hours to come to this piont, there is much more to do until they are ready. Will be continued....... Regards Gerhard


- 108 replies
-
- 13
-
-
Hi Marcus I`ve saved them all, and placed at my dropbox, with some more original stuff about historic artillery. Whoever wants it, please send PM.
-
By searching this forum I found out, that there has no one posted this. Mendel L. Peterson has listed and photographed historic cannons from several countries, high interesting for anyone who wants to build his warship guns correctly. The files are too big to set them herein, just type "Mendel L. Peterson Large green Album" in your browser, the four PDFs are the ones I mean Best regards Gerhard
-
Cutty Sark by NenadM
Gerhardvienna replied to NenadM's topic in - Build logs for subjects built 1851 - 1900
Hi Nenad THIS is it! Nobody will care, if there are four ore five rings around. This looks good to me! Regards Gerhard- 4,152 replies
-
- 6
-
-
- cutty sark
- tehnodidakta
- (and 1 more)
-
Back again with the next part of the pump. The full lever unit with levers, rods and pistons. The thread at the right side is for moving the pump. The nearly completed pump The pump with stands, everything can move free. It will be no problem, to move the levers with a small geared motor. Two figures will be added, with their hands at the levers, even this figures must be converted from "solid" to "moving" ones. Regards, thanky ou all for your so many likes, and for watching in! Gerhard
- 108 replies
-
- 17
-