HOLIDAY DONATION DRIVE - SUPPORT MSW - DO YOUR PART TO KEEP THIS GREAT FORUM GOING! (Only 13 donations so far - C'mon guys!)
×


Gerhardvienna
-
Posts
683 -
Joined
-
Last visited
Content Type
Profiles
Forums
Gallery
Events
Everything posted by Gerhardvienna
-
ancre La Salamandre by tadheus - 1:24
Gerhardvienna replied to tadheus's topic in - Build logs for subjects built 1751 - 1800
Hi Paul Your work of metal art reminds me to expand my limits of doing things. This is an inspiration!!!!! Regards Gerhard -
HI!! Just to keep you all informed, this build has no stop, but there is a lot of sawing work to do, and a lot of filing after too. All the levers have to be made at the moment, I cut the with a jewelers saw from 1 mm brass, and will have to file them to correct shape. So there are no photos at the time, but will come when I have done the work. Regards Gerhard
-
Hi Charlene Sorry to hear that, all the best and get well soon to Jerry! All the best to both of you charlene and Jerry Regards Gerhard
-
Cutty Sark by NenadM
Gerhardvienna replied to NenadM's topic in - Build logs for subjects built 1851 - 1900
Hi Nenad Well done friend! It seems you to get better with every step you do! Regards Gerhard- 4,152 replies
-
- 7
-

-
- cutty sark
- tehnodidakta
- (and 1 more)
-
Cutty Sark by NenadM
Gerhardvienna replied to NenadM's topic in - Build logs for subjects built 1851 - 1900
Hi Nenad I dont think so! Remember, at your small measure the wheel should not be thicker, as I believe. Looks good, I would use it Regards, and hav a happy easter time, as possible! Gerhard- 4,152 replies
-
- 6
-
-
- cutty sark
- tehnodidakta
- (and 1 more)
-
Hi Romanov Good Idea! I will rember that when I`m at this piont with my SMS Danzig build! Thanks for showing. Regards Gerhard
-
Hi Charlene Thank you for that good explanation! Now I can imagine how to use that tool, but looking forward to see some photos. And thank you too for your nice wishes, I had a nice evening by watching WWE Raw on TV ! Best regards Gerhard
-
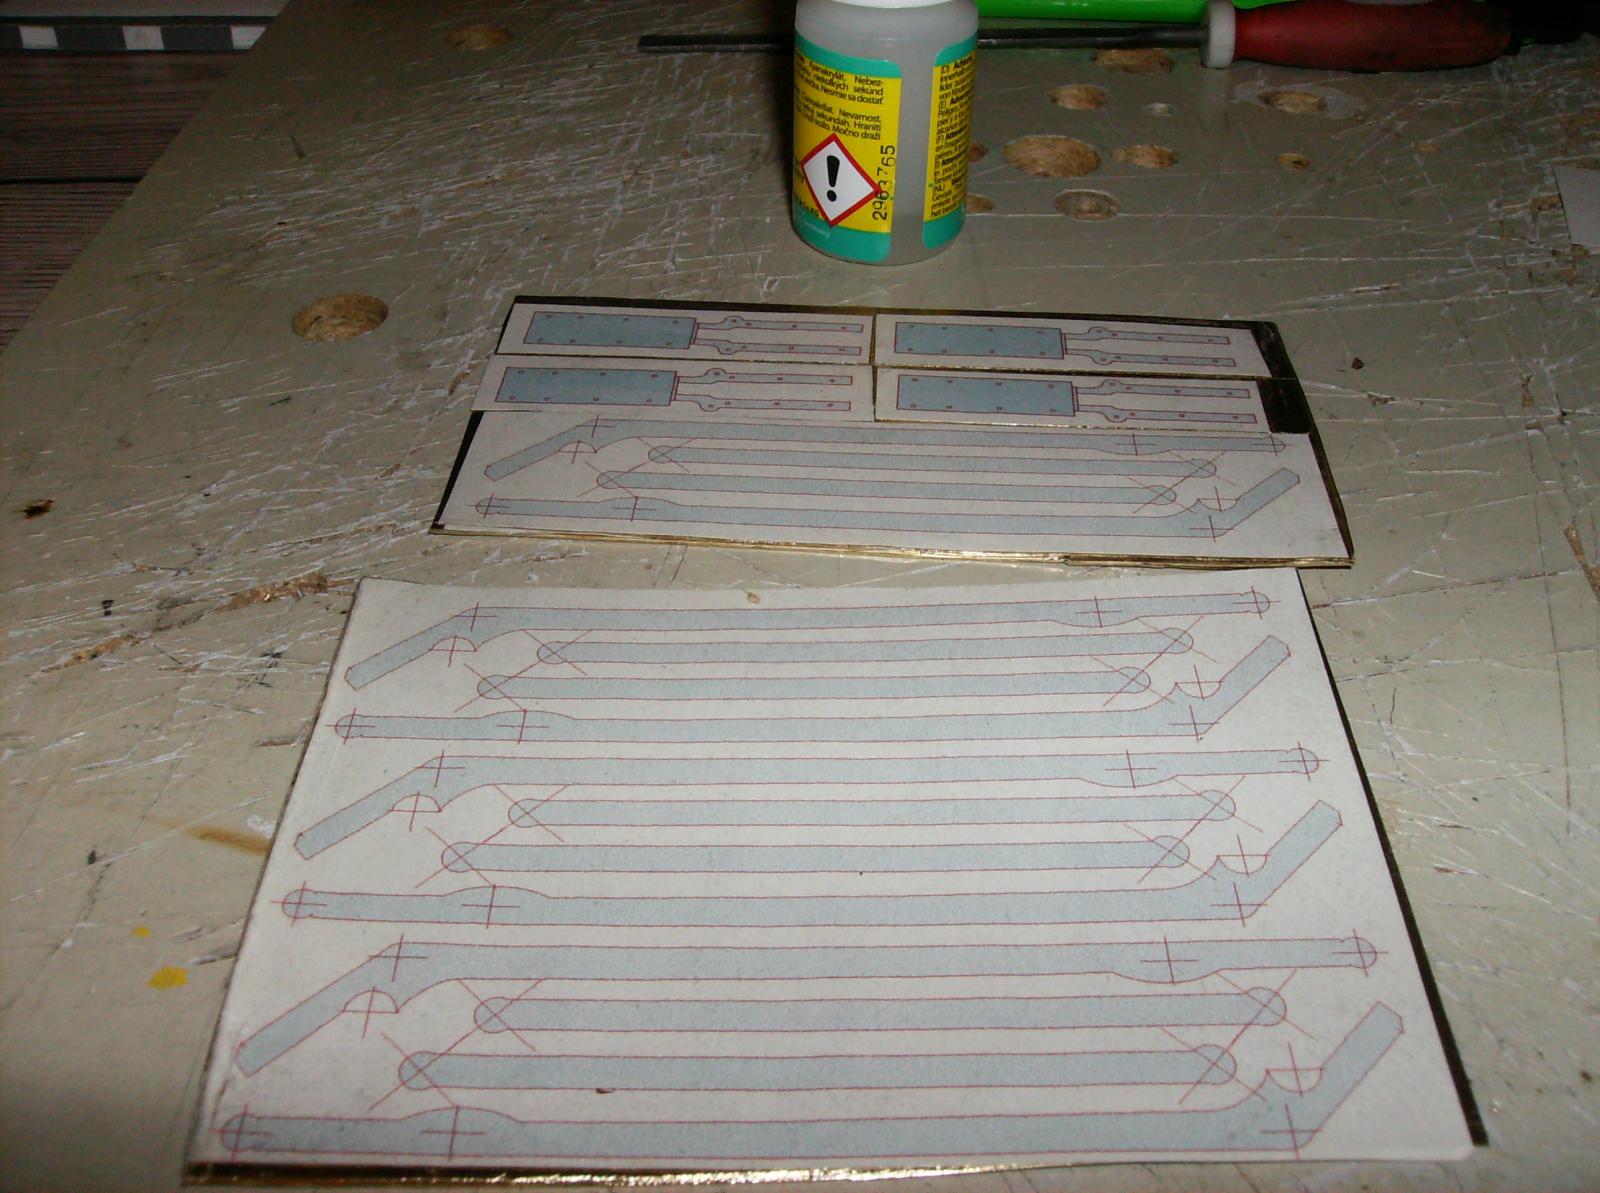
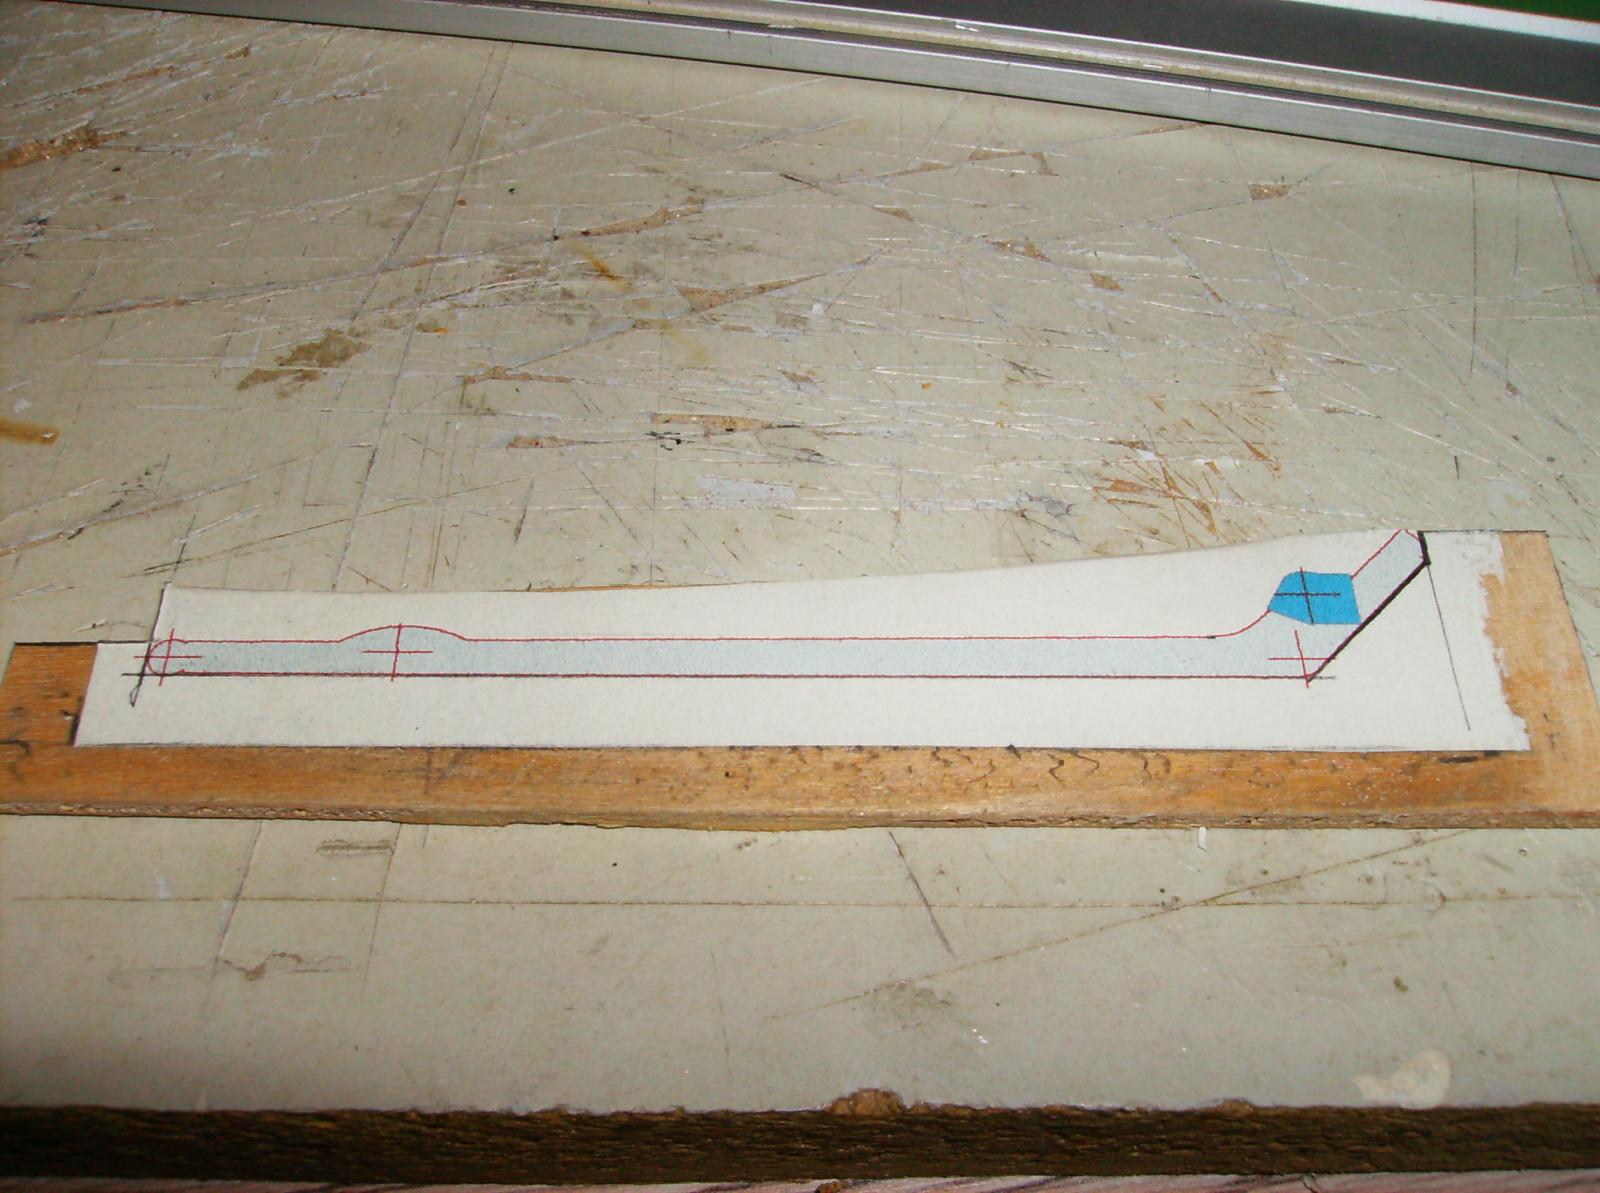
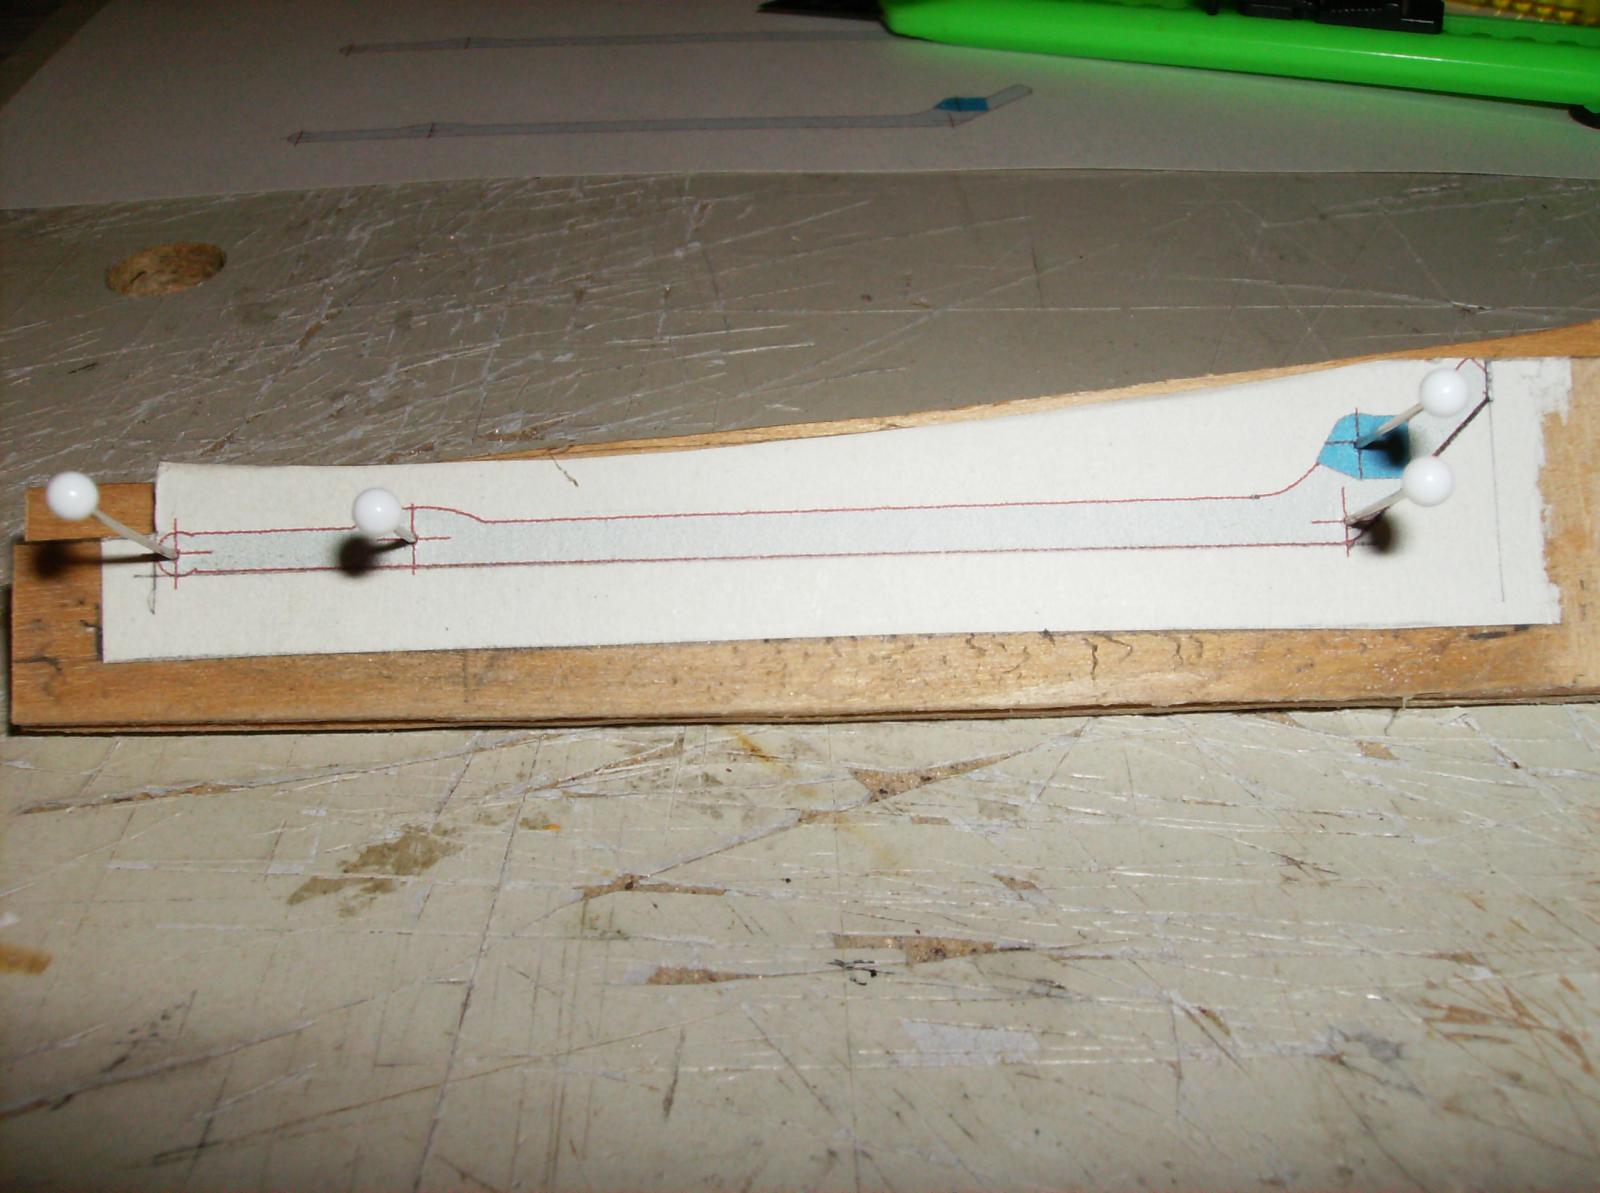
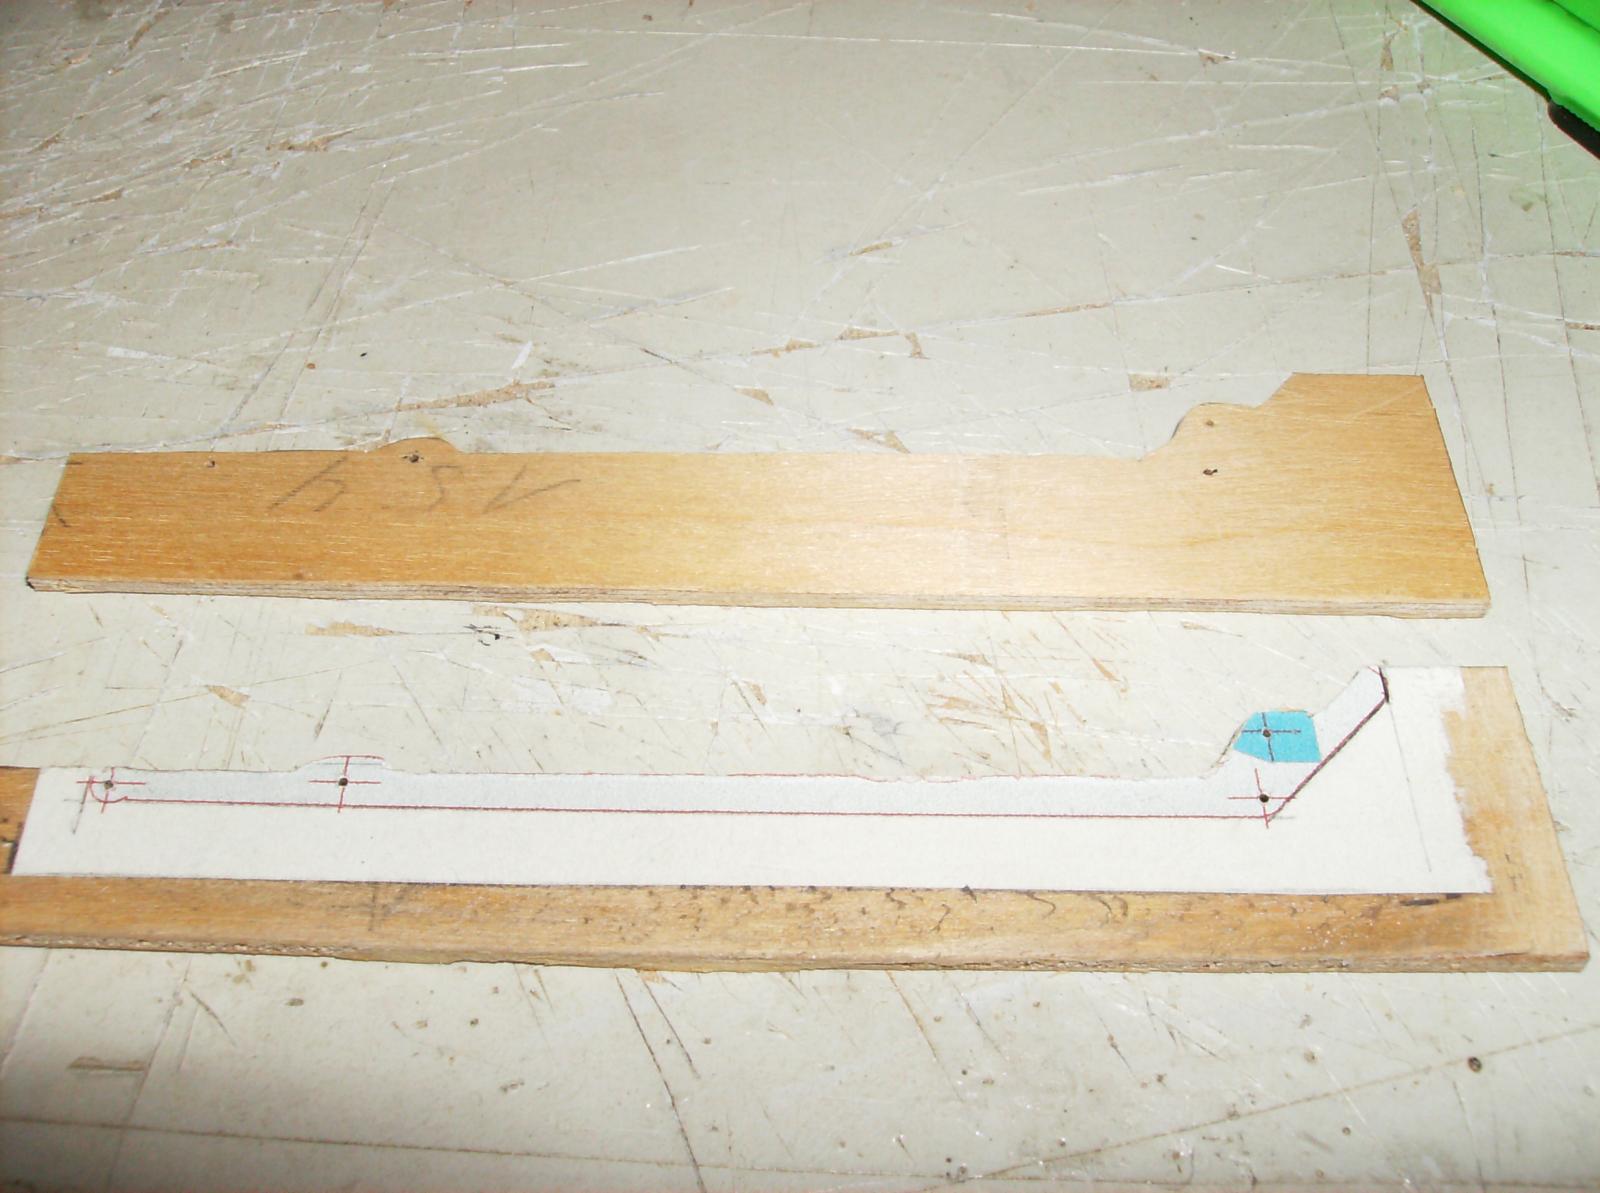
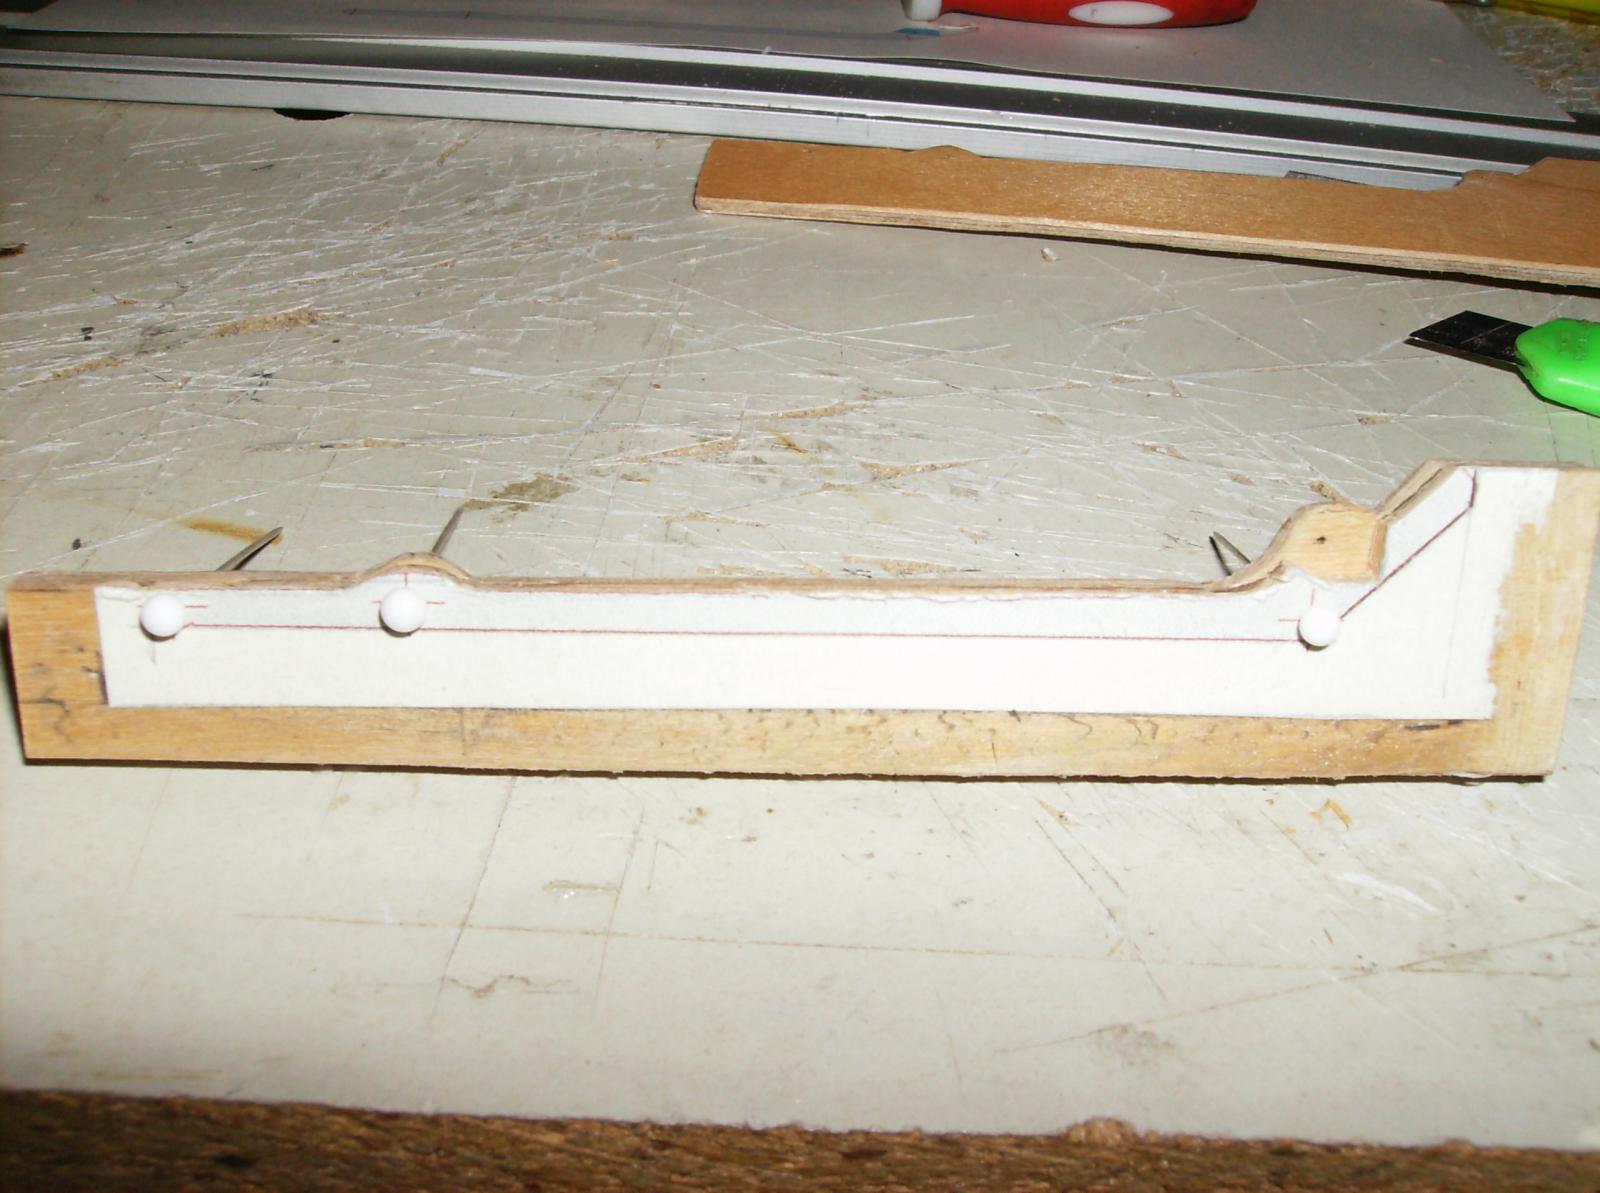
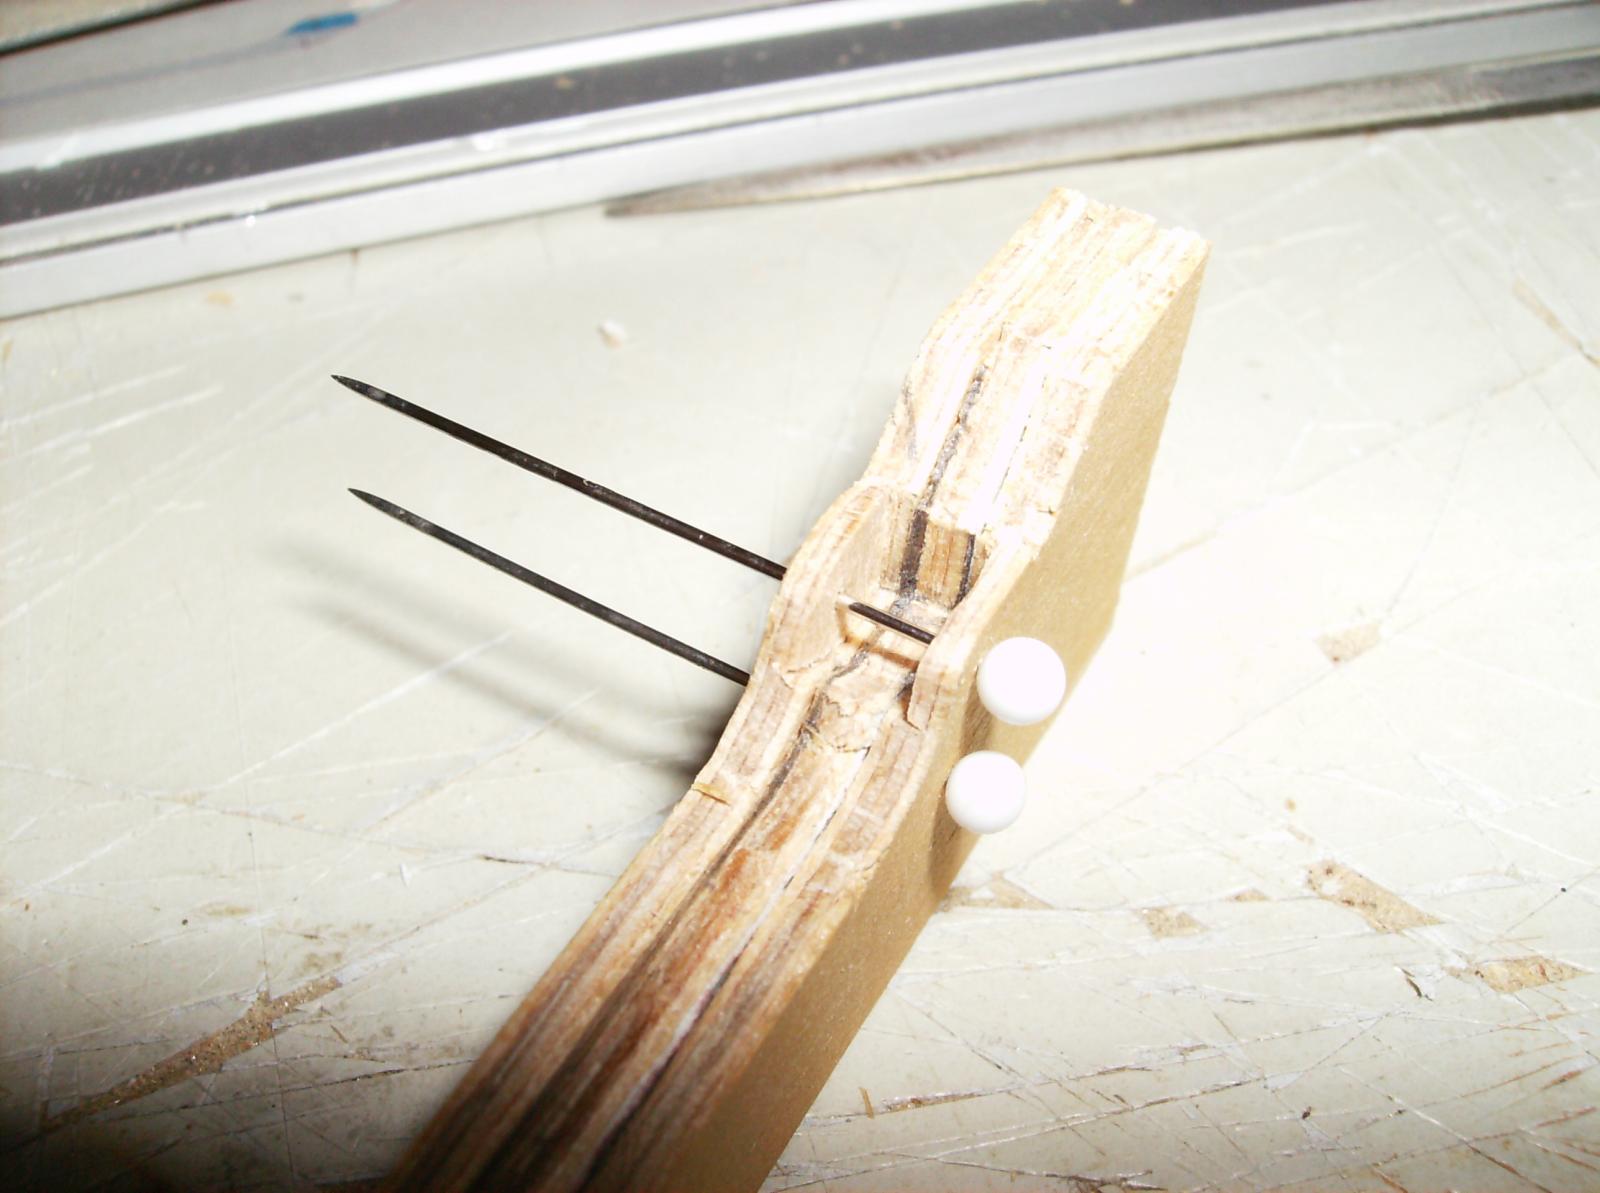
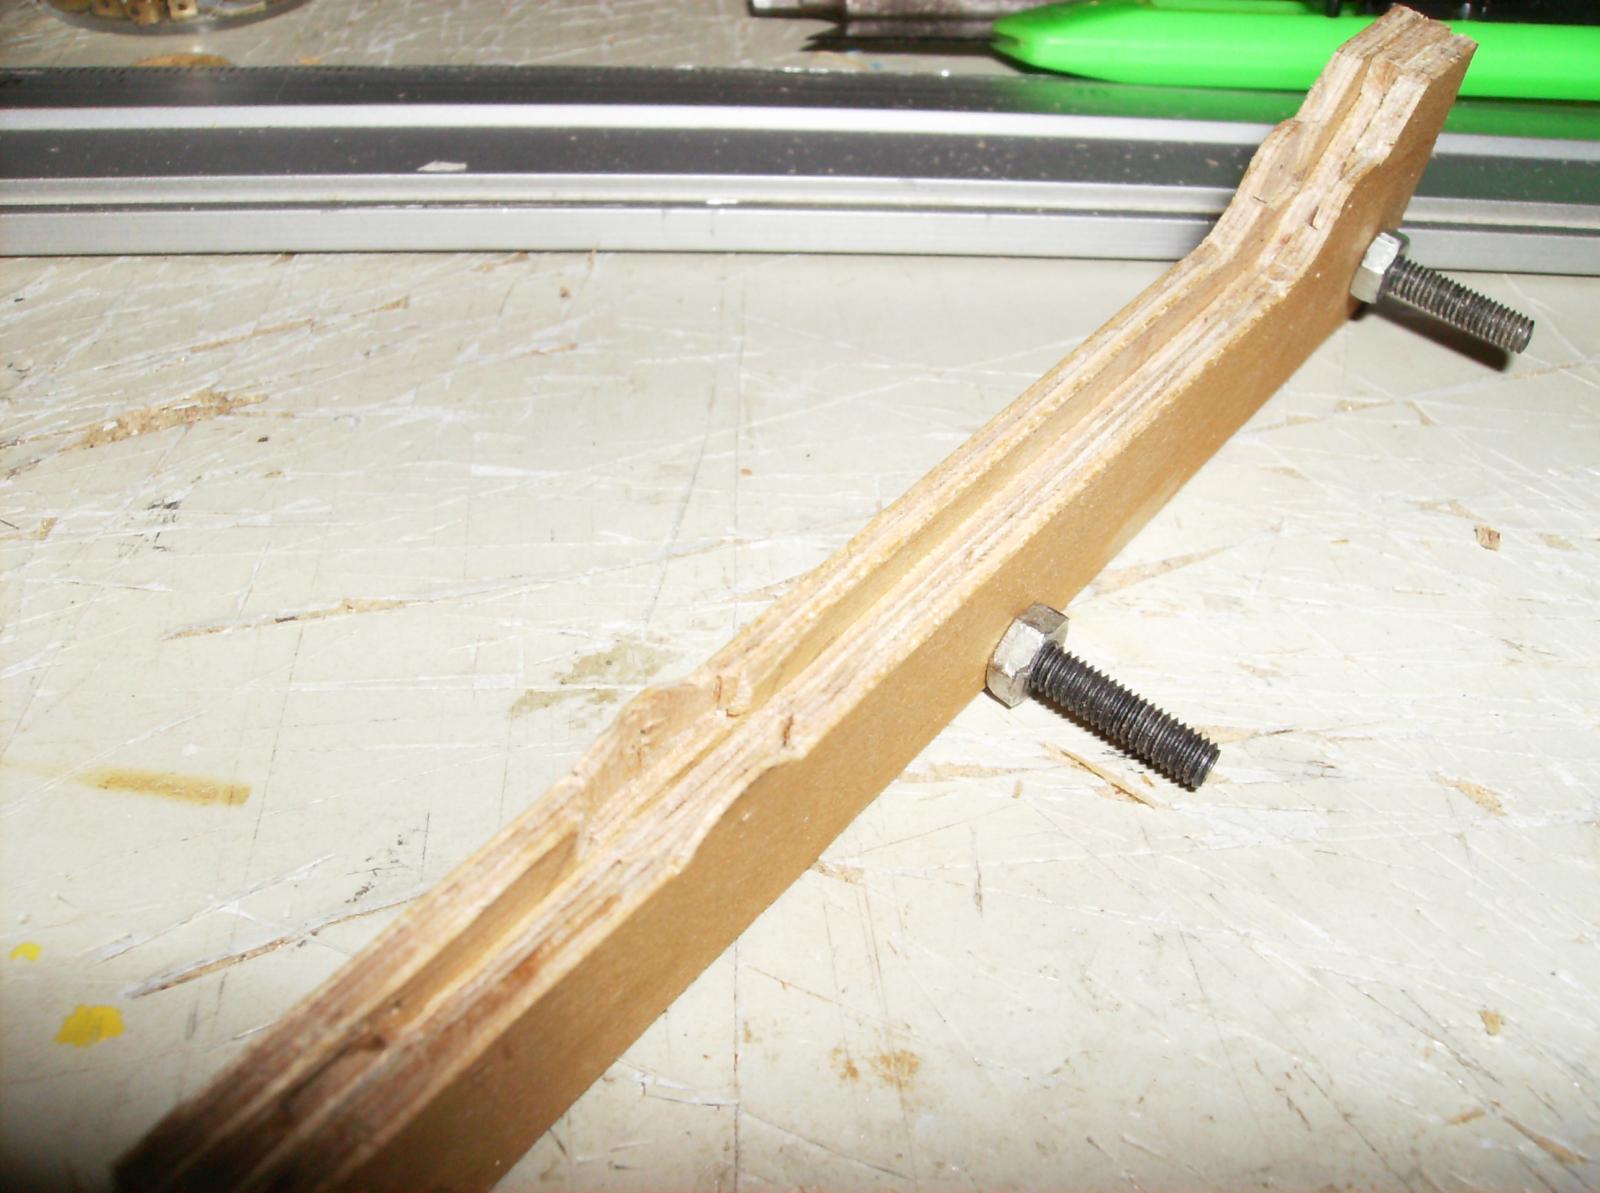
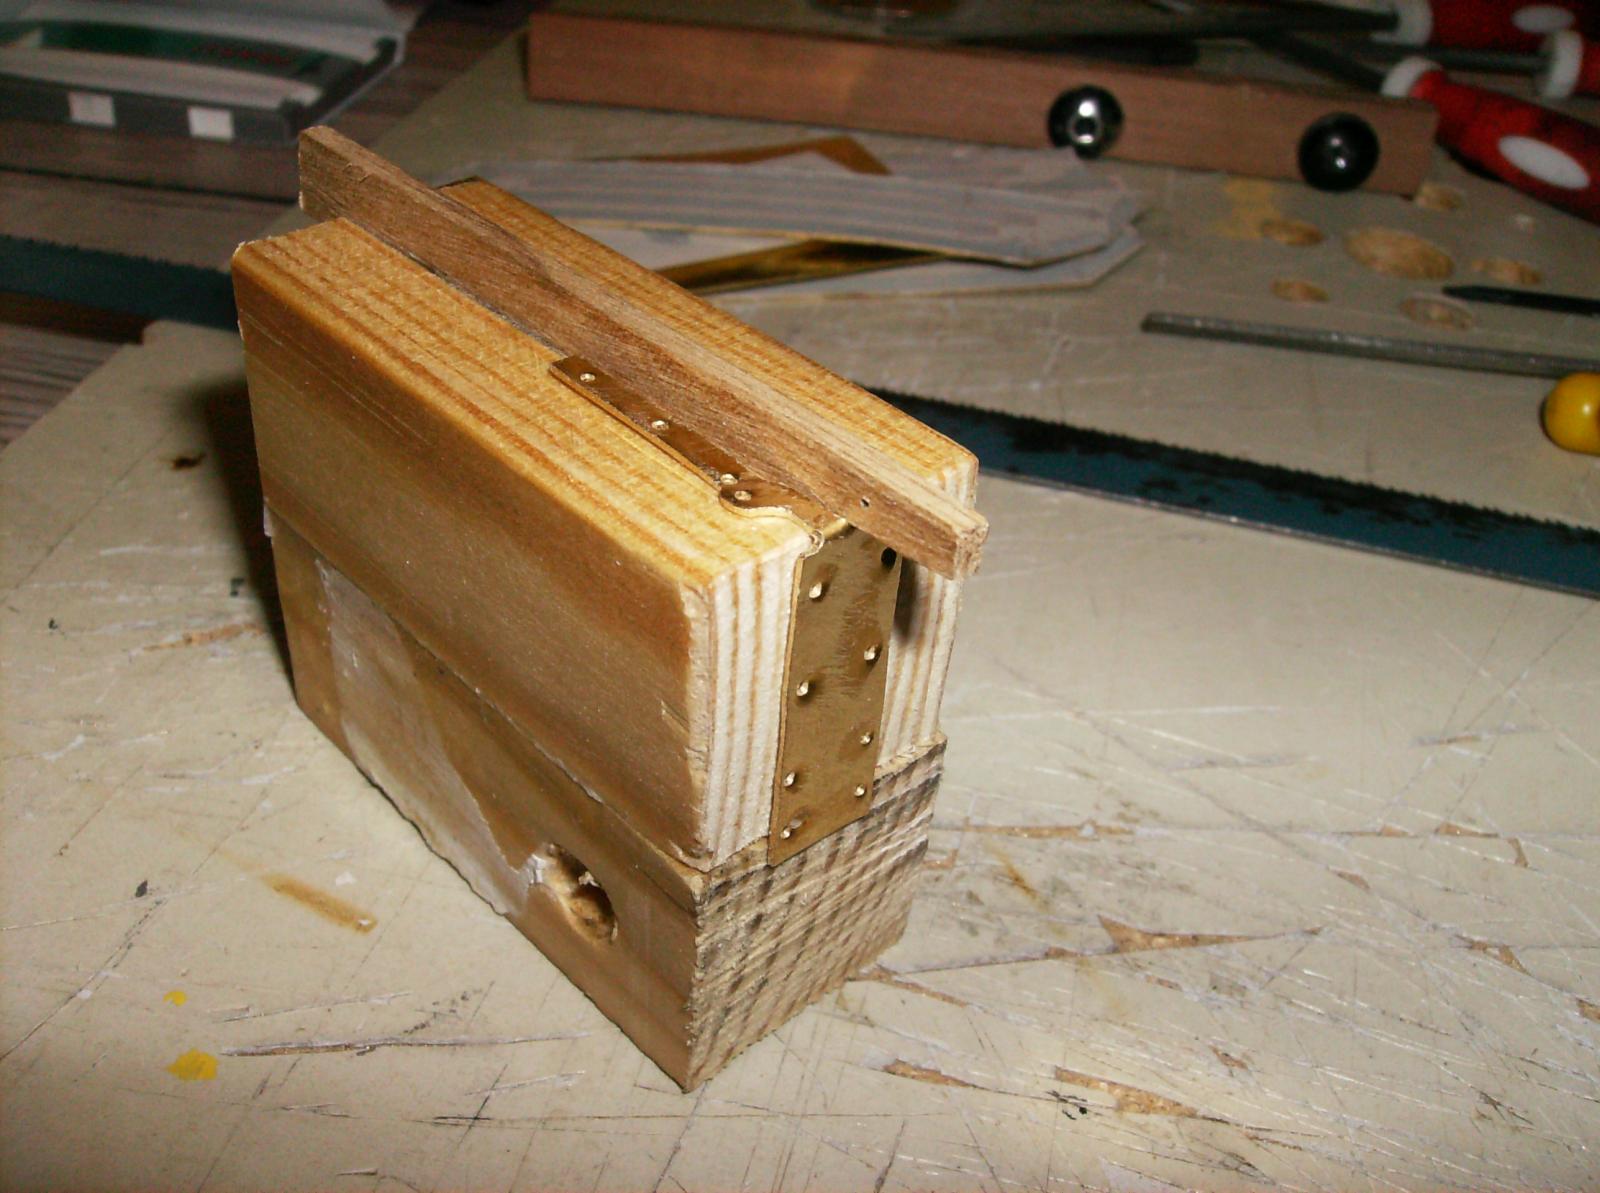
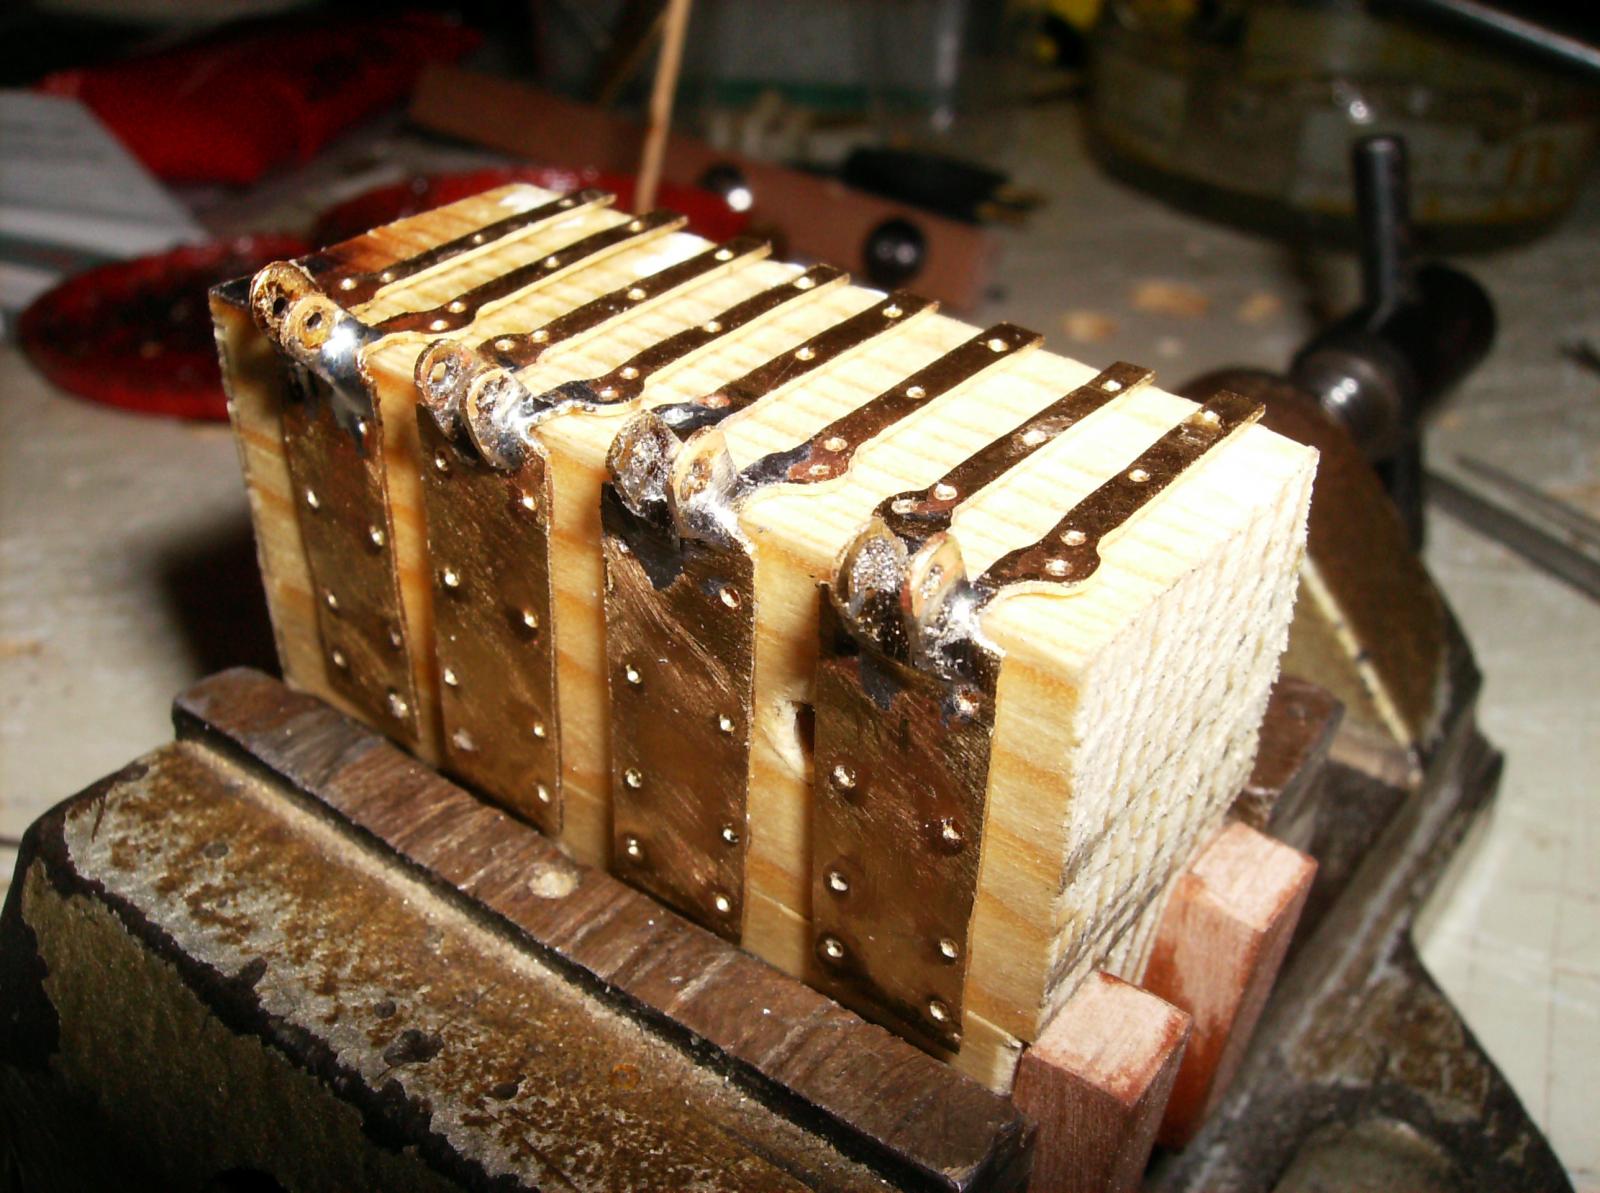
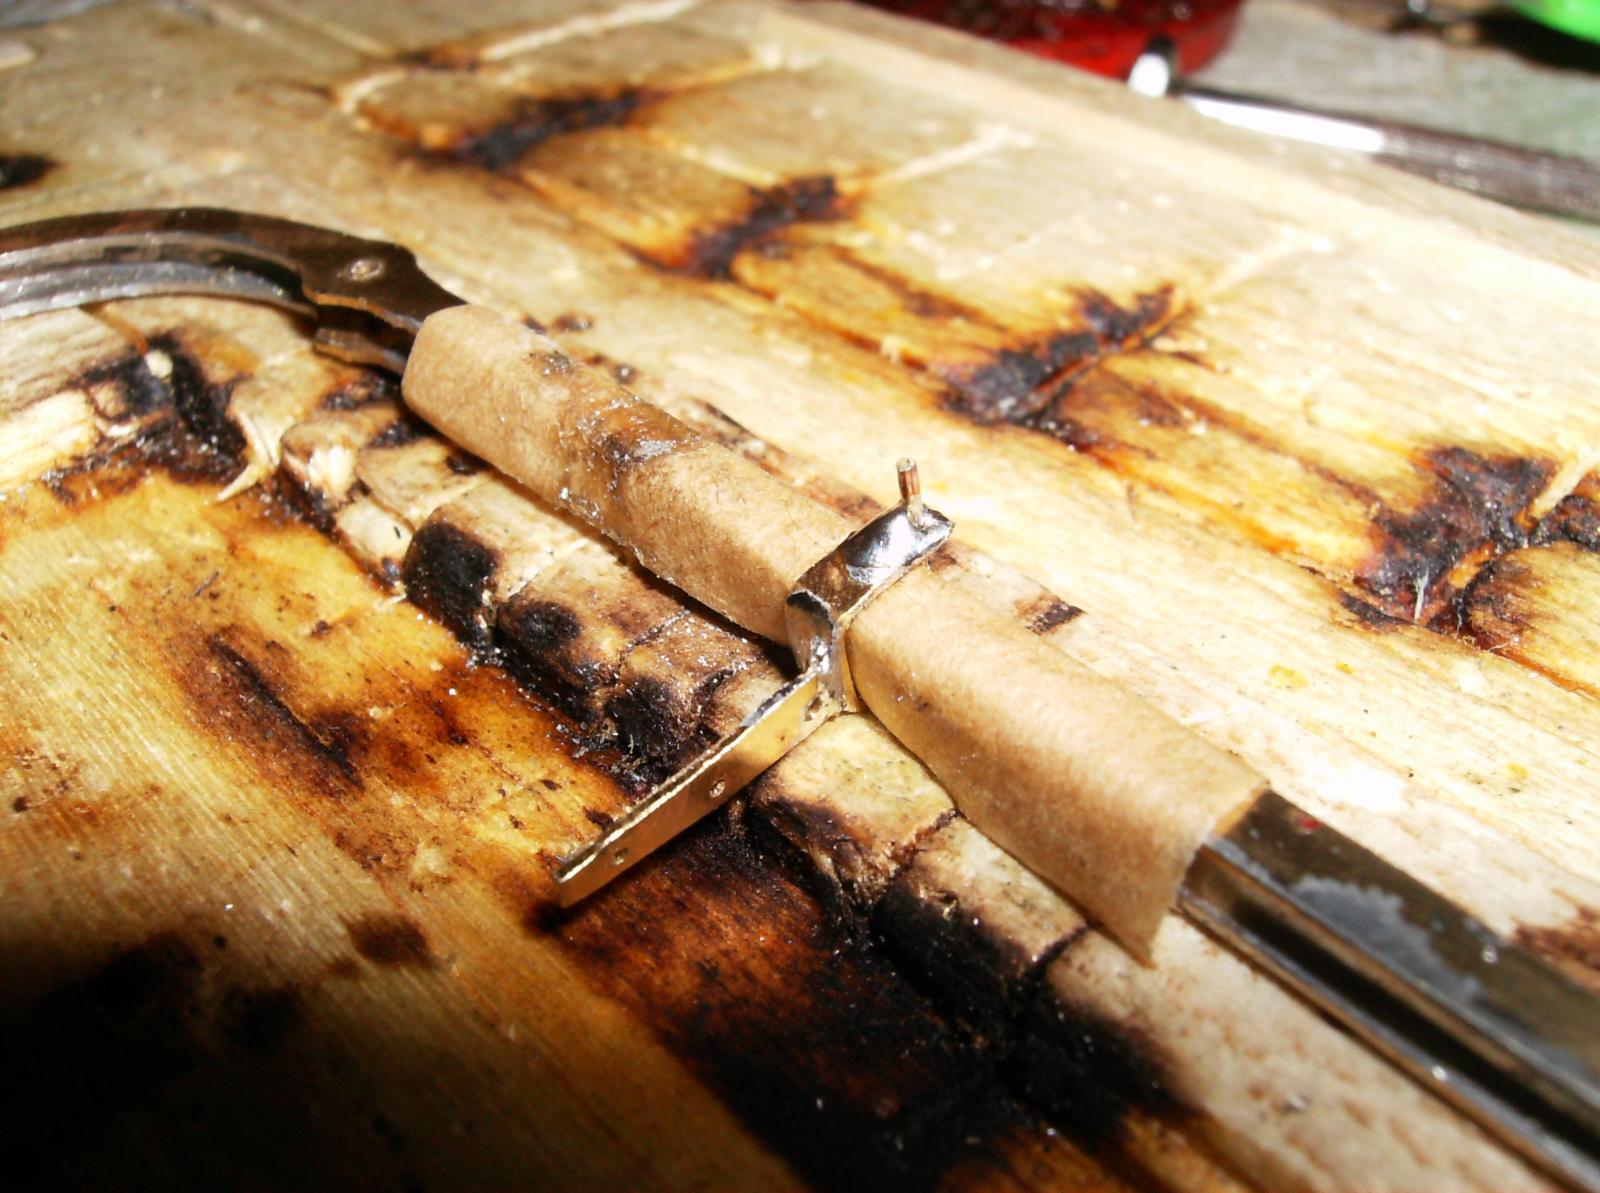
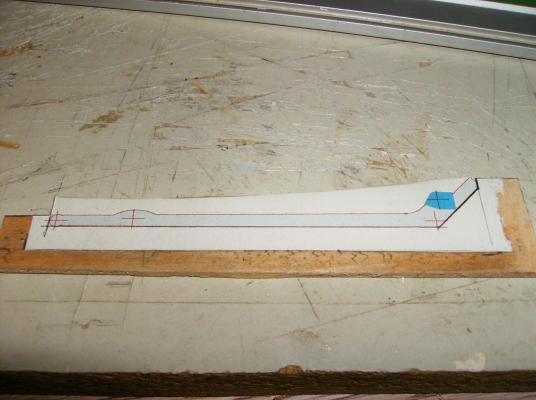
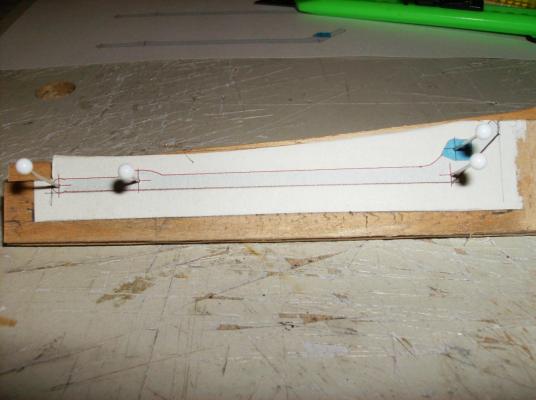
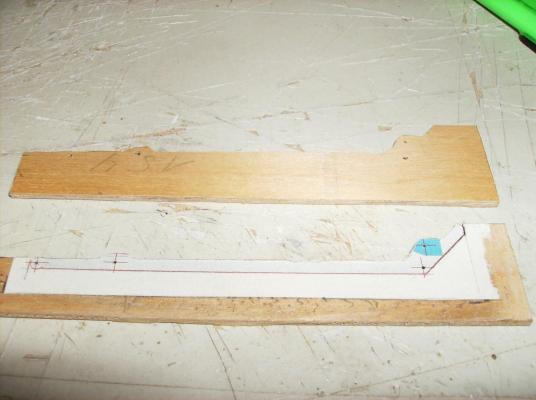
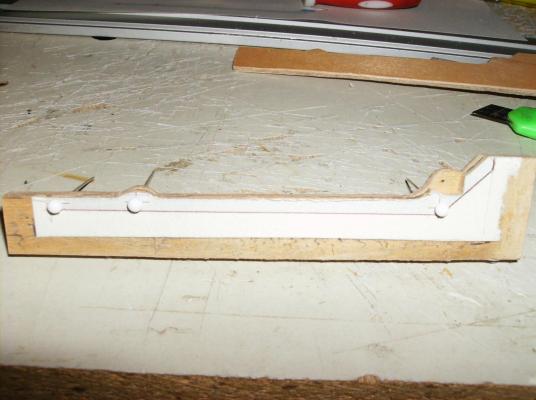
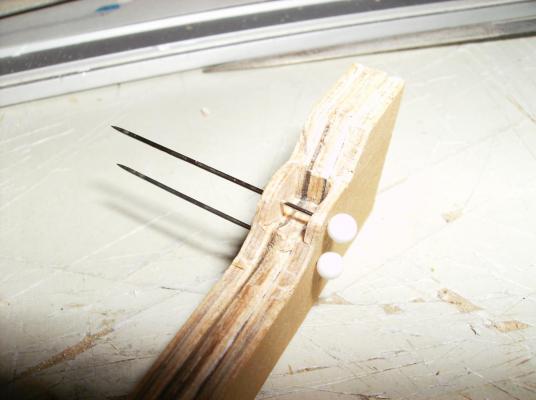
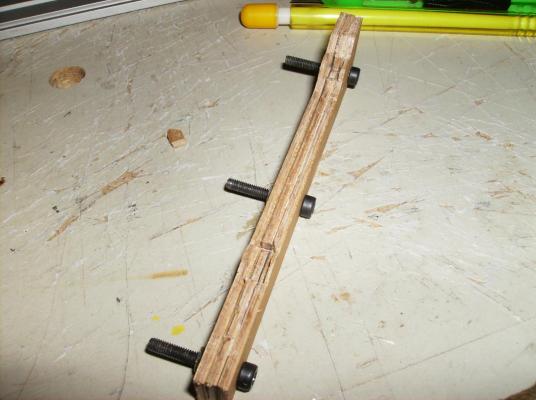
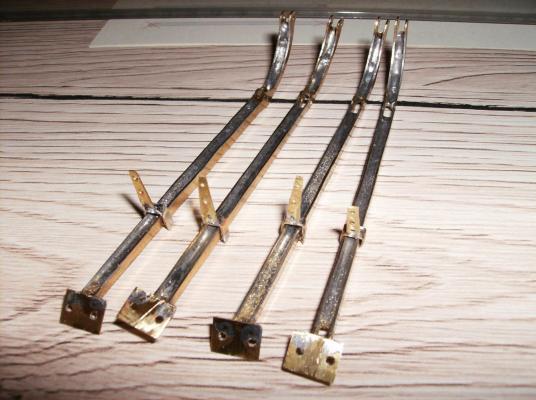
First of all, thank you for your so many likes Some may wonder, how to make such a soldering form, here comes the explanation. This form is meant to solder the large parts from the photo, shown at the foreground. The printed paper sheet glued to a piece of 2mm plywood, I use common glue stick for such things. Inner part of the form with one of the outside parts behind it First outer part cut and grinded to correct shape Center part of the soldering form with first cutout. This cutouts are important to "copy" them to the outer parts of the form! All 3 parts of the form, pinned together. The pinholes are needed, the brass parts will be held here in position, even the different axles will be placed here in the levers. The form with all cutouts made, see the narrow spots on the outer form parts. The finished form, closed with M3 bolts, ready for soldering. Next will be the soldering of the levers, hope for your interest......... Regards Gerhard


- 108 replies
-
- 12
-
-
Cutty Sark by NenadM
Gerhardvienna replied to NenadM's topic in - Build logs for subjects built 1851 - 1900
When it comes to music, I`m still in that mood. That is classic stuff, I`ve been playing guitar in a rockband for some years. Still love it! Regards, keep on rockin` Gerhard- 4,152 replies
-
- 7
-
-
- cutty sark
- tehnodidakta
- (and 1 more)
-
Hi druxey FANTASTIC!!!!!!!!!!! Best regards Gerhard
- 641 replies
-
- 4
-
-
- greenwich hospital
- barge
- (and 1 more)
-
Hi Charlene Could you please show how to use that tool? Would be interesting for me! Thank you so much! Regards Gerhard
-
Hi Jerry & Charlene Rigging of such small parts is never easy, Well done! Regards Gerhard
-
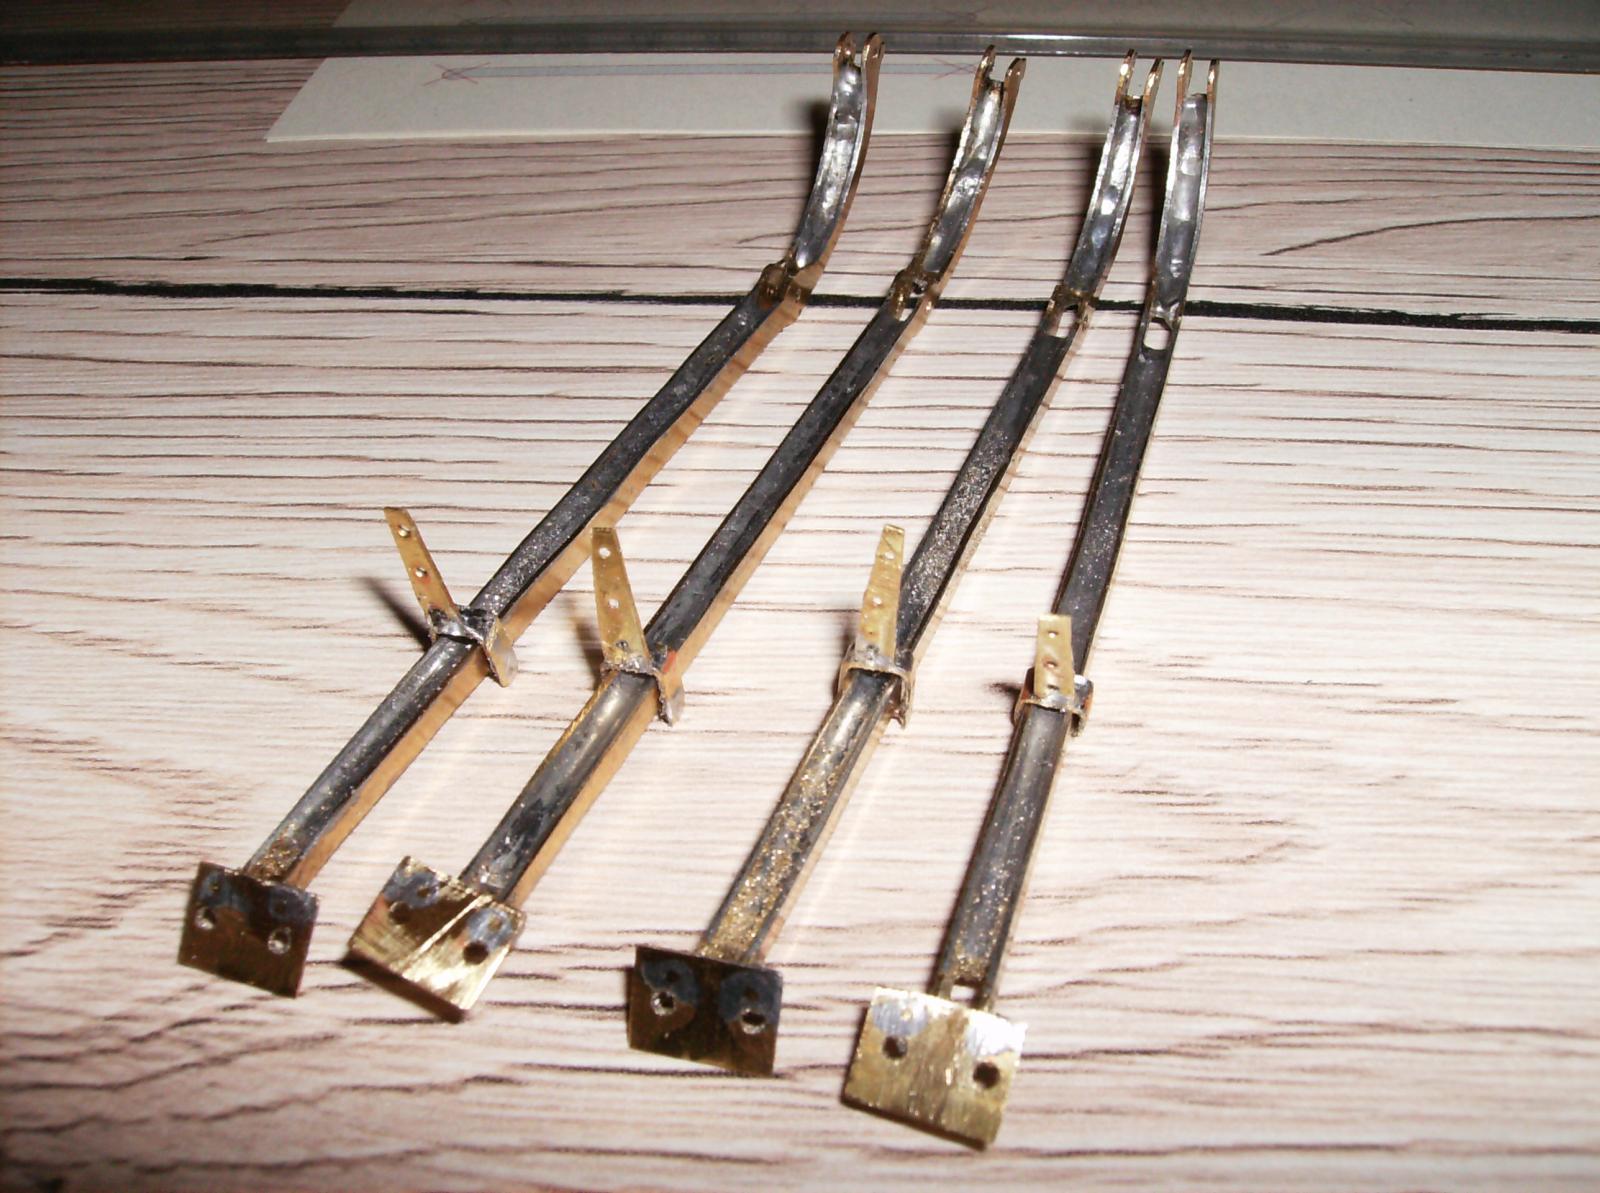
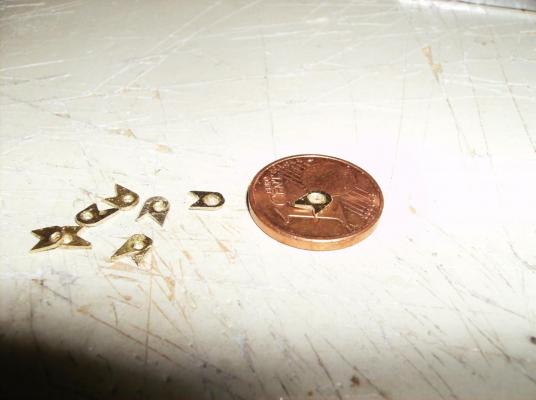
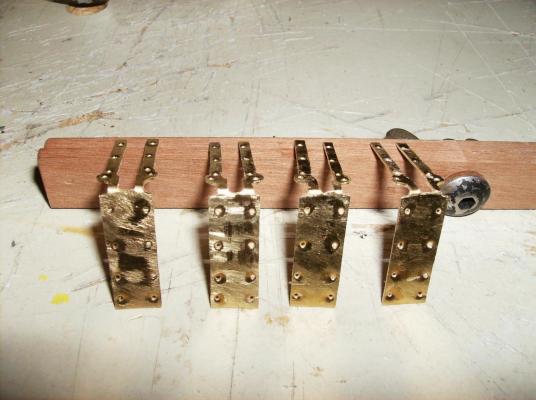
Next probems solved Thank you all for watching, comments and your so many likes! Today I could manage, to solder the eyelets to the mounting plates, these parts are really small. The eyelets First mounting plate in the basic soldering form Soldering form completed, mounting plate and eyelets fixed for soldering Finished mounting plates, some smaller differents are still to see, this is only the outside of the eyelets, the holes are all in correct position. This is important, the levers will not work correct, when the holes are in different position. Regards Gerhard


- 108 replies
-
- 17
-
-
Hi Nils Great looking winches! Regards Gerhard
- 2,625 replies
-
- 4
-
-
- kaiser wilhelm der grosse
- passenger steamer
- (and 1 more)
-
Hi Bob Thank you There are so much more solutions to find, this model will be a very long term project. At the time I`m thinking about the next soldering forms, this new levers are a bit more complex than the older ones. In coming summer I will build the hull, with a full removeable deck, and maybe working sails and rigging, problems (and solutions?) will come up............. I always look for the simplest way to make things, imitation or improvement free for everyone! Regards Gerhard
-
That`s why he is my role model for metal works!! Regards Gerhard
-
Cutty Sark by NenadM
Gerhardvienna replied to NenadM's topic in - Build logs for subjects built 1851 - 1900
Hi Nenad THIS is it! Lots better than before, will fit well to your steering wheel. Regards Gerhard- 4,152 replies
-
- 5
-
-
- cutty sark
- tehnodidakta
- (and 1 more)
-
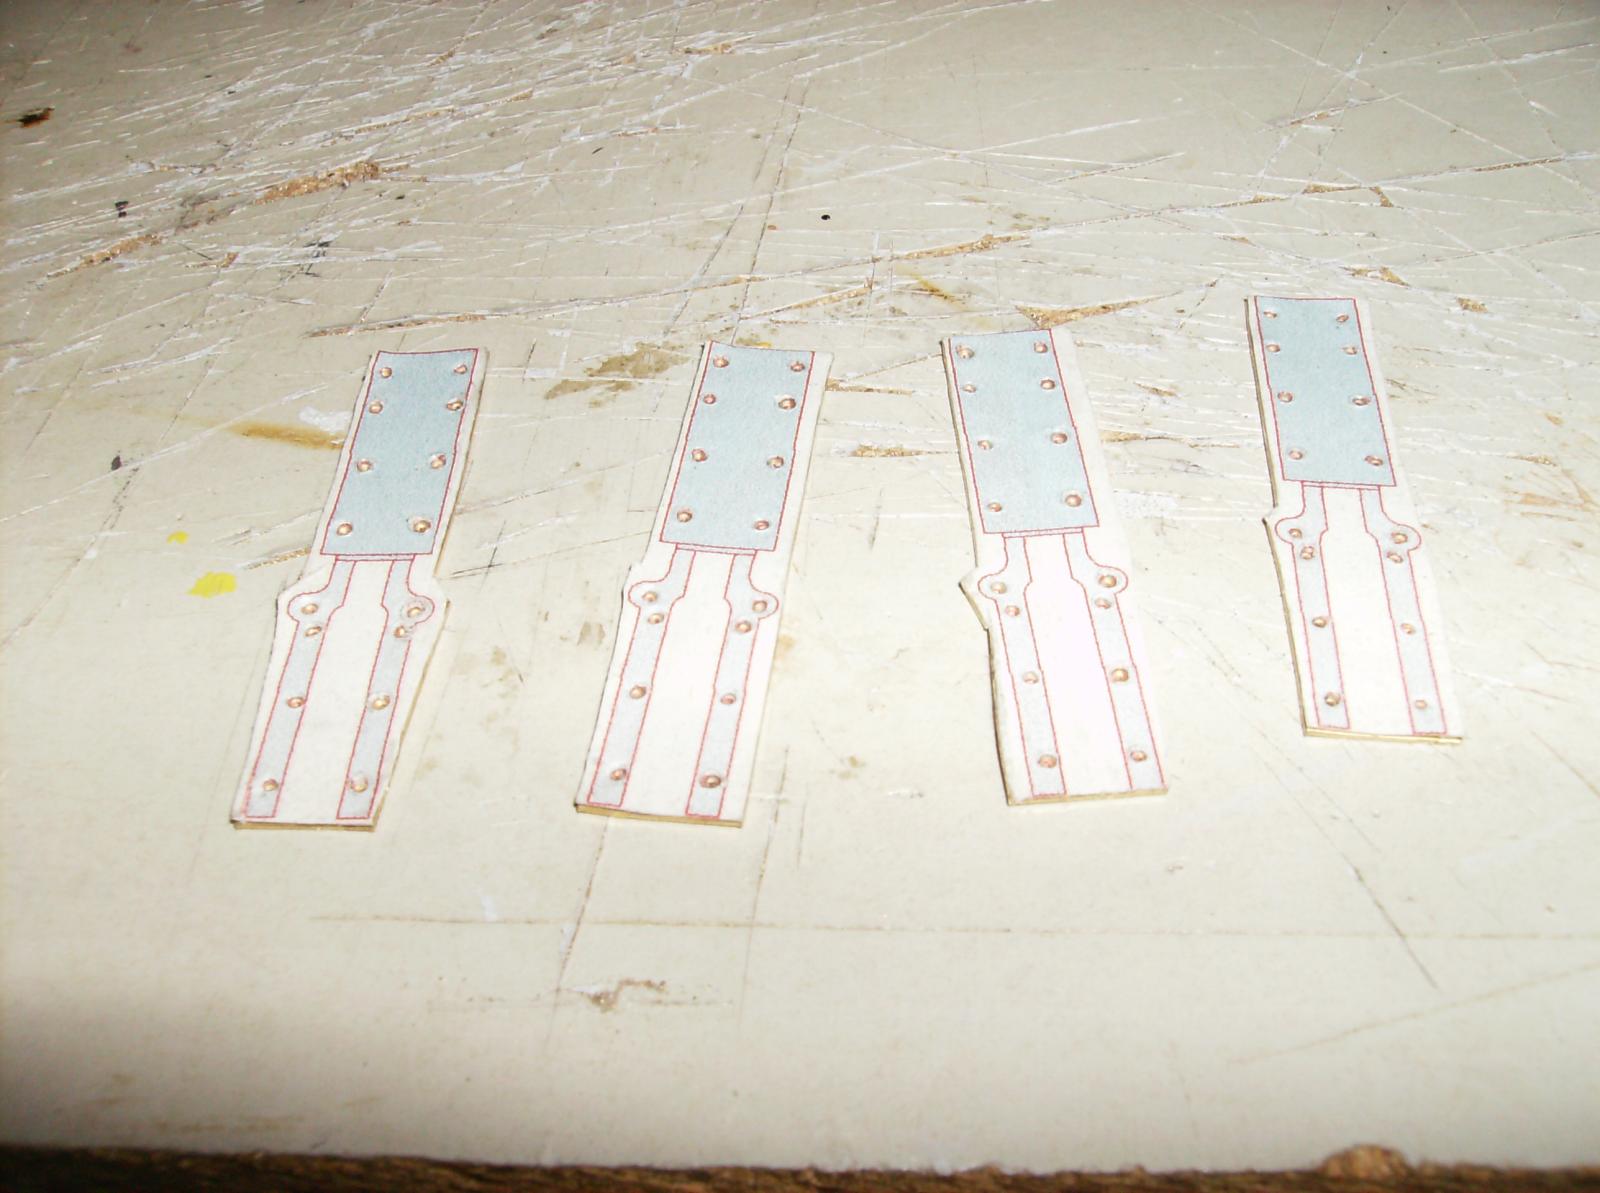
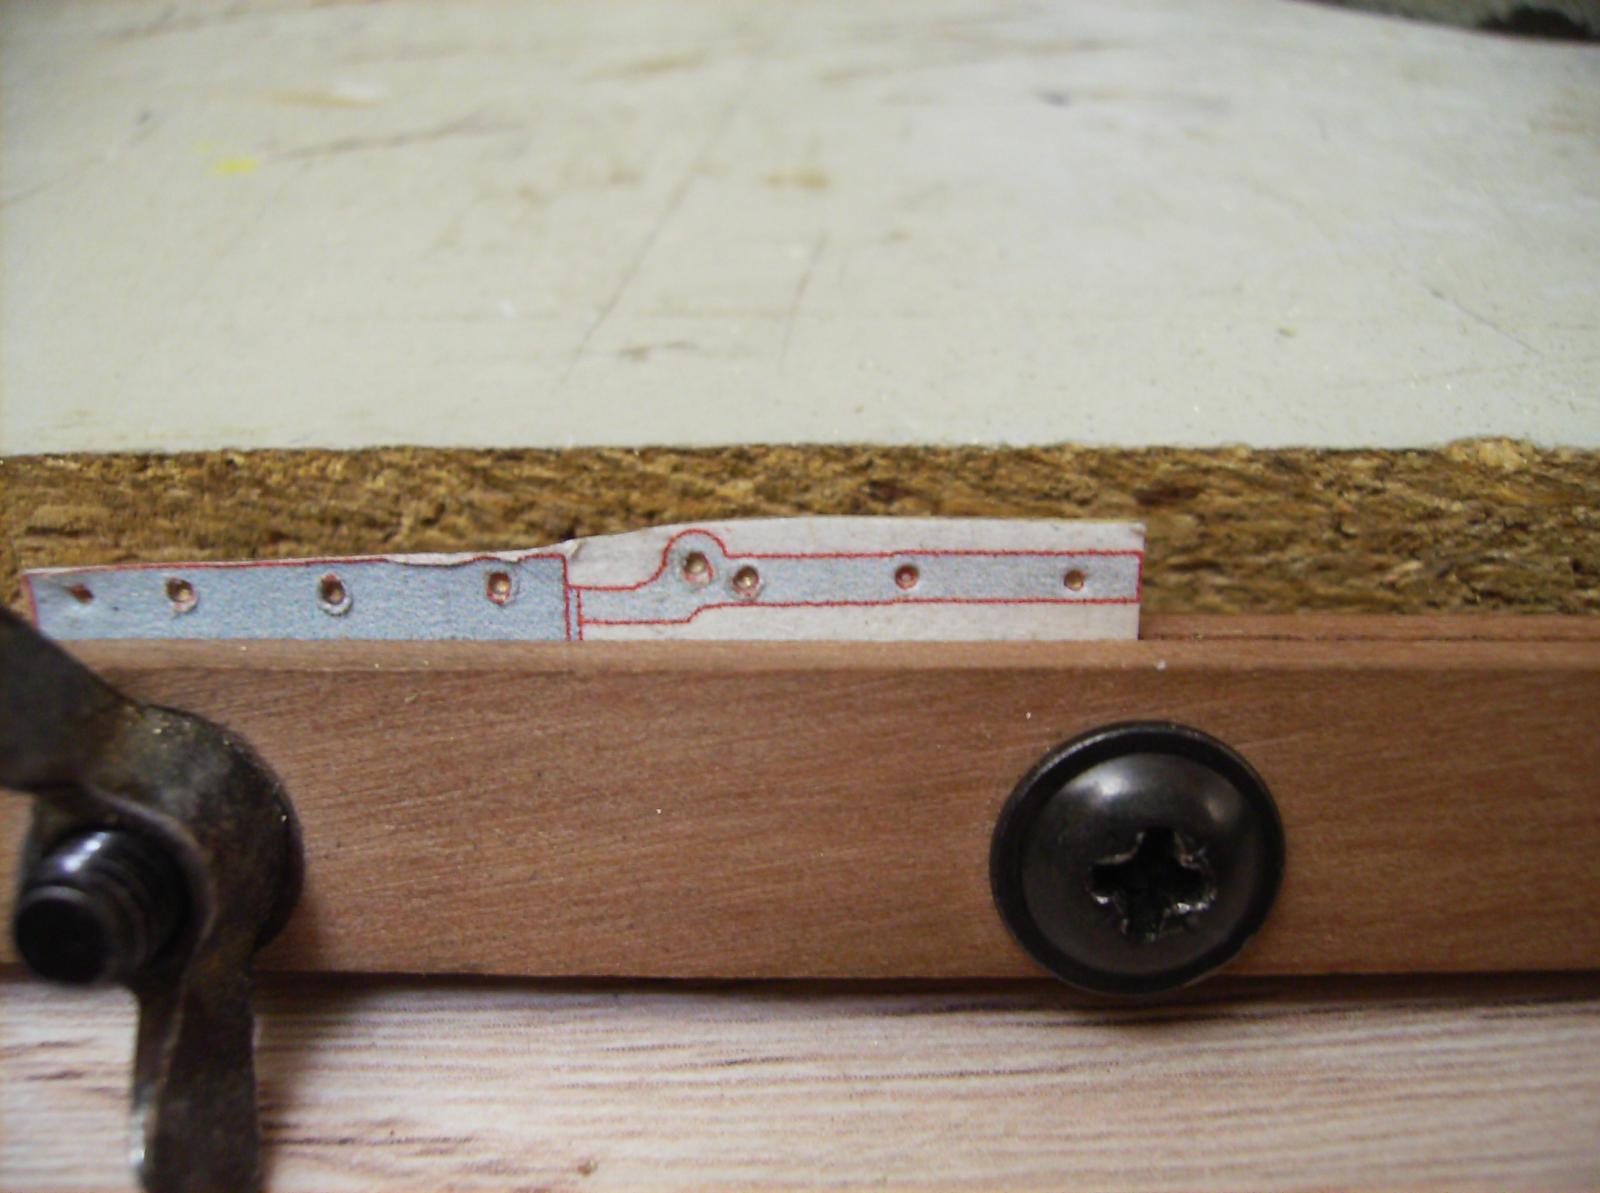
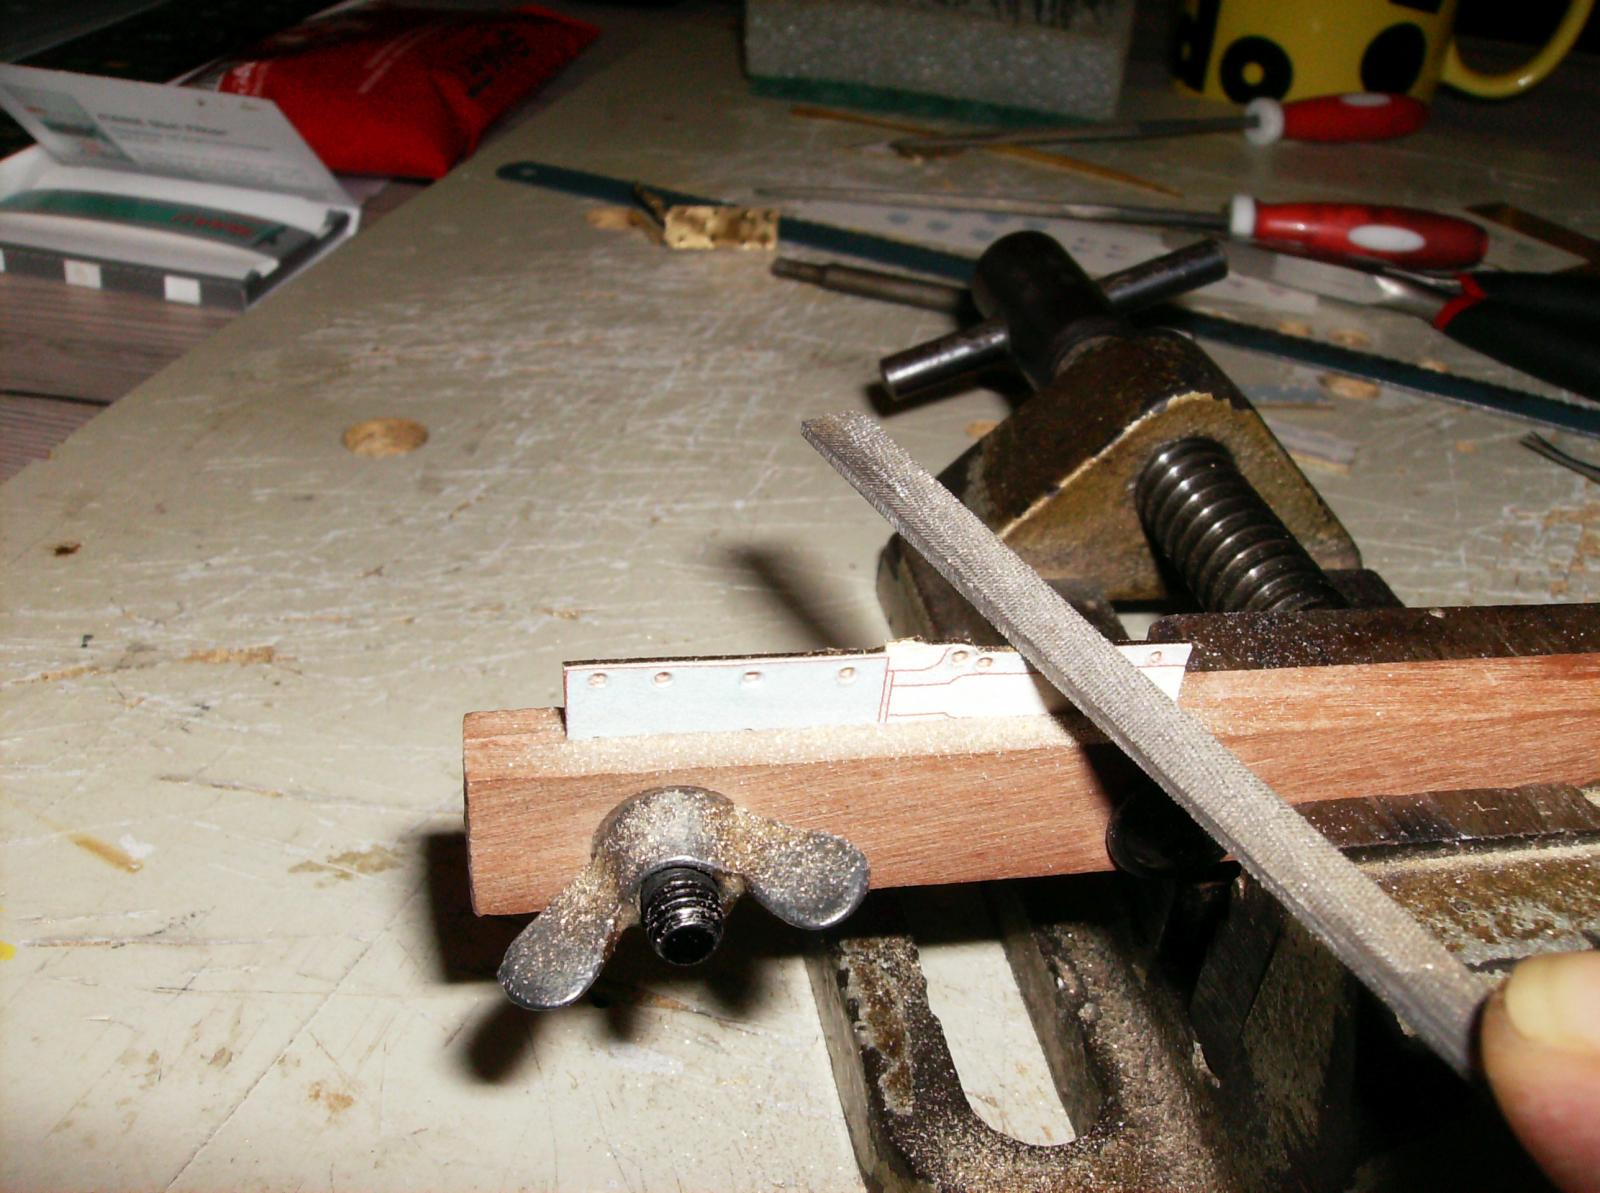
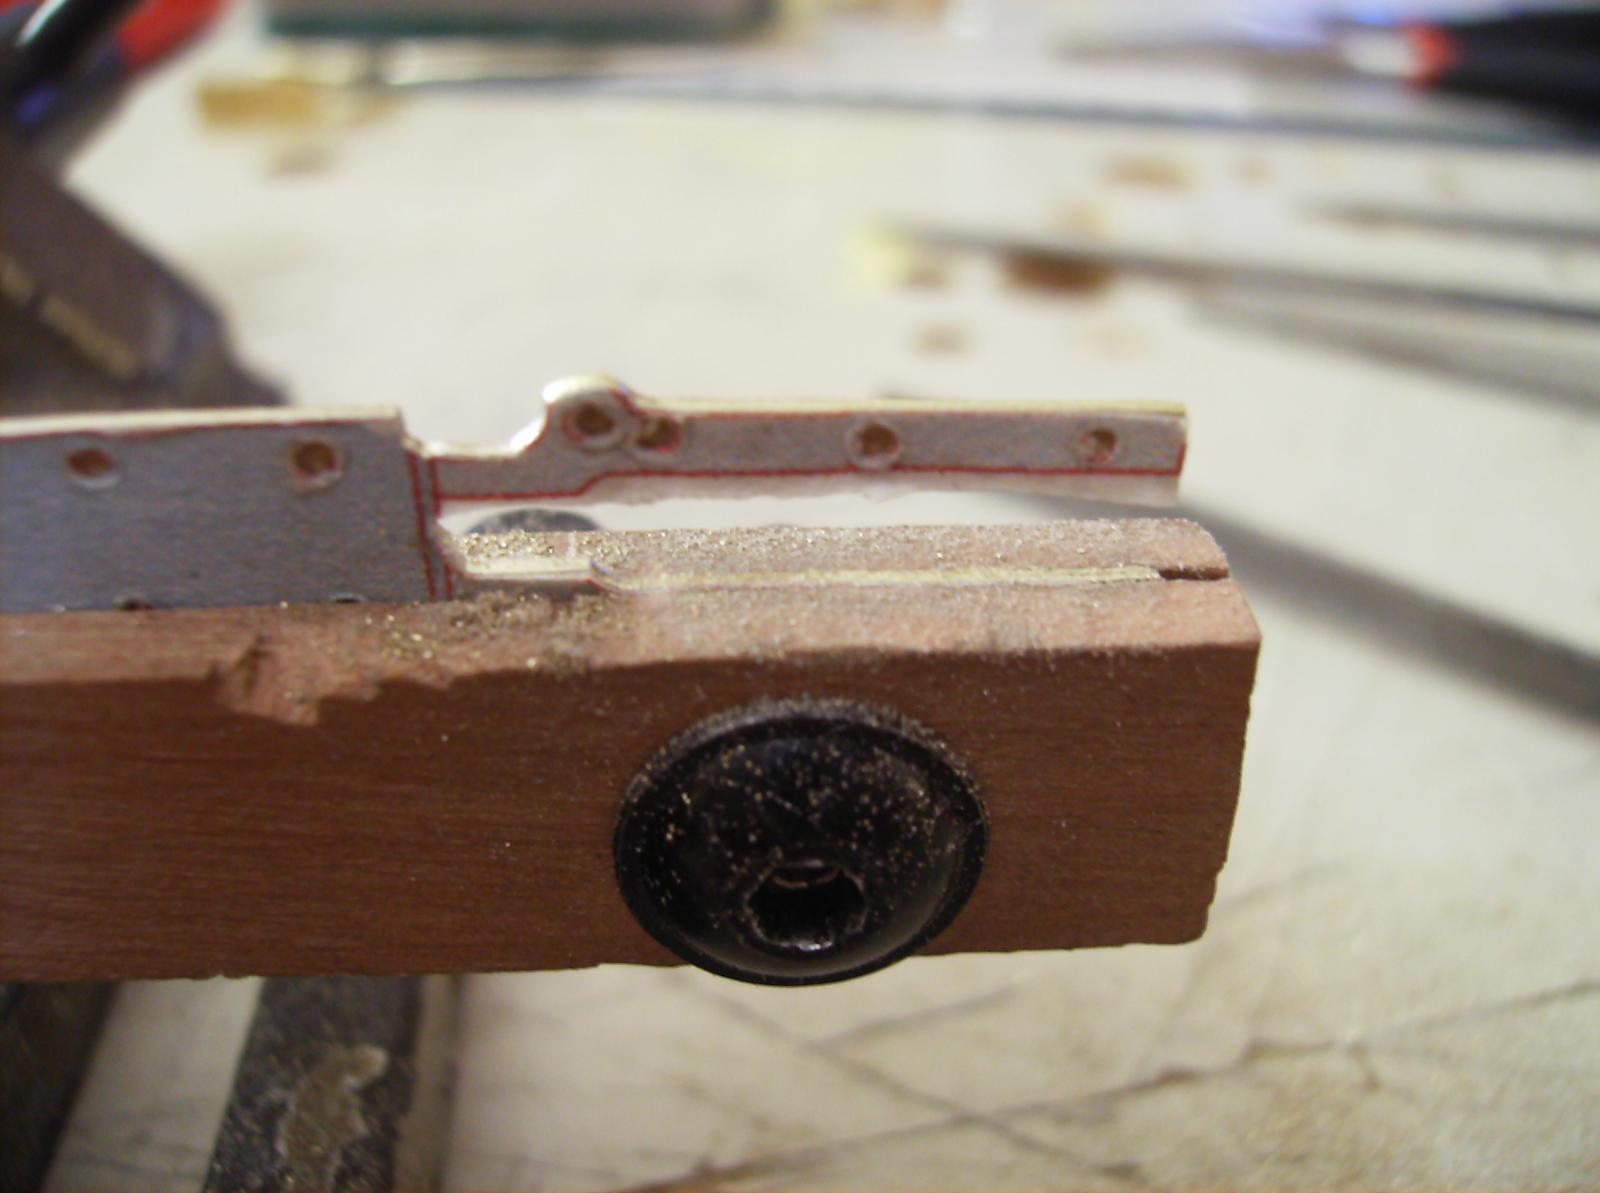
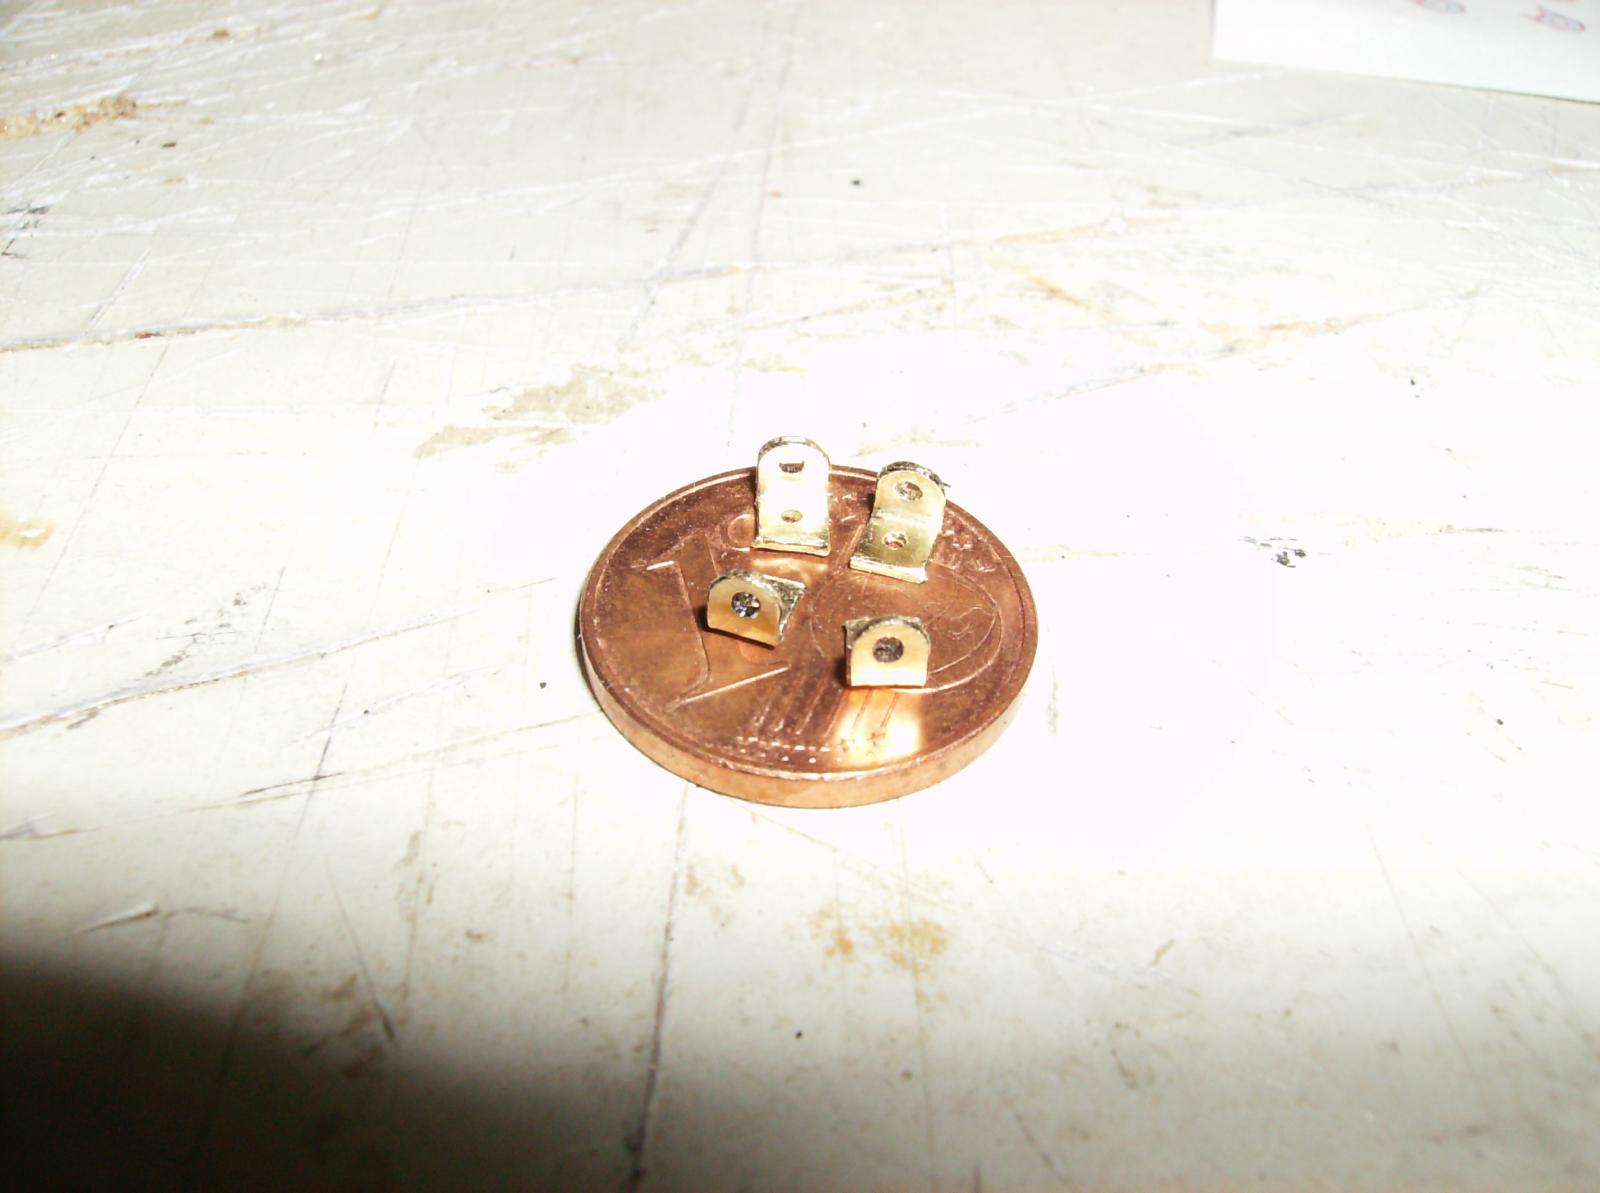
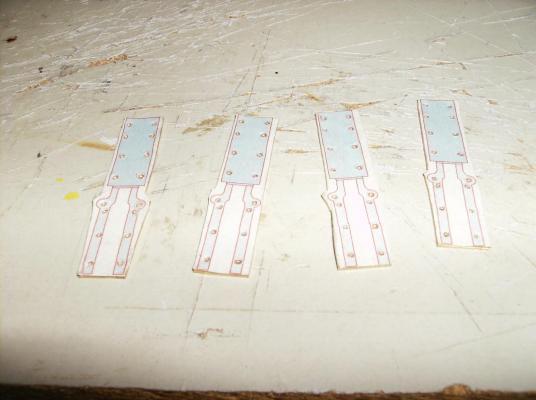
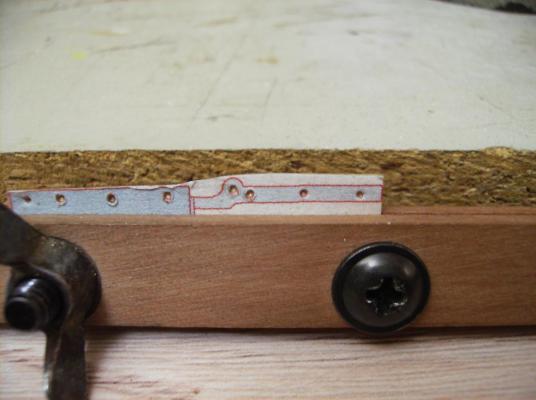
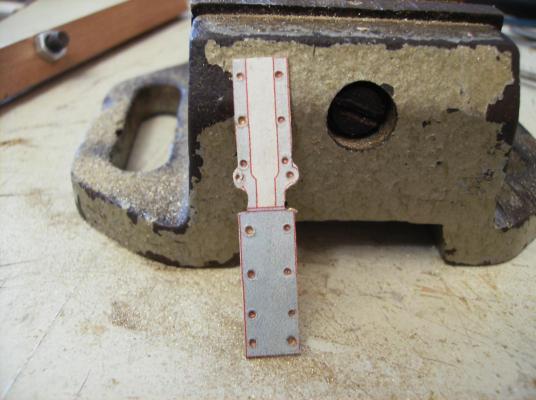
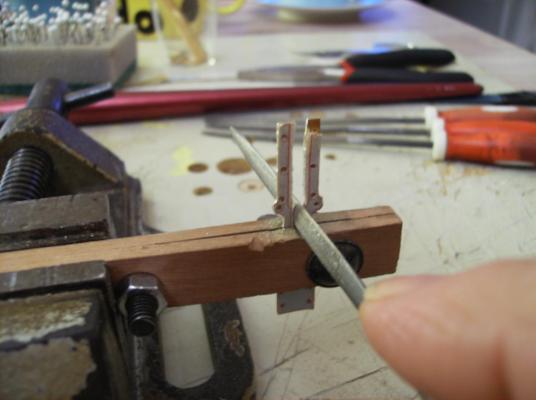
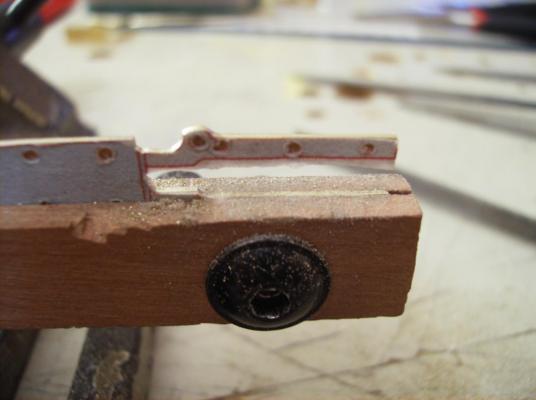
Hi again, repeatedly This weekend was a bit busy not only for model building, but also with home renovation. New kitchen furniture arrived, lots of work for the next days......... But I managed to do something for the SMS Danzig too ! First I had to regroup the new parts at the drawing, not to waste too much brass sheet. The printed sheets were glued to the brass plate, 0,5 mm used as the most parts are. I used superglue for that, it`s the best way to do it. As first parts I made the mounting plates, they were cut out with a little oversize I always use a wooden collet to hold that small parts,working is much easier that way. First I filed the outer contour of the parts, different files were used for filing. Next I made the inner hape All four plates done, the holes were made the way I showed former Even the first four eyelets are ready, they are made from spare etched parts. Best regards, thank you all for watching, and your likes Gerhard


- 108 replies
-
- 14
-
-
Cutty Sark by NenadM
Gerhardvienna replied to NenadM's topic in - Build logs for subjects built 1851 - 1900
Hi Nenad I would use thin plywood for that table, and some harder wood, maybe oak, for the legs. As it seems, you used balsa wood, this is maybe a bit too weak for such things, just my experience. At this small size harder wood is a lot better to grind into shape. Even the box for the steering rod will be easier to build from that. Regards Gerhard PS.: Good to see you "on the road" again- 4,152 replies
-
- 5
-
-
- cutty sark
- tehnodidakta
- (and 1 more)
-
Hi brunelrussell Have you tried http://www.massiv-holz-werkstatt.de/? They have a lot of different wood in all formats, but not sure if they deliver to the US!! As I am from Austria, I always buy my wood there. Regards Gerhard
-
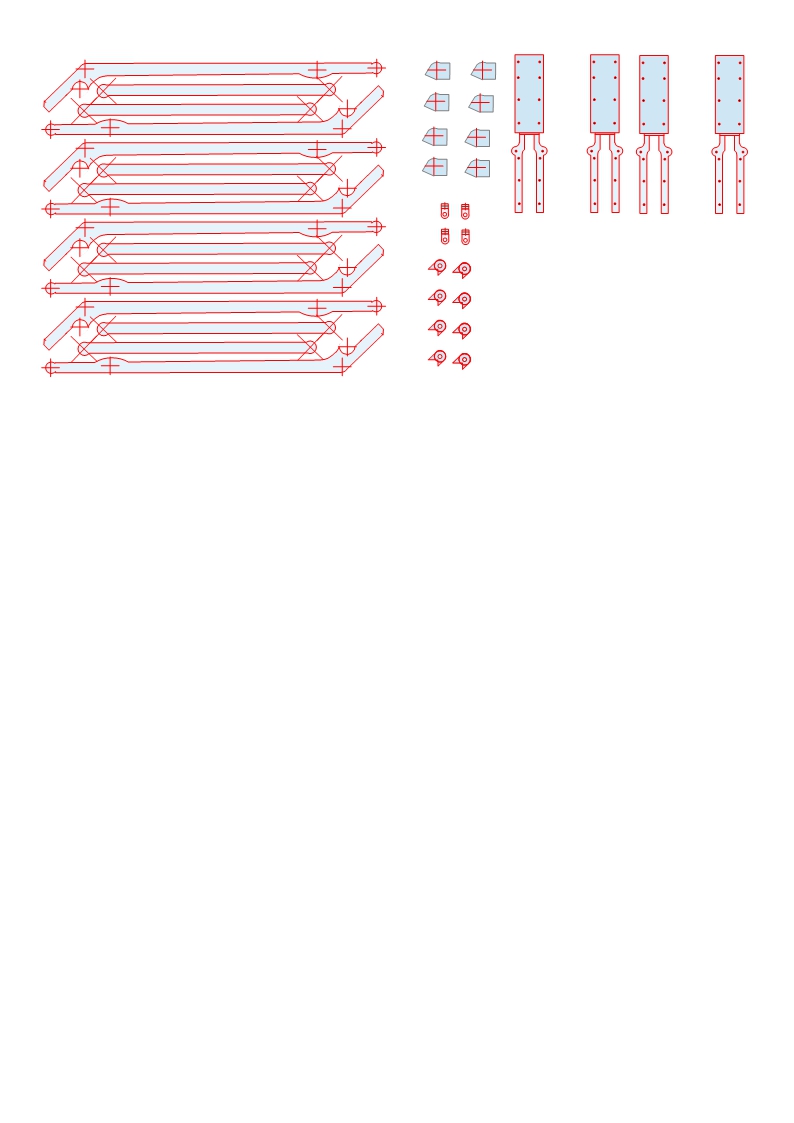
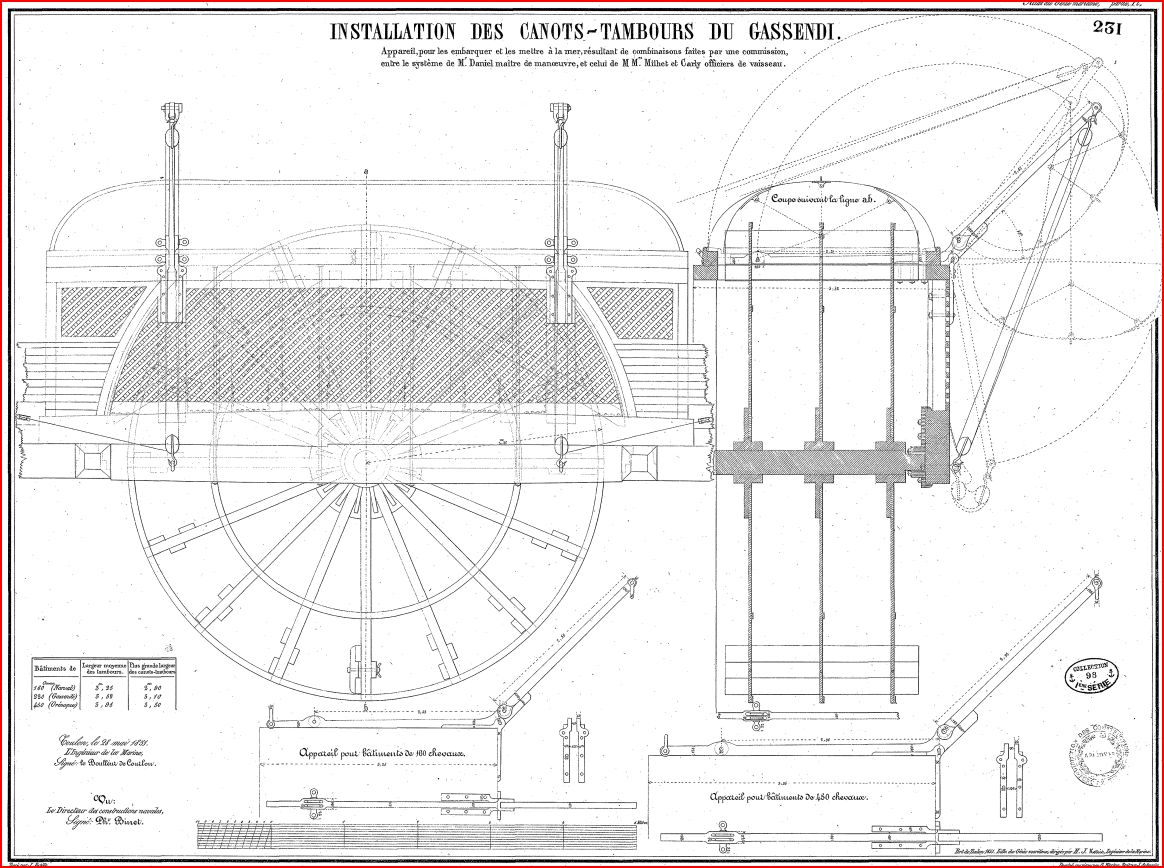
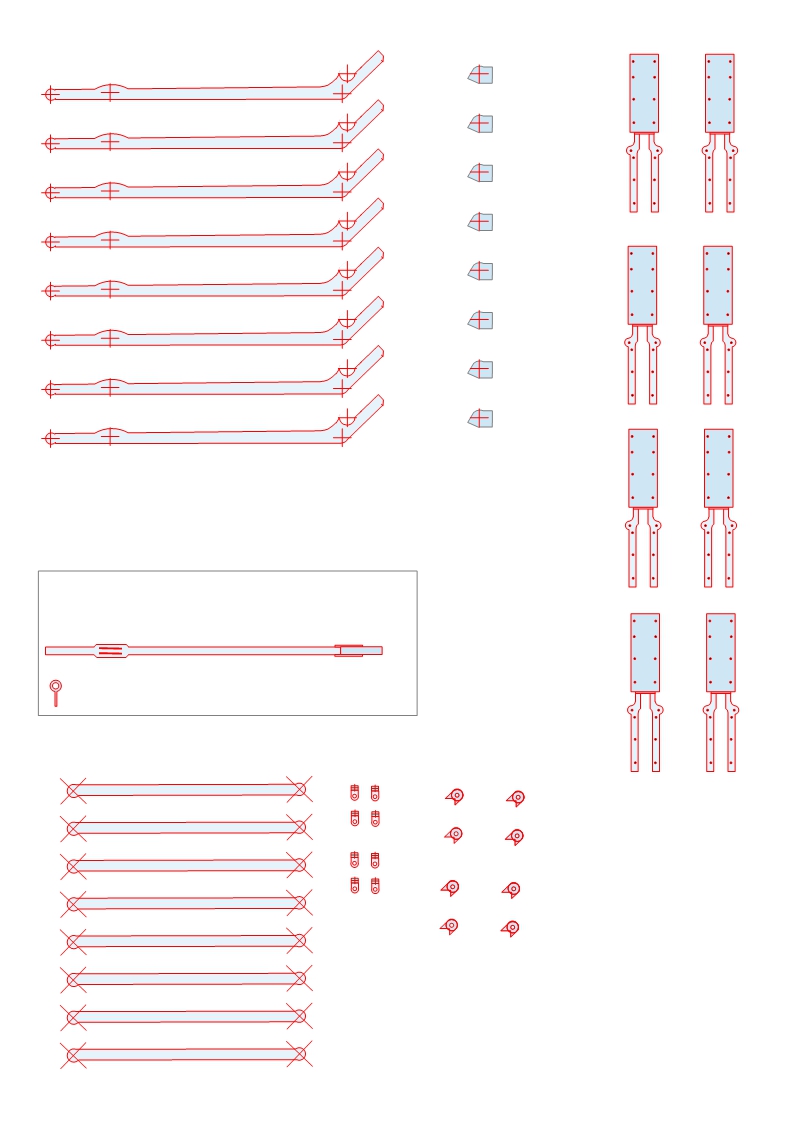
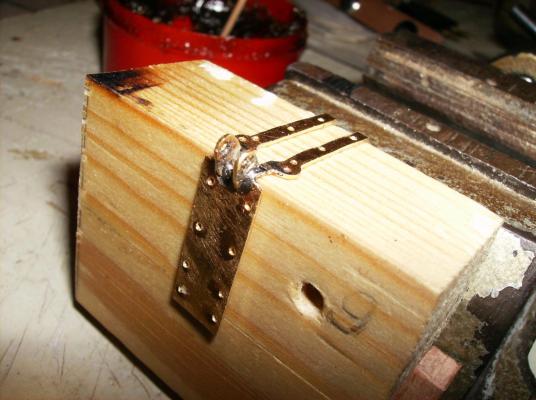
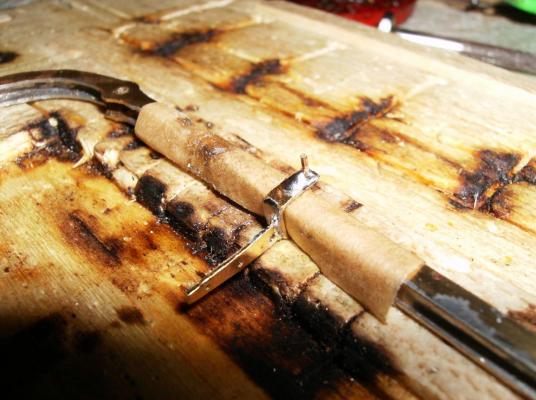
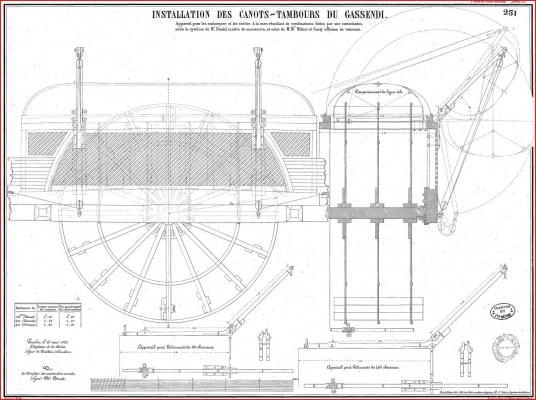
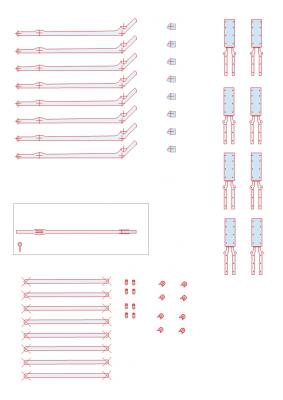
Hi Mark That is on my intention, I like to show how I work, maybe it can help others. Today was a not so much metalworking day, just the upper holders to the Wheelhouse davits soldered. I used baking paper between the holders and the davits, to keep them adjustable. Most of the day were spent with the drawings for the second version of the levers to the wheelhous boats. They are a bit more difficult than the first ones, but the function is much better to see. I used the plan nr. 231 from the Atlas du Genie Maritime, and made my drawings in OpenOffice. This took me some hours, the drawings will be glued to 0,5mm brass, middle parts of the levers will be made from 1 x 2 mm brass bar. The original plan The drawings Best regards, thank you all for dropping in, and your nice likes, of course Gerhard
- 108 replies
-
- 13
-
-
Hi Antony Just found the original title of the film, it was "The Legend of Evil Lake" maybe it is somewhere to find as stream. Regards Gerhard
- 99 replies
-
- 4
-
-
- turtle ship
- korean
- (and 1 more)
-
Hi Antony Impressive start! Waiting for much more Regards Gerhard
- 99 replies
-
- 5
-
-
- turtle ship
- korean
- (and 1 more)
-
Cutty Sark by NenadM
Gerhardvienna replied to NenadM's topic in - Build logs for subjects built 1851 - 1900
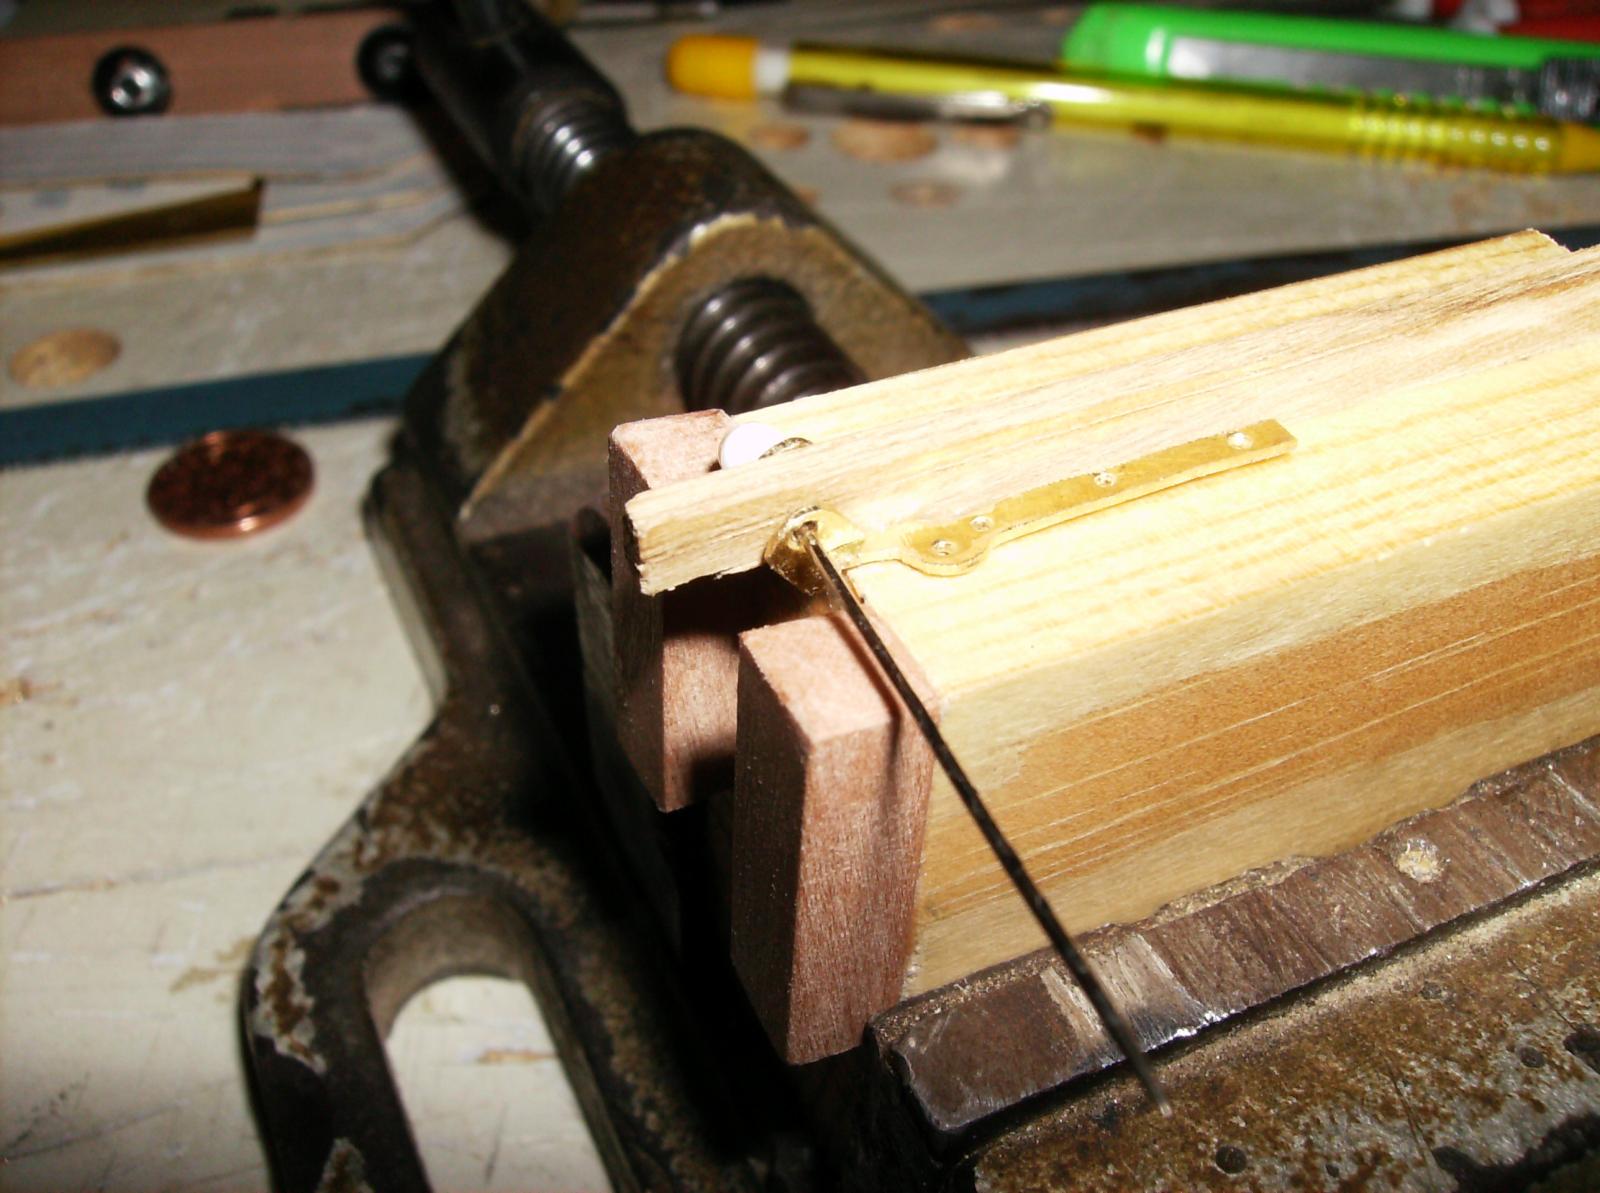
Hi my friend! The most difficult things to do at the steering box will be the hinges, if you want to keep them moveable. You can see how i made such small things here http://modelshipworld.com/index.php/topic/12842-sms-danzig-1851-by-gerhardvienna-radio-150-scale/?p=393467 . I know you can do that! Regards Gerhard- 4,152 replies
-
- 6
-
-
- cutty sark
- tehnodidakta
- (and 1 more)