HOLIDAY DONATION DRIVE - SUPPORT MSW - DO YOUR PART TO KEEP THIS GREAT FORUM GOING! (Only 20 donations so far - C'mon guys!)
×


Gerhardvienna
-
Posts
683 -
Joined
-
Last visited
Content Type
Profiles
Forums
Gallery
Events
Everything posted by Gerhardvienna
-
Hi again Just to keep you informed, I`m not too lazy to do something for the Danzig, I was a bit busy at my home improvement. But between that I could study how to make the next davits, an tried to figure out how the soldering form to make. It`s on the way now, photos will come tomorrow, when the parts are made. Best regards Gerhard
-
Hi Mark Too much to read for too less time.................... But I`m tryin`! What I`ve seen yet, impresses me, best work. I`ll keep on watching this . Regards Gerhard
-
So the Humbrol seems to be better for that than the Revell coluors I always use. I must try them on my next winch. Thank you for advise! Regards Gerhard
- 2,625 replies
-
- 4
-

-
- kaiser wilhelm der grosse
- passenger steamer
- (and 1 more)
-
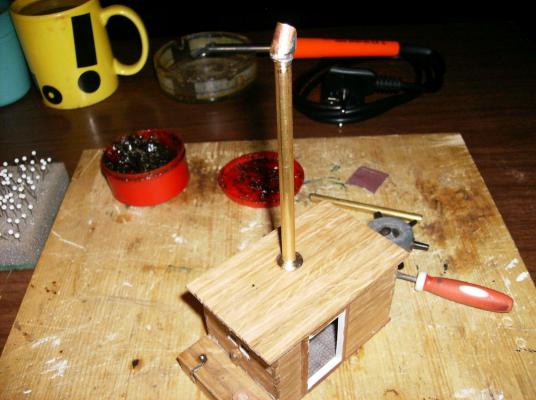
Hi Nils I`m just using a normal 30 watts electric solderin iron, bought at Zgonc here in Vienna, for about 19 Euros . For the Steam engine and boilers I will have to learn hard soldering with propane gas and oxygen, I`ve never done that before. More pics will come maybe in the evening, curios how far I can go today. Regards Gerhard
-
Cutty Sark by NenadM
Gerhardvienna replied to NenadM's topic in - Build logs for subjects built 1851 - 1900
Hello Nenad Sad news! My sympathy for you and your family,take all the time you need for mourning. Gerhard- 4,152 replies
-
- 5
-
-
- cutty sark
- tehnodidakta
- (and 1 more)
-
Hi nils Well made, how did you colour the gear wheels? I`v tried several tims to paint that Plastic wheels, nothing worked out well. Regards Gerhard
- 2,625 replies
-
- 4
-
-
- kaiser wilhelm der grosse
- passenger steamer
- (and 1 more)
-
Hi Johann Great as ever, I`m just speechless............................ Regards Gerhard
-
Cutty Sark by NenadM
Gerhardvienna replied to NenadM's topic in - Build logs for subjects built 1851 - 1900
Hi Nenad I knew you could do it! Well made, 1:100 is a bit more complicated than my giant 1 : 50 measure! Congrats to you, keep on going further! Regards Gerhard- 4,152 replies
-
- 5
-
-
- cutty sark
- tehnodidakta
- (and 1 more)
-
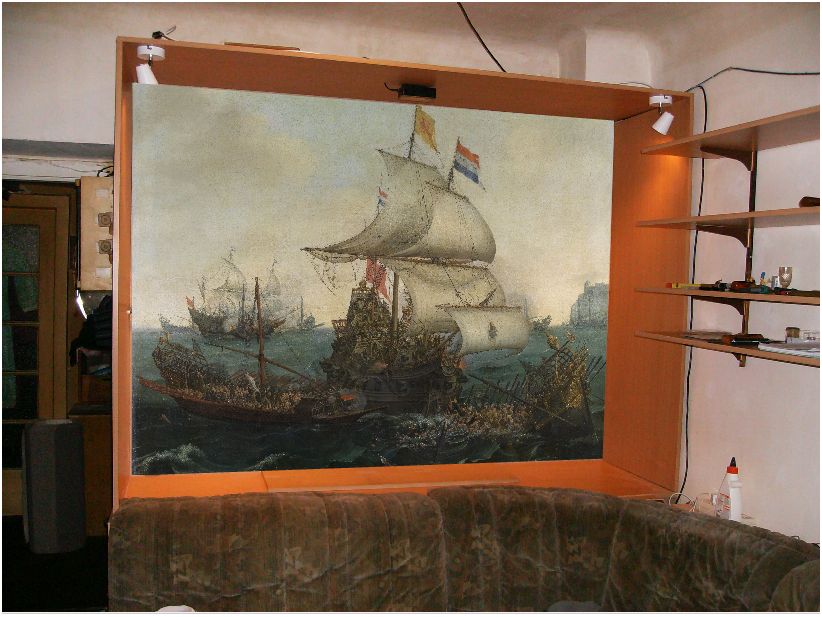
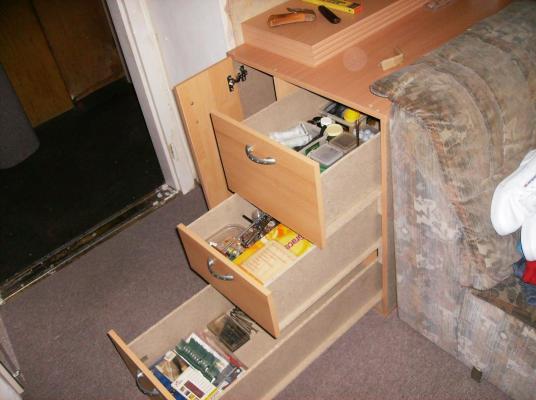
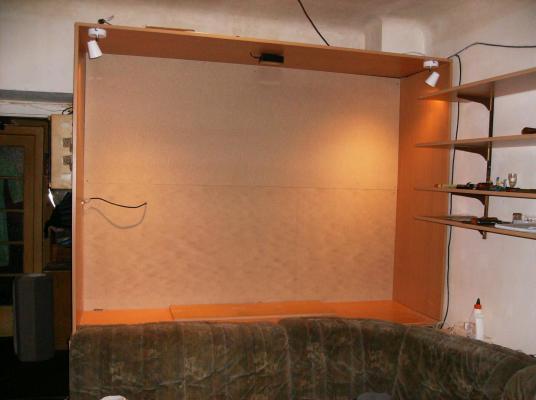
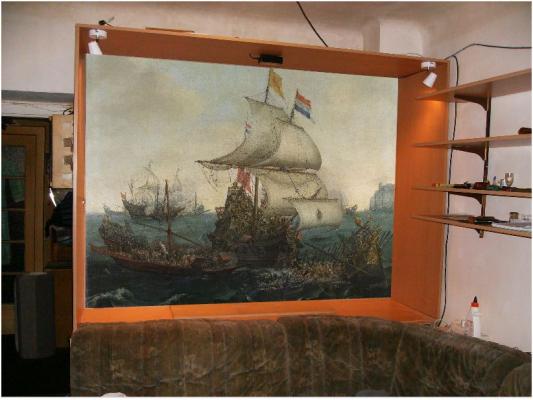
Hi Nenad Absoluteley, you`re welcome! As everyone who wants to visit this report! Thank you for your kind comment, I am always searching for new methods to do several things better, next steps will take a bit more time, with a lot more of soldering work. As this is from now on a realtime report, things will go more slowly. But now a short "in the report" report, what I have done the last days, what stopped me from working on the model. I have decided, that my SMS Danzig will need a new showcase, the old one was not large enough. So I built a large case for my different tools and materials, and a display case above, the lower case is 78 cm high, 2 meters long and 60 cm wide, the display case above has the same measure with 1,50 meters high. The lower case from left side The display case "as built" The same, with a background photo set in , this was done with open office, just to have an impression how it would look like then. Regards Gerhard
- 108 replies
-
- 12
-
-
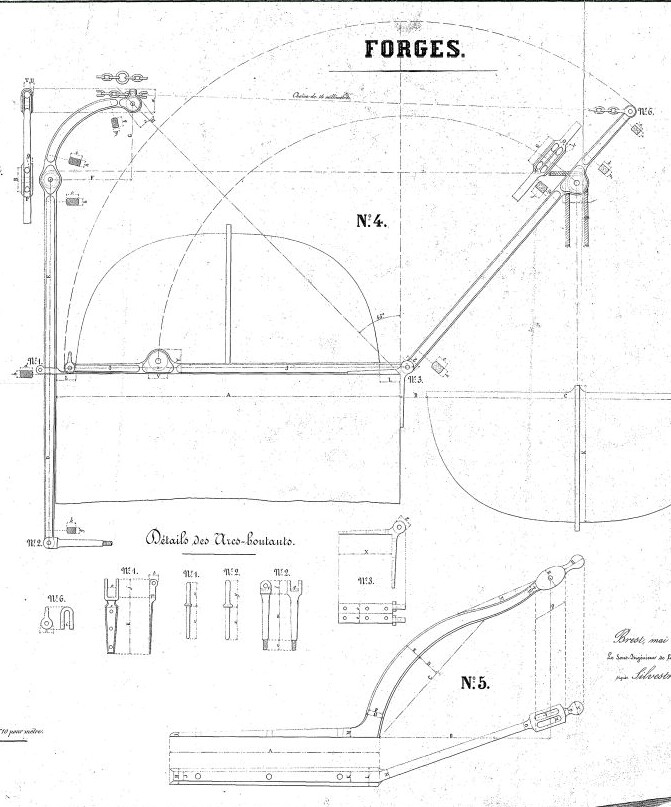
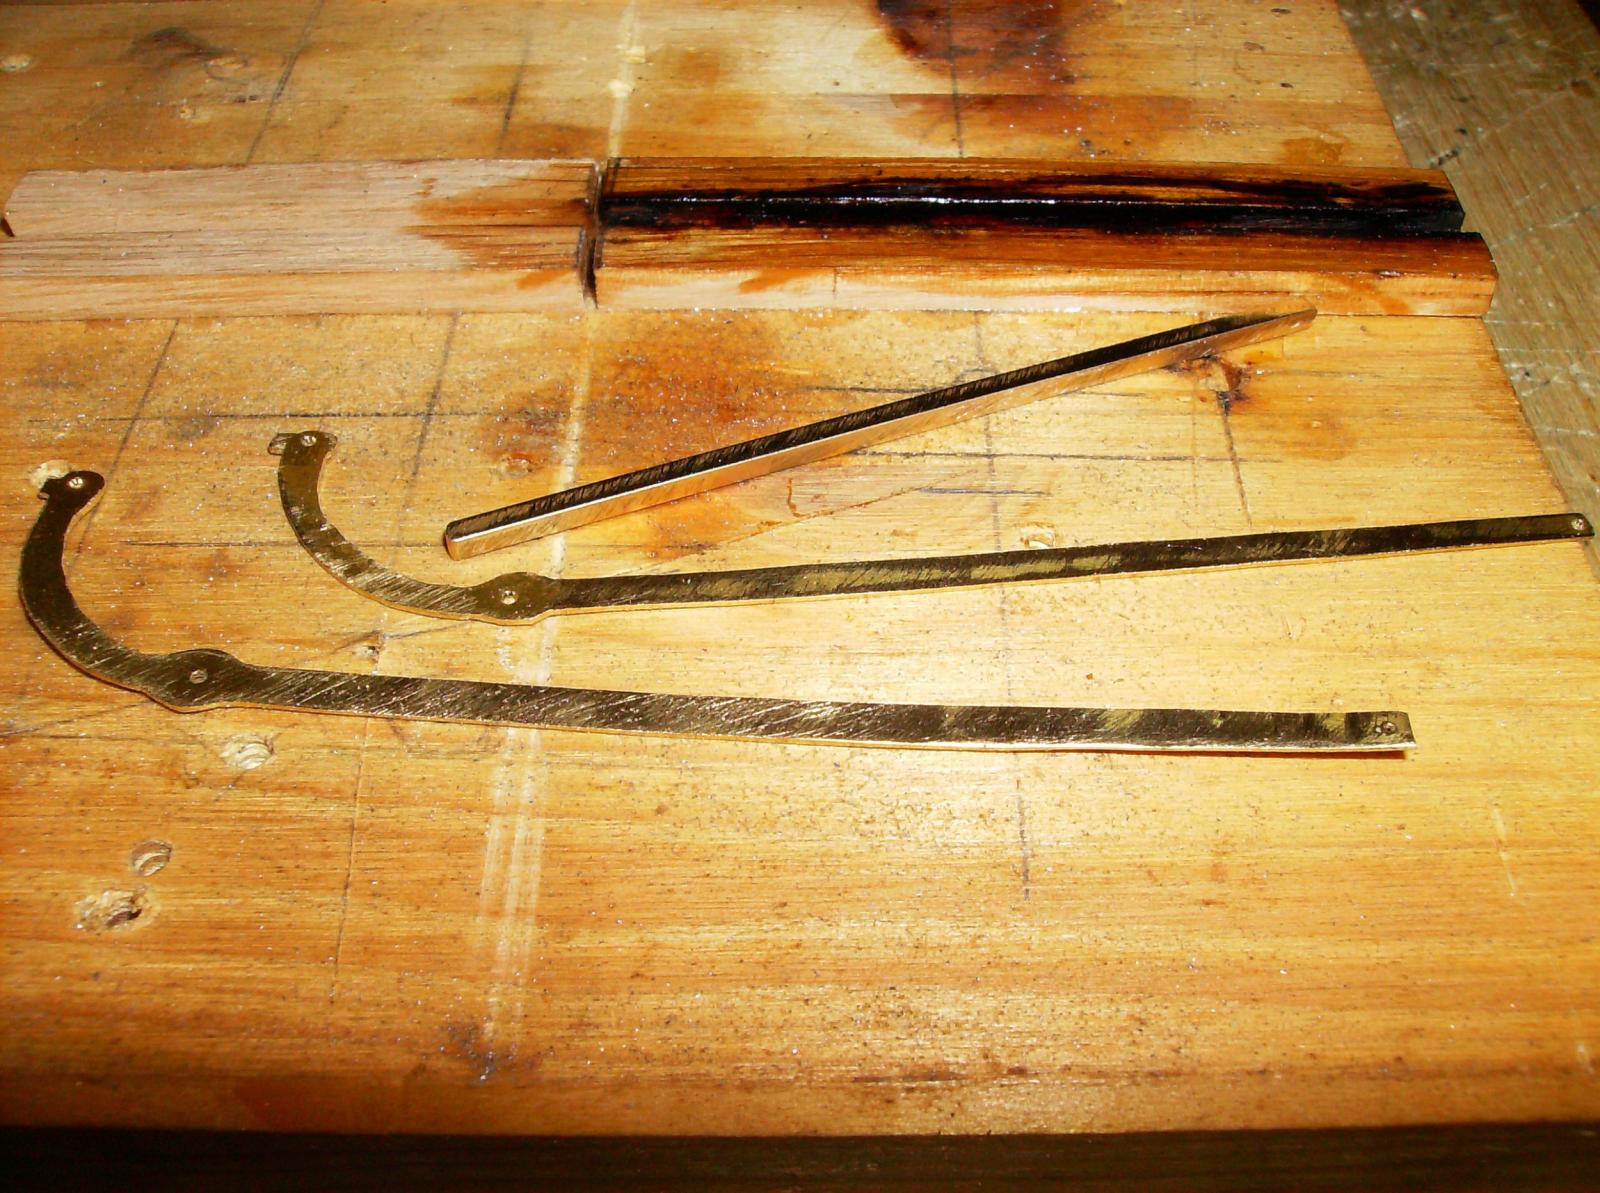
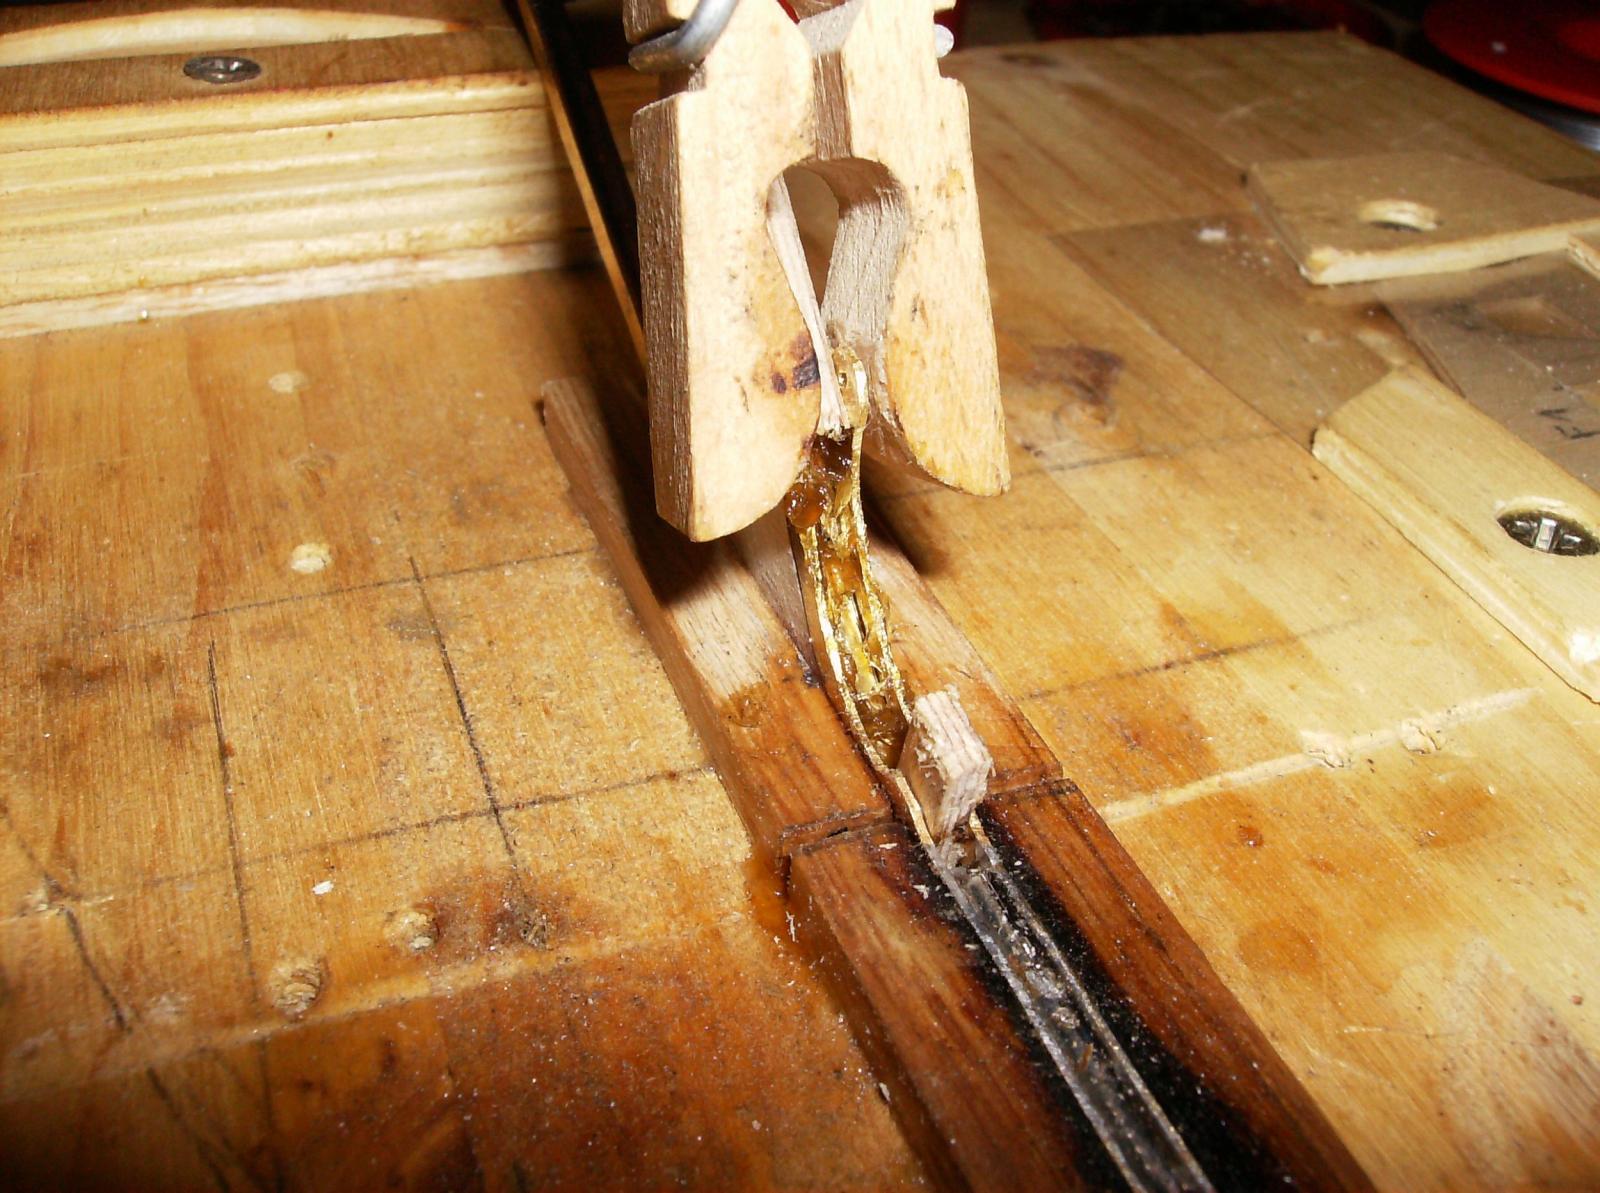
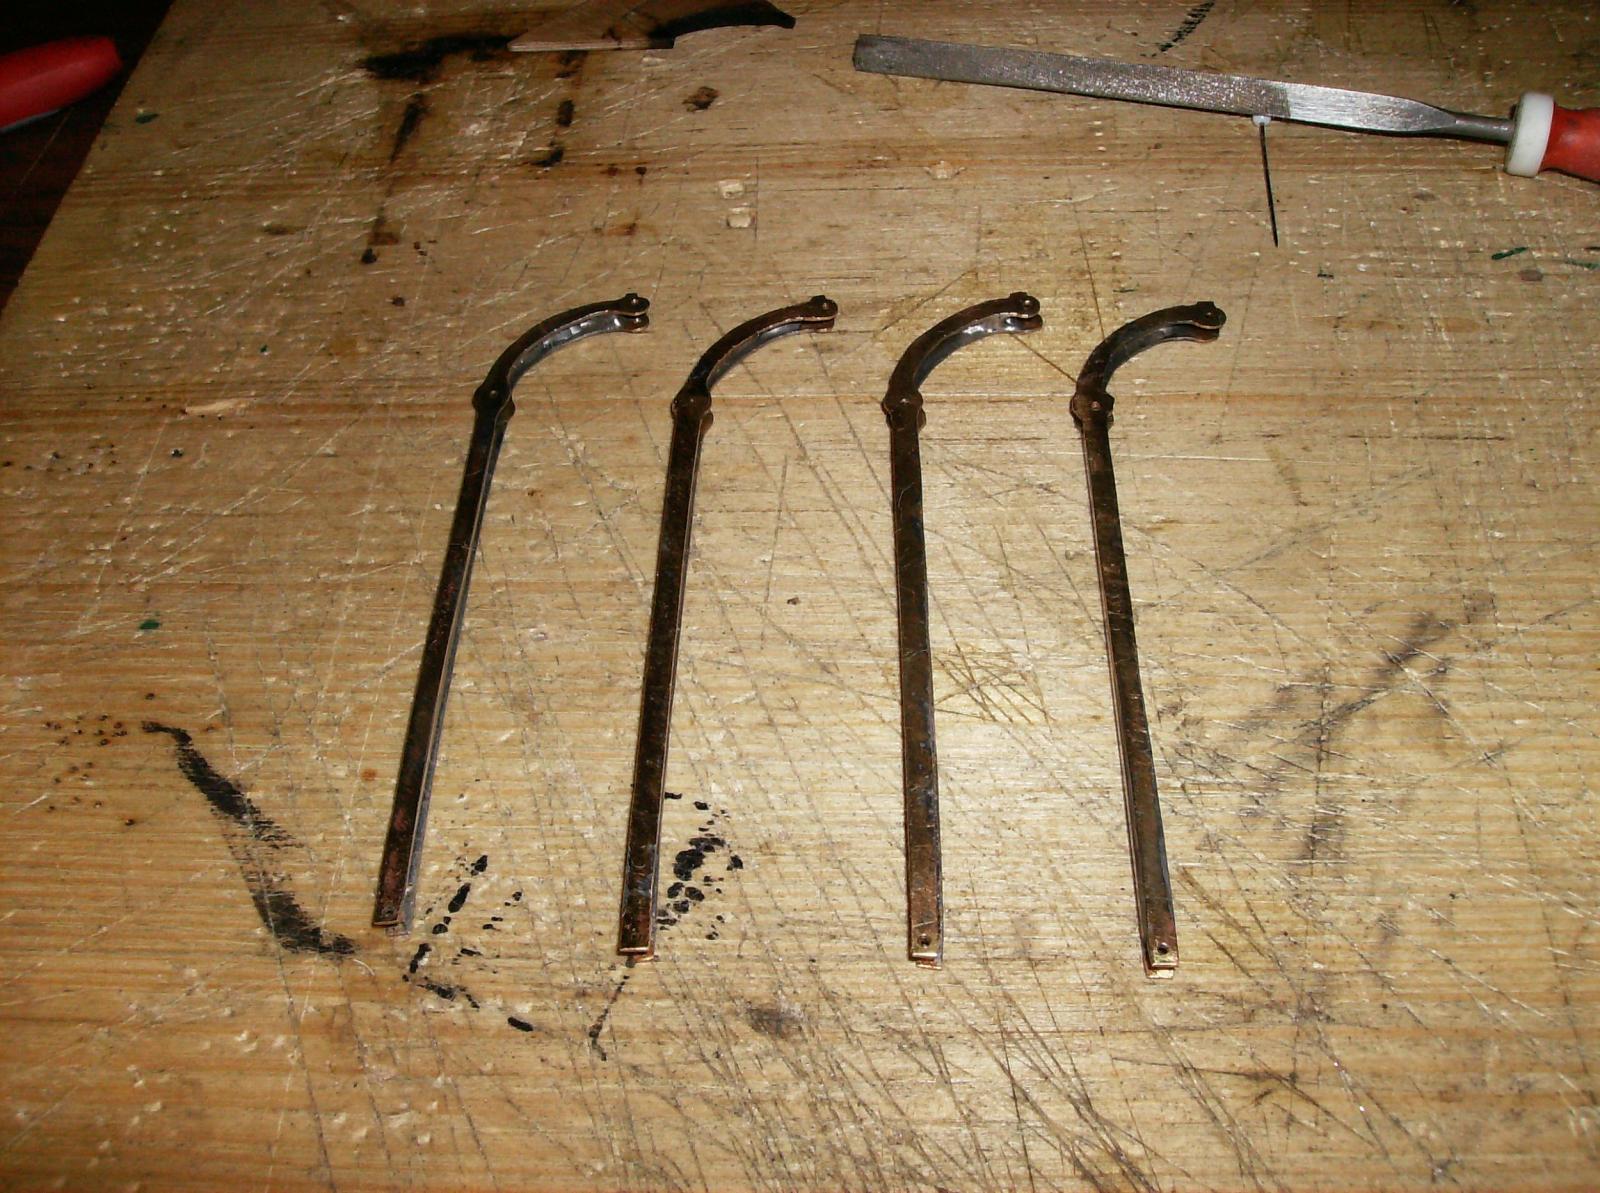
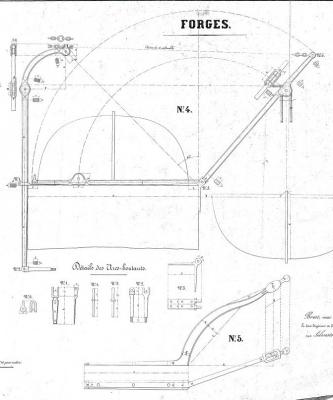
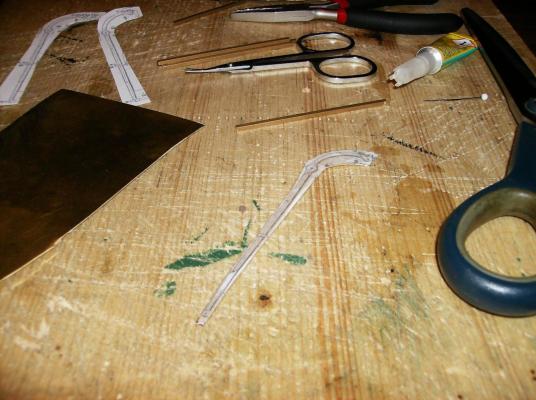
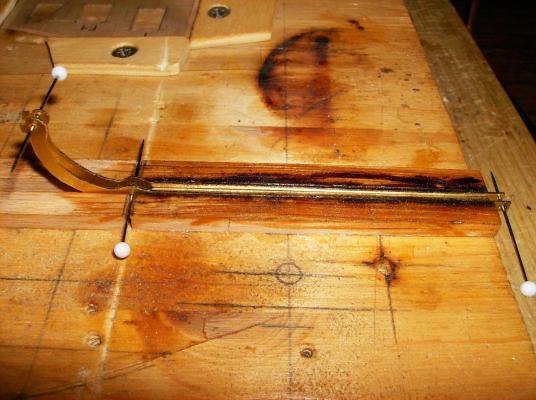
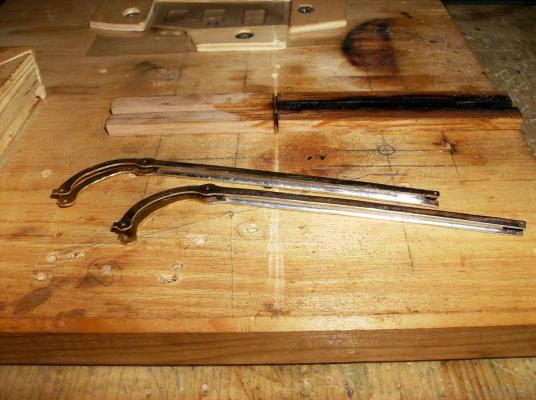
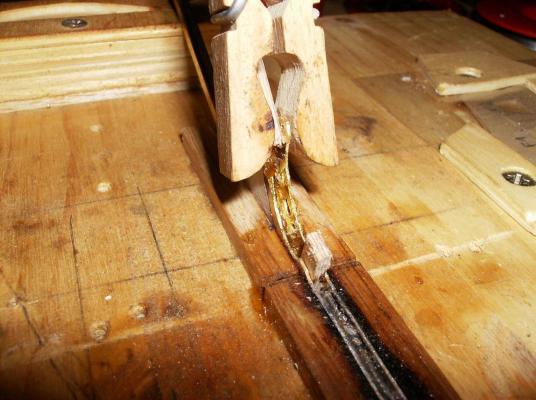
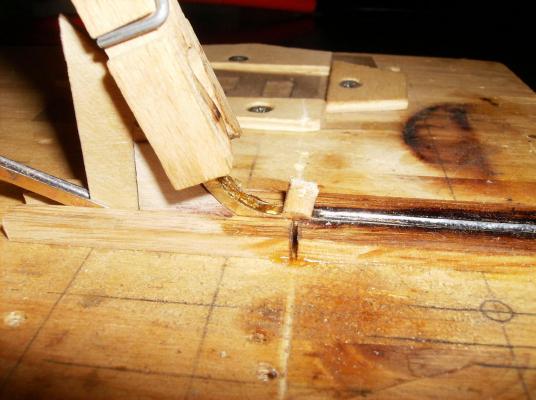
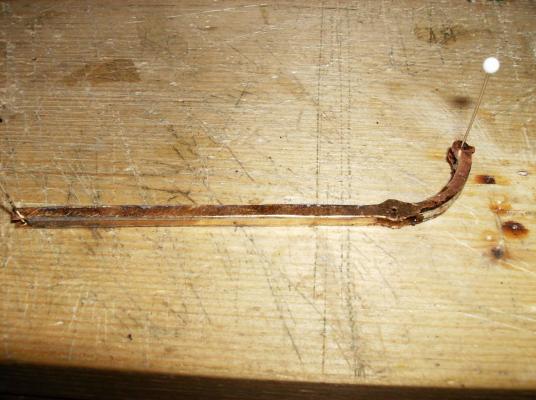
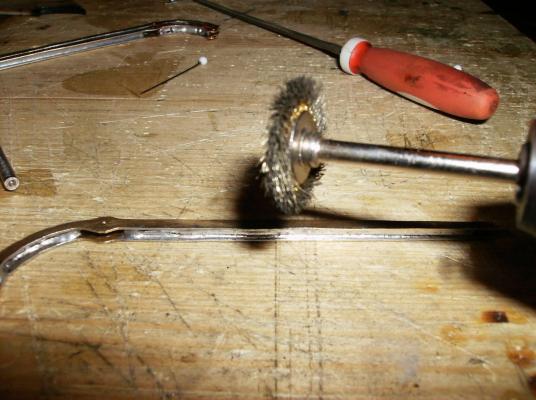
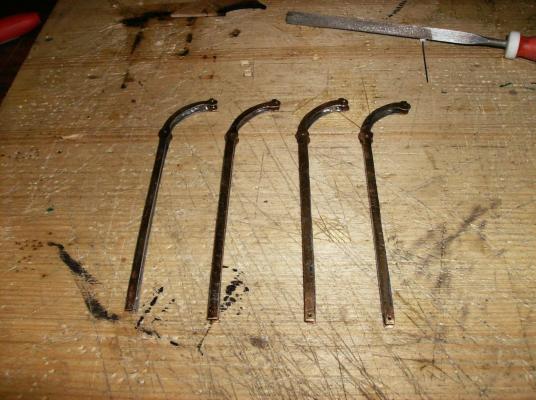
Hi to All and back again with the last parts of the review. The last things i made for the DANZIG until now were the davits for the wheelhouse mounted boats. I used thedrawings '233 from the "Atlas du Genie Maritime" for that, parts Nr 4, brought them to correct scale, and made 8 printouts for the 4 pairs of davits. The copys were glued to a sheet from 0,5 mm thick brass, and cut out. Between the 0,5 mm parts were 2 x 2mm brass bars placed for soldering First pair of davits after the first soldering The next step wasmuch more difficult, soldering the rounded parts. I used stripes from 0,5 mm brass sheet, bended them to shape, and layed the stripes between the rounded upper ends. This section was supported by a piece of 3 mm plywood, also the eye in the middle was filled with plywood. Here will a roll be built in, even at the top, so this parts must be kept clean from any solder. The soldered davits were cleaned from soldering dirt with a rotating brass brush Both pairs done, So this was the last part of my short review to the SMS DANZIG, from now on we are in present times........... I hope you will enjoy it, I`ll be back , with the next parts for the davits and hopefully a lot more! Best regards Gerhard

- 108 replies
-
- 15
-
-
Cutty Sark by NenadM
Gerhardvienna replied to NenadM's topic in - Build logs for subjects built 1851 - 1900
Hi Nenad It`s just great, how you made it. The trick with the light diluted glue is superb, noted that for my next wheel, Thank you! to be serius, you know what you can do, when you try. Thats how I make it all the time, and mostly it works. Keep on going, I like that built! Regards Gerhard- 4,152 replies
-
- 5
-
-
- cutty sark
- tehnodidakta
- (and 1 more)
-
Cutty Sark by NenadM
Gerhardvienna replied to NenadM's topic in - Build logs for subjects built 1851 - 1900
Hi Nenad THIS is it! Fine job done. Regards Gerhard- 4,152 replies
-
- 4
-
-
- cutty sark
- tehnodidakta
- (and 1 more)
-
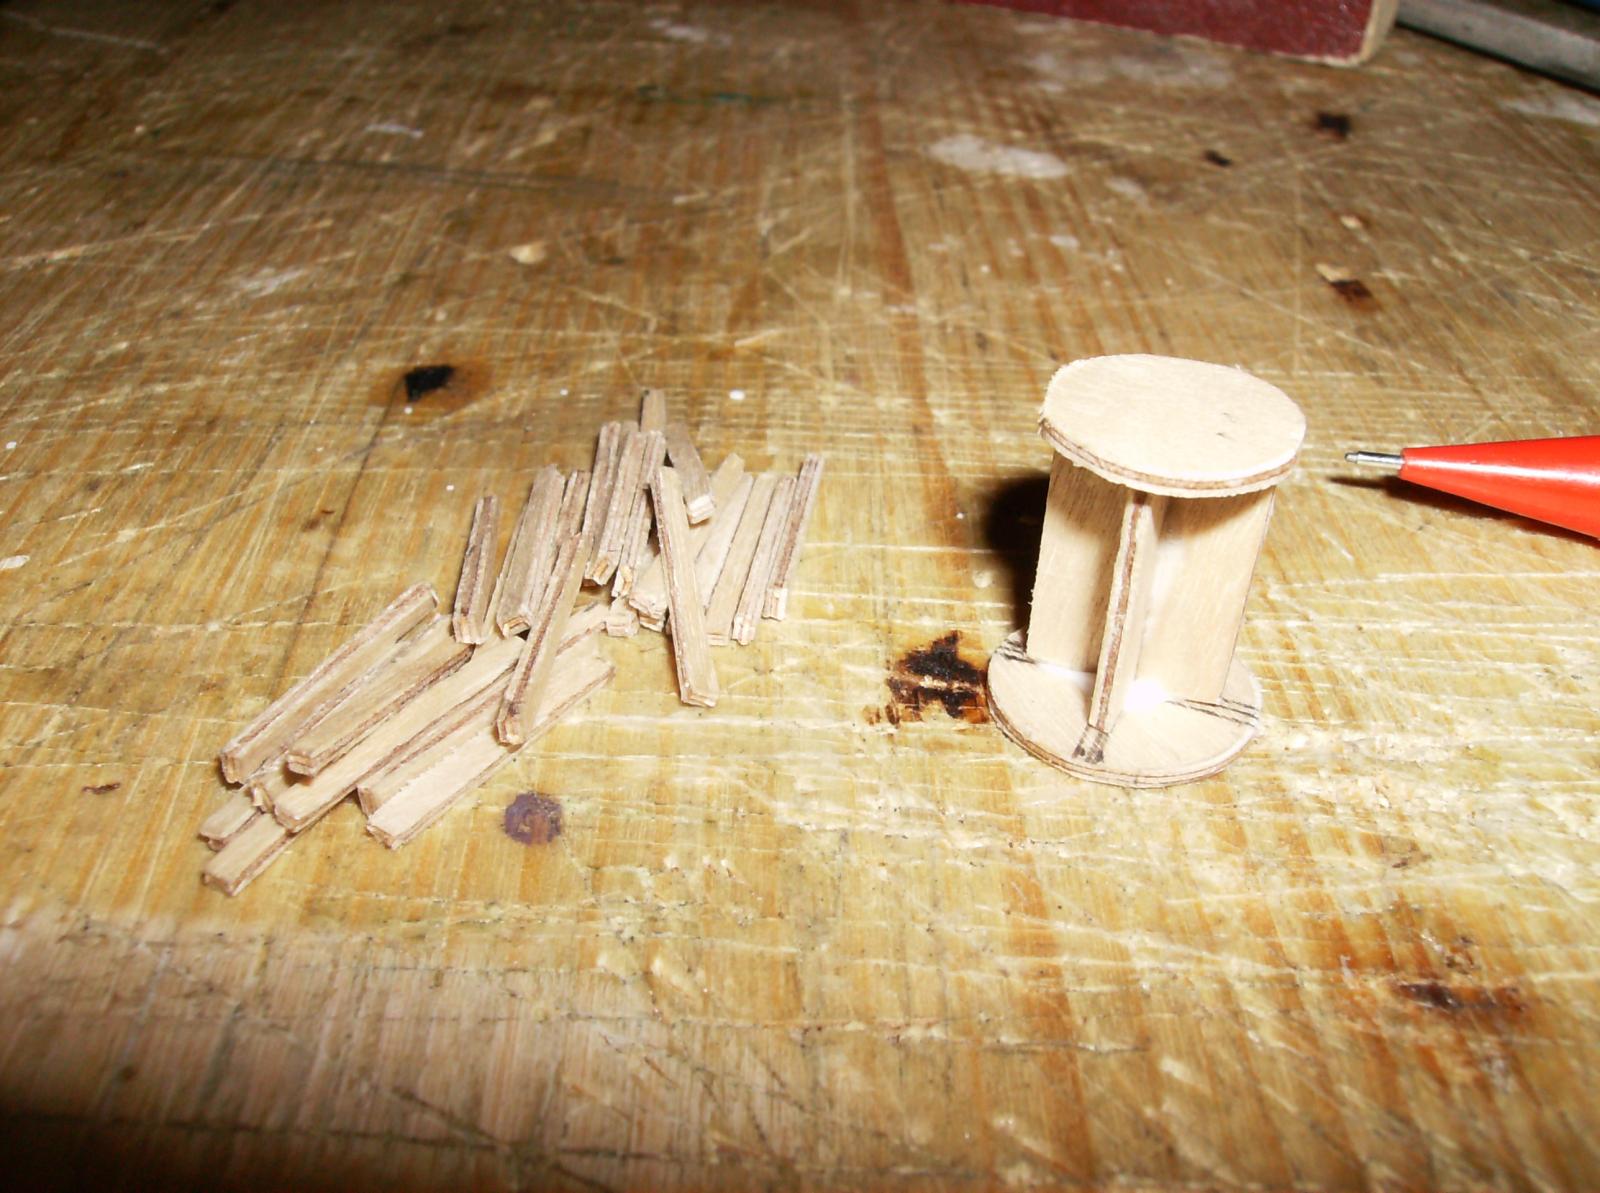
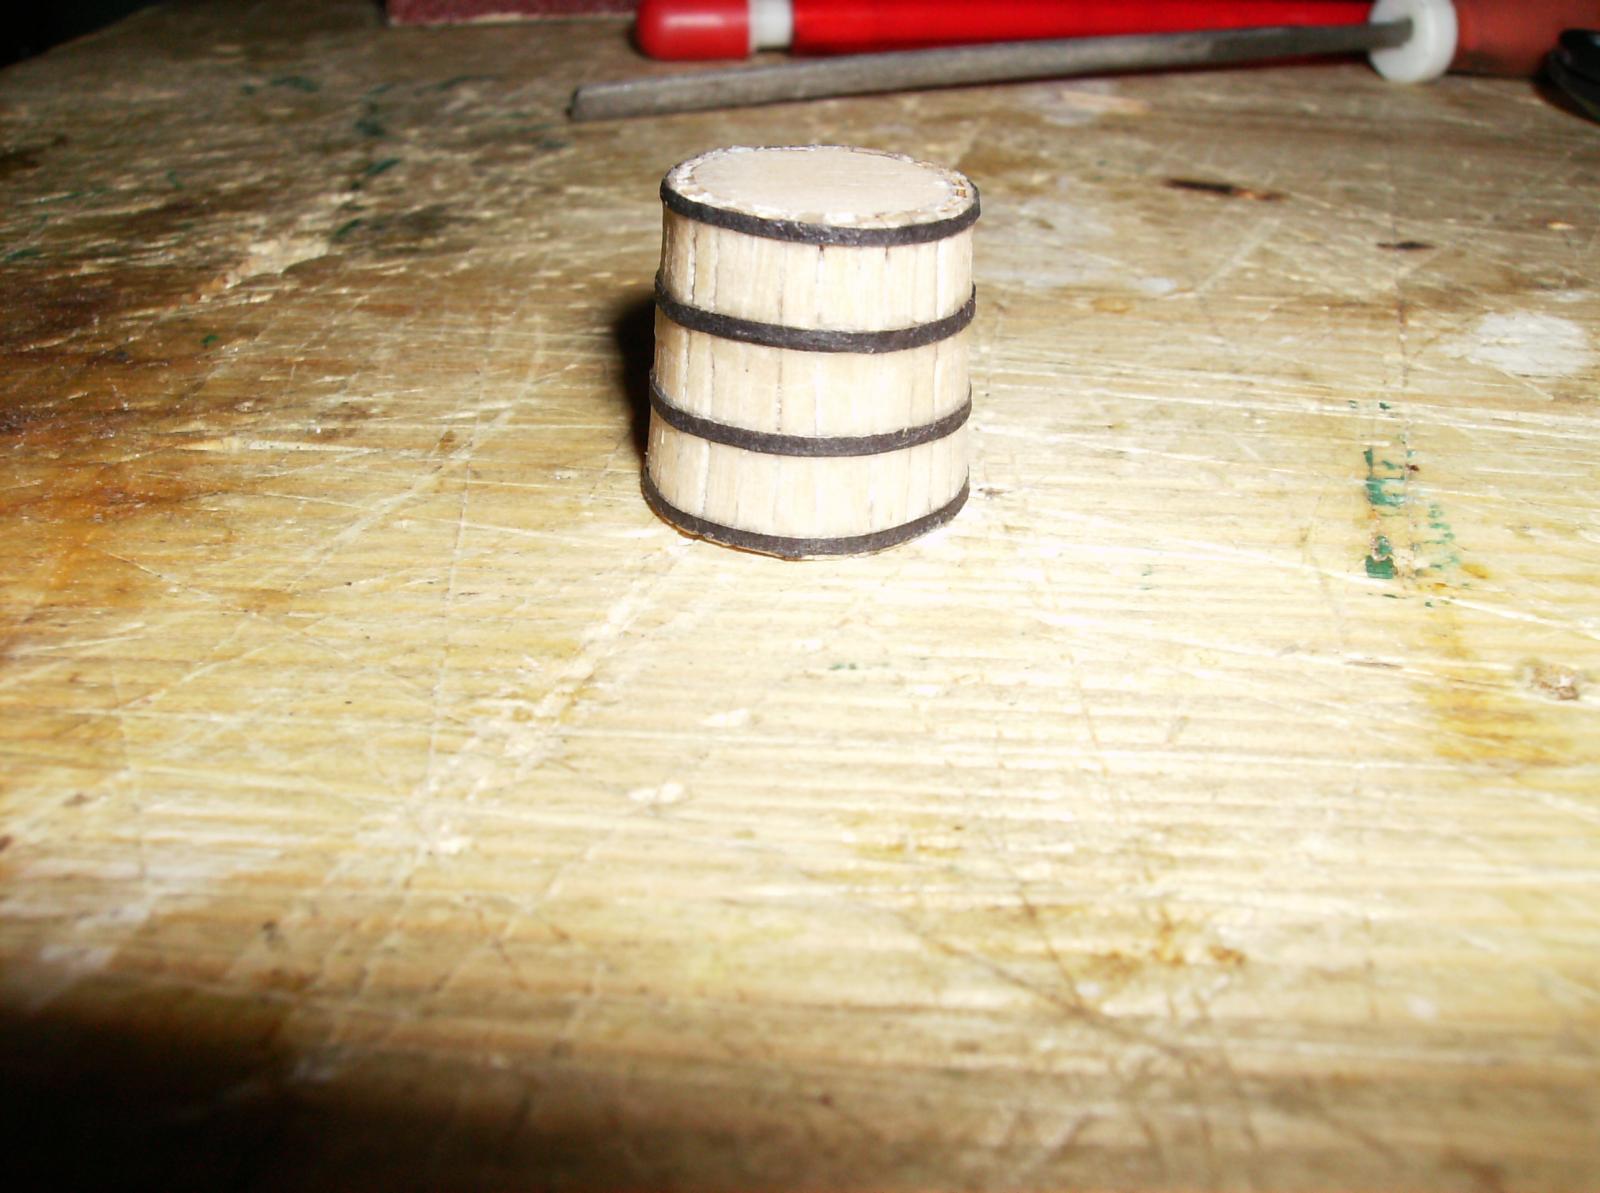
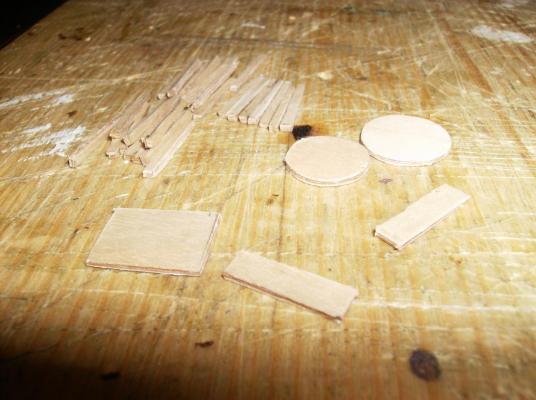
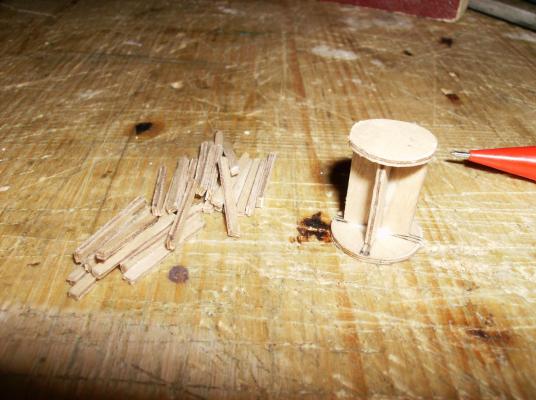
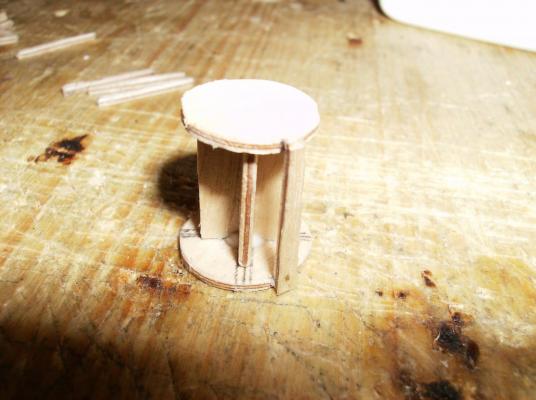
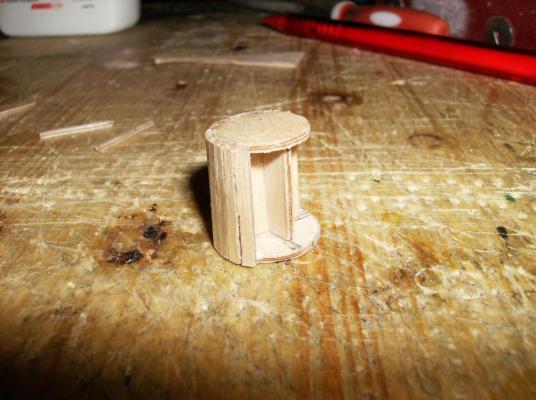
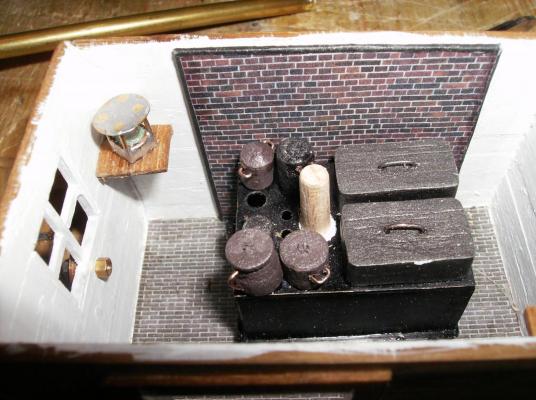
Almost done with the cookhouse, there is one last part from that for the moment. The cook will need some food in store, so I decided to make some barrels, the first one is finished. All parts cut from 1 mm plywood Framework glued First stave mounted & goes on.......... Barrel closed, the stripes on top are just carved grooves "Iron" rings made from black carton That was all about the cookhouse so far, next time will be a bit more of brass works, Thank you all for watching & your nice likes! Regards Gerhard

-
I have no clue, but I konw you will surprise us again.............. Now I call it Victory by Dafi Surprise Regards Gerhard
-
Hi Nils Looks good with the gearwheels. Much better than before, more realistic. Regards Gerhard
- 2,625 replies
-
- 4
-
-
- kaiser wilhelm der grosse
- passenger steamer
- (and 1 more)
-
Cutty Sark by NenadM
Gerhardvienna replied to NenadM's topic in - Build logs for subjects built 1851 - 1900
Hi Nenad Hmmmm.......................... Looks great! And now just 7 more of them, this will be a perfect steering wheel! Regards Gerhard- 4,152 replies
-
- 6
-
-
- cutty sark
- tehnodidakta
- (and 1 more)
-
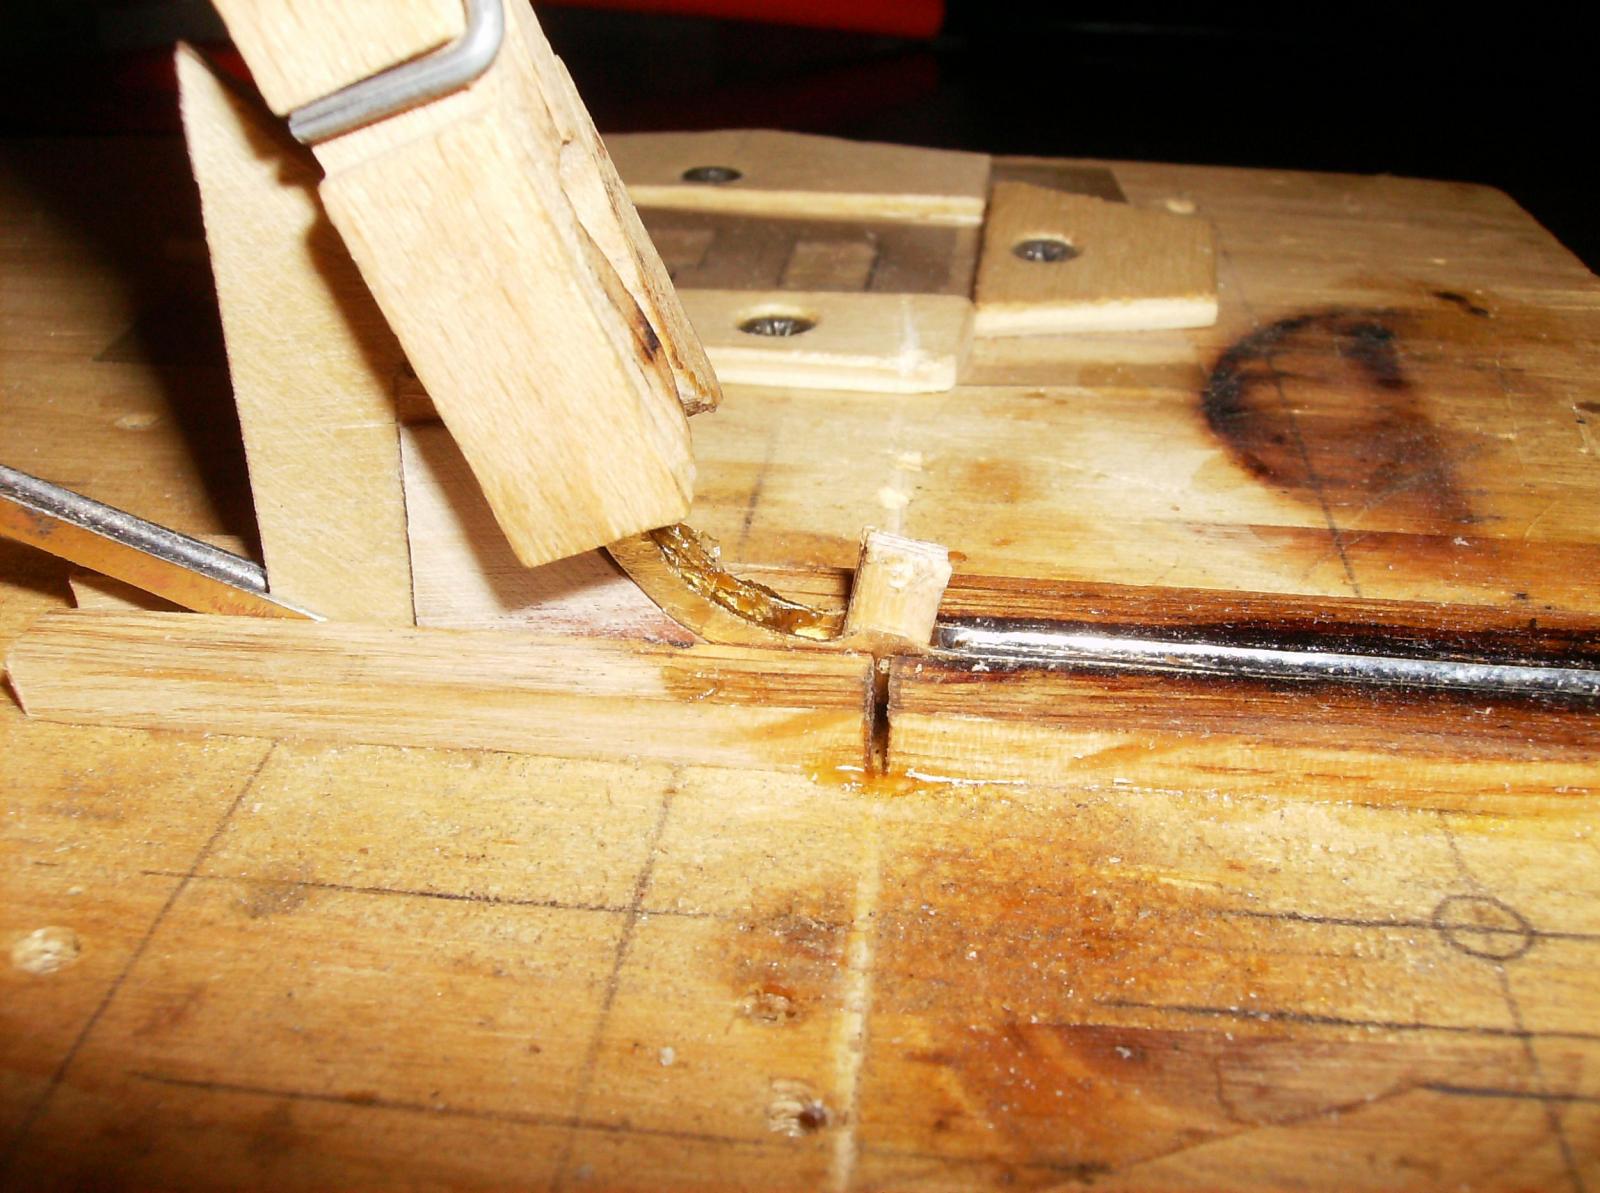
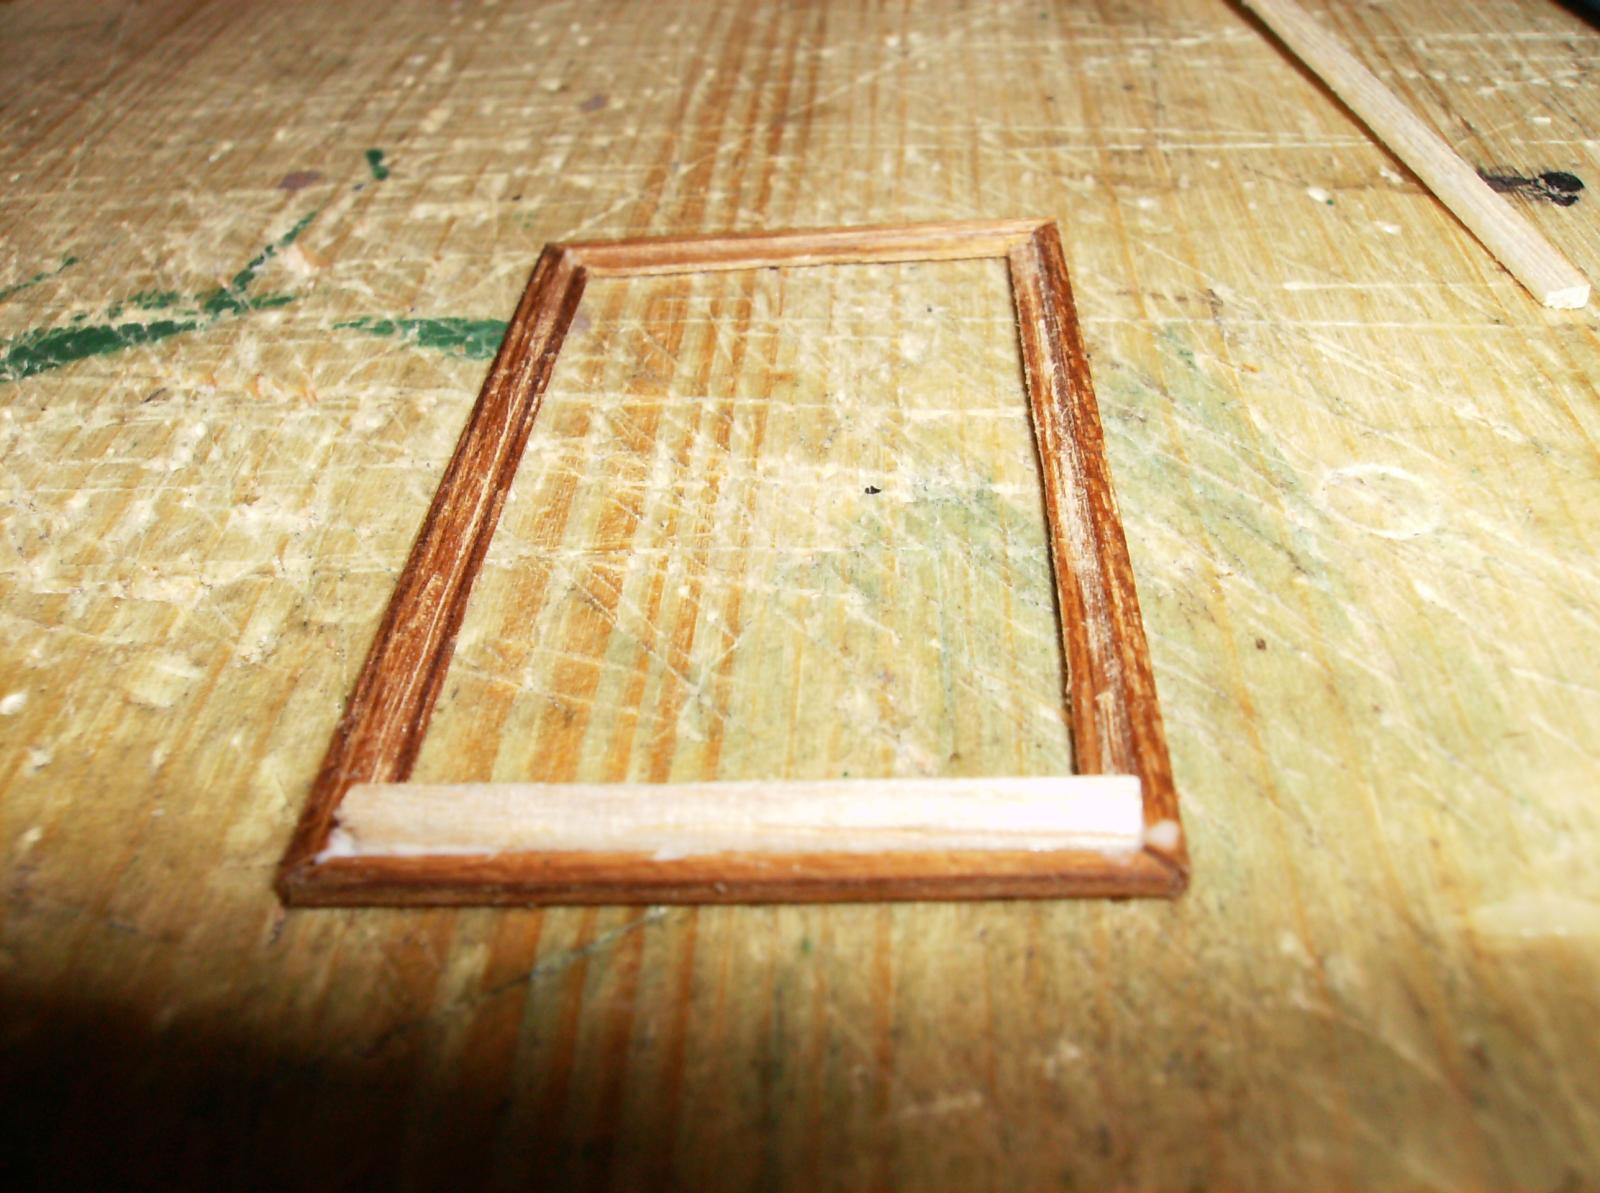
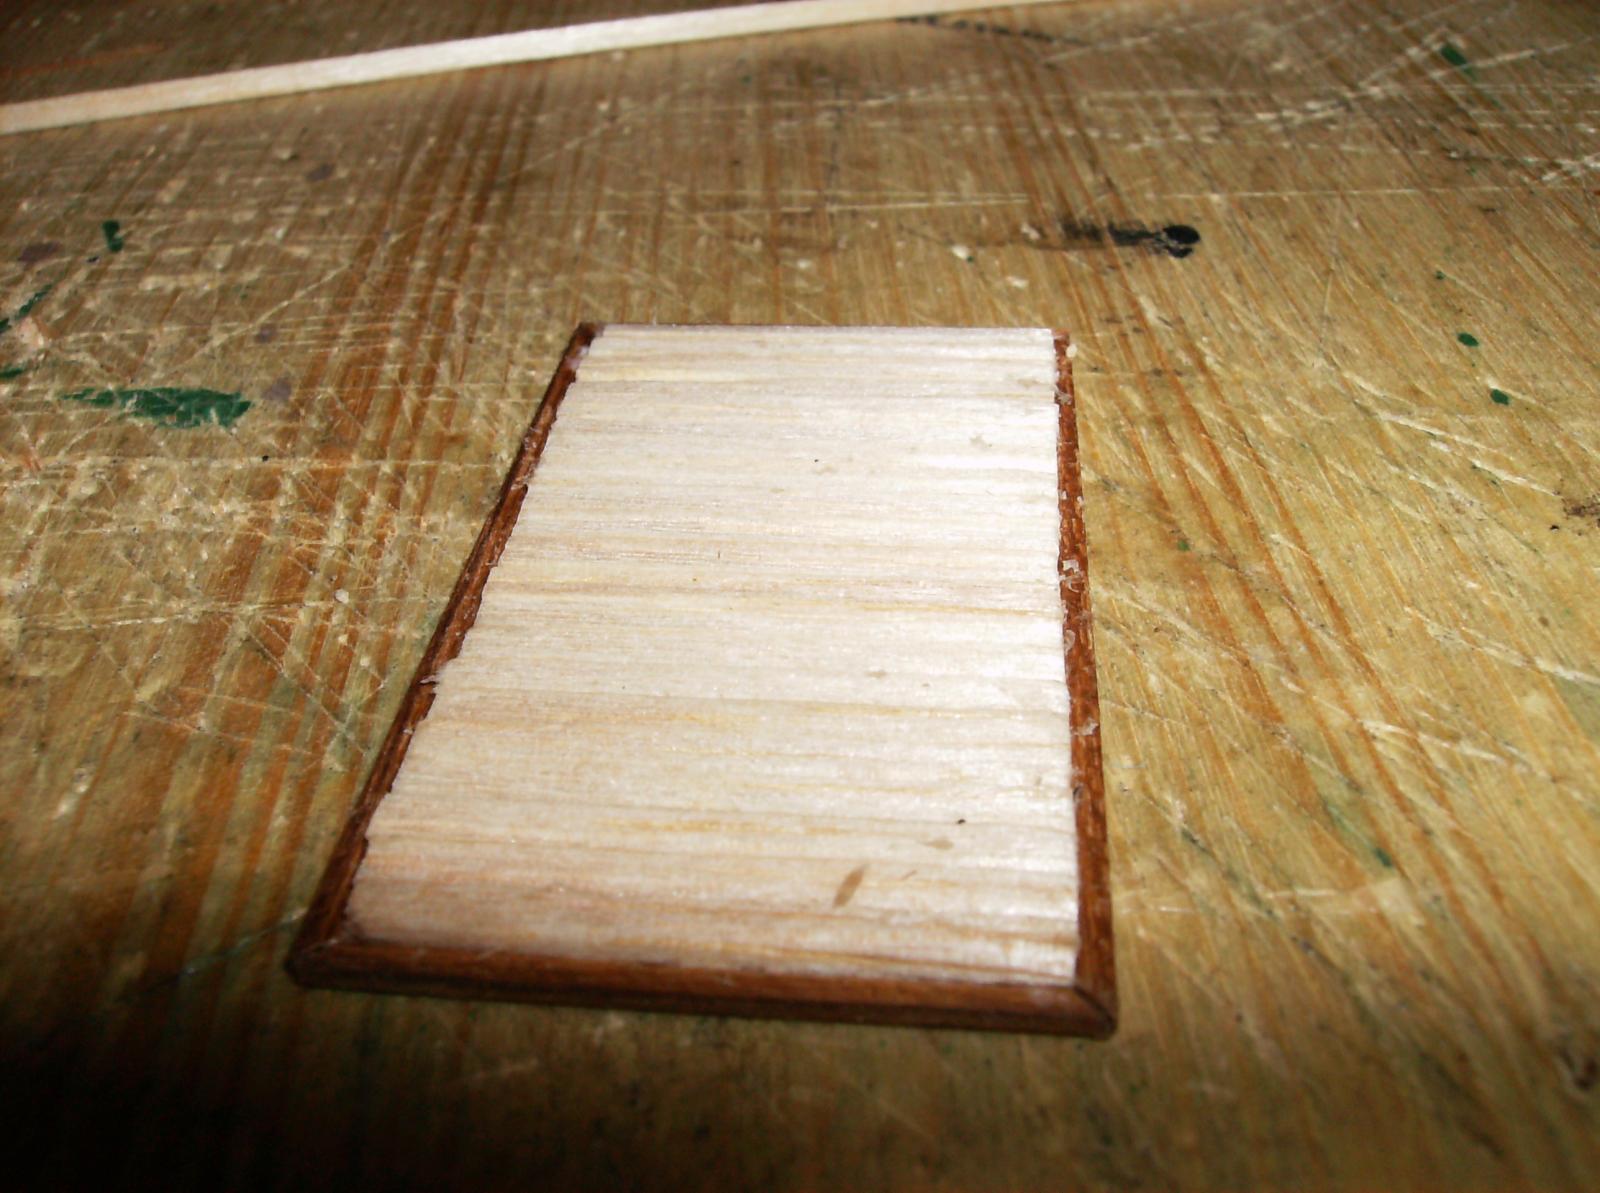
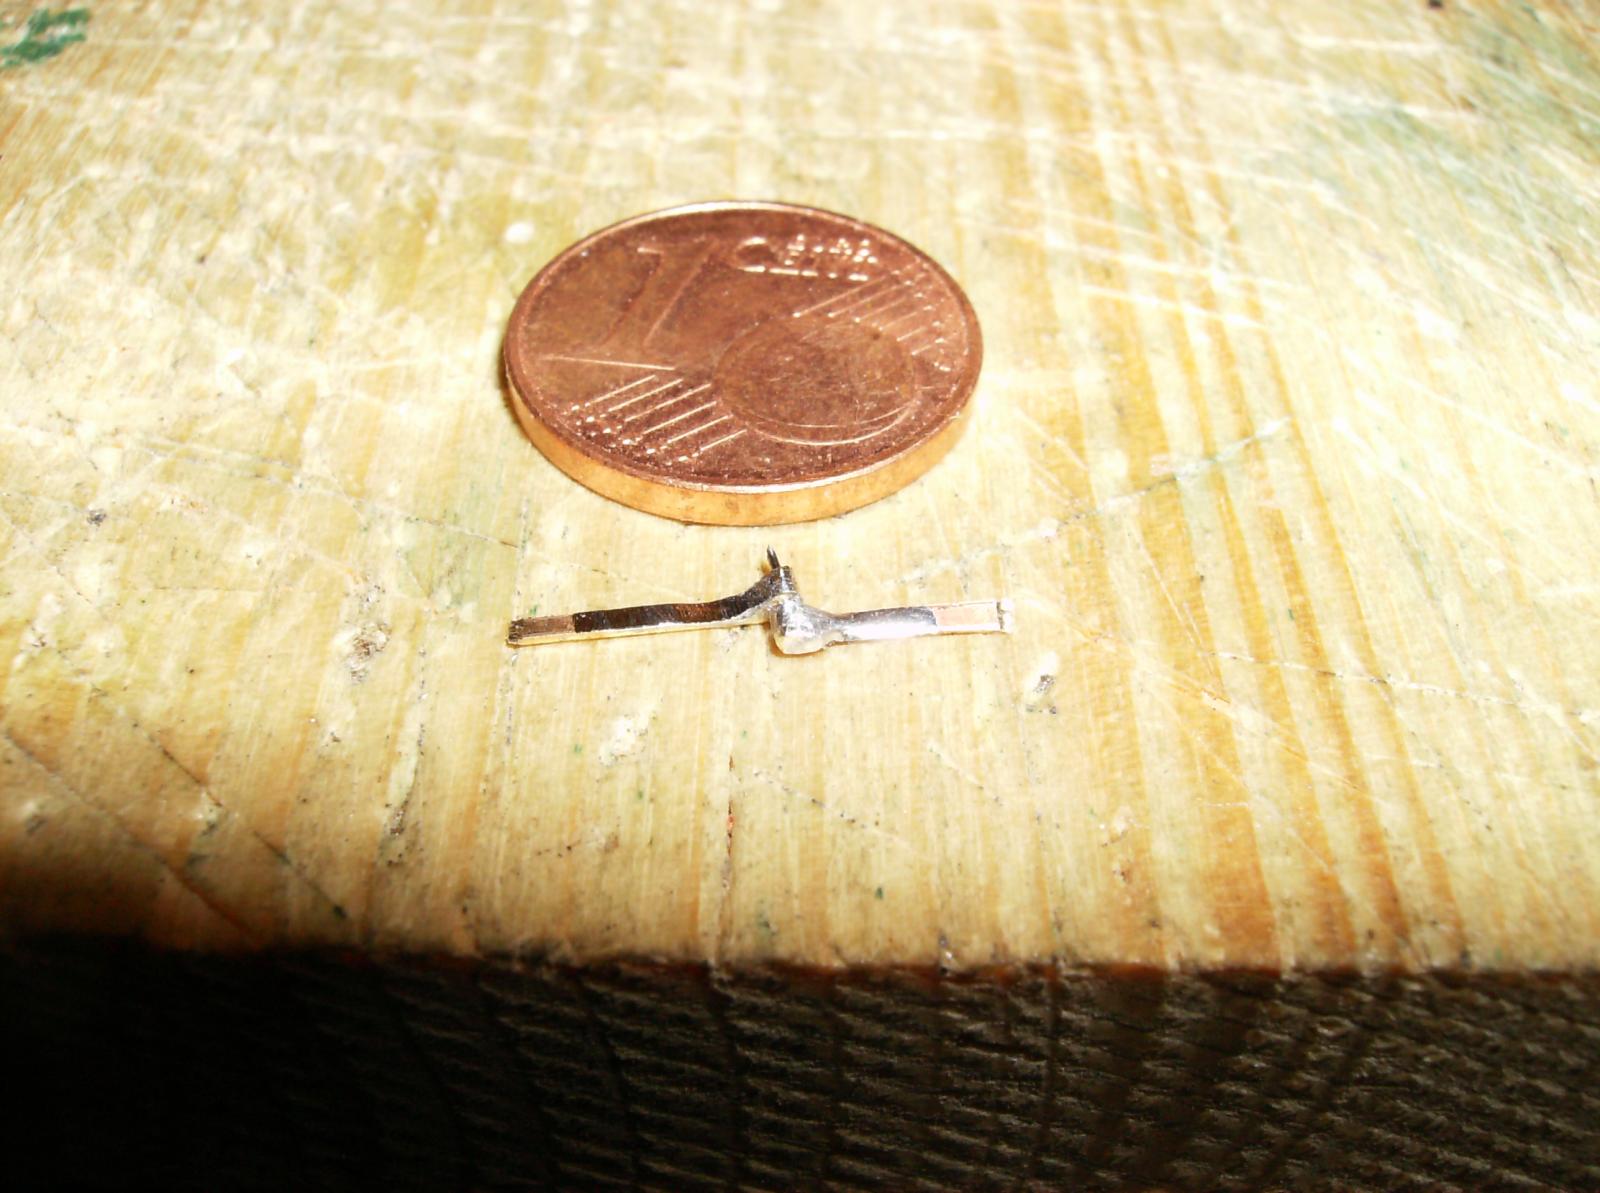
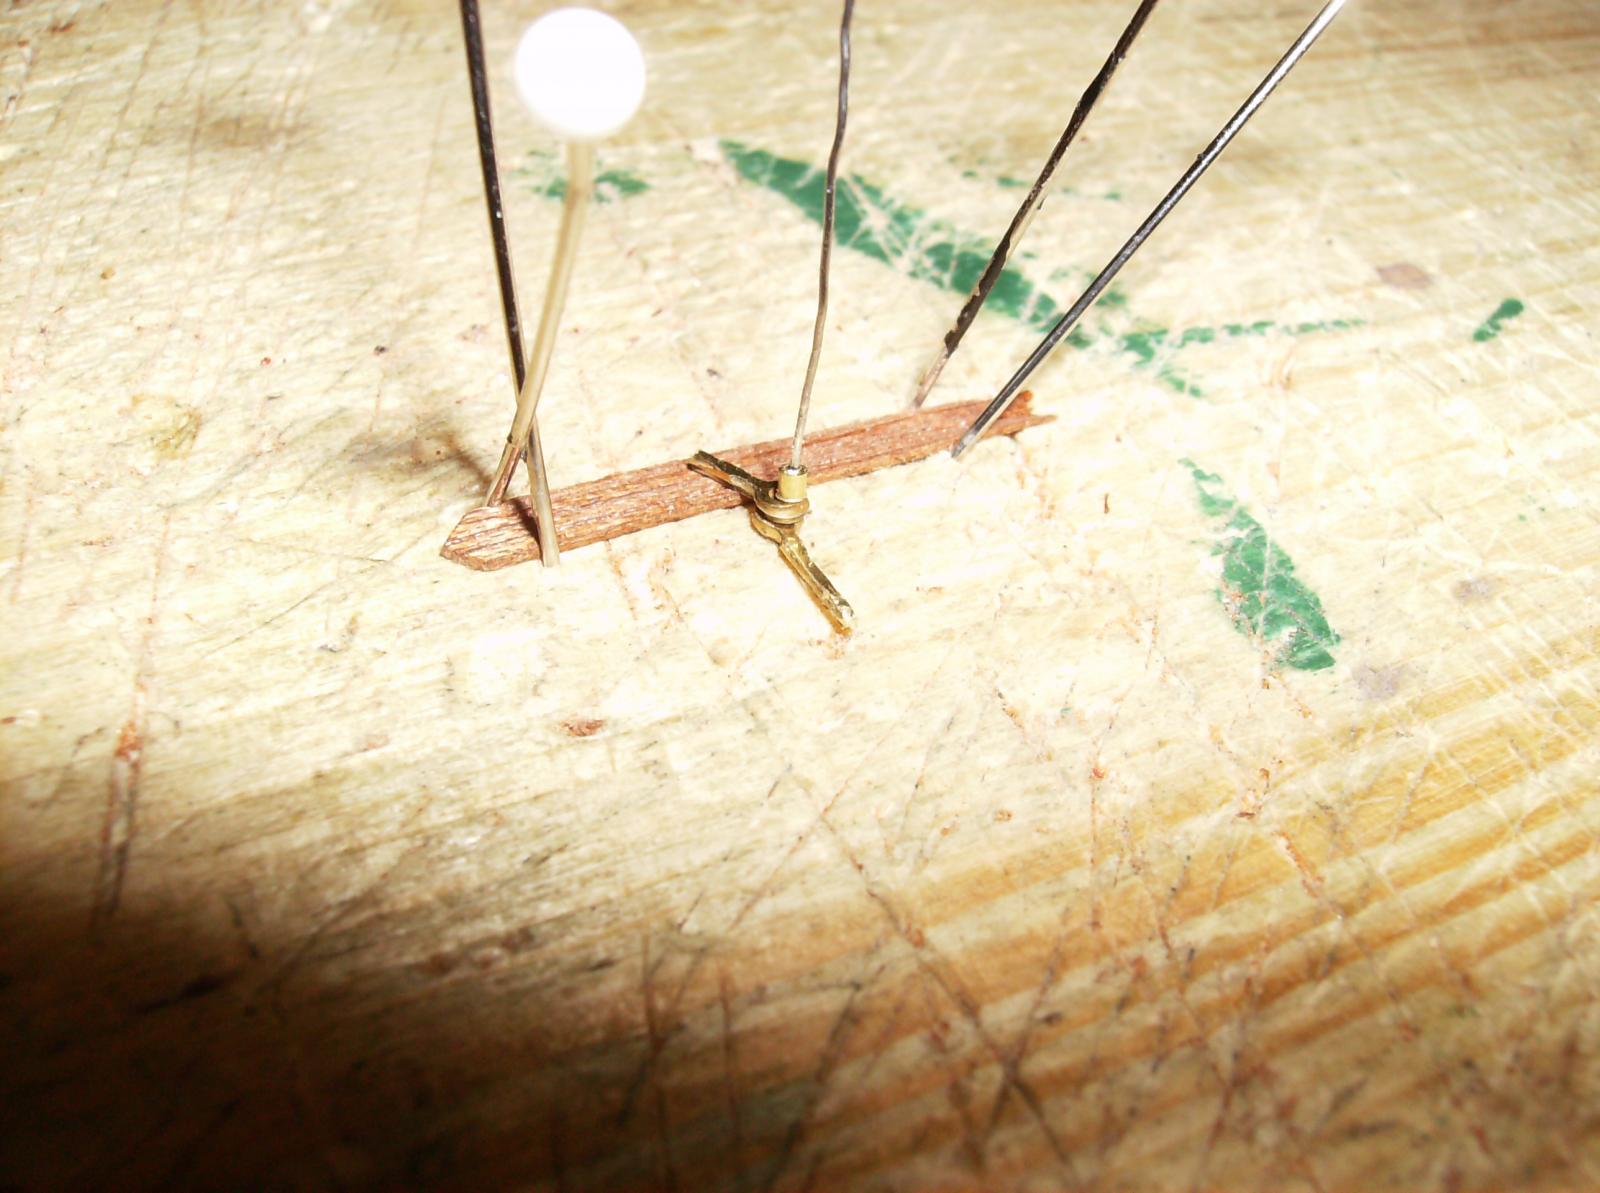
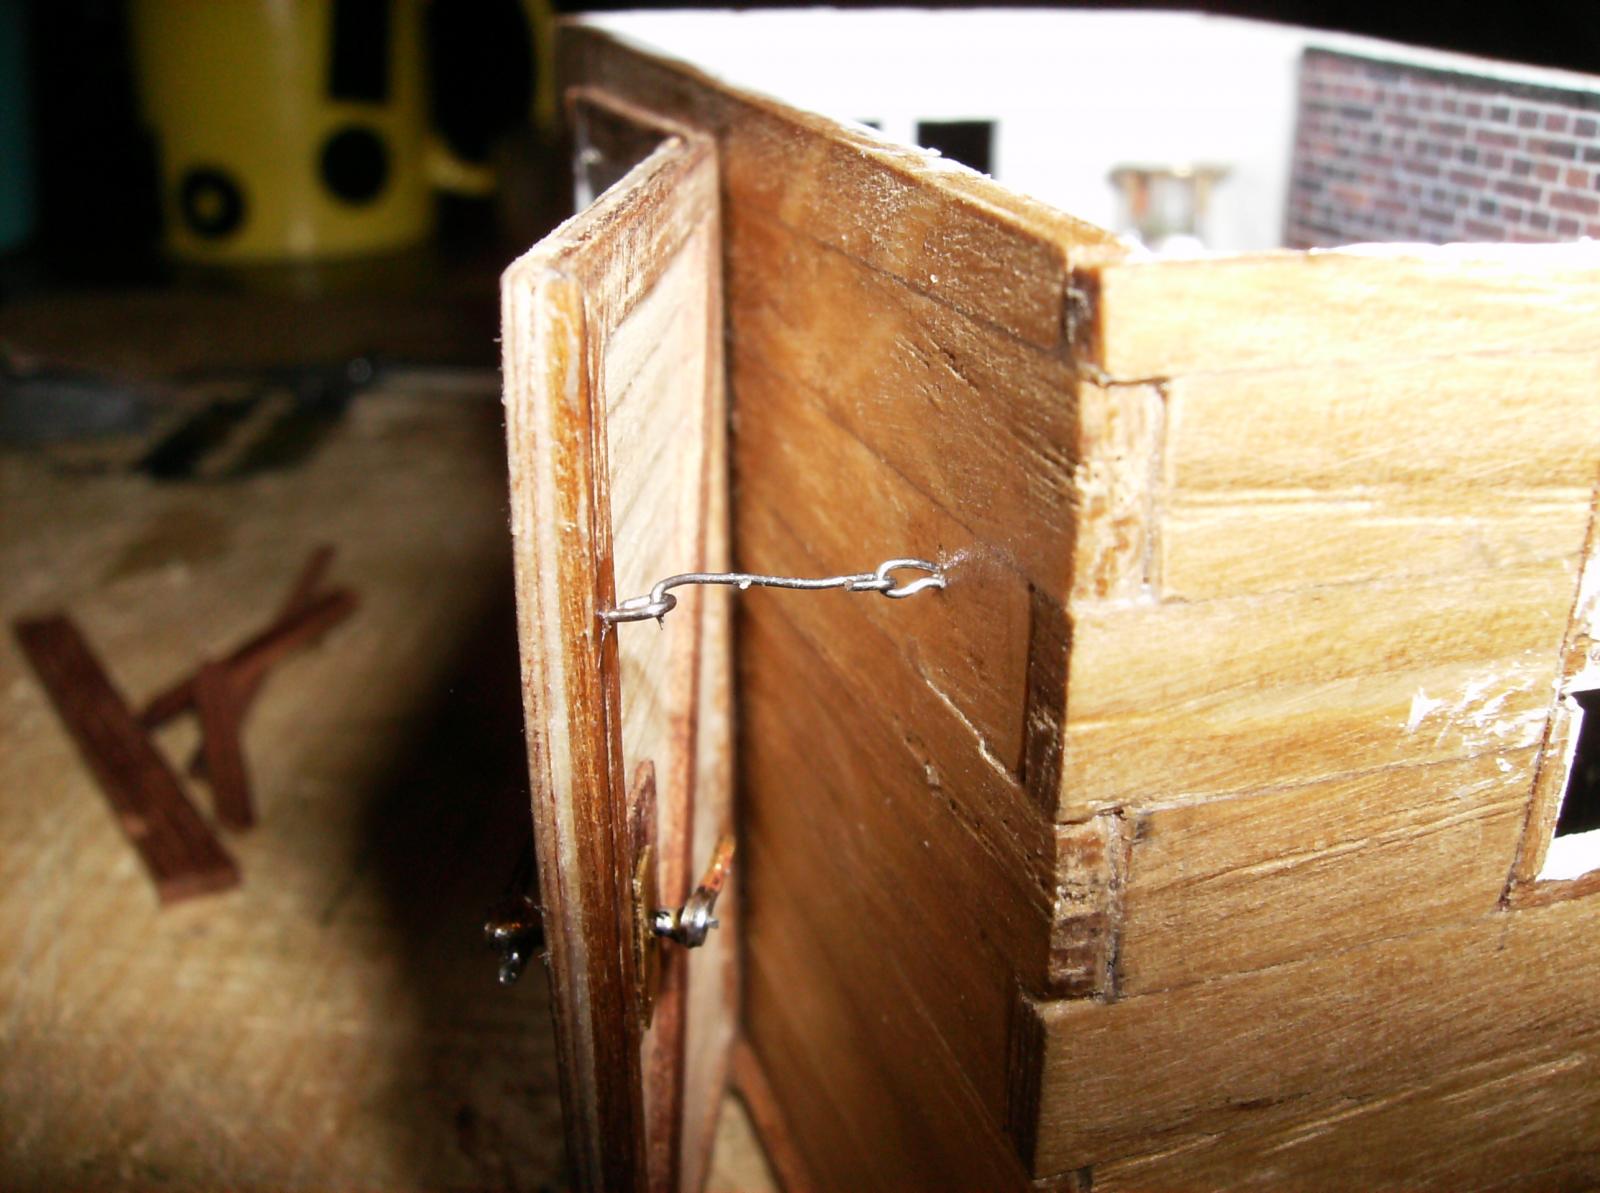
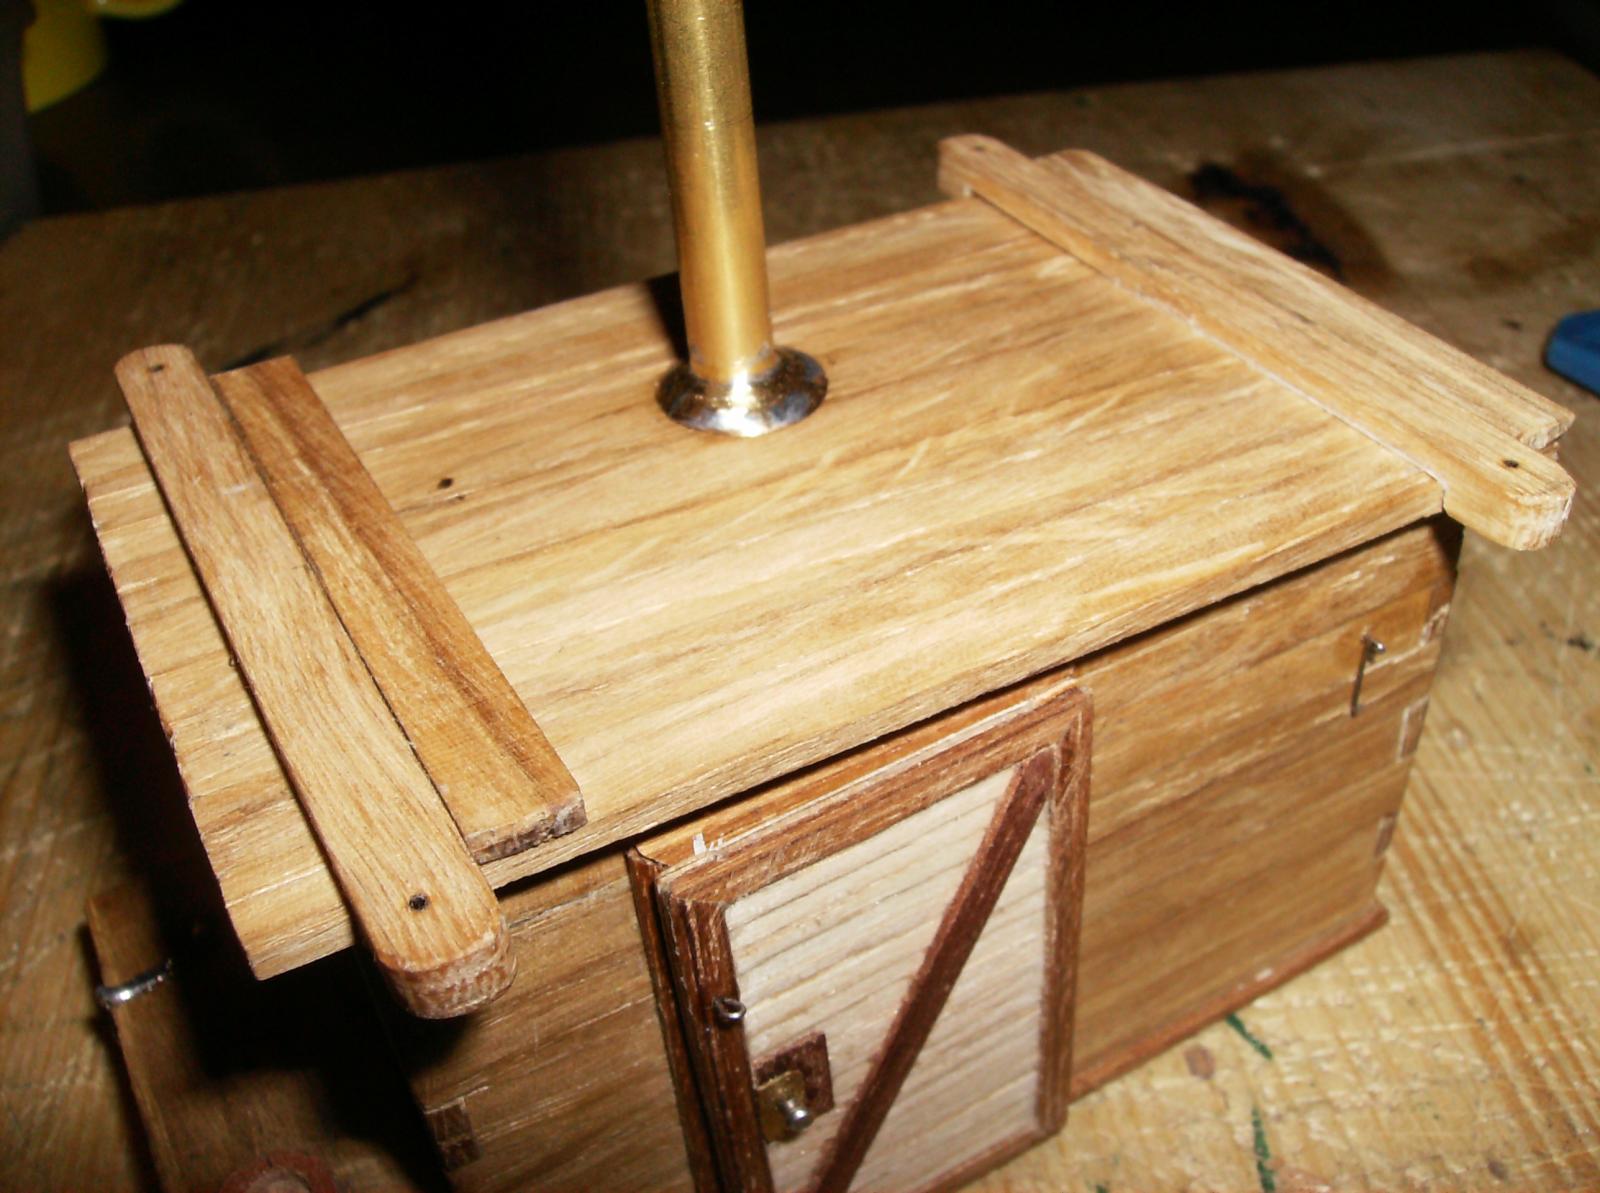
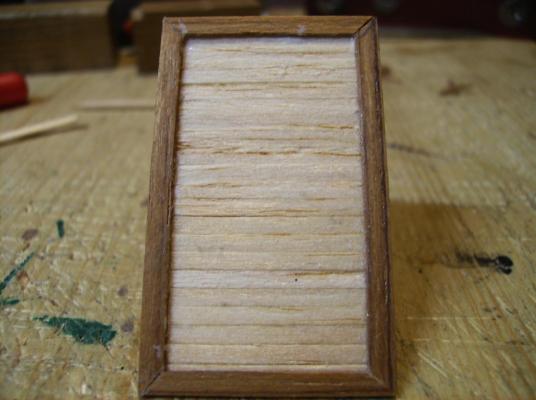
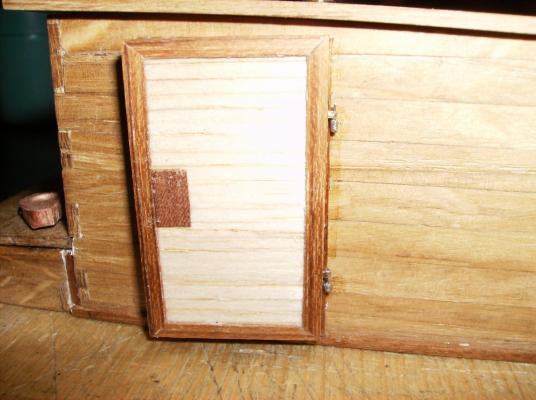
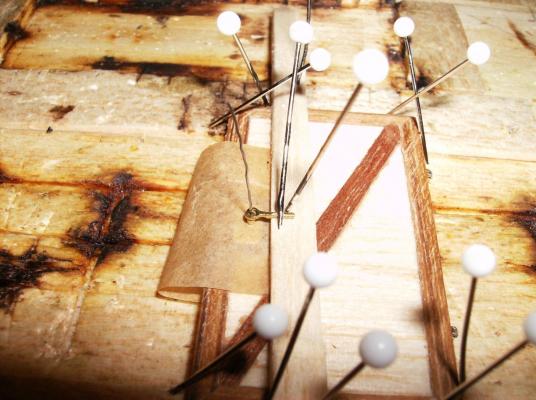
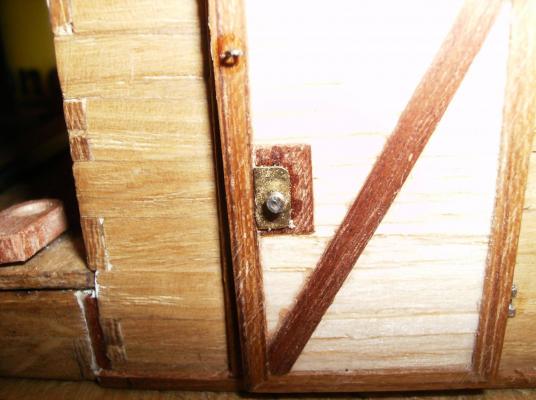
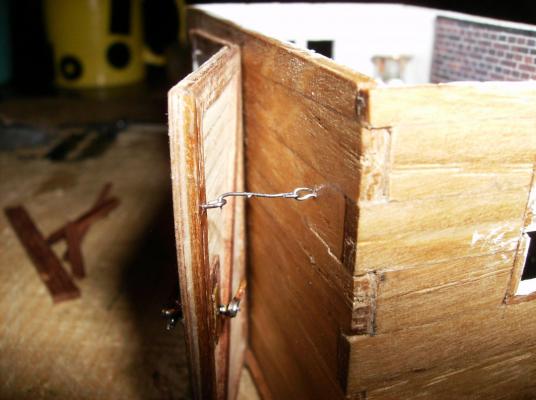
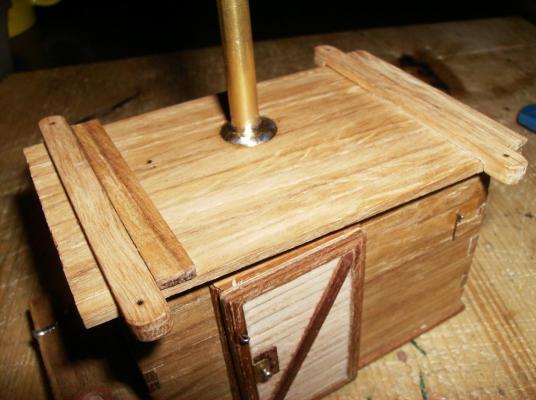
Hello to all interested, here we go again The next thing I made for the cookhouse was the door. I took some old wood of 6 x 1,5 mm that i had in stock, carved about 1 quarter out from one side, and glued then a frame from that material. This frame was then filled with 1 x 2 mm stripes from balsa wood, then i grinded the door down to ca. 1,5mm. The balsa stripes are now just 0,5 mm thick. Then I soldered hinges for the door, they are made from 1 x 0,5 mm brass tube and 0,1 mm brass stripes The hinges were glued to both door and frame, I used superglue for that, and the door was strengthened with wooden stripes Every door needs a clasp, soldering that was not really easy. A I always do, I used a bit of baking paper when I soldered the whole thing at the door. The outer door handle was transormed into a knob The door can also be held open by a hook. Two yokes were made to the roof, they will keepthe house in position, when it is fitted to the deck Best regards Gerhard


- 108 replies
-
- 11
-
-
Hi druxey The Greenwich Hospital barge has less carvings, to do that much stuff would possible take me some years. But I dont know, what will be my next after the Danzig and the Rigi. As I`m a young boy of 58, I will maybe have time for that . Regards Gerhard
- 641 replies
-
- 7
-
-
- greenwich hospital
- barge
- (and 1 more)
-
Hi All I found this drawings by searching for "Prince frederick barge" at google pics https://www.google.at/search?q=prince+frederick+barge&tbm=isch&tbo=u&source=univ&sa=X&ved=0ahUKEwjrodf_yKHLAhUG_HIKHSW1AYUQsAQIPg&biw=1270&bih=899#imgrc=_ A lot more of photos there. Regards Gerhard
- 641 replies
-
- 3
-
-
- greenwich hospital
- barge
- (and 1 more)
-
Cutty Sark by NenadM
Gerhardvienna replied to NenadM's topic in - Build logs for subjects built 1851 - 1900
Hi Nenad As Piet wrote, your on the right track! If you want to make the wheel a little thinner, build it first with the thick rings and center, and grind them later to your wanted size. Therefore lay just a piece of sanding paper on the table, lay the wheels on it and move it slightly around. So you will get the wheel to correct thickness without the danger of breaking it. That`s how I made it with all my steering wheels. Regards Gerhard- 4,152 replies
-
- 5
-
-
- cutty sark
- tehnodidakta
- (and 1 more)
-
Hi Paul As i wrote at the beginning of this report, that`s all just a review. It took me about 6 Months or so, to get all that things done. As I`m a lucky retired guy, I dont have to go to work , but at the time I`m renovating my home, so I can show only the things done until now. As W.E. Falck (he is also here in the forum) gave me as a hint, the houses of prussian warships of that period were painted white, so the cookhouse will be coloured that way. But painting the outside walls and roof will be done, when the hull is built, to keep the coluor in the same condition. The hull will be outsides painted black down to waterline, and coppered below. Will be a lot of work, to place all that copper plates on a 1,5 meters long hull! The inside paint and deck will be made as the original model from the London museum of science did show. I have permission to show that photos from the museum, but only the "low resolution" pics they show at their homepage, here is the link to the model http://www.scienceandsociety.co.uk/results.asp?search=1&screenwidth=1270&pixperpage=50&searchtxtkeys=Dantzig&lastsearchtxtkeys=&withinresults=&searchphotographer=&wwwflag=&lstformats=&lstorients=All+Orientations&captions= I will continue later with a bit more from the cookhouse, so far Regards Gerhard
-
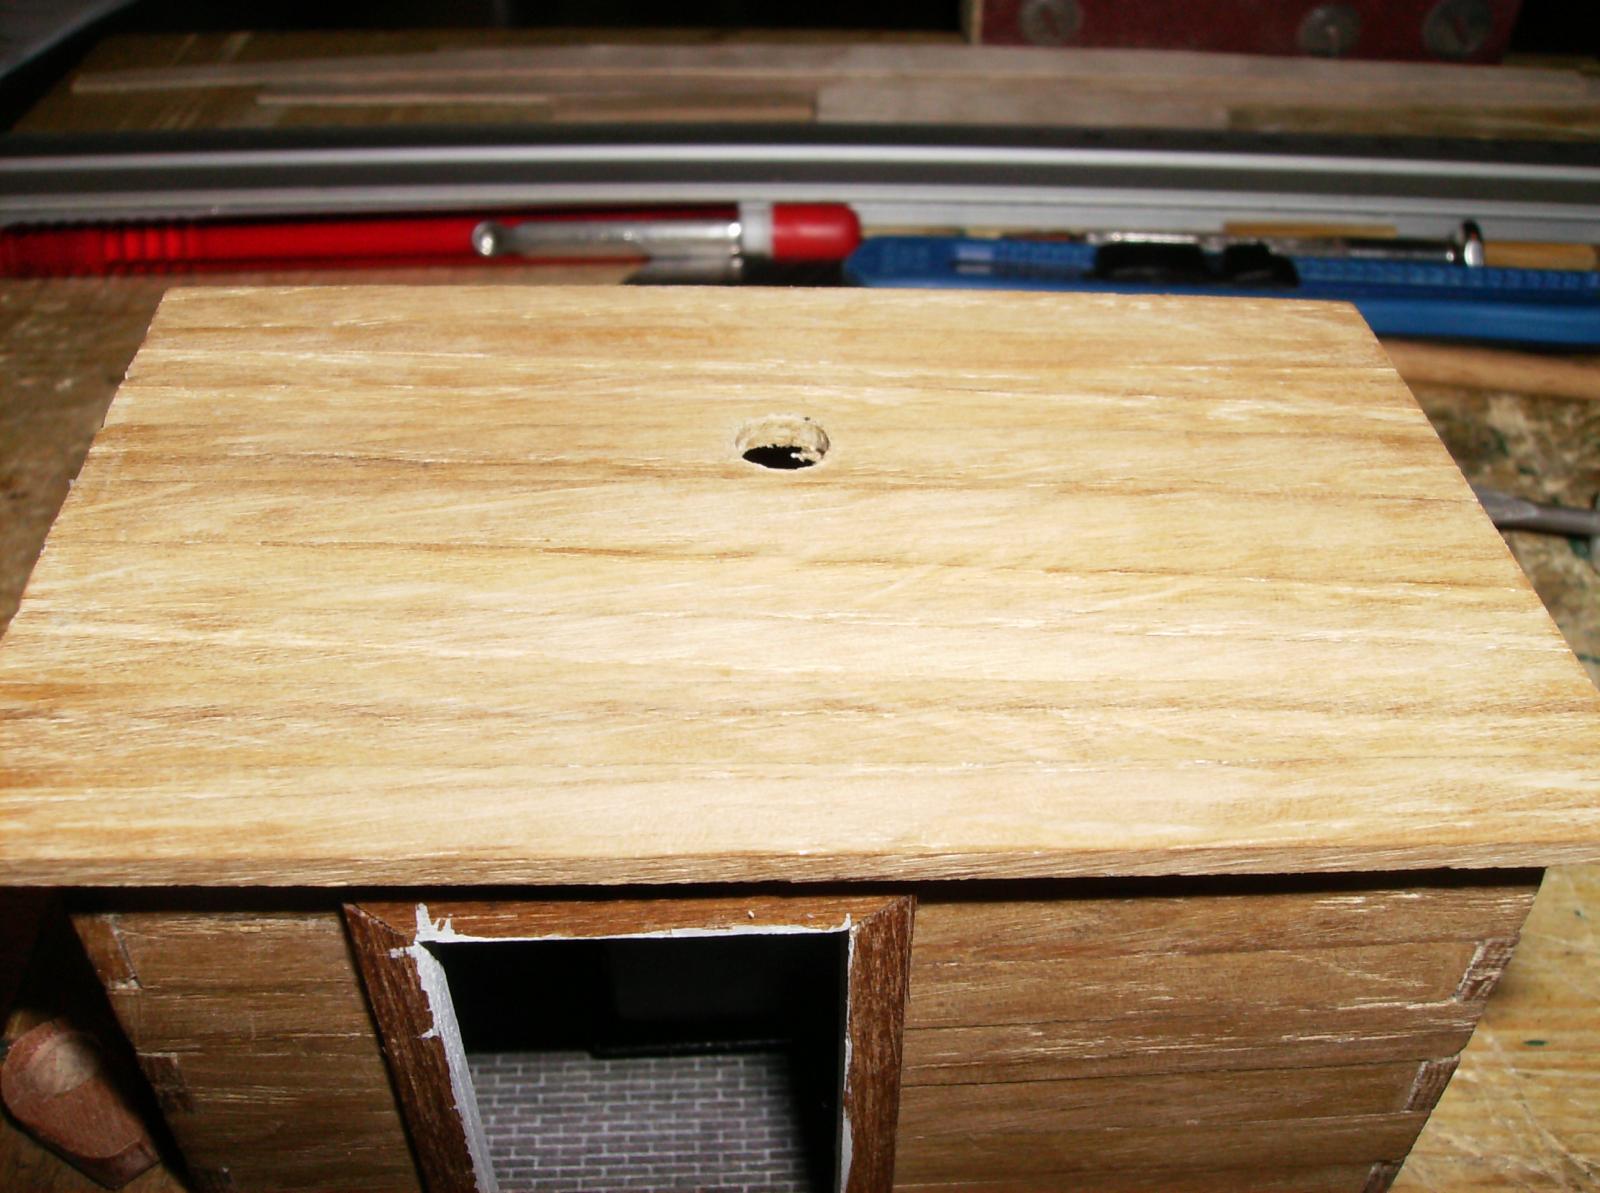
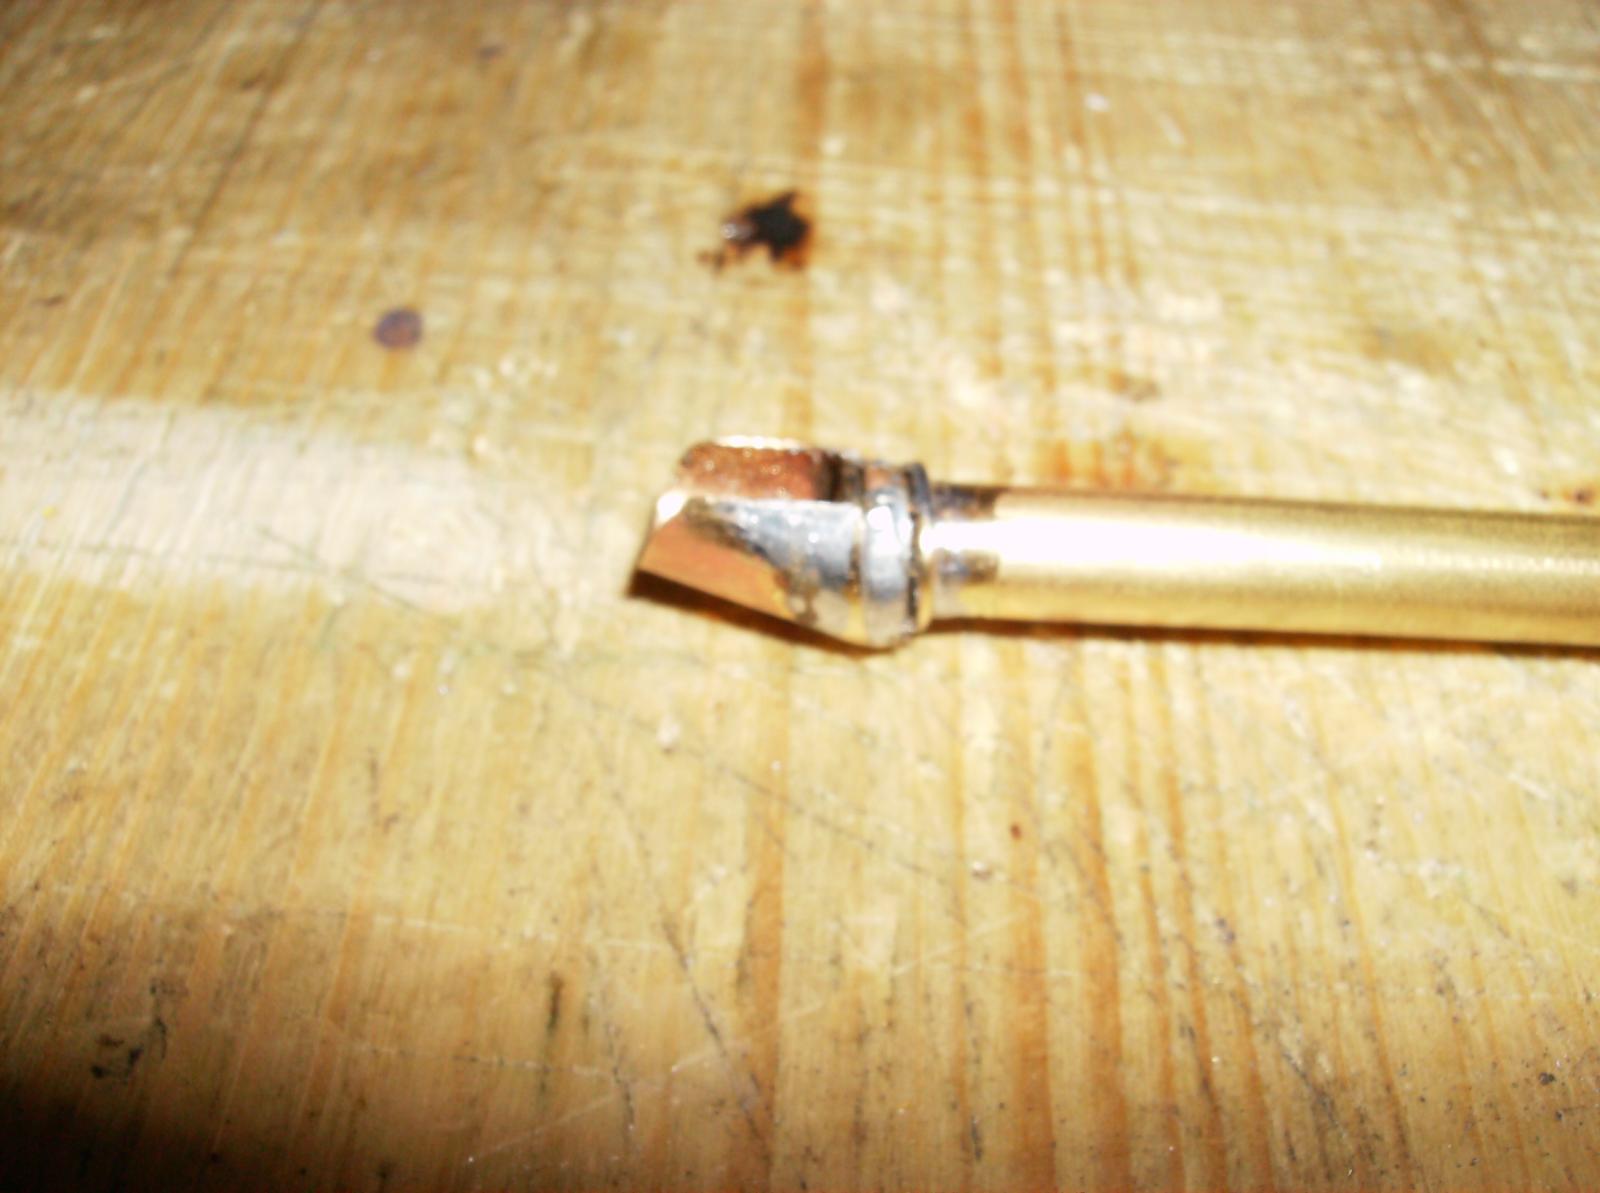
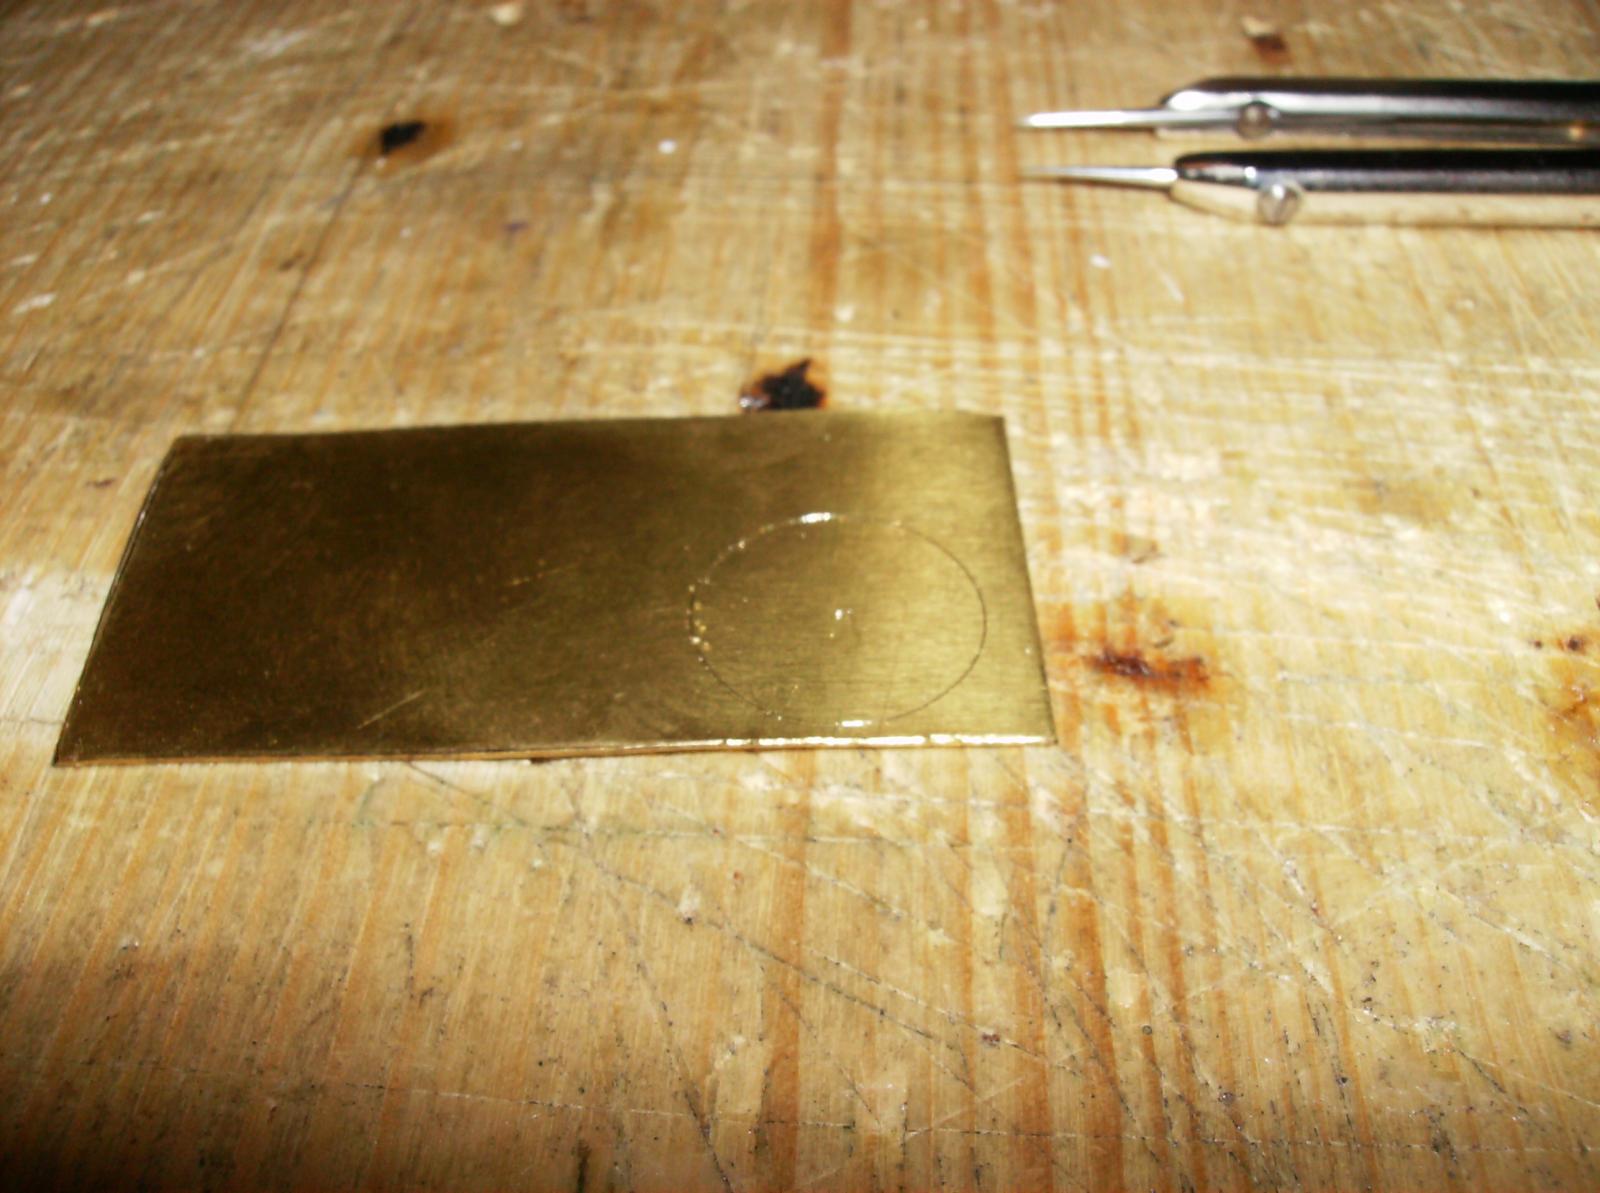
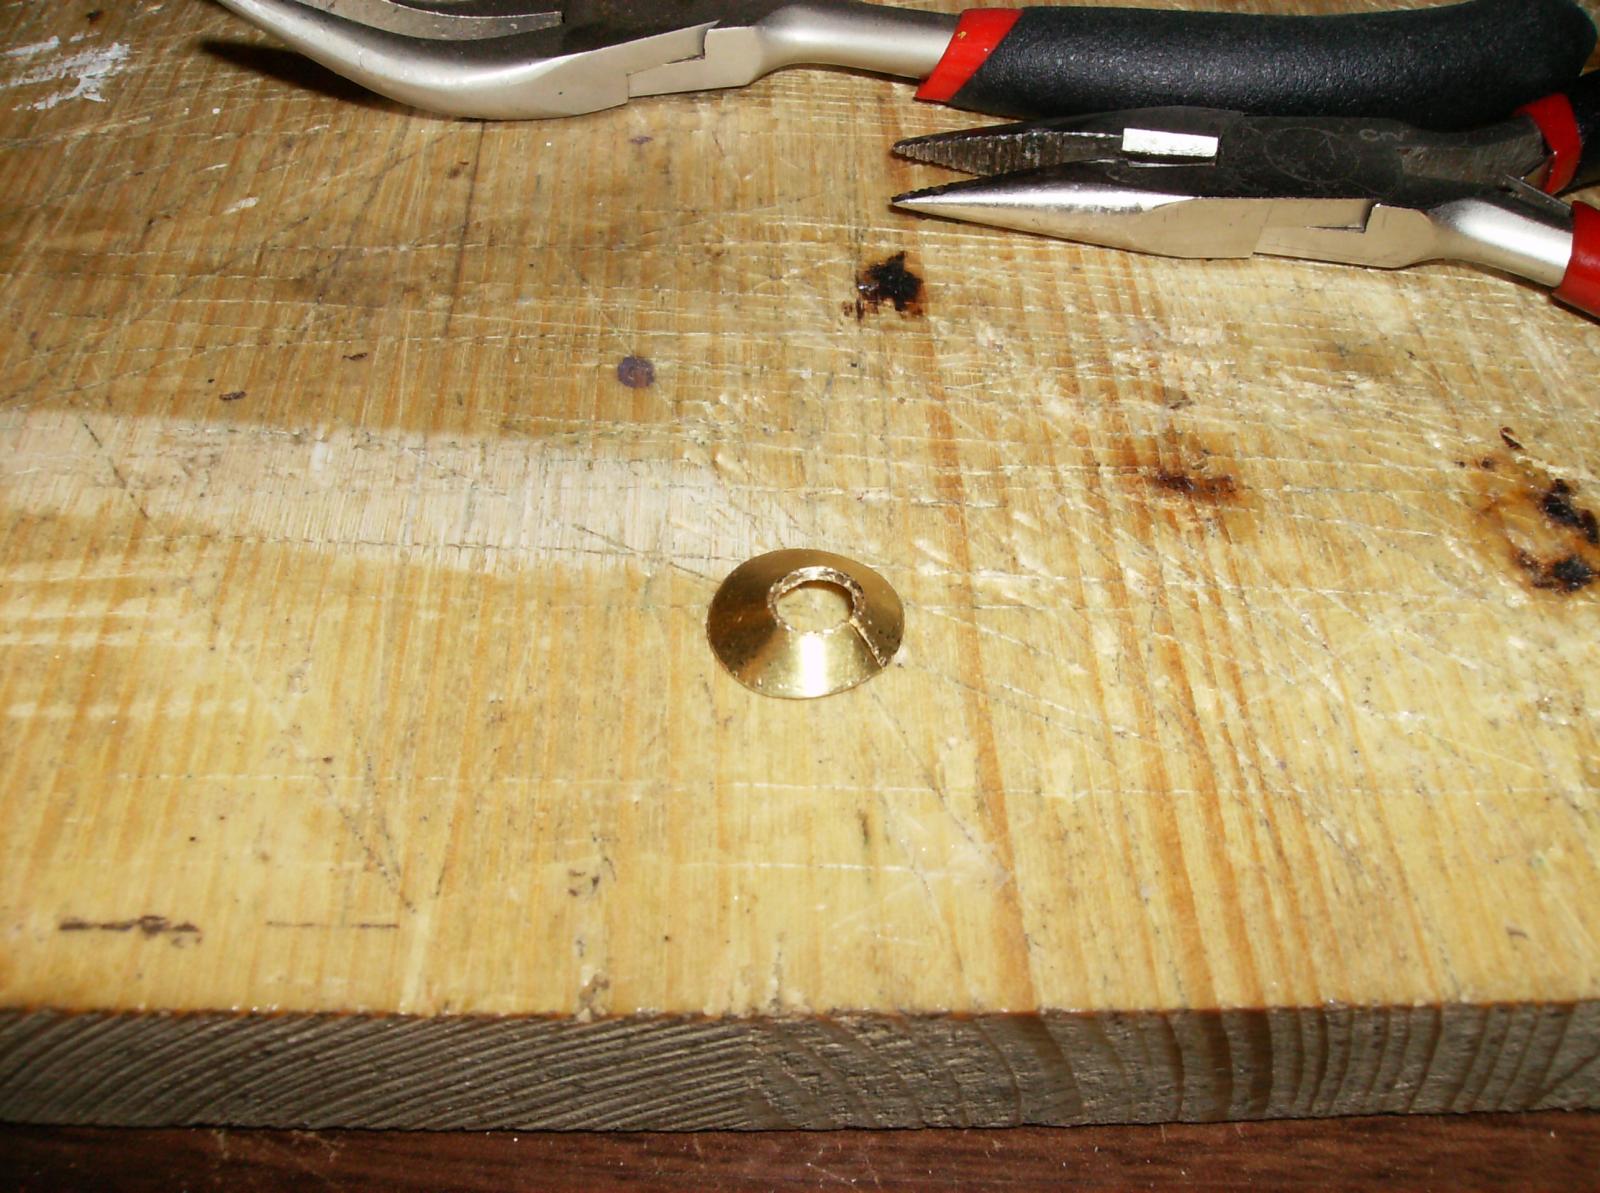
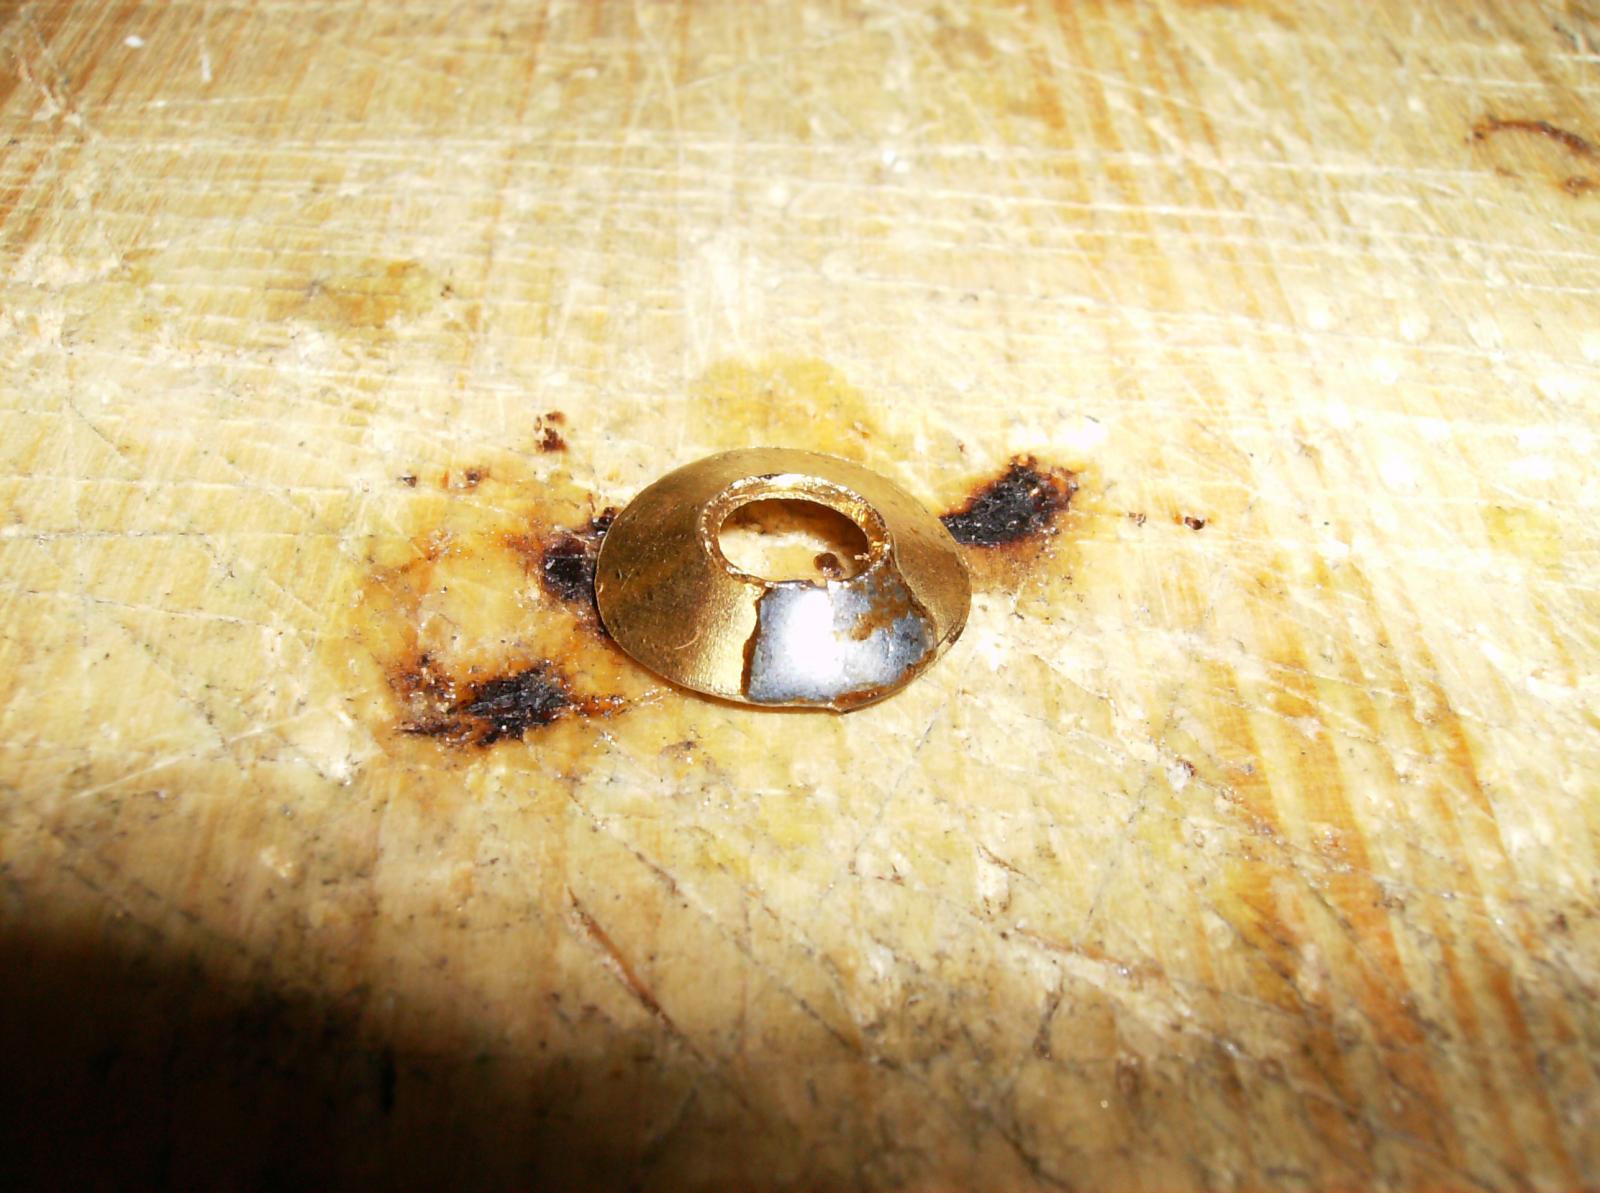
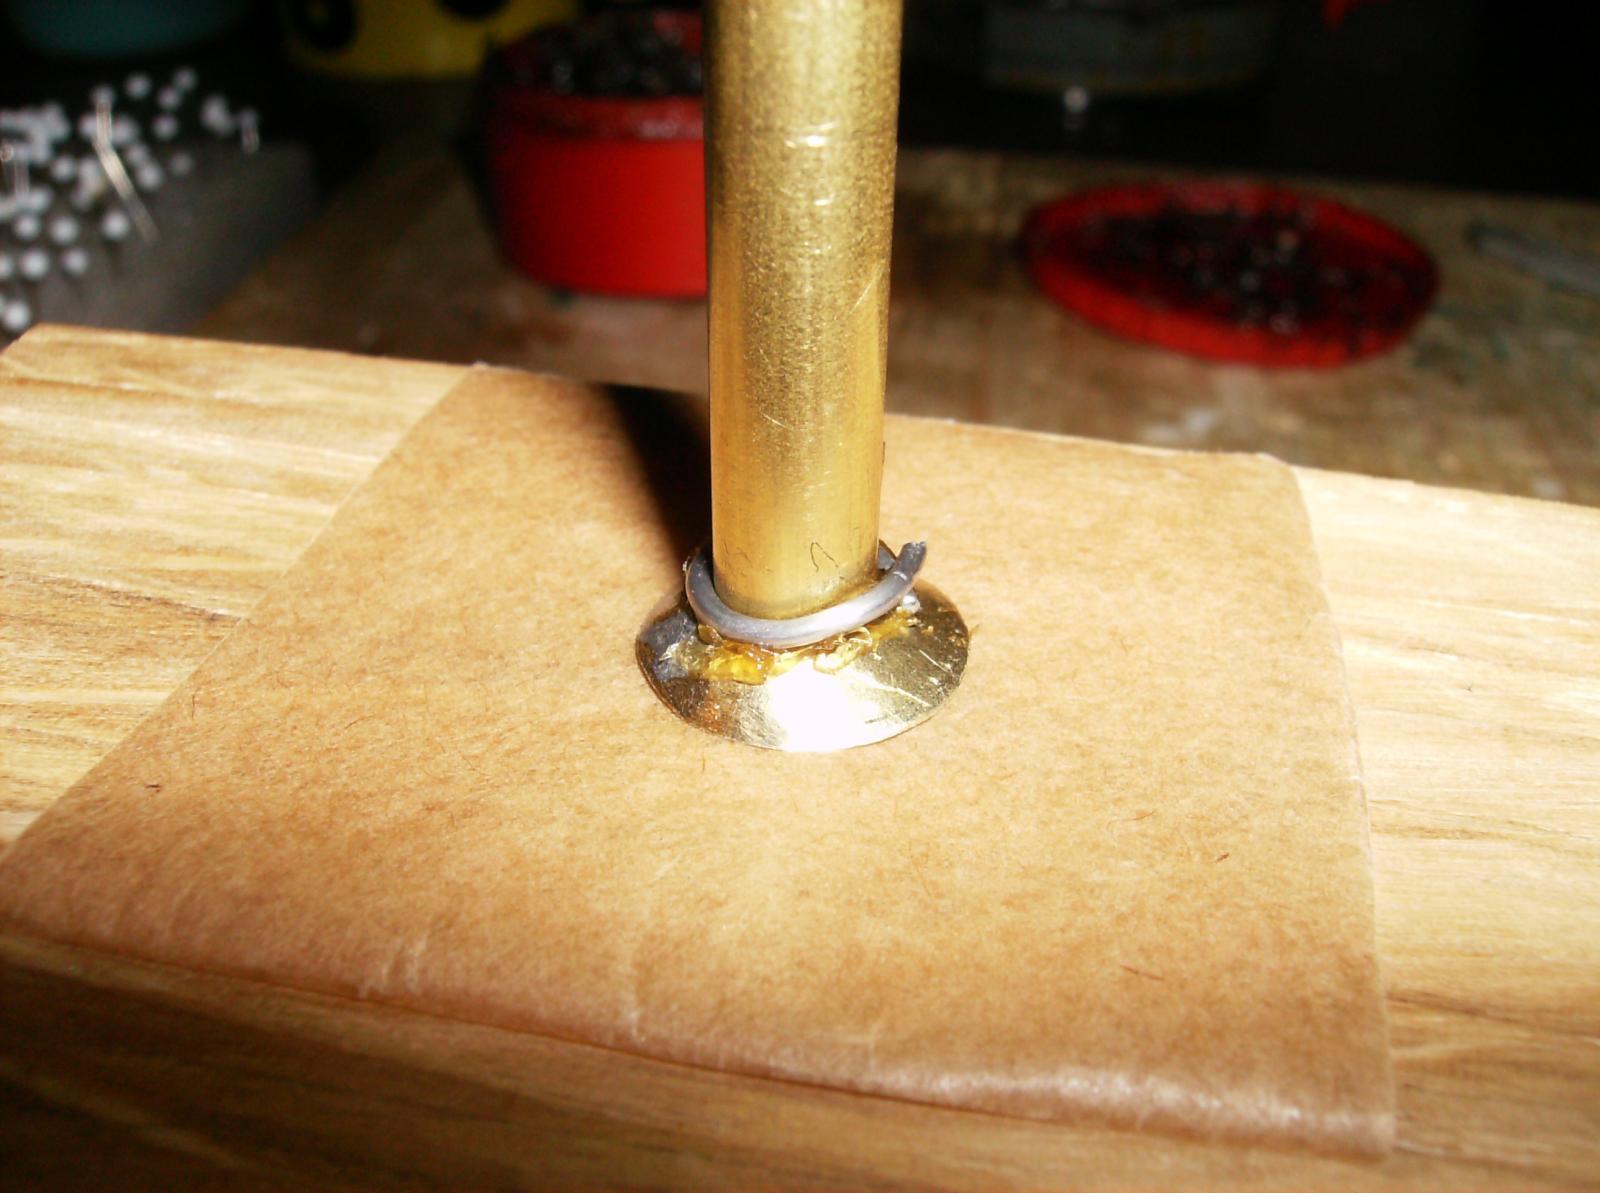
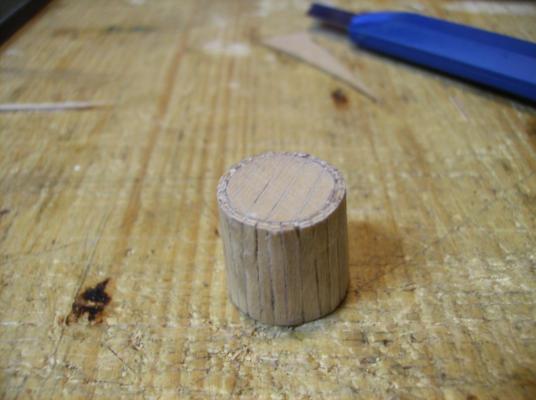
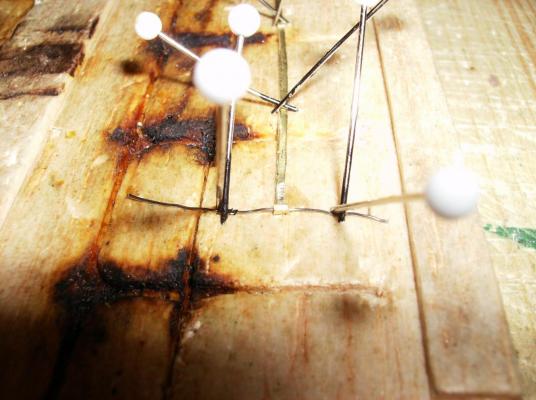
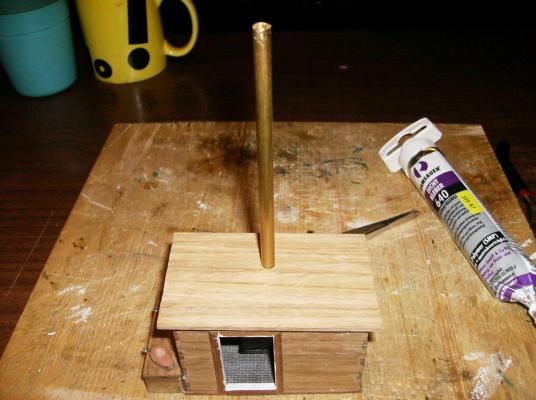
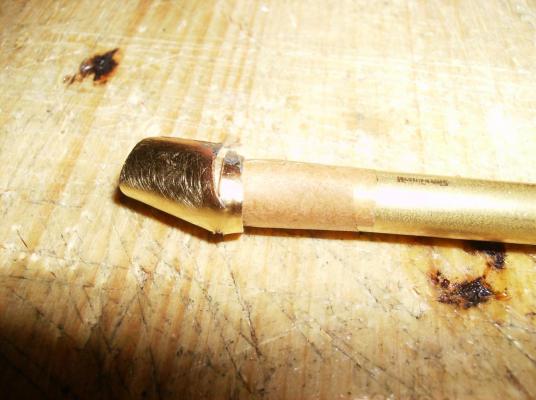
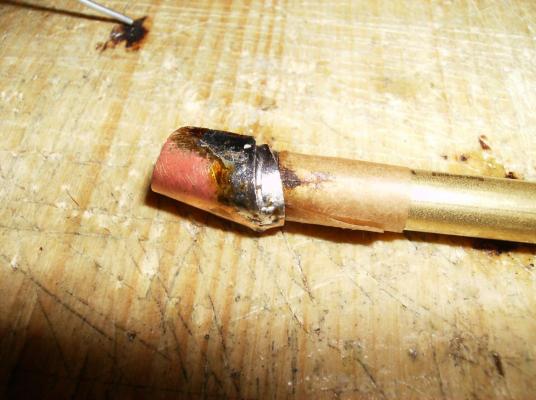
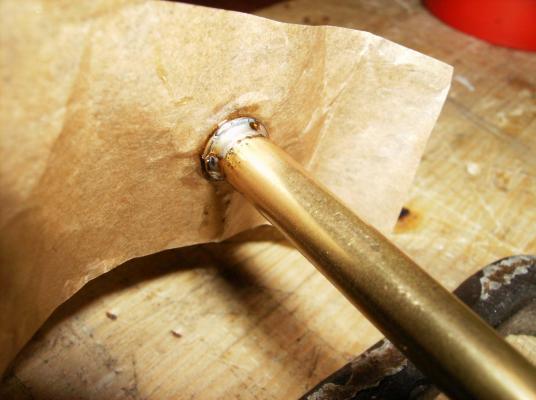
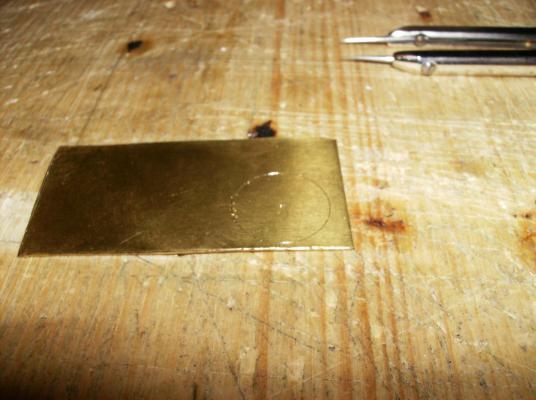
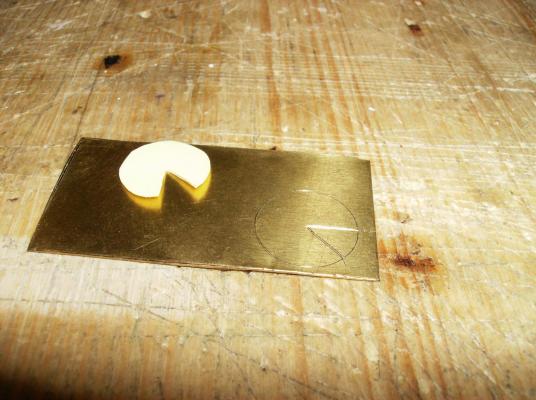
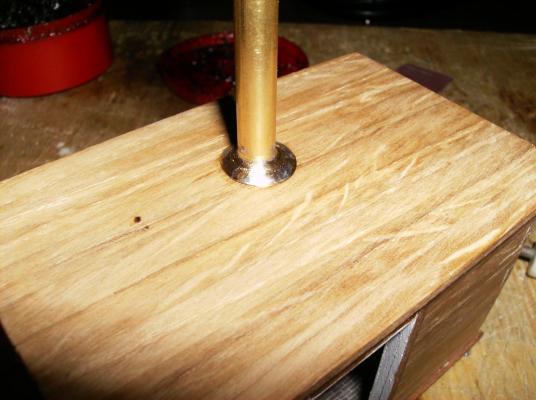
Hi again & Thank you all for watching Next to do was the chimney. I used 6 x 4 mm brass tube, a bit of brass wire and 0,1mm brass sheet for the oart of the cookhouse. First to do was tö make a rest for the chimney at the stove, this was produced with a short piece of 4 mm round wood. Then I drilled a 6 mm hole into the roof, the wooden piece was glued to the stove with that "Ramsauer" sealing glue to the stove. As next I soldered abrass ring to the top of the tube, SORRY, no photo taken from that step! After soldering the end ring I formed the cap from 0,1 mm brass sheet. I layed baking paper between the cap and the tube, so the cap kept moveable. For soldering I gave a large amount of flux to the cap, and soldered the cap with even a large amount of soldering wire. The photo shows the work after a first soldering. As last step on the top of the chimney I soldered another brass ring to the tube, here was also baking paper in use. Next thing to do was the sealing cone to the roof. I marked a ca. 16mm circle to the 0,1 mm brass sheet, marke a sector as a cutout, drilled a center hole, and soldered it to a cone. Then the cone was stuck on the tube and soldered, while the chimney was set to the roof and stove. Mark the large amount of solder flux and the ring of soldering wire aruond the tube. Evev here was baking paper used, this time to keep the roof clean. The soldered cone and the finished chimney. There is still more to come...................... Regards Gerhard


- 108 replies
-
- 12
-
-
Hi Carl Here is one, https://www.royalcollection.org.uk/collection/69797/royal-barge, just klick the pics, as nr. 8 comes one shot of the inside. Regards Gerhard PS.: Just found that wonderful drawings, maybe from a reconstruction of the barge. http://www.clairescully.com/editorial/#/national-maritime-museum/
- 641 replies
-
- 4
-
-
- greenwich hospital
- barge
- (and 1 more)
-
Cutty Sark by NenadM
Gerhardvienna replied to NenadM's topic in - Build logs for subjects built 1851 - 1900
Hi Nenad Not challenge, but maybe exeeding limits ........... To be serious, the only limit is, what you expect for yourself. Things can be done by trying only. BUT; When I look at your former posts, you have made some really difficult things before, so this wheel will not hold you back, as I believe! Regards Gerhard- 4,152 replies
-
- 8
-
-
- cutty sark
- tehnodidakta
- (and 1 more)
-
Hi Druxey Thank you for this info! Is saved for "further use" Regards Gerhard
- 641 replies
-
- 2
-
-
- greenwich hospital
- barge
- (and 1 more)