HOLIDAY DONATION DRIVE - SUPPORT MSW - DO YOUR PART TO KEEP THIS GREAT FORUM GOING! (Only 64 donations so far out of 49,000 members - C'mon guys!)
×


Gerhardvienna
-
Posts
683 -
Joined
-
Last visited
Content Type
Profiles
Forums
Gallery
Events
Everything posted by Gerhardvienna
-
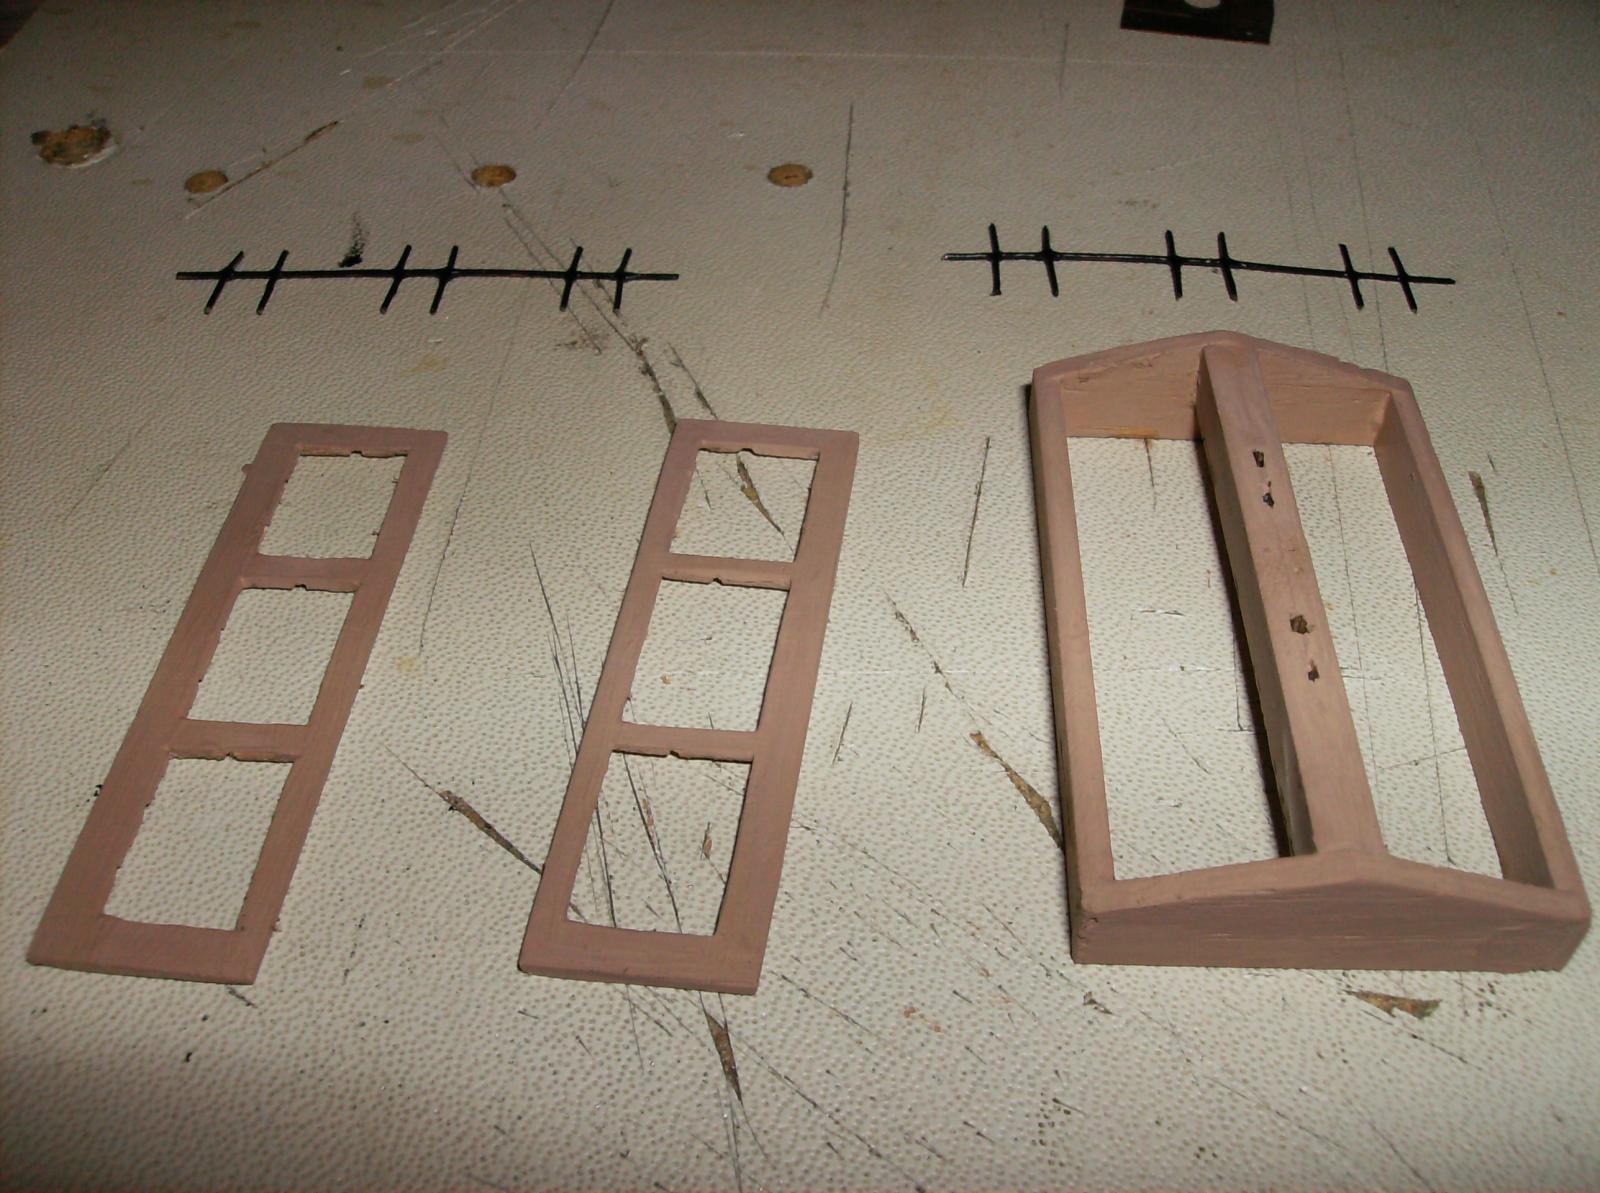
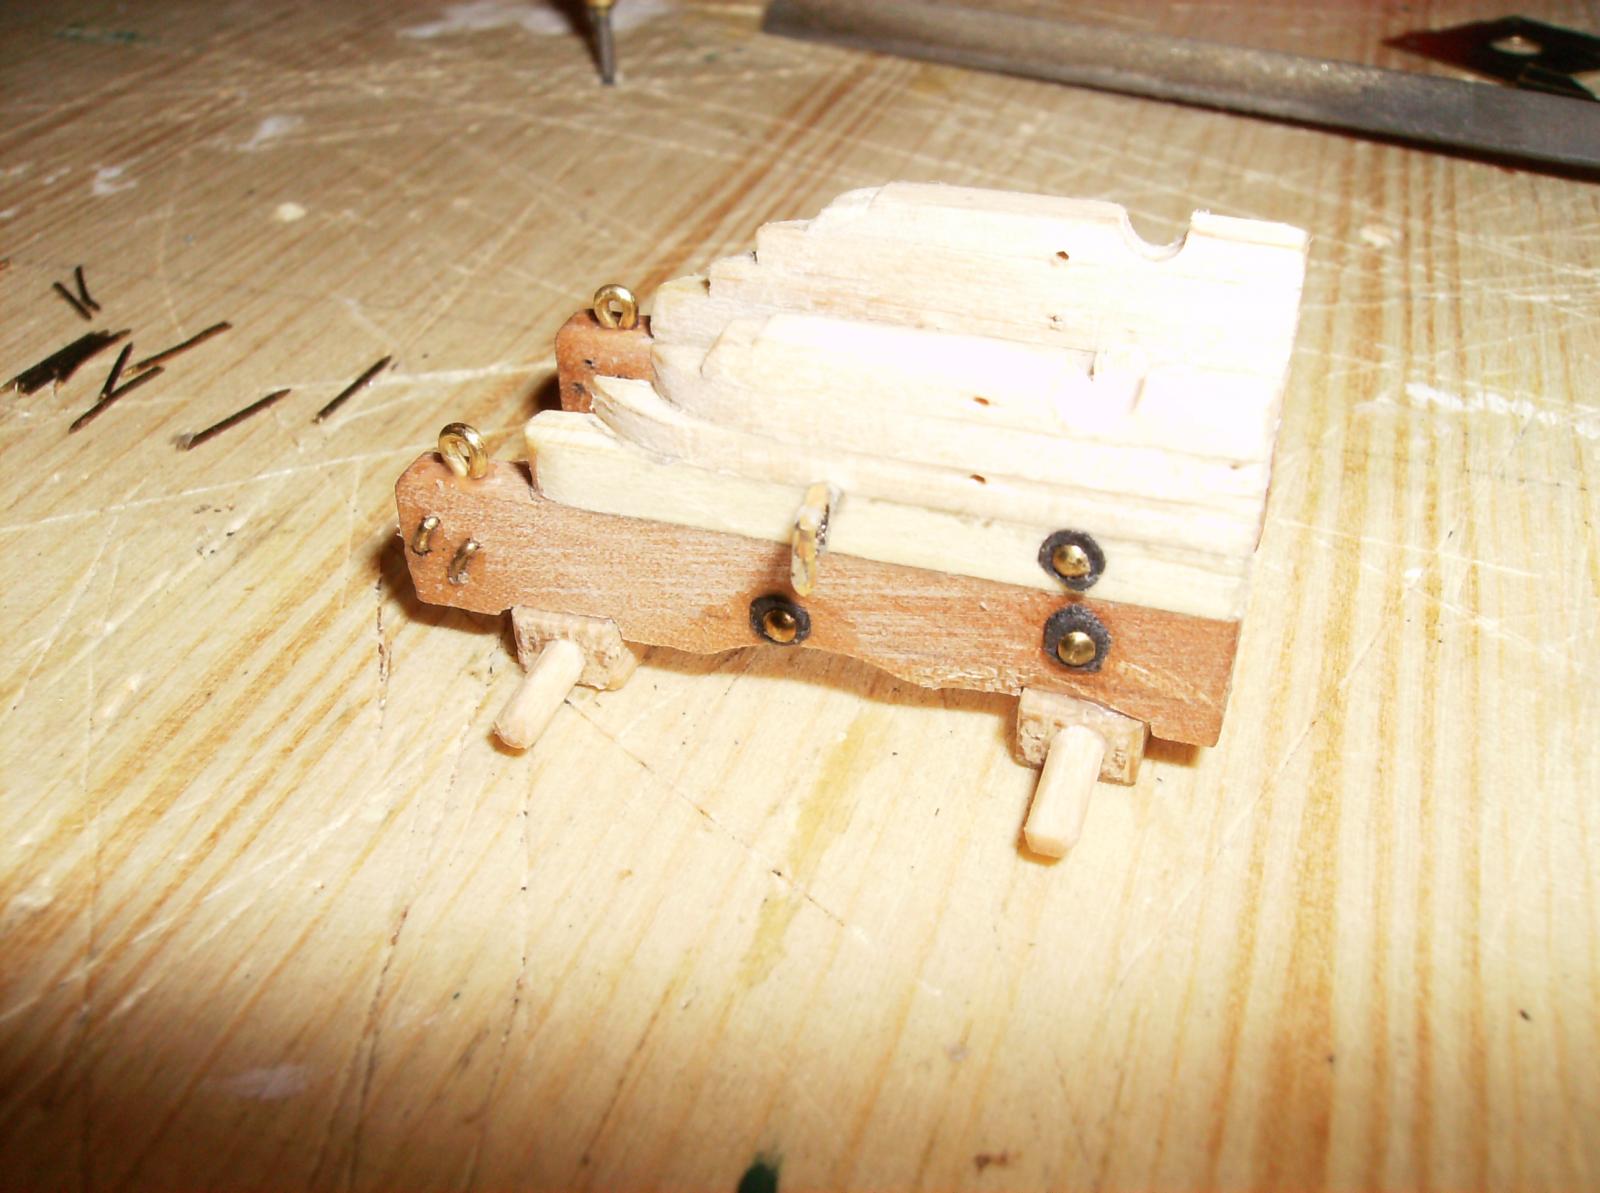
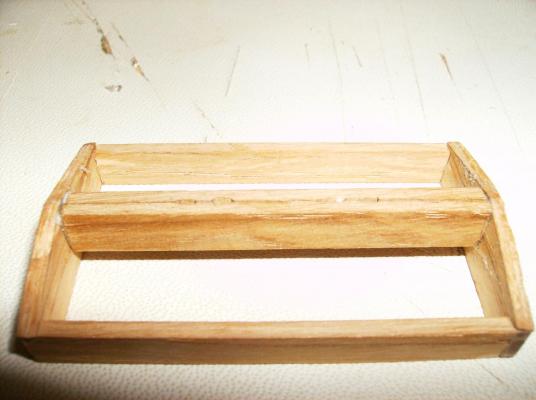
Well, here comes even more of it! Today I made the second grill, painted all parts and prepared the small items for the hinges. The wooden parts of the skylight are painted with a mixture of 5 parts dark brown, 5 parts of white, and 2 parts of yellow revell colours, all in matt. More about the hinges will come in next post......... Thank you all for coming in, and thank you once more for your likes! Regards Gerhard
- 293 replies
-
- 11
-

-
Hi Mark The galleries are the most difficult parts on such a ship. Good luck for this, the beginning looks good at the moment! Regards Gerhard
-
I would expect clincer floor, maybe you could take a look at this https://www.mtextur.com/materials/12105?locale=de-CH I made the floor for the SMS DANZIG kitchen as a clincered one, just printed one out after scaling to right dimensions. Regards Gerhard
-
Hi Elijah You must create an account at the german forum, to see the photos, without there is no way to see them. There are a lot of good infos, not only for your built, but also about common things as rope making, rigging, and really great examples of models. As is HERE!!!! Regards Gerhard
- 701 replies
-
- 4
-
-
- phantom
- model shipways
- (and 1 more)
-
Hi Popeye Thank You! But this is not even the half way, there are so much more things to do, but at the time I`ve no room to get to my machinery. Lathe and milling machine are closed for my home renovation, I hope within the next two weeks i can reopen all, and turn all that little rollers I need for the davits. Days will be filled then with a lot of work on two boats, I can`t get bored from doing nothing ! Regards Gerhard
-
Hi Clarence Lovley build, I like that. The pilots hous with its interior is another important part, and the piles make the model live! Regards Gerhard
-
Hi Nils Good to see you`re back! Fine soldering work on that mast, will be some work to rigg this! Regards Gerhard
- 2,625 replies
-
- 6
-
-
- kaiser wilhelm der grosse
- passenger steamer
- (and 1 more)
-
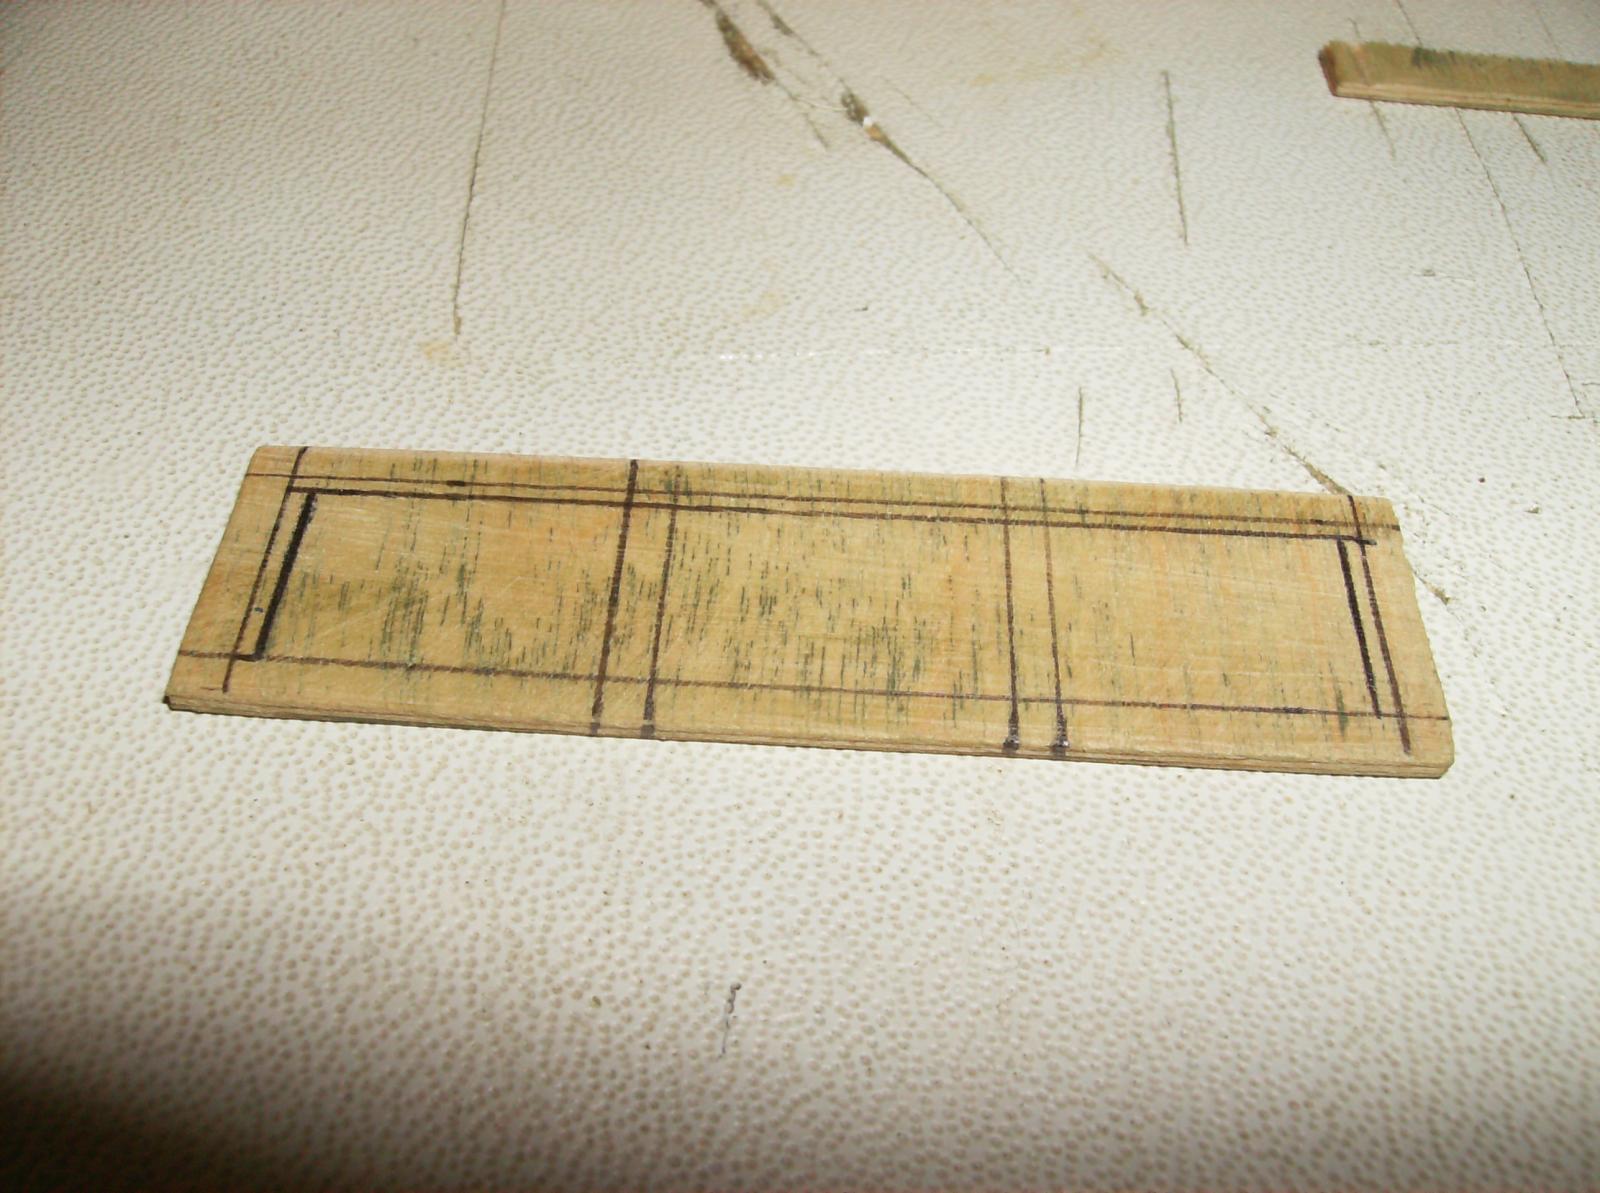
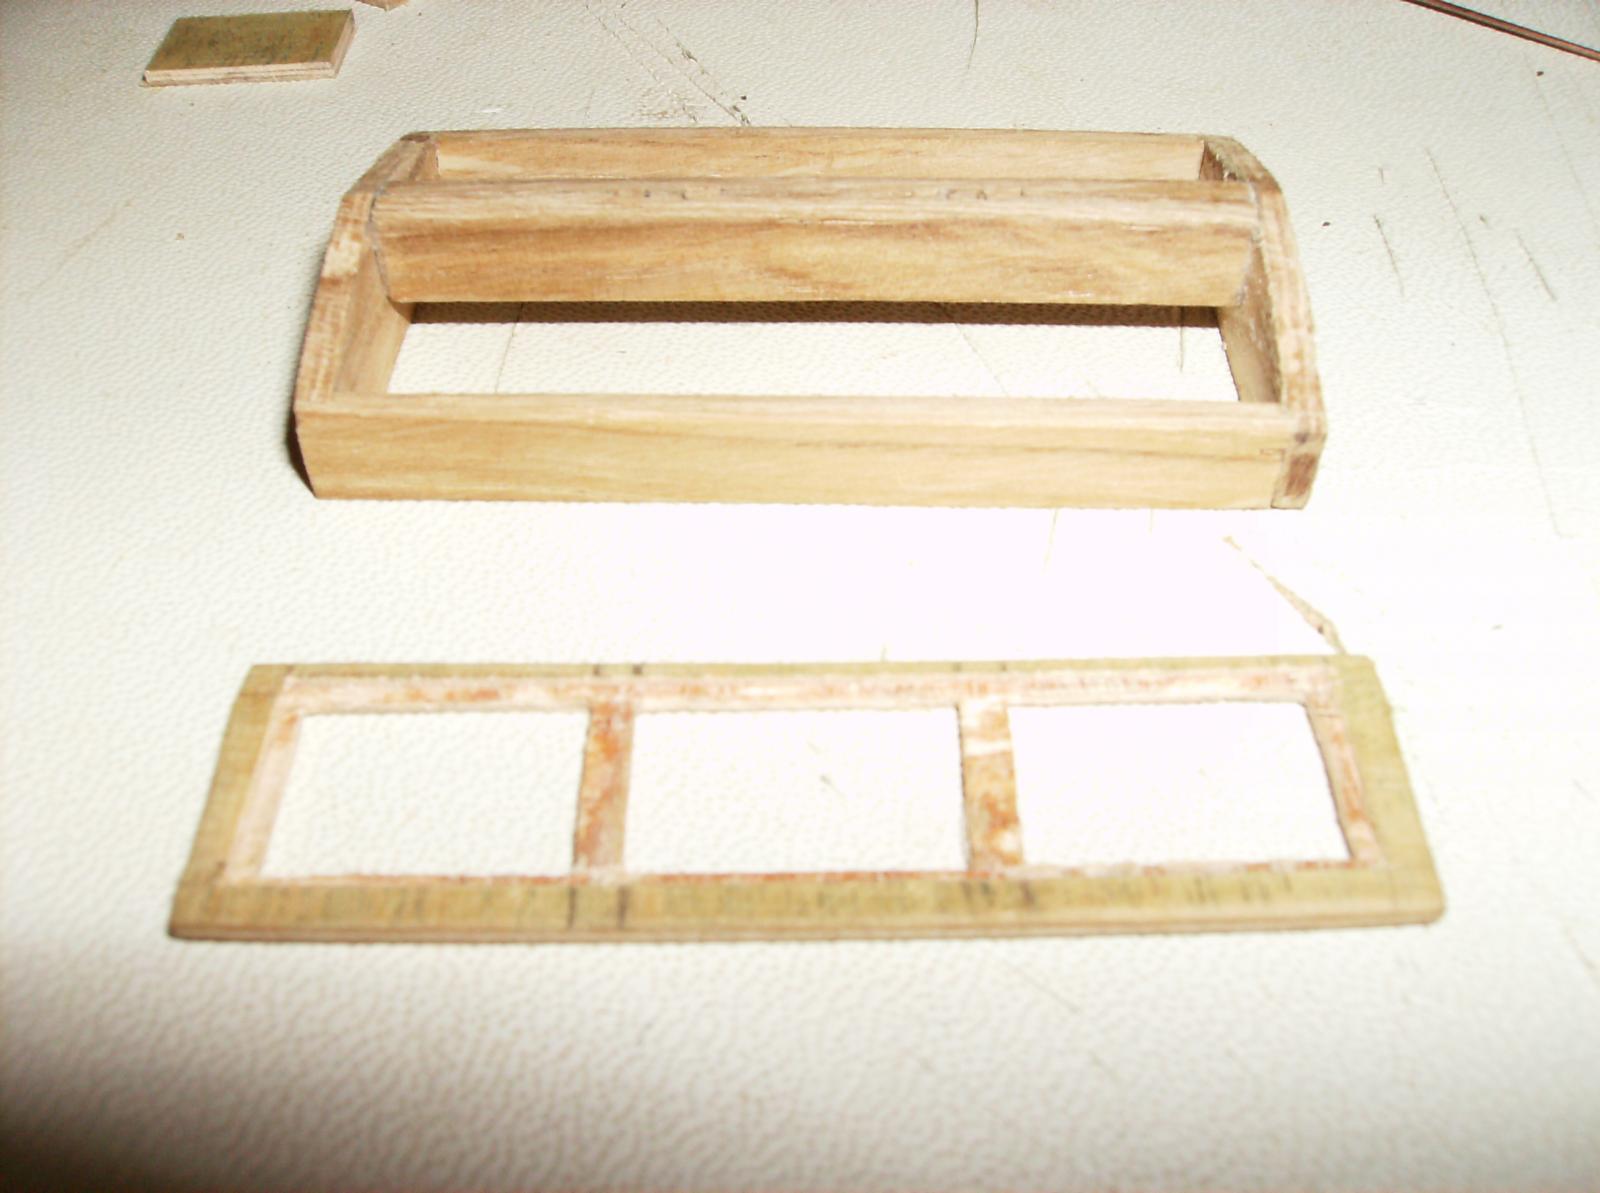
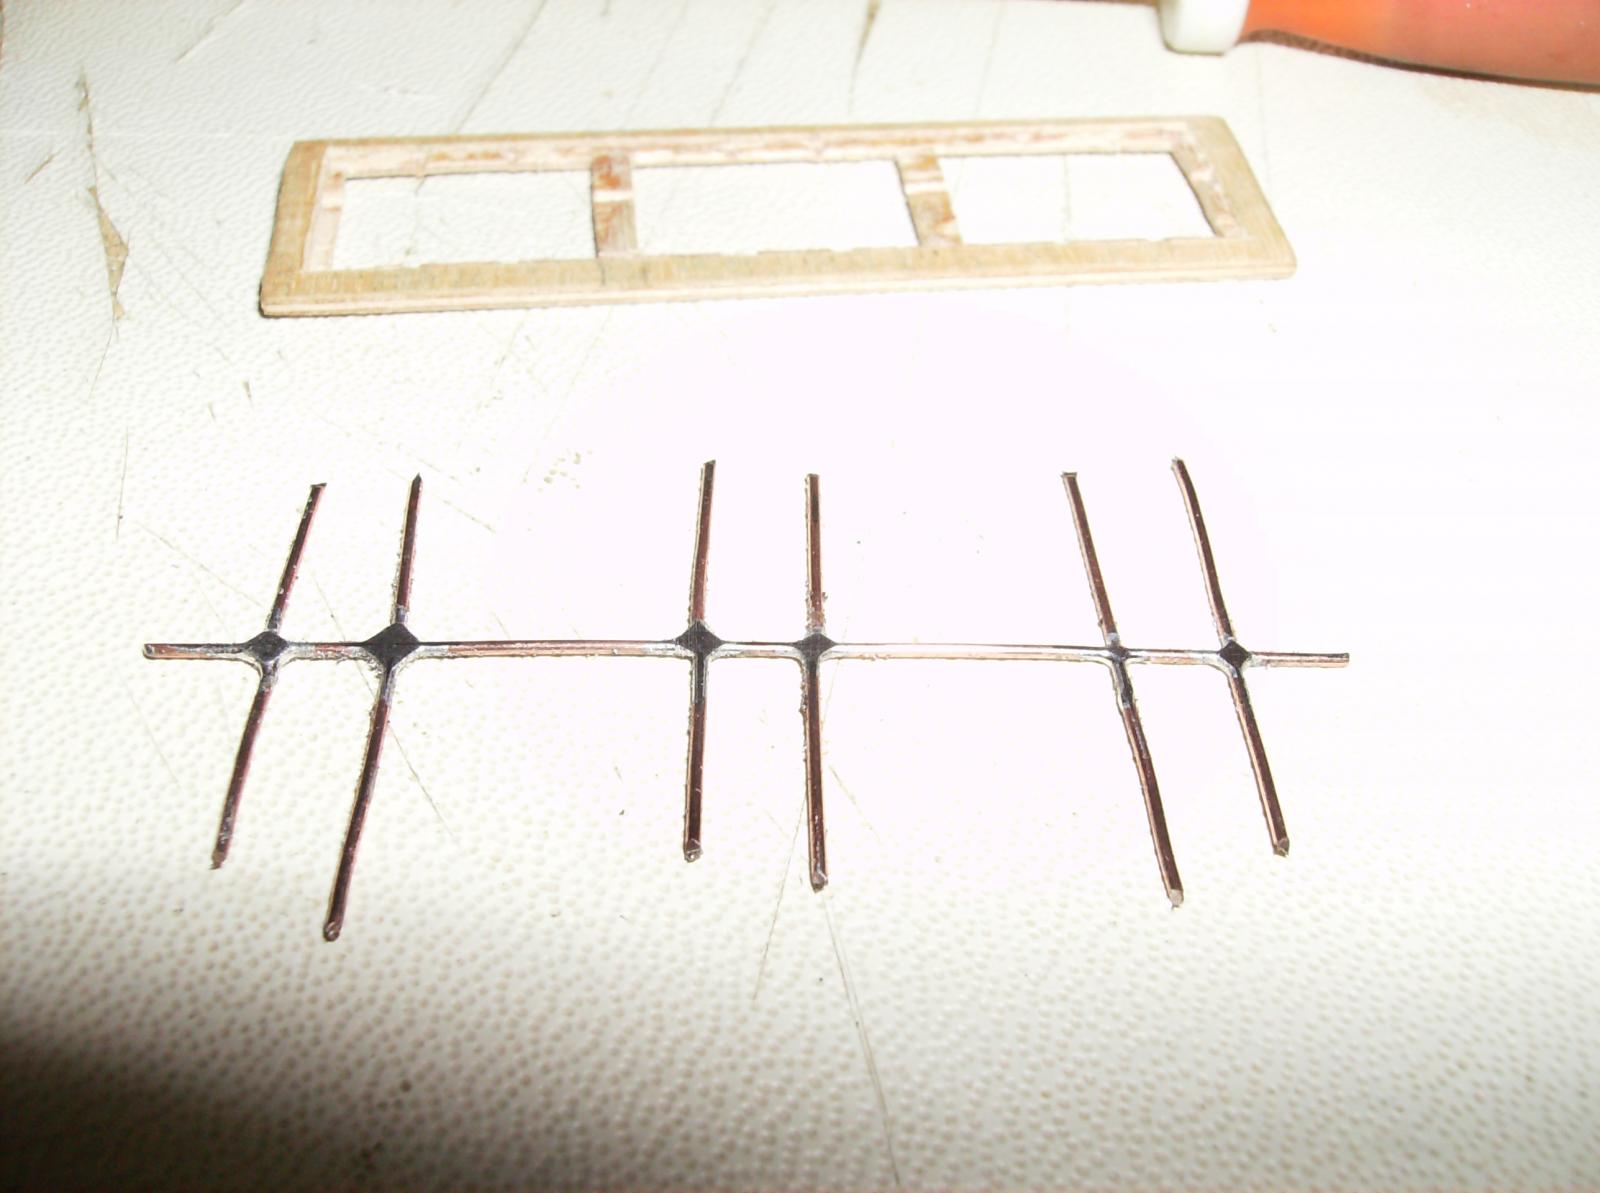
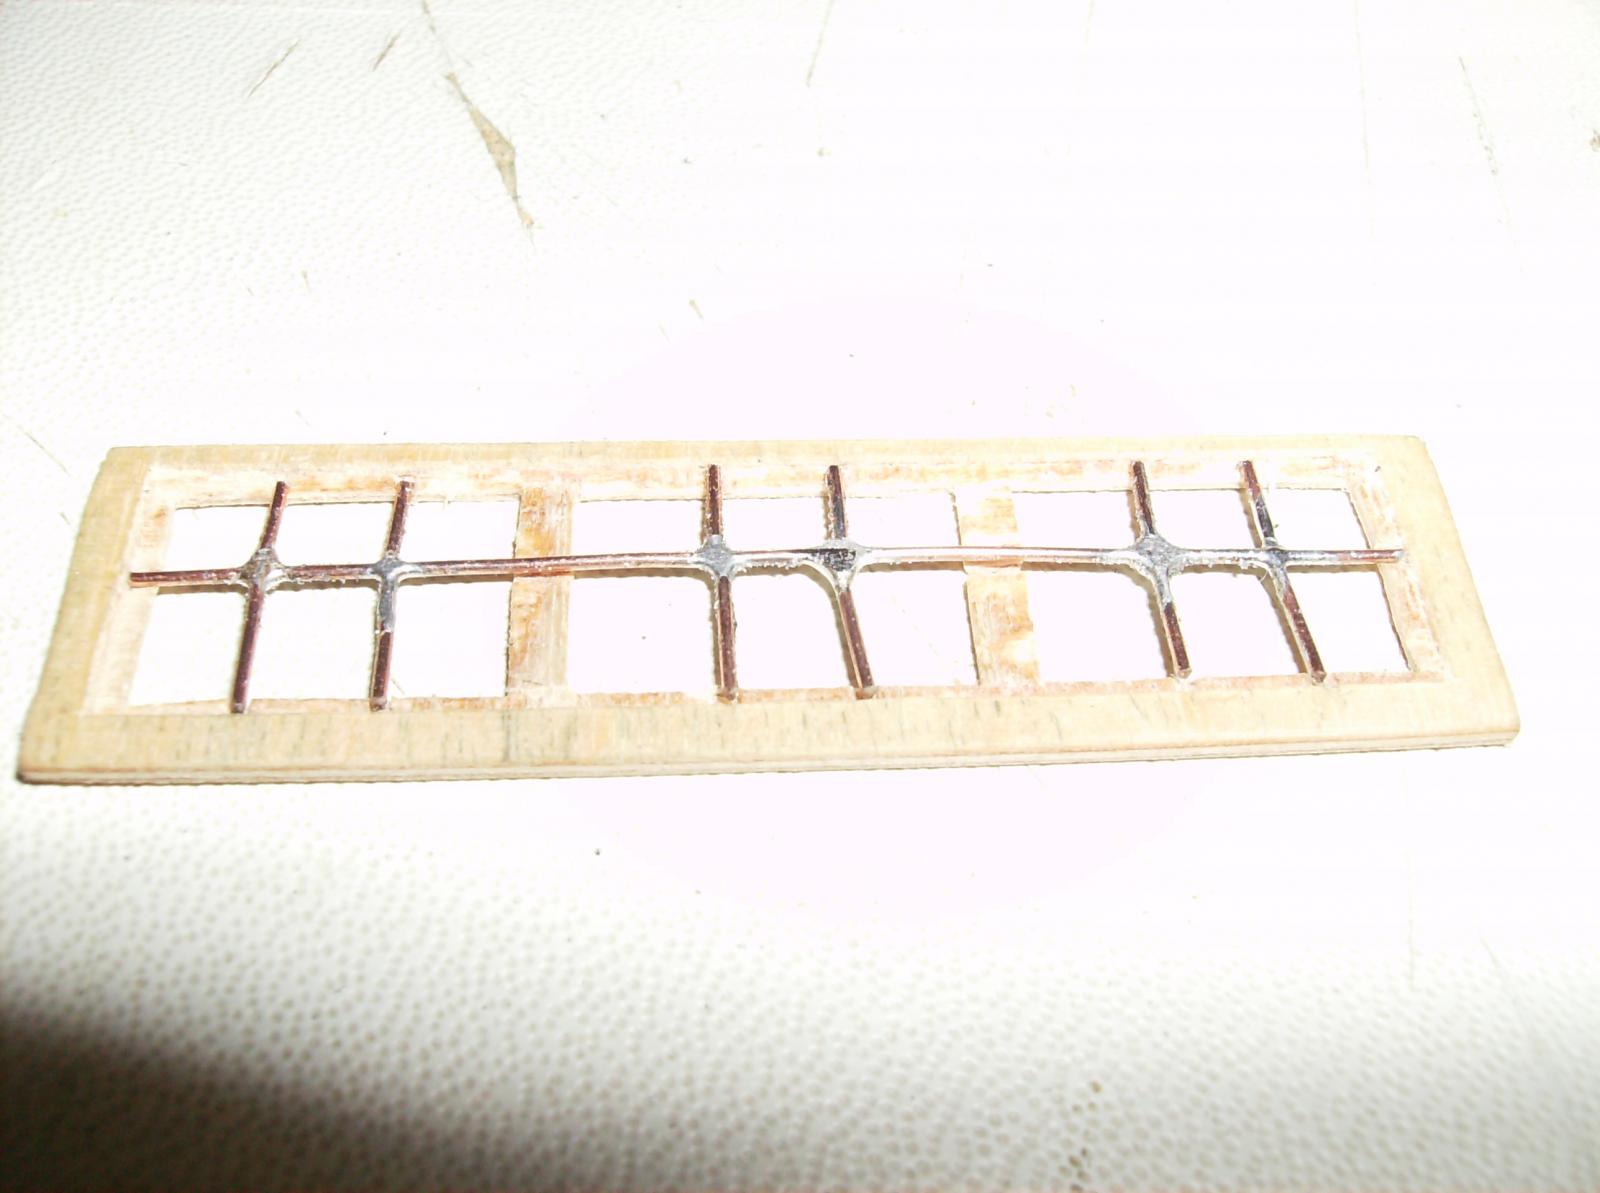
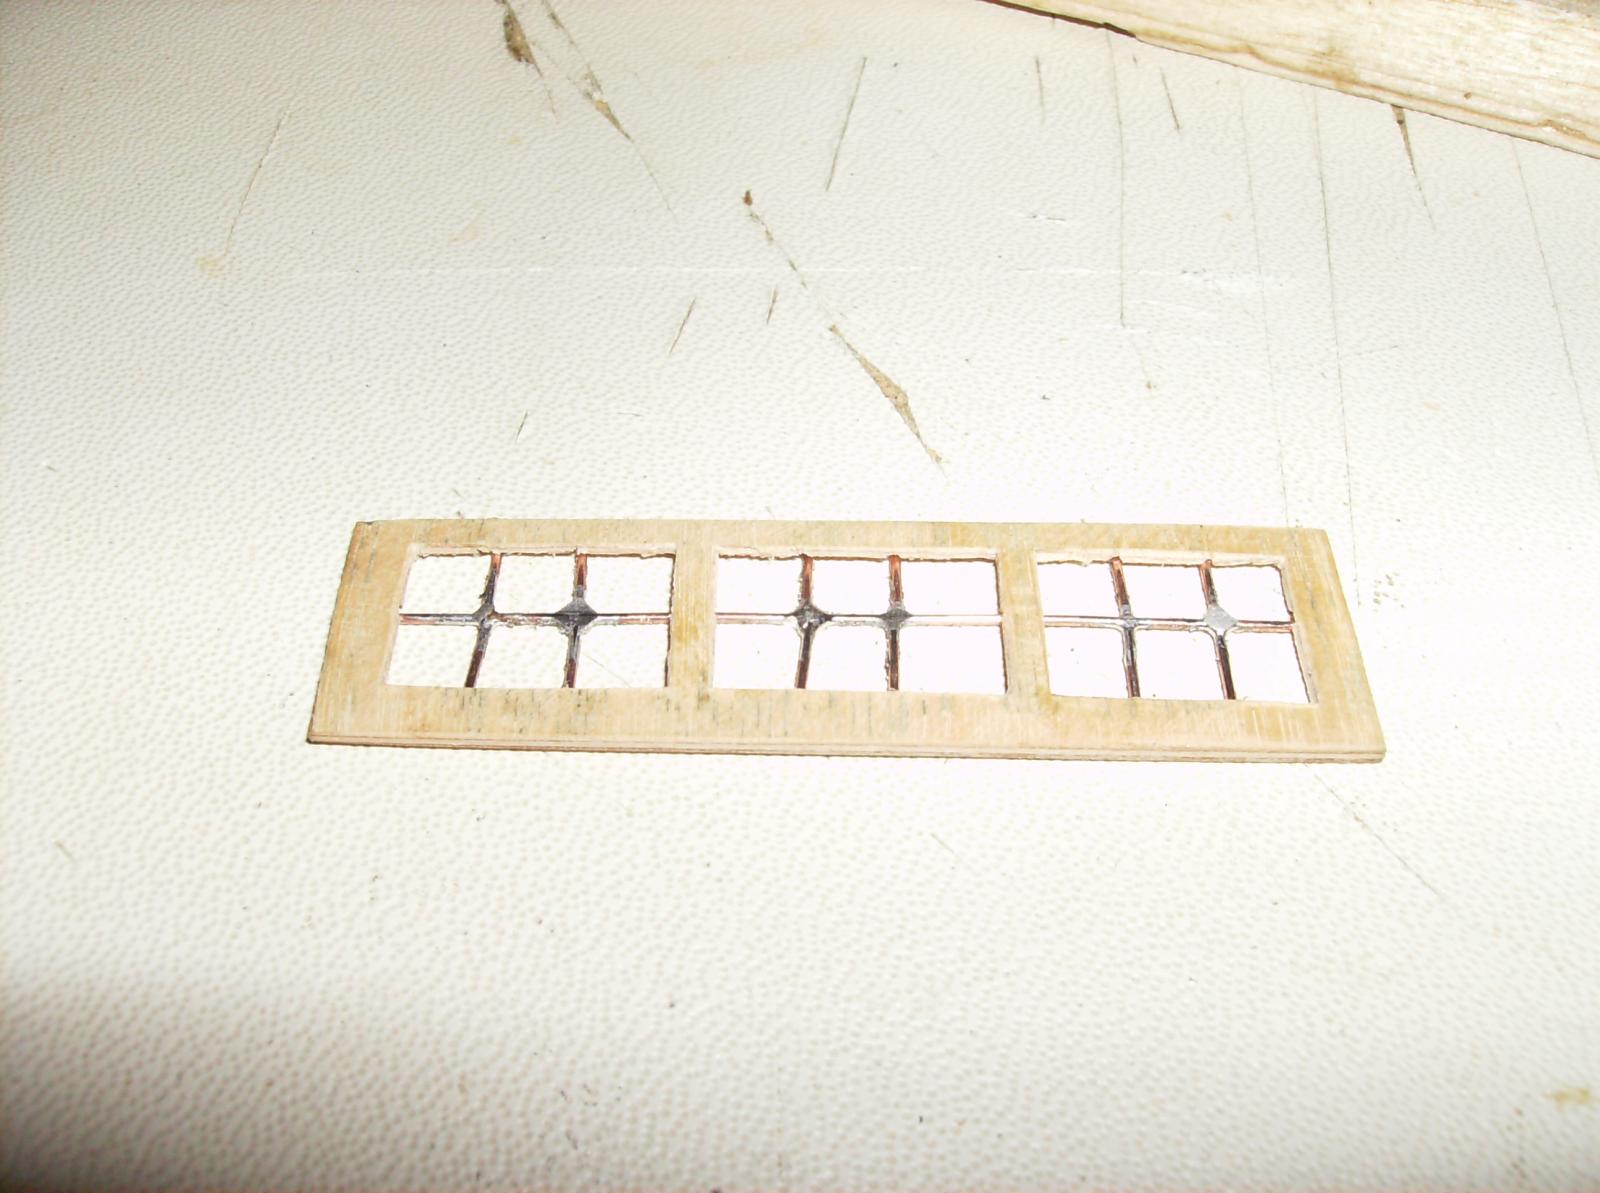
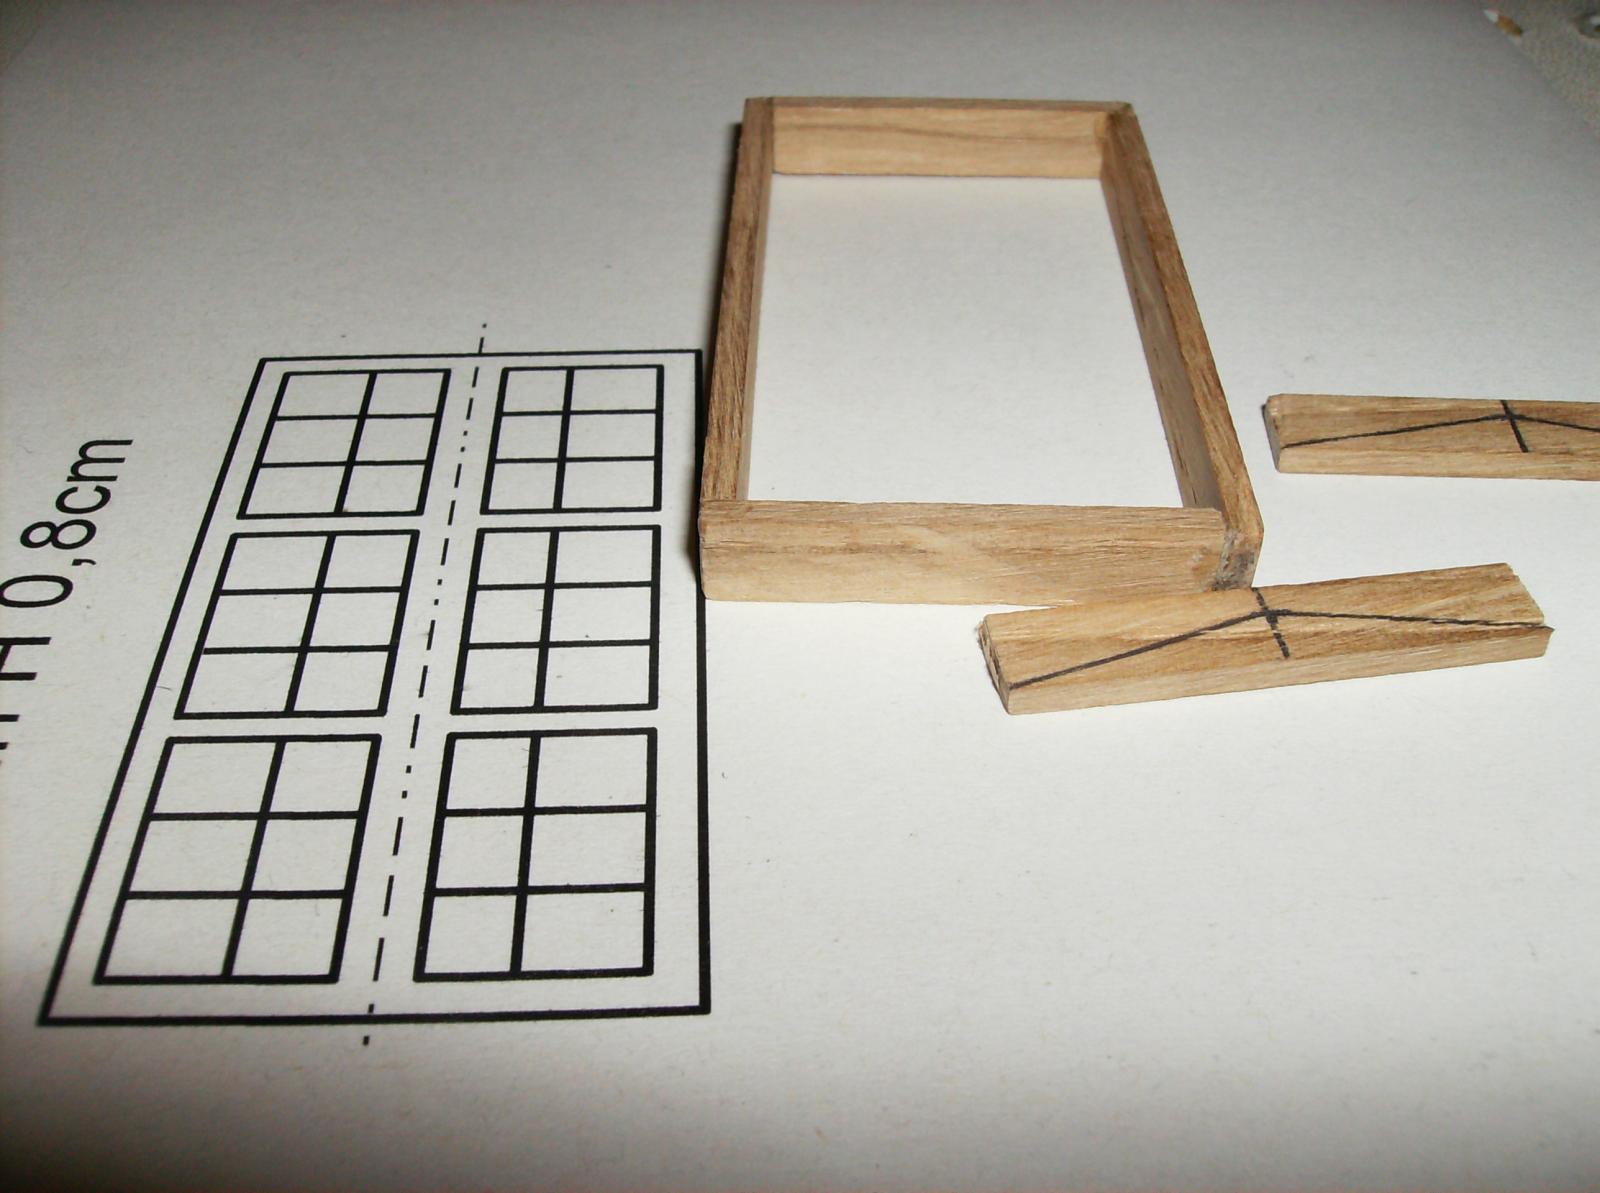
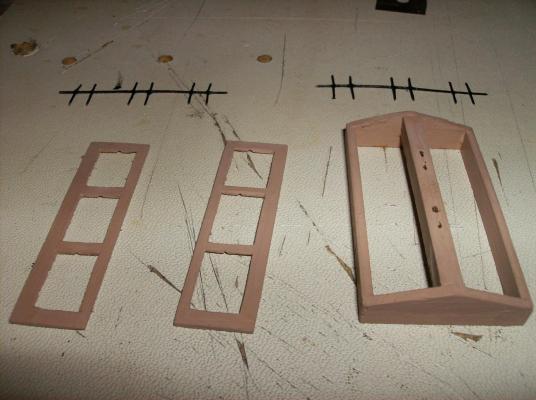
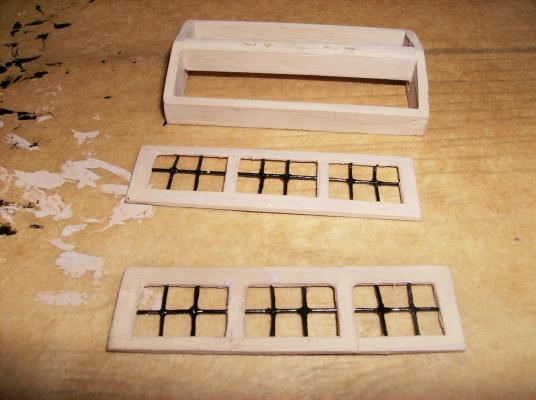
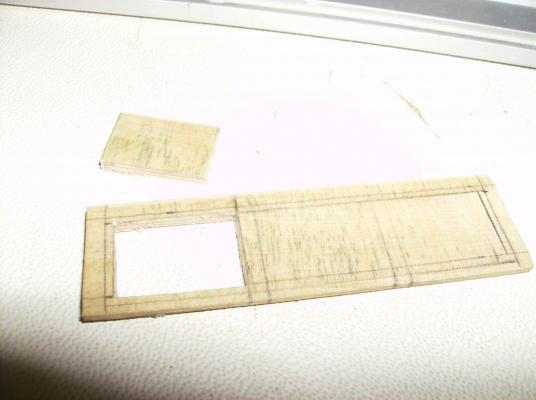
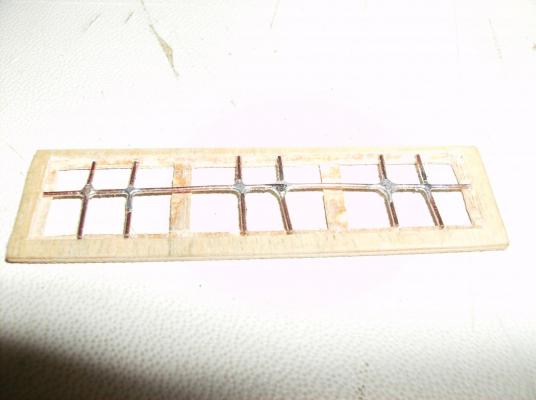
Hi Elijah, Thank You!! And many thanks to all the others for their likes............... Today I continued with the first of the skylights, one of the two window frames is cut out from 1,5 mm thin plywood, and the window grille is soldered from 0,5 mm coppered iron wire. The frame in different stages The grille Mounted for a first test Tomorrow I will build the next window with its grille too, and the hinges. The metal parts will be painted black, not clear, what colour the wodden parts will get. Maybe I follow Gene Bodnar http://www.modelshipbuilder.com/e107_plugins/forum/forum_viewtopic.php?5406.postwith the coluors, his model of the Cairo is a real good one! Regards Gerhard


- 293 replies
-
- 10
-
-
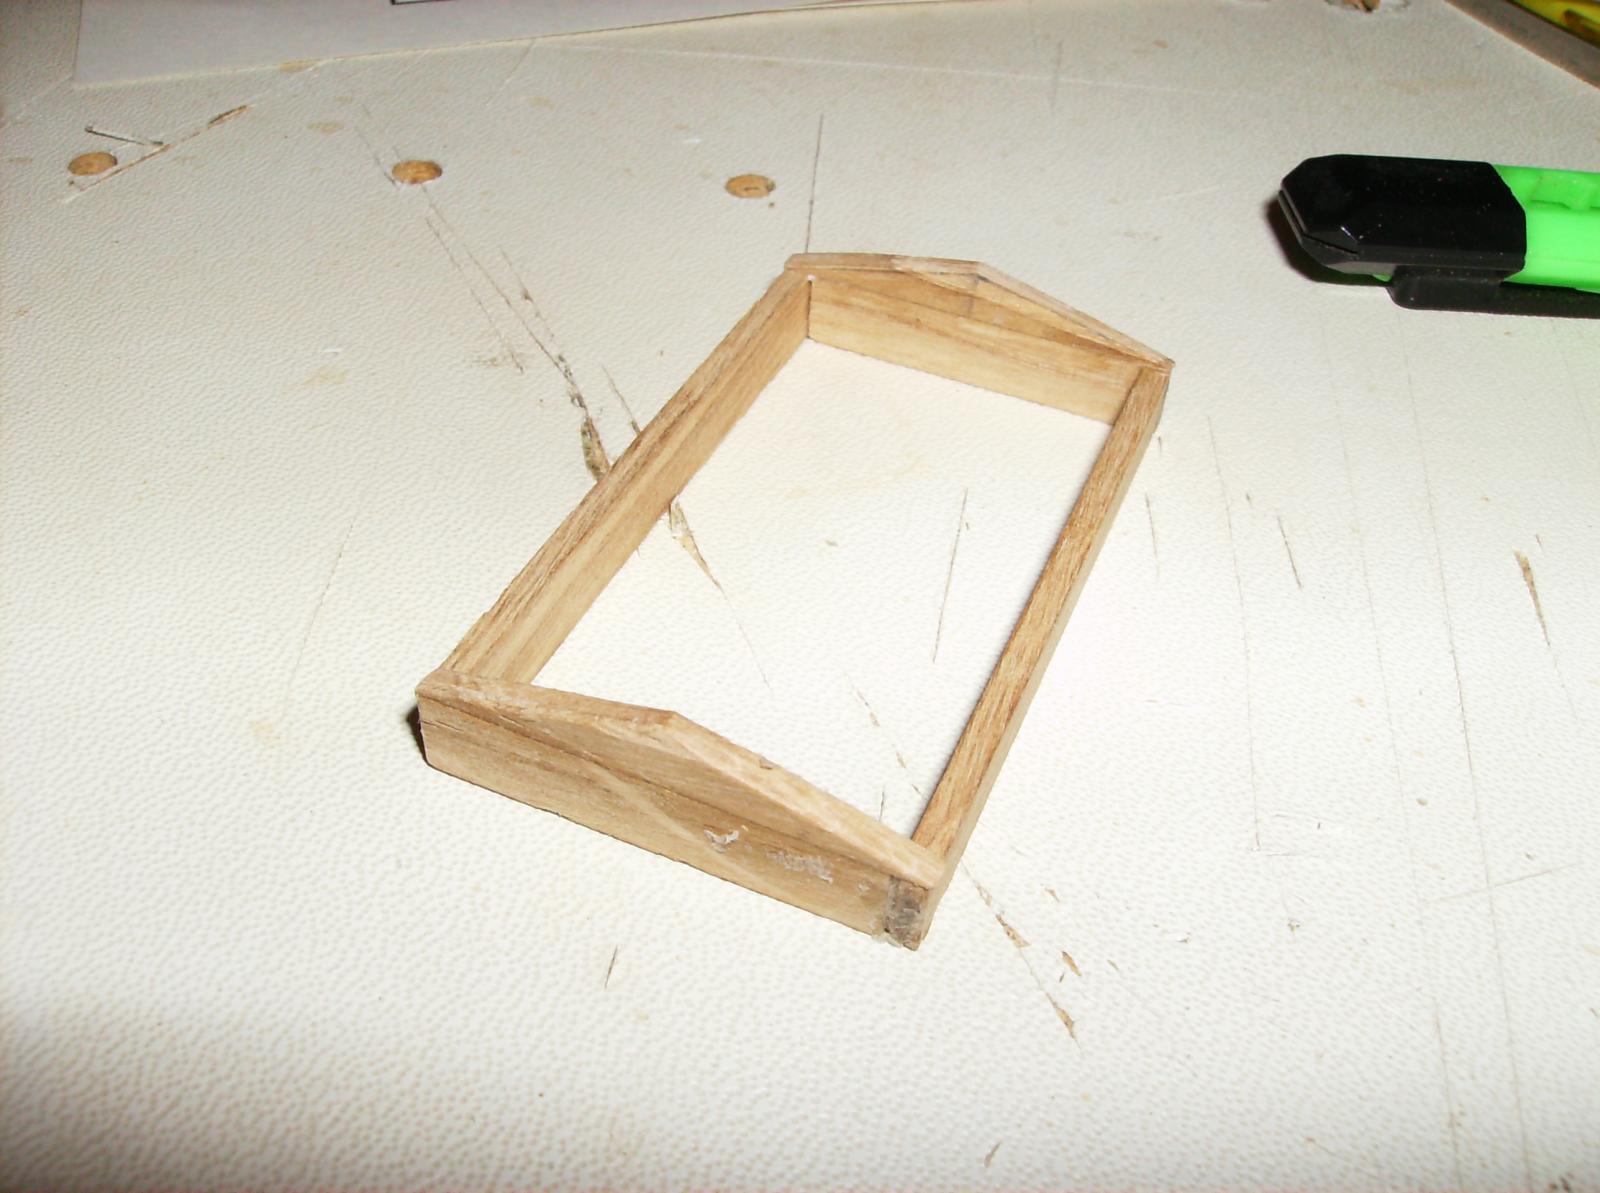
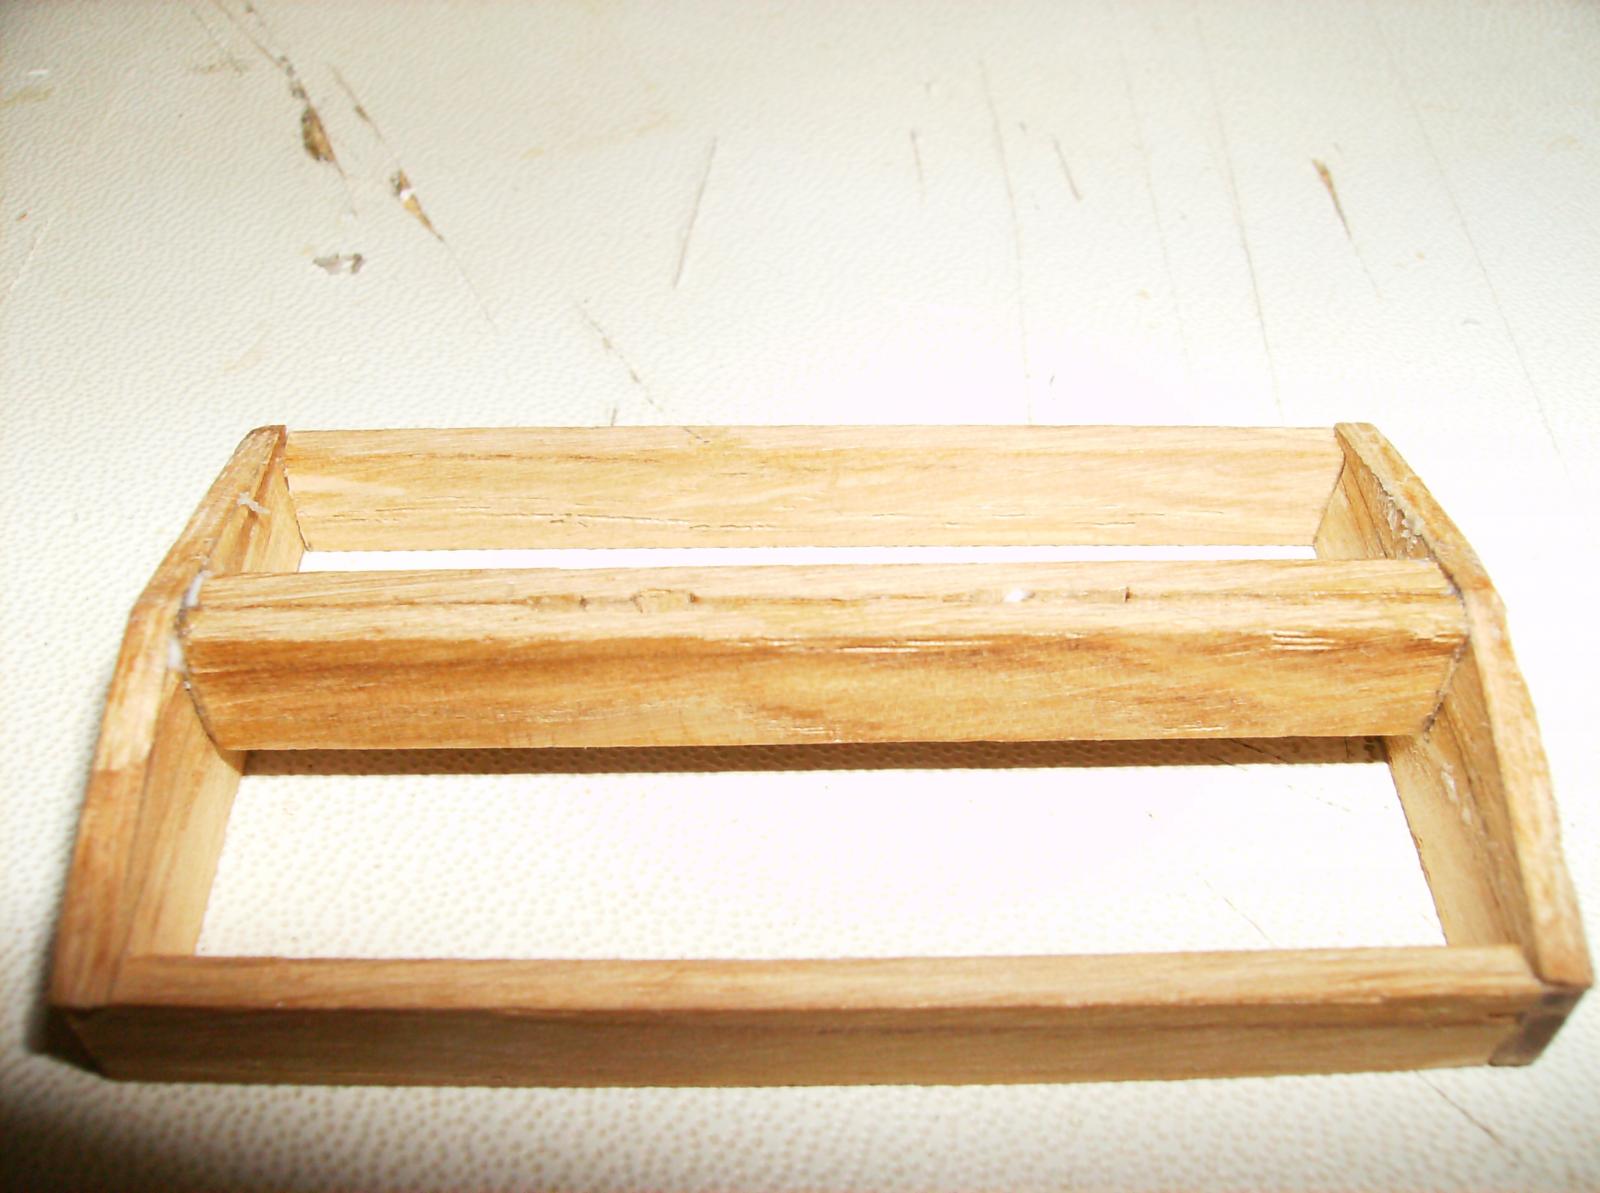
While I still cant work on the milling machine to mill the carriages, I`ve decided to start with the first of the skylights. This will be 55 mm long, 32mm wide and about 8 - 10 mm high, the plan gives not a clear view of that. Ths skylights will be functional, as the original would have been, this will bring more air to the boiler/ burner for the steam engines. Firts steps to the skylight Regards & thank you for watching Gerhard


- 293 replies
-
- 12
-
-
Hi druxey this is unbelievable, AGAIN!!! All that fine carved stuff, much too much for my clumsy hands................ Regards Gerhard
- 641 replies
-
- 3
-
-
- greenwich hospital
- barge
- (and 1 more)
-
Hi Popeye Sorry to hear that about your wife Scratch is always my intention, but not all plans are good to build good models. There is a plansheet from the Cairo from VTH to get, I have ordered it, but that`s NOT the Cairo, just close to it but never correct! I`ll stay with the Bob Hill plans. Regards Gerhard
-
Hello Popeye Welcome to the CAIRO Take your seat, there is space enough for even more, Olivia is invited too............... You`ll find spinach in the refrigerator. Like some garlic on it? Regards Gerhard
-
That`s me too. But as I wrote, it will take some time. I just can build , when my home renovation works have a break, at the moment i cant work at the lathe, most tools are "locked away", this will be for the next two weeks. Just a little woodwork is possible, research in the internet and planworks too. But this gives me more time to look for meor building materials, as I found today rails with the correct measure of 1,8 mm height. They will come from http://www.hobby-ecke-shop.de/product_info.php?info=p205_gleisprofile-neusilber-oder-neusilber-bruenniert.html Some more pics from the Cairo are saved on my PC, and I`m still collecting more. Preparing works for the hull can go on, when my wood is delivered, I will start with frames. Regards Gerhard
-
Hi Elijah Looks good, what you are doing here! If you want to have more tipps and hints for your build, there is a building thread in a german forum, but you must be logged in there to be able to see the photos:http://www.segelschiffsmodellbau.com/ An english translation is included in that forum, just scroll down to the end of the page, there is a button on the left side to manage the languages. Then look in the forums overview for community projects - Lotsenschoner Phantom. All the best Regards Gerhard
- 701 replies
-
- 4
-
-
- phantom
- model shipways
- (and 1 more)
-
Hi Cathead Wood is ordered, plans are ready, just waiting for delivery! Today was not really lazy, but no pics. I had to search for model railway tracks for the front and rear casemate, as they were originally armoured that way. The rest of the casemate will be plated with 1 mm brass sheet, the rails are 1,8 mm high in scale, so I will have to grind or mill them down to this from 2,07mm. All armour will be blackened, as the origin was. Another step before building was to scale the frames to correct size, even this work was done today, now I can start! Regards Gerhard
-
Hi Glenn A little bit of black paint, and some front endcaps and stacks for the boilers, and they will fire up! Phantastic piece of work you made here again. Regards Gerhard
-
Cutty Sark by NenadM
Gerhardvienna replied to NenadM's topic in - Build logs for subjects built 1851 - 1900
Hi Nenad I llike that compass, looks good! 1mm brass wire would fit well as a lantern housing, but will not be easy to mount to the compass housing. Regards Gerhard- 4,152 replies
-
- 6
-
-
- cutty sark
- tehnodidakta
- (and 1 more)
-
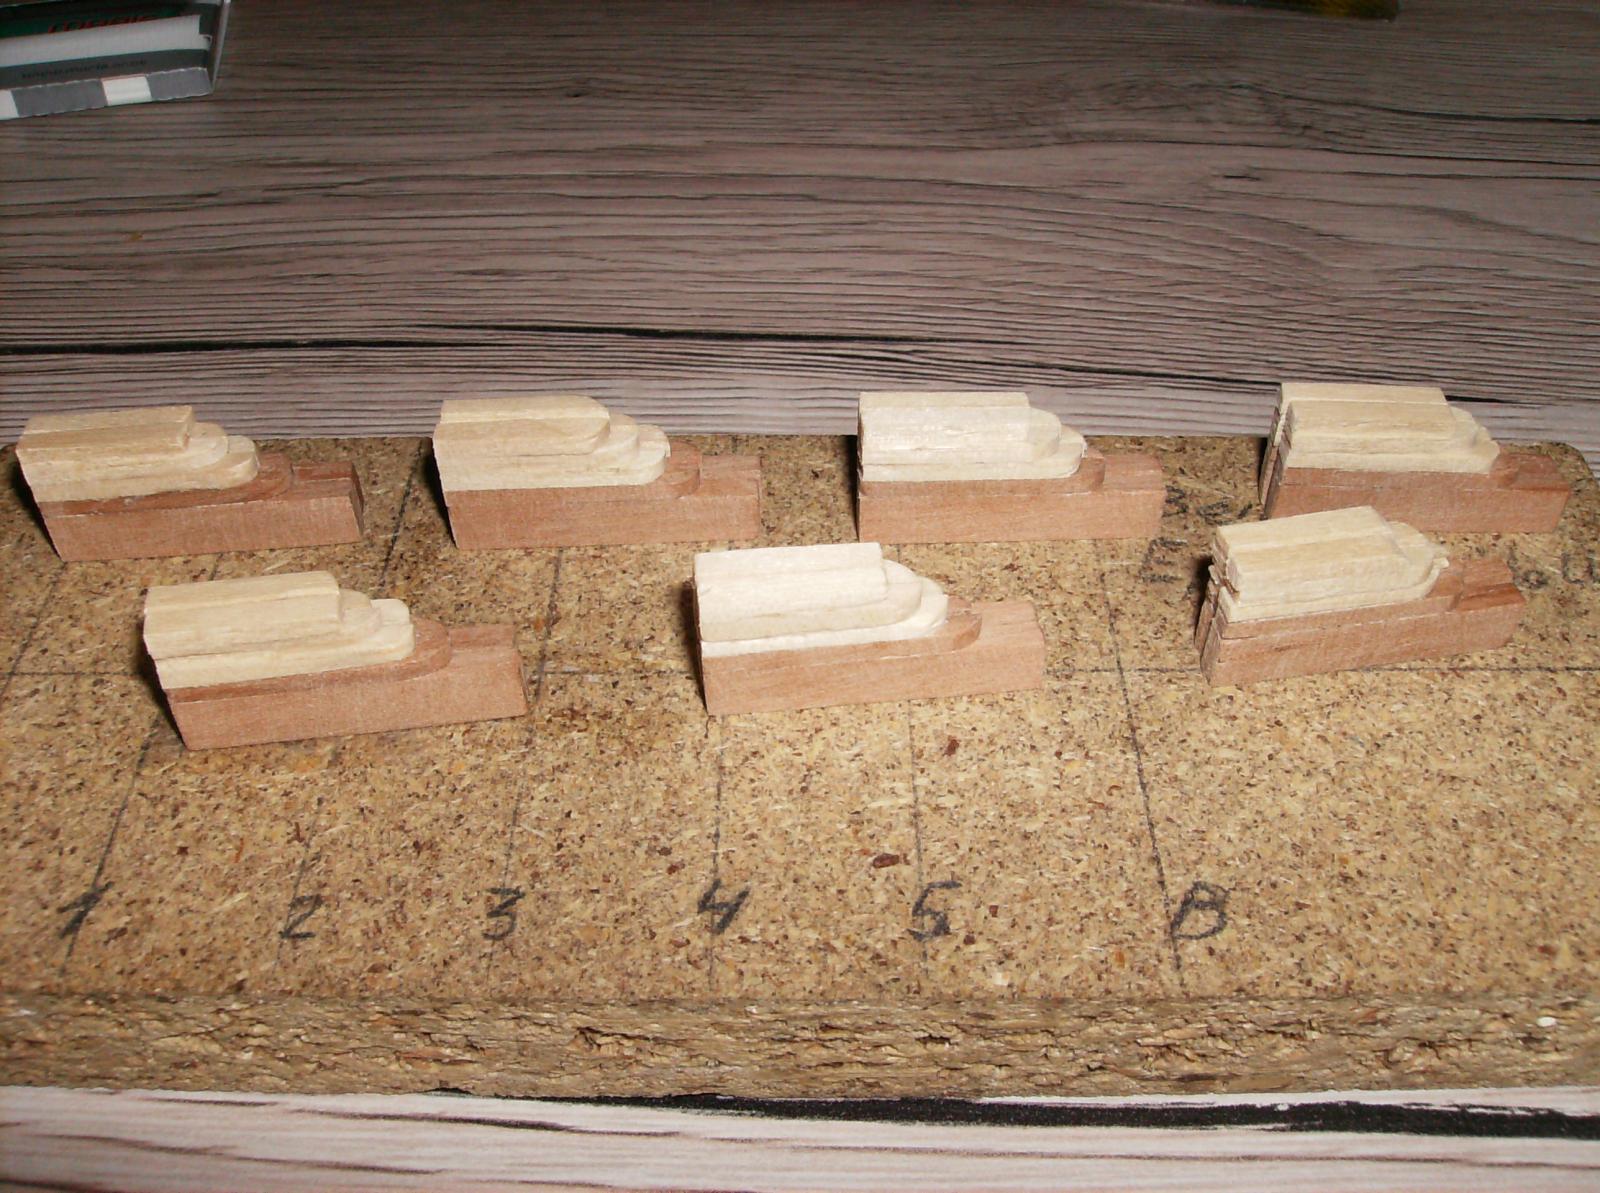
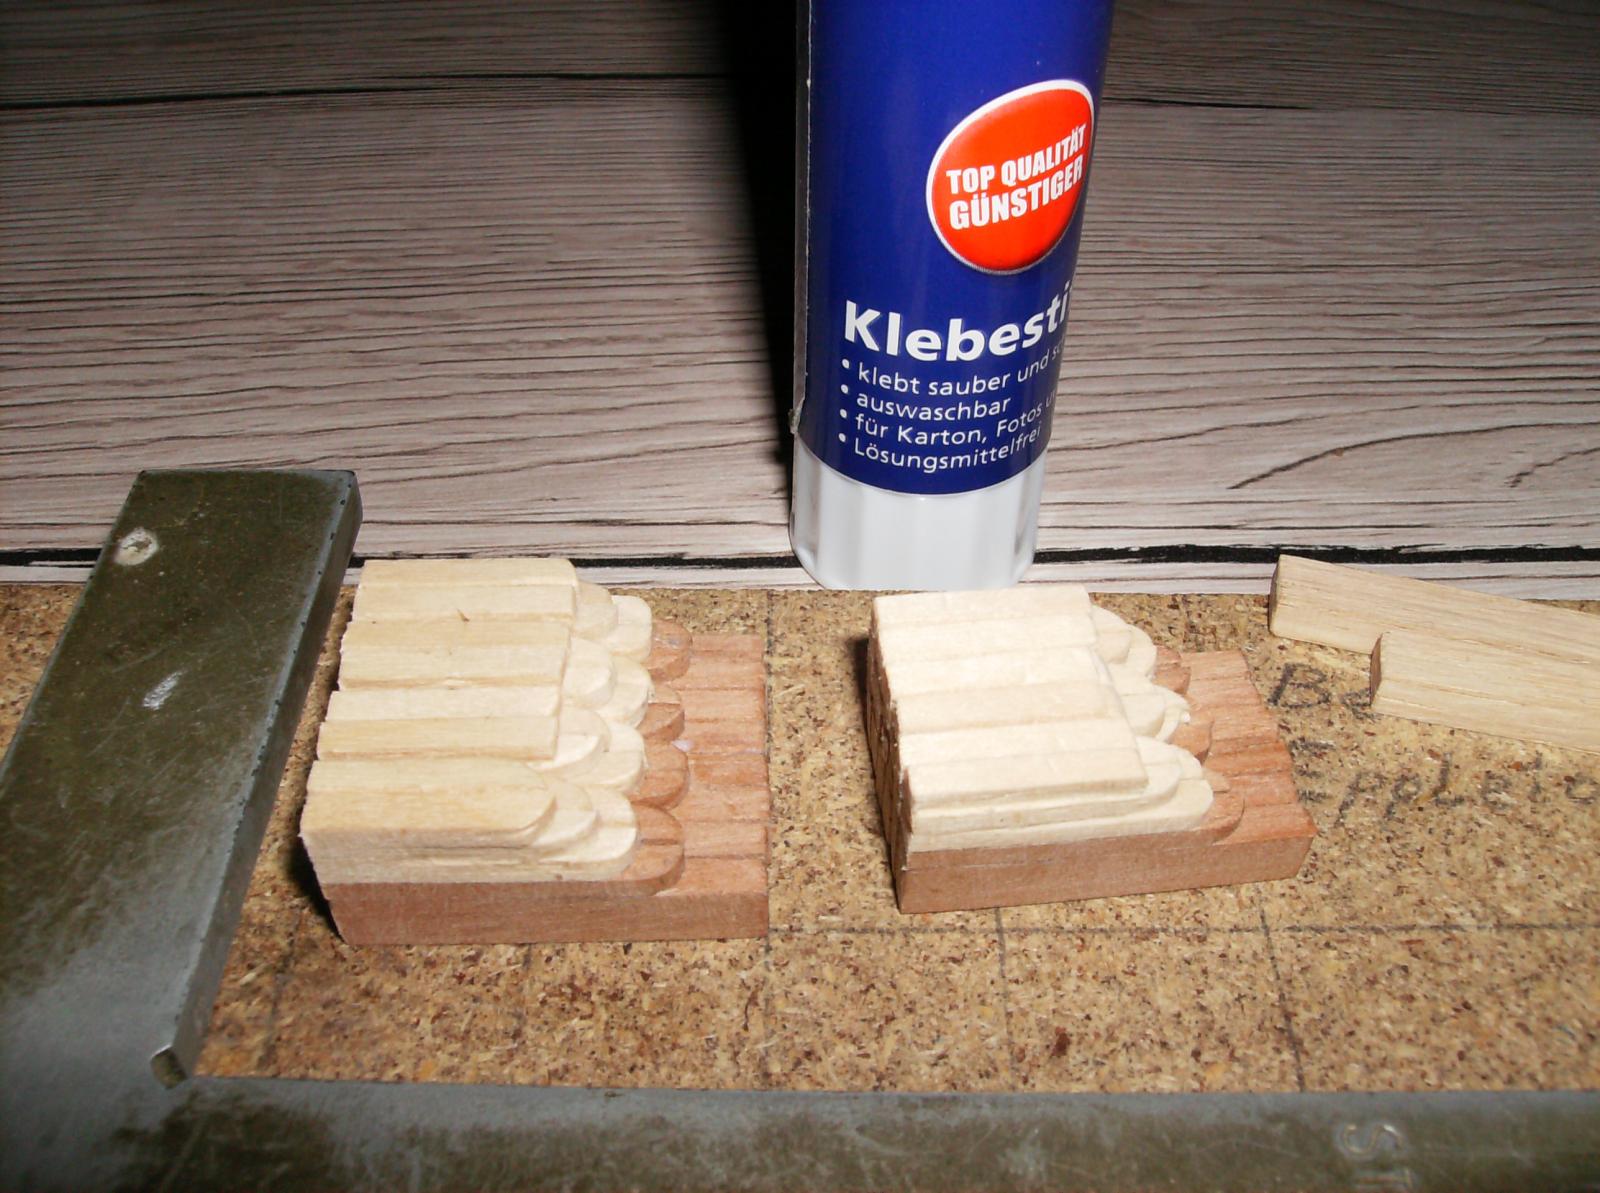
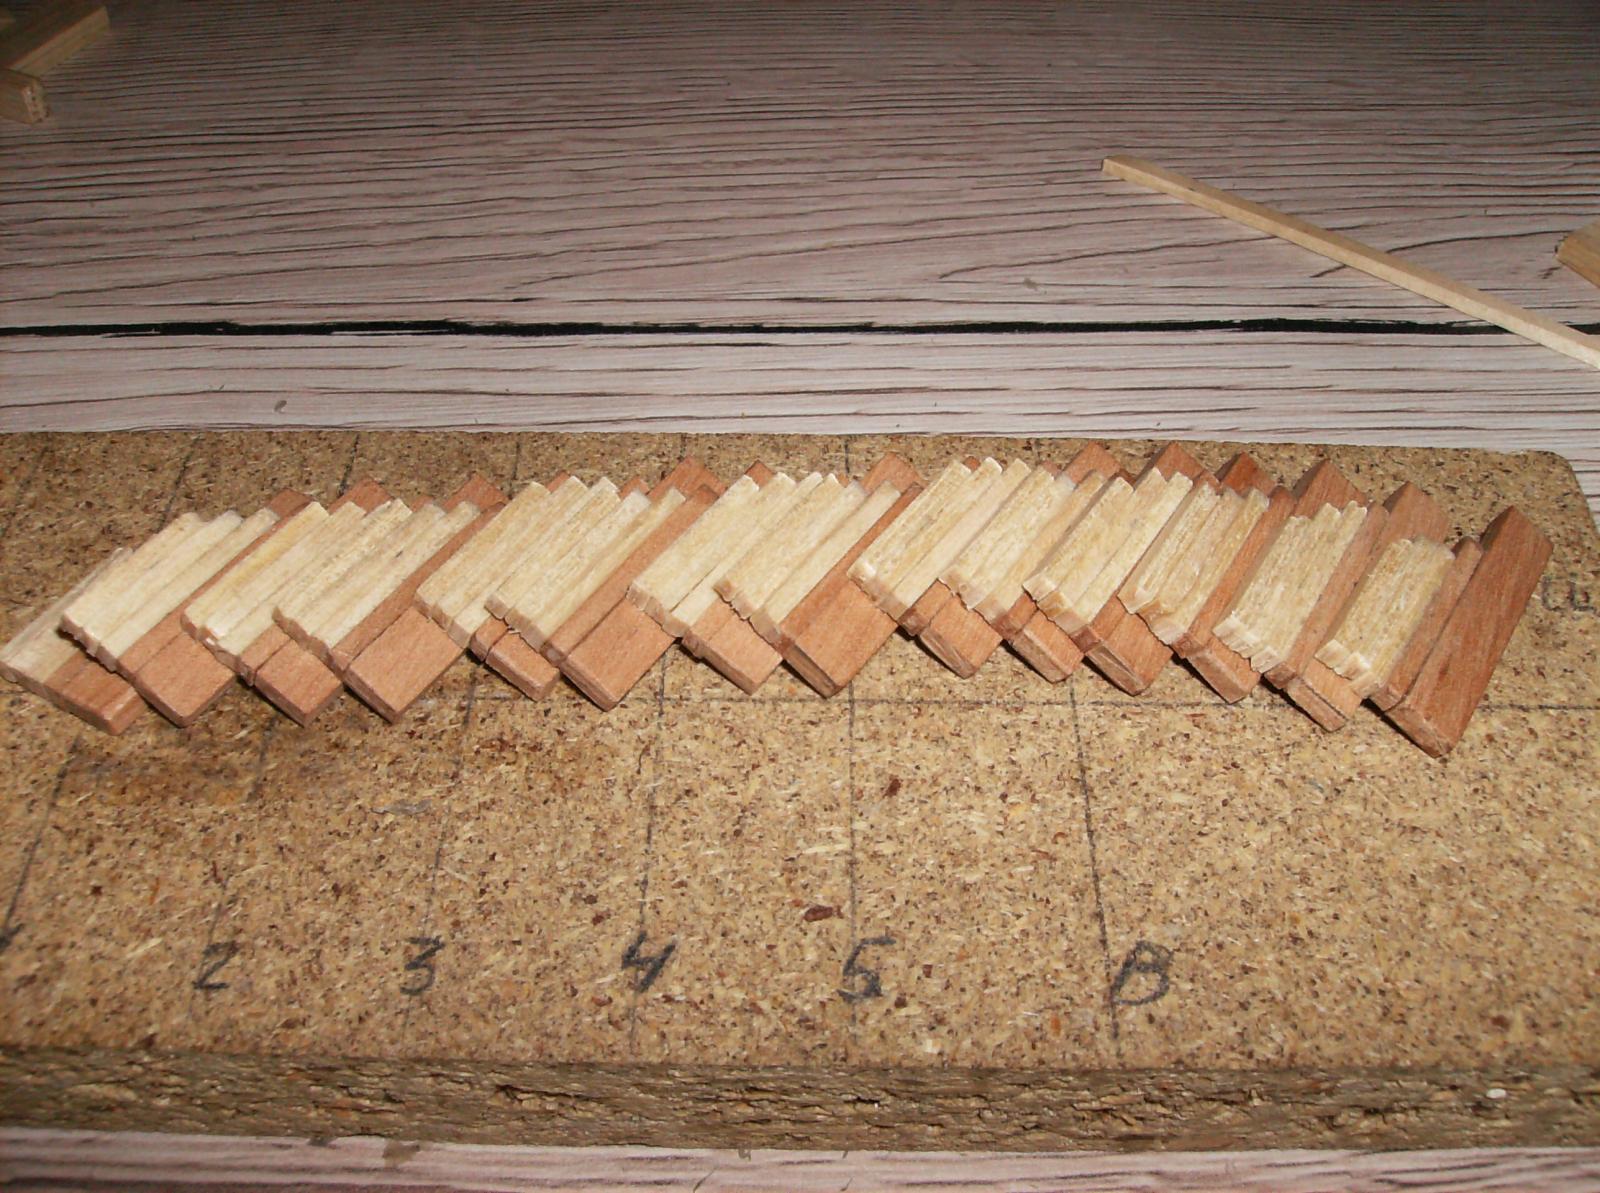
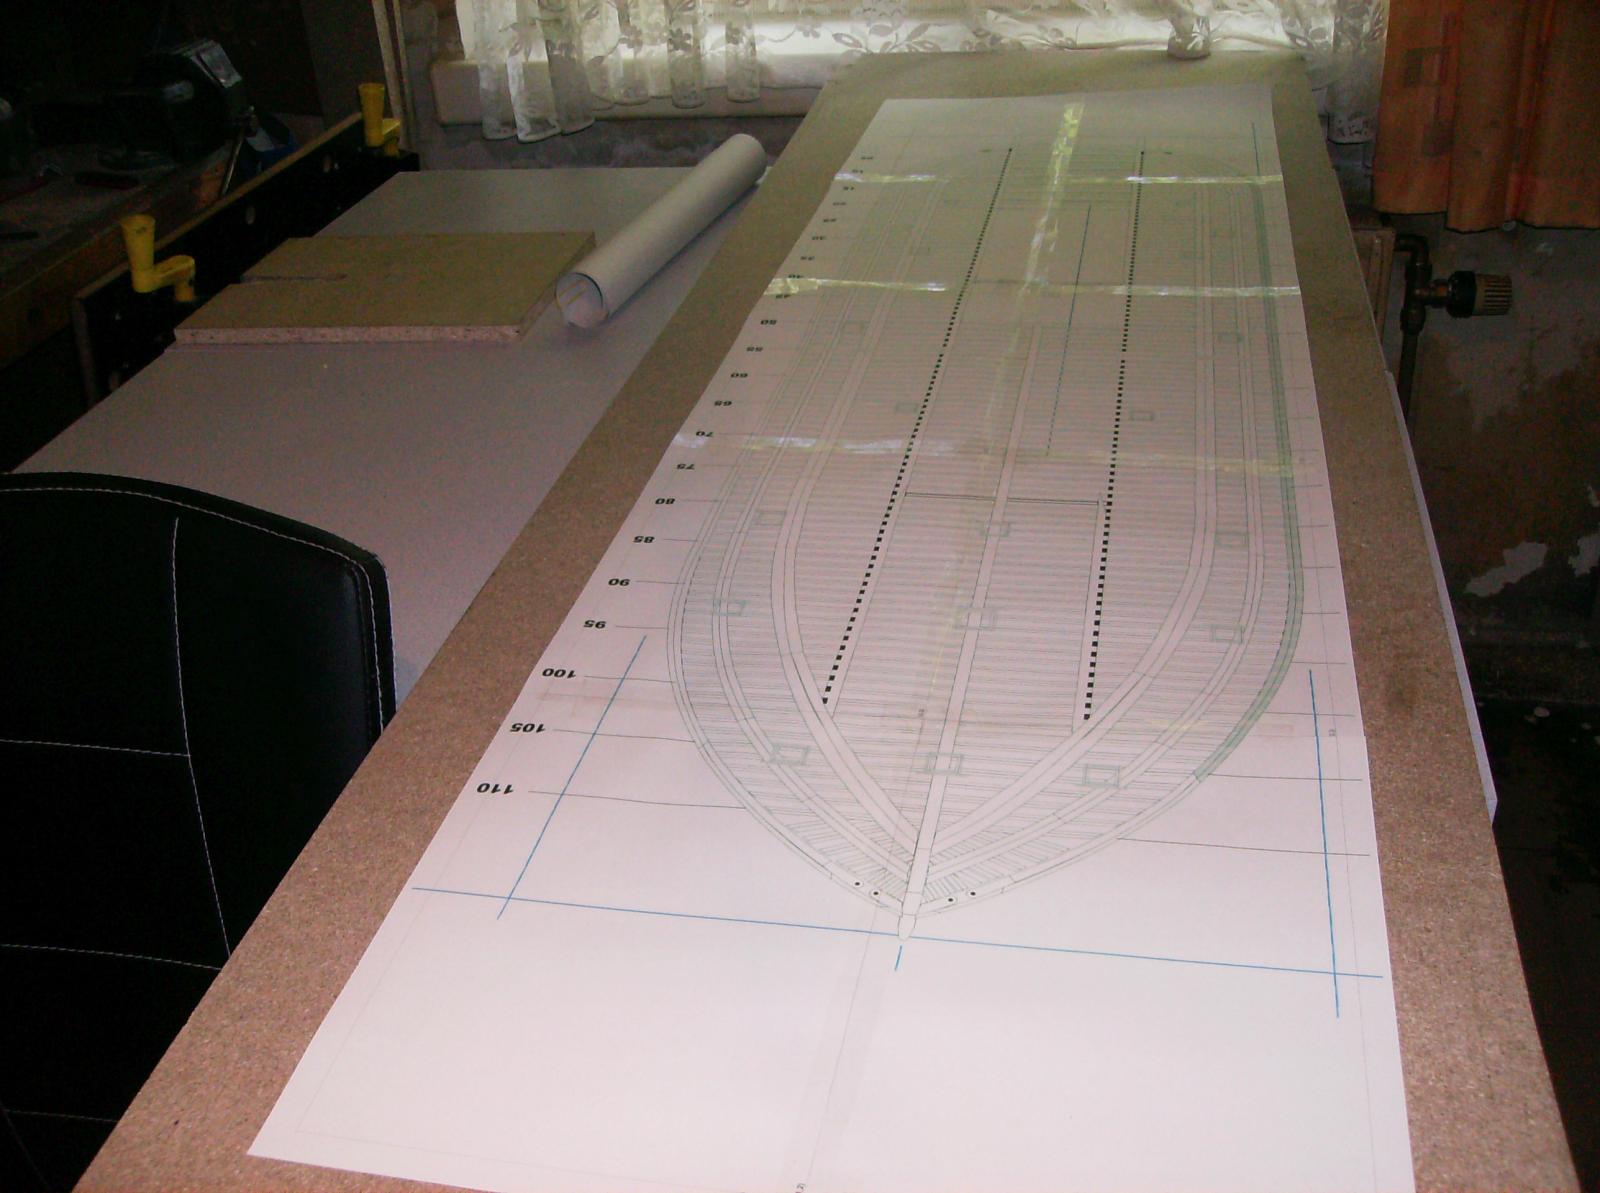
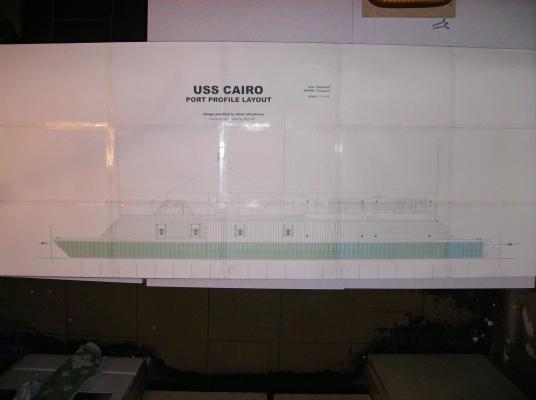
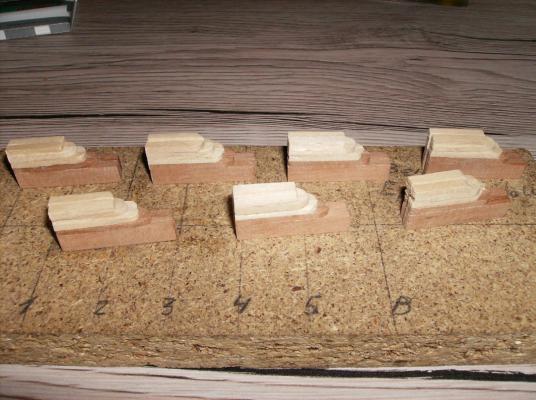
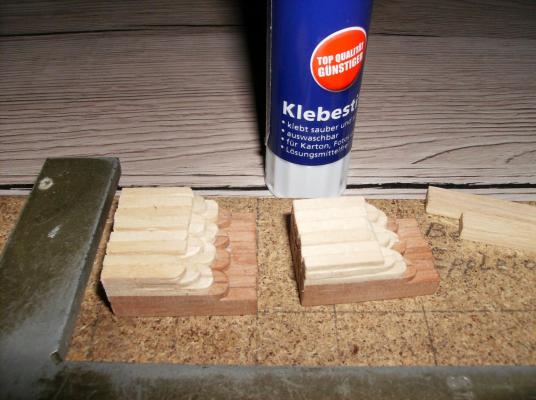
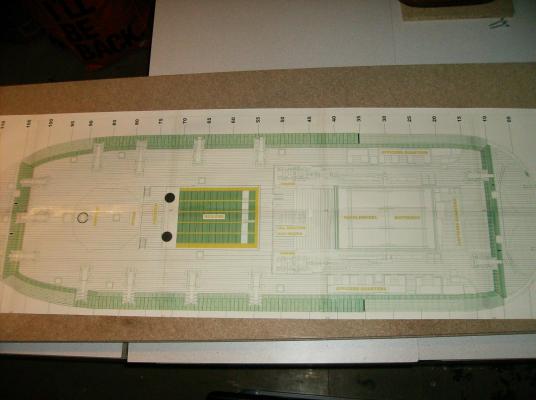
Hello again, and thank you all for watching still............. Today was just a little progress, but important too. I found some time to complete the last important plan drawing, the side view, and grinded the smaller carriages to their final thickness. After that i glued them to one 3-pair and one 4 pair package in preparation for milling. This will happen tomorrow, when I can find some time again, my home renovation is still going on. As a last step for today I ordered som pine wood for the frames, next week the real build will start! The rescaled port view plan, and yes again; THIS will be a big girl! The grinded side parts for the carriages The glued parts, use only glue stick for that. The parts will stick well together, but can be split into single parts after. Regards, thank you all for that so many likes!!! Gerhard
-
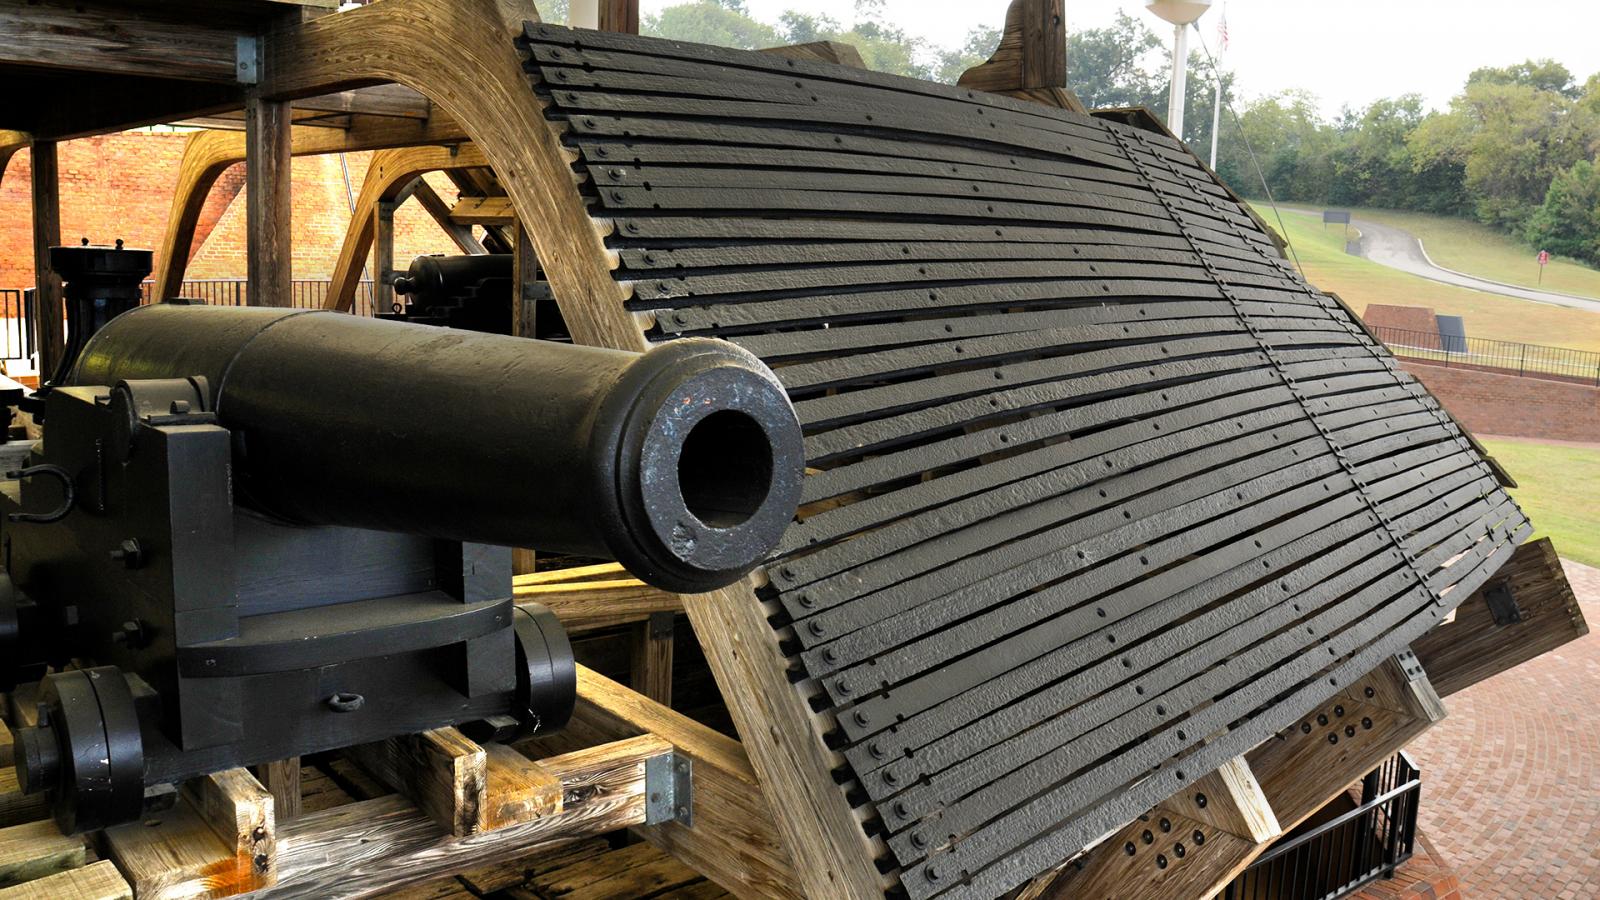
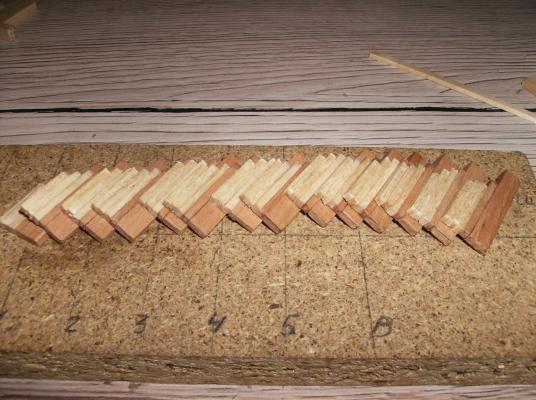
Hi Elijah Will take me some time till she comes into water.But I`m going on. Hi @All Thank you once more for watching, and of course yor likes! Today I continued with the drawings, the most important plans for the build are now ready for working, and also the side parts for the smaller carriages are all glued, They will be grinded to their final shape, and then the missing parts of the carriages will be made and added. I do not care for the colour of the wood of this parts, they all will be painted black. Original restored gun (source: http://npplan.com/wp-content/uploads/2014/11/Vicksburg-057.jpg) By watching this photo, I wonder if there were no wooden planks below the rails??? The side parts of the smaller carriages The today completed plans drawings Regards Gerhard

-
Cutty Sark by NenadM
Gerhardvienna replied to NenadM's topic in - Build logs for subjects built 1851 - 1900
Hi Nenad This compass will be a real challenge! Although I make lots of brass things, I would have to study a bit longer how to make it. To your questions: As Sailor 1234567890 wrote, the marked cylinder will be for a light, I think the marked thing on top of the compass could be for allowing daylight to shine into the compass for better day vision, and the thing at the left side could be a door for cleaning works. Just a suggestion, I may be completley wrong! Regards Gerhard- 4,152 replies
-
- 6
-
-
- cutty sark
- tehnodidakta
- (and 1 more)
-
She WILL! But that fits good to my others, the smallest floating model is about 80 cm long, and the DANZIG will be around 1,70 meters. So the CAIRO is in the middle with that 1,12 meters. But she is really wide, with over 30 cm. There is room enough for all the engines and RC Components, will be fun to work in the hull. Regards Gerhard
-
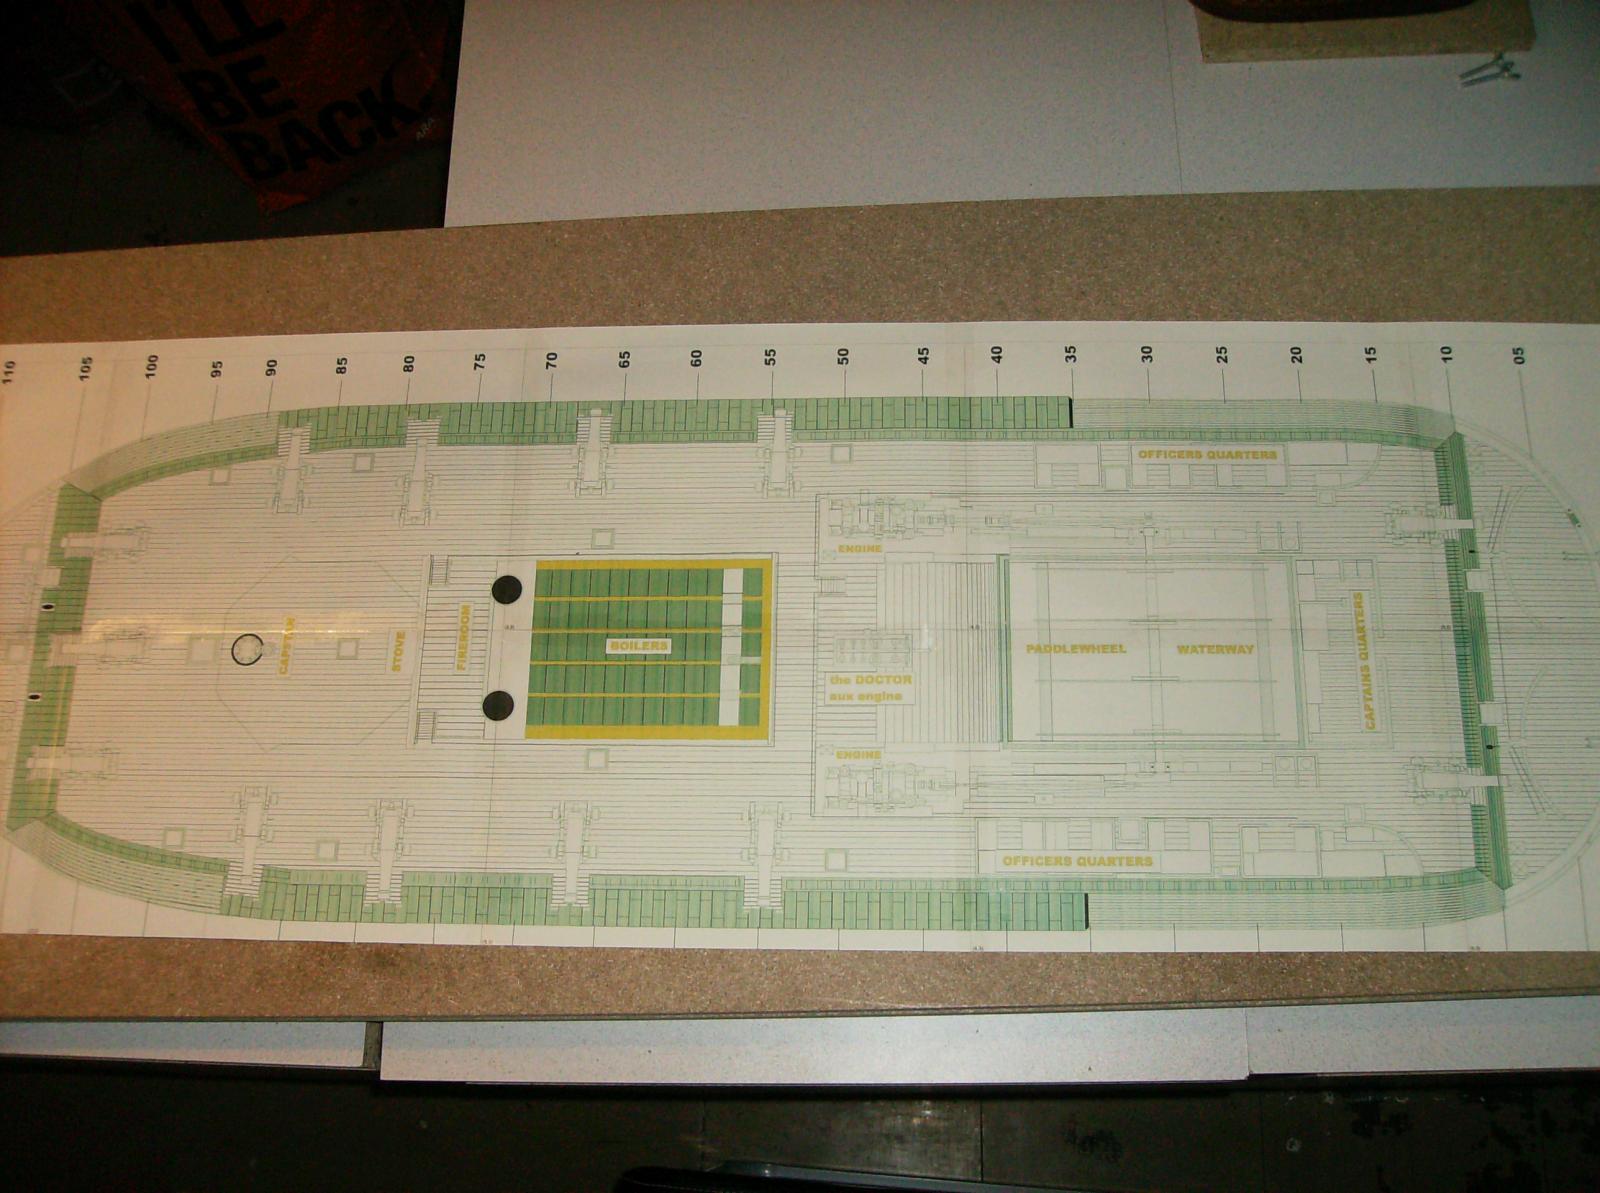
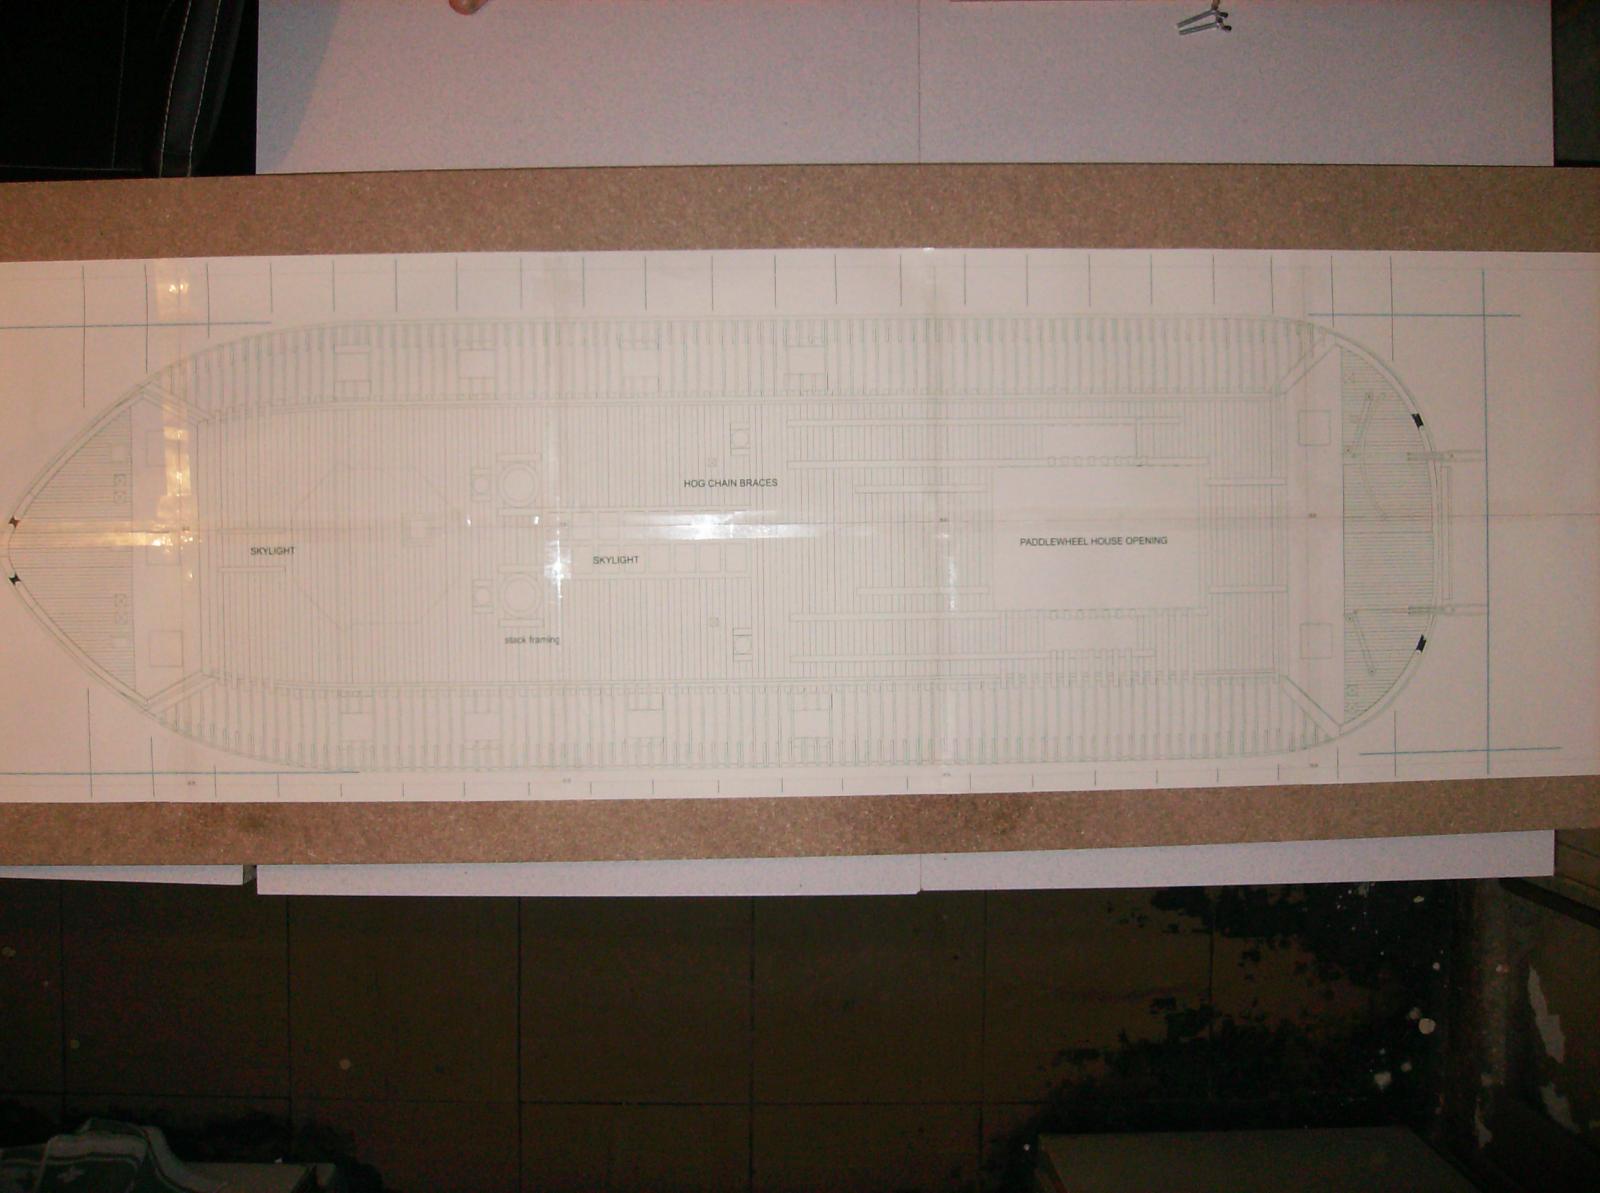
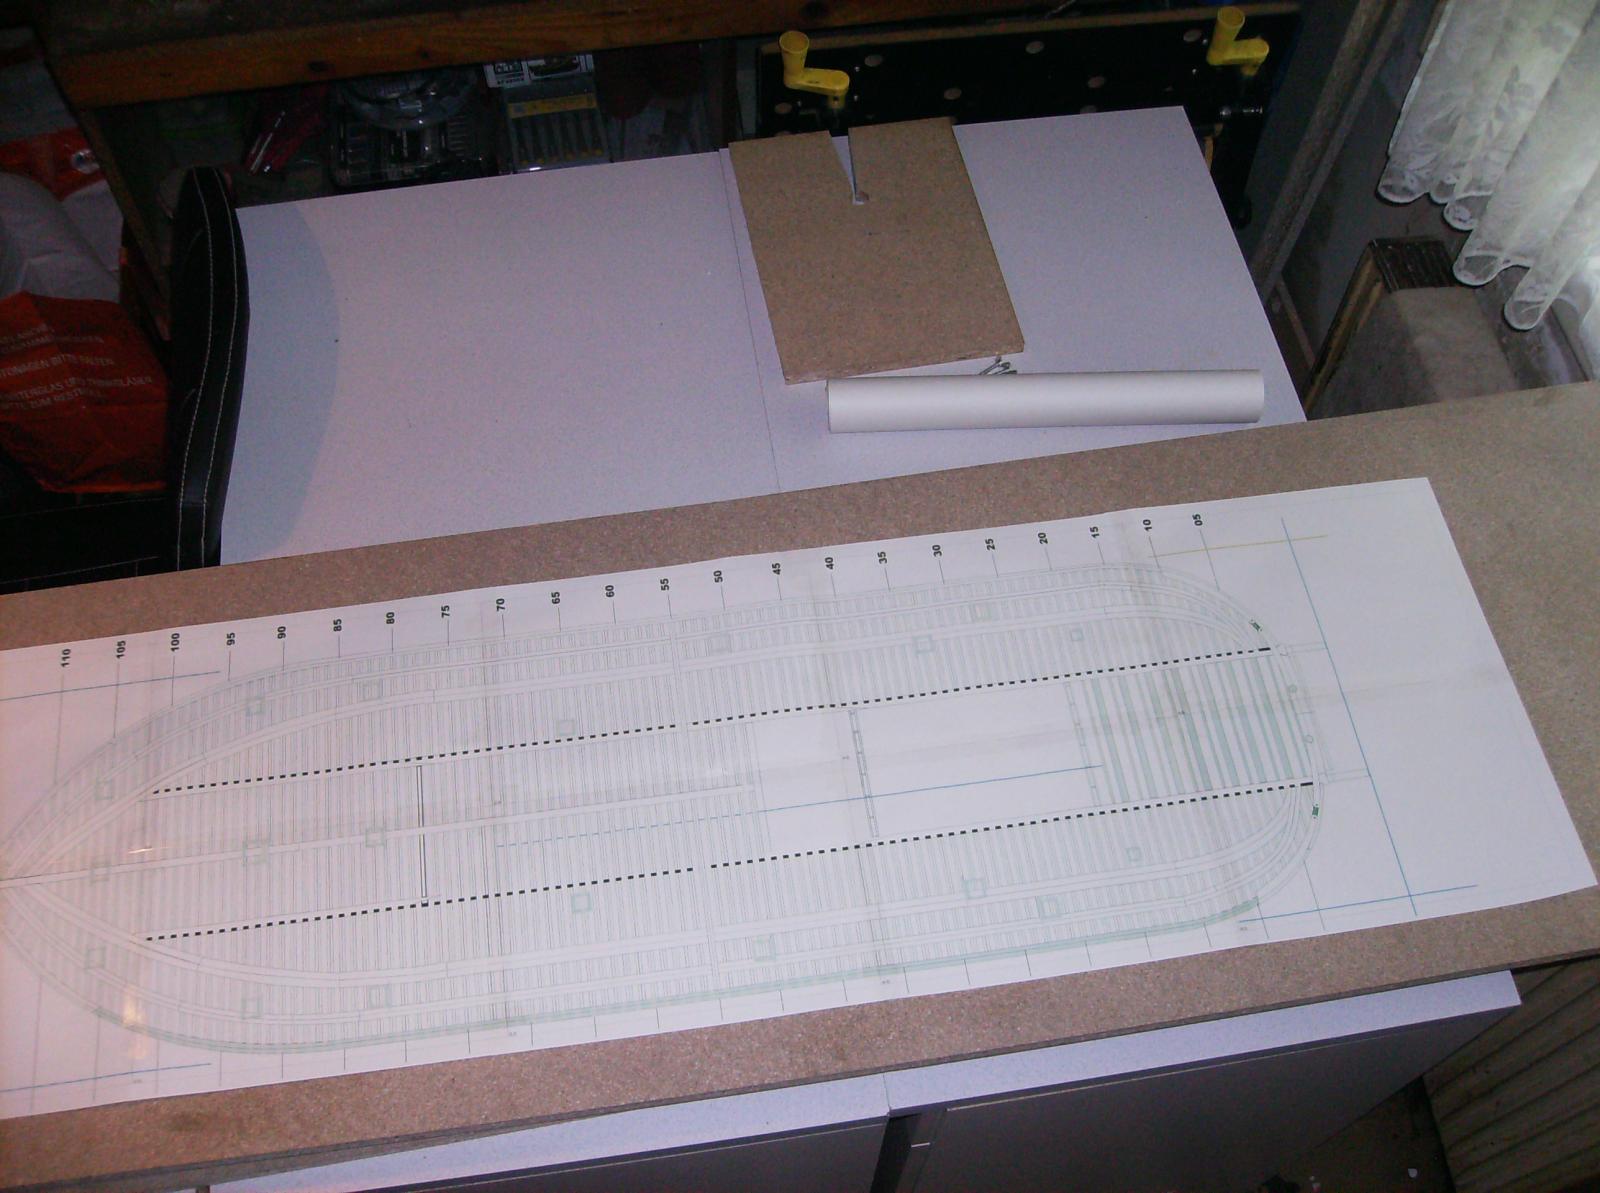
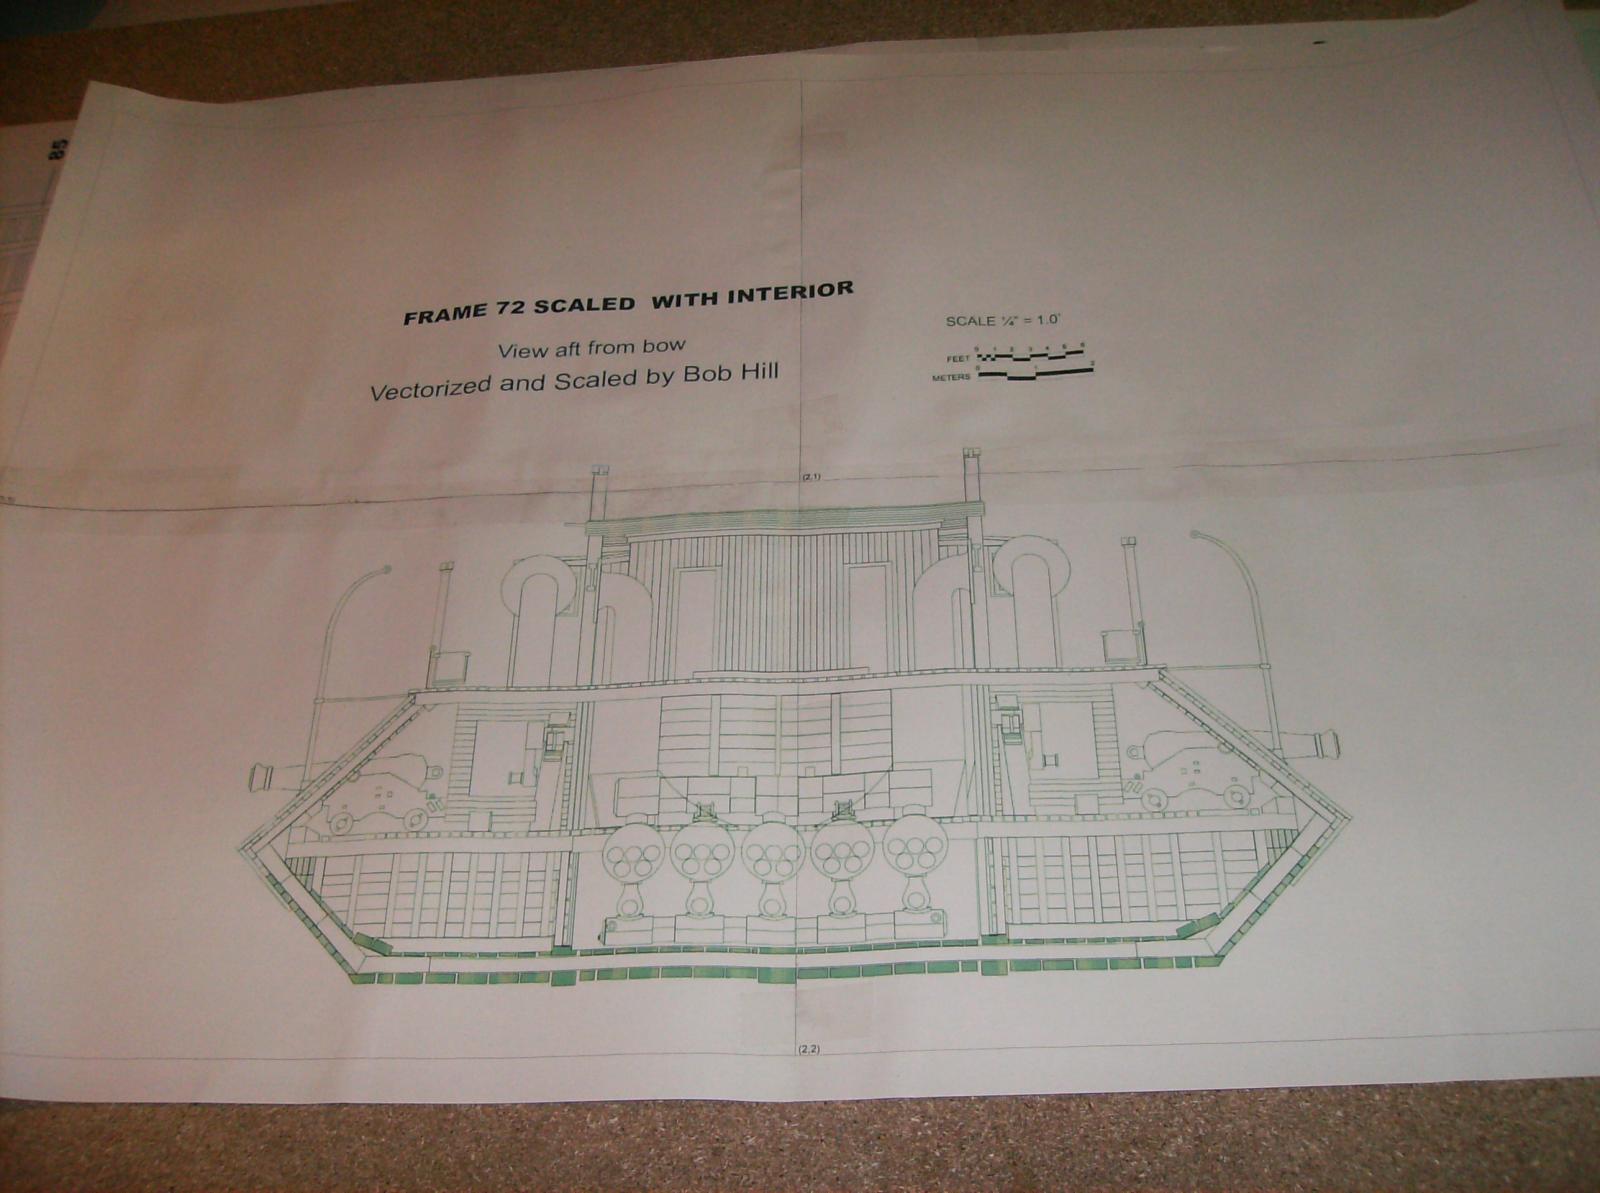
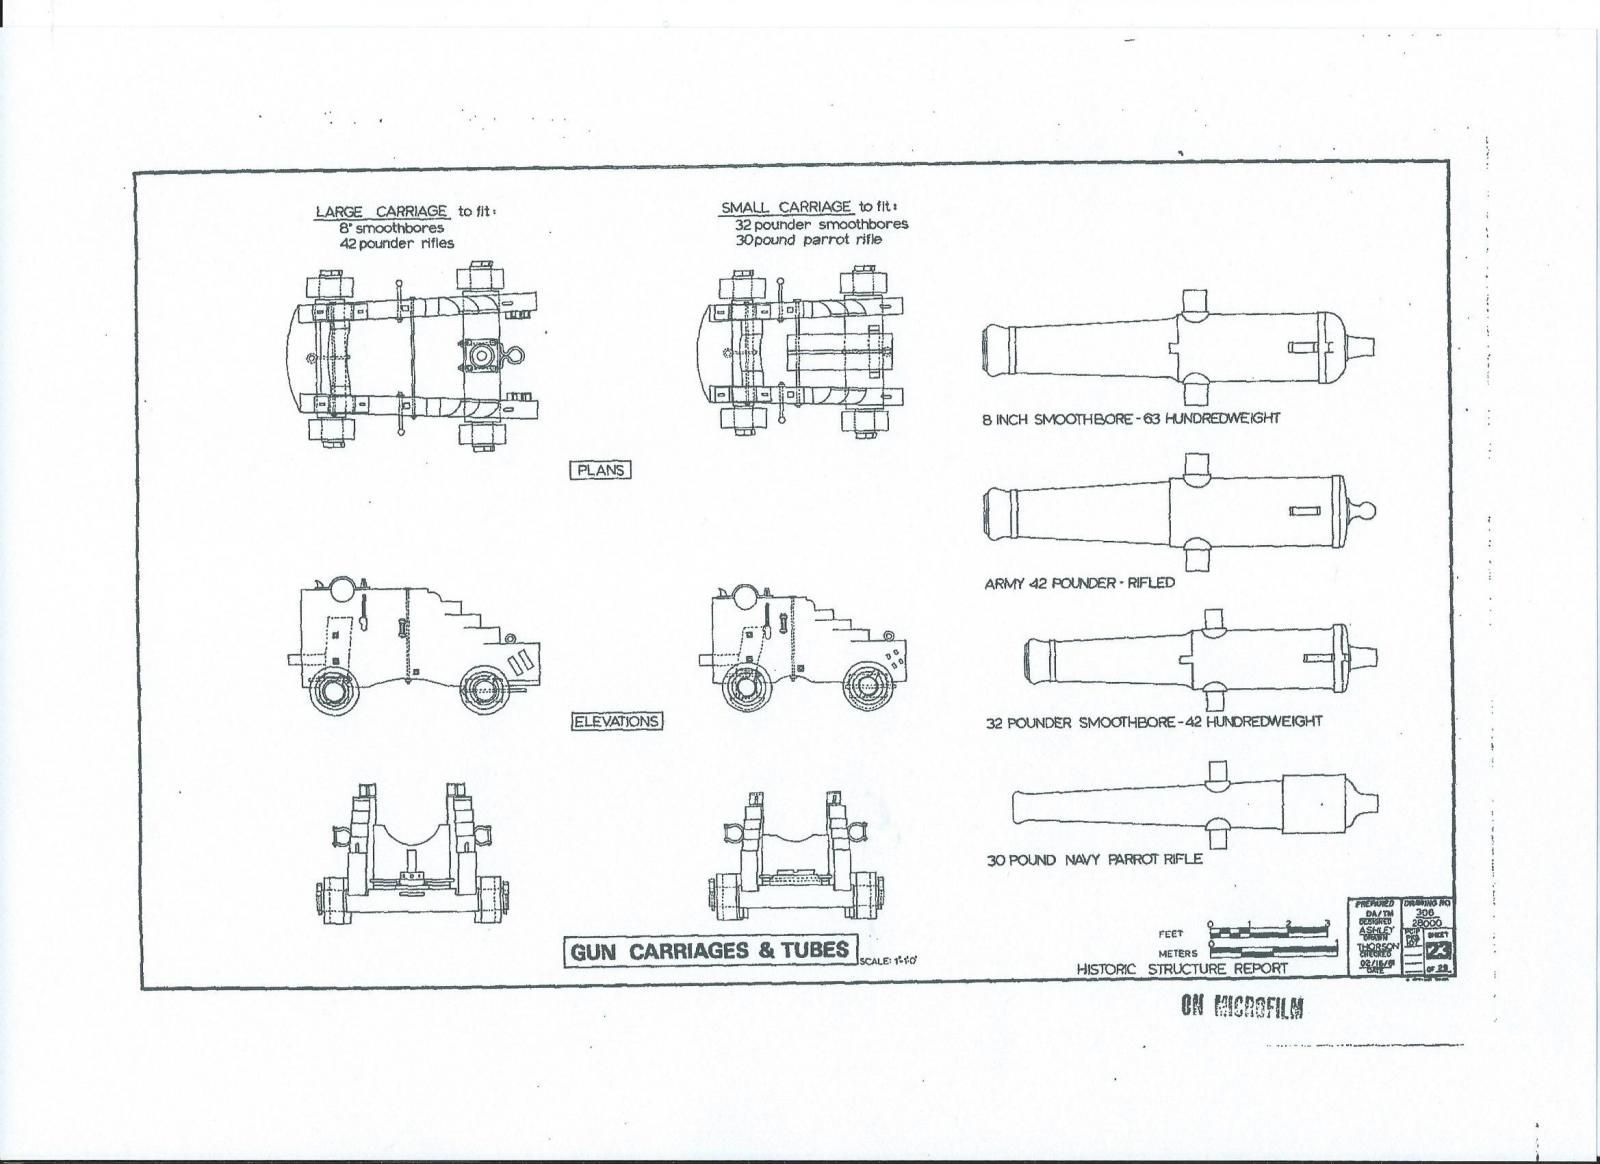
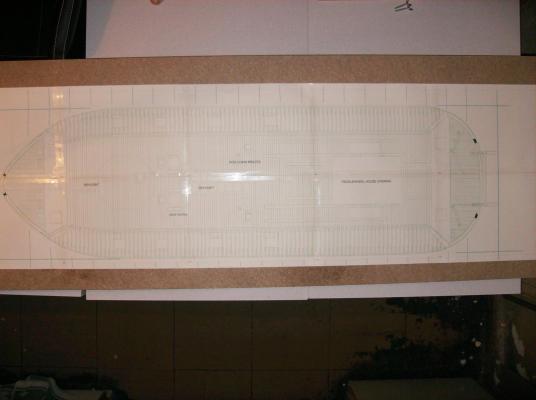
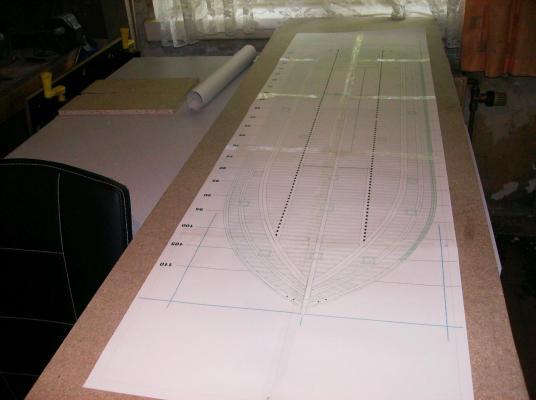
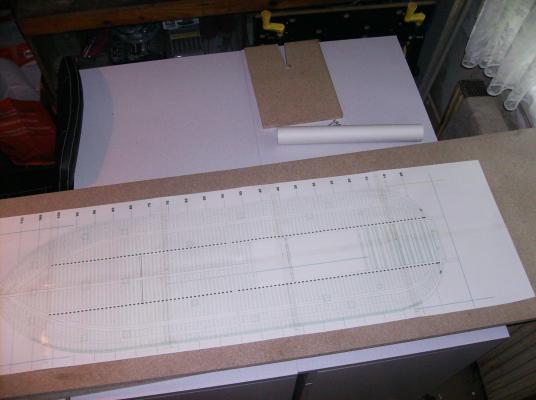
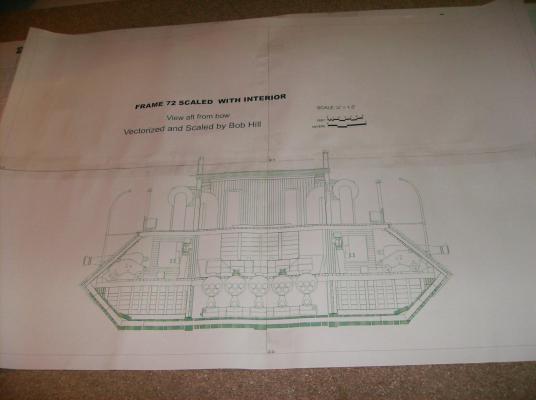
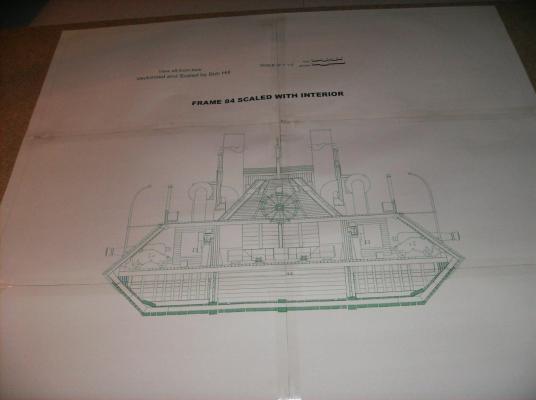
Hello again Thank you for all your comments and so many likes Today I could print out the first plans, and connect the single pages with tape. The hull will be 1060 mm long, and 312 mm wide, so the plans are correct, just the scale bars printed to the plans are not. This means ALL of the scale bars on the Bob Hill plans, but they are perfect for working, when they are scaled to correct size! The hull on plans Frame 72 scaled Frame 84 Scaled The drawings for the guns come from the historic structure report, the scale bars at this drawings are correct! Regards Gerhard

- 293 replies
-
- 12
-
-
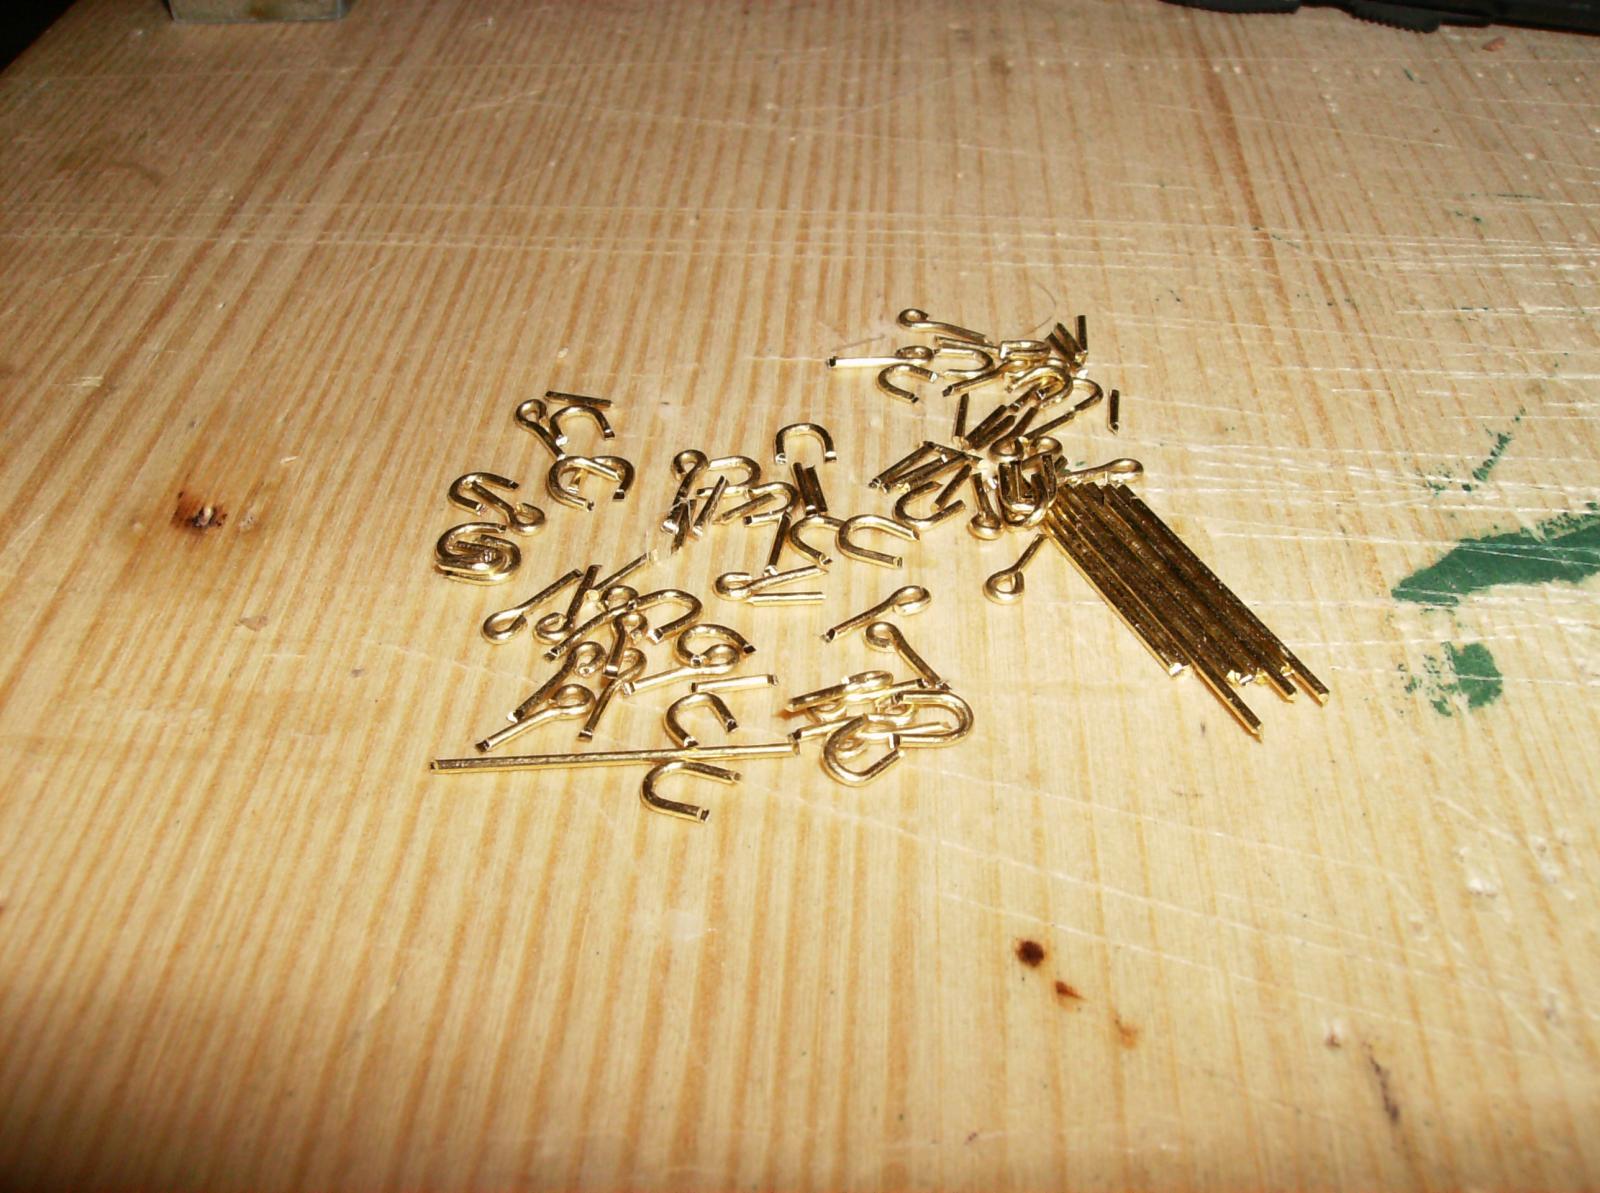
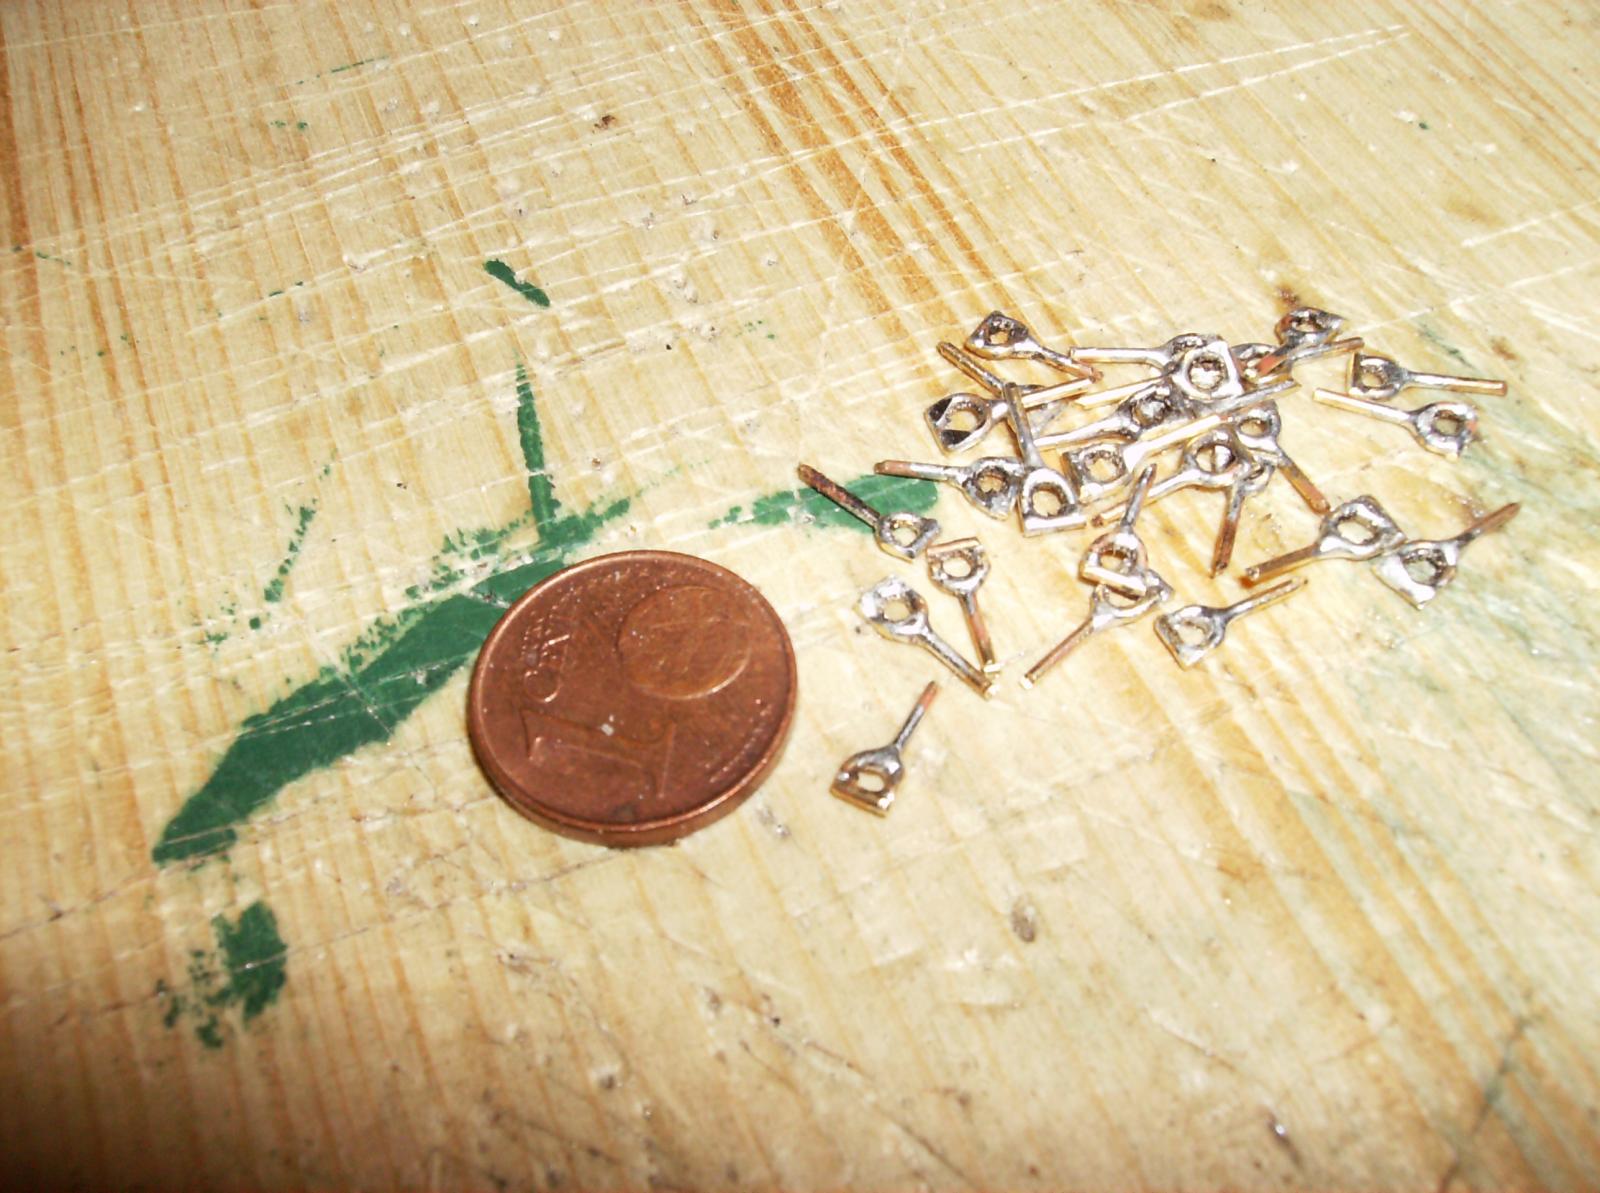
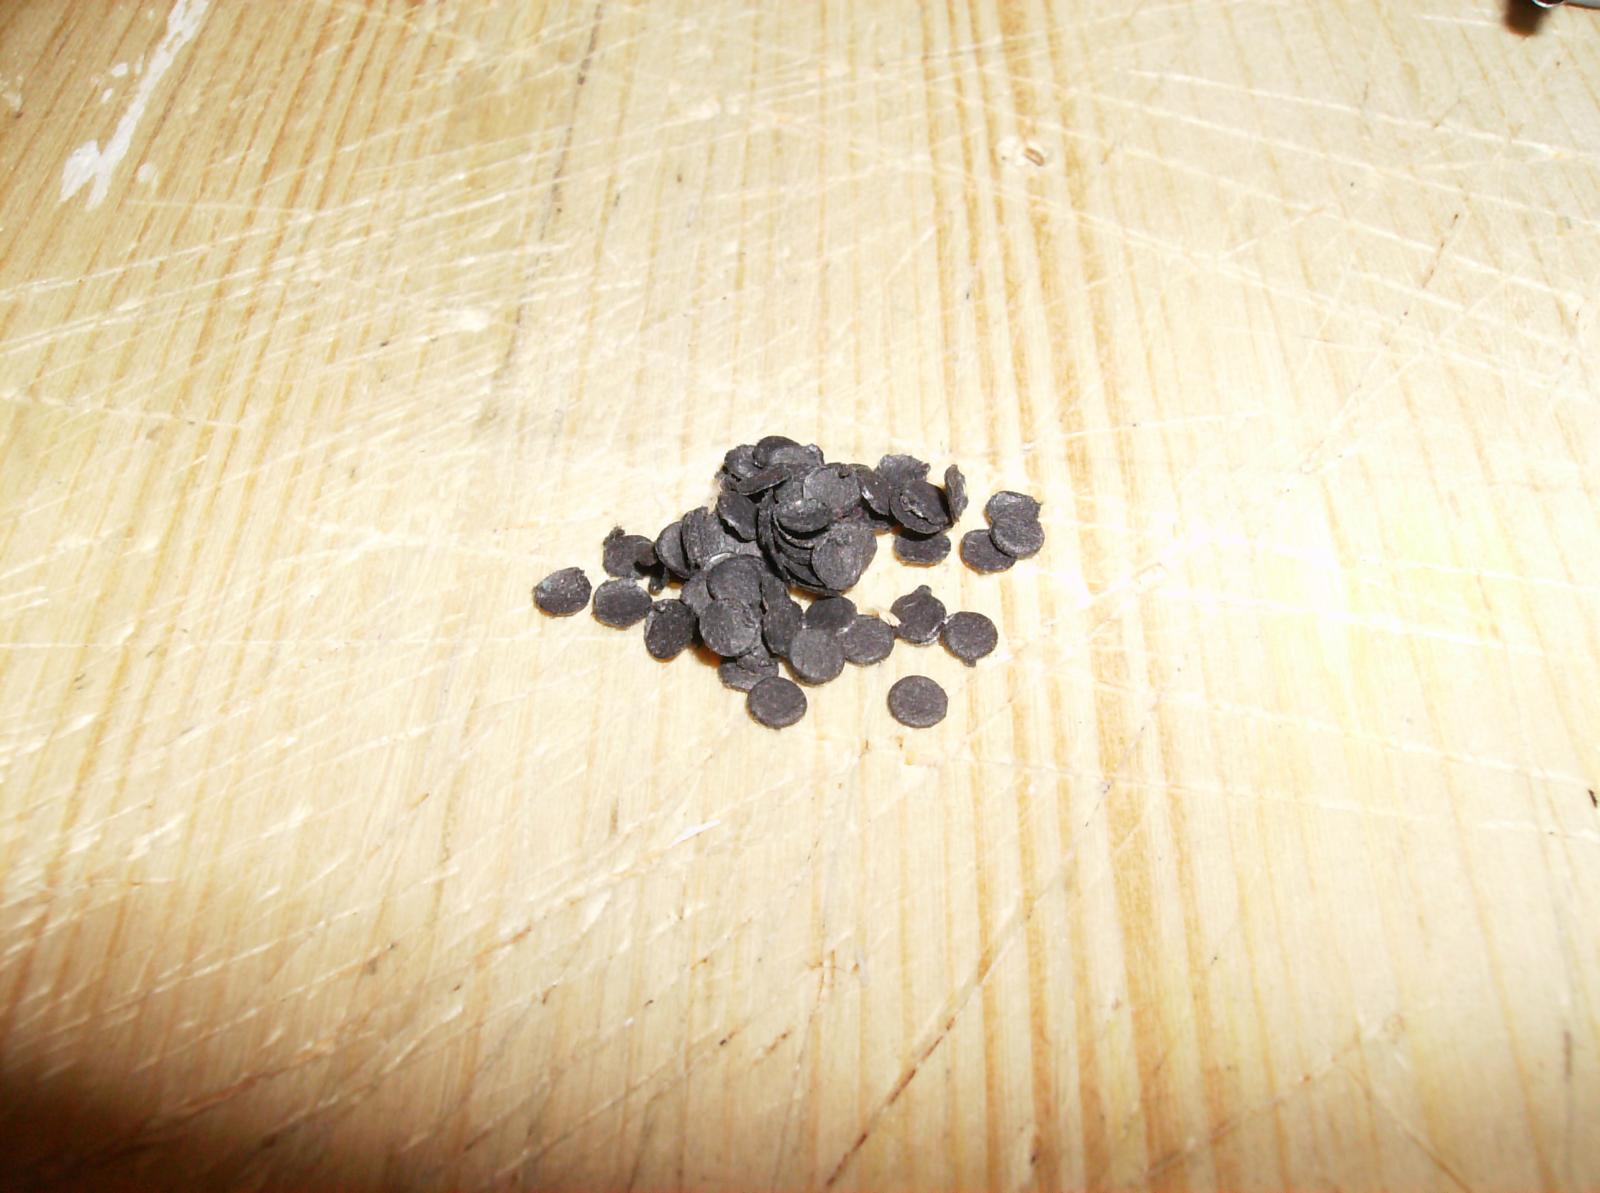
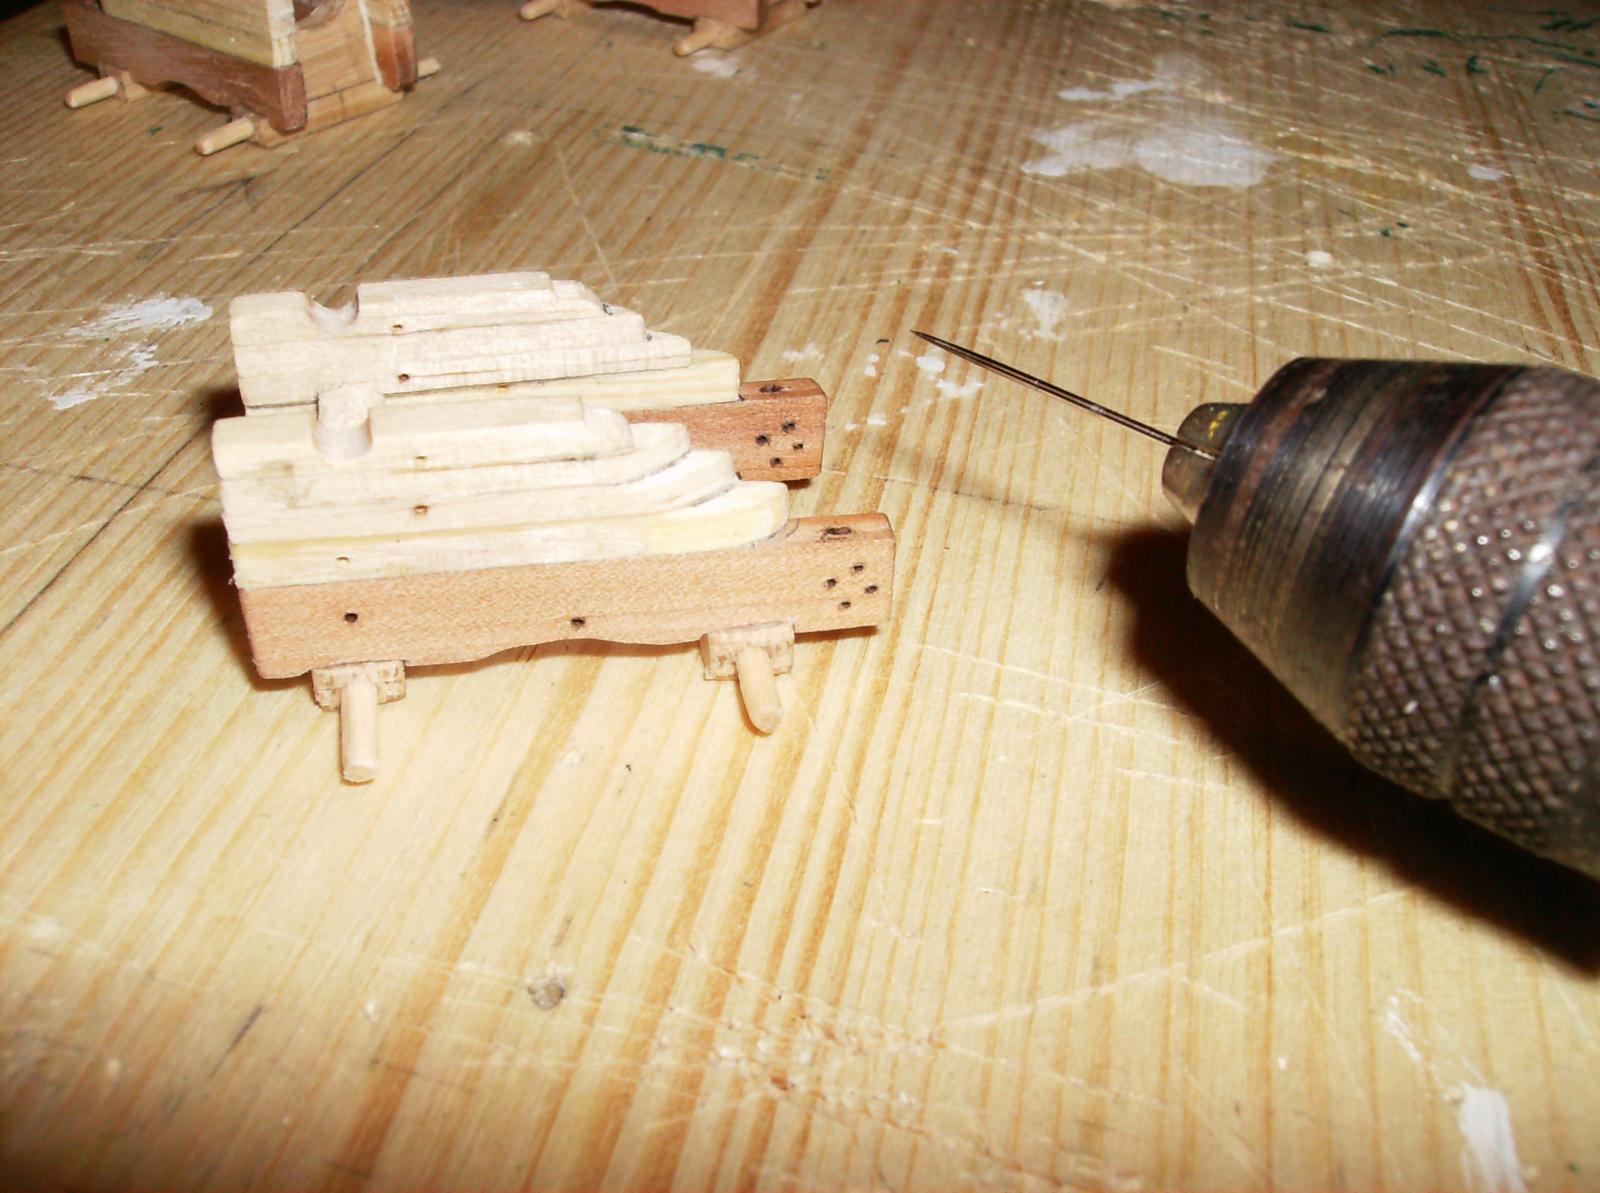
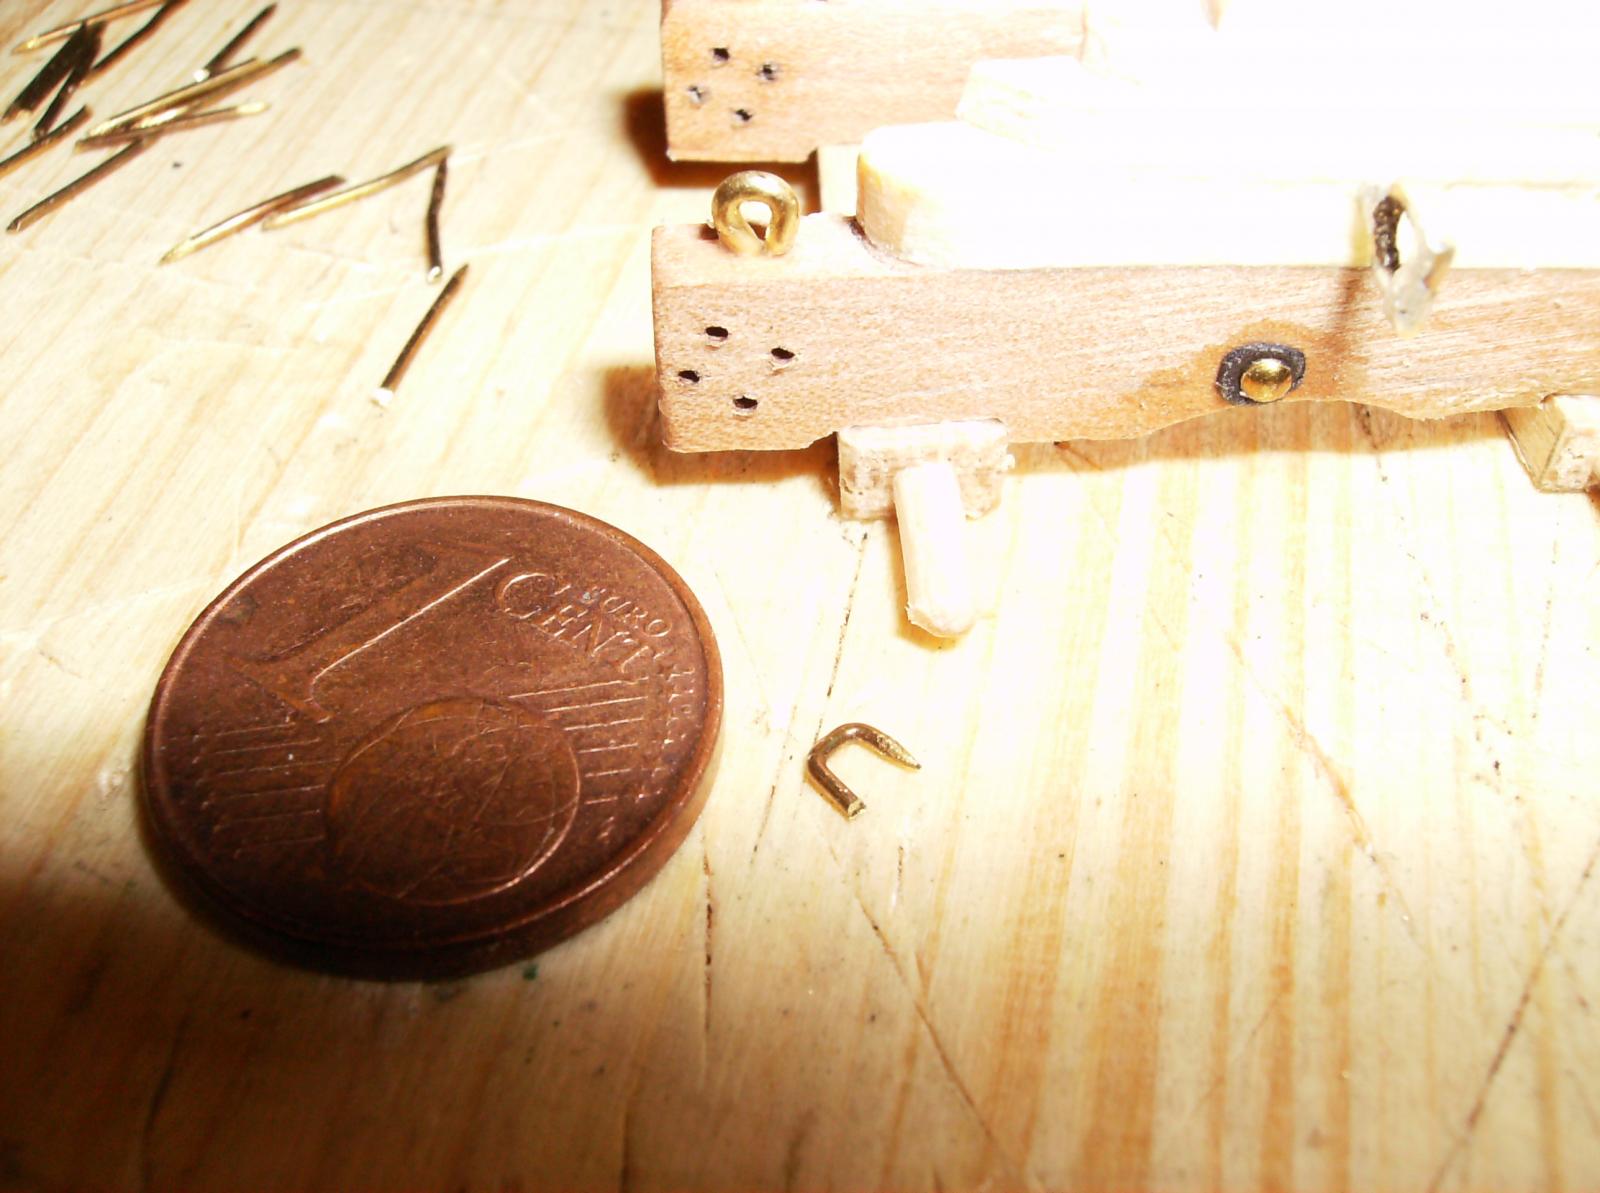
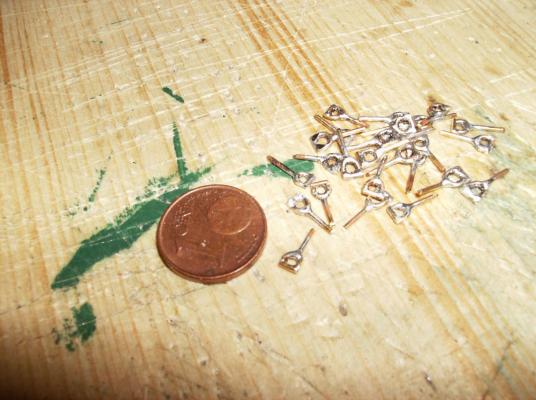
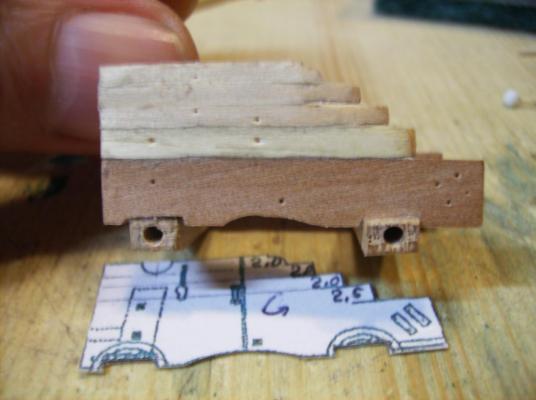
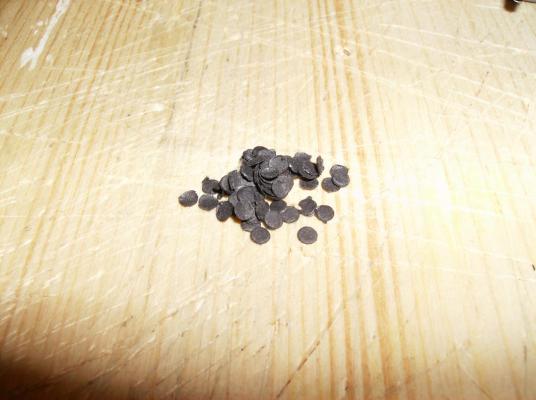
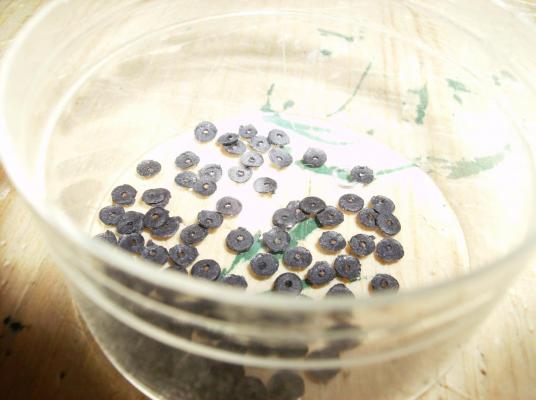
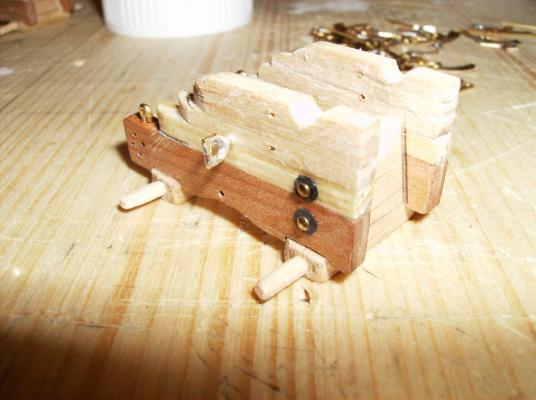
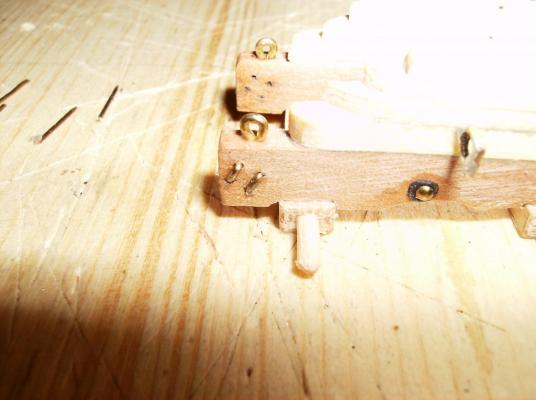
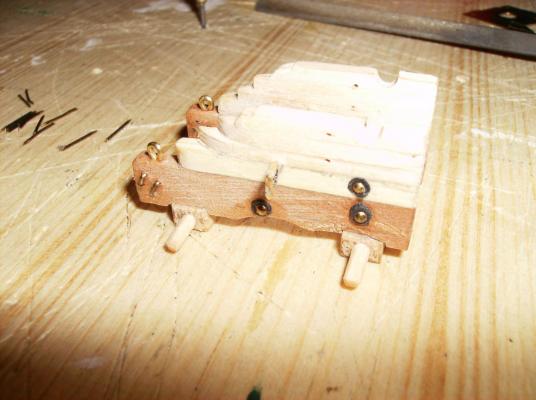
Hi Elijah Welome on board! Enjoy the report, get a beer or wine or softdrink. Popcorn is ready, take your seats! ----------------------------------------------------------------------------------------------------------------------------------------------------- After that a bit more theoretical things I would like to continue with the gun carriages. Some fittings were to make, all are from brass or coppered iron wire, and some really small discs were needed too. I made them from black cardwork, this was the easiest way to produce them. Fittings and materials Before mouting the fittings some holes were needed. I drill that narrow holes with a sewing needle in a fast running drilling machine. The cardwork discs Drilled holes and mounted discs. The nails are small copper nails, shortened to 3mm length Even more fittings............ That was, what I`ve done earlier, all following posts will be delivered "just in time" Again thank you all for tipps and hints, and your so many likes! Regards Gerhard


- 293 replies
-
- 12
-
-
Hi Bob Thank you for that hint! Just took a short look, the book is only listed at amazon, but without price, and it seems to be out of stock. I must search a bit more, maybe I can find it elsewhere. But as I wrote in post 21, I have good plan drawings for the engines, so it is not too bad, when I cant find the book. As i guess there will be a lot of metal work for me to do! Regards Gerhard
-
Hi Daves I do have all the drawings, thank you. But it seems there in no photo from the doctor and the auxiliary engine. But I will trie to built all these engines for the model, so I can also use similar ones, and maybe change in size to fit them. There is always a way for me , to be as close as ever possible to original! Regards Gerhard