HOLIDAY DONATION DRIVE - SUPPORT MSW - DO YOUR PART TO KEEP THIS GREAT FORUM GOING! (Only 20 donations so far - C'mon guys!)
×


Gerhardvienna
-
Posts
683 -
Joined
-
Last visited
Content Type
Profiles
Forums
Gallery
Events
Everything posted by Gerhardvienna
-
ancre La Salamandre by tadheus - 1:24
Gerhardvienna replied to tadheus's topic in - Build logs for subjects built 1751 - 1800
Hi Paul Simply Marvelous! Regards Gerhard -
Hi Grant Thank you for the info! I`m just thinking about building a Baby Bootlegger beneath my historic projects, would be very interesting for me! Regards Gerhard
- 339 replies
-
- 6
-

-
- dumas
- Chris-Craft
- (and 3 more)
-
Hi Daniel I NEED all of this, and I dont build the vic ! Seems to be so much new stuff about the ship, to rebuild all of this will be a lifetime working! How good, that the Danzig and the Cairo are not that complicated.......... Great work of art you are delivering to us! Regards Gerhard
-
Cutty Sark by NenadM
Gerhardvienna replied to NenadM's topic in - Build logs for subjects built 1851 - 1900
Hi Nenad As You see, even the boring things pay out, when they are done When I keep the measure in mind, perfect job! Regards Gerhard- 4,152 replies
-
- 7
-
-
- cutty sark
- tehnodidakta
- (and 1 more)
-
Hi Grant Maybe I`ve overread this, how large will she be? Drive assembly and rudder look good! Regards Gerhard
- 339 replies
-
- 5
-
-
- dumas
- Chris-Craft
- (and 3 more)
-
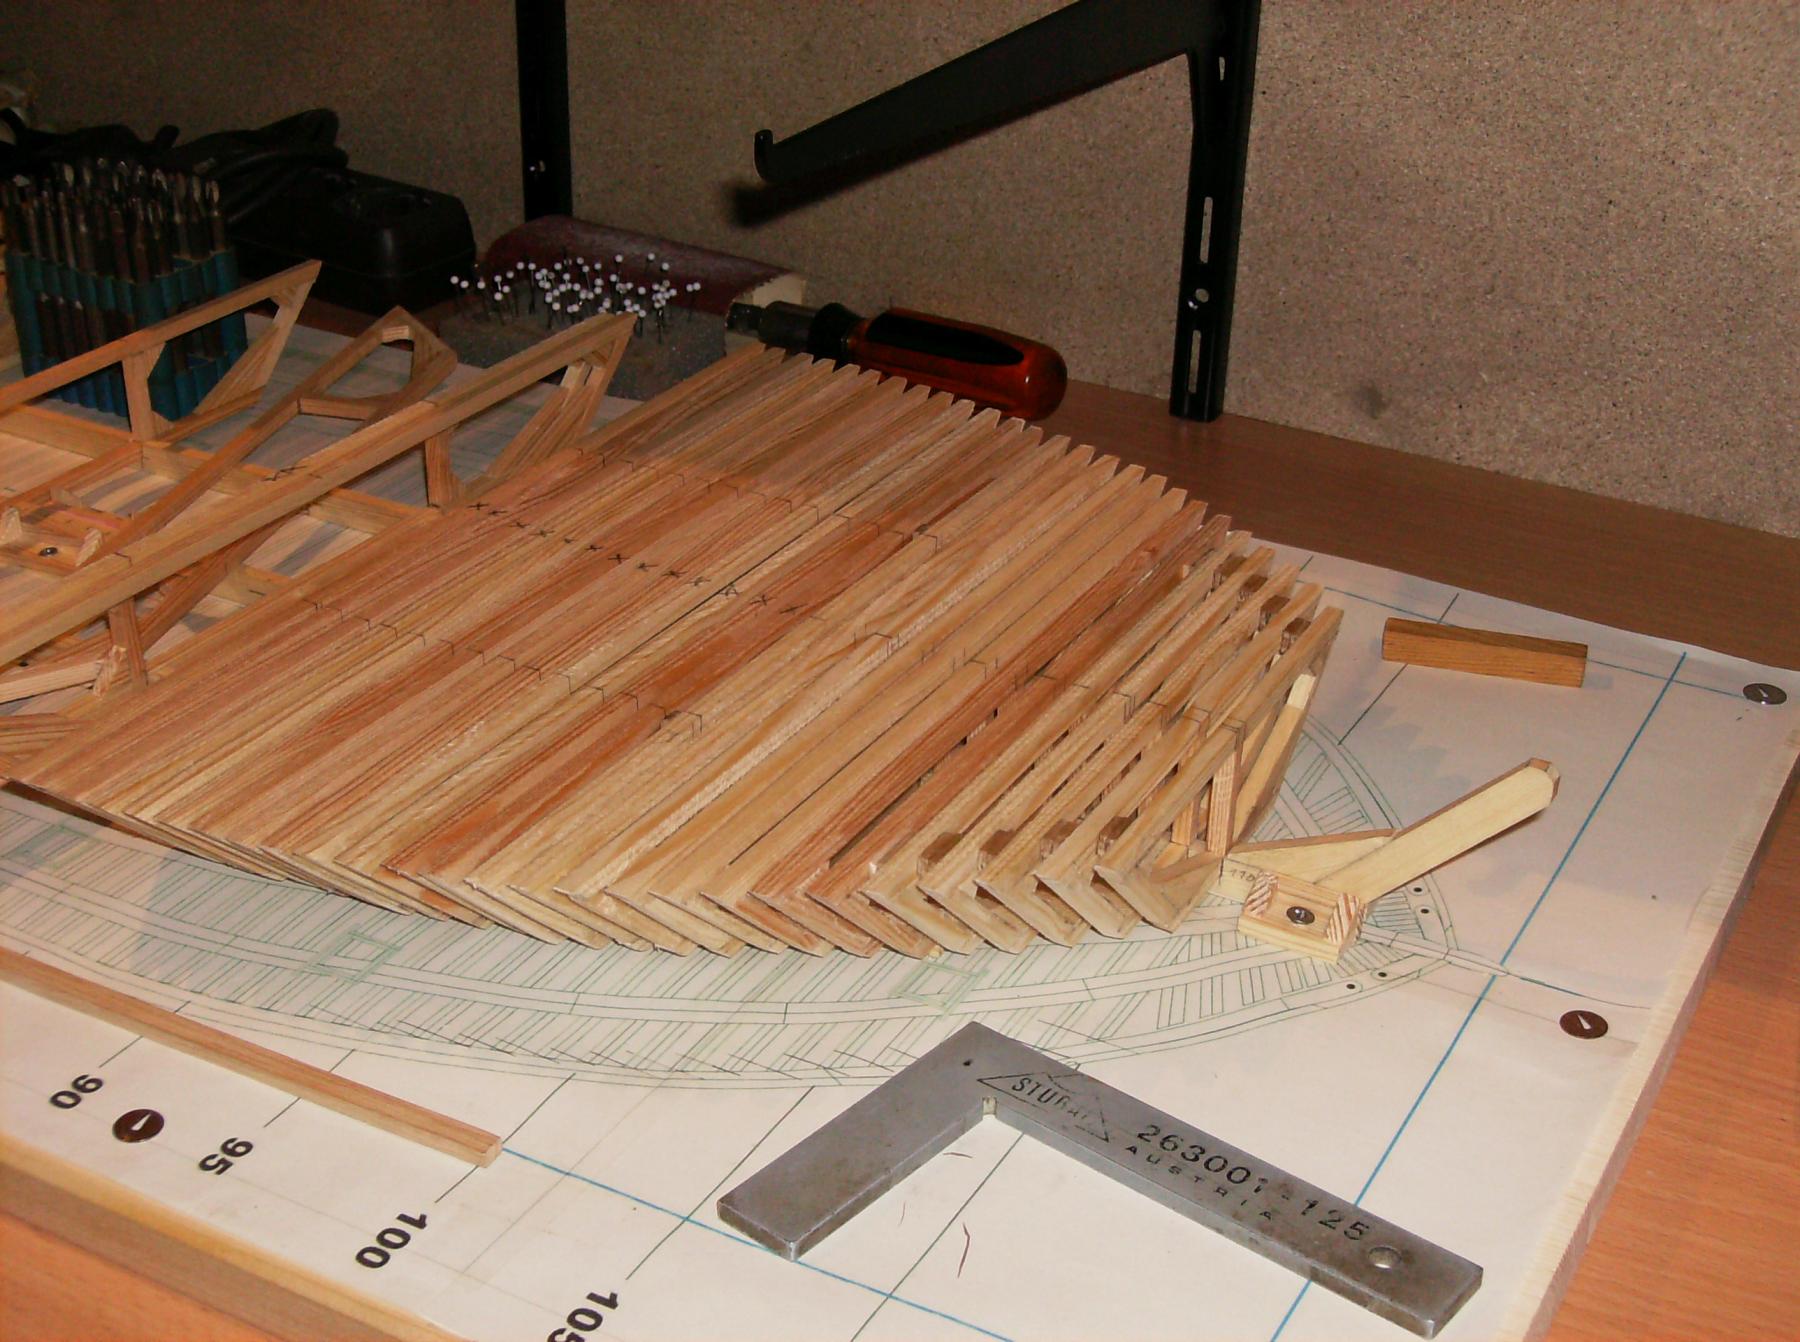
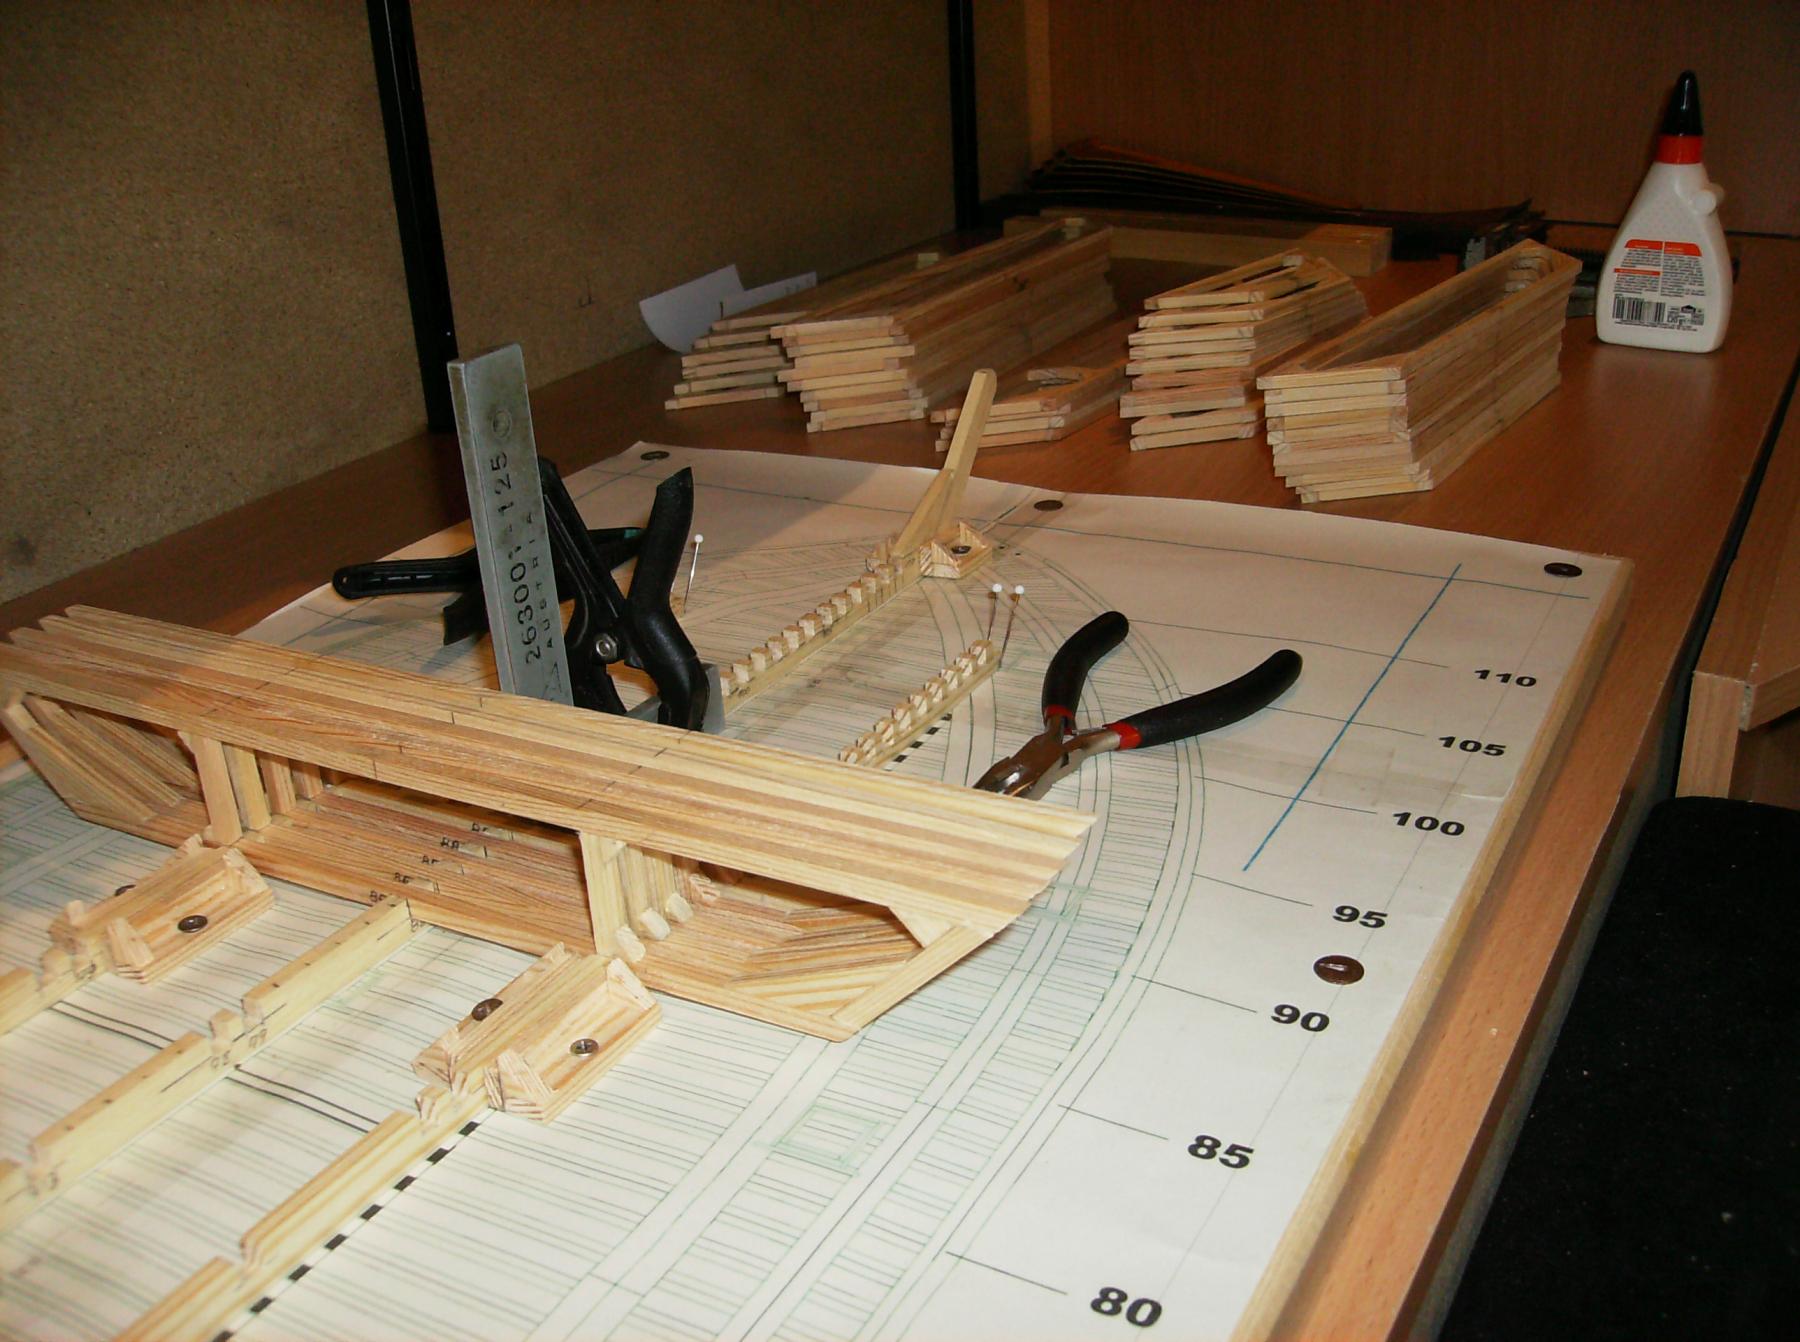
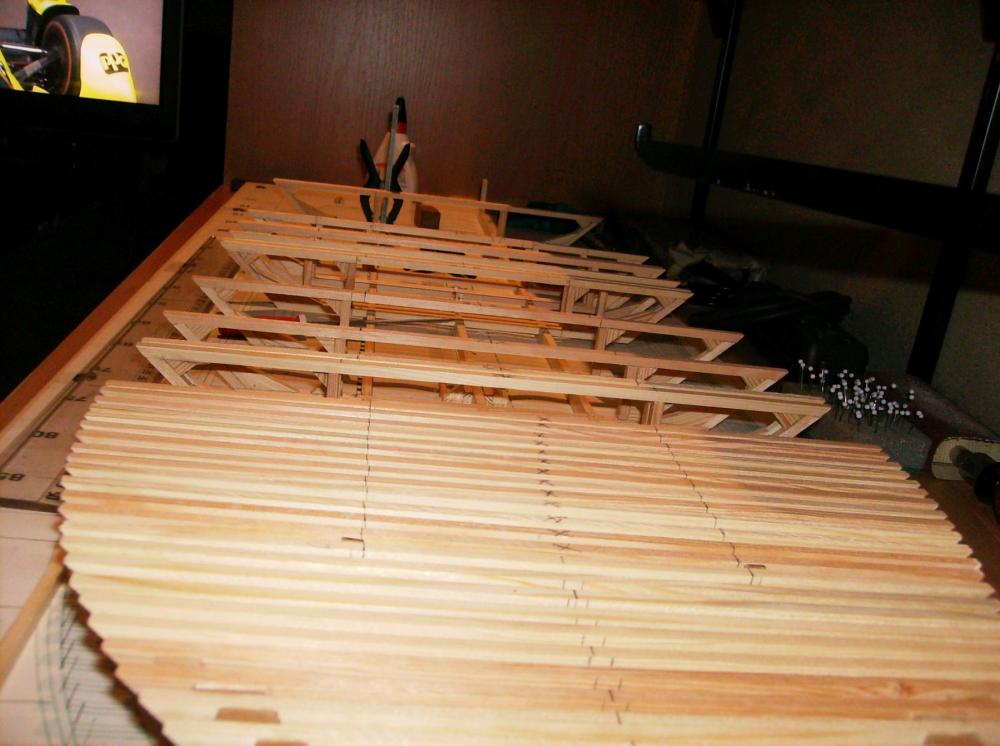
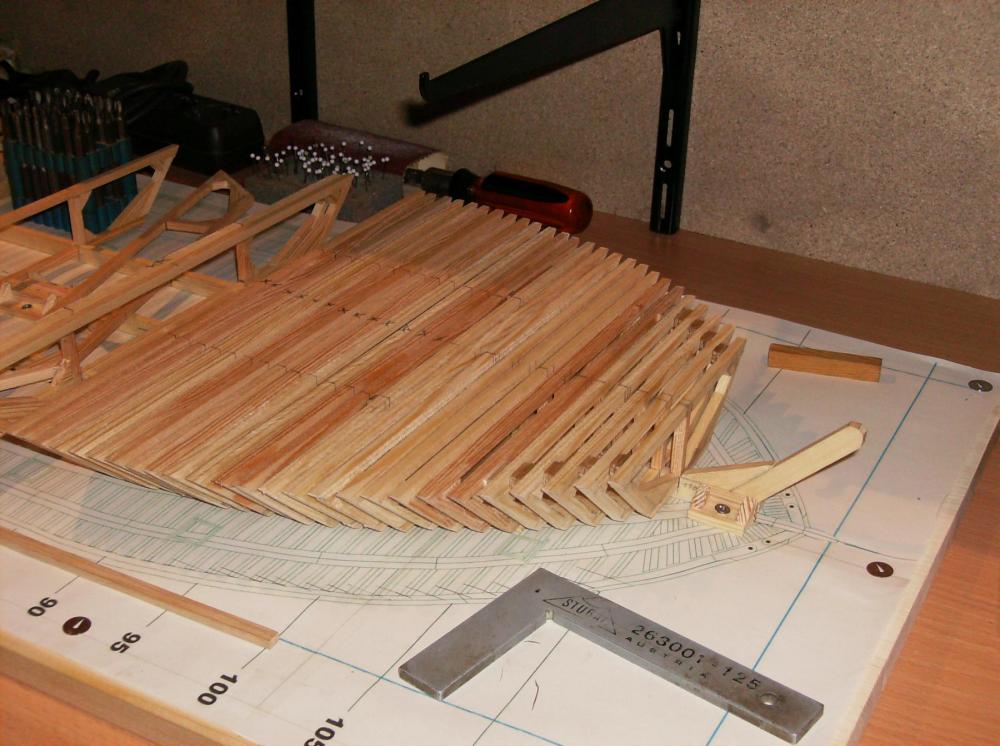
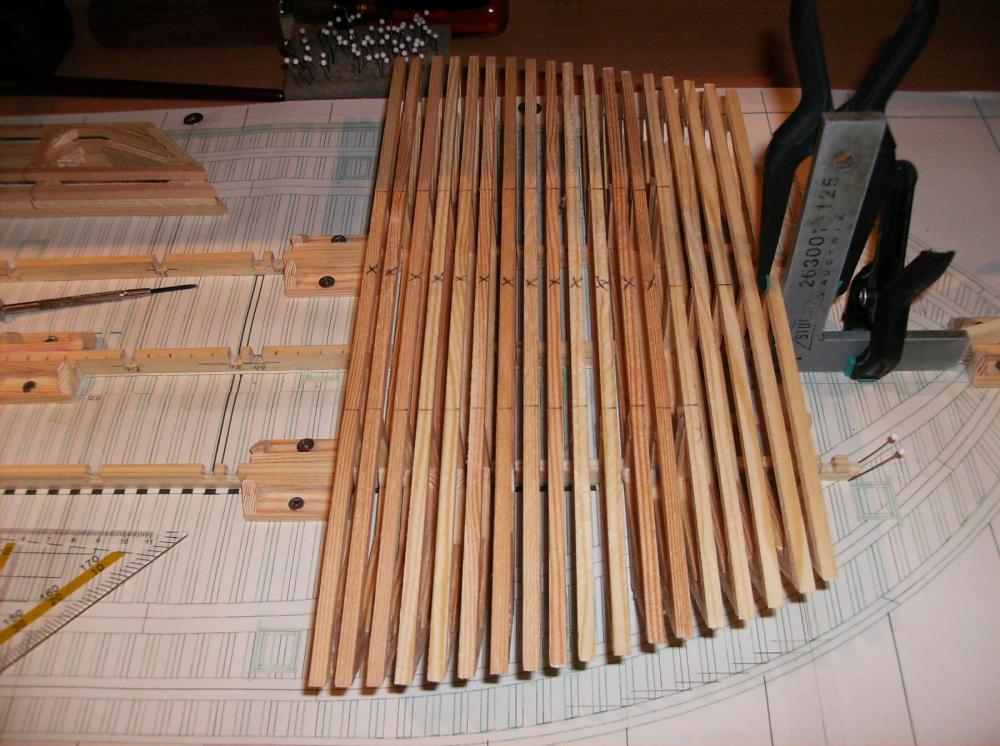
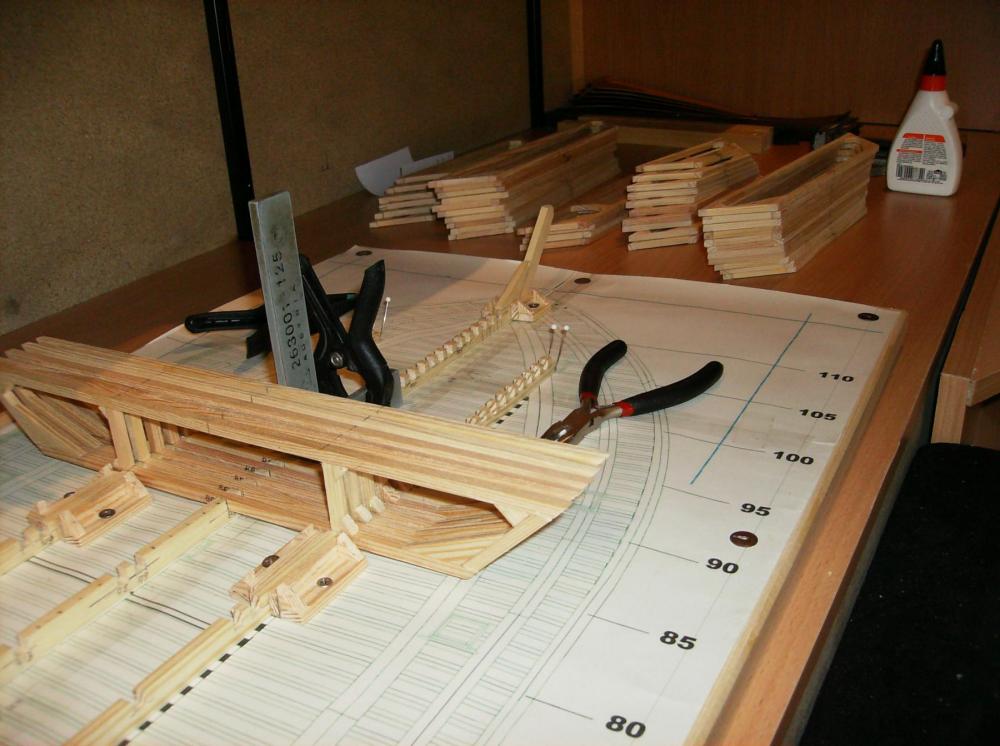
Hi again, and thank you all for your interest and likes! Some more new pics today............ The last days I set some more frames to the keels, and made some reminders for me as marks to different frames, where and how wide to cut them. Just 8 more to glue to the keels, and that part of work is done Overview of the now set frames Frames with "reminders" A look from stern to bow...... NOW I`m going to watch the Indy 500............ Best regards Gerhard
- 293 replies
-
- 14
-
-
Hi Carl Thank you! When it comes to good tips, hints or critics, I always try to listen. Every tip of making things better may help! Btw. I`m still searching for a good drawing of the engine, the original drawings are not that good for rebuilding. I know about the "Ageless Engines" plans, this engine is much too large, and the E.T. Westbury engine from which I do have the plans. But this engine does not look like the original, so it is not what I expect for "my" Cairo. Most important will be the function of the valves and the cam, and how can I make it a reversal engine. Thank you all again for your interest, Regards Gerhard PS.: No new photos for today, just the same old story of setting frames to the keels ...................
-
Cutty Sark by NenadM
Gerhardvienna replied to NenadM's topic in - Build logs for subjects built 1851 - 1900
Hi Nenad Fine fizzling work friend! Nice done with all that small holes and wire! Seems to be another lunatic here............. Regards Gerhard- 4,152 replies
-
- 4
-
-
- cutty sark
- tehnodidakta
- (and 1 more)
-
Hi Carl You`r so right ! I made that mistake on a former project, was only 2mm, but I built the complete hull new then! But it was only 12 frames, and a lot of balsa wood stripes, so this was not too expensive . Such a mistake with the Cairo would be much more intense in costs and time.............. Regards Gerhard
-
Hi Carl This comes from the angle the pics are taken. All of the frames end up with the inner line of the hull. Regards Gerhard
- 293 replies
-
- 12
-
-
Hi Carl Absolutley! The frames at the bow are enough, 10 frames at the stern and 10 in the mid section will be good to work with. For a usual hull I use one frame around each 10 cm, at bended parts every 5cm, so there are a lot more at the Cairo hull. The bow and stern will be made from solid wood blocks, and grinded to final shape, I`ve made that on former hulls too, it works fine. If it is necessary, I can fill smaller portions of wood to the blocks, the result will be a good surface for planking. More about this work will come later, as always with lots of pics (IF I dont forget that! ). The blocks will be glued to the hull, when the inner pits are set in, they will give some extra stability to it. Thank you & all others for your interest! Regards Gerhard
-
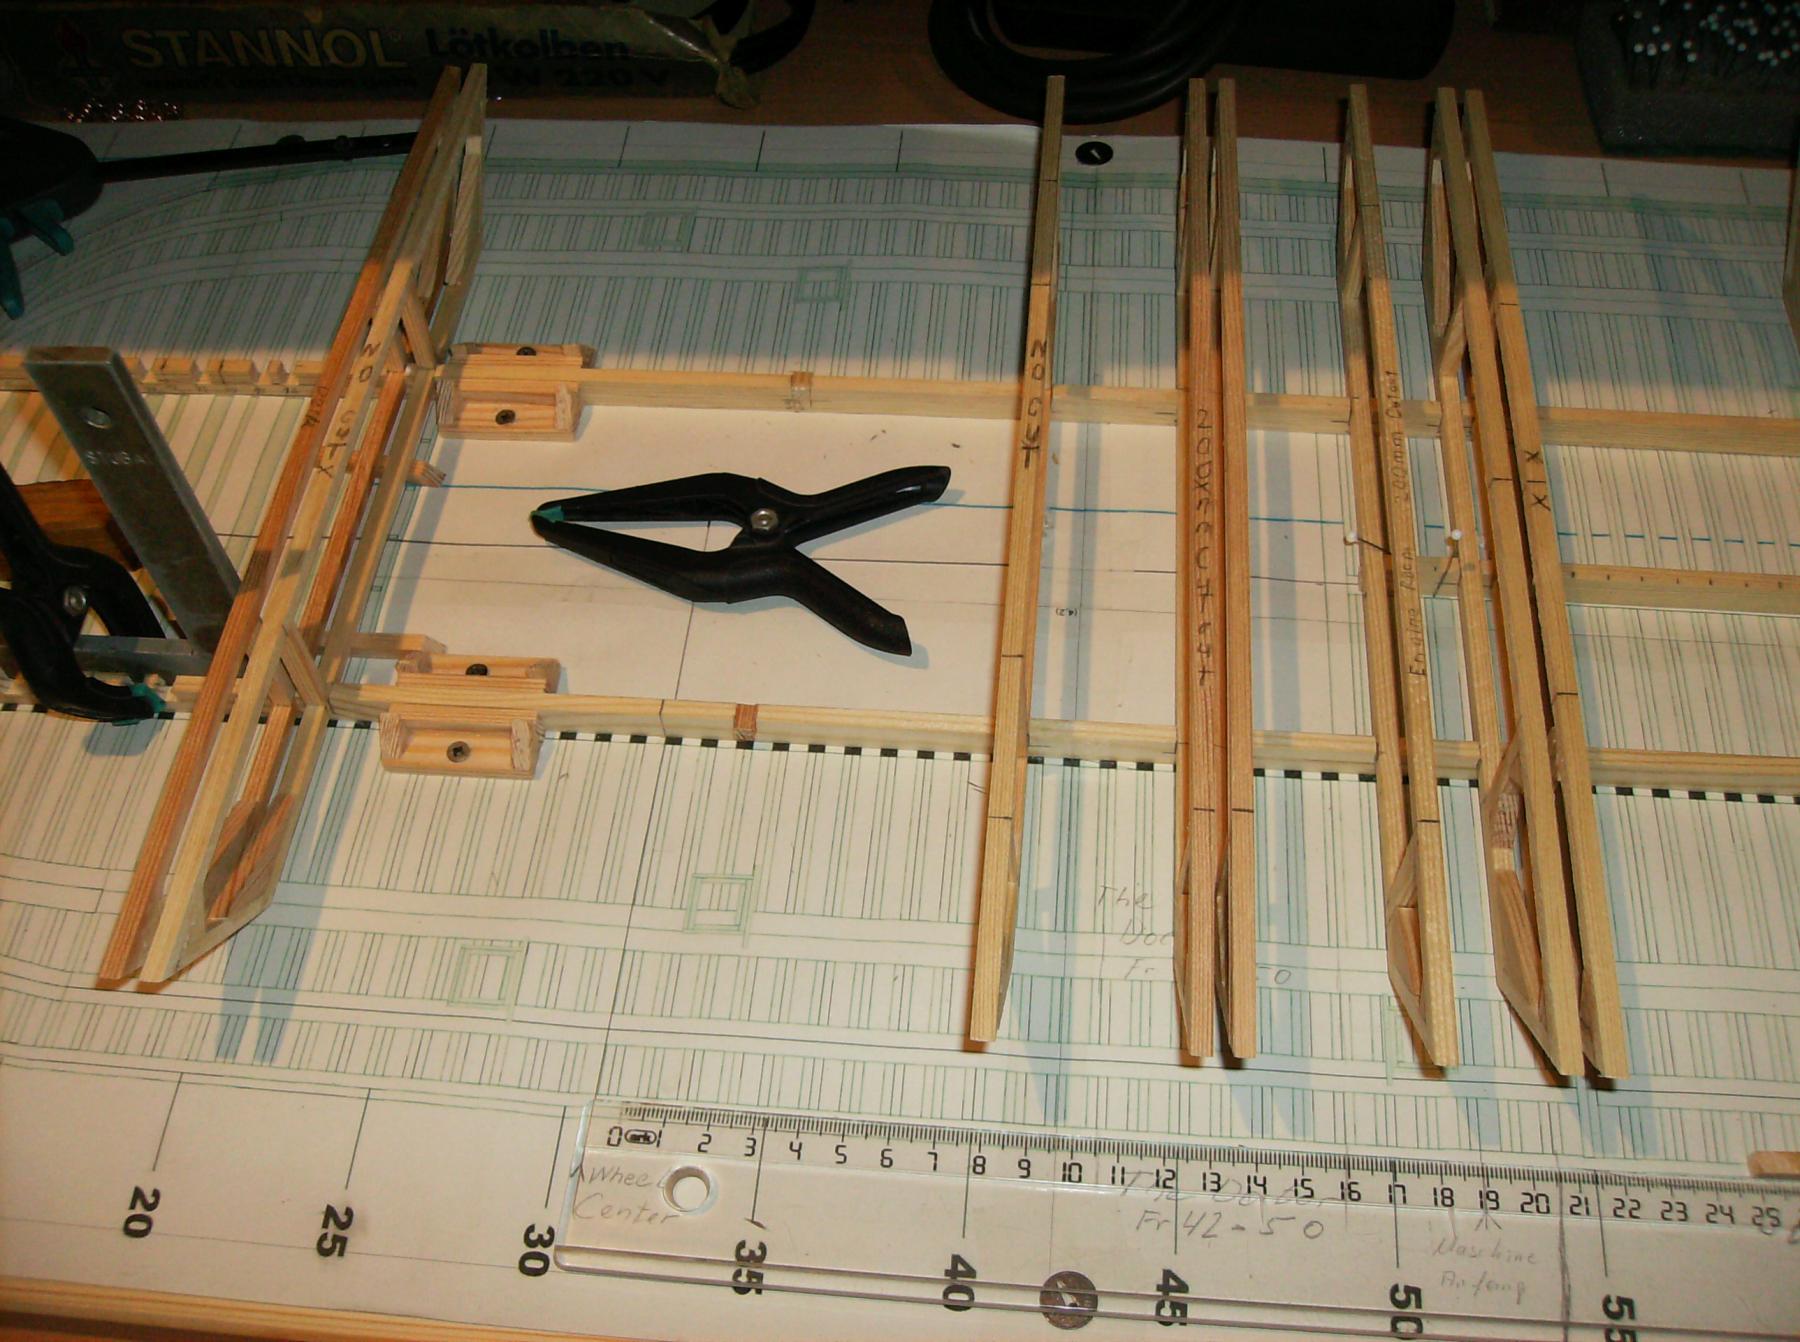
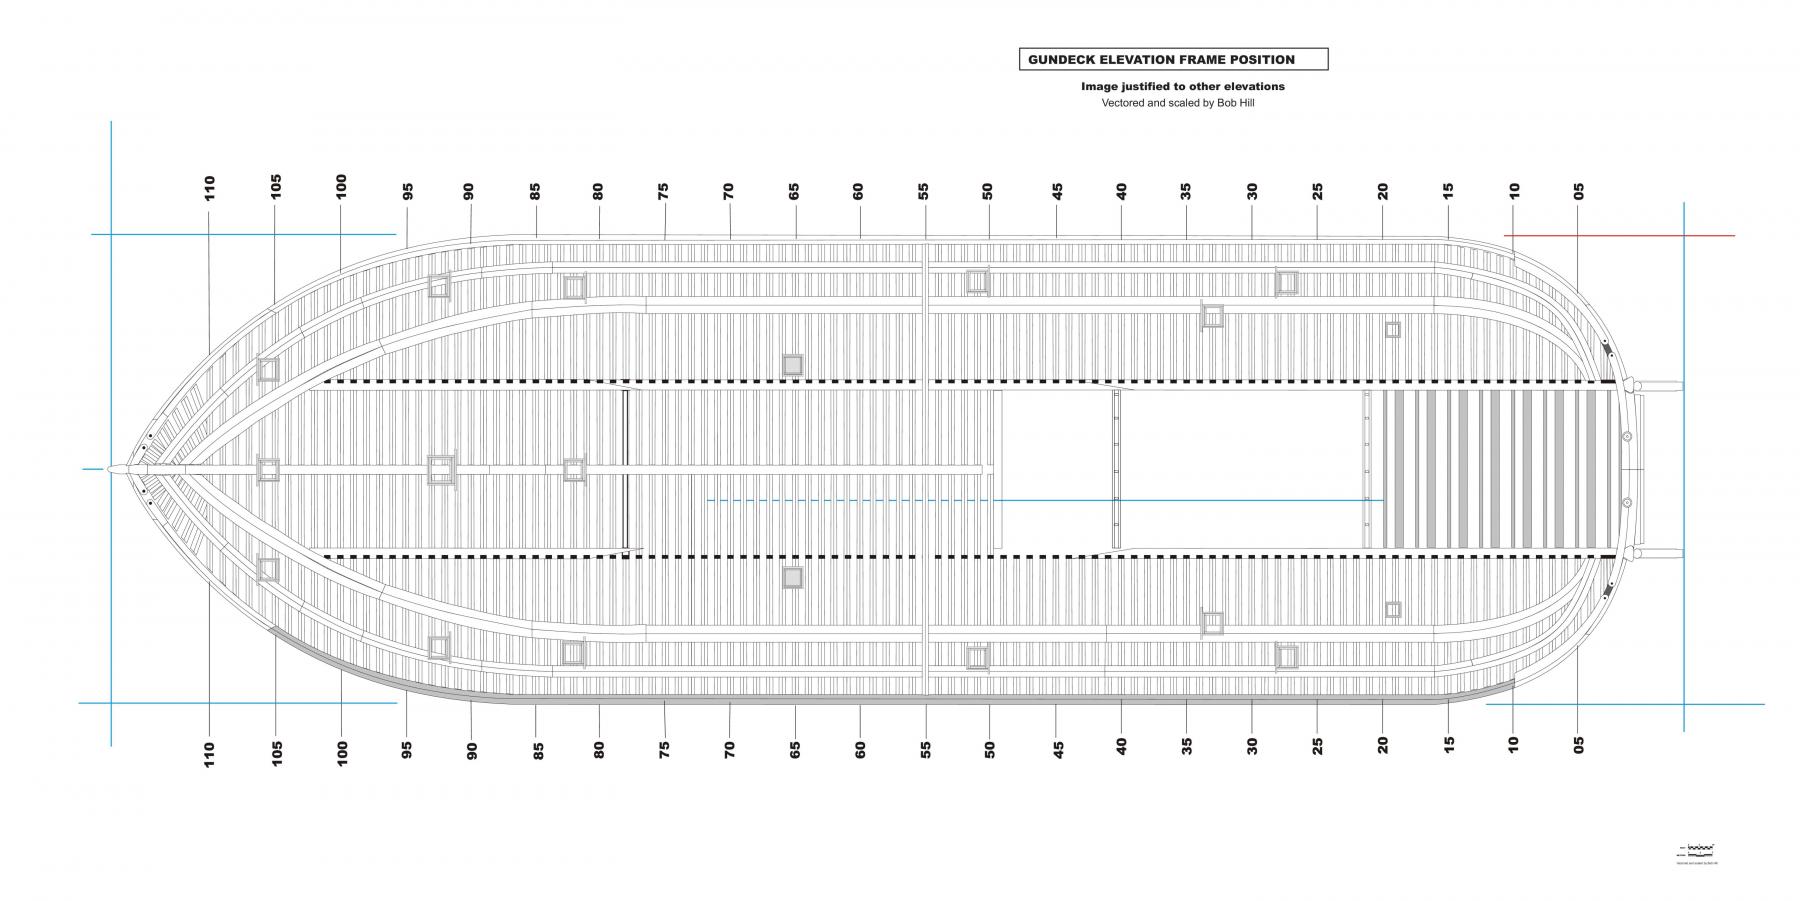
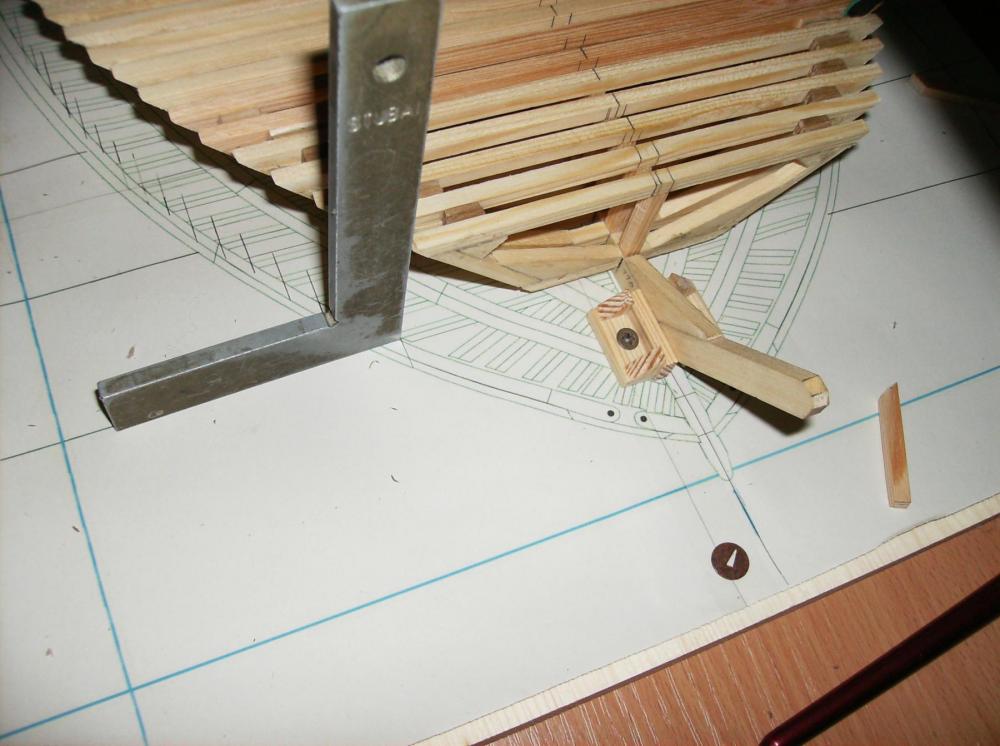
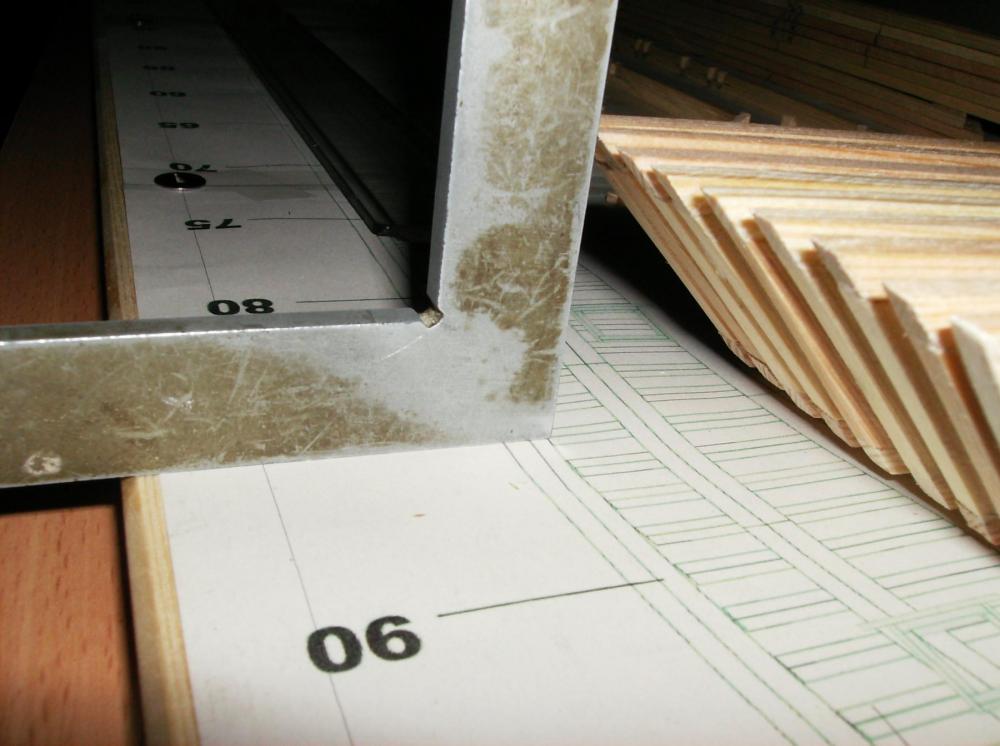
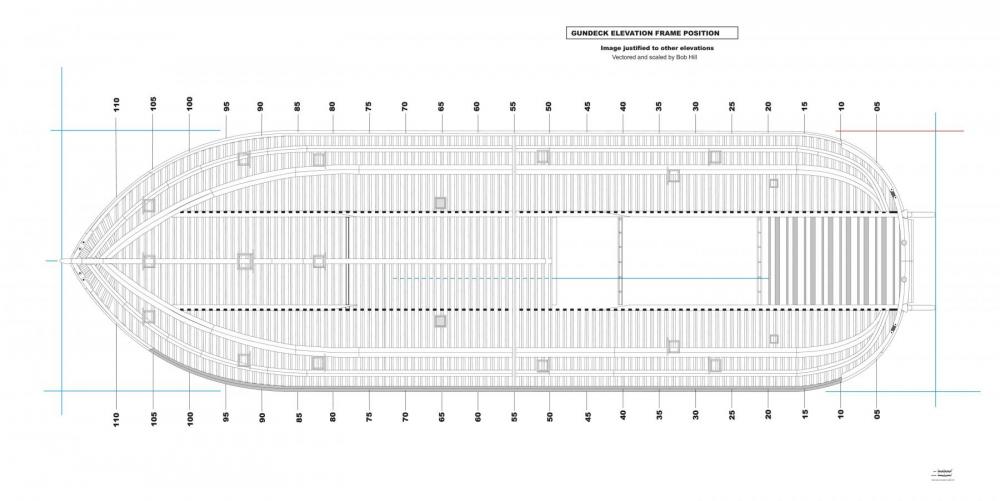
Hi David The three keels were necessary, the centered paddlewheel did not allow to make the center keel at full length. It runs from the bow back to frame No. 50, the side keels run from Frame 105 to the stern. This is good to see in bob Hill`s plans which I use for my build. Hi Carl Thank you! She hopefully will not be too haevy, most of the engine will be made from aluminium as far as possible. Most of the casematte will be made from balsa wood, the pit for engine and gas tank will be made from 2mm plywood. Planks are planned from 2 x 6 mm pine, the deck will consist of 1 mm plywood and 1x 5 mm wood stripes, maybe peawood. A bit of endurance is important for doing the same things all days long, now that the frames are ready for assembling work flows a little better. Today the last frames at the bow were set to the keels, not so much work at this stage, next days the frames to the stern will be mounted. Thank you all again for your interest and so many likes Regards Gerhard
- 293 replies
-
- 12
-
-
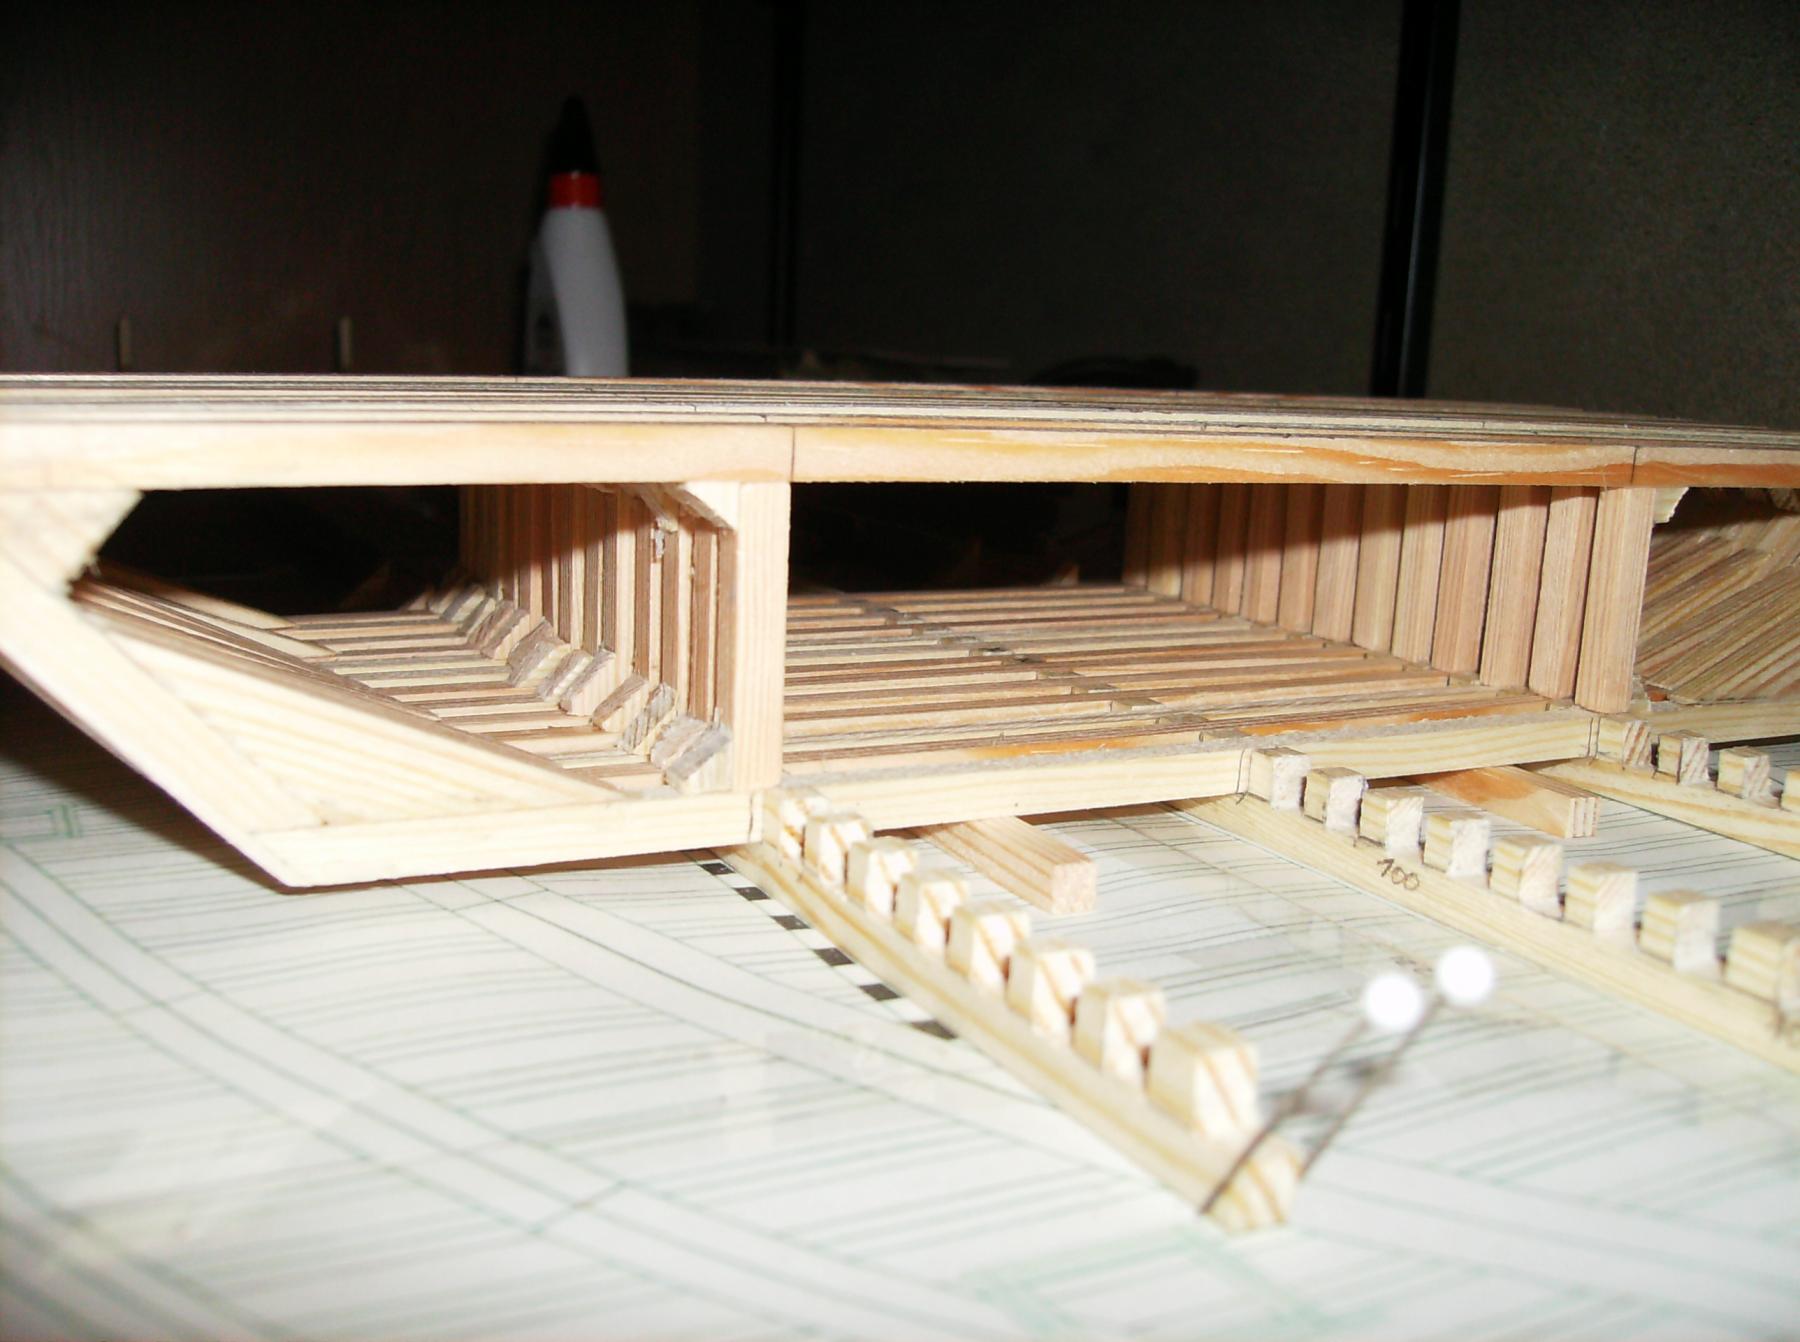
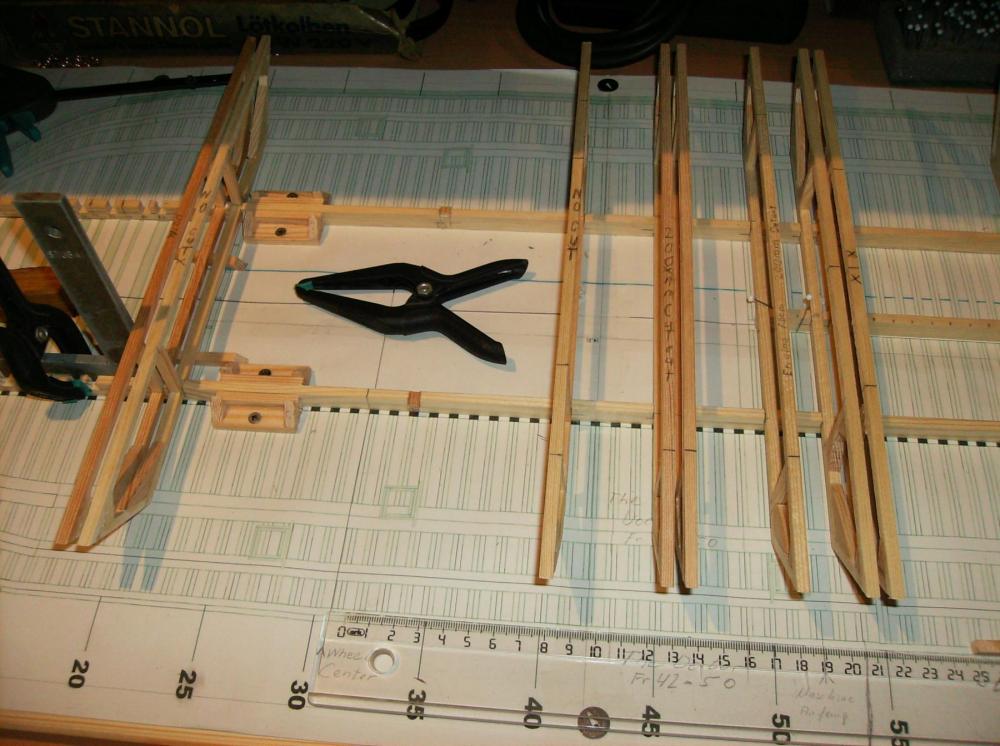
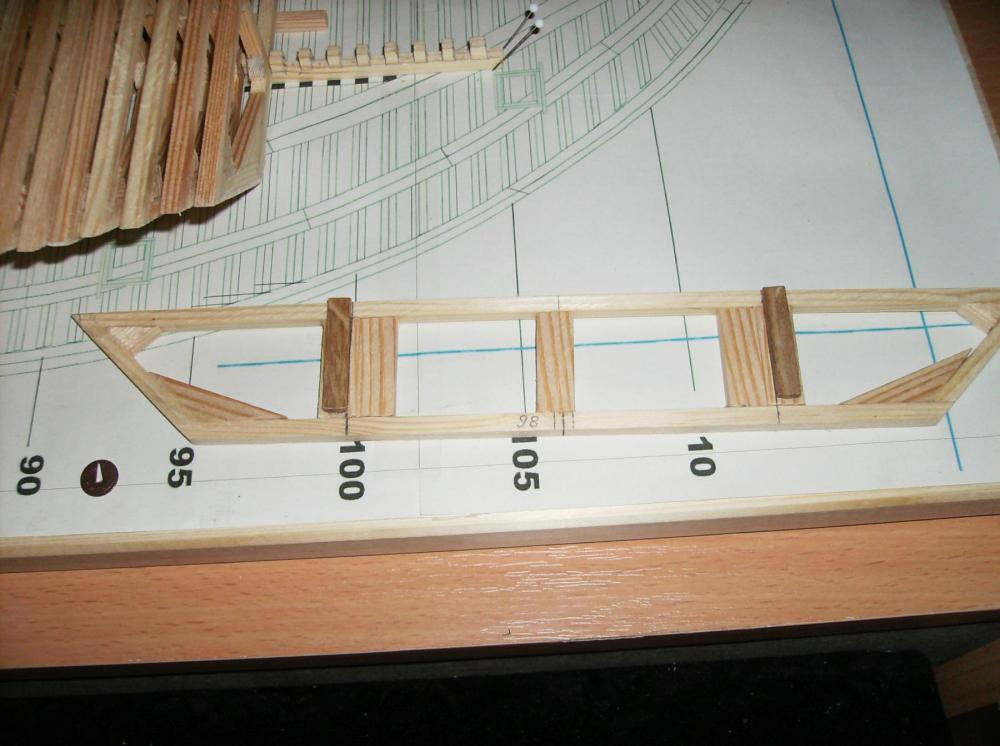
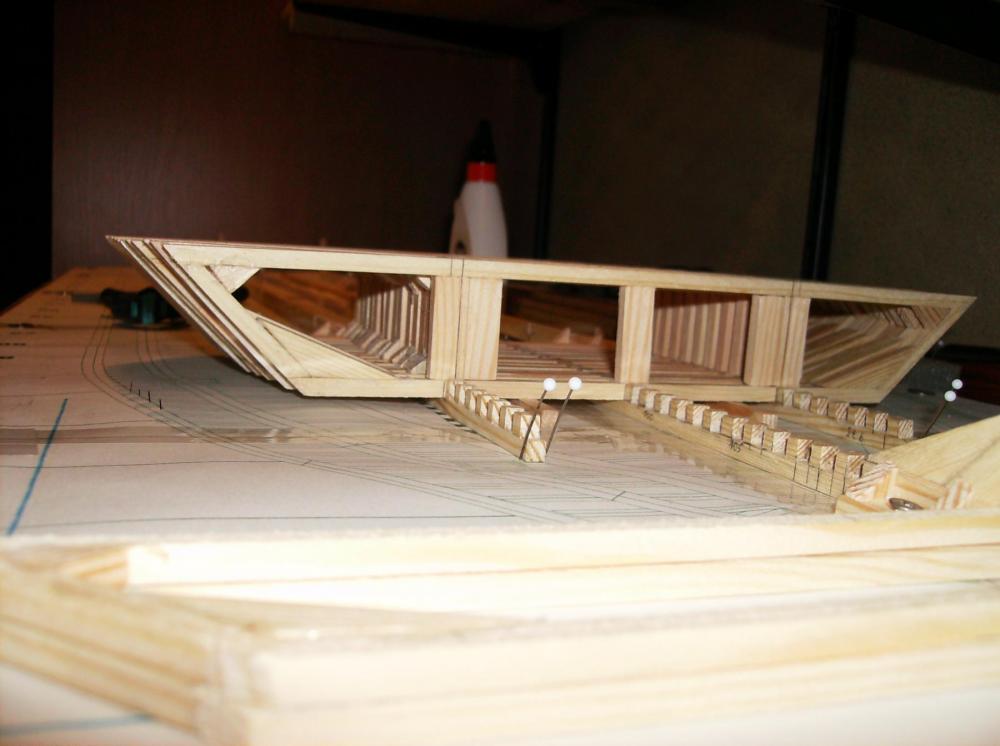
Hi popeye Indeed this wil be a large one. But I will need a lot of the space inside for all the mechanics and RC parts. If you make a life steam model, there is so much more to be placed than in an "only" electric driven boat. Today the next few frames were set to the keels, frame No. 98 marks the front end of the machinery pit, see the photos. Frames 85 to 97, the vertical wooden stripes mark the sidewalls for the machinery pit. Frame No. 98 marks the front end of machinery pit Frame 98 set to the keels Frames No 85 to 102 set to keels. The "X" - marked parts will be cut out of the frames after planking the hull. In this part of the hull the gas tank will have its seat. Regards, and many thanks for watching and your kind likes! Gerhard

- 293 replies
-
- 15
-
-
Hello Johann Thank you! Have set more frames today, still going on with it. This will take some more days................... Regards Gerhard
-
Hi Mark I dont think I will need more notches. I have made the cutouts for over 40 frames, this will be enough for a good stability. Most frames are set at the bow and stern sections, less in the middle, but the whole hull will be stiffened with 2mm plywood inside, and 2mm planks outside. So this will be a really solid hull, strong enough for the steam equipment. No new pics today, just setting frame after frame after frame.................... Thank you all for your interest & likes! Regards Gerhard
-
Hi Charlene Congrats to your finished Bounty! WELL DONE! Regards Gerhard
-
Cutty Sark by NenadM
Gerhardvienna replied to NenadM's topic in - Build logs for subjects built 1851 - 1900
............................if you decide to come to Belgrade, I can be your travel guide to some interesting places Works continues ... still 25 dead-eyes to be made ... slowly, slowly, slowly Would be nice to have a good guide there, I possibly would find anything......... As your work is mine, setting frame after frame after frame............... endless story Regards Gerhard!- 4,152 replies
-
- 4
-
-
- cutty sark
- tehnodidakta
- (and 1 more)
-
Hi Elijah Thank you! She MUST come together , now the work starts. In times I dont glue frames to the keels, I`m studying plans and drawings from sternwheeler engines, so I will be able to draw and construct my own machine. All the plans I know at the time show too large engines, so I have to make a full new one. Regards Gerhard
-
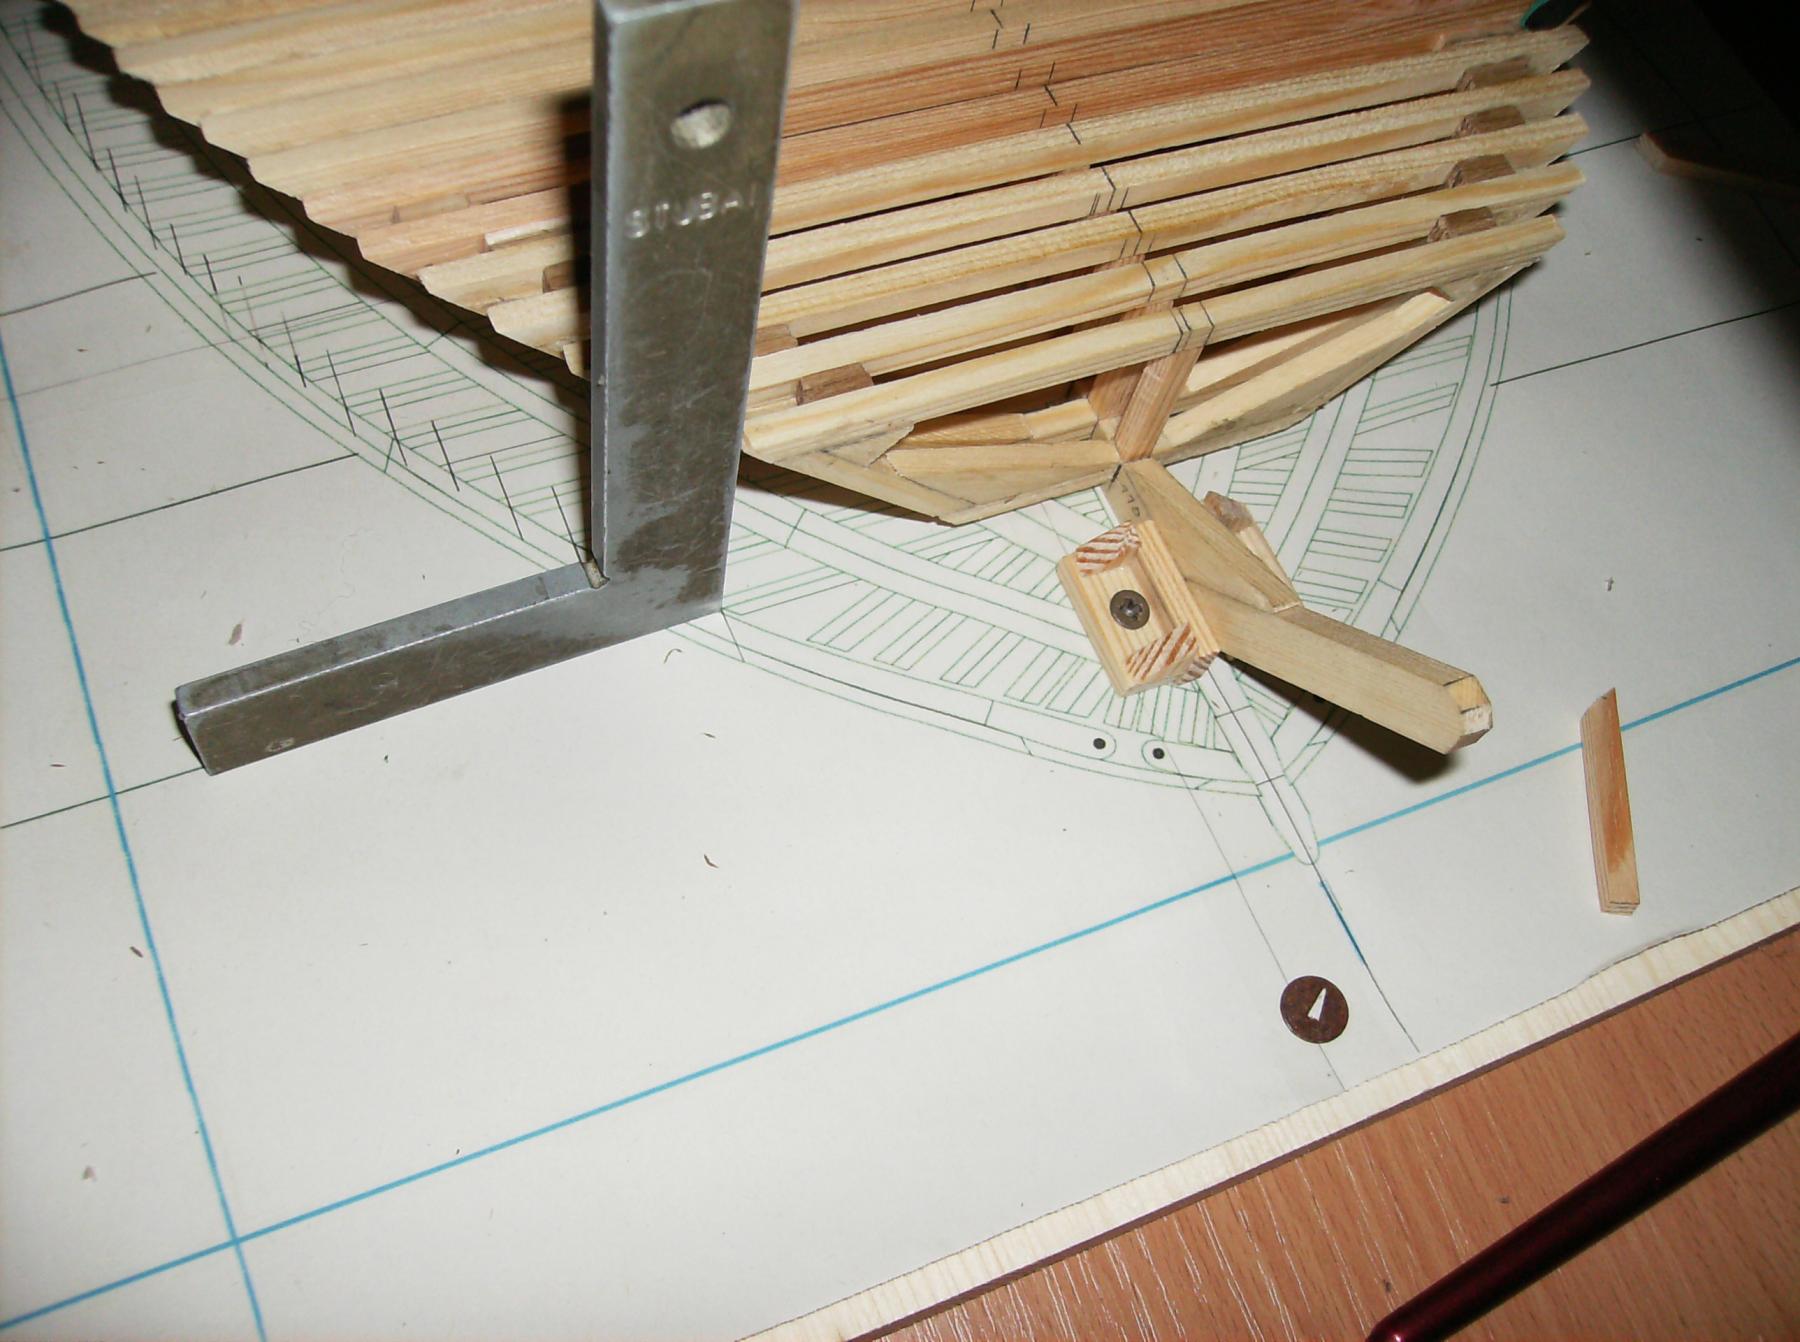
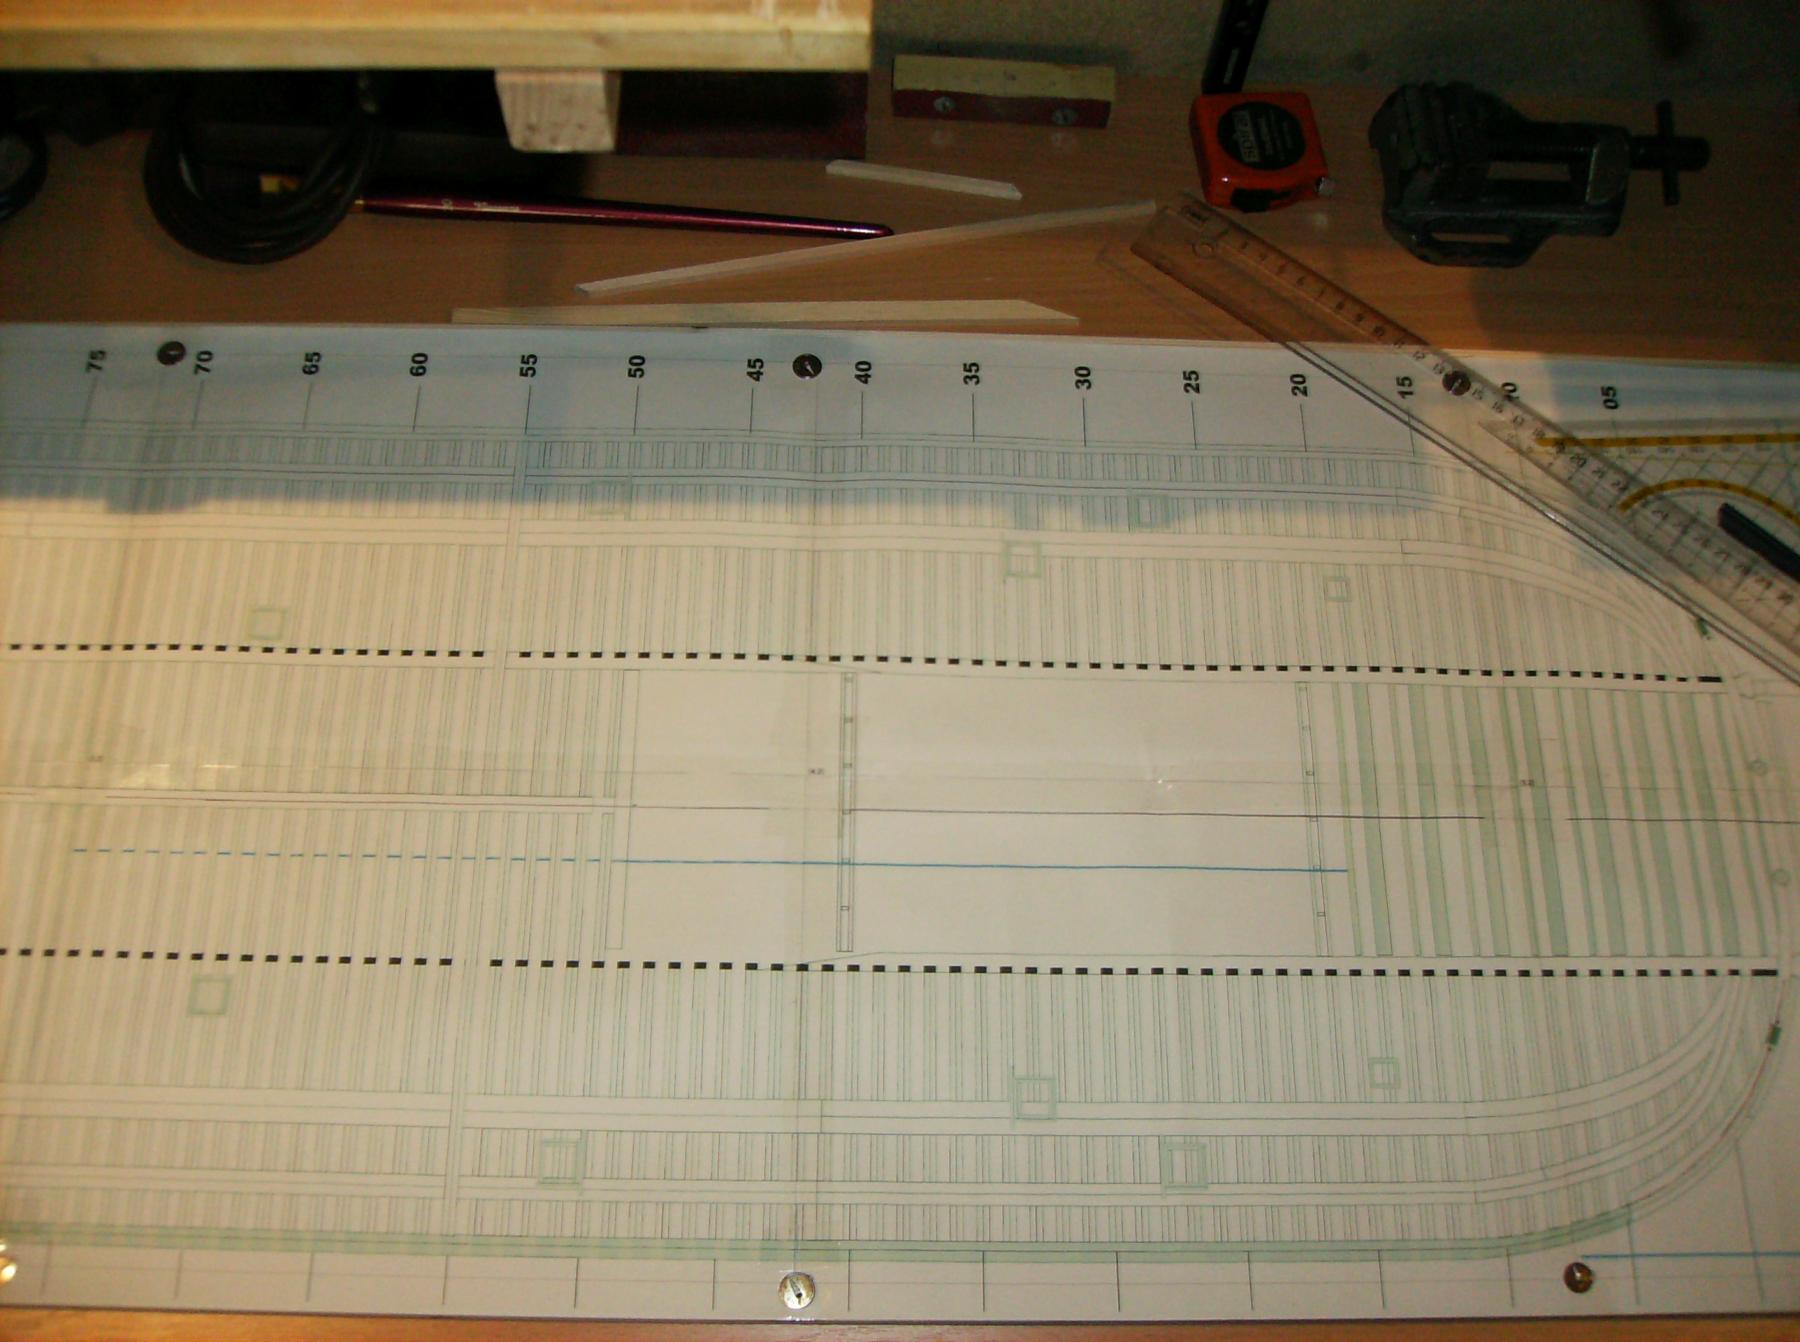
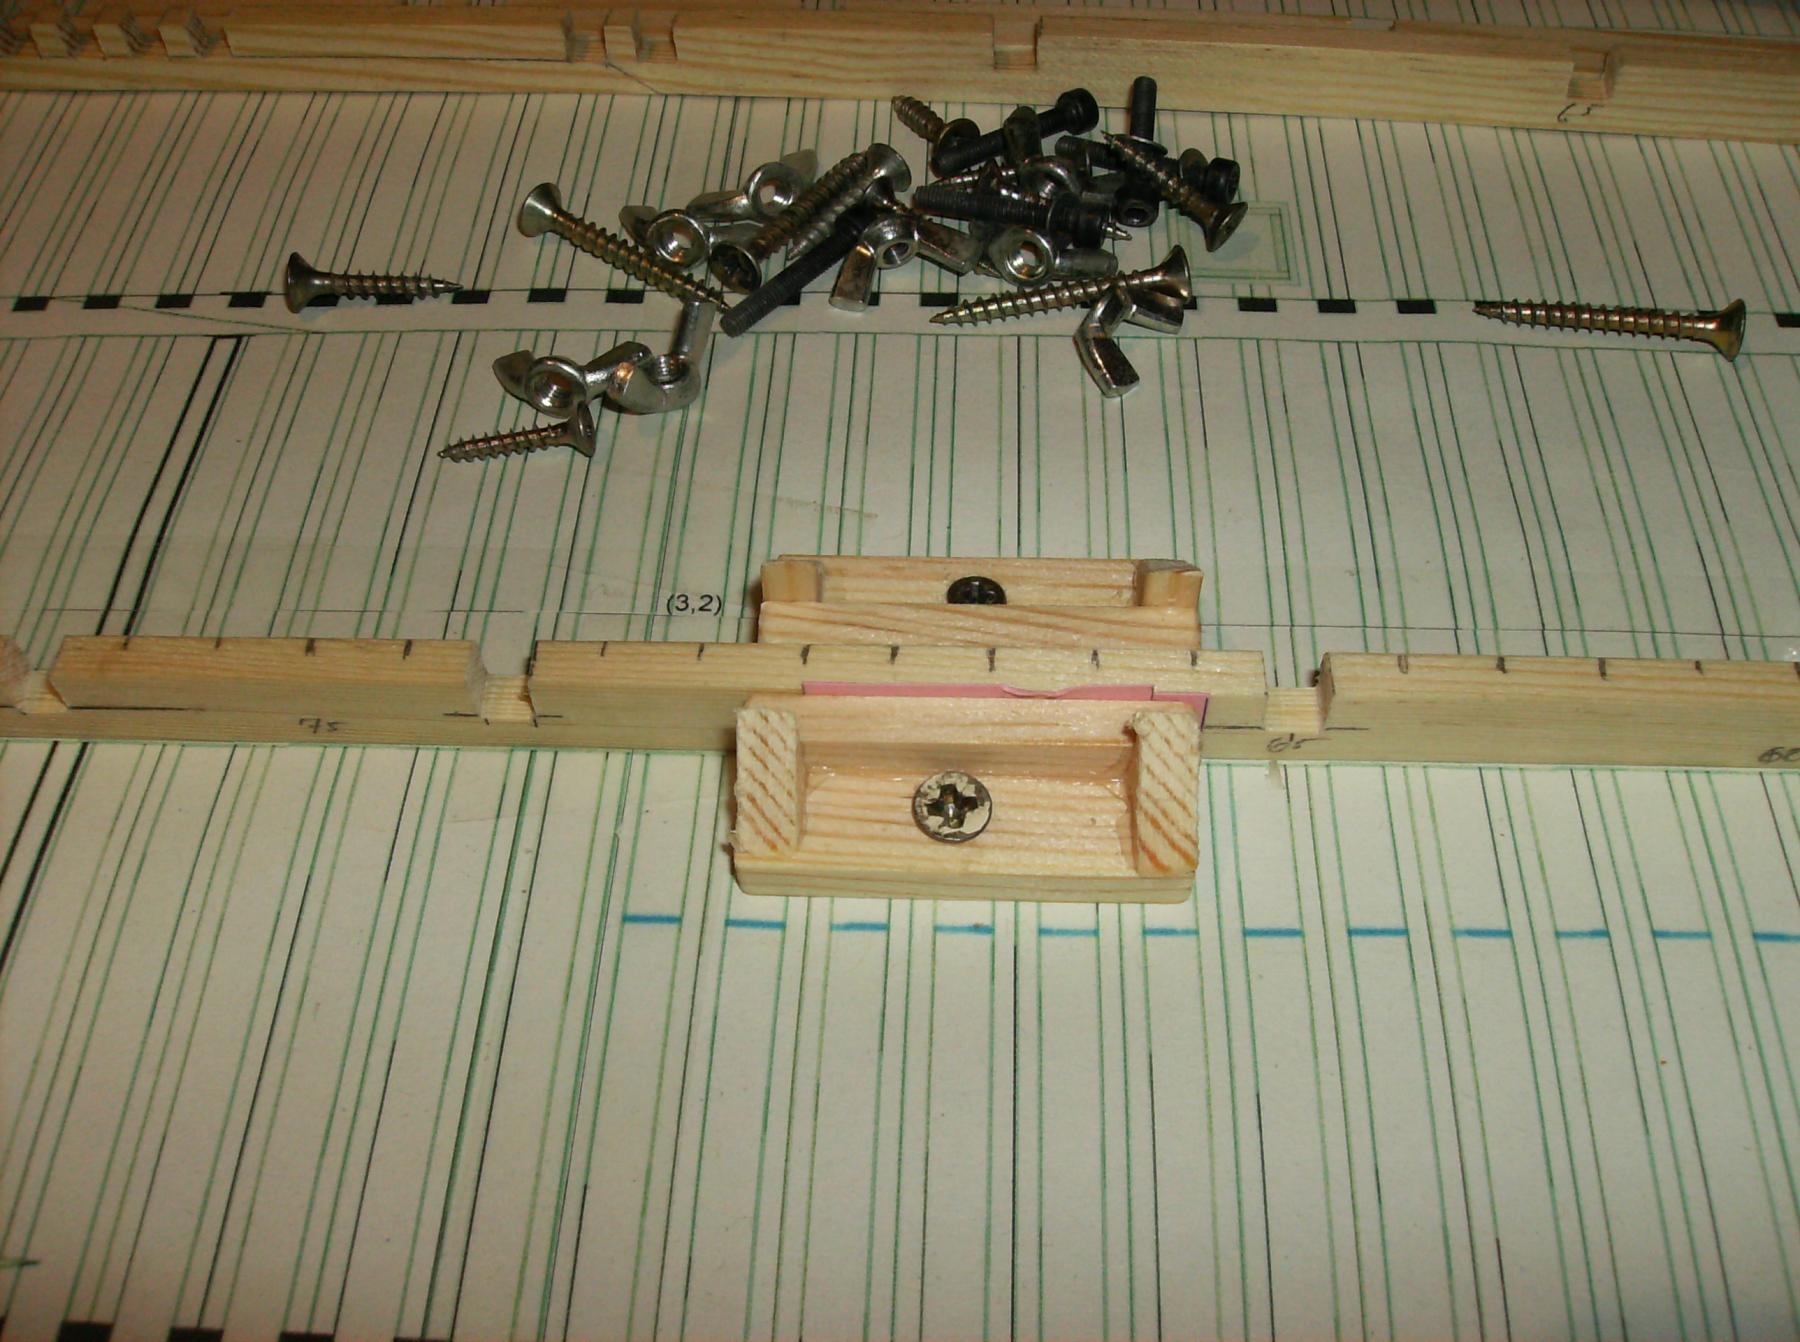
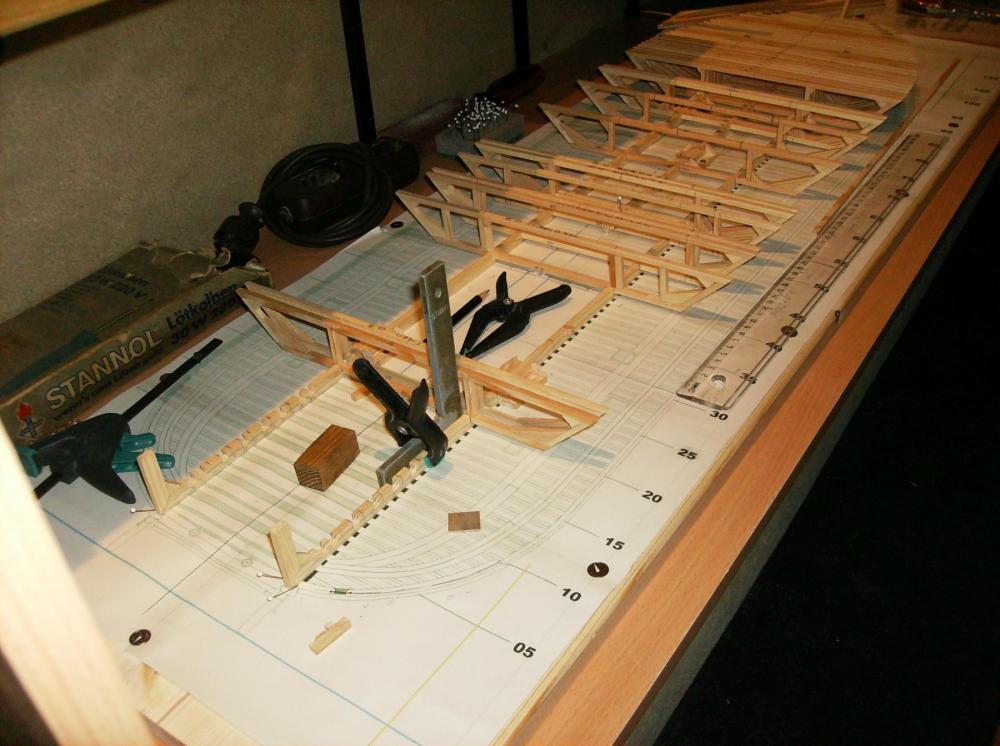
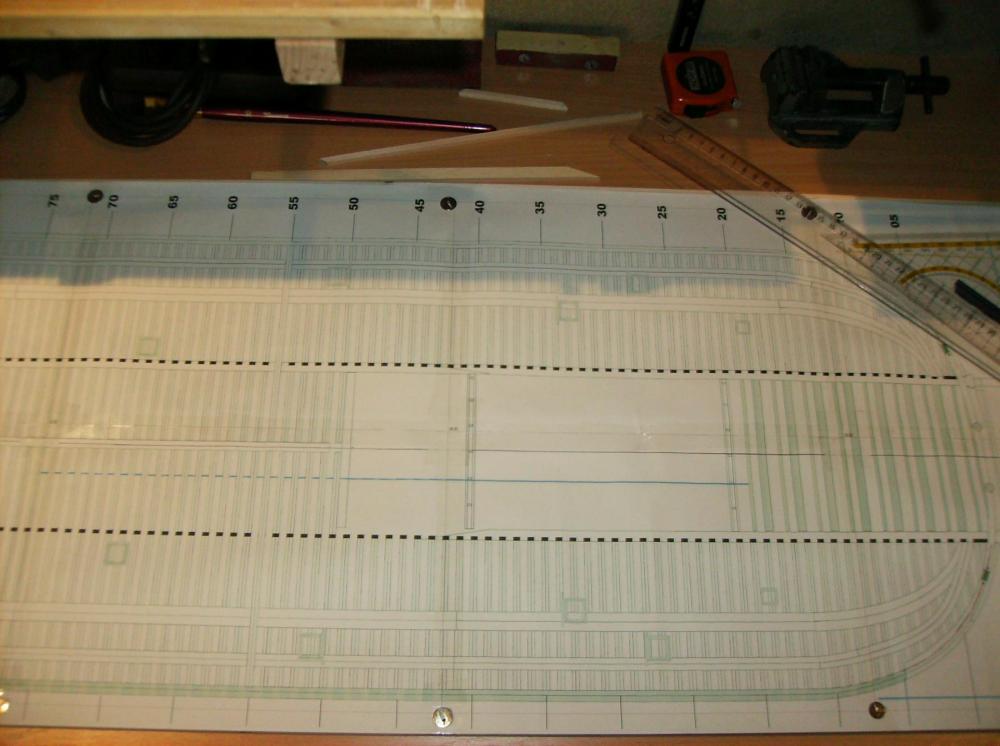
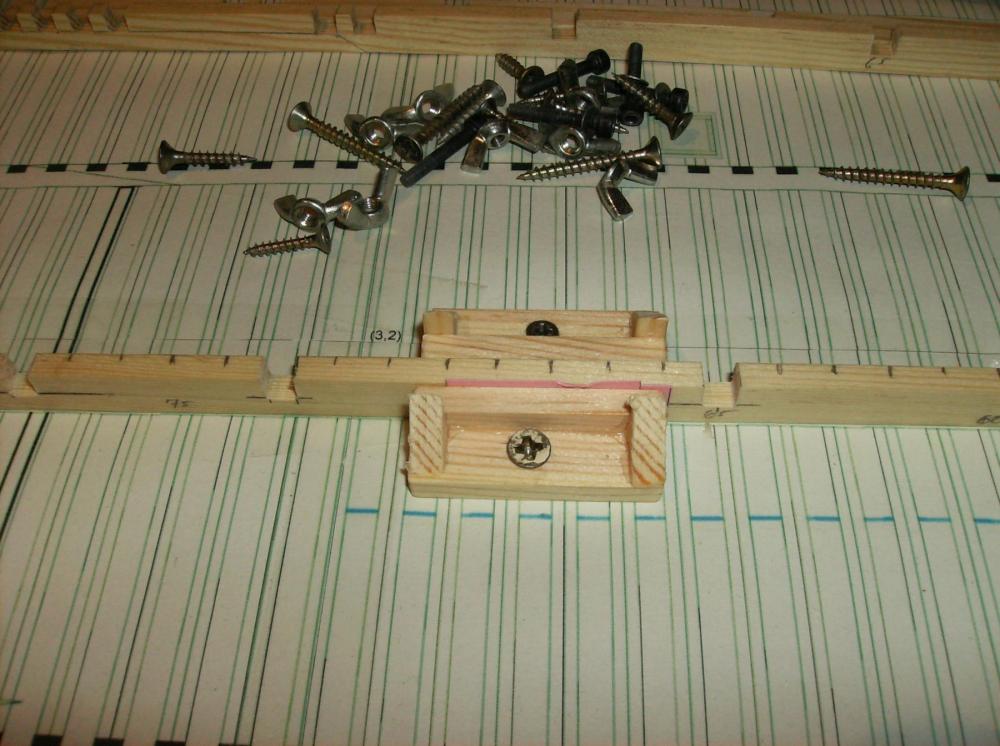
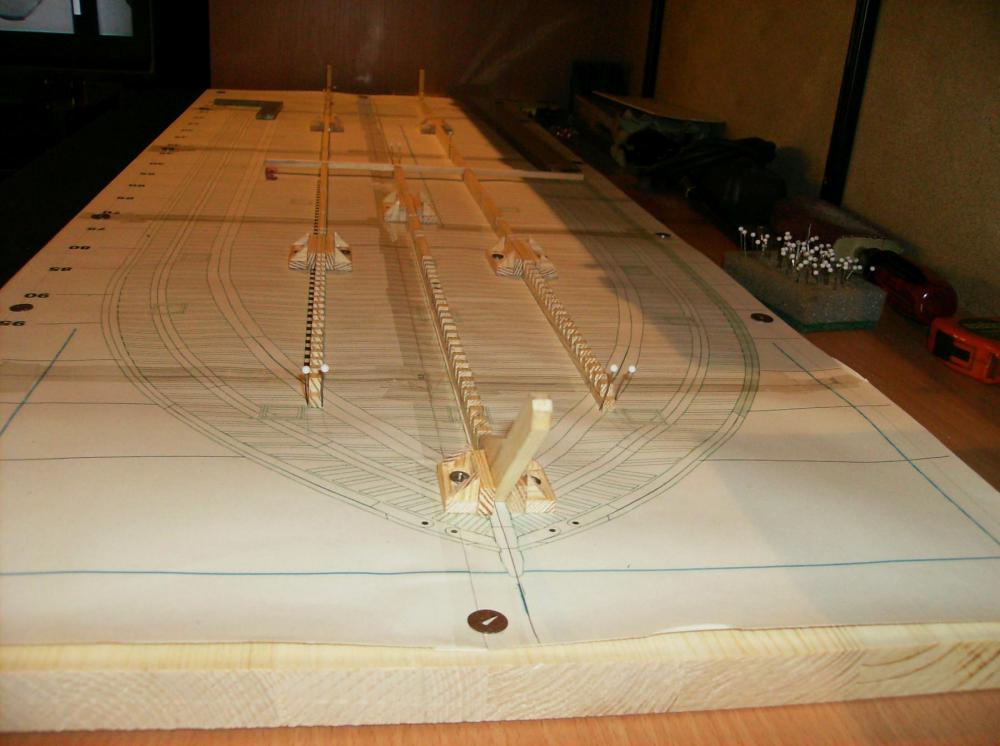
Back again with more............. The plan sheet is fixed to the board, the keels are clamped to the plans, and some frames are glued to them. Plan on the board, fixed with flat nails Center keel fixed with wooden clamps Each of the keels is held with 2 of this wooden (homemade) clamps All 3 keels on the board A few frames are glued to the keels, more are to see in the background Thank you for looking in, and yor likes and comments! Regards Gerhard

- 293 replies
-
- 16
-
-
Hi Grant Just flew over this report, I`ll stay tuned Regards Gerhard
- 339 replies
-
- 4
-
-
- dumas
- Chris-Craft
- (and 3 more)
-
Cutty Sark by NenadM
Gerhardvienna replied to NenadM's topic in - Build logs for subjects built 1851 - 1900
Hi Nenad I must visit that somewhen! I was just in former Yugoslavia when I was a kid, that was in Savudria, and never then. But as I know, there are so many great places to see! Regards Gerhard- 4,152 replies
-
- 2
-
-
- cutty sark
- tehnodidakta
- (and 1 more)
-
Hi Bob Nice job at those vents! I like to make them from plywood, i feel more confident with it. Styrene is a material i`ve never worked with. Regards Gerhard
- 348 replies
-
- 3
-
-
- pequot
- cable ship
- (and 1 more)
-
ancre La Salamandre by tadheus - 1:24
Gerhardvienna replied to tadheus's topic in - Build logs for subjects built 1751 - 1800
Hi Paul It`s getting better and better again! I like your build! Regards Gerhard -
It`s a bit late for "today" as I meant yesterday, but re-examining and overworking the frames took longer than I thought. Now they all fit well to the plans, and I can start with the building board, prepare the plans, and fix the keels to the board. Next photos will come when I`m doing this, then the real work starts! Regards, and thank you all again for watching & likes! Gerhard