


Ian_Grant
-
Posts
2,051 -
Joined
-
Last visited
Content Type
Profiles
Forums
Gallery
Events
Posts posted by Ian_Grant
-
-
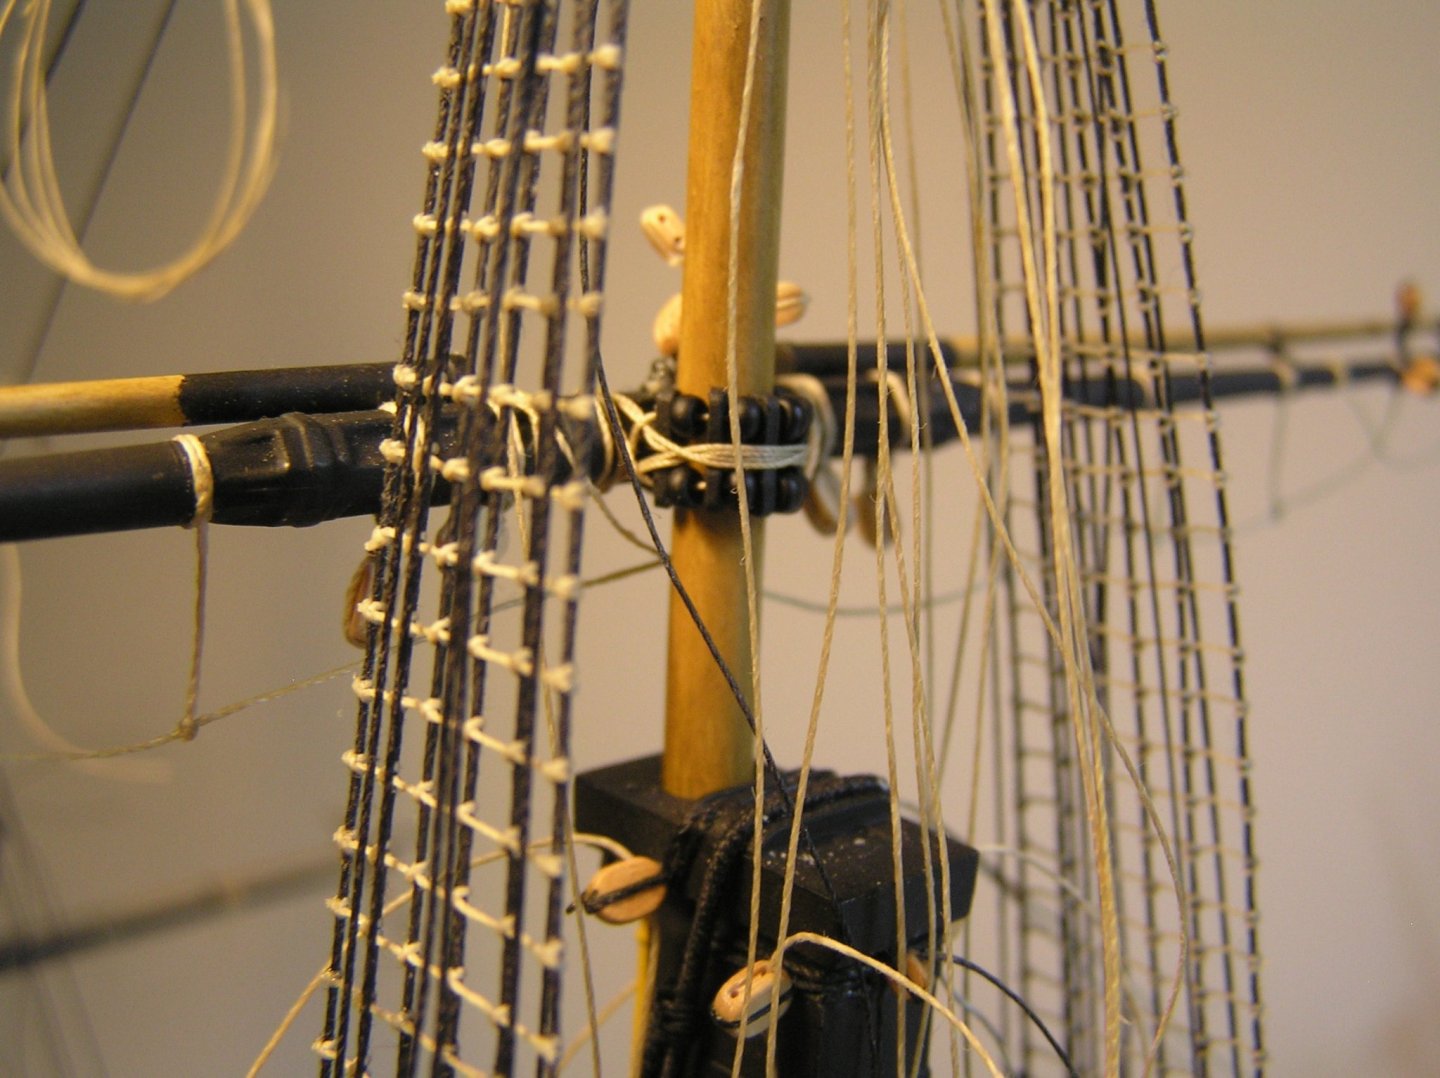
Bill here is an example of a parral made with seed beads and some tiny slivers of wood, drilled. It's relatively easy to rig the parral with the brass rod retaining the yard in place.
- Old Collingwood and dafi
-
 2
2
-
Yes that picture is during my build. You mean the gun rigging? I left off the steady tackles to the deck rings; the rest is pretty standard but I cheated and just attached the breeching rope and train tackles to a single pair of eyelets beside the gunports (now that I think of it, these holes for the eyelets are best drilled before you glue the hull halves. And even before your final exterior paint in case you accidentally drill through 😉.
OC is right about increasing mast stiffness. In my case, though, I used wood dowels, but a bicycle spoke inside the mizzen mast because the cavity was a small diameter for a piece of wood. It worked great but got in the way when I drilled a hole in the front of the mast for a piece of brass rod to hold the cro'jack yard while I rigged it.
I didn't have any issues with the plastic spars. I planned to make a new flying jib boom from a bamboo skewer but in the end used the plastic part. It is cased after all.
Glad you mentioned attaching yards to masts. Wood or plastic, Heller provides no means of doing it. I planned to mention this much later in your build, but to summarize: (1) The lower yards are attached by "truss pendants" (and supported by jeers and sling) which you can find out about in books. However, you'll need to add some eyebolts with attached blocks to the quarterdeck at the foot of each mast and you need to add a couple of cleats to the front of each mast; all this to rig the pendants which Heller ignored. (2) the other yards are attached by "parrals" which you probably already know about from your other ship models.Again, Heller ignores them. You can make them from seed beads later.
In my case I drilled and attached short brass rods at the centre of all yards, which were inserted into holes drilled in the masts. I did not glue them to the masts, to allow them to give a little if I bumped them while rigging. The rods hold the yards while you rig their parrals or whatever, and are invisible afterward.
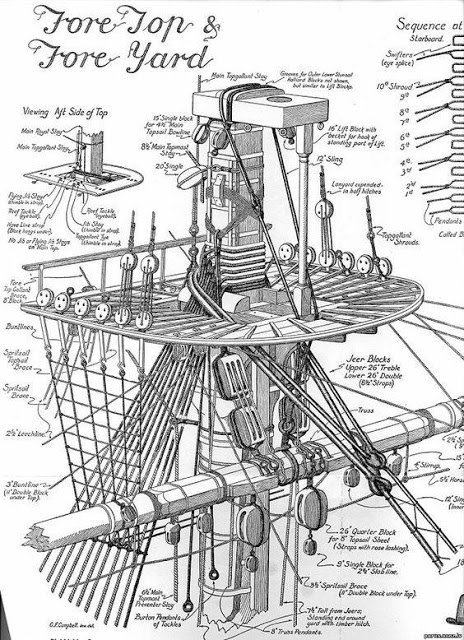
Again I emphasize - obtain a copy of Longridge's book which goes into great detail on all specifics of Victory's rigging 🙂. To whet your appetite, here is one of the many fine (and helpful) drawings in it (shroud sequence partially cut off):
- dafi and Old Collingwood
-
2
-
Yes, that's it. Thanks for the stroll through memory lane😀.
If you can drill large enough for the breeching thread then great! Not sure how it would look. It might be worthwhile to add eyes for the show guns. I've lost the pics from early in my build, but here is about the best I have showing the main deck guns with the rather neat attached eyes for breeching rings.

-
Bill, you're giving me nightmares by having me re-read my crumbling Victory instructions 🤪. Sorry I don't know what this refers to either. I made zero use of their "Table of Threads" as I rigged by a book. In any case, I believe the breeching rope was 6-3/4" on an upper deck 12 pounder which translates pretty close to 0.5mm DIA thread.
The gun tackles on a 12 pounder were 2-1/2" which translates to 0.2mm. I think I used 0.25mm as 0.1 looked flimsy. With care, 0.25mm can be rigged through Syren 2mm wood blocks.
And this reminds me: Many modellers, including me, filed off the "flash" on the gun pommels only to later realize that the "flash" was meant to represent the breeching ring. Popular consensus was to file off the flash and add breeching rings using small eyelets, at least for the show guns.
- Old Collingwood, Mexspur and dafi
-
3
-
Query: How do I click in Daniel's message above to read more about these Turner drawings? No matter where I click I end up at post #1 with the sun burning? Too many pages to scroll through........
Sounds like my Vic might be out of date now after only a few years - no pink in the bee lines and no solid bulwarks 😒
-
-
Bill, you could do that but Evergreen does make sizes close to what you need.
https://evergreenscalemodels.com/collections/14-white-polystrene-strips/products/122-020-x-040
and to save you the trouble of gluing three rows on the bottom:
https://evergreenscalemodels.com/collections/14-white-polystrene-strips/products/126-020-x-125
Might be worth looking around for.
- Old Collingwood and dafi
-
2
-
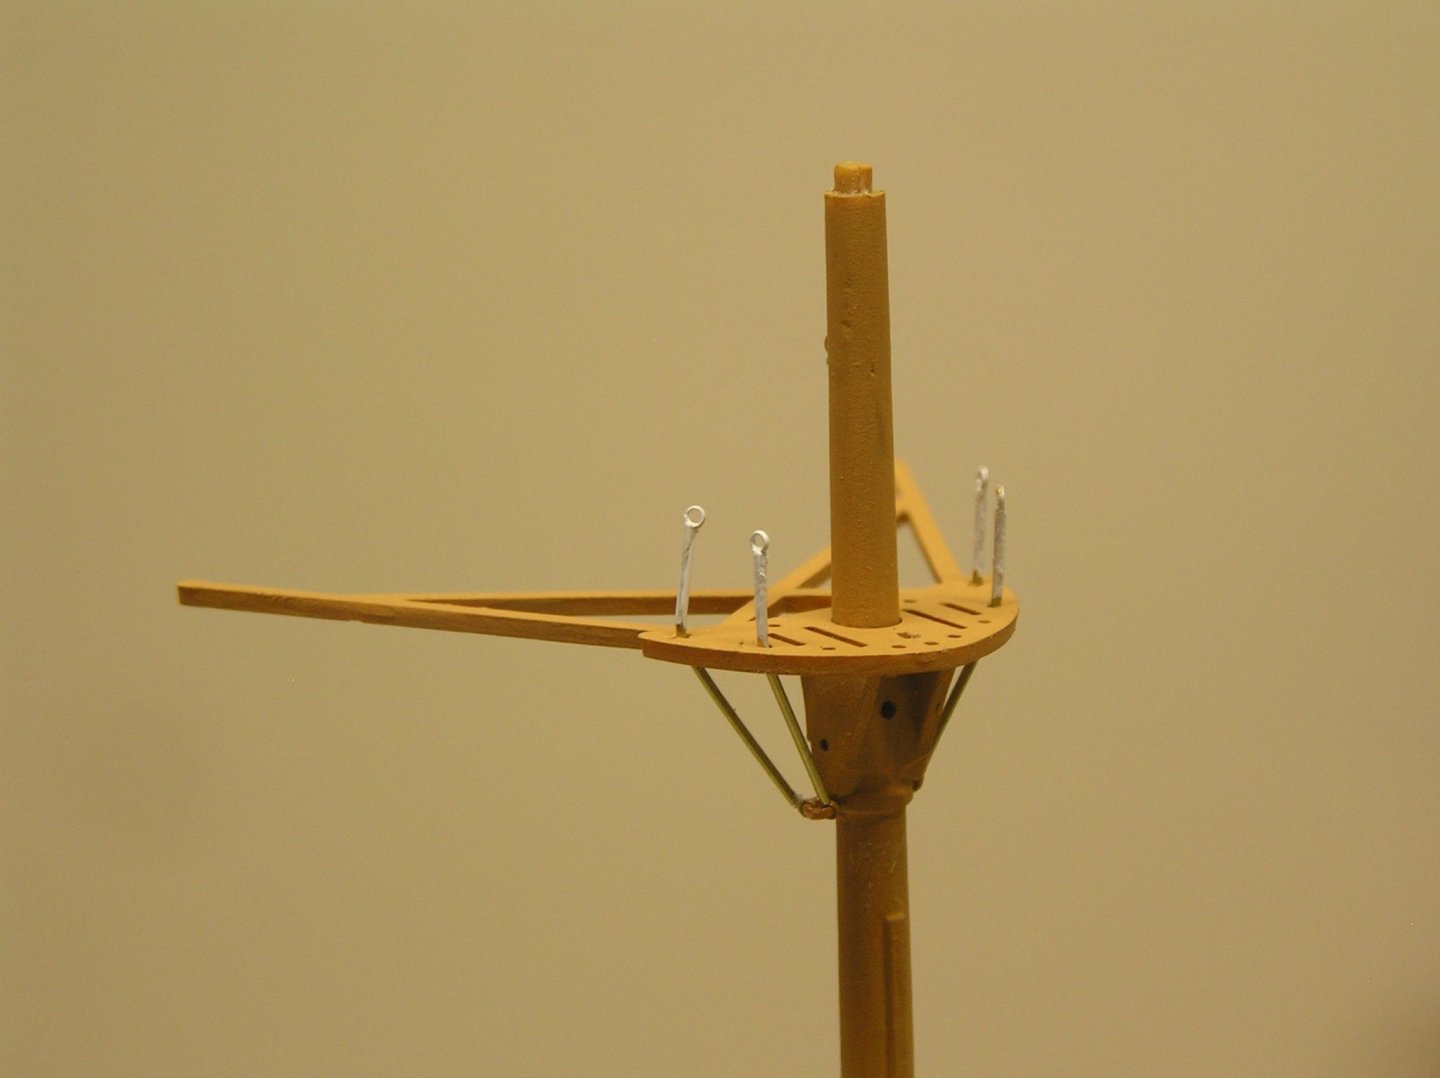
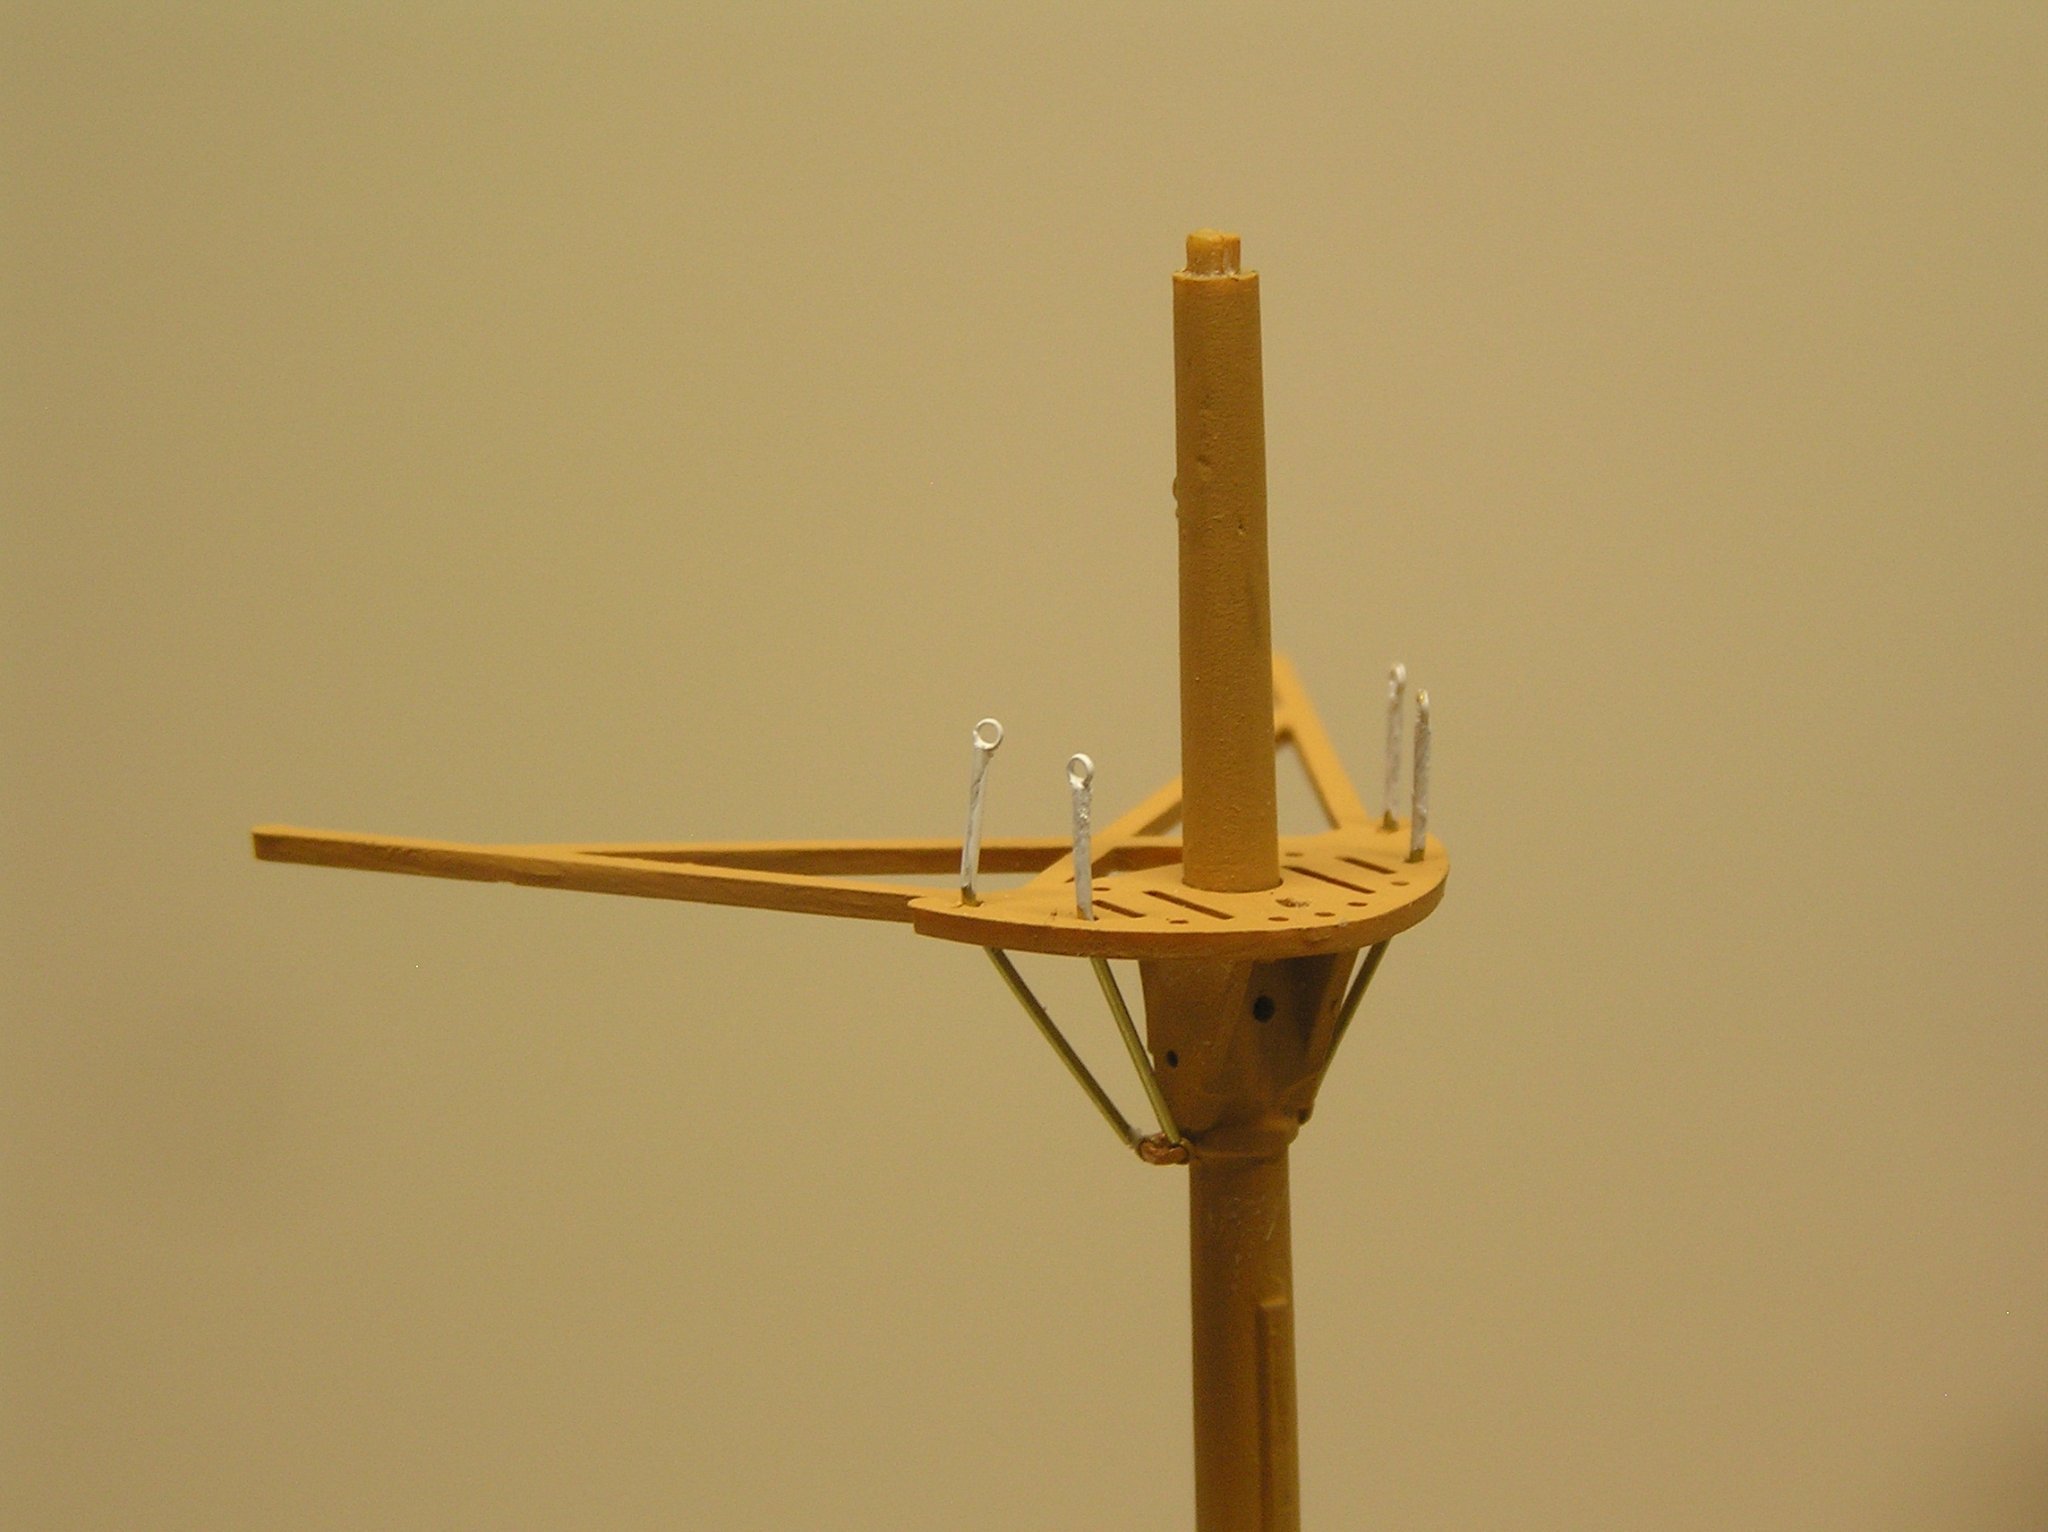
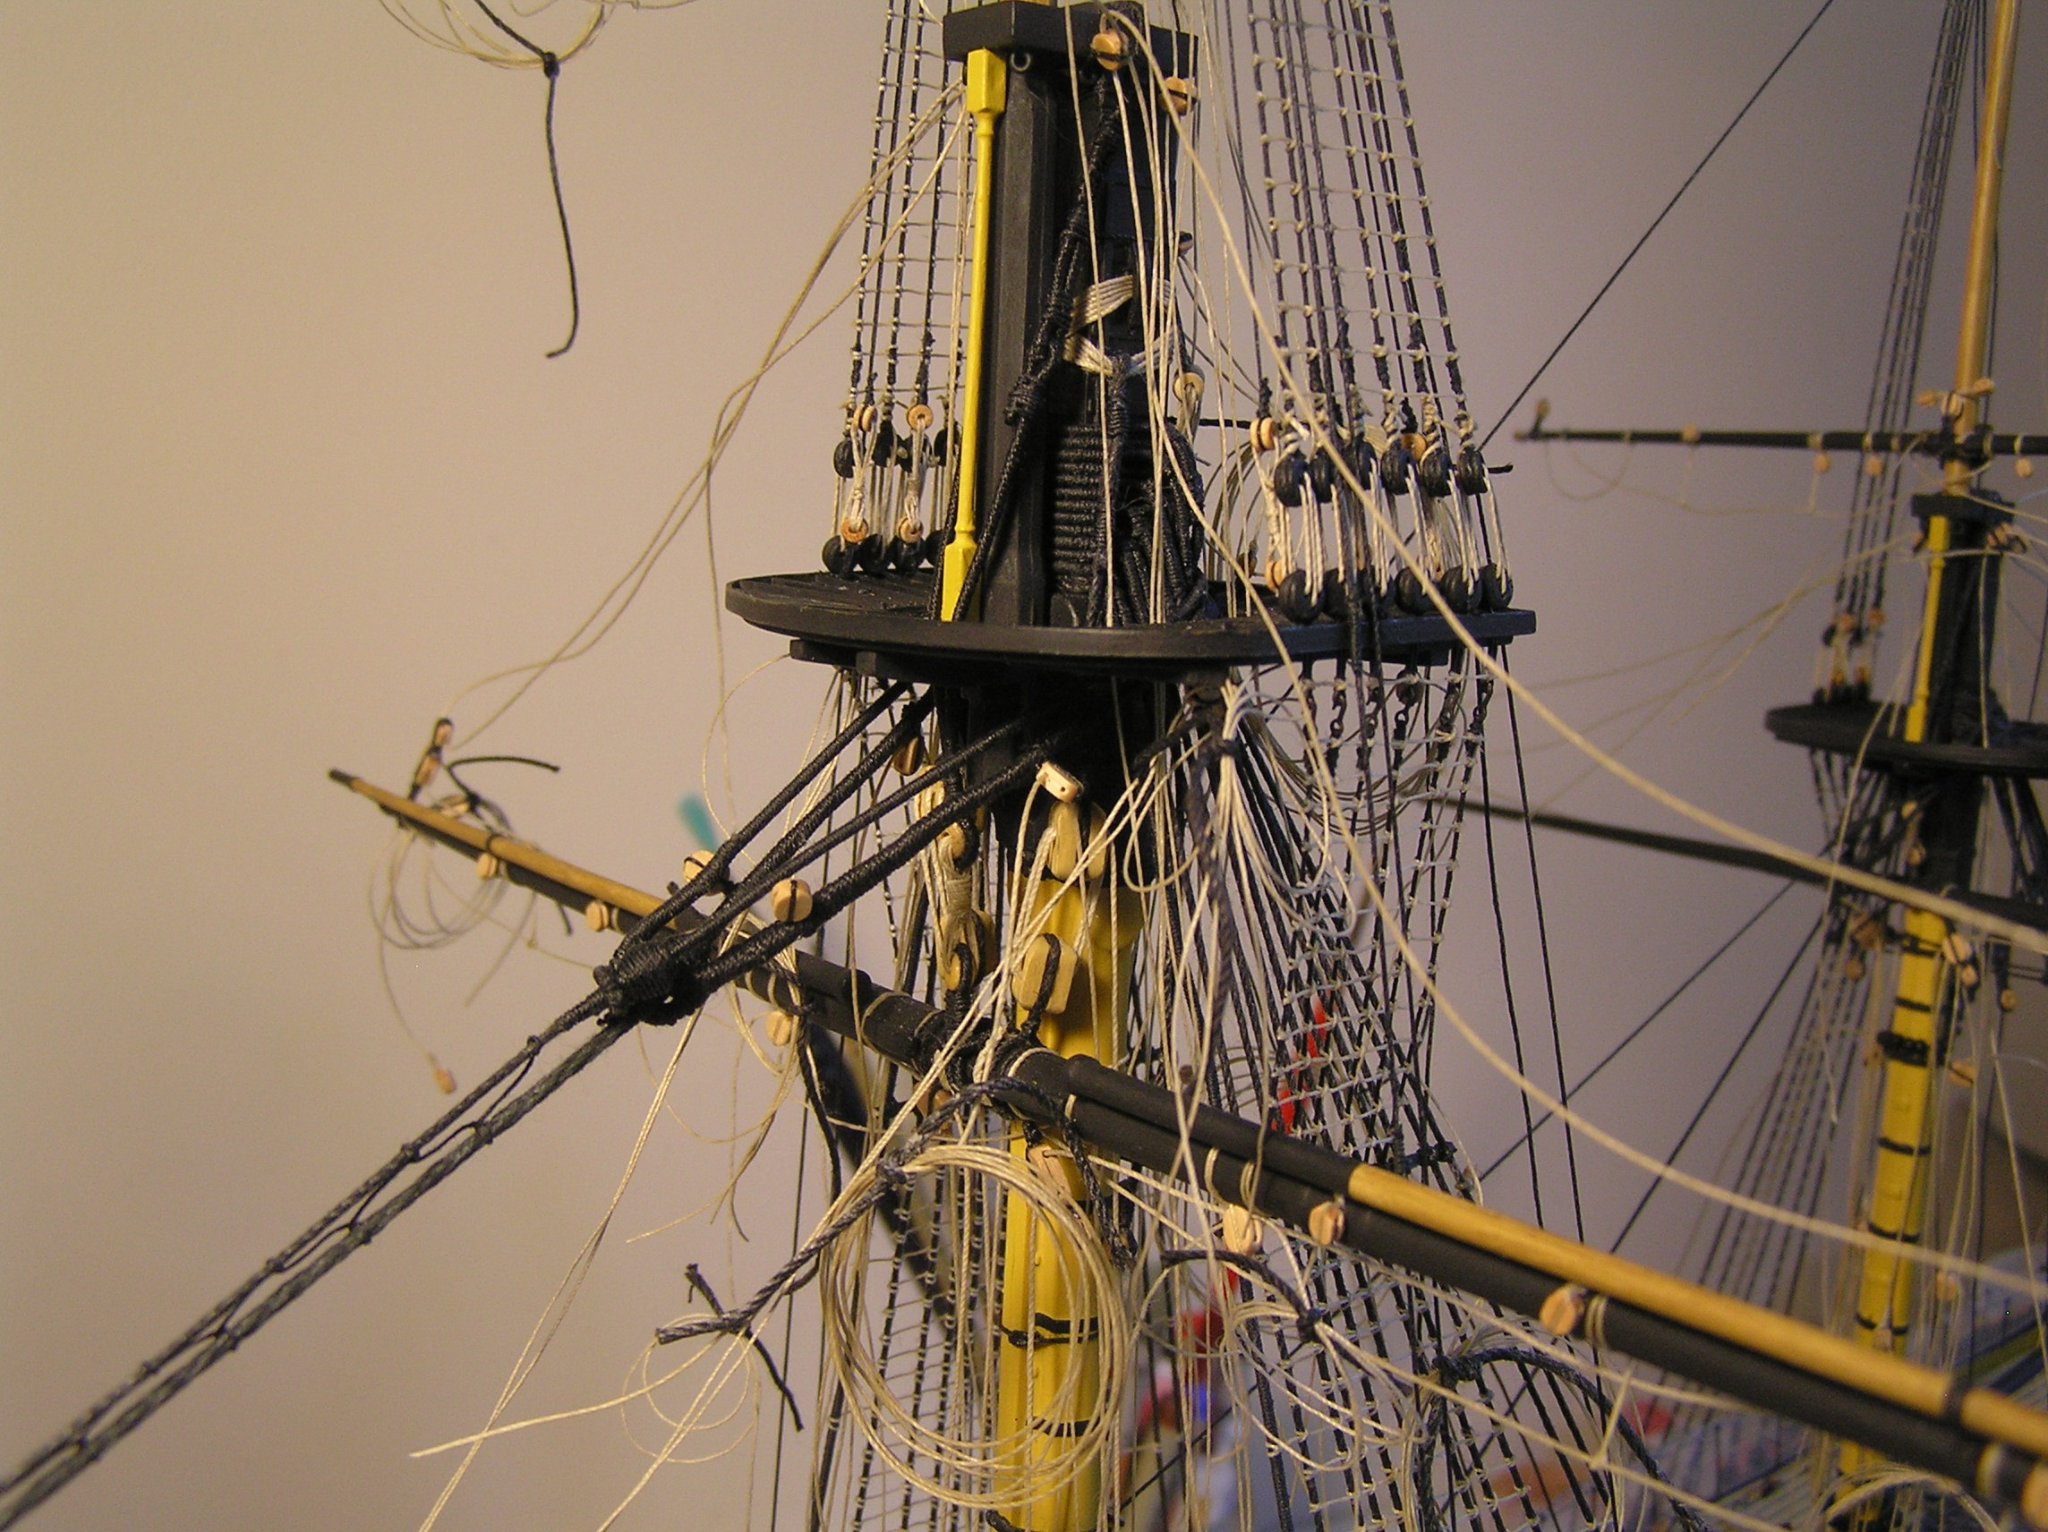
I finished the chess table and even got a little work done on Preussen. I discovered the danger of being away from a model for a while. I was adding the futtock bars at the crosstrees and while working on the fourth mast I realized I was using the wrong two holes in the crosstrees.....what was I thinking?! I had to cut them all off and do again, wasting some precious micro tubing and eyes.
Here is one of the masts, with primer on the topgallant shroud "screws":
I will now start working on the test jig and program for a galley rowing mechanism.
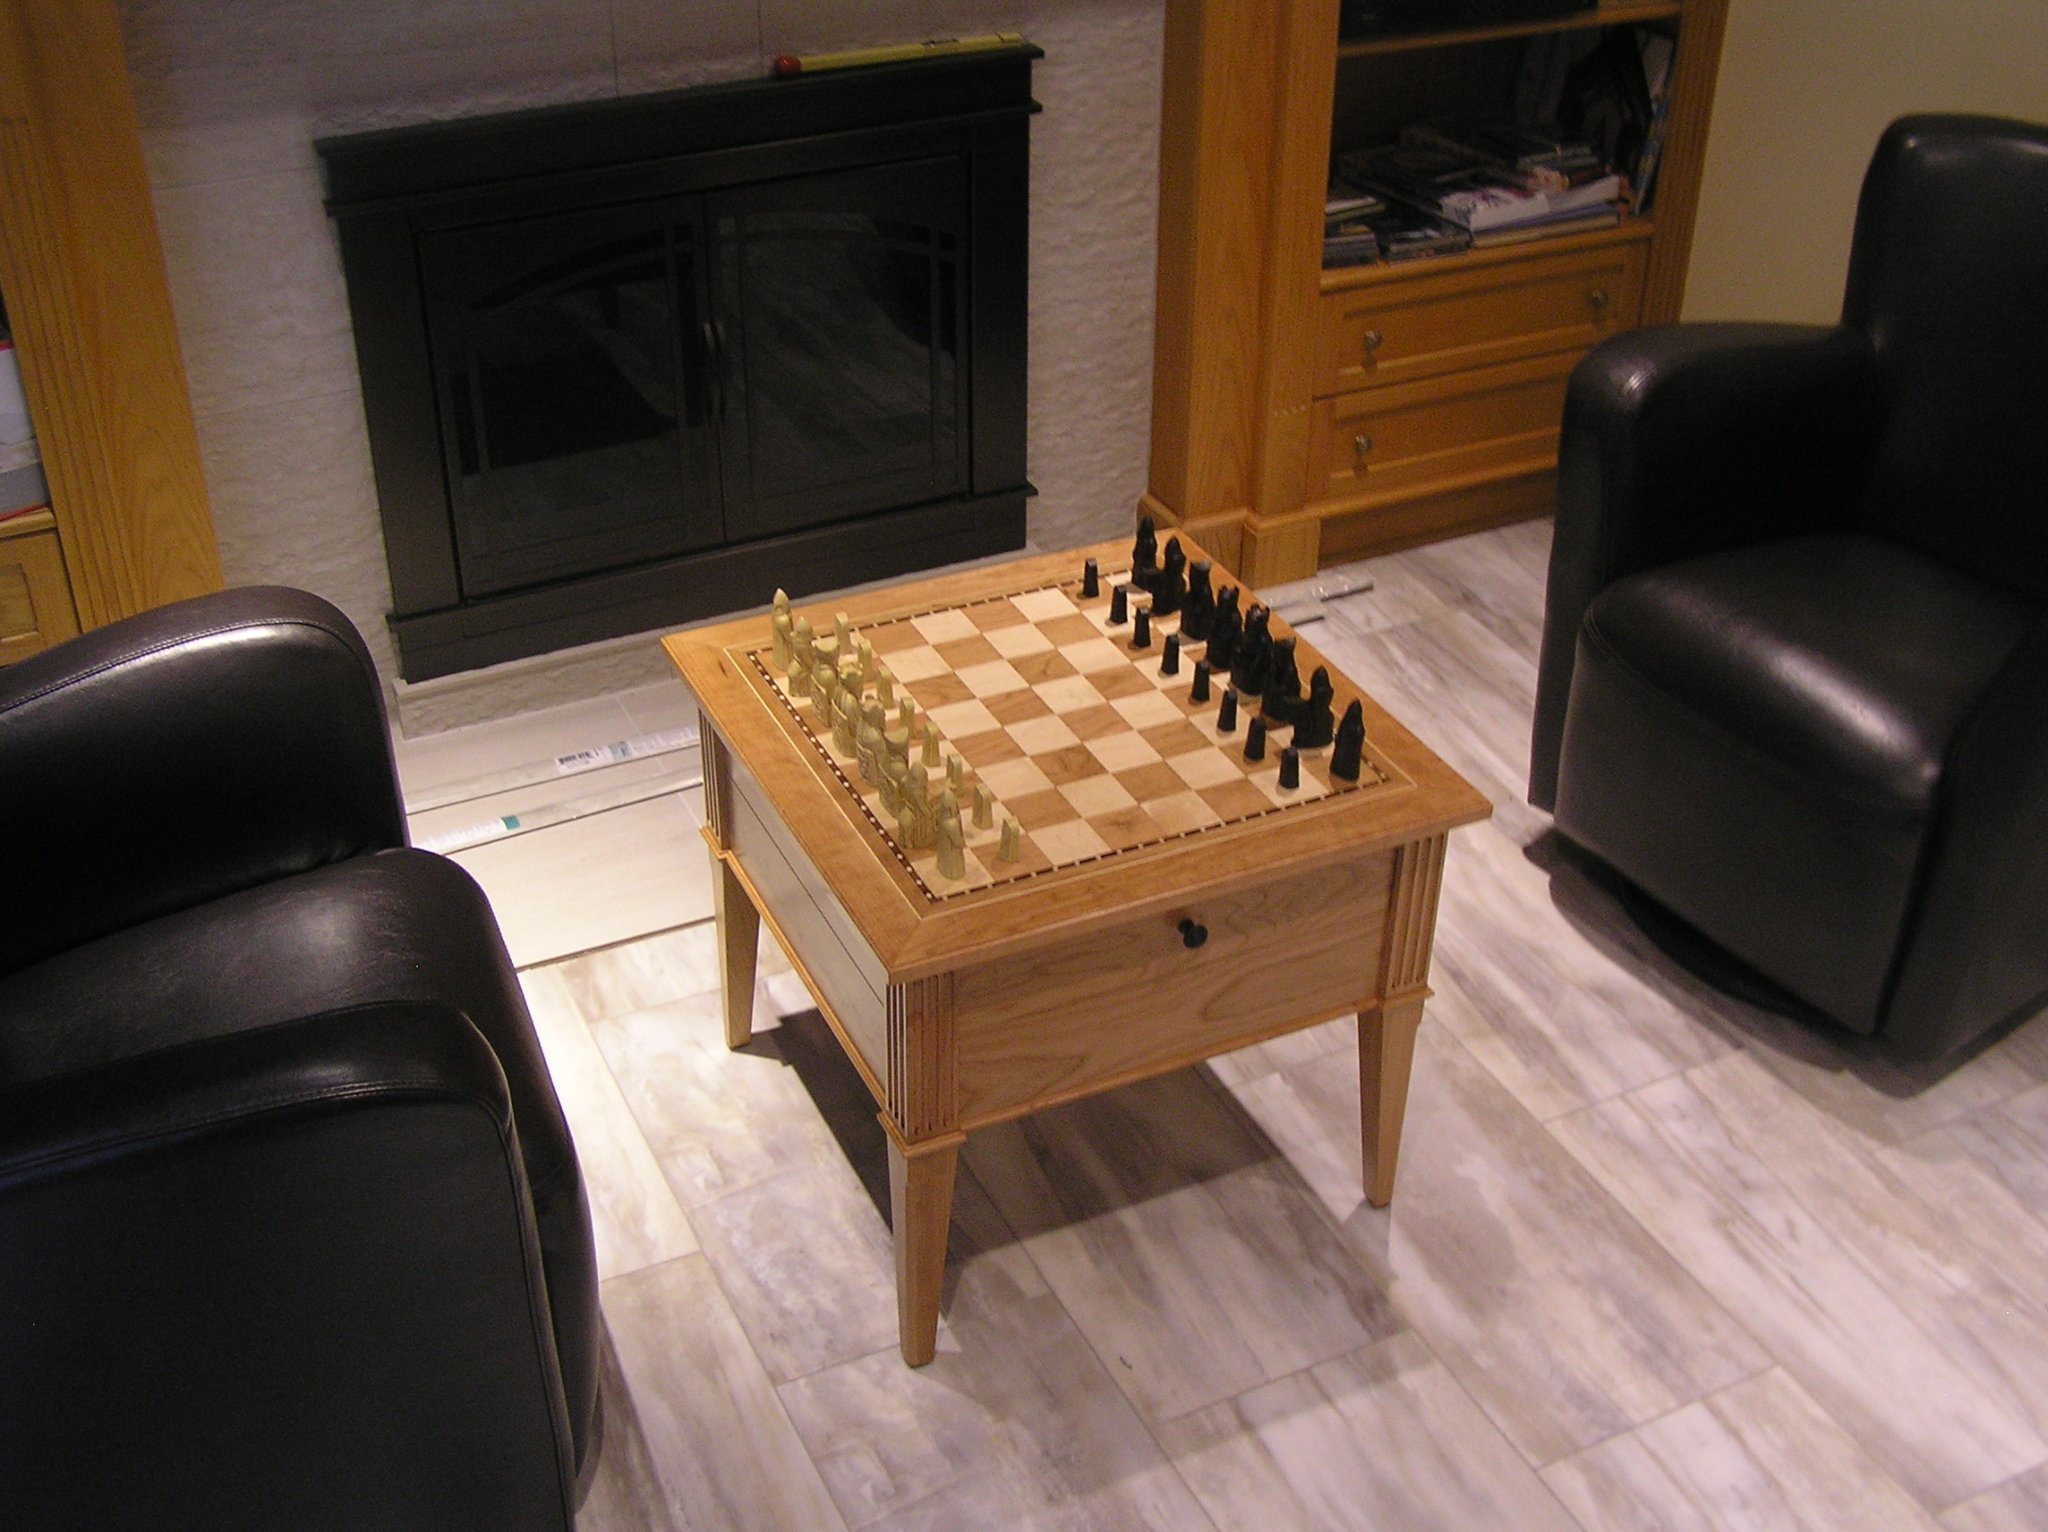
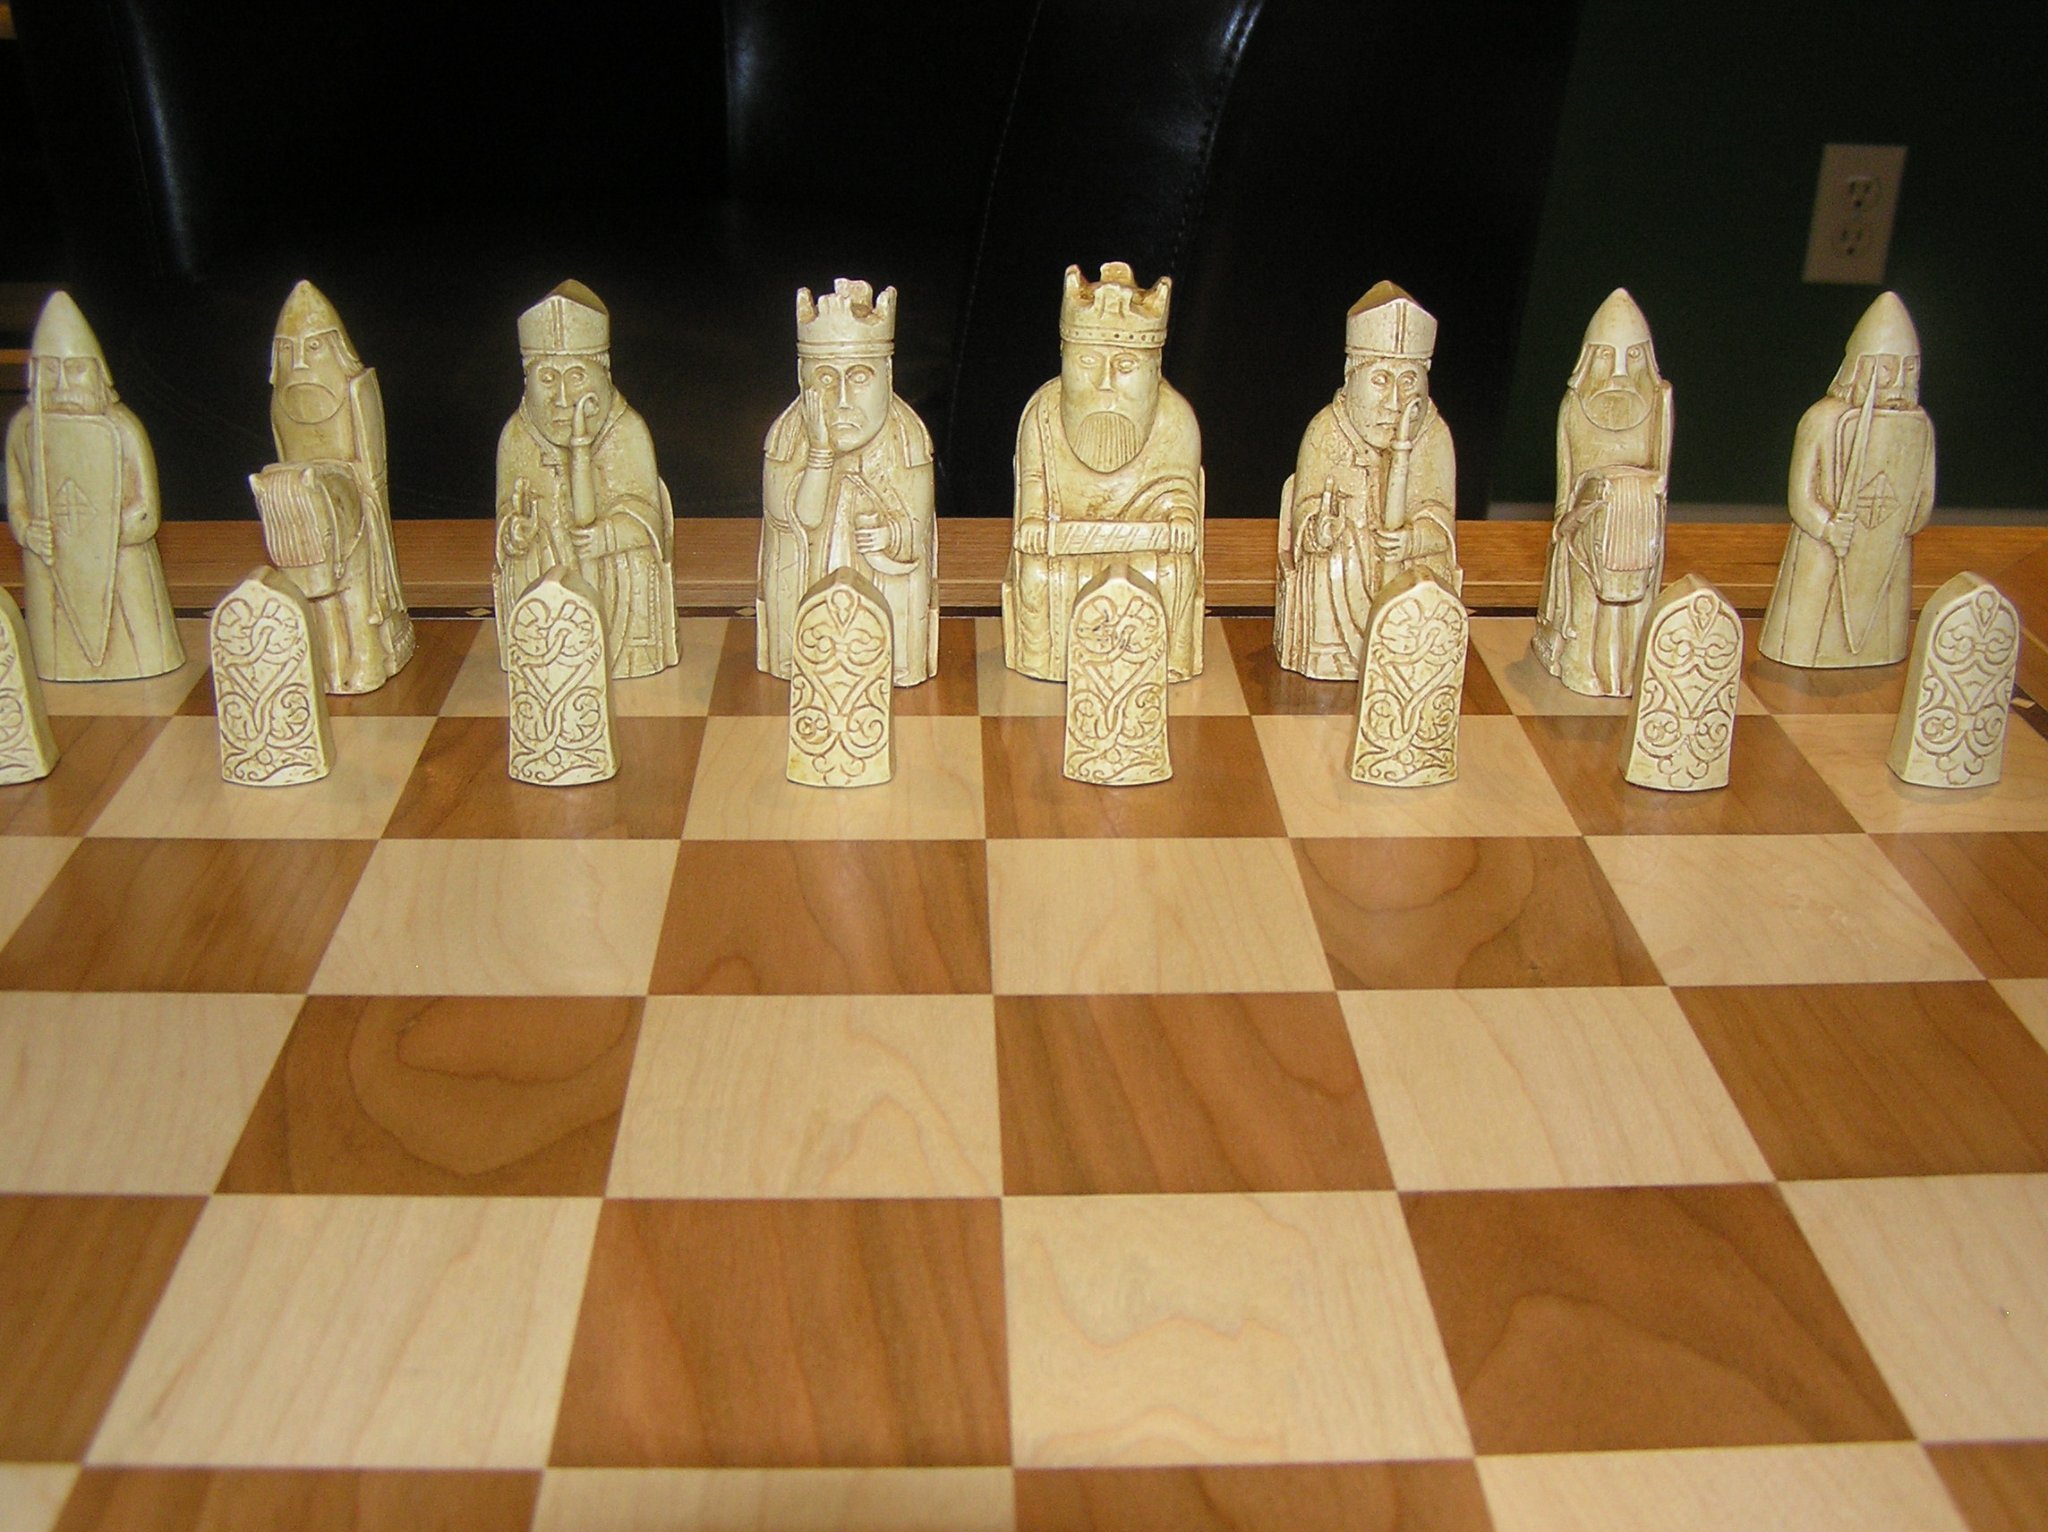
For those who may be interested, here is the completed chess table:

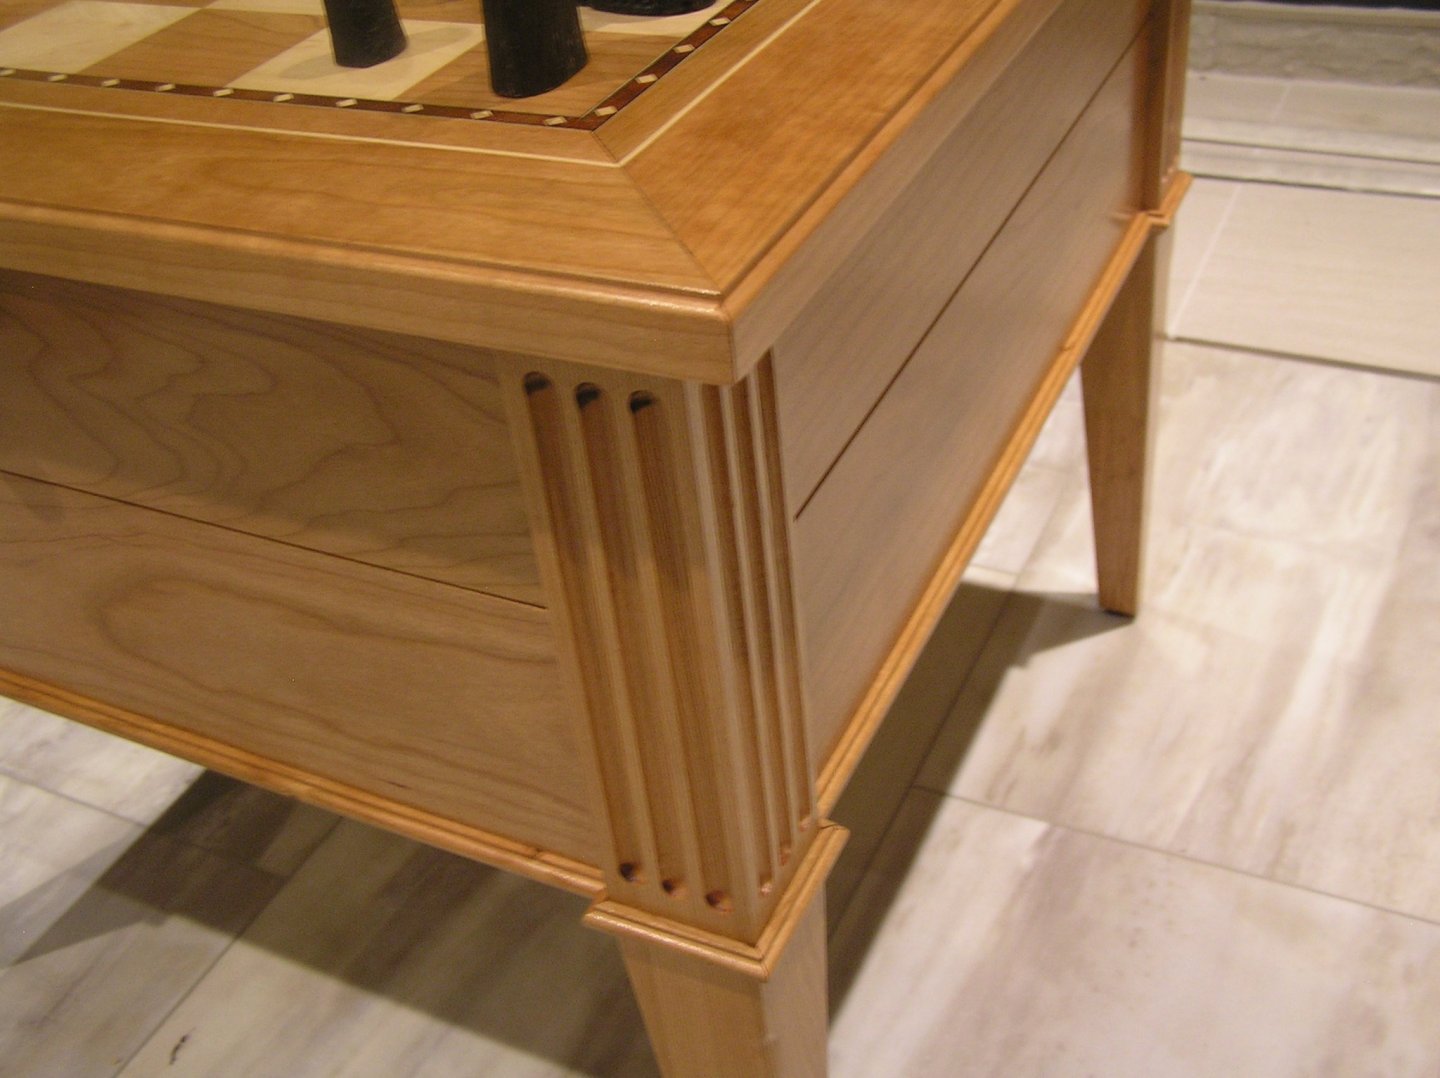

The drawers were sized to accommodate the red flocked chess men holders from the original packaging. The field squares are 2-1/4" to suit the rather large men (and woman). The small lower trim was a bit fiddly round the legs, but it gave me an excuse to add a 23ga pinner to my tools
 ; my 18ga nailer would have made a mess of it.
The chess set is a replica of the "Isle of Lewis" set as seen in the British Museum.

-
O.C. has it nearly right. Daniel wants you to increase the width of the top wale (runs along the hull below the main deck gun ports), by adding a single 1mmx0.4mm strip along its top edge, and three of the same strips along the bottom edge. He is saying that the wale as molded is narrower than the length of the preventer plates thus they cannot lay flat on the hull.
I didn't do that; of course not all his instructions were written and translated back then. I don't recall having any problems, in my ignorance.
Marc is correct; the evergreen on the bulwarks is a different "experiment" Daniel has made on this practice hull. The bulwarks were low at Trafalgar, shockingly so when you imagine shot passing over the deck with the foredeck guns crews closed up! I've seen shots of Victory sitting at Portsmouth with closed in bulwarks but that was in Victorian times, after her seagoing career.
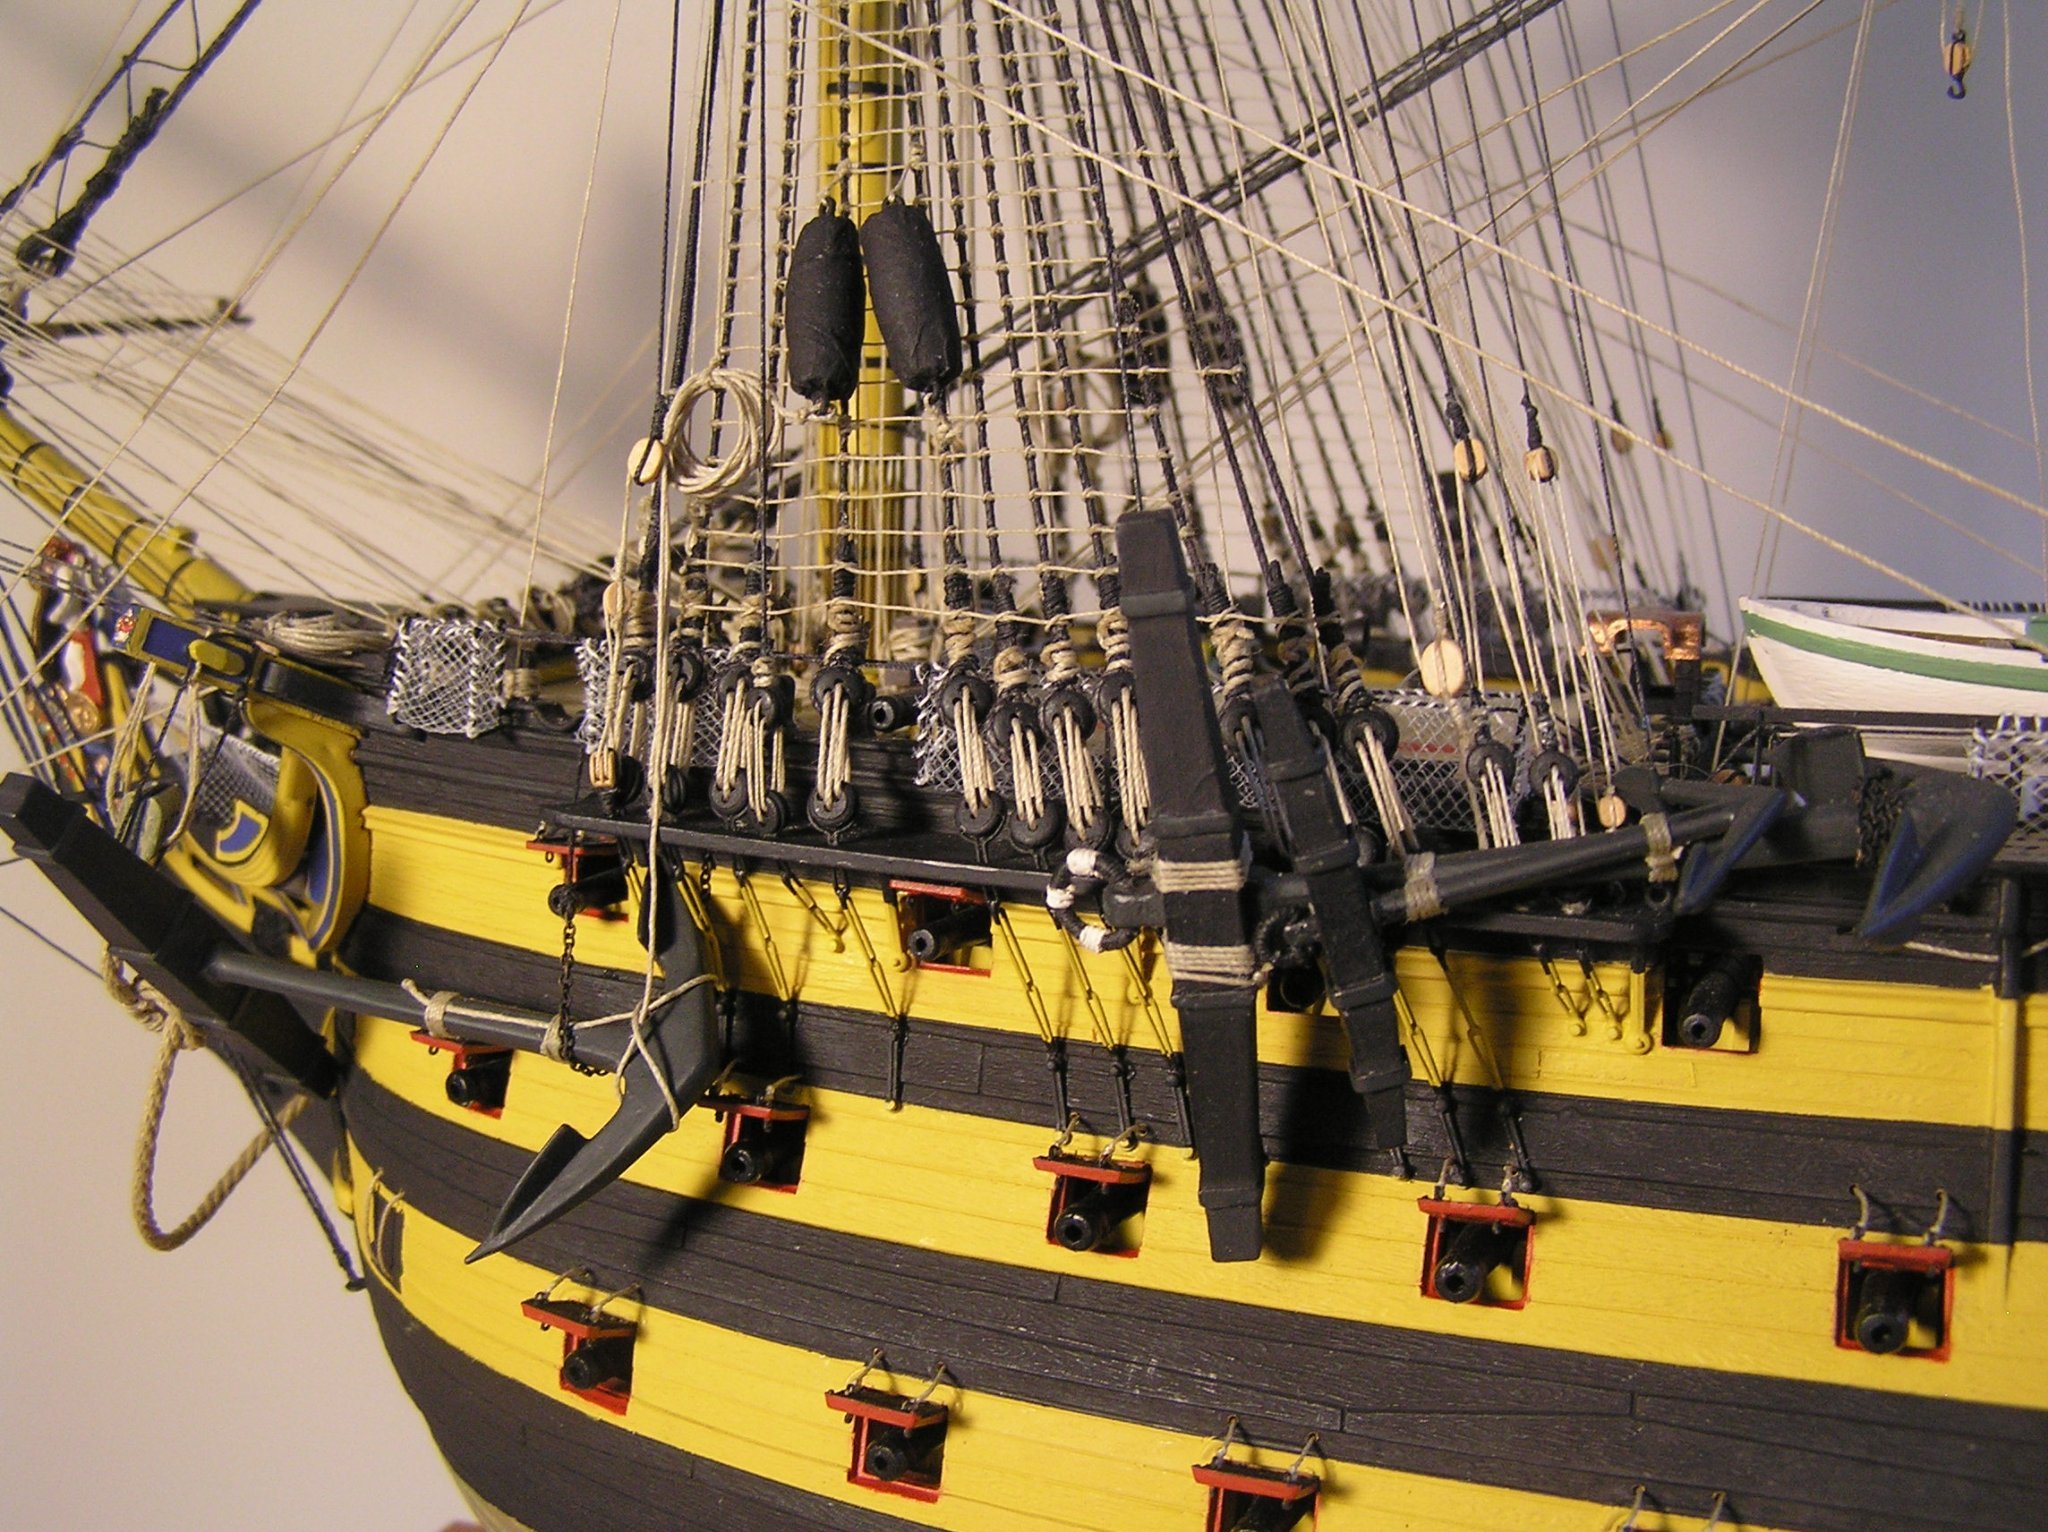
Here are the fore chains on my model, attached to the as-molded wale; Bill you can decide if you can get away with it:

- dafi and Old Collingwood
-
2
-
On 6/25/2021 at 9:28 AM, Bill97 said:
Congratulations on them Canadiens! Great job! Are your arenas back to full capacity yet? Here in Louisville we have finally gotten back to full capacity.
Yes they have been inspired, and Carey is playing at his top level. Fun to watch!.....(later edit).....except for the perennial NHL playoff terrible refereeing!!!!!!!!!!!!!!
Lord no, as far as I know no one can go into a rink yet. Usually I go lunchtime skating in the fall but this year I had to wait until the canal was open to go skating and unfortunately this was a very short season for the outdoor ice. The minor hockey leagues didn't run as far as I know, though at one stage they were having intra-team scrimmages. I'm glad my kids got to experience minor hockey play until university, before the world came crashing down.
-
14 hours ago, CDW said:
It appears that some company in China is using the Trumpeter plastic, combining it with a Pontos detail set, repackaging it all in a much improved box, then selling it all under their name brand of "I Love Kit".
Go to Ebay and do a search for "I Love Kit". There are a ton of different models being sold under this brand. Great looking kits by the way.
So is this happening under a license from trumpeter to use their plastic?
-
Hi Bill; CA means "Cyano Acrylate" glue. Yes, it gives you a few seconds before grabbing. There is regular and gel. Regular is great to lock a knot in rigging thread as it is so watery it gets absorbed; on the other hand even a tiny drop can seep along the thread and be noticeable due to darkening. Gel is better at staying put.
There are people who will tell you that CA in rigging will crack up. Maybe they're right and a drop of shellac is best. I don't know....
And by the way: GO HABS GO!!!!!!!!!!!!!!! GO HABS GO!!!!!!!!!!!!!!!!!!!!!!! GO HABS GO!!!!!!!!!!!!!!!!!!
Ole...ole....Ole.....Ole.....!!!!!!

-
Bill, I use gel CA like this:
https://www.homedepot.ca/product/krazy-glue-krazy-glue-gel-2ml/1000421795
Great news about your new parts! Look forward to seeing you progress.😃
-
Oh no, nothing negative. "Kit bashing" is slang for making modifications with non-kit materials to enhance the final product. Could be as little as using different cannons, or as much as Marc's extreme bash on the "Soleil Royale" 🙂
Marc hope the term "bash" alluding to your SR does not offend you!!!!!! It is an inadequate word to describe the incredible work you have done in widening the hull, adding all the frieze details, and completely rebuilding the stern!
-
I actually used Evergreen 0.005" sheet to make steel hull plates for my "Preussen" build, because Heller only engraved them above the waterline. Yes, Evergreen is very handy!
Bill, I sense some upcoming kit bashing..........
-
Bill, I have no opinion about the port hinges, I left it with the kit version. My only comment about the gunport lids as supplied is the actual ship's port hinges place the hinge pin just outside the hull, centred along the crack between the port's upper edge and the hull. So when you want to display an open port on the model, proper placement of the port lid means that the only contact to the hull is the top edge of the hull opening just "kissing" the top outer edge of the port lid. Hard to explain without a picture, I hope the preceding sentence makes sense.
If one glues the port lid to the top surface of the port opening, it means pushing the port lid into the opening a little and then the port lid looks too small to close the port opening completely. I ended up gluing very small strips of evergreen along the port lids' top edges, then gluing this evergreen to the top of the port opening, leaving all the port lid outside the hull. I painted this evergreen red inside the port lid, and left bare to glue to the port opening tops (which I did not paint red way back after lining the ports, for this reason).
I did add four brass etch eyes to each lid, two inside and two outside.
-
6 hours ago, Hubac's Historian said:
Okay, Ian - what did you do for thread to rig the model? Did you purchase someone else’s scale rope? Make your own scale rope?
Syren got out of the rope making business. I’m debating whether to lay-up my own line.
Marc,
On the recommendation of someone on the old Pete Coleman HMS Victory web site, I ordered various sizes of Amati rigging thread. For the forestay and mainstay I could not get the required diameter in black (was it 1.6mm ?? I think??) but it was available in natural so I dyed it with fabric dye.
If you want to view more of the looks of Amati thread there are more pictures in my Victory pseudo-log, added here after the demise of Pete Coleman's HMS Victory web site on which I had a detailed log.
I must say rope walks look interesting especially for larger ropes in scales say 1:100 and greater, but my current 1:150 build only needs small threads so the surface is less important. Especially to my ageing eyes 😉
-
On 6/22/2021 at 9:45 AM, Bill97 said:
You guys are trying to get me killed! 😀
How do I convince the comptroller of the family budget (wife) that I ultimately need to spend as much for after market improvements to the ship as I did the actual model. Of course I do have a birthday coming up in August! Hummm!
Uummmmm........did we mention that all these options are on top of the obligatory purchase of better thread and wood blocks and deadeyes? 😁 I did not total my expenses on this ship, or tell my wife, but the enhancements were far more than the kit cost. And worth every penny.
LATER EDIT: I was telling my wife about this discussion and she snorted and said, "All those packages from Europe? I figured you spent quadruple the model price on extra stuff". I told her it was actually only about triple 😁
-
Bill, Pete's message has reminded me: also ask about his knighthead part - worth getting too! 🙂
The kit is also short of the smaller anchors and I think he may have them too. Or you can order suitably sized ones elsewhere.
Sorry to bombard you with info!🤪
EDIT: I just looked and he has expanded his production since my day!!!! Beautiful anchor buoys come with the anchors, and his resin figurehead shield - WOW!!!!!! I would love to have had that to paint with its crisp relief.
-
John, the SR is in my stash but I keep putting it off and starting other models. I love your quarter gallery modifications and the re-purposed lower gallery in the stern, also the figurehead colours. I will be referring back to this log of yours whenever I get around to mine. If I ever do 🙄
-
Hi Hubac, or "Marc", is that correct? First time my model has been described as "eye candy", especially by someone who crafts such an incredible model as your SR; thank you! 😲
Yes wood deadeyes are pretty much de rigueur for this kit as the plastic ones don't have a groove around their perimeter and so are pretty much impossible to attach to the shrouds.
You have a sharp eye to notice the belfry roof. I find Humbrol metallic paints hard to apply convincingly; you almost need to have the can stirring continuously to keep the metal flakes mixed. So I used copper tape for the belfry roof, and didn't bother applying a verdigris patina. I also wrapped the bell itself in silver metallic duct tape; looks very nice but not really accurate as a bronze casting.
-
Hi Bill,
The advantage of etched brass is that they can form tiny details that cannot be molded in plastic due to strength issues. As you say, the purpose of the brass etch sheets is not to add bling, but to enhance detail.
They can also help with functionality.
Example (1): The plastic hammock stanchions included in the kit have no molded eyes at their top ends, rendering them very difficult to rig neatly with the ropes that run along their tops to support the nettings. Plus they are necessarily molded over-size to have some strength. Daniel's stanchions are simplicity itself to rig with the netting support ropes. Also, when you inevitably knock them during the build, they bend instead of breaking and are easily straightened.
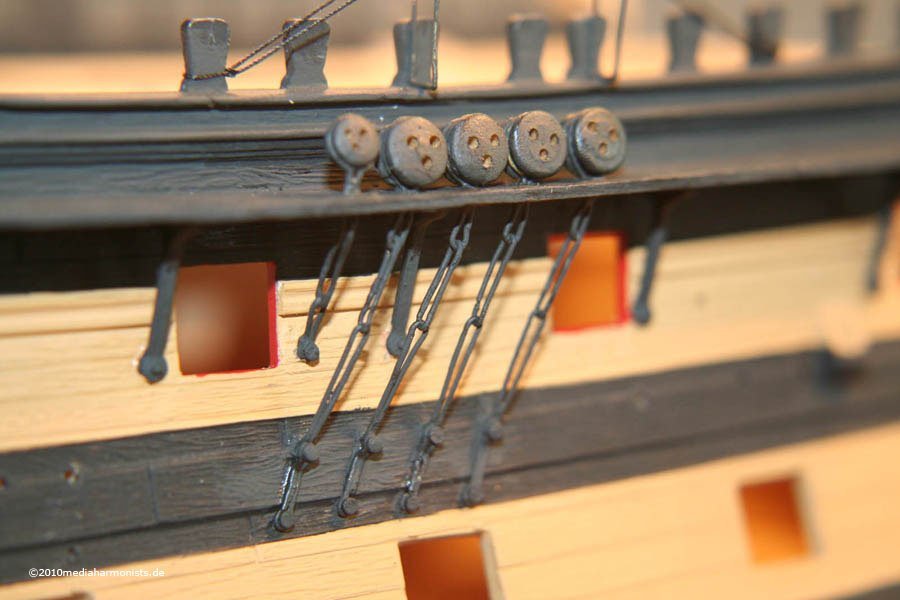
Example (2): The kit provides nothing for the lower chains. In fact, the hull doesn't even have the preventer plates molded on. Heller would have you tie strings to the very clunky-looking strops on their lower deadeyes and pass them through the holes in the hull. The result is to say the least crap looking. Daniel's brass parts replicate the three links of the chains and provide the preventer plates.
Here is the Heller method (image from Dafi's log):
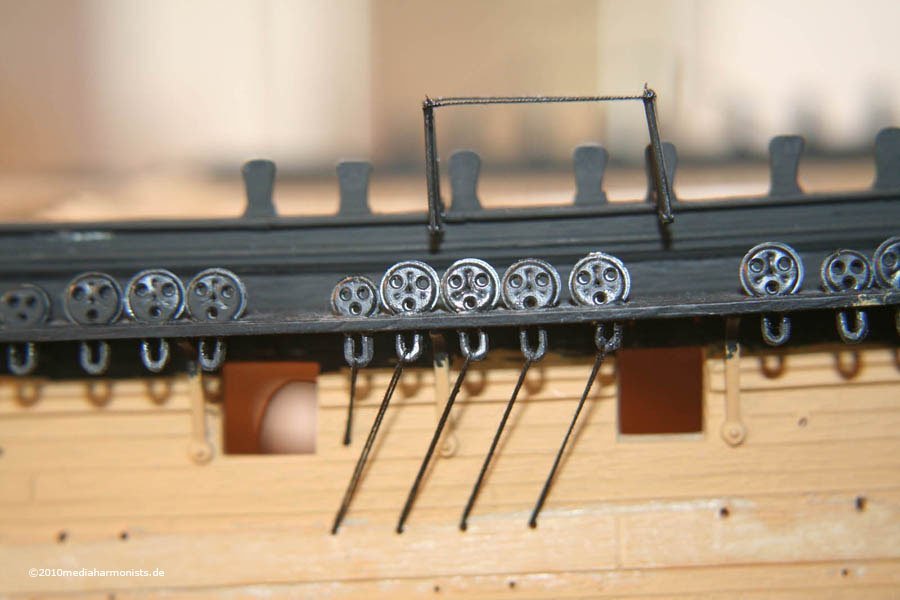
and here are Dafi's chains (image from Dafi's log):
Here are Dafi's chains on my model; note the preventer plates (the etch stanchions are also seen):
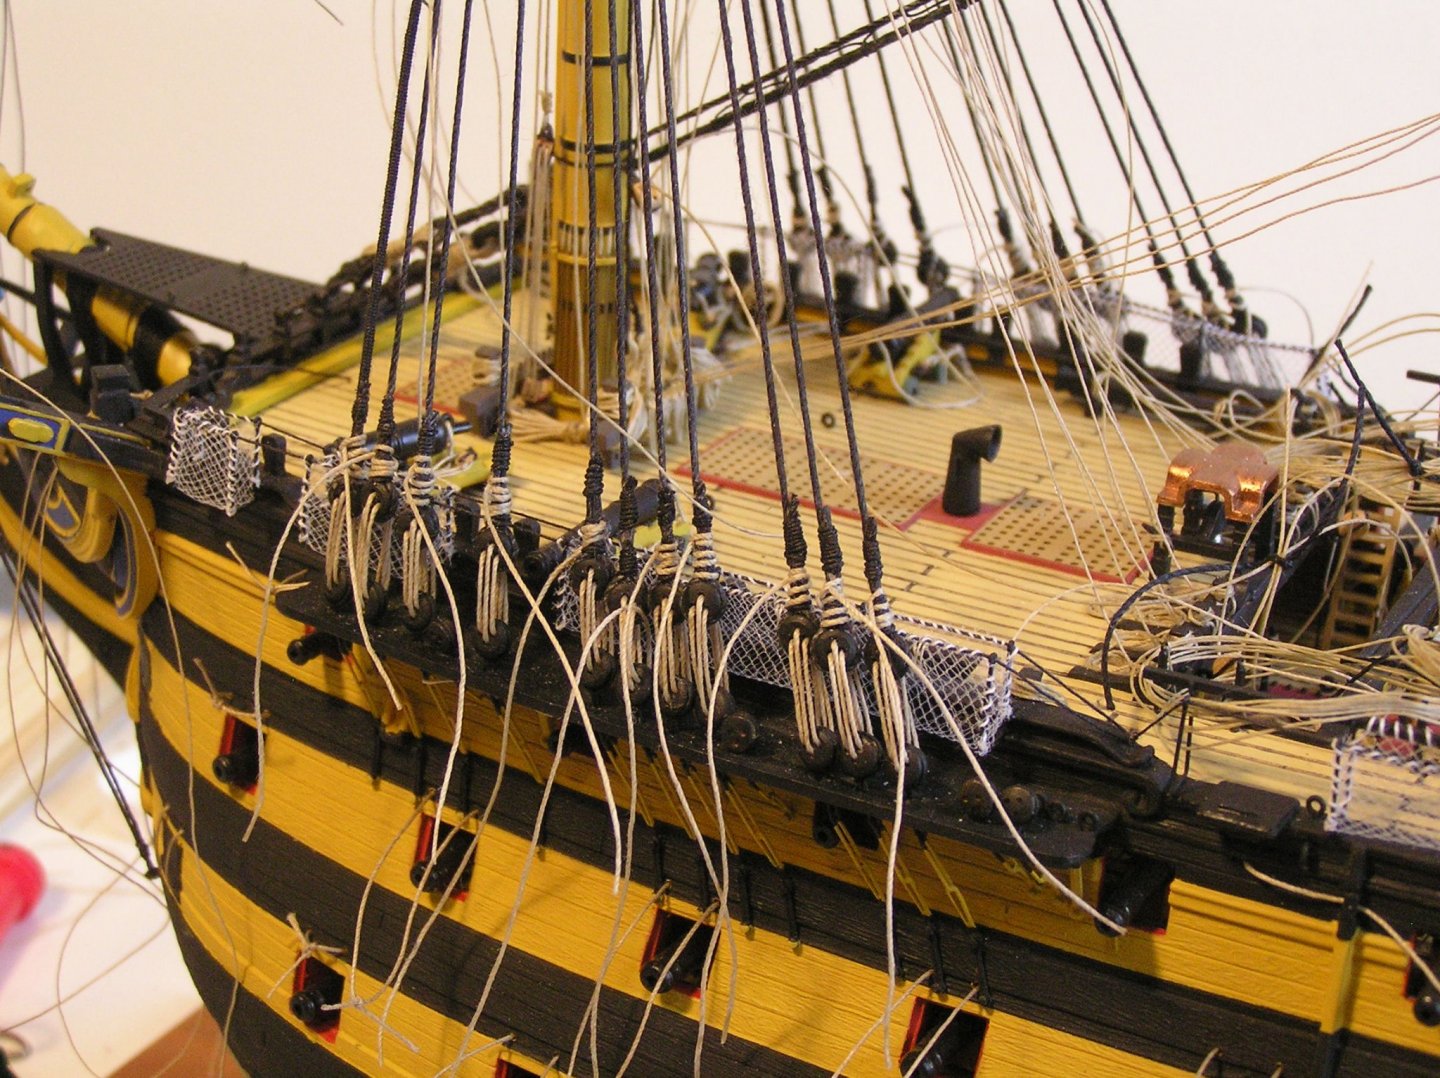
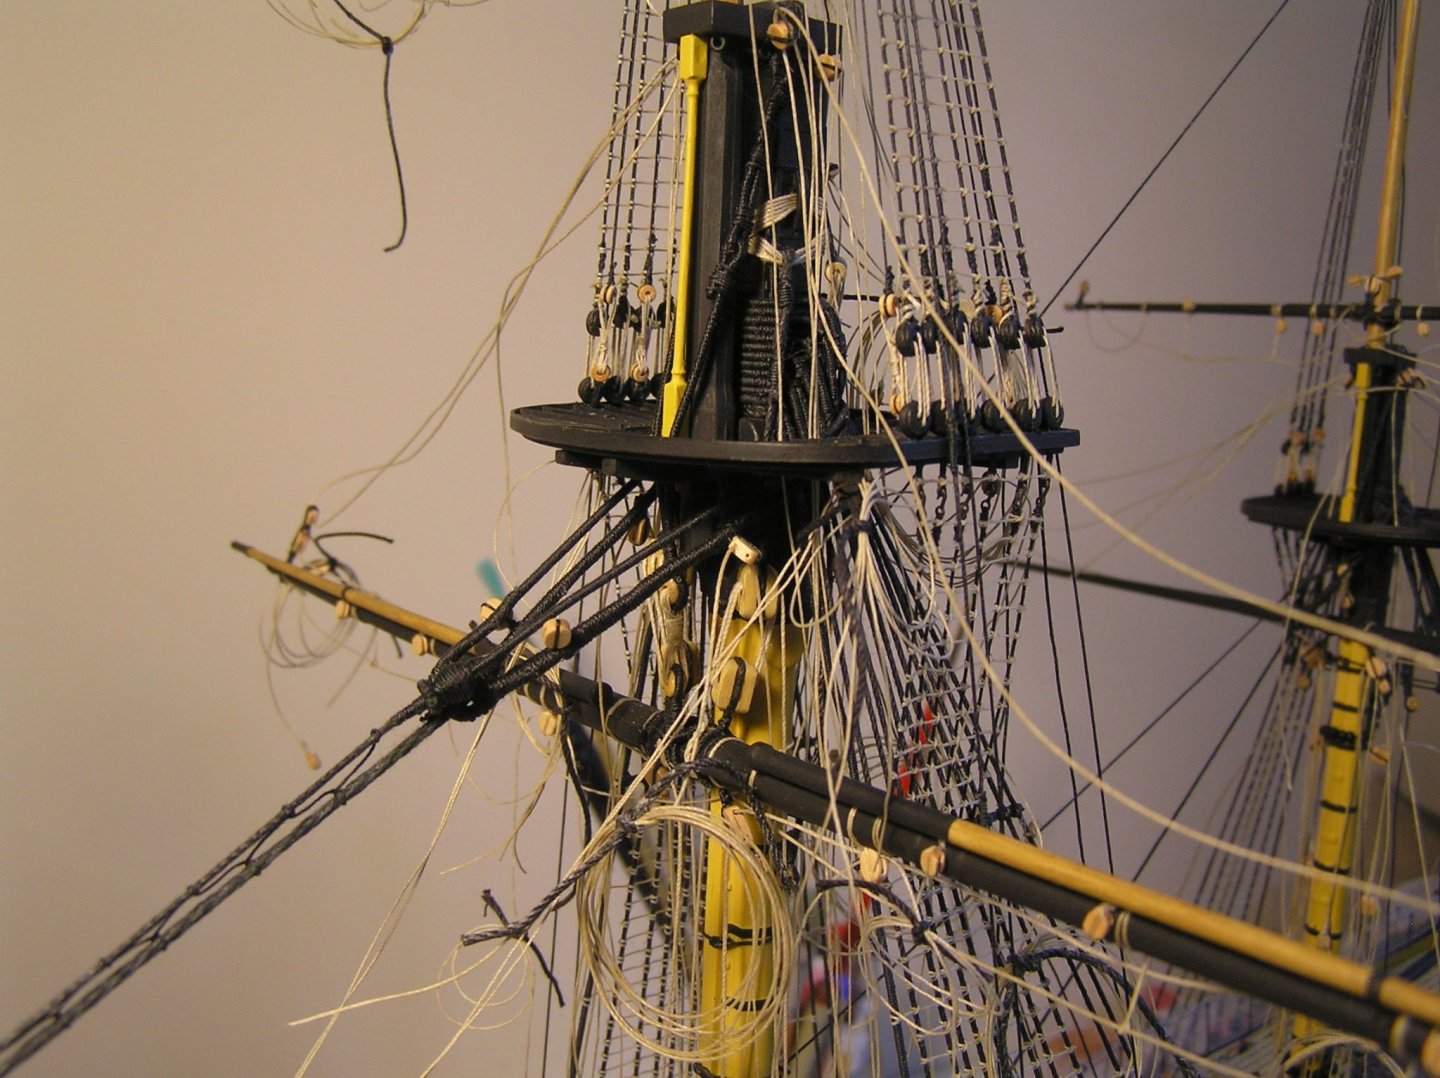
Example (3): I don't even recall how Heller would have you strop the lower deadeyes in the tops. As I mentioned before their deadeyes are unusable anyway. Dafi's etch sheet that provides the lower chains also provides neat strops for the wood deadeyes you need to buy for the topmast shrouds (smaller than the lower mast deadeyes), and associated hooks to attach the futtock shrouds. Here is an image of my model; if you look carefully you can see the hooks attaching the futtock shrouds to the deadeye strops:
Example (4): the sheet with the stanchions includes a new binnacle and skylight. I don't have detailed closeups of them but here is a shot of my model which includes the etch skylight which you can compare to the Heller rendition:
The two sheets I recommended earlier provide all these, and more. For instance, gun locks for the cannon and new stunsail boom irons neither of which I used. Hope I have shown you how you can enhance your model considerably!
- Hubac's Historian and dafi
-
2
-
Not to interject here with nonsense (I hope), but do we "know" Viking shields had bosses? I thought bosses were originally a central metal part with a "knob" on the inside as a hand hold, until some genius thought of strapping shields to forearms to make use of shoulder and upper arm muscles instead of straining just the wrist? I stand ready to be refuted.....😉
Love your model, Cathead!
- mtaylor, mbp521 and FriedClams
-
3
-
2 hours ago, Hubac's Historian said:
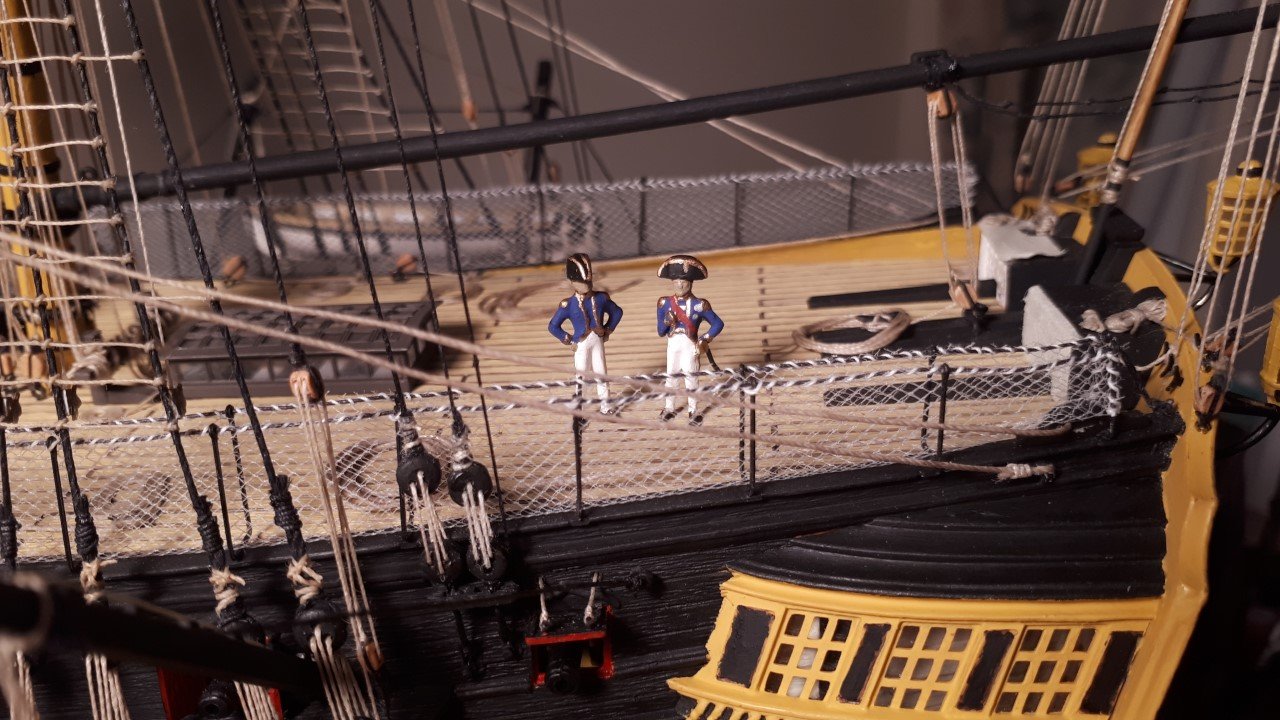
Personally, I don’t care for that salmony yellow color, even if it is correct for 1805. Port linings do look good, Bill!
I wholeheartedly agree! I do like the new red though.
Nice looking deck, Bill!


HMS Victory by Bill97 - FINISHED - Heller - 1/100 - PLASTIC
in - Kit build logs for subjects built from 1751 - 1800
Posted
Yes, that's the one. I should mention that of its 272 pages, the detailed rigging description occupies about 70 pages; the rest deals with scratching a wooden hull and fittings and is very little use to the plastic modeller. There is a much smaller book, "Classic Ships: HMS Victory" by Noel Hackney, which demonstrates how to enhance the smaller Airfix Victory. It goes through all the same rigging stuff with rope and block sizes but has far less detailed diagrams, though adequate. If you are budget conscious I assume this little book would be far cheaper and you still have MSW to assist.
For your other question, the truth is that, going by build logs I have seen, most people who start this kit never finish. You have to be pretty dogged to overcome the terrible instructions and know to buy wood blocks and deadeyes. I actually bought my kit in 1983 but life got busy and it was started only a few years ago after my kids got big. Had I started it then, without the internet and its invaluable search tools and forums, I probably would not have finished, or at least it would not have been near as nice. Remember the days when all you had was a local hobby shop (there were good ones) and looking at the ads in "Model Boat" magazine for materials? 😀 How would I ever have learned of Longridge's book?
Regarding parrals, here is a pic from Longridge. I just bought some seed beads of appropriate size, filed a piece of maple to the cross section, drilled, then sliced it up with an exacto knife. Then sort through the pieces for the best.
And for example here is a page from Hackney's book. Short and sweet. His scale block sizes are for the smaller Airfix model, not for 1/100 but you can convert his actual size to suit.