DONATION DRIVE - SUPPORT MSW - DO YOUR PART TO KEEP THIS GREAT FORUM GOING!
×


RGL
-
Posts
5,539 -
Joined
-
Last visited
Content Type
Profiles
Forums
Gallery
Events
Everything posted by RGL
-
 Thin glue! Use a scalpel to cut a groove for it and the support struts. I hated this bit on my Varyag.
 -
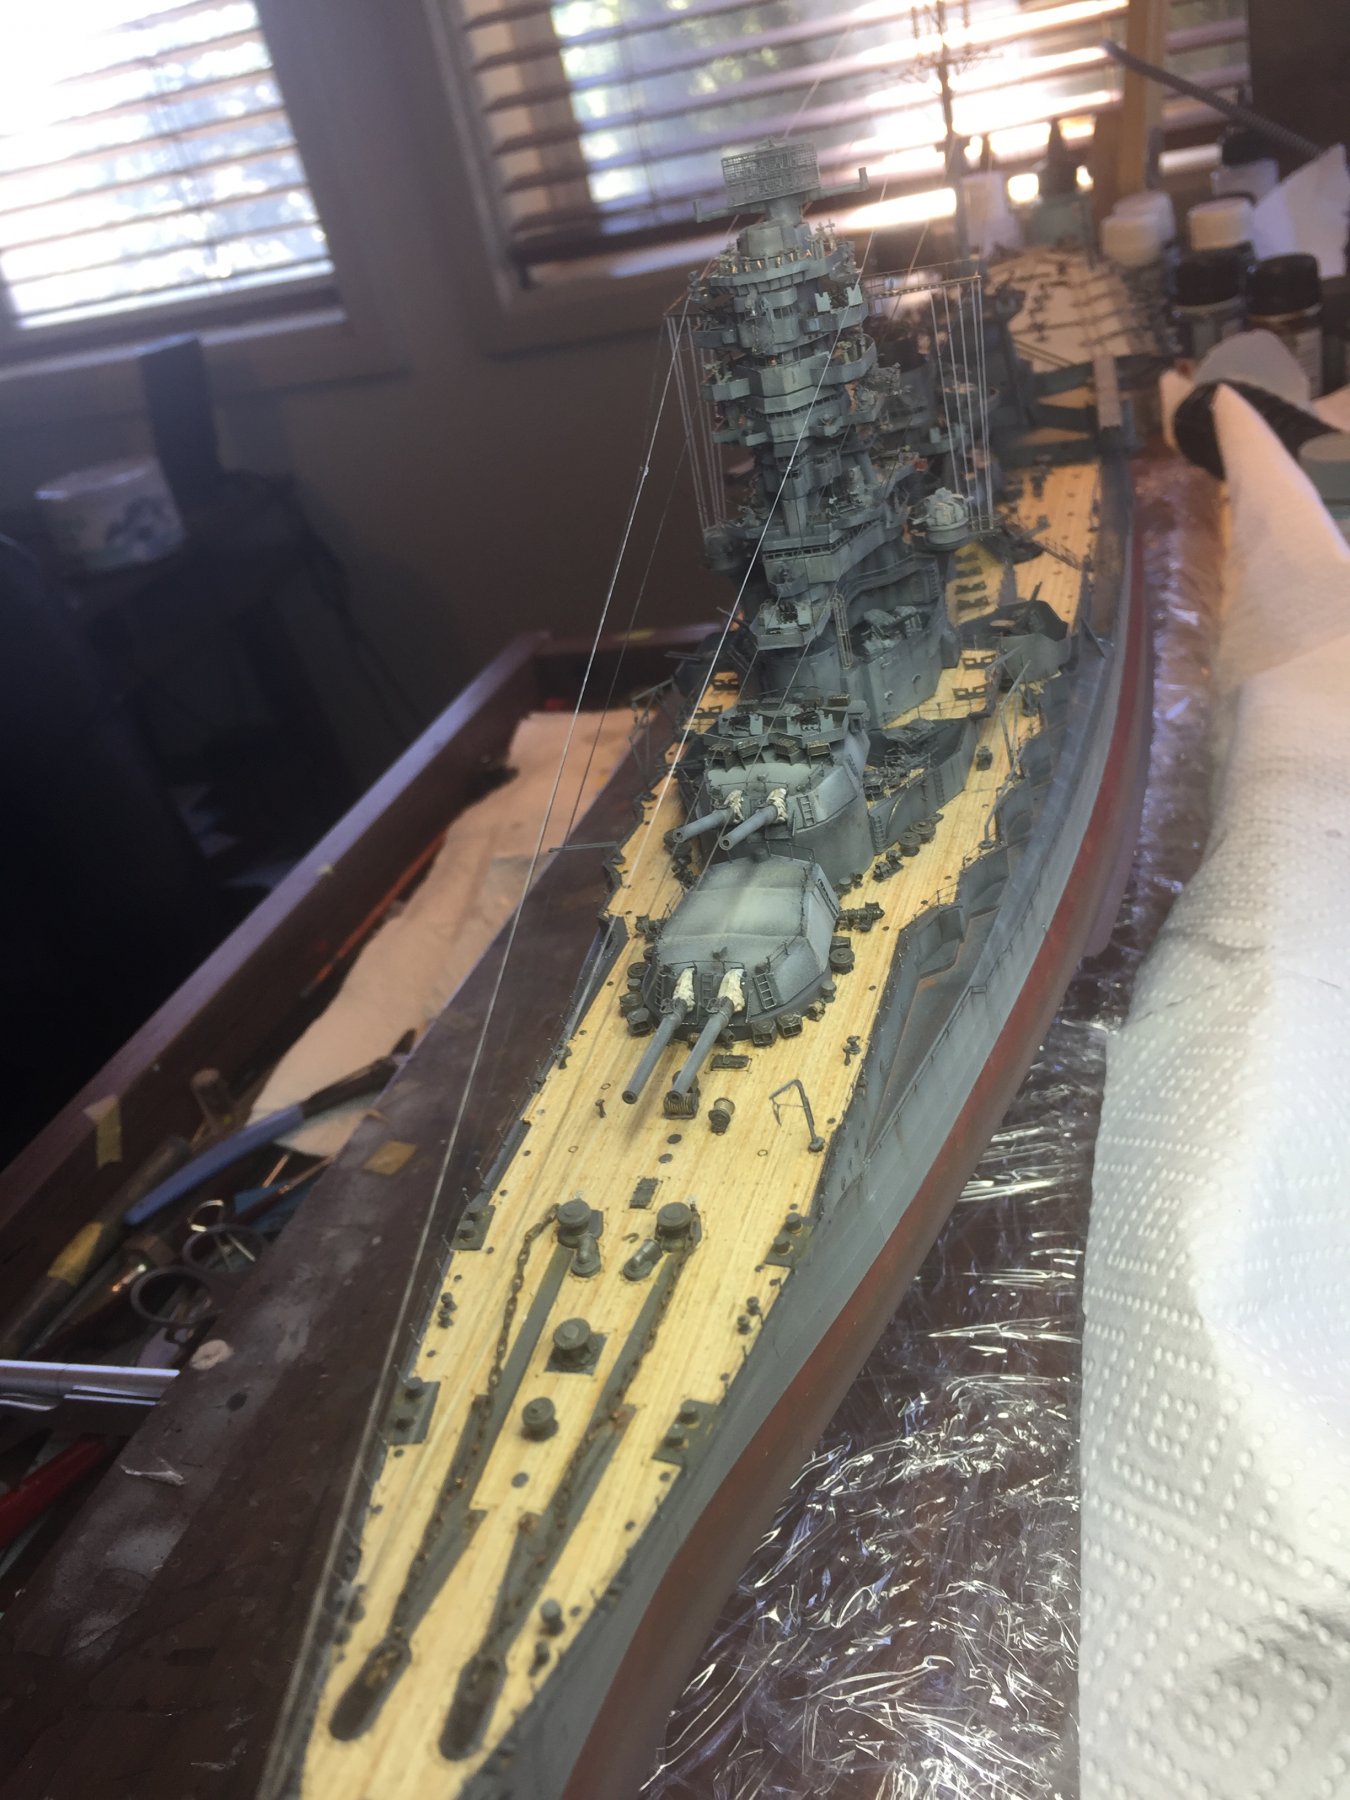
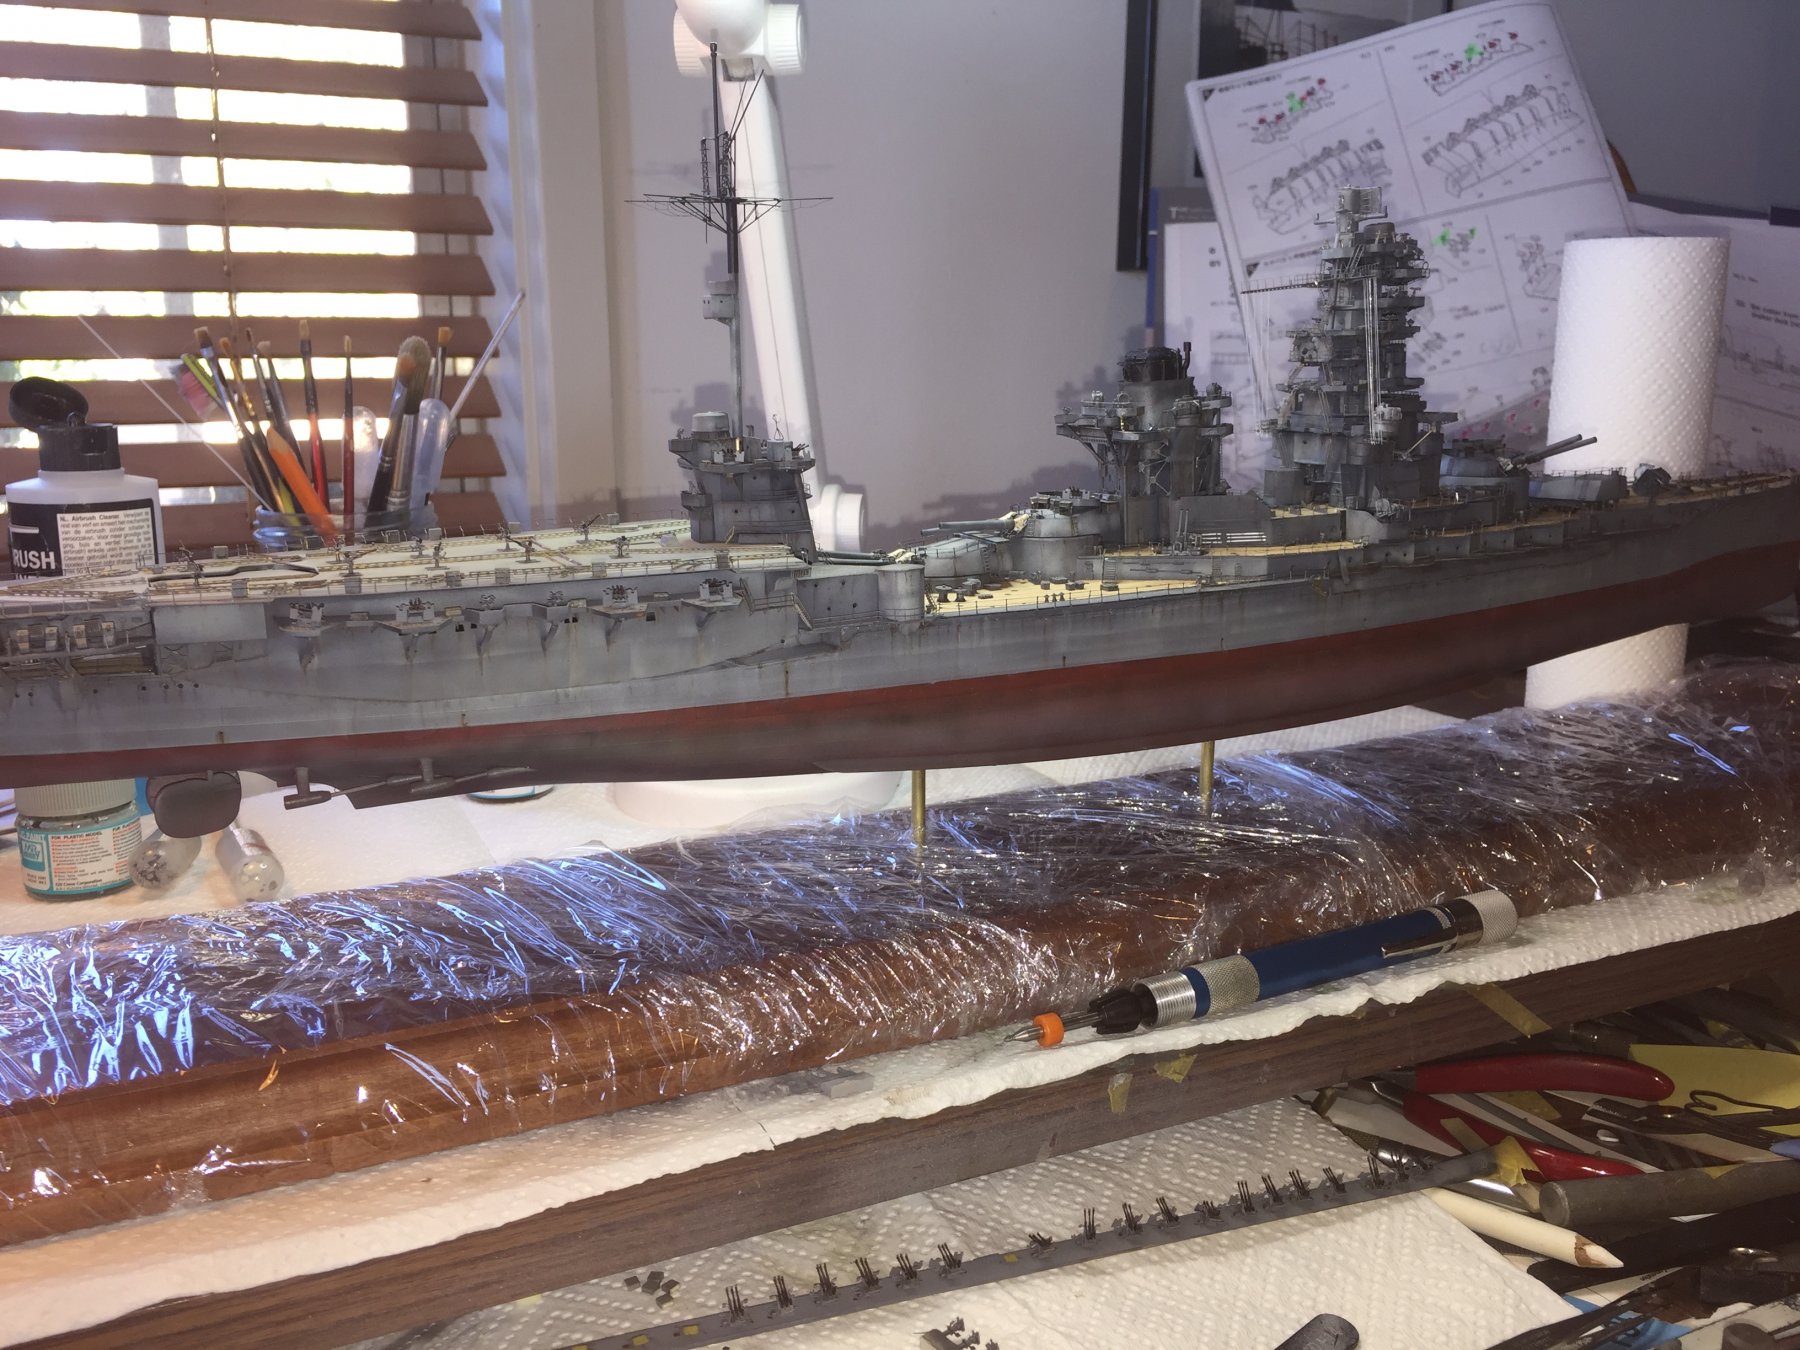
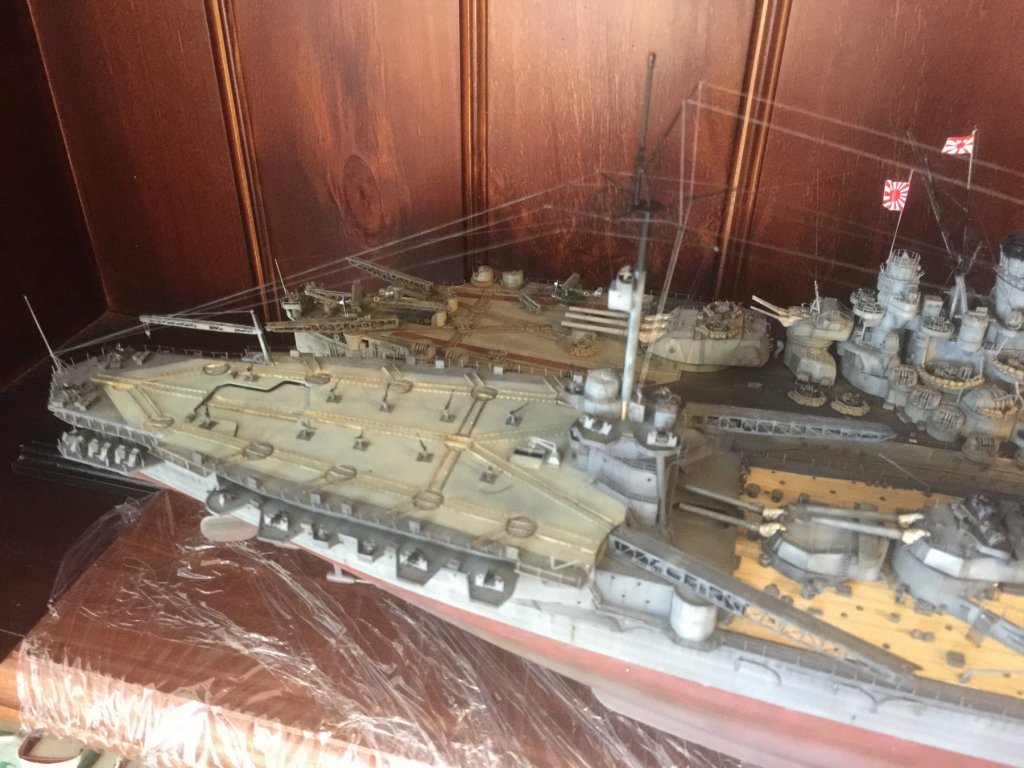
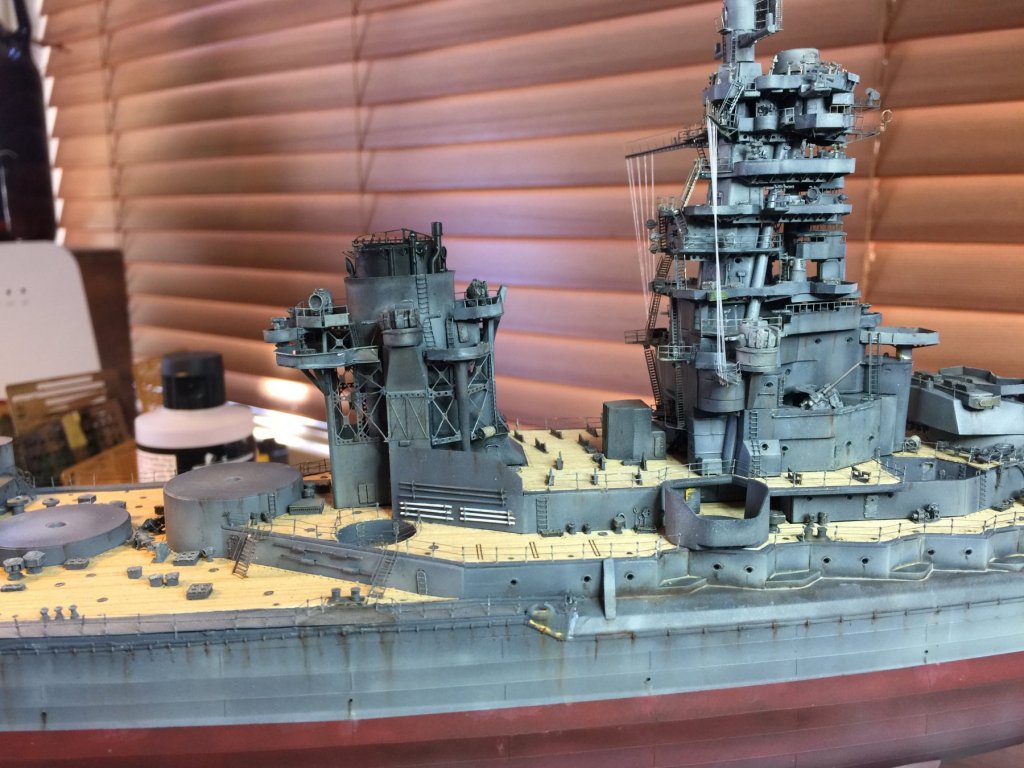
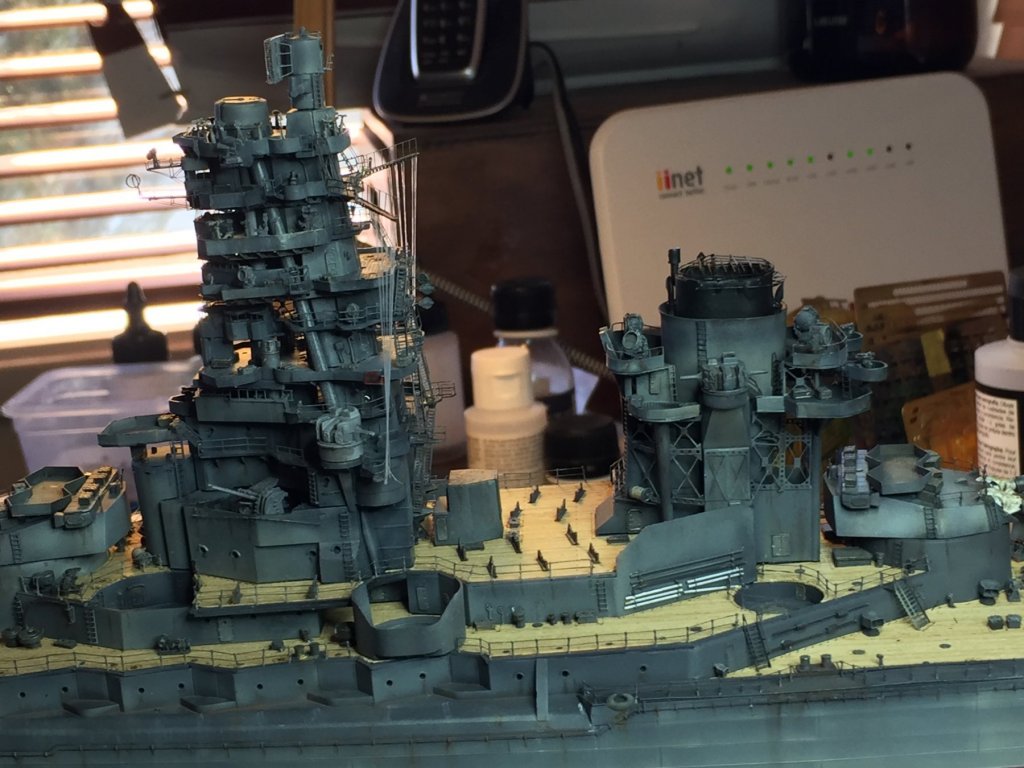
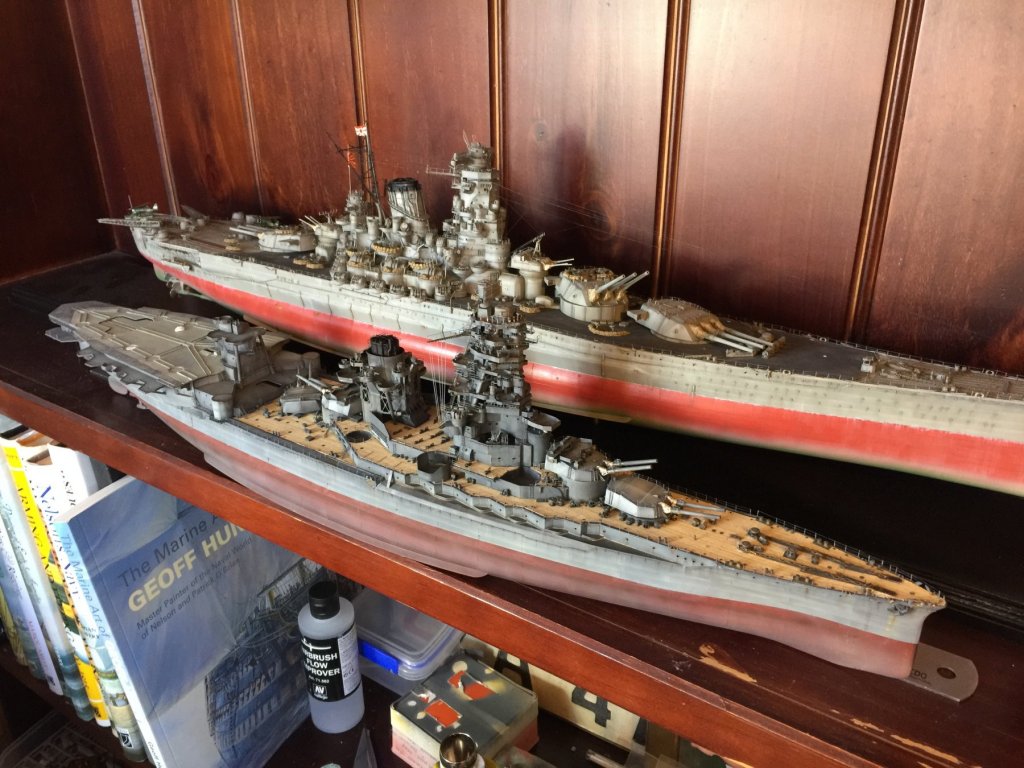
Ok, the main ship is now pretty much done. Davits and Cats added, rigging done. I’ll touch up the paintwork at the end.


- 224 replies
-
- 22
-

-
I’ve got a shed load on this to go yet. I’m hoping to get the rigging done today, then I can add the davits, then throw on the catapults then start on the back ate and aircraft.
-
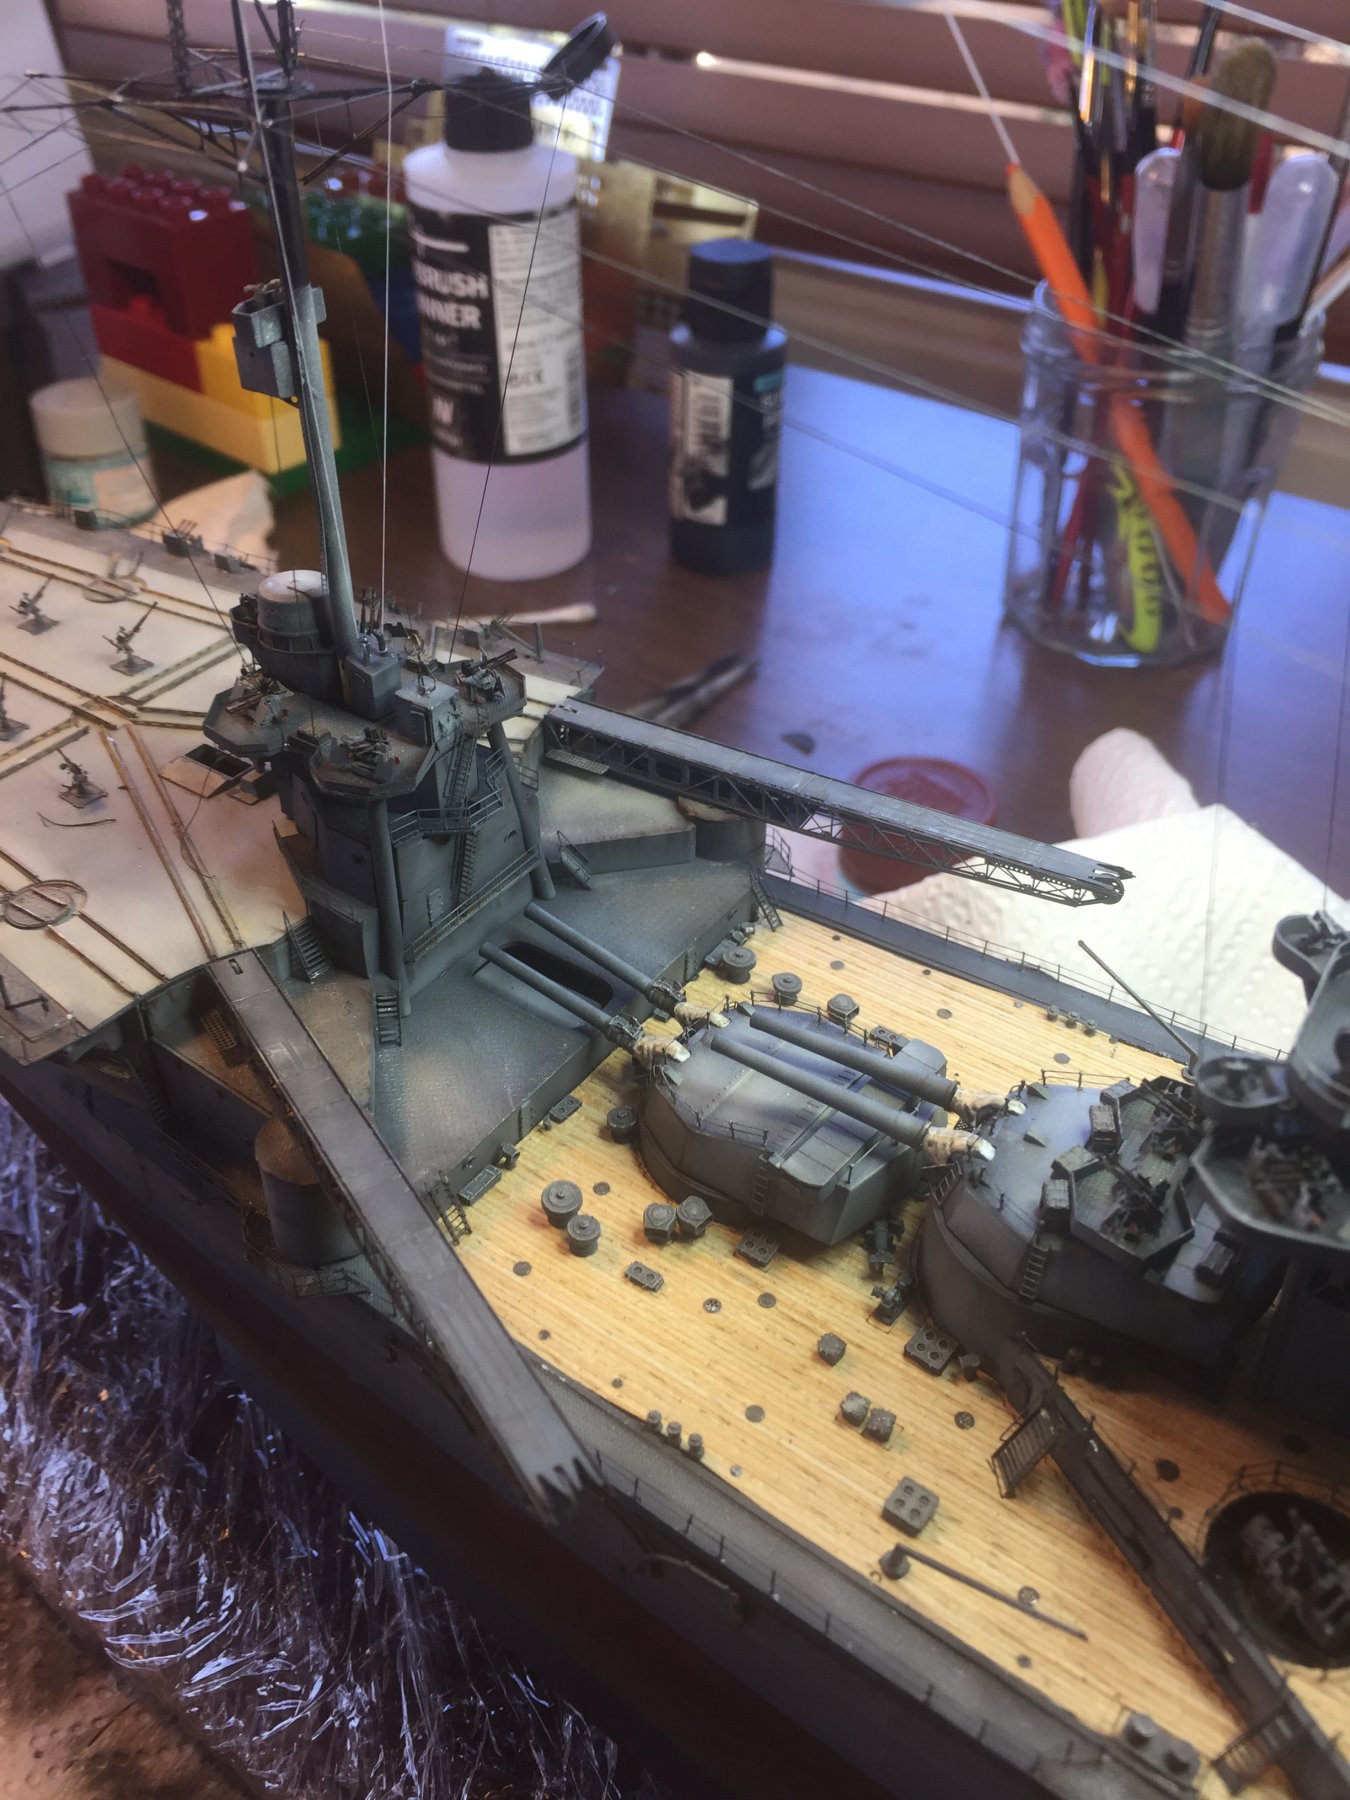
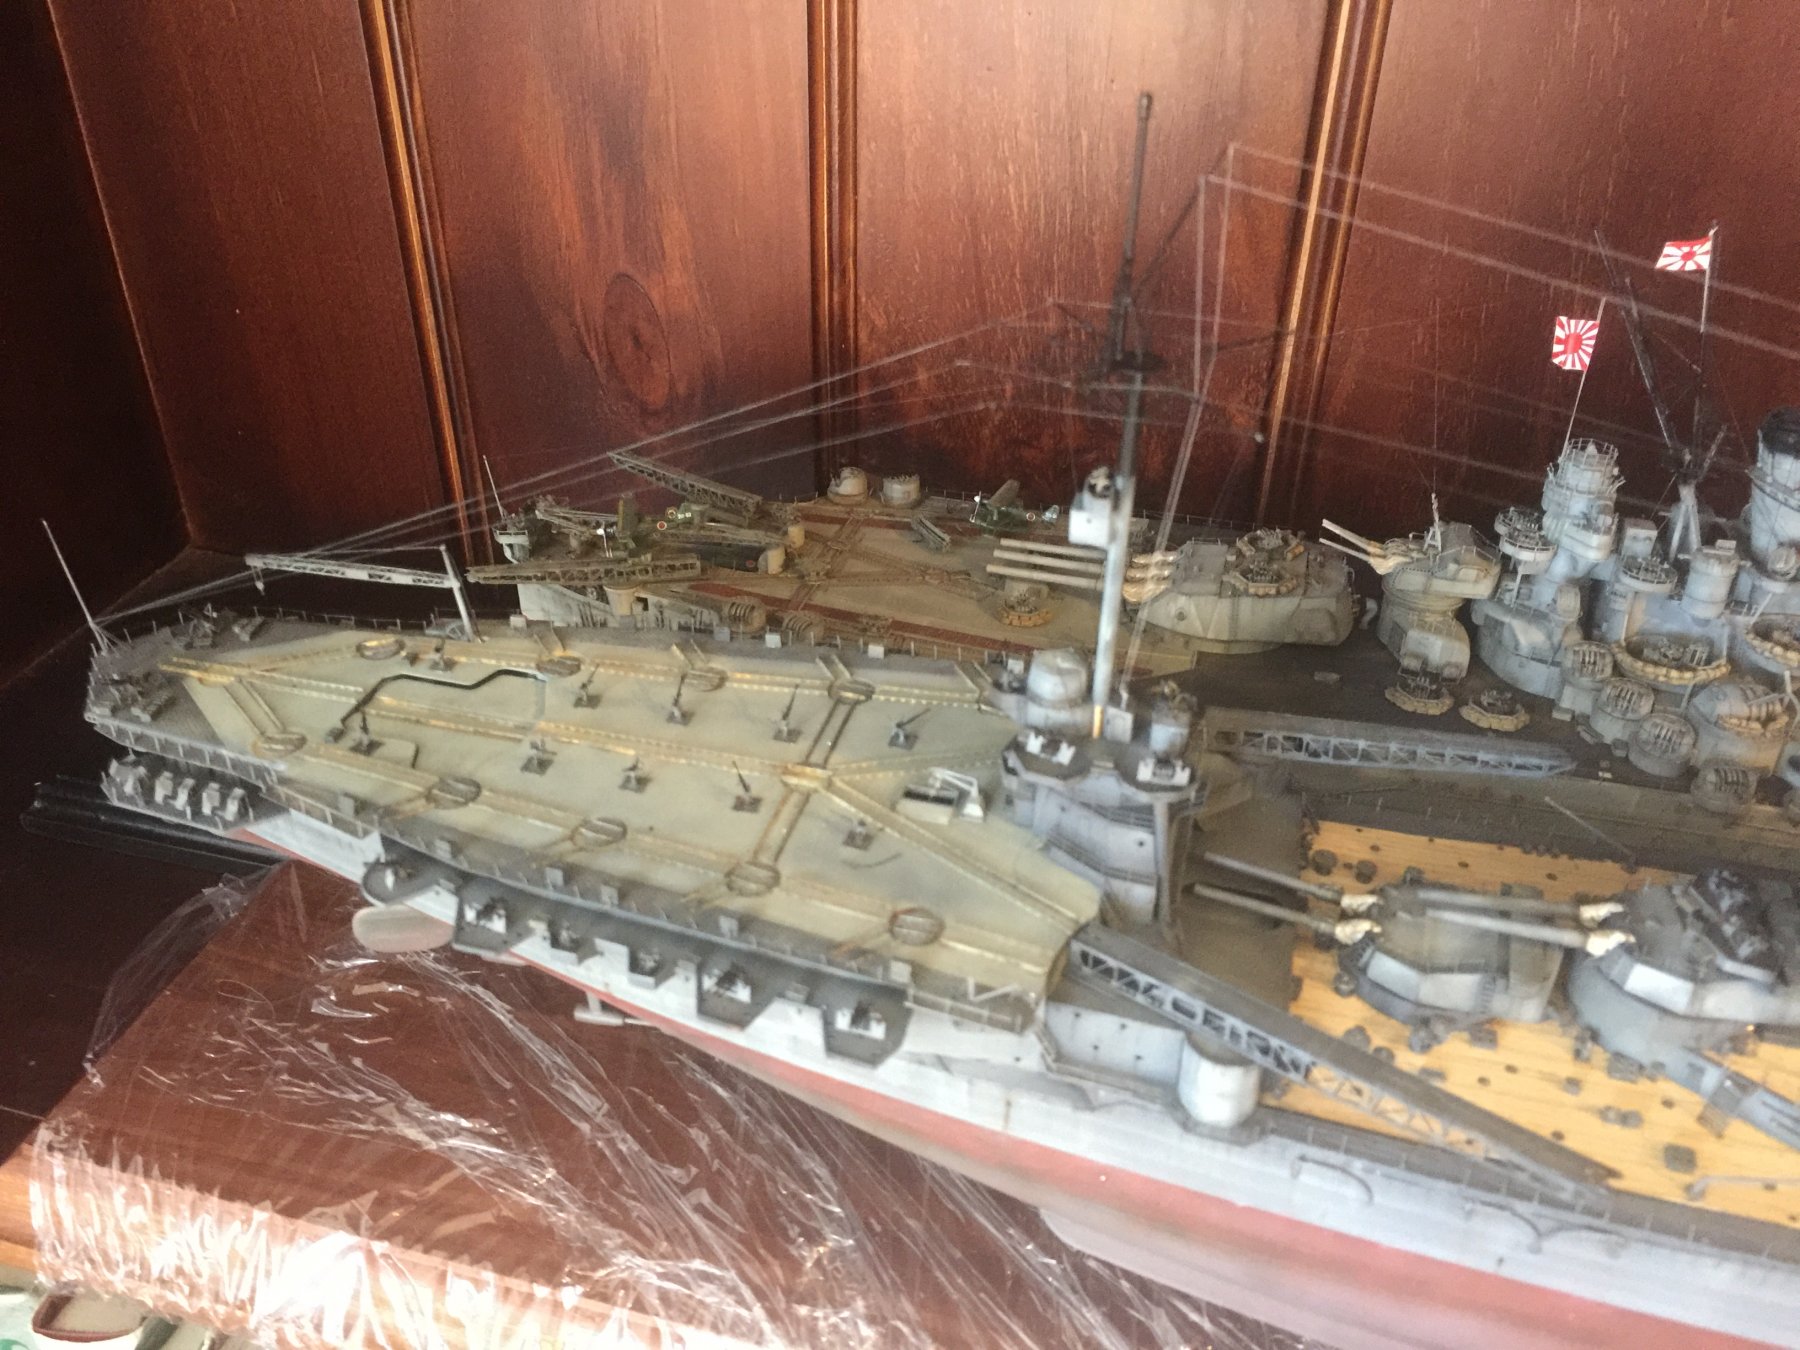
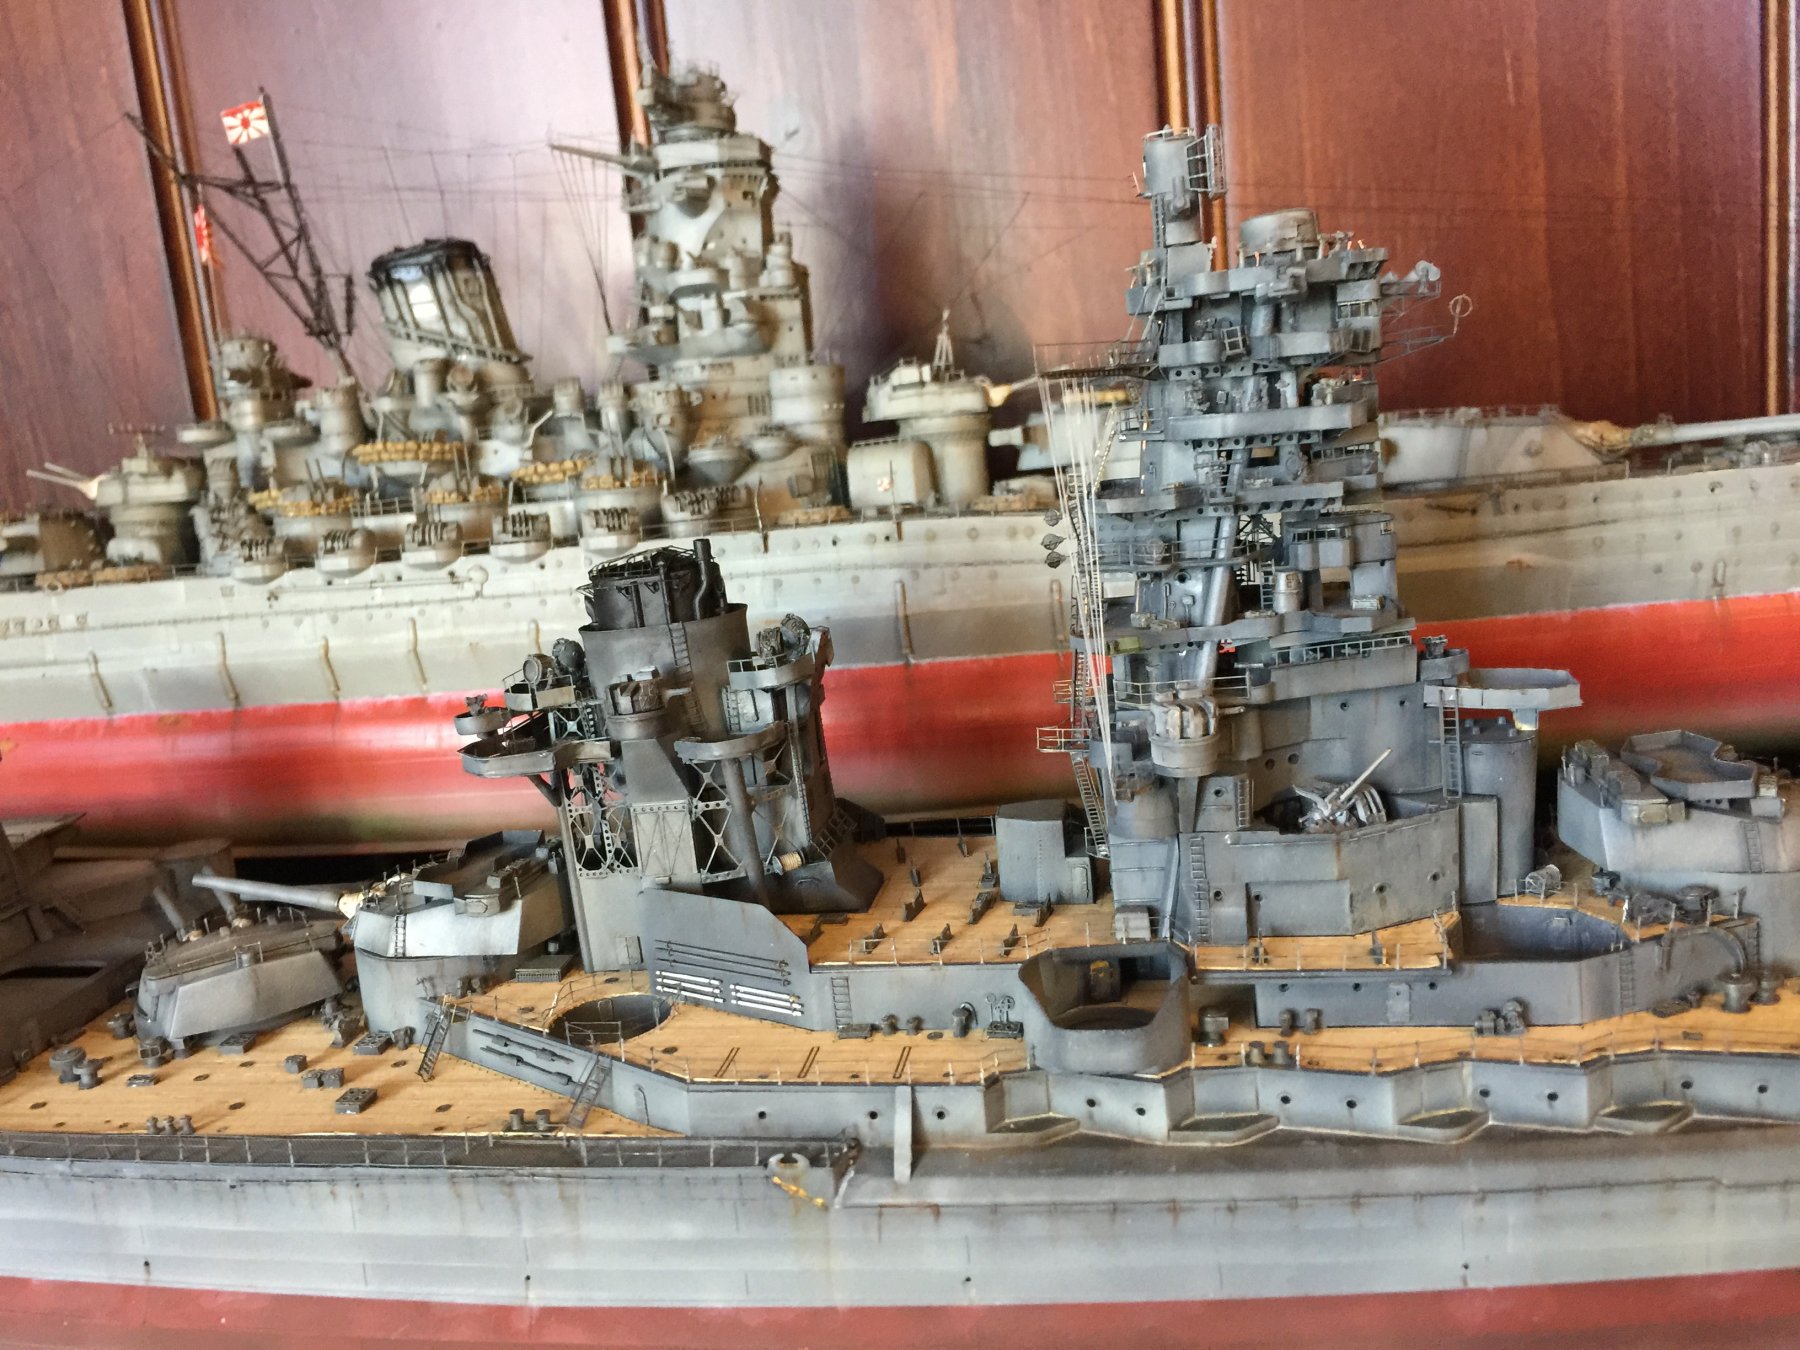
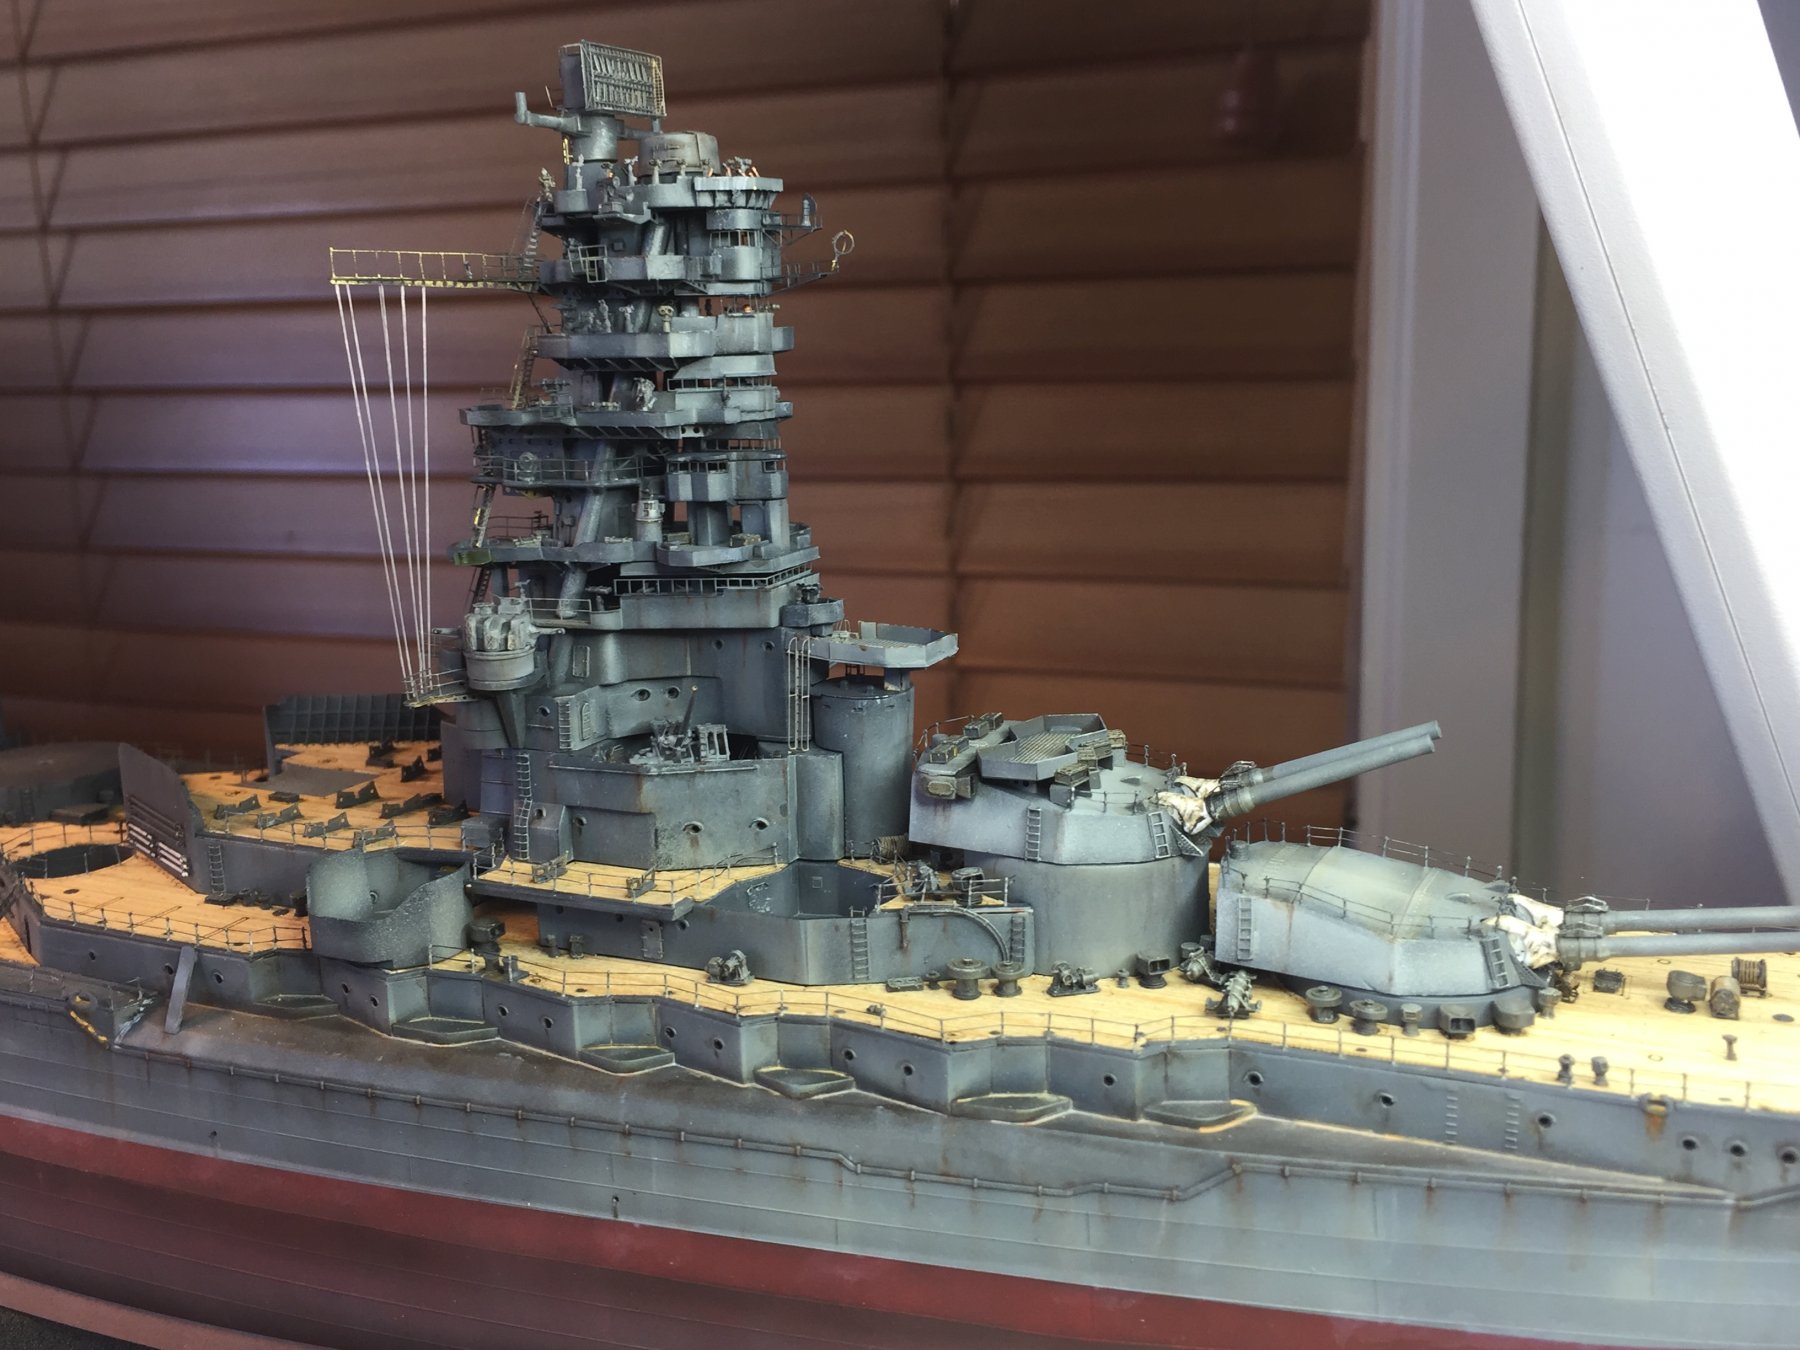
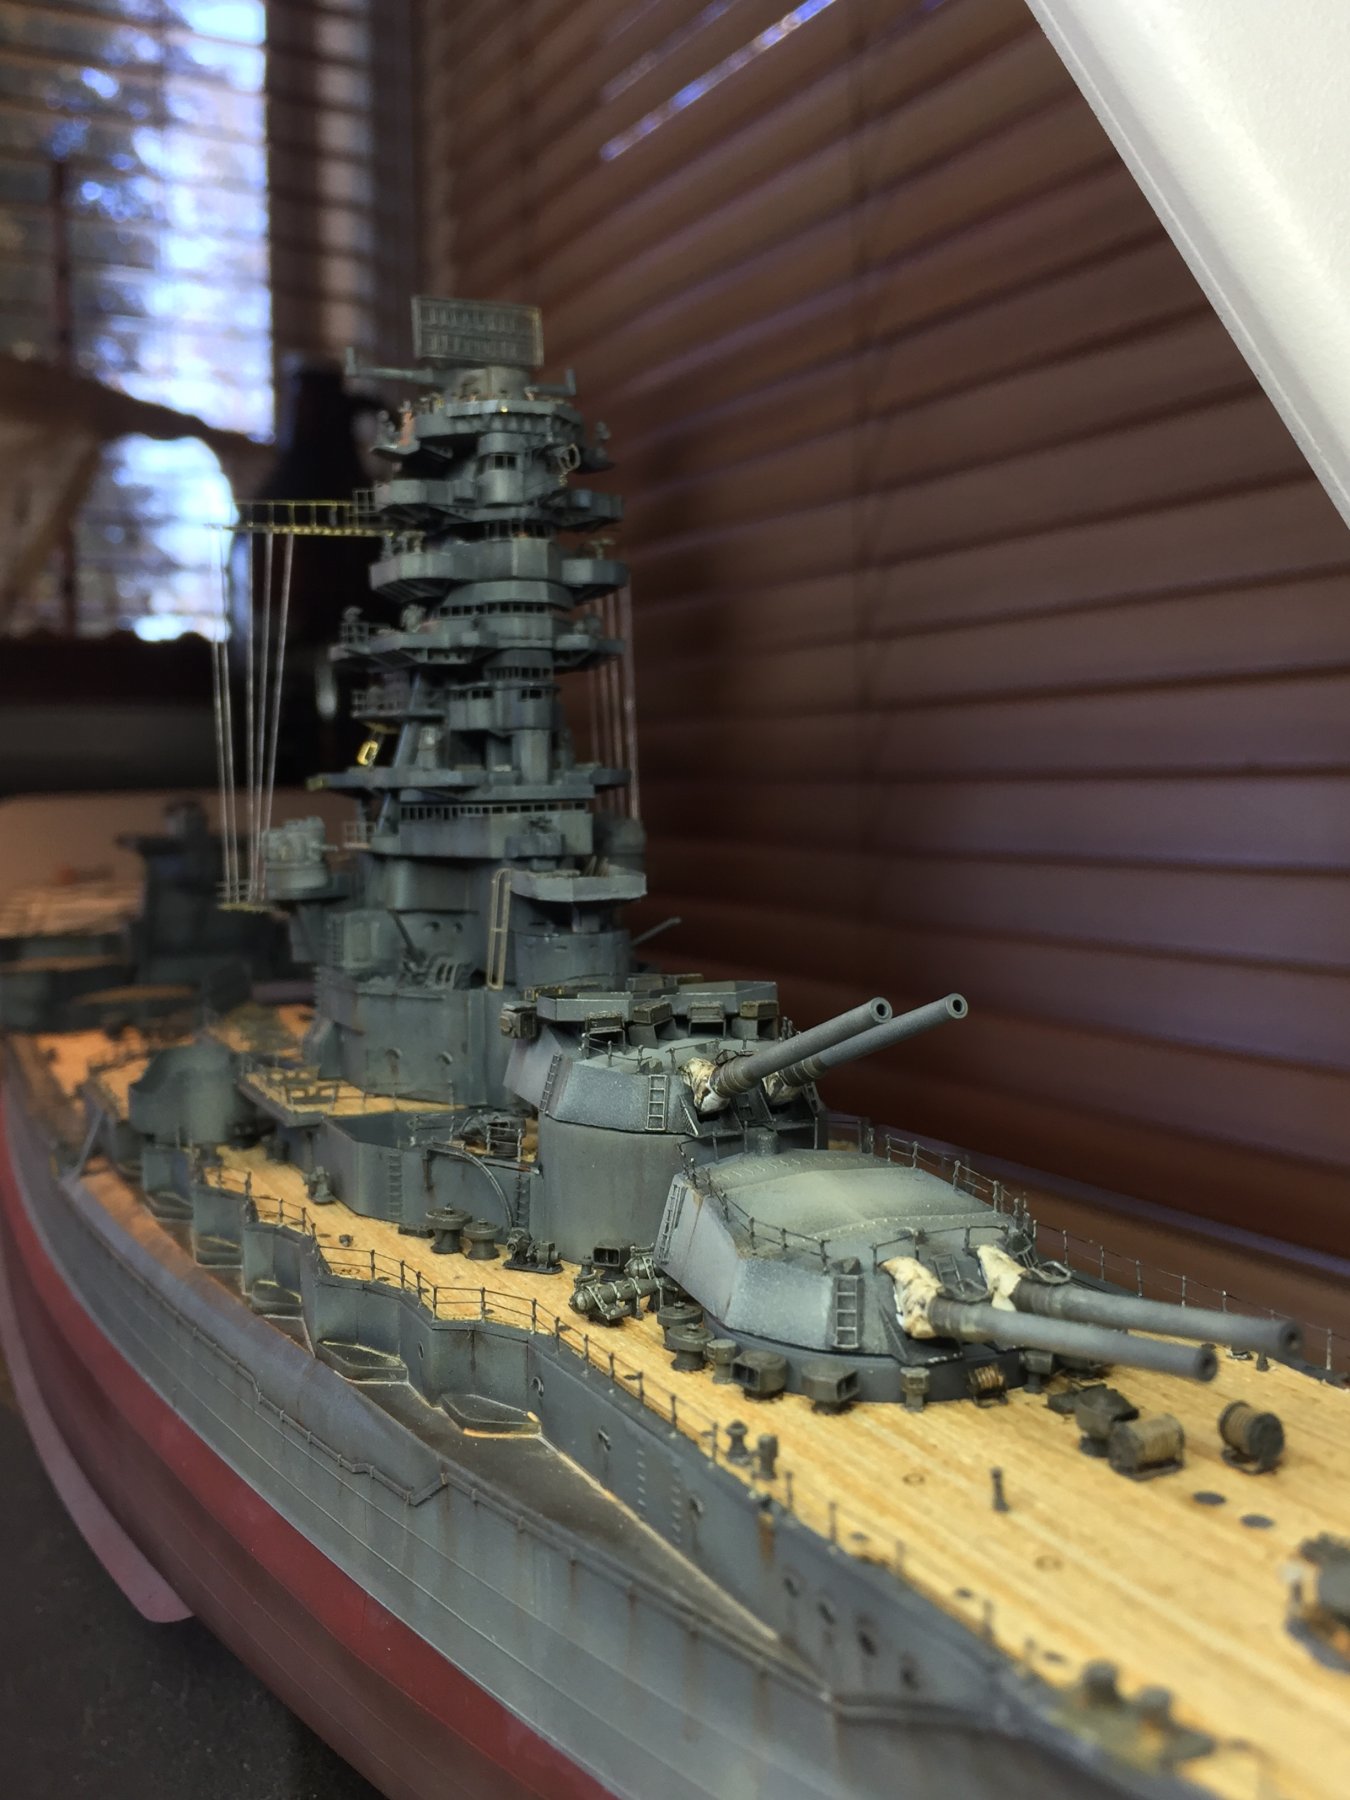
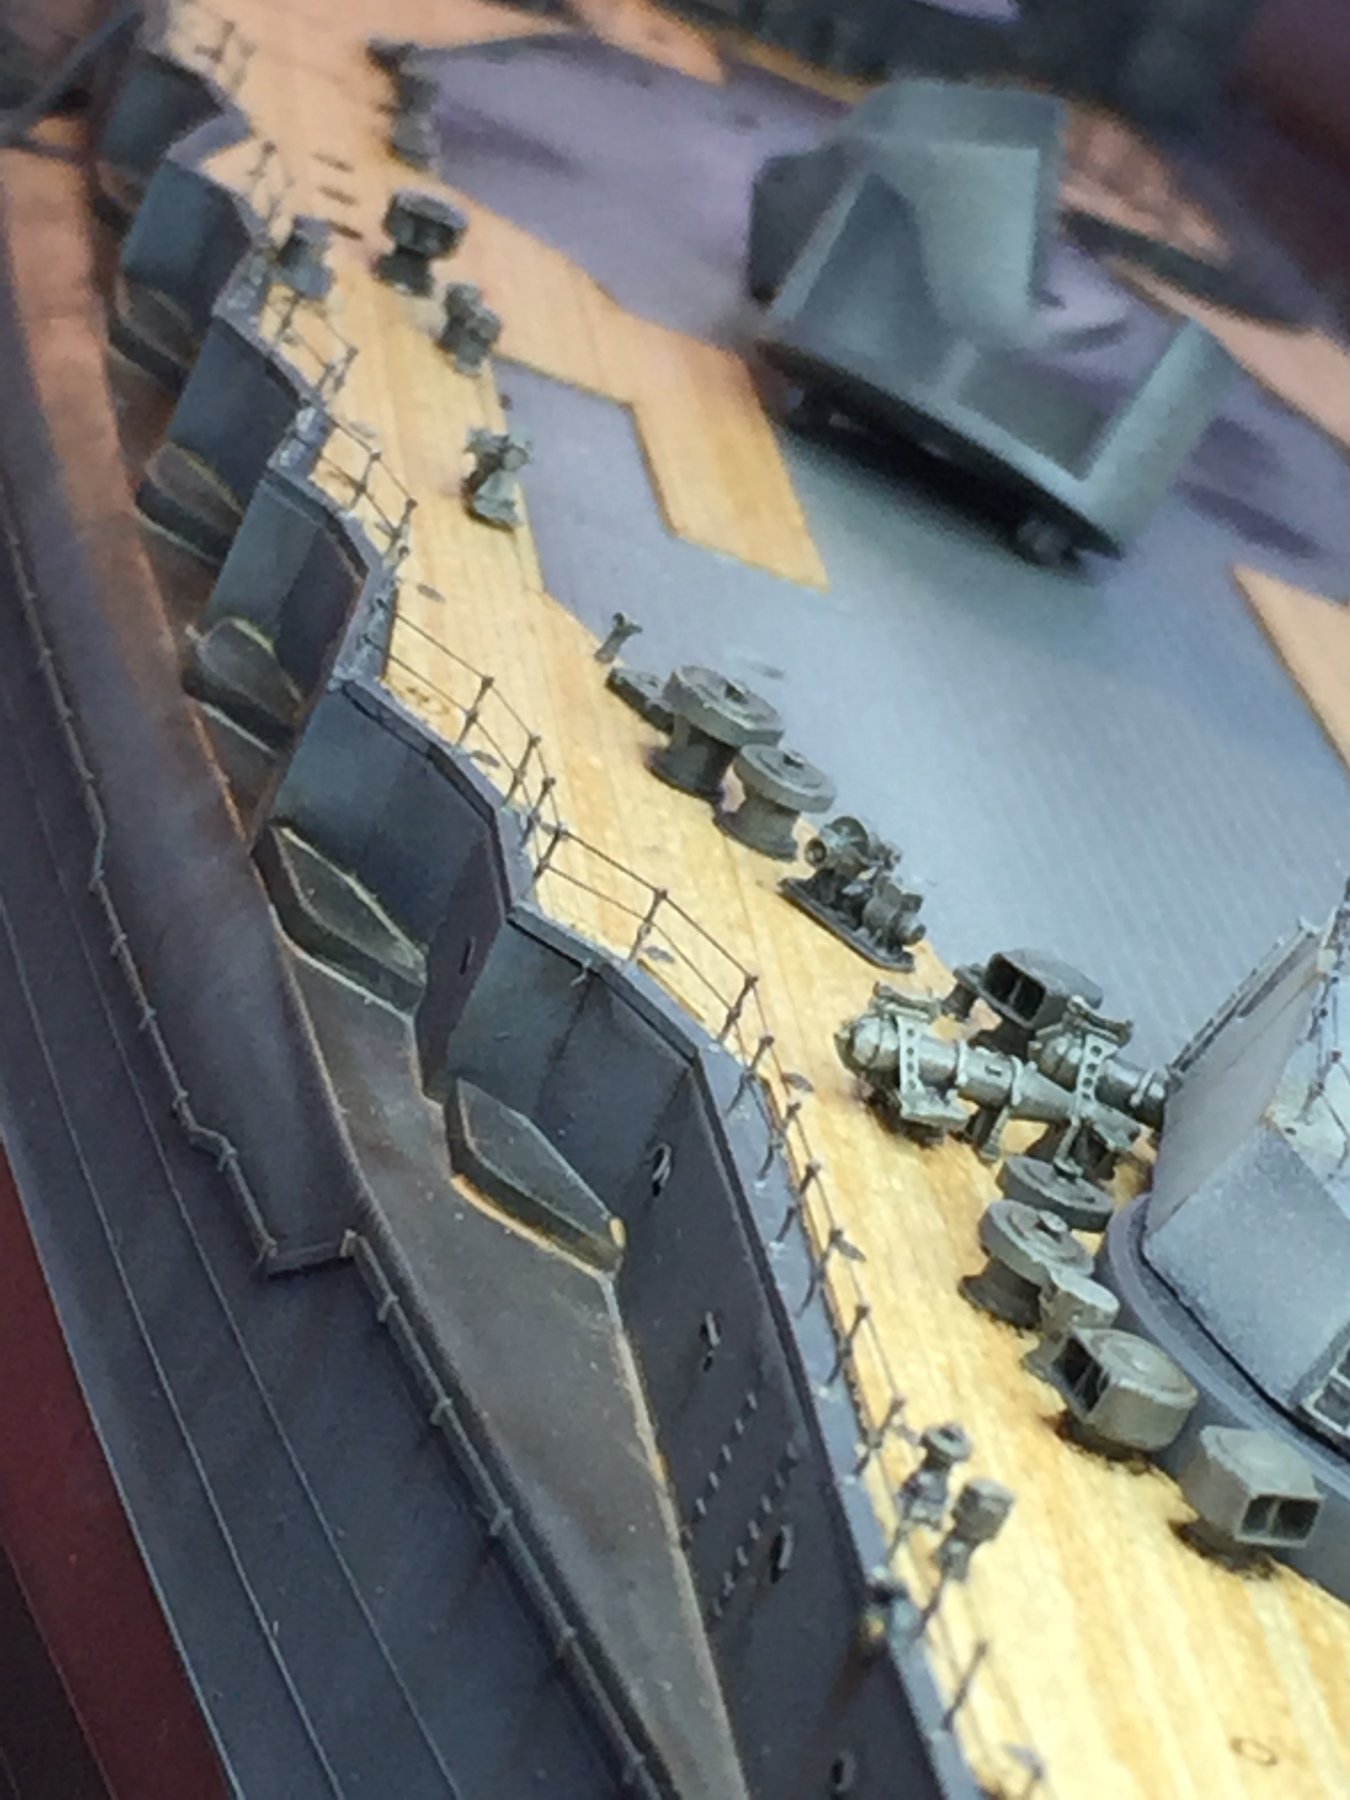
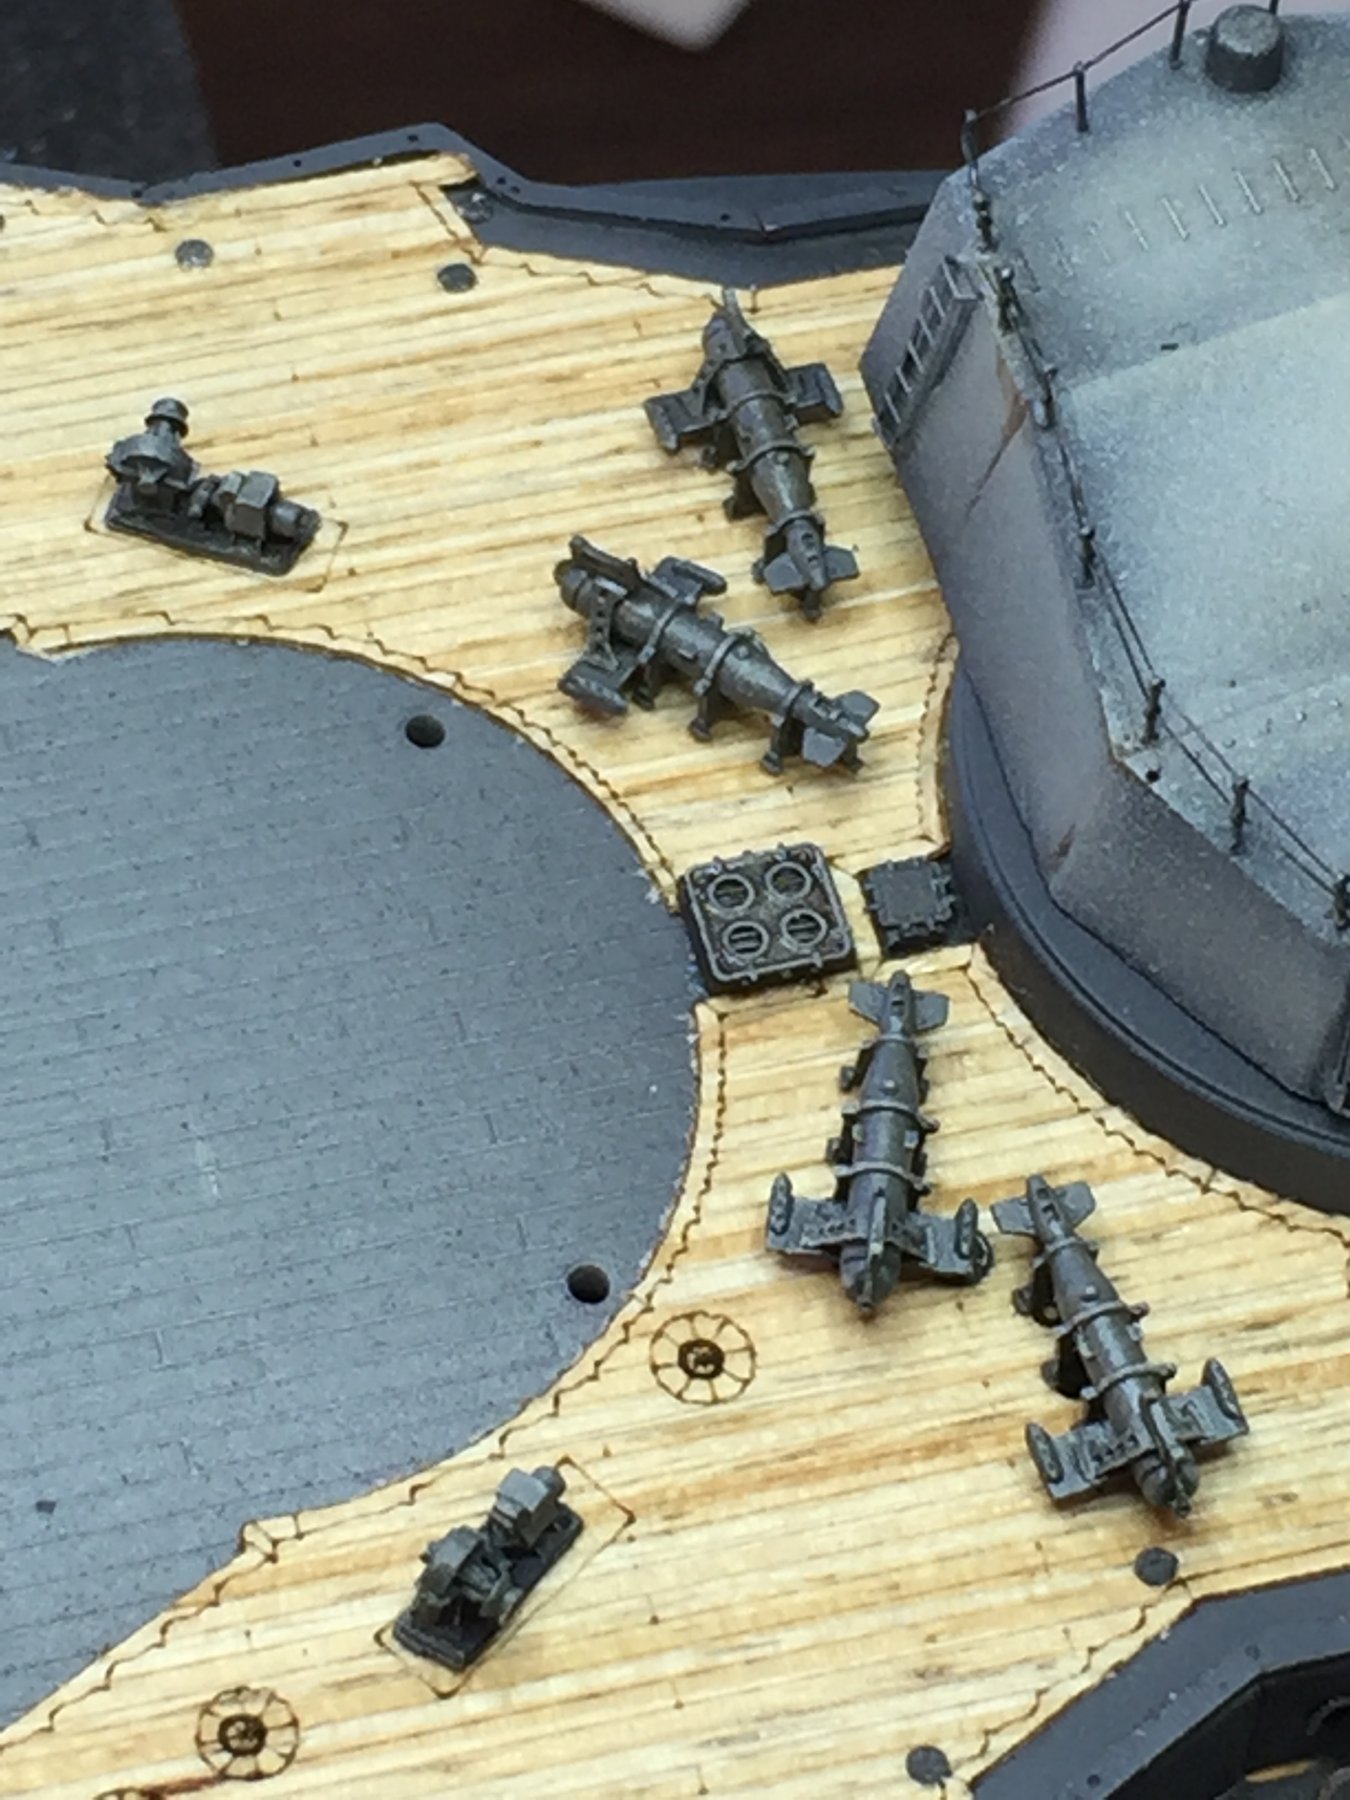
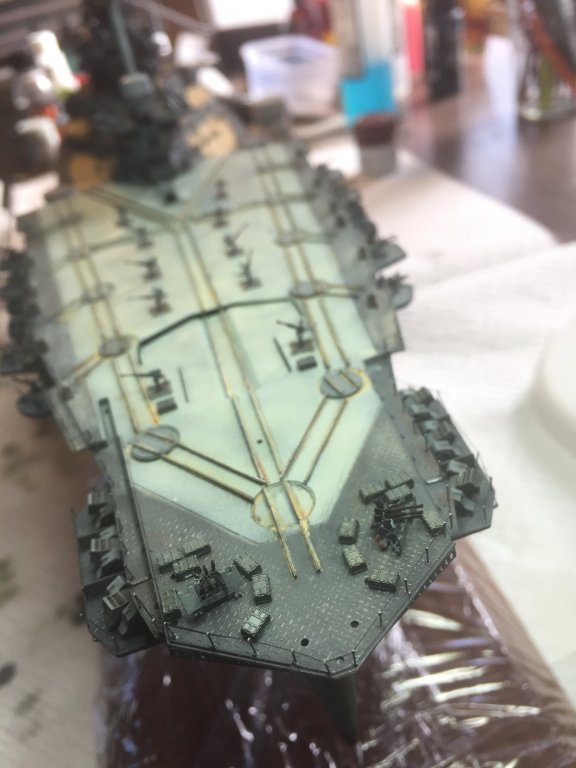
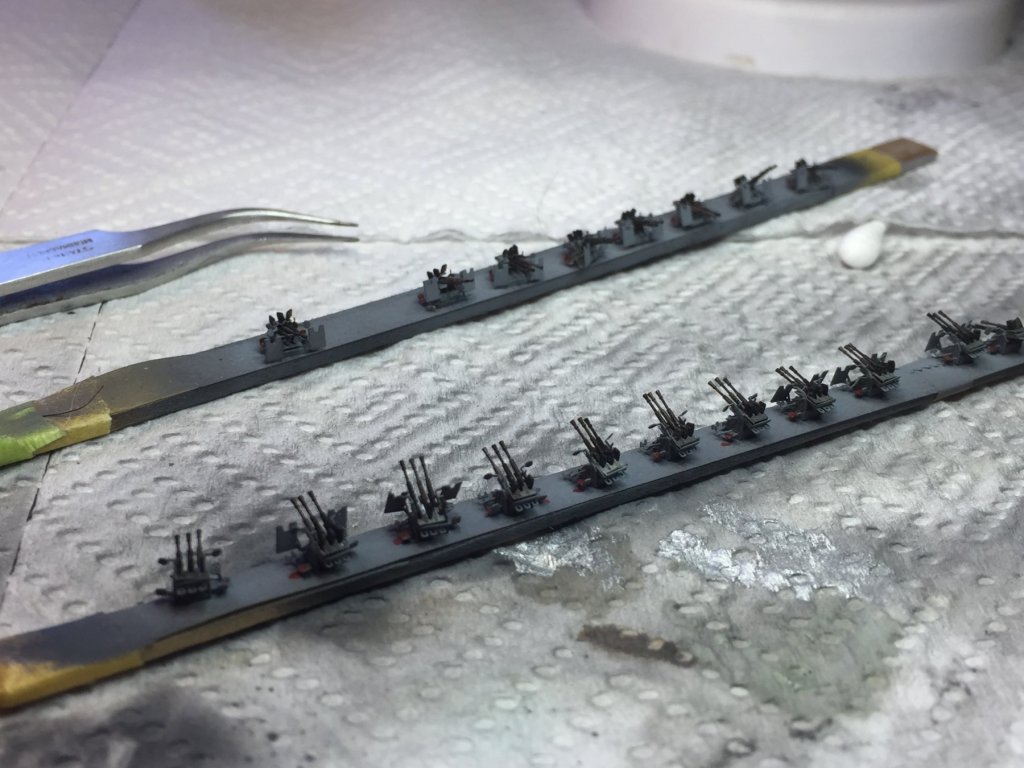
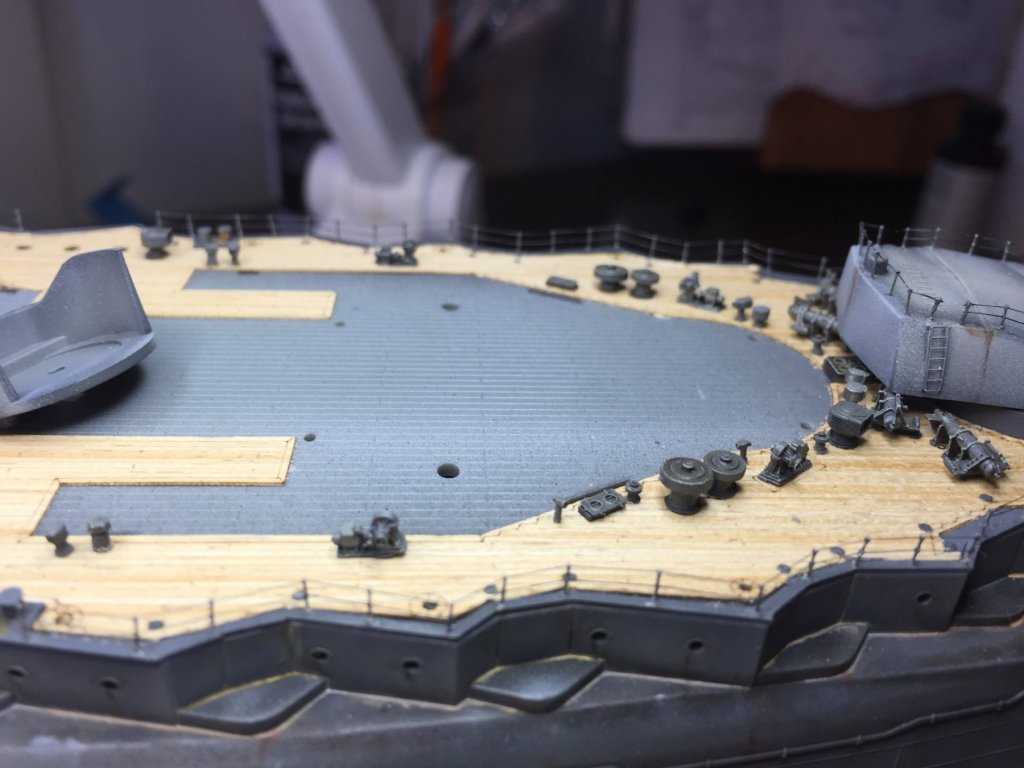
So, that’s it, all the armament added, 8 big cannon, 8 12.7cm high altitude gun mounts, 31 triple 25mm’s, 10 single 25mm’s, 6 rocket mounts.


- 224 replies
-
- 16
-
-
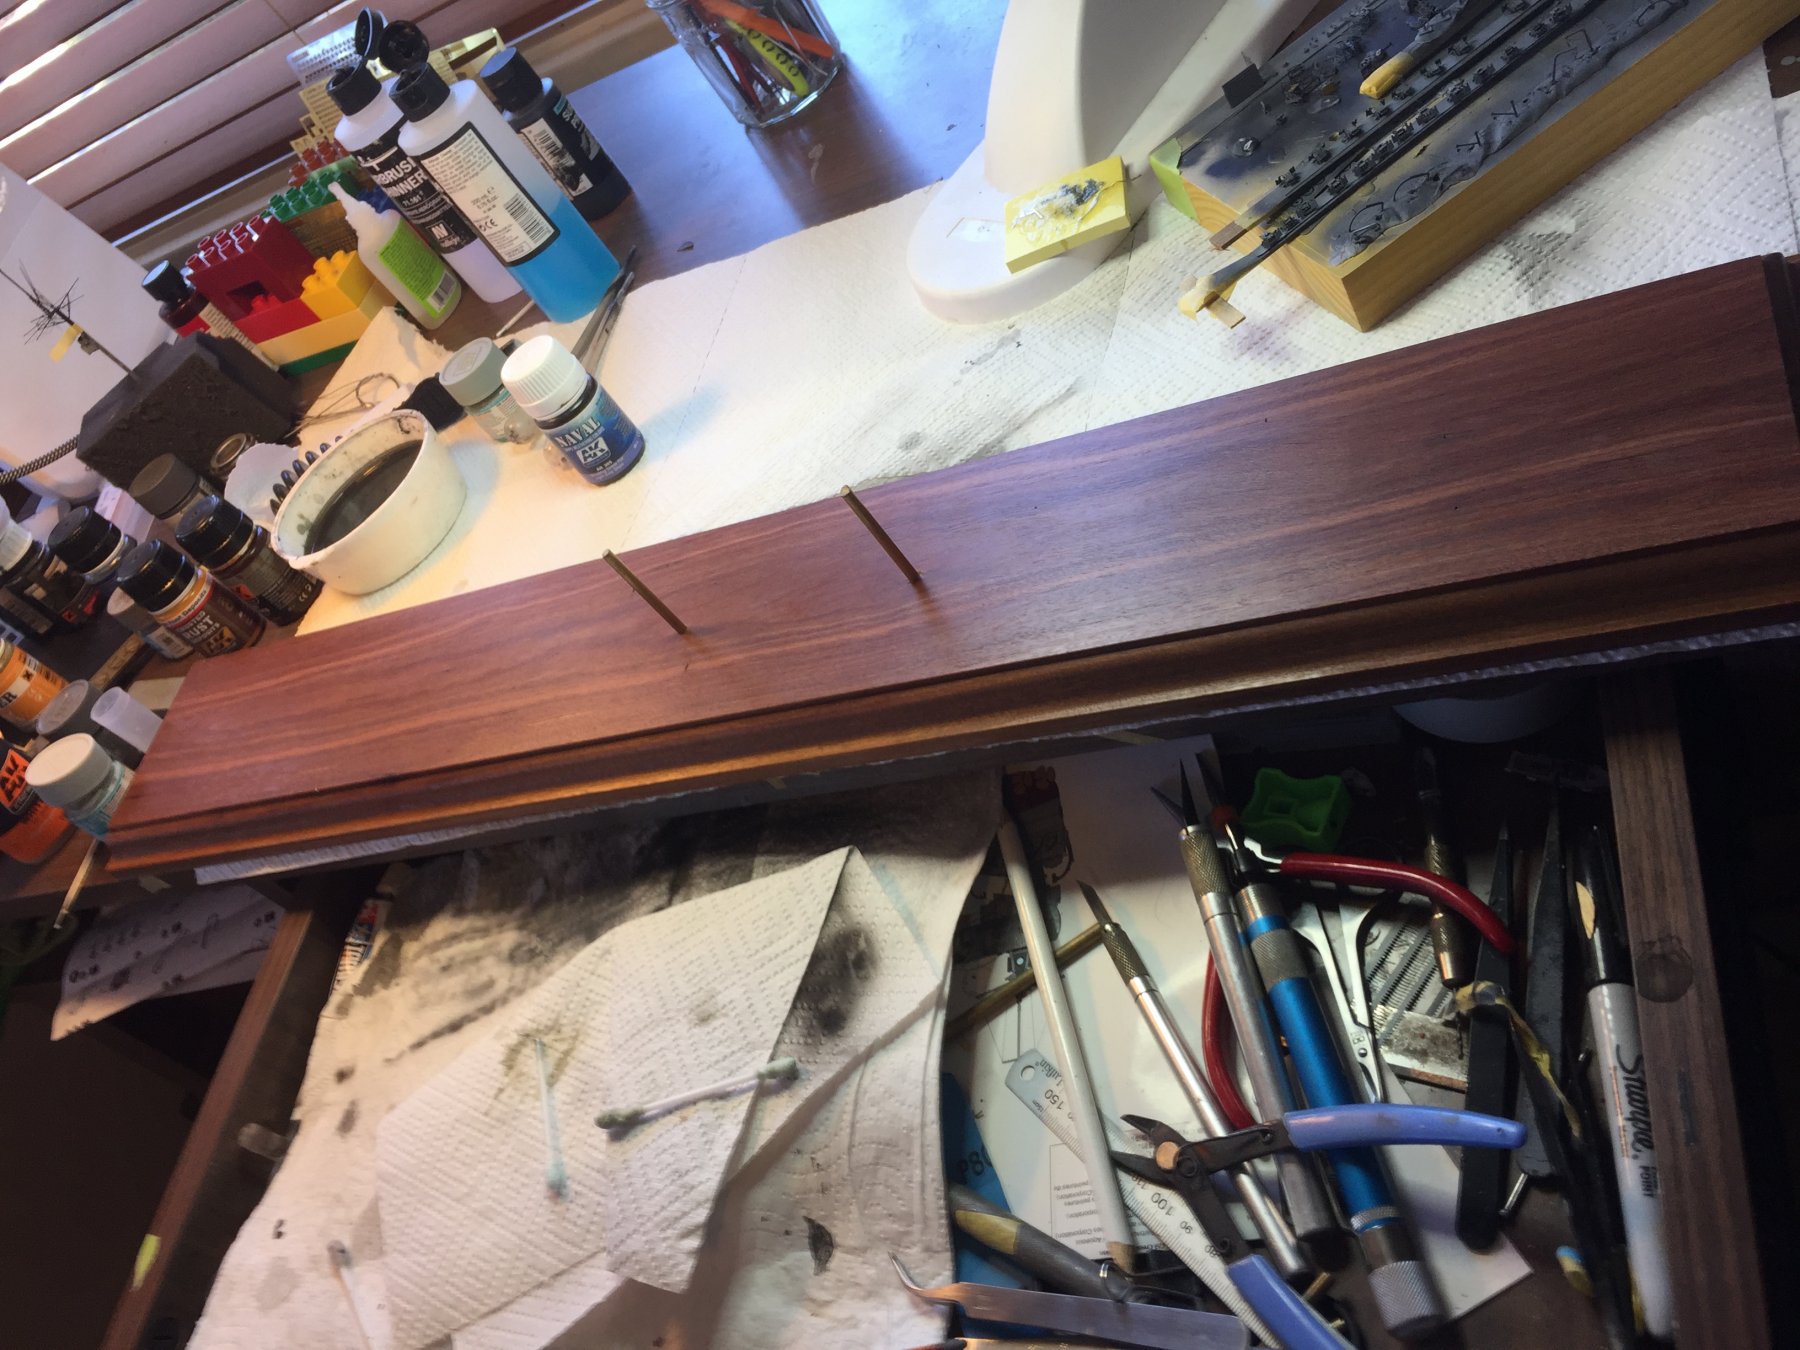
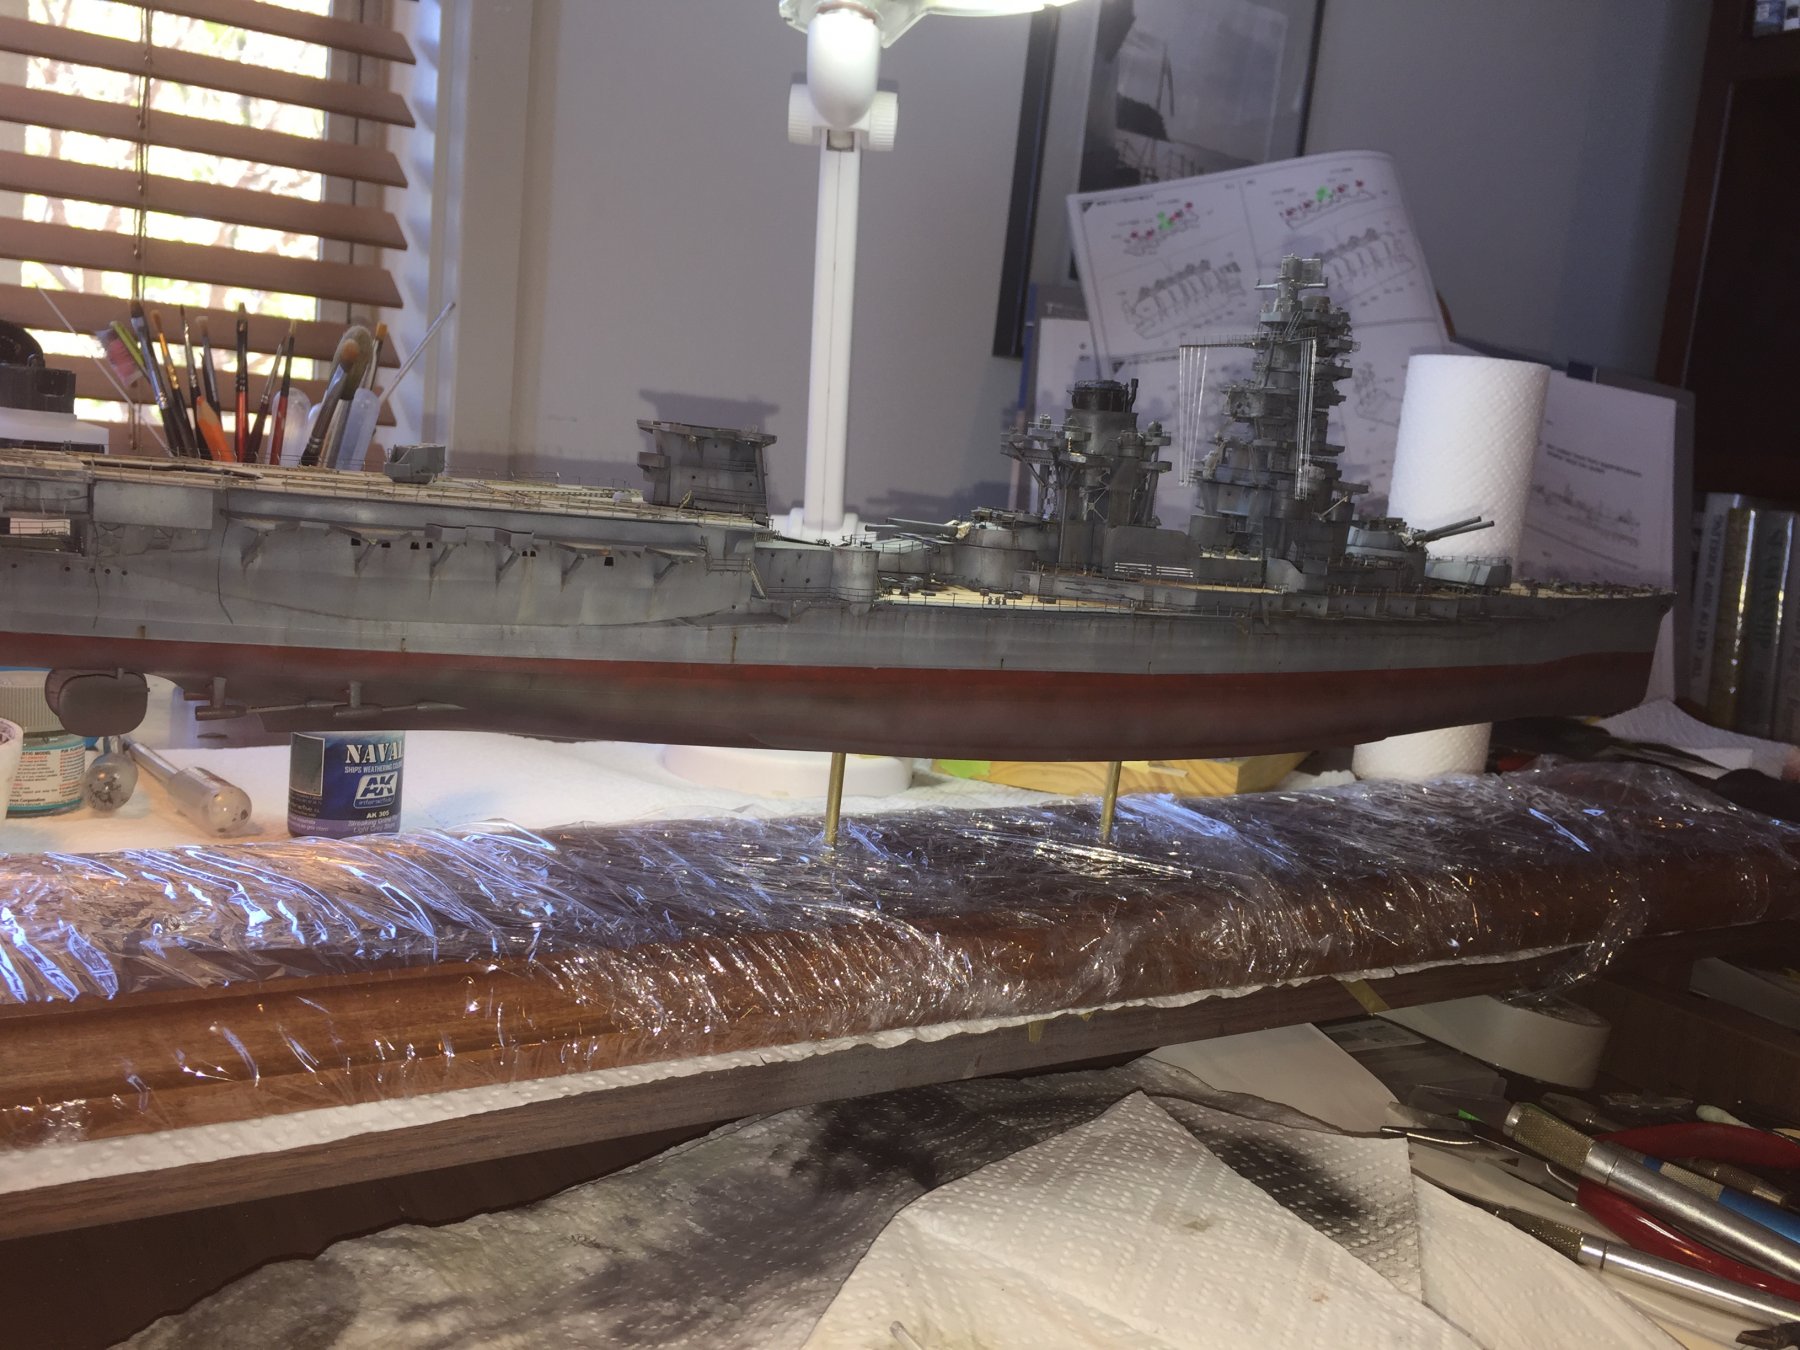
I got three base boards made up, deciding if I should use it on Isuzu plus the new one which I bought on eBay
-
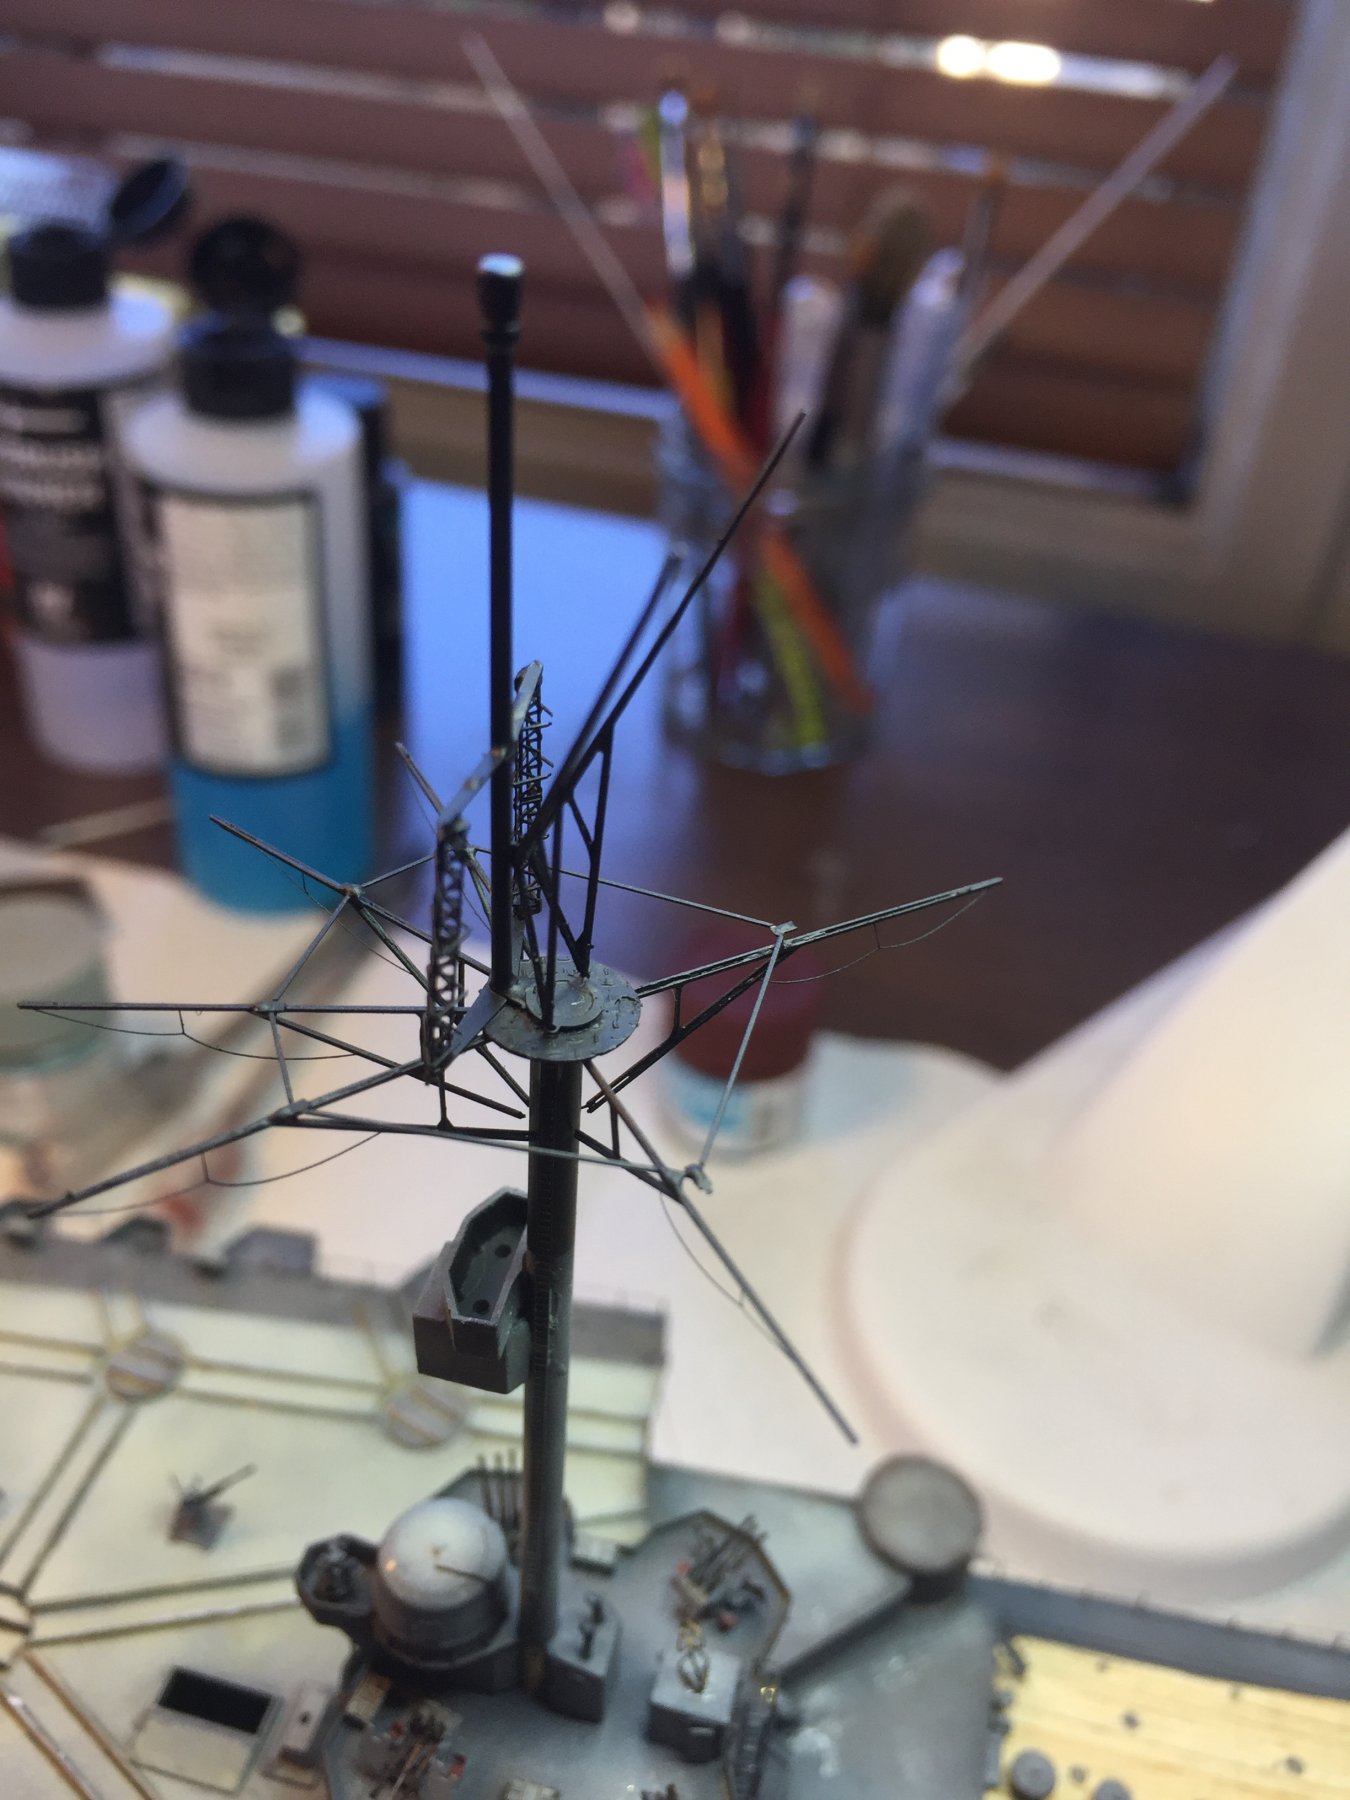
Work inboard to outboard. Wait till you see the convoluted mast. I was starting to get a bit stale with this build, and considering I still have the ship’s boats and aircraft to go I think I’ll be well and truely over my IJN phase after this one.
-
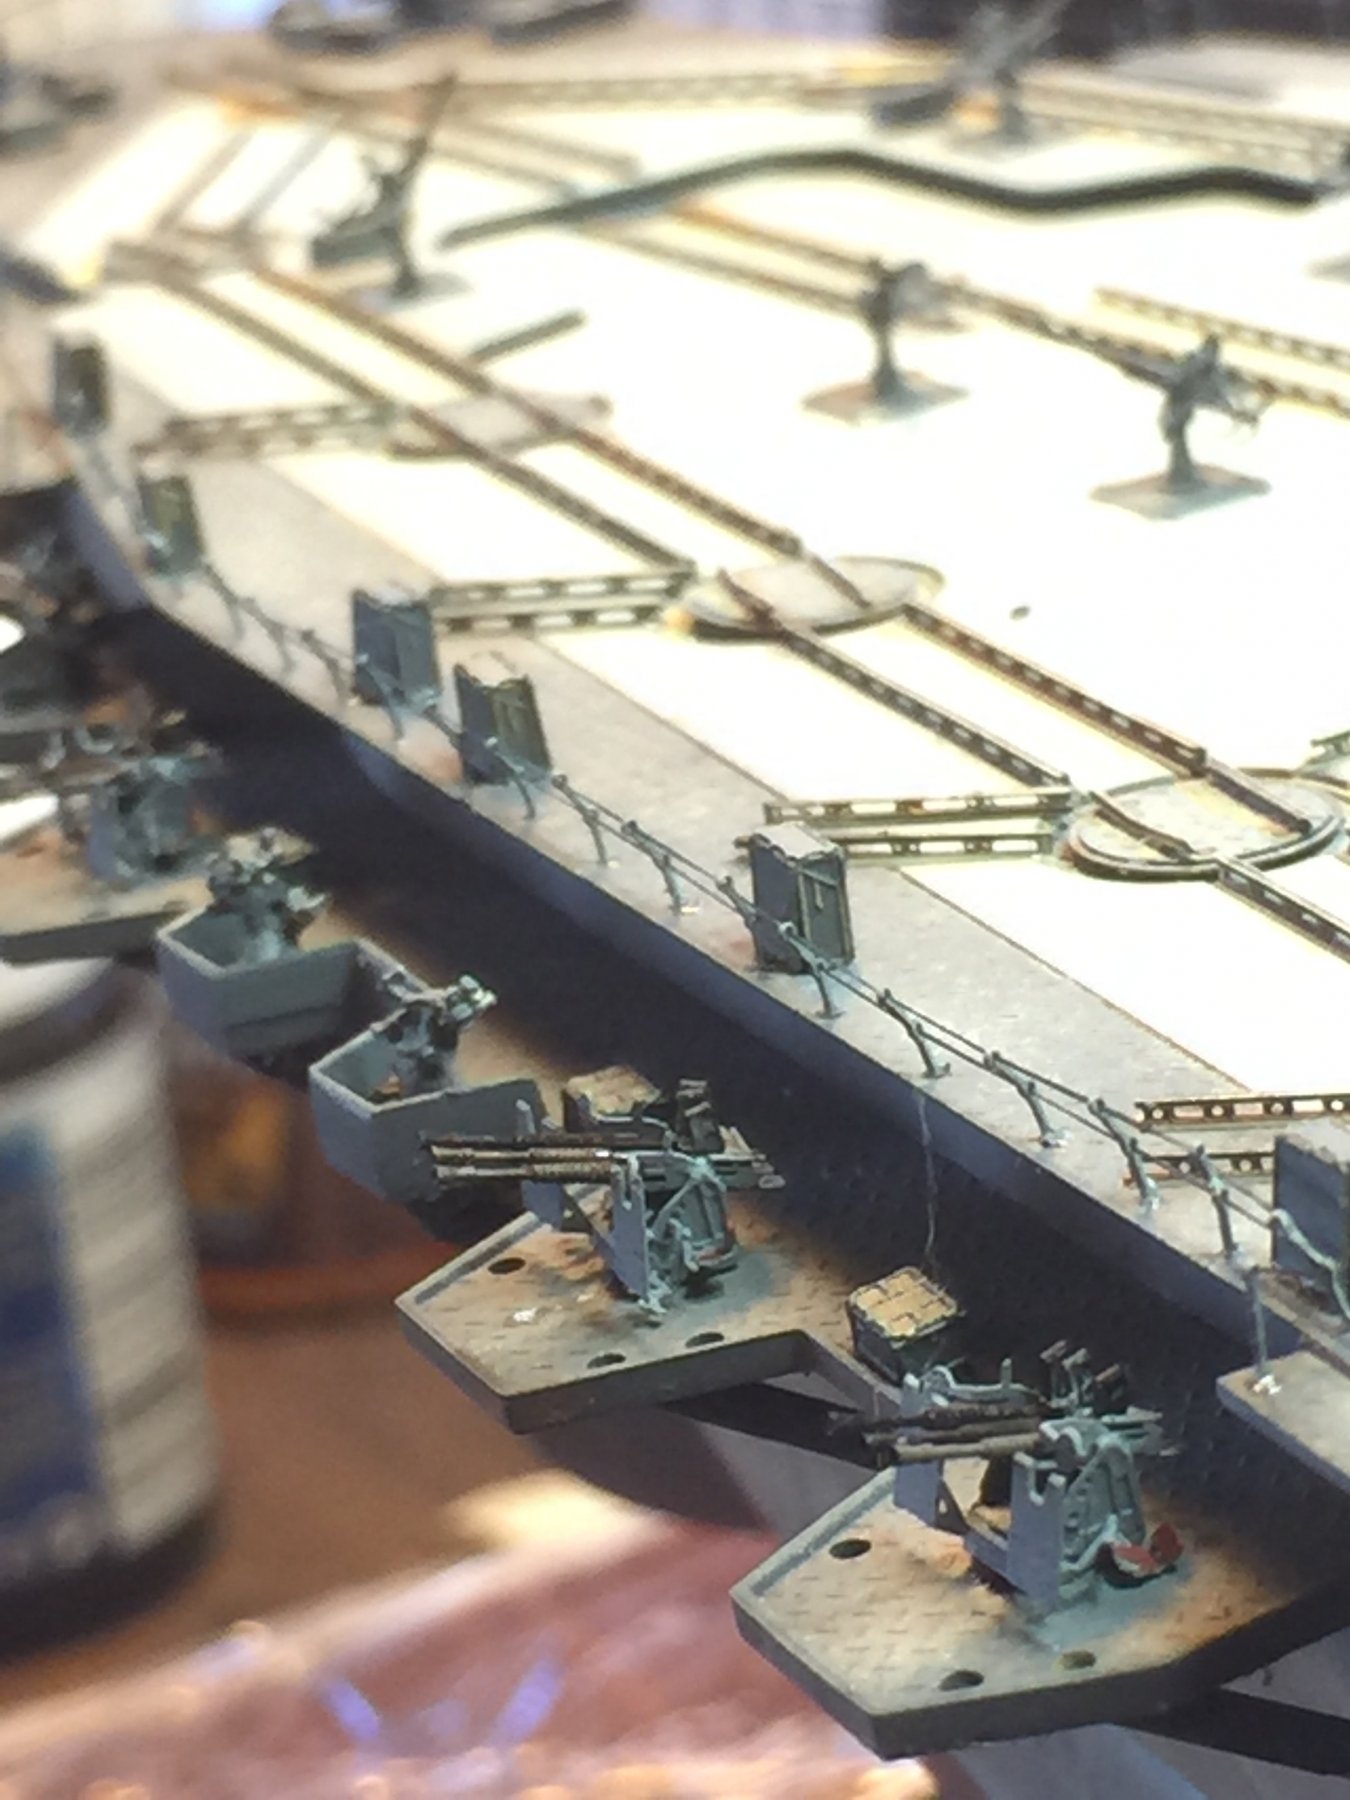
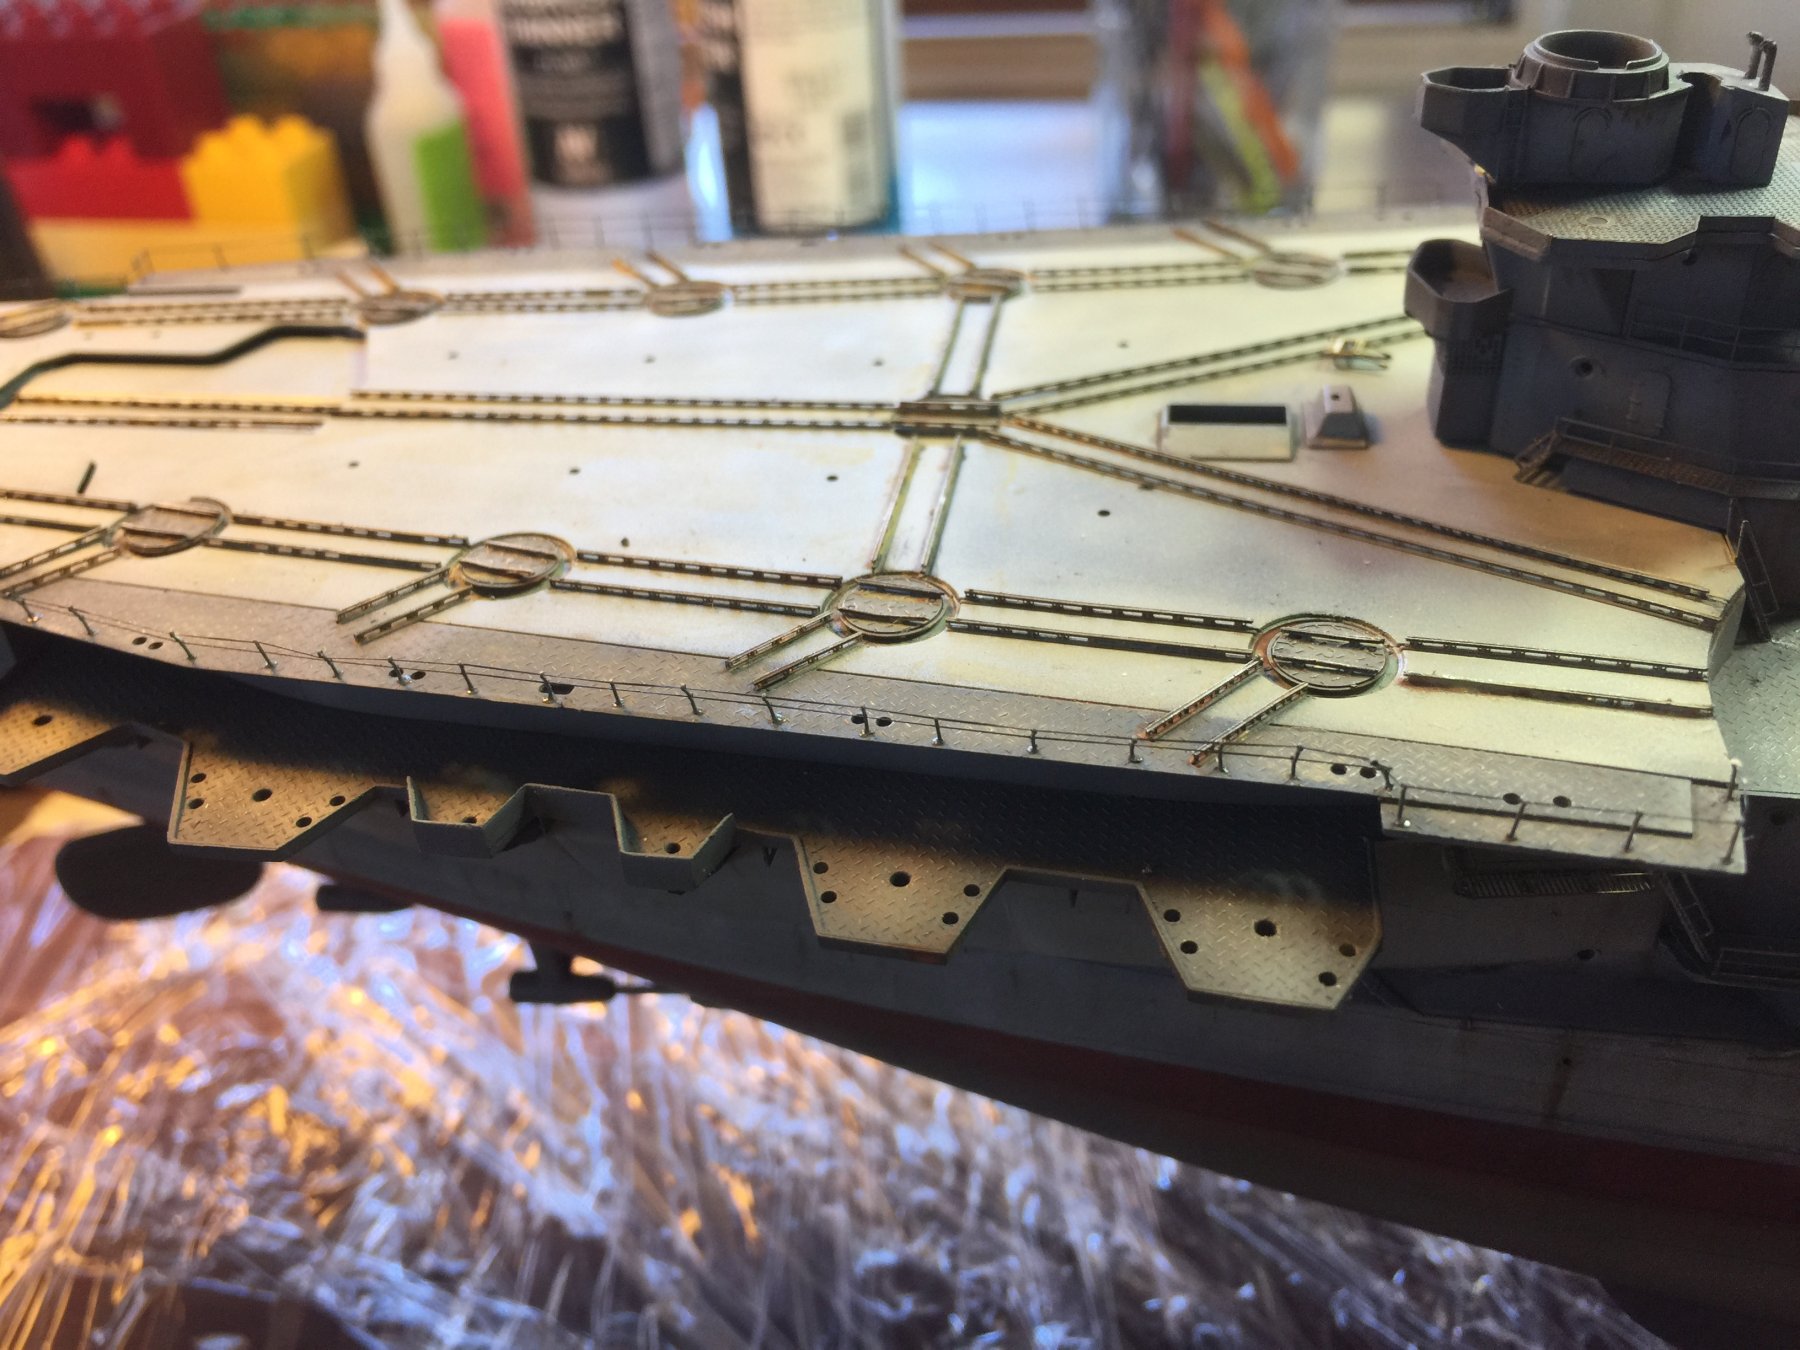
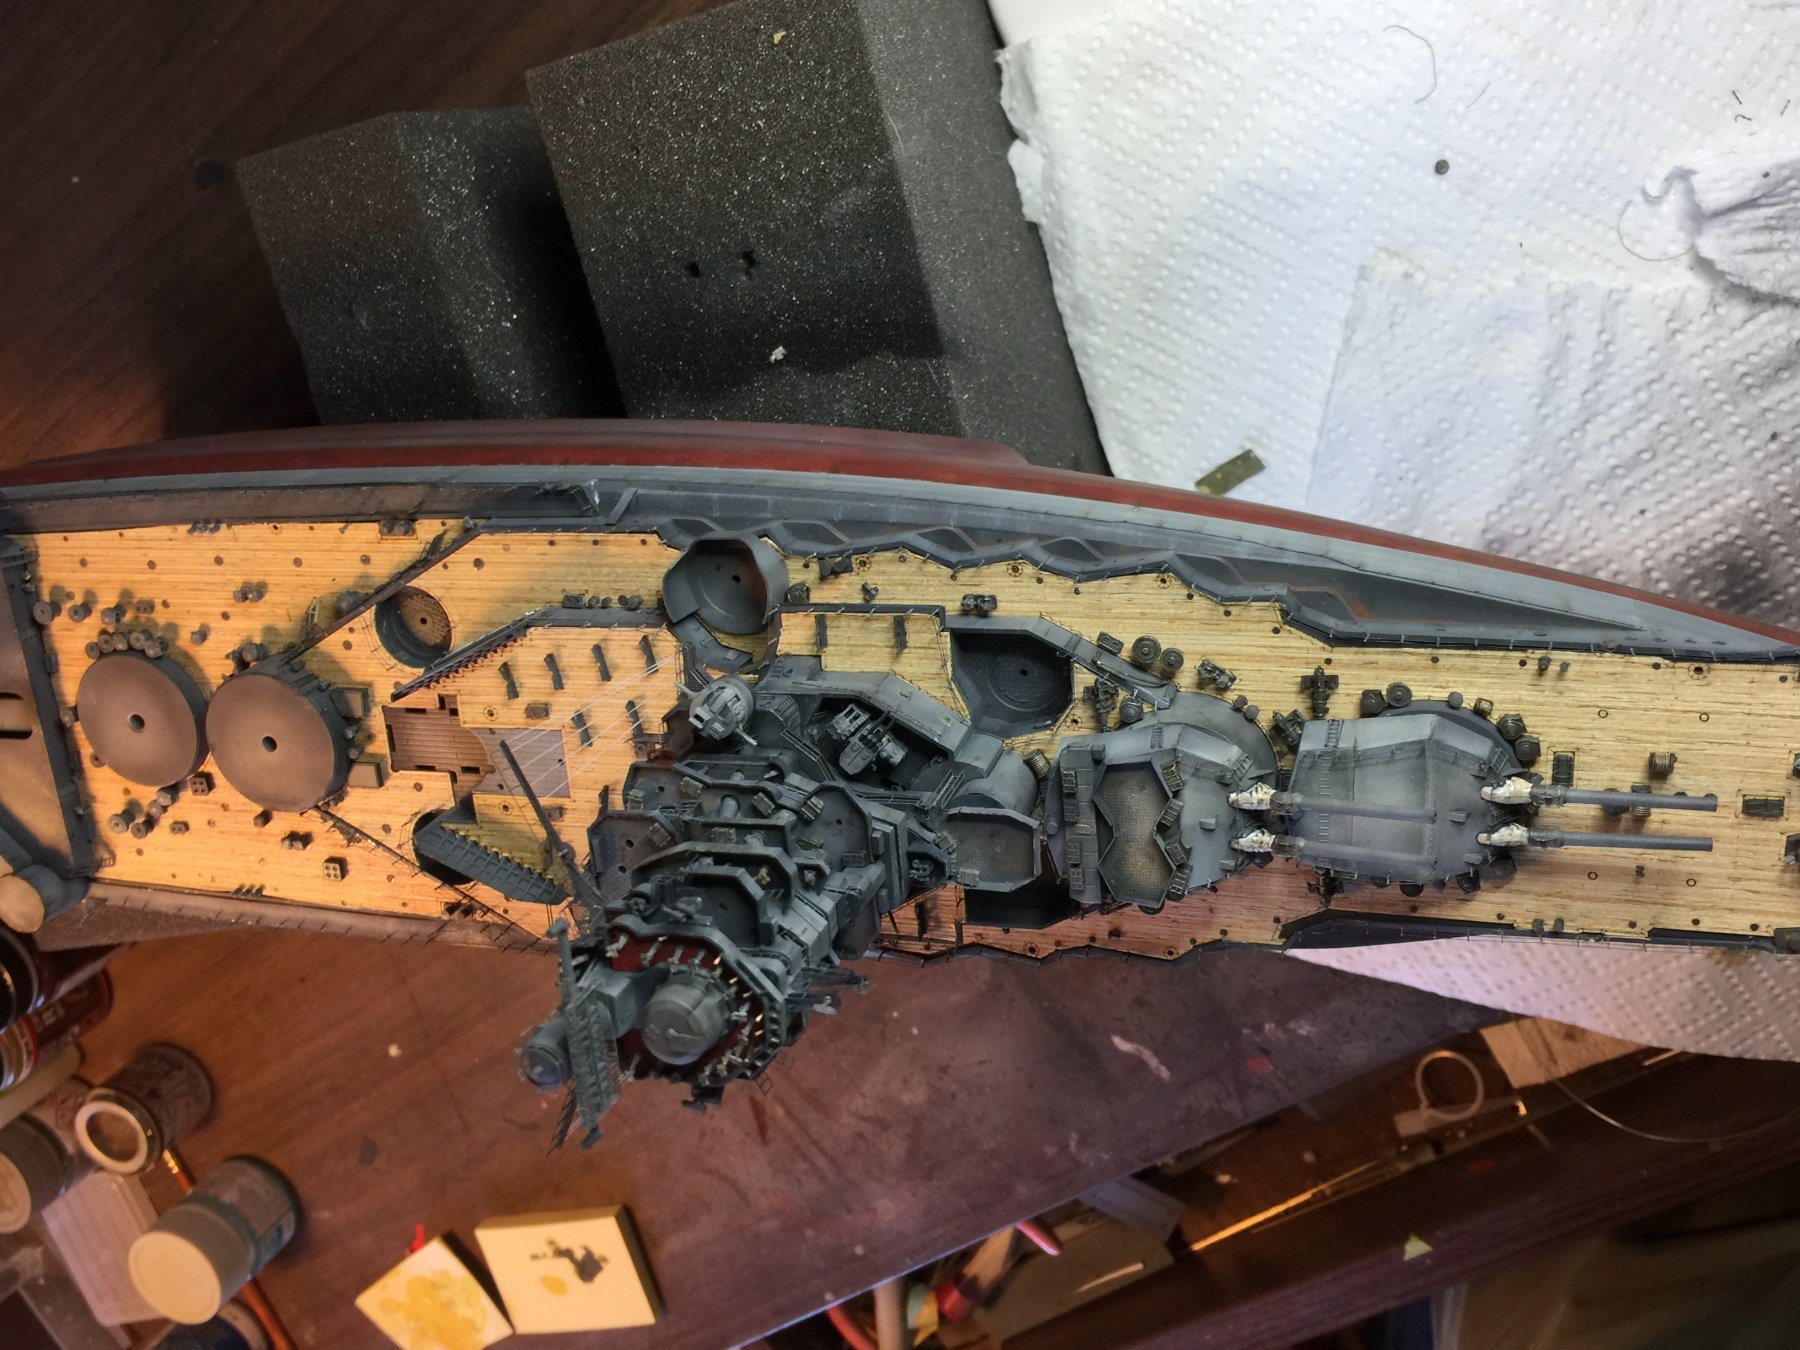
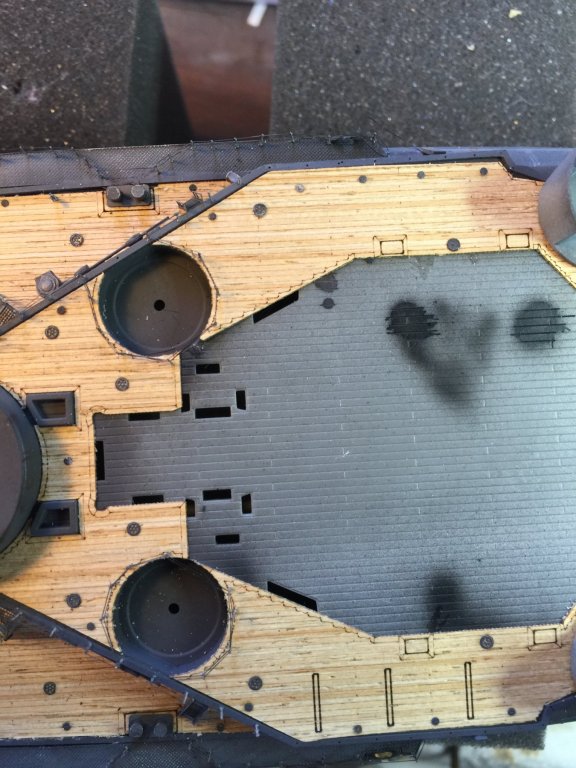
I haven’t posted for a while because there has been an enormous amount of small piecework to do. Putting a fence around the back veranda; I don’t know if the flight deck had railings, but I know the rear bit did as the video of the ship in 1945 shows it. I’ve added the 6 rocket launchers at the stern, the turntables and done up the 25mm’s. That is just back breaking work, 31 triple 25mm’s, each with individual barrels and magazines and 11 singles. Tomorrow I can start throwing them on. The baseboard was made up for me and is a beautiful bit of hardwood with Tung oil to season.


- 224 replies
-
- 14
-
-
Don’t give up on it, just get some generic PE (GMM still has that scale), then make it up, no one will ever know.
- 133 replies
-
- 5
-
-
- jeanne d arc
- heller
- (and 2 more)
-
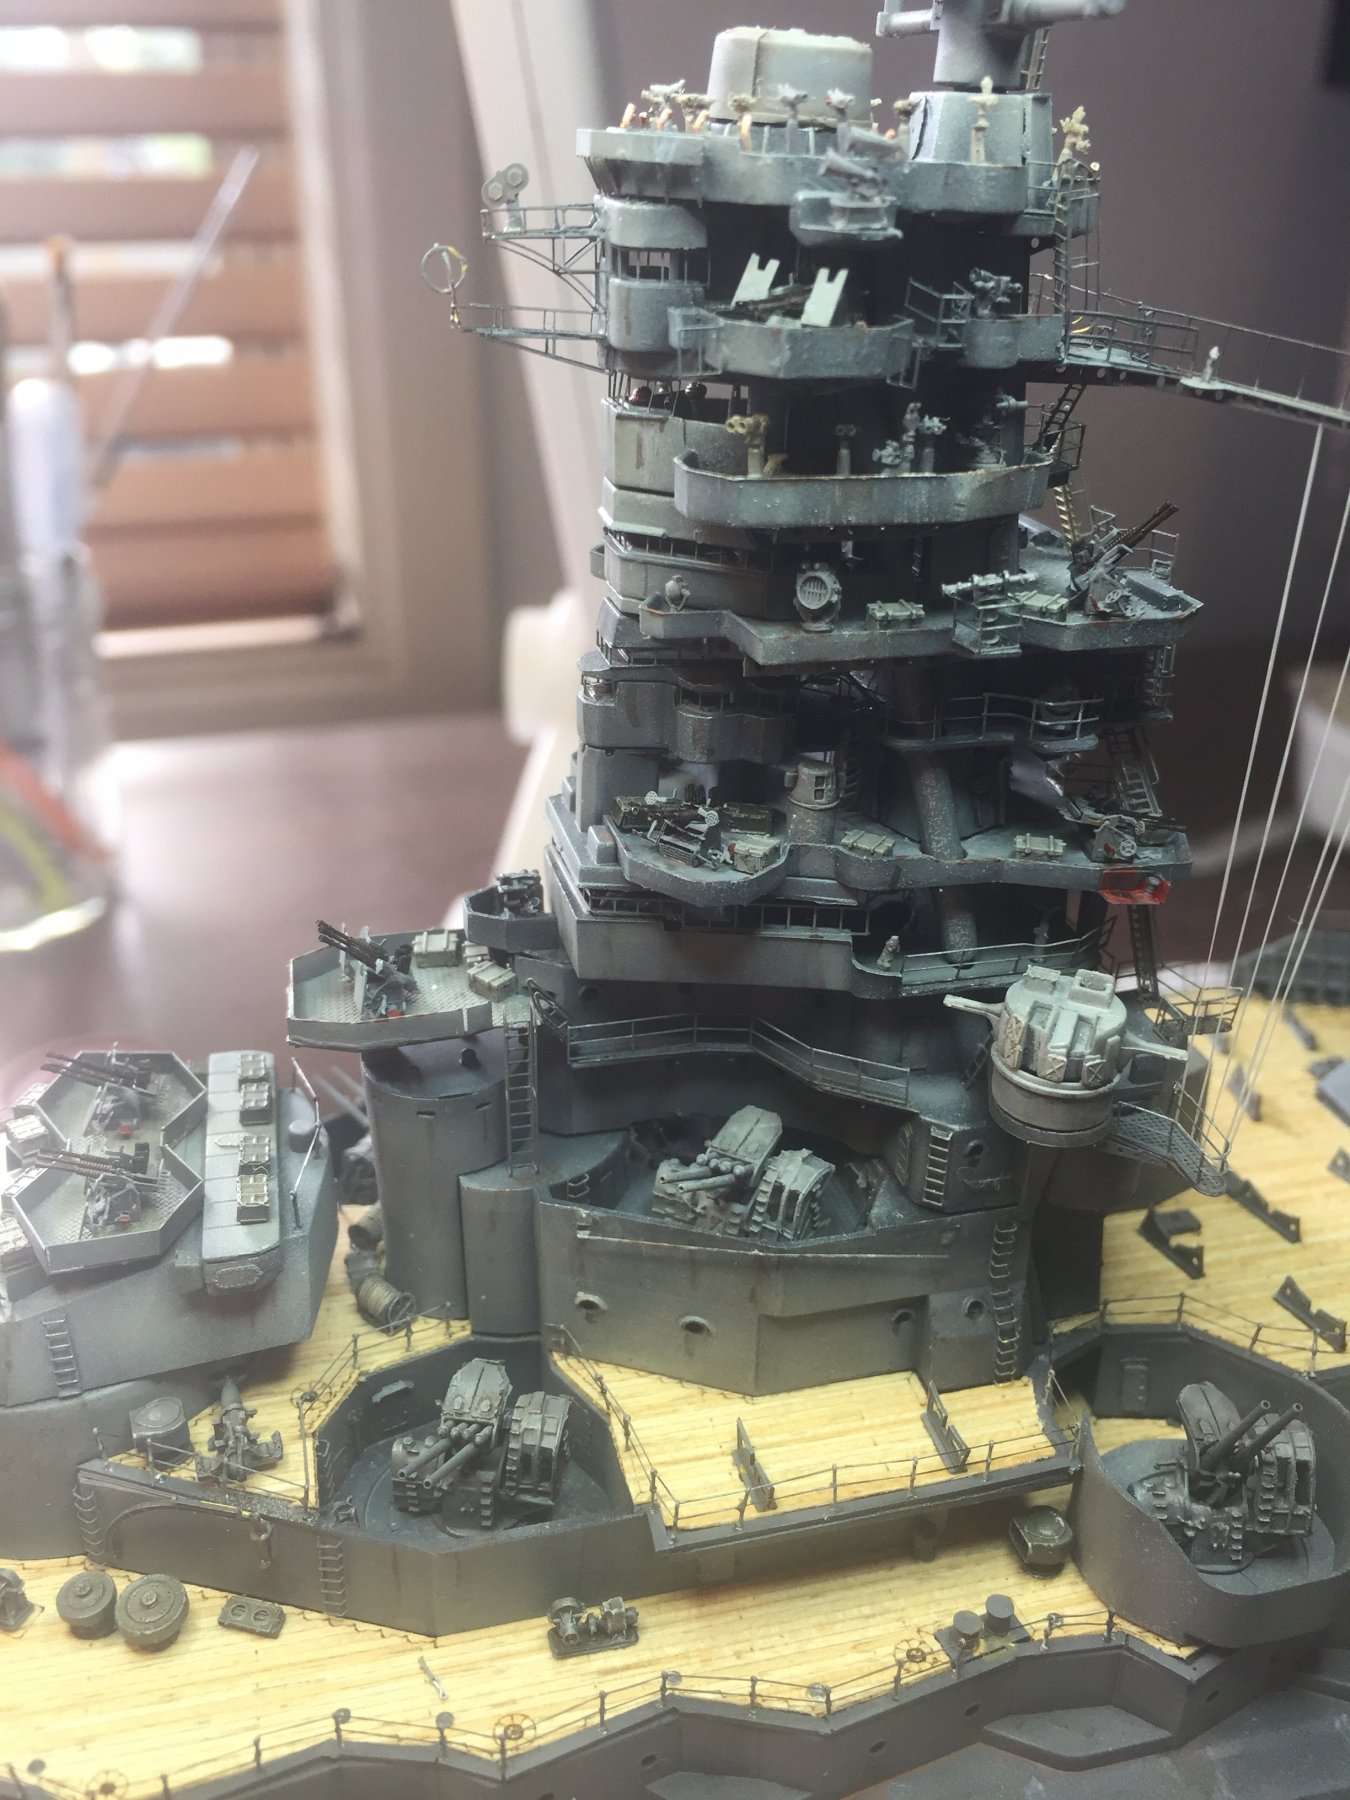
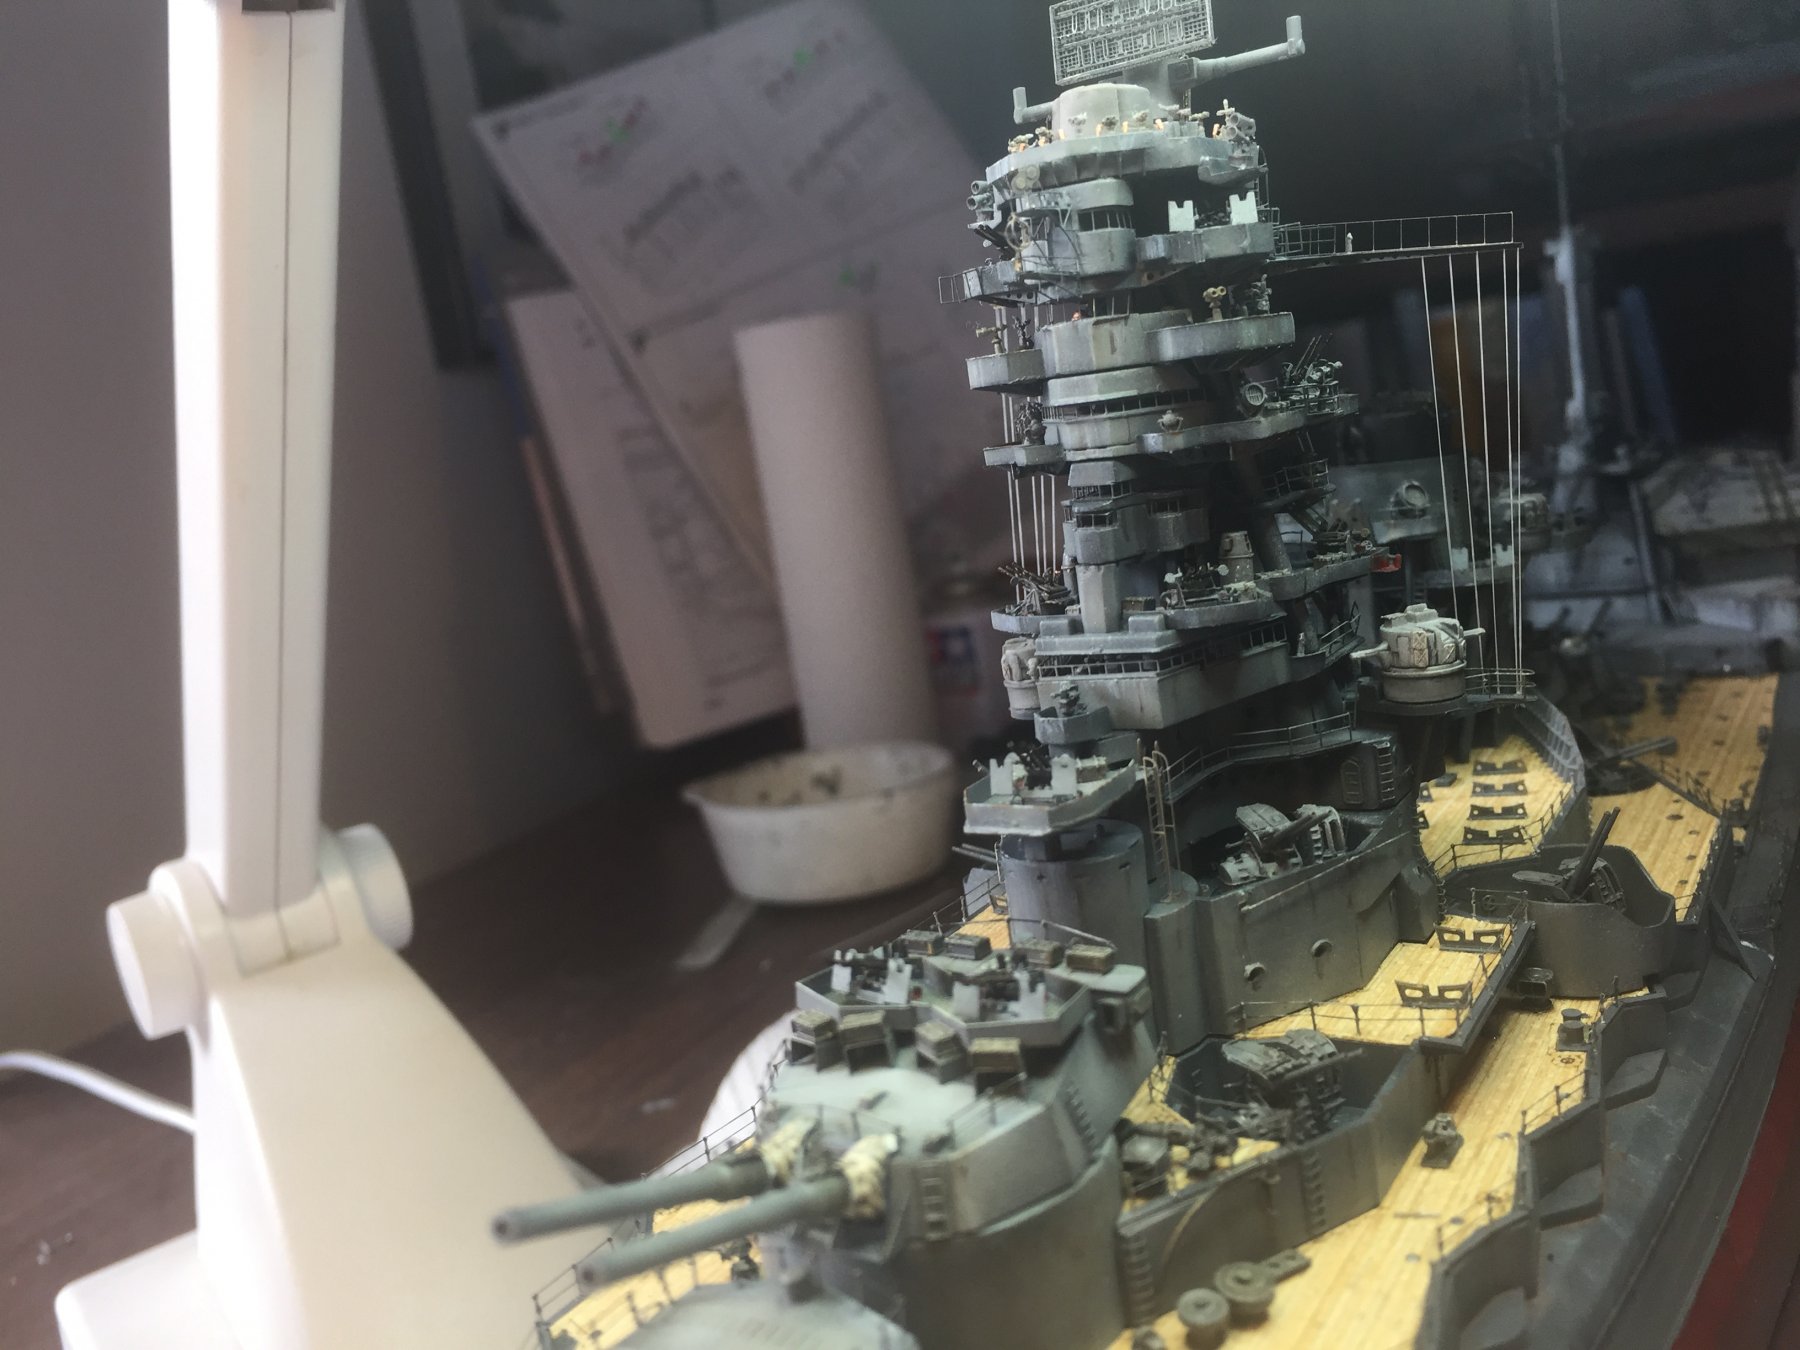
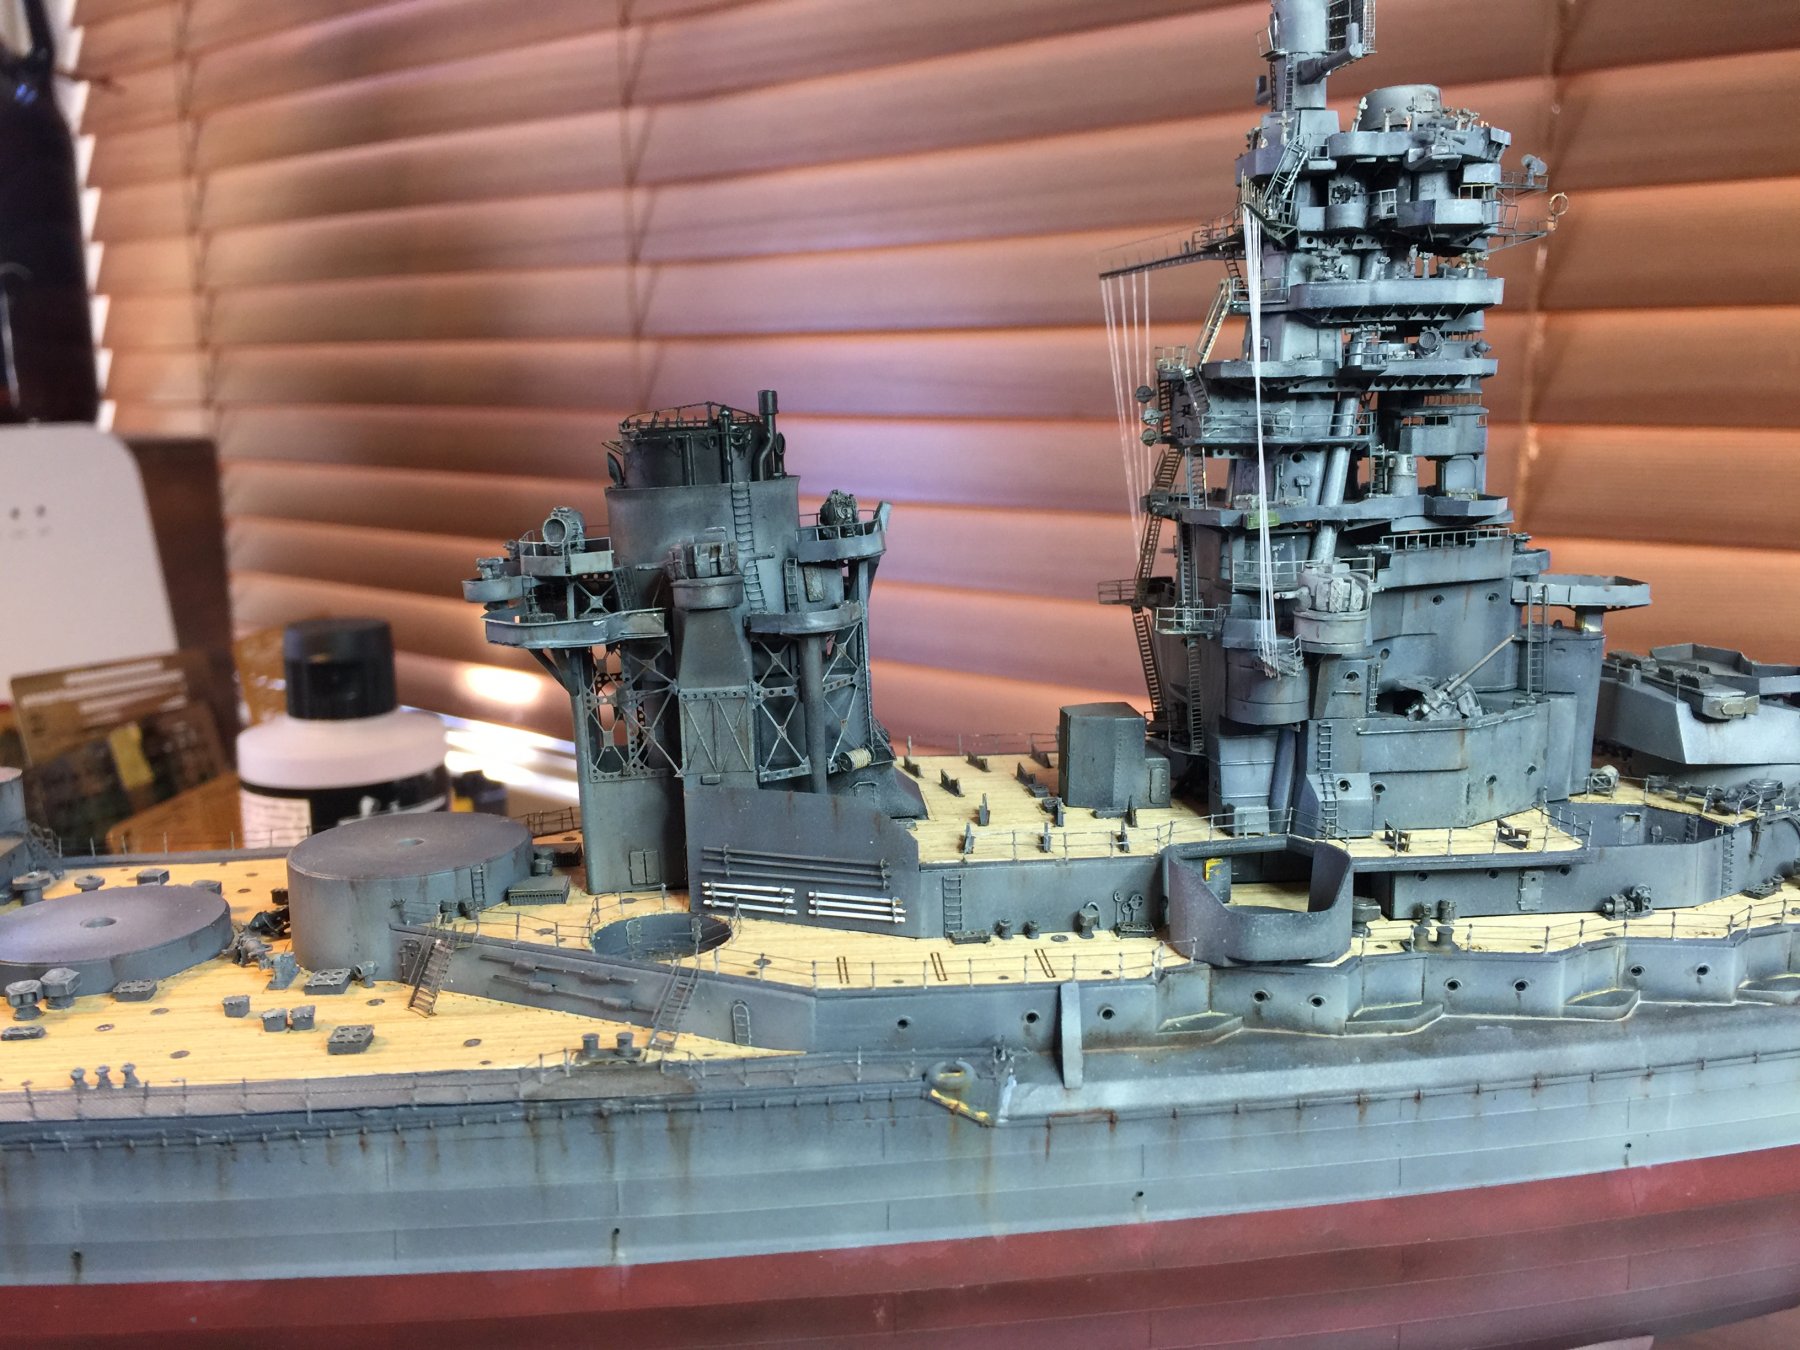
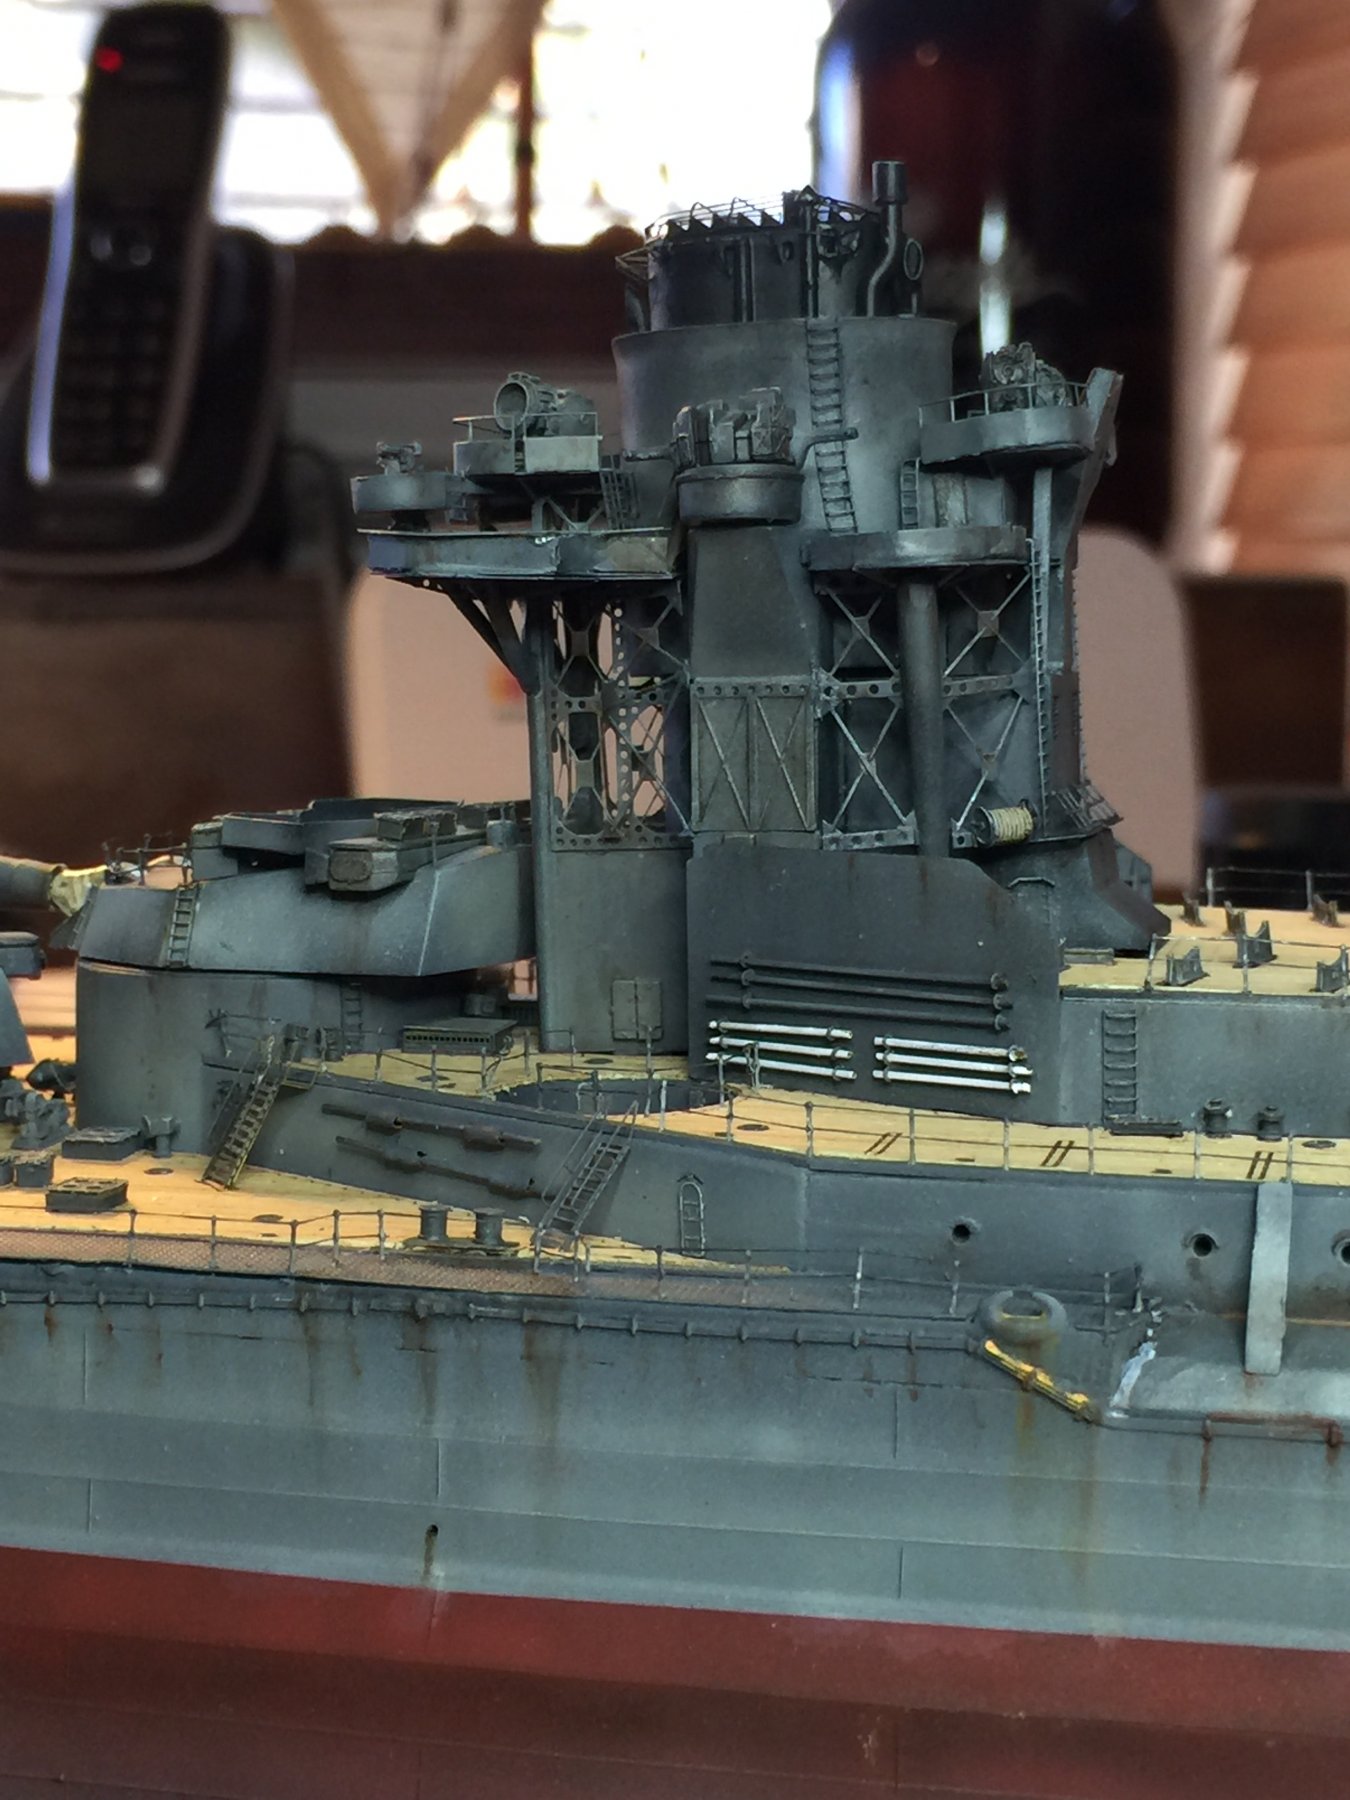
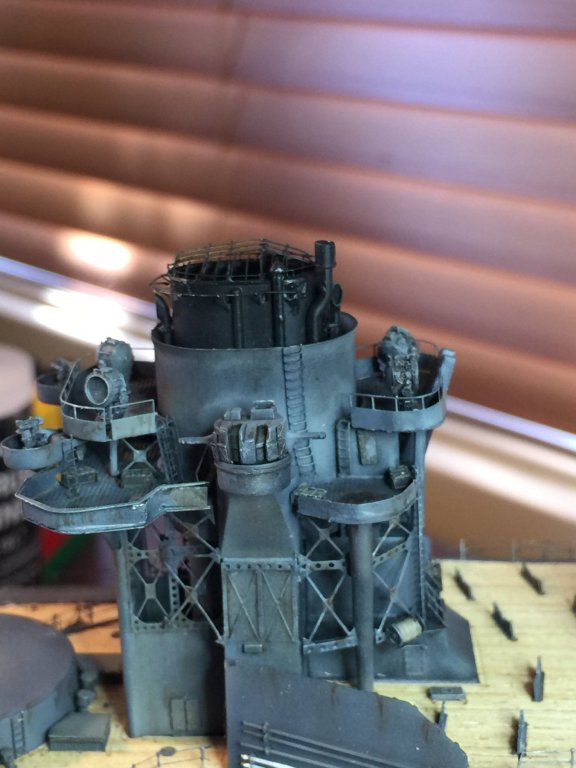
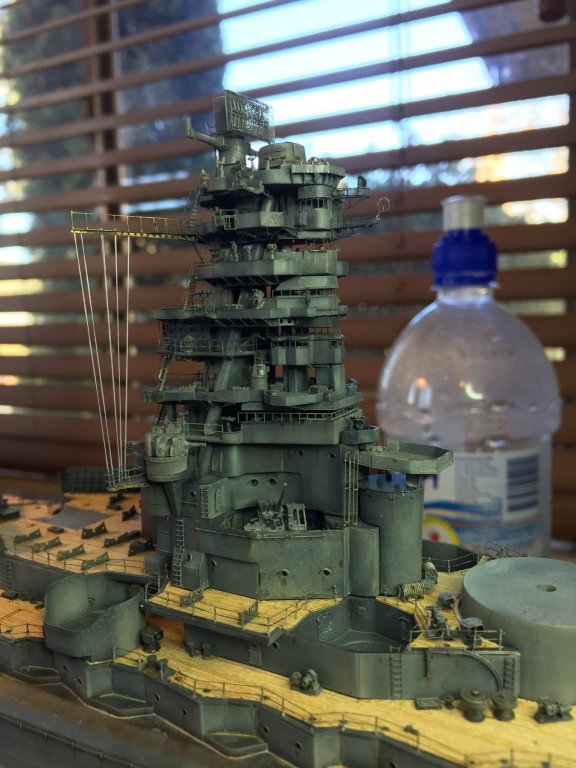
The stack, or funnel. Horrible bit of kit as the PE really needs to be done up with the deck to get the alignment correct which if flat out impossible with the wooden stick on deck. Good enough for government work and weathered using black pastels for soot. This is the last main structure with only the mast to go and then lots of planes, boats and guns.


- 224 replies
-
- 17
-
-
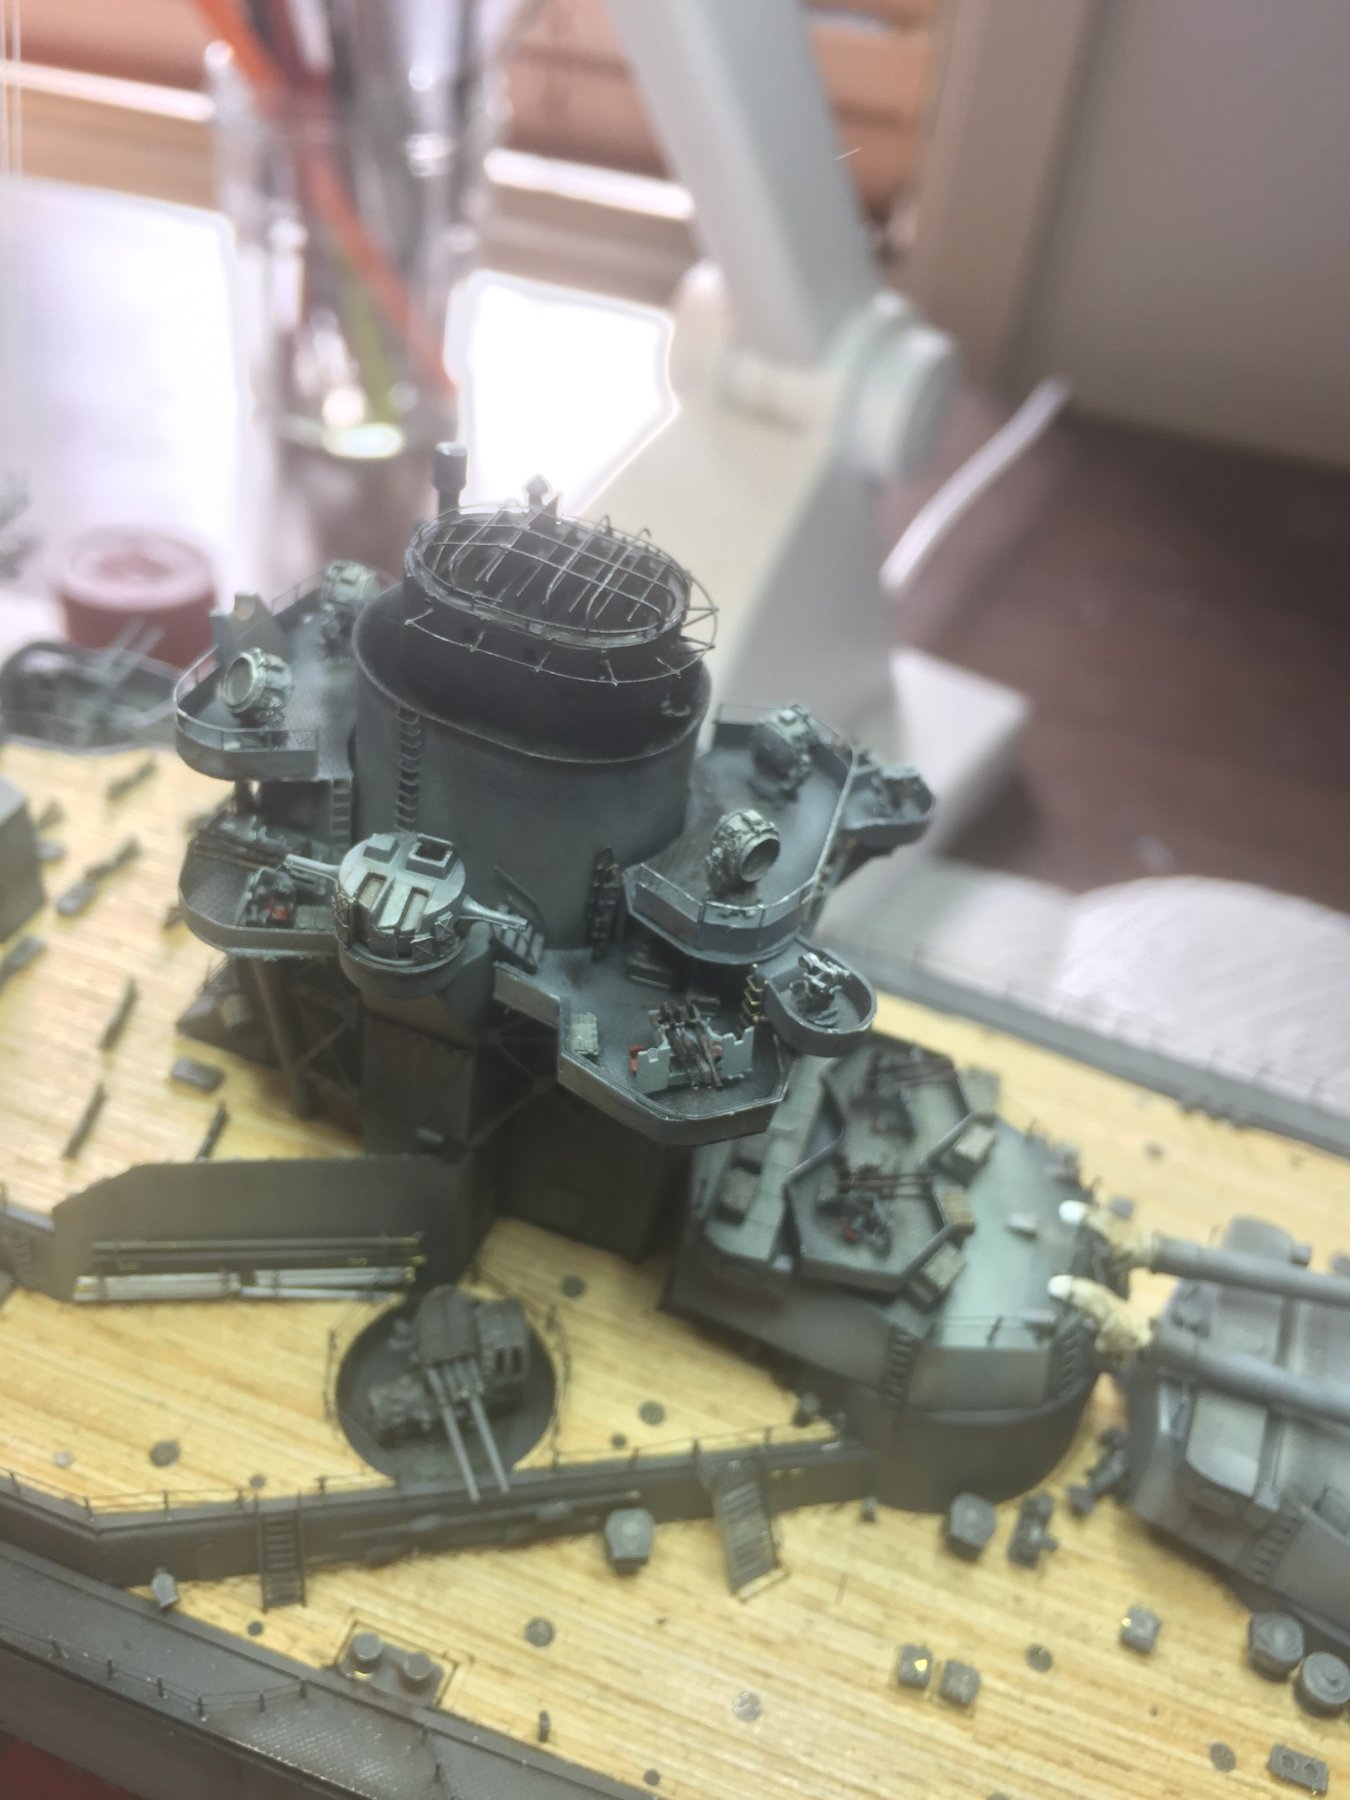
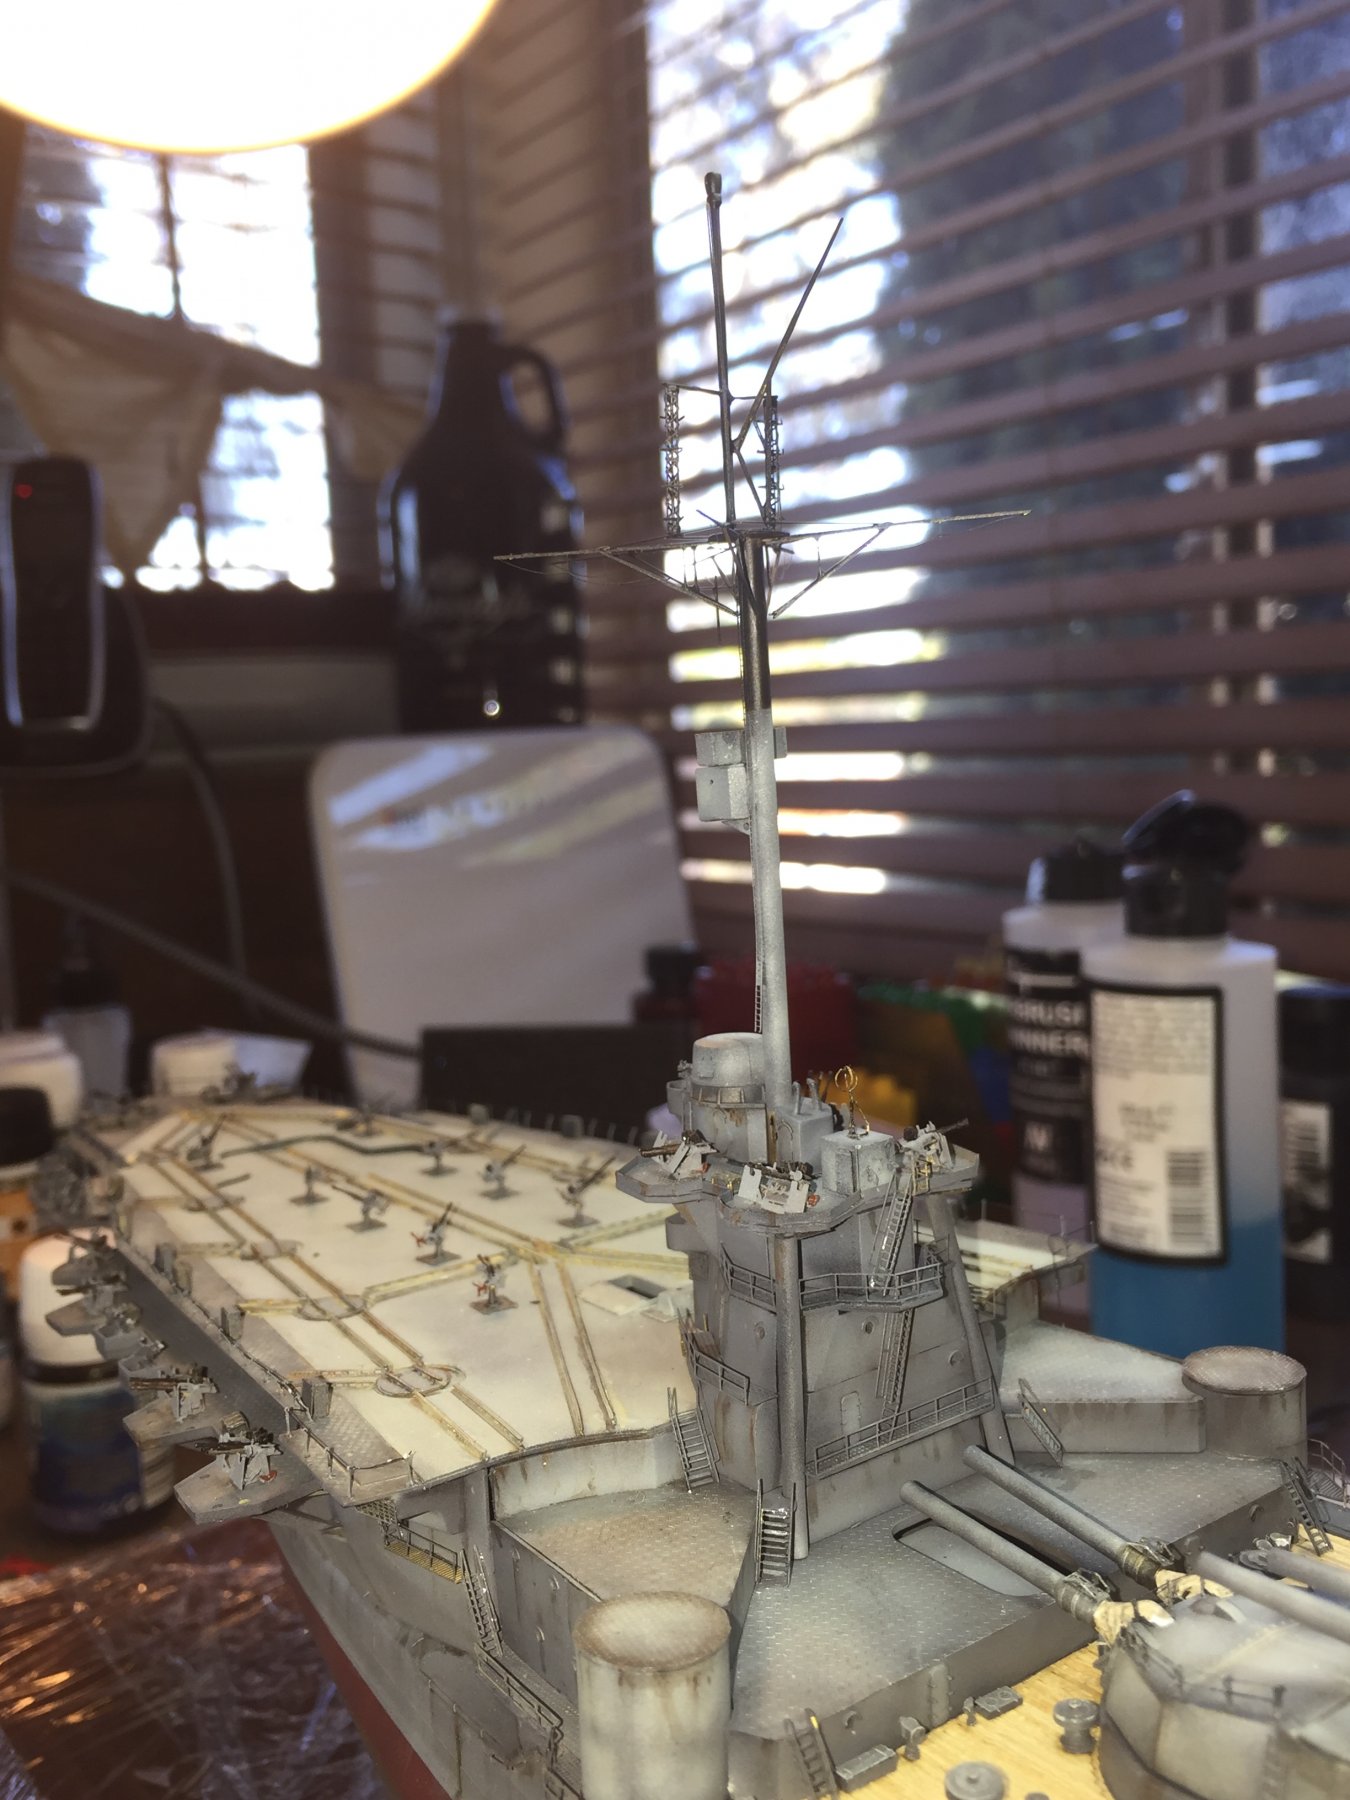
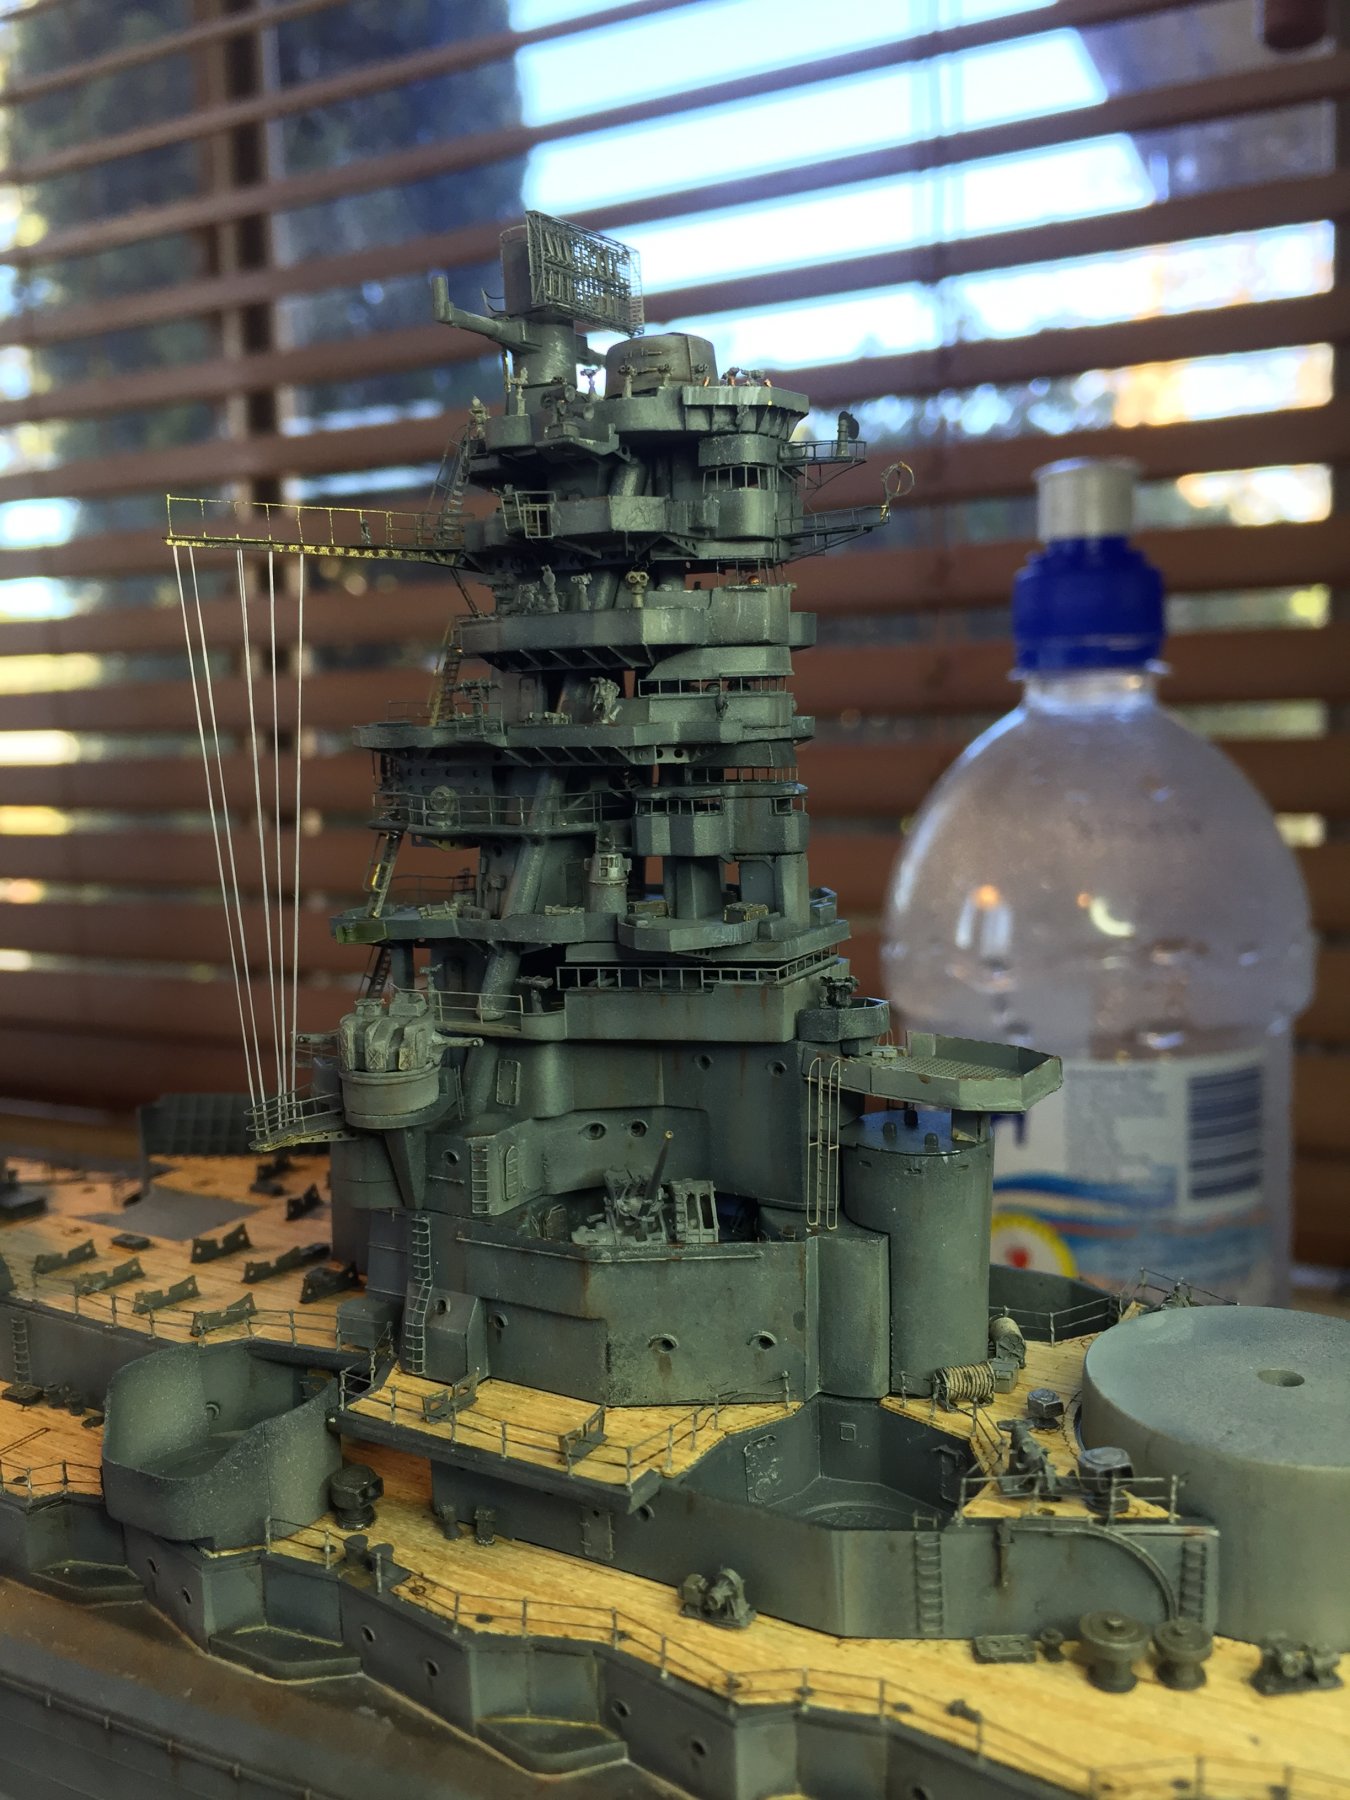
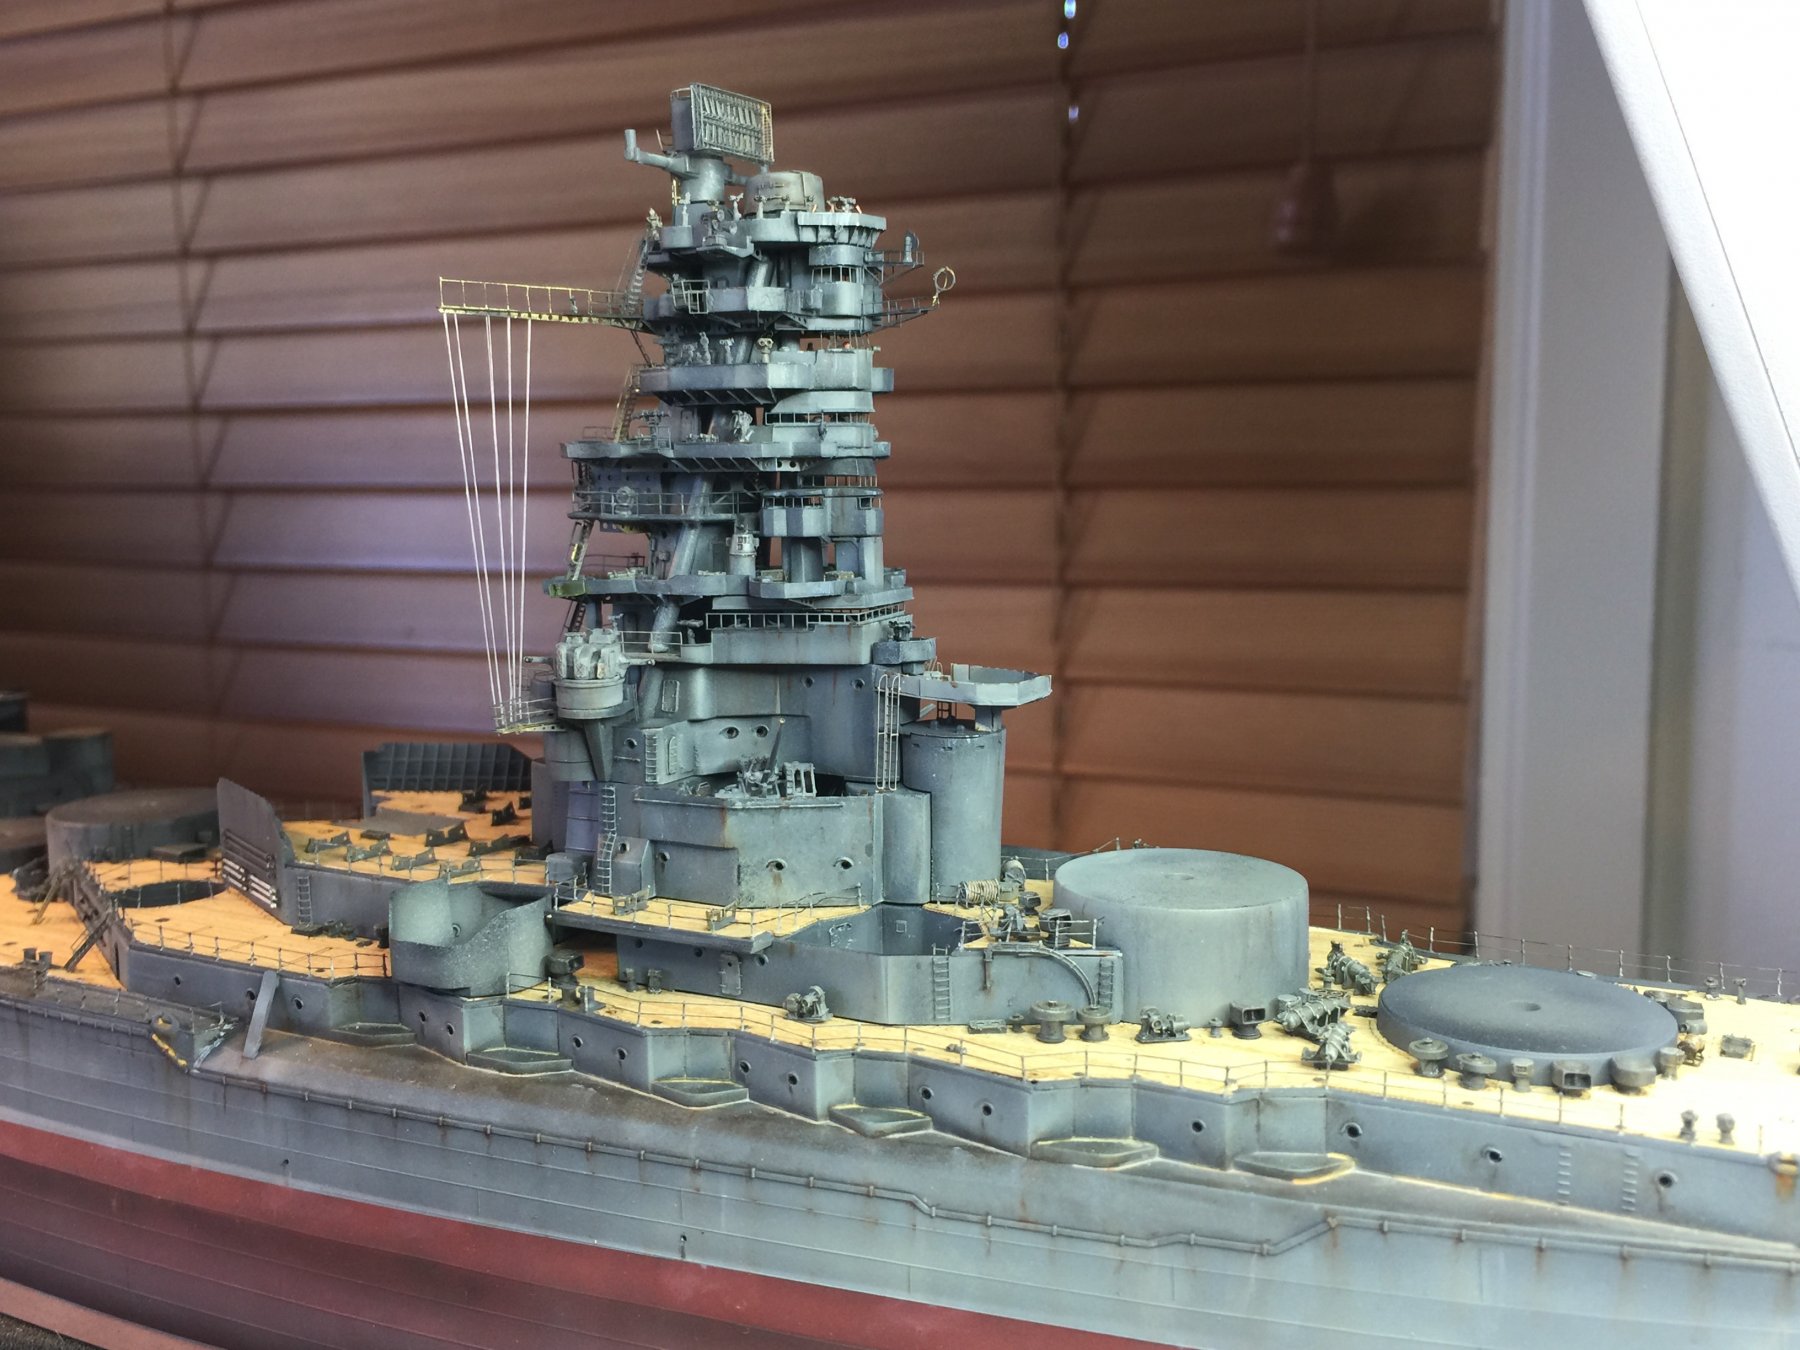
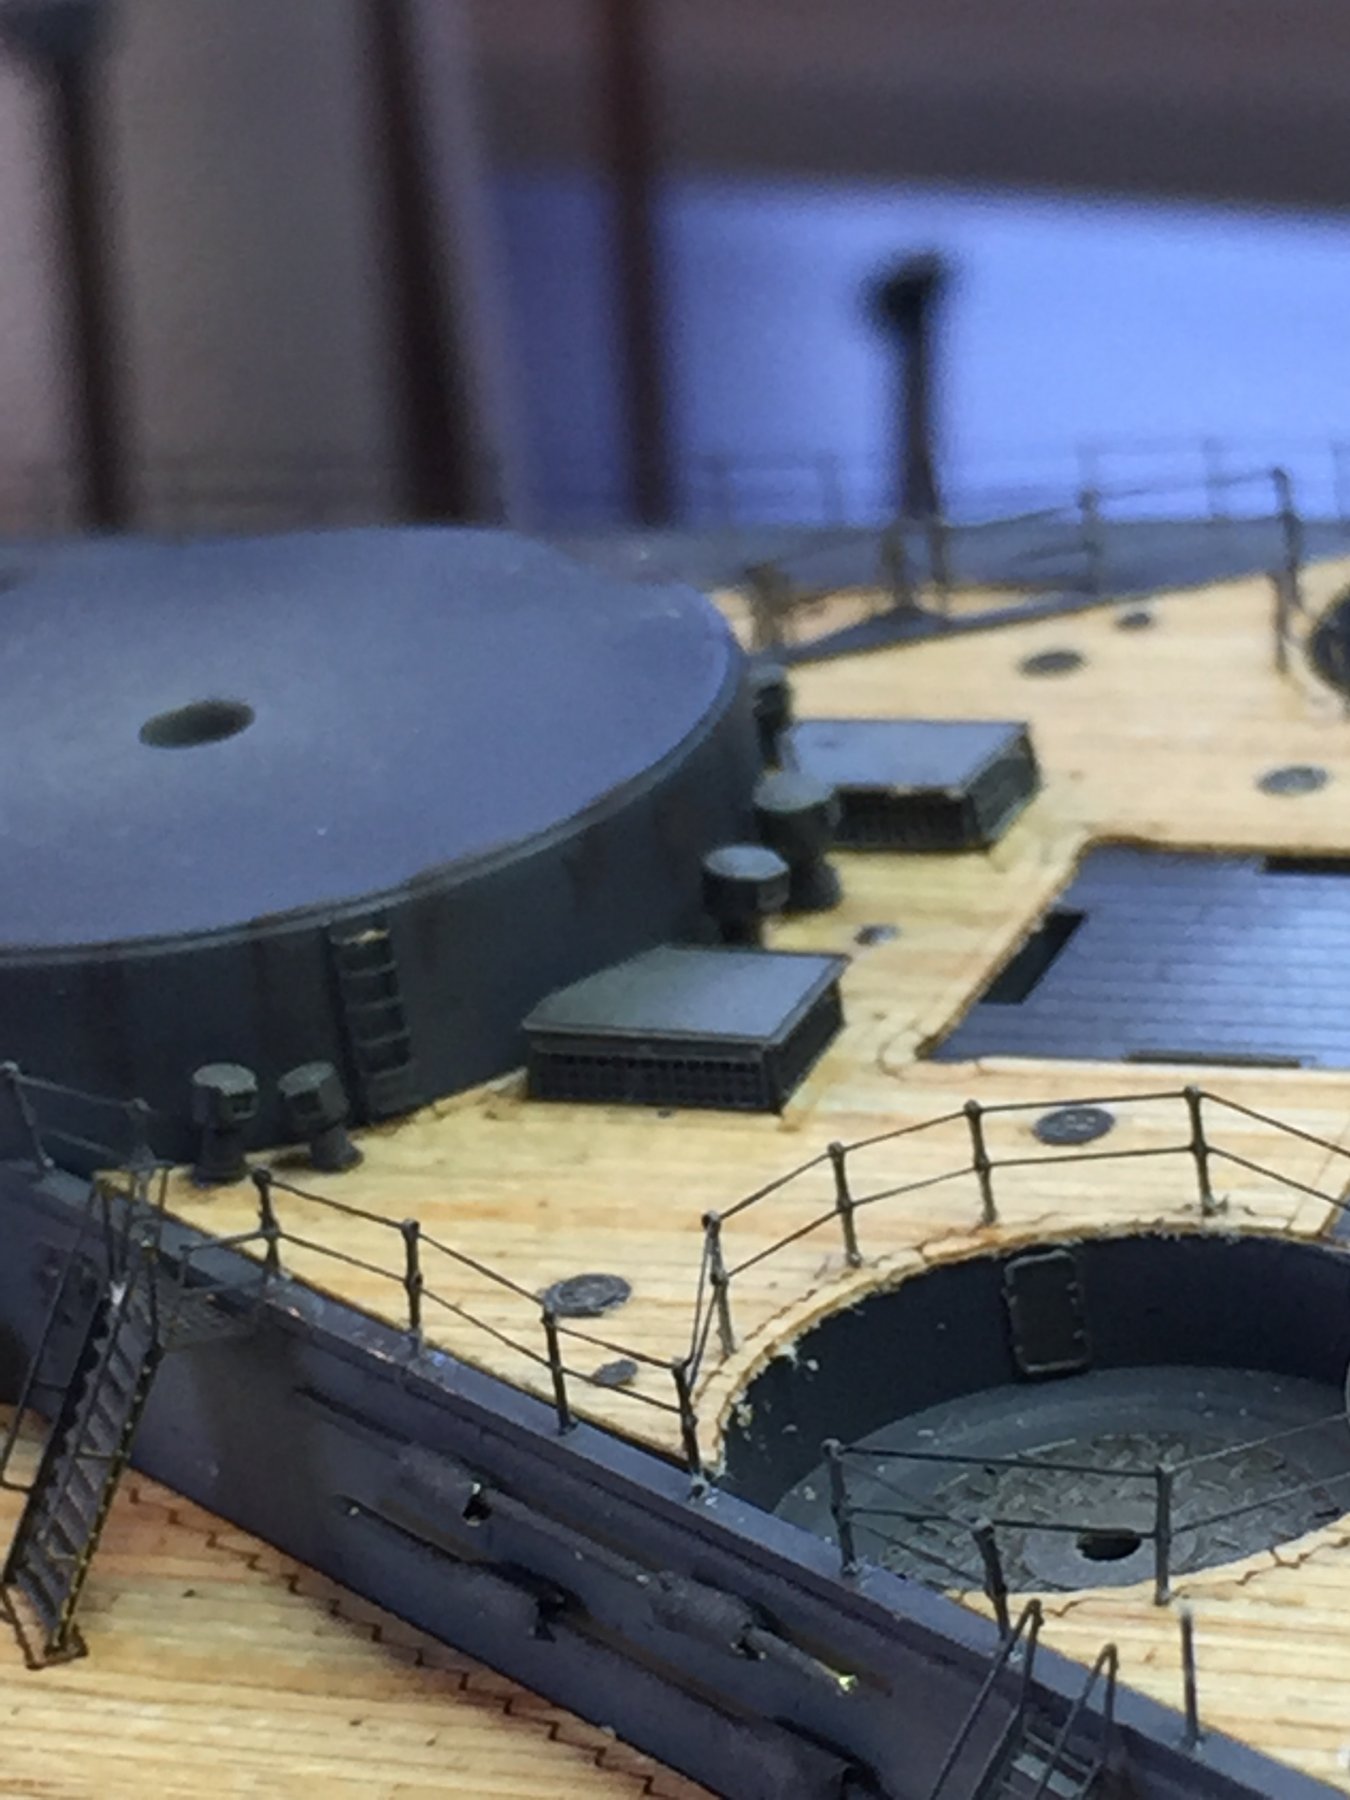
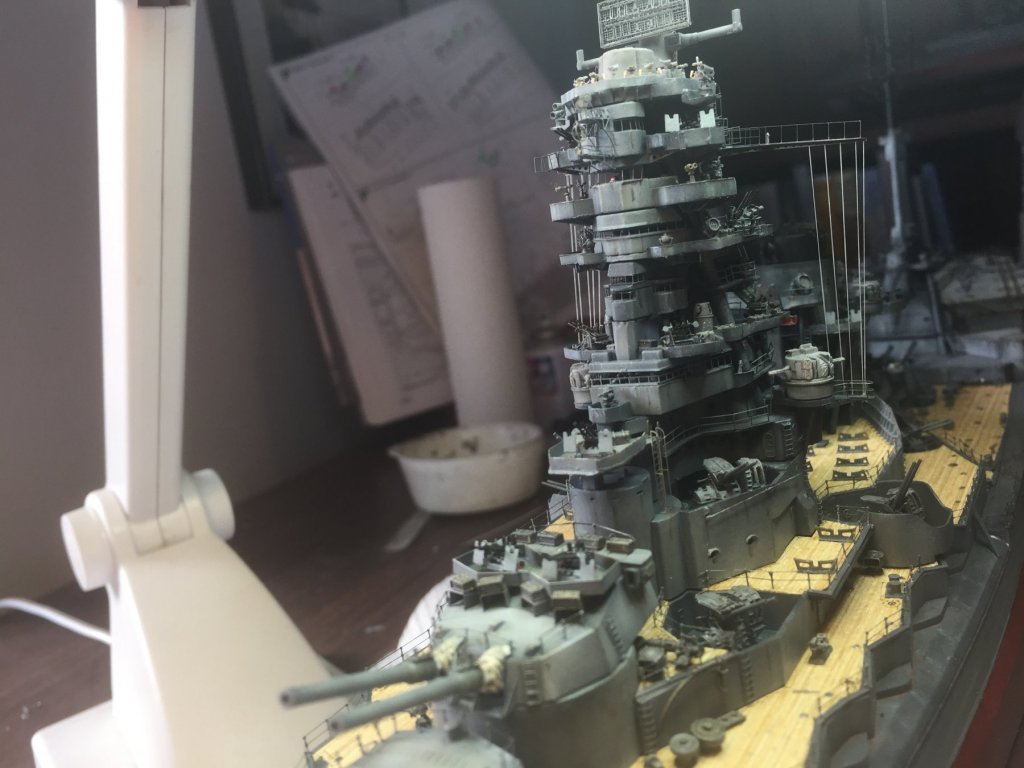
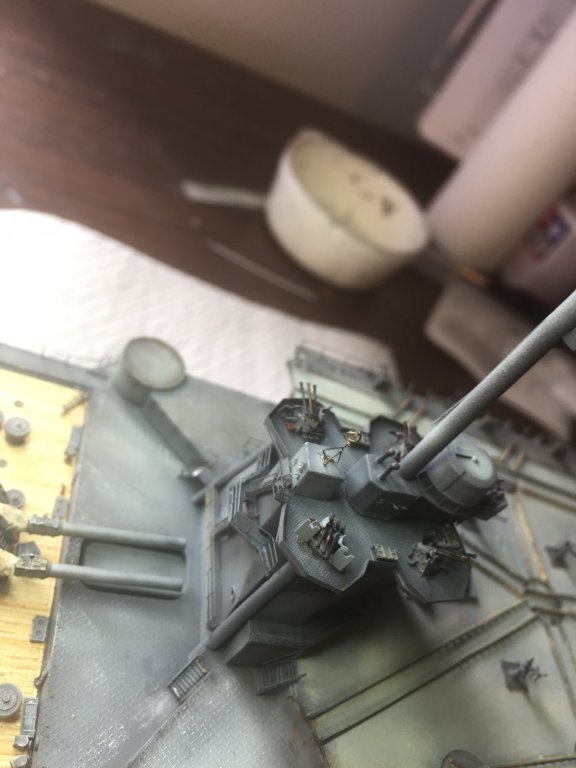
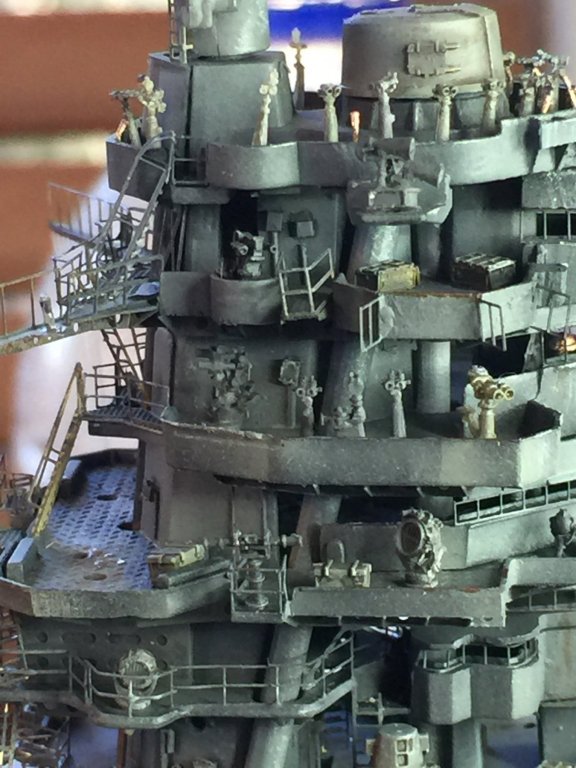
The Pagoda has been lightly weathered with grime, rust and salt. The lugs that go into the deck were cut off and it sits almost perfectly snug without glue. I'll weather the funnel next, then once attached I can add the crane and it's rigging. You can see from the close up there is a lot of detail to add, and I still need to add 9 25mm's, and do up the remainder of the 13.7cm guns plus one barrel which has gone god knows where.


- 224 replies
-
- 18
-
-
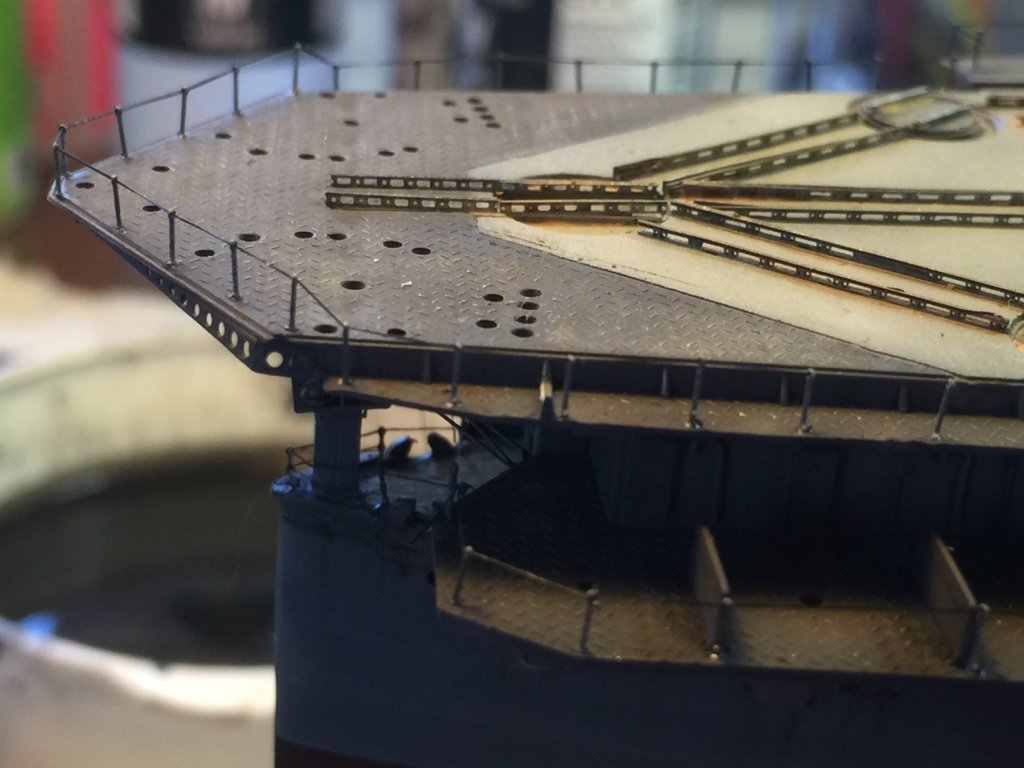
Railings at the front of the bus done, 2 days work and a cramp in my right trapezius. It doesn't seem much but threading the railing is a nightmare as the elastic catches on the paint in the tiny holes.


- 224 replies
-
- 12
-
-
Sweet ship, very nice. L'Arsenal probably have some French aftermarket for her. Im in.
- 133 replies
-
- 6
-
-
- jeanne d arc
- heller
- (and 2 more)
-
I probably should have (that's what it's called), but Yamato and Isuzu have metal focsle areas so did'nt need it.
-
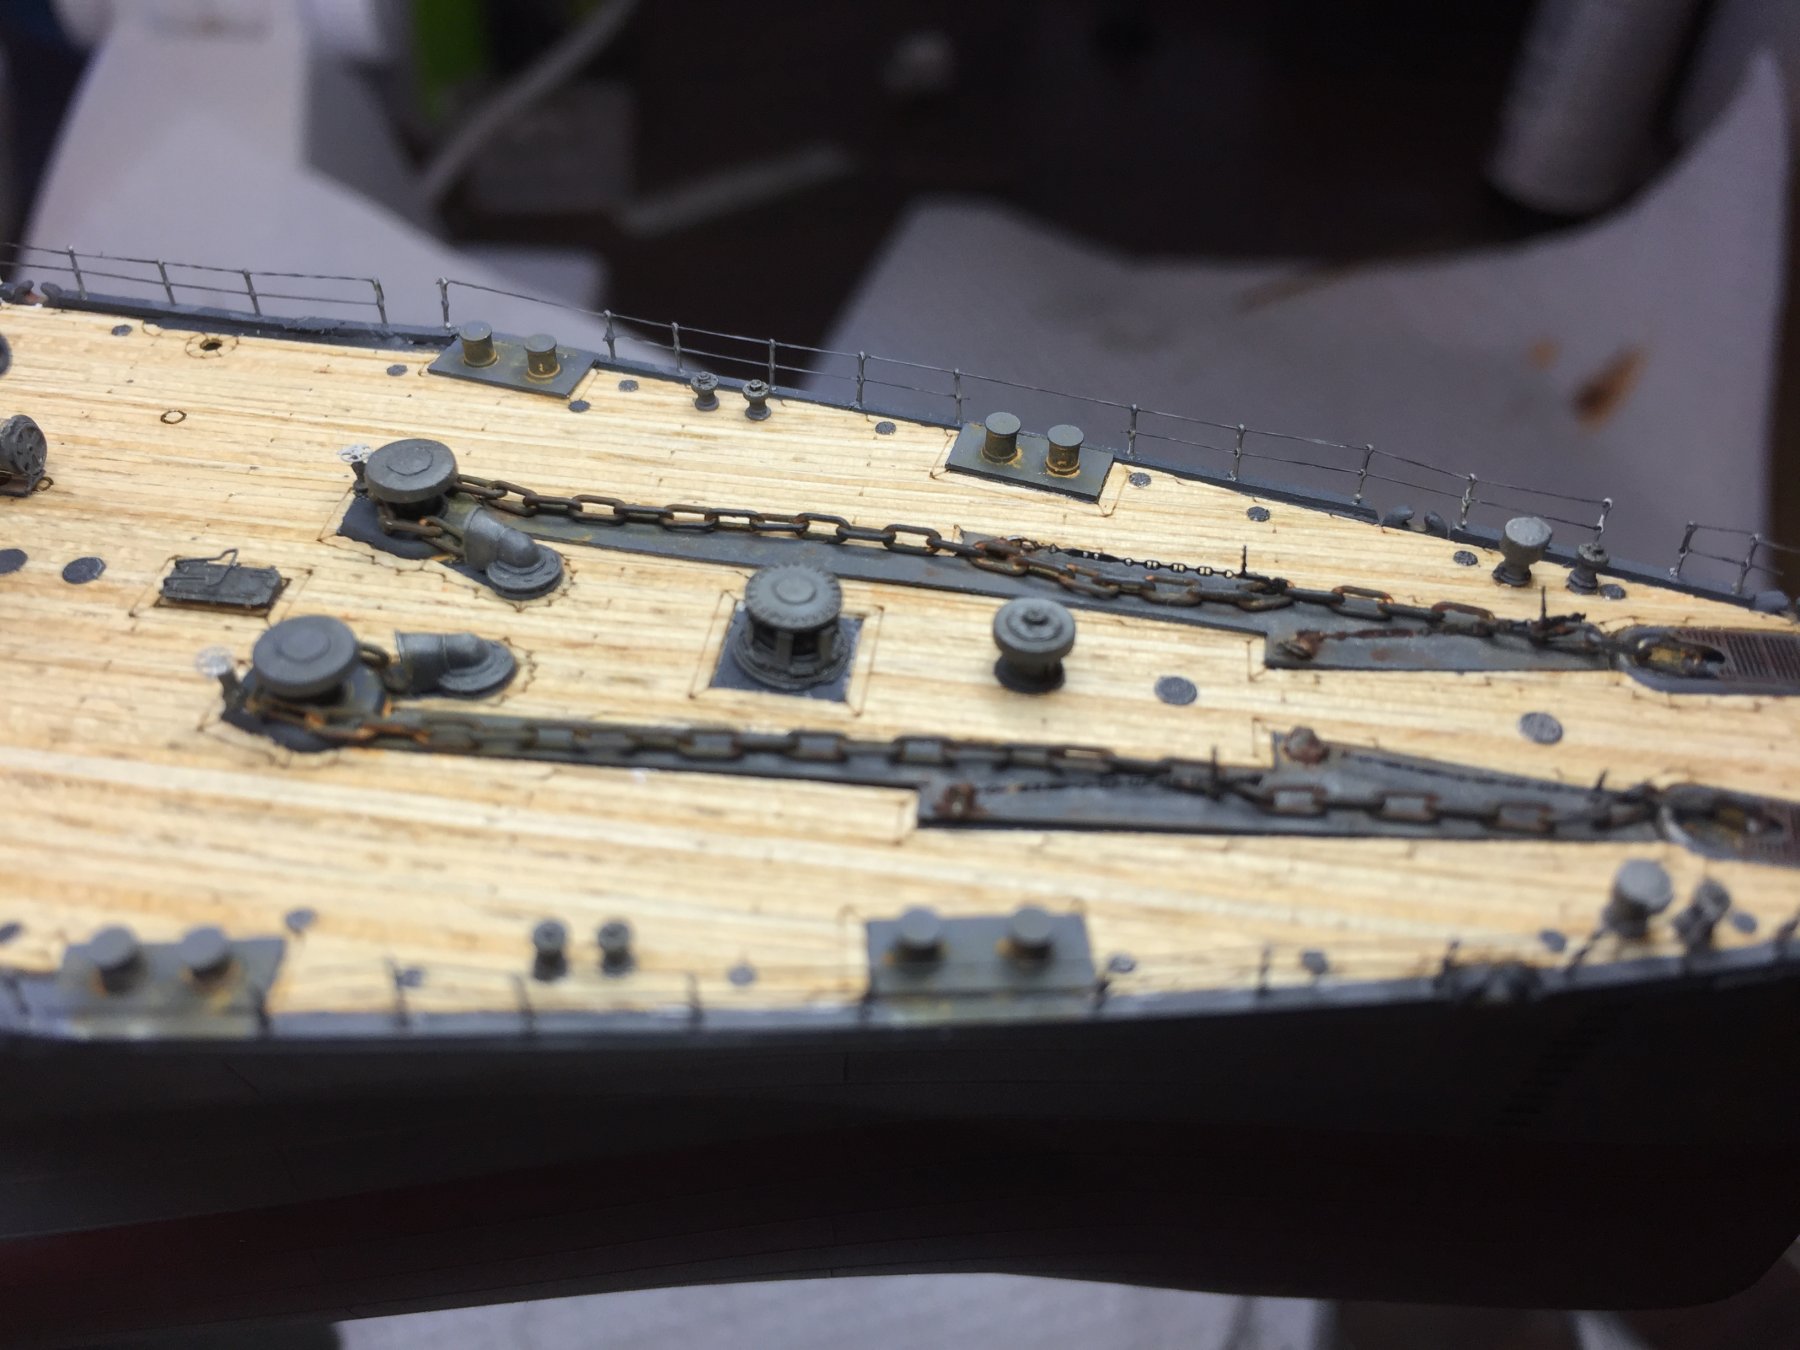
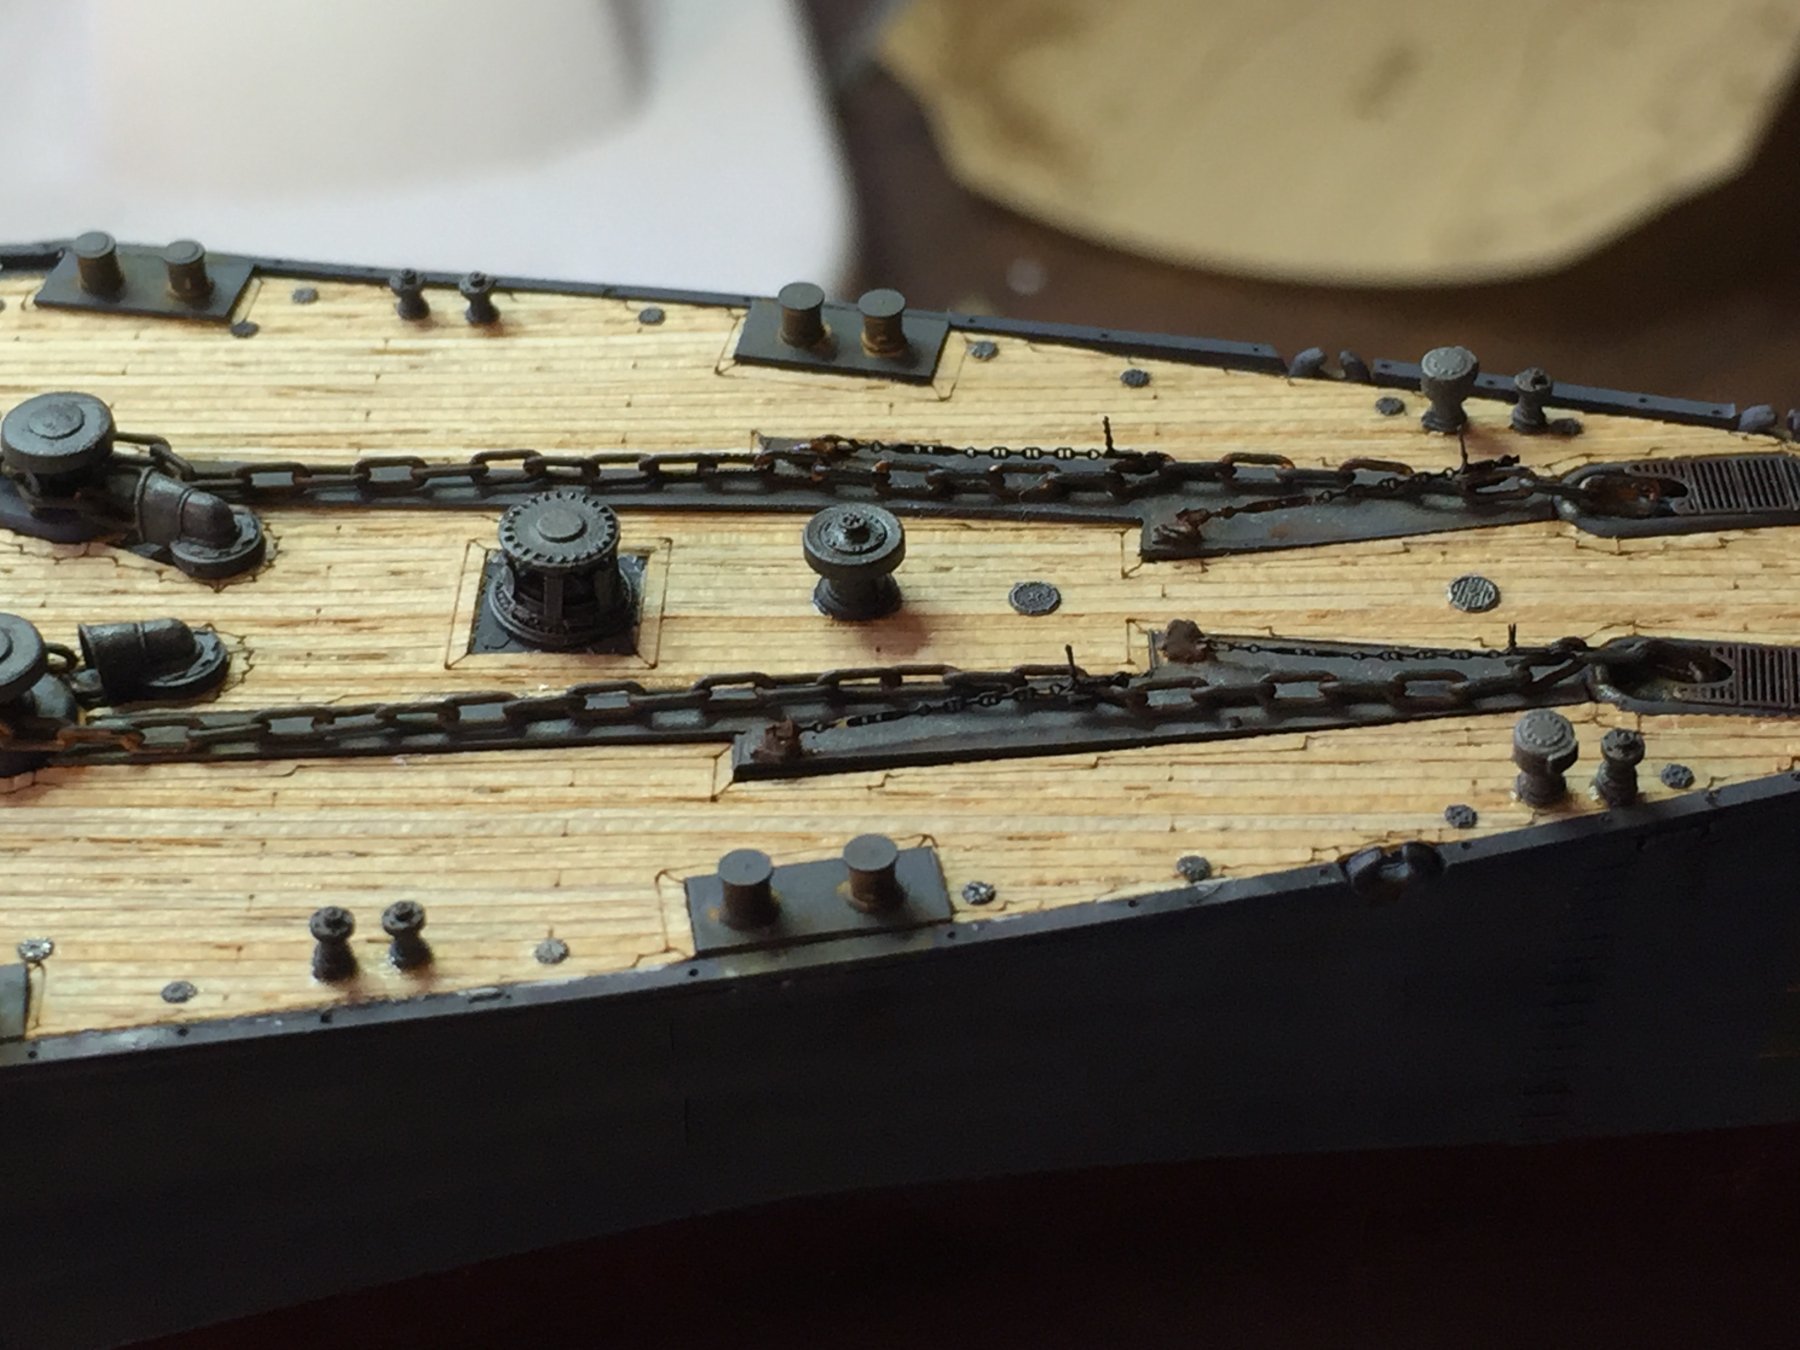
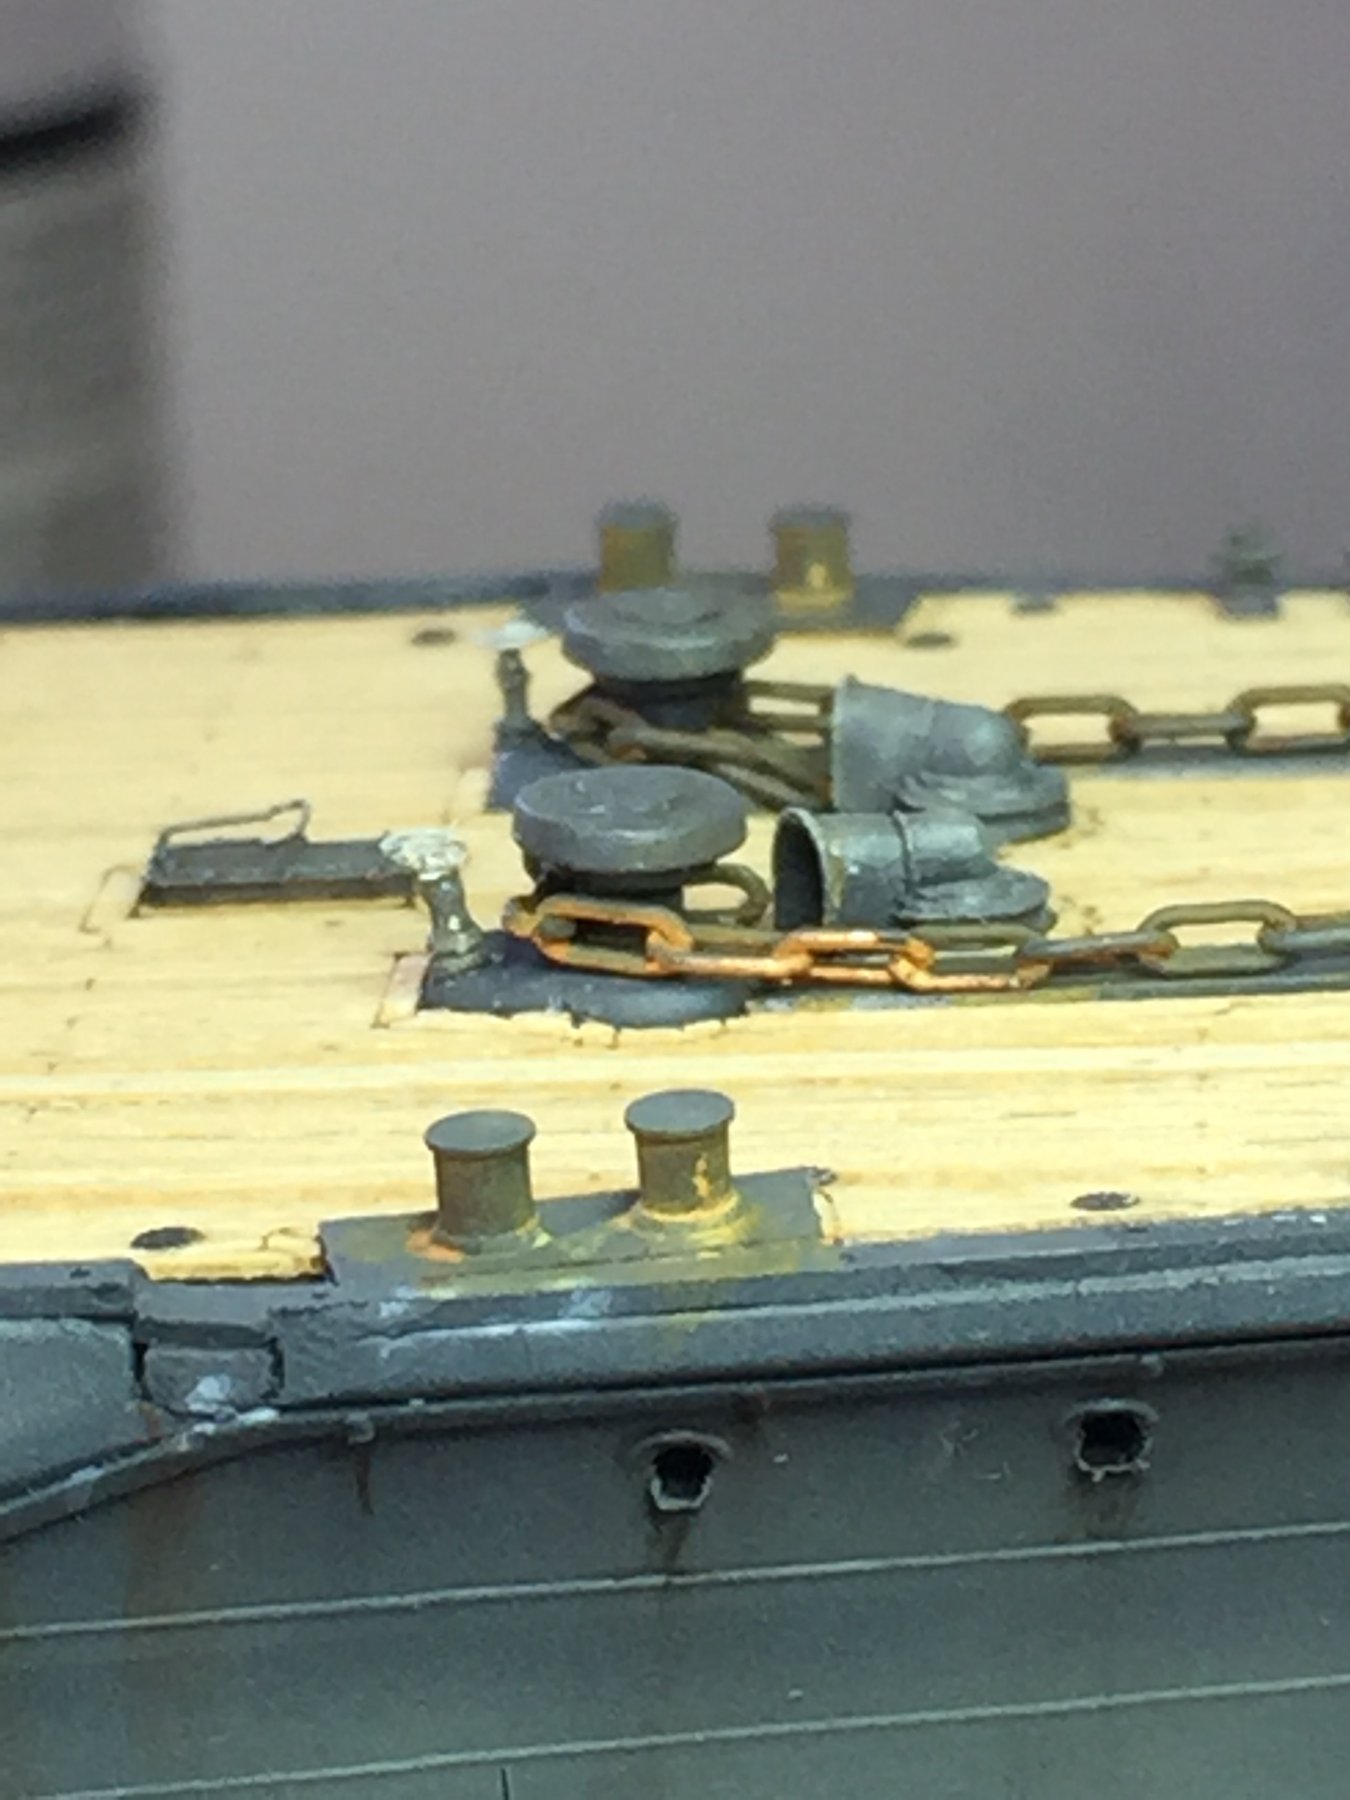
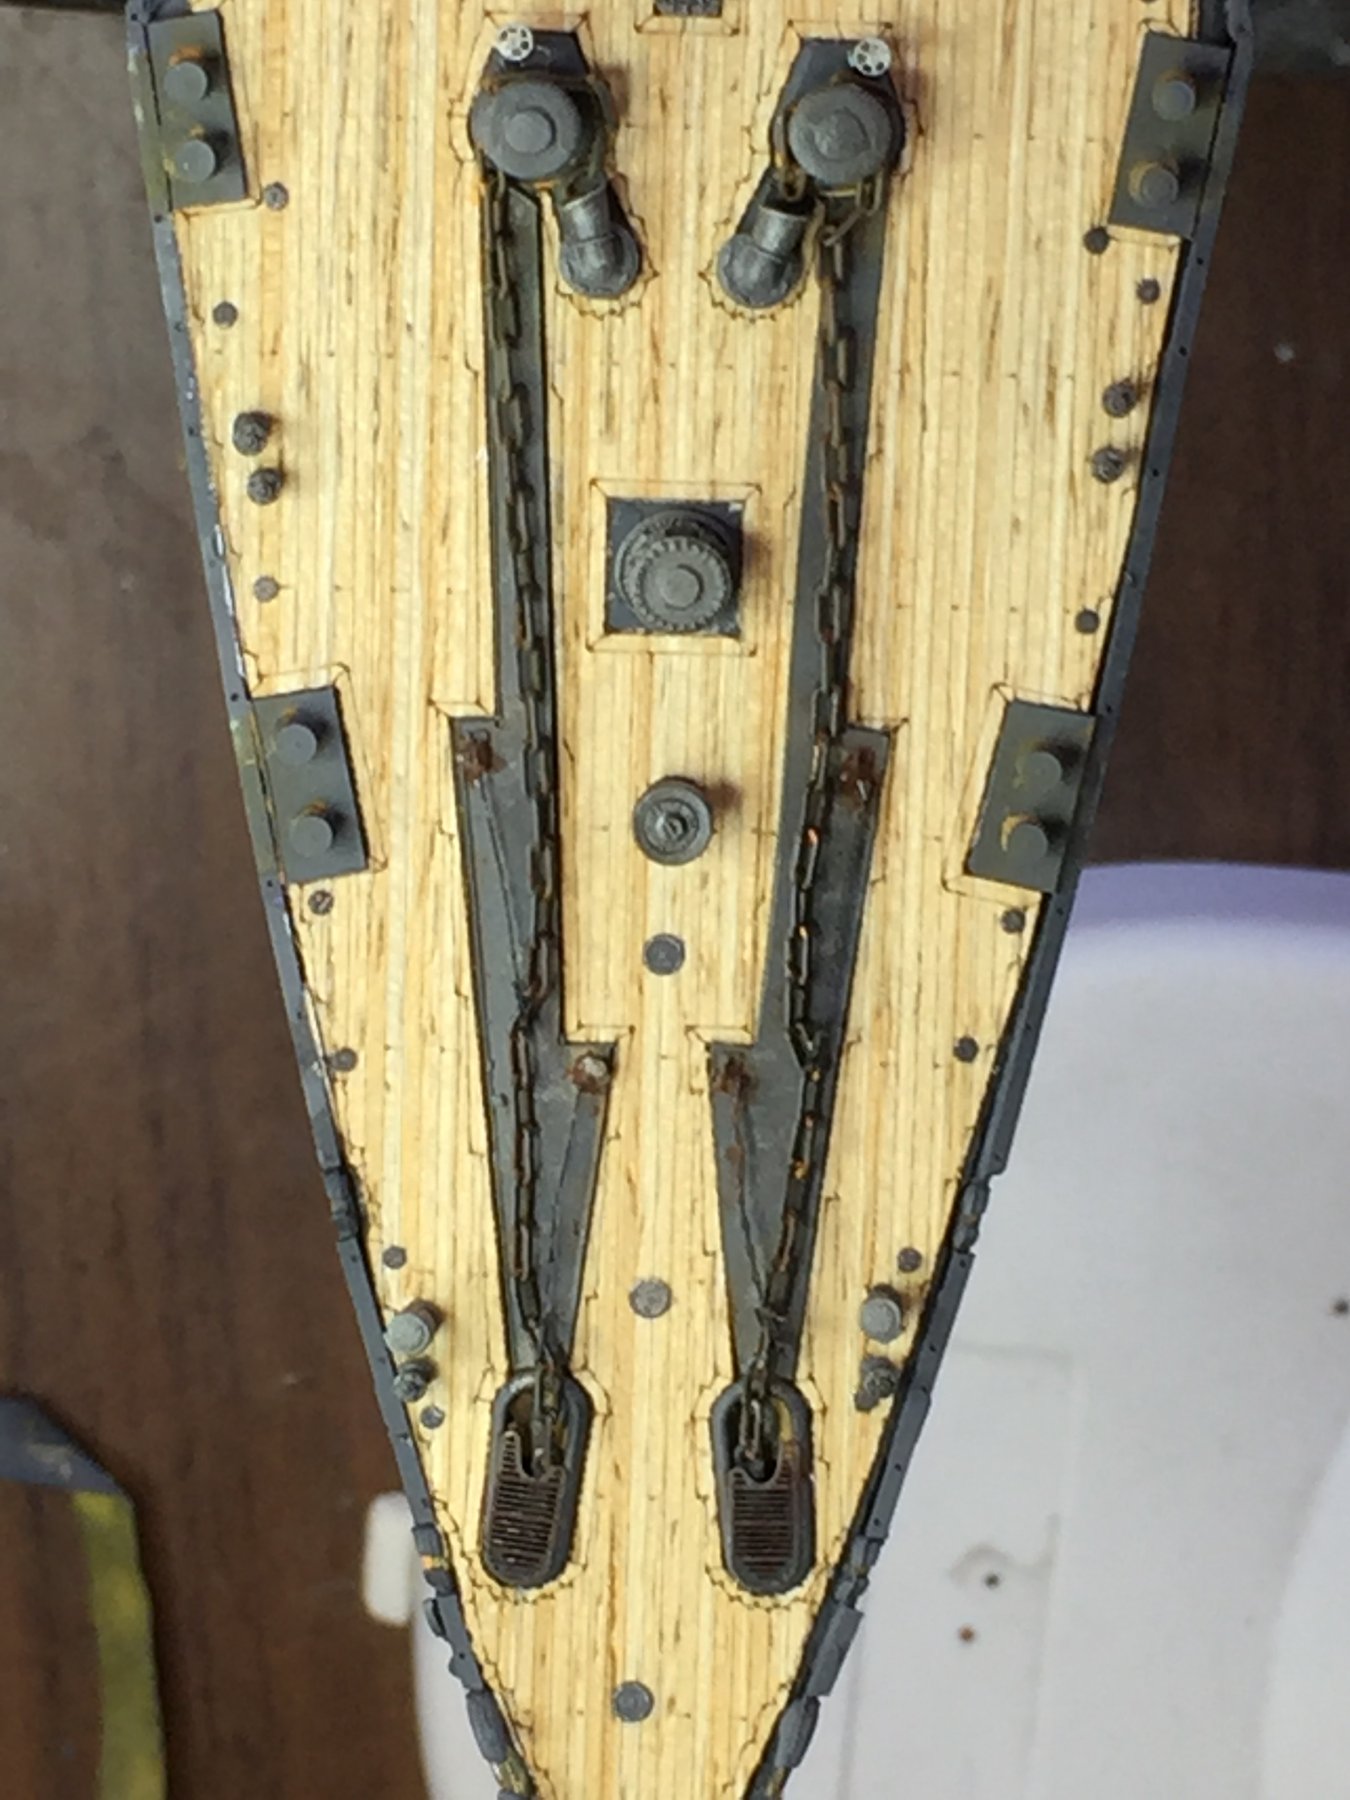
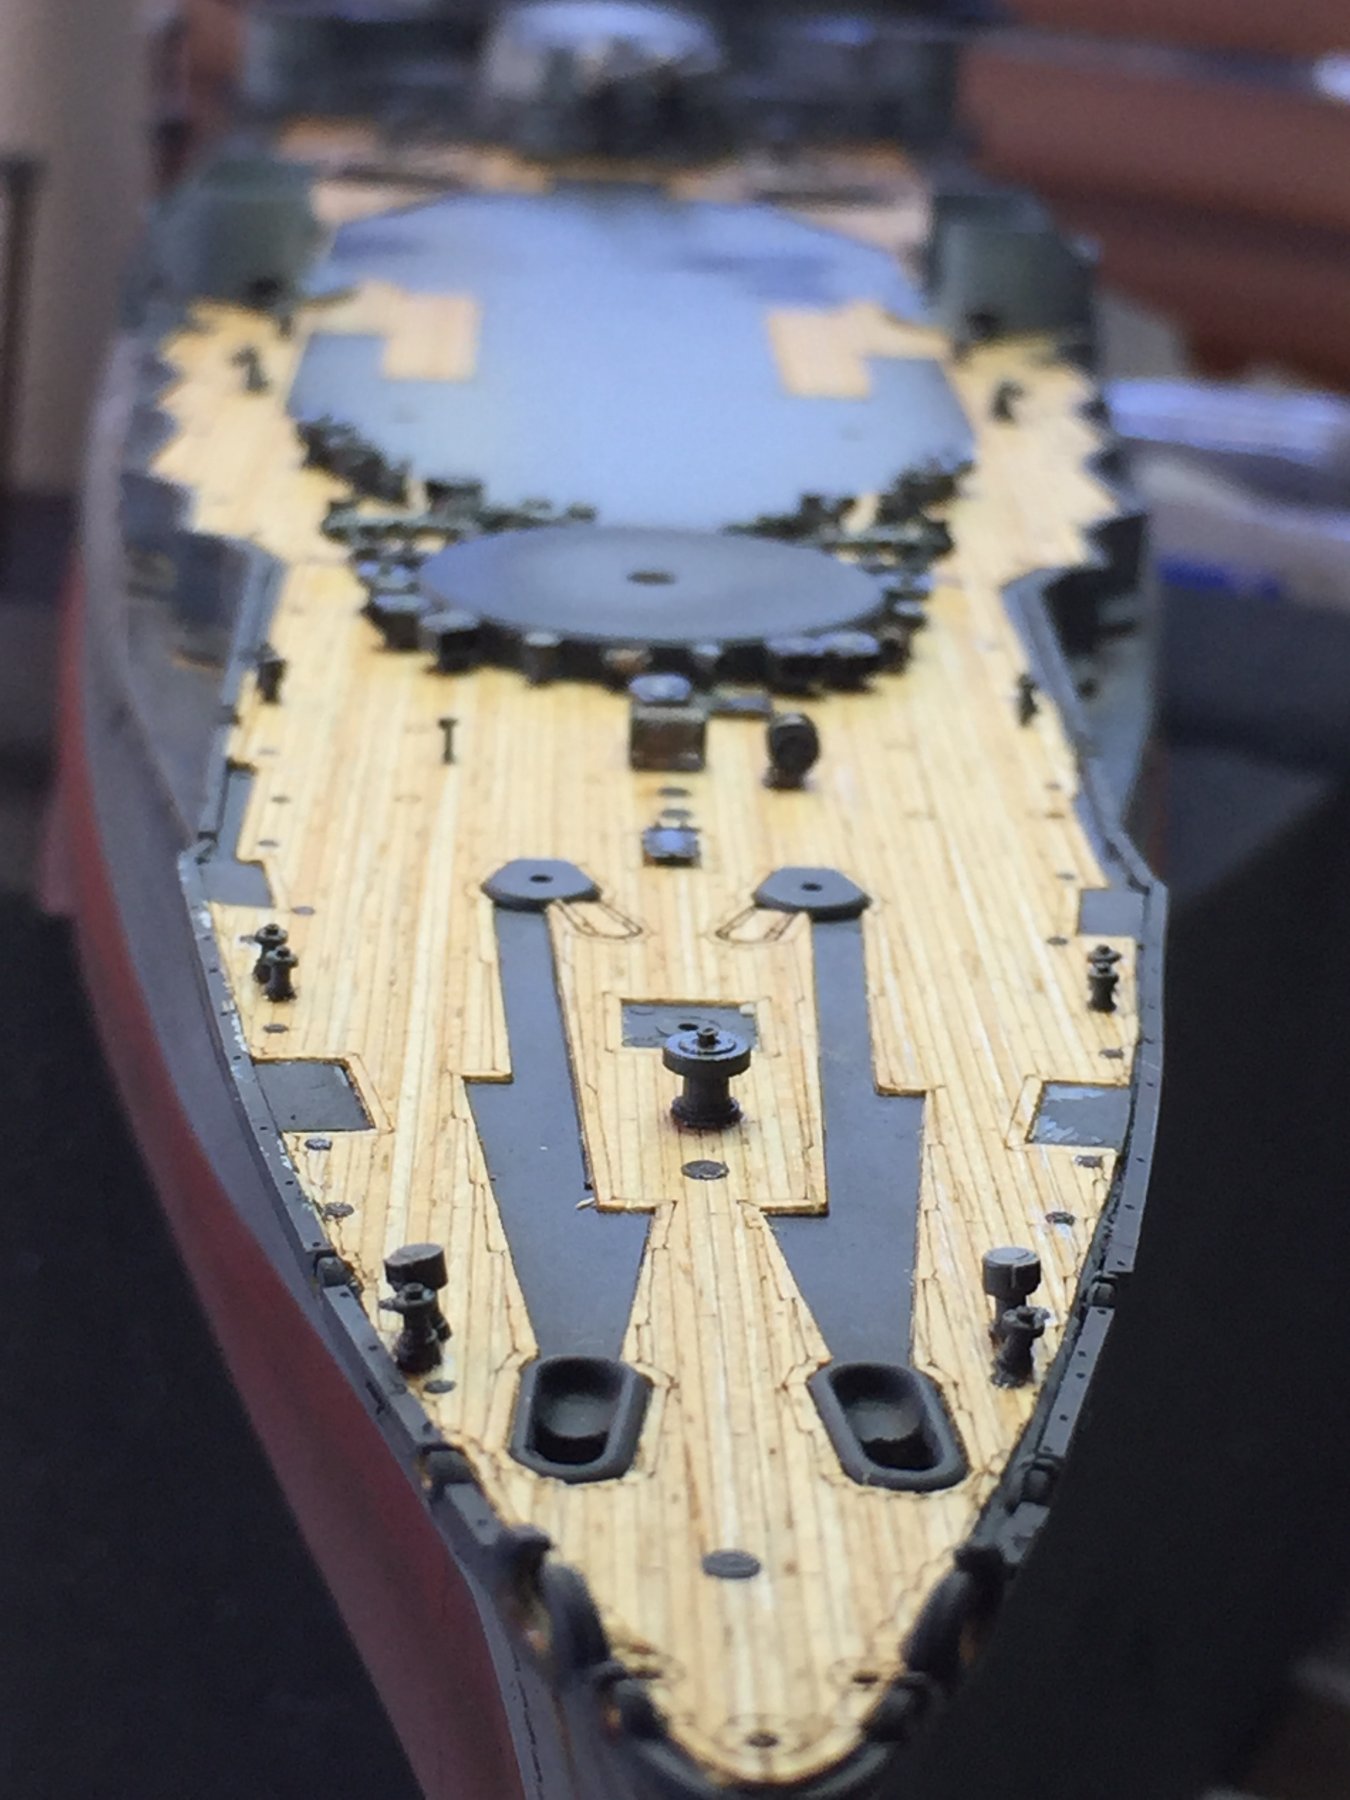
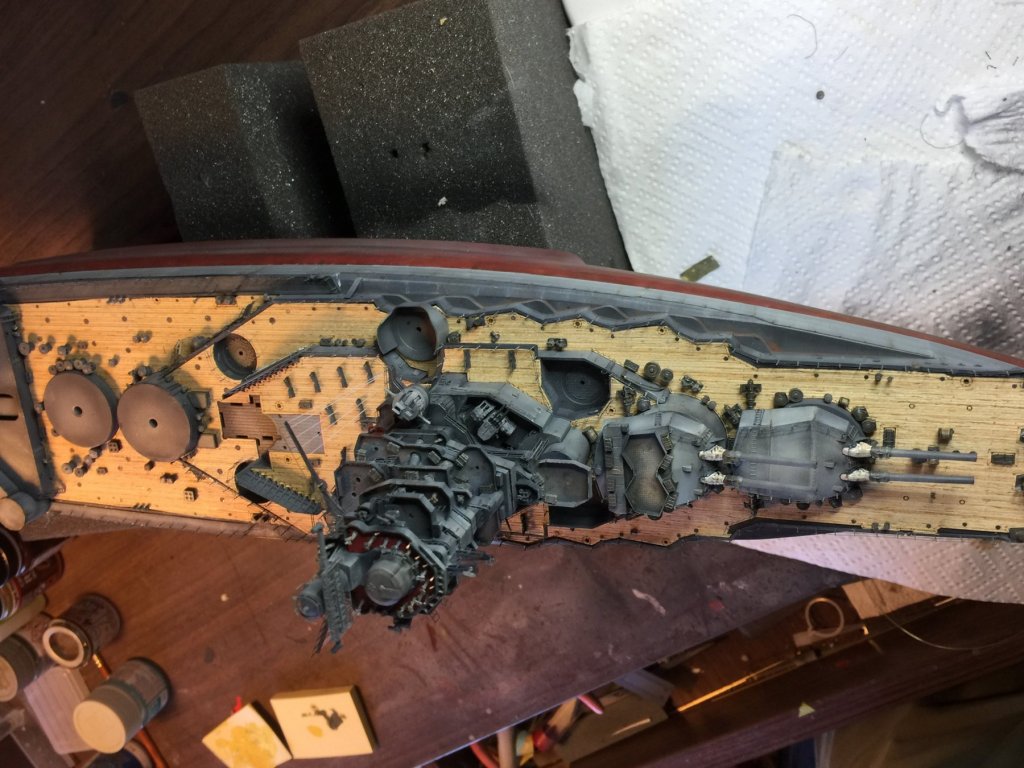
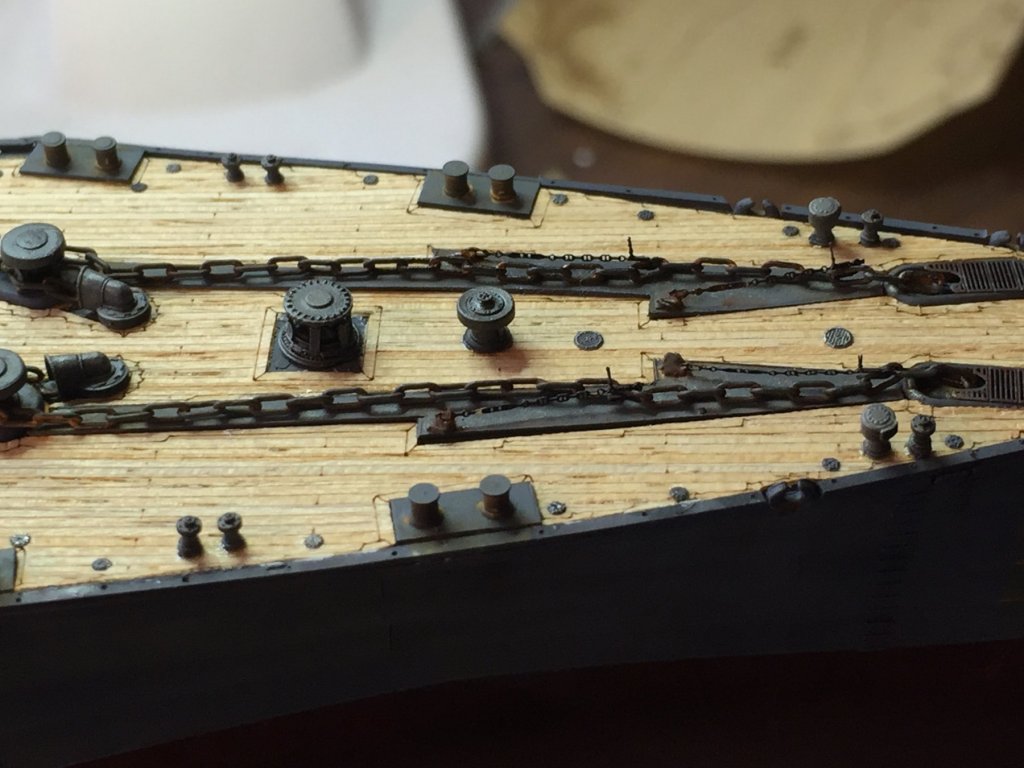
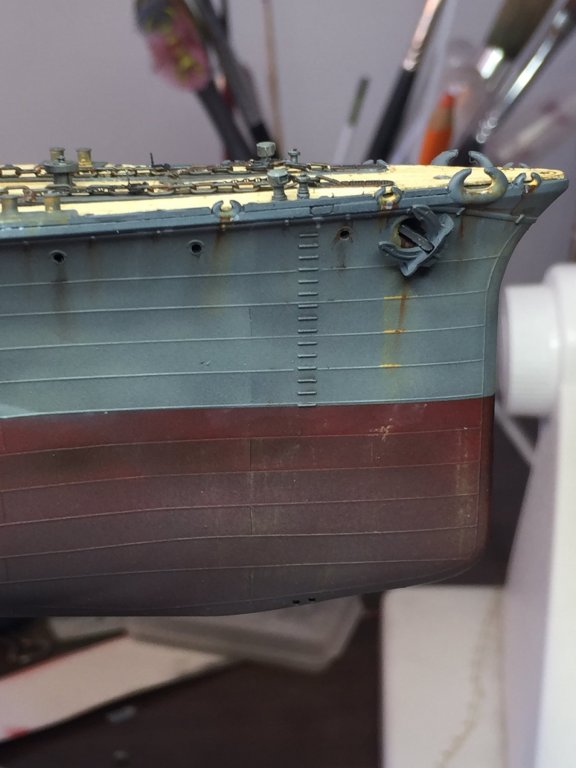
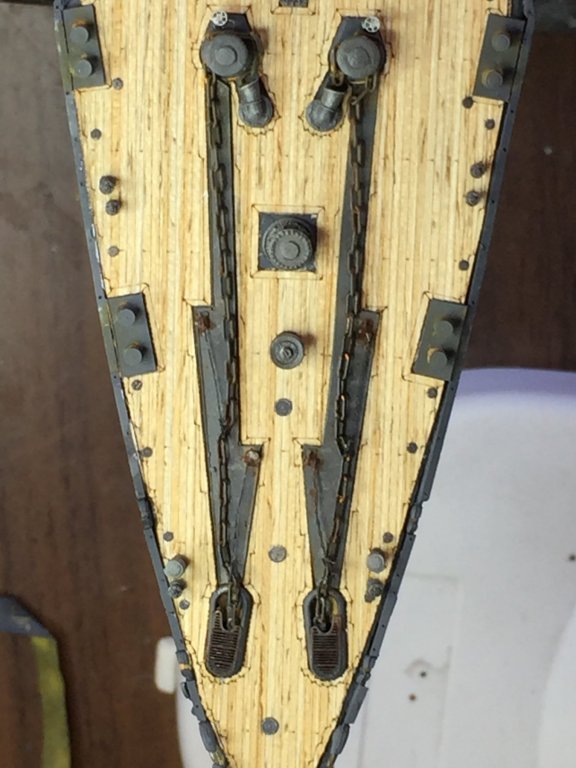
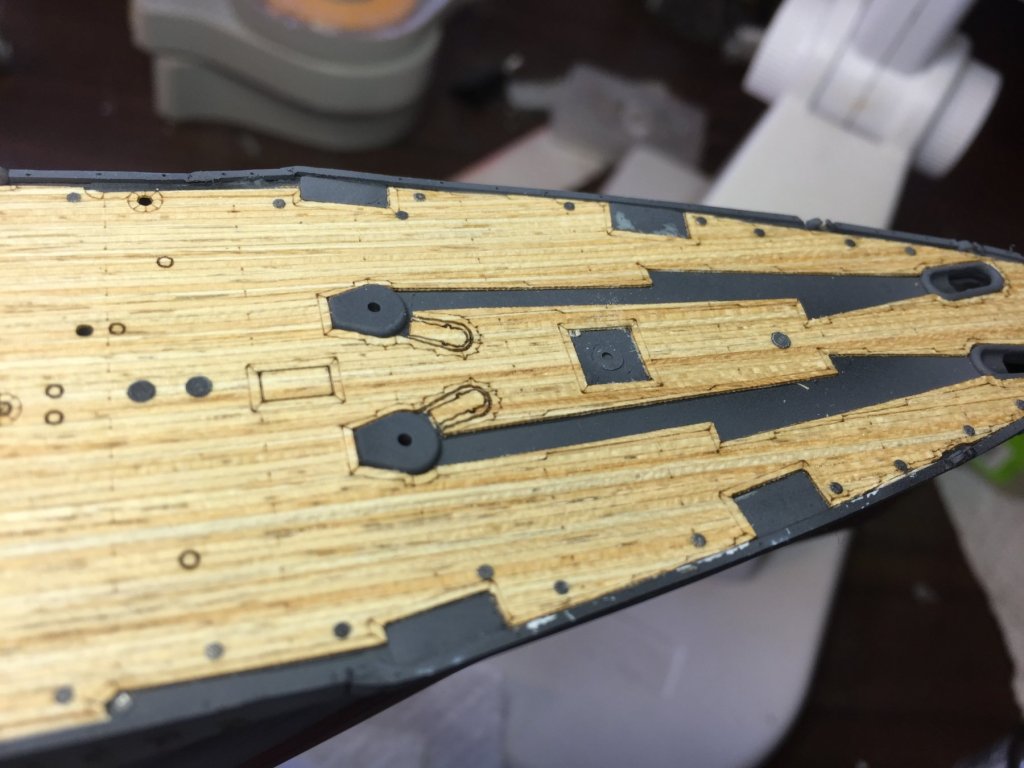
The kit provided anchor is pretty much rubbish, the stock is a curved piece of plastic! There are also no stern anchors provided. I widened the hawser holes holes and used a North Star anchor set, joined to the Artwox chain, running strait through to the capstans. Hawser holes covers, chain stoppers and brake handles, as well as covers for the bit where the chain runs into the chain locker. The bit where the chain runs was recessed into the deck after the wooden deck was used, so I used the cut outs as stencils to cut plastic strip to fill the holes. Mall of the bollards from the kit were shaved off ages ago and are brass on plastic strip. Little bit of weathering, and railings to go.


- 224 replies
-
- 15
-
-
So much prep for so 'little' to show. You'll be finished your big M before you know it now you've got the airbrush out.
-
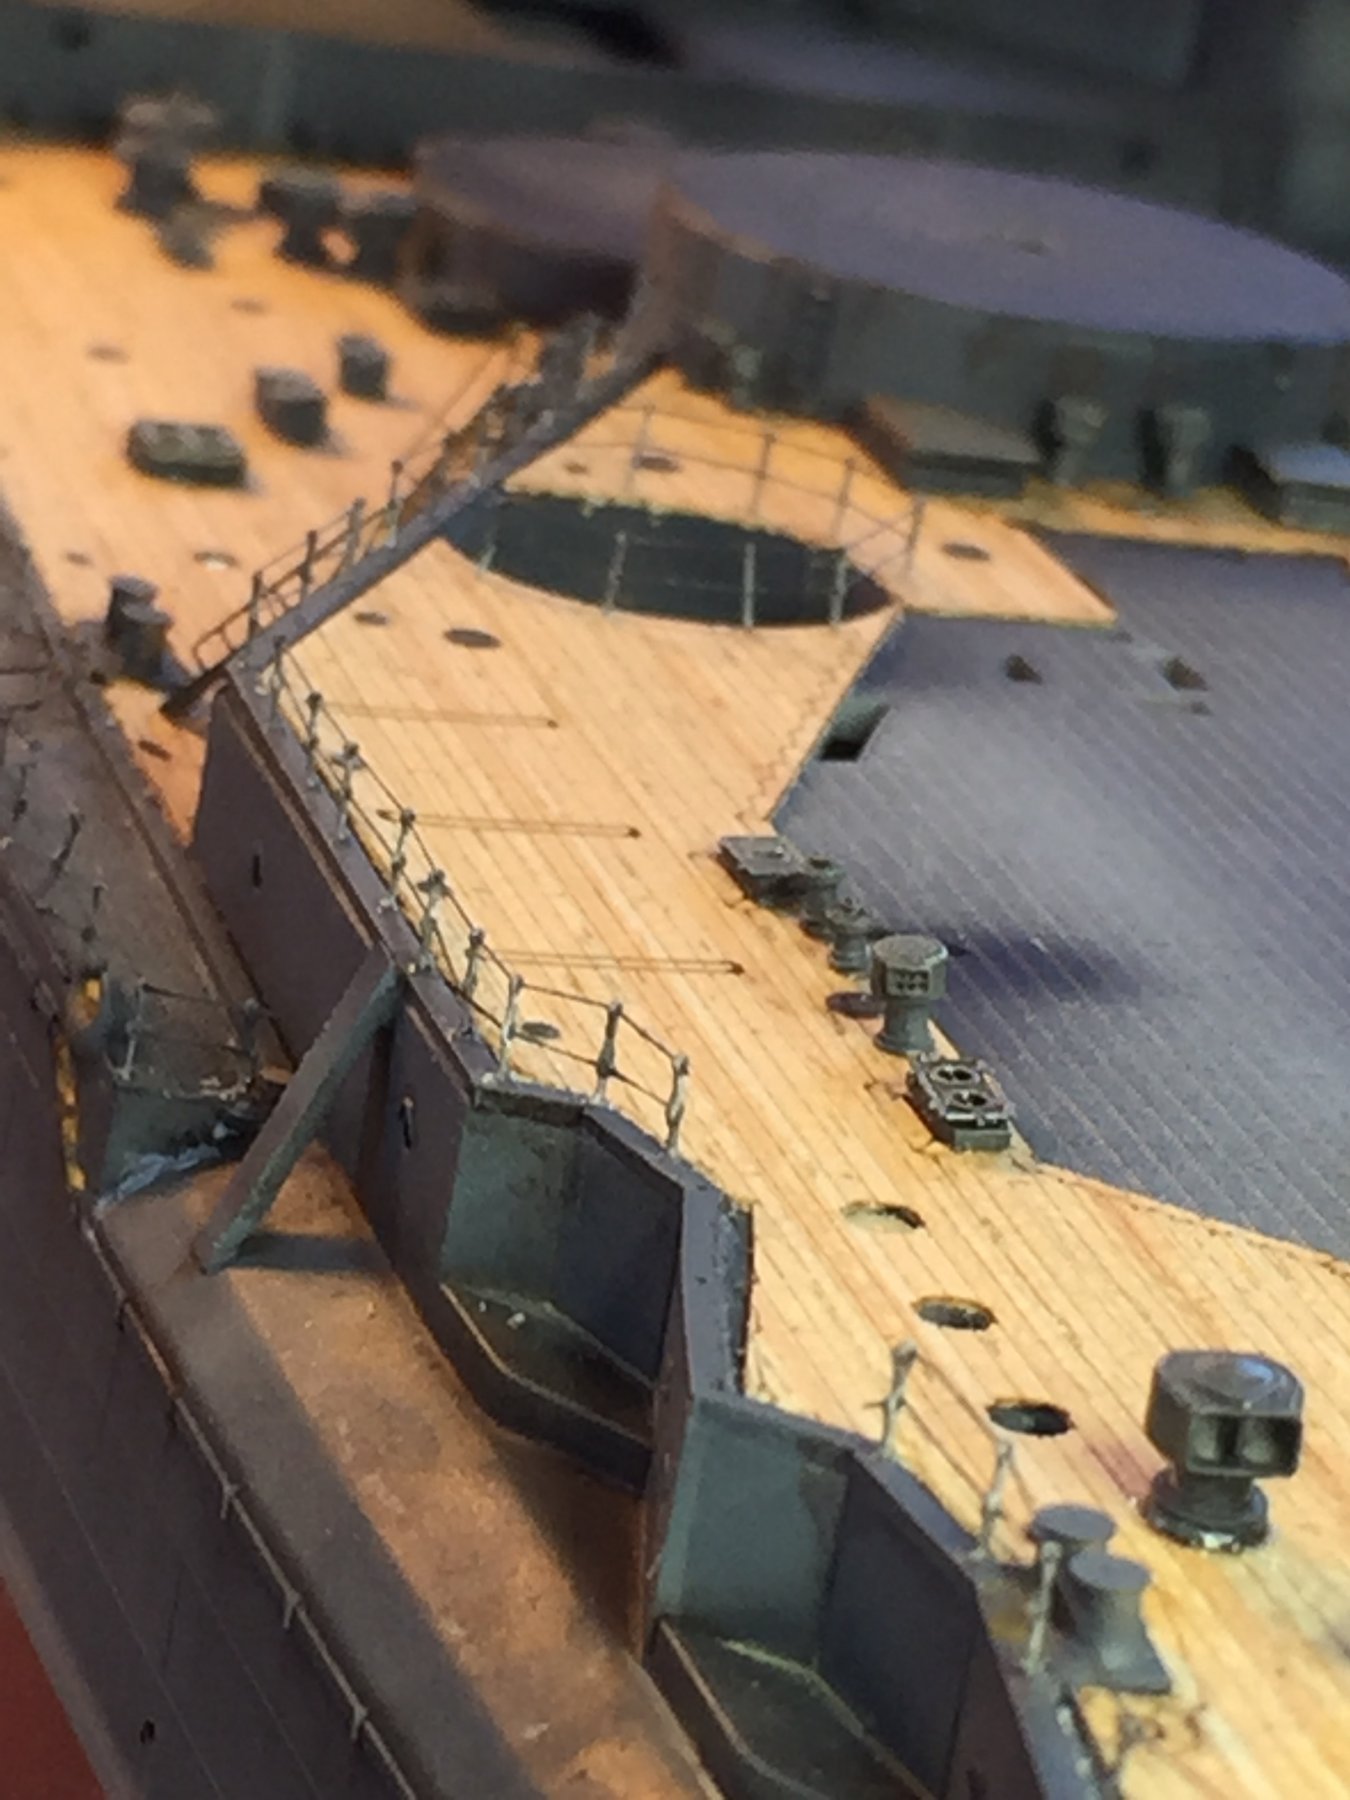
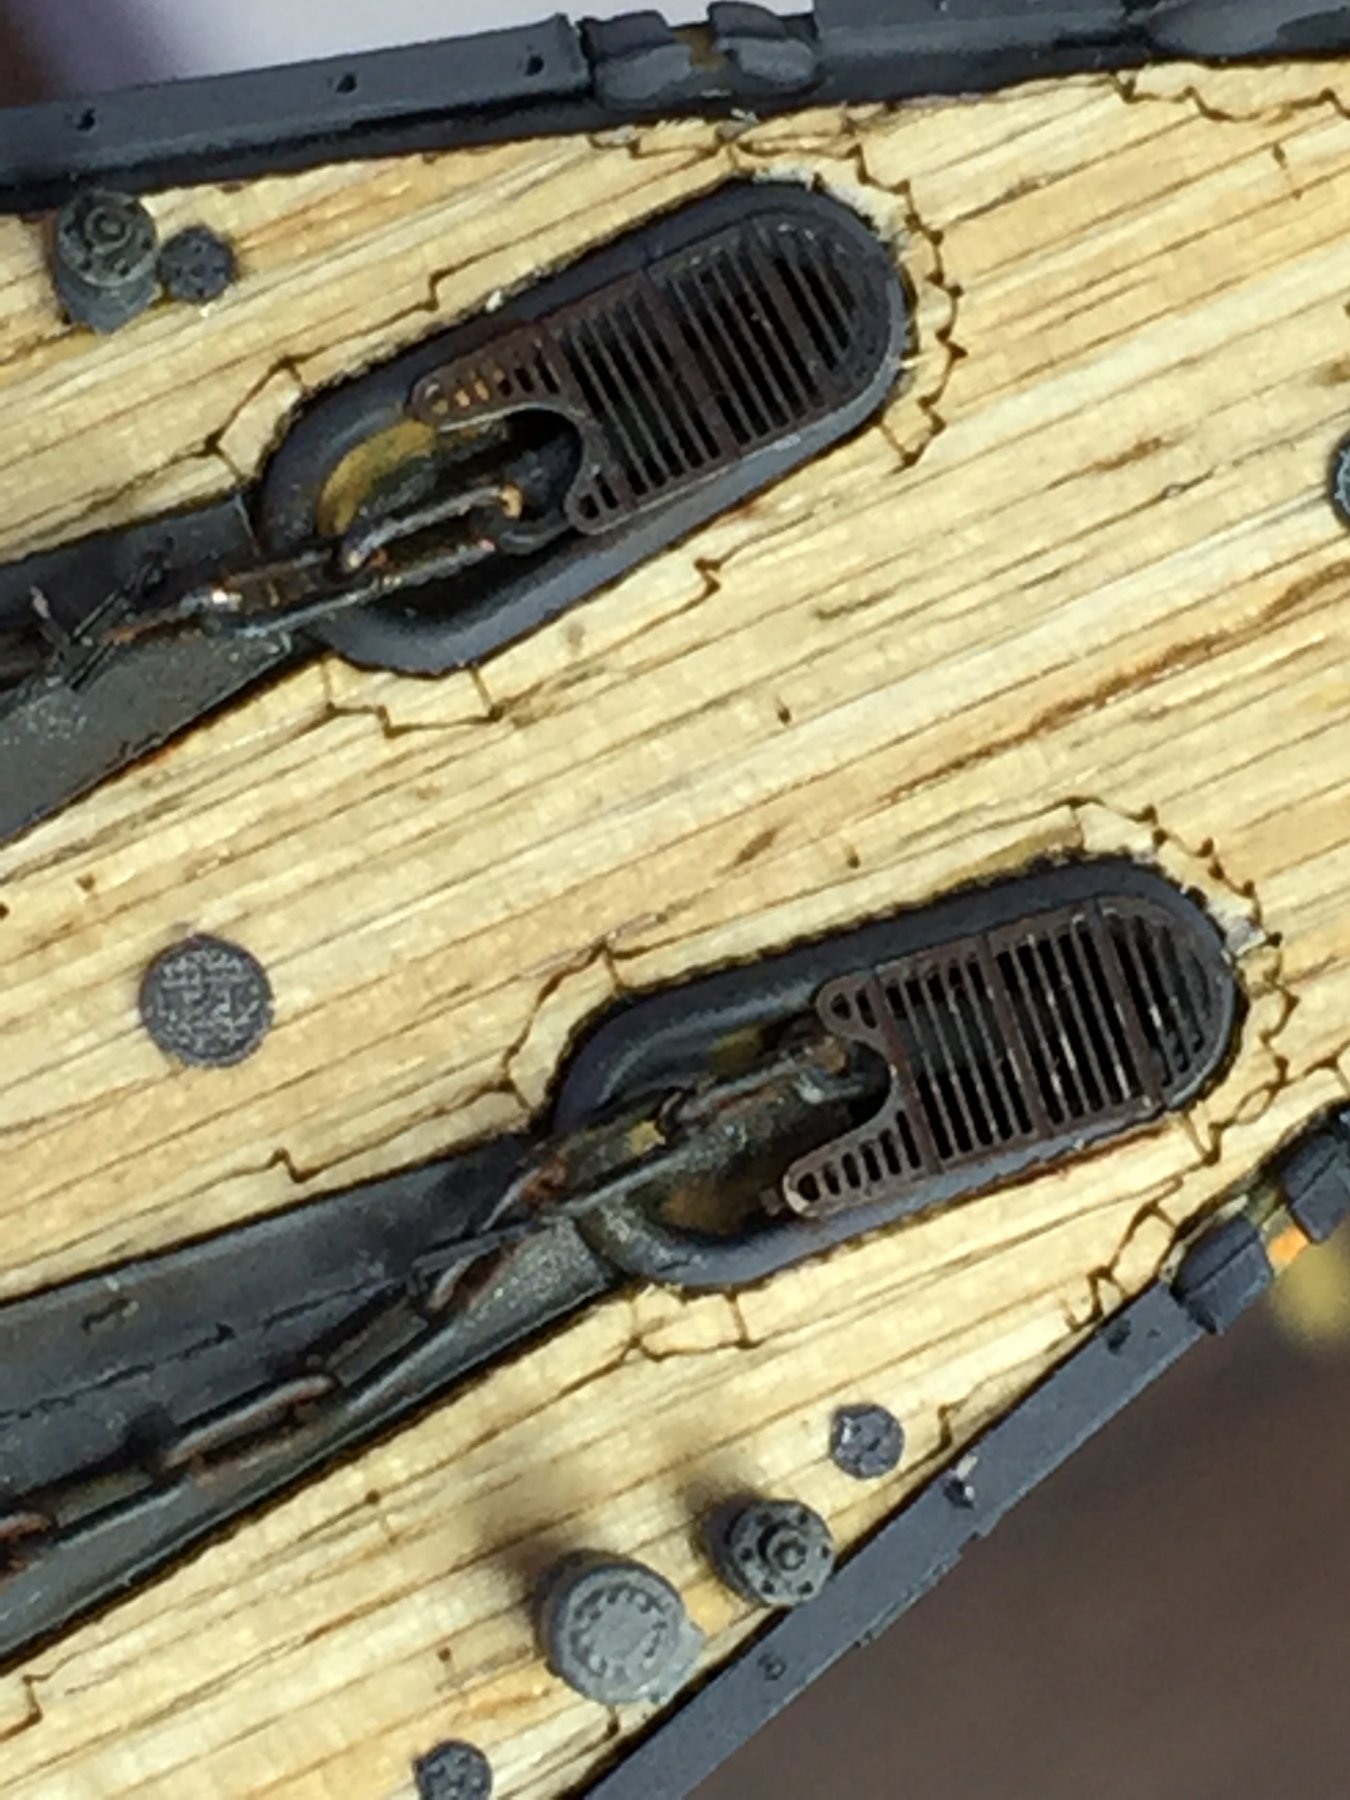
Finally the vents. I have to do up the anchor stuff now, chains, stoppers, breaks, anchors, cut some strip to make the anchor run flush with the decks. I've got a few more places to add vents at the base of the Pagoda, but I want to get the railings finished first.


- 224 replies
-
- 16
-
-
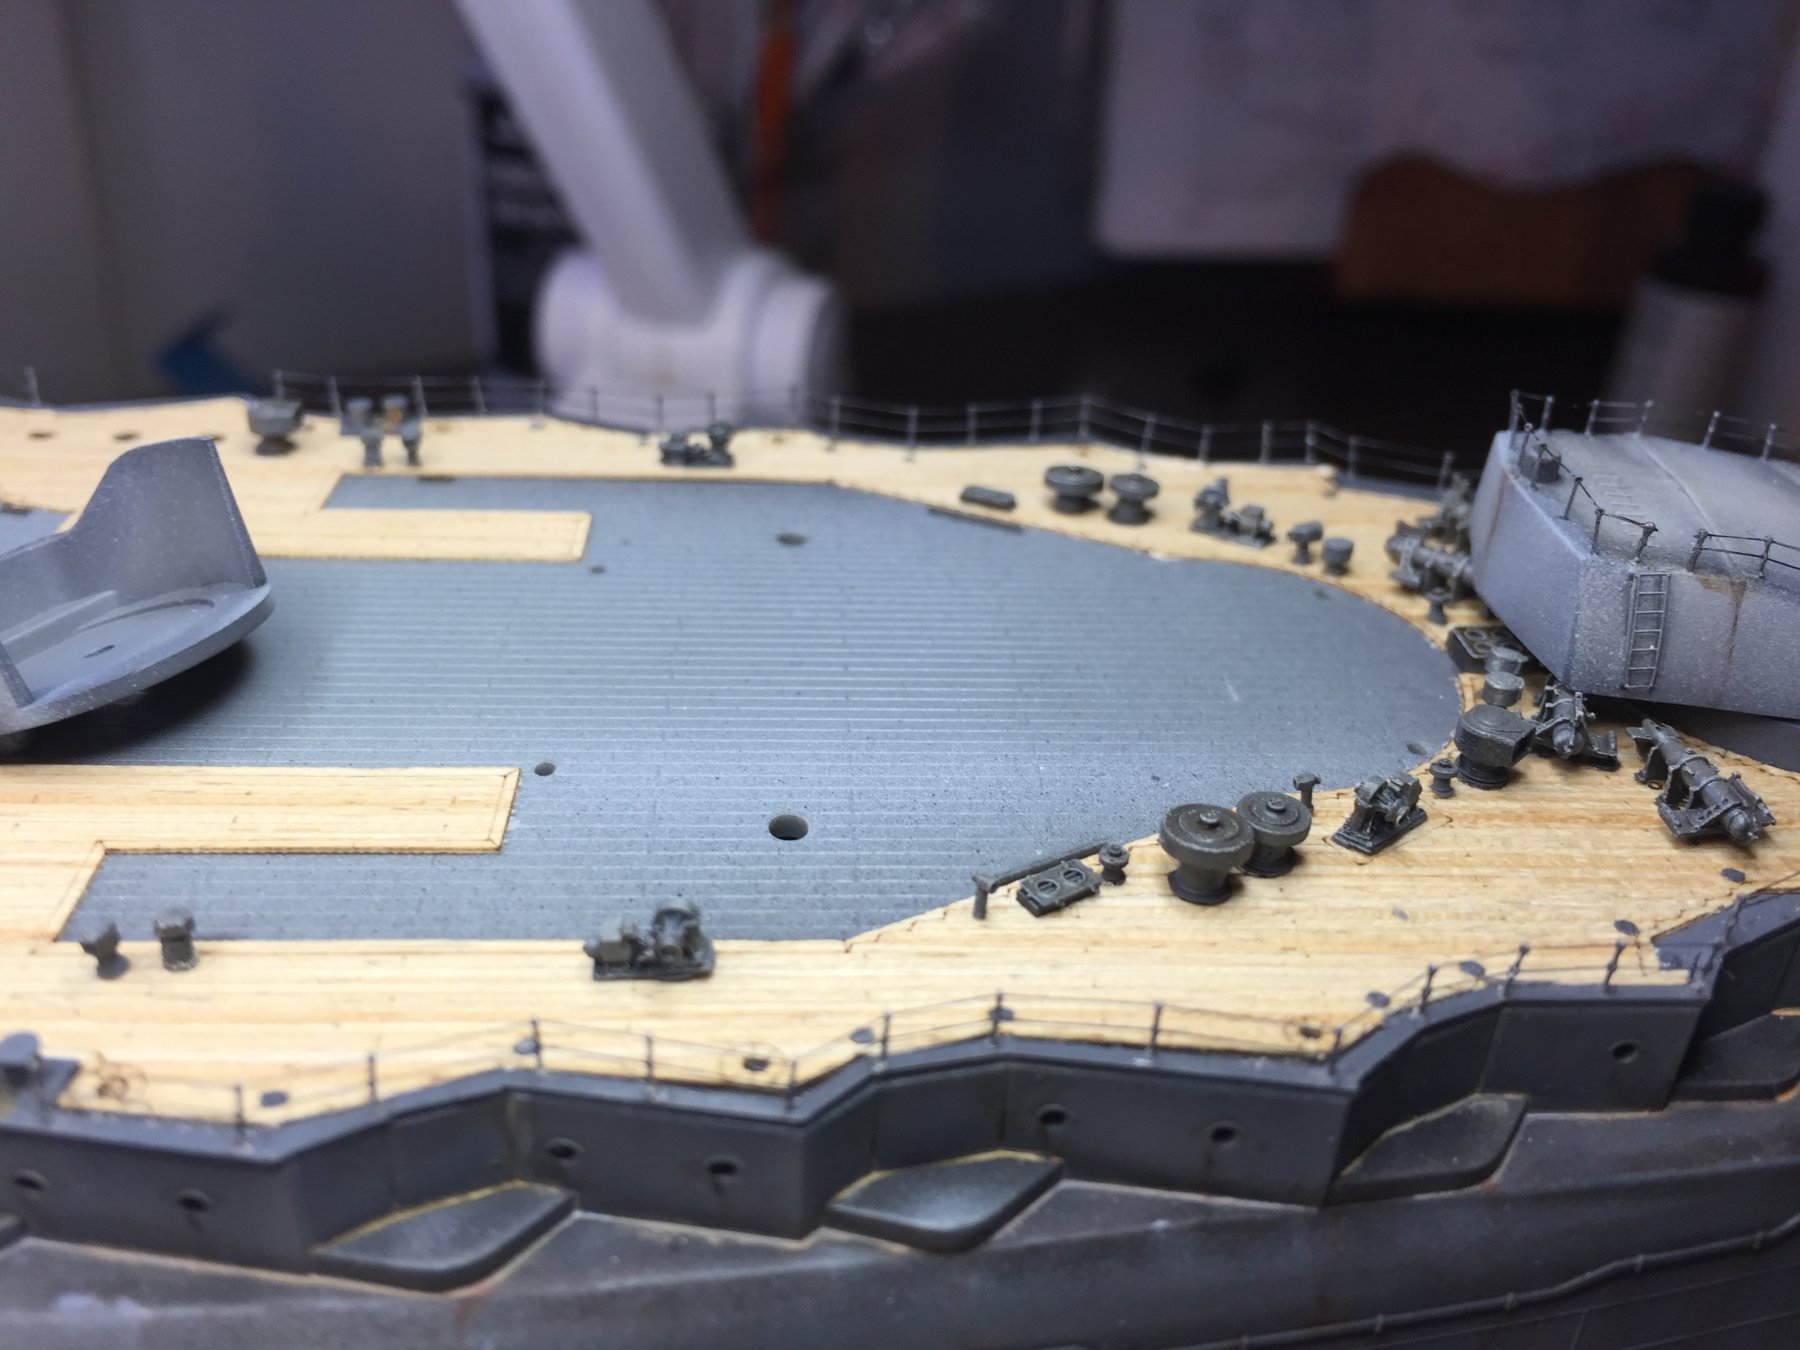
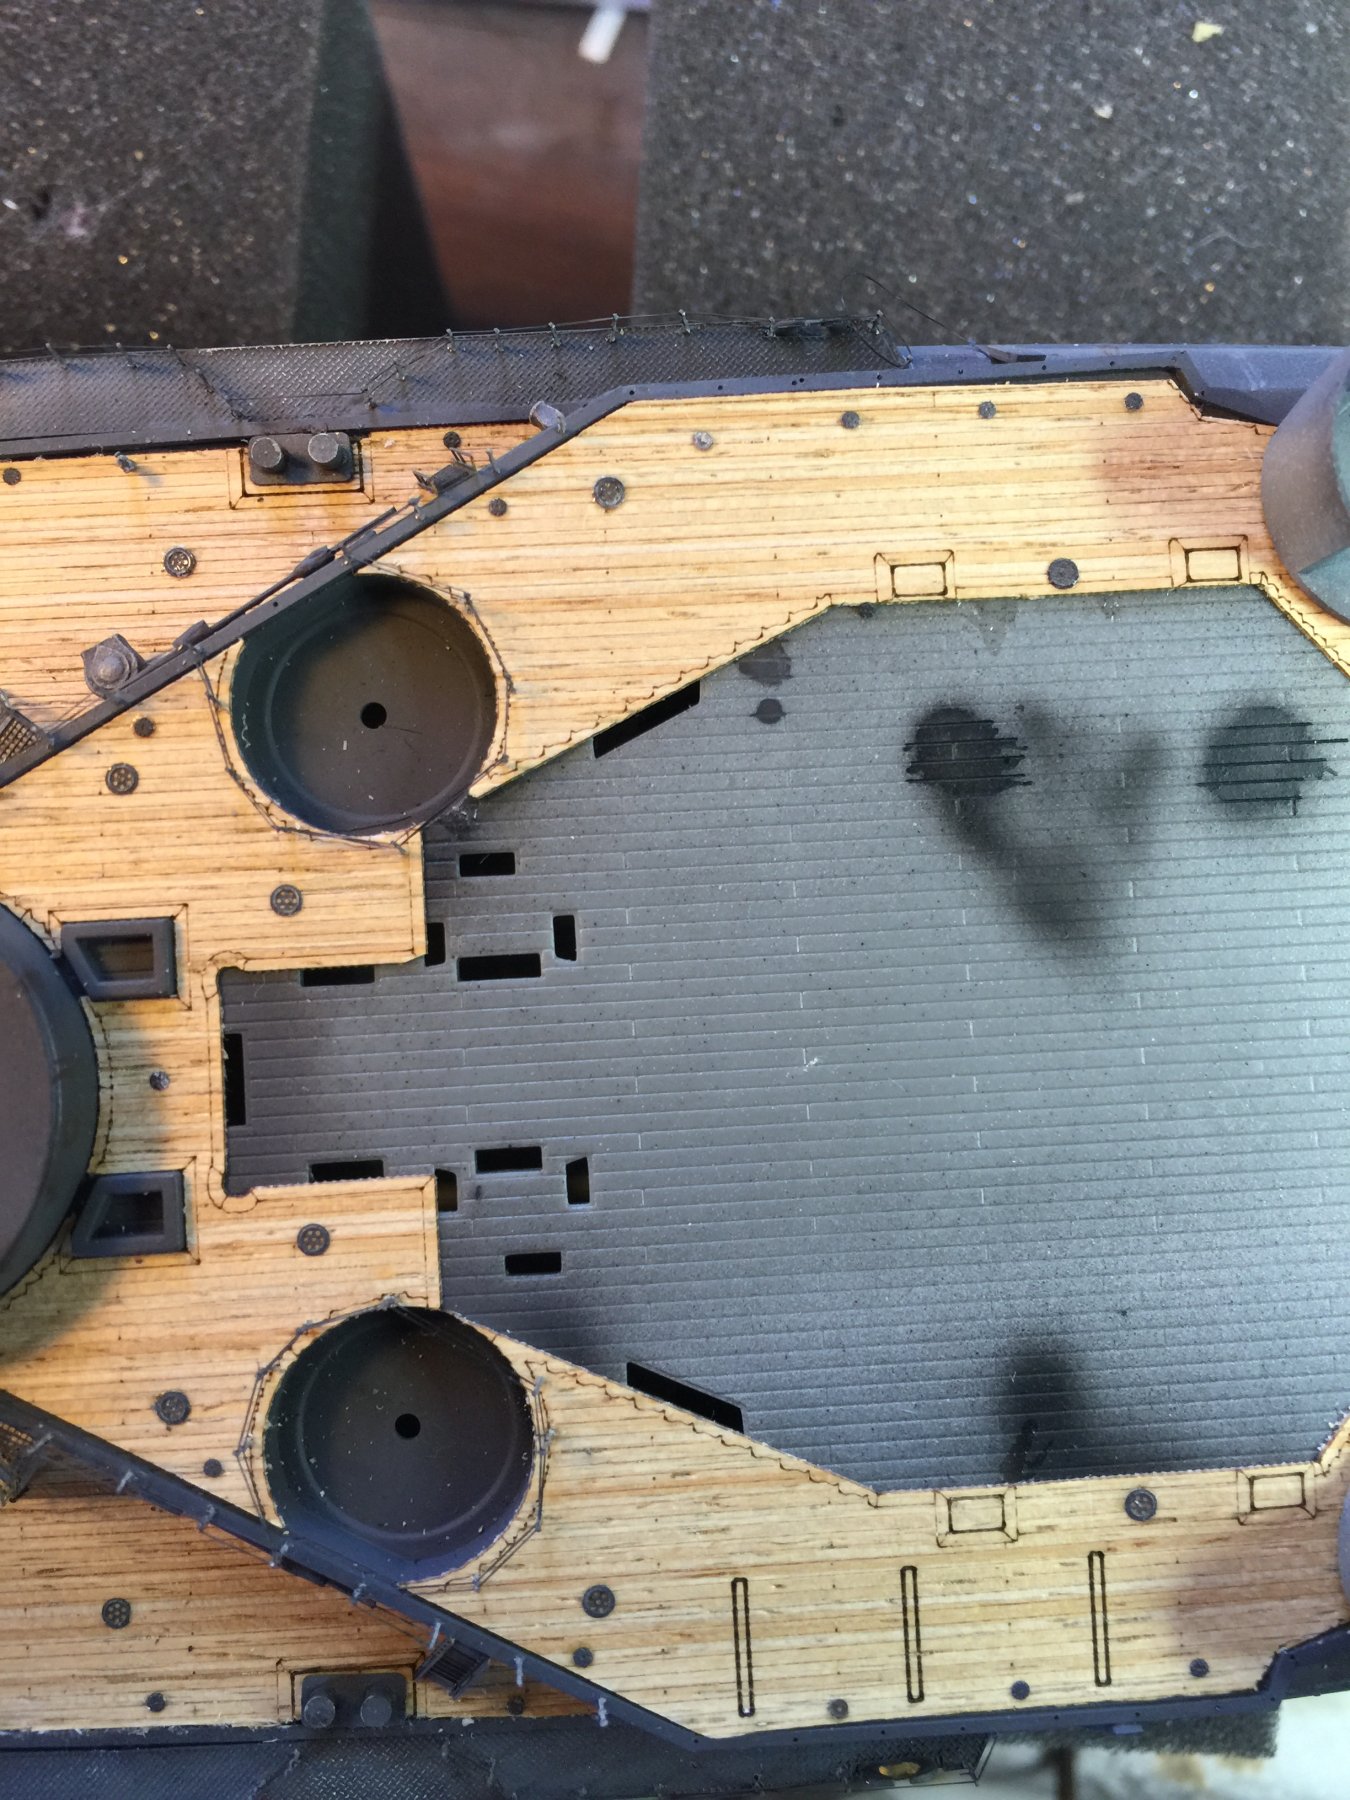
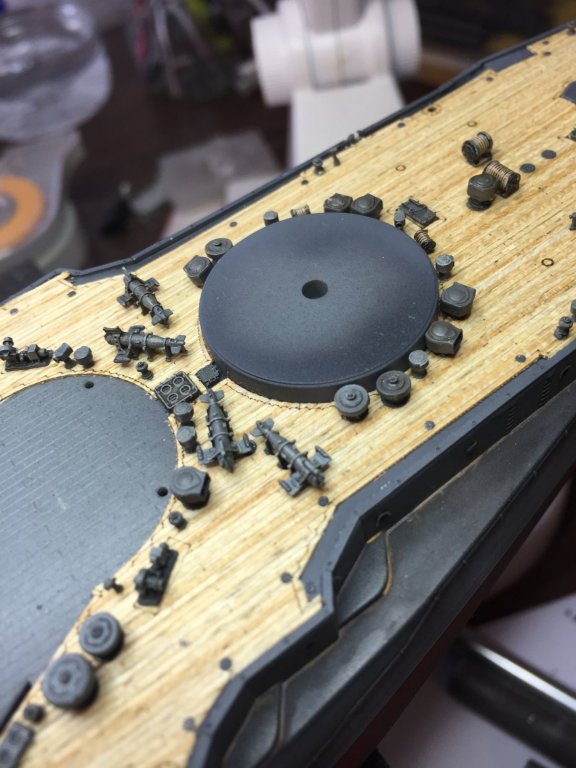
Every reference book has the decks with deck lights and various holes and covers. No kit ever makes reference. Chrysanthemum and Sword actually make them, they're tiny! As I have some I thought I'd use them. They're the tiny dots on the wooden deck.
- 224 replies
-
- 10
-
-
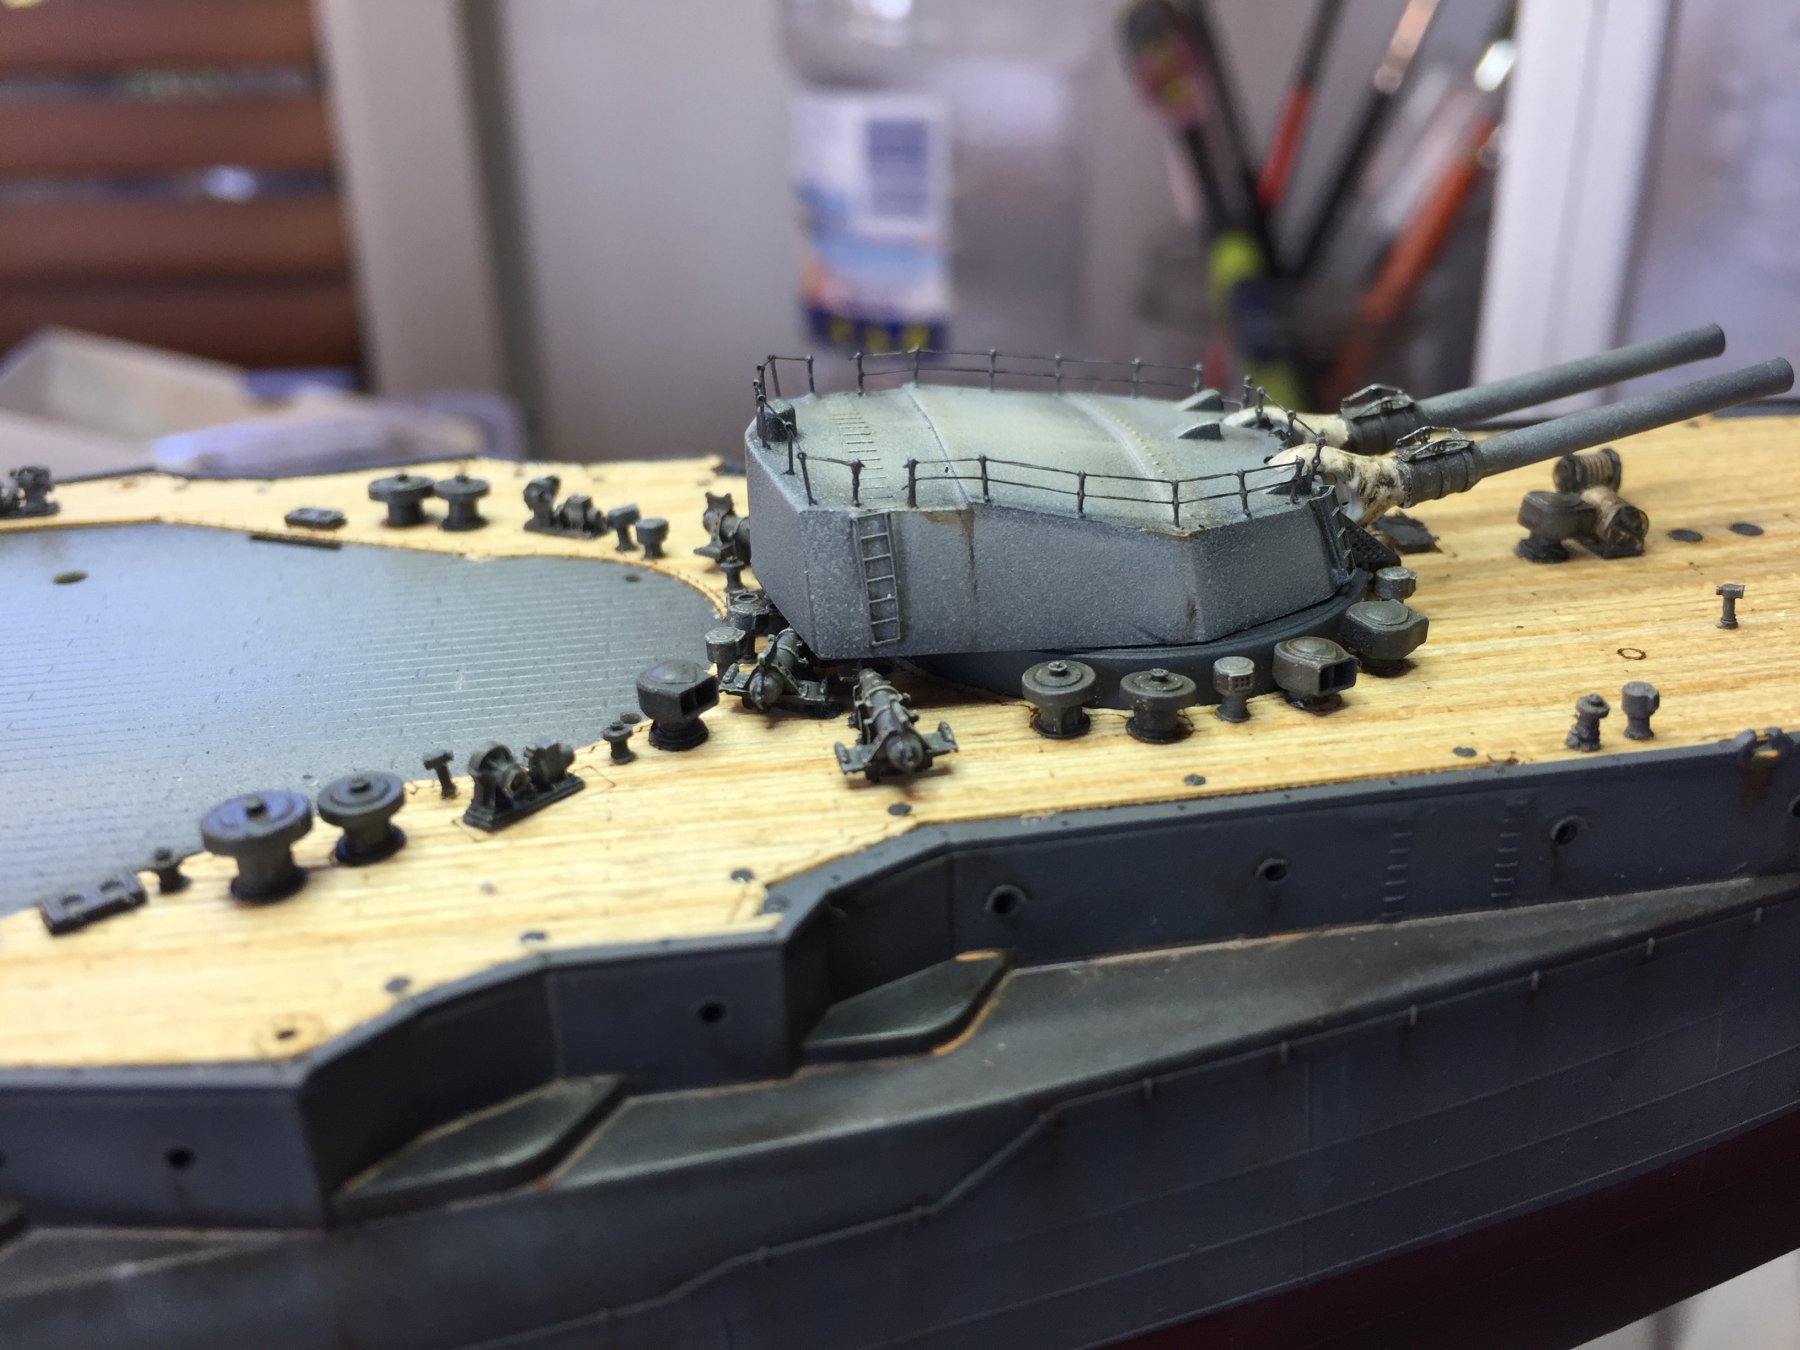
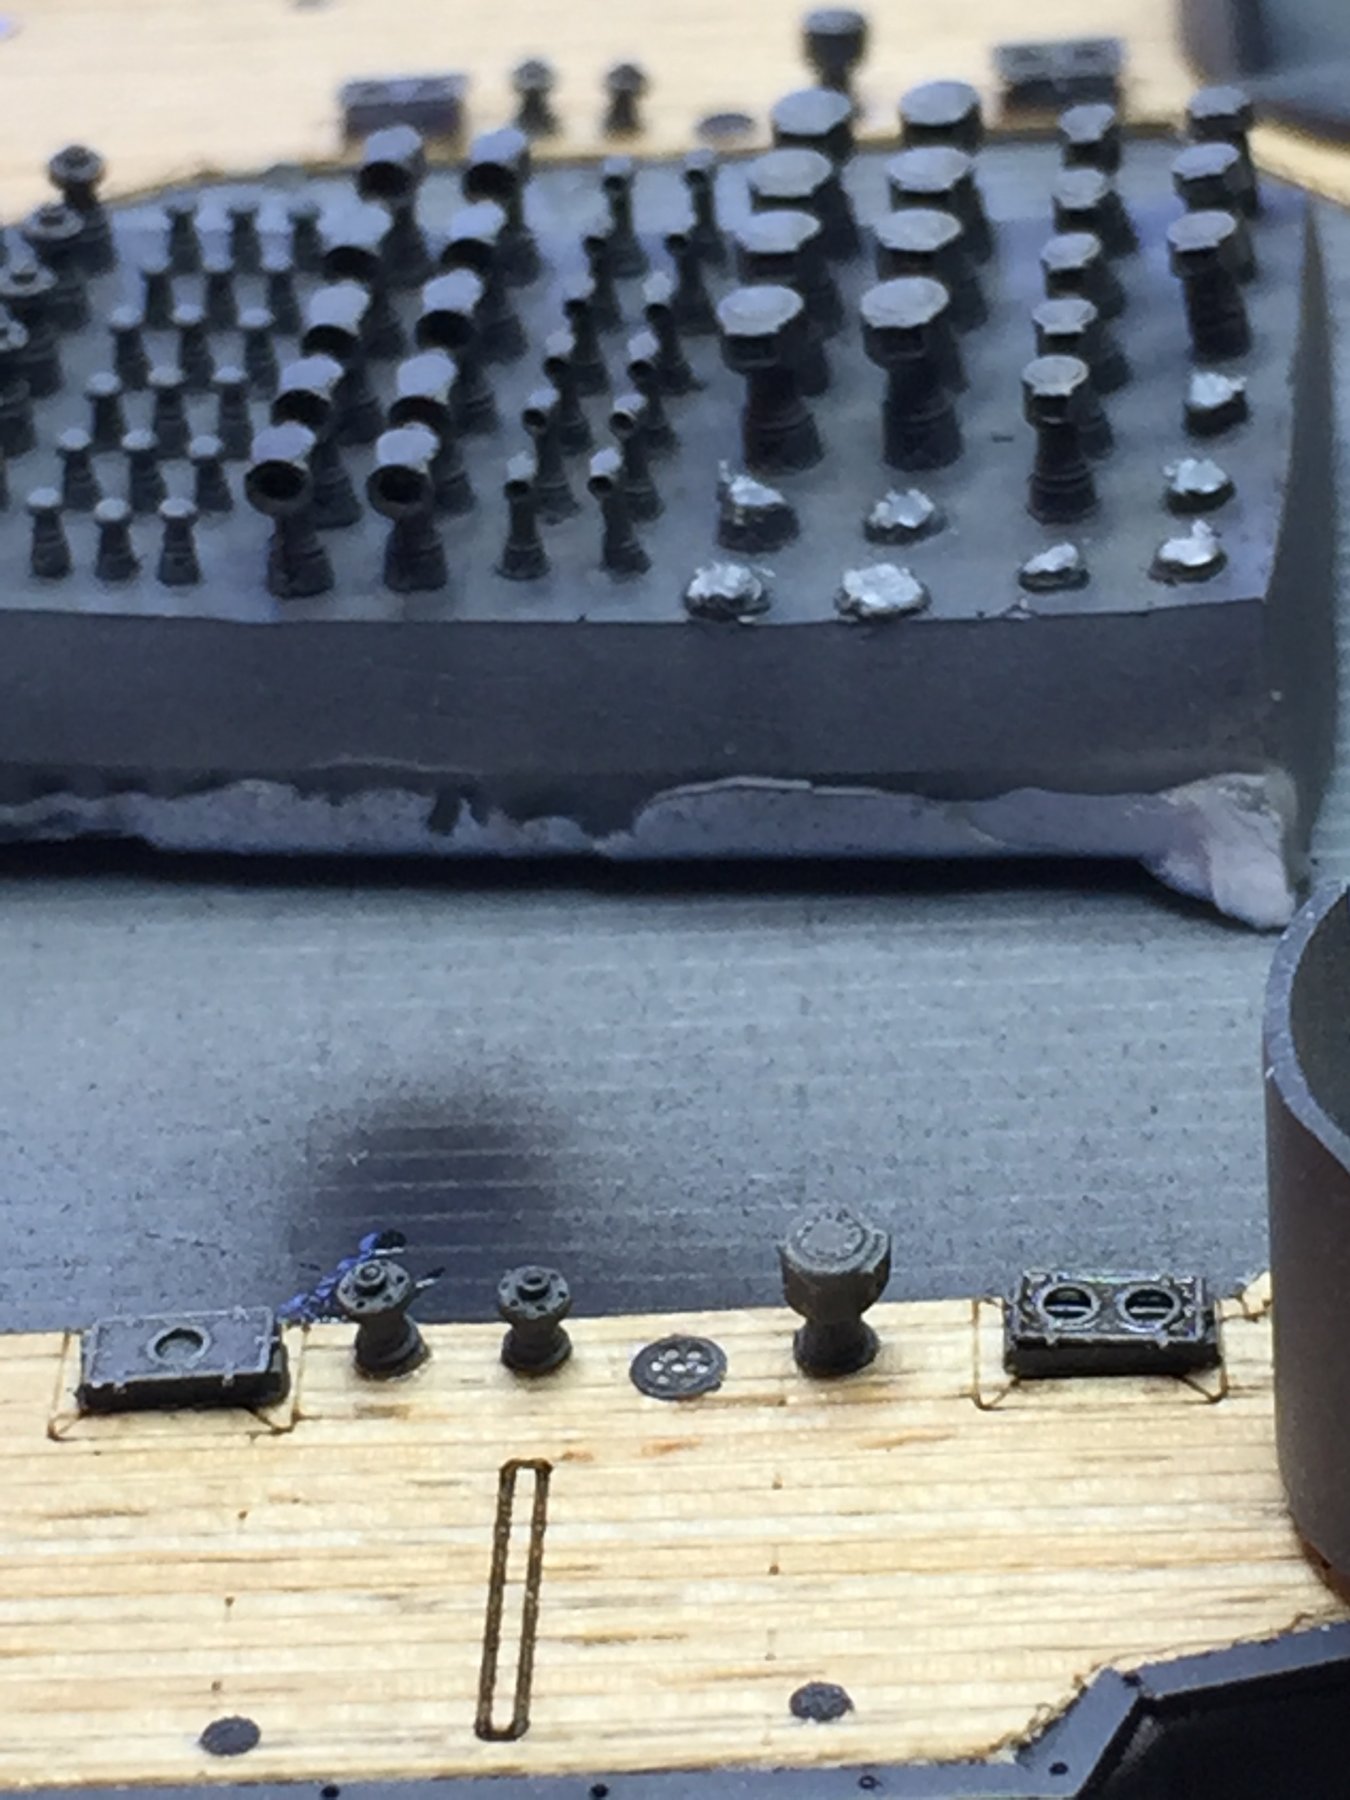
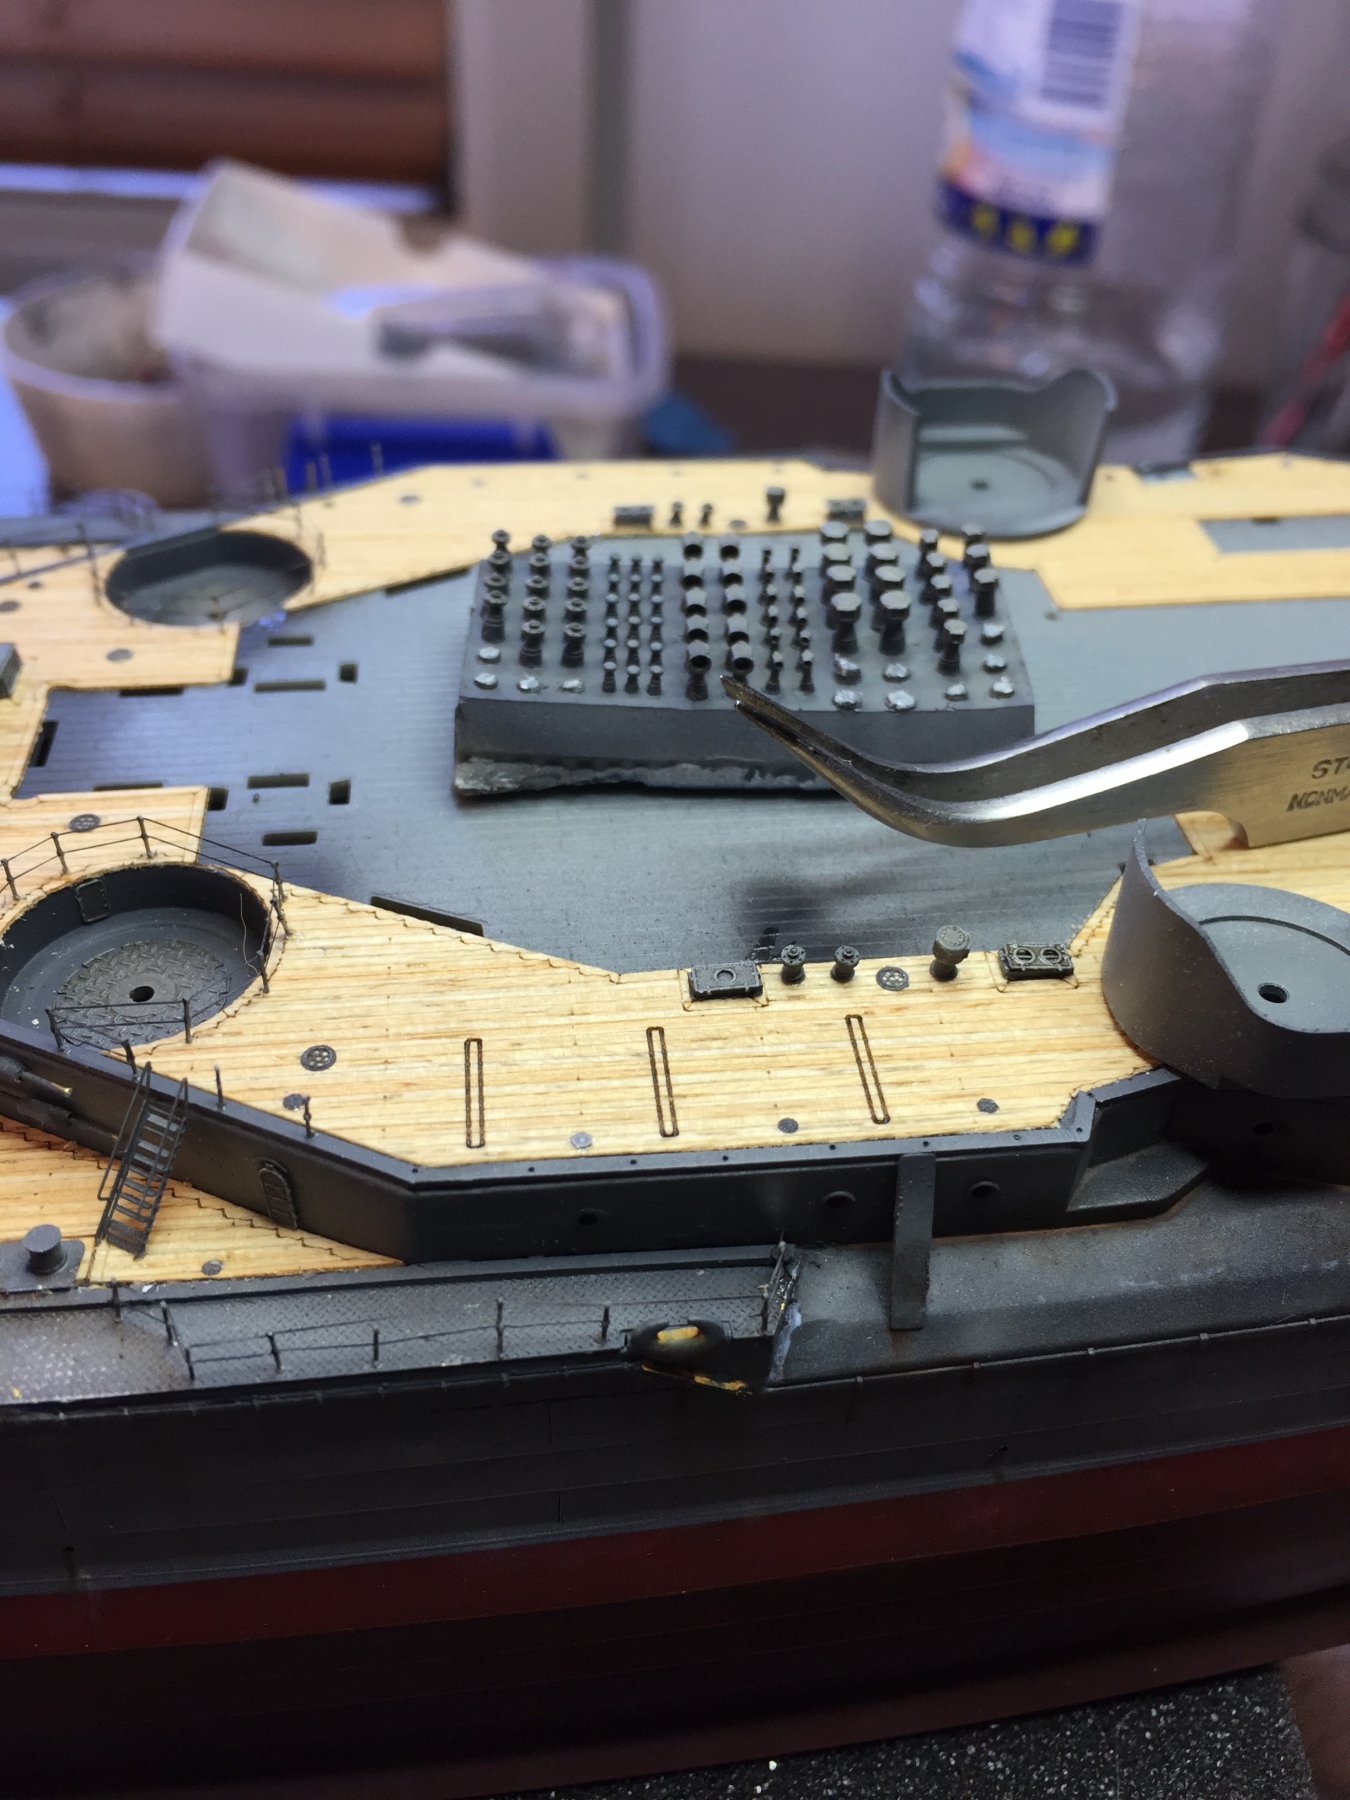
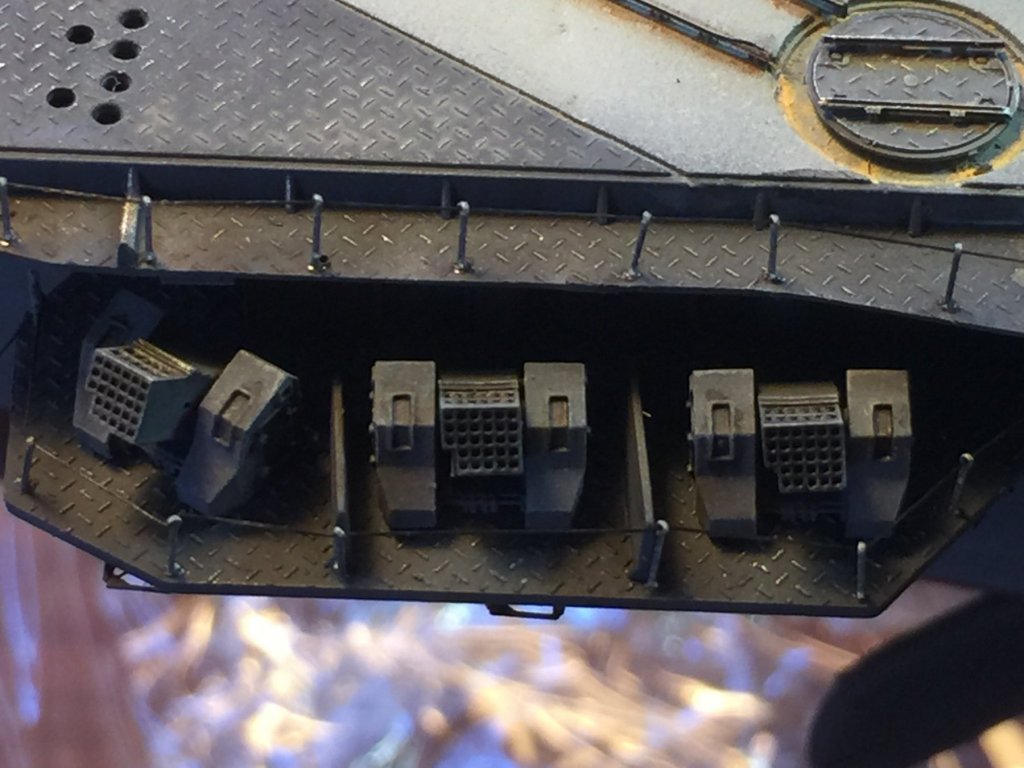
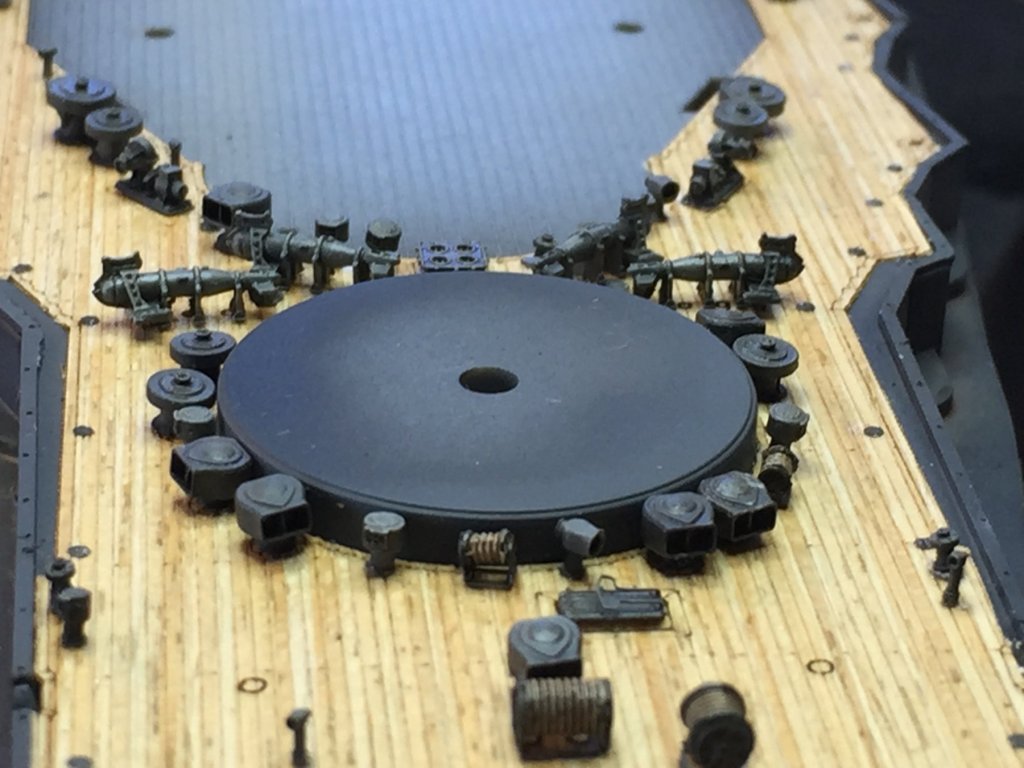
It's training equipment, there is a barrel that sits on top of that and platforms that sit either side, all of which is removed when not in use.