RGL
-
Posts
5,539 -
Joined
-
Last visited
Content Type
Profiles
Forums
Gallery
Events
Everything posted by RGL
-
 I read someone once that it matched sattilite imagery off the Queensland coast it was that good.
- 517 replies
-
- 2
-

-
- Endeavour
- Artesania Latina
- (and 1 more)
-
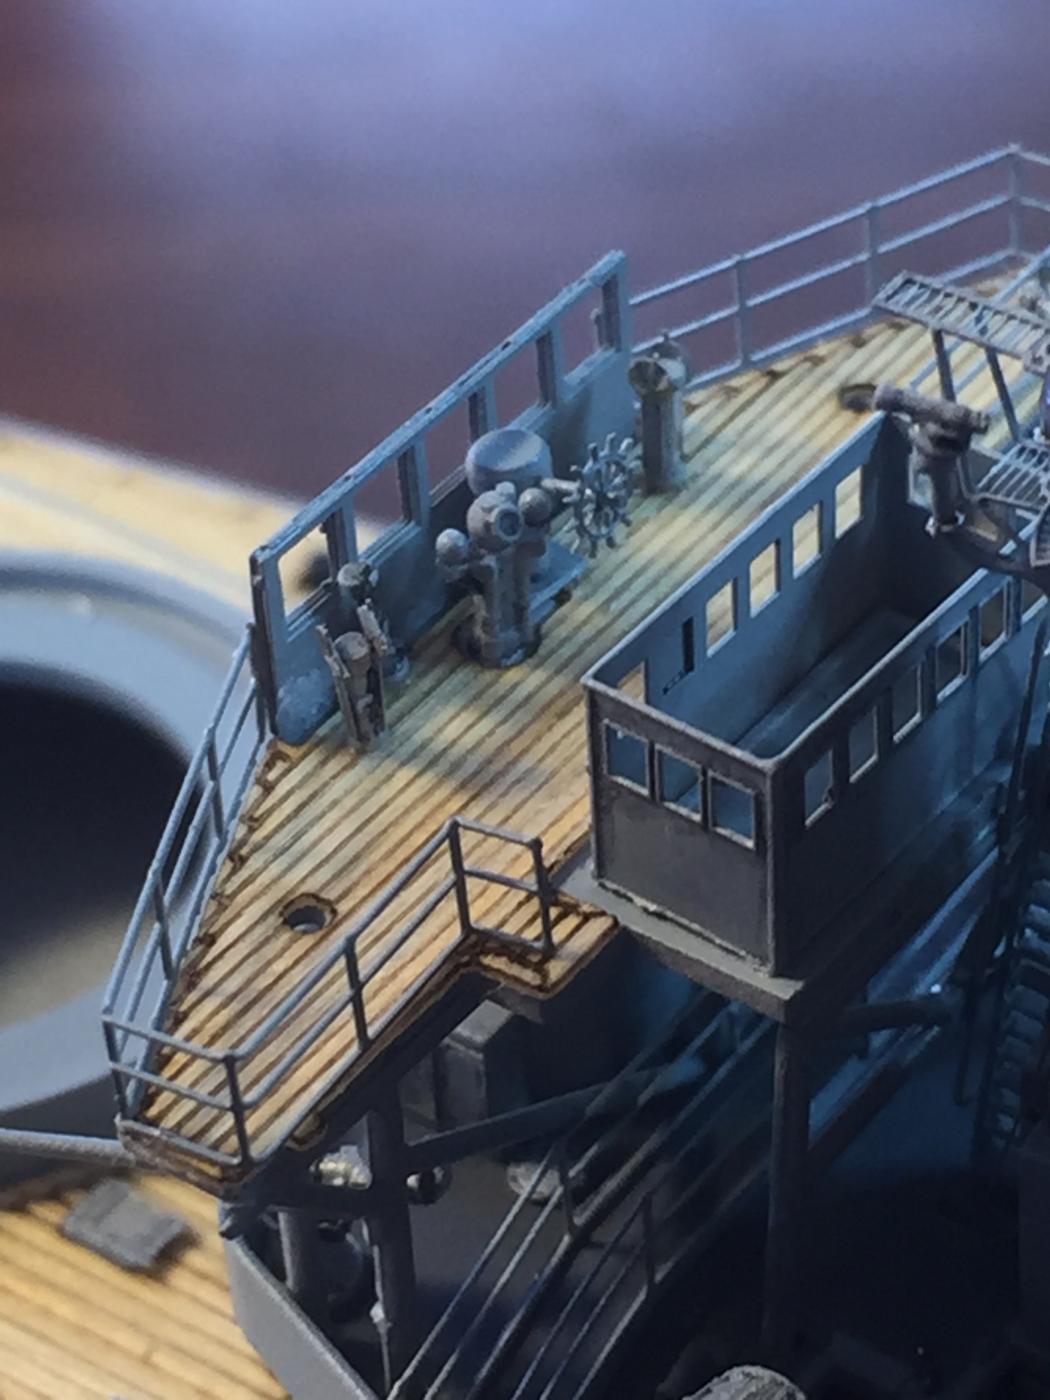
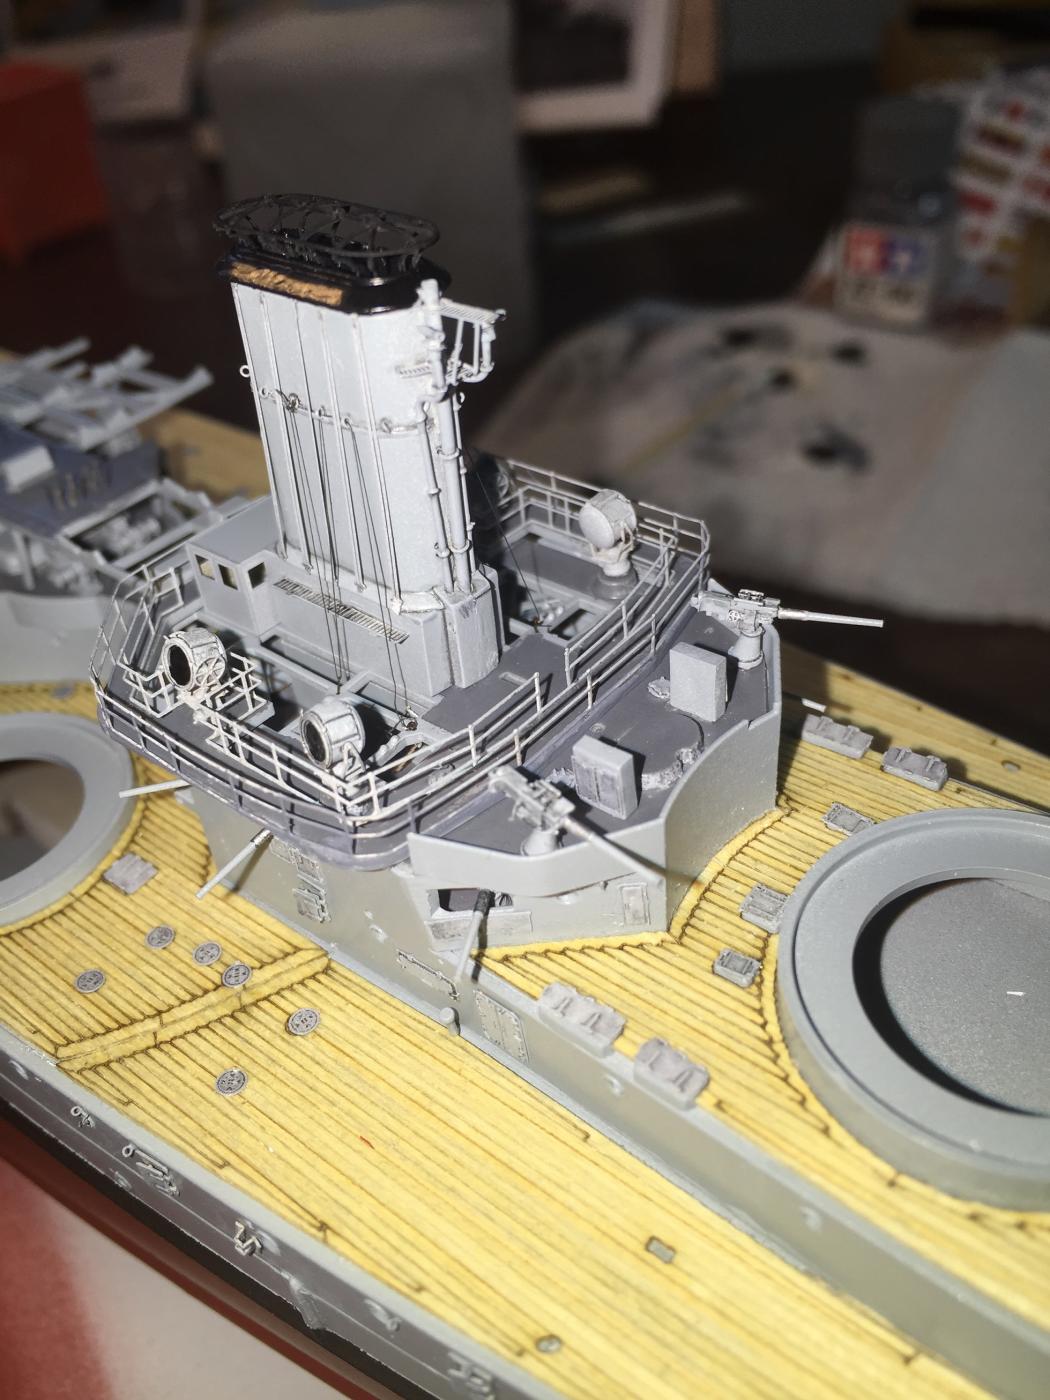
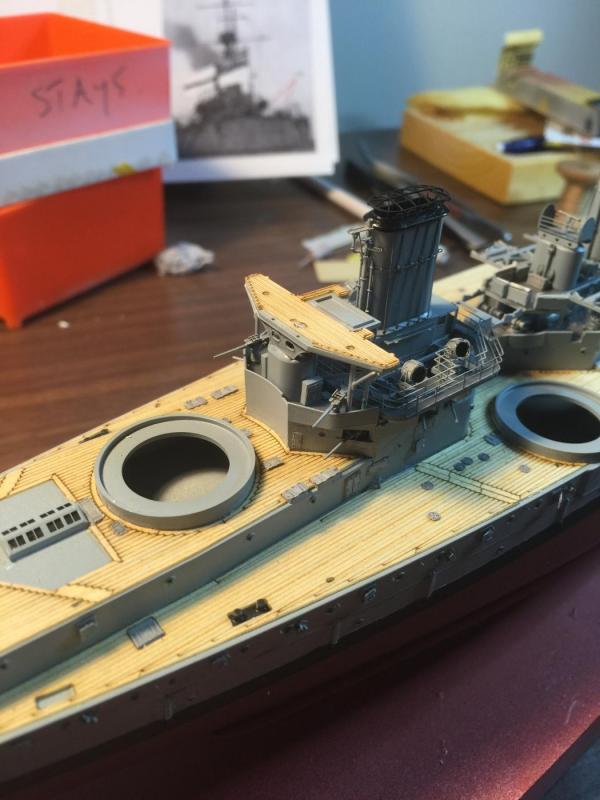
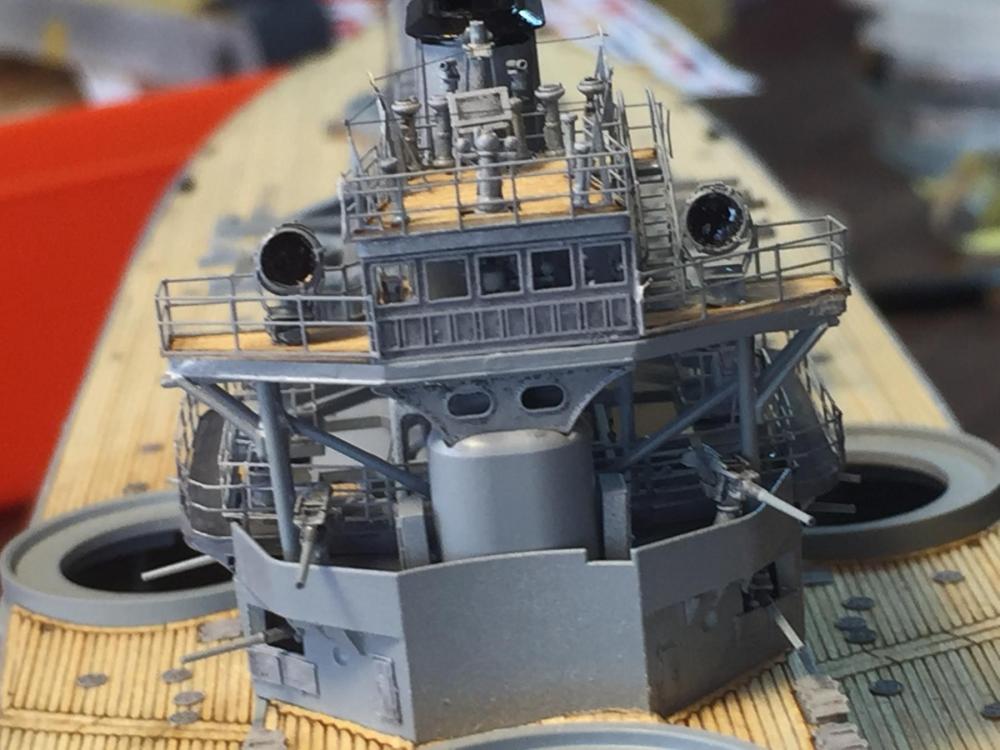
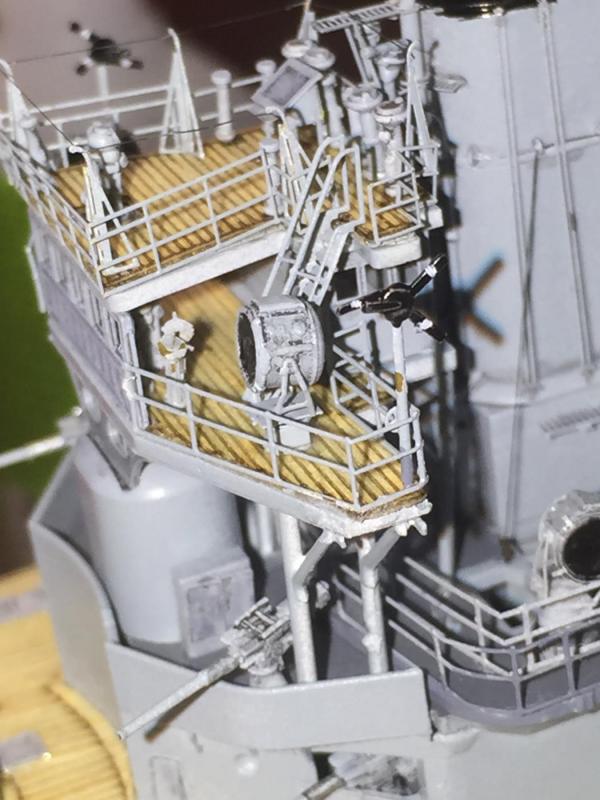
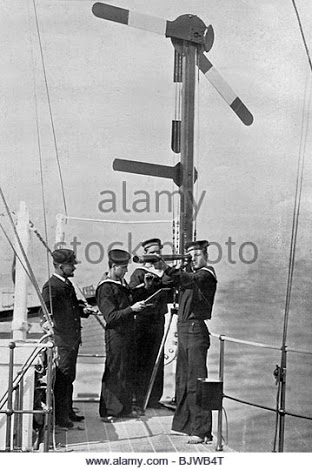
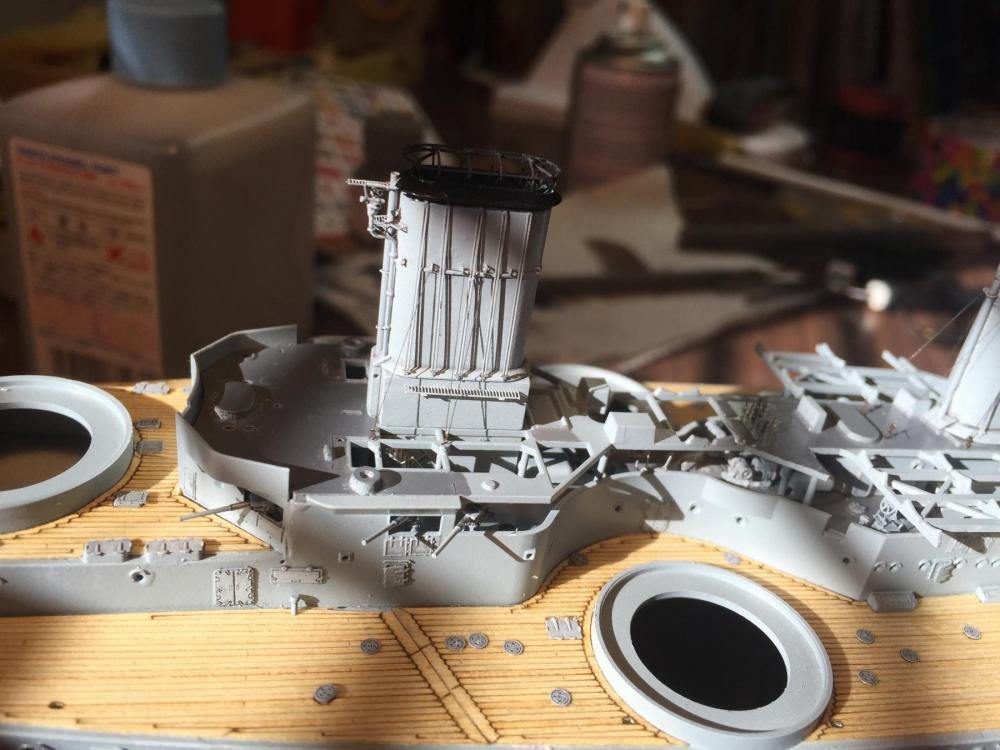
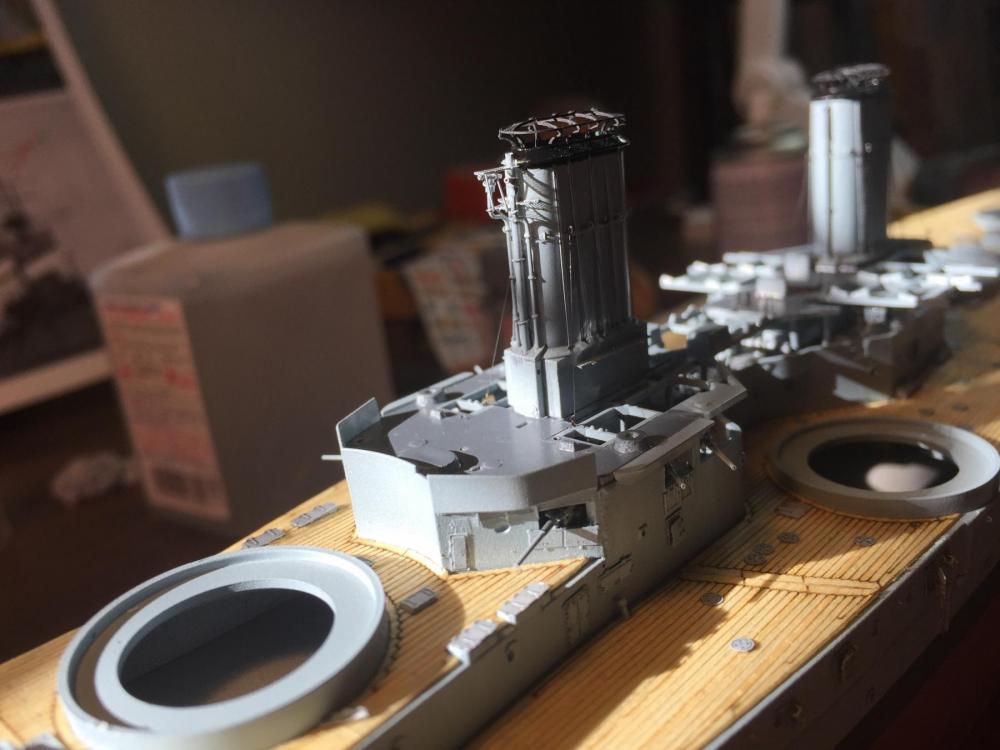
Now, the bridge. I know the photos show some paint missing but I intend to fix it up afterwards. The ships open bridge, I used bits of both Pontos and Flyhawk, plus North Star for the fittings as the resin binnacle and compass directors are second to none. It all went on fairly easily. The Compass platform just plonked on ad the Flyhawk stuff was a much better fit. A final addition was the Sephamores. No one has added these but it is referenced everywhere and a little bit of scratch building. And finally for scale, you cannot drink coffee when doing this.


- 342 replies
-
- 17
-
-
- dreadnought
- zvezda
- (and 2 more)
-
Thanks for the likes and comments. All the pre fab done for the bridgework but now work is in the road again.
- 342 replies
-
- 6
-
-
- dreadnought
- zvezda
- (and 2 more)
-
It's all a bit of a binge, lots of tiny part work, then throwing it all on.
- 342 replies
-
- 7
-
-
- dreadnought
- zvezda
- (and 2 more)
-
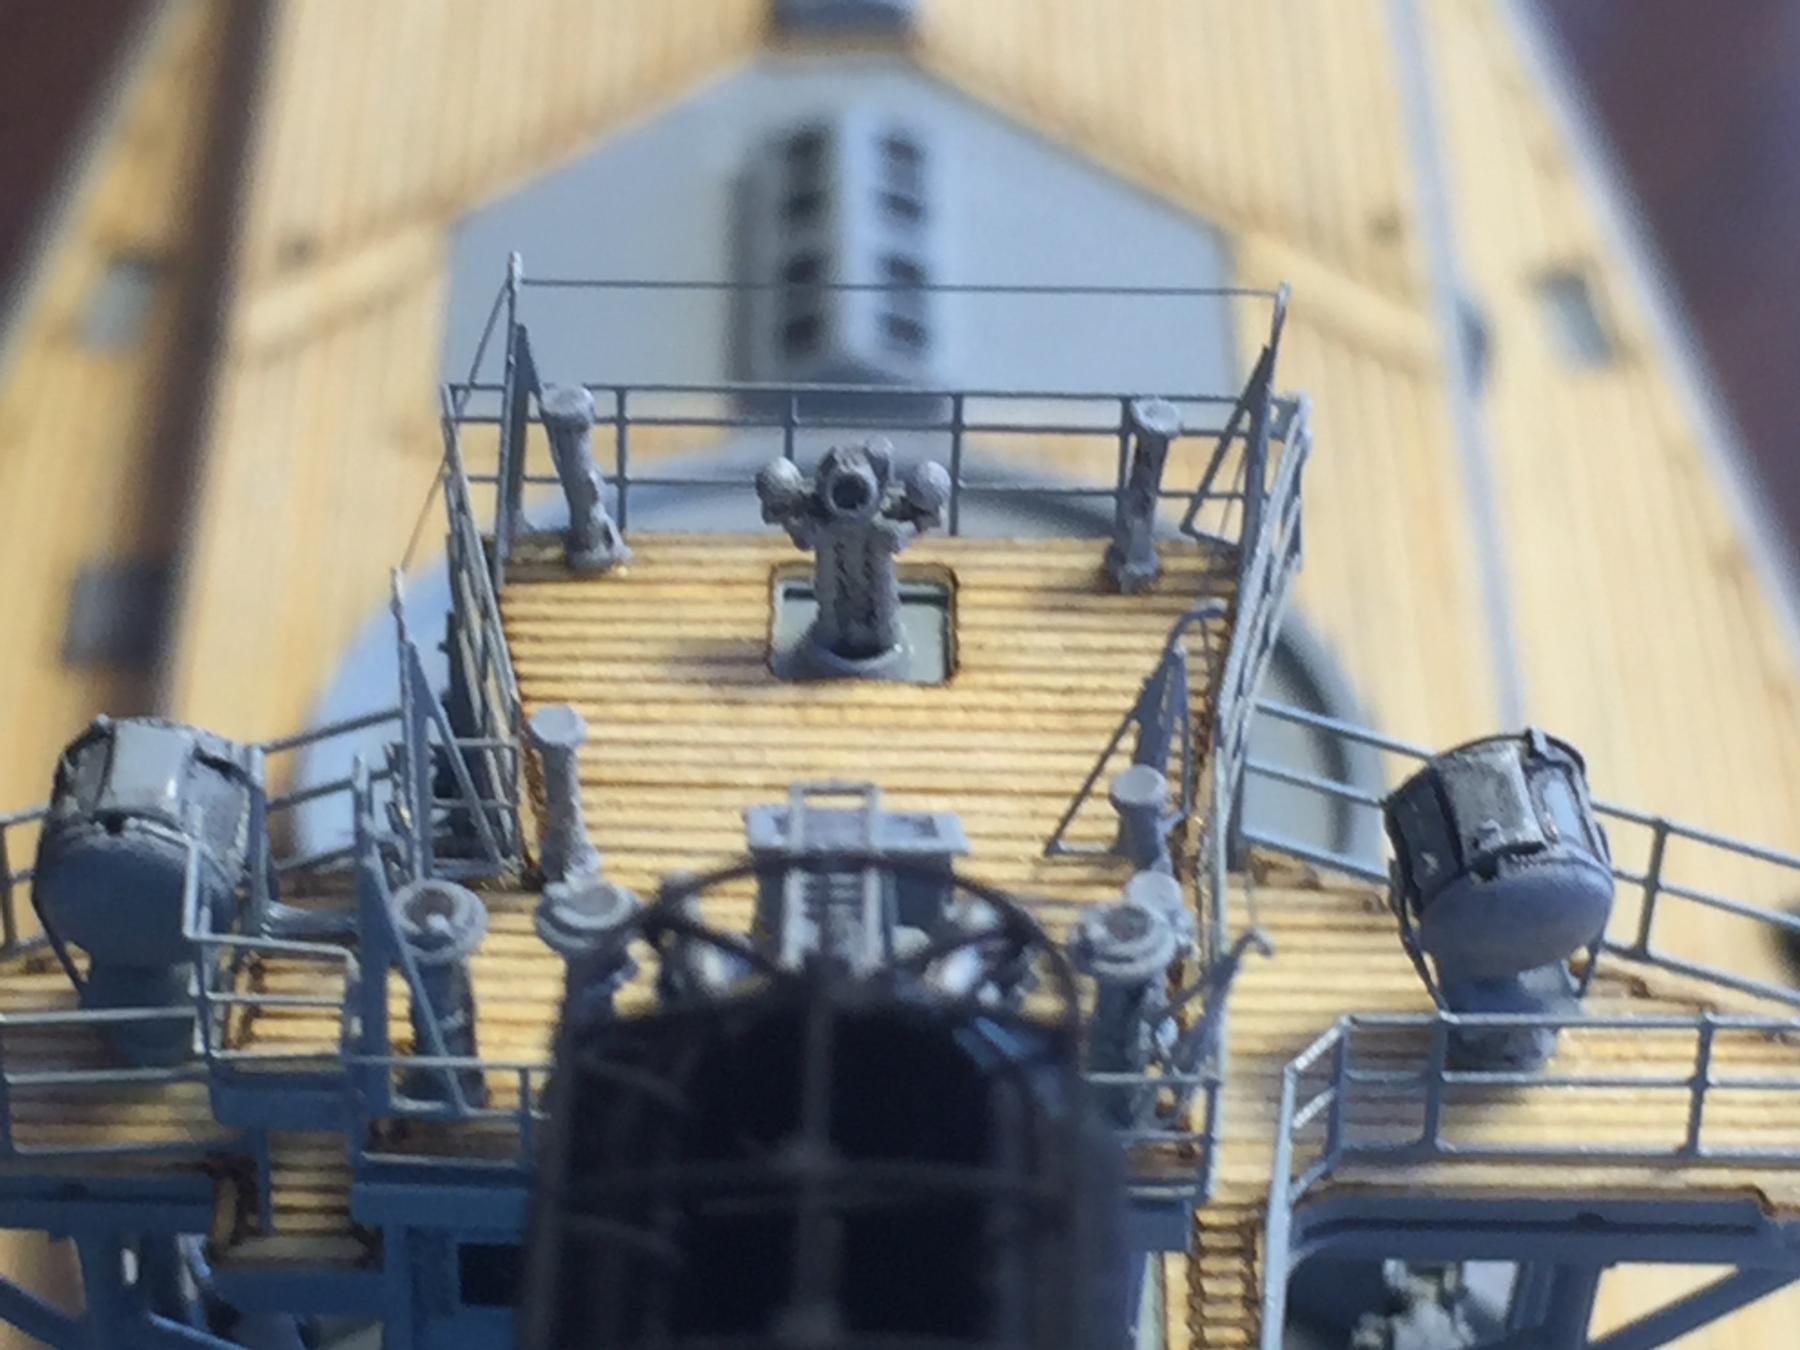
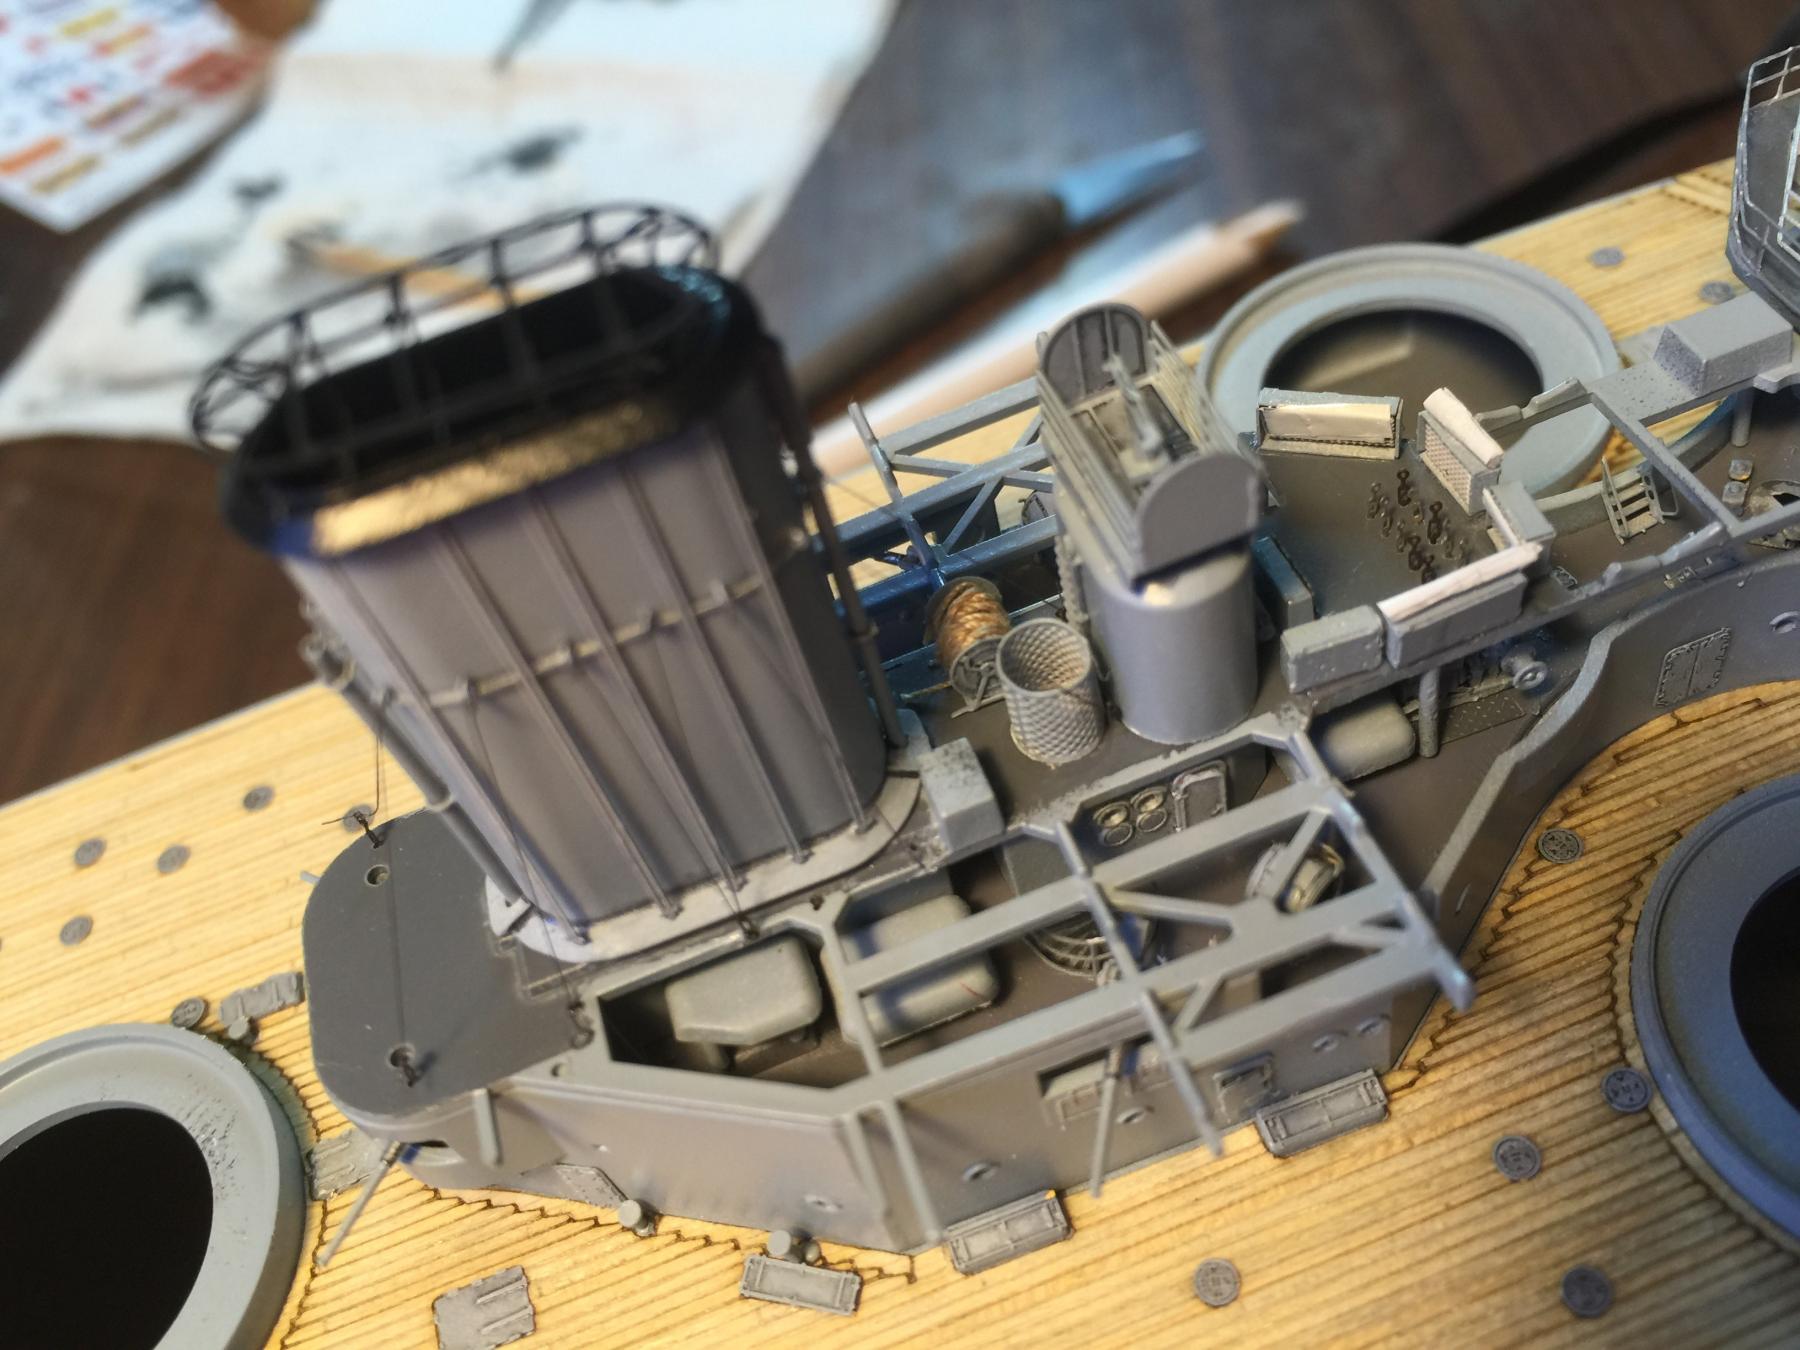
Next is the range finder, spare anchor and screen to the W/T and hawser reel. The spare anchor is after market, and I need to find and add another anchor yet to go near the stern searchlights.. Finally the stern rail and search lights. and the final product. Next will be the bridge.


- 342 replies
-
- 20
-
-
- dreadnought
- zvezda
- (and 2 more)
-
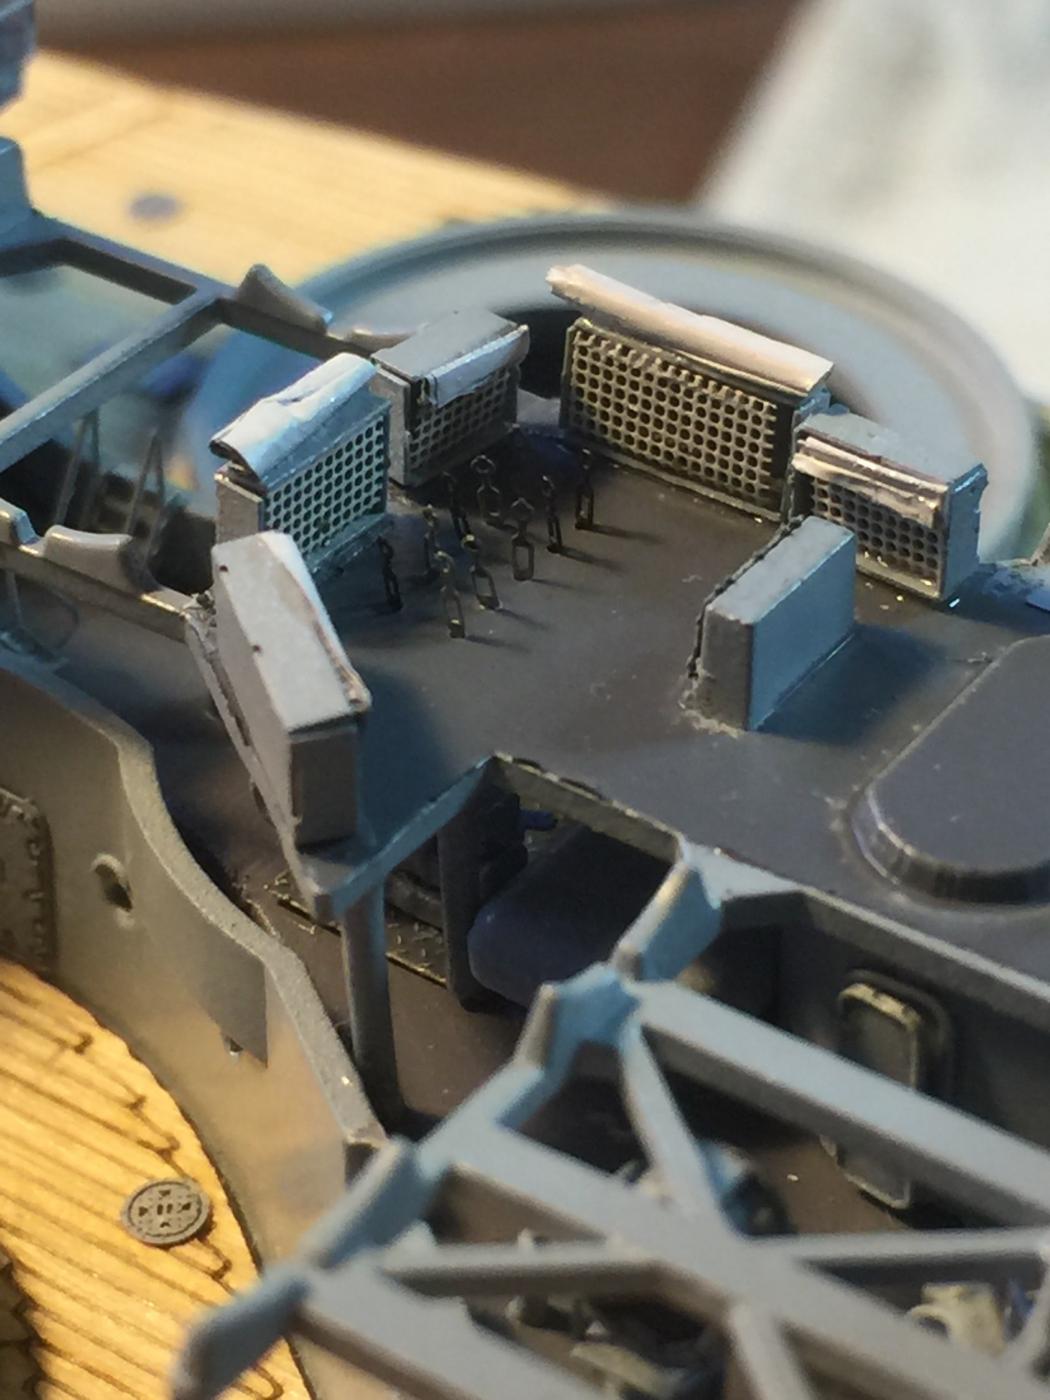
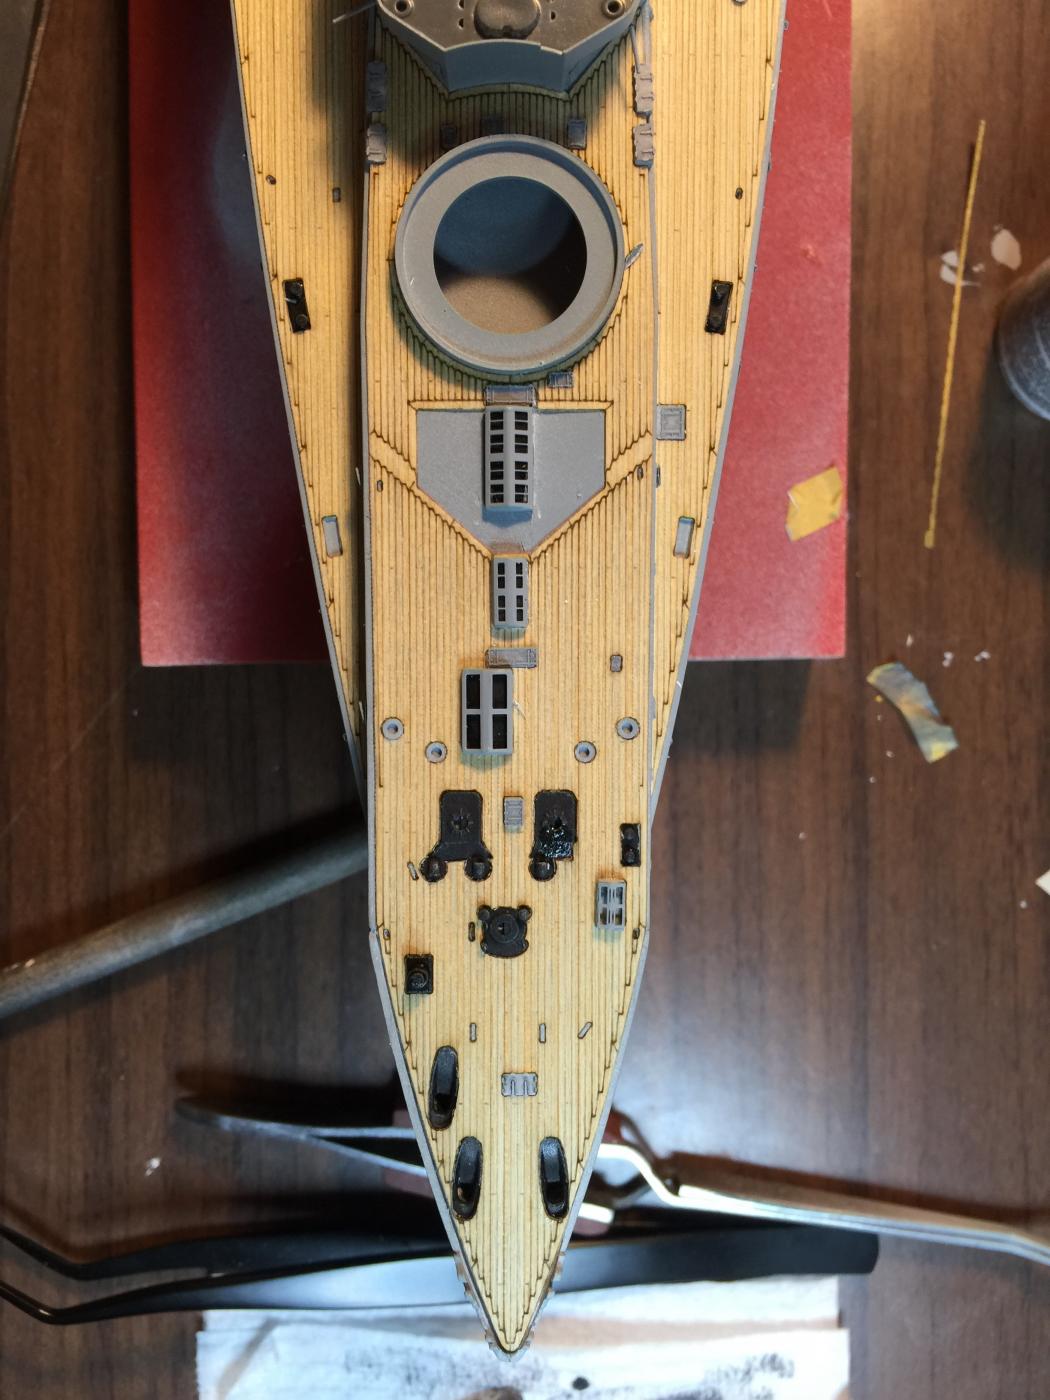
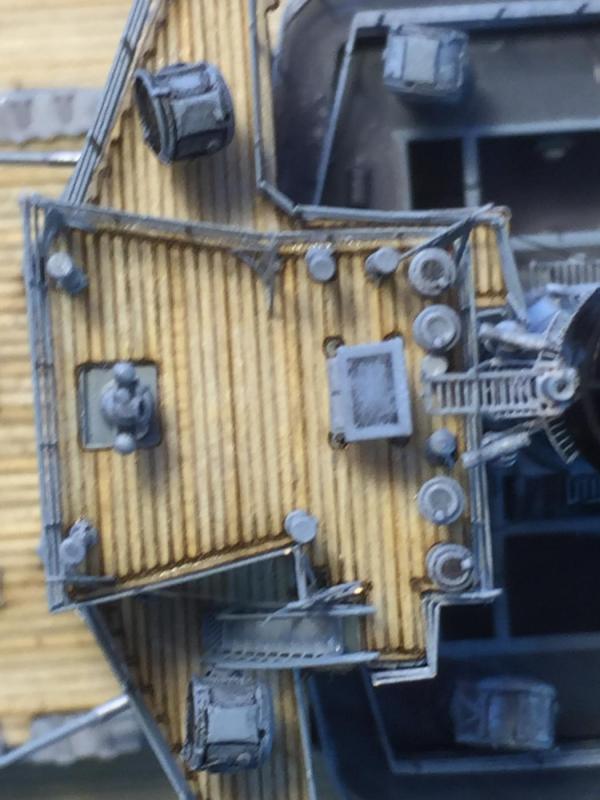
Next, the flag lockers. Pontos does not address these at all, but Flyhawk supplies 5 open boxes. A few open source photos from the net show the details.. I considered getting individual cotton threads of different colours to represent the flags, but it would be just a bit too much. I used WEM grills cut and folded into the open boxes and some painted foils to represent the covers. I already added several belaying points for when I rig her out for flag halyards.

- 342 replies
-
- 18
-
-
- dreadnought
- zvezda
- (and 2 more)
-
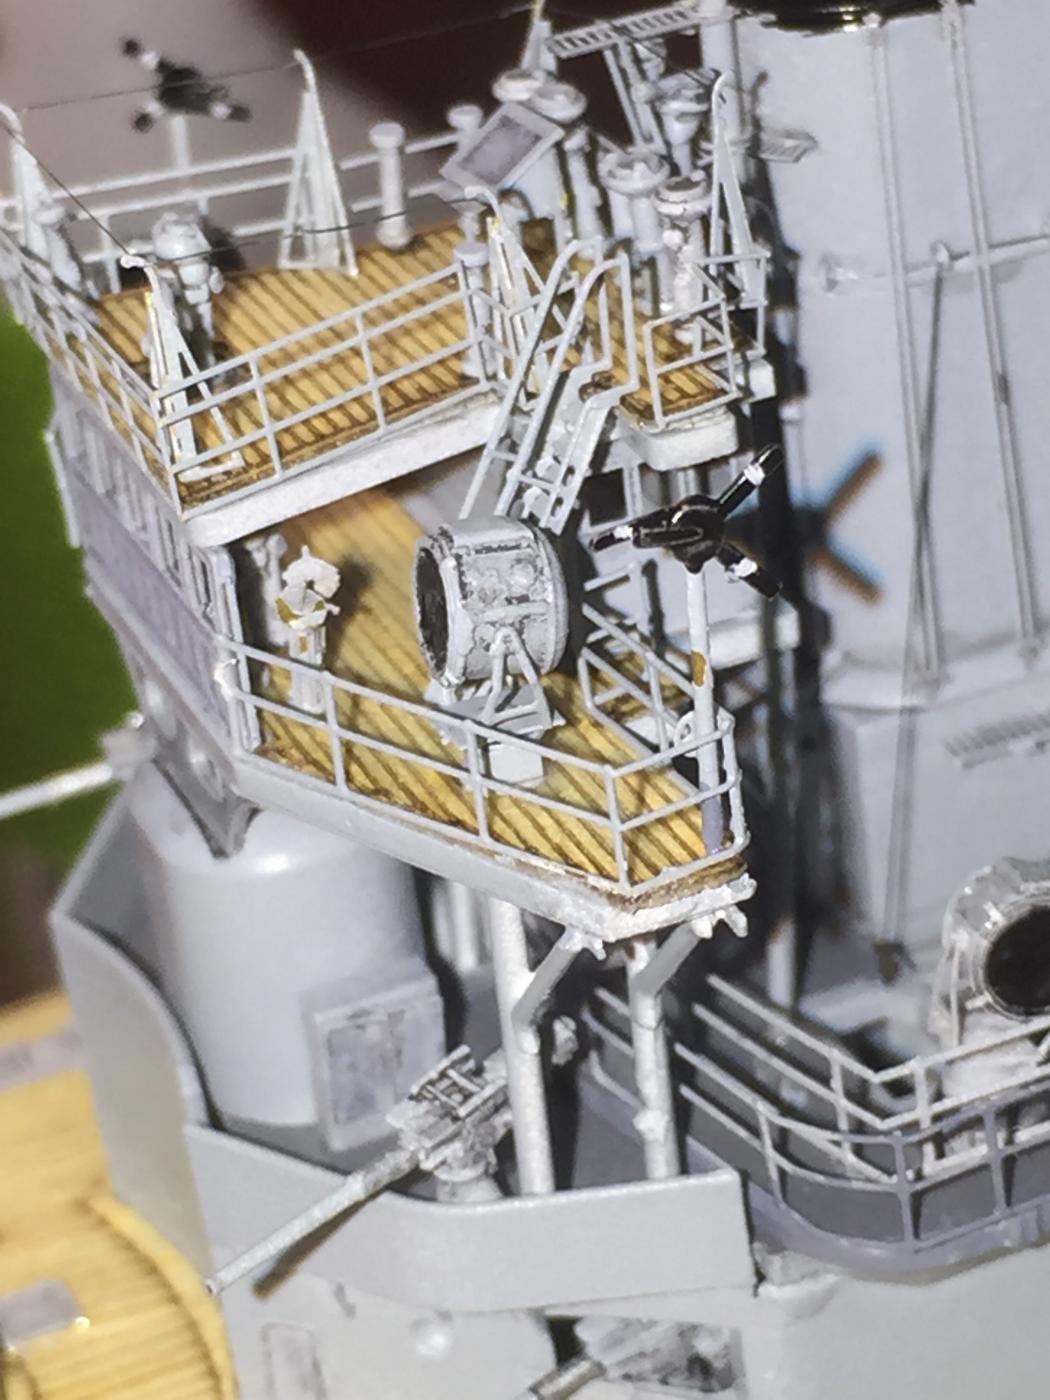
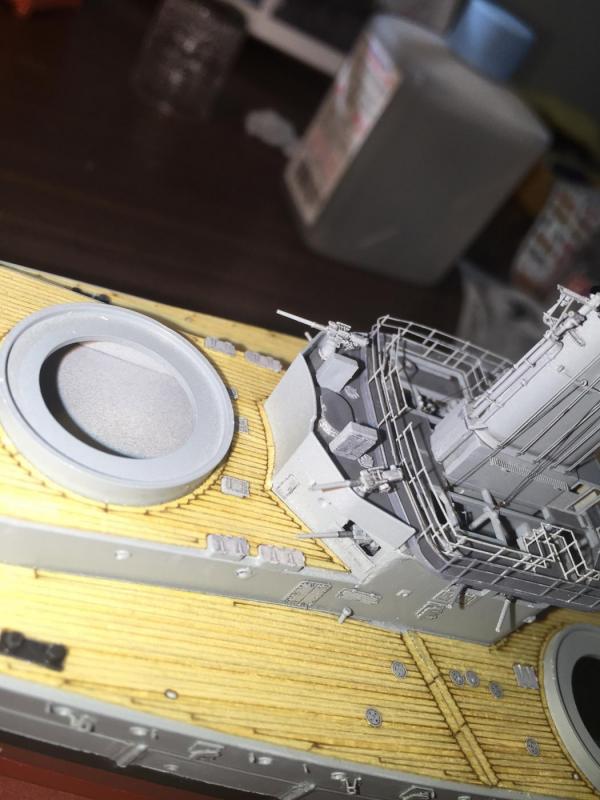
Next is the fore 12 pdrs, search light screen covers and ammunition hand up hatches. Then the 4 search lights on the Admiral's walk. 2 are electronically controlled and 2 are manual, so I placed flywheels on the manual ones.

- 342 replies
-
- 18
-
-
- dreadnought
- zvezda
- (and 2 more)
-
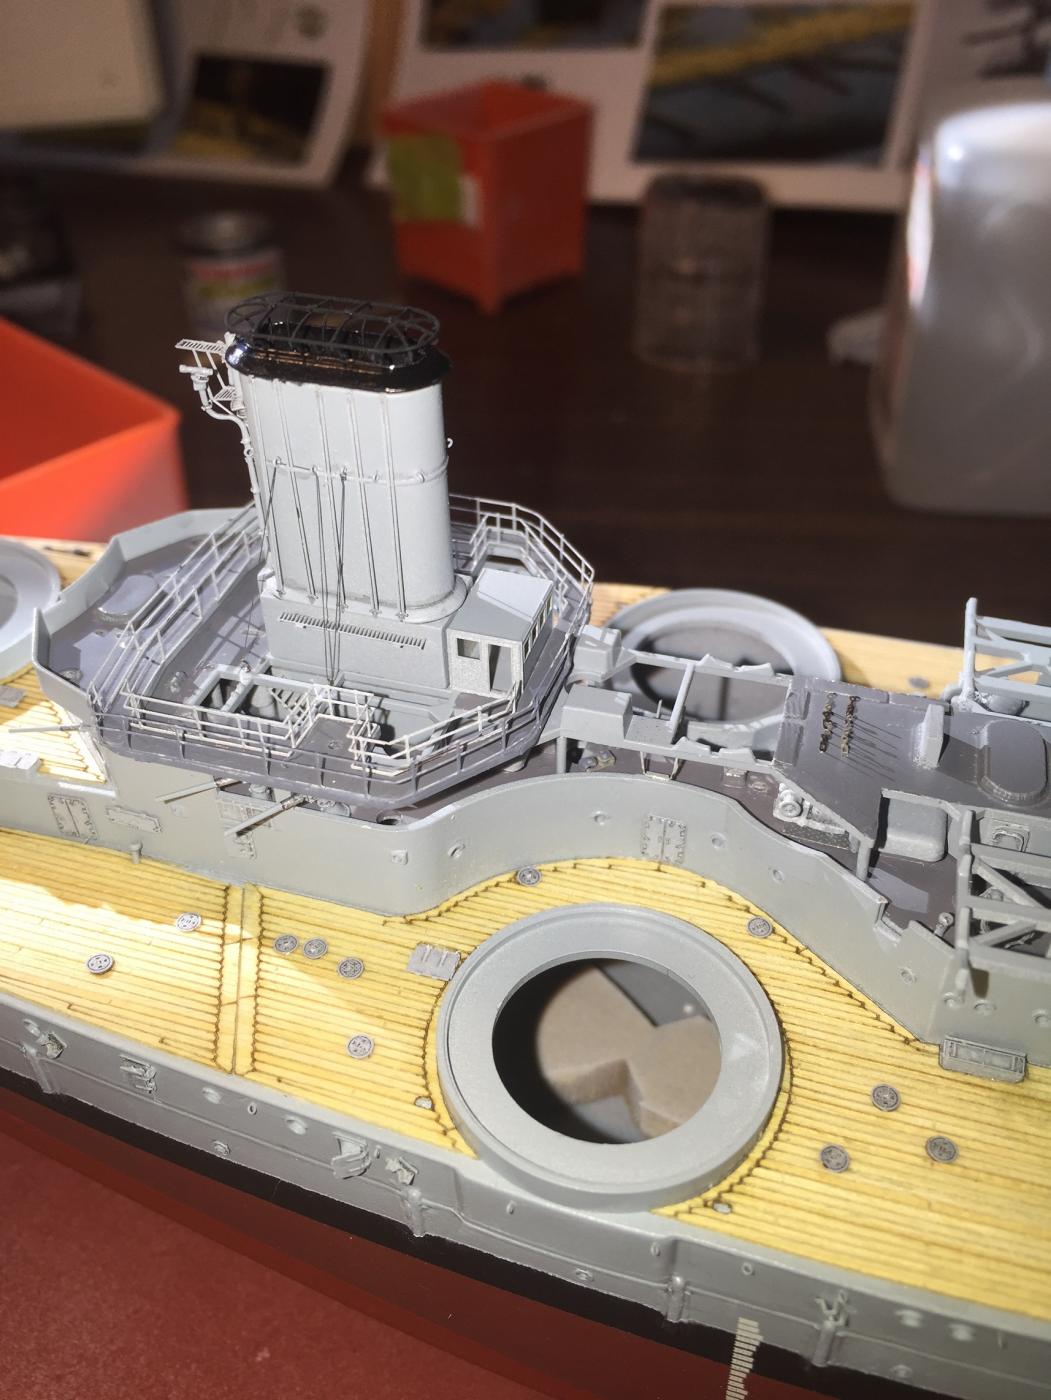
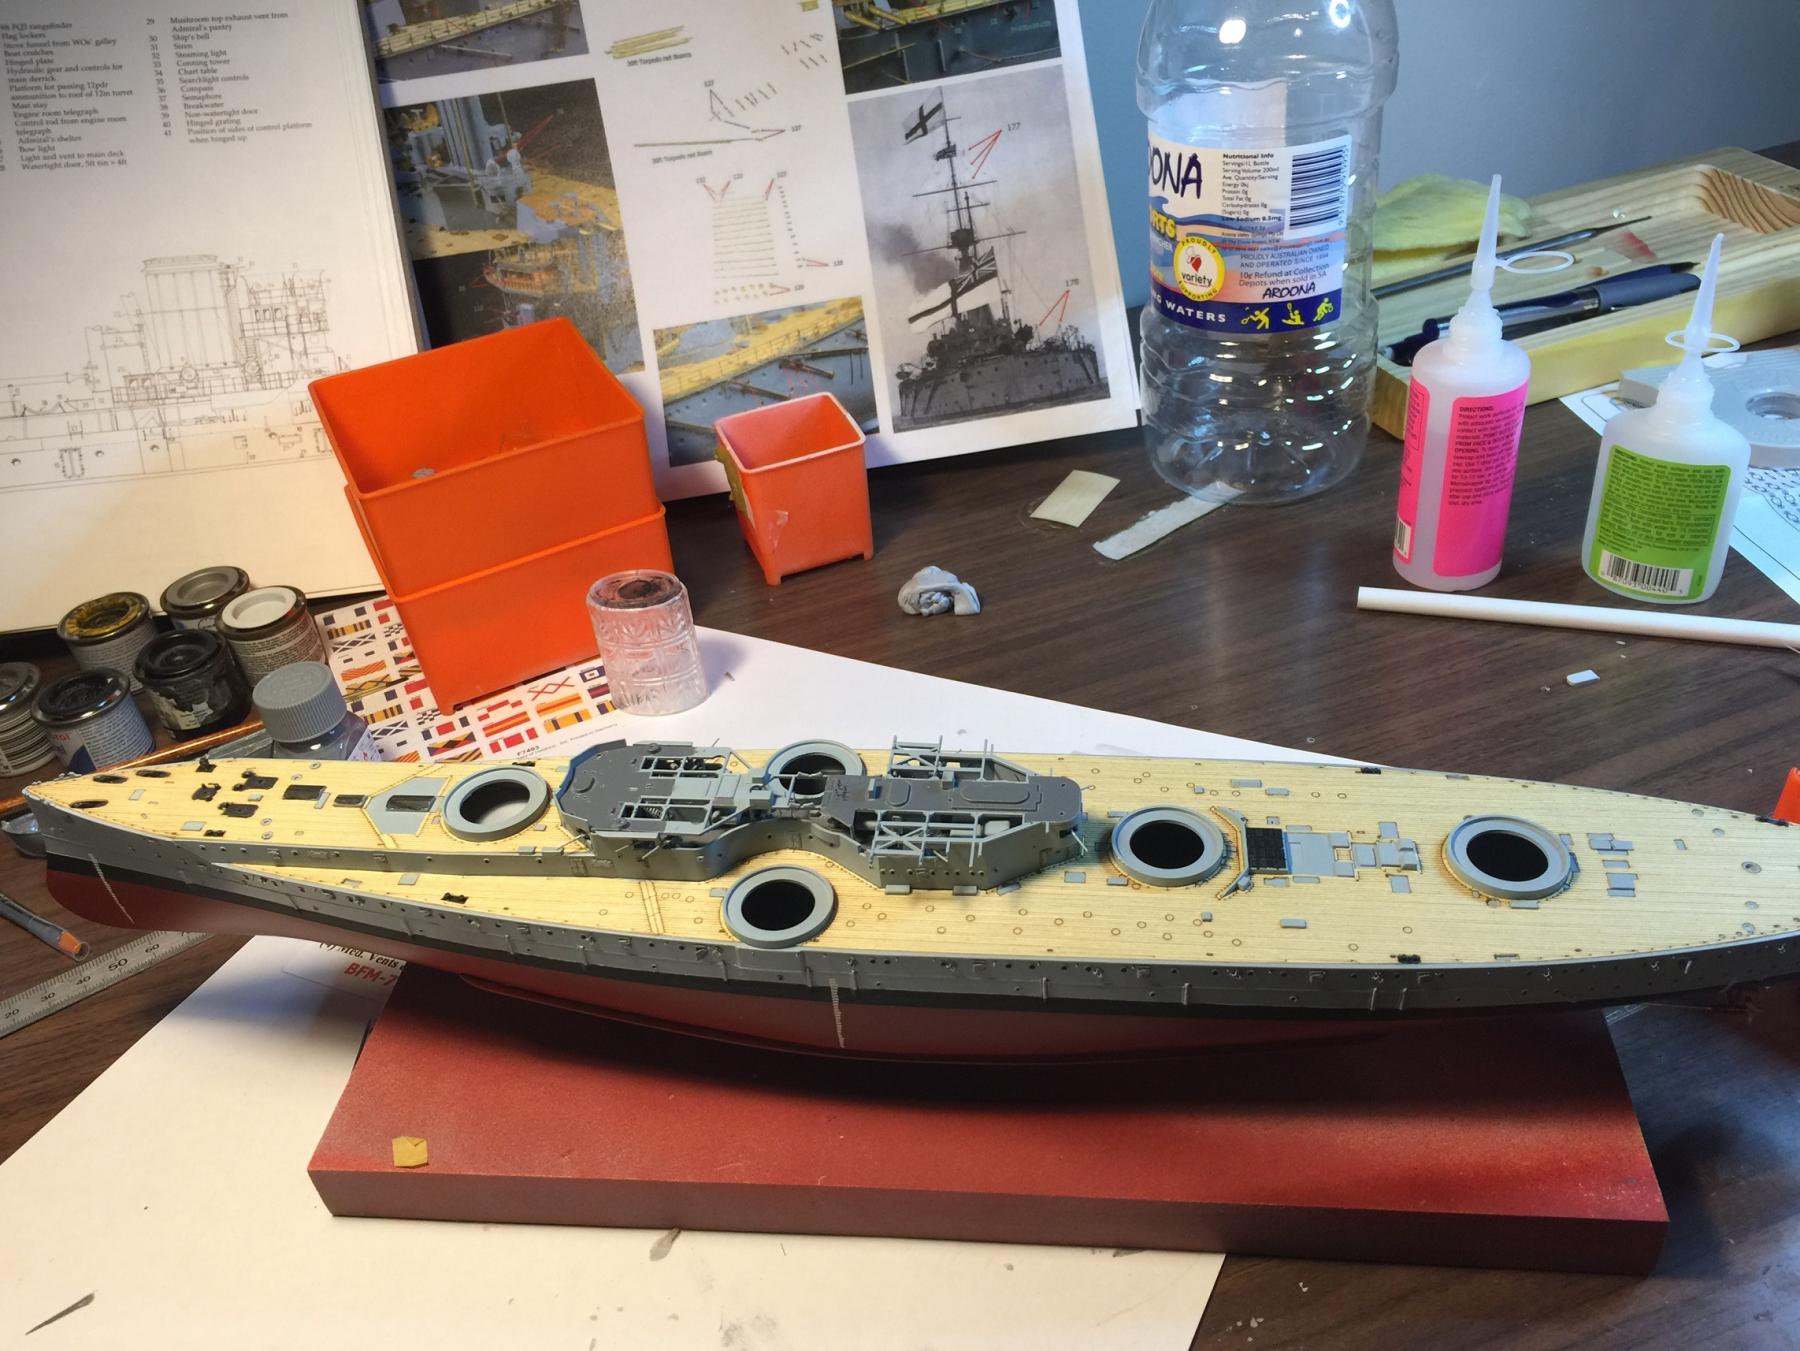
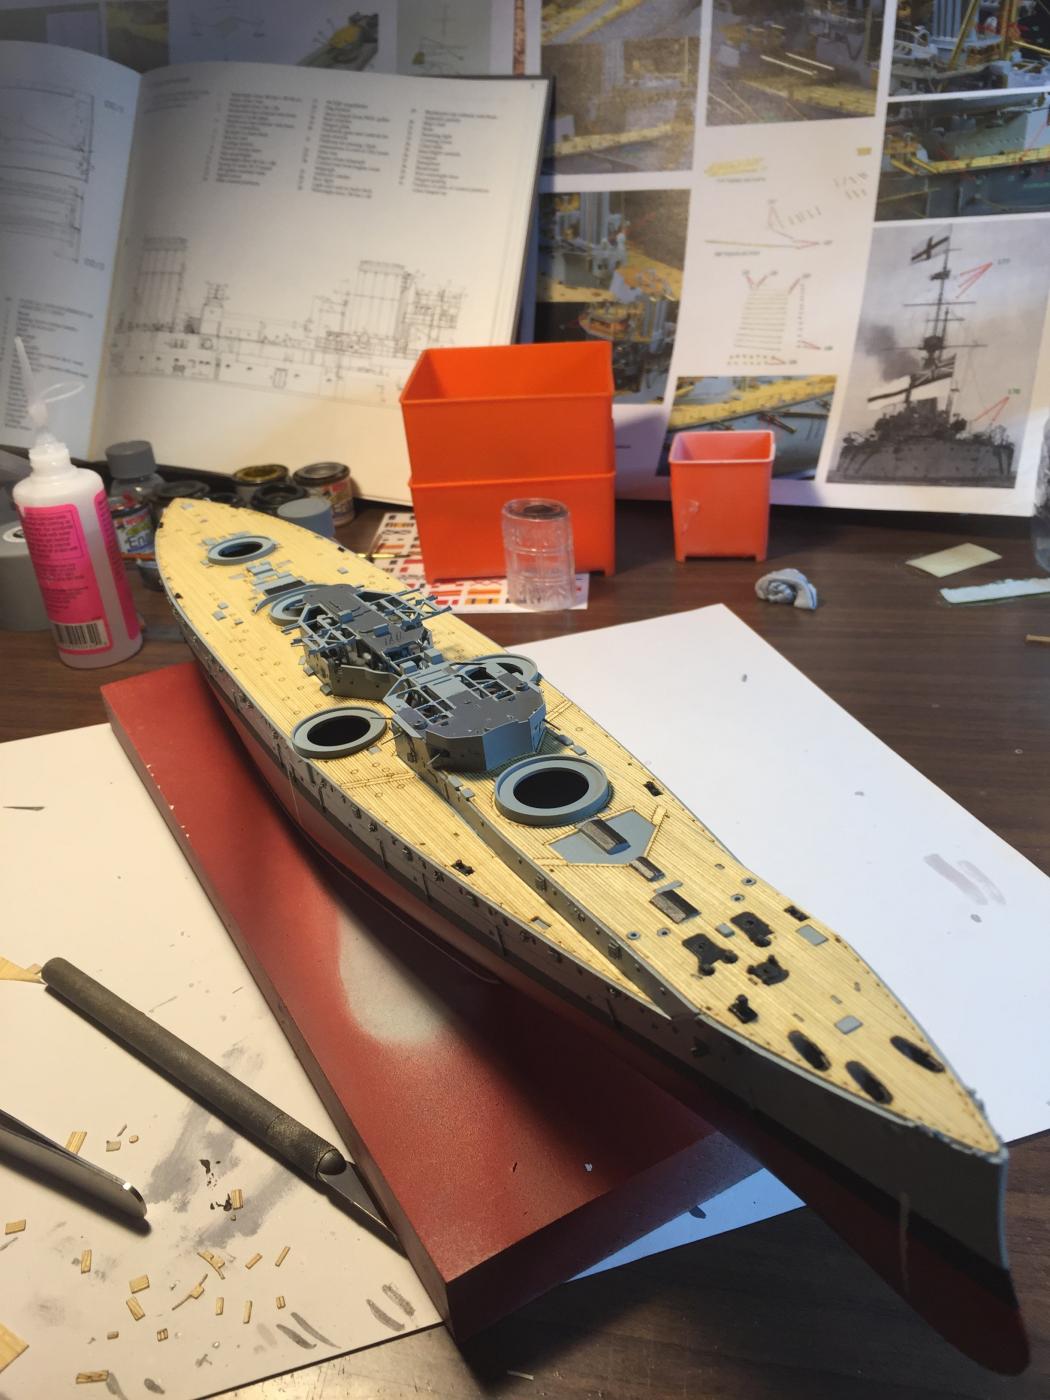
Now the belaying is done, I can add the Admirals walk and Cabin.I used the Flyhawk one as it fits better and looks a bit more natural than the Pontos one whichrequires you to use the kit supplied roof which would be problematic fitting under the lip of the fore funnel.

- 342 replies
-
- 17
-
-
- dreadnought
- zvezda
- (and 2 more)
-
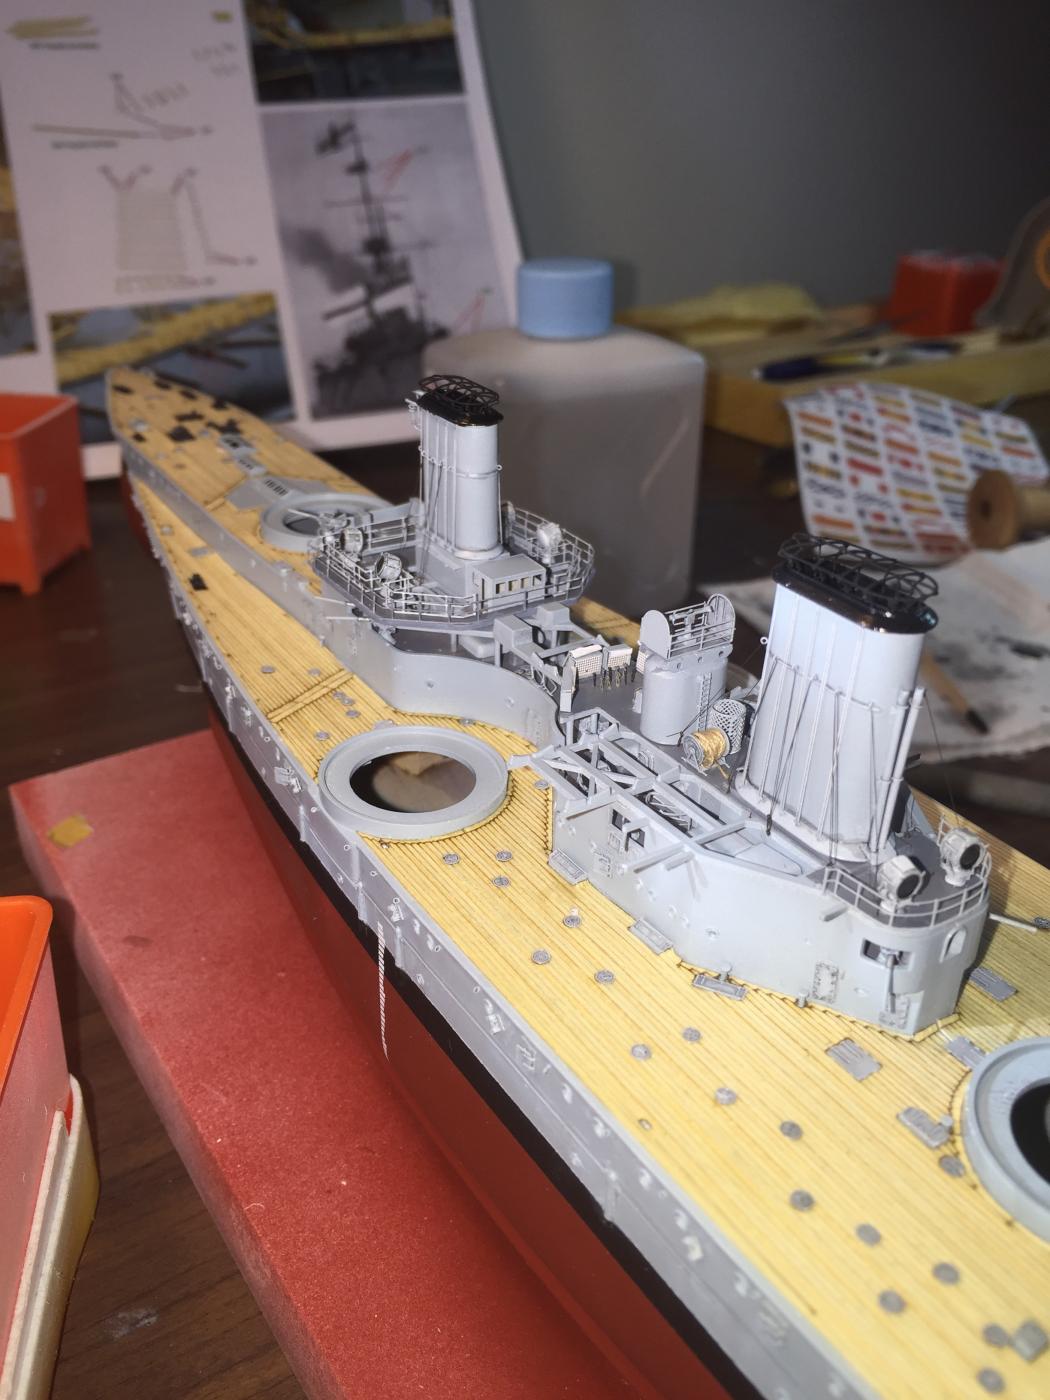
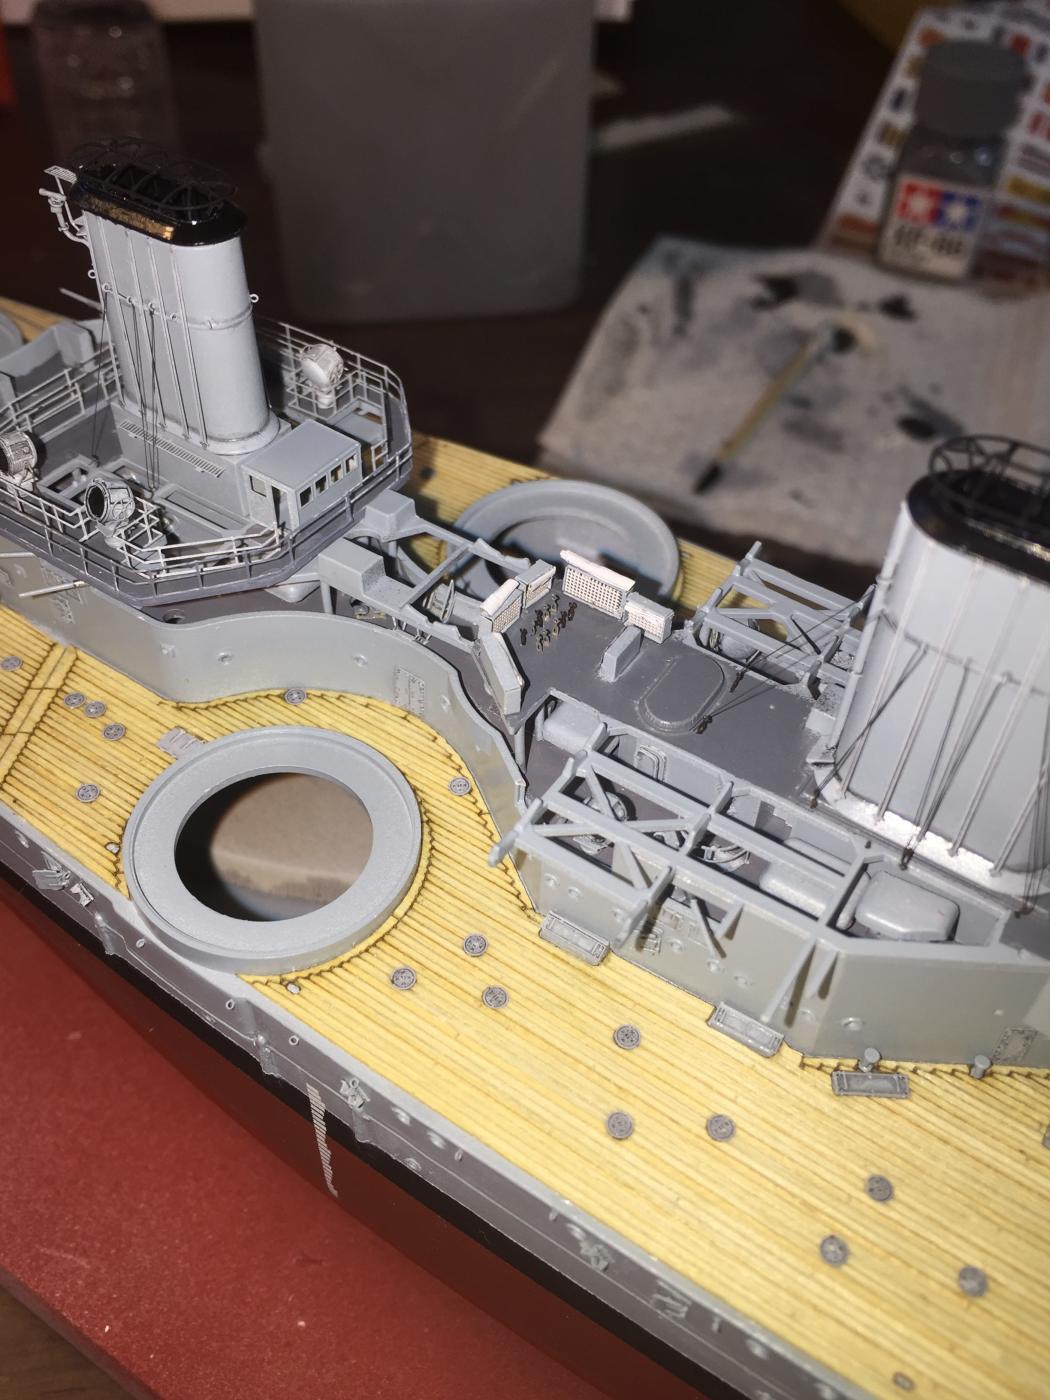
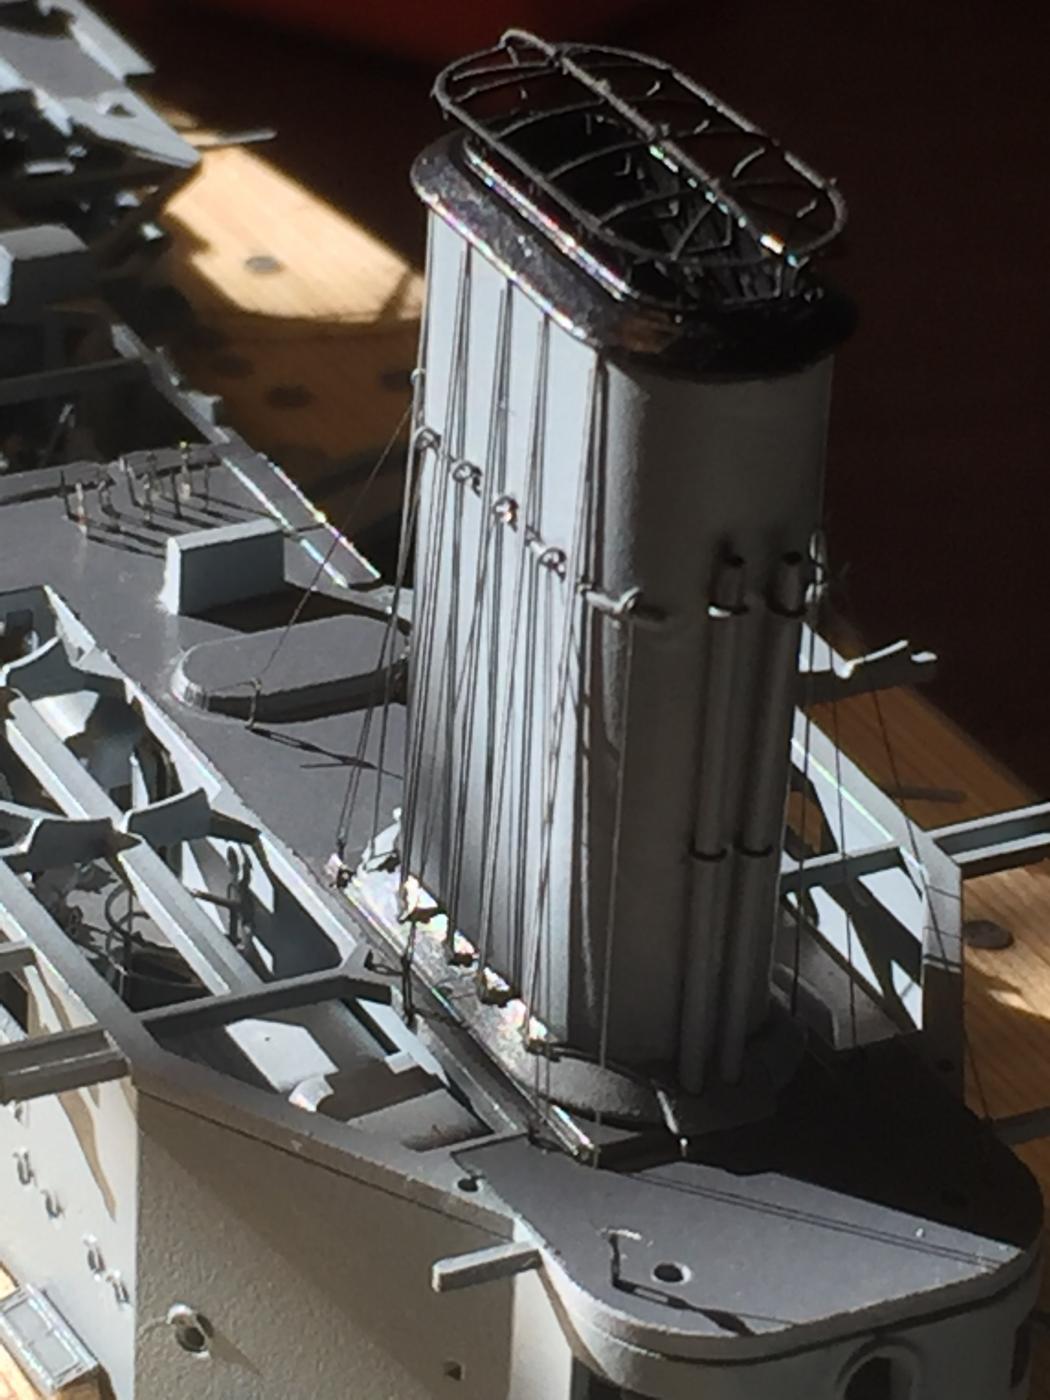
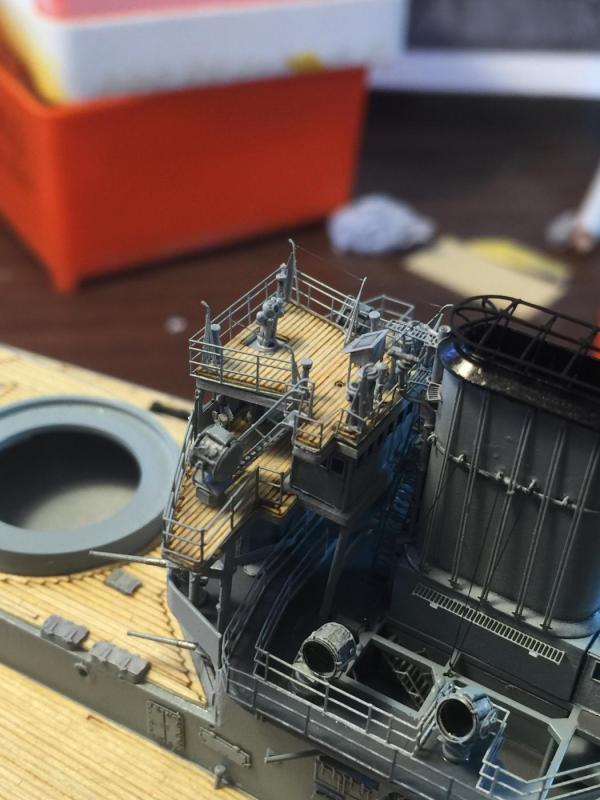
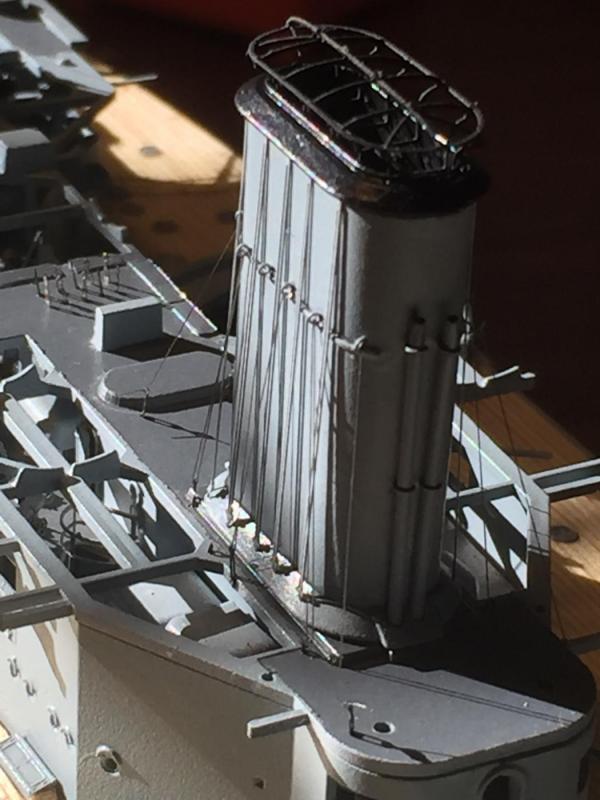
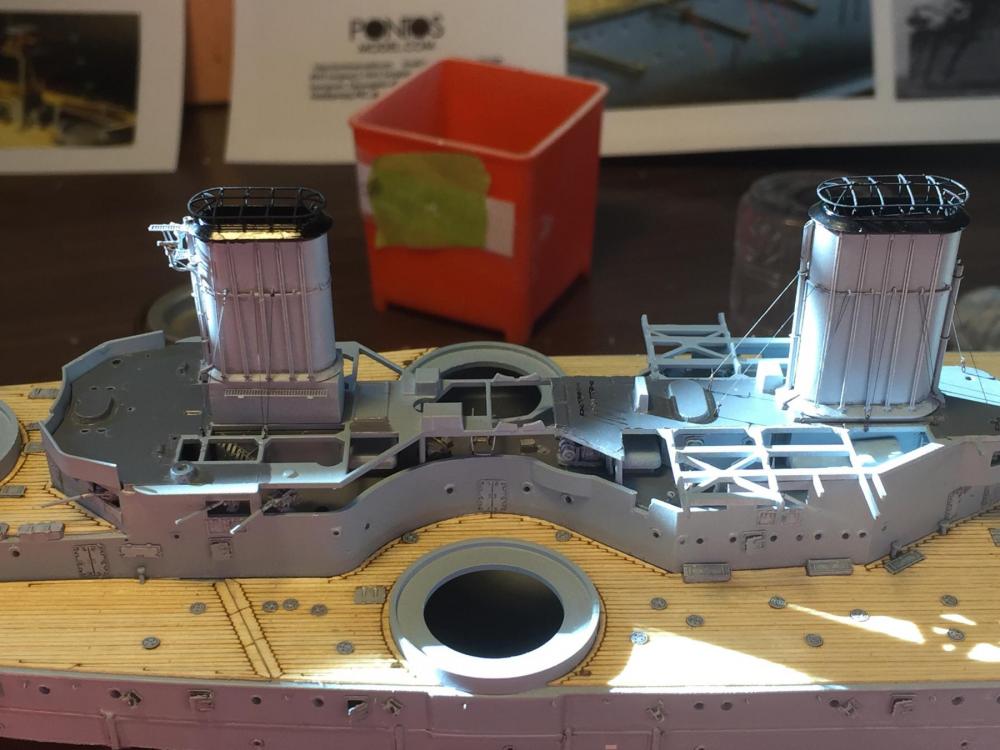
Moving right along, now the boat deck. I attached and rigged the funnels. Some of the lines belay to the towers so will have to come after.
- 342 replies
-
- 19
-
-
- dreadnought
- zvezda
- (and 2 more)
-
Gunther, I can only assume it is to diffuse the heat plume from the stacks. A bit of research on Dr Goigle seems to indicate this but I'm sure there are a few engineers here that could elaborate on this.
- 342 replies
-
- 6
-
-
- dreadnought
- zvezda
- (and 2 more)
-
It certainly is David, I think all of us are OCD to a point, why would we bother otherwise with this hobby?
- 342 replies
-
- 7
-
-
- dreadnought
- zvezda
- (and 2 more)
-
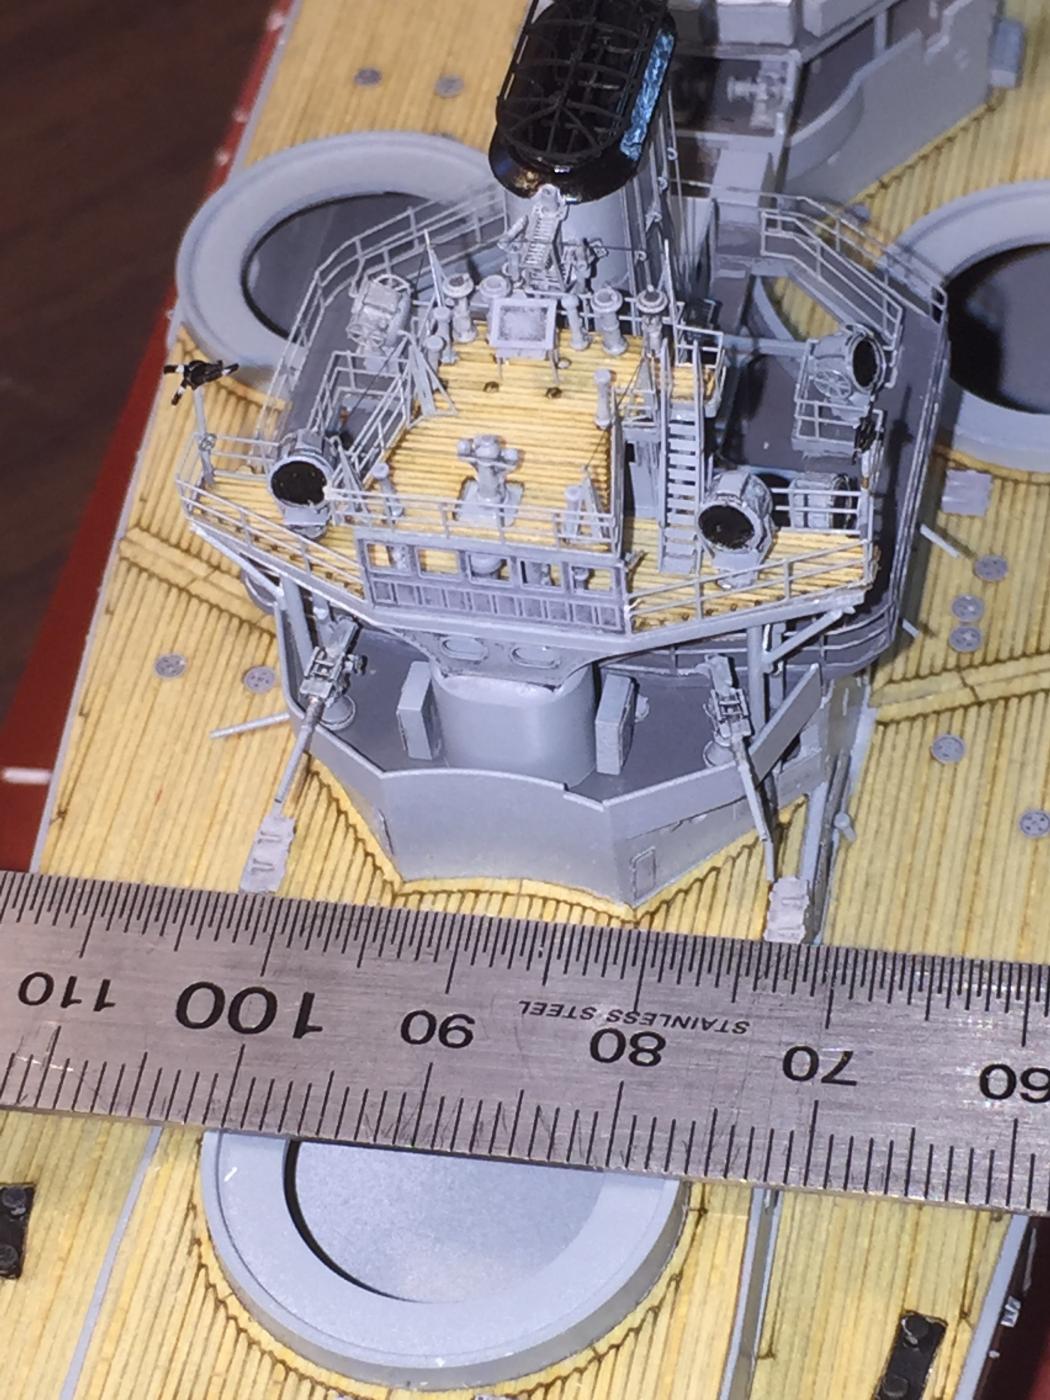
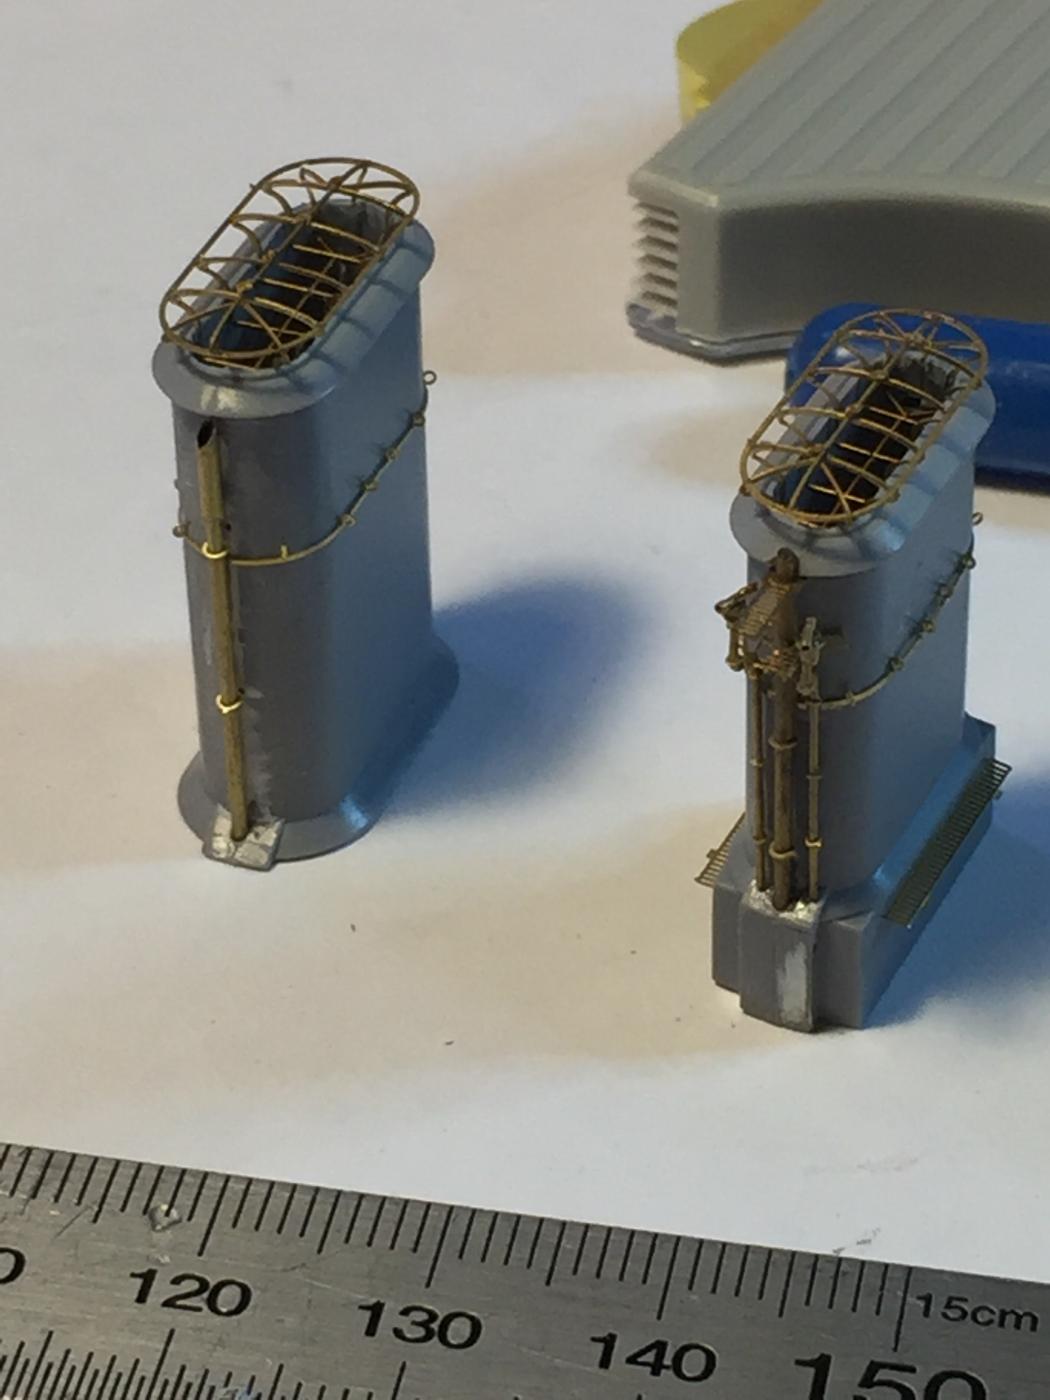
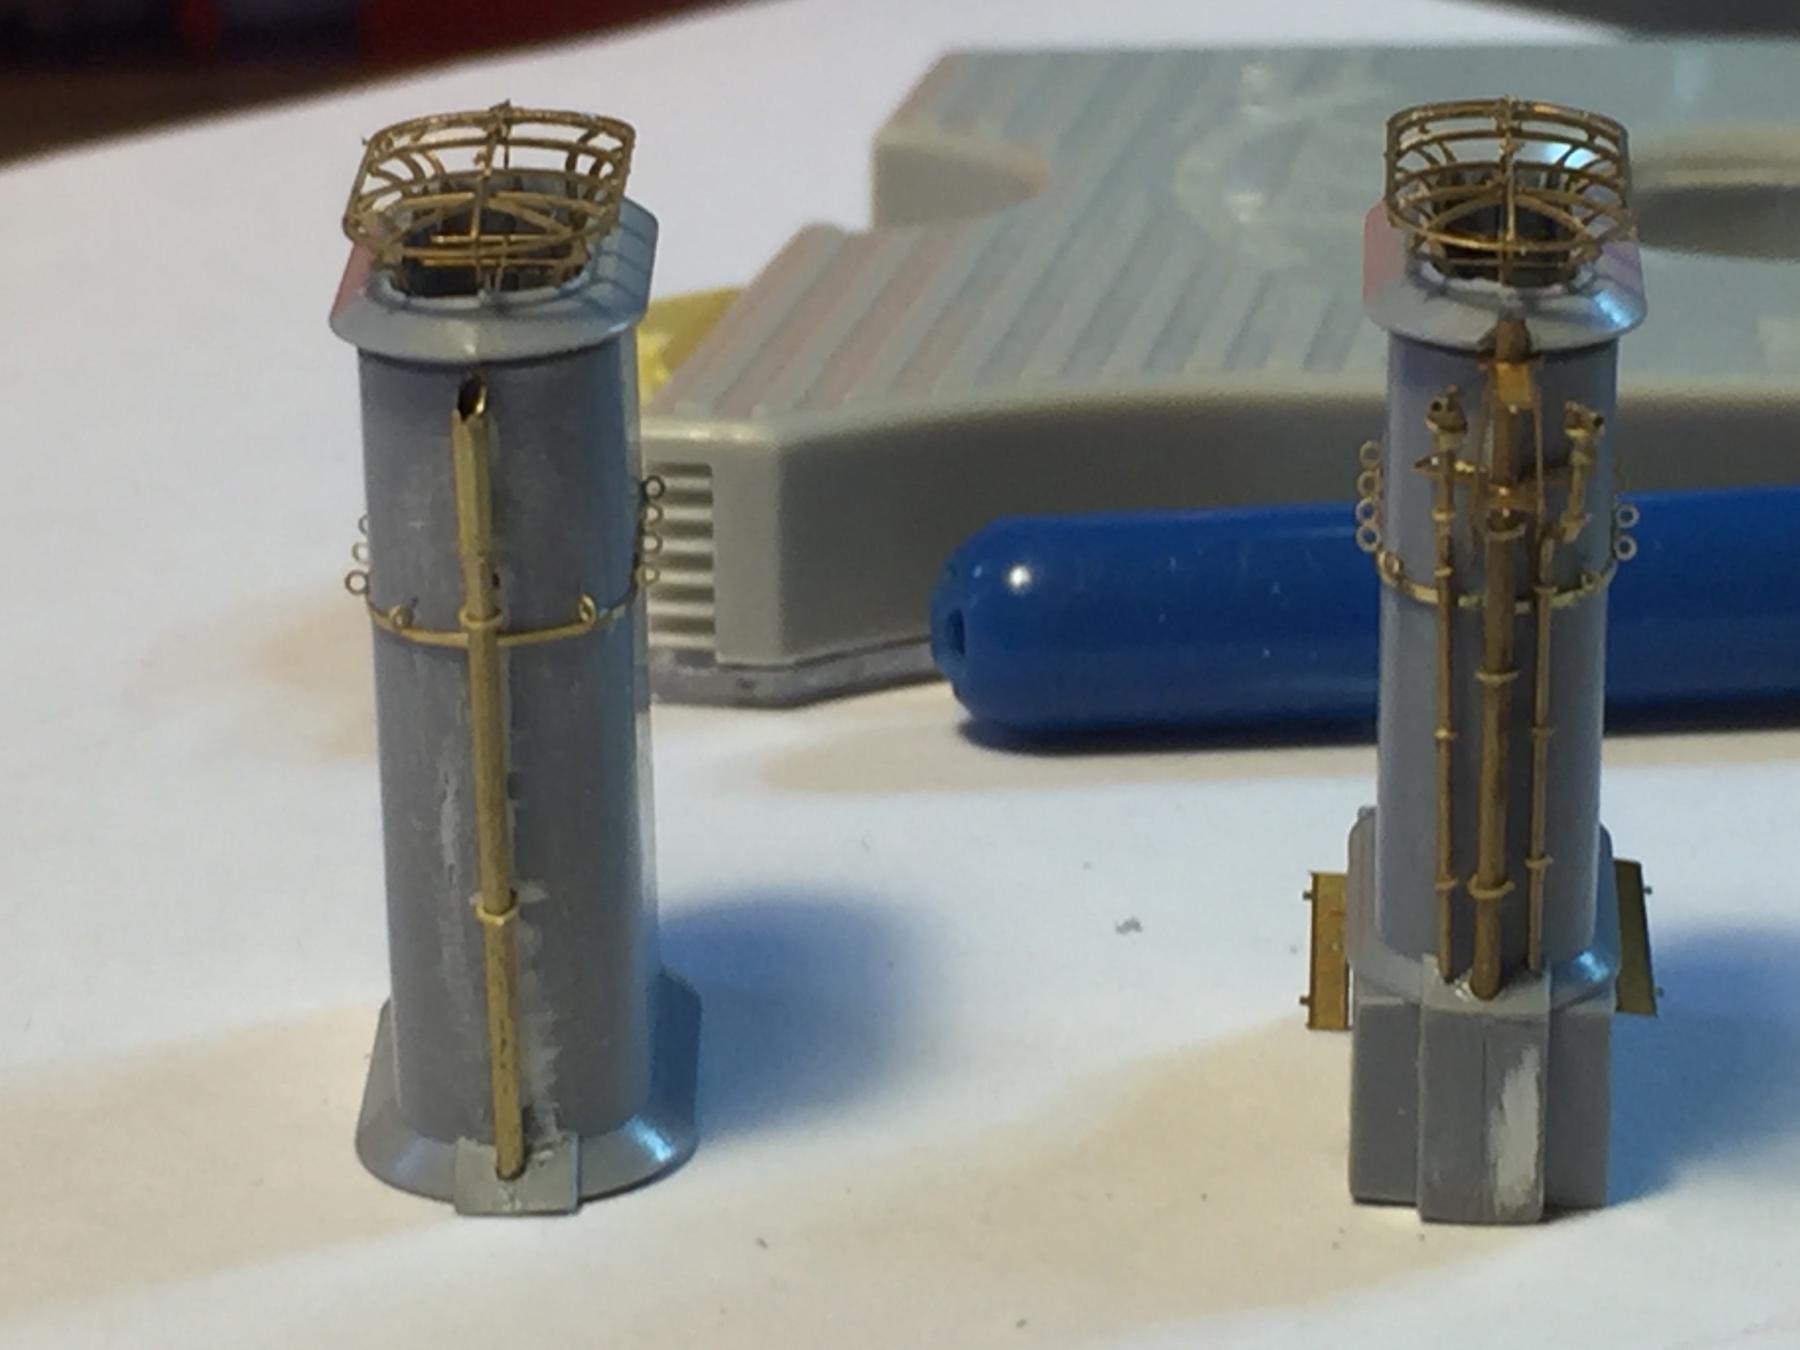
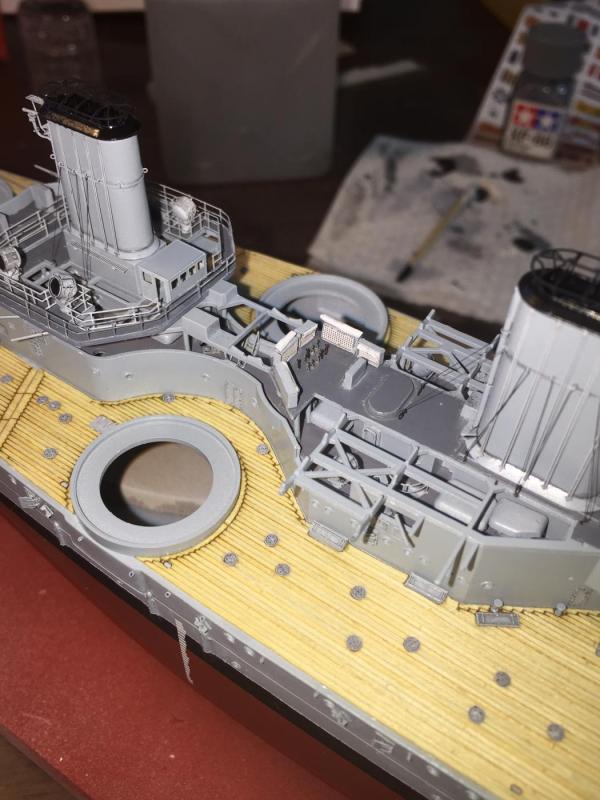
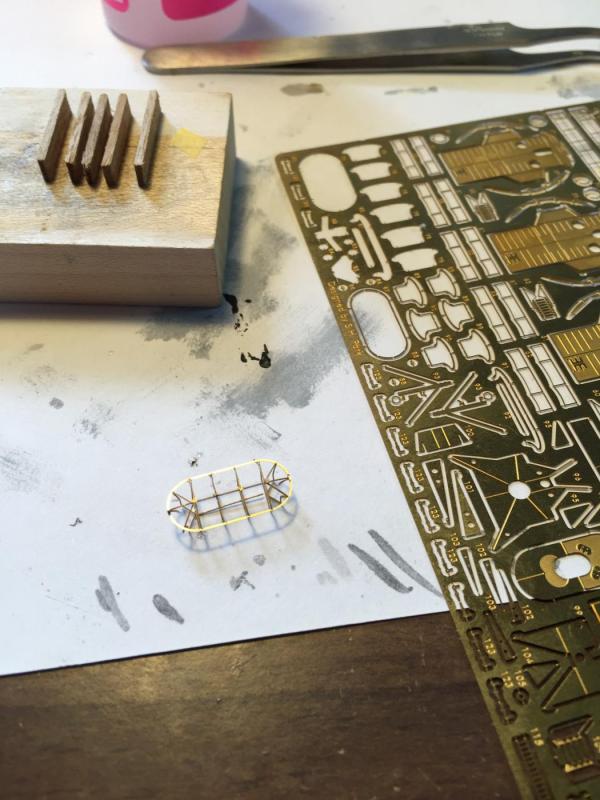
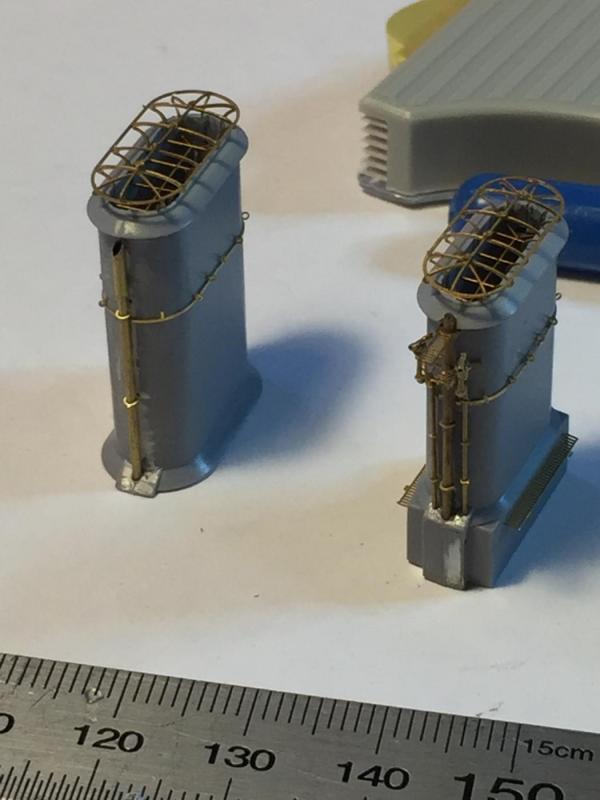
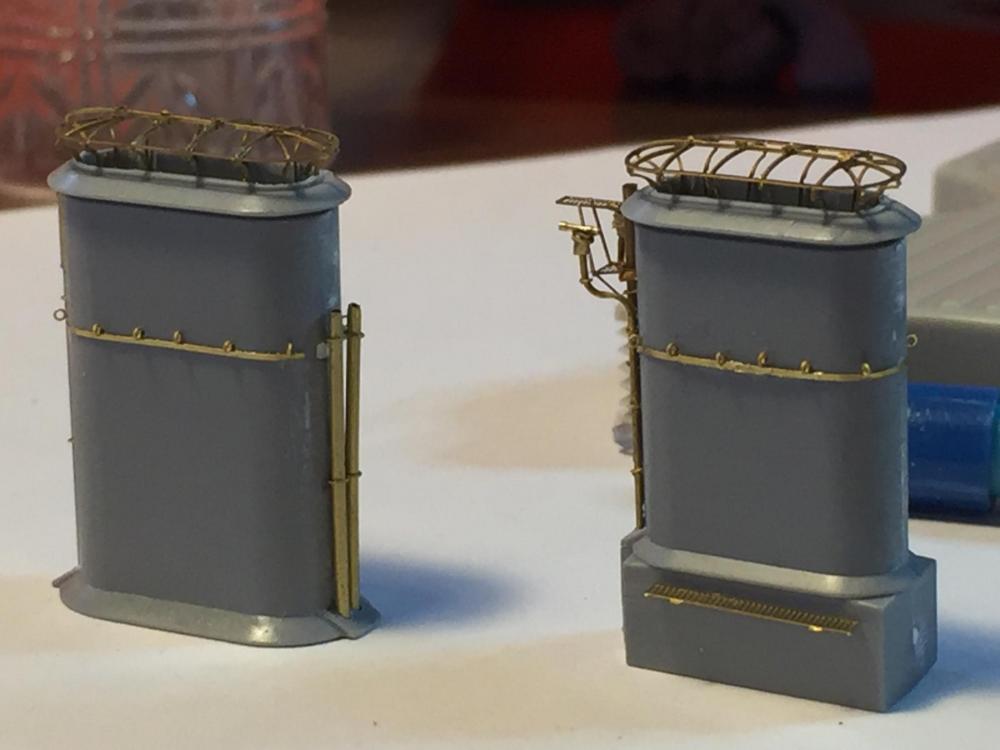
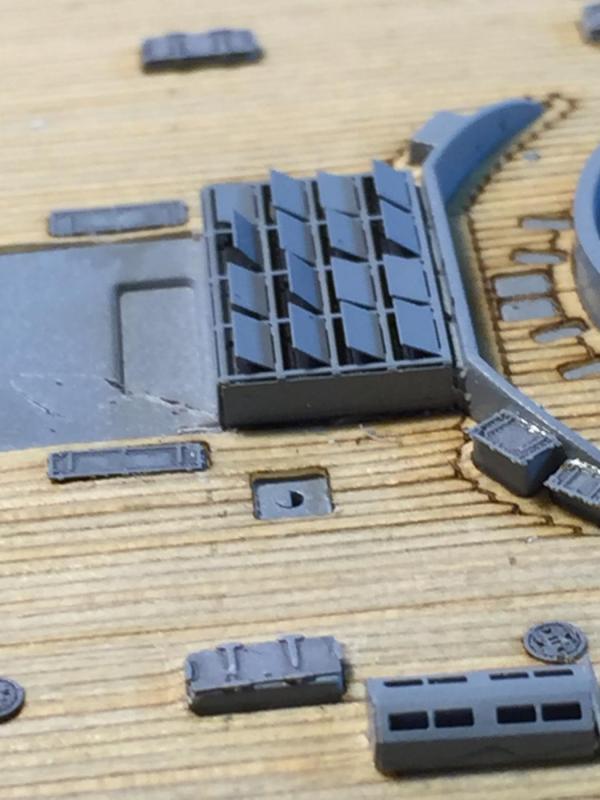
Now the funnels which will go on the boat deck. The funnels grill is very intricate and in many pieces which I had to make up a little jig and cut off and replace all the vent pipes and fabricate the pipes for and the horns. Also making up a funnel band and eyelets for rigging later. Came up nicely.

- 342 replies
-
- 19
-
-
- dreadnought
- zvezda
- (and 2 more)
-
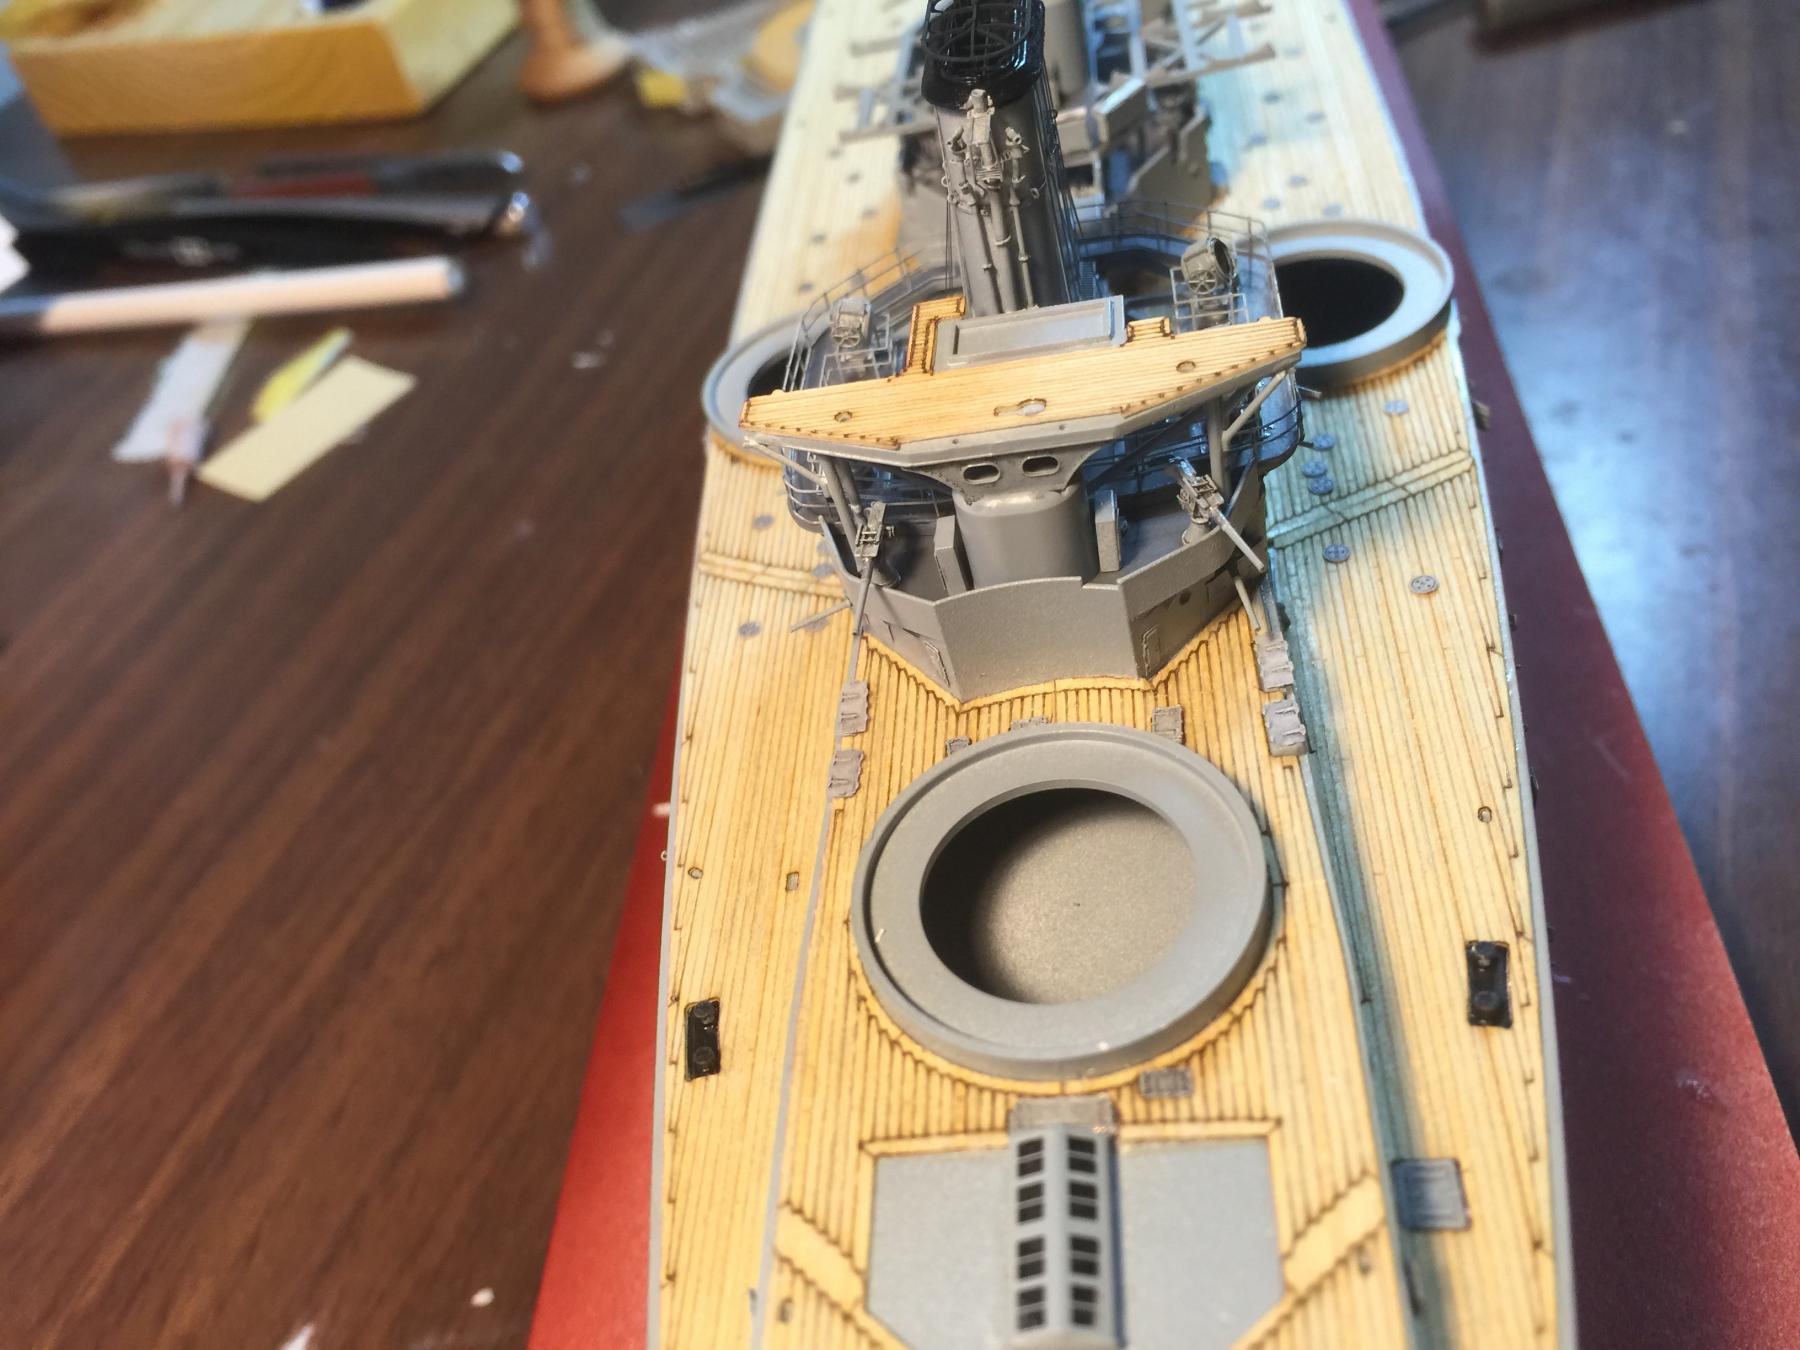
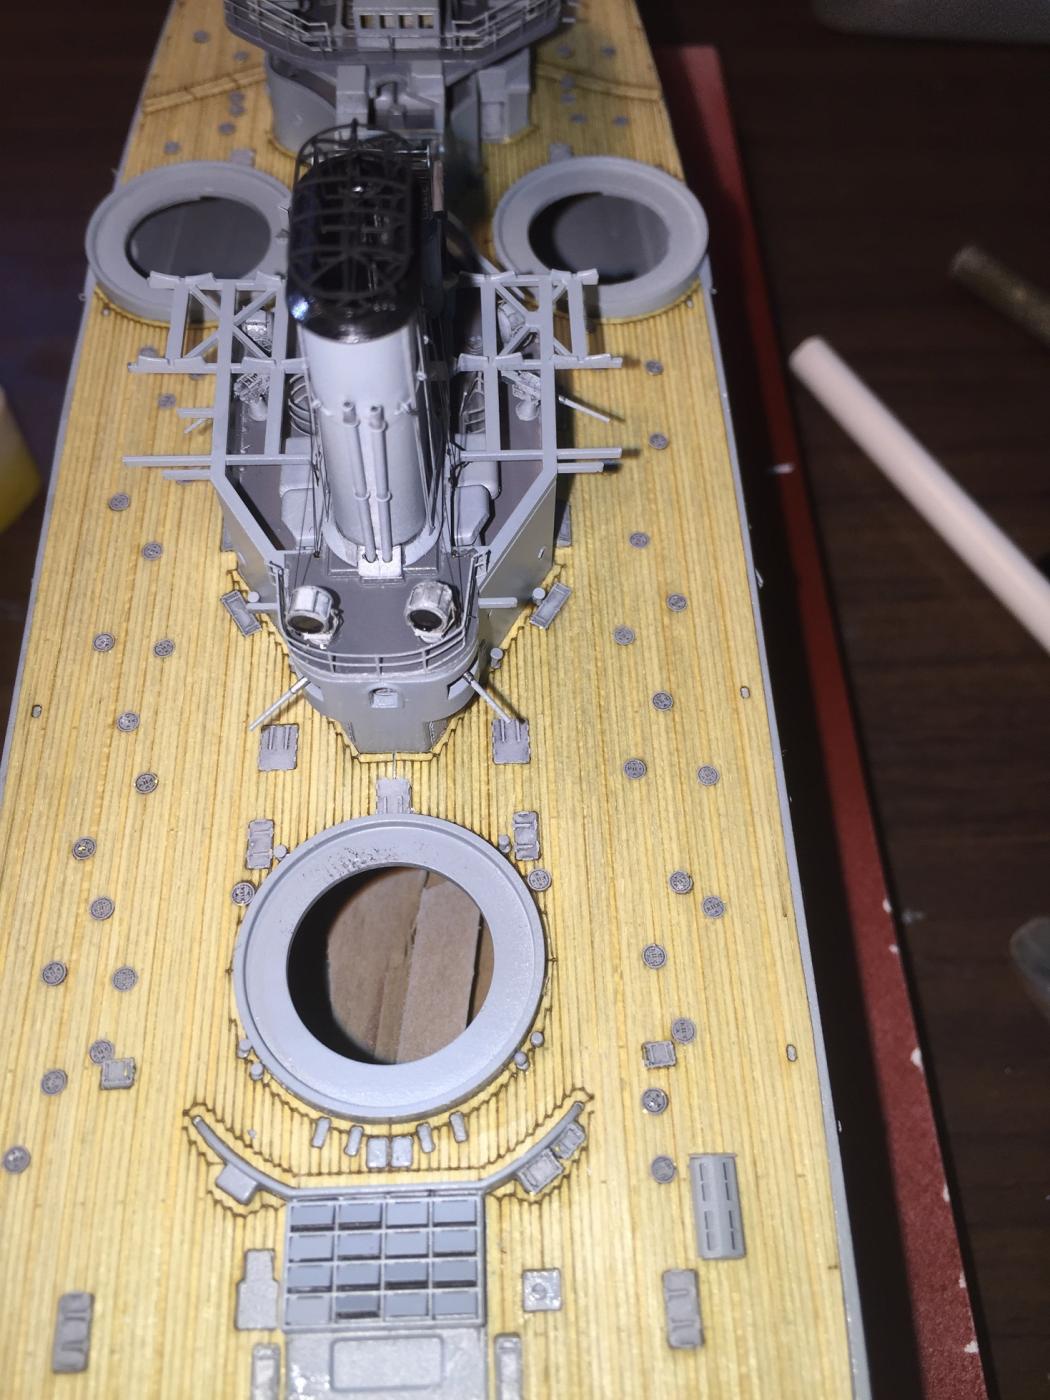
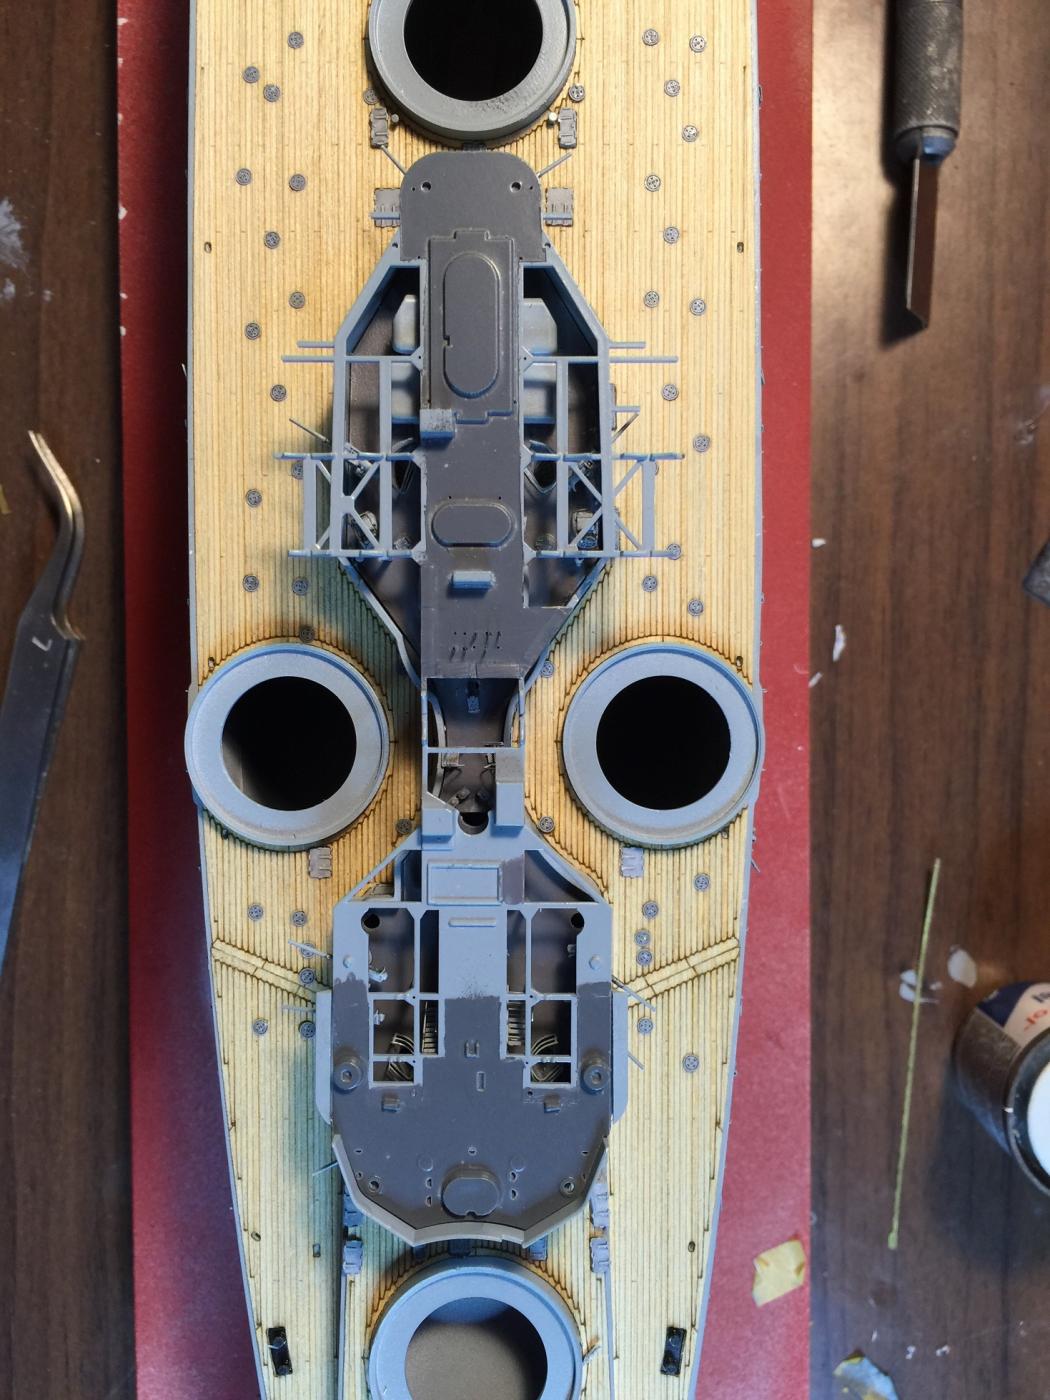
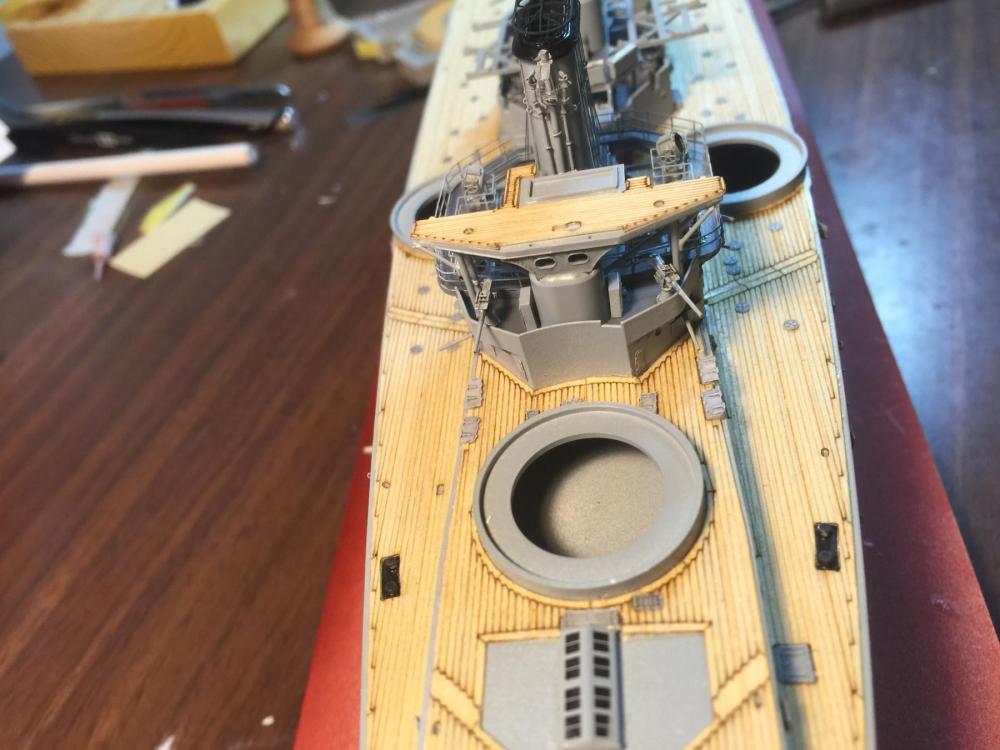
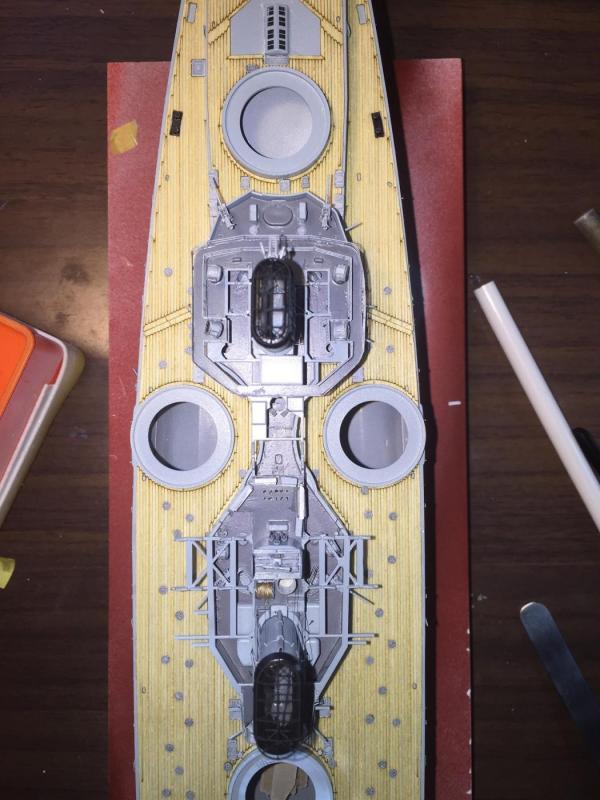
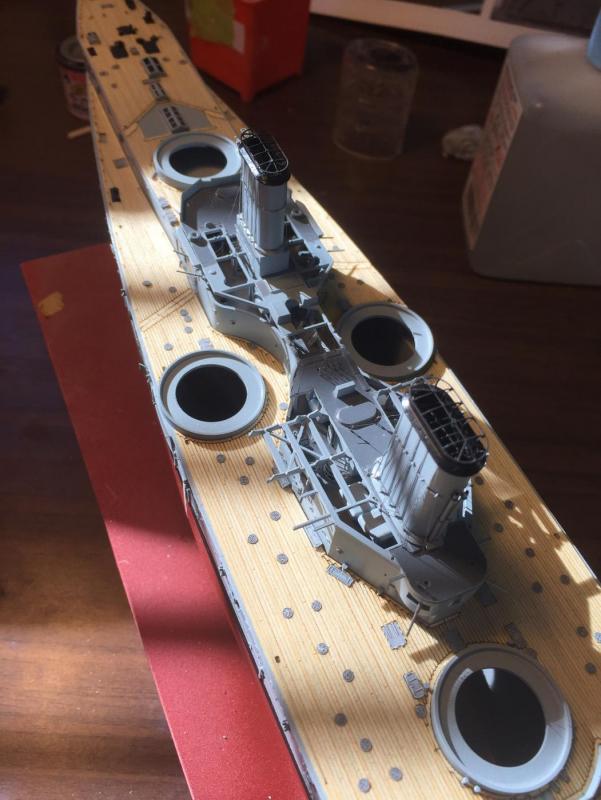
There are a myriad of deck hatches, and Pontos and Flyhawk both have some gaps in their plans. In particular the engine vents that Pontos just chose to ignore. There is a LOT more detail to go on top the decks but this will do for now to save snags.


- 342 replies
-
- 15
-
-
- dreadnought
- zvezda
- (and 2 more)
-
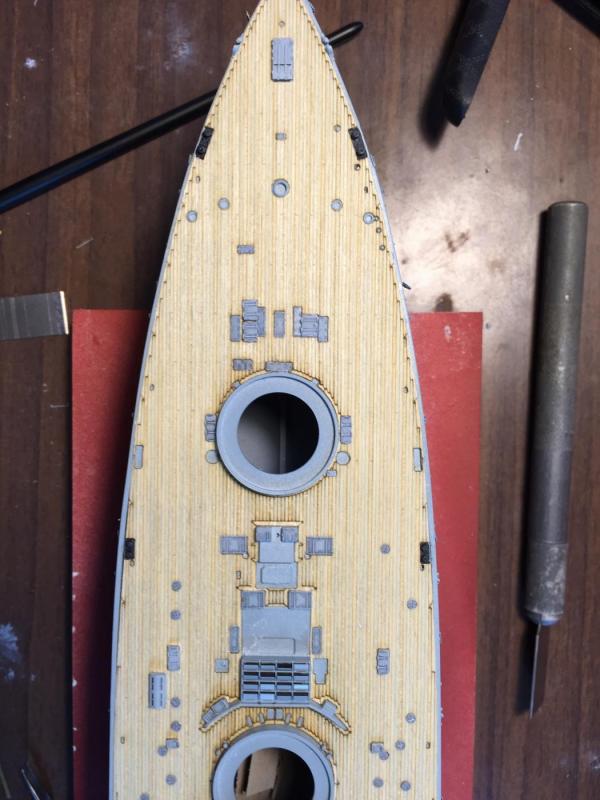
The deck has an adhesive backing, so it "should" just stick on. When I placed it on it stuck, then a couple of hours later it popped up in places, which I rubbed down thinking it needed heat, and a few hours after it kept popping up, thus the thin CA as anything else would leave bulges
- 342 replies
-
- 6
-
-
- dreadnought
- zvezda
- (and 2 more)
-
The wood deck comes with the pontos upgrade kit, and it is just lovely, just not very adhesive.
- 342 replies
-
- 6
-
-
- dreadnought
- zvezda
- (and 2 more)
-
A bit of a re think and the deck has to go down so as not to catch on stuff. A simple exercise? No, after laying the thing down painstakingly, after a few hours the thing keeps popping up in sections. Using a sliver of PE and thin CA over the last few days I have been making running repairs to get the thing to sit properly. Still looks good and makes me happy with the guesstimate of the paint colour. I have now down up all the boat deck and funnels but will now not paint or attach anything until I have done up the deck hatches.


- 342 replies
-
- 21
-
-
- dreadnought
- zvezda
- (and 2 more)
-
Mate, looks great. I knew it would get to you!
- 517 replies
-
- 3
-
-
- Endeavour
- Artesania Latina
- (and 1 more)
-
I'm in. There are a few Russian sites with these builds which is why they invented Google translate. Massive undertaking.
- 244 replies
-
- 5
-
-
- borodino
- dom bumagi
- (and 1 more)
-
Yes mate, I will be, but it will be a while off yet, I want to work from the centreline outwards. There is a heap of work to go yet. I'm looking forward to the contrast.
- 342 replies
-
- 5
-
-
- dreadnought
- zvezda
- (and 2 more)