RGL
-
Posts
5,539 -
Joined
-
Last visited
Content Type
Profiles
Forums
Gallery
Events
Everything posted by RGL
-
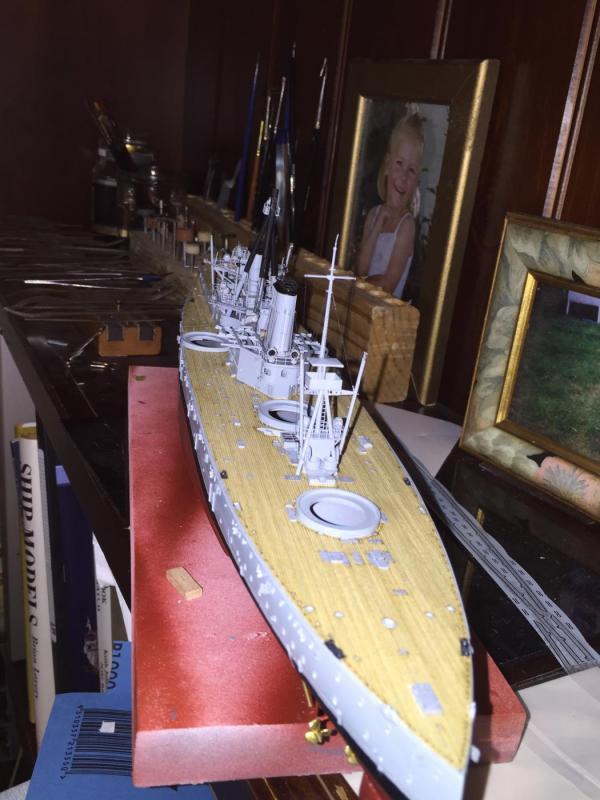
 Thank you all. Lots of piecework to go now, ships boats, ladders, deck fittings, anchors etc. once that is done I'll post again. Then the plan the guns, then rails, large aerials, than finally the fully rigged torpedo nets.
- 342 replies
-
- 6
-

-
- dreadnought
- zvezda
- (and 2 more)
-
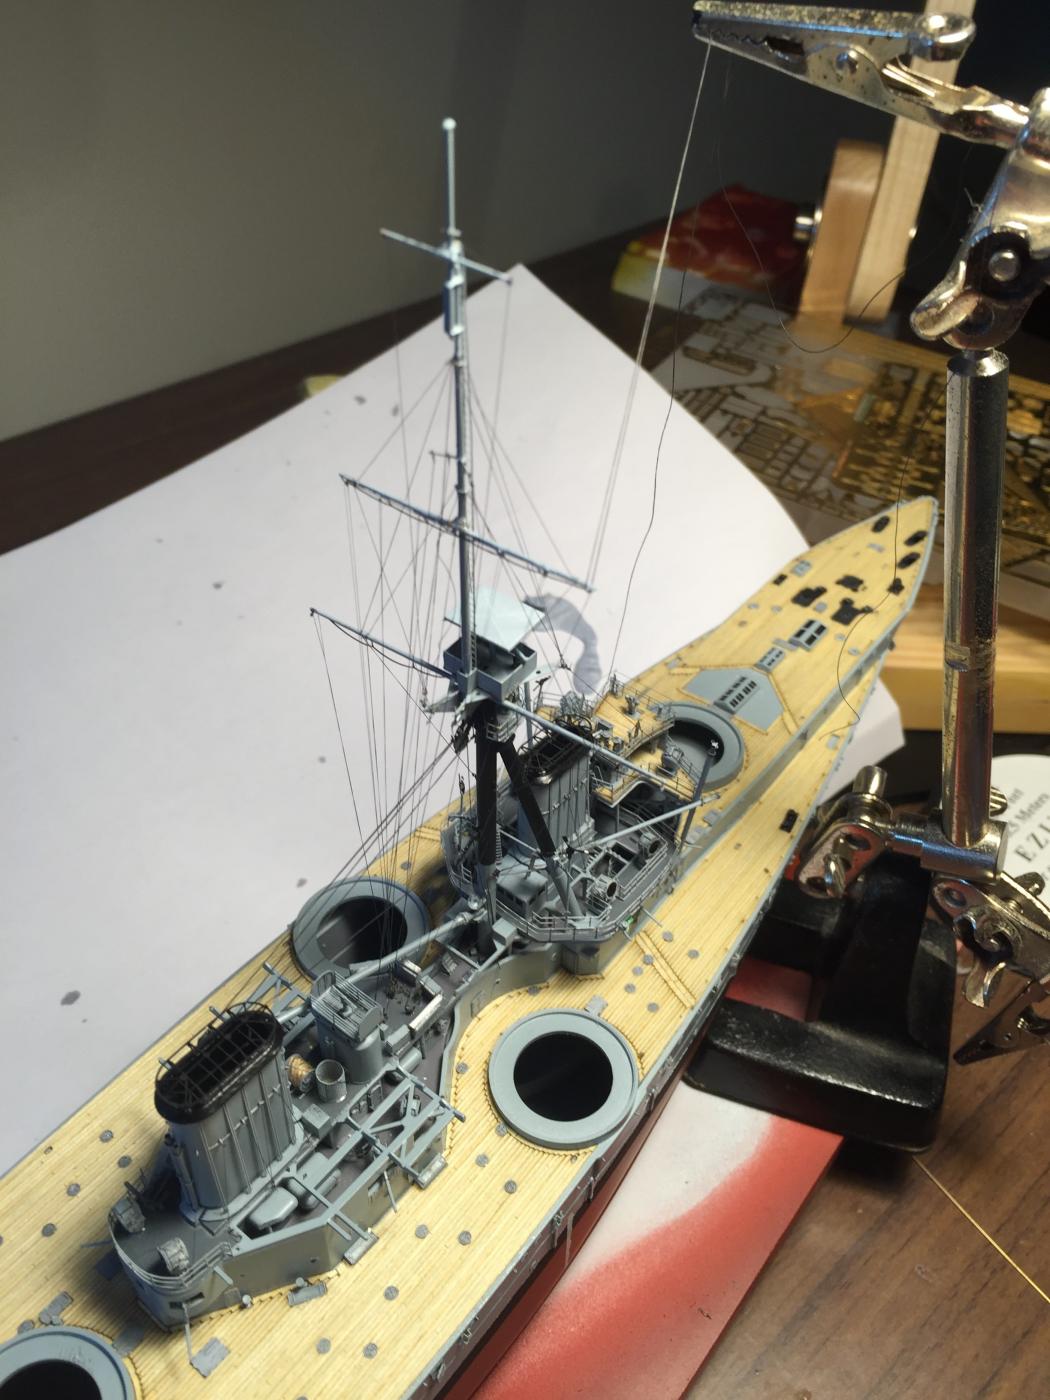
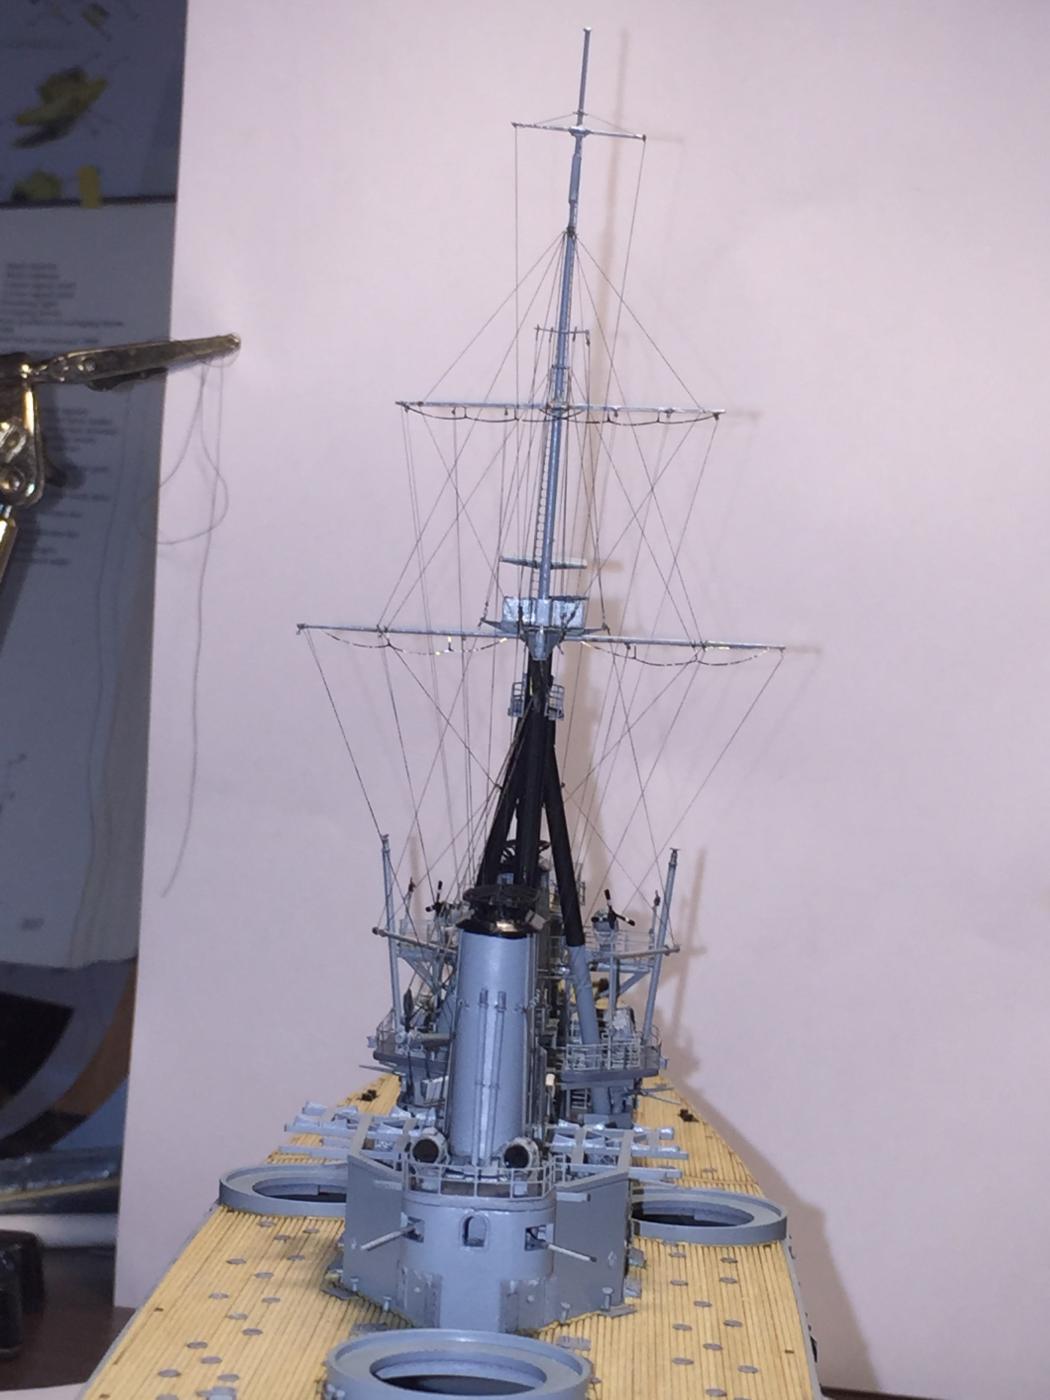
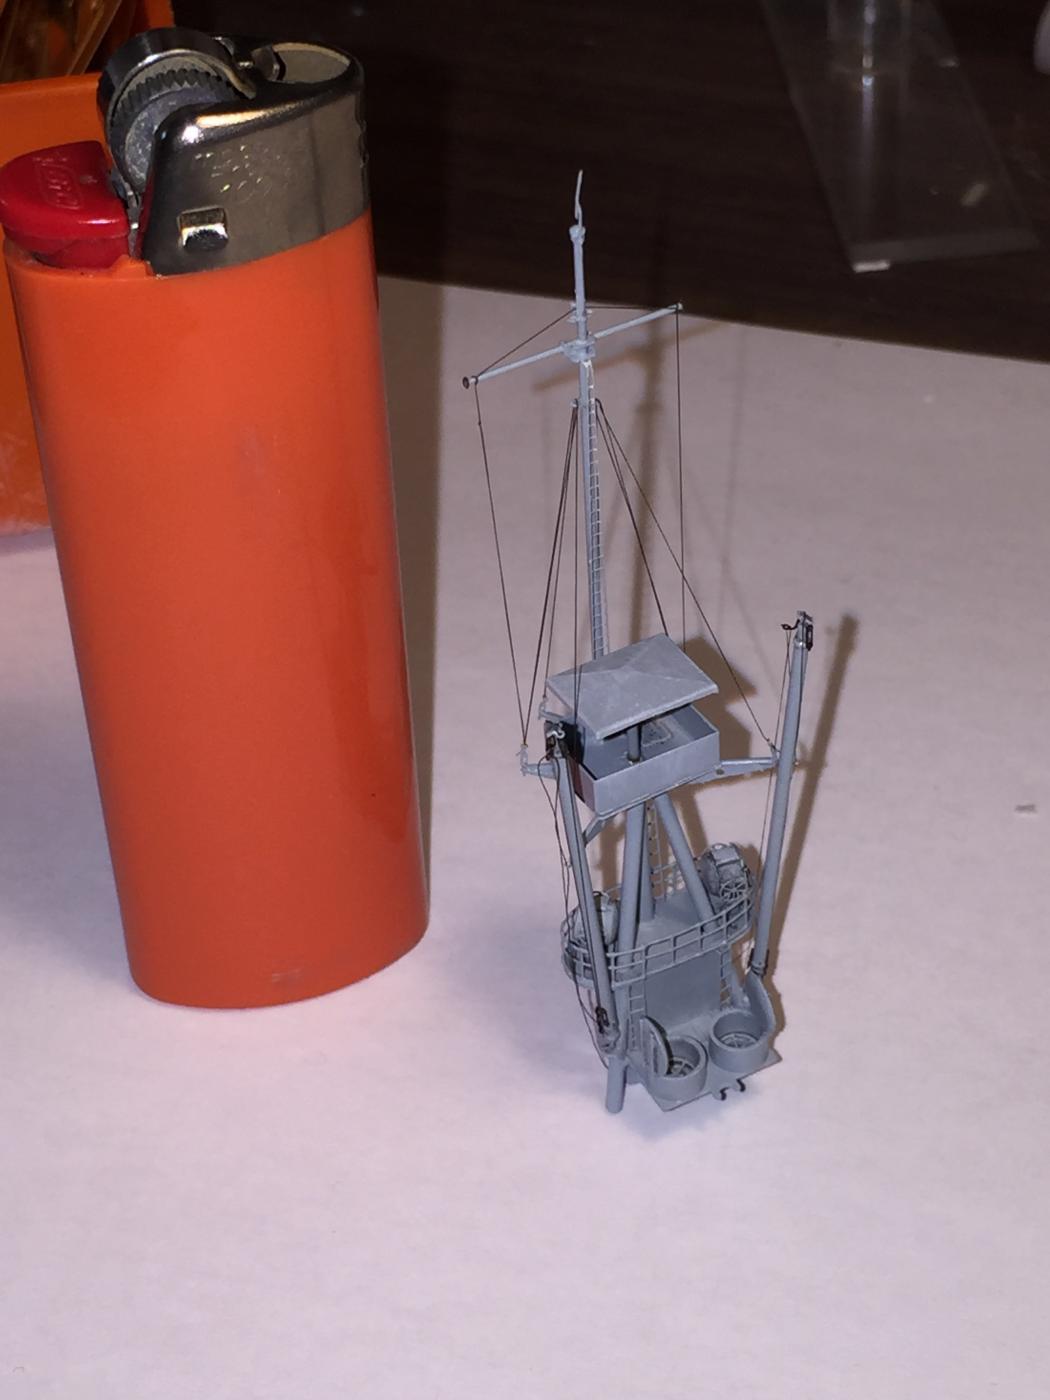
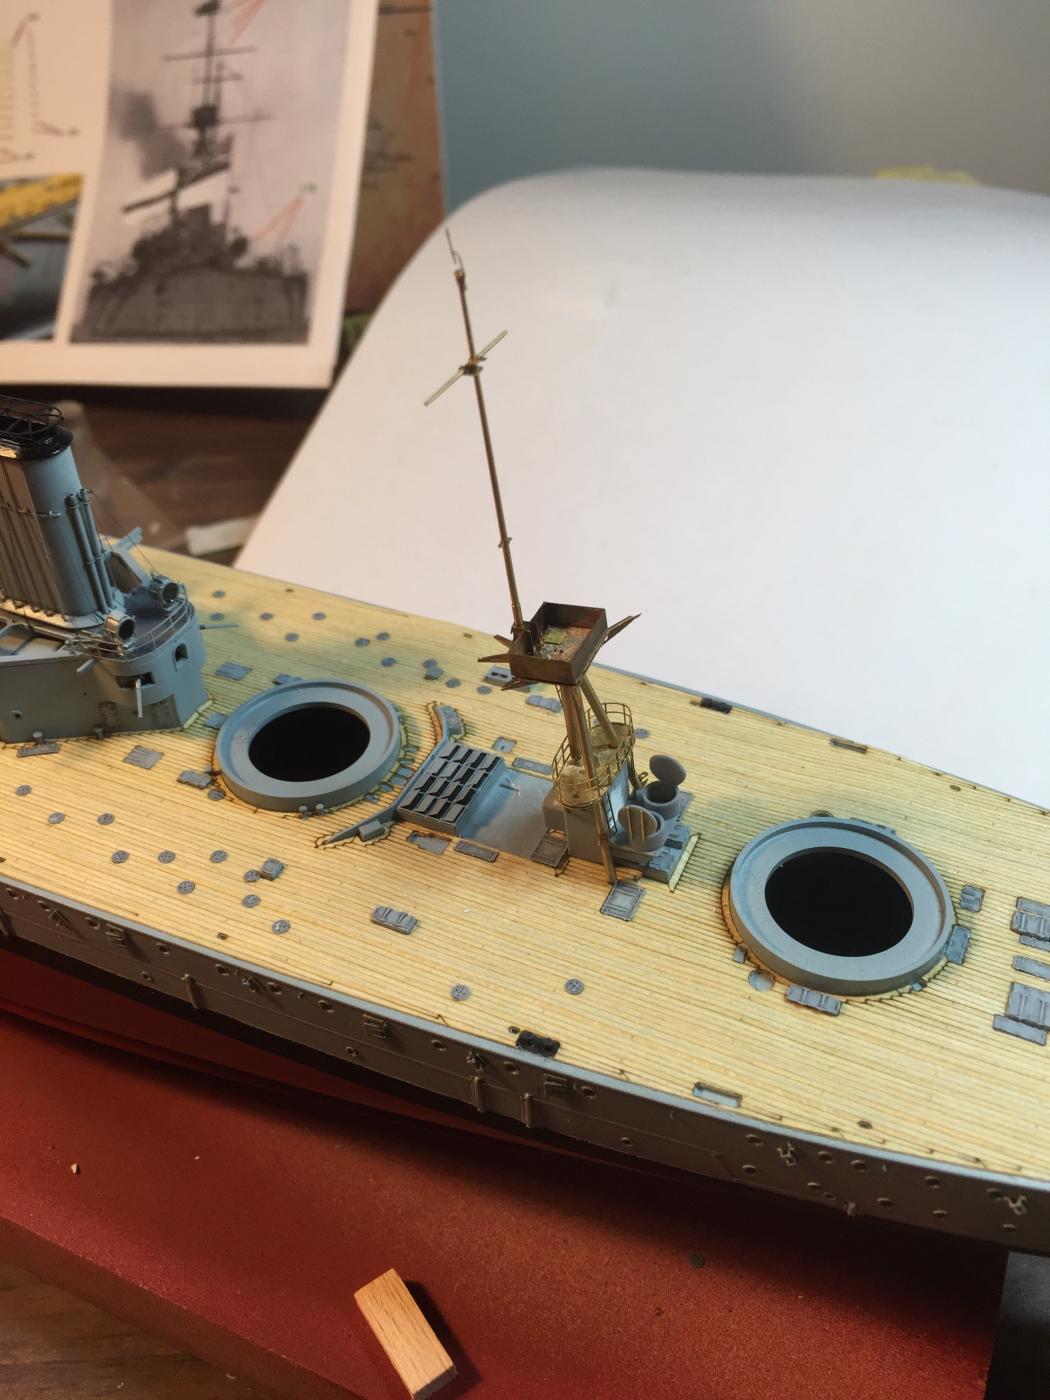
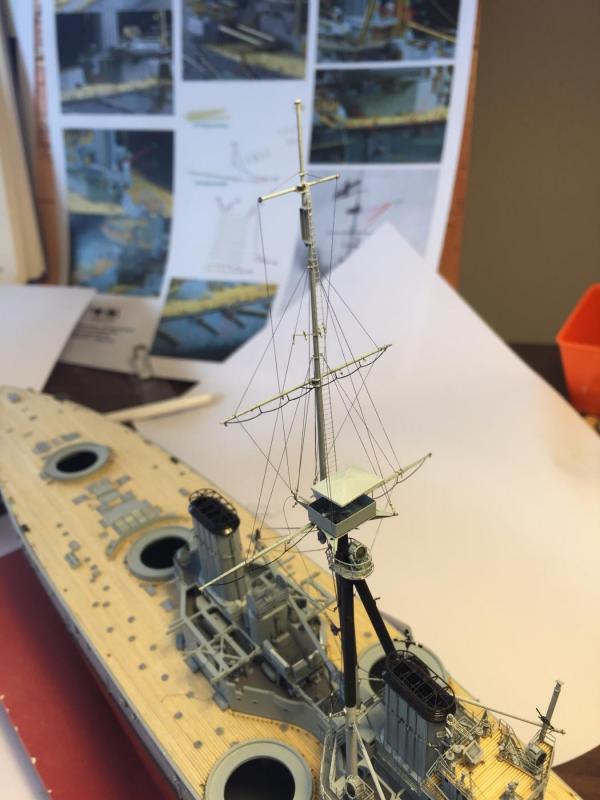
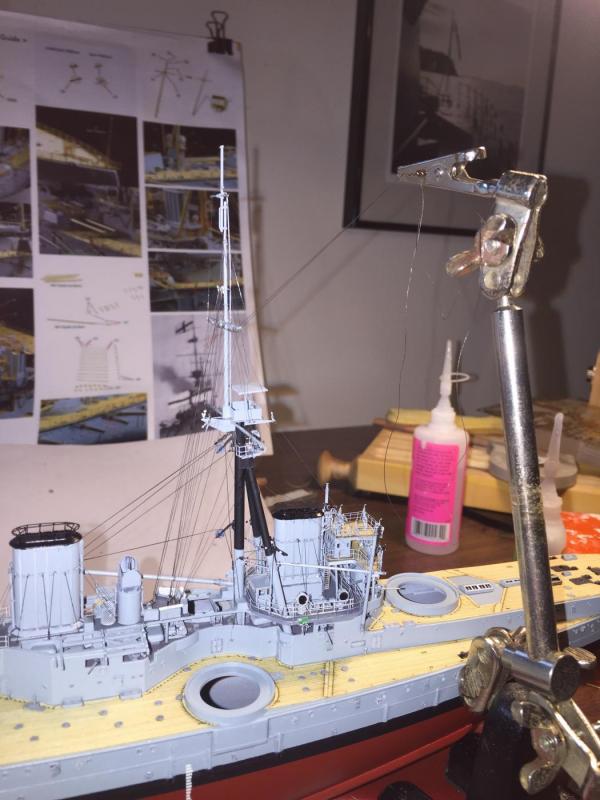
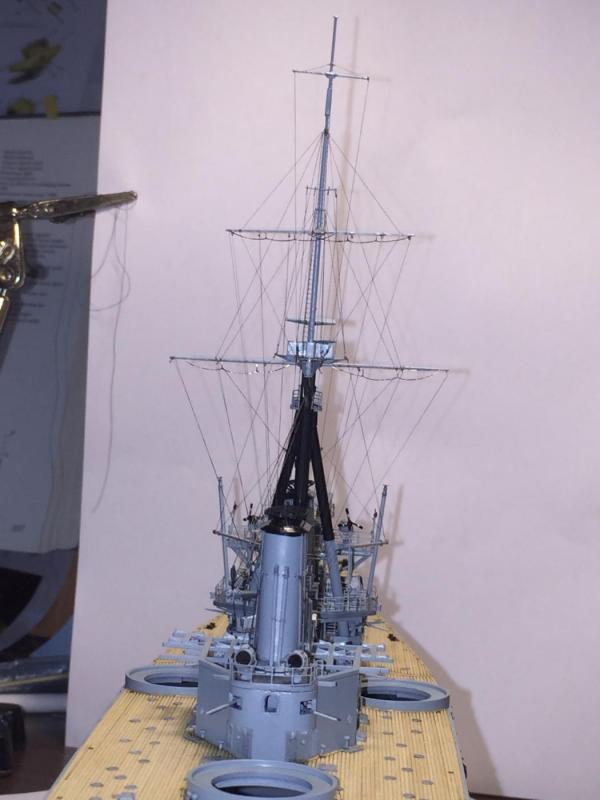
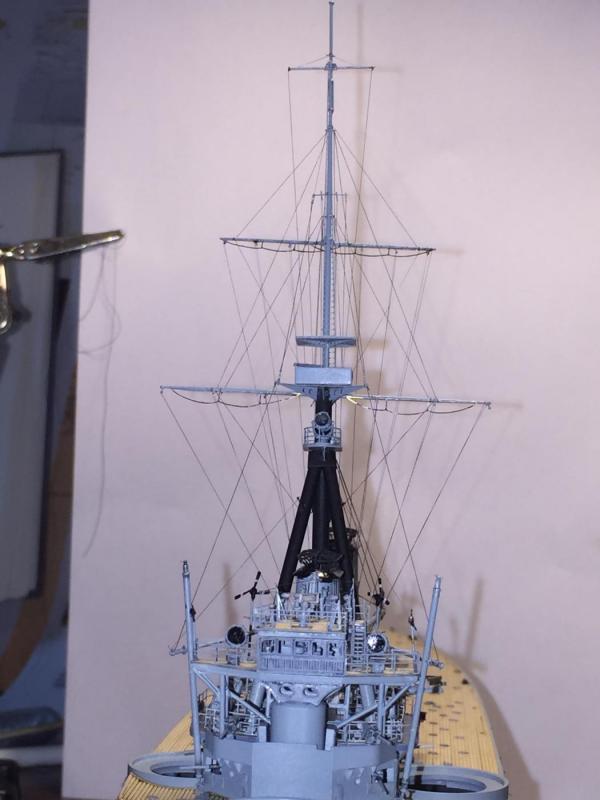
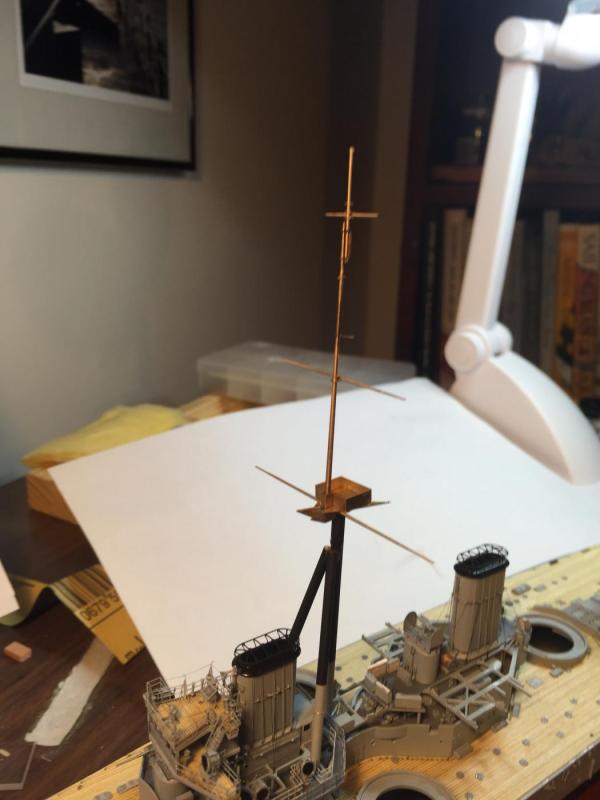
The finalization of the fore mast. Went togeather with great fanfare until some idiot put the mast on backwards, the had to pull it apart and start again. Then the standing rigging. The i added all the back stays, 2 days work as the lines are sooo fine. The of course, that bloke Murphy caught up. The glue on the crows nest gave way. So, as the thing is fully rigged with elastic under tension, I had to hold it in the correct plane and then make sure the yards are parallel to the deck both laterally and horizontally with one hand and glue with the other. Pain in the backside. Then I thought i'd got away with it and the middle yard snapped it's brace to the mast. As above a pain in the butt but using a set of helping hands it was remedied. Finally, the rigging of the mast is complete. It is not as strait as I'd like but I will add stays later.


- 342 replies
-
- 25
-
-
- dreadnought
- zvezda
- (and 2 more)
-
Nice work, that's quite tricky
-
Pretty much, very hard to scratch build the very fine details, unless your eyesight is poor then it doesn't matter.
- 342 replies
-
- 5
-
-
- dreadnought
- zvezda
- (and 2 more)
-
No, none at all on the Pontos fret, they are North Star, and using eyelets for the signal halyards. I'm using the rigging from the Alliance model works as the mast ladders. I'm currently in the process of adding the fixtures to the foremast, including foot ropes from fly hawk. Once added I can rig then paint up the brass by hand as it will block up the holes if I do it before.
- 342 replies
-
- 6
-
-
- dreadnought
- zvezda
- (and 2 more)
-
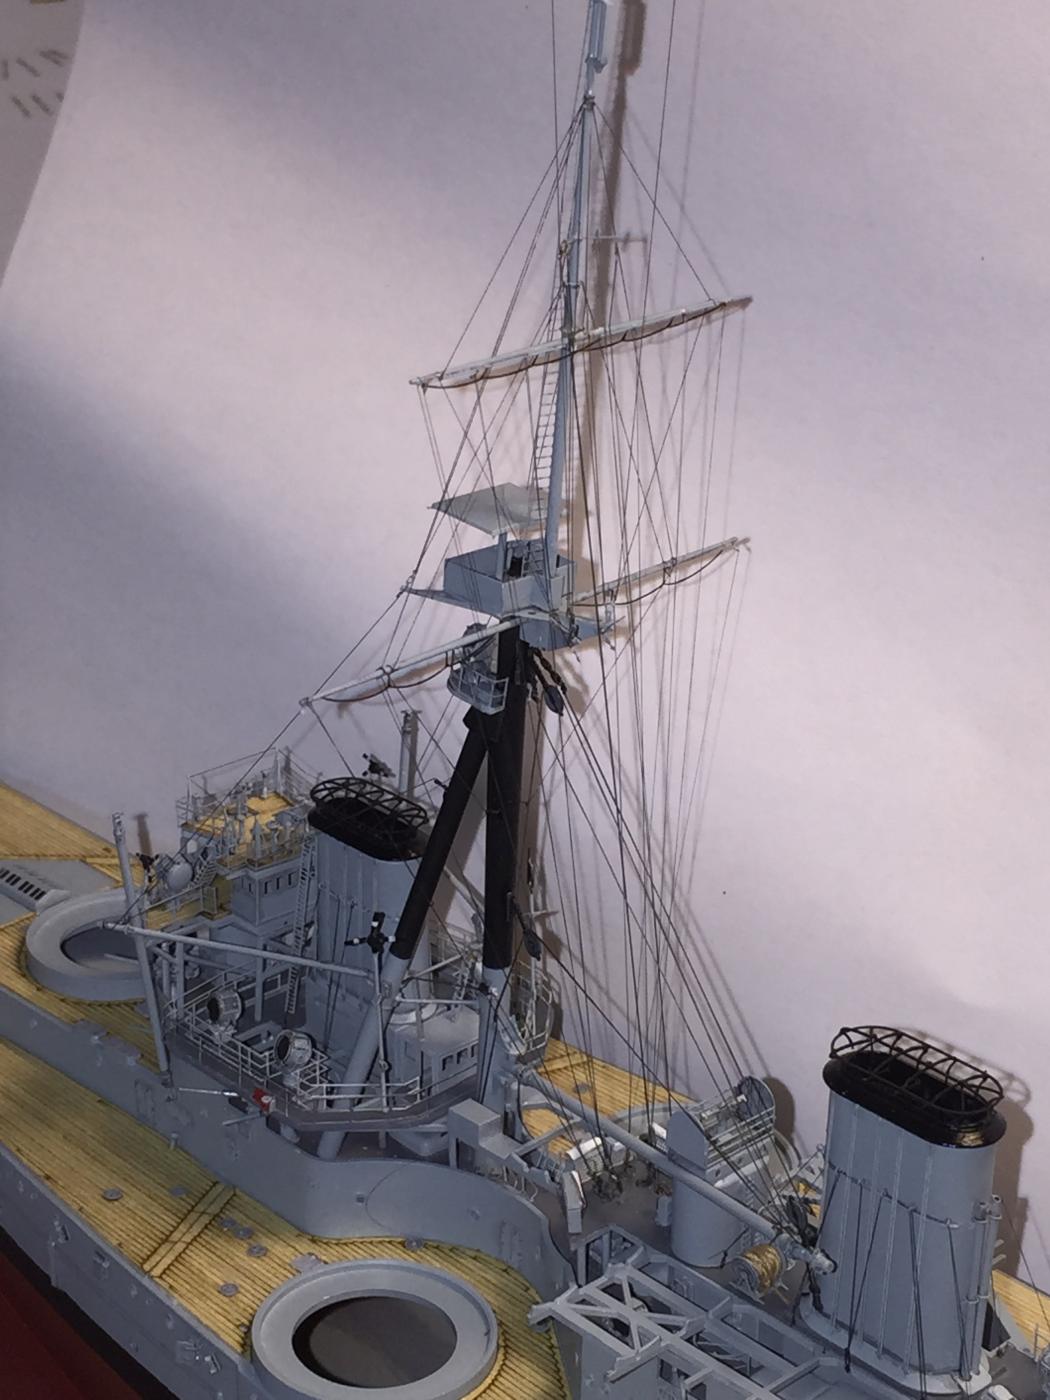
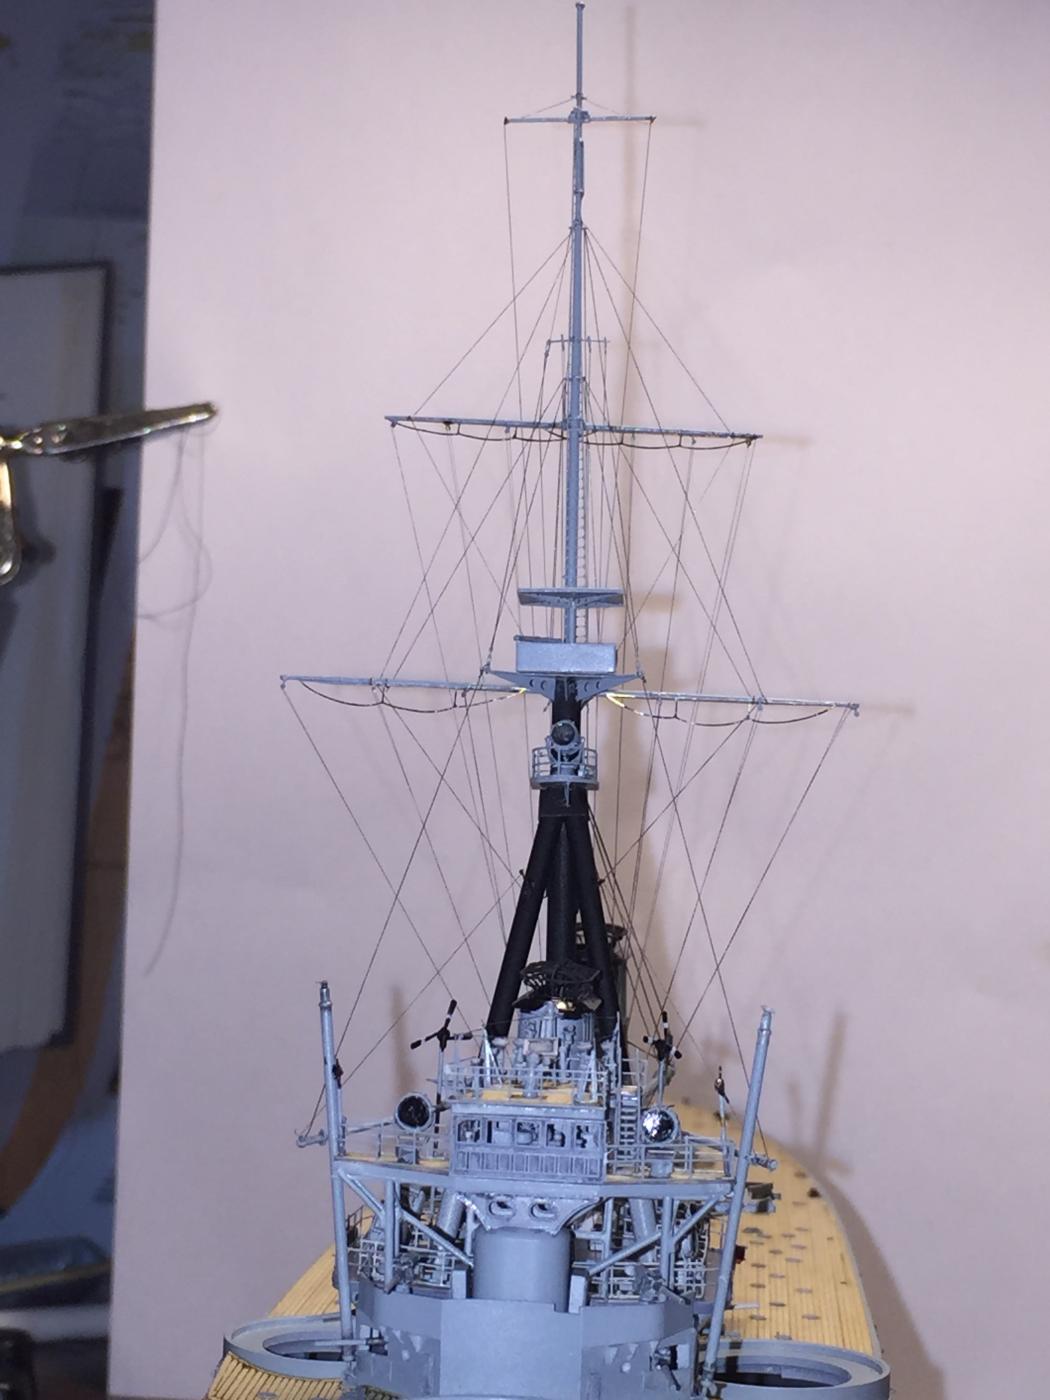
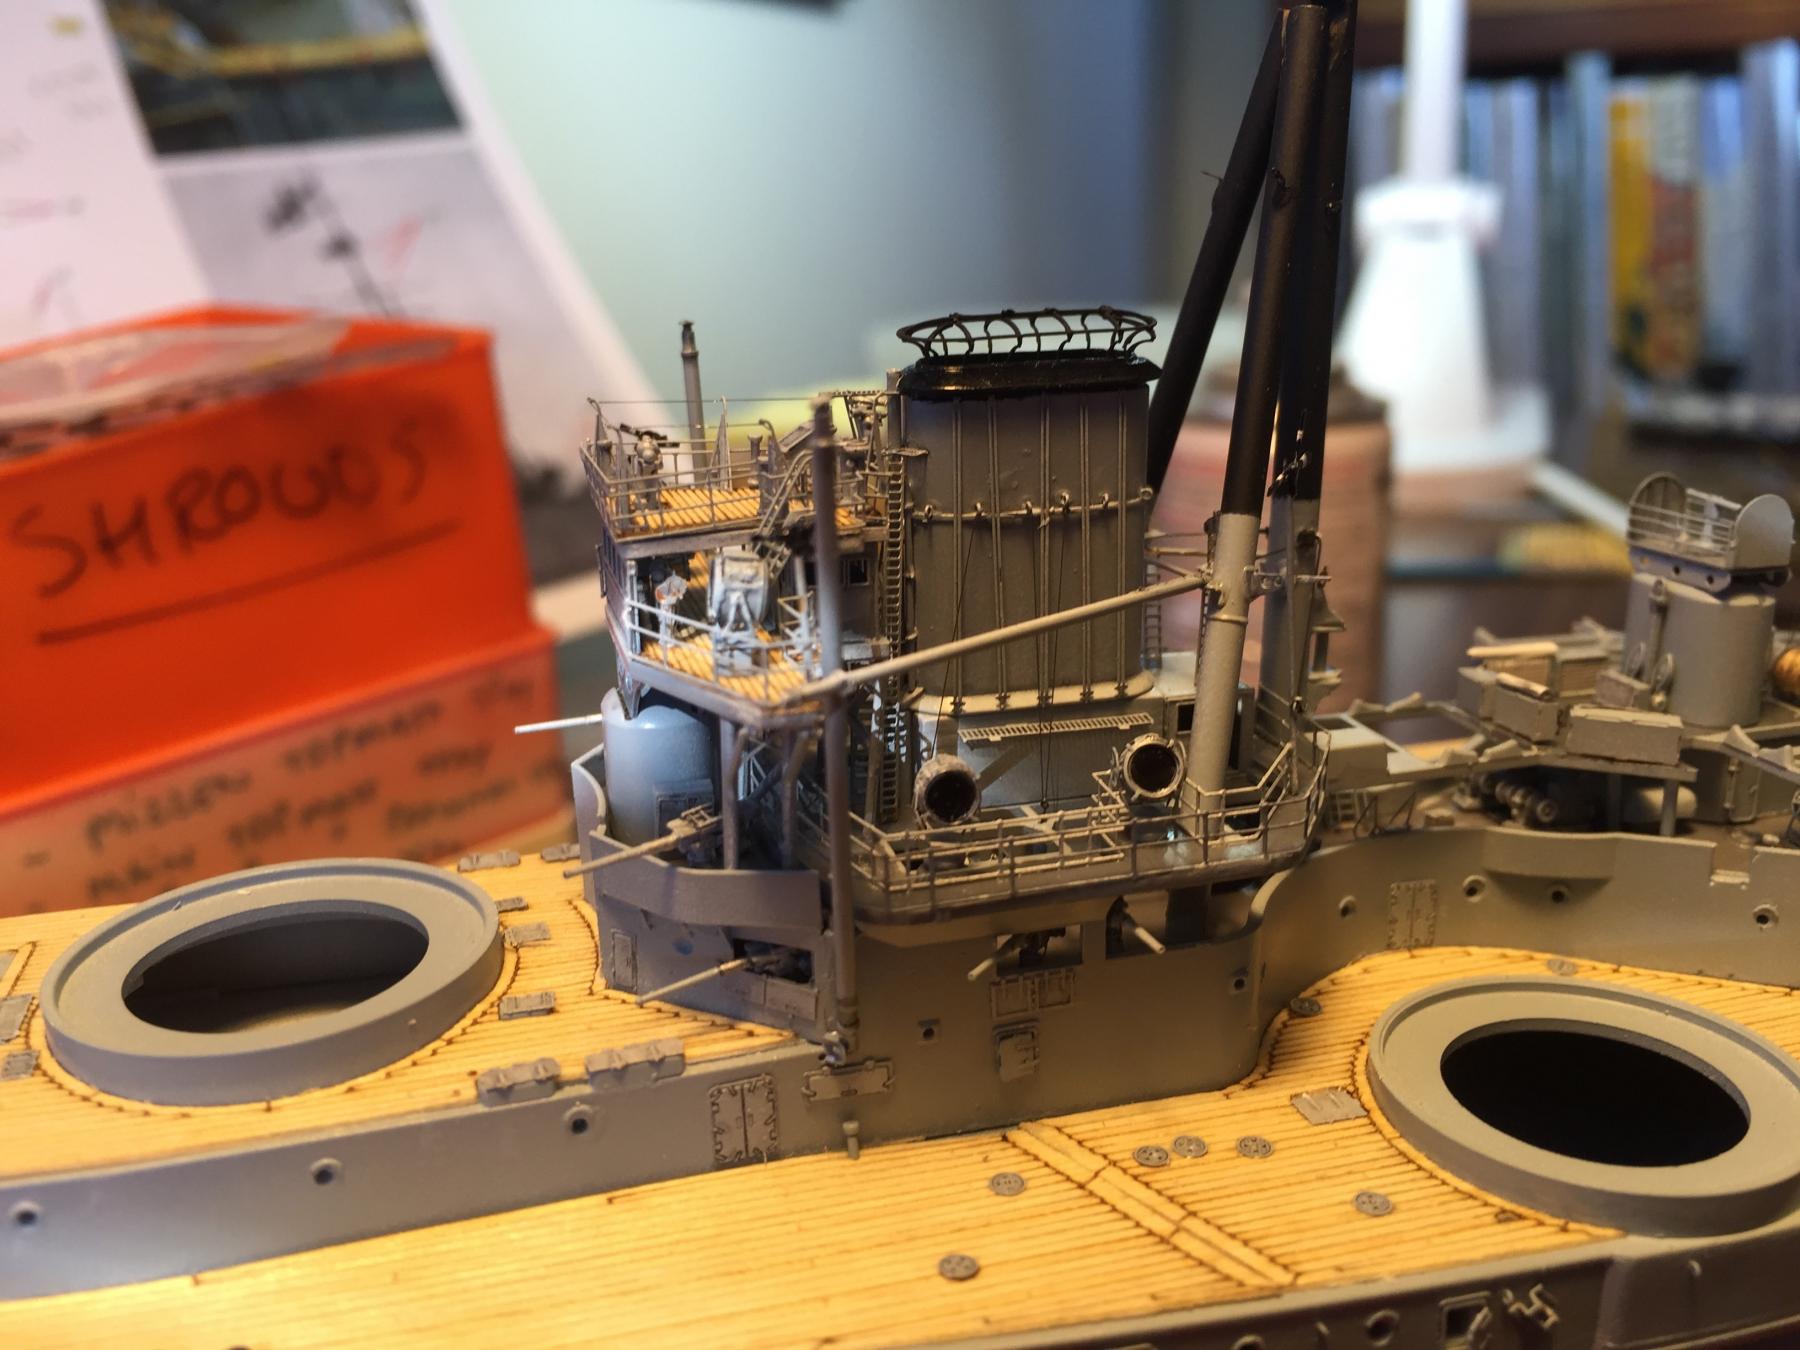
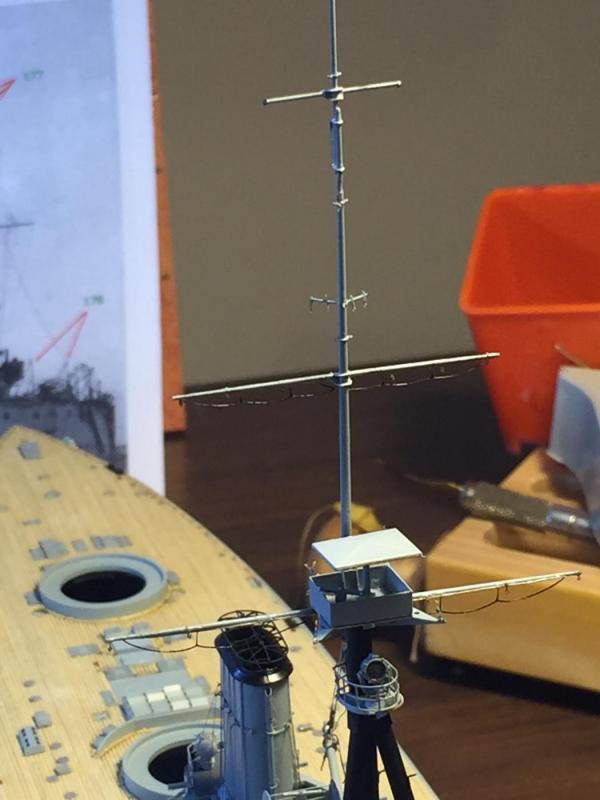
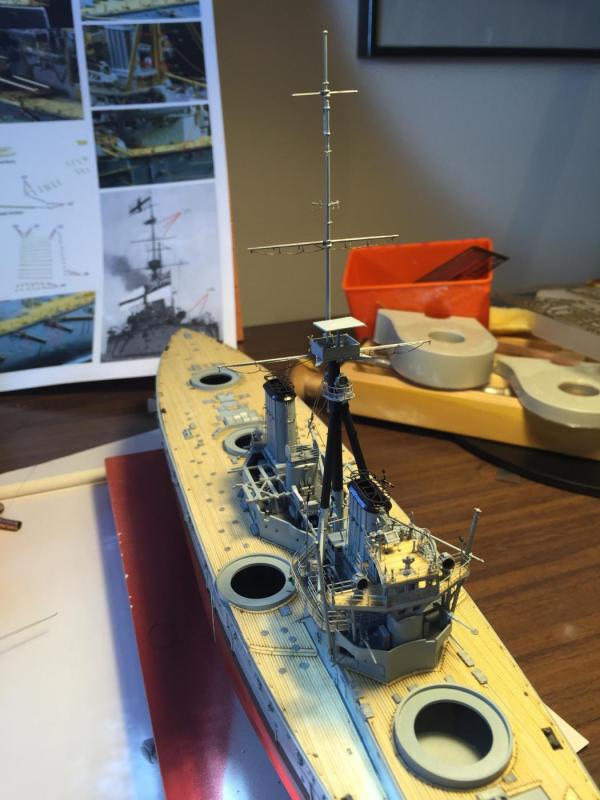
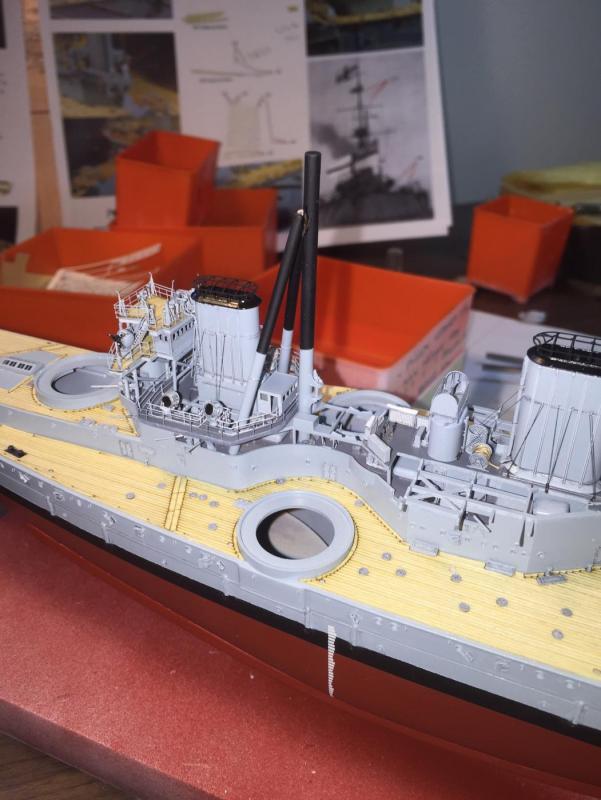
Man flu aside, I managed to get the main mast finished. I added tiny turnbuckles to allow the stays. Then just a matter of rigging it up and adding the coaling derricks which I rigged up as well. . I also added a small ladder up to the wireless telegraph yard. Then dry fit on the deck. I don't need to glue it down yet but it fits perfectly.


- 342 replies
-
- 19
-
-
- dreadnought
- zvezda
- (and 2 more)
-
Yes mate, hopefully the hot chocolate will allow your bride to think that we're not all strange like my wife thinks. She did not believe we didn't talk about "boat building".
- 342 replies
-
- 4
-
-
- dreadnought
- zvezda
- (and 2 more)
-
If you use a product like Ezyline, the "wire" has a flexibility of something to the magnitude of 20 so it does not pull on the fitting, it just stretches taking the terror out of rigging and wondering what is going to fling off. Unfortunately it comes in black, rust or white not grey. When you build a wooden ship there is no give in the rigging. Watching some of the other builds here in wood, most are using rope walks now. I got the cheap version but if I build another tall ship I'd invest in a decent one. No need at our scale.
- 342 replies
-
- 7
-
-
- dreadnought
- zvezda
- (and 2 more)
-
I discovered yesterday to put my lamp on my right hand side (I'm right handed) and it makes everything easier! Who knew? My 4th kit and I just figured that out.
-
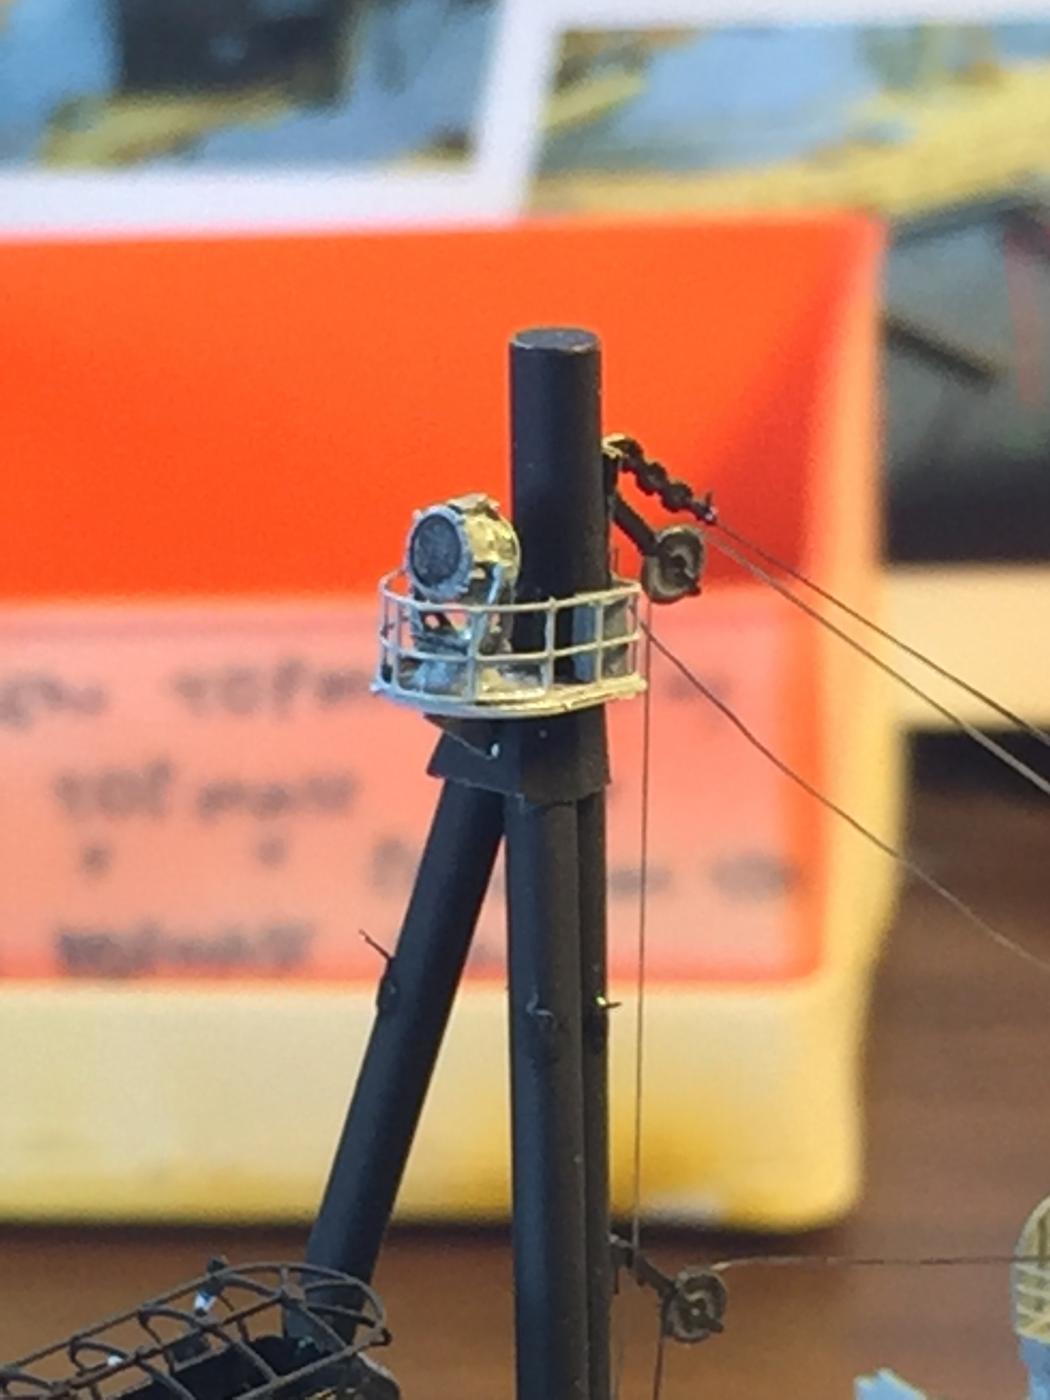
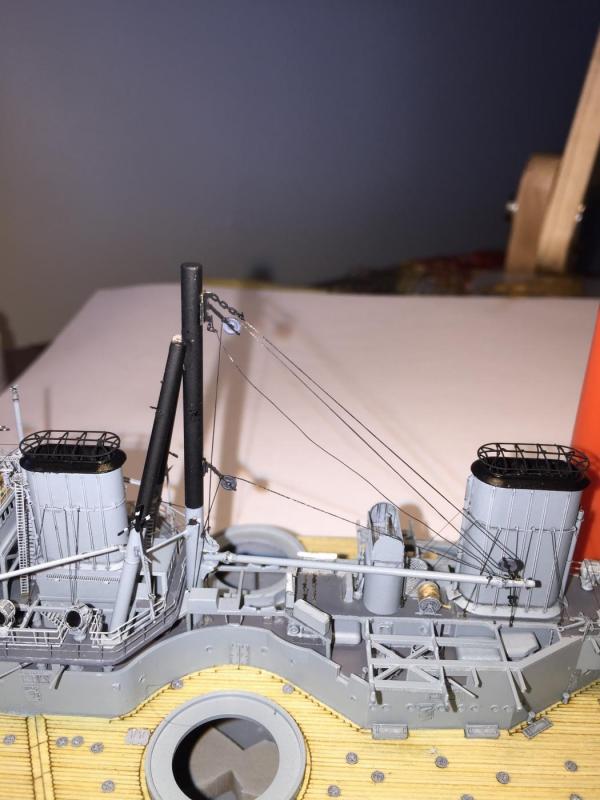
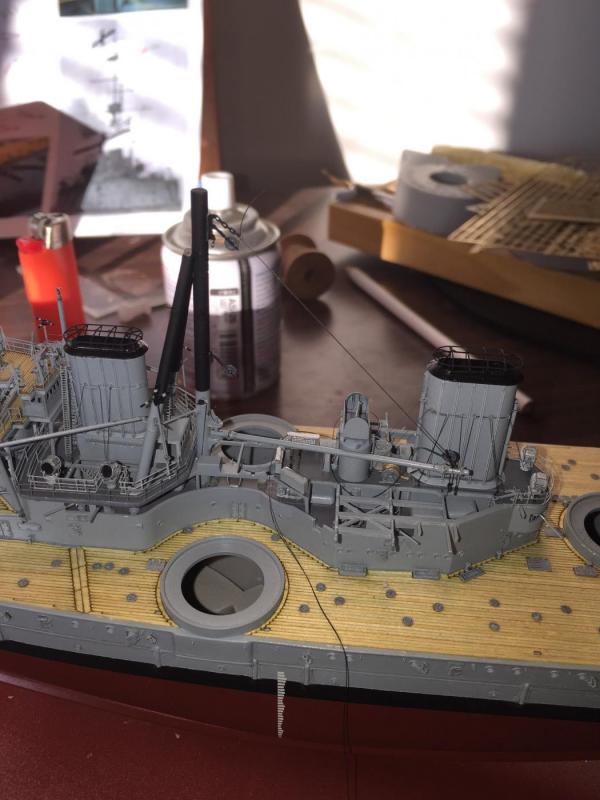
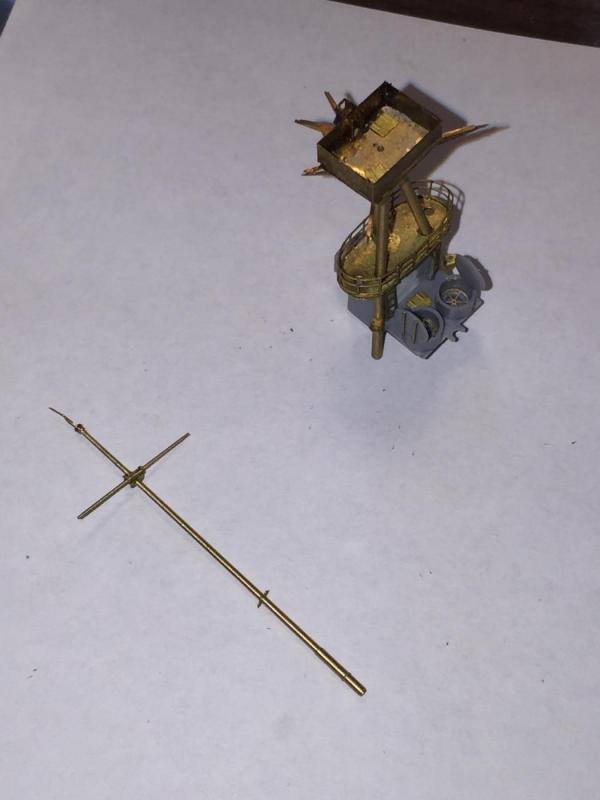
At home off work with man flu. Being productive, I cut the pulleys off the one piece etch and rigged with easy line. The pivot point on the boom is somewhere on the floor of my garage as it was dropped by some idiot whilst it was being painted, and I had to fabricate a new one from plastic card. The search light platform and a smaller search light. I will need to add a small ladder when the crowsnest goes on. And finally the sidelights which are referenced in the AOTS but ignored by everyone else.


- 342 replies
-
- 15
-
-
- dreadnought
- zvezda
- (and 2 more)
-
It's amazing what can be made up in plastic now considering the use of CAD, gone are the days of plastic blobs
- 75 replies
-
- 7
-
-
- scharnhorst
- dragon
- (and 2 more)
-
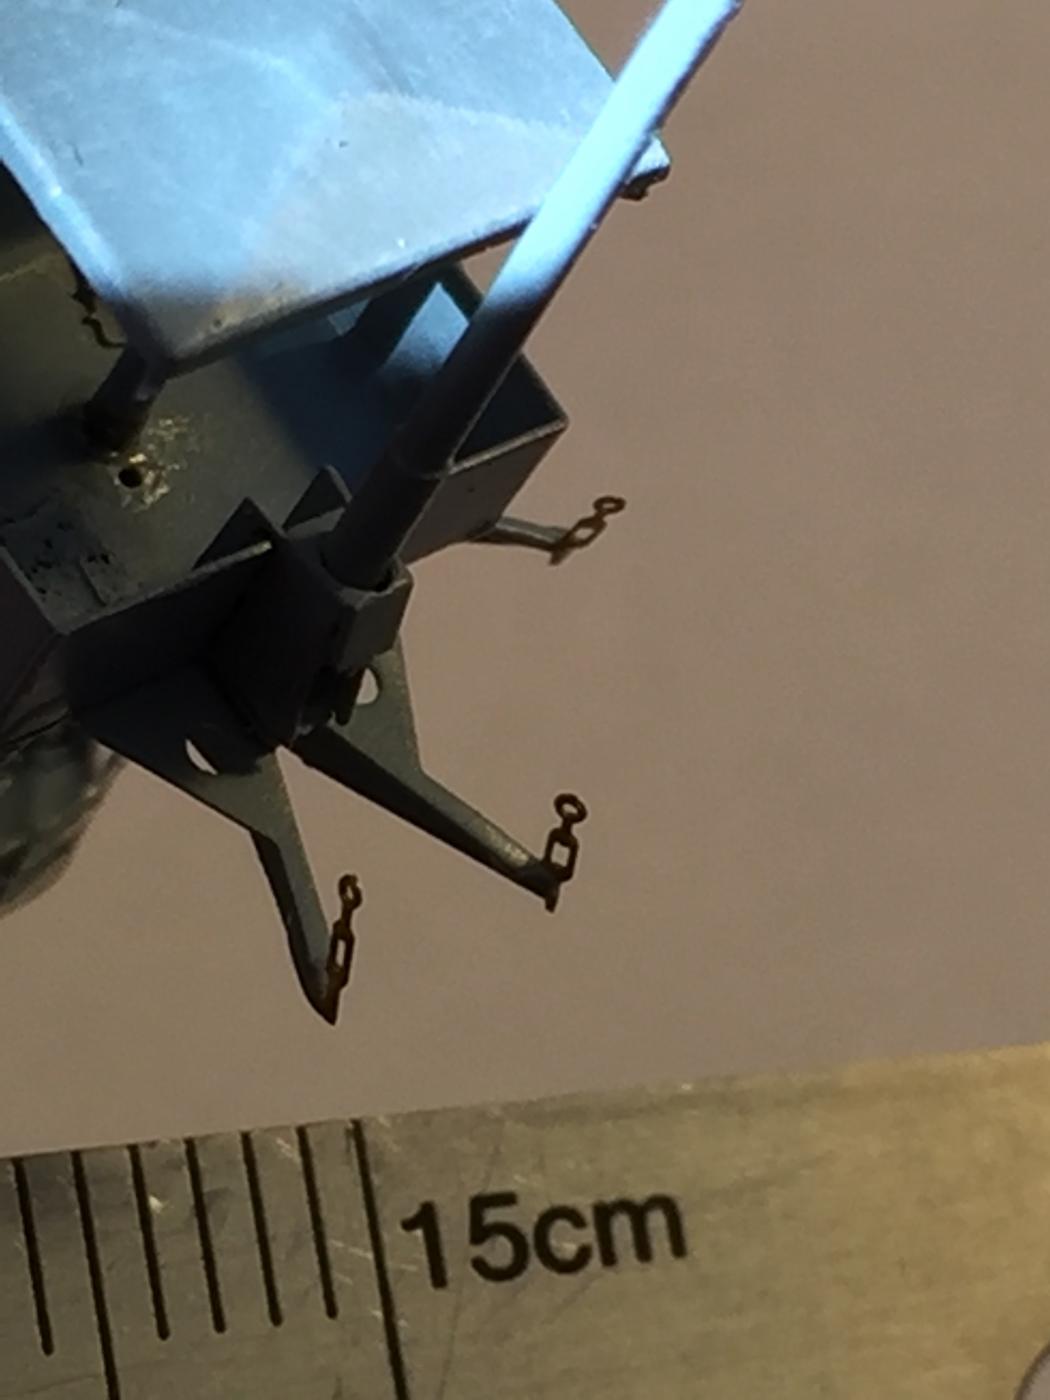
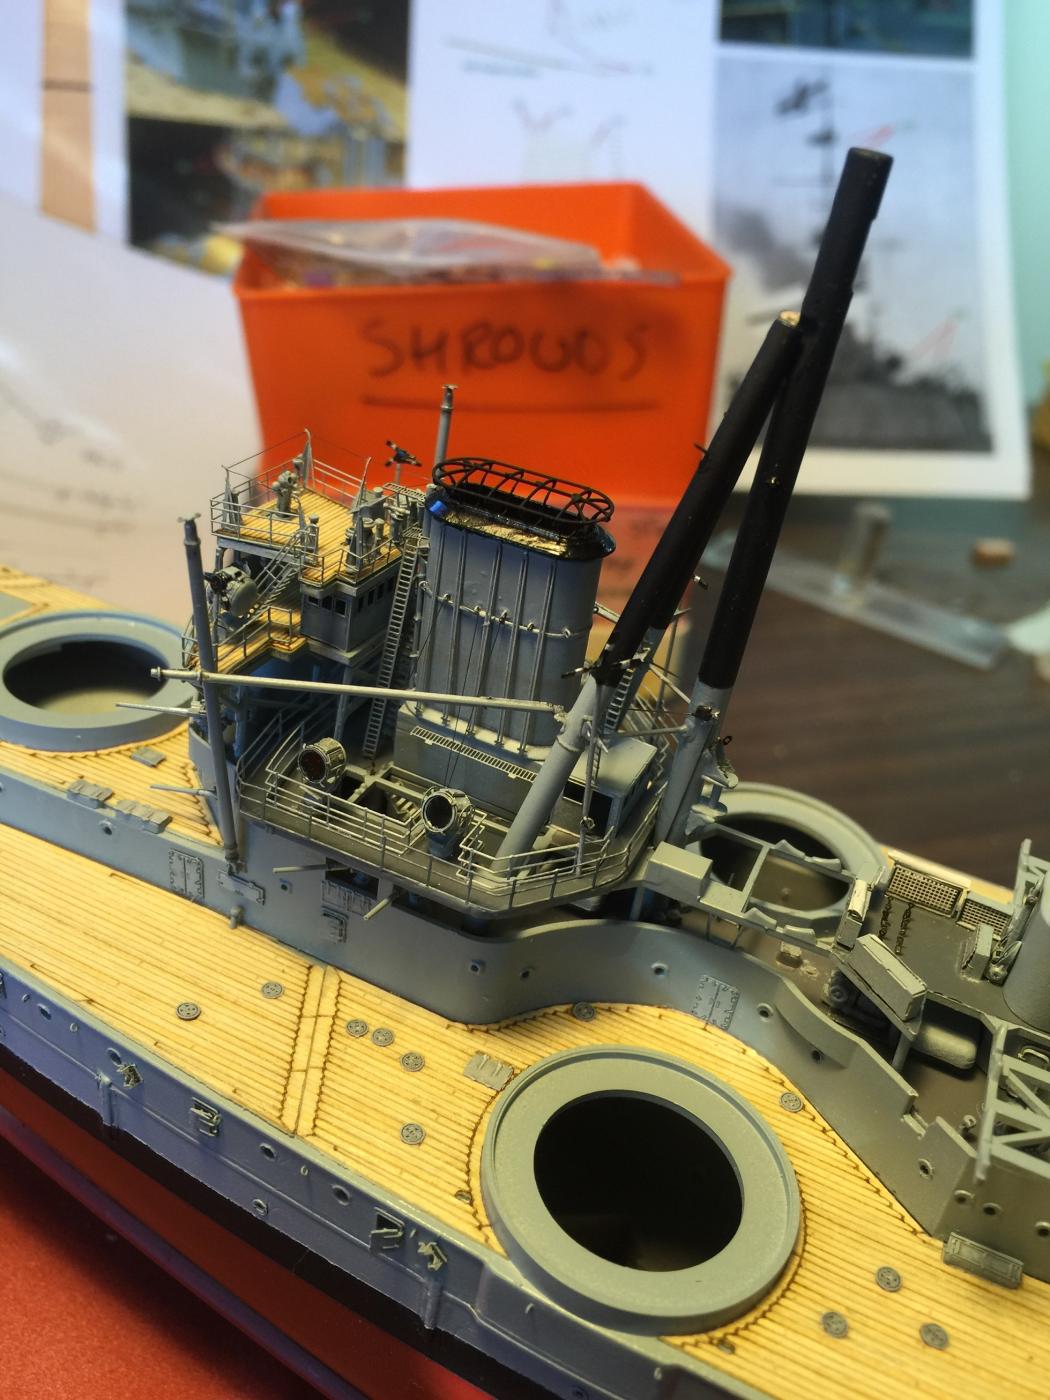
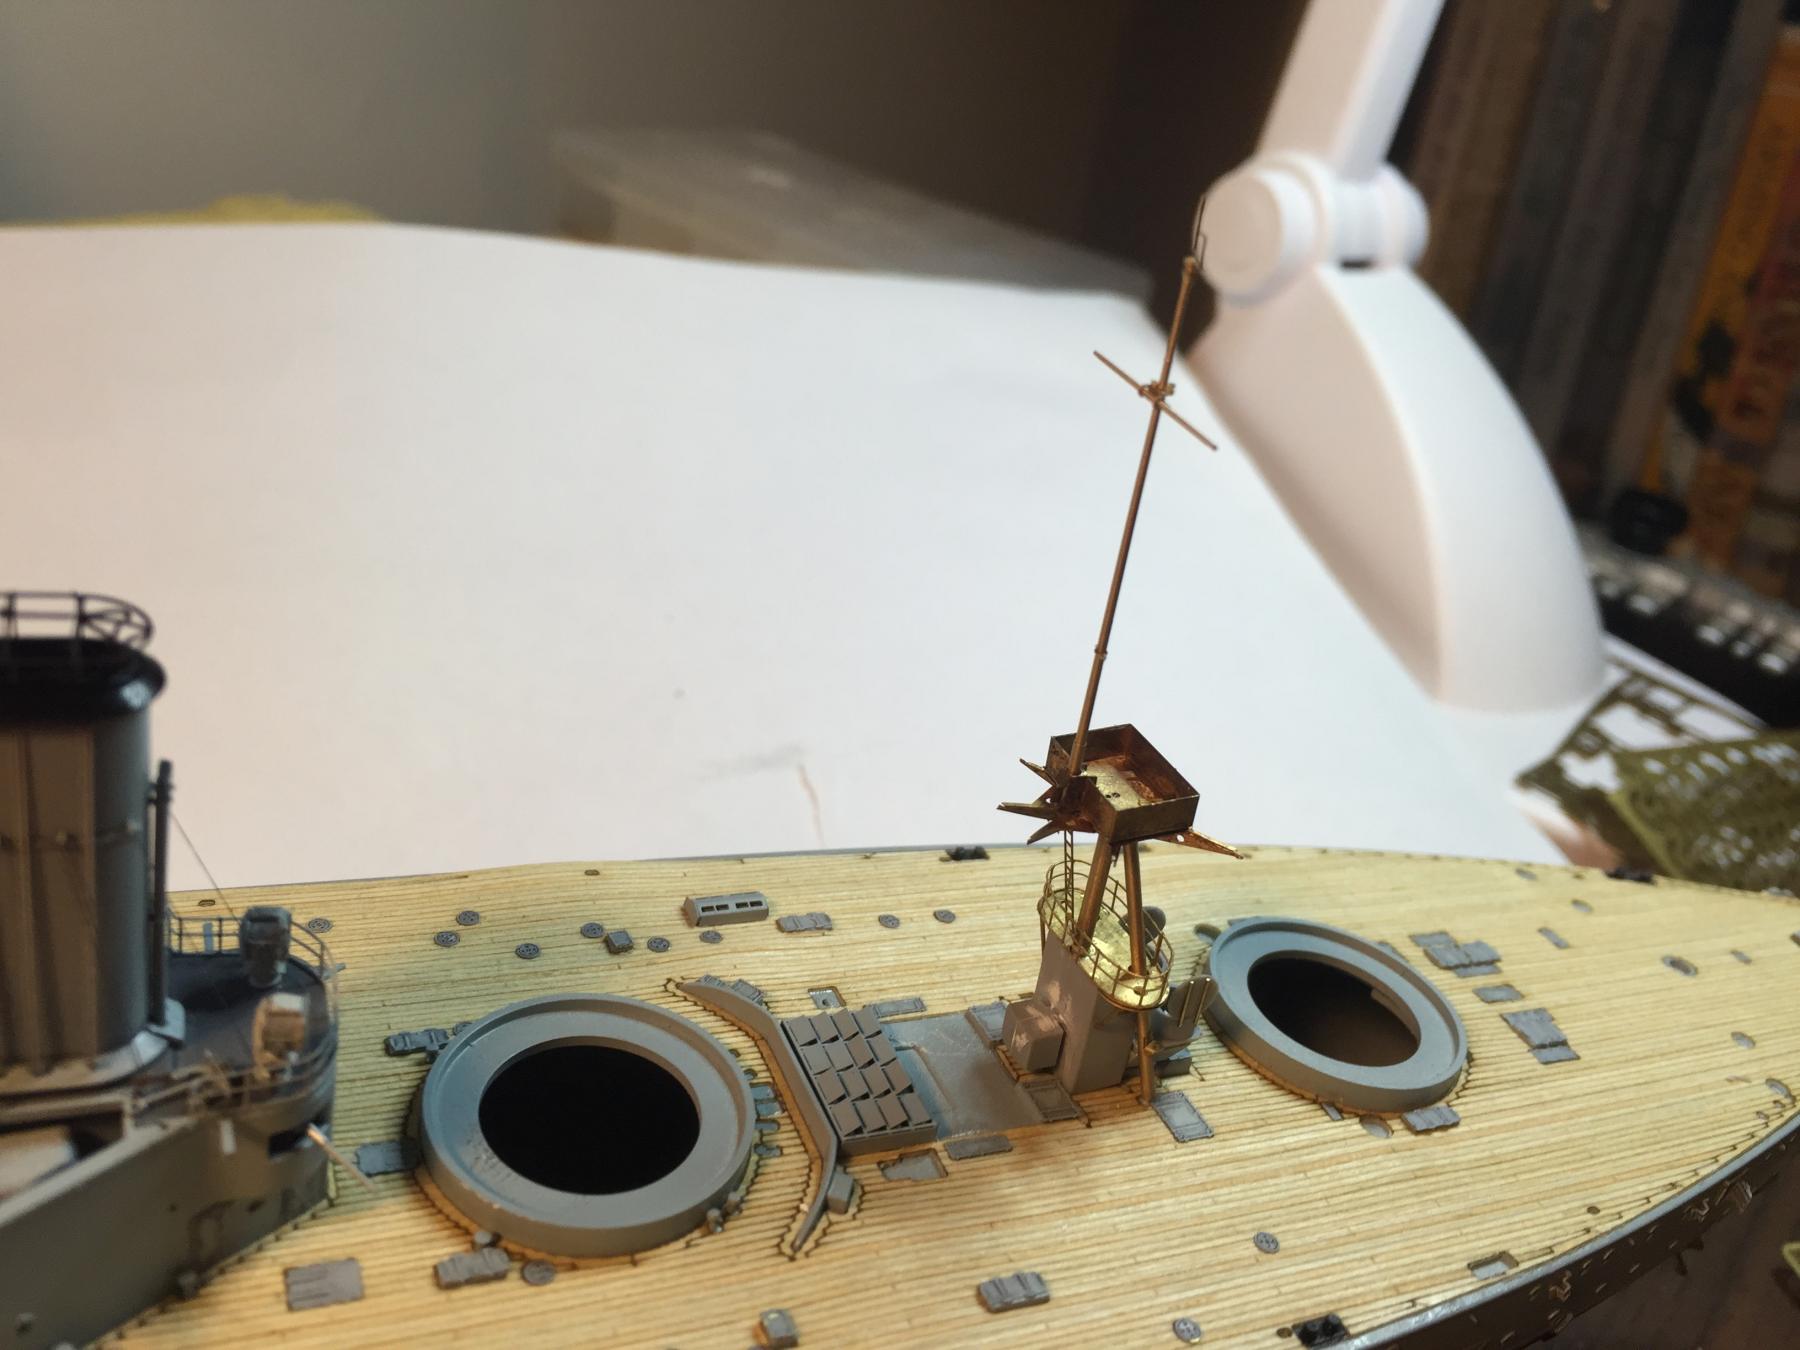
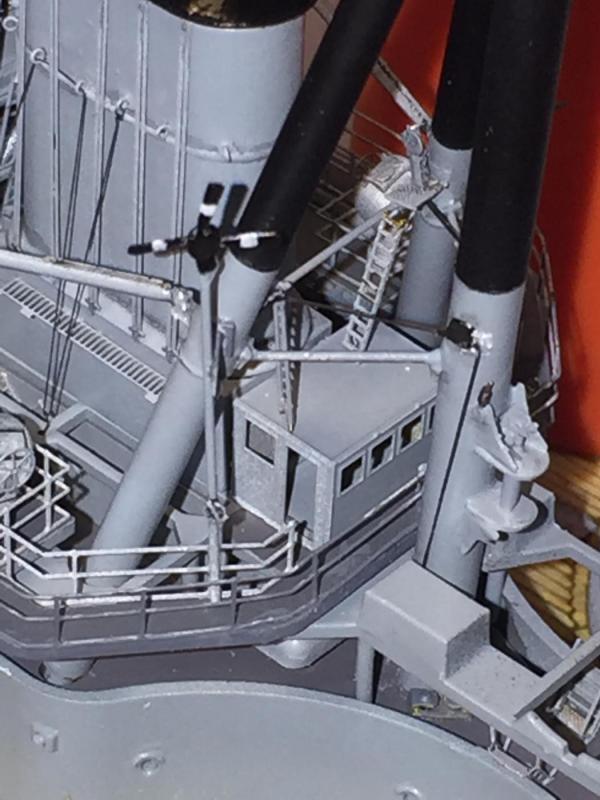
The bottom of the foremast is now pretty much complete. I fabricated the three tripod support struts out of very very thin copper pipe, placing 1x1mm support blocks to rest them on. As this is the 1907 version, I have added boat booms (using the undersize coaling derricks from the kit) making support brackets from spare etch. The larger derricks are Pontos. I won't rig them up until the upper masts go on. I have also added 6 belaying points to the tripod which will be needed later. The engine telegraph platforms come withe the Pontos kit, but the telegraphs are North star, and I rand some black line to simulate the control rods which run belowdecks. Finally the 1907 version had semaphores just off the Admirals cabin which a fabricated agin and have the resting on another support strut made out of excess etch. It does not seem like much, and the macro is not flattering but it was as fiddly as hell. There is a little bit of touch up painting to go but that can wait. I guess I'll have to do the main davit next, and it's rigging and pulleys consist of a single piece of etch which I have cut up so I can rig is correctly.

- 342 replies
-
- 18
-
-
- dreadnought
- zvezda
- (and 2 more)
-
Thank you G, but nothing in comparison to what what some others do here. Most of our ships will never leave the house, so it's up to our own OCD. I'd love to see a group build in plastic. Starting from kit selection, research, technique, aftermarket, step by step build with votes for direction to take.
- 342 replies
-
- 5
-
-
- dreadnought
- zvezda
- (and 2 more)
-
The fore mast is quite intricate, and the Pontos masts are just magnificent and fit like a glove. I should be able to get a fair bit of rigging done before I plonk it on. There are lots of little bits I have prepared for painting that will go on the support struts that are only a couple of mm each.

- 342 replies
-
- 18
-
-
- dreadnought
- zvezda
- (and 2 more)
-
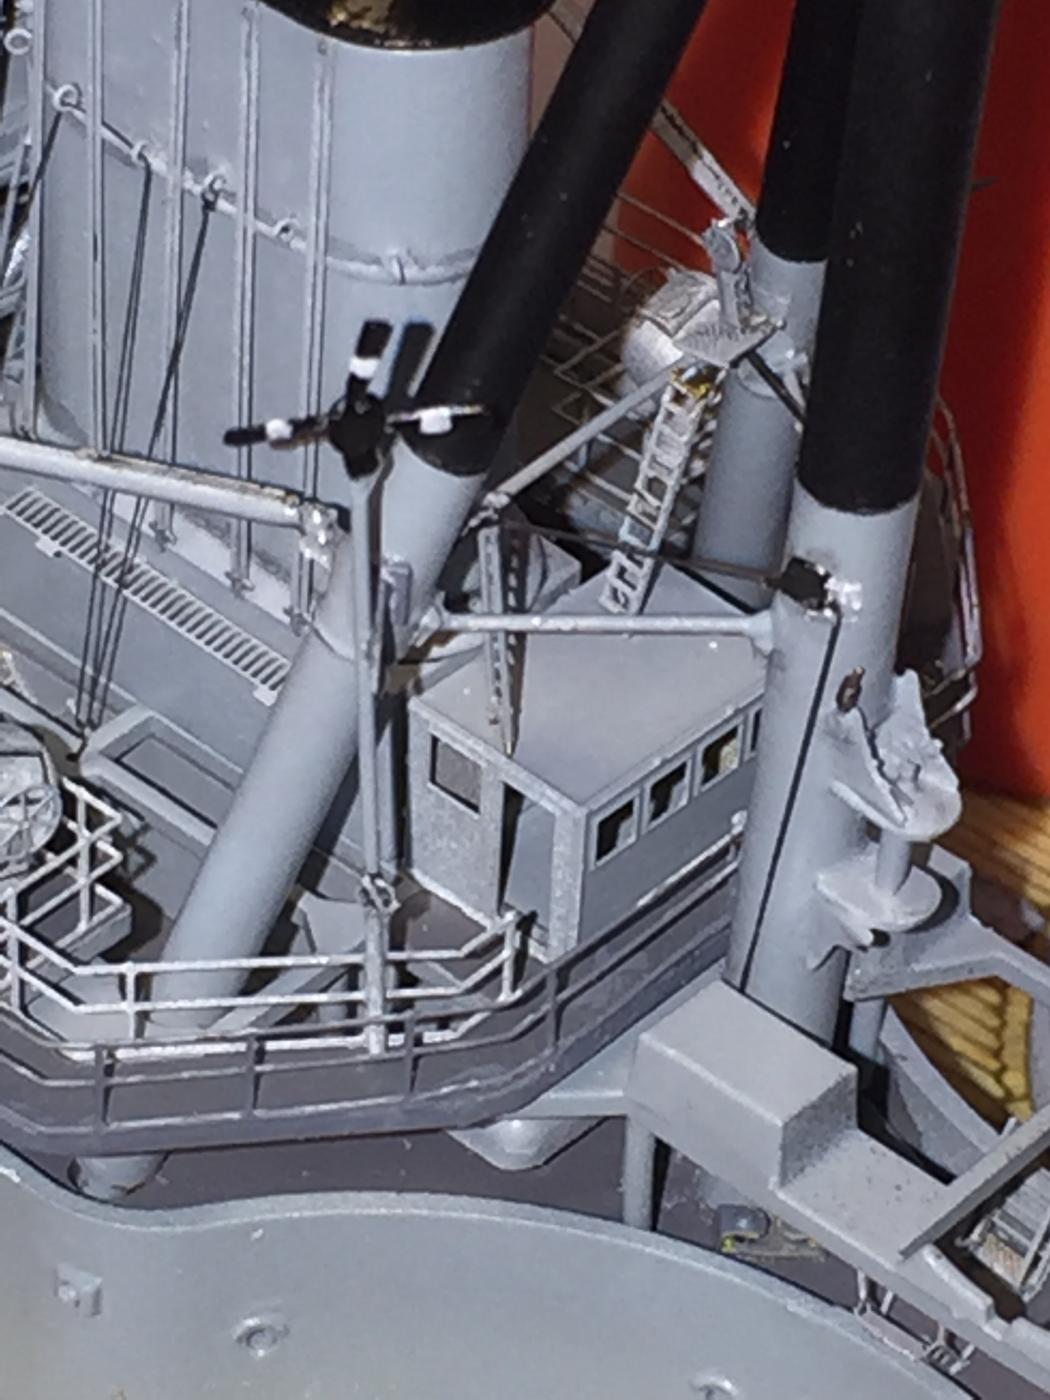
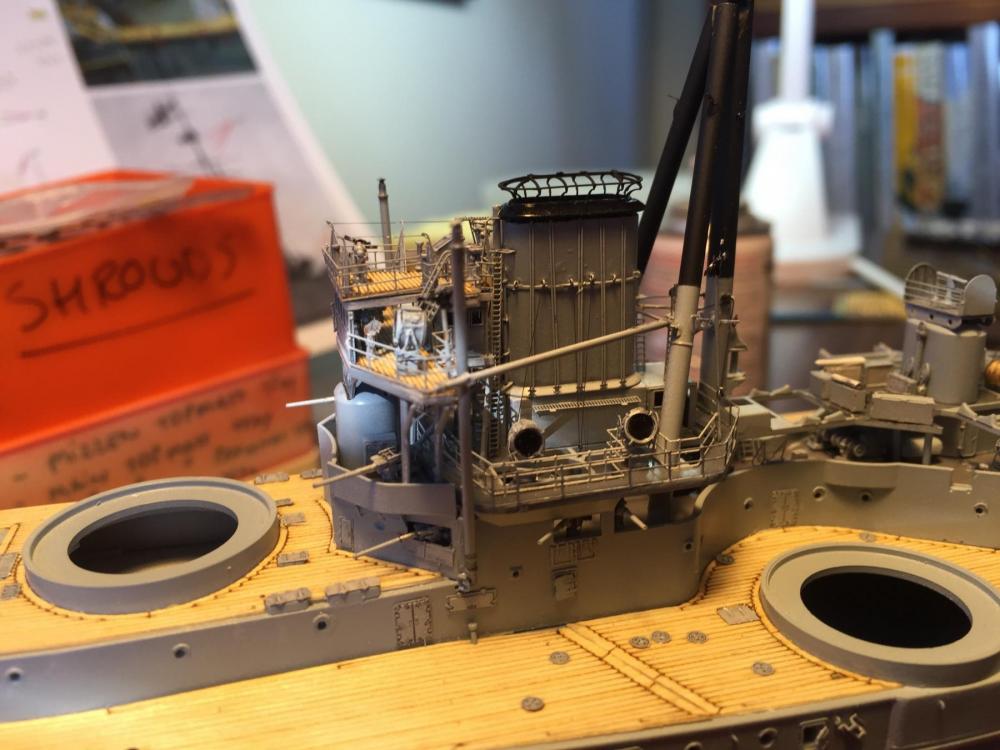
Moving along, I am trying to get as much prep done as possible before painting as it is more economical. The main mast, well, meet my nemesis!. If you've ever had that bit that you can't get right this is it, The beauty of brass and CA is when you get it wrong, you burn the CA off with a lighter and re start. The engine room vents at the rear of the structure are not referenced anywhere and have a single reference to covers in the AOTS only so I drilled them out and fabricated hatches. There are ladders that run up the support struts but the boat boom's do not allow this in the kit. At least with this piece I can complete nearly all the rigging off kit after painting.


- 342 replies
-
- 18
-
-
- dreadnought
- zvezda
- (and 2 more)
-
Great build, it must weight a ton with all that wood!
- 227 replies
-
- 3
-
-
- BlueJacket Shipcrafters
- Stephen Hopkins
- (and 2 more)
-
A small addition, the base of the foremast. Does not seem like much, but I have read on other builds people say this is fiddley, and it certainly is. The Pontos upgrade provides three brass rods which just do not like each other. My plan was to do the entire mast assembly off kit, but it is impossible as the angles of a tripod do not allow the think to go in past the boat deck. As such it has to be done on the ship itself, which means to get the correct measurements for all the other bits that will be attached have to be done on the model, increasing the risk. There are support struts, 2 engine room telegraphs, numerous belaying points, ladders, two boat booms and 2 semaphore brackets to be added yet. Strangely the Zvezda hit includes the support struts but not pontos, the boat booms are also missing and the 2 semaphores are also not mentioned which were all in place in 1907, no great task to build them, but Pontos has some amazing details and just forgets really obvious ones.
- 342 replies
-
- 16
-
-
- dreadnought
- zvezda
- (and 2 more)
-
Black majic to me Slog, a whole new world that's probably beyond me but I'm still enjoying it.
- 244 replies
-
- 6
-
-
- borodino
- dom bumagi
- (and 1 more)