


RGL
-
Posts
5,554 -
Joined
-
Last visited
Content Type
Profiles
Forums
Gallery
Events
Posts posted by RGL
-
-
-
-
-
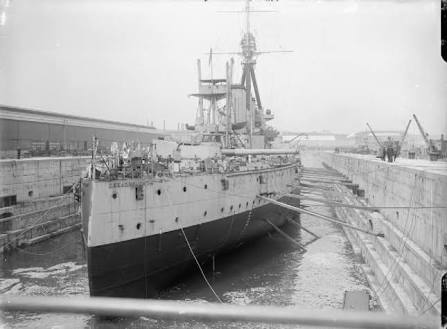
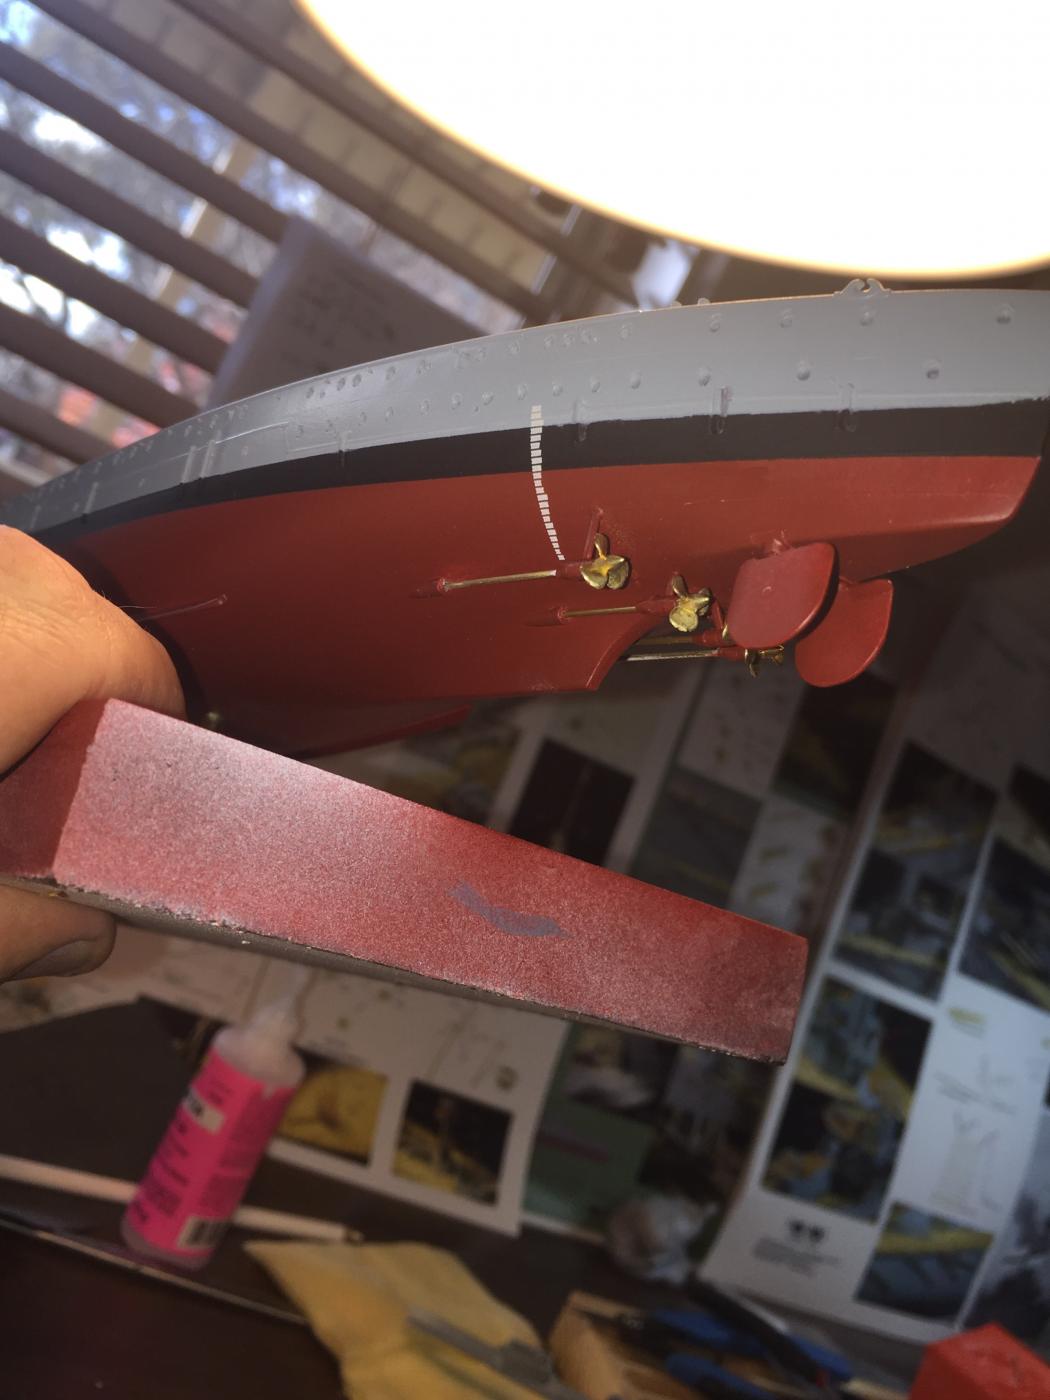
Umm, Greg - looking at your last photo, it appears that you have right hand propellers on the port side and left hand propellers on the starboard side. Have you photos to show this ion the original ship, as multiple propellers are almost invariably fitted the other way around so that they're outward turning when the ship is going ahead; which provides for much better manoeuvrability - especially when going astern.
John
-
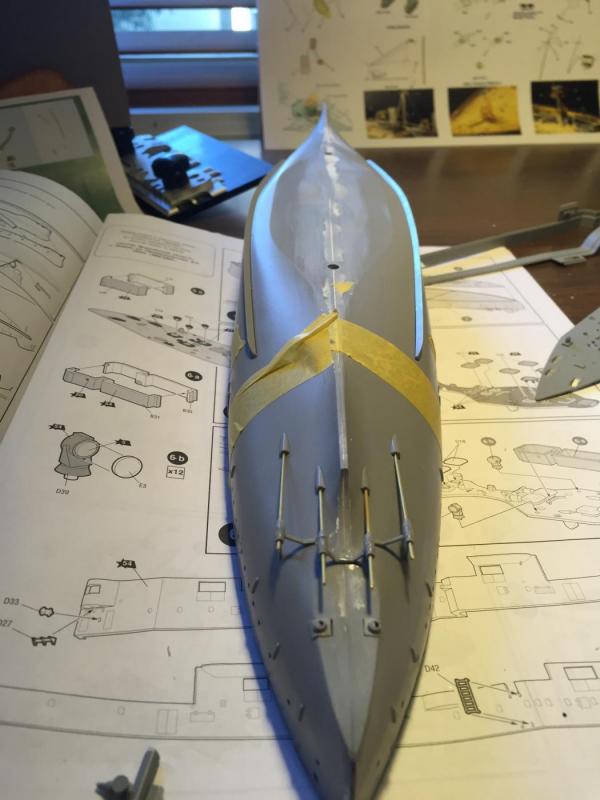
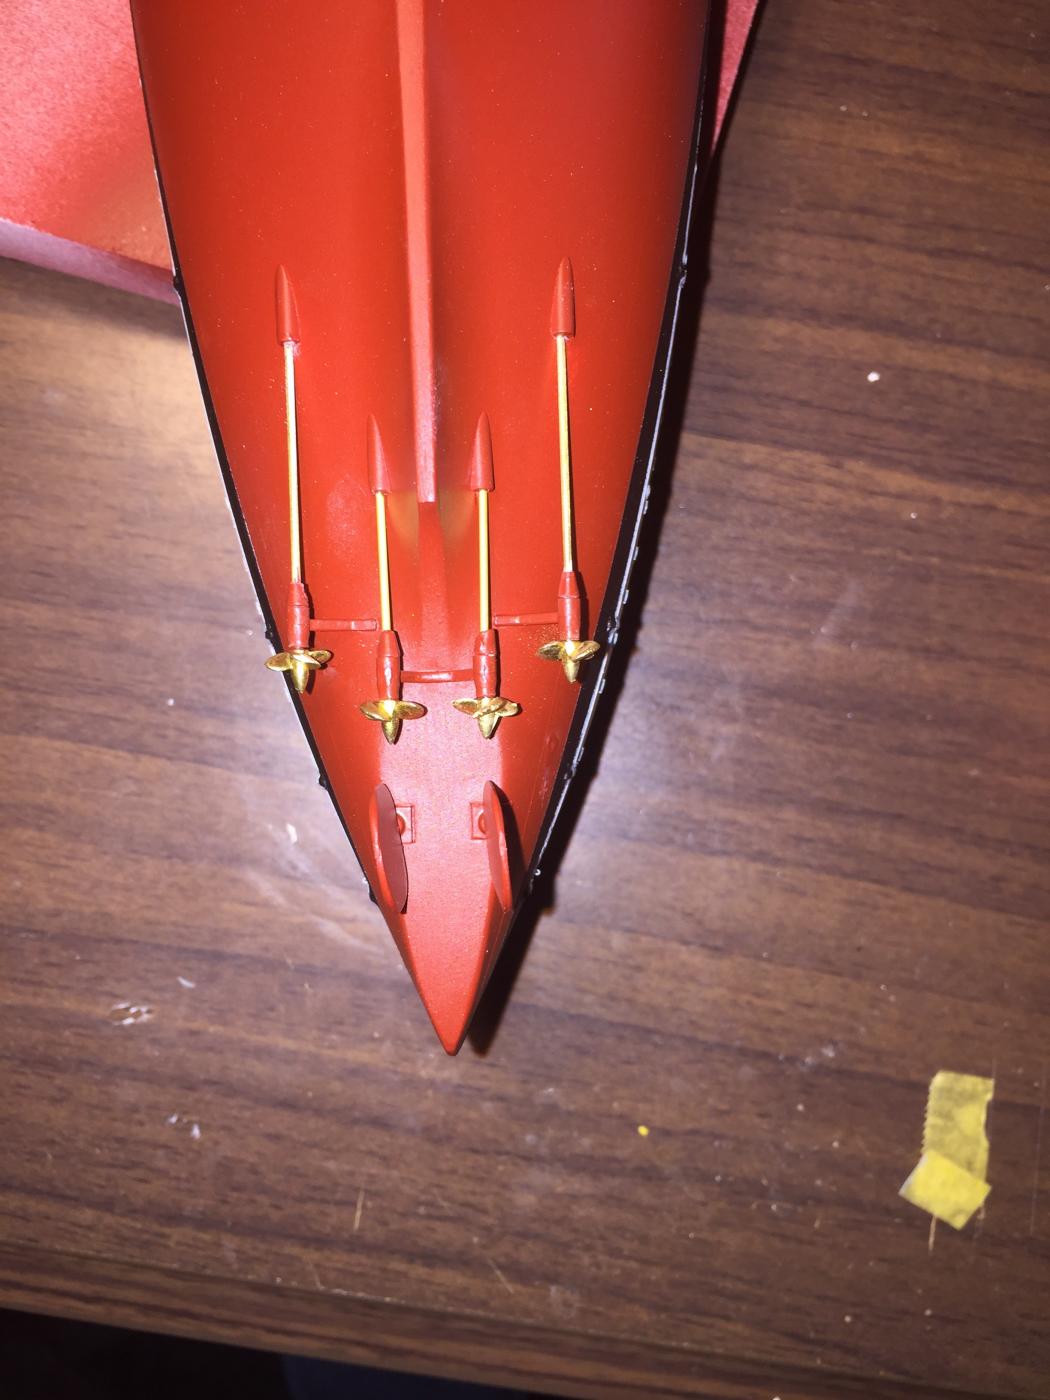
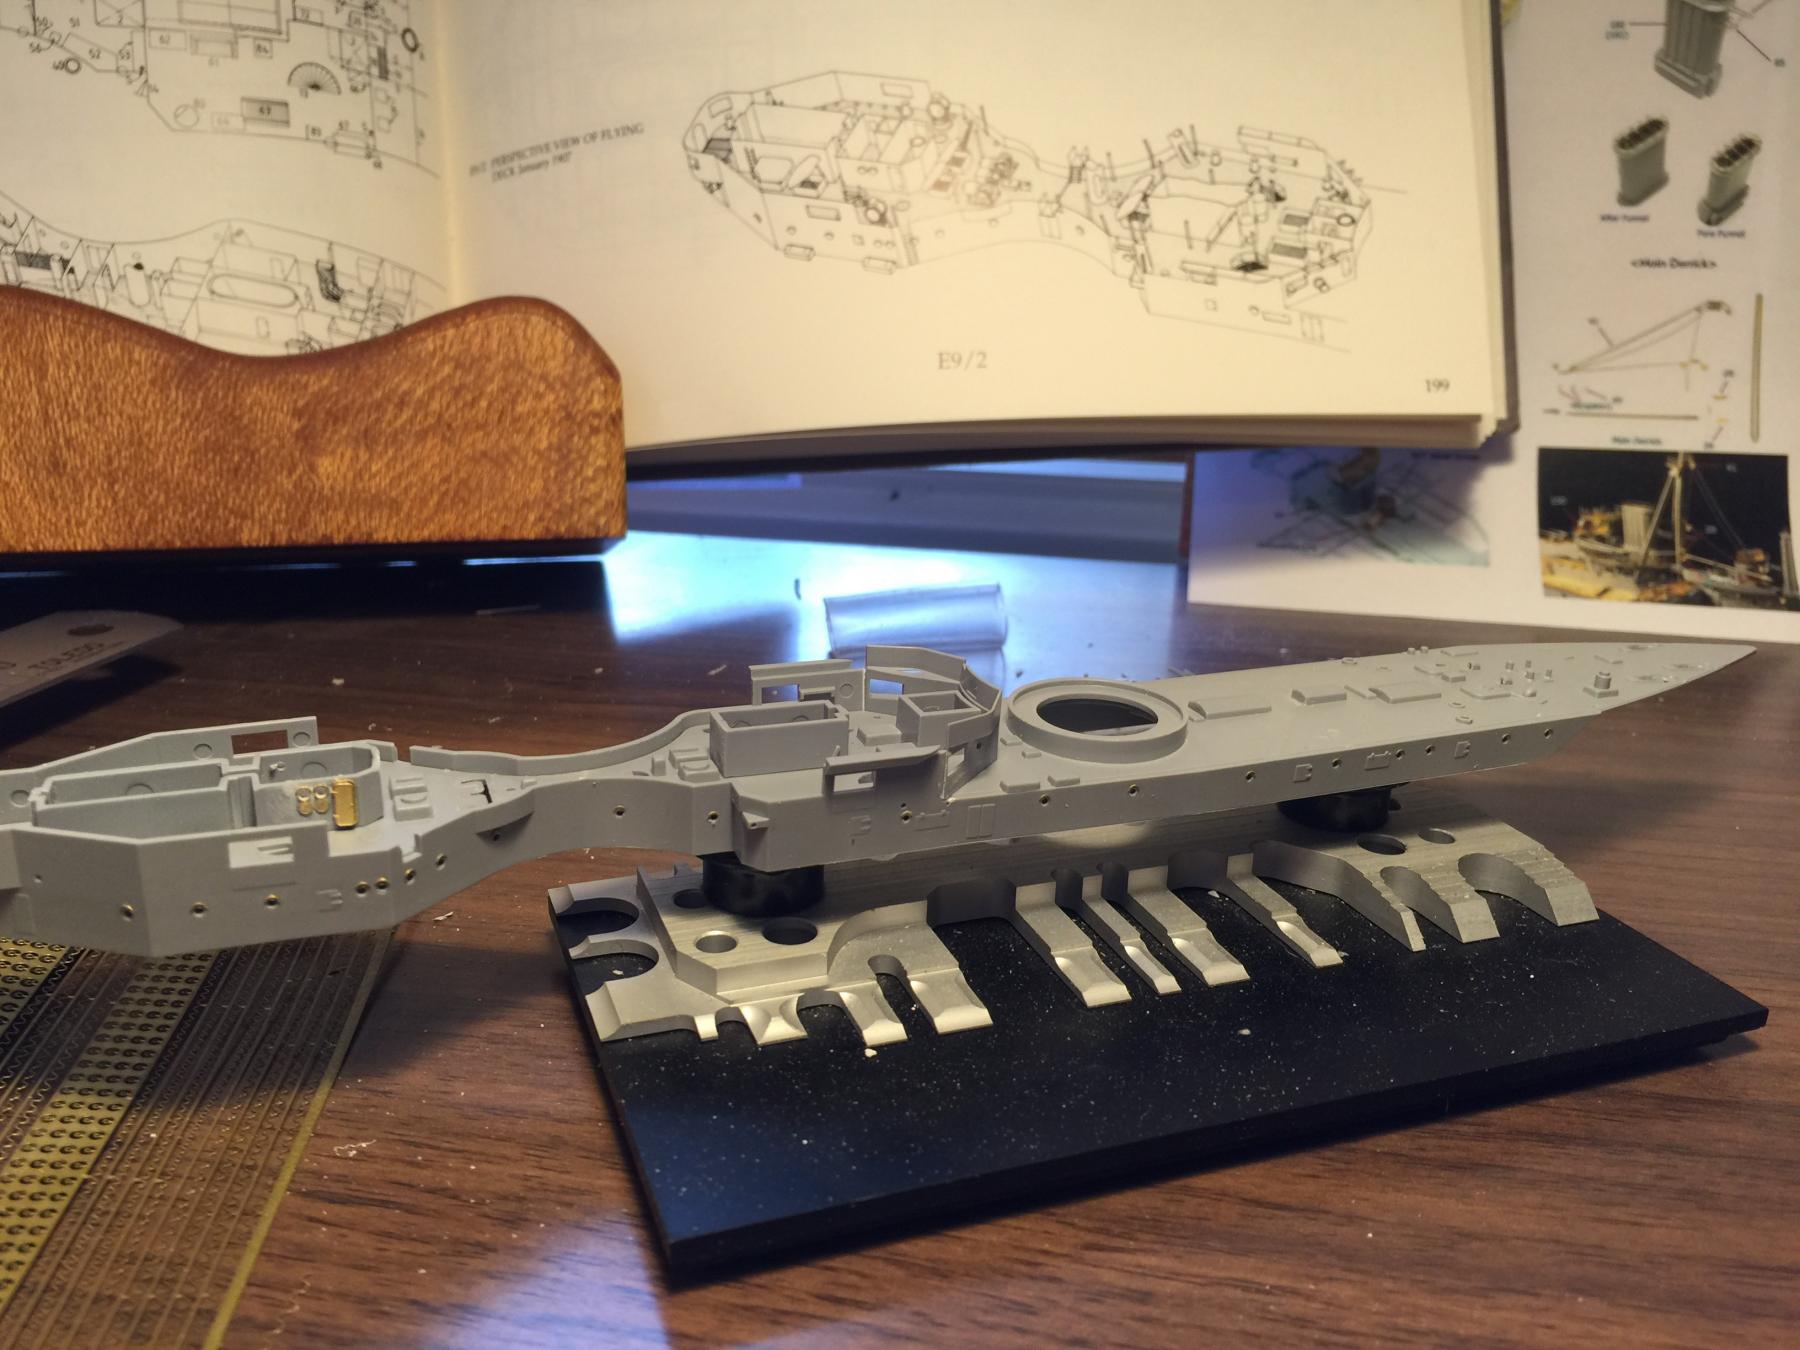
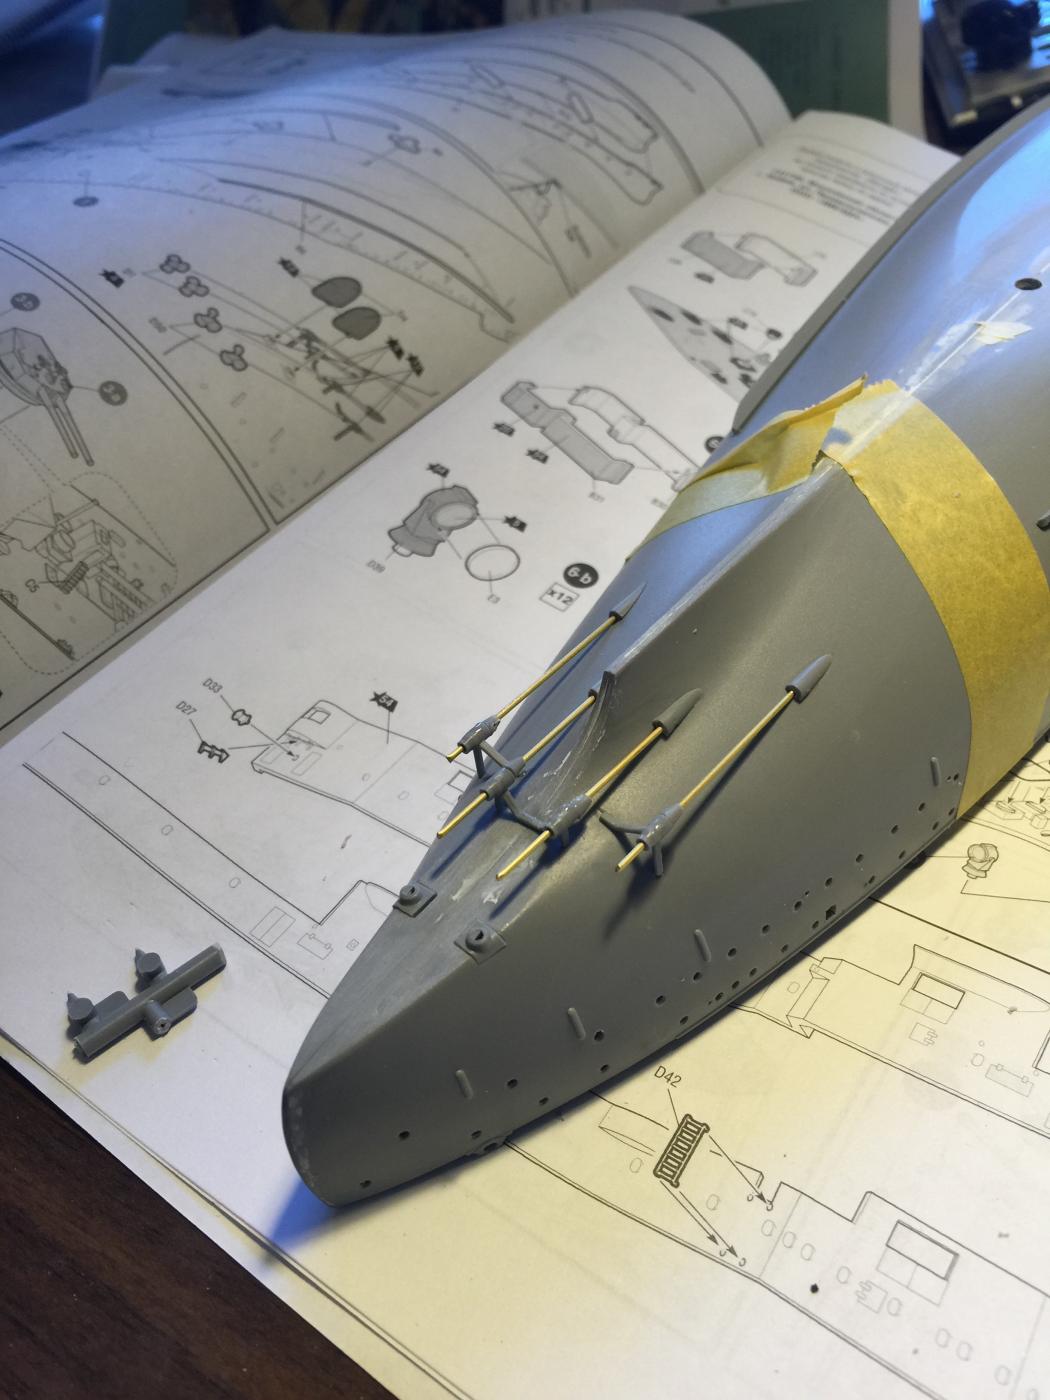
The screw and shafts complete. I used some lovely G Factor brass ones specific to this kit.
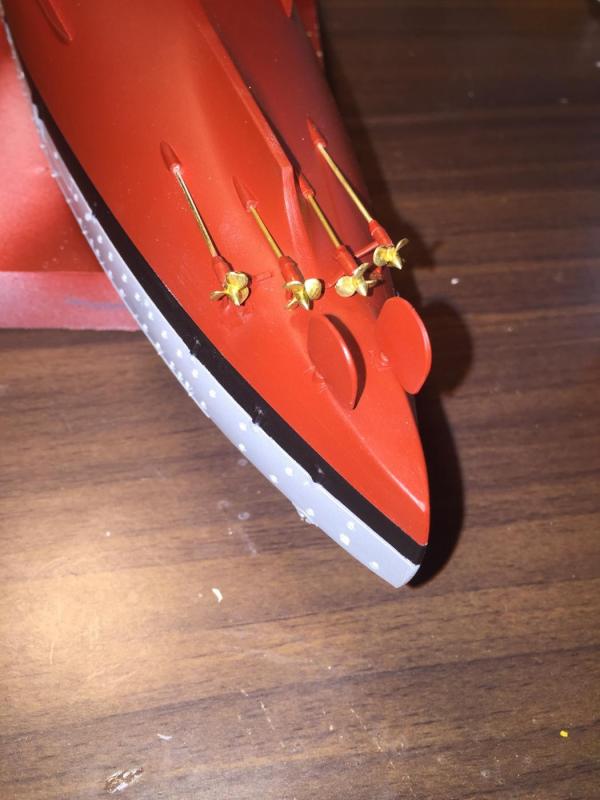

I then placed on the depth markers. These are dry transfers which I have never used before but after a quick look on the internet on how to use them (no instructions were provided) they went on very easily. If you loom closely at the tird phot you can see the .3mm rings for the torpedo boom rigging.
This is now my Monday morning so back to the grind.


- mrshanks, Captain Slog, docidle and 12 others
-
 15
15
-
-
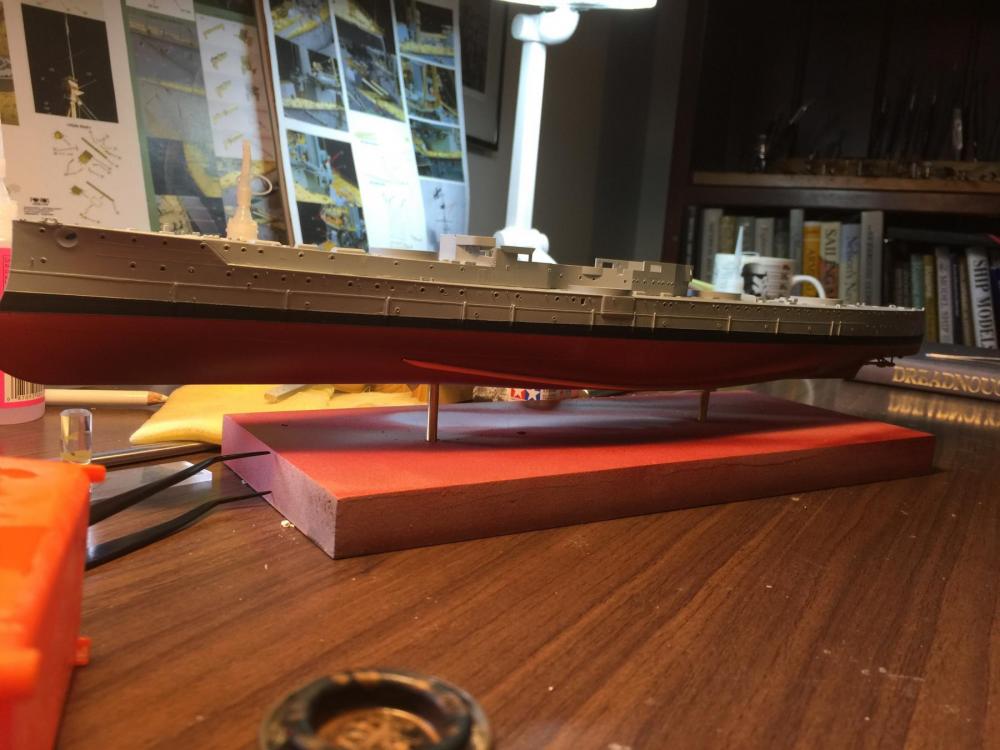
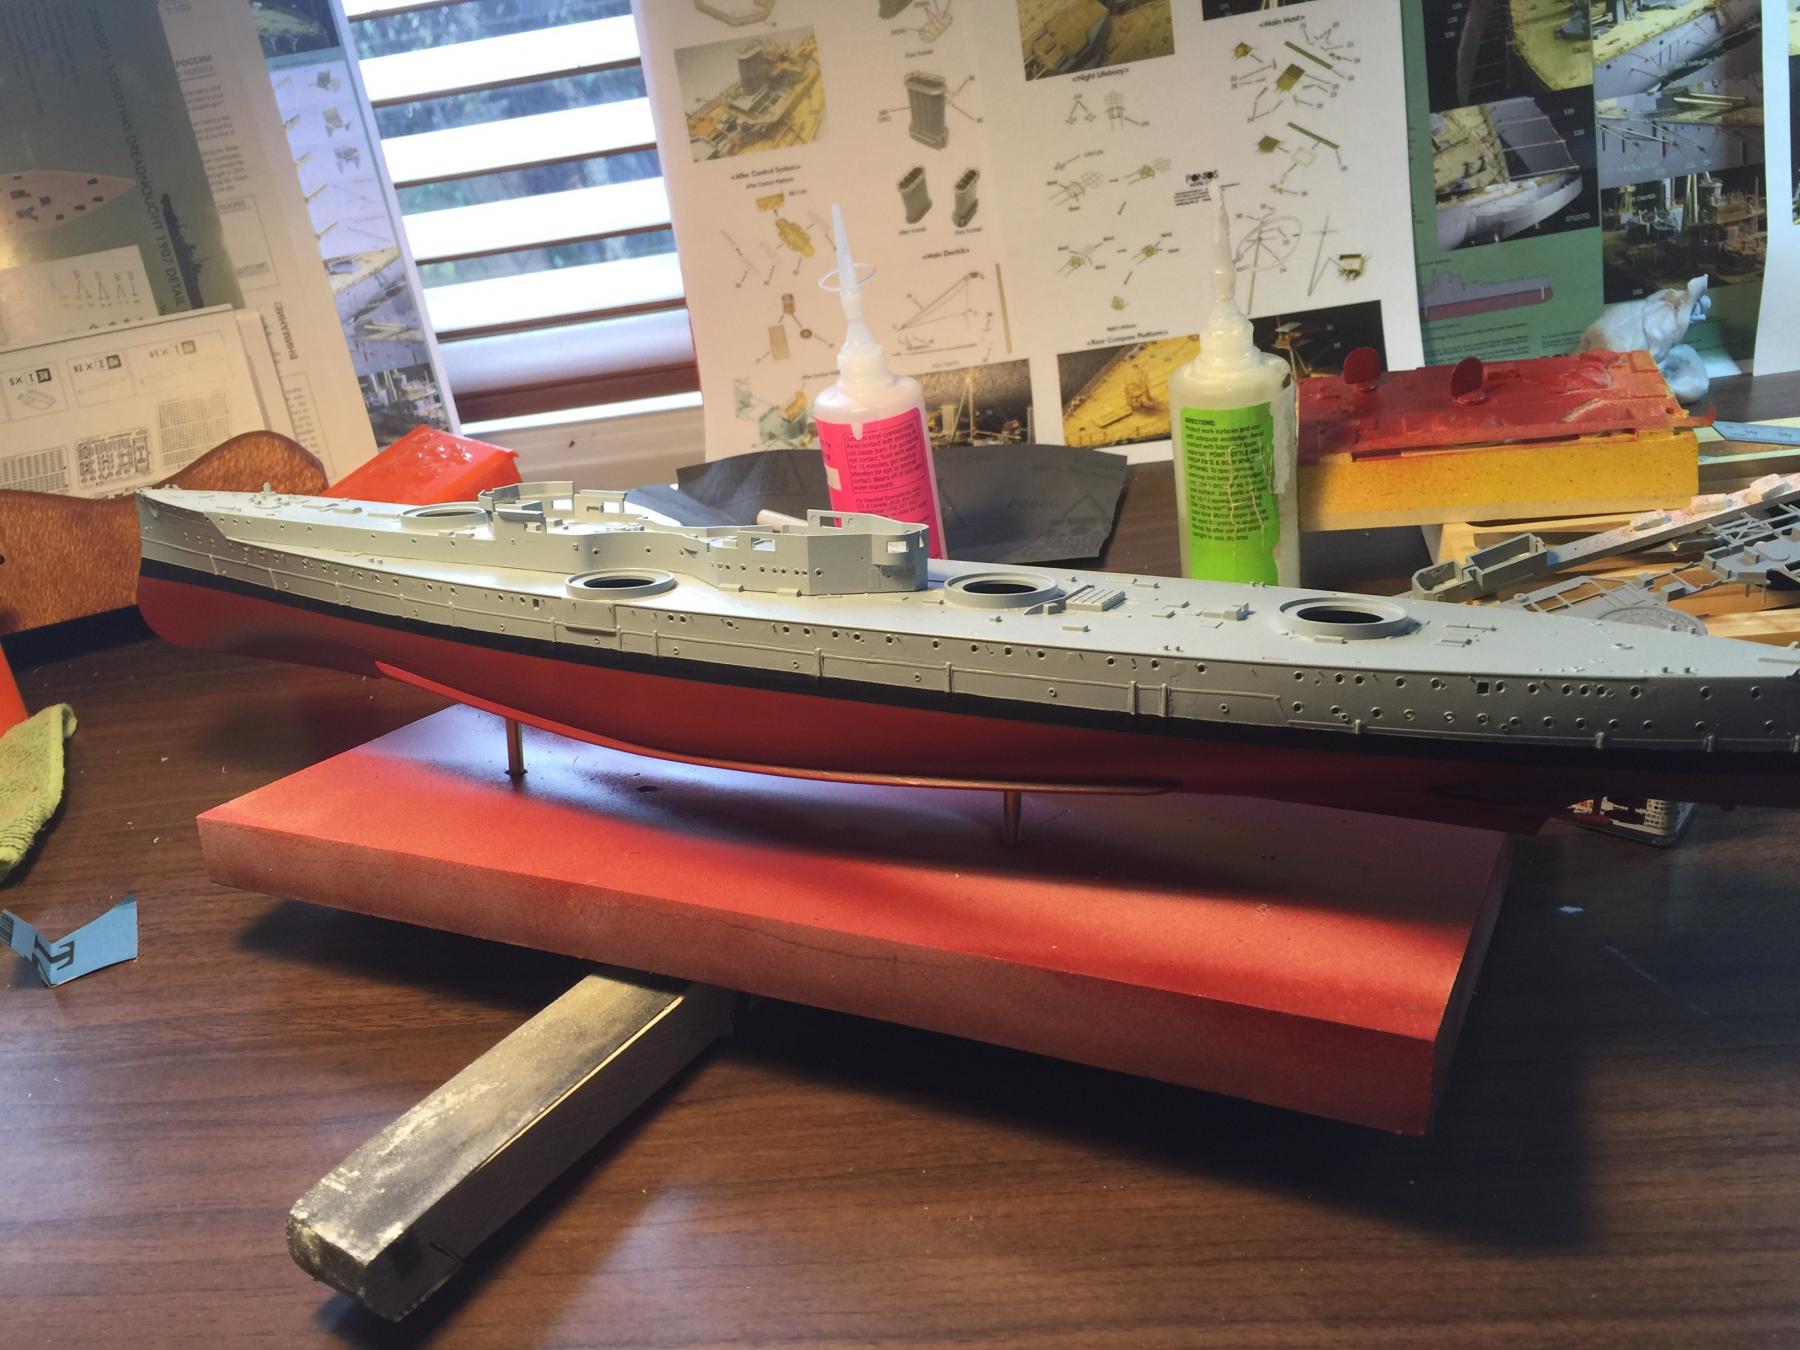
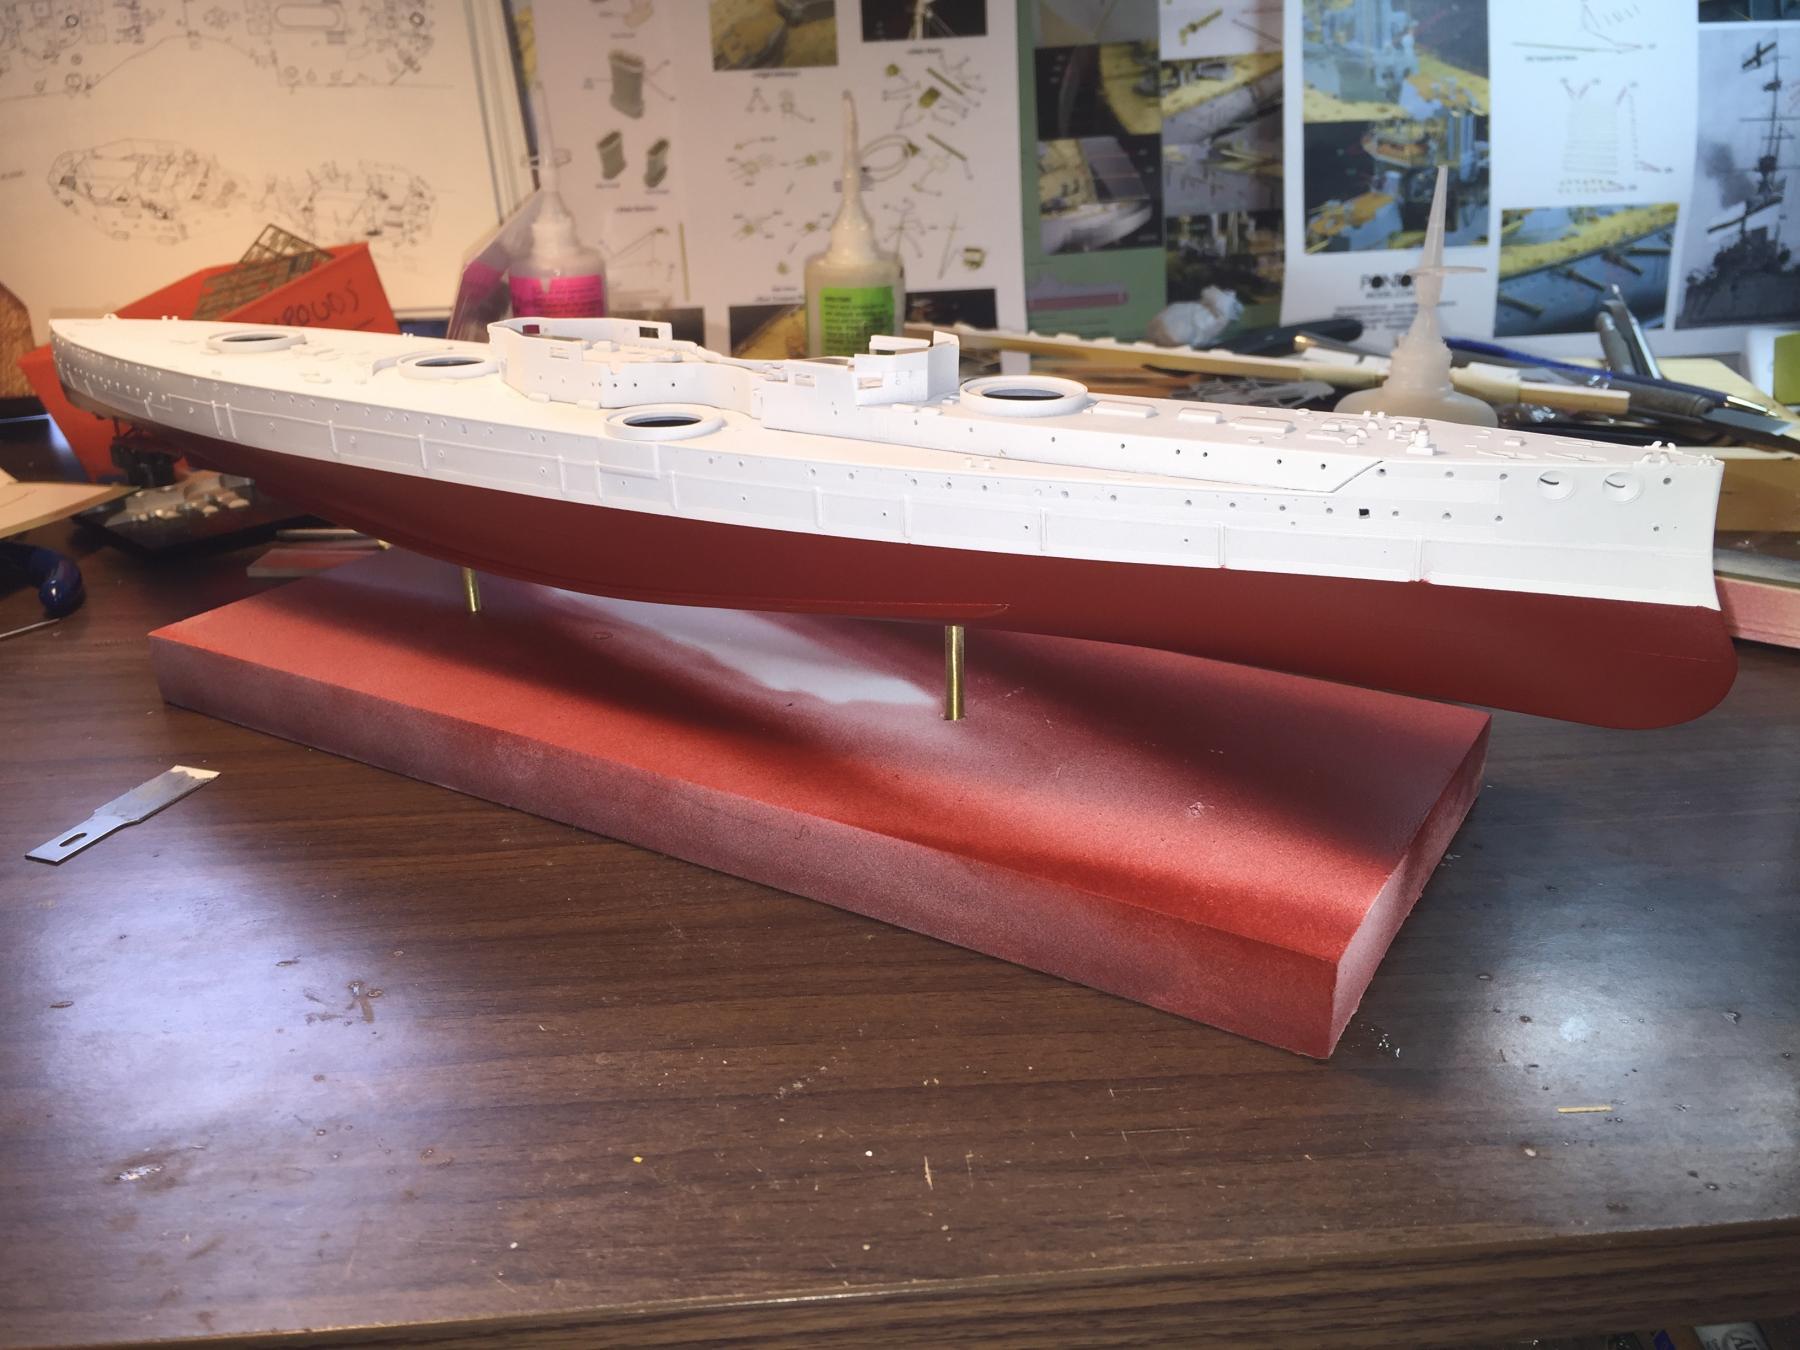
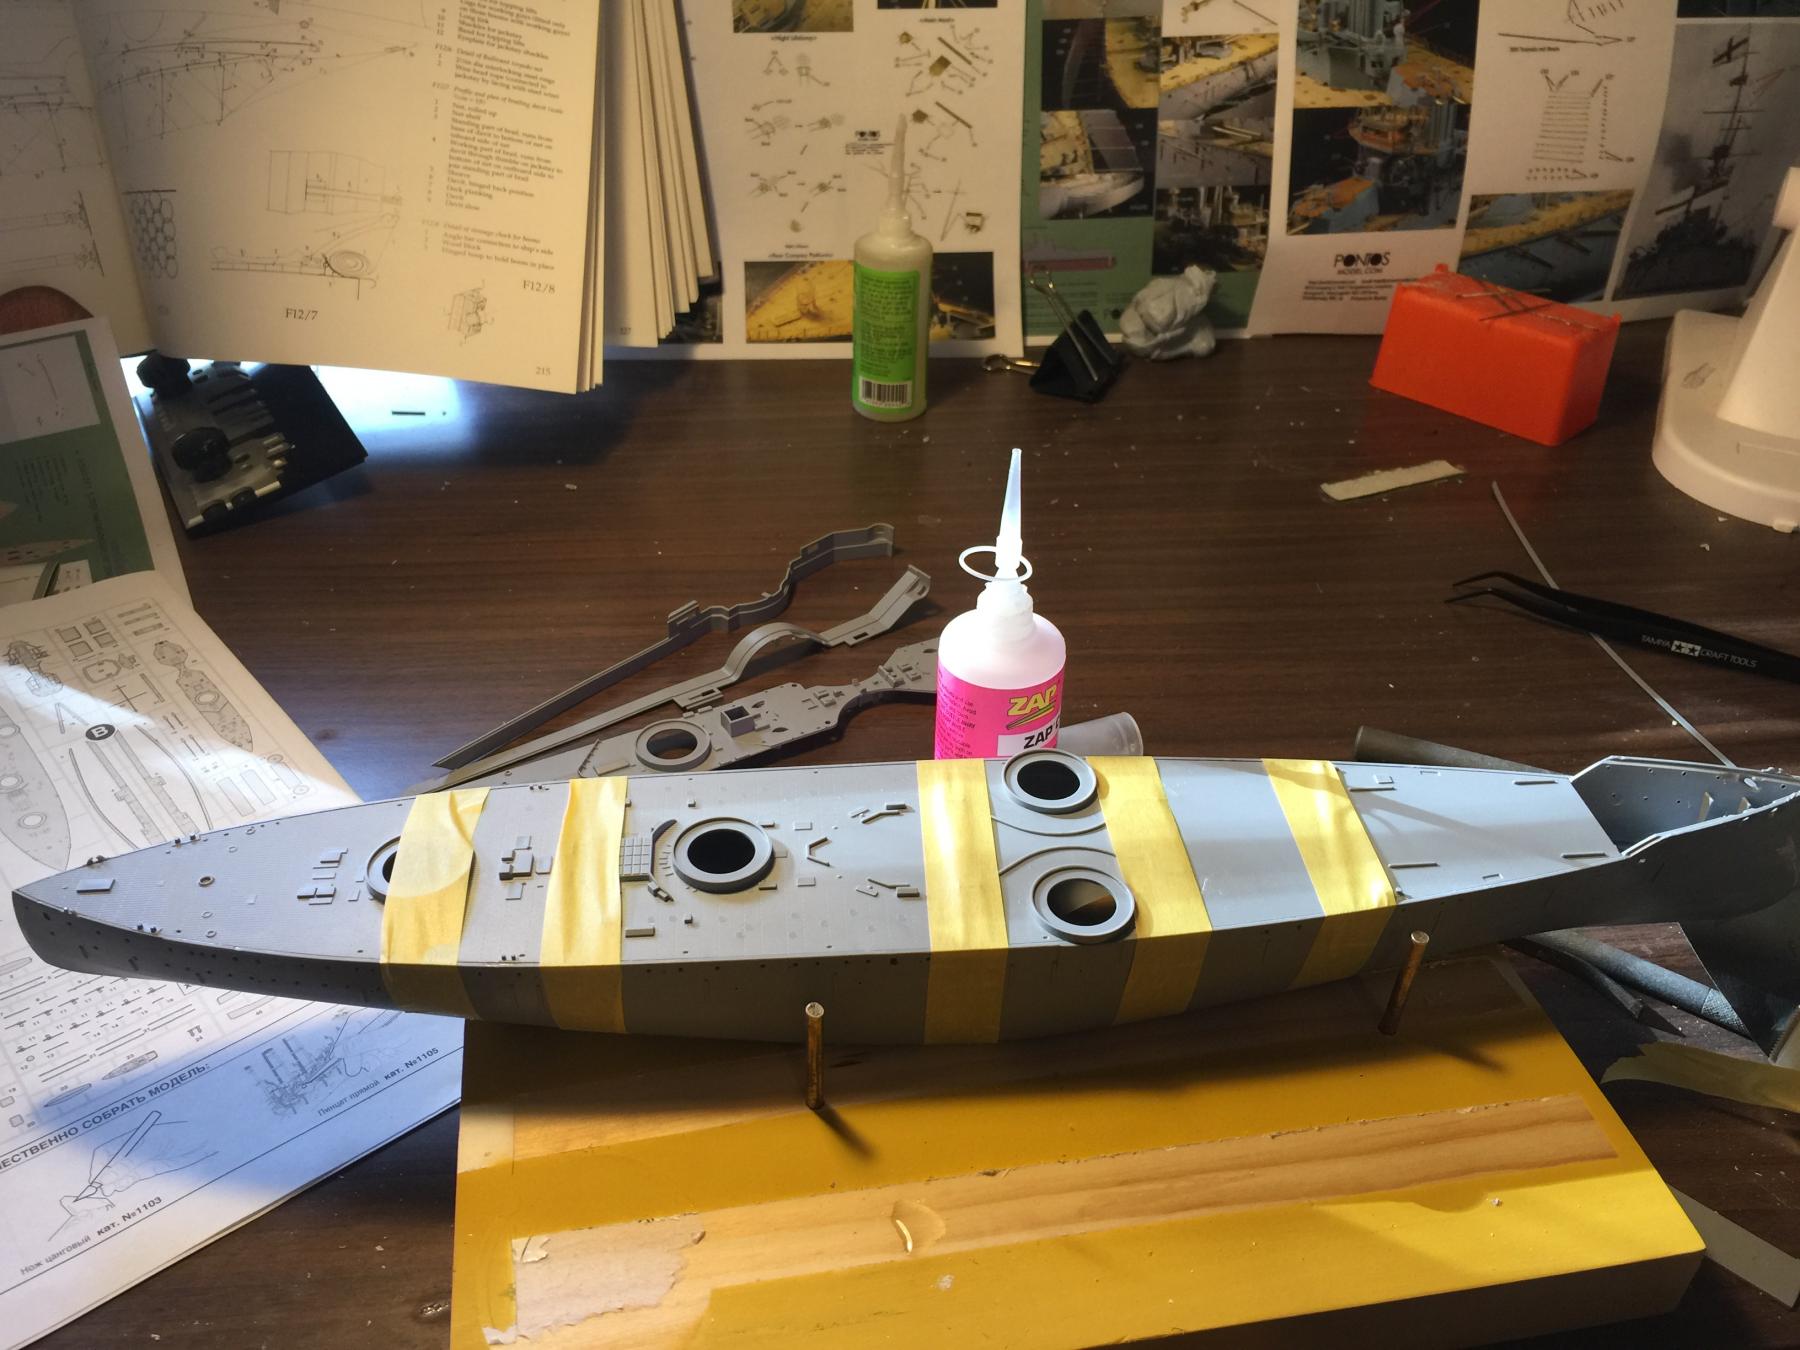
The basic hull is now complete, lots of details to go, but the main painting is done. The armor bands came up OK.
-
-
There is a heap of plastic models and aftermarket coming out in 1/200 at the moment, OK if you have poor eyesight and lots of space I suppose. I often wonder what the kids will do with mine when I'm gone! The Endeavor would look good anywhere, the plastic ones are a matter of choice I suppose, so will end up in a bin.
-
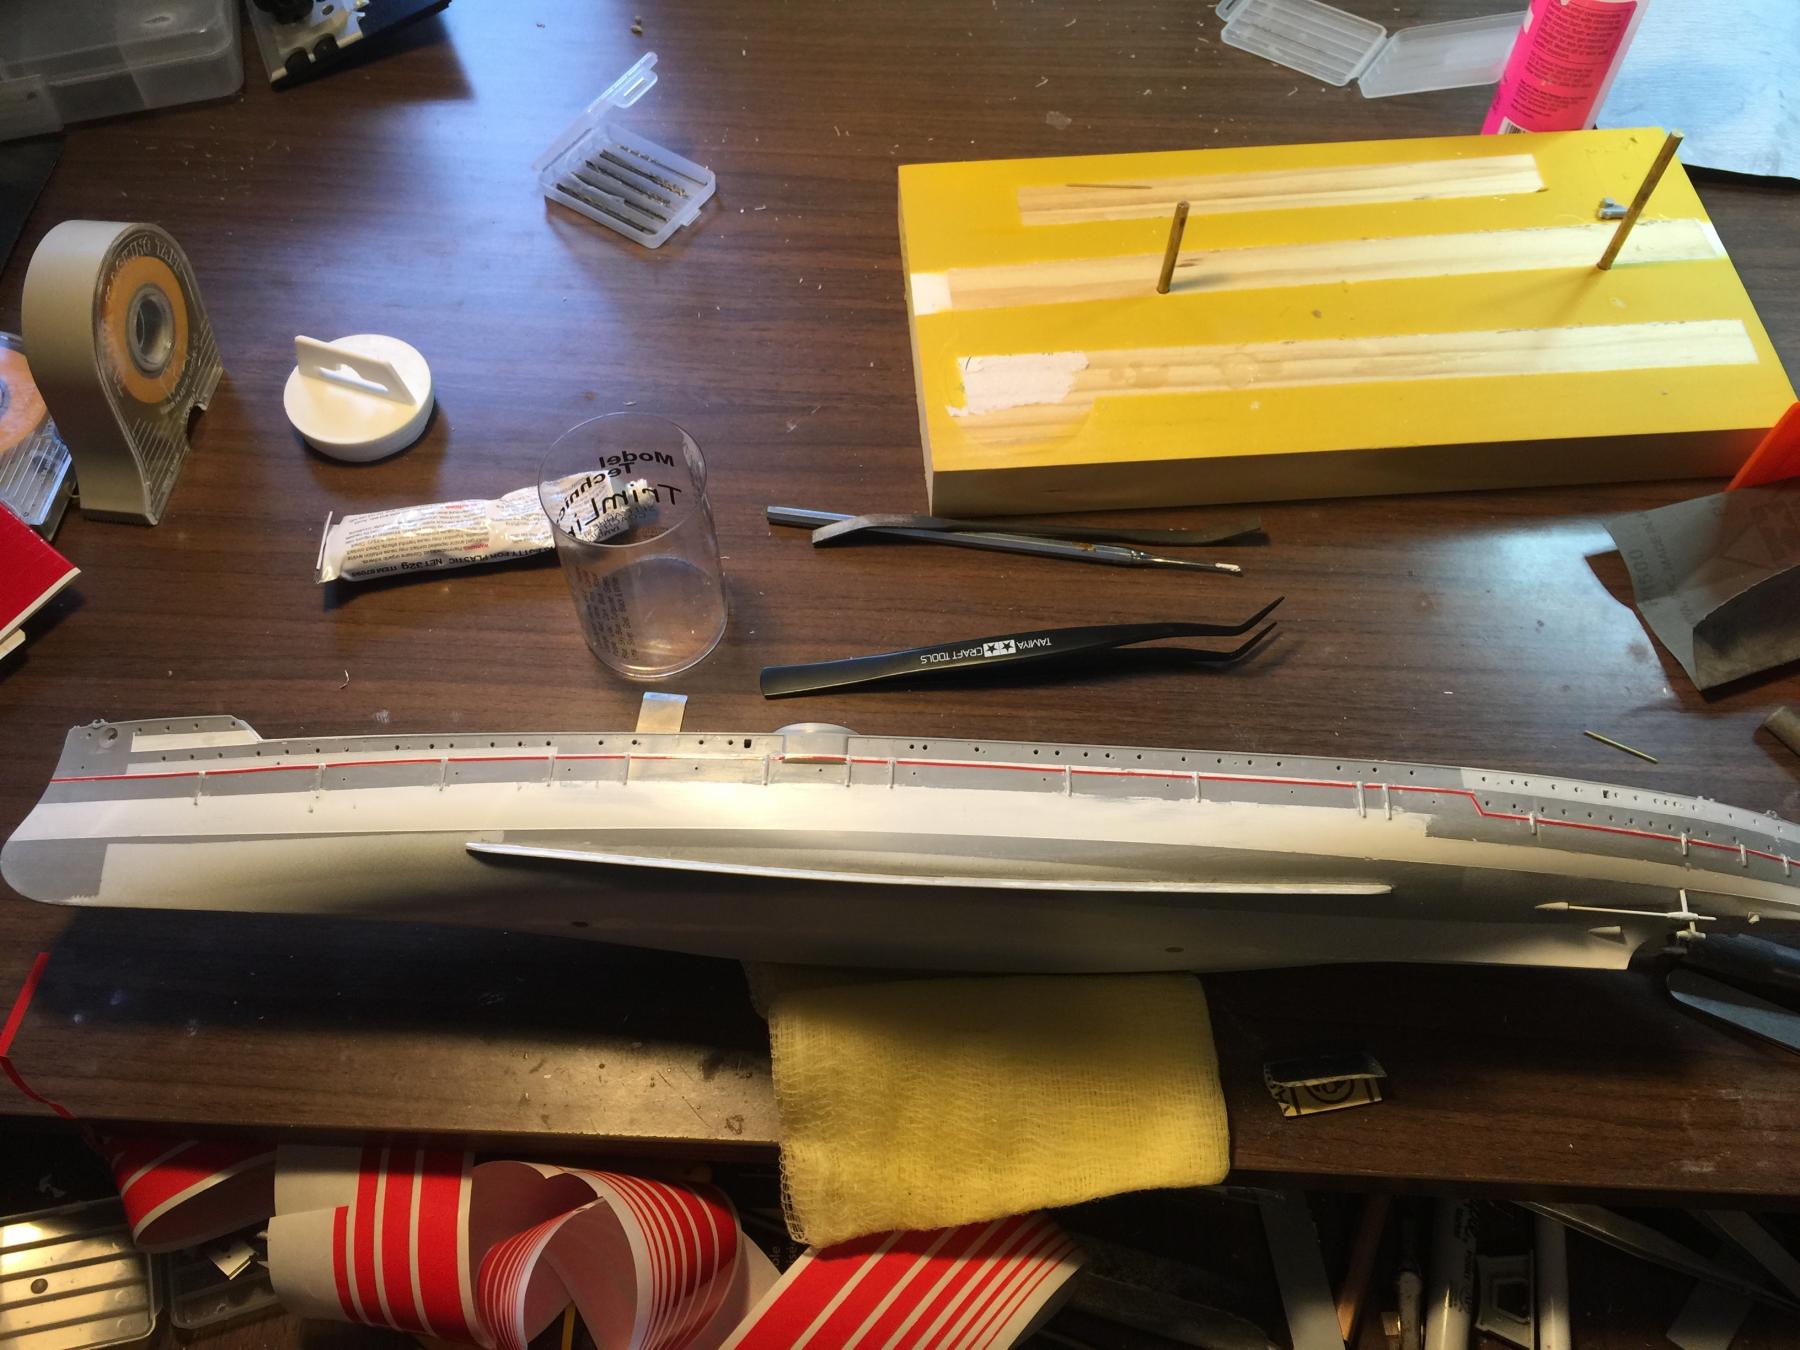
Moving along! Primer coat done and the armor belts came up OK.
 then the bottom of the hull. I want to leave it about 12 hours before I do the black band and upper hull. Over all I'm pretty happy so far. Before I do the grey top I want to add around 100 or eyelets to the side of the hull for the torpedo net boom rigging. They are so small I wont prime them as they will just fill up with paint.
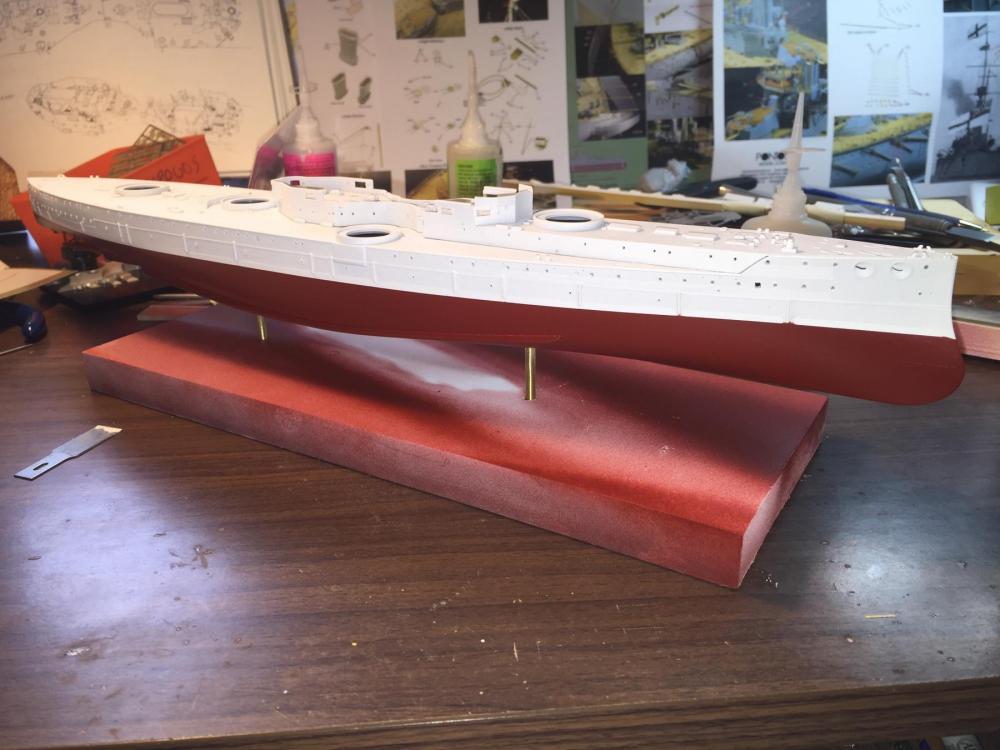
-
-
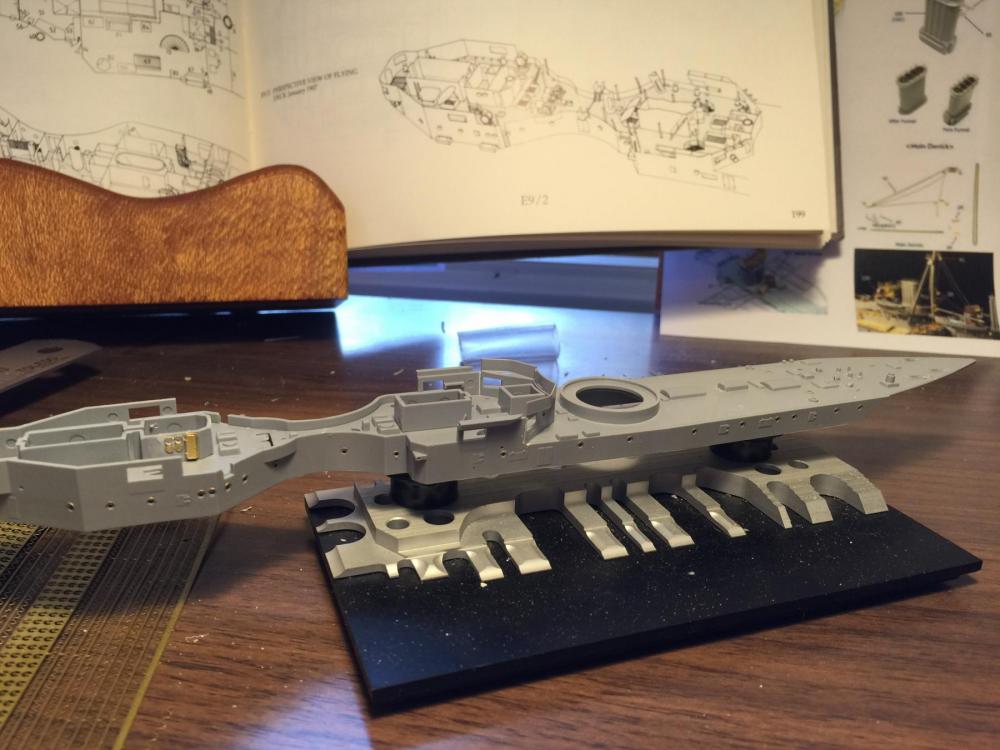
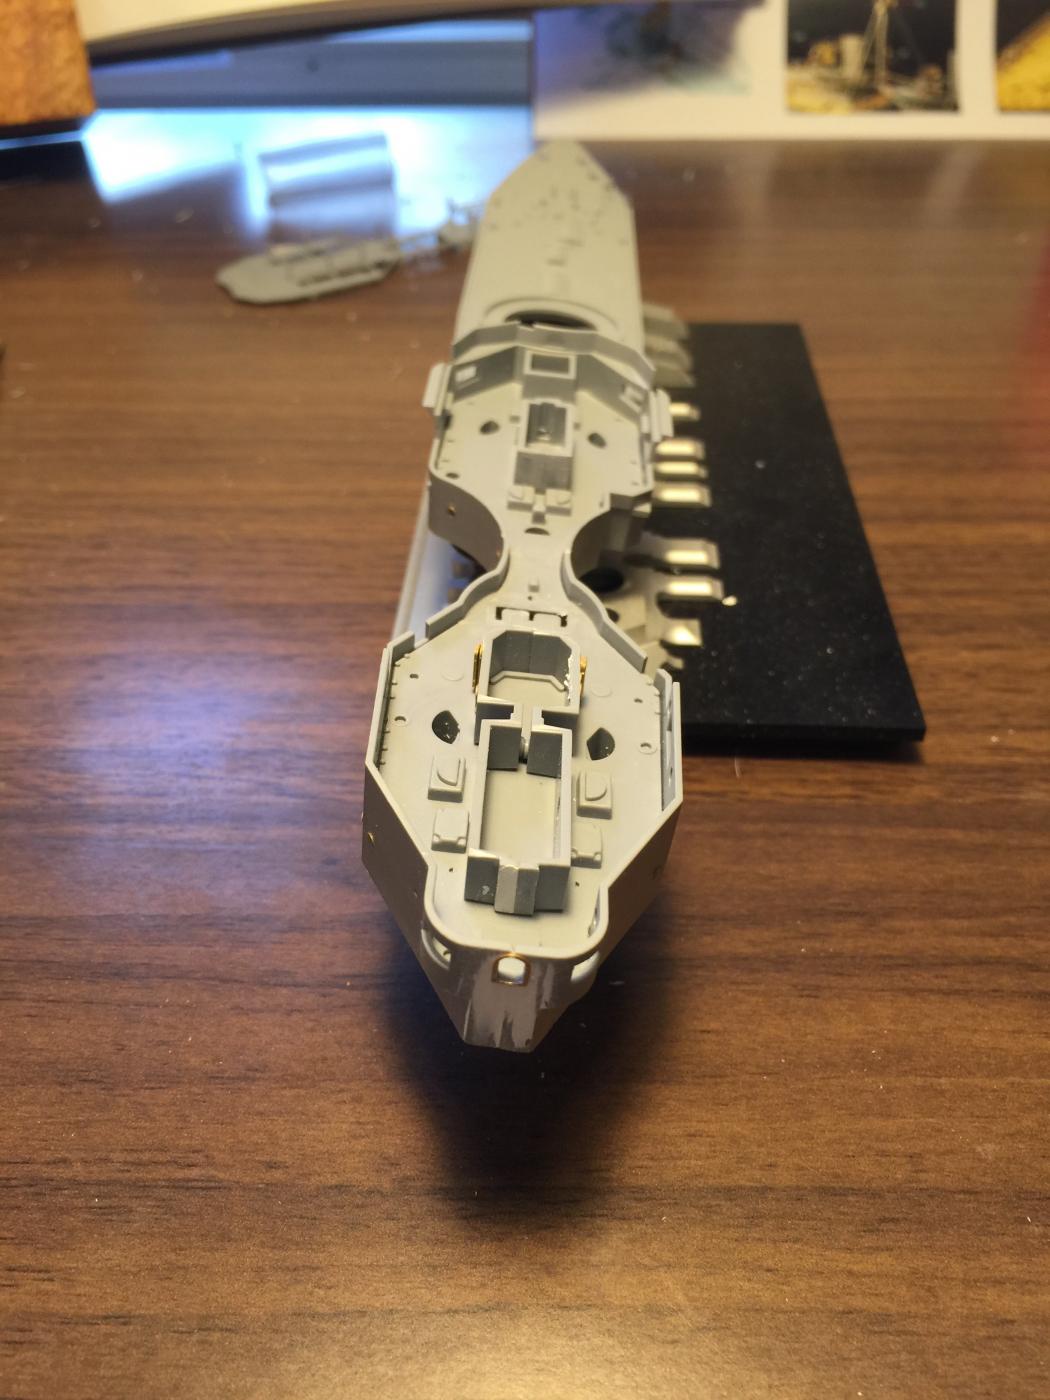
Ok, the flybridge (I suppose), does not sit well, and I wanted to join it before I painted. All the molded hatches have been shaved and will be added with etch afterwards. Major step as far as I'm concerned. Primer coat next.

-
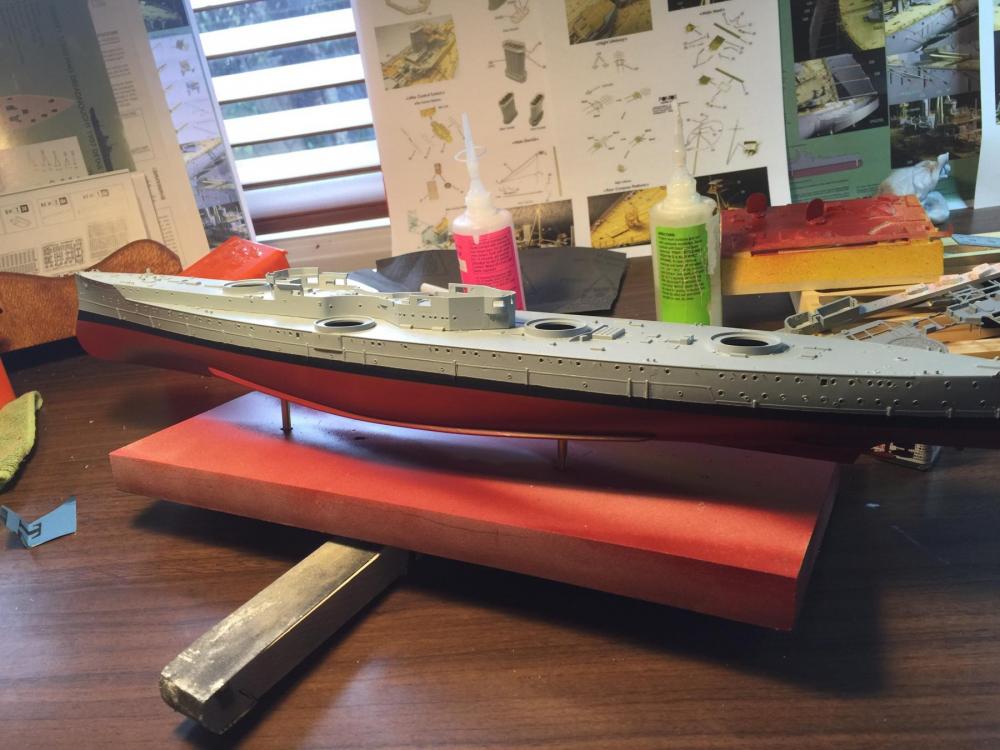
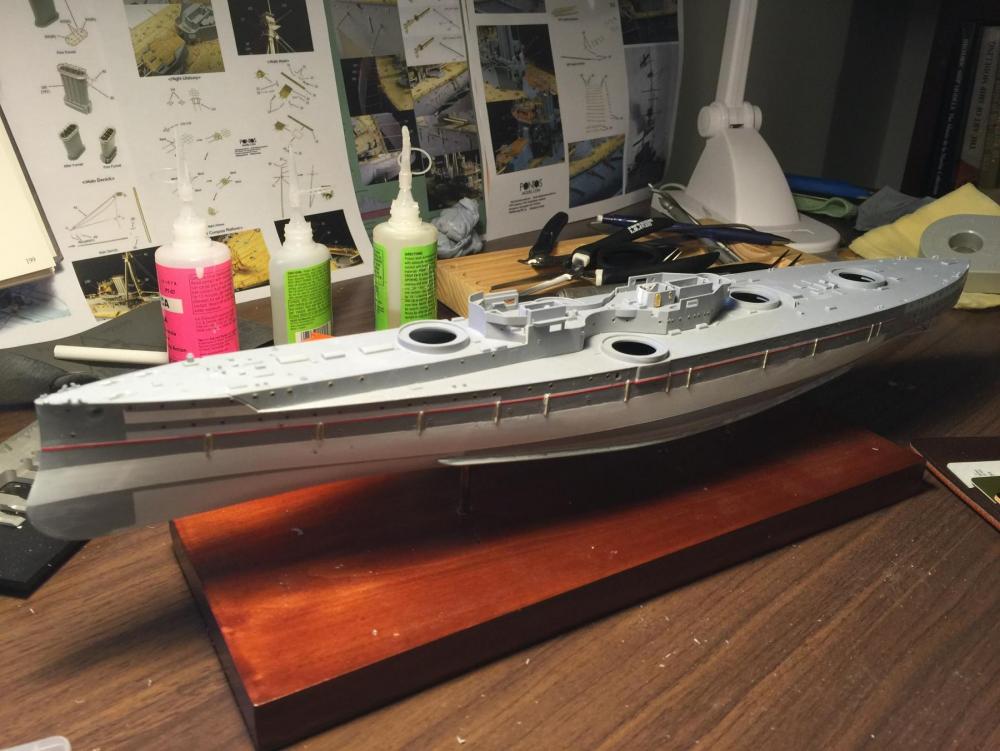
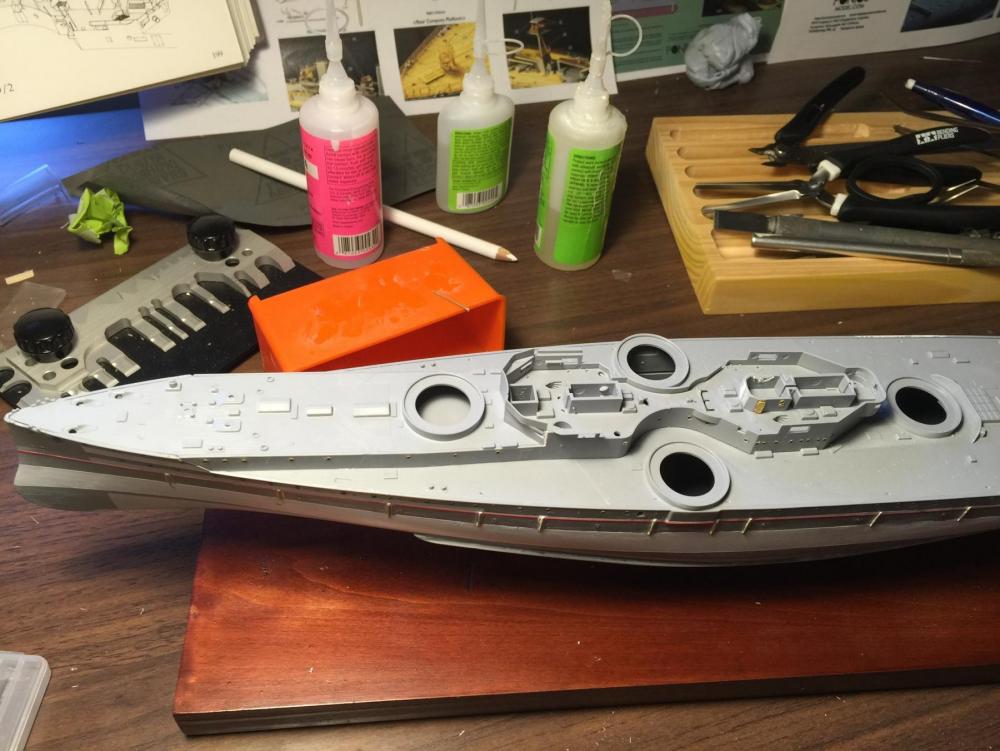
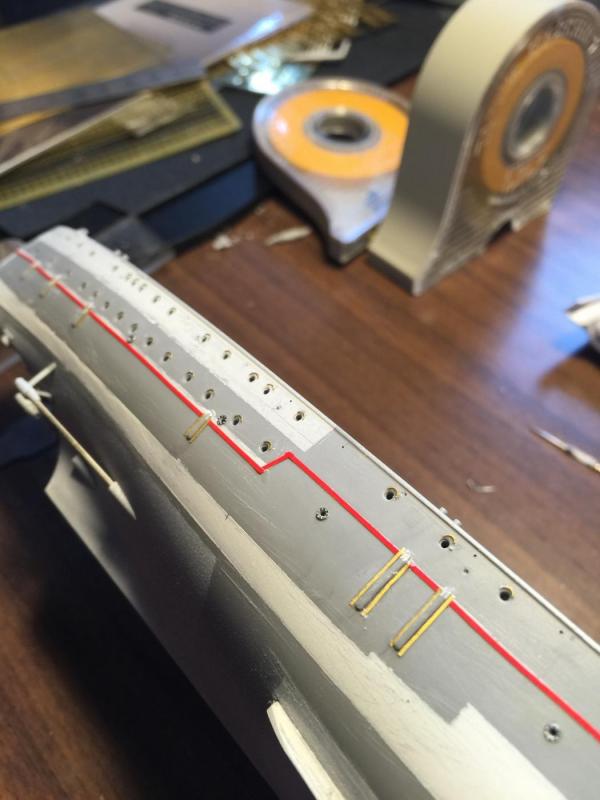
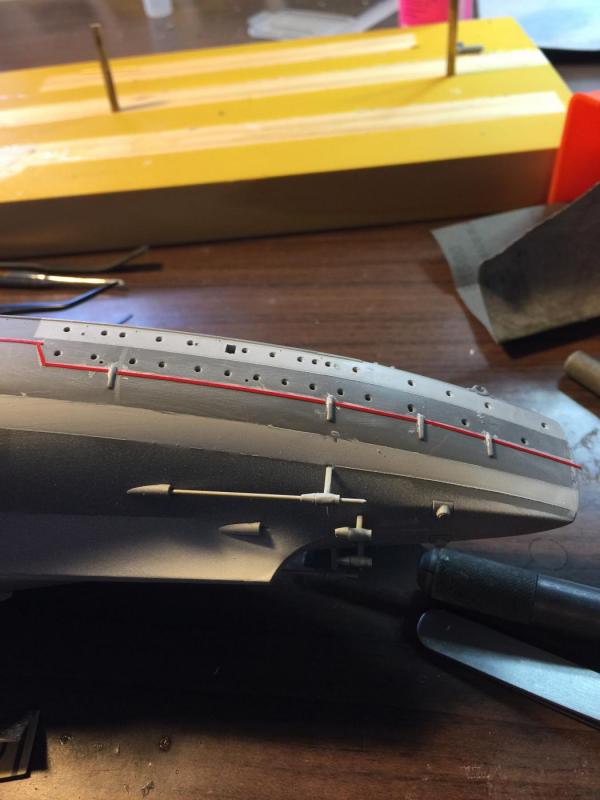
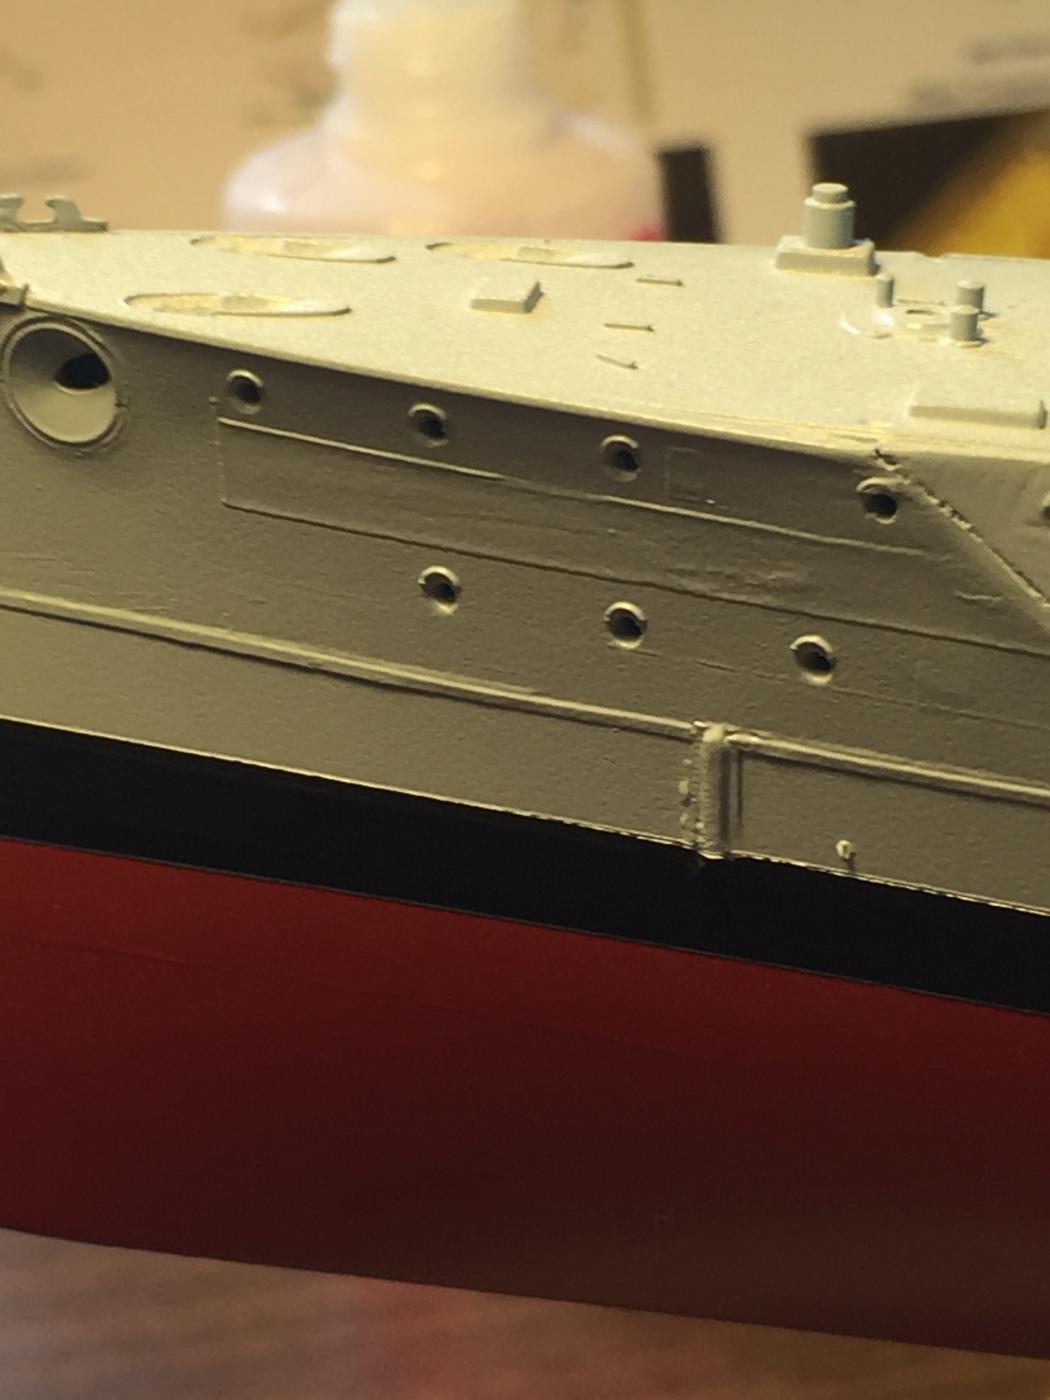
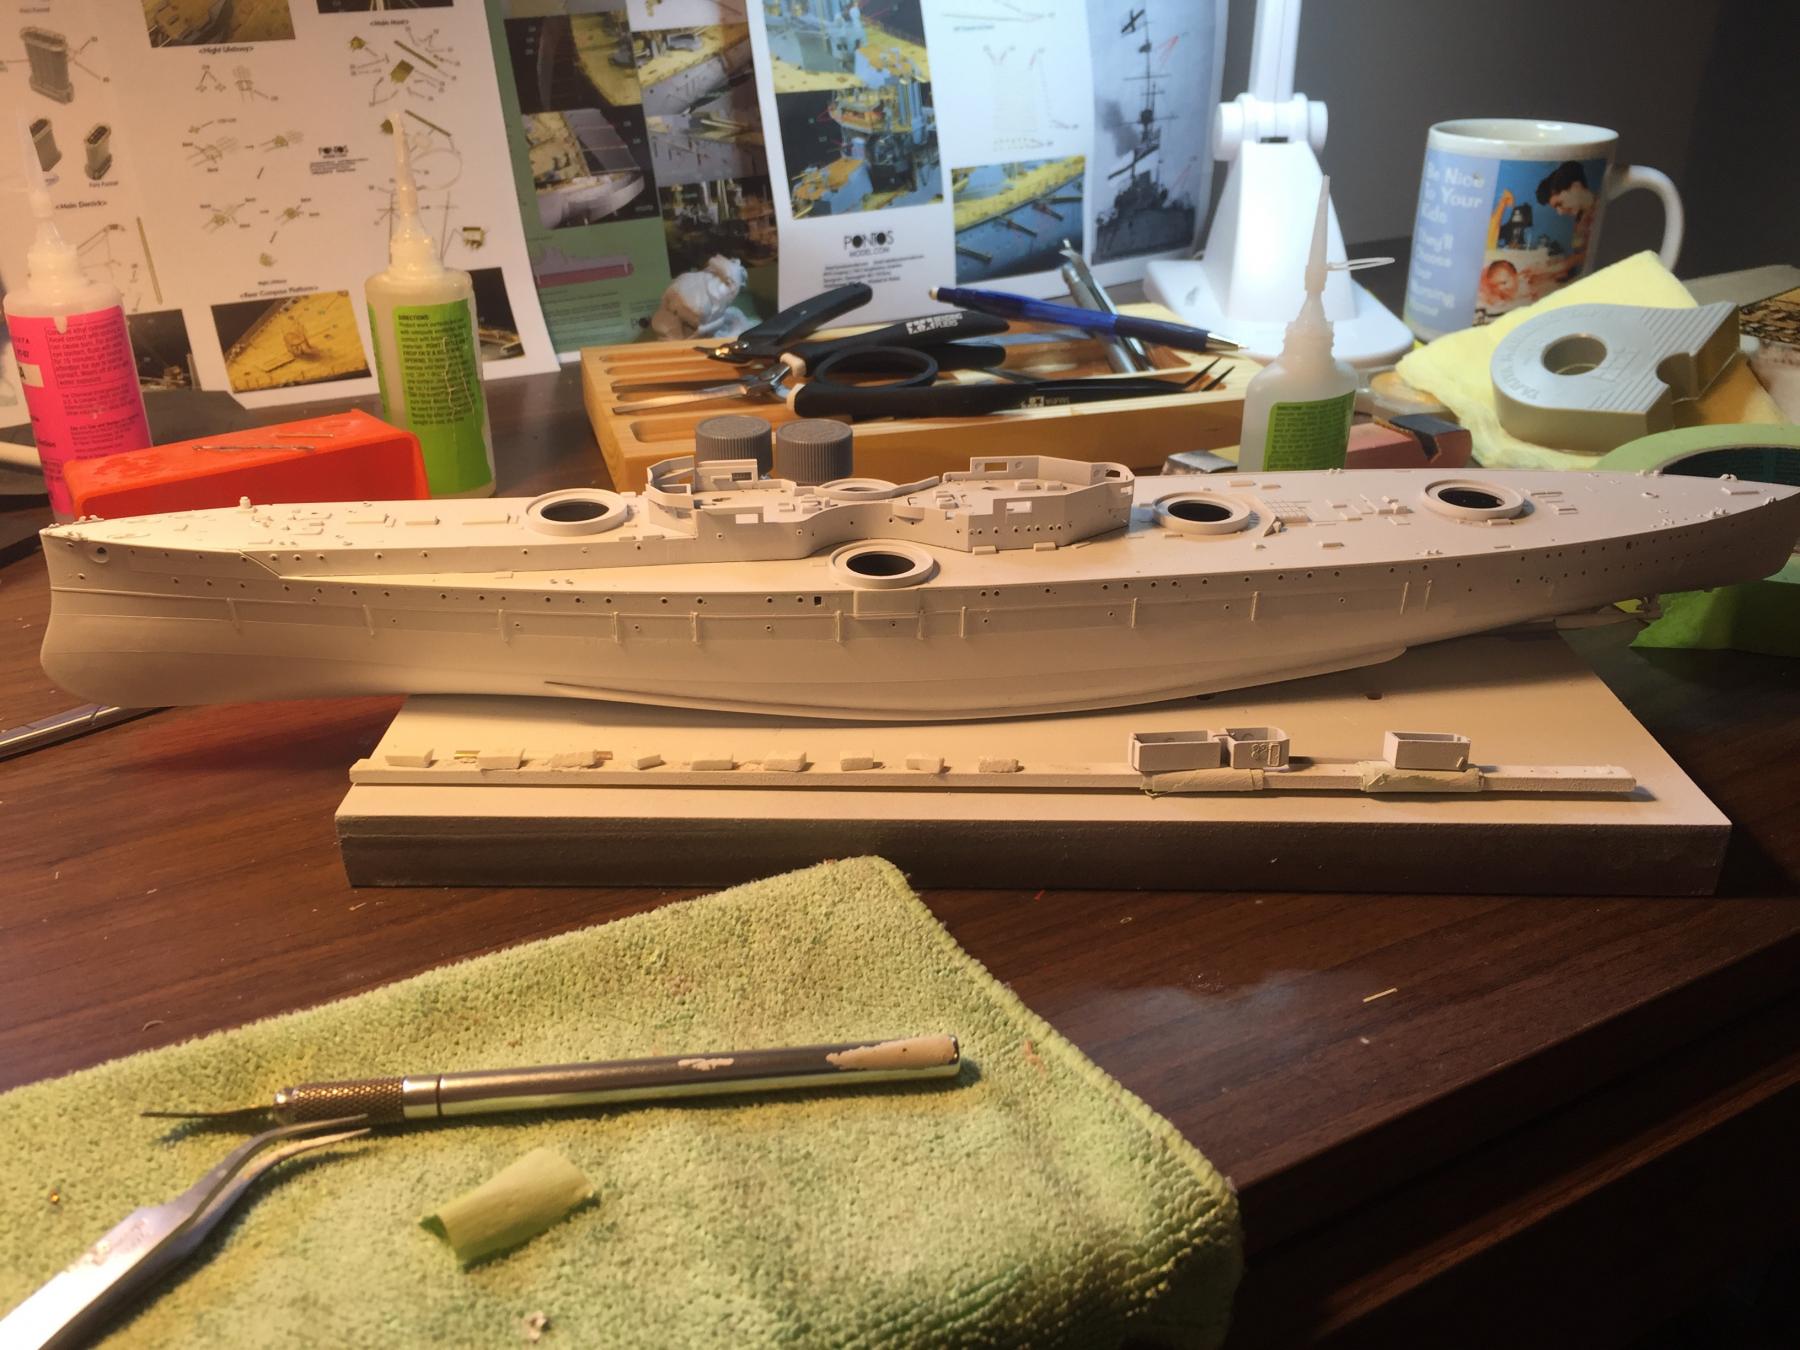
Moving along with the hull, 120 porthole eyebrows added, and strips along the strengthening bars with microscopic rivets in them (you can see these on the original photos) as well as the flanges for the torpedo booms. Looks messy but it is yet to have its first proper primer coat.


-
That's not good mate, as I say to the bride, I don't go out drinking, I hate golf, I'm not mad about football, it's my meditation time.
- EricWilliamMarshall, cog, mtaylor and 2 others
-
5
-
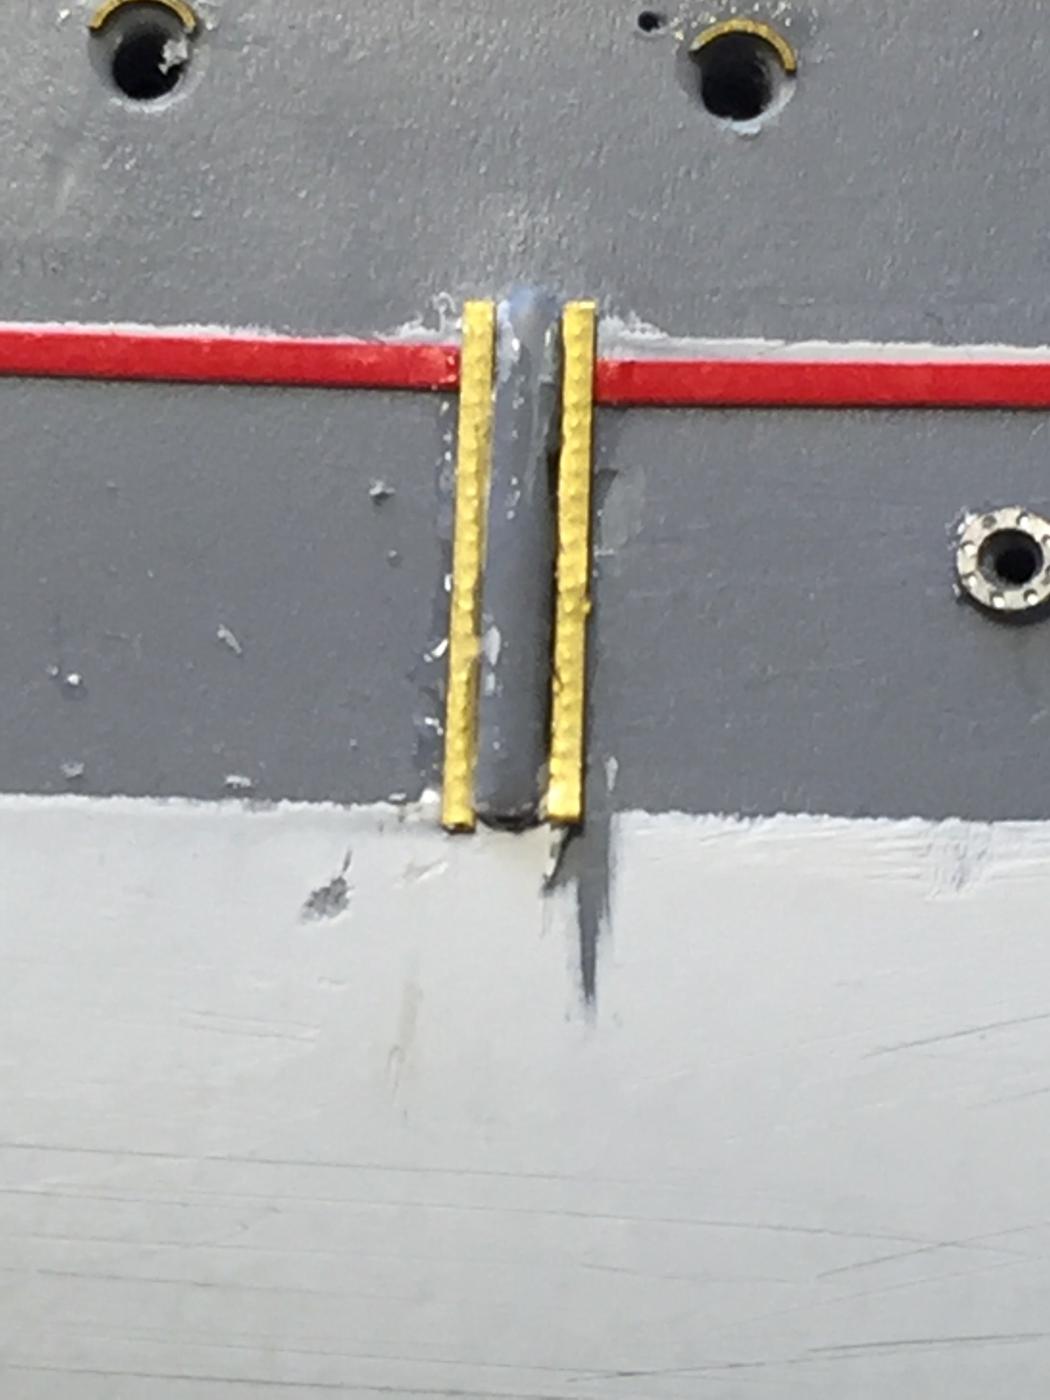
I used tape on the other sections but the central armoured band is too narrow to get right (at my level anyway), so I'm giving it a run, but I'm not overly concerned as it will be less visible due to the nets. Anyway, work has gotten in the road till next week.
- mtaylor, Old Collingwood, Elijah and 1 other
-
4
-
-
-
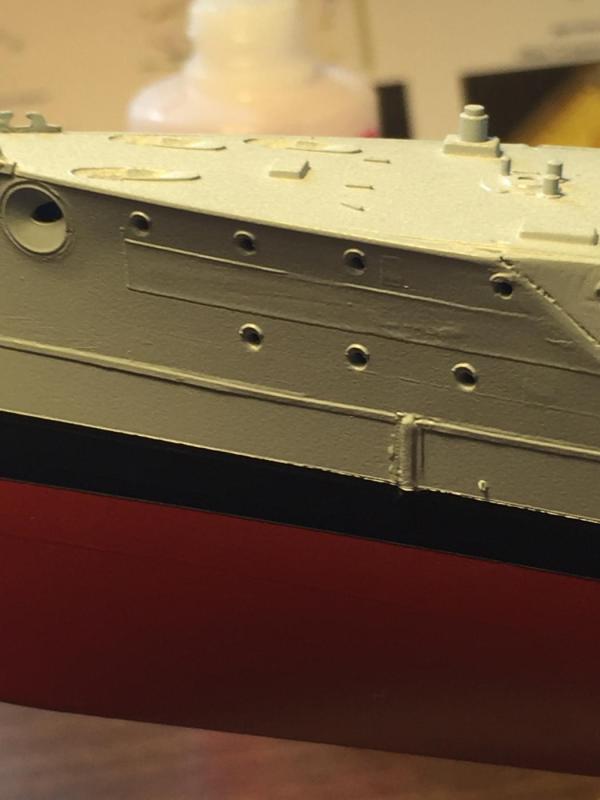
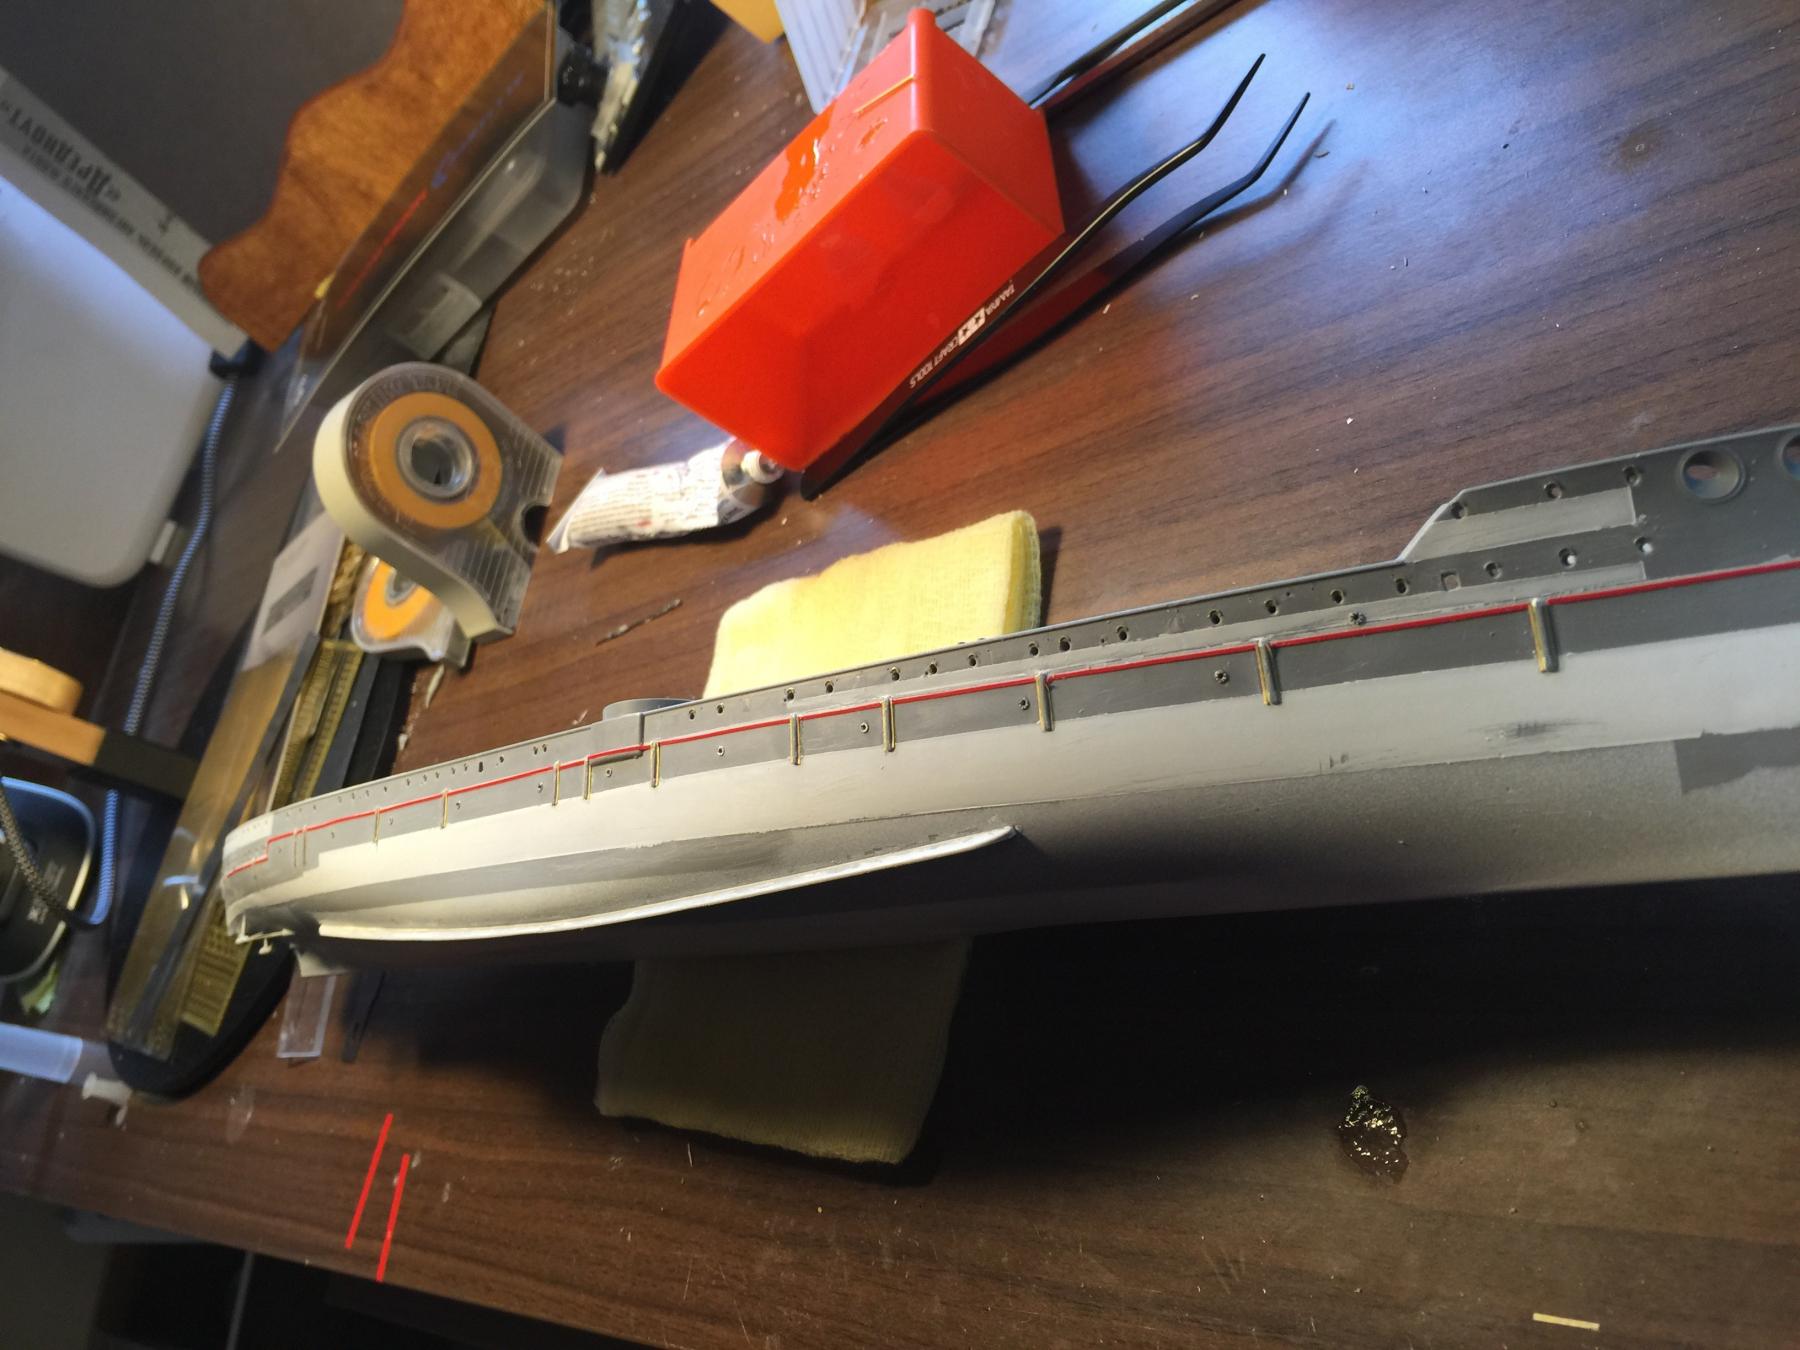
There is no detail of the armor plates at all on the hull. So I did some masking in an attempt to have an under coat of plates, the main band running across the length of the hull did not work out too well so I had an epiphany and remembered the red tape I used on the emden, which is very thin and will do well after painting. But the time it has a couple of primer coats and a sand it should work out before the top coats.
The bilge keels also had a massive gap which needed filling.
A light sand then add the multiple porthole eyebrows. I know it looks rough now, but hopefully will not be so noticeable as it will be wearing a skirt (torpedo nets).

- Old Collingwood, BANYAN, schooner and 12 others
-
15
-
-
-
Now, I had to get moving along, as it becomes a bit of a chicken or the egg argument when I do each part. Firstly I had to join the hull, drill holes for the pedestals, putty up the gaps then clamp in the deck.

Next is to add the bilge keels then cut down the shafts and struts, replacing them with brass rods.

Next will be a light primer coat along the seams to look for errors.
-
-
-


HMS Dreadnought 1907 by RGL - FINISHED - Zvezda - 1/350- PLASTIC
in - Kit build logs for subjects built from 1901 - Present Day
Posted
I believe Jim! The problem is to change them now will destroy the entire assembly!!!!when the model is complete, and the nets are slung out, it will hopefully not be so noticeable. They are about 7mm is diameter.