RGL
-
Posts
5,550 -
Joined
-
Last visited
Content Type
Profiles
Forums
Gallery
Events
Everything posted by RGL
-
 Robin, nothing in Parkin, and I read your thread from last year, but a quick Dr Google search has an excellent NSW Maritime PDF document of anchors that may make a good cross reference and another excerpt from the oriental navigator stating "a small or coasting anchor". This I reckon it's a technique using two anchors, not an particular anchor. It would make sense given the complement of anchors was laid out prior to the voyage, as to which one, I have no idea. Happy to be corrected.
 -
Robin, do you recall which part of the voyage it referes to? Happy to look it up but it's a big book .
-
It's going to stain up and polish very nicely
-
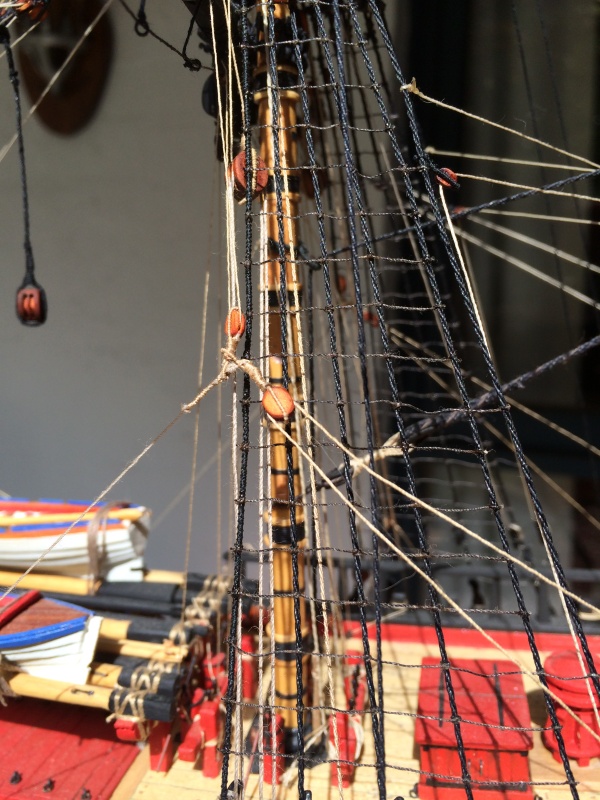
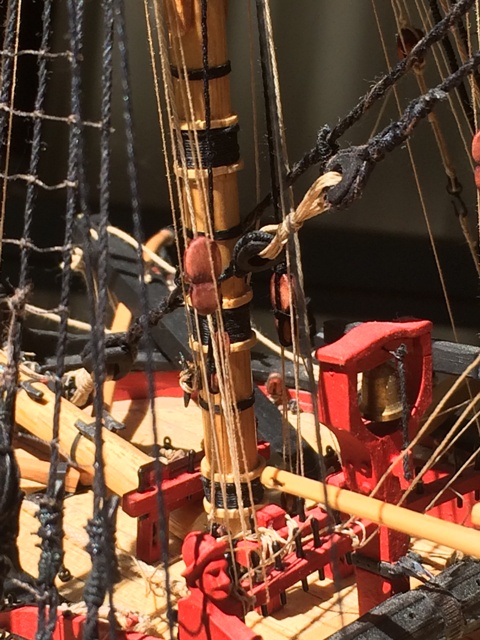
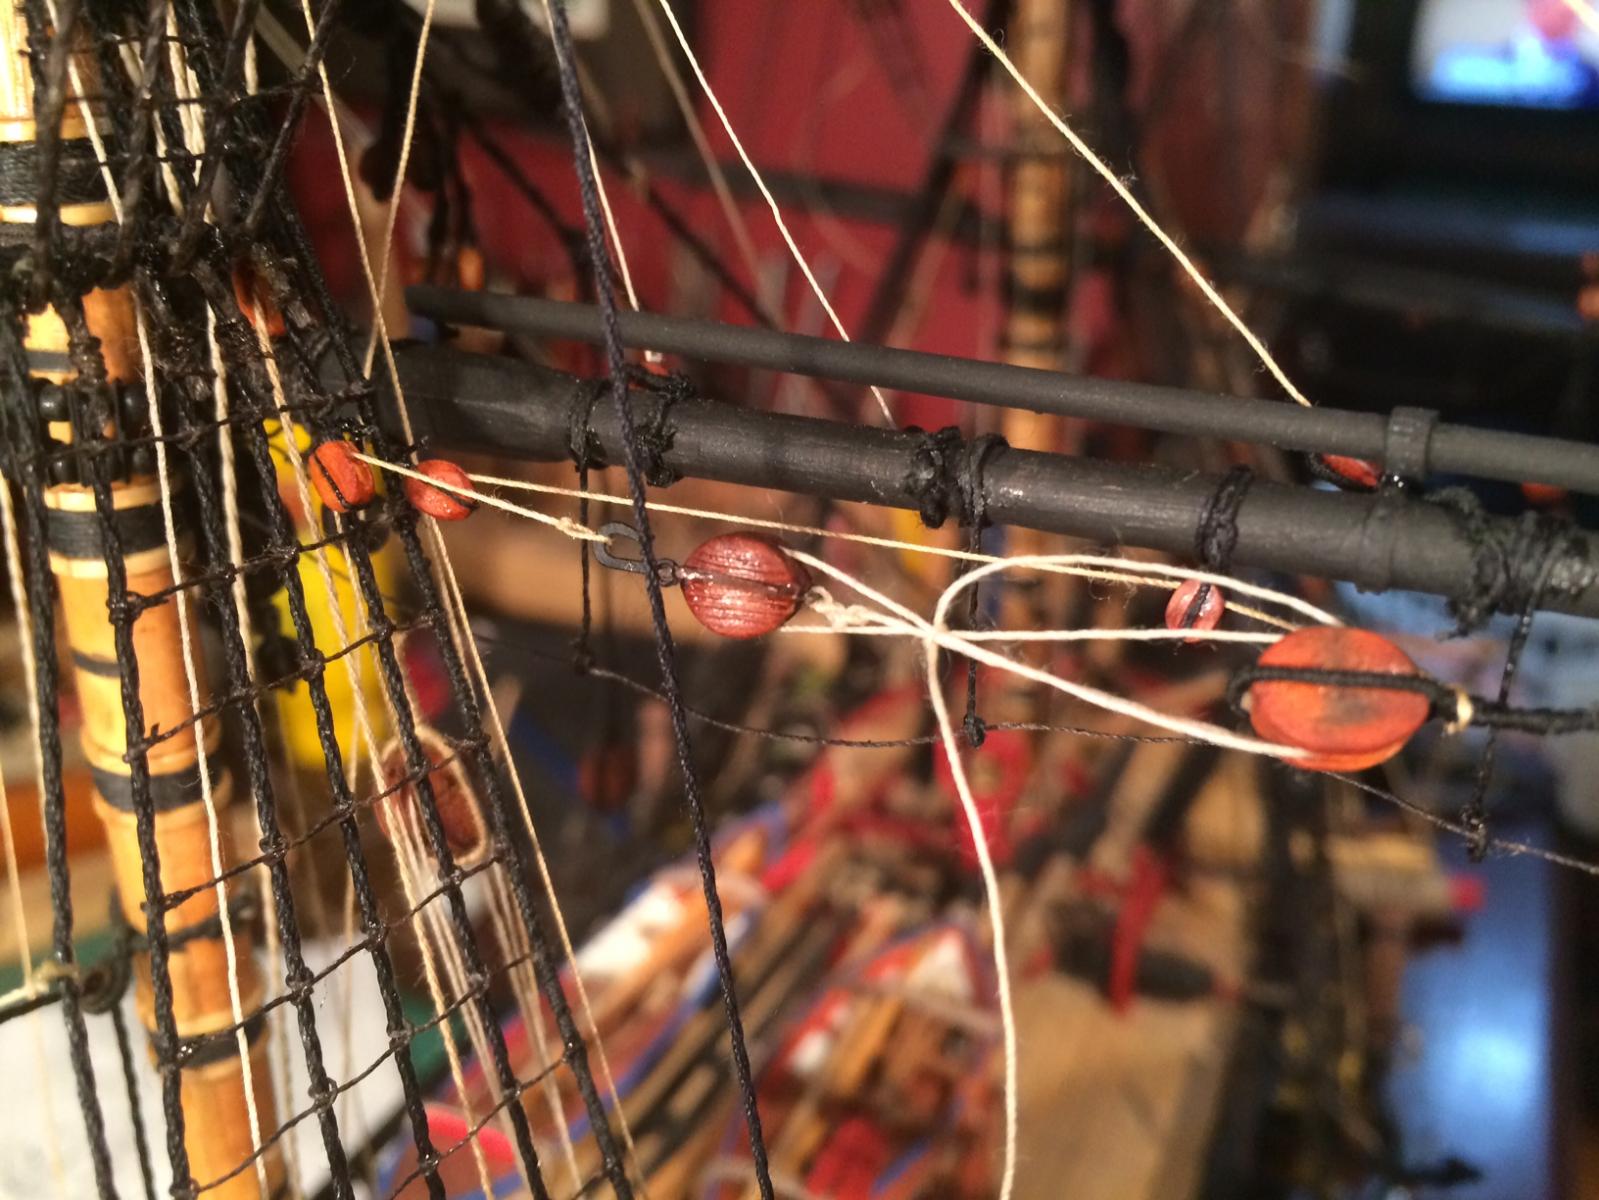
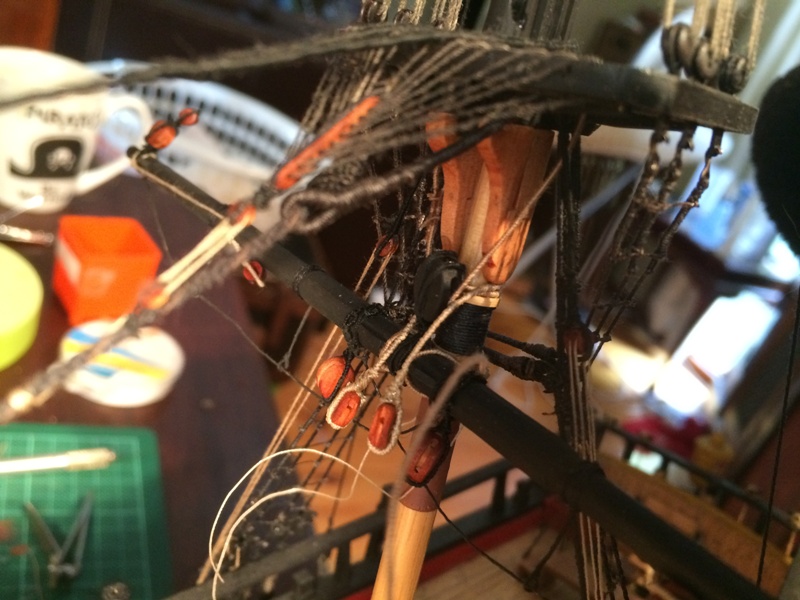
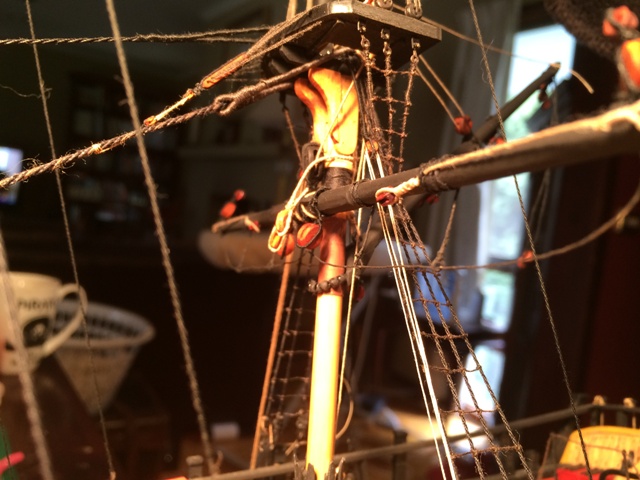
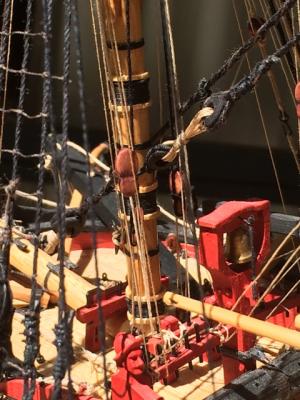
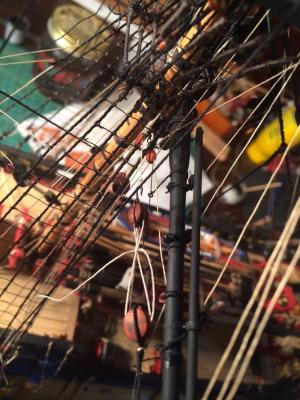
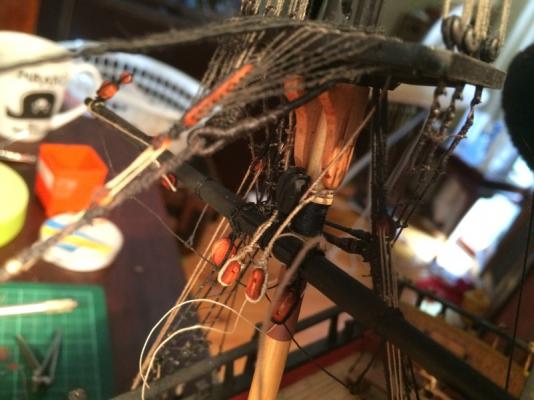
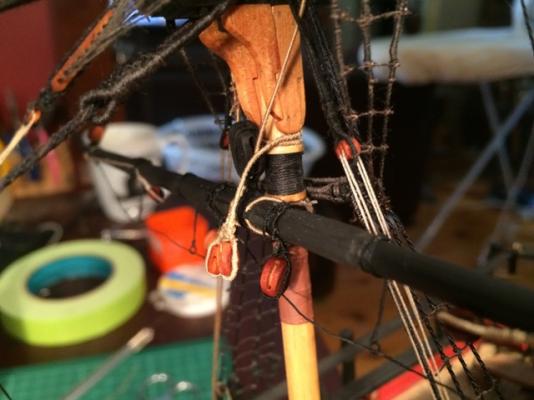
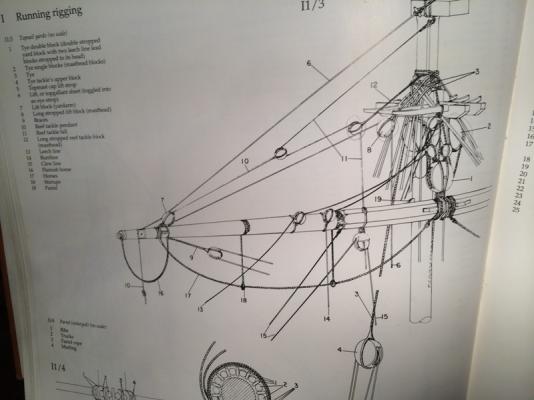
The final bits on the main and fore yard, the braces, clue lines and tacks. the clue lines are somewhat difficult, as Parkin says it has three blocks, but AOTS says it is two blocks and a knotted rope.


-
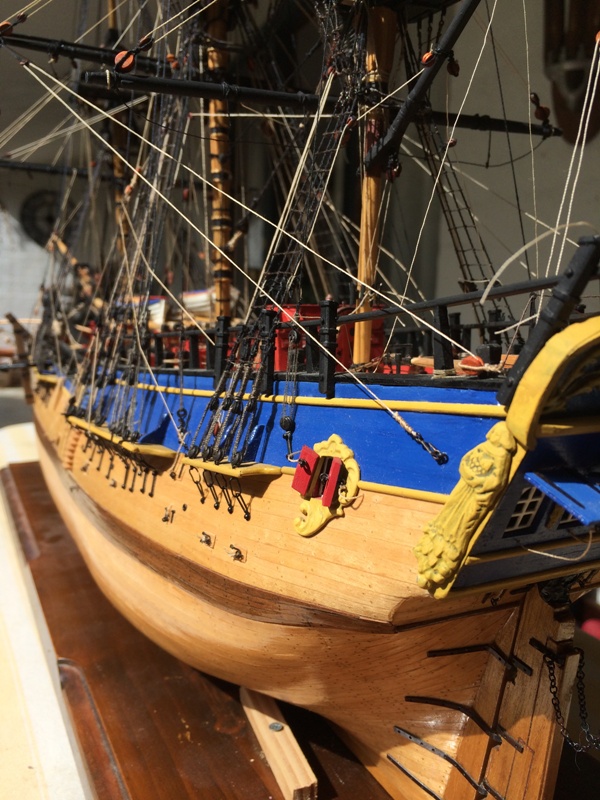
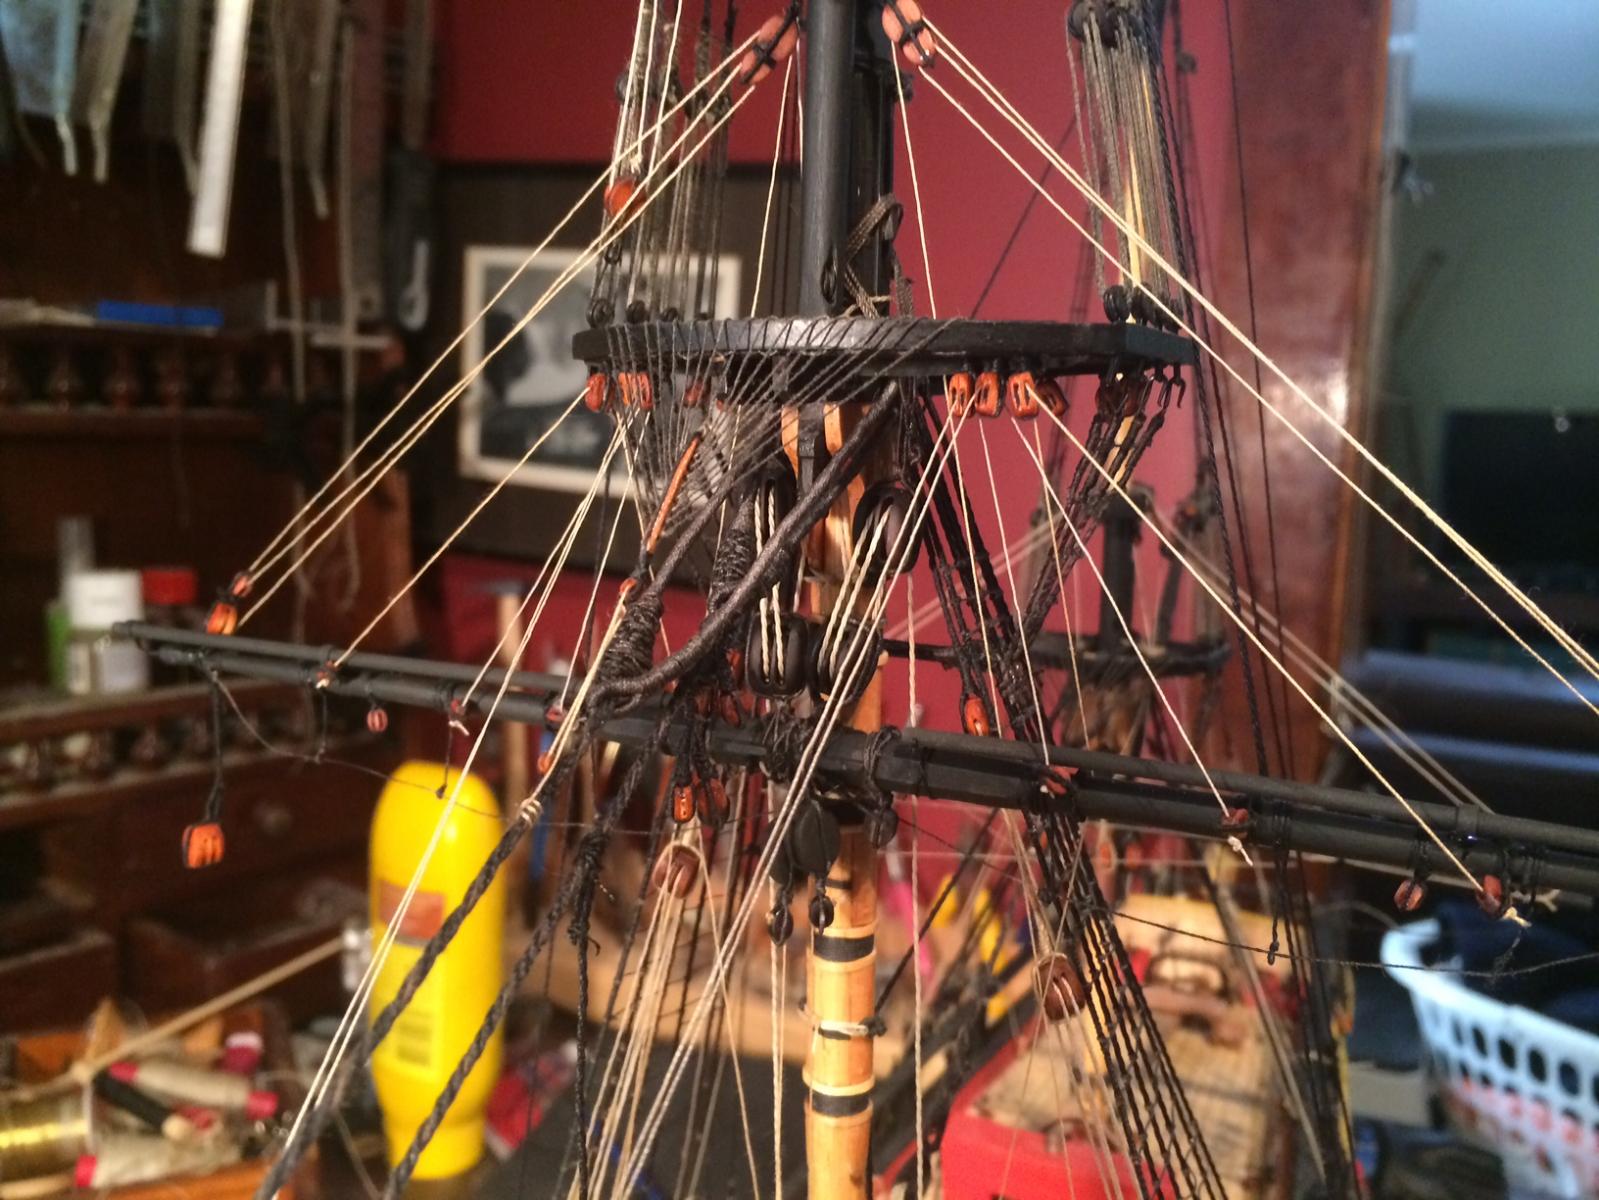
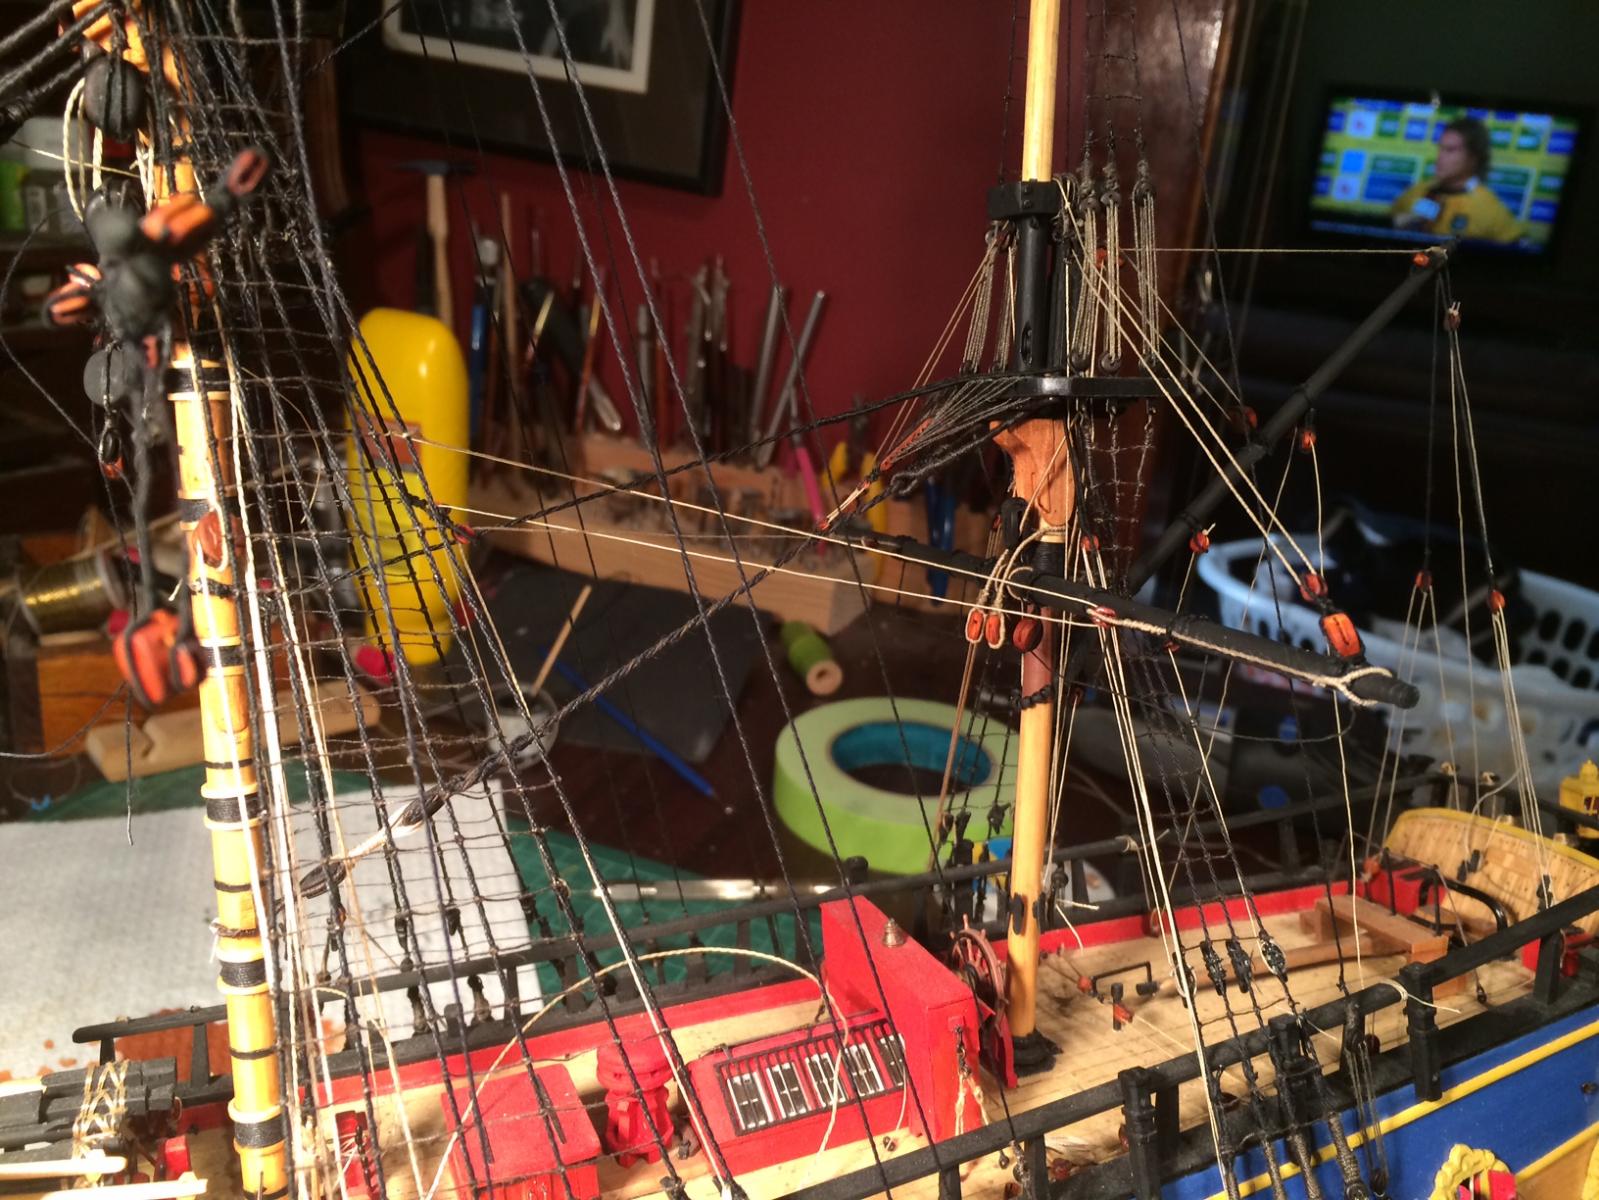
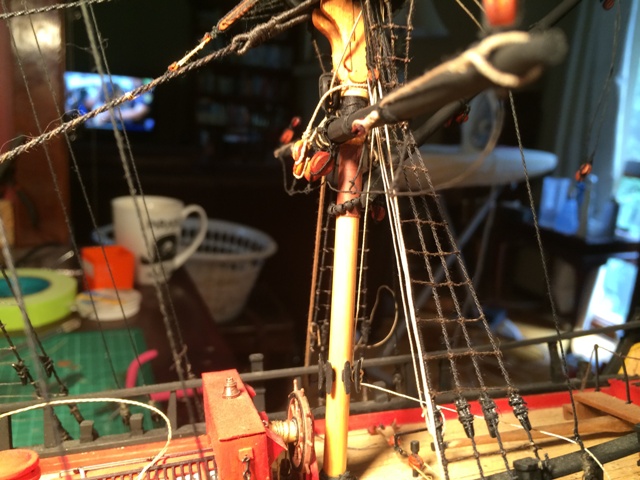
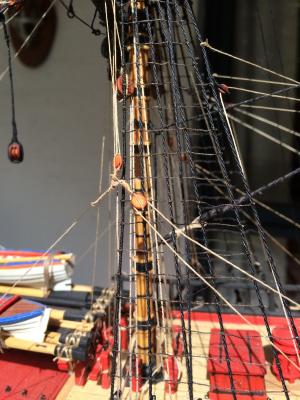
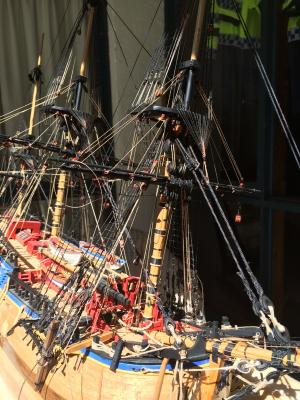
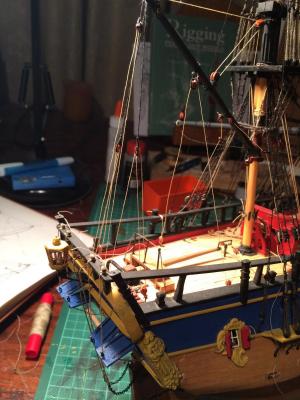
Stunning day here in Canberra, so I thought I'd take the old girl outside to help with photos. The Fore mast main yard bunt and slab lines done. Braces and clue lines to go. The pin rails look messy but will be covered up with rope coils later and the tricing lines for the yard tackle will be tied off later too.


-
I'm up to the part where I'm doing the running rigging, and I've got most of it squared away in my head. My Endevour has Chess trees but the rigging plan does not show them used. The main sail clue lines seem to run through a forward block on the gunwales. Is it only used to draw in from a tack when the sails are rigged? Seamanship in the age of sail shows them used but no other reference really shows them in use.
-
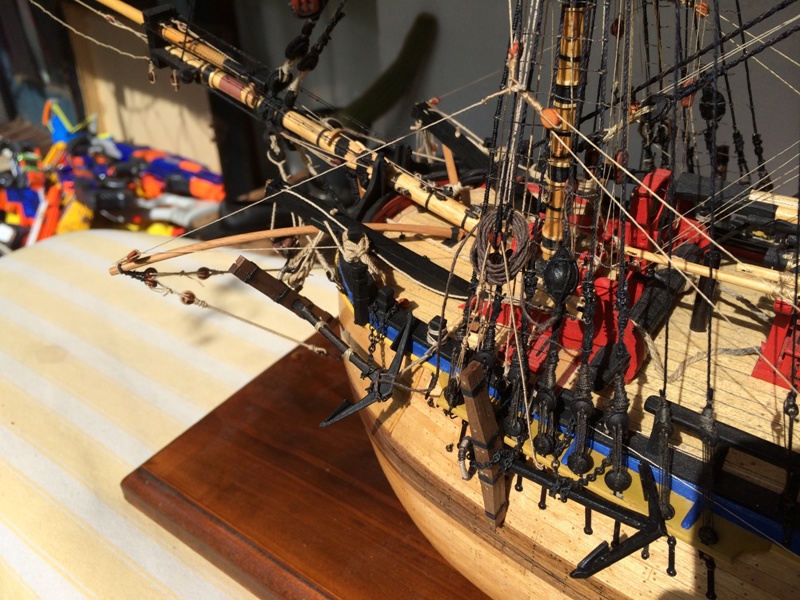
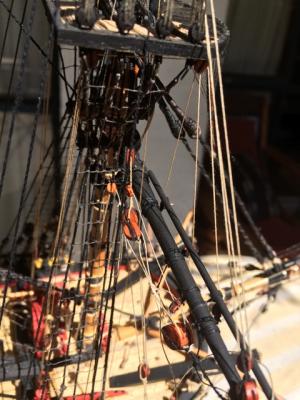
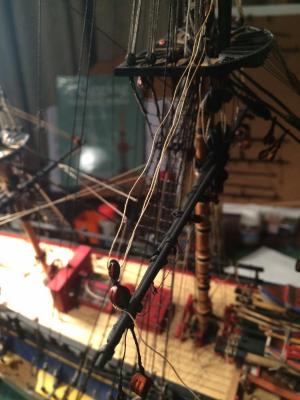
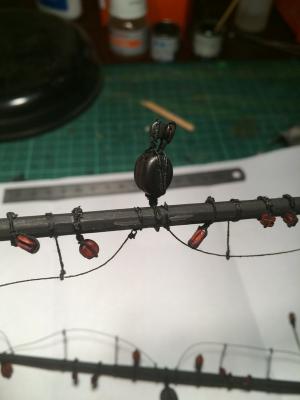
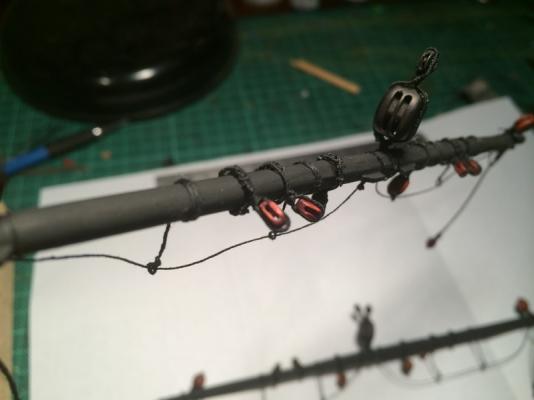
The Tricing lines! The book shows the blocks attached to the 5th stay but belayed to the 1st and 2nd stay. I did it, and it just did not make sense, so i removed and re attached them to the first and second stay as the run is so much better. The actual run of the tackle block is tied off and i intend to actually add a bundled line at the end when finished but I've tied it off to get it out of the road. I will wet it with diluted glue then to given it the appearance of droop. I wont add the port side tricing lines until the end as it will just get in the road as i intend to have a boat slung from the tackle.

-
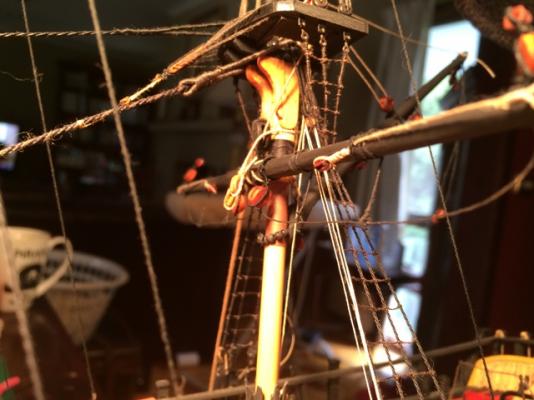
Progressing with the main yard, and along Frolich's method, I'm adding the running rigging as i go. With knotted ends, I've added the leach and bunt lines though the lead blocks. The hardest part of all of this is belaying them at the moment. The lead blocks run forward and the AOTS plans have them belayed beside the belfry which some idiot forgot to add a point to .


-
Pete, I have never used the AL instructions, they just don't make any sense. i have gone off the AOTS from the start. It just takes hours of study to make sense of them as I've never sailed a tall ship! Greg
-
Nice work!
-
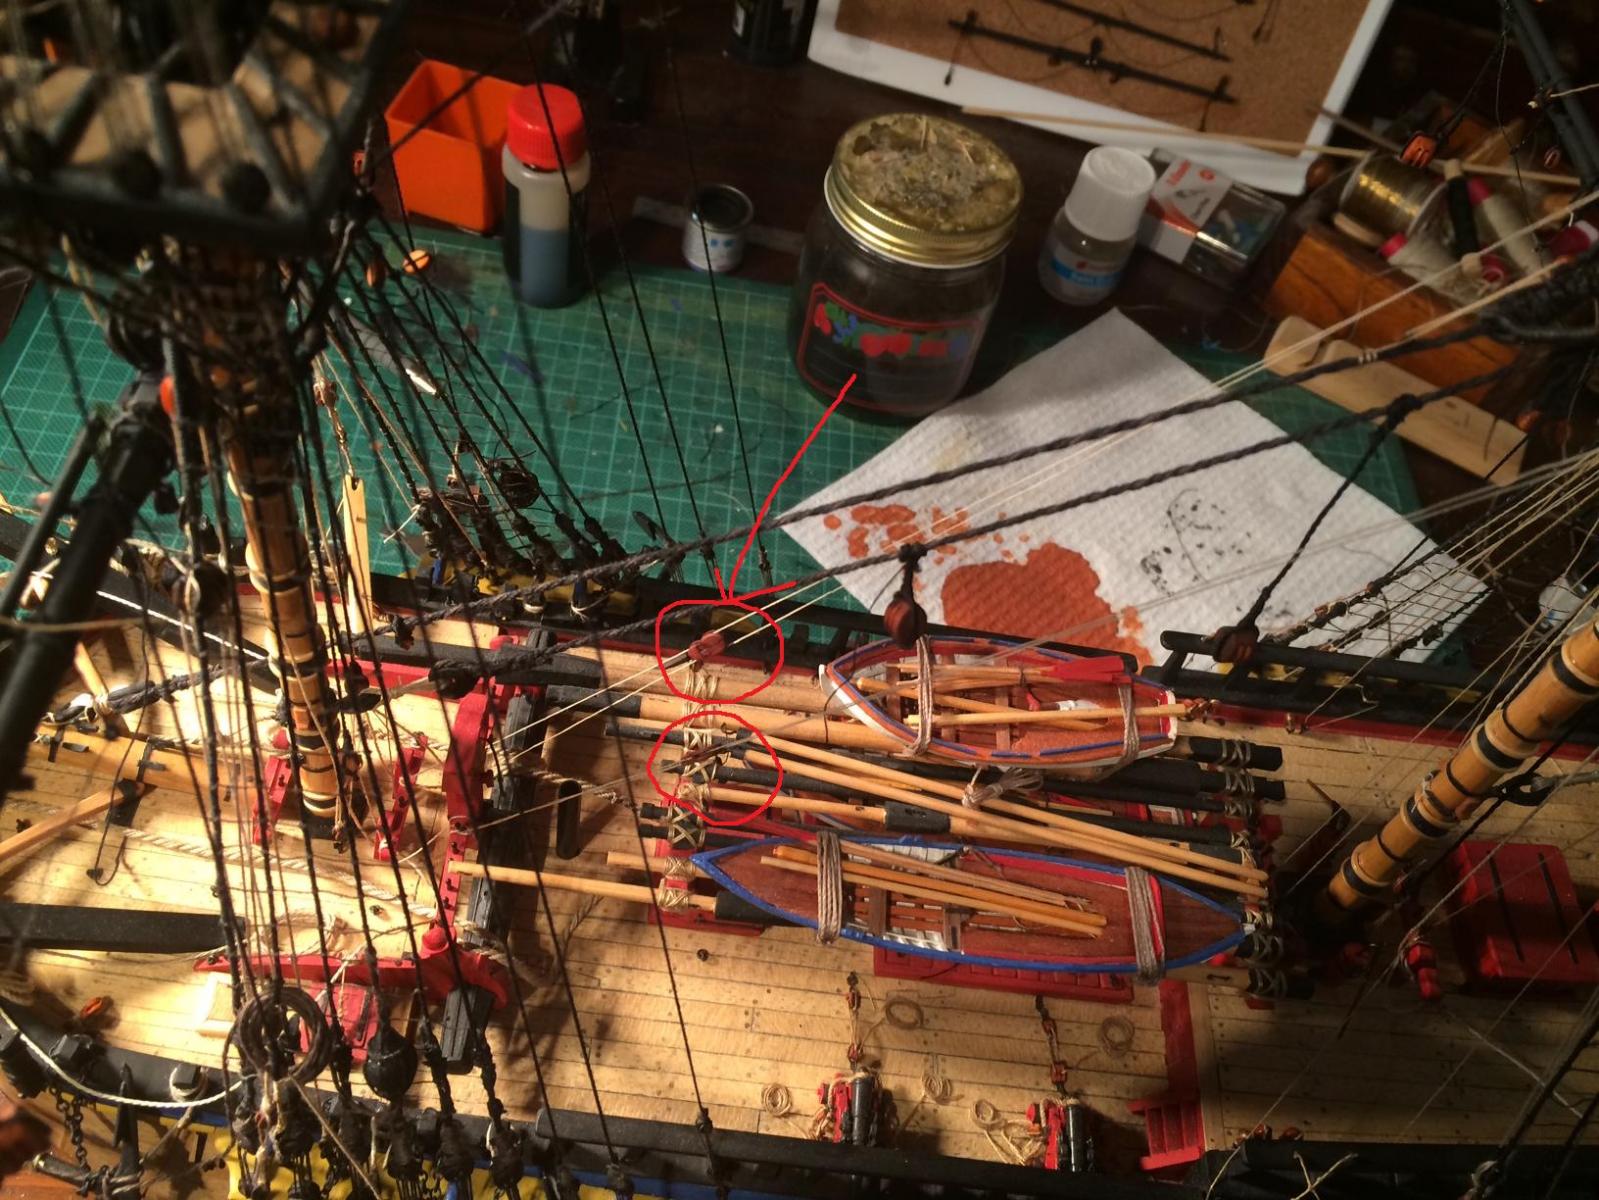
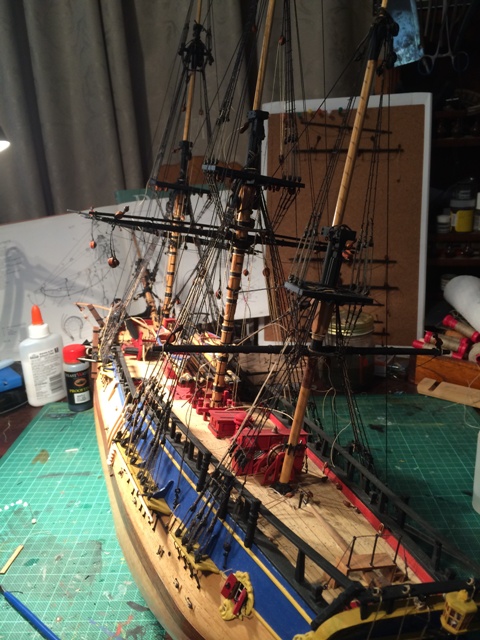
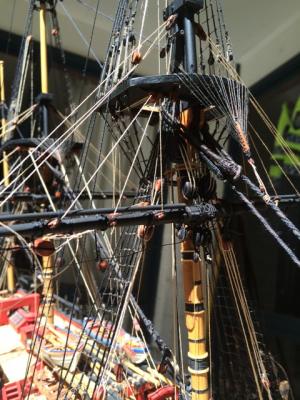
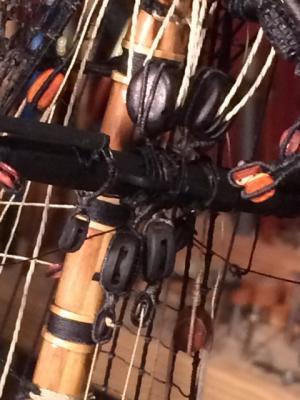
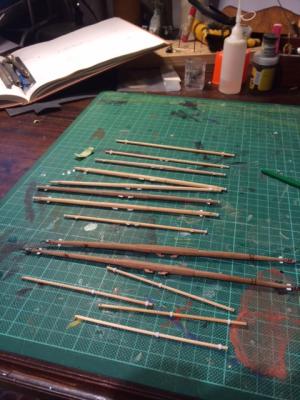
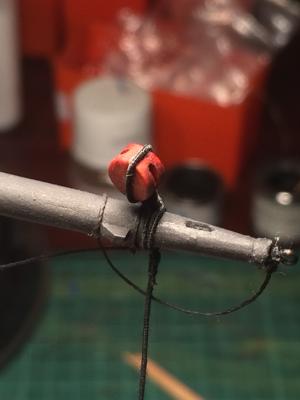
Now numerous blocks to go, 8 small blocks on the stays for the tricing lines fore and main (they rig up the tackle to the yards), Braces, fore and main course blocks and rigging, tackle, there is less and less room to move. At the very very end i will do up all the bundled ropes as there will be hundreds of them to do,I've had to order more blocks from clasicmodel as they just seem to keep appearing.on the plans.
-
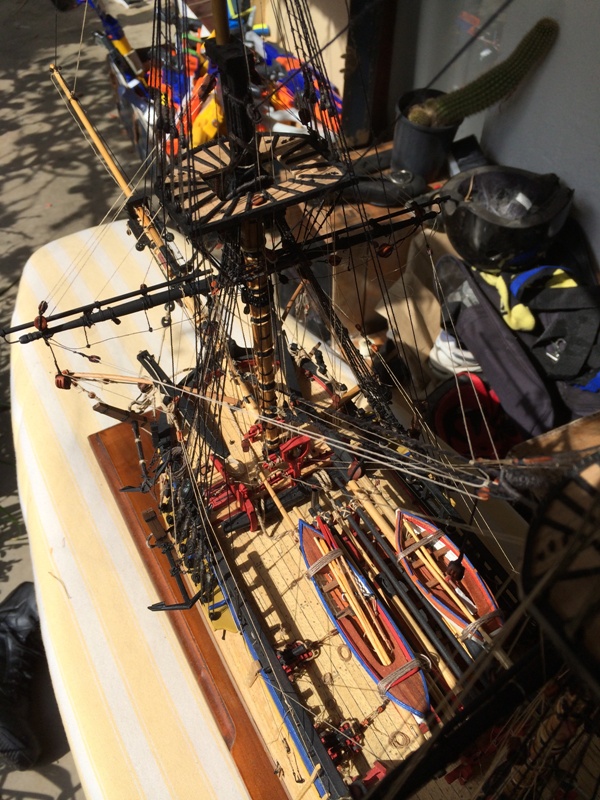
I've finally got all the sundry blocks ready to go for the main and fore yards. I noticed when i added the lifts that gravity plays no part in these small ships, so i have used the slab line to act as gravity and will brace the lifts and jeers.
-
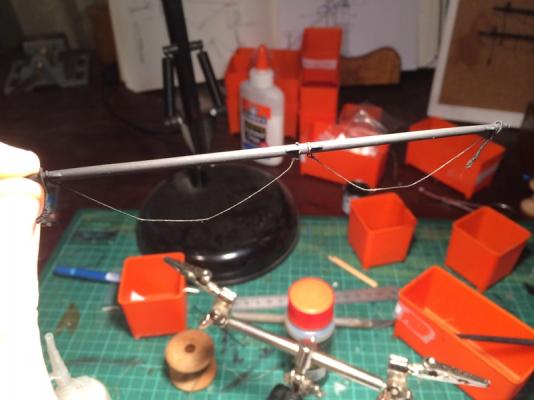
The Gaff's running rigging. whilst it will be bare poled, l've decided to add as much running rigging as possible.
-
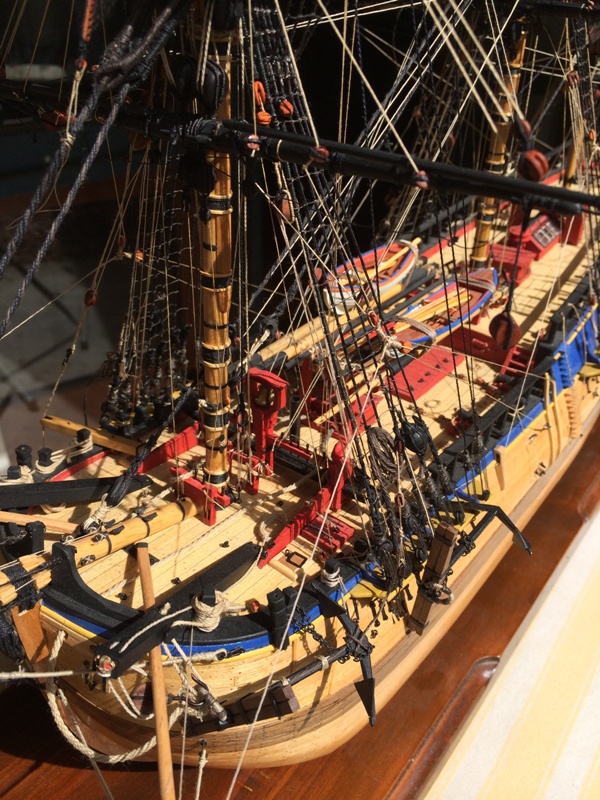
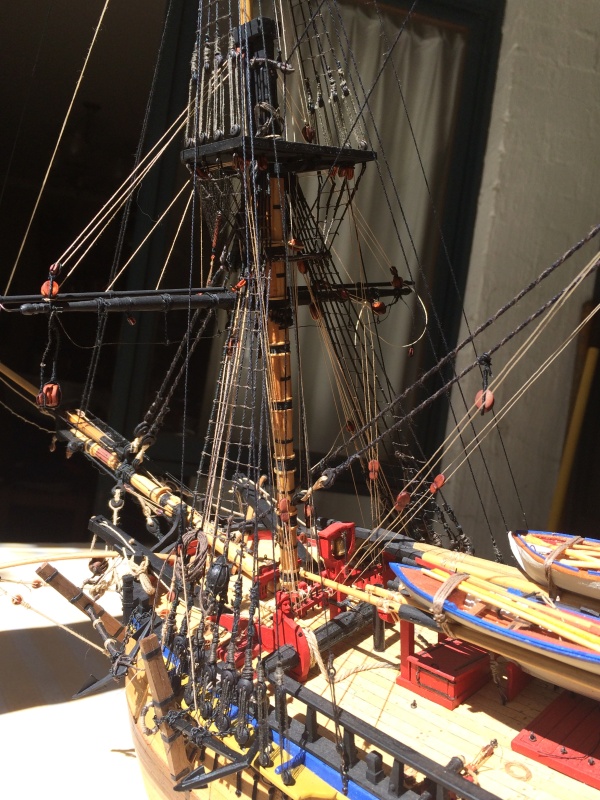
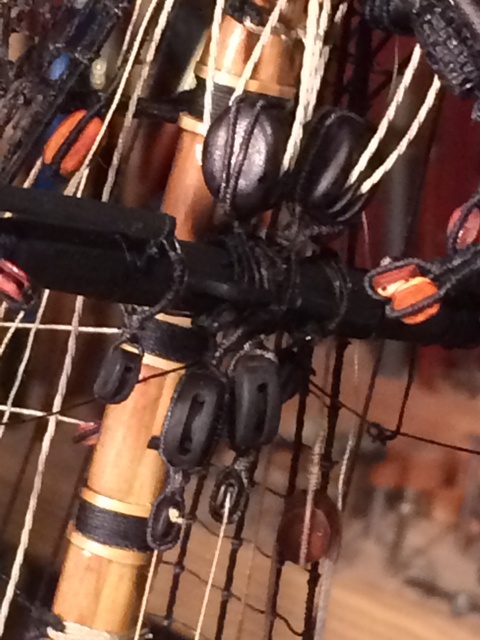
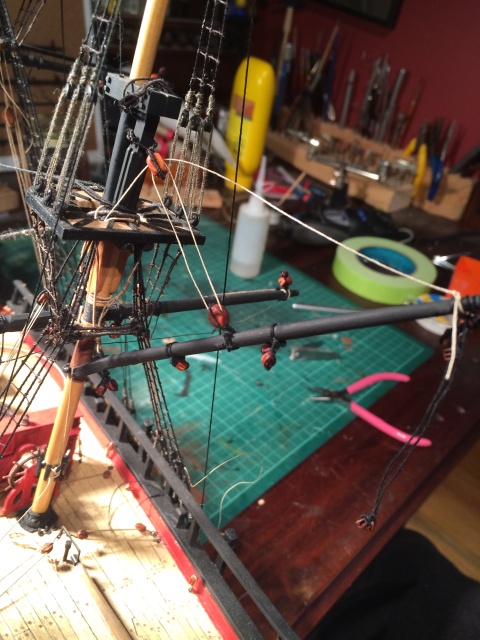
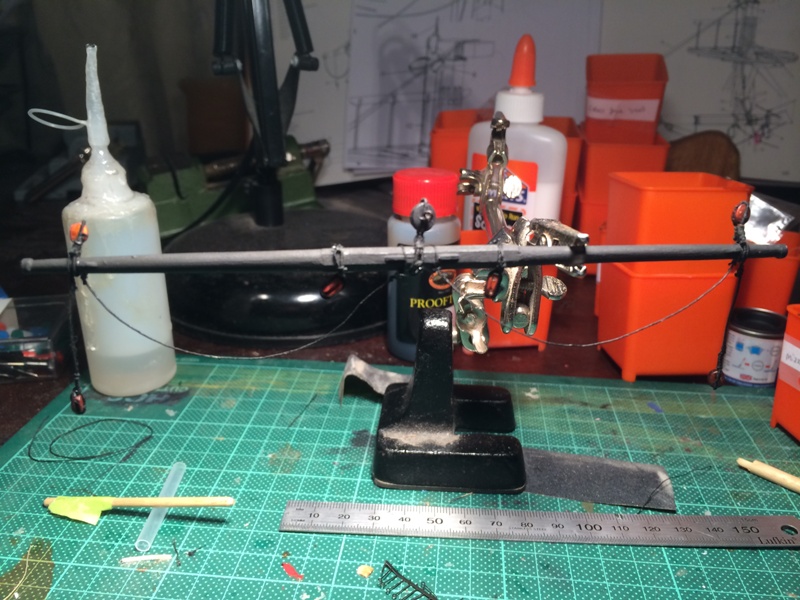
Attaching the yards to the masts. I thought I'd start front to back then thought that the braces would just not work unless I went the other way around. It makes for ease of access at least. The two main yards lash up quite well but it is tricky getting the parrels attached. the mizzen mast uses rope slings which become fiddly when lashing then through an eyehole.


-
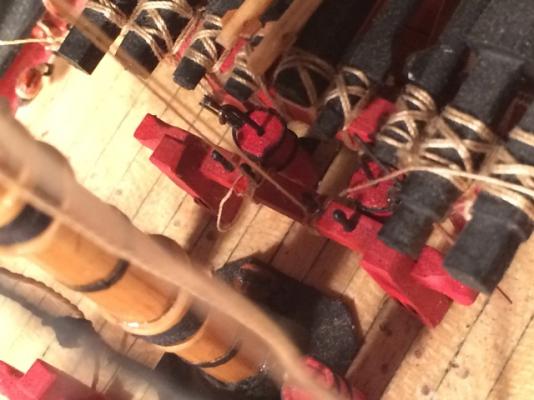
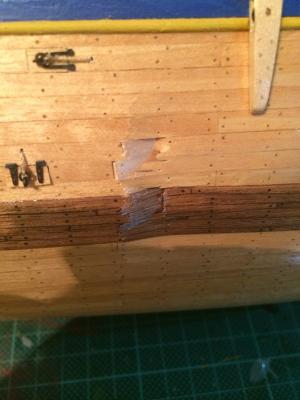
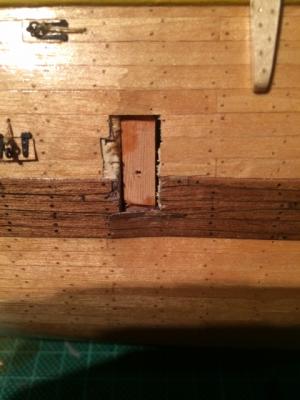
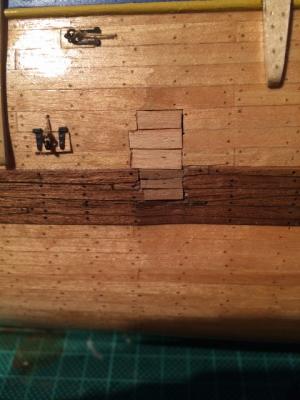
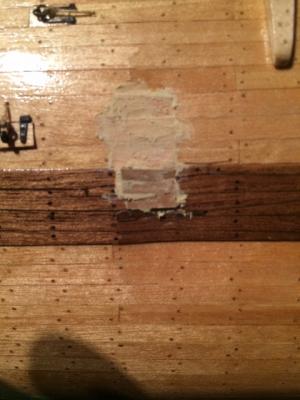
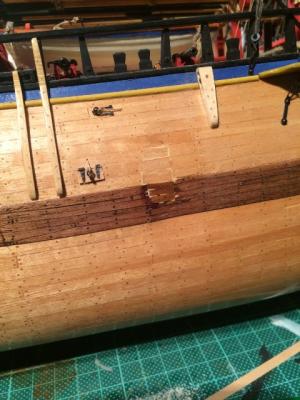
Thanks folks, just became slog after a while. The final bit of cat damage repairs now. It's not perfect but the hole was really substantial and the crush injury was between bulkheads. The filler looks very bright but will hopefully fade with age and all the other bits will distract from it. the run of the planks and the anchor stock wales was a lot of work at the time, and near impossible to replicate without a complete strip out which would have made more mess than it was worth.
-
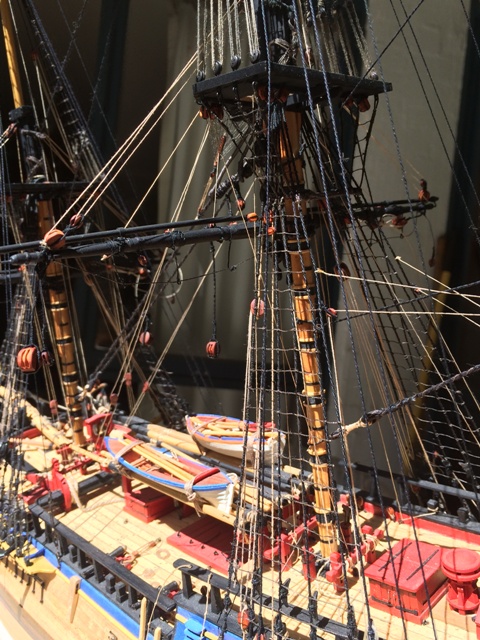
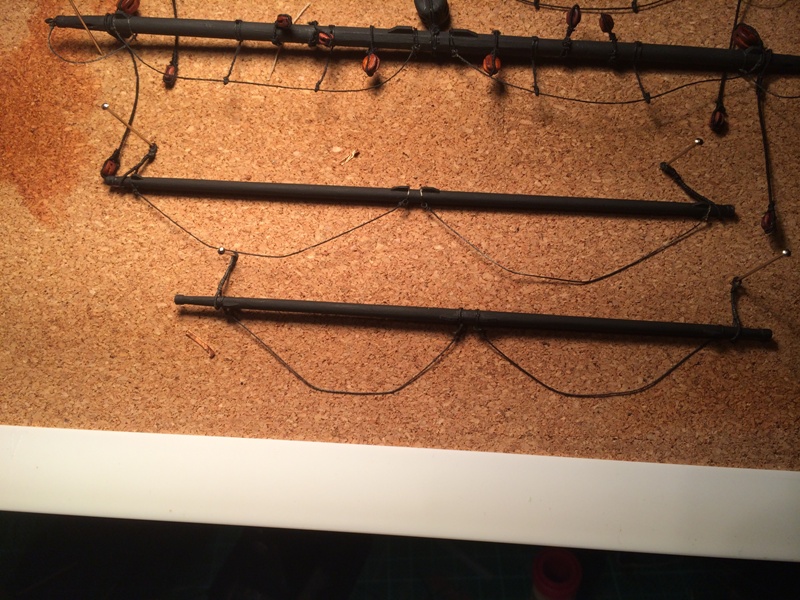
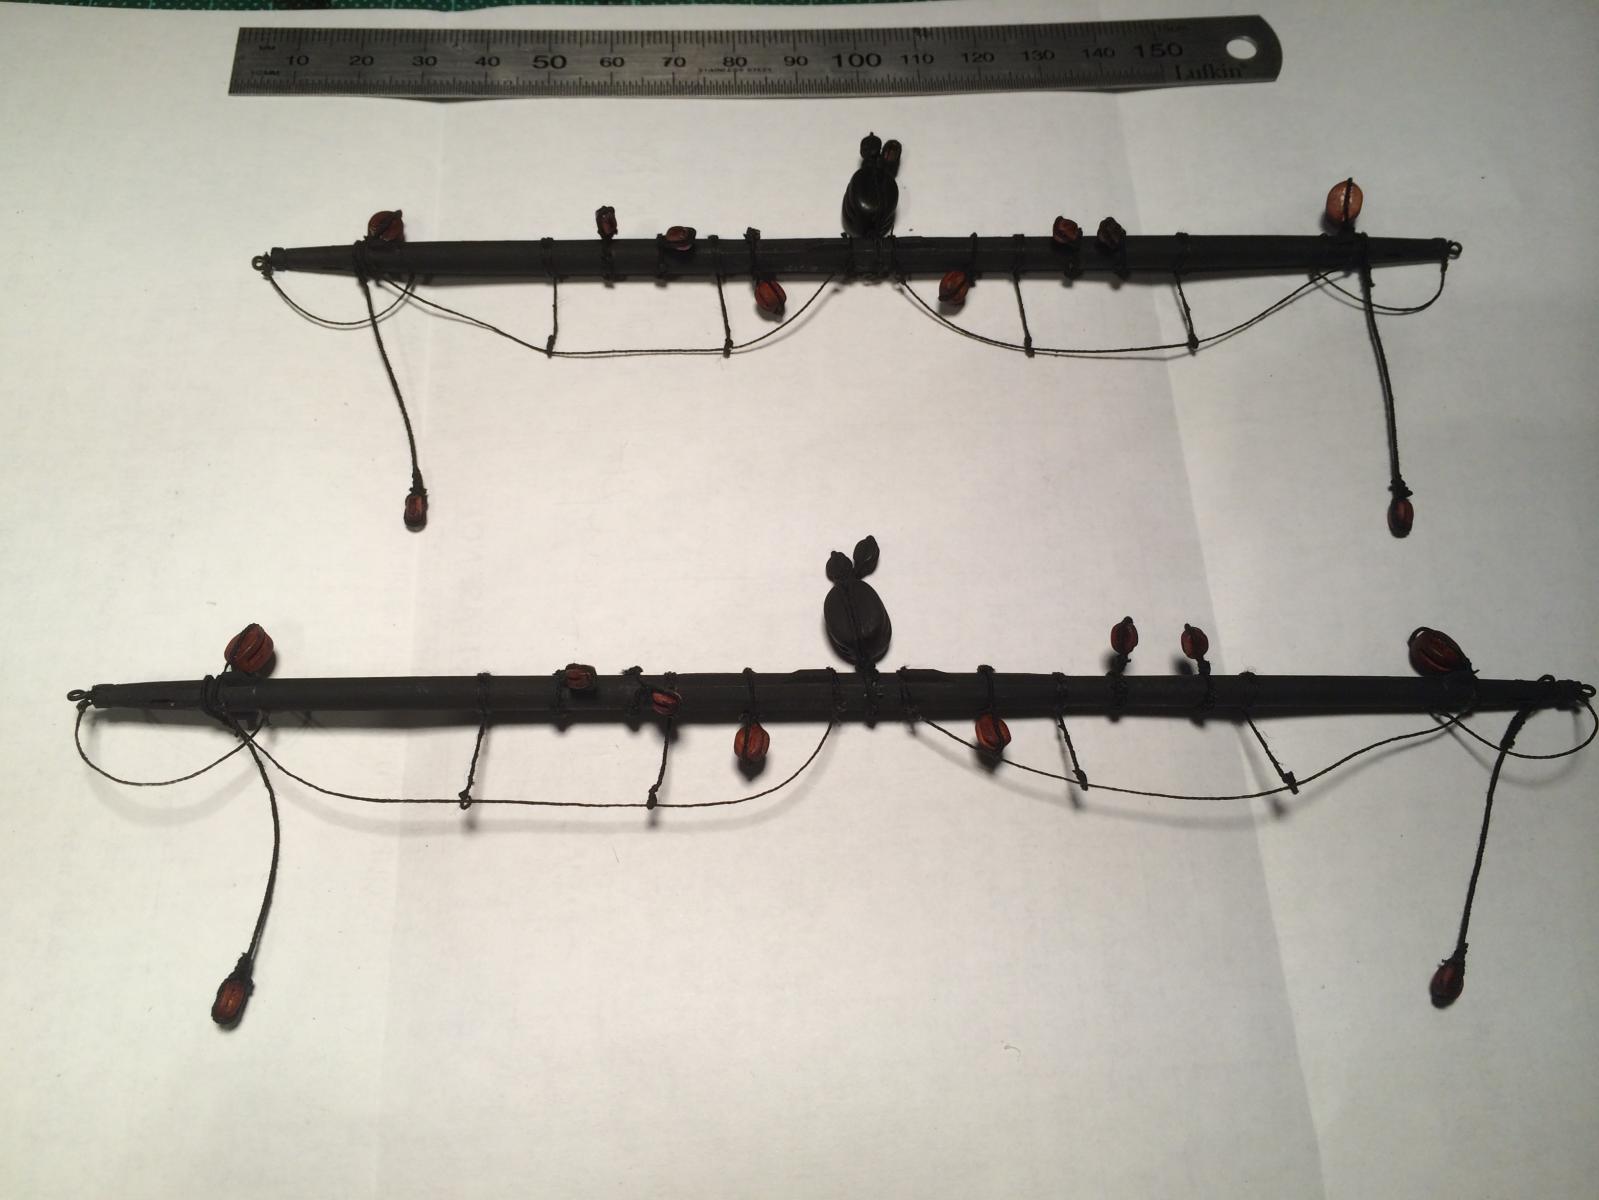
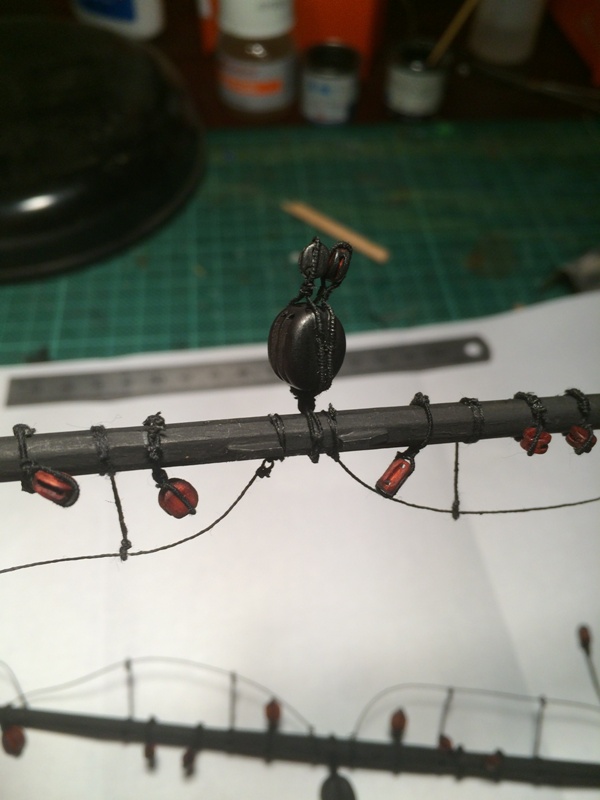
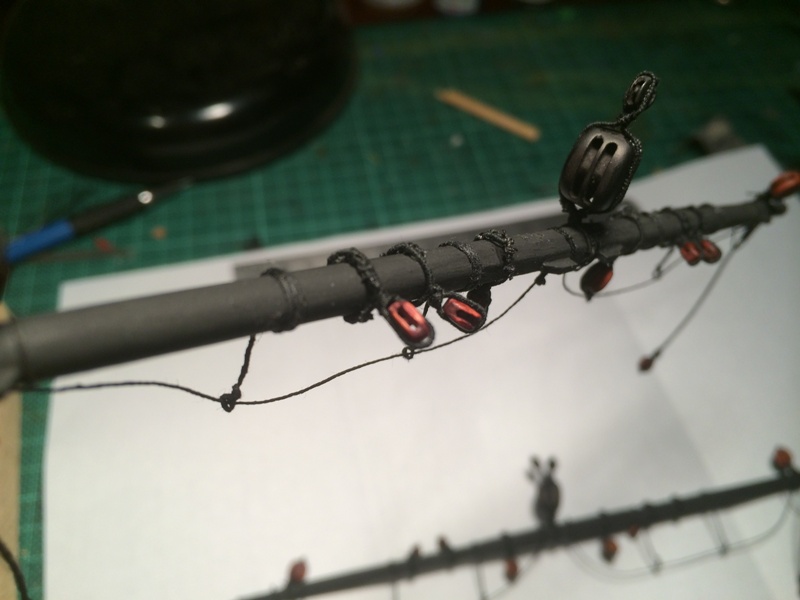
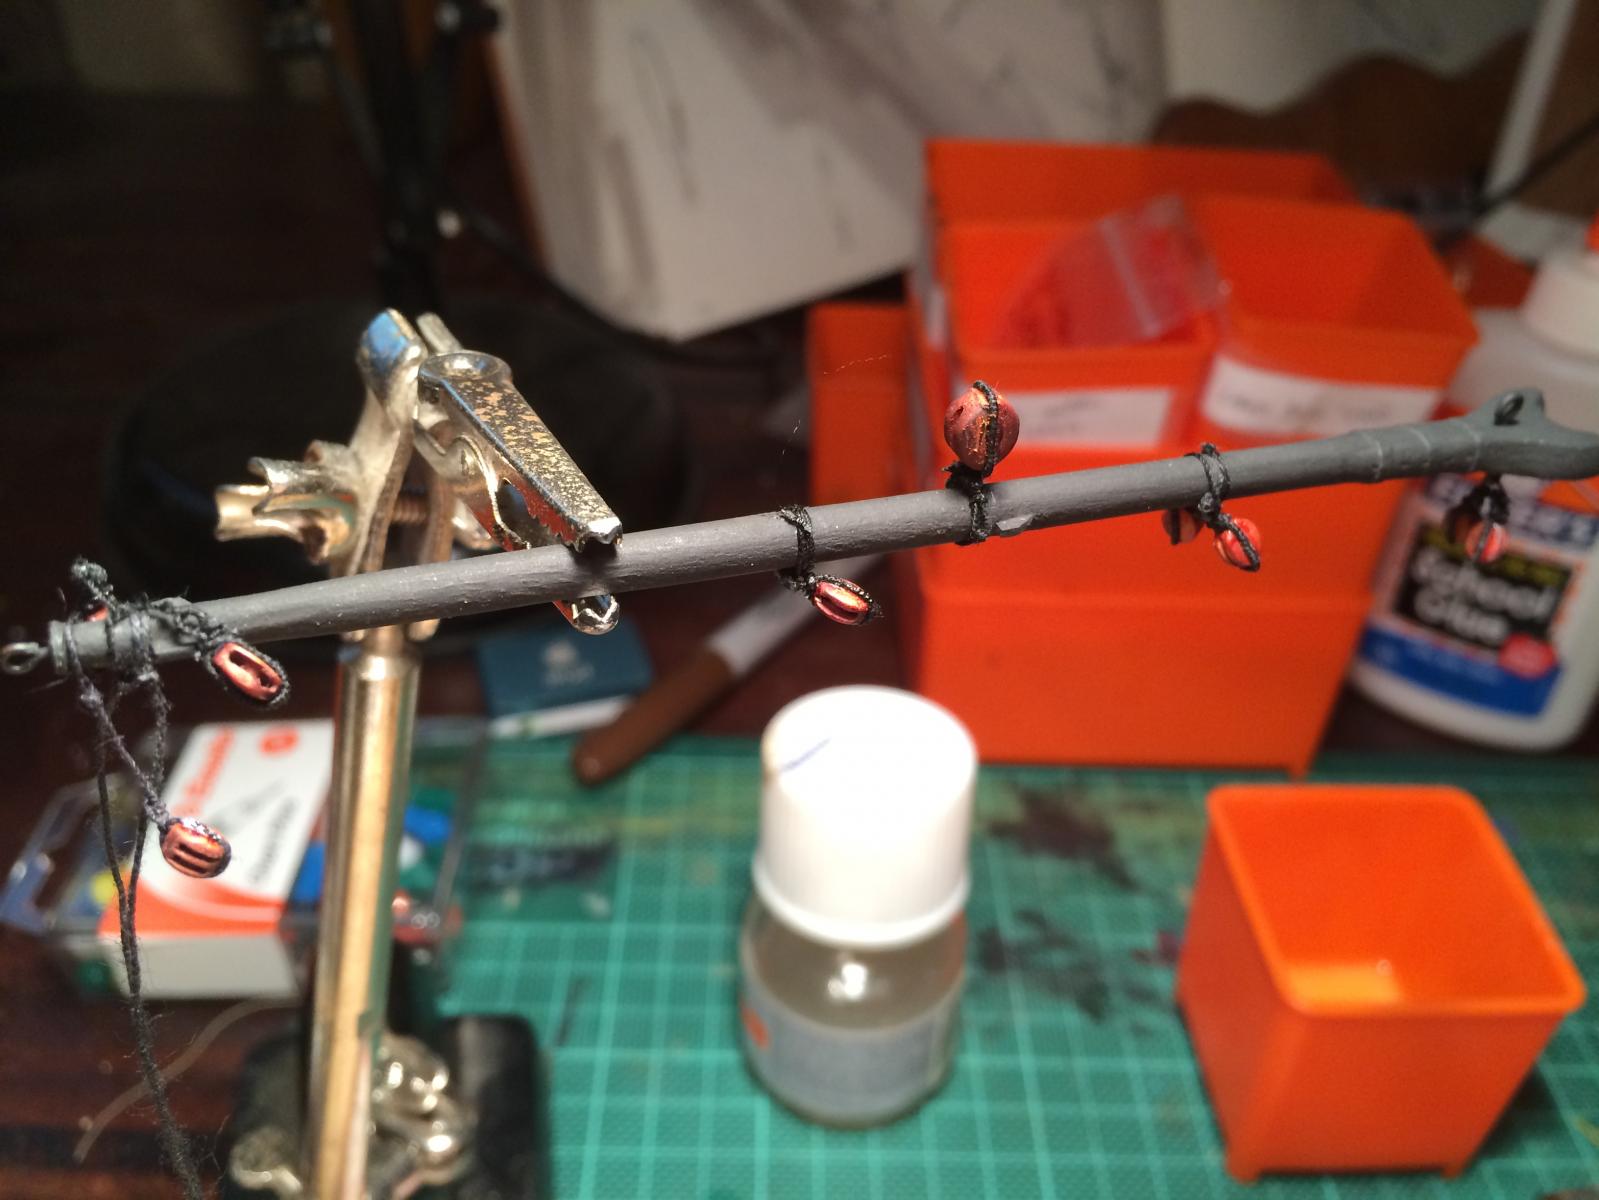
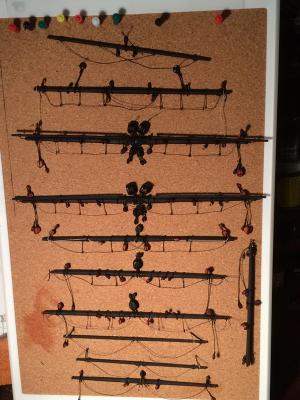
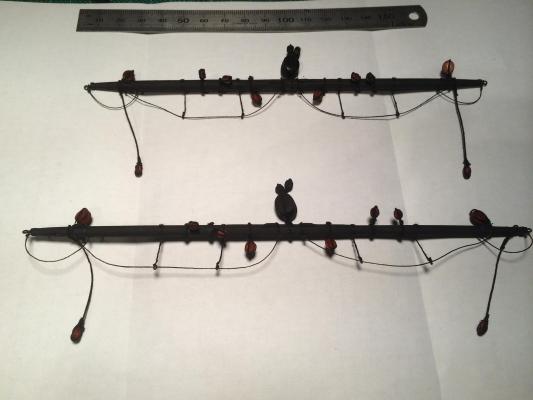
From sticks to very complex sticks. The yards are now complete, with over 107 stropped blocks by back is a little sore.
-
Topgallants, by far the easiest to do. 1 to go.
-
It's not so much the planking that got to me but the thousands of tree nails. Janos used a dark wood filler.
-
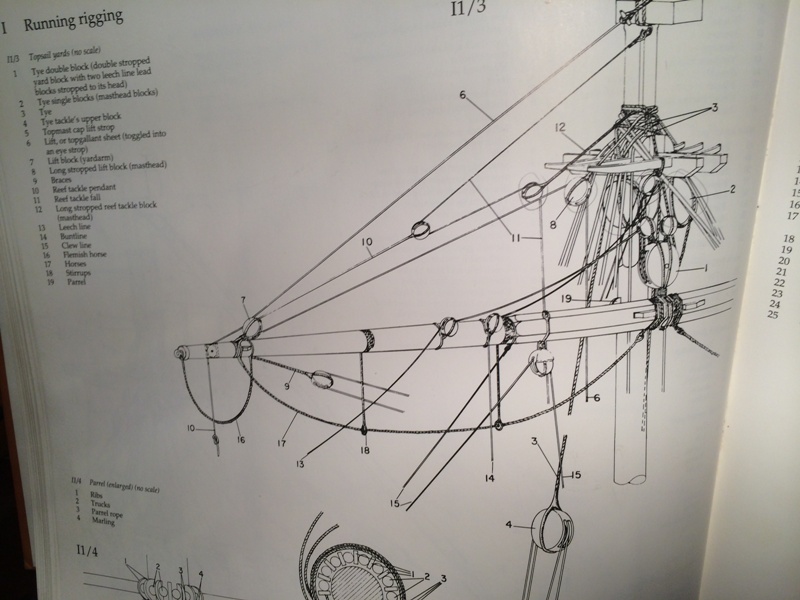
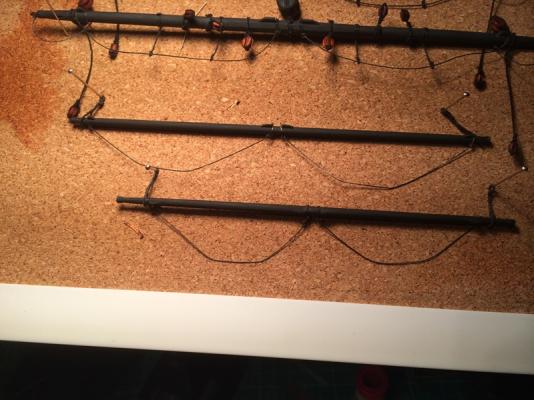
The fore and main topsail yards complete. Only 3 to go and only one of them had blocks.
-
I don't think we'd ever tolerate intellectual property here!
-
The Parkin book is a dual volume with the endeavours log and a book of poster side prints. No where near as detailed as the AOTS.
-
The Gaff. I did the entire thing from scratch as you can see the AL Yoke would have never worked. 5 to go.