HOLIDAY DONATION DRIVE - SUPPORT MSW - DO YOUR PART TO KEEP THIS GREAT FORUM GOING! (Only 36 donations so far out of 49,000 members - C'mon guys!)
×


FriedClams
-
Posts
1,368 -
Joined
-
Last visited
Content Type
Profiles
Forums
Gallery
Events
Everything posted by FriedClams
-
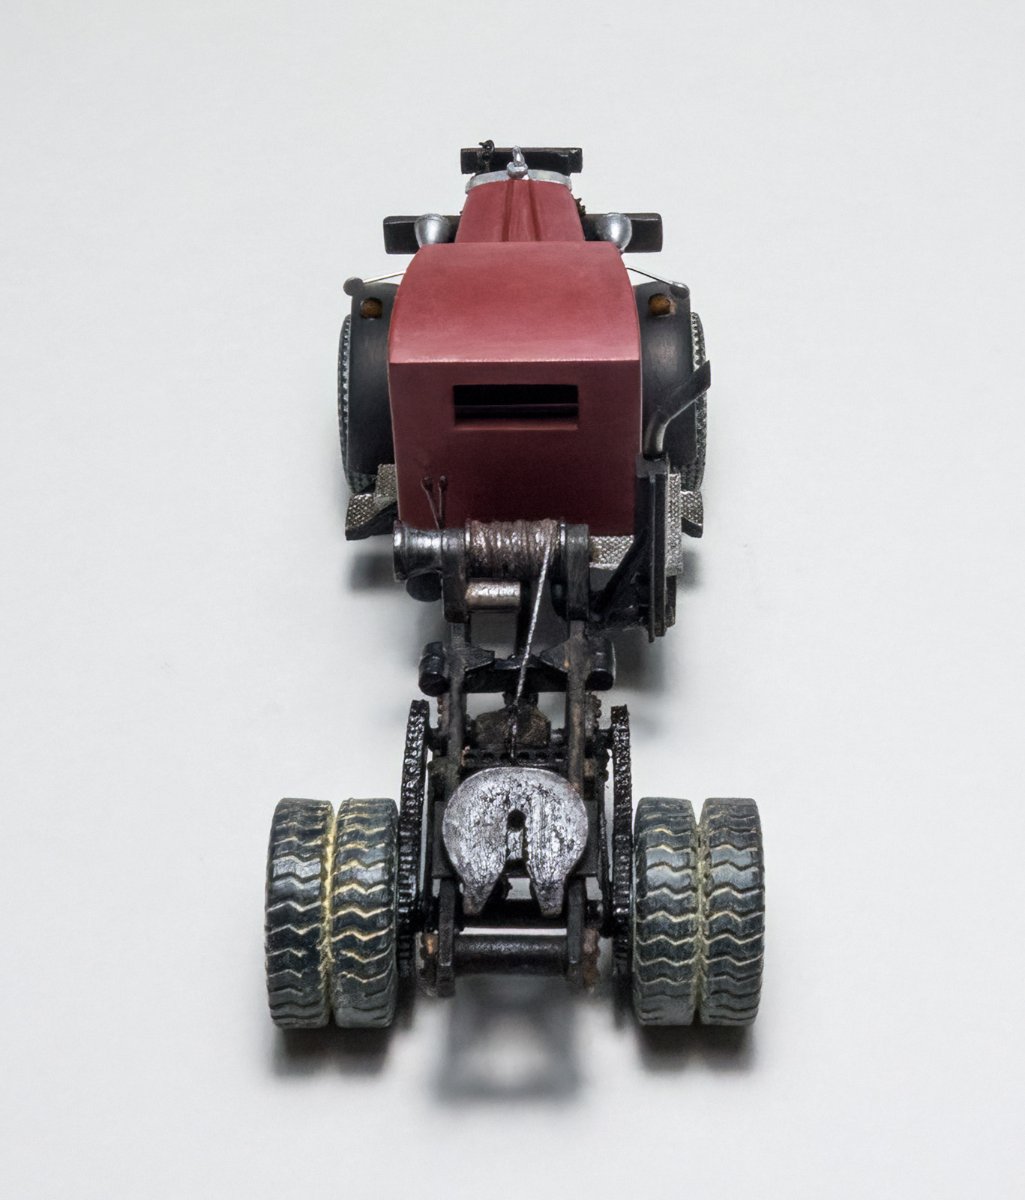
 Hello Colin. I use pigment powders quite often and they work great, but they do have their limitations. They will not stick to smooth surfaces without some sort of carrier. Also, the powder is ground very fine, much finer than chalk or pastels and they are crazy messy. Be sure to check out some of the many great YouTube videos on how to use them and the different ways in which they can be worked before you take the plunge – they are not for everyone and I know people who hate them. Thanks for stopping and the nice words. The manufacturer was able to get some very smooth and crisp details on the parts, especially considering the medium and scale. Thanks Mark. Thanks for the kind words Paul. But I'm far from a master, and I I've picked up many tips and techniques from our fellow builders here at MSW. Any progress on Mighty Mite? Hello EG, and thanks. There is just something about an old Mack truck that's special. Here's a gentleman who restored a tandem wheel FK. In part one he talks about the restoration. In part two he drives it around town, but it's difficult to make out what he's saying over the engine. A beast of a truck. Hello Keith. Yes, I added the grease and here's a closer look at the plate. I painted the plate acrylic flat black and added rust-colored pigments while it was still wet. Once dry I gobbed ivory black oil paint on top. I've not found anything that looks more like grease than black oil – after all, it is oil paint. Thanks Keith. Thanks for looking in and for the compliment Andy. Do you think I need to add more grease? Hello Charles, thanks for following my builds and for the nice comment. Your question is a good one and I'm glad you asked. I should have done what you suggested and sanded a slight flat on each tire so (as you stated) it looks like the vehicle has some weight to it. That's one of those details that is often forgotten about (like I did here) but adds to the model's realism. I don't know what could be done with resin tires, but I've seen modelers produce very convincing sidewall bulge on injection molded tires by warming up the material and smushing it down a bit. The wheels on this model are already glued on, but I might try dragging it across a flat piece a sandpaper and see how that goes. Hello Ken. Yea the tires in this kit are quite good although they did require some clean up. There was even some mold rubber stuck between the treads. I've never made a Sylvan kit, but I see they have quite an extensive product line and I find their early/midcentury cab-over tractors tempting. Gallery Glass is a pretty handy product and I use their Crystal Clear quite often. What I don't like about the stuff is that it shrinks as it dries so you often have to apply it a second time to fill in where it has sunk. And it doesn't dry hard like a clear epoxy does, more like rubber. Useful stuff just the same and I've been using the same 2oz squeeze bottle for about 5 years. Thanks for the comment. Thanks to all for looking and the "likes". Gary
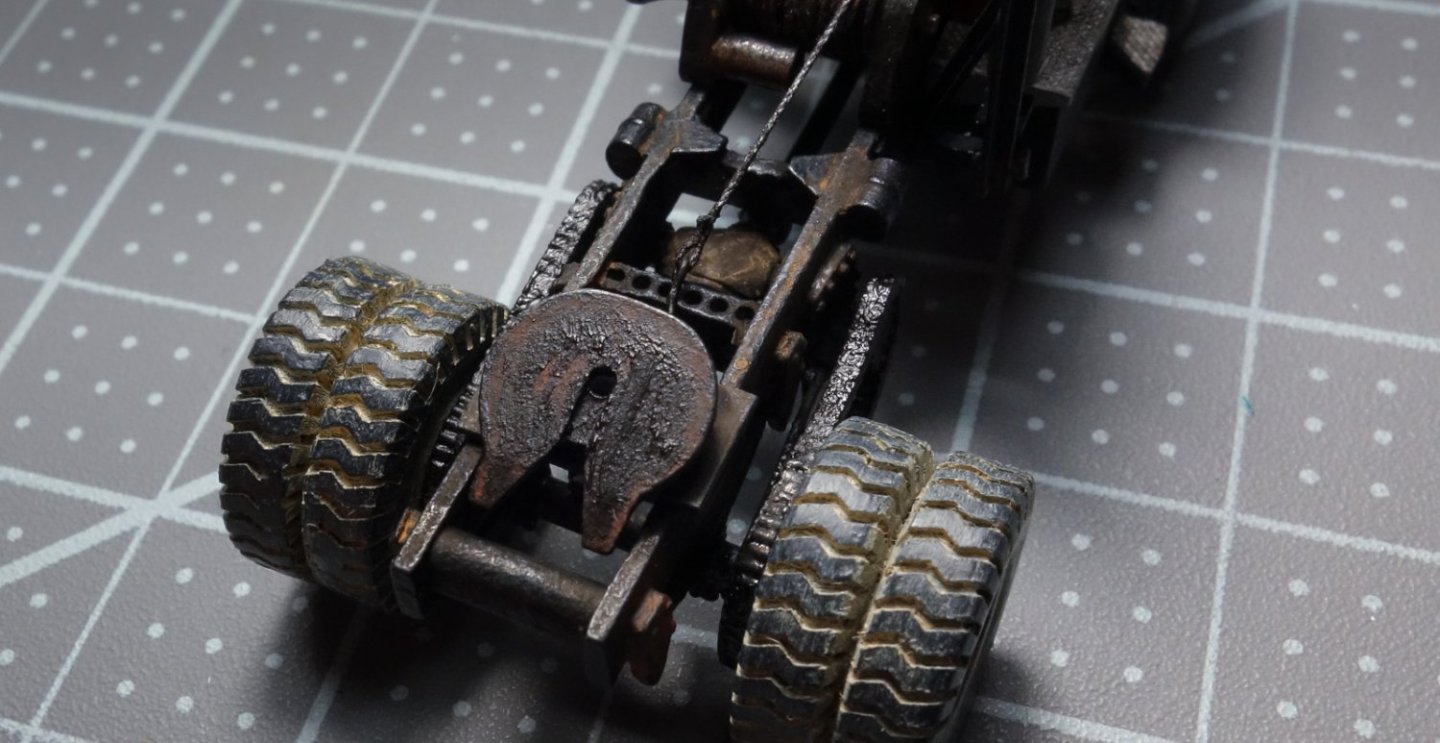
-
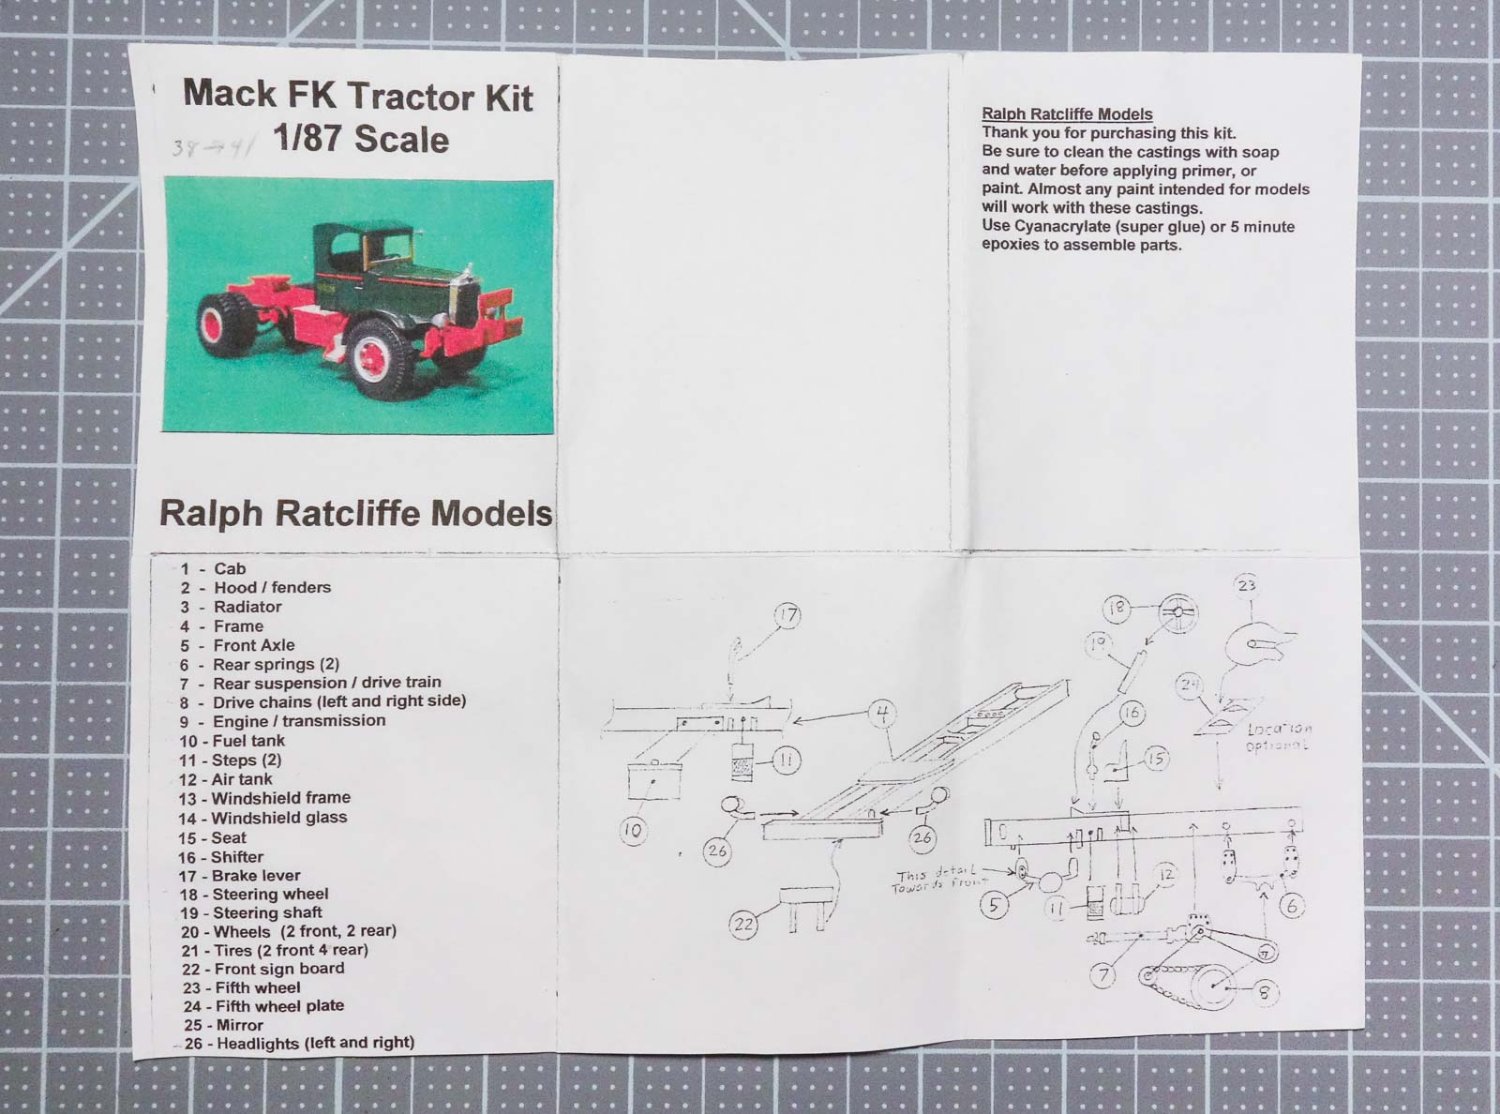
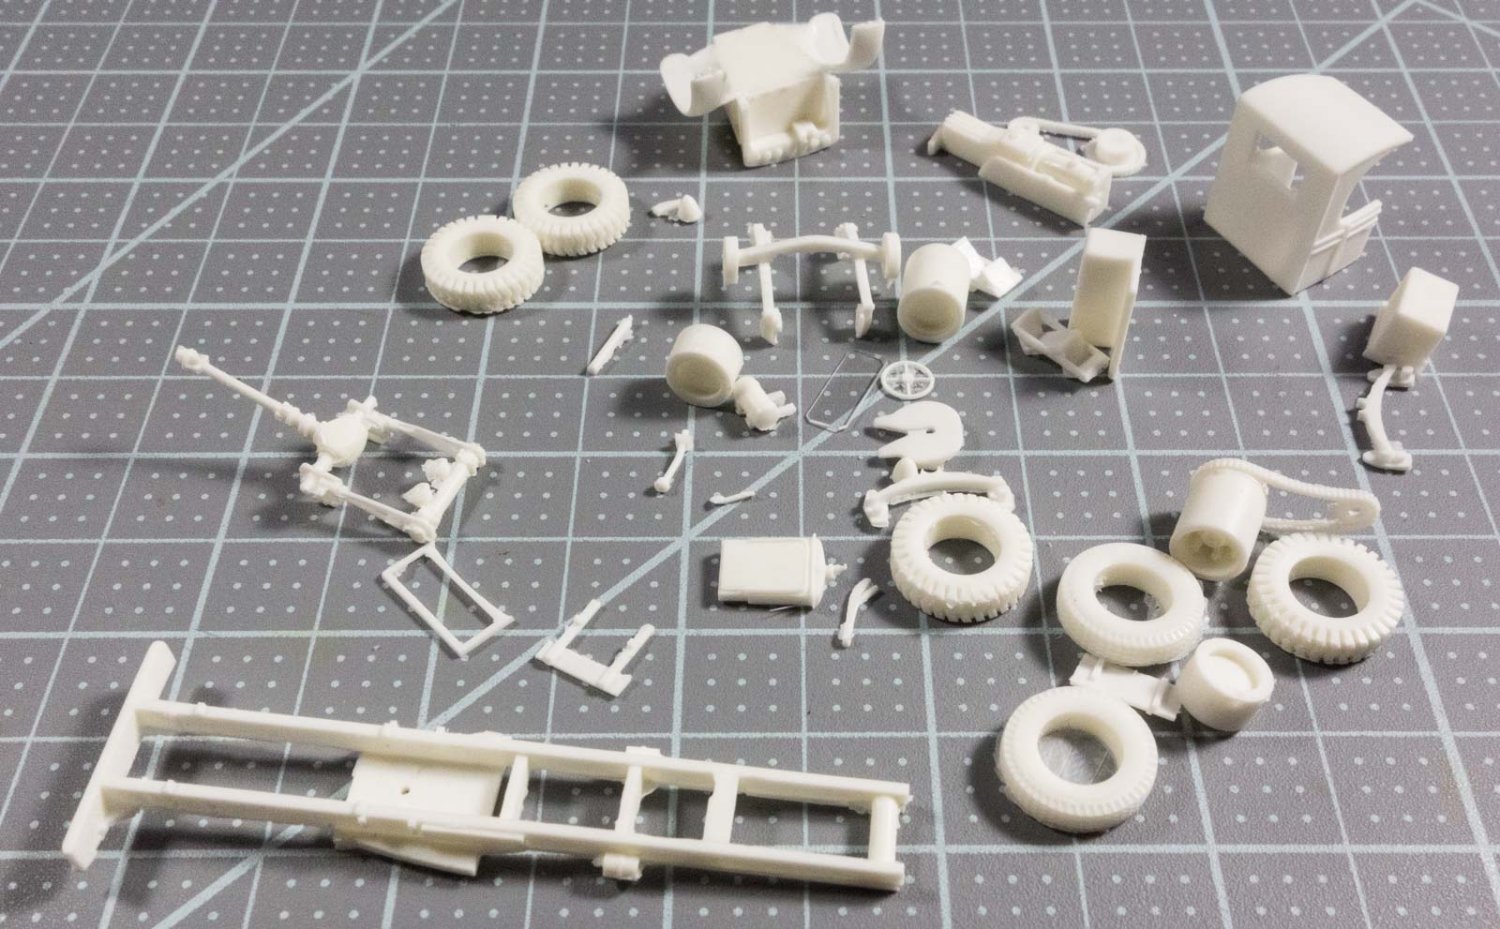
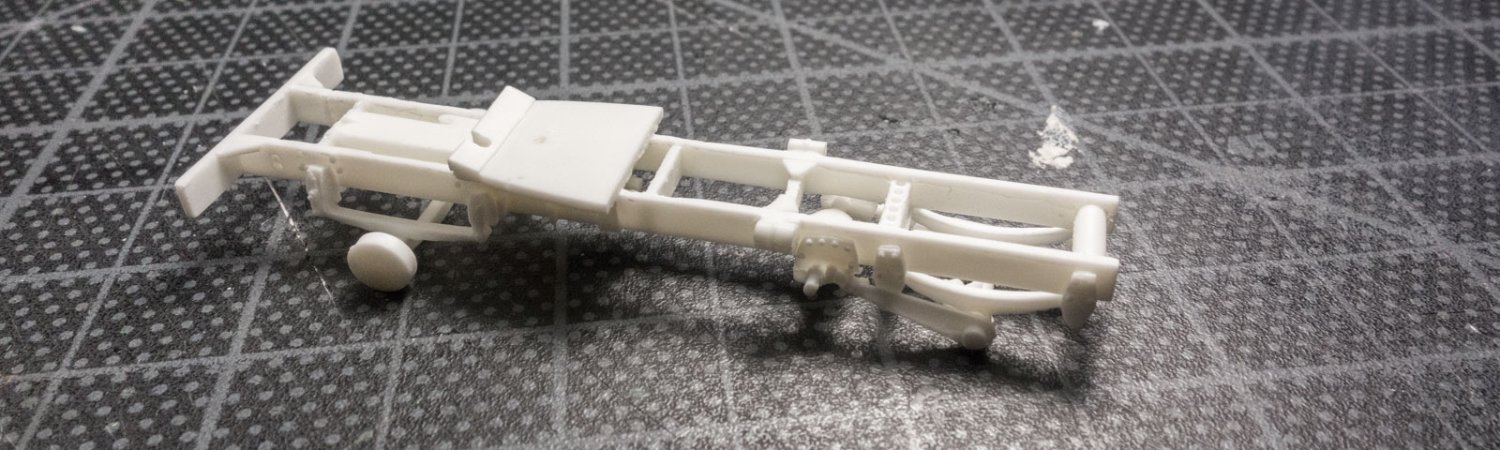
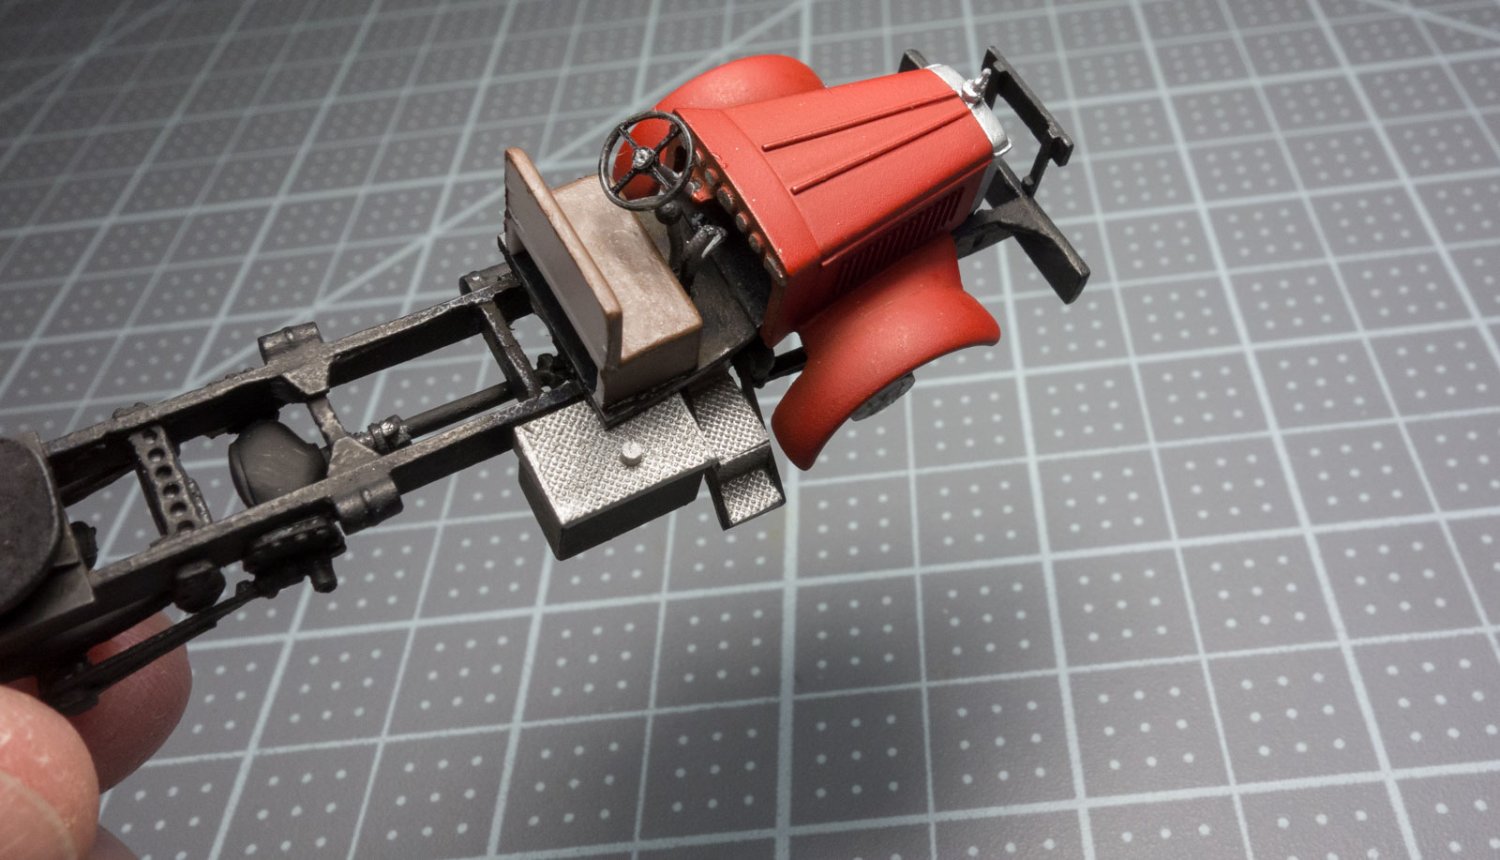
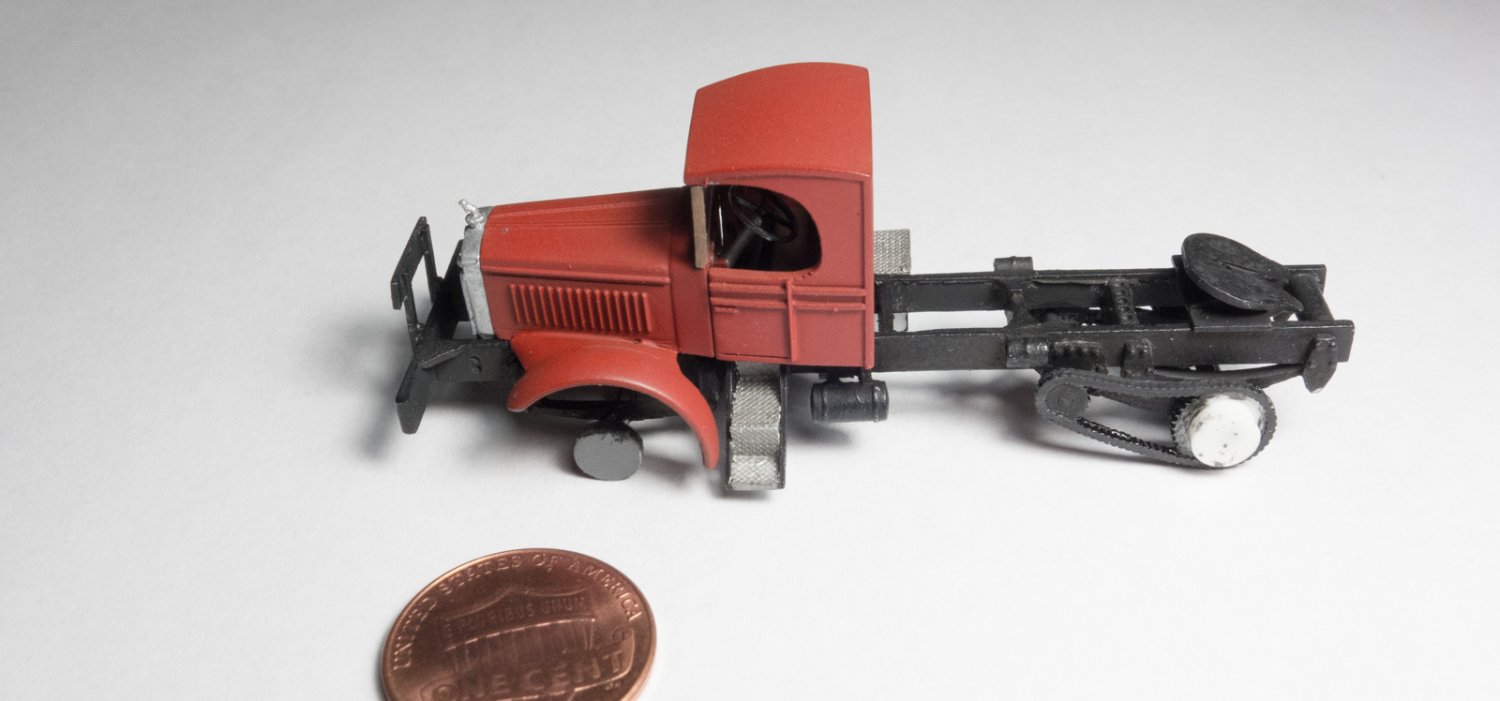
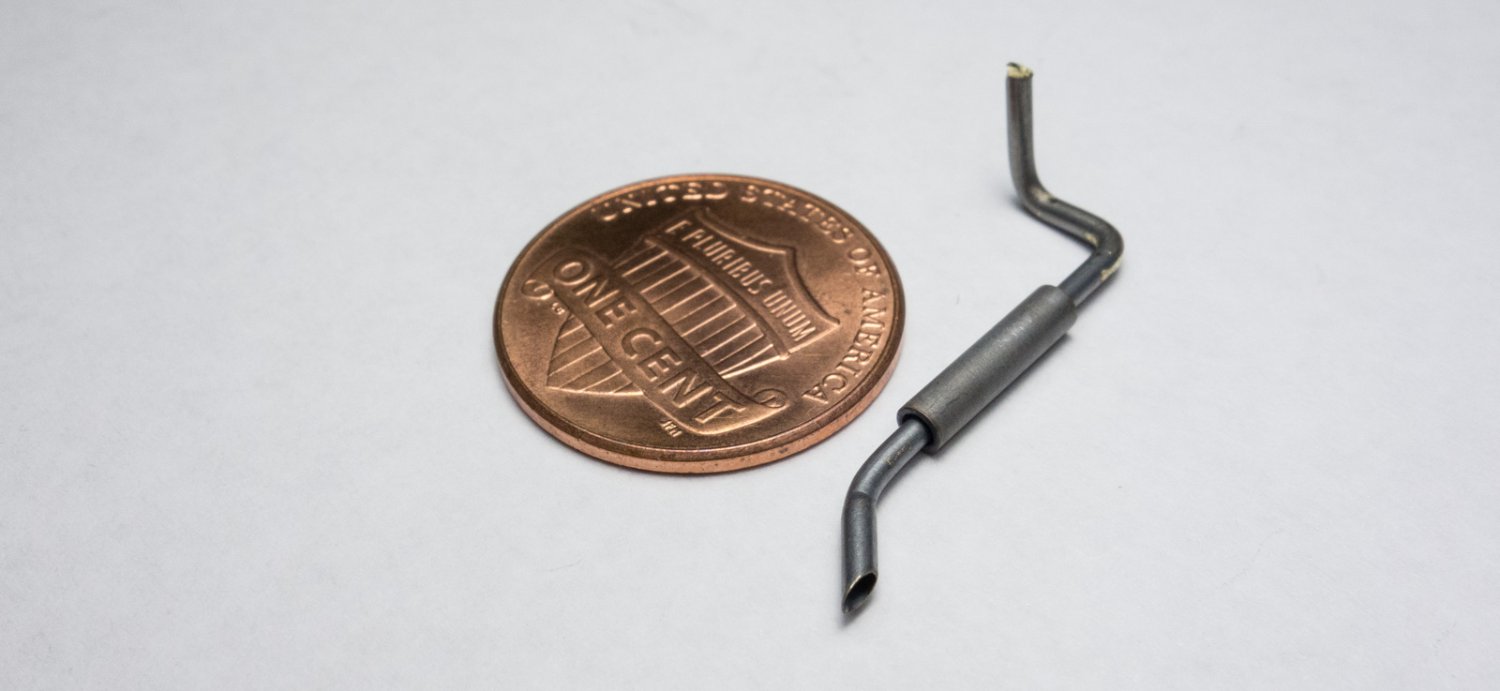
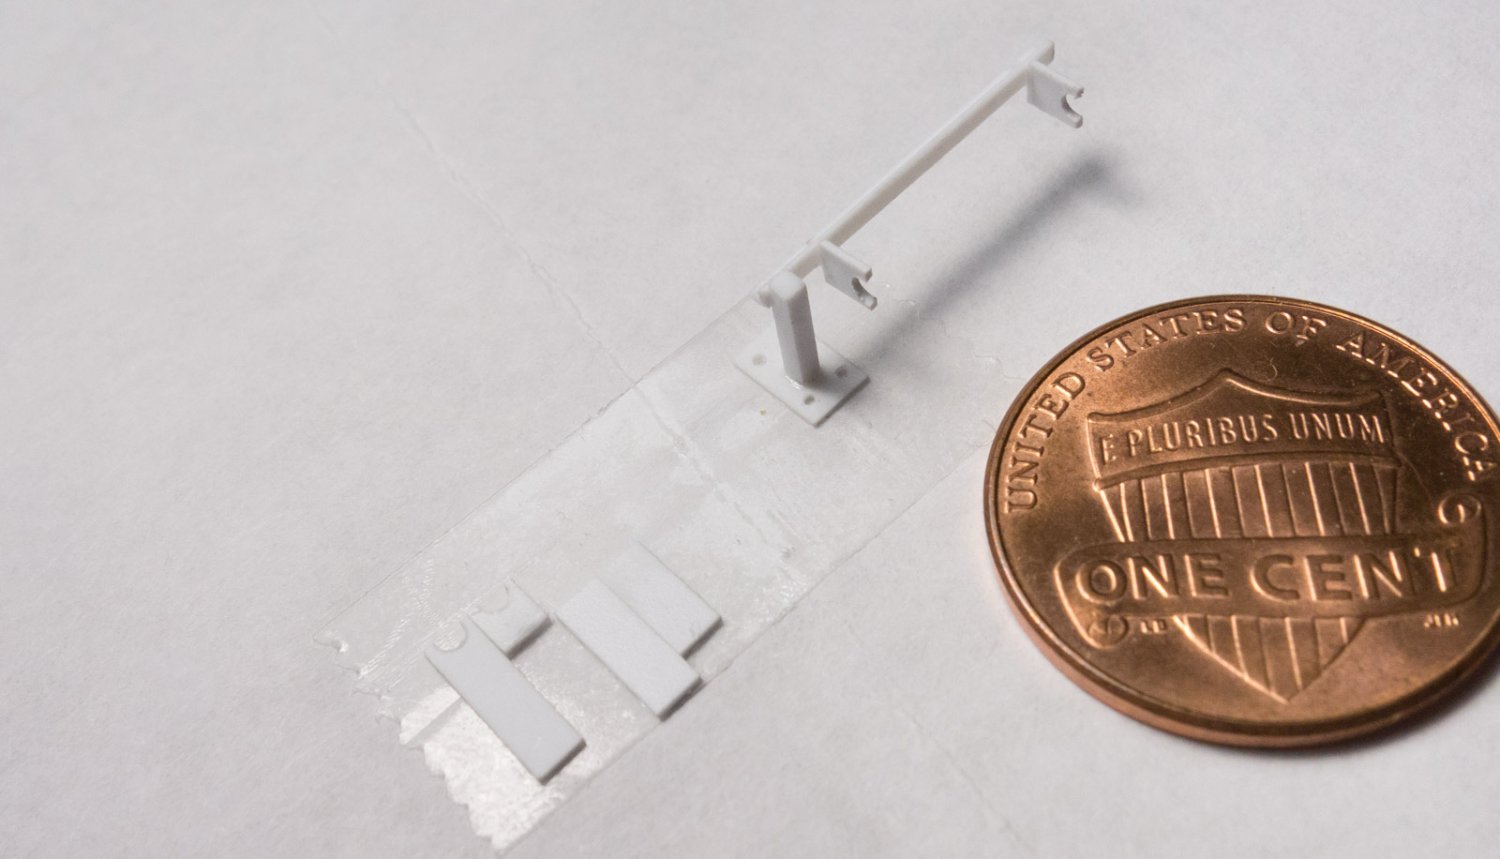
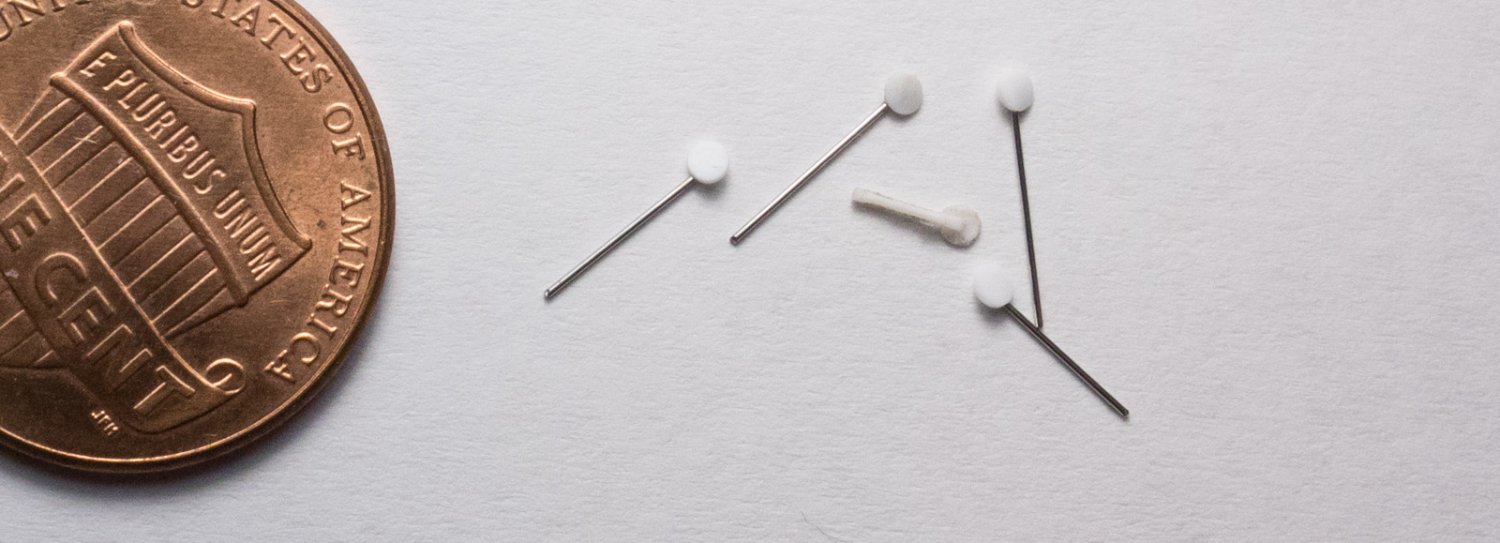
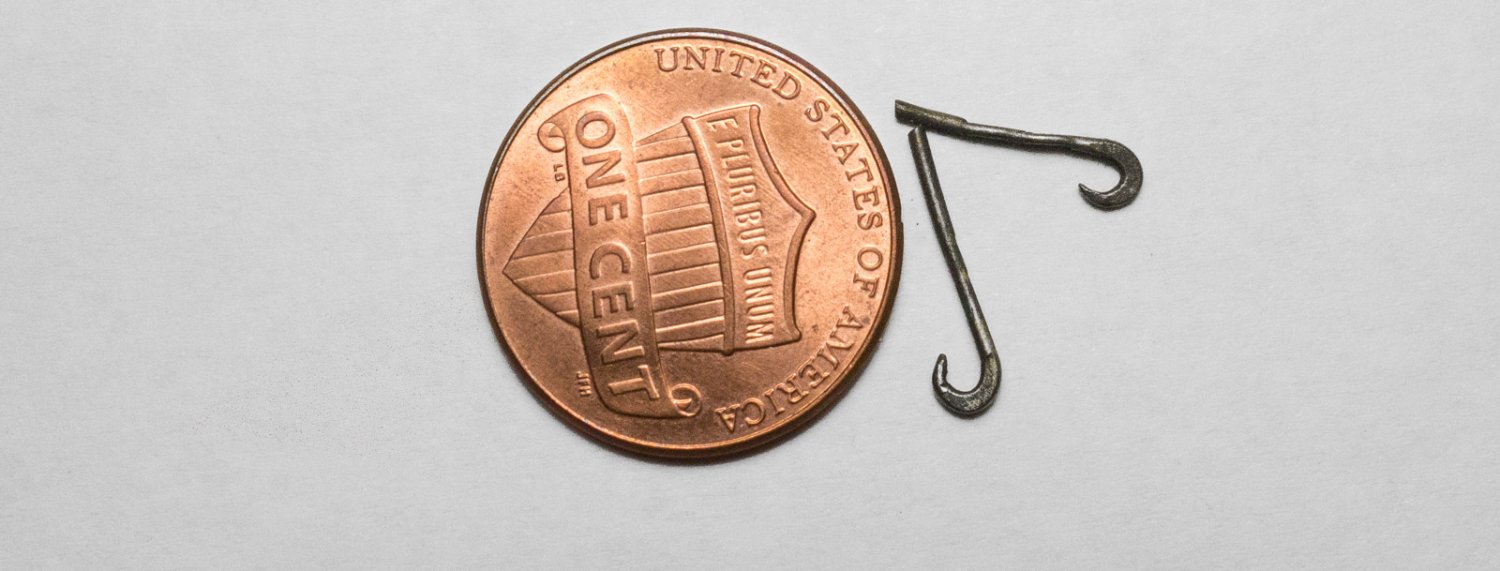
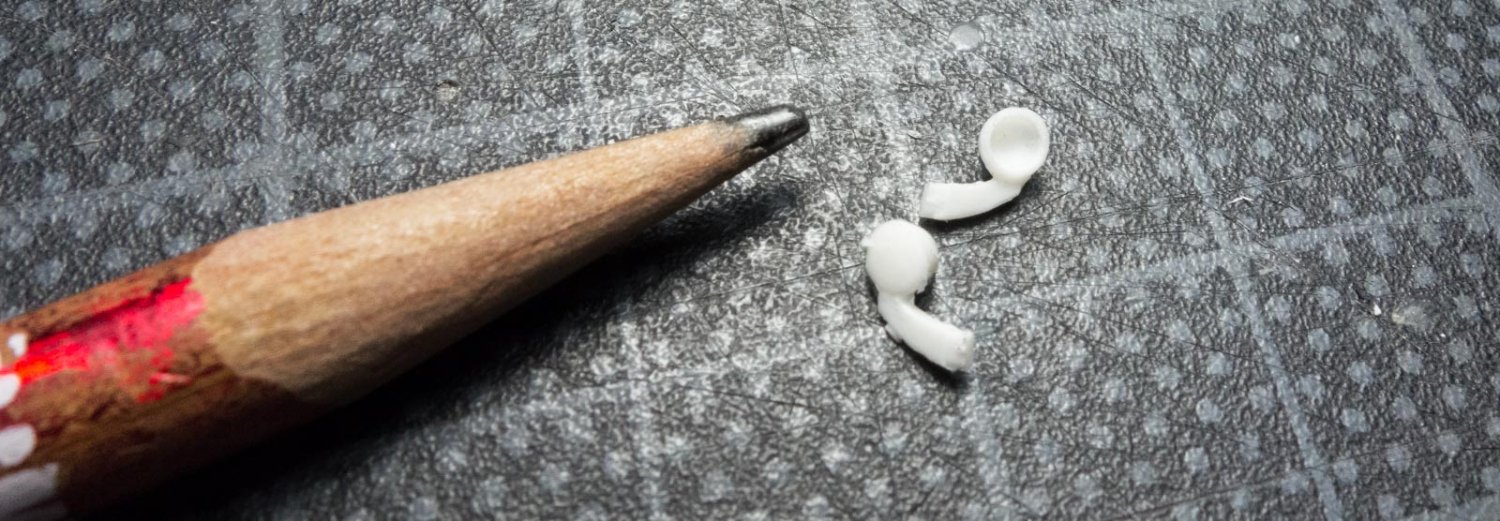
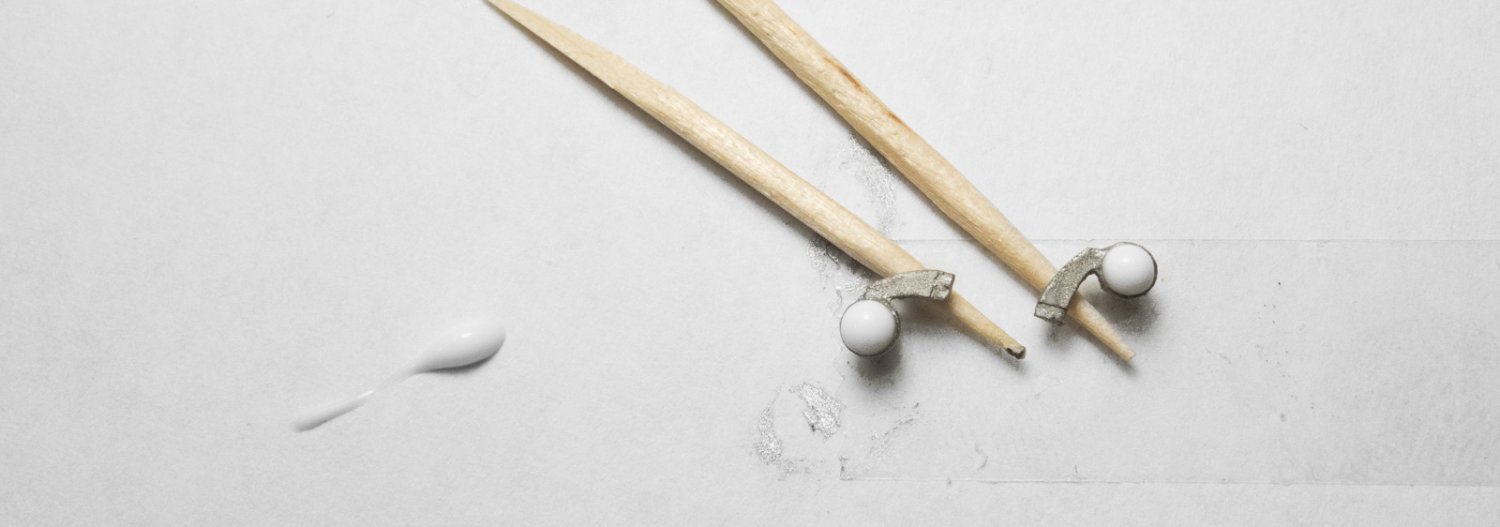
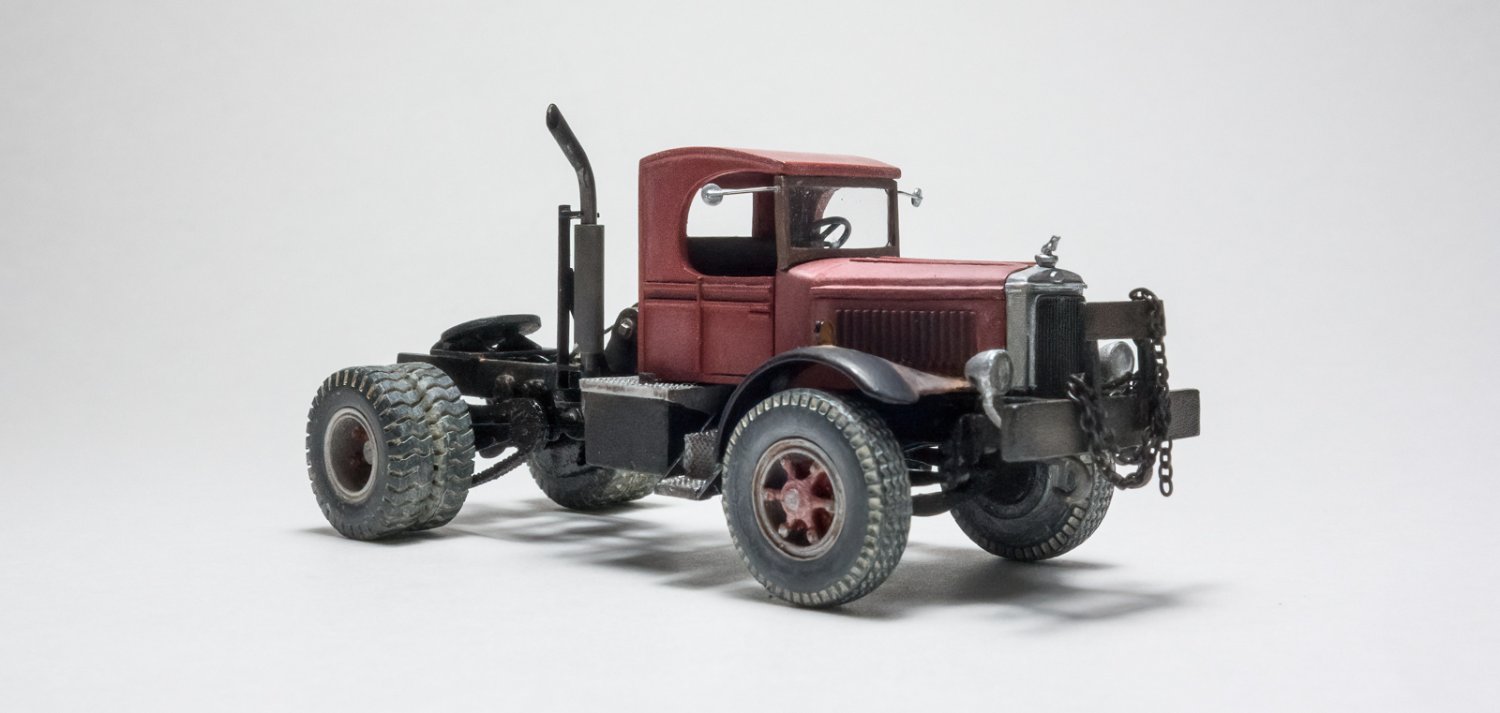
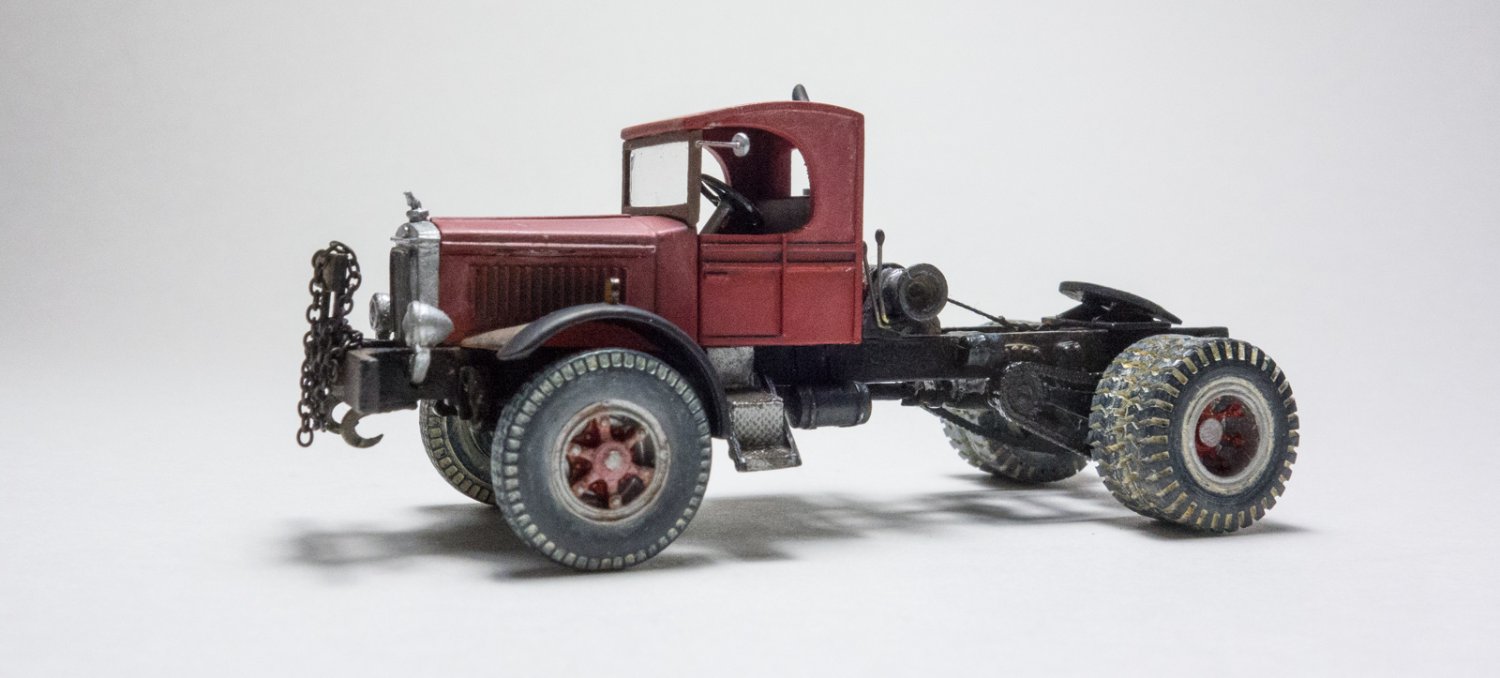
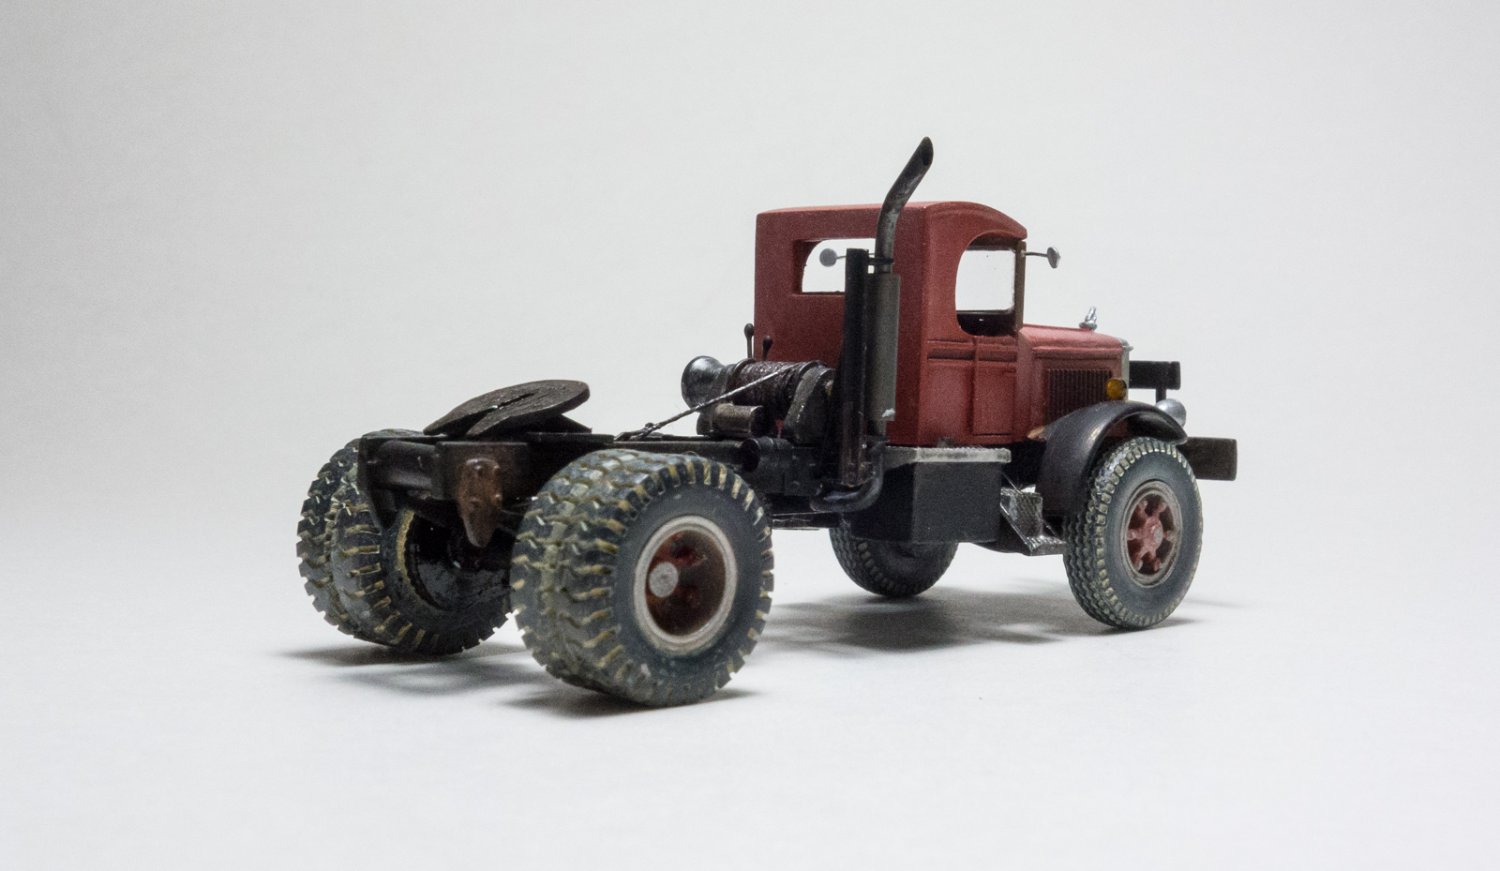
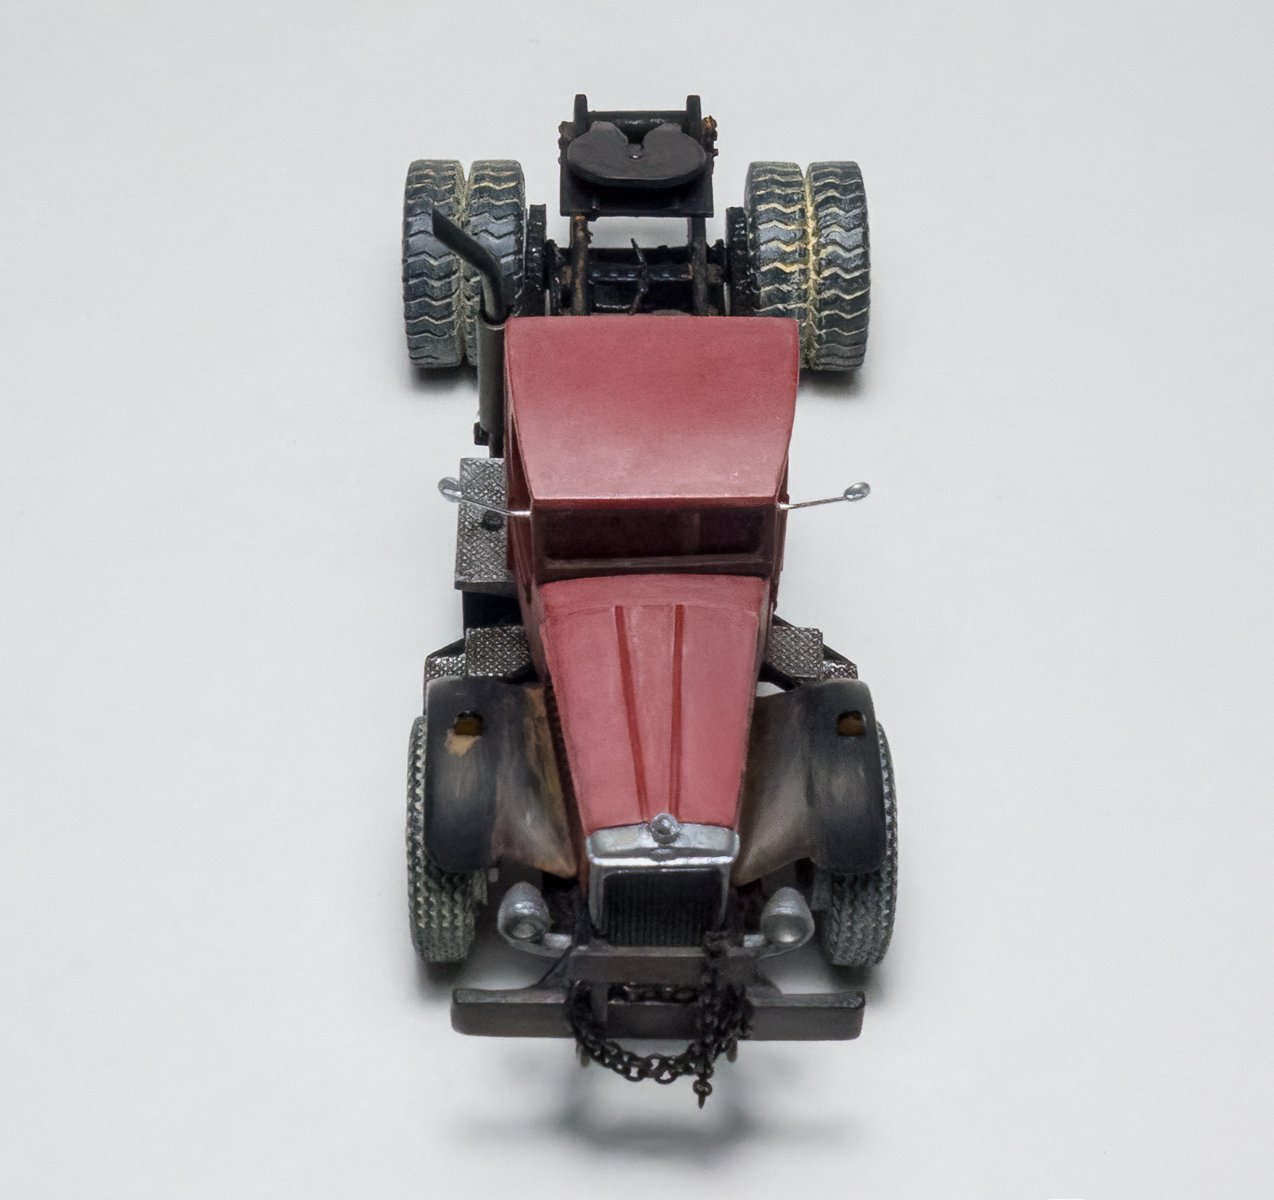
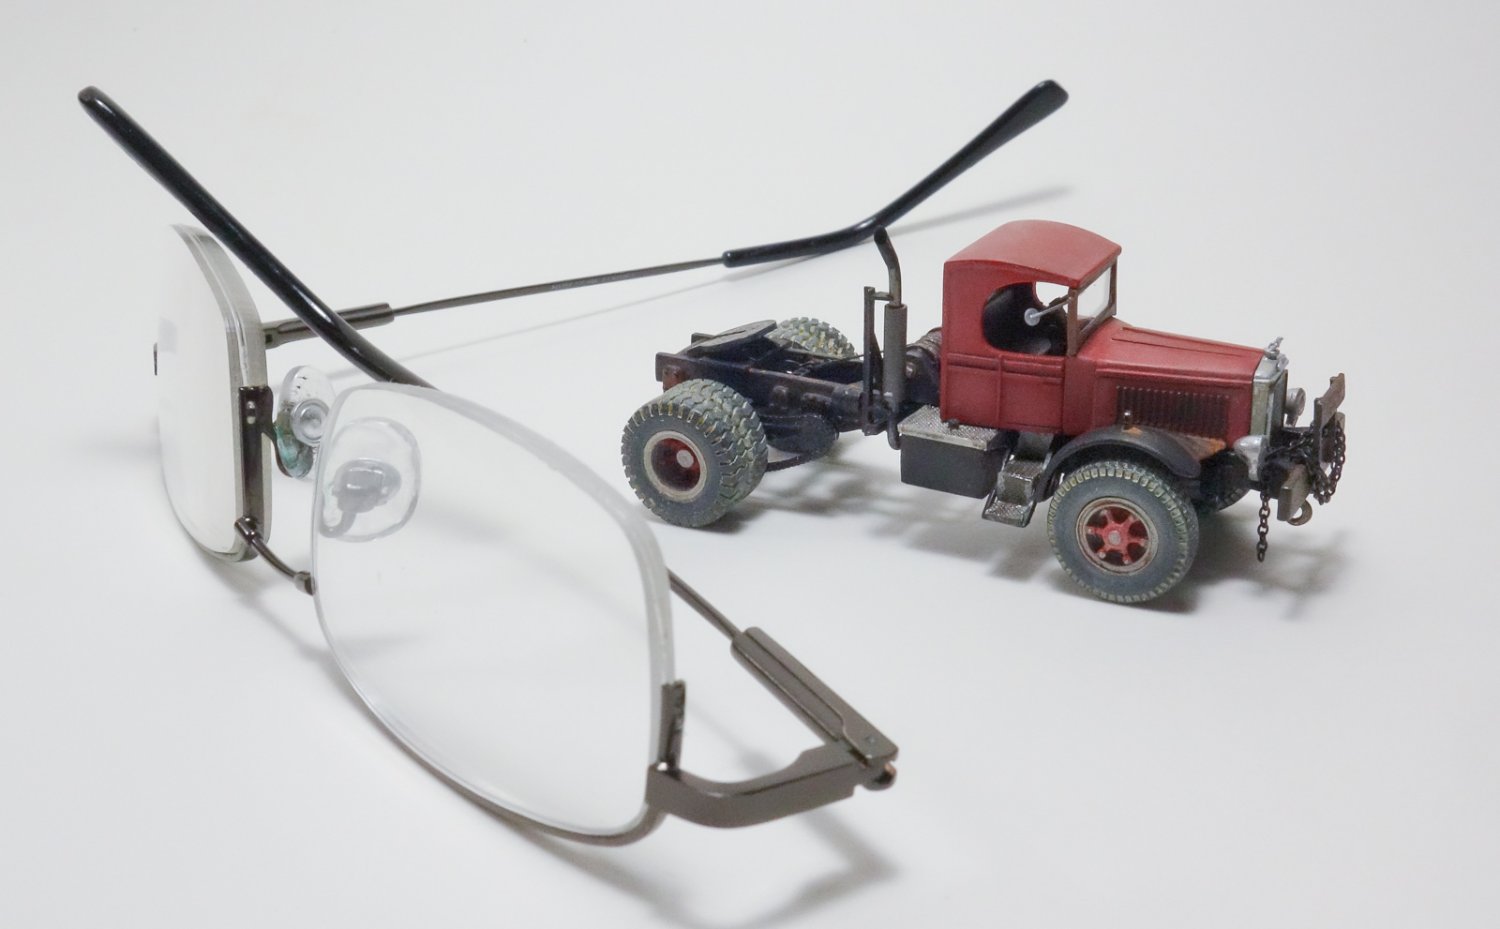
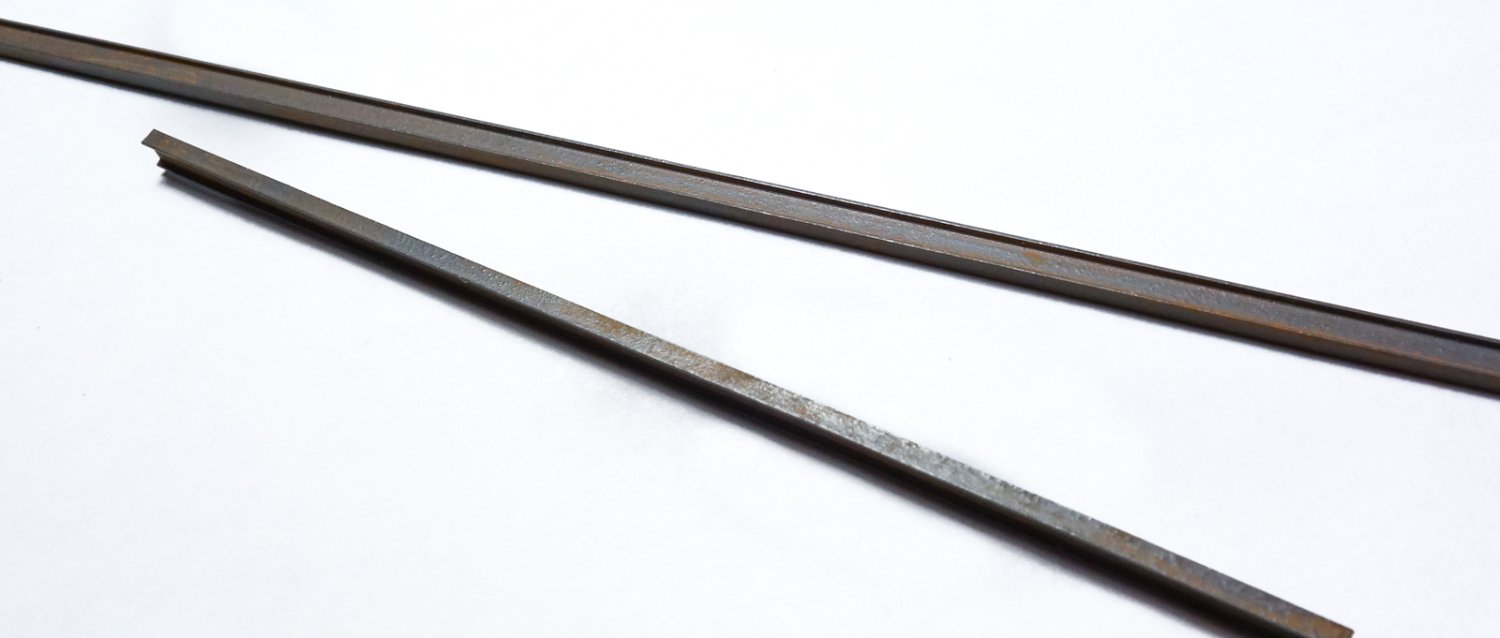
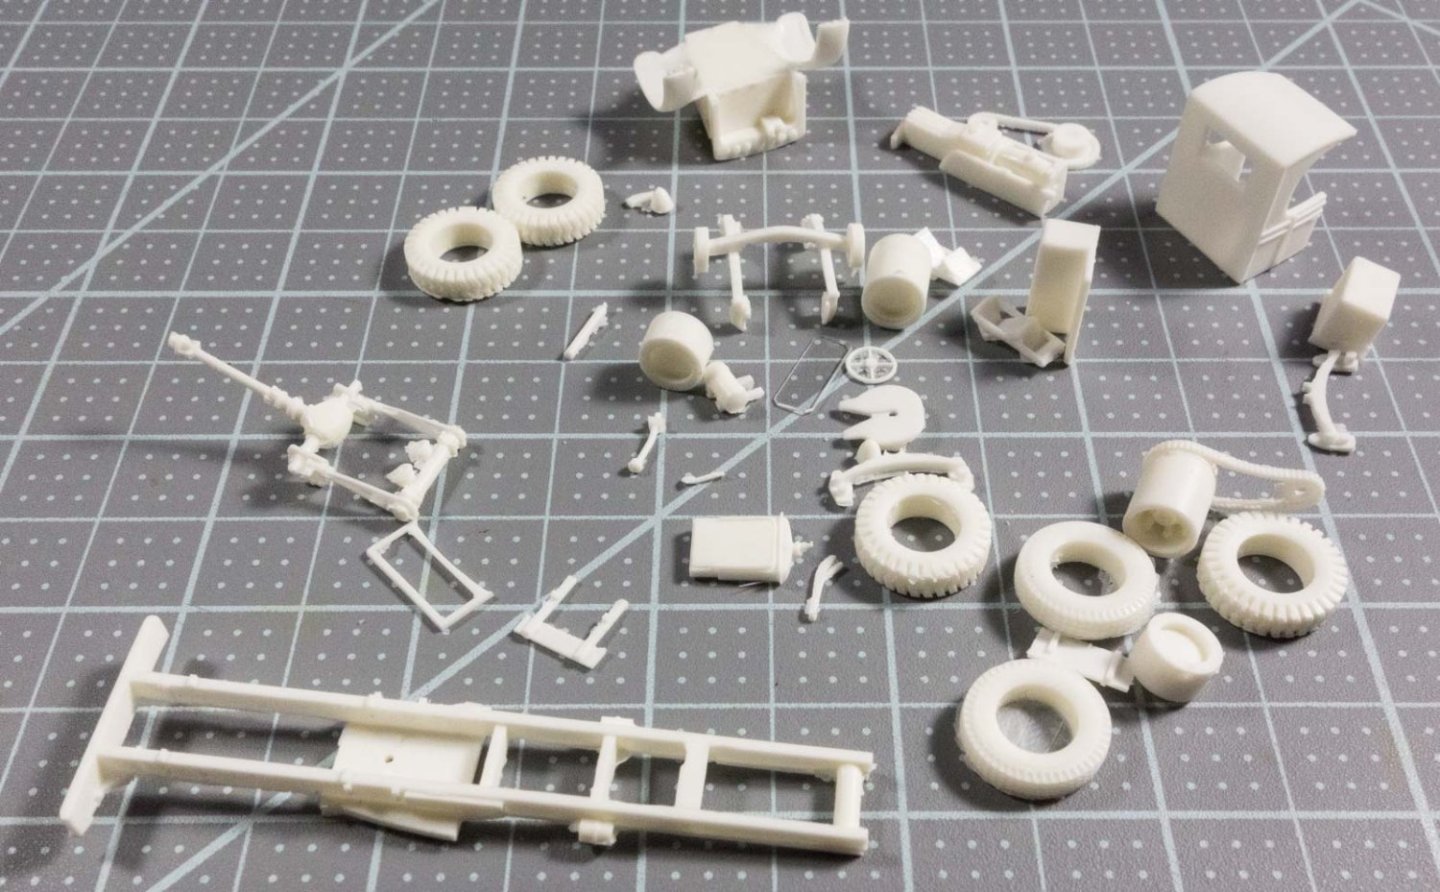
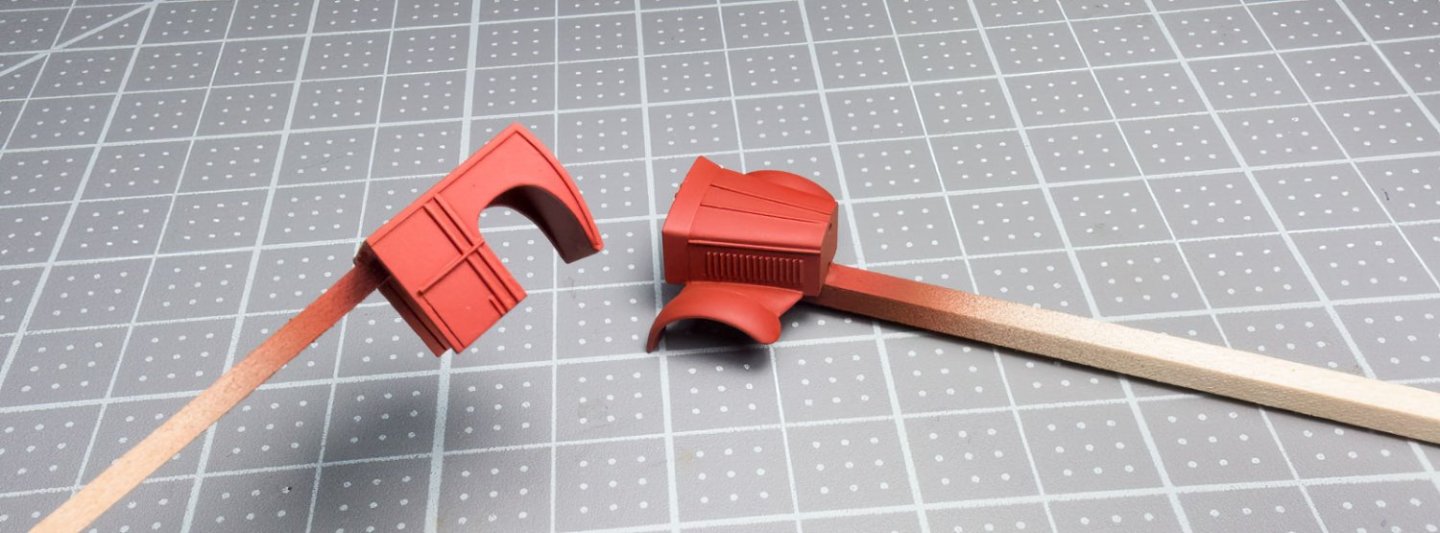
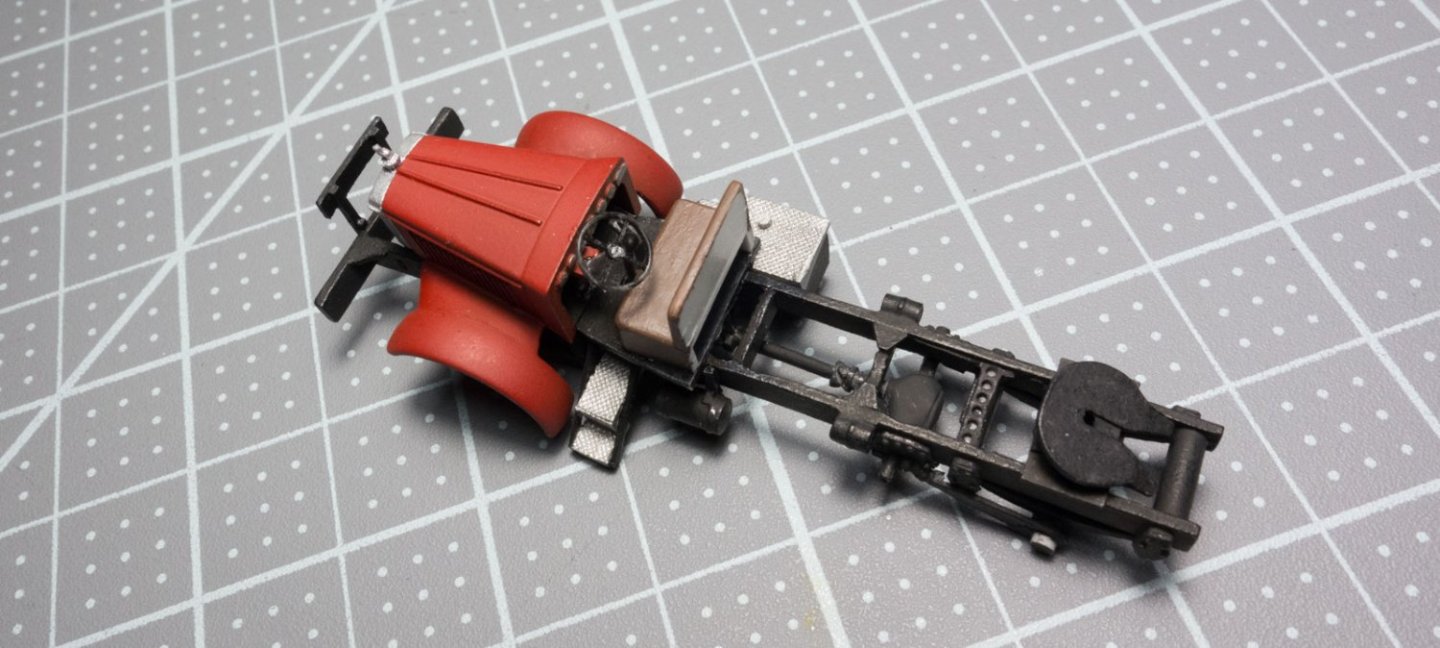
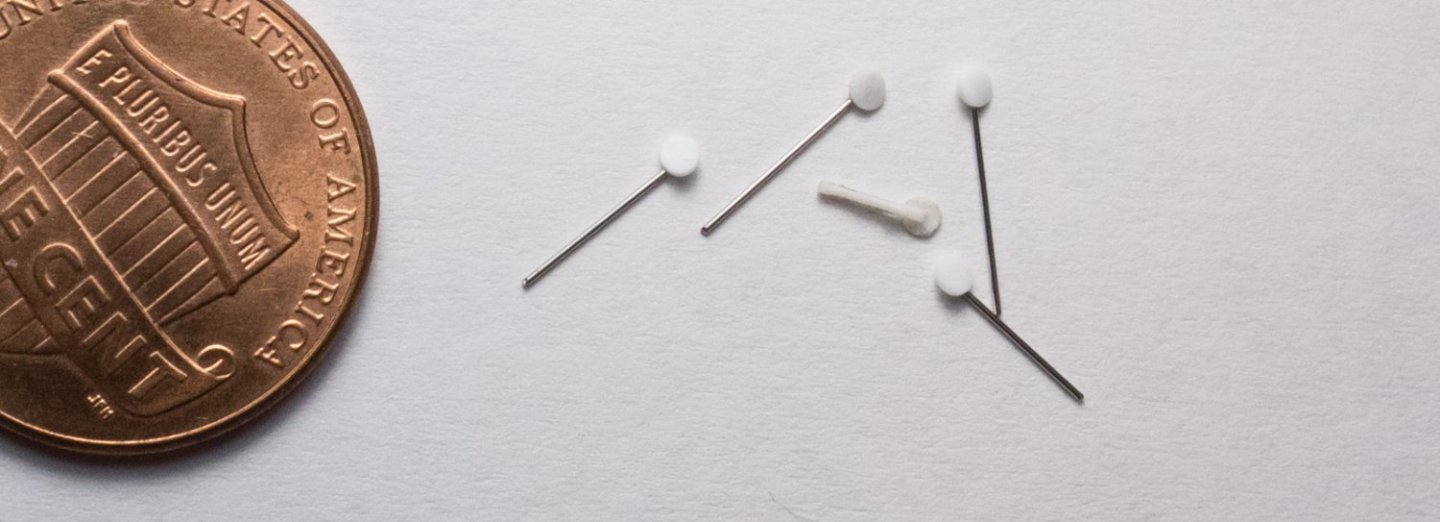
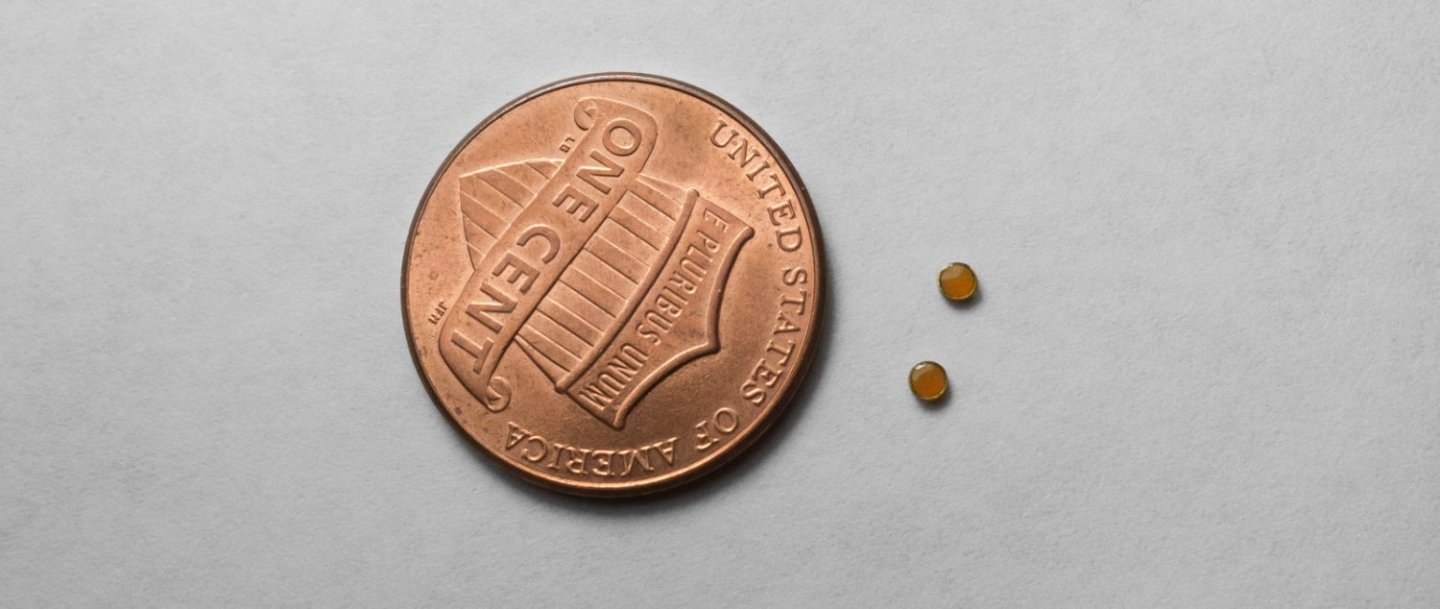
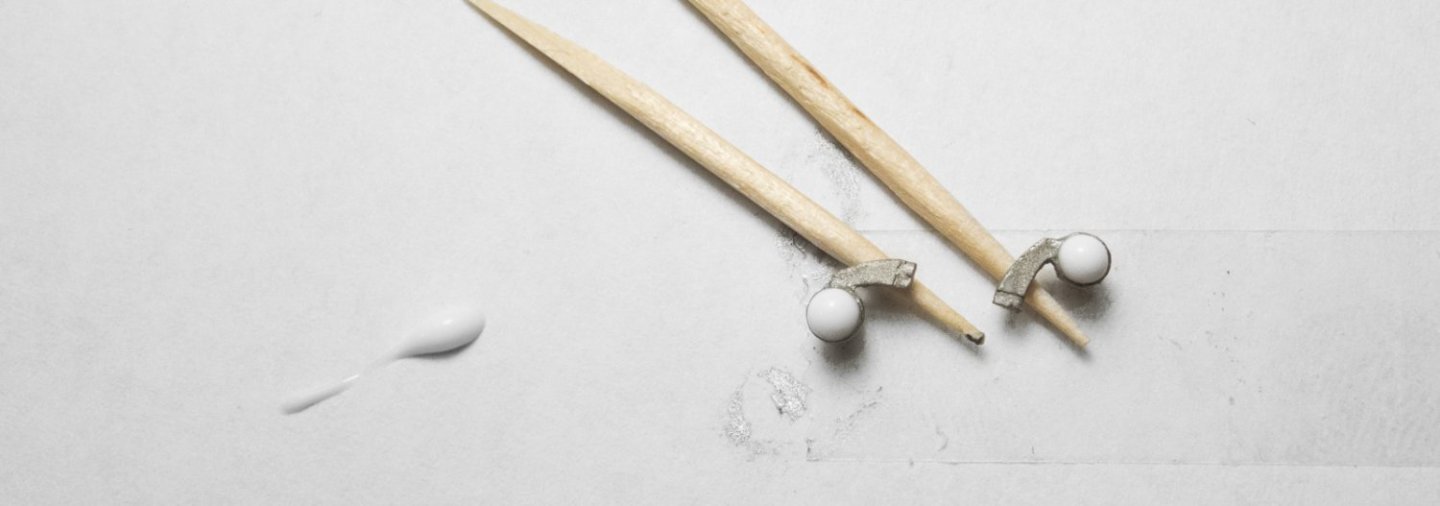
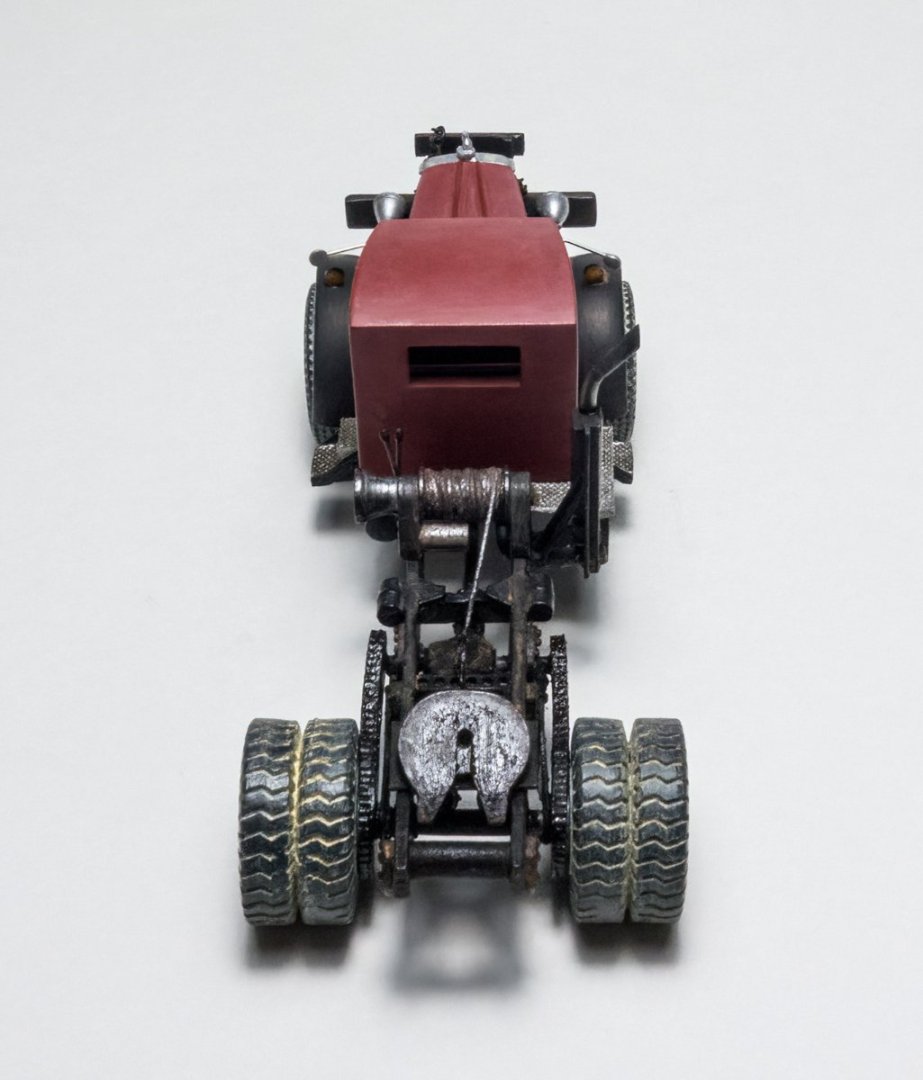
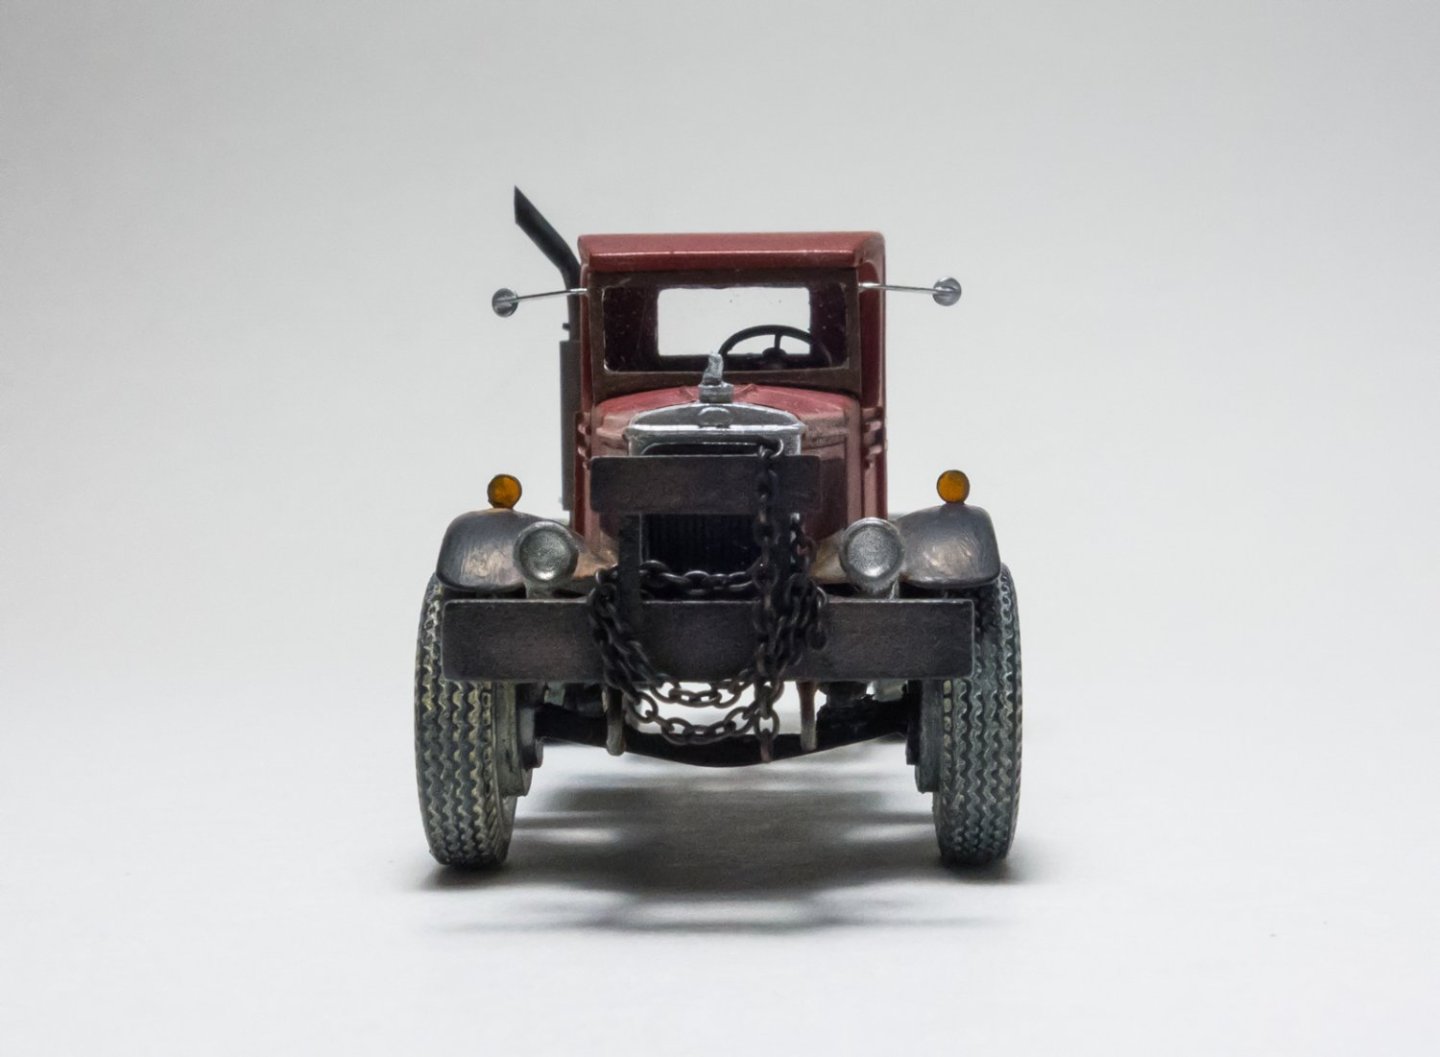
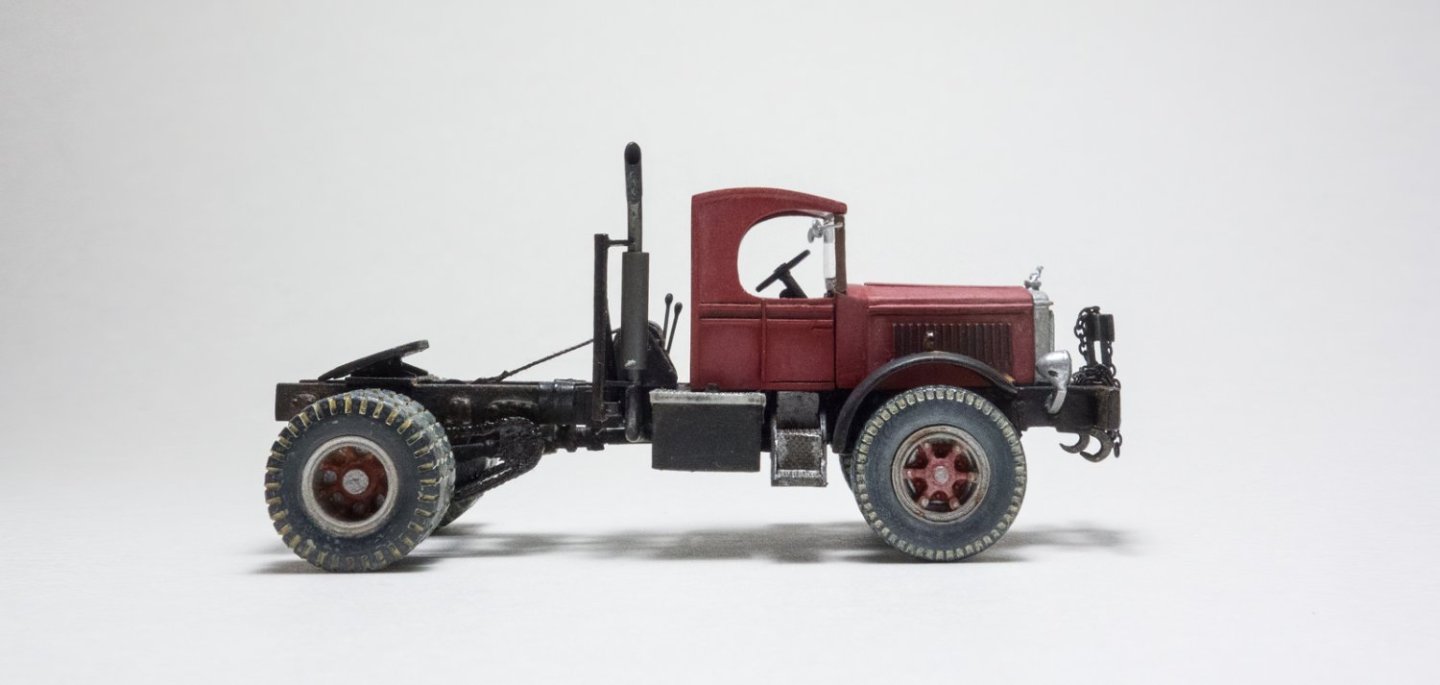
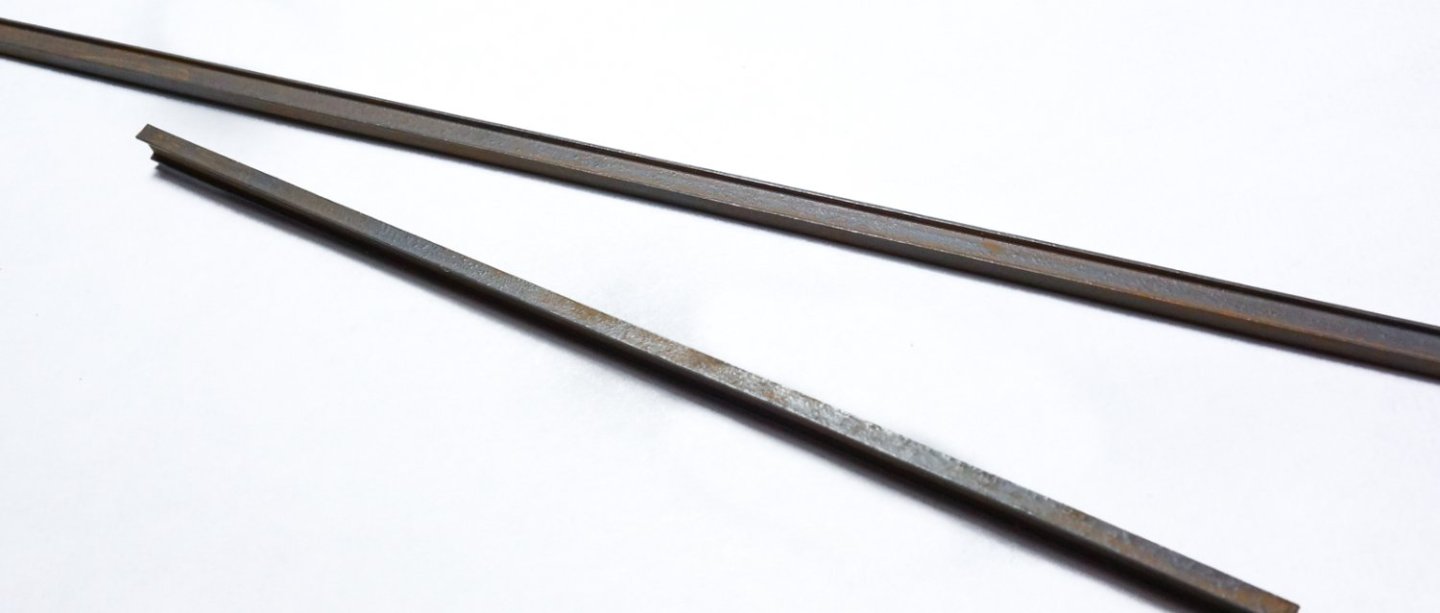
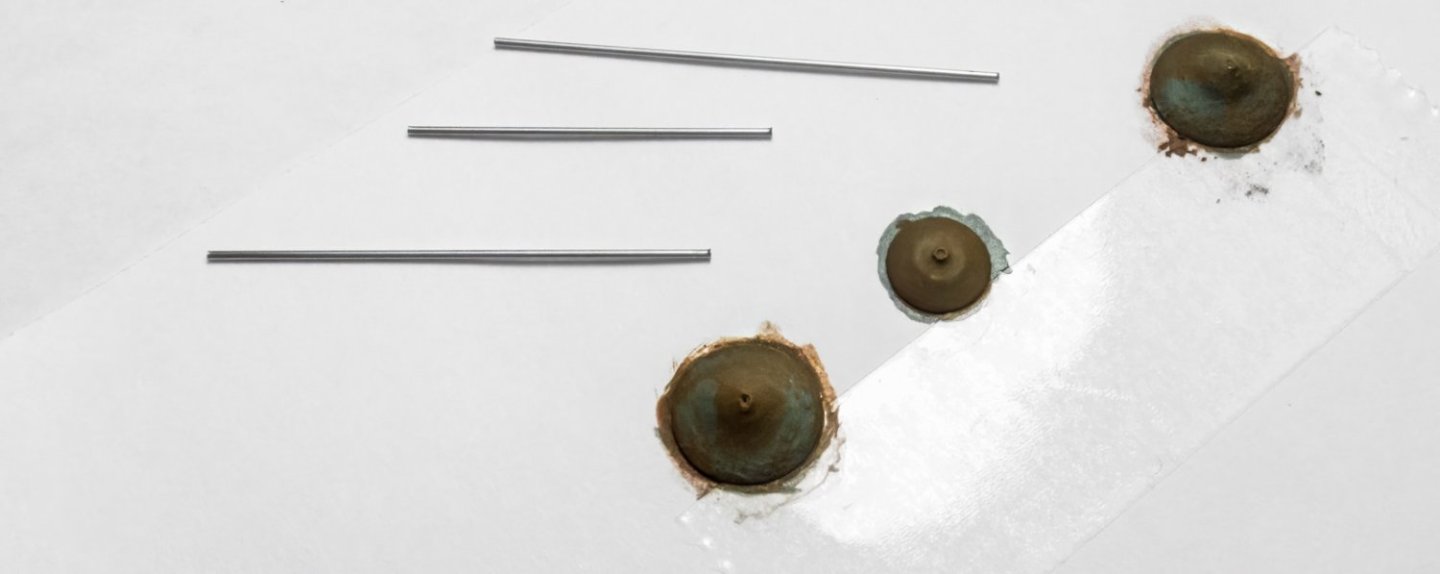
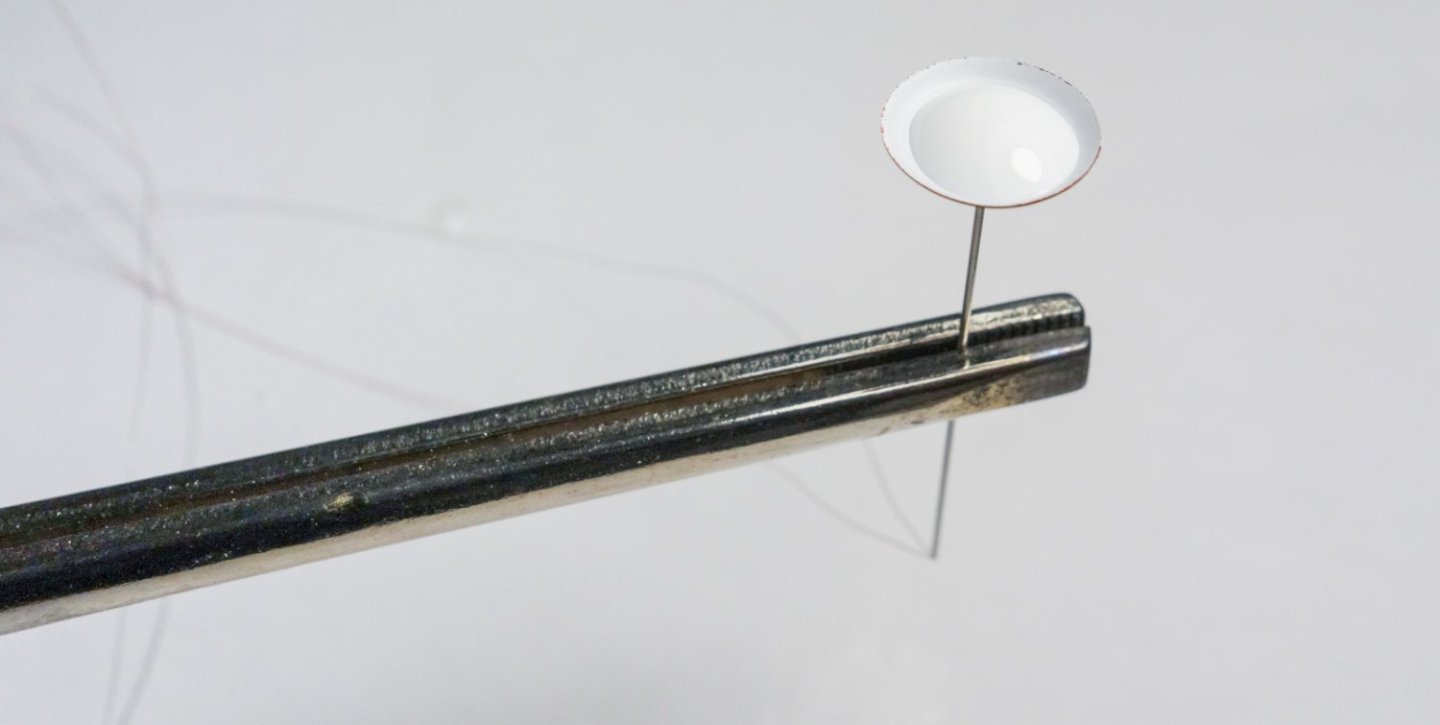
Greetings Fellow Modelers, Thanks to all for the comments, "likes" and for taking the time to look. The whole purpose of the shadowbox display is to provide a stage for interchangeable 1/87 vehicles. The first vehicle to take the stage is the Mack FK. Five different “F” series models were built from 1937 to 1947, and with a gross vehicle weight of 23 tons, the FK was built from 1938 - 1941. Trucksplanet.com tells me only 123 units of this vehicle were produced, so they don't show up at truck shows very often. This model kit comes from Ralph Ratcliffe Models and is cast in resin. The owner individually casts each kit himself by hand and consequently the kits are expensive. I bought this kit on eBay some years ago for a fraction of the current list price of around $50 U.S. The company's products are unique in the sense that you can buy truck and fire engine parts À la carte - cab sets, frame and suspension kits, engines, transmissions, wheel sets, etc. And the castings are very good and considering they are in HO scale, I would say they are excellent. The instructions for building the kit are, let's say simple. Here's the entirety of the kit and although the assembly is easy, the size and fragility of the model requires patience. The suspension and drive train goes together quickly. Everything is primed with Stynylrez gray then the cab and hood are airbrushed with a mixture of Tamiya primary flat colors to give me this orangish-red. I leaned orange because I'm going to fade the paint and faded red often reads pink, which I certainly don't want. The frame is painted black. The model is assembled - tanks, steps, chain drives, radiator, 5th wheel parts, steering wheel and other stuff. The model seemed incomplete to me, so I scratched a few additions. First, an exhaust stack made of brass wire with two different sizes of brass tubing soldered to it. And support bracketry adapted from an example I found on-line. I replaced the kit supplied rear-view mirrors with these made of .010” stainless wire and thin slices of styrene rod. The rod was warmed over a candle flame and stretched to gain the diameter required. Extras were made to replace the ones that would surely jump from my tweezers. In the center you can see one of the kit supplied mirrors. A couple of tow hooks for the front bumper were fashioned from brass wire. Slices of thin-wall brass tube were cut to represent fender mounted directional signals. These things are about 1.5mm in diameter and less than a .5mm thick and boy were they ever fun to cut from the tubing. They would collapse and required reforming into a ring by slipping them onto a sewing needle. They were filled with a tiny drop of amber Gallery Glass. I modified the kit supplied headlights. The lower piece in the image below shows the original with a flat featureless face and the upper one that was drilled out to provide a little interest. The pieces were painted with a steel-colored enamel while the cavities were painted in chrome and filled with clear Gallery Glass. In full disclosure, and as far as I can tell, most of the Mack trucks of this era were painted with red frames and I have never seen an FK painted in the way that I have here. But, I'm not claiming the truck is original and the decision on colors as well as the add-on items simply reflects my personal taste. Because the model is so light (.423oz or 12 grams), I did have to torque the frame a tad to get all the wheels to sit on the ground, but overall the model went together well. I didn't want to turn the thing into a rusty pile of junk, so I used a light hand putting some age on it, using only oil paints and pigment powders. Here's a good look at the headlights. The chrome paint in the cavity with the Gallery Glass on top, catches the light in a decent way. I think the radiator and mirrors need dulled down a bit. And finally, the obligatory gigantic spectacles photo. Thanks for stopping. Be safe and stay well. Gary


- 98 replies
-
- 19
-

-

-
That is one aggressive looking piece of equipment. Looks like fun to build. Gary
-
Brig Le FAVORI 1806 by KORTES - 1:55
FriedClams replied to KORTES's topic in - Build logs for subjects built 1801 - 1850
Beautiful work as always Alexander! Gary -
Nice work, interesting model. Congrats. Gary
-
The brutal honesty of the close-up camera is always discouraging, but in the end, I think it makes us better modelers. Wonderful work Grant! Such a fun project. Gary
- 333 replies
-
- 10
-
-
Sweet work OC. Gary
-
Great work Glen! Like everyone else, I too was holding my breath. What a process and steady hands. Amazing. Gary
-
Hey Keith. No, I've not started a build log on the dragger as I want to finish this one first. And there isn't very much to physically show on the dragger at this time. It's a long-term project for sure. Gary
-
Hello Glen. Been reading through your log and just caught up. What a fun and creative project this is. Looking forward to future updates. Gary
-
I hope to make it work somehow. But it's ironic that you should mention an old machine shop with line drives etc., because that's a project I have long been planning for. It would require a wider shadowbox than the one I'm using now, but oh yea, a boiler, steam engine, overhead belts and lots of machinery. But I've already started work on another scratch fishing dragger and . . . . . there are just so many models I want to build, more than I will ever have time for. Thanks for stopping by Wefalck Gary
-
I'm pulling up a chair also Dan. As you stated, very nice detailing in the moldings. Gary
-
Hello folks - I so appreciate all the "likes" and the wonderful comments. Thank you. Thank you OC. So far this has been a fun, no stress model. That's good to hear and a wonderful compliment. Thanks Alan Thanks Ken. This is the third display where I've included them, so I'm at least getting faster at making them - if no better. Just because I have a Charlie Brown head, doesn't make it okay to make fun of my glasses. Thanks for the nice words Dan. Thank you Keith. I always truly appreciate your support, encouragement and feedback on all my builds. Yes, there will be an LED in the box at the top of the stairs to highlight the staircase and hopefully graze the wall as well. Thank you Mark. Thank you EG. Yea, this model really is predominantly about the lighting, and it will make or break the thing. At this point I'm not confident how it's going to turn out, but I feel certain there will be some fails and a "plan B" down the road. Hope to have something new to show soon. Gary
-
Great progress Alan - looking very good. Even though you've still more work to do on them, shaping the towers and adding the fill already makes a big difference. And thanks for sharing the Welsh castle photos. Beautiful countryside. Gary
-
Being pragmatic and logical can be such a drag sometimes. I admire your discipline Keith. Gary
-
More wonderful figure painting in progress. I enjoy seeing the stages in how you paint them - very instructive. What sort of product are you using to hold the figures in place atop the paint jars while working on them? Do they easily detach like rubber cement? Gary
-
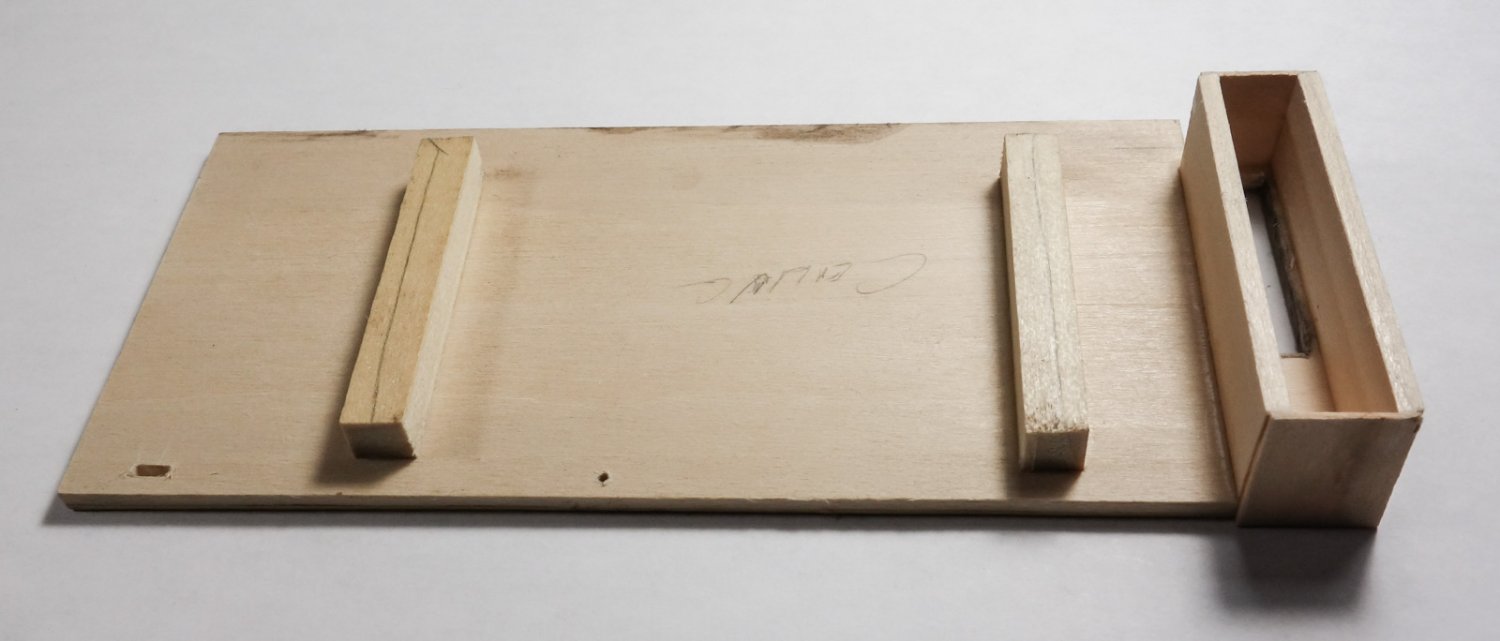
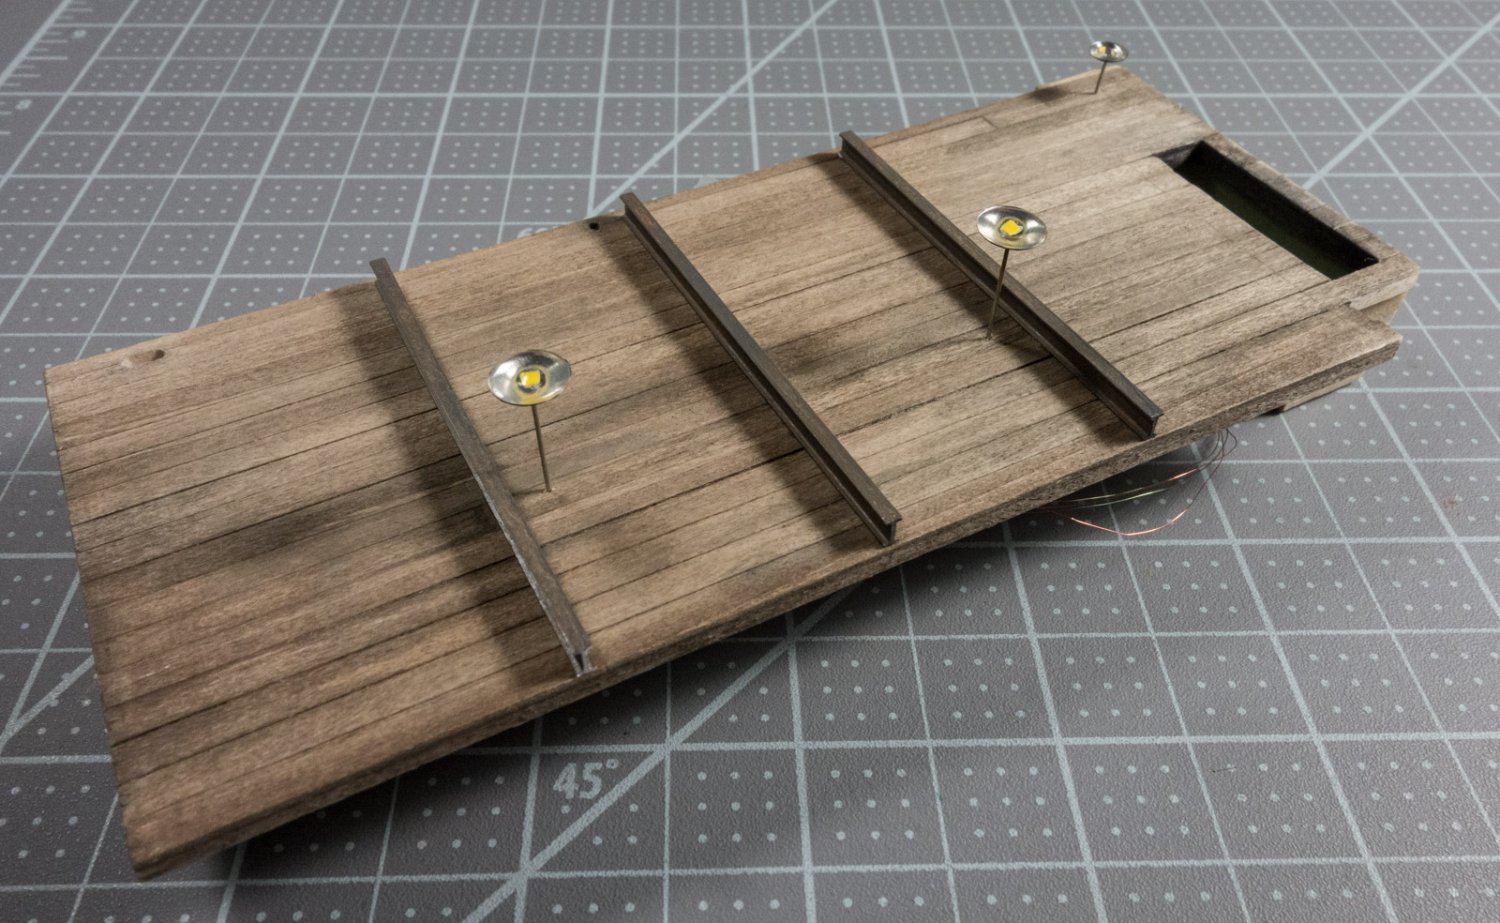
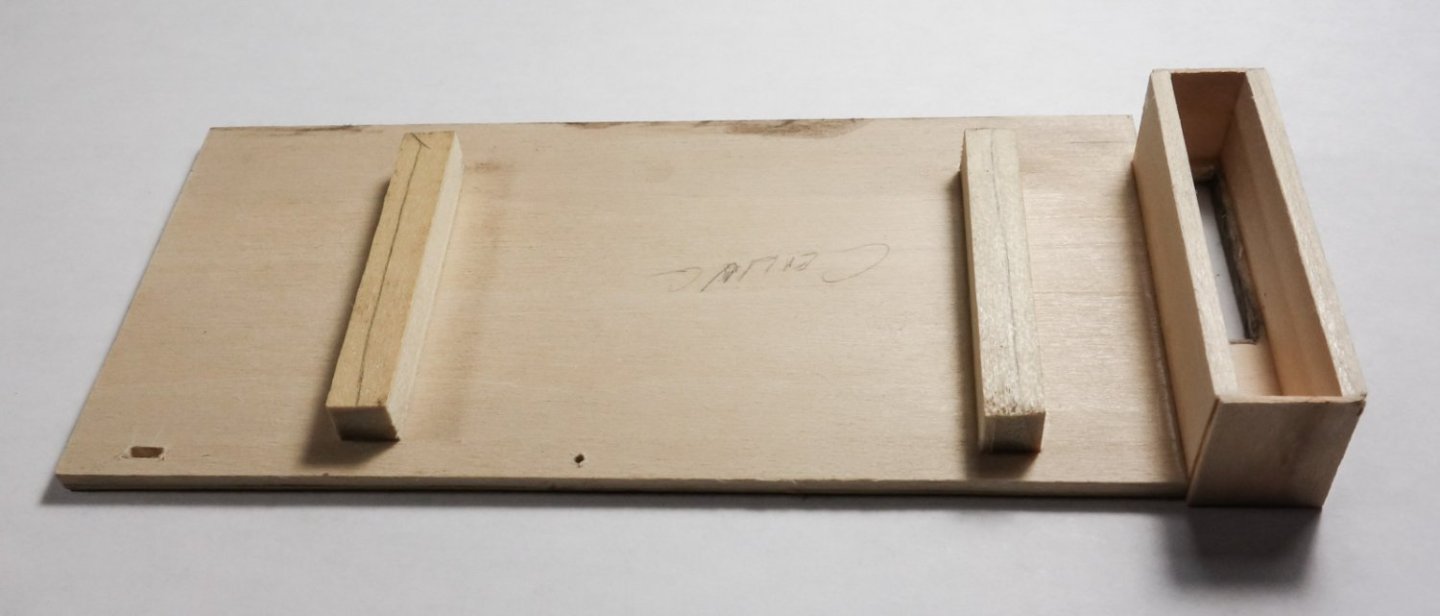
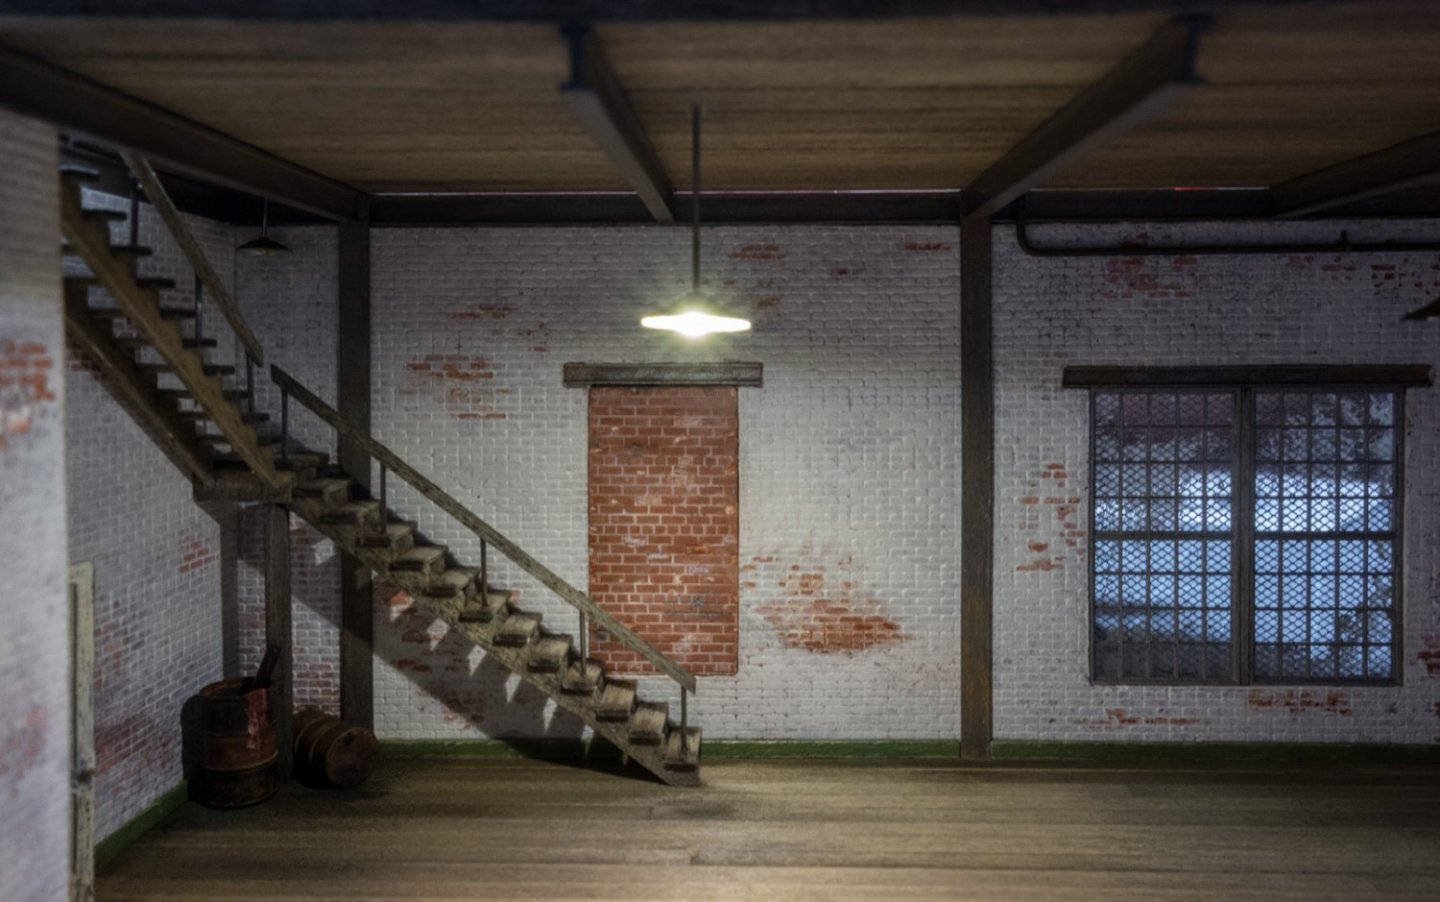
Hello Fellow Modelers, Thank you Wefalck, Andy, Keith, Alan, Paul, Mark, OC, Colin and Mike for your kind and generous comments. I appreciate it very much. And thanks to all for the likes. Well, I haven't accomplished much lately, but here's a short update on what I have managed to get done. The ceiling for the display is a simple construction - scale 2 x 10's glued down to a piece of 3/32” basswood sheet. It's colored in the same way as the floor was – chalk and alcohol. Above the ceiling, a box surrounds the cutout for the stairway. It will act as a visual block not allowing a view of the inside of the shadowbox. The interior of the box will be painted and the top covered. Lighting will be installed inside so that it will shine down the staircase. The two small holes along one edge of the ceiling are where the electrical panel conduits pass through. Evergreen I-beams will be attached to the ceiling to match up to the steel structure of the walls. The material is colored with Stynylrez gray primer and pigment powder. There will be three light pendants hanging from the ceiling: two larger ones as general fill lighting and a smaller one above the stairway landing. The pendant shades hang off the scale pipe. The “pipe” is stainless tubing and has an inside diameter of .013”. I have not found any pre-wired LEDs with wires fine enough to fit through such small tubing, so I solder up my own surface mount LEDs with very fine wire. In another build log, I have explained how I do this, what LEDs I use and how the pendant lights are constructed, so rather than repeating all that here, I'll just provide a link to that posting for anyone who is interested. Post #117 at the link below. https://modelshipworld.com/topic/28441-1940-auto-repair-shop-interior-by-friedclams-finished-diorama-in-187/page/4/#comment-864355 Here's the pendant shades for this model – green primer and rust colored pigments. Once the LEDs are inserted, they are covered in a product called Gallery Glass (crystal clear – not white), which is clear after drying. Before the ceiling gets glued down to the walls, I might just add a junction box to the pendant pipe at the ceiling and a conduit leading off from that. Emphasis on the word “might”. In the photo below, the ceiling has been temporarily flopped on top to get an idea of what these pendants lights will look like. It's being driven at full current and will not be that bright when the thing is done. Nor will there be a light crack at the top of the wall. The LED is a surface mount warm white #0603. Thanks for taking a look. Be safe and stay well. Gary


- 98 replies
-
- 18
-
-
-
Nice progress on this model Edward, and very nice workmanship! I like the ladders - clean and square. Gary
-
"Ditto" Gary
-
Very nice Denis, she looks great. Well done. Gary
-
You're making good progress here Alan and it's looking really nice. I applaud your decision to light the interior and it will really bring an extra dimension to the model. I do think you will need to add blocking partitions to limit what the viewer can see and how far into the structure they can see. It has been my experience that lit windows invite viewers to place their eyeball as close as possible to see what's inside. Card with similar looking block walls printed on them would be great. Or you could even take photos of a completed section of an exterior wall, stich multiples of them together in software and then print (not glossy, duller the better) and paste them to card stock. Doesn't need to be high-quality images. Just thinking out loud. Keep the updates coming, love it. Gary
-
Good to see an update, Ken. Looking good. Models are like people; most have one profile that's better than the other. But if it's going to always bug you, maybe you could just pull off the wide plank along with the planks adjacent to it (or two on each side) and divide the space equally between the replacements. Gary
-
Great progress Grant! That is a sweet little shed, love the hinges. Gary
-
I’m pulling up a chair also Craig. Yes, that is interesting- four different colors on a single sprue. Hmmm? Gary
- 46 replies
-
- 10
-
-
Excellent work on the doors OC. Absolutely no way to tell they’re made of paper. The wear on the lower frames is great also. Gary