HOLIDAY DONATION DRIVE - SUPPORT MSW - DO YOUR PART TO KEEP THIS GREAT FORUM GOING! (Only 13 donations so far - C'mon guys!)
×


FriedClams
-
Posts
1,368 -
Joined
-
Last visited
Content Type
Profiles
Forums
Gallery
Events
Everything posted by FriedClams
-
 Happens to all of us, Jack, but it's good to see you coming back to it! Gary
 -
Keith, I hate to think how many times I've stared directly at situations with predictably unfortunate outcomes and walked right into them anyway. Many of which had nothing to do with model building. Gary
-
Nice progress on the Mary Day, JD! Stanchions and covering boards are one of my least favorite things to do in boat modeling, so fussy and time consuming. Your work here is clean and precise. Looks great! Gary
-
This model is looking really sweet, J.C. Very nice. Whenever I'm unsure, I always wait until I am sure because it can be so difficult to undue. After the chainplates and rudder hinges are on, the decision may be easier. Gary
- 312 replies
-
- 5
-

-

-
- Chile
- Latin America
- (and 6 more)
-
Such graceful lines - beautifully built, Siggi. Gary
-
Great start to an interesting project, Eric. Looking forward to following along. Gary
-
Nice to see an update on this model, Dan. Absolutely ditto that! Gary
-
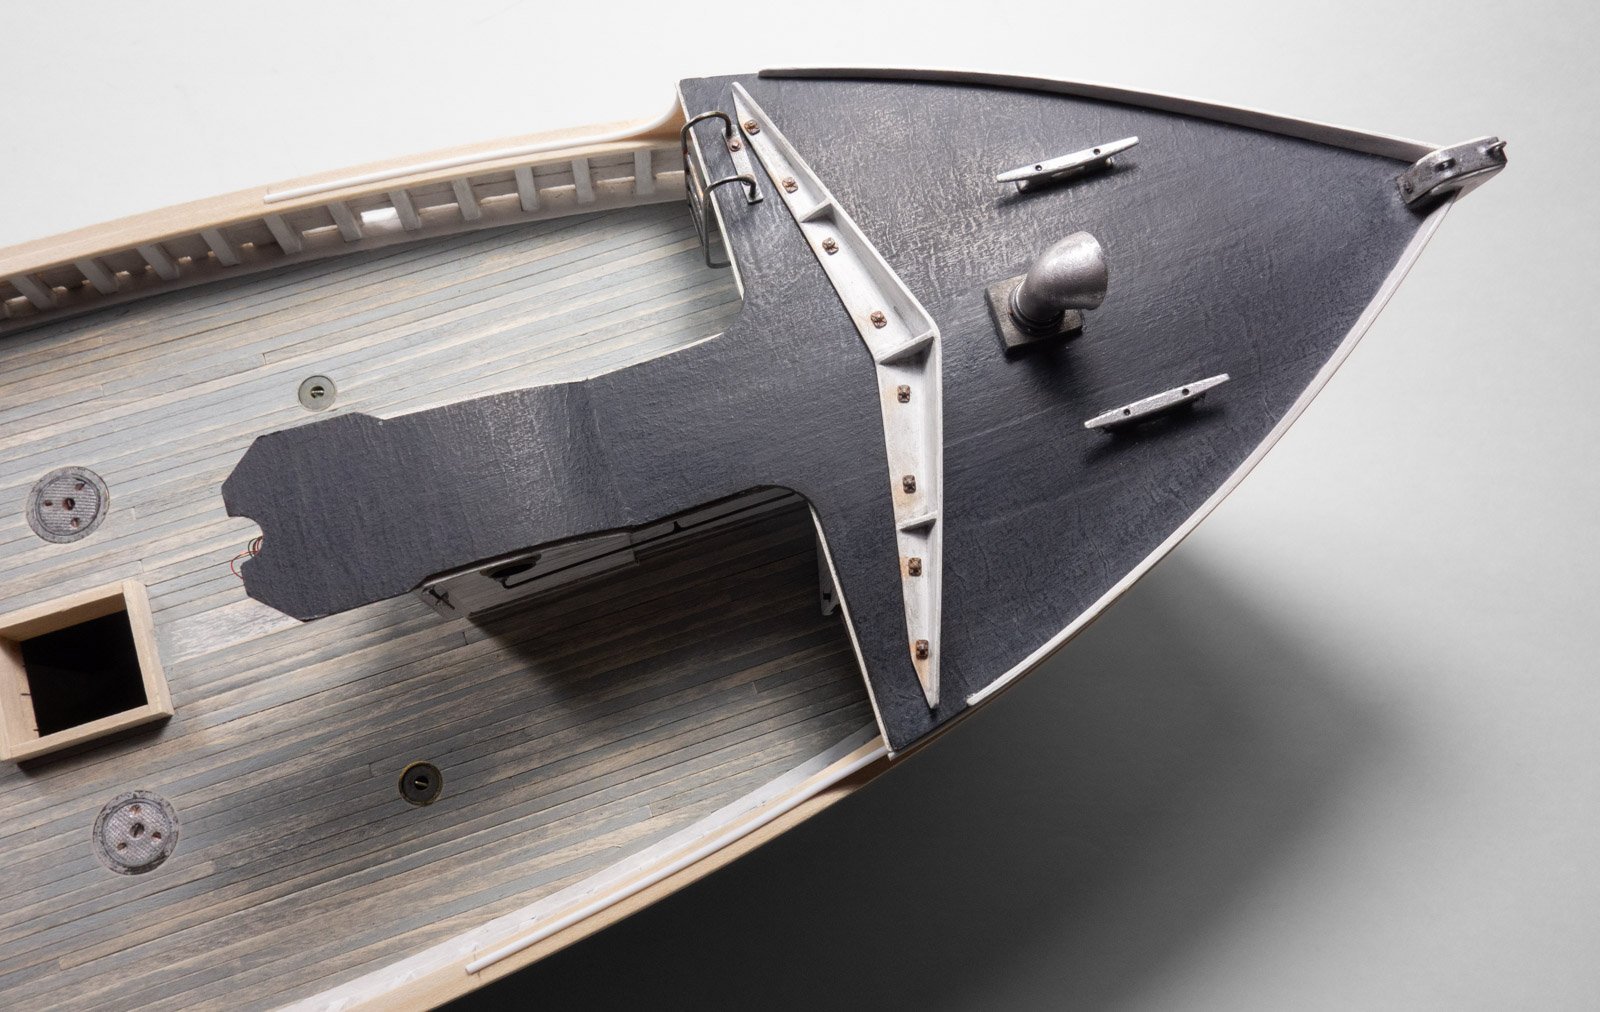
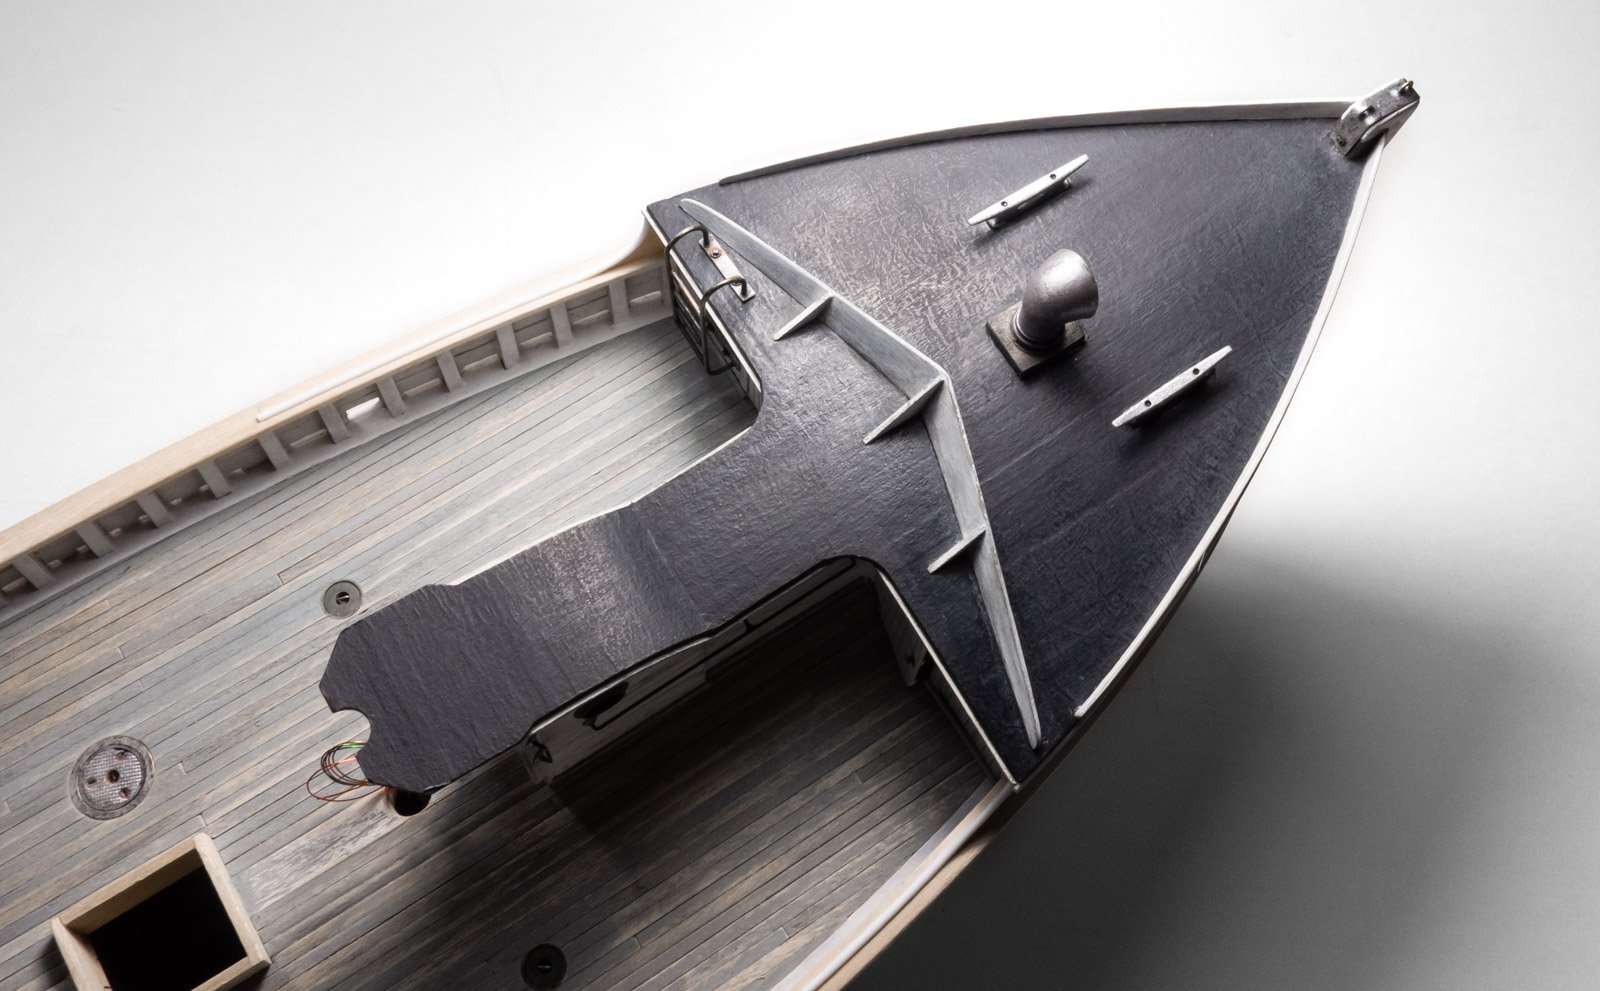
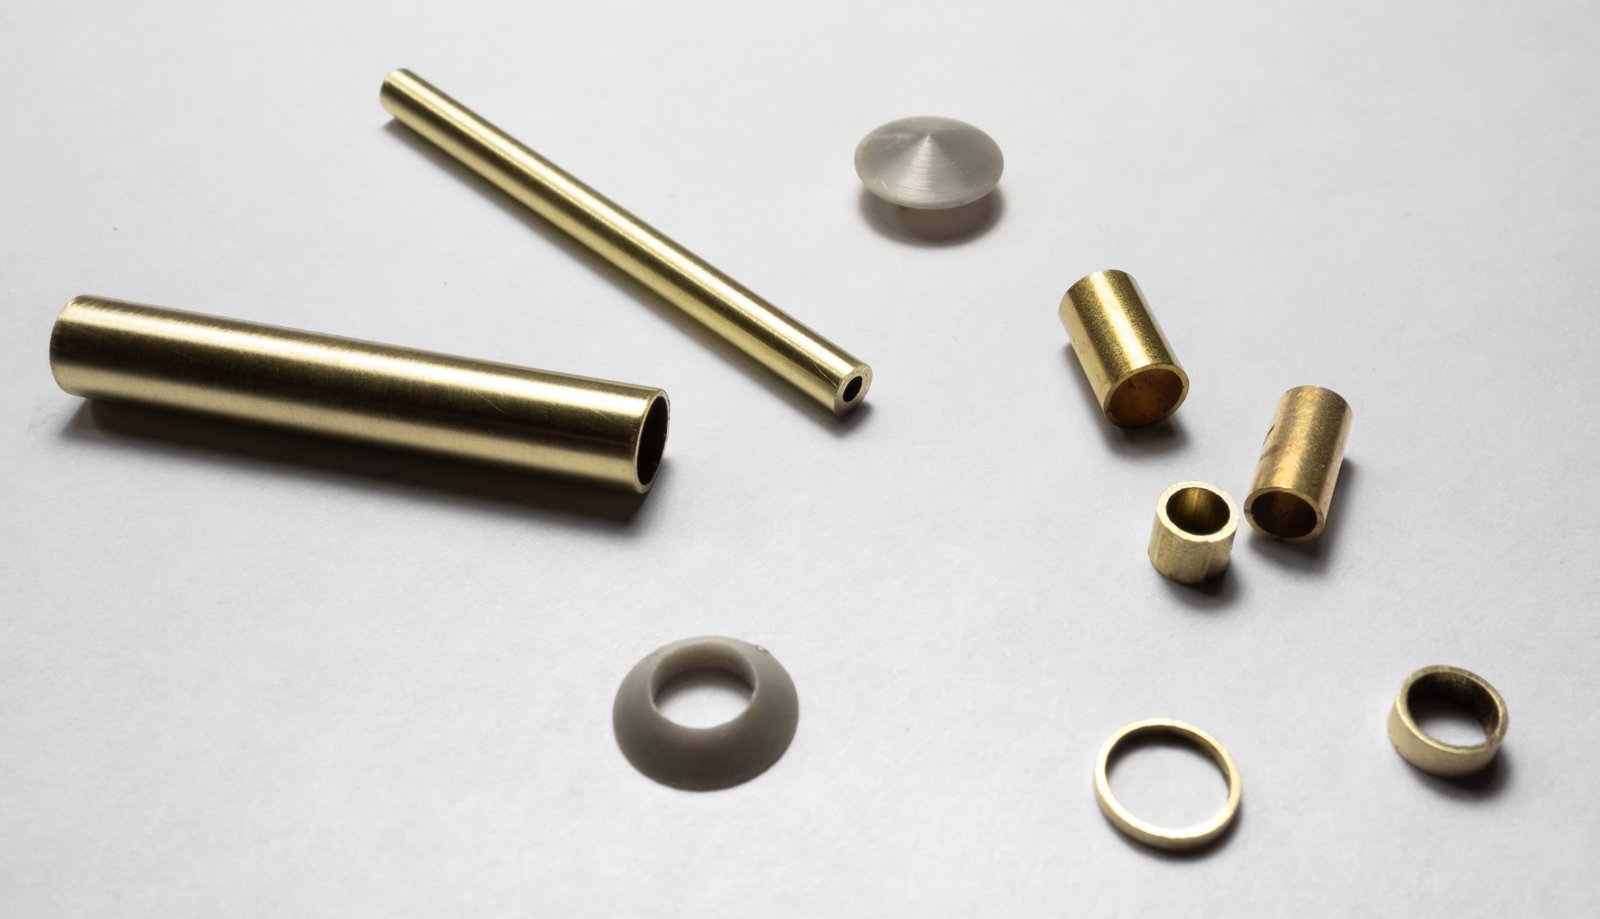
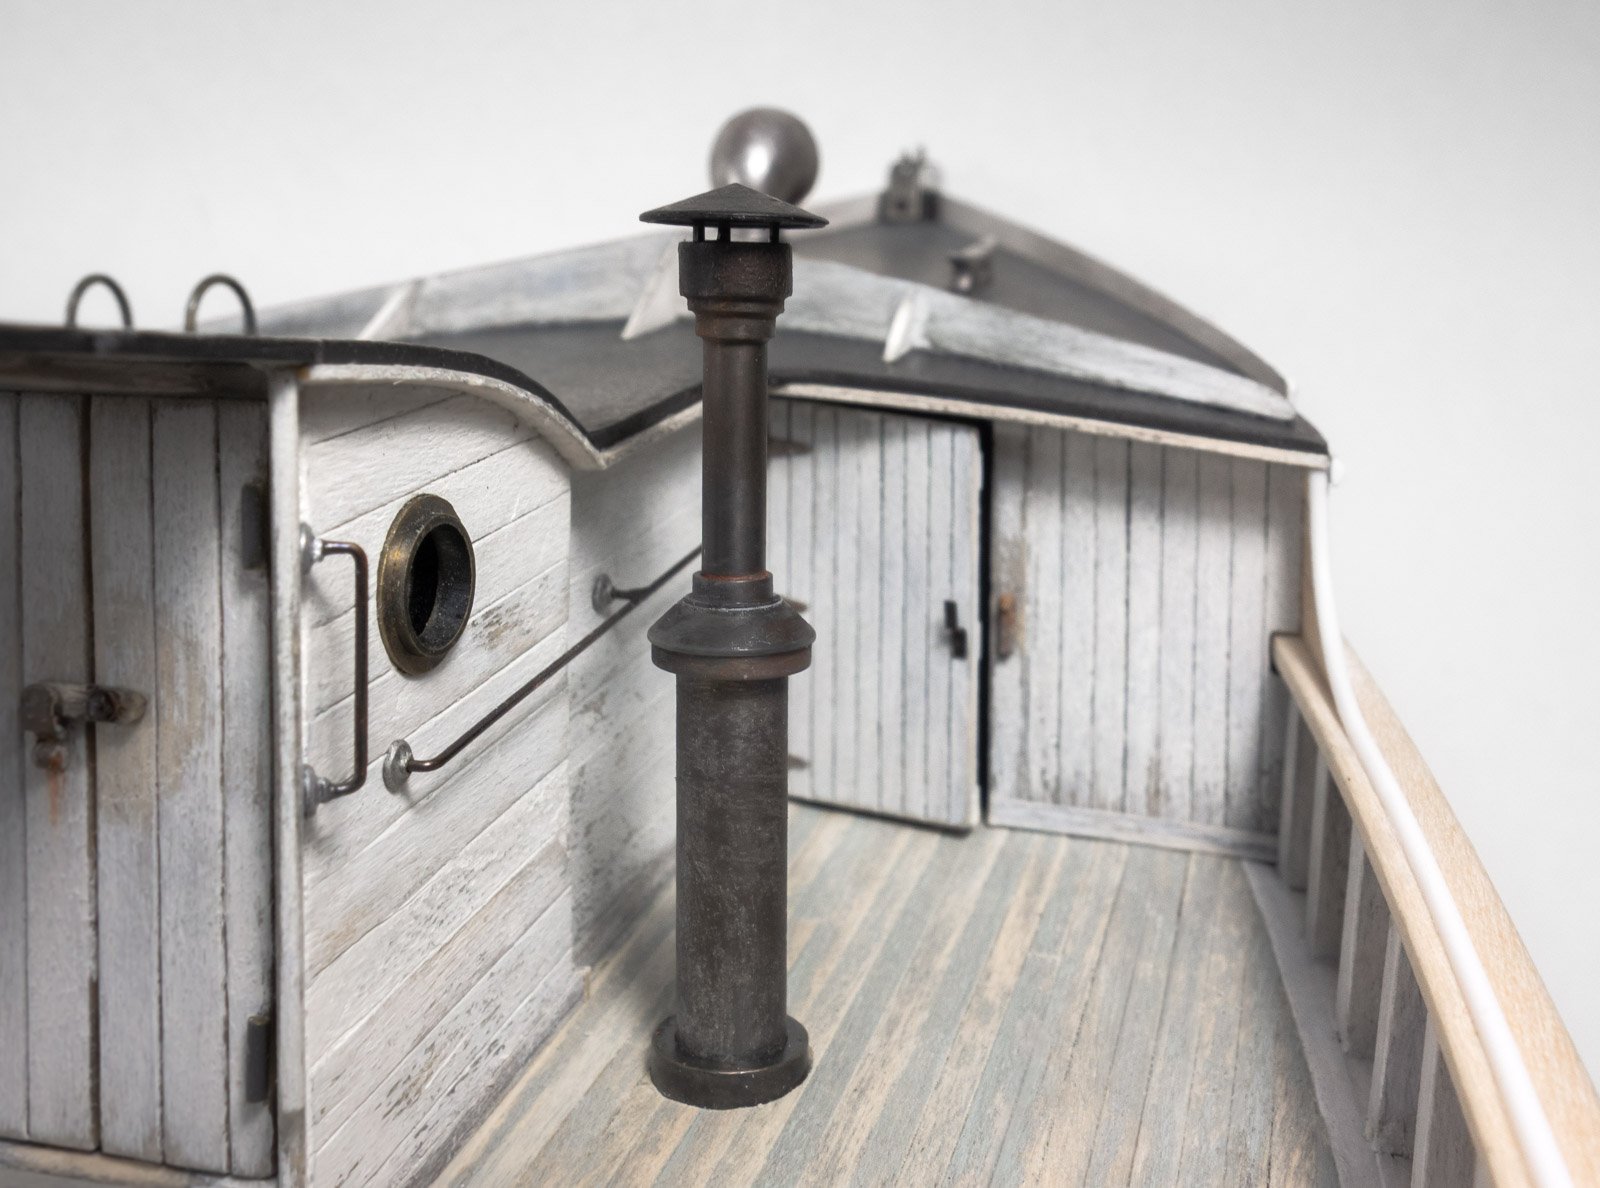
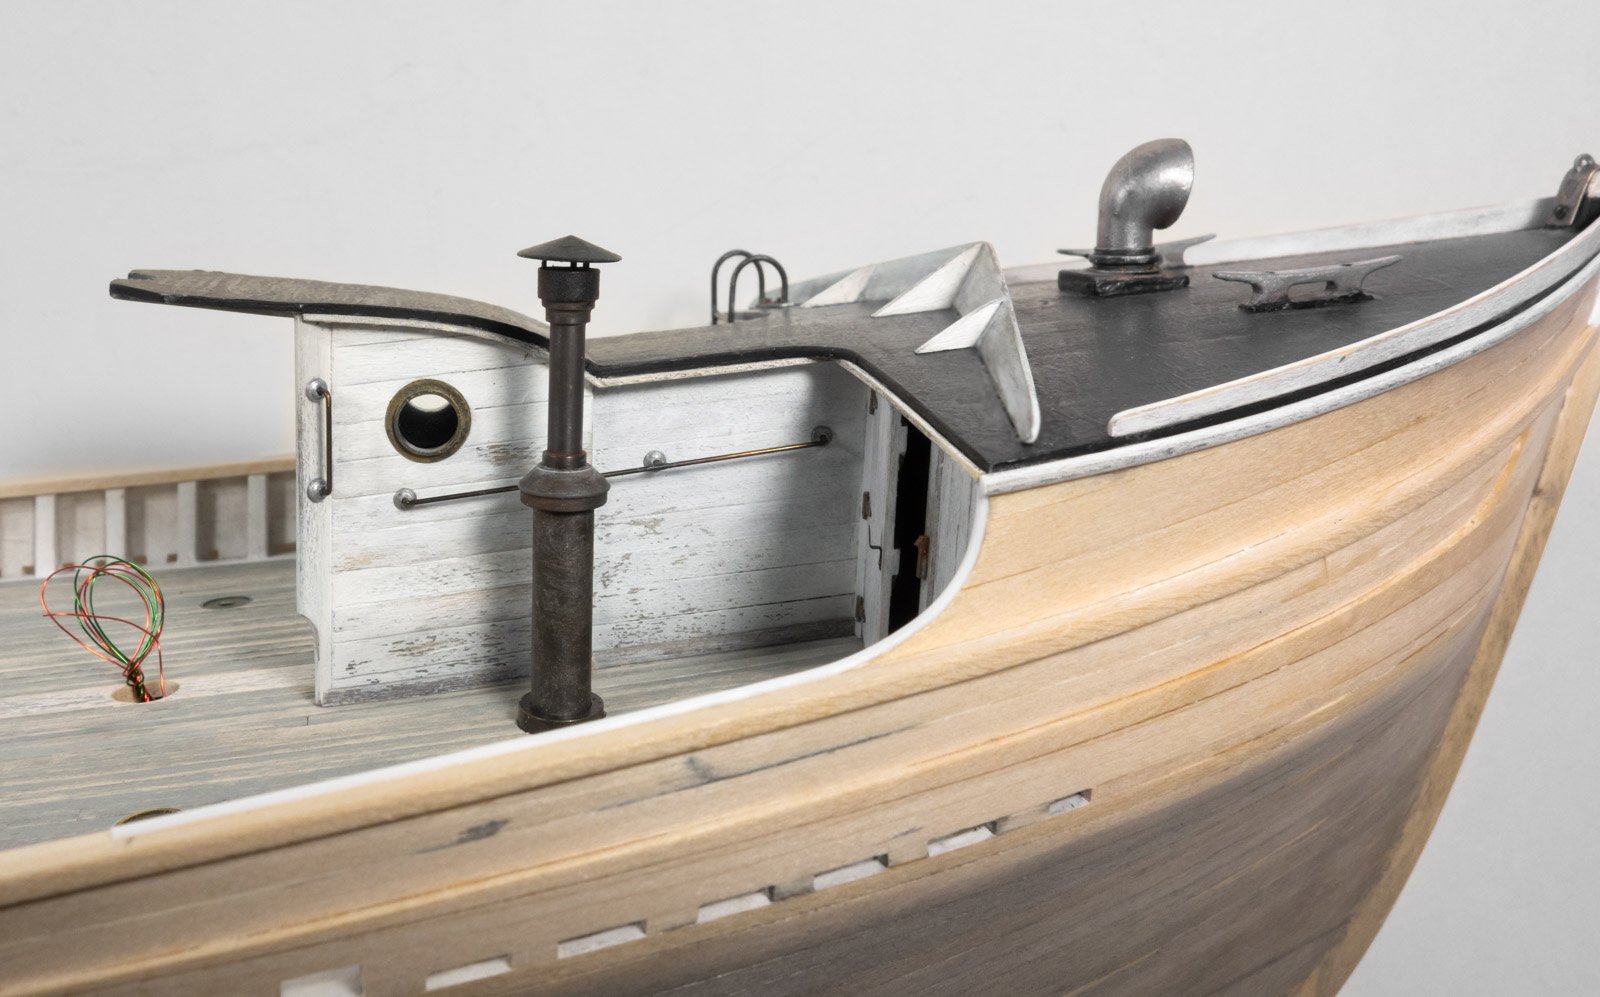
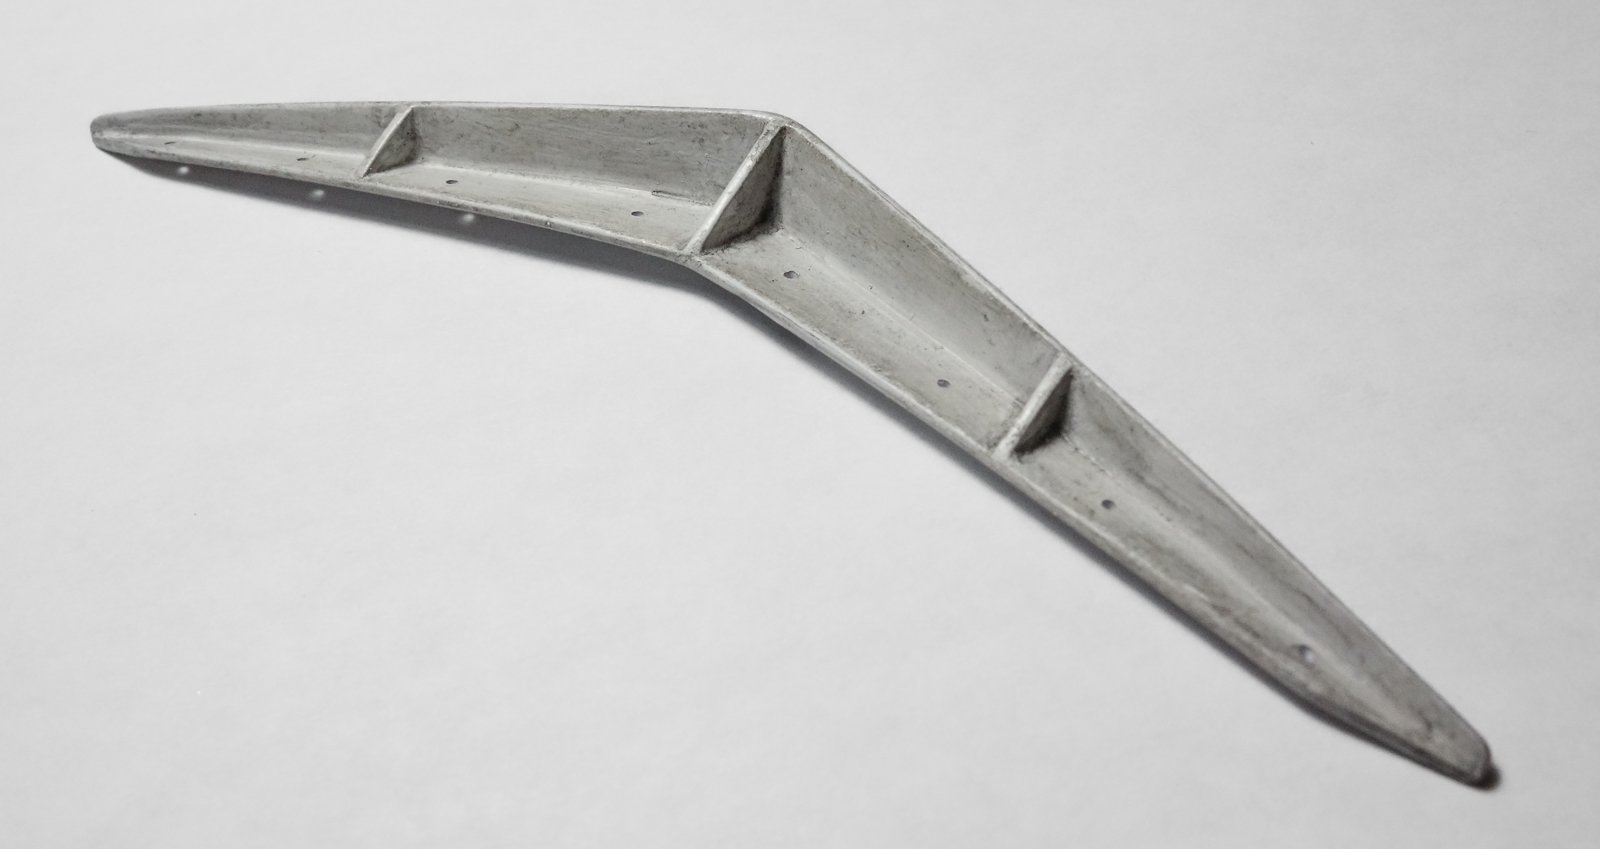
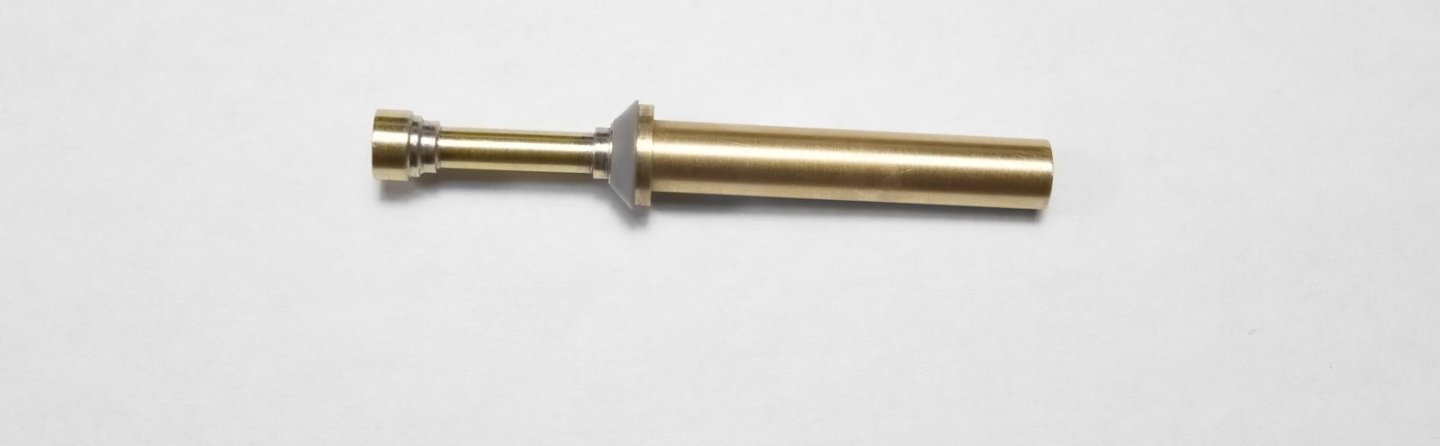
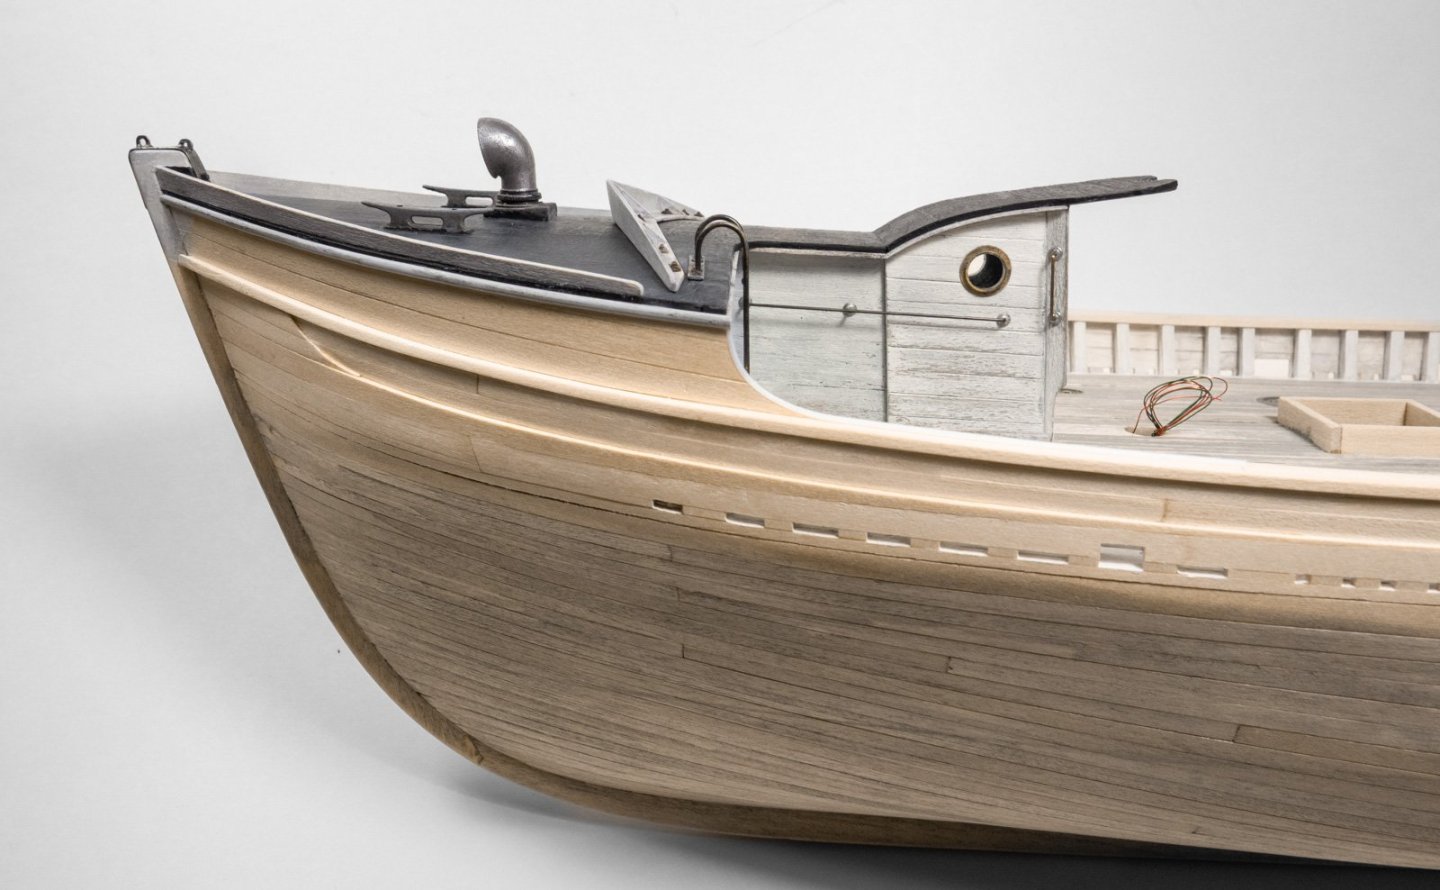
Keith B, Paul, Chris, Druxey, Bowwild, Glen, Keith A, Andy, Marc and Rick - I thank you very much for the compliments and support. And thanks for all the "thumbs up" and to those watching quietly. A brief update. The wave break diverter that I installed in the last post has been removed and replaced with one of a different design. The original one is something that might have been installed on a metal hull boat, but never on a wooden fishing vessel of this era. The Pelican’s plan set shows a side view of the diverter, but no details or even a top view and what I ended up building was simply wrong. Further research showed the wave breaks on these wooden draggers were built directly onto the deck and not constructed in a shop and then bolted on. The images below show the before and after. Creating the new wave break was the easy part. Fixing the deck after tearing off the old one was the hard part because chunks of the “rubber membrane” tissue came off with it. Heavy sigh. Moving on, I built the galley stove stack and the only info I have on it is the outboard profile. I lifted dimensions from the drawing but placed an alternative cap on top instead of the conical diamond shaped one shown on the drawing. The lower half of the stack has a double wall which allows hot air to travel up between the two pipes and exit at the beveled cap where the outer wall terminates. This helps protect the crew from burns when brushing against it. It's made from brass and two modified plastic pieces from a Grandt Line boiler stack. Solder and glue. Once I knew how it would stand above the deck, I soldered on a deck collar. Then blackened, oil paints and pigment powders. A hole was cut through the deck and the stack inserted. It still needs a support bracket off the doghouse and some butyl or tar at the deck. But deck wear patterns around it and deck weathering in general will be done after all other objects and details are in place. Meaning, not for a while. Thanks for stopping and take care. Gary


-
Fantastic work, Marc! I agree, and from a modeling perspective a little asymmetry just looks right. Your eye for detail and nuance is exceptional. Gary
- 2,696 replies
-
- 2
-
-
-
- heller
- soleil royal
- (and 9 more)
-
Excellent progress, J.C. That bowsprit looks great and your light hand on the weathering is very realistic. Gary
- 312 replies
-
- 6
-
-
-
- Chile
- Latin America
- (and 6 more)
-
Interesting updates, Wefalck. Hmm, a little adjustment time would be useful. Me too. Gary
-
Nice update, Brian. I like your louvered vents, and I agree the open position is more visually dynamic. Great little bollard jig. Gary
-
The water and steam piping turned out very nice, Keith. Tricky indeed and fiddly as well, especially in 1:120. I mostly use phosphor bronze wire now instead of brass because it’s harder and resists kinking and slumping. Tichy Train sells the stuff in 8” and 3’ lengths - .008” up to .04”. Just an FYI. Gary
- 732 replies
-
- 3
-
-
-
- Lula
- sternwheeler
- (and 1 more)
-
Sweet work, Keith and creative solution with the BBs. Gary
-
Beautiful work, Glen - and now I know what parrel beads are. Gary
- 301 replies
-
- 4
-
-
-
- Constitution
- Bluejacket Shipcrafters
- (and 1 more)
-
I know this model is going to be around 3’ LOA, but that photo above (2nd from the bottom) really drives home how big that actually is. Very cool! And it’s impressive that even your foundational structure work is clean and elegant. Nice progress, Paul. Gary
-
Looking really nice, Keith! I bet that girl frothed up some water getting some of those loads moving. Gary
- 732 replies
-
- 5
-
-
-
- Lula
- sternwheeler
- (and 1 more)
-
Very nice progress, Jacques. Really like that toned down blue. I find weathering to be a process and I’m often not happy with an initial result. Try stepping away from it for a few hours, or better still overnight. Sometimes a fresh look will tell you what it needs. Gary
- 312 replies
-
- 3
-
-
-
- Chile
- Latin America
- (and 6 more)
-
Very nice final photos, Eric - compliments to Mrs. Cathead. Congratulations on another beautiful river boat. I'm heading over to grab a seat for the model RR project. Gary
-
Lula is coming along great, Keith. I do love that beam engine! Gary
- 732 replies
-
- 4
-
-
-
- Lula
- sternwheeler
- (and 1 more)
-
Fantastic work, Glen! Great soldering and well - everything else too. Clean, crisp and as Keith said, handsome. Gary
- 301 replies
-
- 3
-
-
-
- Constitution
- Bluejacket Shipcrafters
- (and 1 more)
-
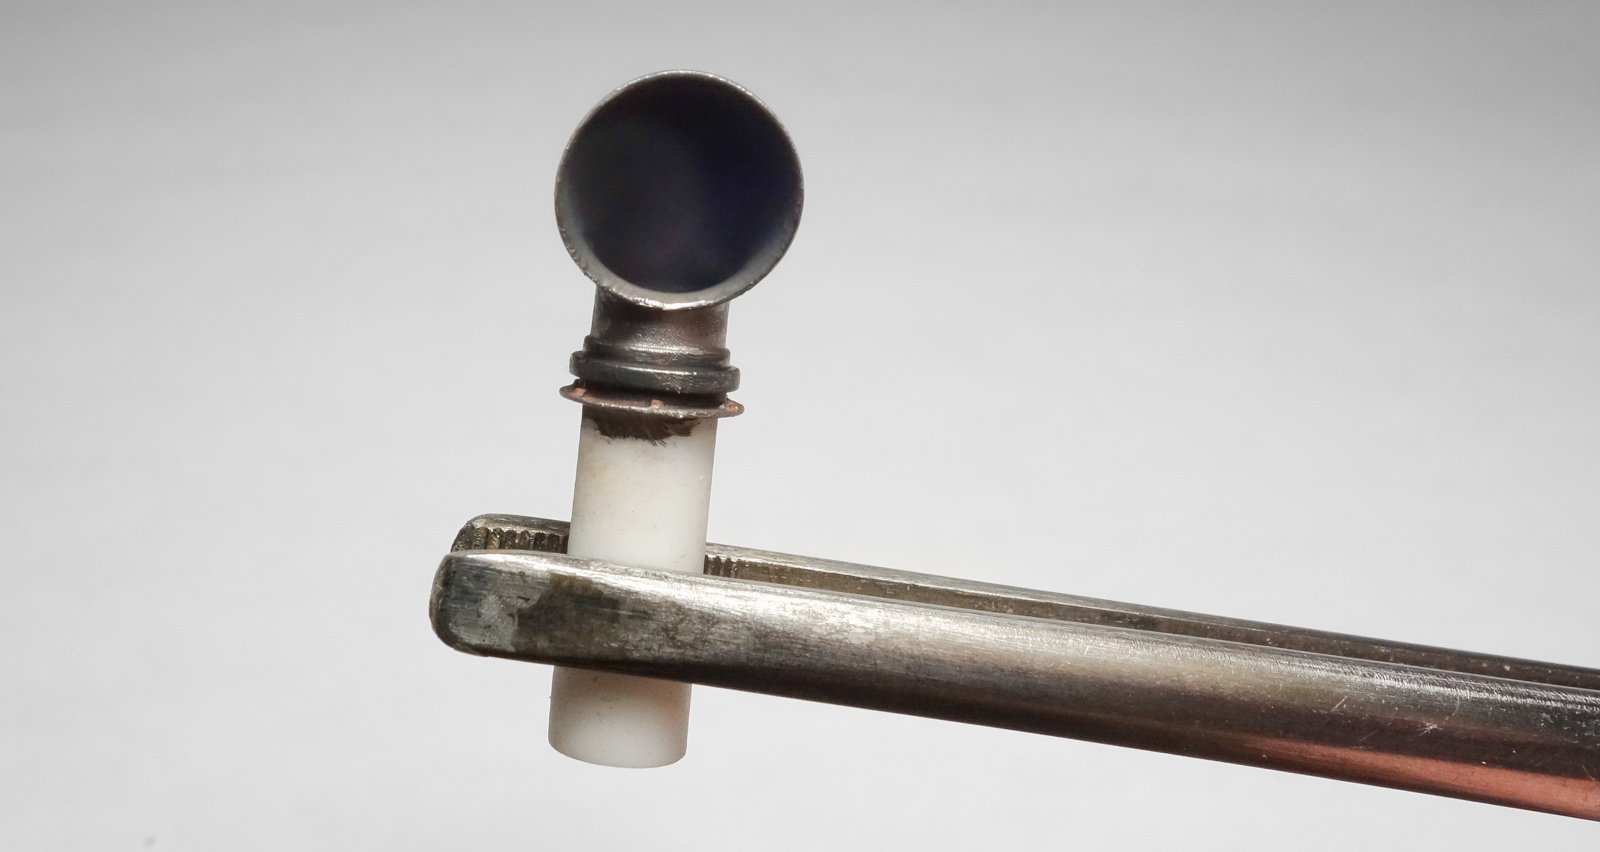
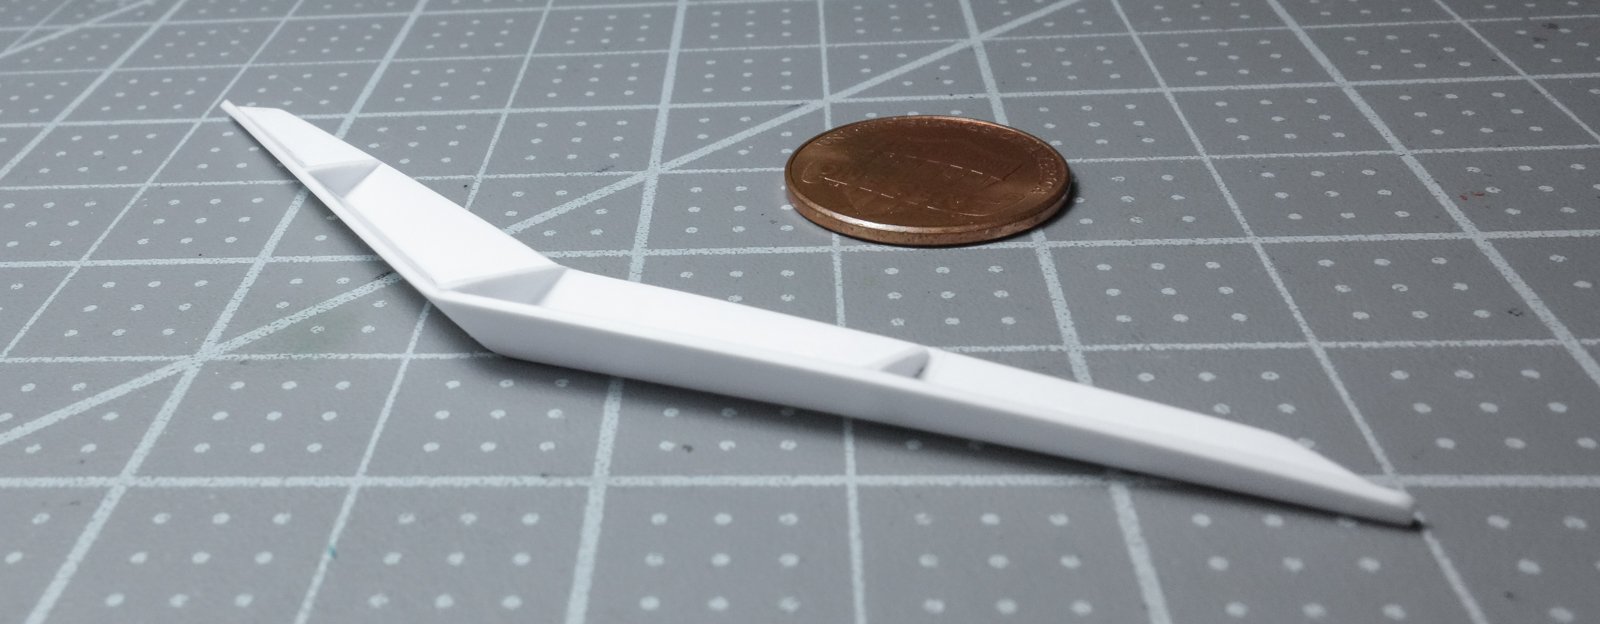
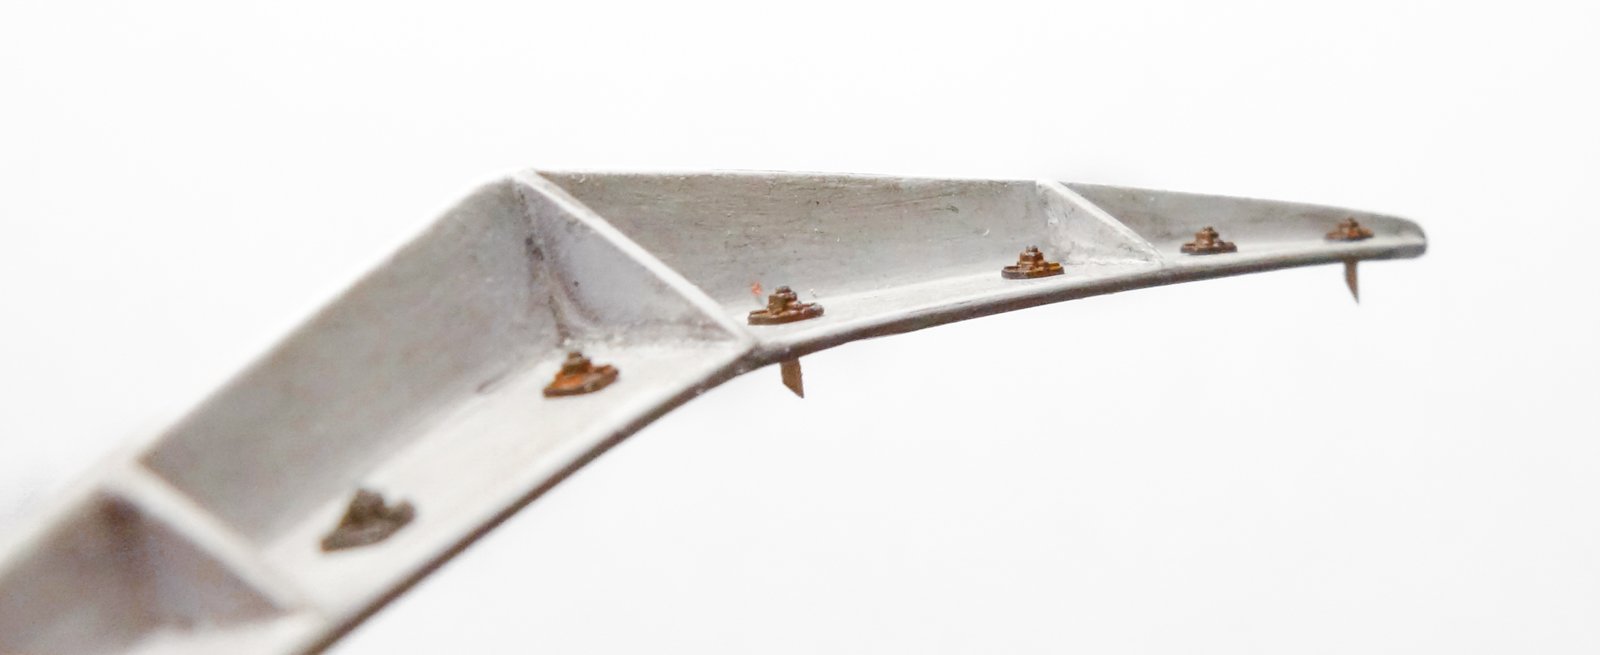
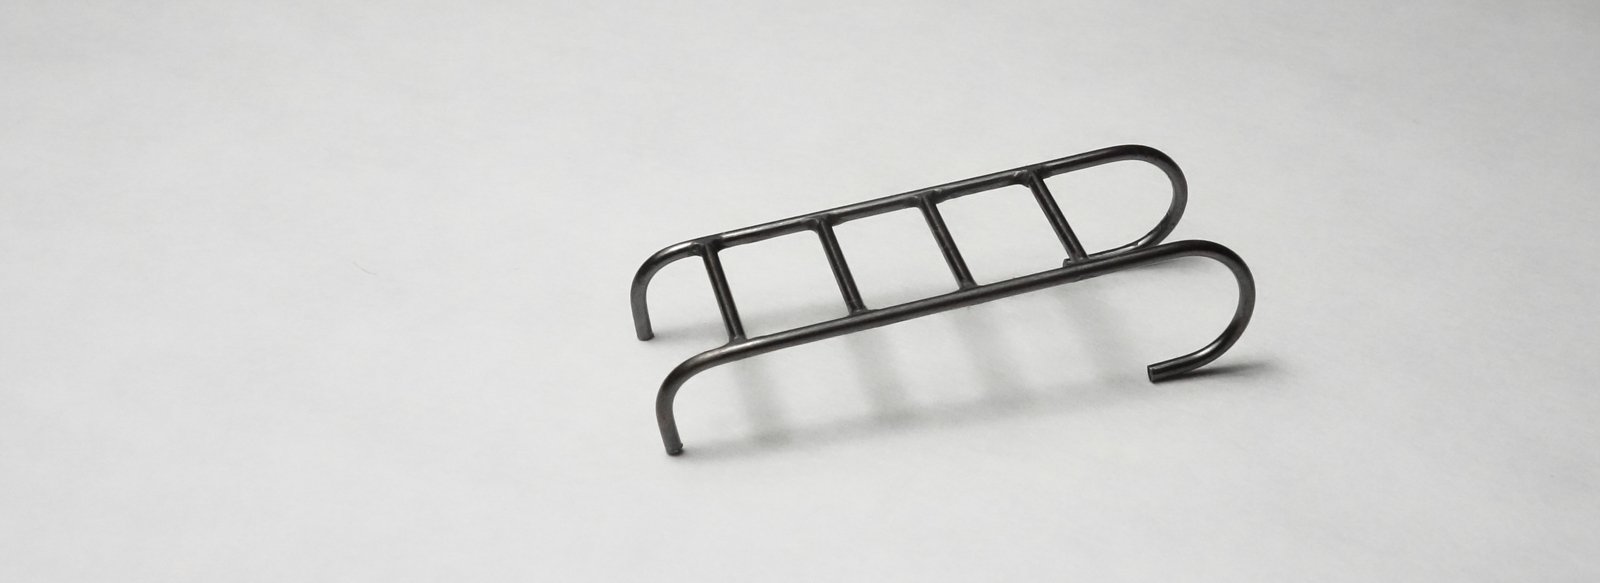
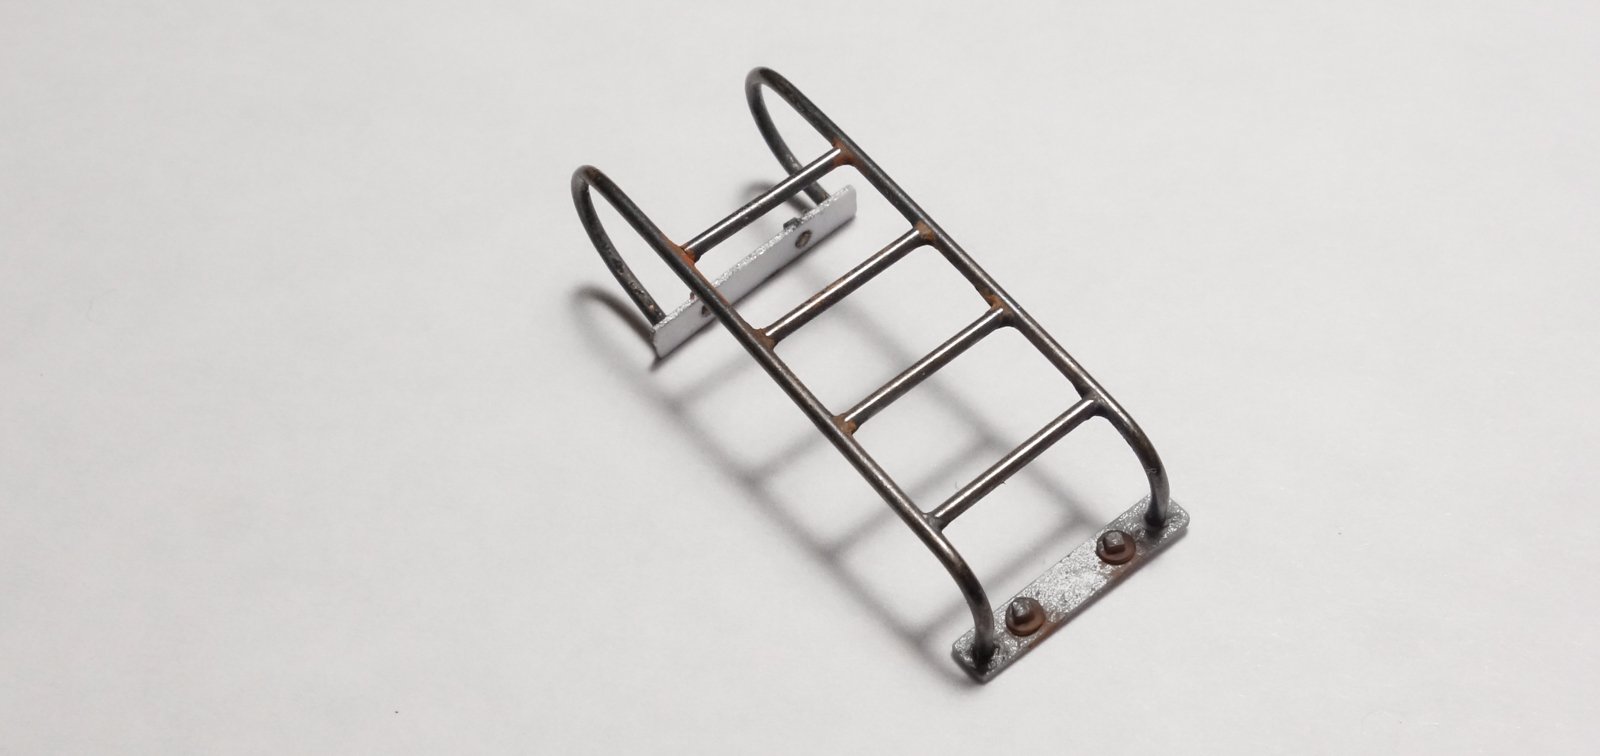
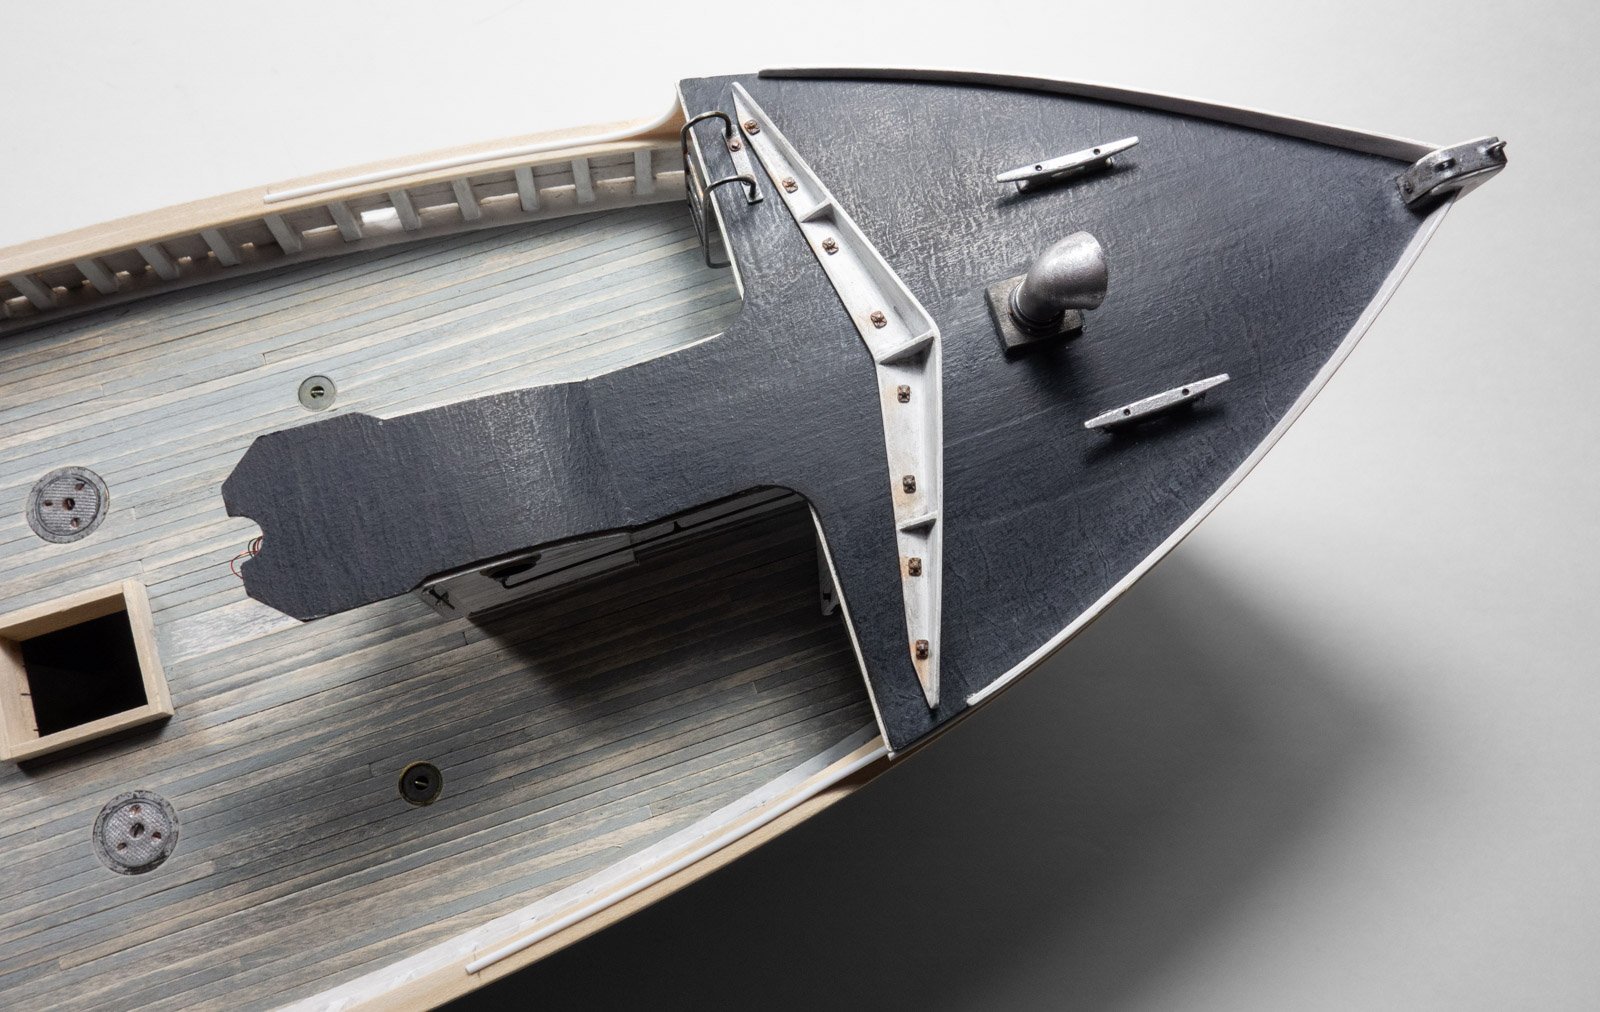
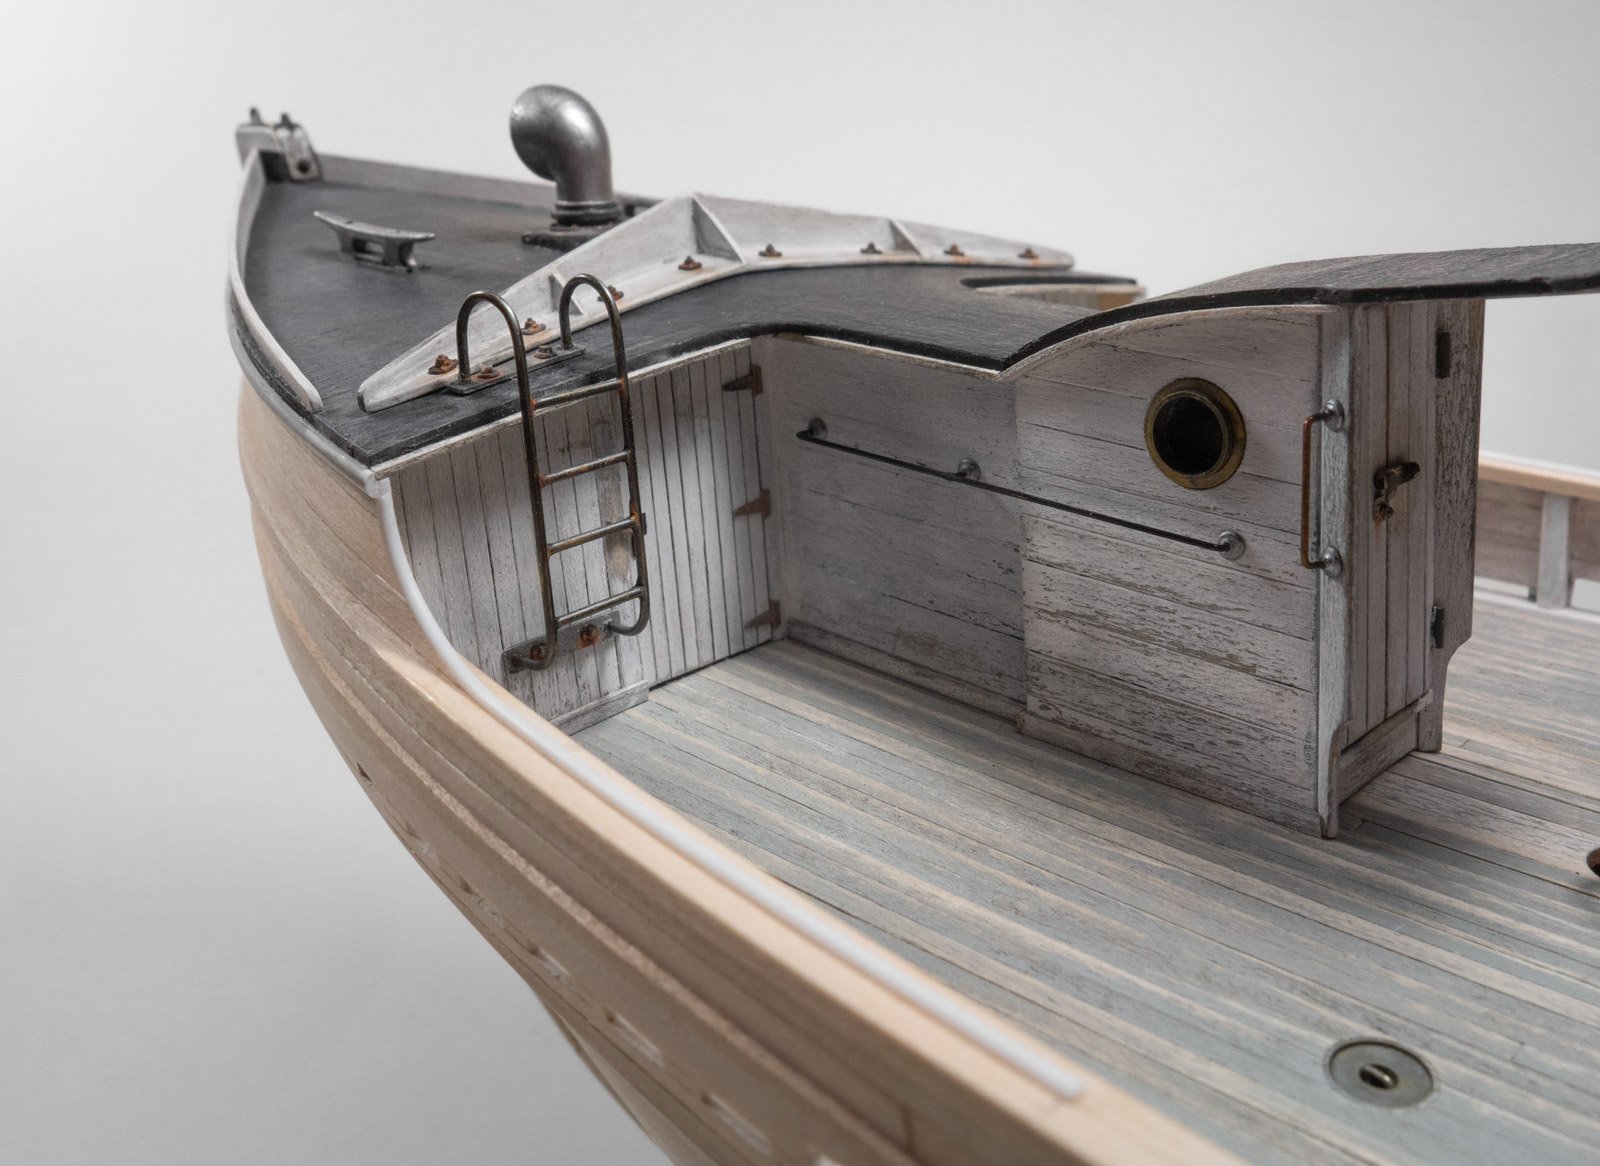
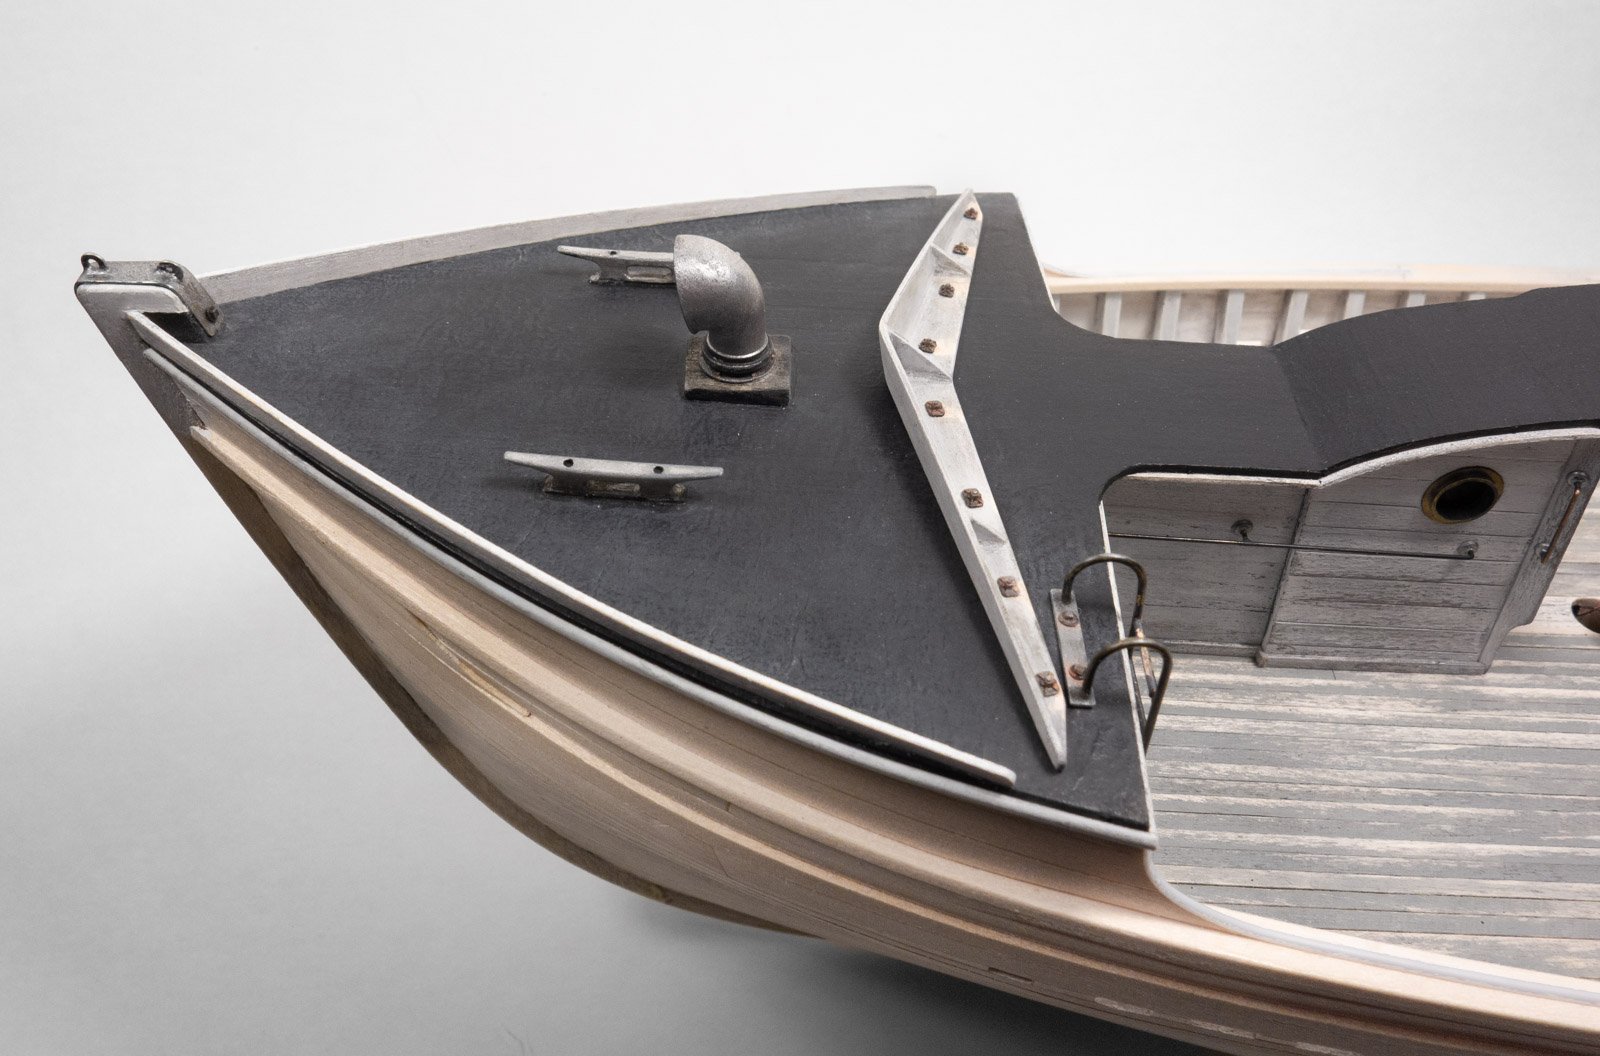
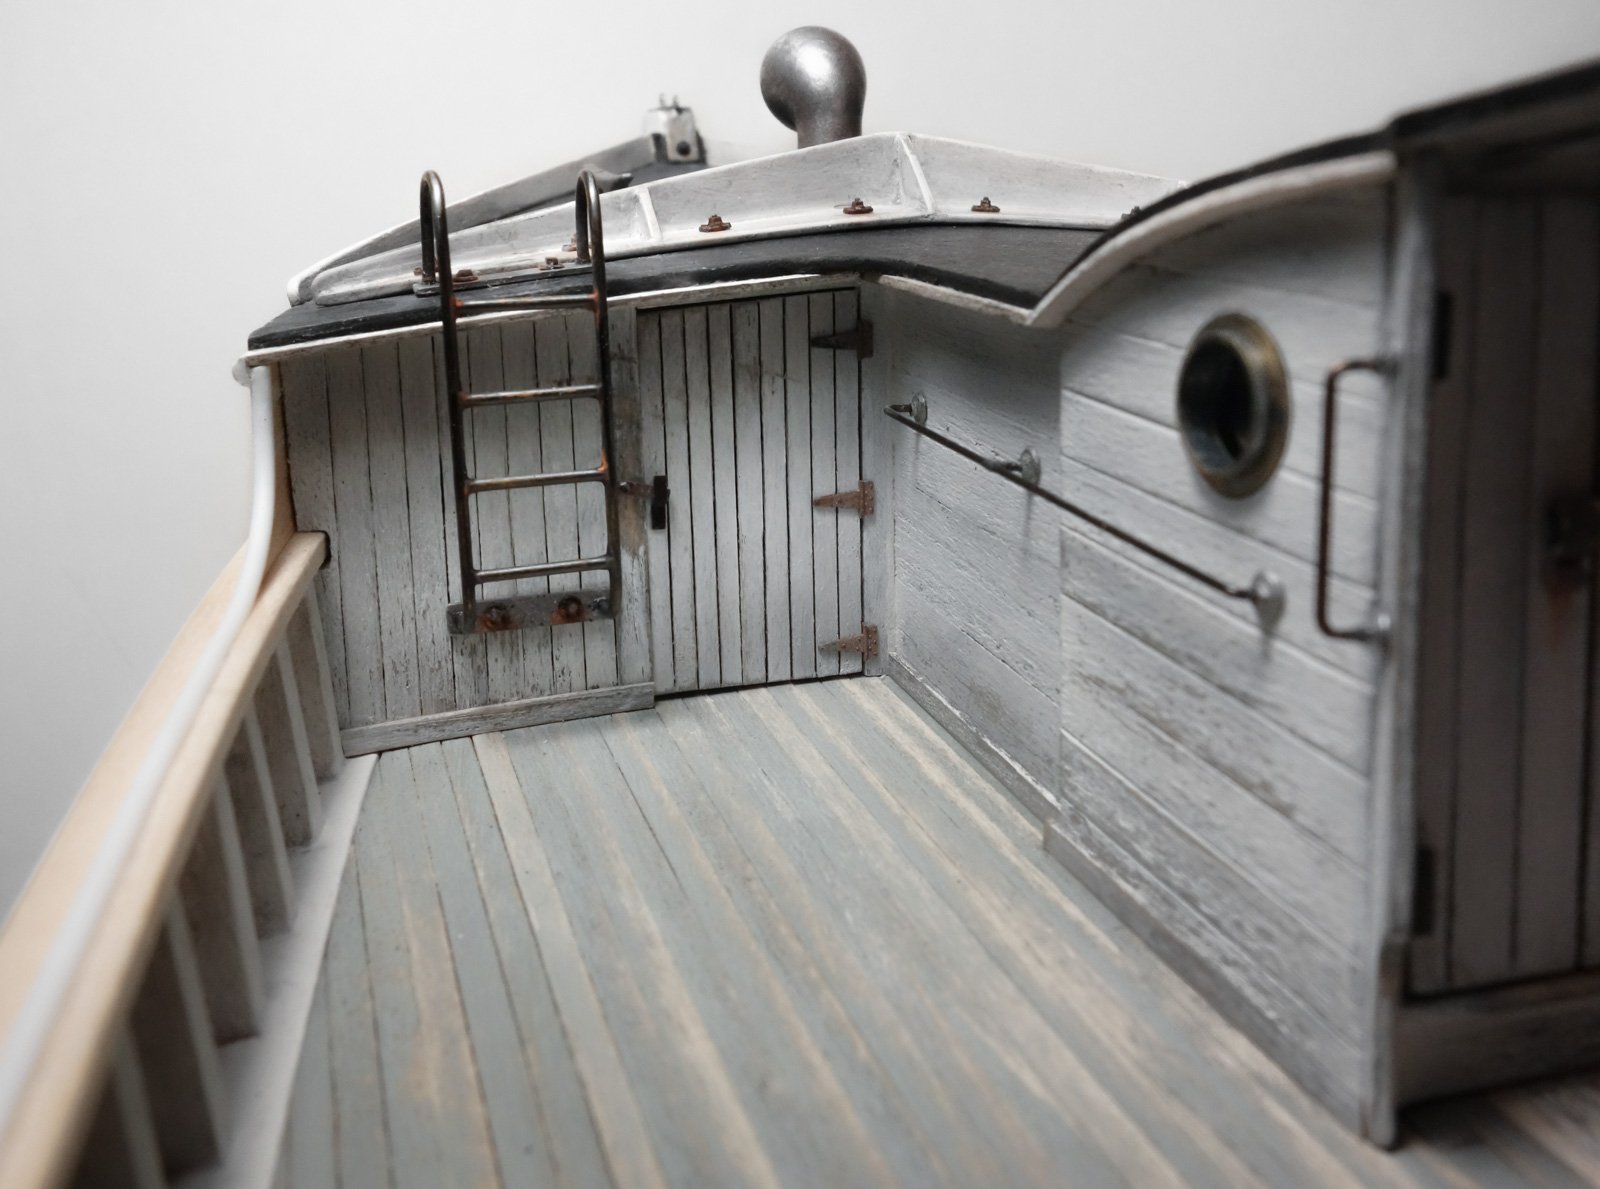
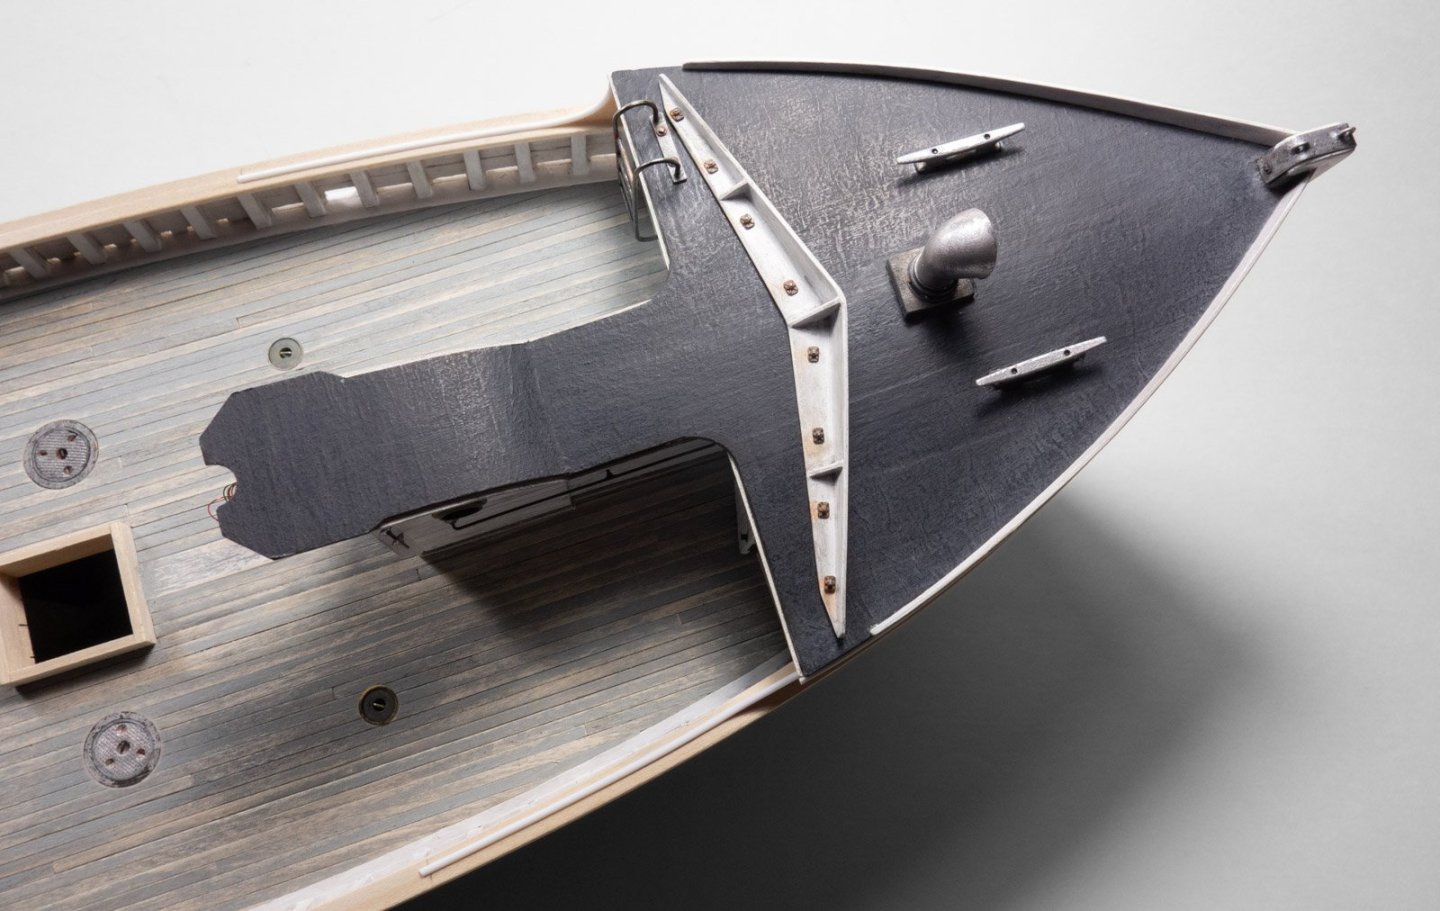
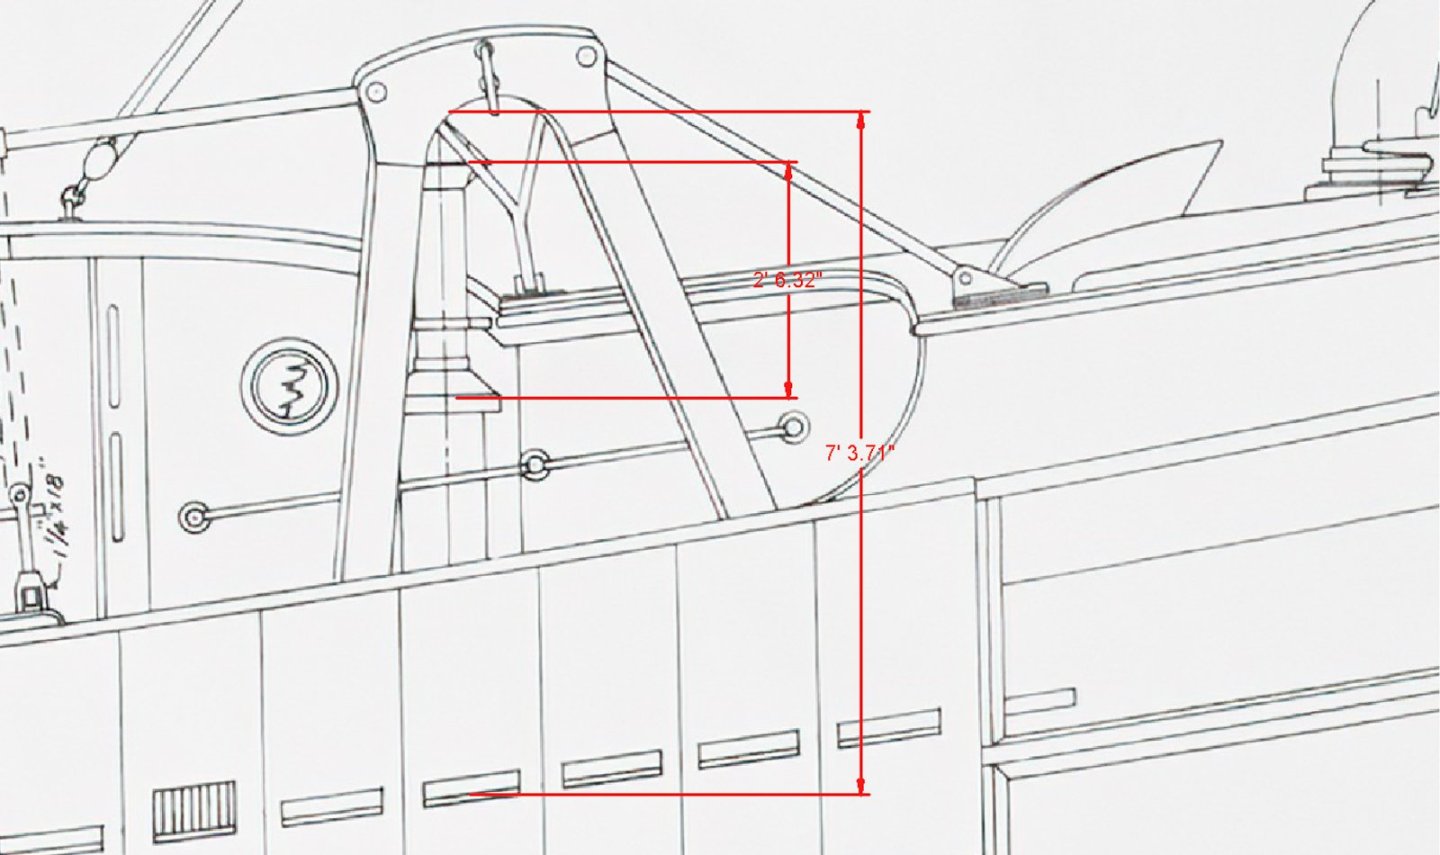
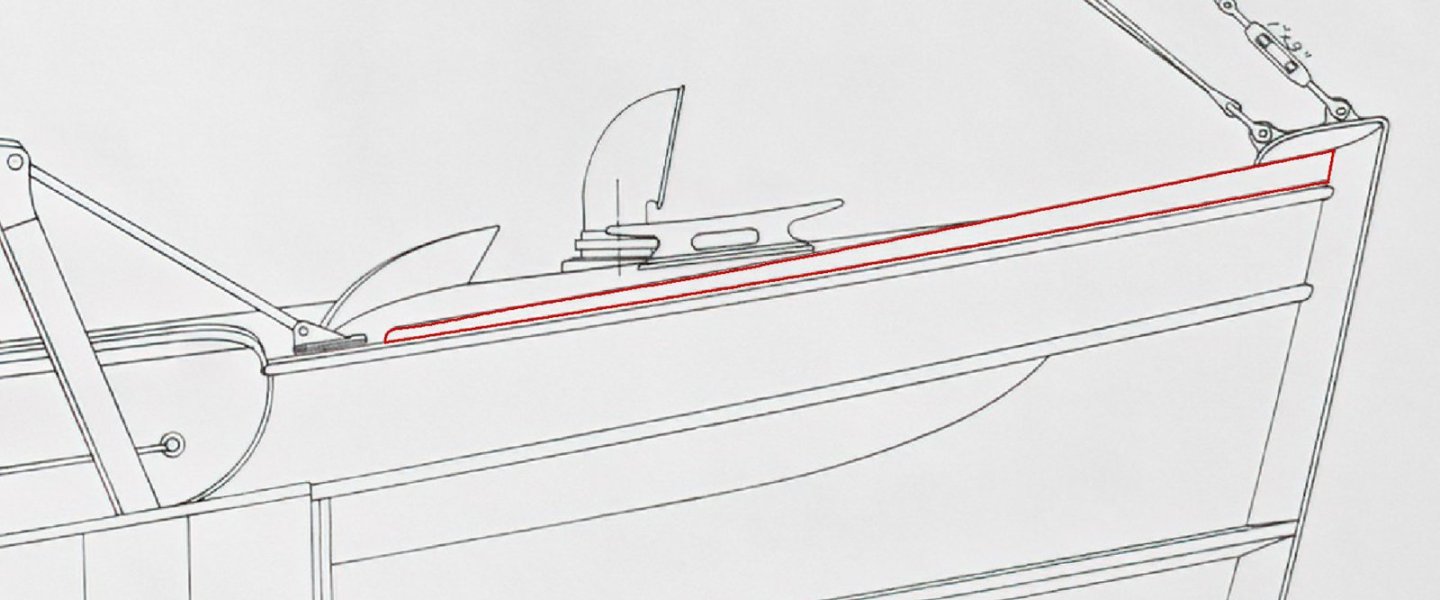
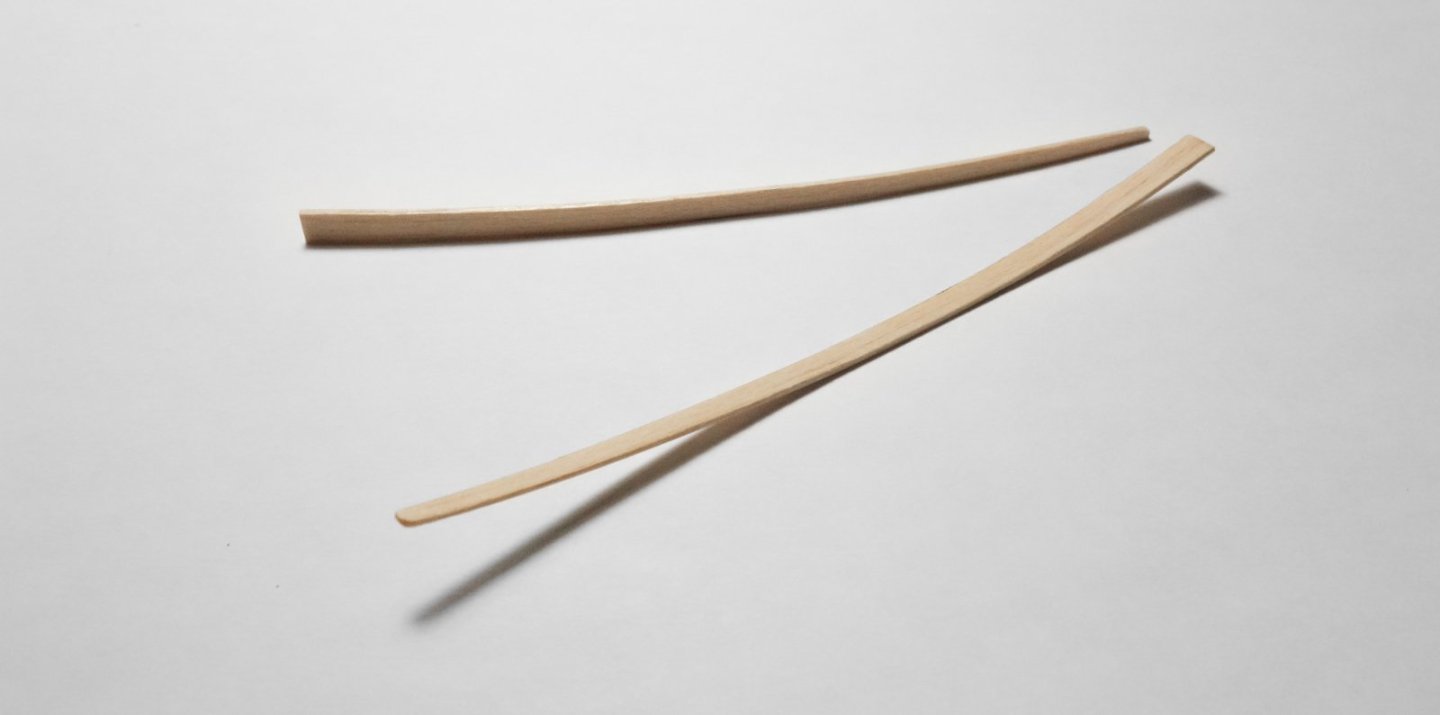
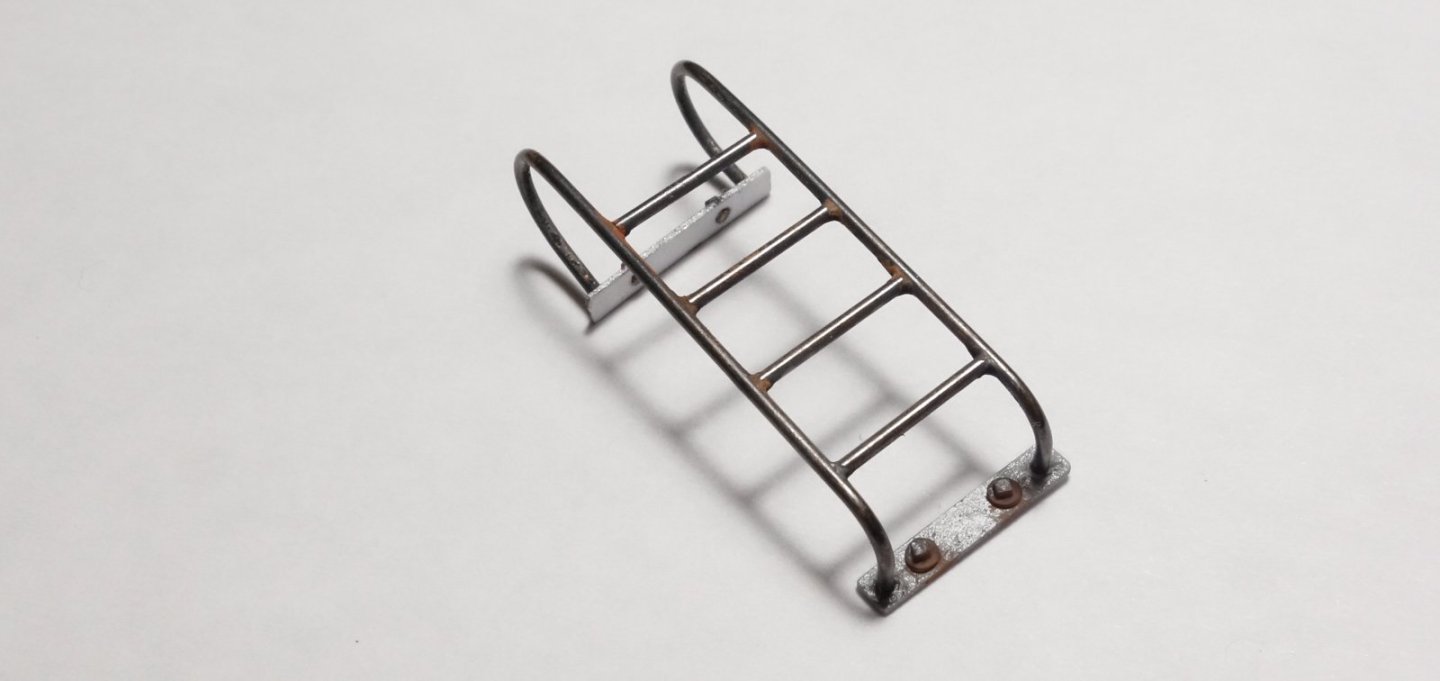
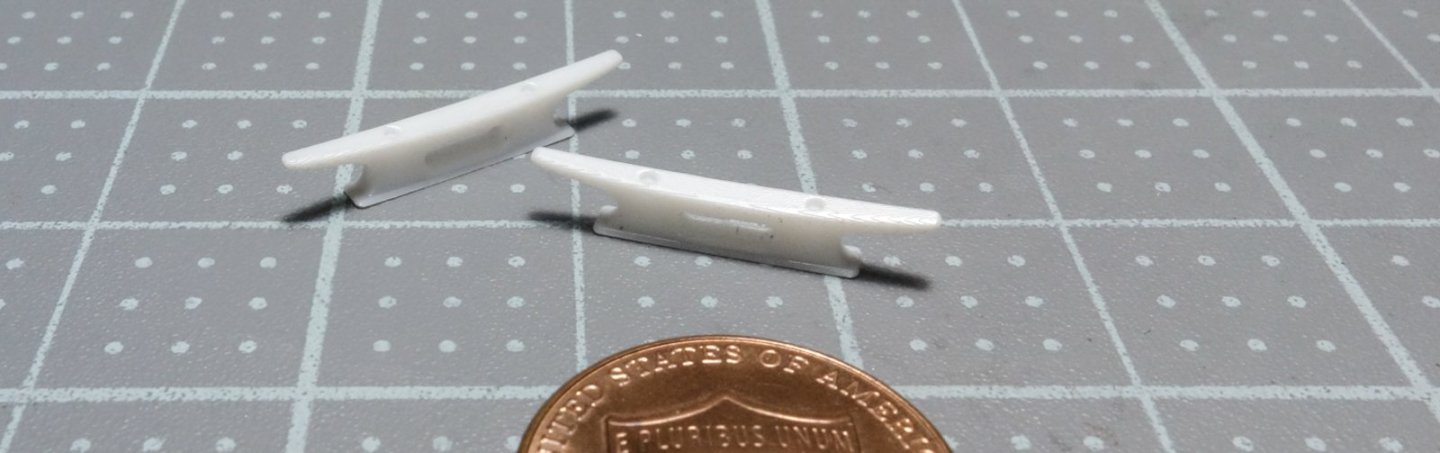
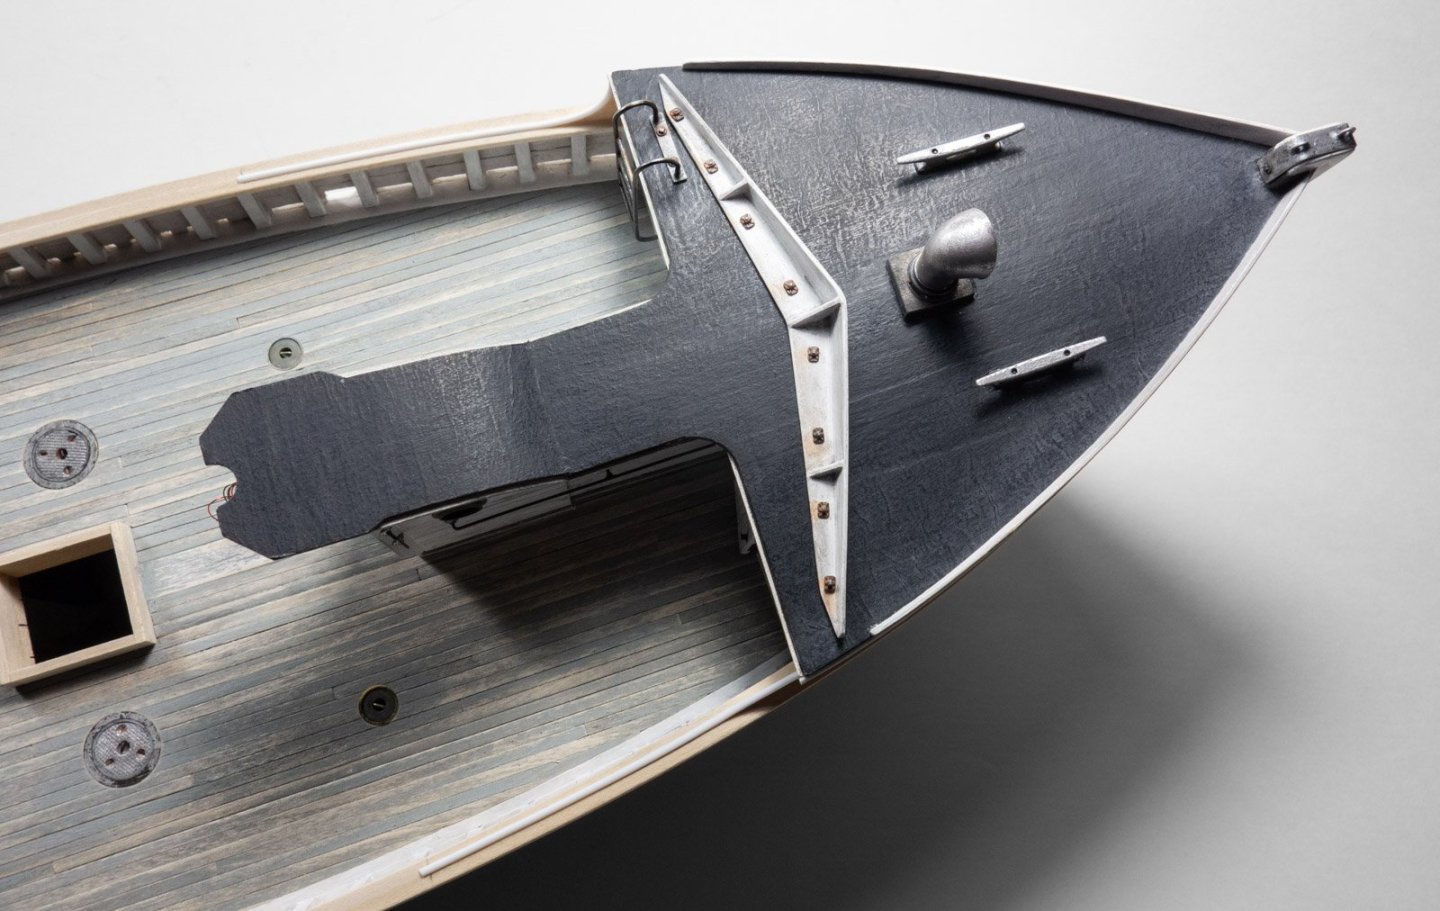
Greetings Fellow Modelers, Thank you Valeriy for your kind words, and thanks to all for the "likes." Here’s an update on the Pelican’s whaleback. First, the toerails along the P/S edges of the deck are cut to shape then heat bent. Next, the ventilator and its mounting/rotation flange got some color. I used a product on the cowl from AK Interactive that I’ve not tried before called True Metal. This paint was recommended to me by @TOM G and it works great although I haven’t yet mastered how to apply and polish it for best results. It’s a wax based colorant similar to Rub’n Buff, but whereas that product is more of an architectural hardware restorer, True Metal paint is produced for the model hobby and comes in a dozen or so colors that modelers can use. An interesting product that so far, I like – thanks Tom. The cowl below is a mixture of TM “steel” and “iron” applied with a colour shaper. Almost looks galvanized. A beveled coaming/plinth is added. The “wave break” is a diverter whose purpose is to keep water coming over the bow from flowing aft onto the main deck. It’s made from .03” (.76mm) sheet styrene which scales to about 1.4” (36mm) thickness. It’s dirtied up a bit and holes were drilled at each bolt-down location. The unit was temporarily located on the whaleback and selected bolt-down holes were drilled through into the deck. Leaving some of the bolt shanks provided a foolproof way to affix it without concern of getting glue smear on the deck surface. Bolts are Grandt Line 5113. The stemhead fitting is brass with a scale thickness of about .5” (13mm) and the eyes are flattened wire. One of the wires will be clipped flush on the backside and the other will penetrate the wood stem. A port side deck ladder is made of .035” (.9mm) brass rod and finished with Jax Flemish Gray. The ladder receives two styrene mounting brackets and weathering pigment. Two 40” (102cm) tie off cleats will be primed then painted with True Metal on top. I drilled into the bottoms and glued in stubs of brass wire for deck attachment. Then all of the above was glued to the model. Trim pieces were added here and there. All of it is basswood except for the half-round styrene on the right. A wider strip of half-round styrene was added as a rub rail just below the deck surface. This strip also secures the rubber membrane flap that folds over the deck edge. Thanks for stopping by for a look. Be safe and stay well. Gary


-
All nicely squared and true, Paul! Excellent. Handy plastic right-angle squares. Gary
-
Those final photos of your model are wonderful, Valeriy! Your work is so inspirational and some of the finest modeling I've seen. Congratulations! Your customer will no doubt be ecstatic. I do hope you share it with us. Gary