tlevine
-
Posts
2,033 -
Joined
-
Last visited
Content Type
Profiles
Forums
Gallery
Events
Everything posted by tlevine
-
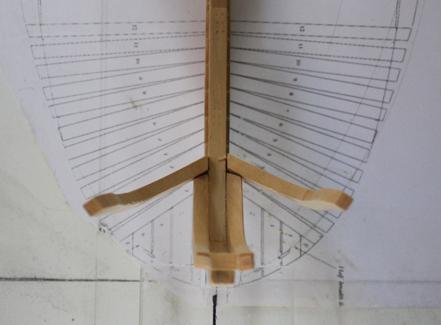
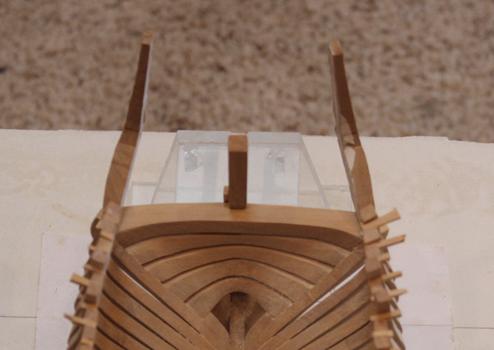
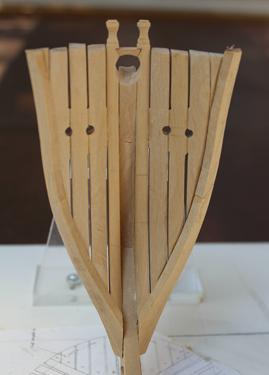
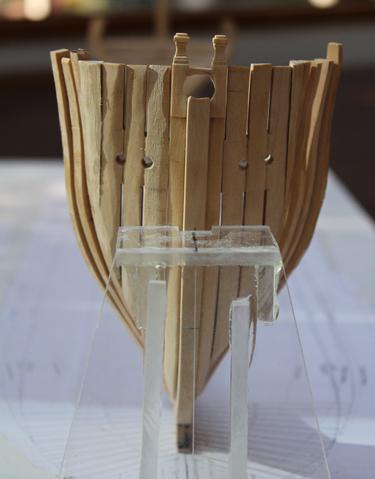
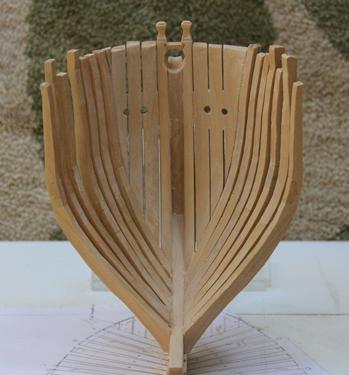
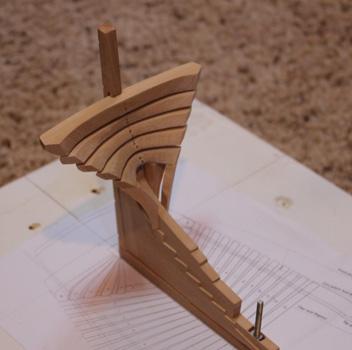
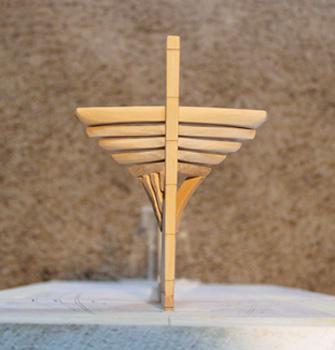
 Nov. 15, 2011. I had time yesterday to start the fore external and aft internal fairing. It is daunting to remove all that wood from the hawser timbers and fore cants. Beginning the Fore and Aft Fairing Author: dvm27. When fairing the hull I use a pencil to draw lines across the hull from top to bottom. As you begin to fair the marks start to disappear. This means the high spots are being sanded down towards the lower spots (which still have the pencil marks). The pencil marks are reapplied every so often. Once all the pencil marks have disappeared the hull is fair. Sweep your hand gently across the hull from time to time and you will appreciate the fairing progress. David Antscherl taught me this method and it has worked quite nicely. Greg. Nov. 21, 2011. I have started working on the counter timbers and the knee of the head simultaneously. There is a lot of fitting and temporary tacking of pieces, so while the aft was drying I worked on the fore, etc. I have the angle for the counter timbers set and the timbers are temporarily pinned in place. I have also started the external curvature of these timbers. The next step will be to carve out the excess internal wood and permanently install them. I will not finish the exterior profile until I start the exterior fairing. The mark on the aft side is the top of timber line. Atalanta’s top of timber line is 4” shorter but I went with the prototype instead. The timber’s angle is the key; the height can be shortened later. Counter Timbers The shape of the bow timbers had to be redrawn from David’s plans. The stem of Atalanta has a slightly different shape from the plan, as does the anterior edge of the knee of the head. The cheeks are positioned 6” lower and the curve of the upper part of the lacing and extension is also a little different. All of the joints below water have black paper (felt) and the upper joints have pencil on the edges to make the joint more apparent. I need to sand the knee to its final shape and drill several holes before mounting. There are always items that seem easy but in reality are not. The filler timbers between the aft cants and the counter timbers are one example. I spent a lot of time measuring and remeasuring the location of the side lights. Even though the height of the top timbers is different on Atalanta than on the prototype, the height of the side light is unchanged. There are six timbers on each side. Two of the timbers form the vertical sides of the side lights. There is a short timber under the sill. The four aft timbers need to fill in the remaining space relatively evenly while, at the same time, gradually angling aft to approximate the angle of the counter timber. The fore timber has an unusual configuration. It is notched onto the first cant frame and has an aft taper superiorly and a fore taper inferiorly. I left these timbers very oversize because I did not know how it would all come together. I have started cutting the first few full frame pieces. The frames will have chocks between the futtocks except as shown in the plans. Counter Timbers
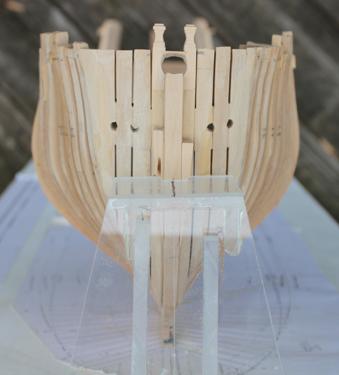

-
Chuck, I am the person who put the fillers in between the bulkheads. It makes all the difference in terms of strengthening the frame. I think a lot of builders (including myself) have snapped off that stempiece. The basswood is very soft. I left mine off the model until all the hul planking was completed.
-
Thank you for looking in, gentlemen. I have about a third finished. I am going to try to get the next third posted this weekend. It is just so difficult to sit typing and sorting pictures when I would rather be making sawdust.
-
Aldo, there are much better people to take advise from than myself and I have not looked at the partners on the upper deck but if you want to see how it looks on the lower deck go to the first page of my Atalanta (re)build. This shows the partner with an octagonal exterior. David discusses the round vs octagonal hole in Vol I. Also, why don't you look at Danny's Vulture so see how he handled it. His build log is in the process of being reposted.
-
Robbyn, as you start to kitbash you will probably end up purchasing most of the power tools along the way. The only things that I have bought specifically for scratch building are a scroll saw, a thickness sander and a spindle sander. The first is necessary, the second is useful and the third is a luxury. I also do most of my work on the kitchen table, storing everything in the garage or basement until needed. Enjoy.
-
And he still manages to get underfoot. I just make sure my hands are empty when he does.
-
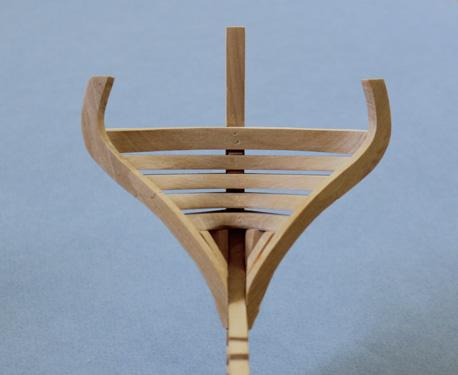
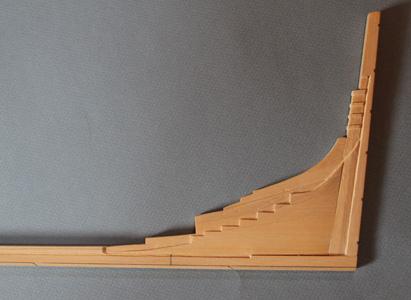
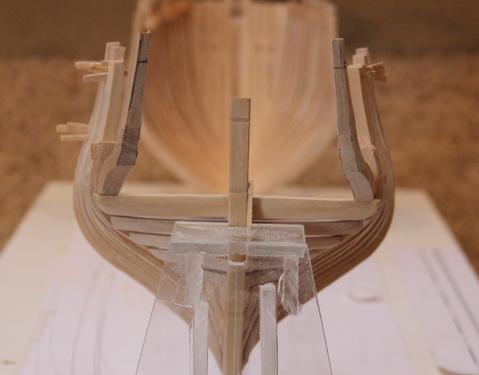
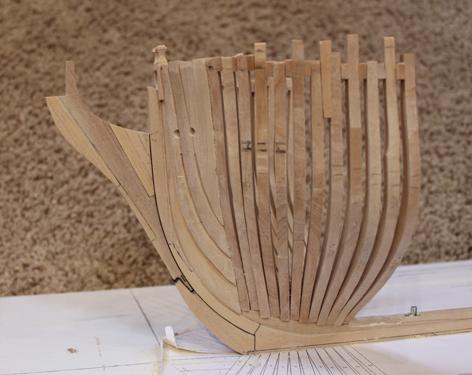
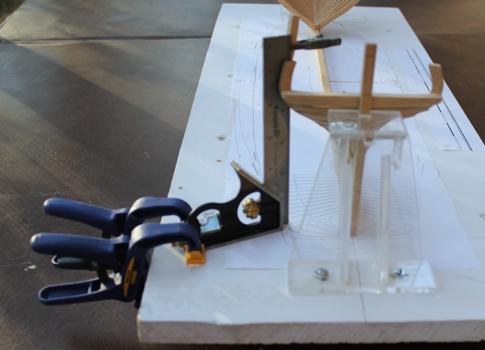
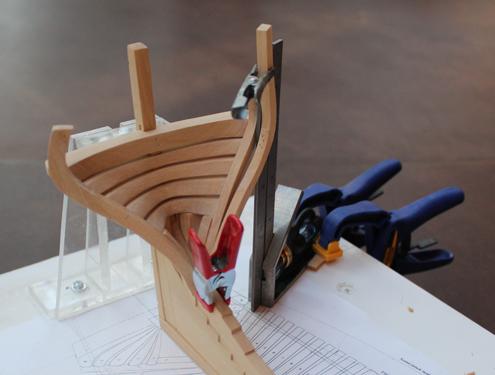
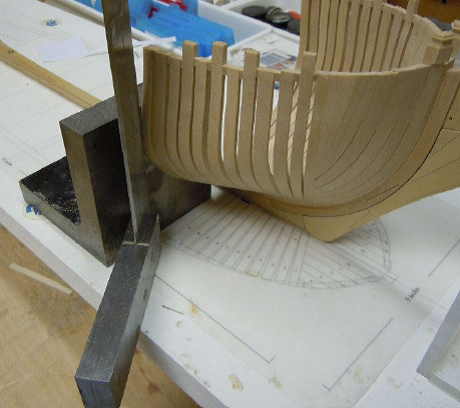
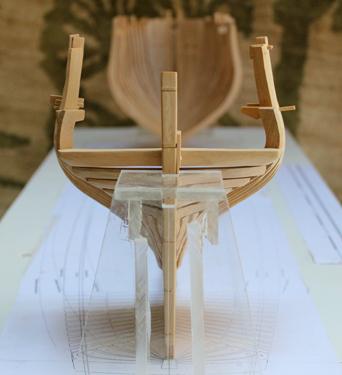
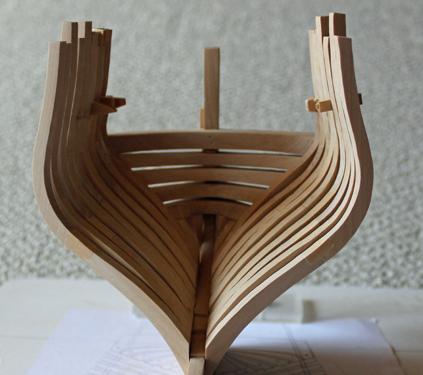
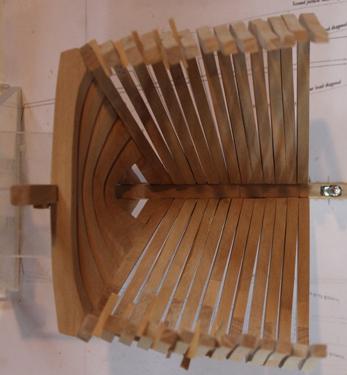
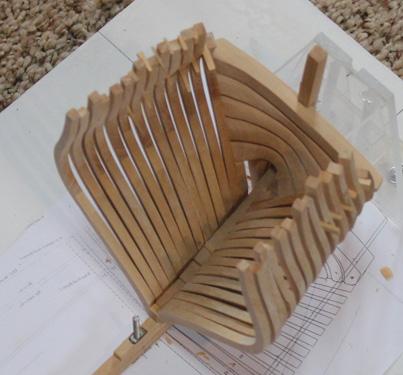
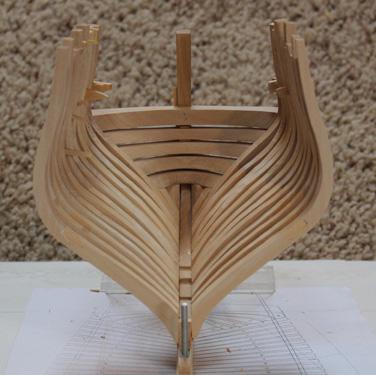
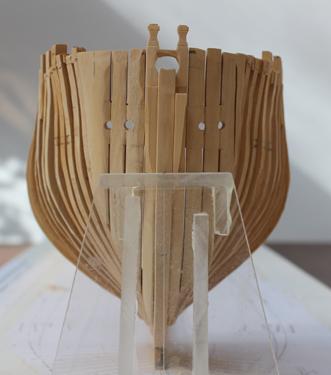
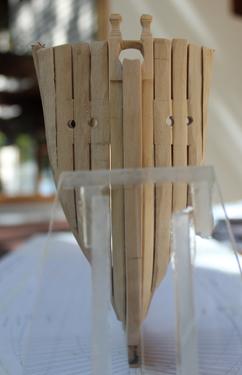
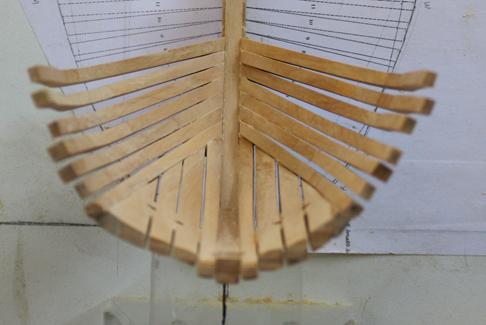
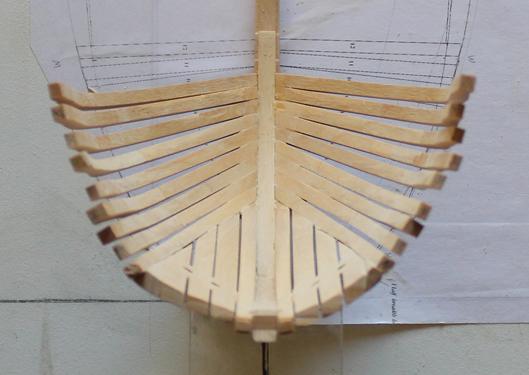
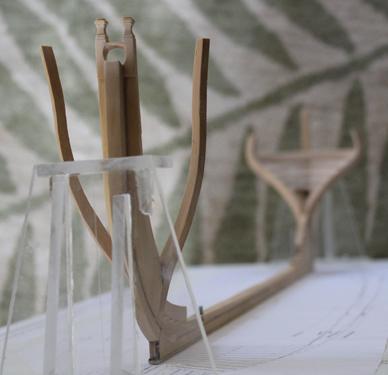
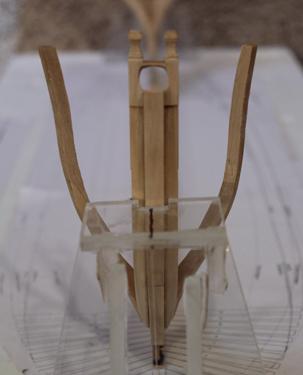
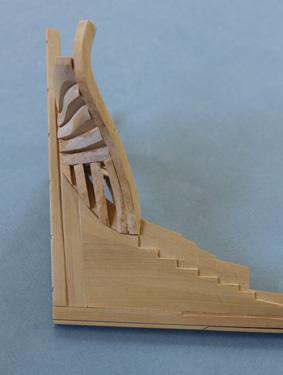
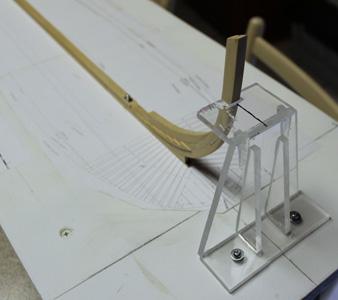
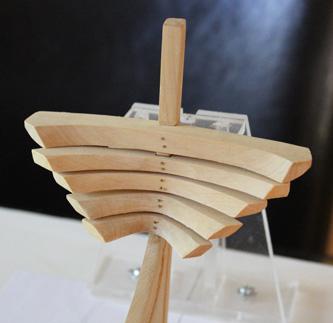
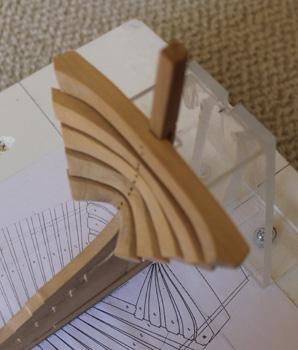
Oct. 16, 2011. I have added the second aft cant frames. I thought this would be a good time to show my setup. I clamp a carpenter’s square to the building board on the aft line of the cant. In the second picture you can also see a shim next to the square to keep the clamp from sliding off the square. The frame is then clipped to the square and the foot is held in place with the clamp. I tried using a square made from plexiglass but found that the transparency made things more difficult. I will therefore be very careful not to let the metal square fall on to the model. Frame Setup Author: dvm27. Here is the setup I use to add frames. I use a steel angle plate. This sits on the aft line of the fore cant or frame (reversed aft) and the bladed machinist square is located at the maximum height of breadth on the plan. I just add glue to the heel of the cast (or frame) and sit in place, applying gentle pressure for about 30 seconds while the glue tacks. Thus, the frames are perfectly square to the table and the height of breadth assured. No clamping for me. Greg. Greg’s Method Nov 6, 2011. I have finished constructing the aft cants and am in the process of mounting them. The process is similar to mounting the fore cants but for some reason I found it easier to inadvertently tip the aft cants behind vertical. For anyone else building a Swan class in the future…leave the steps on the deadwood a little too long. It is easy to trim them back later when the cants are installed. One of my steps was too short (on both sides) and I had to narrow the foot of the cant to improve the appearance. Aft Cants Author: Dan Vad. I found the same thing with the aft cants wanting to tip a bit – maybe something to do with their narrower profile? Nov. 6, 2011. Danny, I think part of the problem is an optical illusion. They actually “seem” better when they are tilted. Nov. 13, 2011. All of the aft cants are in place. I had to reset most of them after I tripped over the dog while carrying the model. How I got away without serious damage (to either the ship or myself) is amazing. I have started fairing the interior of the aft cants and have glued up the exterior stern counter timbers. Aft Cants Finished Author: Jim Lad. Nice to hear that there was no serious damage done. I hope the dog is OK too! John. Nov. 13, 2011. Fairing the aft cants is more difficult than the fore cants because of the compound curves involved. I felt is necessary to leave any fairing until they were all in place. With the fore cants I started fairing them after only eight of them had been installed. As for the dog…deaf, almost blind, stupid, senile but very cute (just ask him!) Cocoa

-
Thank you, Ben and Pat. I felt instructive comments from other members were important to include. Some of them have been paraphrased or combined from multiple posts to make it easier to read.
-
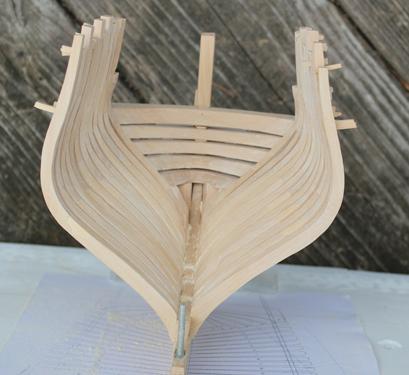
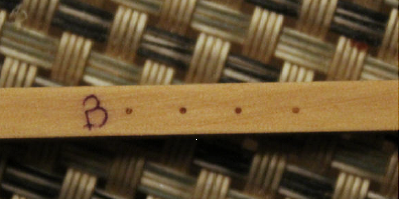
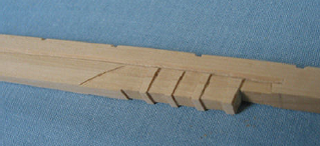
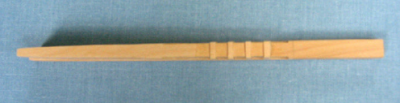
Oct. 15, 2011. I made a treenail mock-up and applied Watco’s. From L to R the species are bamboo, degame, pear and Castillo boxwood. Bamboo wins. It is slightly darker than the boxwood and the pear is too dark. The degame is too brittle to bother with. Treenail Mockup All the fore cant frames are mounted. What worked best for me was to cut the lower futtock with a 2 mm margin and the upper futtock very fat. I then tacked the lower futtock onto the frame template, made the chock and glued that to the lower futtock. I then made the scarf for the upper futtock and gave that to the chock, paying much more attention to the joint than the angle of the upper futtock (the reason it was cut oversized). Once glued up, I took a fresh copy of the frame template and applied it to the frame. The shape was finished on the spindle sander and finally, the bevel at the foot was cut. Full sized Averylabels are perfect for transferring the frame templates to the wood. Being stiffer than regular paper helps prevent distortion. There are several other brands of the same product. Some of them leave a black residue, others are too sticky. If you are counting, there are six copies of each template…two sticky and one plain for both the port and starboard sides. There are two unusual frames. Between frames 7 and 8 there is an extra top timber. This is trapezoidal in shape and steals from the aft side of 7 and the fore side of 8. The upper futtock of frame 11 is cast aft. This futtock is cut from thicker stock to accommodate the cast. To get a clean cut superiorly I partially cut this down with the Preac Say and then finished it with chisels and sandpaper. I have penciled in the location for the bird’s mouth tenon on frames 3 and 5 for cutting later. Spacers have been placed between the timberheads. This adds substantial strength and stability to the model. They were left protruding to facilitate removal later. Fore Cants Finished Author: dvm27. I cut the sill mortises on Pegasus after temporarily mounting and marking them. While easier to cut with a chisel off the model, this technique caused me some headaches as sometimes the frames were a hair off when remounted on the model. On my current model, I plan to mark and cut these after all the frames are in. Ed T shows how efficiently this can be done on his model. Regarding fairing, I suggest adding the first frame pair before fairing to see how the cants flow into them. These square frames are a bit fuller and the difference may seem somewhat jarring. I also removed the assembly from the building board while fairing and started with 80 grit garnet paper, progressing to 220 for the final sanding. I had an occasional filler piece between the cants come loose during the fairing but these were easily glued back in place. Your goal is to get that nice consistent 5” top timber line smoothly curving towards the bollards. I found the pencil trick mentioned by Druxey very helpful. Draw numerous horizontal (sheet) lines with a pencil from the top of the keel to the top timbers. Sand until all the marks are gone. This will show the high and low spots.
-
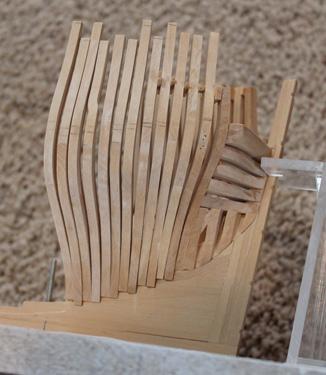
Oct 4, 2011. The rest of the hawse timbers are in place. The outboard faces have been cut significantly oversized to (hopefully) prevent any mistakes on the final fairing. The most difficult part of making the last timber is accepting the fact that the easiest way to fabricate it involves wasting a lot of wood. TFFM Vol. III describes the technique. I have also mounted the next three fore cant frames Hawse timbers installed Fore Cants Oct. 5, 2011. I plan on treenailing the chocks. I will drill the exterior holes into the chocks for stability and drill the interior holes shallow for appearance. I cut both the chocks and the scarf joints oversize and then “sneak up” on the perfect fit. The frames have not been drilled for treenails yet because I am still debating which wood to use for the treenails. I will be looking at Castillo box, bamboo, pear, and pau marfin. Author: dvm27. I guess everyone has their favorite method of inserting treenails. I drew them down to fit a no. 76 drilled hole, using a Byrnes draw plate. I use bamboo because I don’t like to make them too obvious and it doesn’t fall apart at this diameter. Once the frame is assembled but before it is raised I drill the four holes from the outside in after pre-marking them with pencil. It’s pretty easy to eyeball the positions and angles. You just need to remember which direction the pattern goes. I insert the treenails dry, trim them close and then paint over them with a dilute white glue wash. A dry-inserted treenail will not swell, so a tighter fit can be made. The glue locks them in place. Always check your choice of trunnels with the final stain you are using. As it is the end grain of the treenail showing, it could look darker than the length of the treenail. Oct. 10, 2011. I went back to the original drafts and incorporated the difference in the bow shape to a copy of the Mylar. I found that there were two frames that would need modification. In attempting to debond those two joints, several of the frames debonded. The end result was most of the fore cants had to be reinstalled. I have given the interior a preliminary fairing of the hawser timbers and the cant lower futtocks. The first picture shows the starboard side faired and the port side left “raw”. The final result is in the last picture. I have also drawn in the location for the sill between cants 3 and 5. Fairing Fore Cants I have mounted a few more cant frames. It is actually beginning to look like a ship! The joints are predrilled for treenails. I will be making the treenail pattern a mirror image on each side. I. e. the aft treenail will be higher than the fore on either ide. More Fore Cants


-
Echo by jml1083 - cross-section
tlevine replied to jml1083's topic in - Build logs for subjects built 1751 - 1800
Looks good. Having attended the first Echo workshop I can assure you that your skills will definitely improve. I agree with Druxey that hand tools can take you a long way but a scroll saw will take you a whole lot less time to get there. I don't know if Greg updated his "bring" list but a few things that were not on the list that were helpful to me were a cutting mat, a no. 11 Exacto, a sanding stick and a small straight edge (and of course your Optivisors!) Enjoy! -
Sept. 28, 2011. I have made the first six fore cant frames. I used the angle gauge on my scroll saw for cutting the angles for the bollard, hawse and cant timbers. I later discovered the gauge is off approx. 1 degree. This resulted in a 2 degree cumulative error which was corrected by changing the angle of the aft end of the bollard timber by 2 degrees. Needless to say I have bought an accurate protractor and am no longer relying on the angle gauge on the saw. I felt this was safer than removing 1 degree on two pieces. Of course, I had already glued and pinned the bollard timbers so this had to be done mounted on the stem. Any internal imperfections will be hidden by further construction. The apparent crossing of cant 3 in the first picture is a result of the camera angle. Because this is such a critical timber, I used hidden brass pins to secure them. Wood treenails were installed externally for a uniform appearance. Fore Cant Author: Dan Vad. I do the 90 degree bevels with my disc sander to the angle on the pattern – also the little step where it sits on the apron. Then I use a sanding board to shape the fore-aft angle. My sanding board is a piece of MDF with a gloss laminate (old shelving) which I’ve cut to the size of a sanding sheet and screwed to a corner of my workbench (from underneath). I glue 120 grit paper to it with spray-on contact cement. I start off with a couple of rough cuts by feel on the edge that will need the most cut off, holding the frame like a pencil. Then I use my adjustable protractor to check how close my angle is, making more cuts and adjusting my grip as needed. As I near the “uncut” edge I check the angle again. Etc. This also works great when finessing the chocks. Sept. 30, 2011. I discovered that the toprail contour for Atalanta is different from the prototype. It is lower fore, the same midships and higher aft. The bowsprit is also at a slightly different angle. Initially I thought that the plans had become distorted in the copying process but after taking several measurements I was convinced there was no error. I also noticed that the fore shape of the stem is different towards the keel. The second and third hawser timbers have been placed. All the hawse holes will be reshaped during the final fairing. In the last picture you can see the temporary spacers placed in the airspace. It always amazes me how something that looks hard is deceptively easy and something that looks easy is actually quite difficult. As an example, the airspaces and hawse holes looked tough to me but were easy. But mounting the hawse timbers square, plumb and at the correct angle is very difficult. I measured across the timbers at the airspace and full breadth lines and am shy be a scale inch. I will make that up in the fourth timber. Hawse timber 2 installed Hawse timber 3 installed

-
This has always been one of my favorite builds to follow. Thank you for taking the time to repost.
-
Thanks for taking the time to repost your exquisite build. There is always something else for me to learn when I review the reposted logs.
-
Robbyn, you are seeing one of the reasons to convert to the dark side of scratch building (or at a minimum, aggressive kit-bashing). Kits almost never include the material required for this approach. We are lucky, however, to have vendors such as HobbyMill or the Lumberyard who can provide sheets of wood to replace the kit supplied materials. Are you single or double planking? If double planking, the thickness is typically 0.5-1.0 mm. Sheet veneer could be used in that case and can be purchased from many sources. When you purchase wood, be sure to get the right species. The "walnut" provided in most kits is too brittle and the grain is too coarse. Check out some of the scratch logs to see the species that are commonly used. Swiss pear, pear, costello boxwood and pau marfin are all tight grained, easily worked with hand tools and are reasonably flexible. Regardless, considering your location, it is either a long drive or mail order.
-
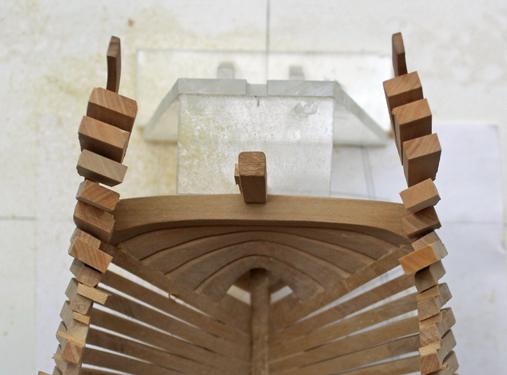
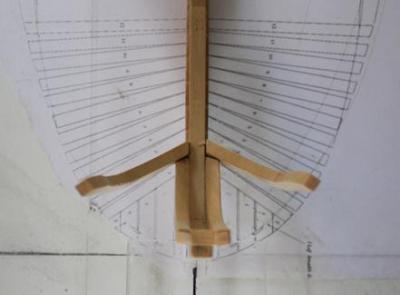
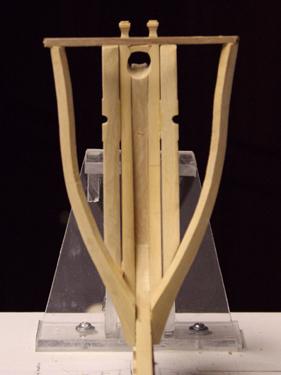
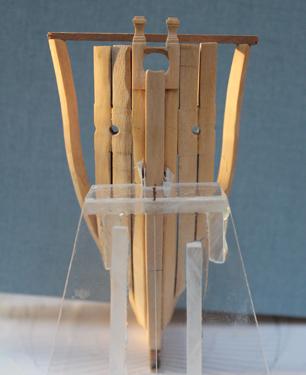
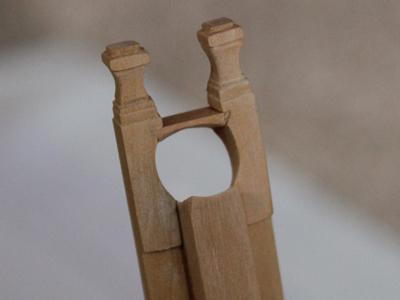
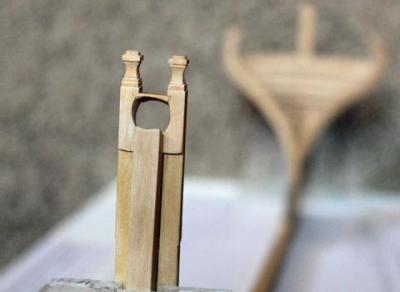
Sept. 18, 2011. The next step is to sand the top of the stem for the bowsprit and make the opening in the bollard timbers through which the bowsprit passes. In TFFM, David demonstrates a surefire way to get the angle correct. The line of the bowsprit is extended to the keel. A brass tube wrapped in sandpaper to achieve the correct diameter of the yard is threaded over a dowel. The dowel is then used to guide the moveable brass tube and sand the opening at the correct angle and diameter. The mortise for the chock between the bollard timbers has also been made. The pictures show the fore and aft faces of the timber. Hopefully, the difference in the mortise size is visible (it is larger aft). The angle of the bowsprit can also be appreciated. The timbers still need finish sanding. Bowsprit Opening Fore and Aft The bollard timbers are now glued to the stem. I put two pins into the stem for added strength. Bollard timbers attached to stem Author Dan Vad. Did you run the sanding tube back through after fitting the bollard timbers? It may need a small touch-up but I would wait until after you glue the chock in. That definitely will need rounding off. Sept. 26, 2011. I made the chock for the bollard timbers and then added the groove for the top of the bowsprit off the ship. That minimized the risk of damaging the bollard timbers. Once installed, I tweeked the curve with an 11-blade. Only took me two tries! In the second picture you can see the slight step-off for the air space between the bollard and the second hawse timber. Chock

-
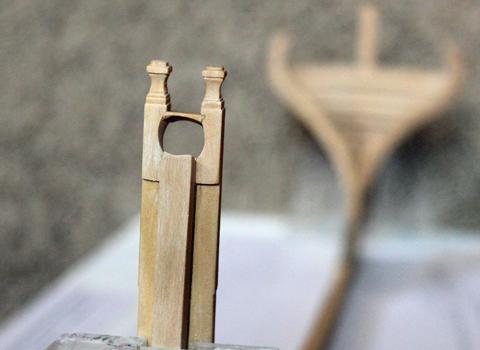
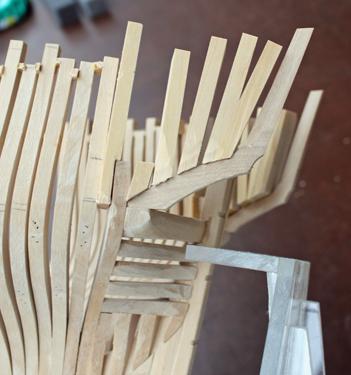
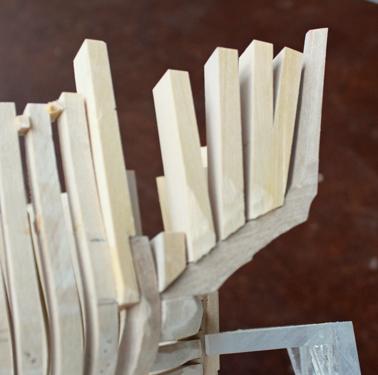
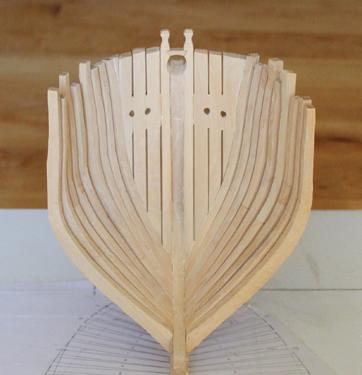
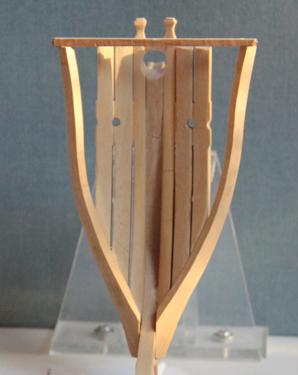
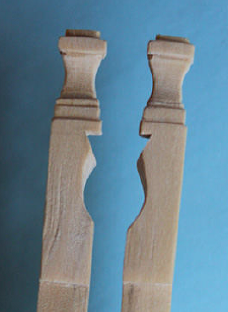
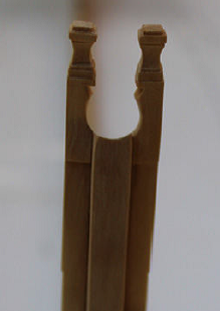
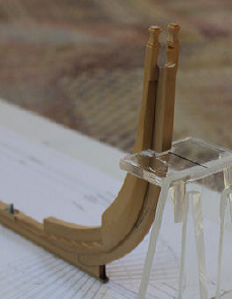
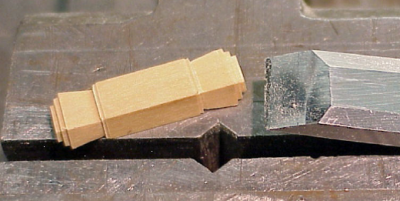
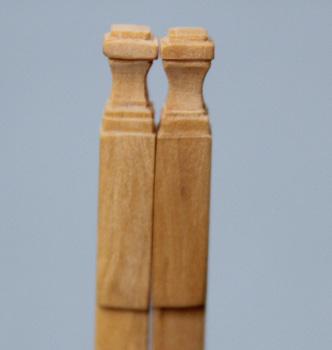
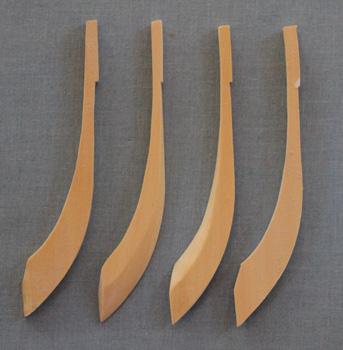
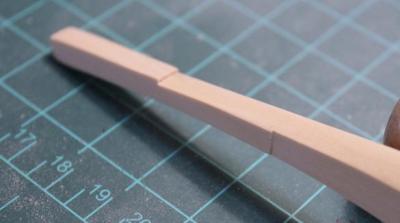
Author: druxey. Slow and steady is the way for this part of framing. Check frequently against the plan on the baseboard (it is marked out there, isn’t it?) and a square. Also check that each timber sits at the correct height. Author: dvm27. The angle of the air space should echo the air hole but it’s not crucial as the inside face virtually disappears once the adjoining timbers are added. What is crucial is to make sure the upper edges of the air space line up on each side. Also, the knighthead shaping is crucial to the appearance of the model. But you do have the option of shaping it off the model (as I did with the timberheads) and adding them as separate pieces. The plankshear will cover the joint. The first photo below shows my original knightheads shaped directly on the bollard timbers. Over time, they lost their crispness through repeated trauma. The second photo shows the replacements added years later. Greg. Original Knightheads Replaced Knightheads Faces machined on the Preac saw Sept. 16, 2001. I plan on shaping the knightheads now but rather expect that they will be sawn off at a later date and redone as you did, Greg. The knighthead/bollard timber tops are done. It took 2 ½ hours for the first one and 1 ½ hour for the other. I compared the knightheads shown on the plan for Atalanta with the Mylar. This show a beveled cut down from the top, as seen in Greg’s photos. Atalanta had a curved waist instead, as seen in the pictures. The hardest part was getting the two timbers to look like mirror images of each other. I did the work with a combination of #11 blades, Swiss needle files and sandpaper. The finished size of the timber tip is 0.2 x 0.2 x 0.45 inches. Knighthead Author: Dan Vad. The good news is that all the other timberheads have an easier design.


-
Sept. 12, 2011. The treenails are hard to see but there are two in the foot of the frame and fashion piece and in the filling frames. The aft cant is also treenailed into each transom. The chock is treenailed into both futtocks using a diagonal pattern. I wet the cant frame to help them stand out a bit for the photo. The pins holding the transoms in place have been removed and treenails inserted. I decided I wanted more strength for the wing transom insertion and so countersunk the brass pins. The pictures were taken before that was done. Aft Cant Installed Author: Dan Vad. I suggest you cut the Hawse Timbers with a bit more overhang on the top timber line than the templates are drawn to. I cut mine exactly to the templates and came up fractionally short. Sept. 20, 2011. The bollard timber is another one of those complex pieces that, when finished, does not have a single face in the same plan that it was cut out in. The first step is to cut the foot at a 34.5o angle. The rest of the piece is cut normally. I made three sets. The first set I made after scaling the templates too small. On the second set I did not allow myself enough tolerance and when placed on the sip the rabbet would not have had a graceful curve coming up from the keel. Once cut, the medial face needs to be modified so that it fits snug against the stem. Then the lateral face needs to be reshaped so that the thickness of the two bollard timbers and the stem is a consistent thickness. In the pictures you can see the gap before reshaping the timber. The fore and aft faces not need to be tapered, leaving a 1mm ledge on the fore face for later fairing. The picture shows the discarded and the shaped timbers to help illustrate the amount of shaping required. Bollard Bollard 4 Bollard 1 The airspace is cut next. This gap allows ventilation between the hawse timbers and is 0.015” deep. I cut this with a chisel and sanded it with 400 grit. I deliberately cut is too short because I am uncertain of the exact angle it needs to be. It is supposed to be at the same angle as the hawse hole. I will finalize and bevel the edge when the next timber is ready to be installed. Bollard 5 Bollard 6 Once I had the final shape of the bollard timber I traced it on to the stem and completed the rabbet. This stops at the lower edge of the knighthead.


-
Sept 11, 2011. I have fitted the fashion pieces and the filling frames between them and the stern timber. They have all been left “fat” for final fairing later. I found it easiest to remove the aft acrylic support for access to the area. I must admit I thought more than once how I wish I was building upside down (a la Hahn). I hope to get the aft cant frames installed today. Fashion Pieces Filling Timbers Sept. 12, 2011 I have completed and mounted my aft cant frames. All told, it took about six hours to cut shape, chock, mount and treenail both of the frames. I have mentioned that I am a slow builder. I am happy with the fit of the chock. I took the keel assembly off the building board to make it easier to clamp the frames to the other members. Aft Cant Frame Aft Cant Frame Installed
-
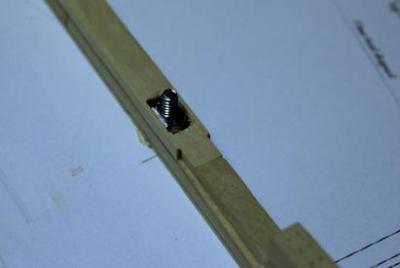
Sept. 5, 2011. The captive nuts are in place in the rising wood and keel. I have decided to use single bolt pedestals. The bolts are placed according to the plans. Since the aft bolt goes through the fore part of the deadwood, a longer bolt was necessary. This will be cut off later. The Plexiglass vertical supports have been made and secured to the building board. The stem and stern slots will be lined with adhesive-backed felt. Keel Bolt Base Author Dan Vad: I see you haven’t glued you lower three transoms on yet – good move. If you make up two of the right angle cant frame jugs now you’ll be able to use that to get the exact lines for trimming the ends of them where they butt onto the fashion pieces and aft cant frames. They are a real “bear” to trim up after they are glued on. Sept. 6, 2011. Danny, I plan on predrilling the filler transoms and pinning them but they will not see glue until everything is fair. On Atalanta the fashion pieces appear to end at the lower transom. The Fly is like the Vulture with the fashion pieces extending to the top filler transom. Sept. 7, 2011. The more I looked at the transoms, the less happy I became. This is my (hopefully) final stab at them. In my previous efforts I was unaware that the CD that accompanies the Mylar (containing the frame outlines) also contained plans for the transoms and fashion piece. The first set of filler transoms were made based on my interpretation of the Atalanta plans. The second set had the benefit of David’s drawings to follow. I was pleased to discover that there was not a tremendous difference between the two sets…just enough that I am glad that I remade them. They have been temporarily pinned in place. Transoms

-
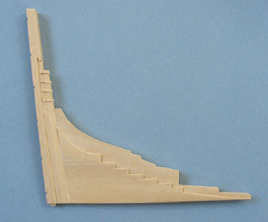
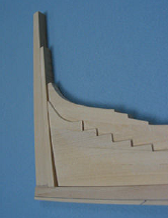
Sept. 5, 2011. The wing transom is roughly shaped and pinned in place. Nothing will be glued until the base supports are made. You can see the aft rabbet extending above the top of the wing transom. Wing Transom The transoms were difficult for me and I remade each one a few times until I was happy with the result. What I finally figured out was “bigger is better”. You can always make them smaller. The photos illustrate that concept. Although they look sloppy, there is sufficient extra wood to allow me to fair them up later with the aft cant frames. They are only press fit at this point. The last pictures shows them after they have been trimmed up a bit. Transoms
-
August 29, 2011. I have started the rabbet. TFFM suggests using a small v-gouge to shape the rabbet. I don’t own one so my approach was a little different. First, I mark out the lower edge of the rabbet (3” from the top of the keel). Then I draw a line to represent the deepest part of the rabbet and use an 11-blade to score this line. I use small chisel bites to bevel down to the score and finish up the bottom of the rabbet. Then I pare off ribbons of wood on the upper part of the rabbet until I get the right depth and angle. The share of the rabbet changes throughout its course. L-shaped at the deadwood, V-shaped in the mid-portion and then a wide V at the stem. I have not decided whether to put in the stem rabbet now or wait until the hawser timbers are shaped. I fayed the deadwood into the rabbet but only minimally trimmed the lower apron. I will leave that until the fore cants are in place. Keel with Rabbet Deadwood Rabbet I have decided to leave the stem rabbet until later. It will be easier for me to match the rabbet to any irregularities of the hawser assembly rather than the other way around. The next challenge is the wing transom.

-
August 28, 2011. The sternpost assembly is finished. The easiest part is cutting the notches for the transoms. I’m glad that I have Greg’s book (Volume 3 TFFM) as his picture sequence helped me out quite a bit. The notches have been cut for the pintle straps. Stern Post Rabbet The deadwood has been glued to the stem piece. After letting it dry I started fairing the deadwood into the inner stem. Then, I also slightly recut the bearding line above the stepping line to give it a smoother curve. Last, I added a tenon to the stern post and cut a mortise into the keel. A little more reining of the deadwood is necessary but I am going to wait until the frames are installed to get the correct shape.

-
August 22, 2011. The next step was to decrease the thickness of the deadwood as it approaches the keel and the inner post. This is supposed to be a concave shape but I misread it and made it convex initially. Since it is a lot easier to take off more wood than put it back on, there was no harm done. The first picture shows it done wrong and the second one shows the correct shape. With the unshaped inner post in position, the amount of taper is more evident. Convex Deadwood (Wrong) Concave Deadwood (Correct)
-
August 22, 2011. Work continues on the stern deadwood. I cut out the stern post and the inner post now to make sure everything lined up correctly. The stepping line was put in and the thickness above the stepping line was decreased to 12”.