


garyshipwright
-
Posts
901 -
Joined
-
Last visited
Content Type
Profiles
Forums
Gallery
Events
Posts posted by garyshipwright
-
-
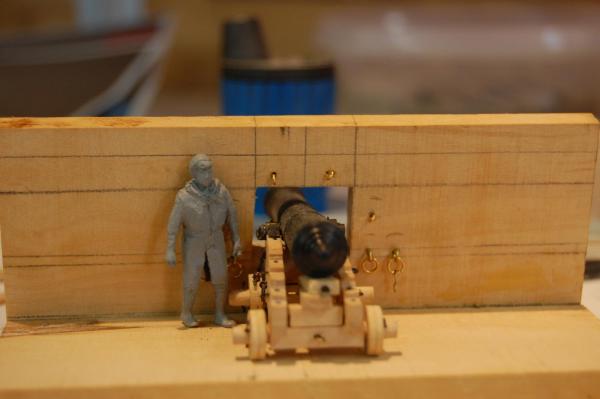
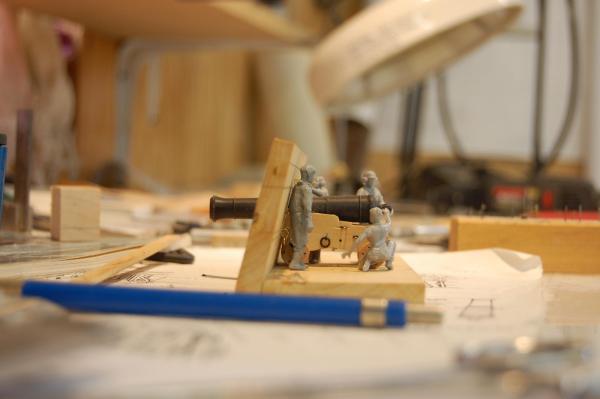
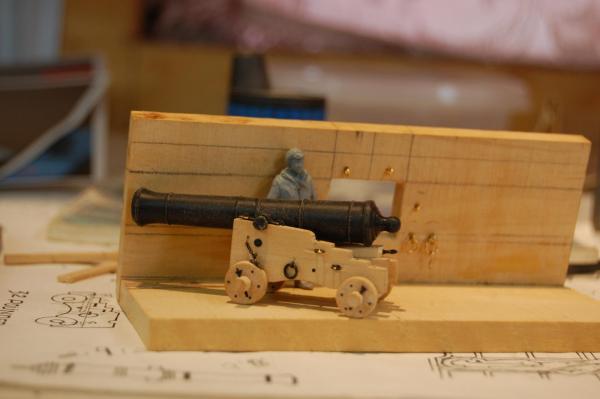
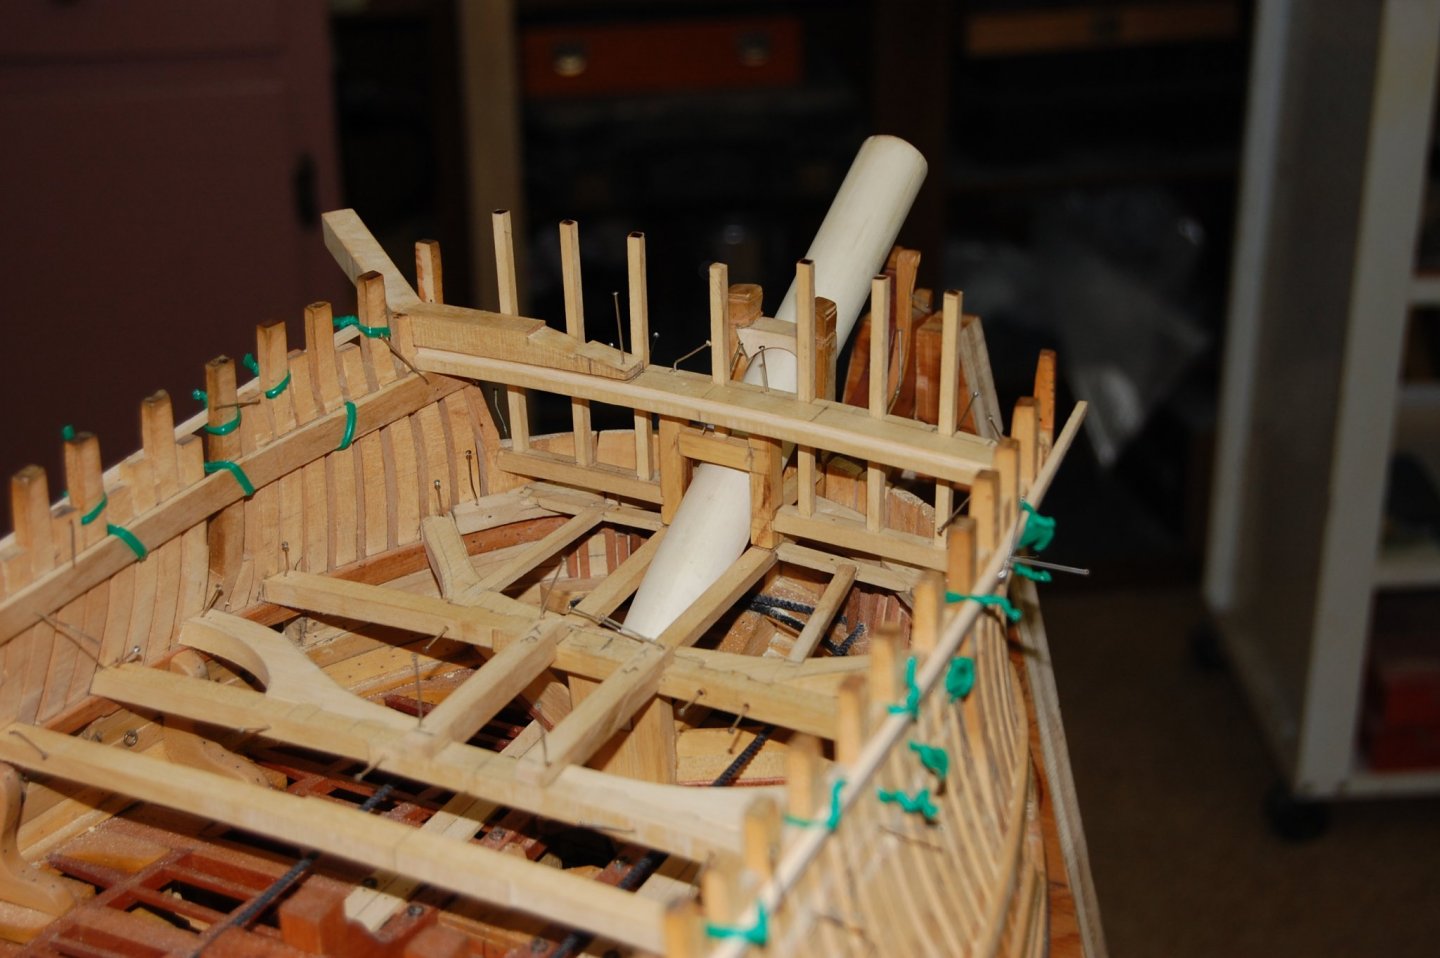
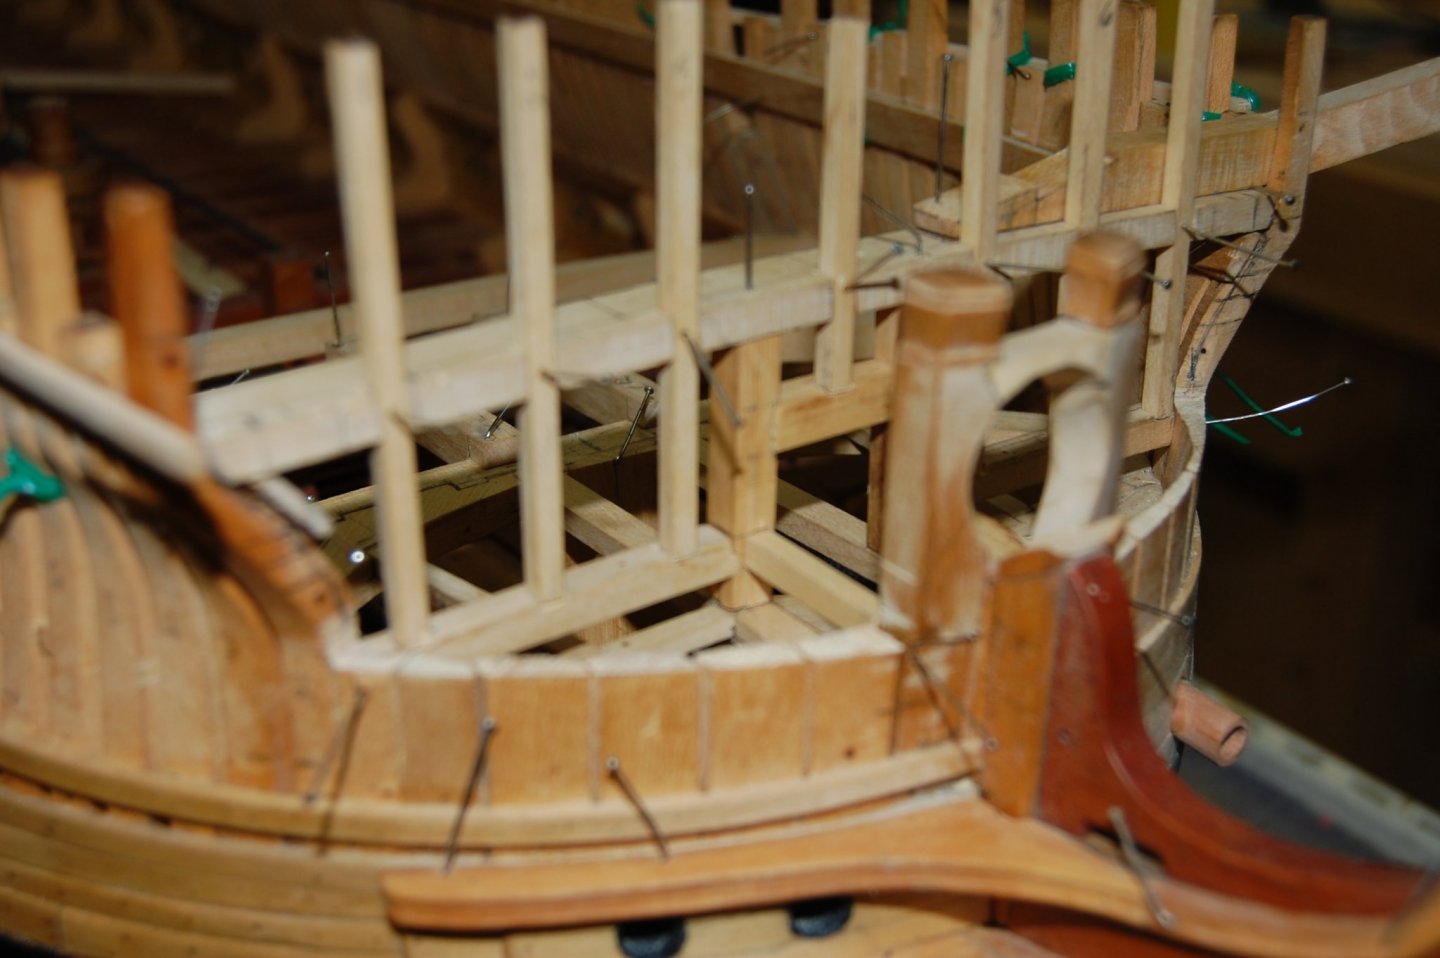
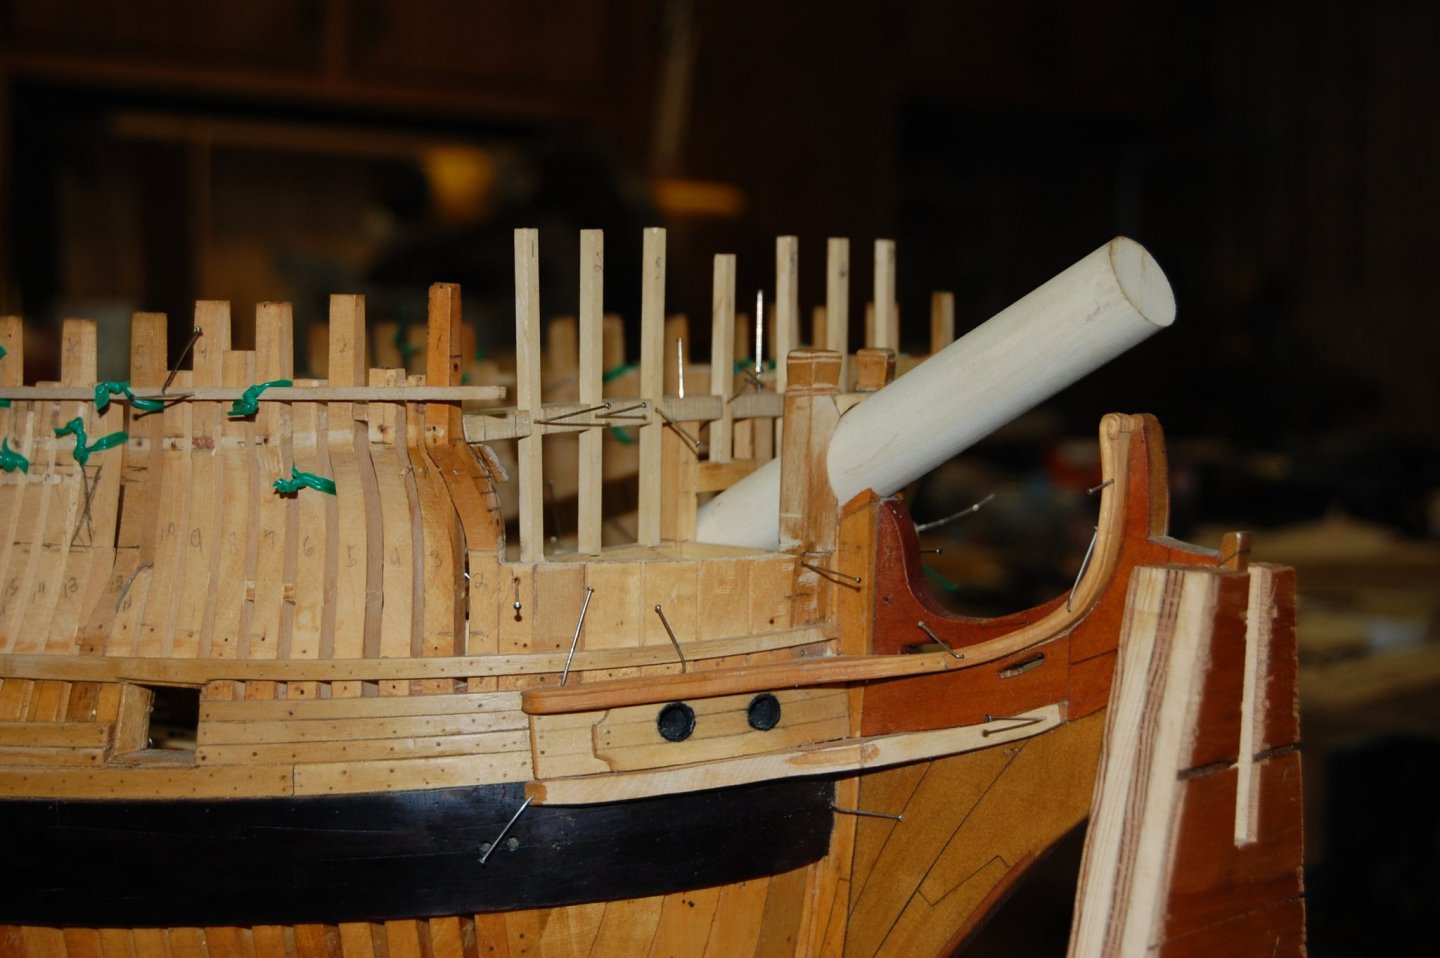
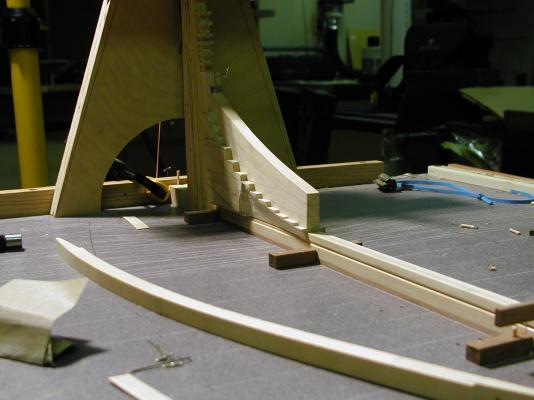
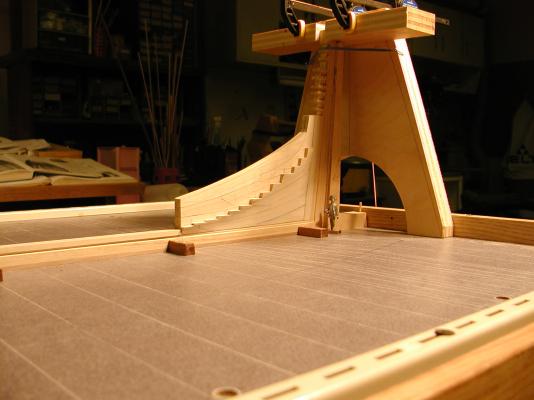
Thanks guy's. Just to let you know that Montagu isbeing worked on here is some pictures out of sync with the rest of the build photos,showing the build up of her 32 pound gun. Am in the research phase of figuring out the sizes of every thing that fits with the gun. It does seem that not every one agree's on the sizes of the fittings that fits with this type of gun. One item that I have been looking for and just a matter of time before I find it, is the size of the hooks that the block and tackle used. Just like the blocks, some say 6 inch blocks and other say 8 inch blocks, which is probably what I go with. Any way here is some photo of how the cannon looks minus the rigging which as soon as I get the right type of end mill to make the blocks, they will be rigged to the cannons. One thing is for sure, there sure is a lot of parts and pieces to them. Gary
- fatih79, freewheelinguy, harvey1847 and 2 others
-
 5
5
-
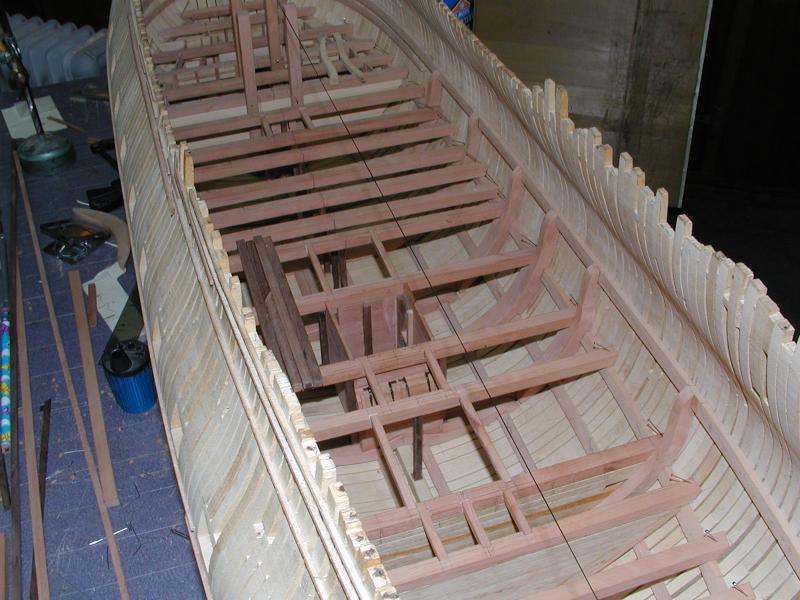
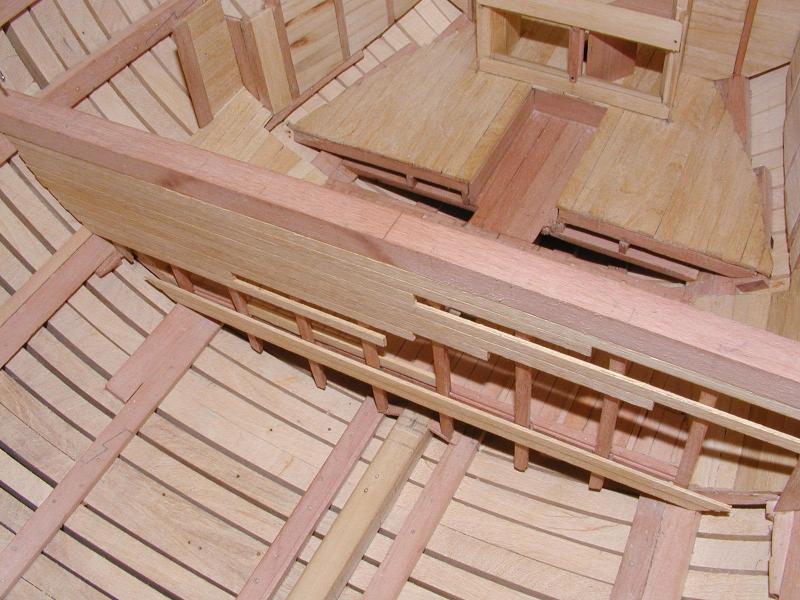
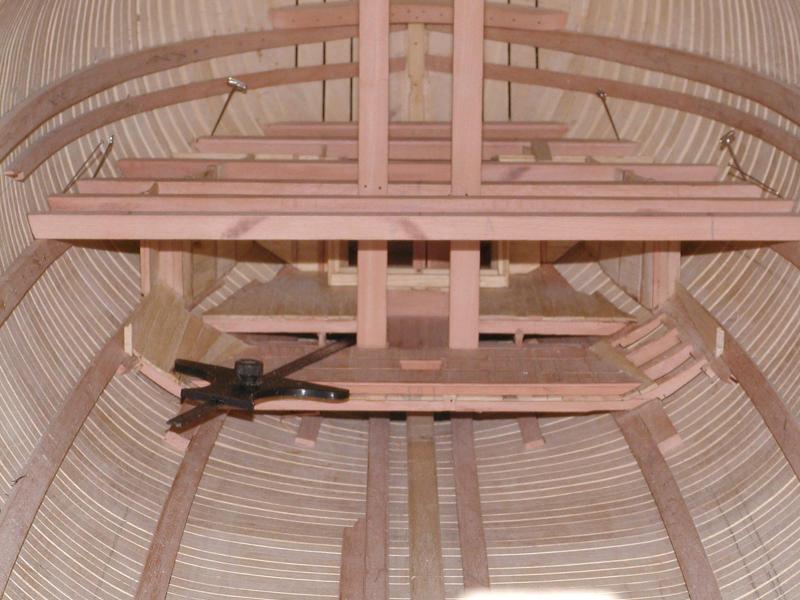
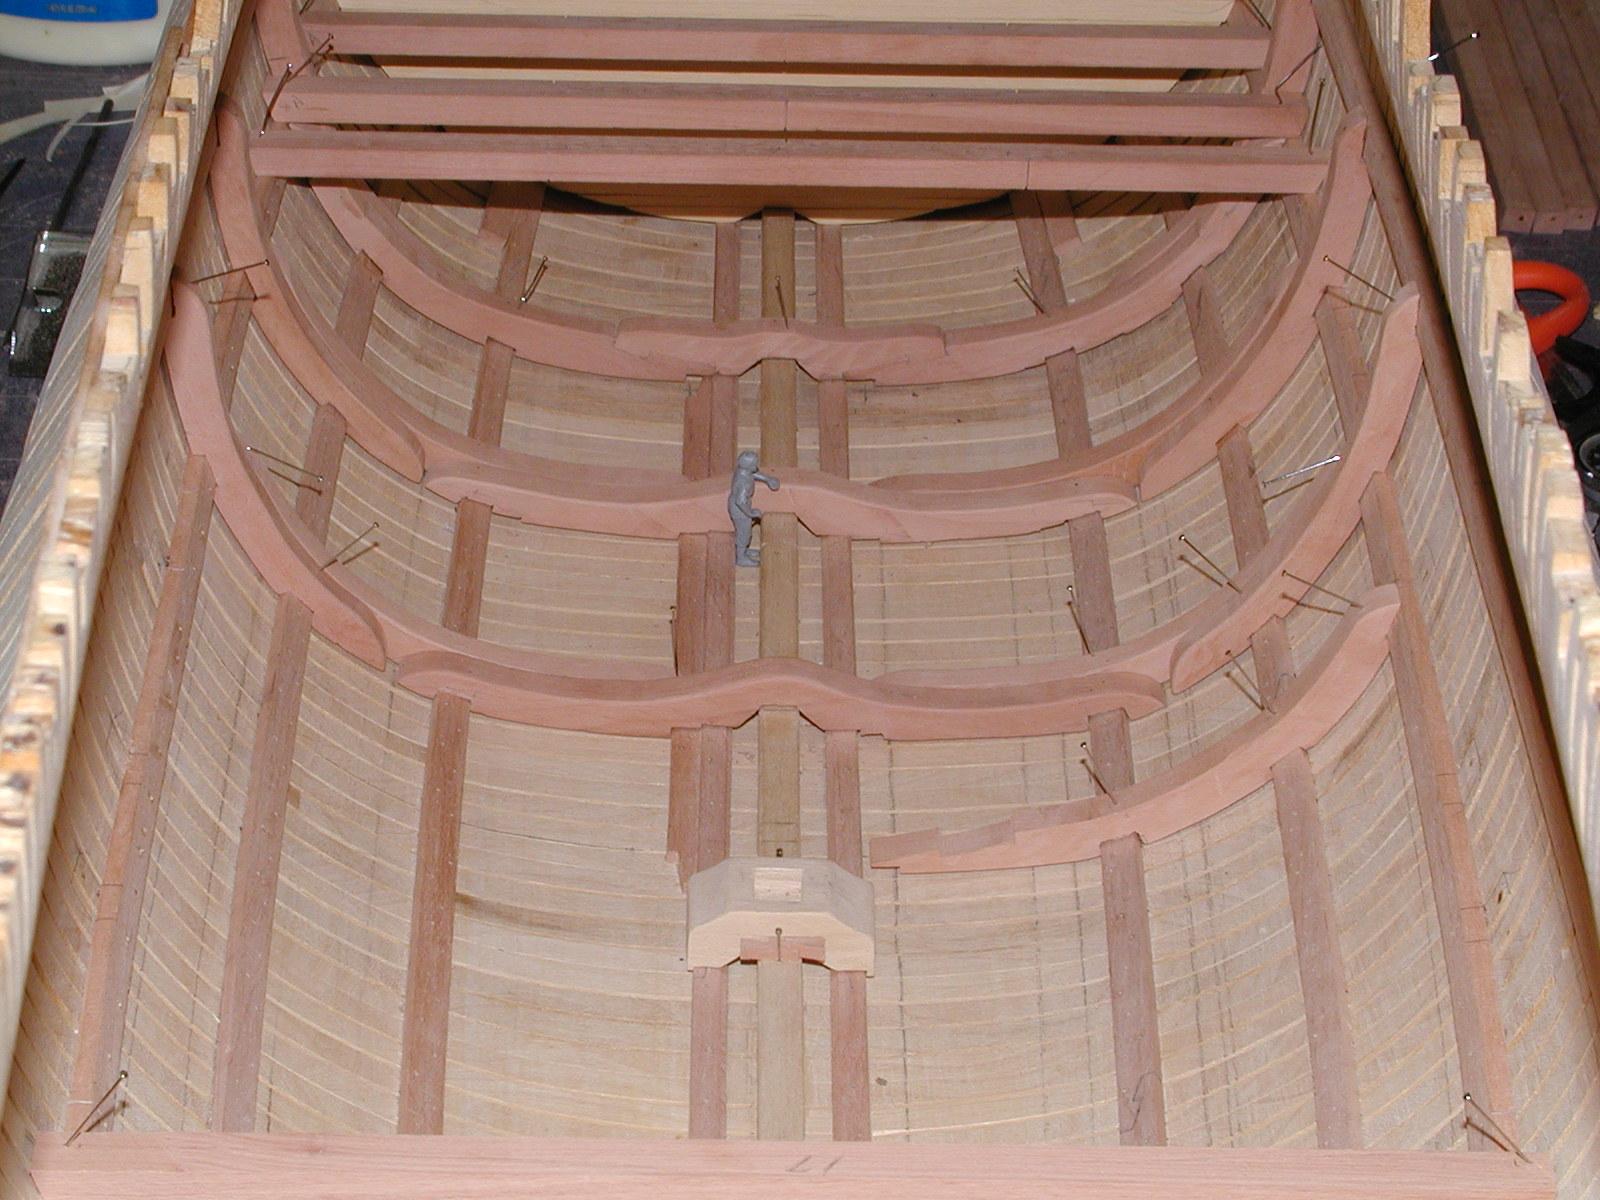
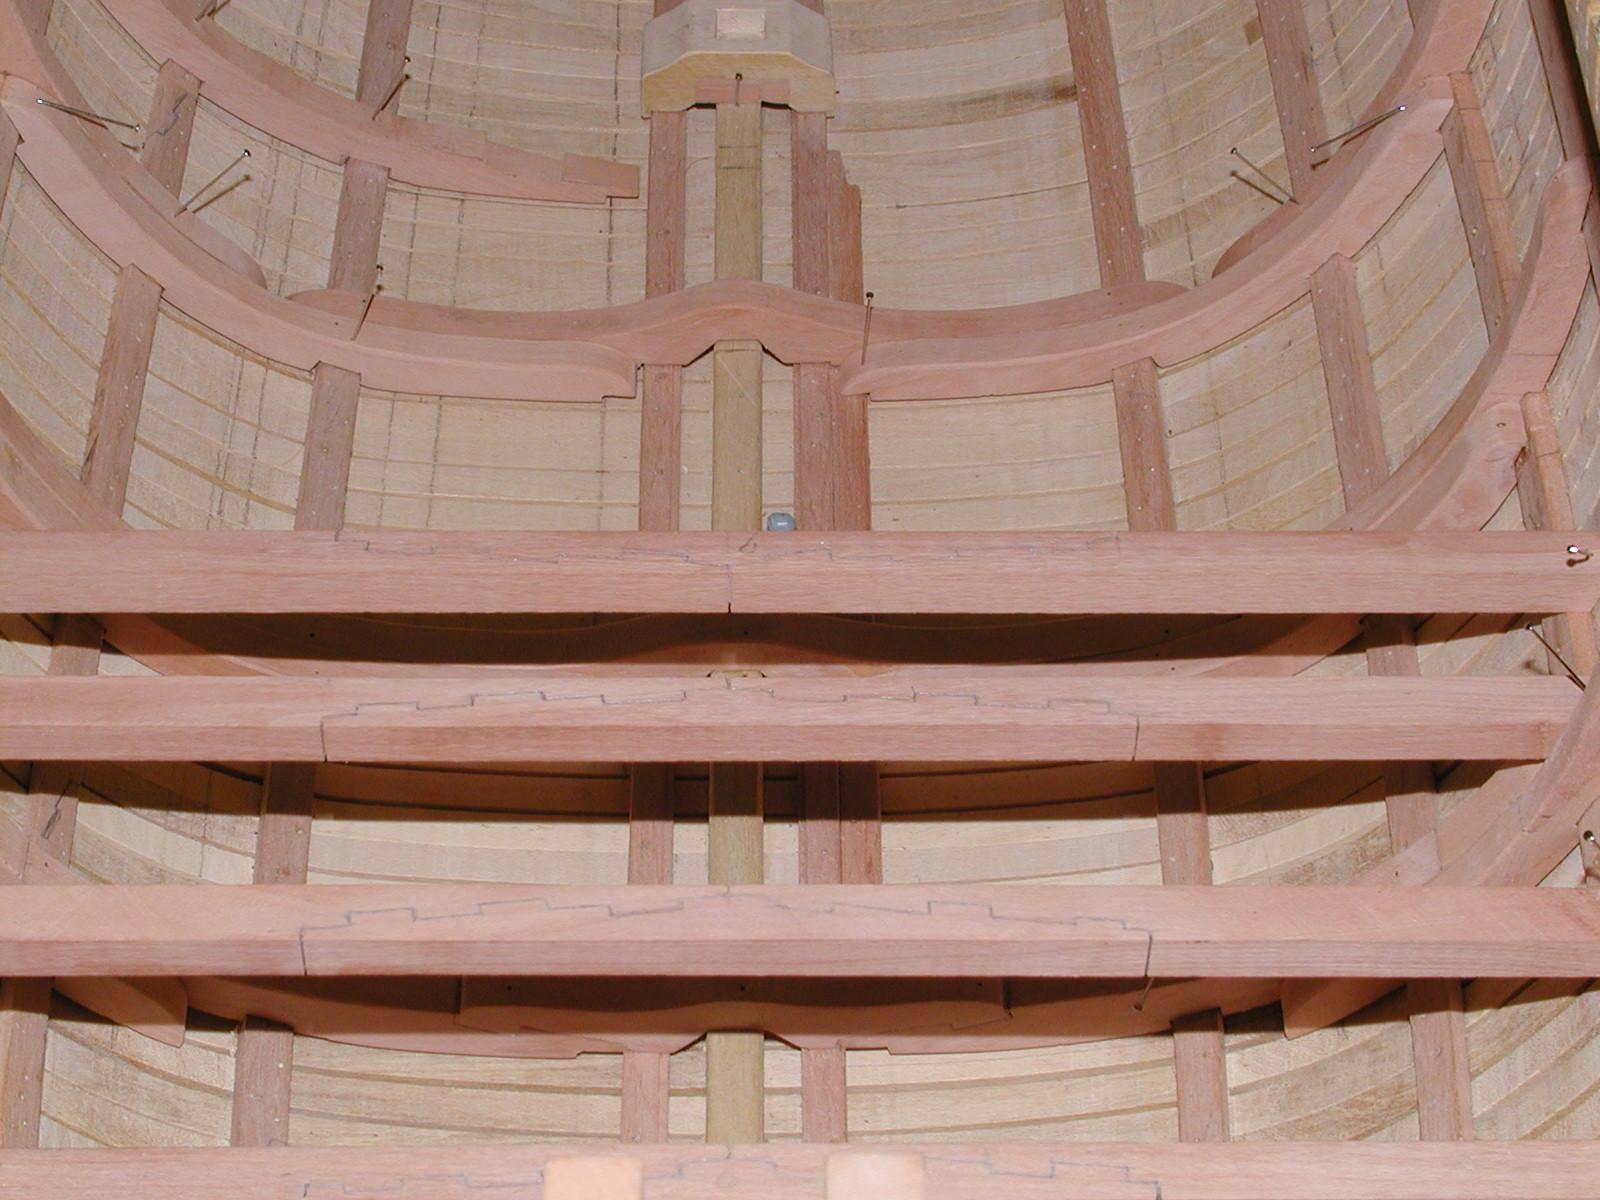
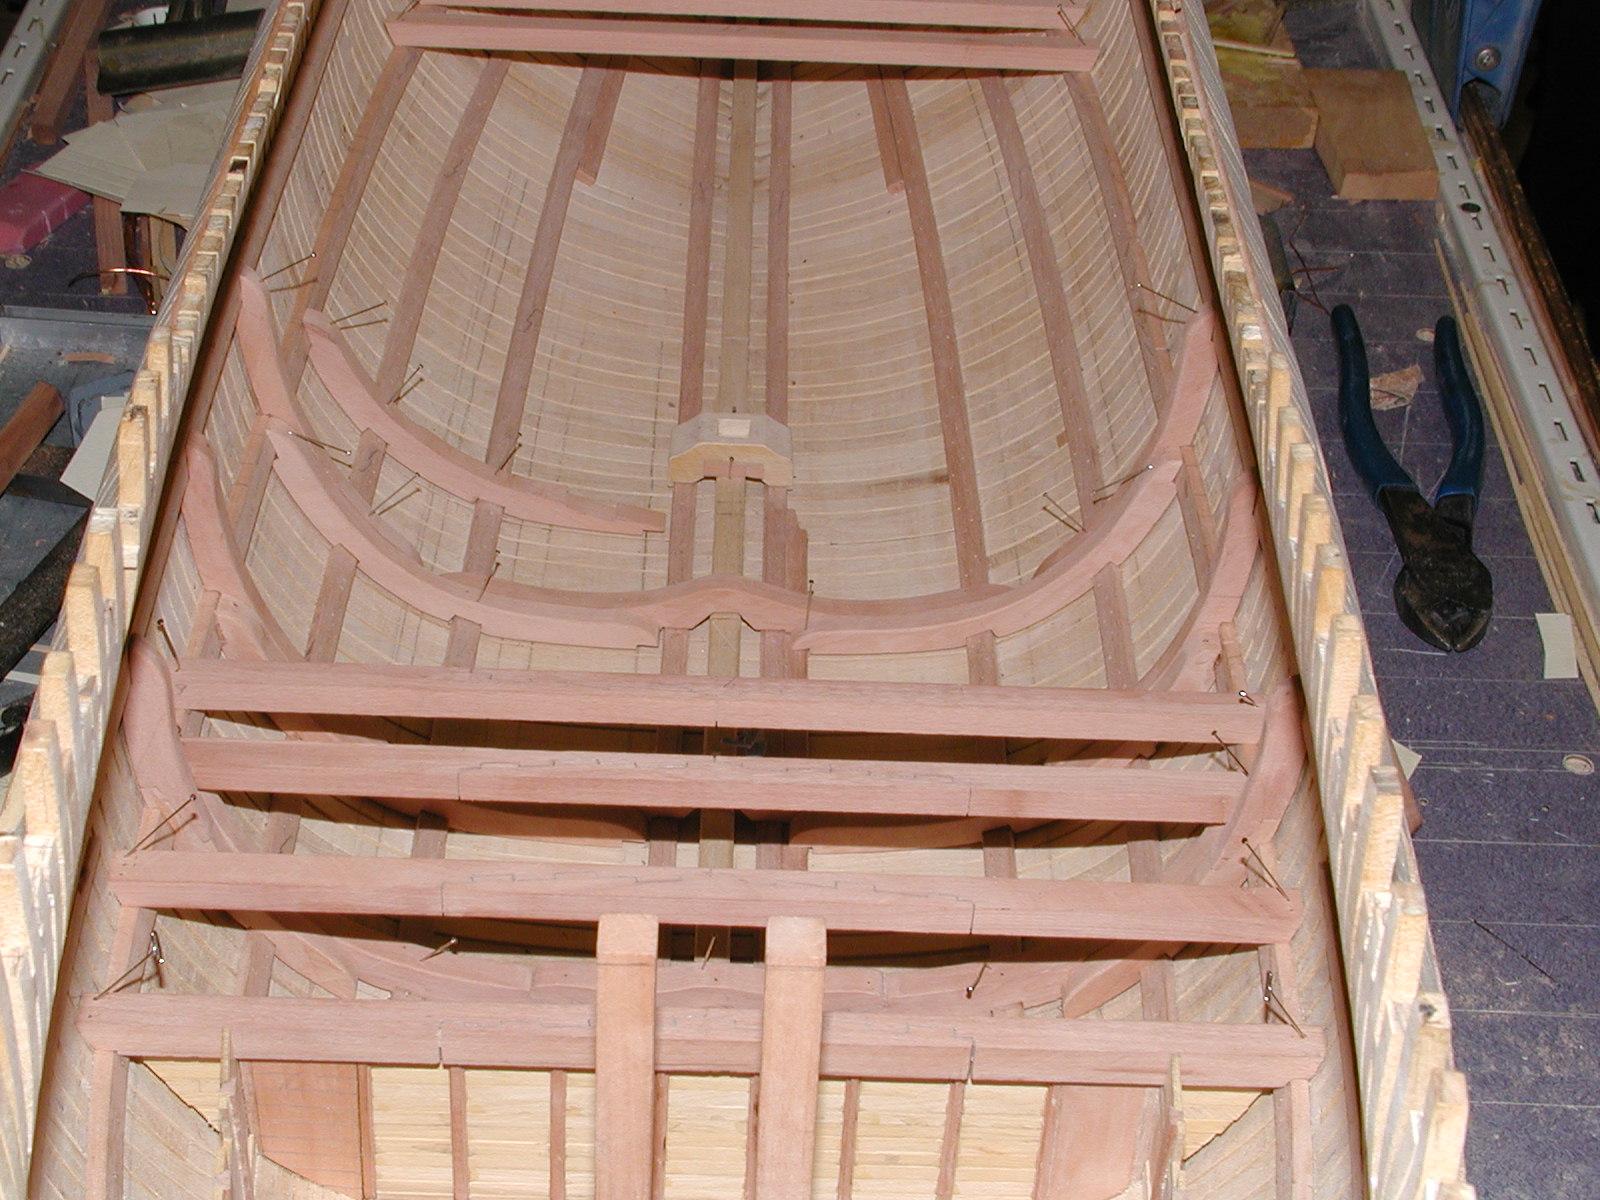
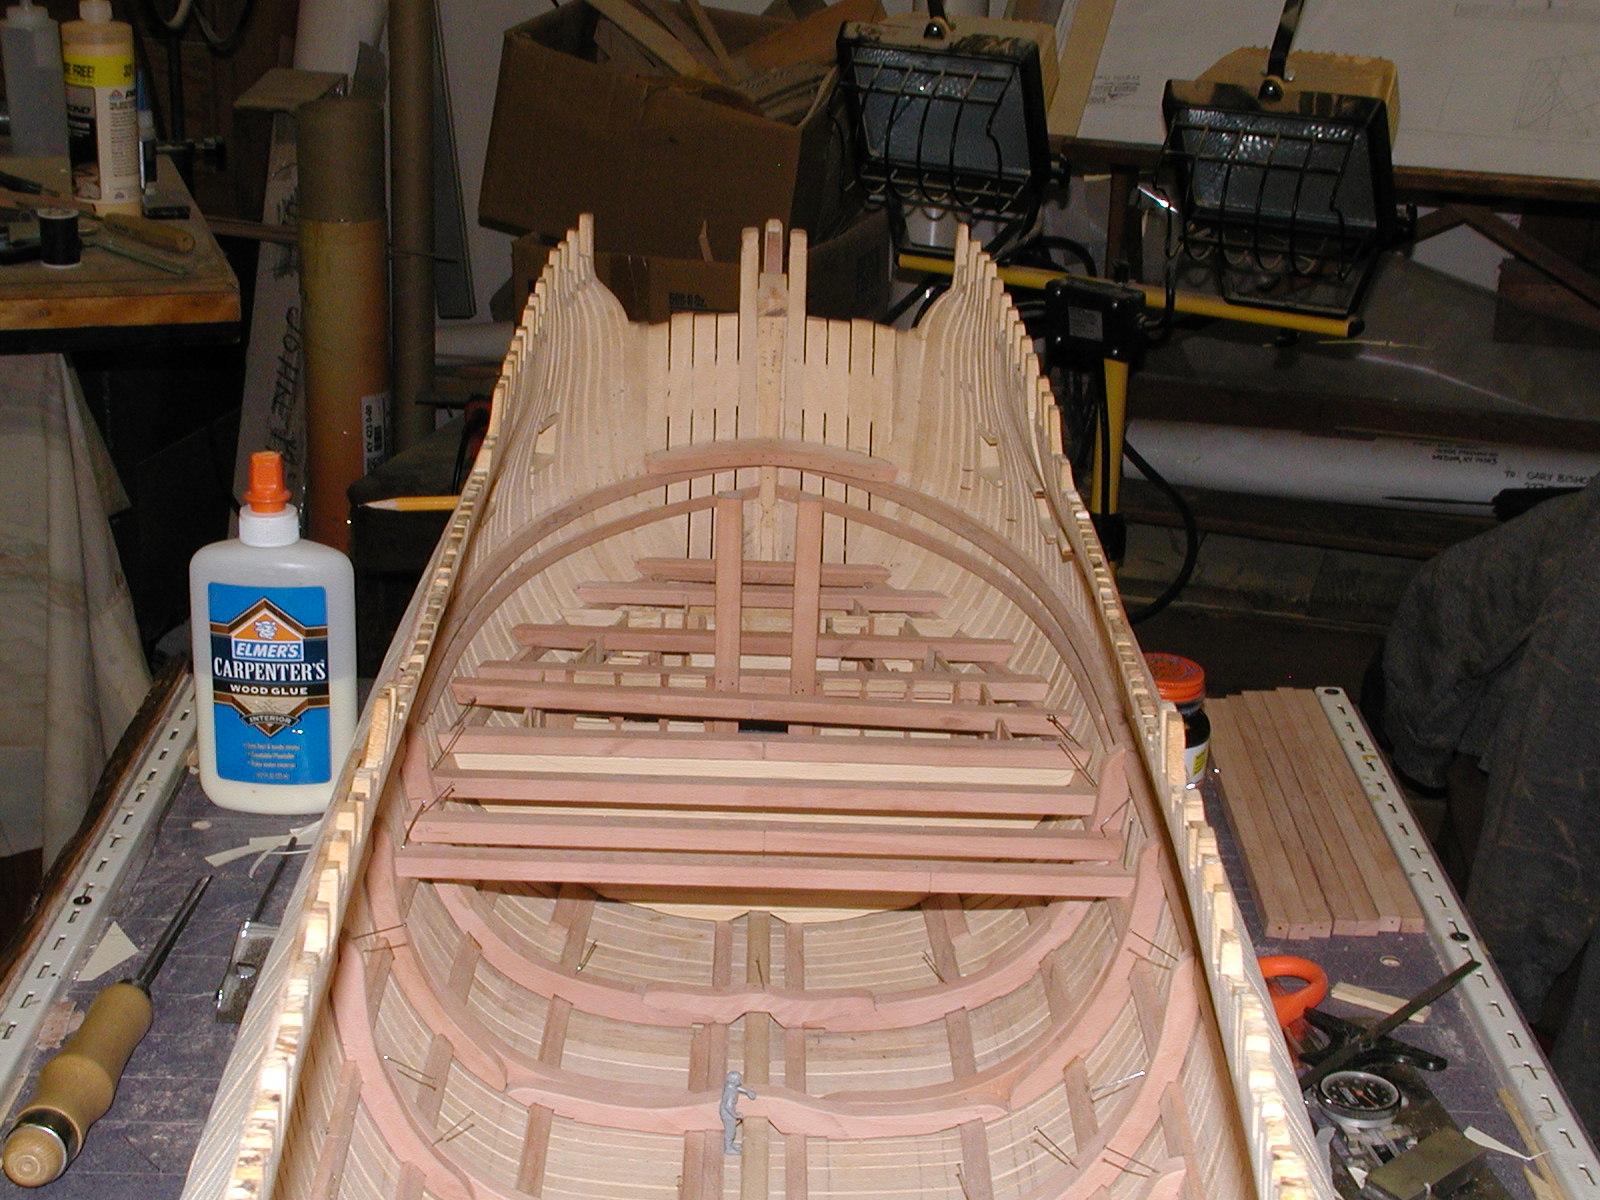
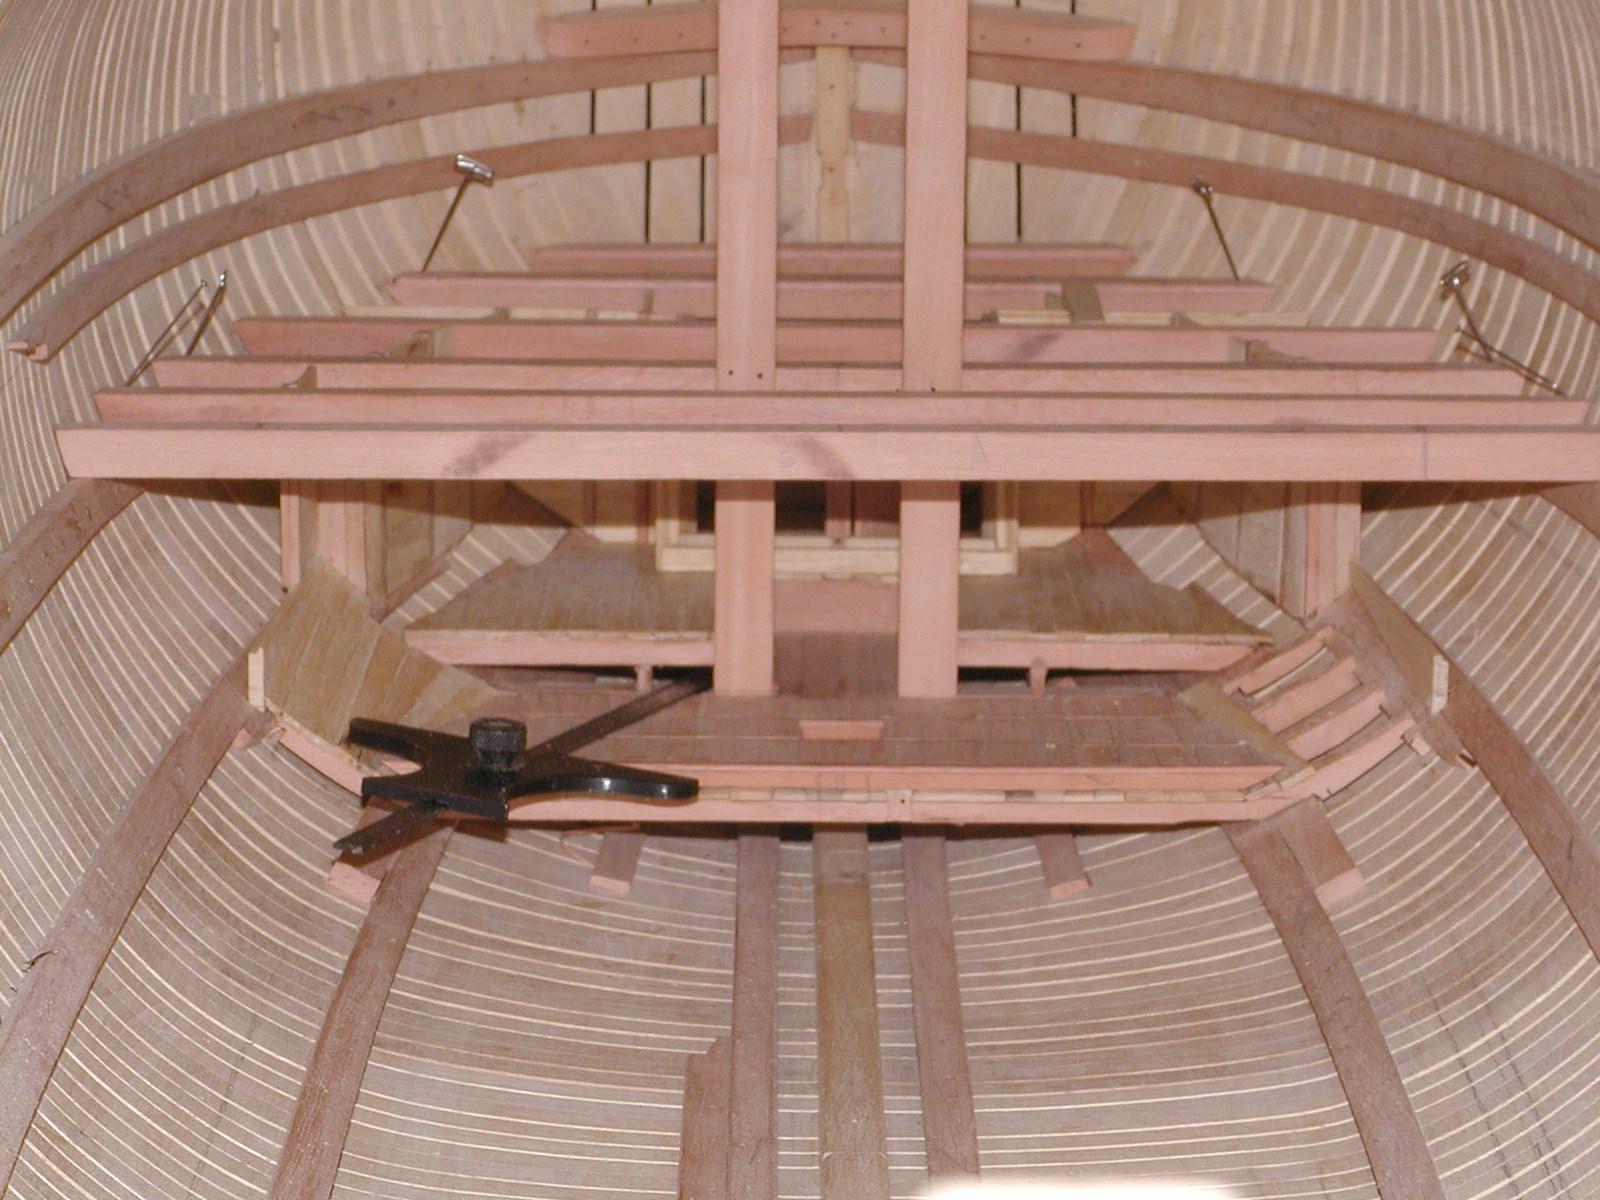
Hi Guys. Another update for you and this time as far back as we can go on the orlop, but has more to do with strengthen the transom's more then the Orlop deck. Some call them sleeper beams and Goodwin call's them transom knee's, which you can see on page 108 in his book Sailing Man of War,1650-1850.In the photo's you will also see the last beam of the gun deck along with knee's for the deck transom and the knees for the last deck beams. Most 3rd rates had three of them per side. Hope you enjoy the photo's folks.

-
Thanks guys. There is a couple of places around here that's up for sell Clipper. At the moment the closes ship modeler lives about two hours away. Hopping maybe just maybe I can get to the NRG get together this year but will have to wait and see at the moment.
Thanks Robin, I also like Ed T's build log. He has given me some great ideals that has help me with some area's that I have come across.
Thanks Ed, but does seem that you are a little on the nice side but do enjoy your build very very much. Also look fwd to your next book when it comes out.
Hi Guy. Your very welcome sir and if there are any other pleaces that you wish to see, just let me know sir.
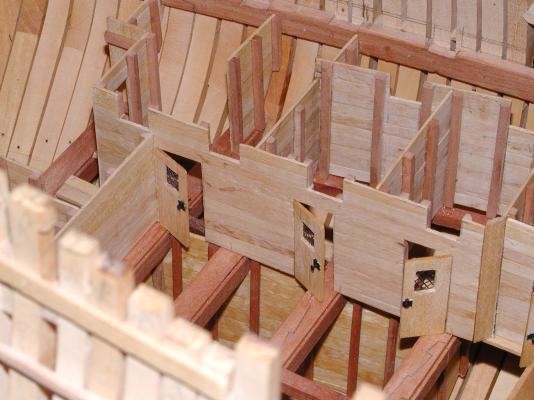
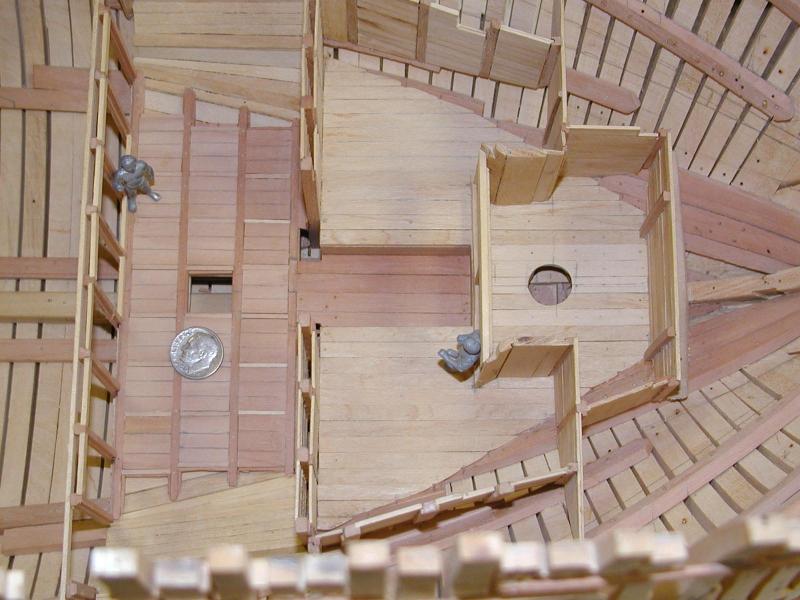
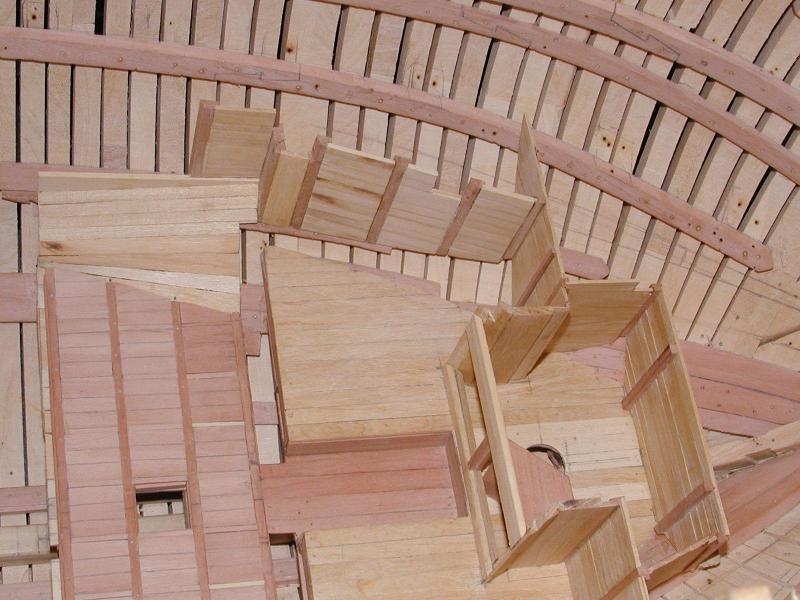
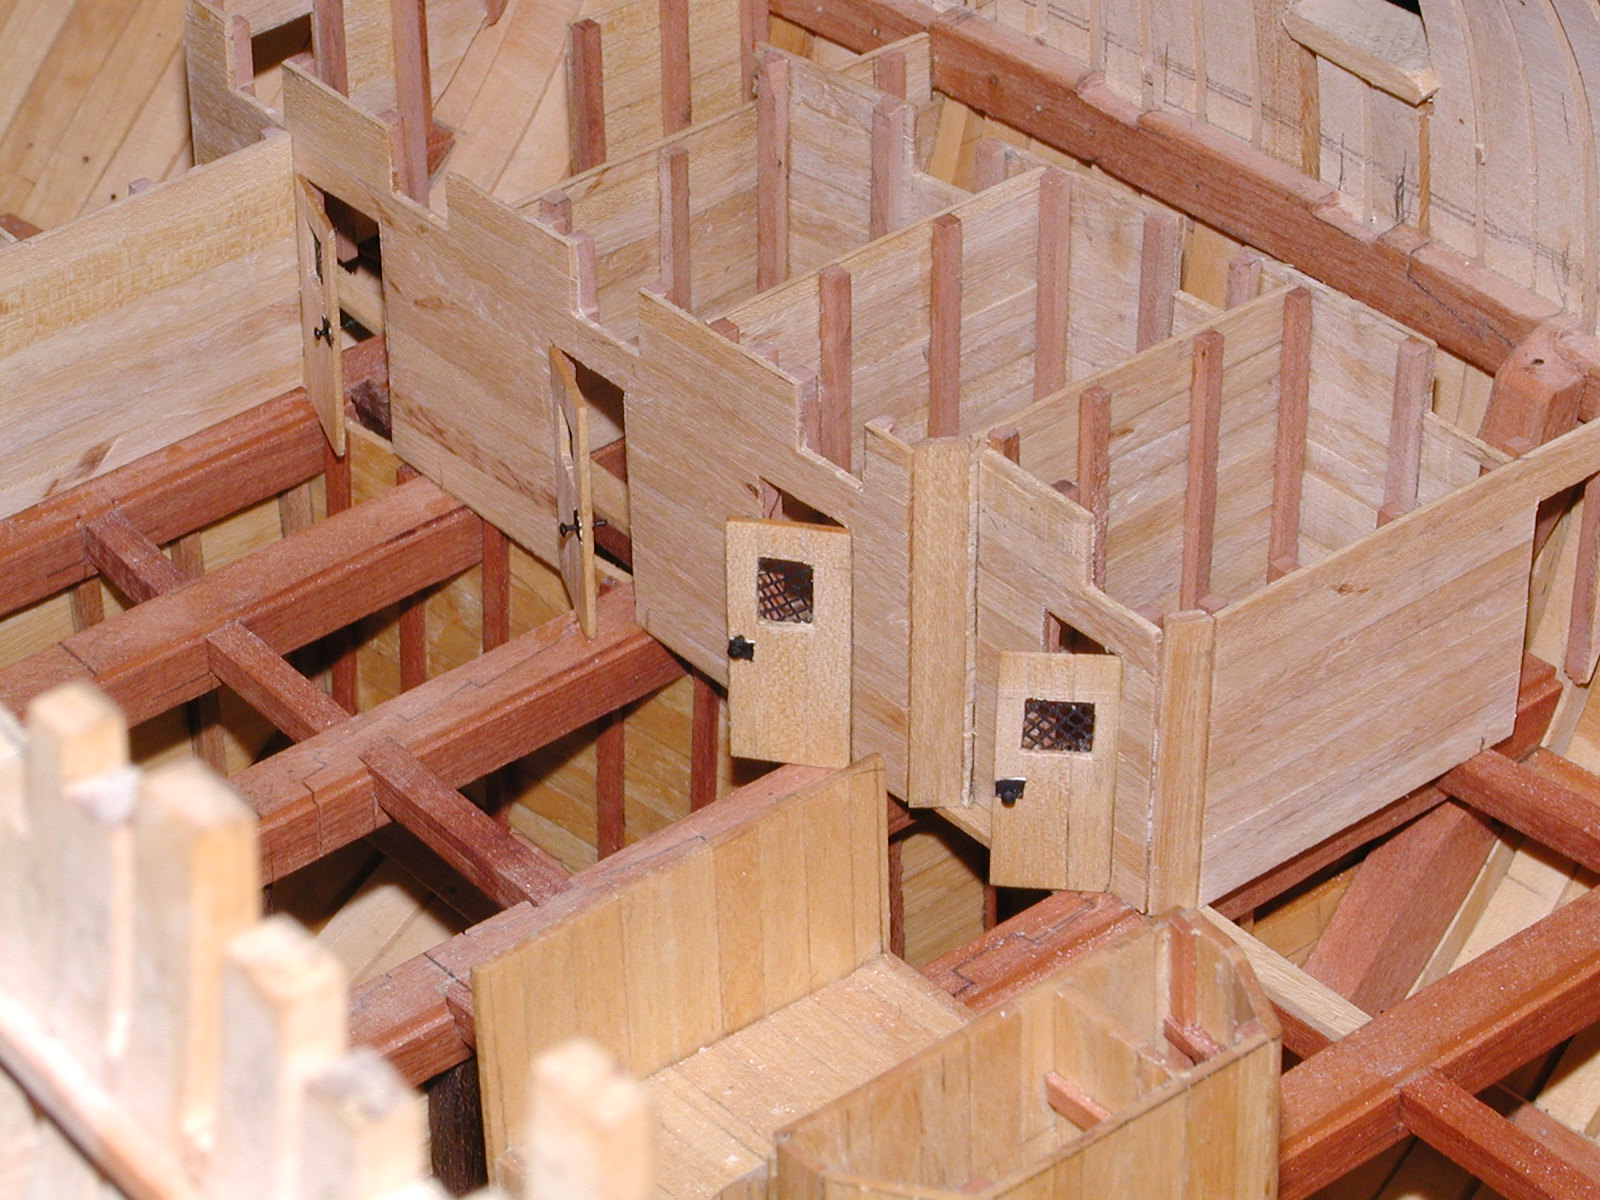
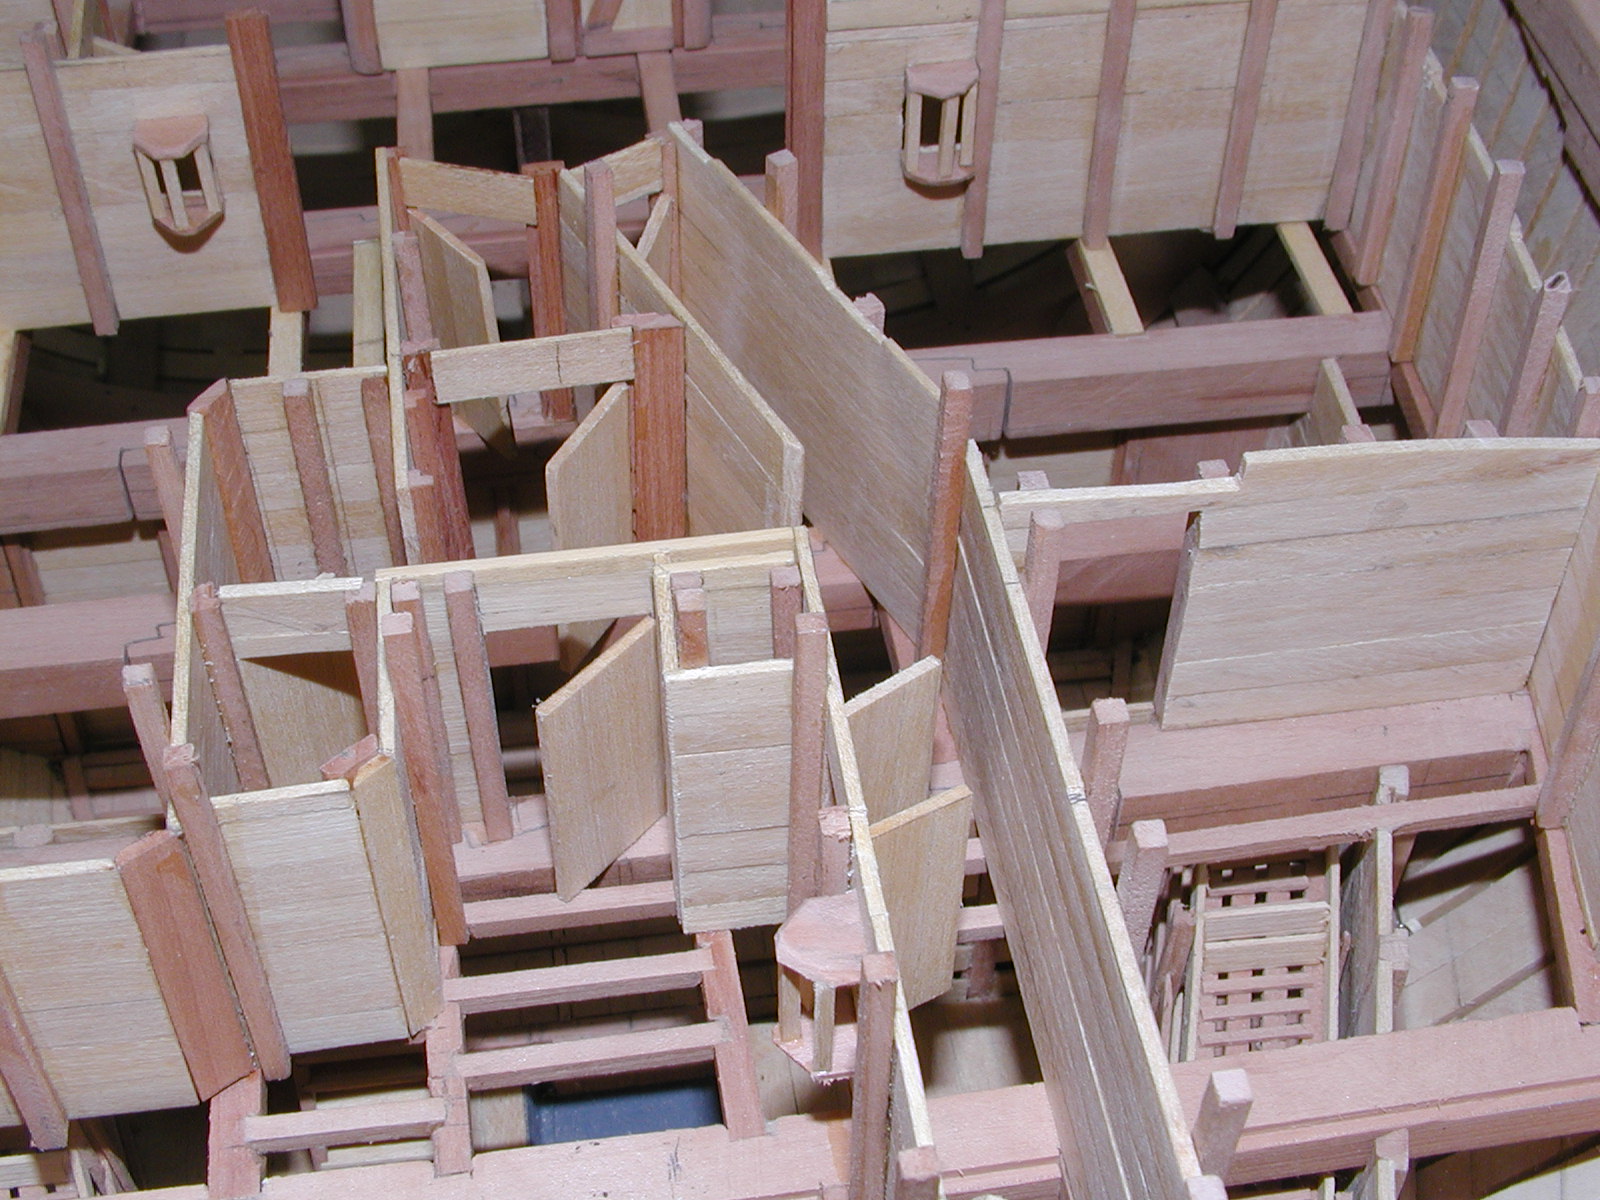
To show more on her Orlop deck going aft, this shows the last of the store rooms on this deck. One thing that I did detail on these store rooms was the windows and the door knobs. One can just feel how hot it got down here with only the gratings suppling air flow. Reminds me of being in the attic running circuts for some ones house.


-
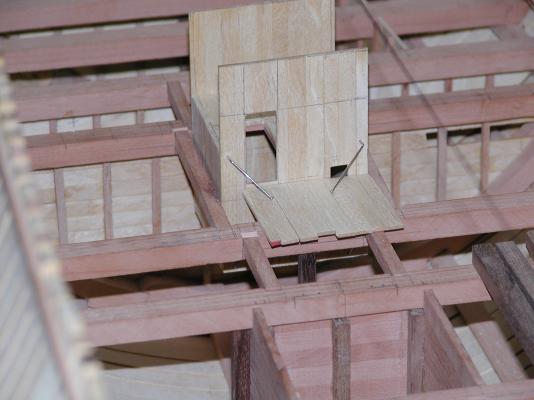
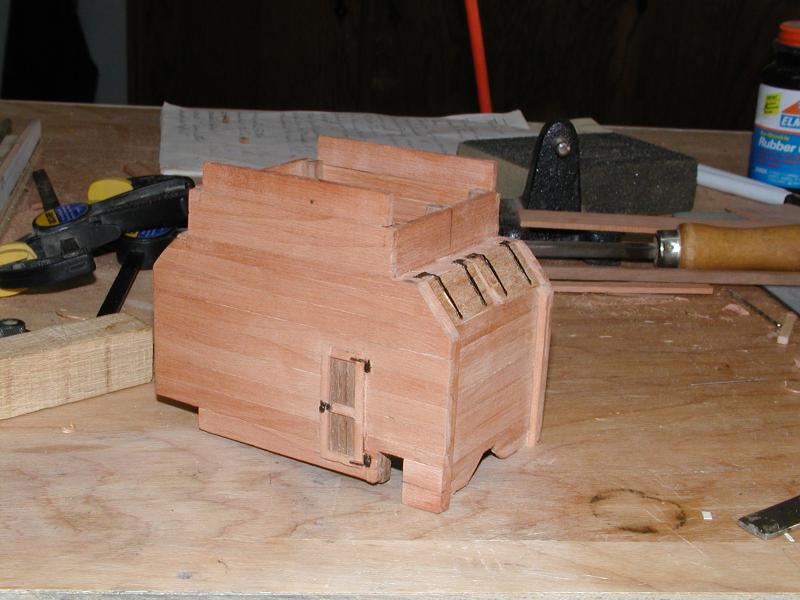
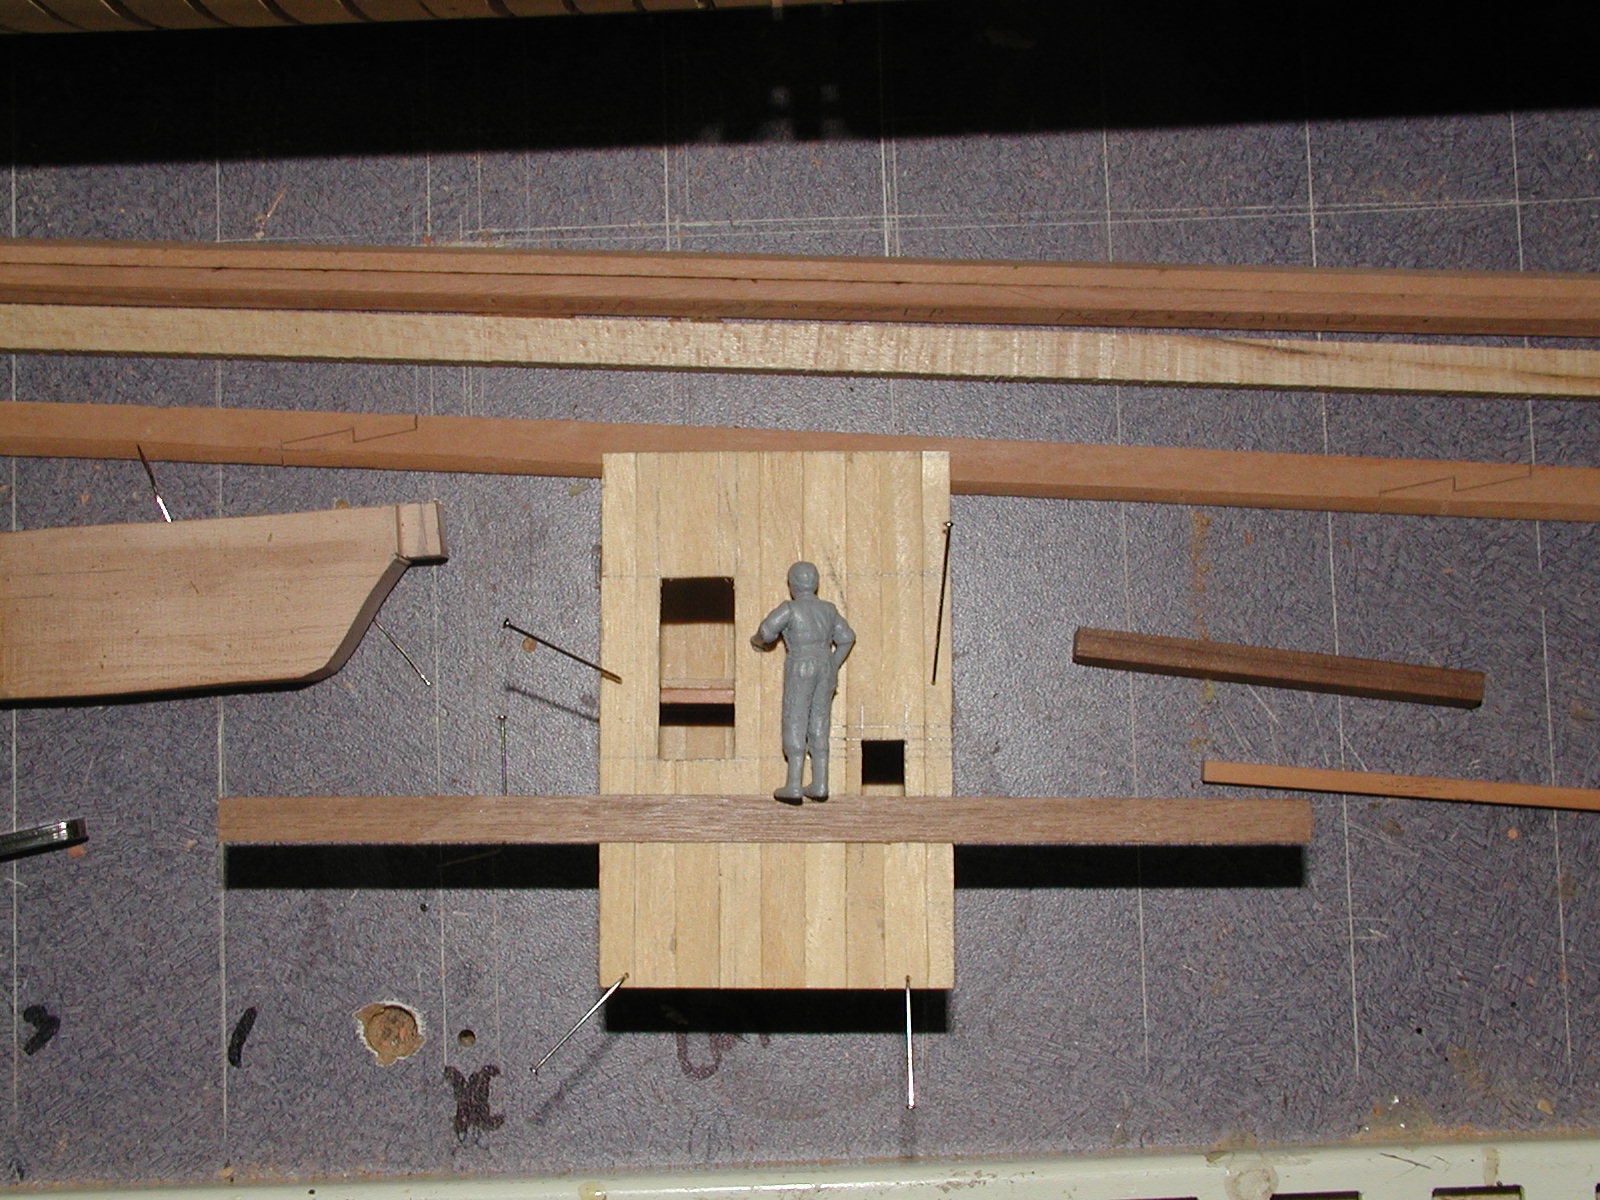
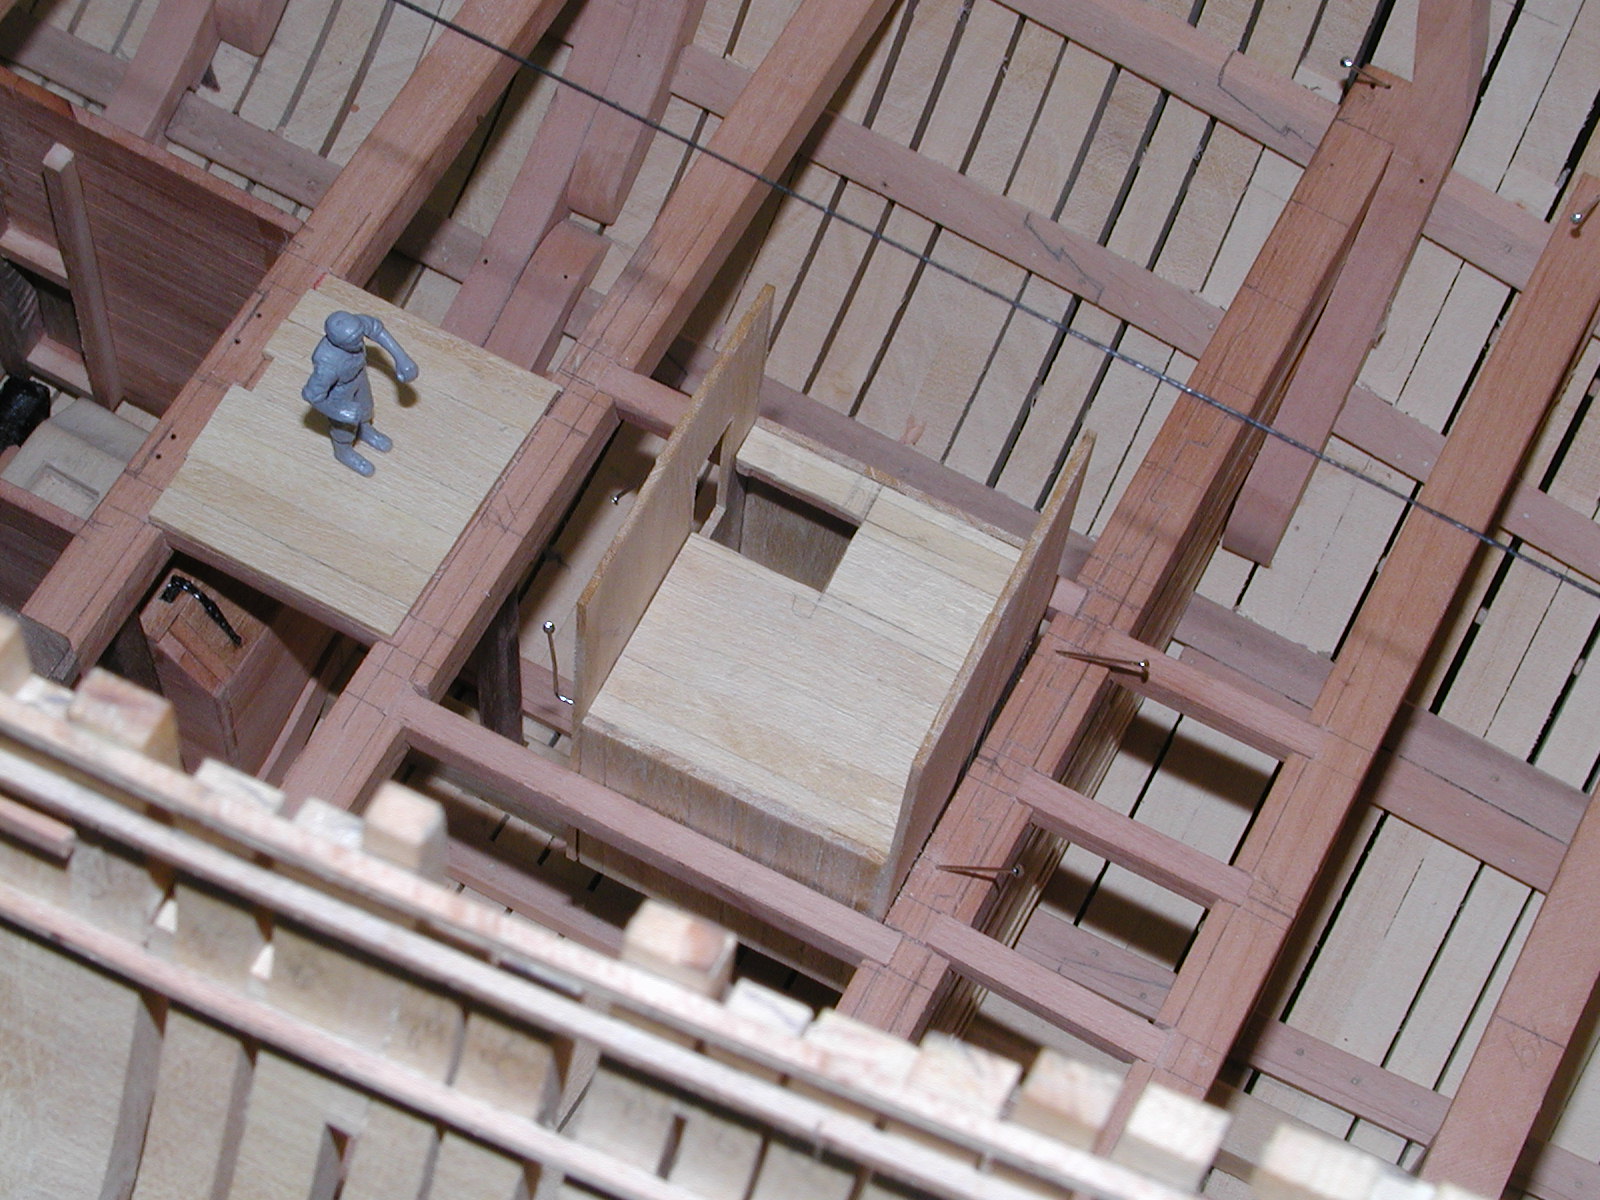
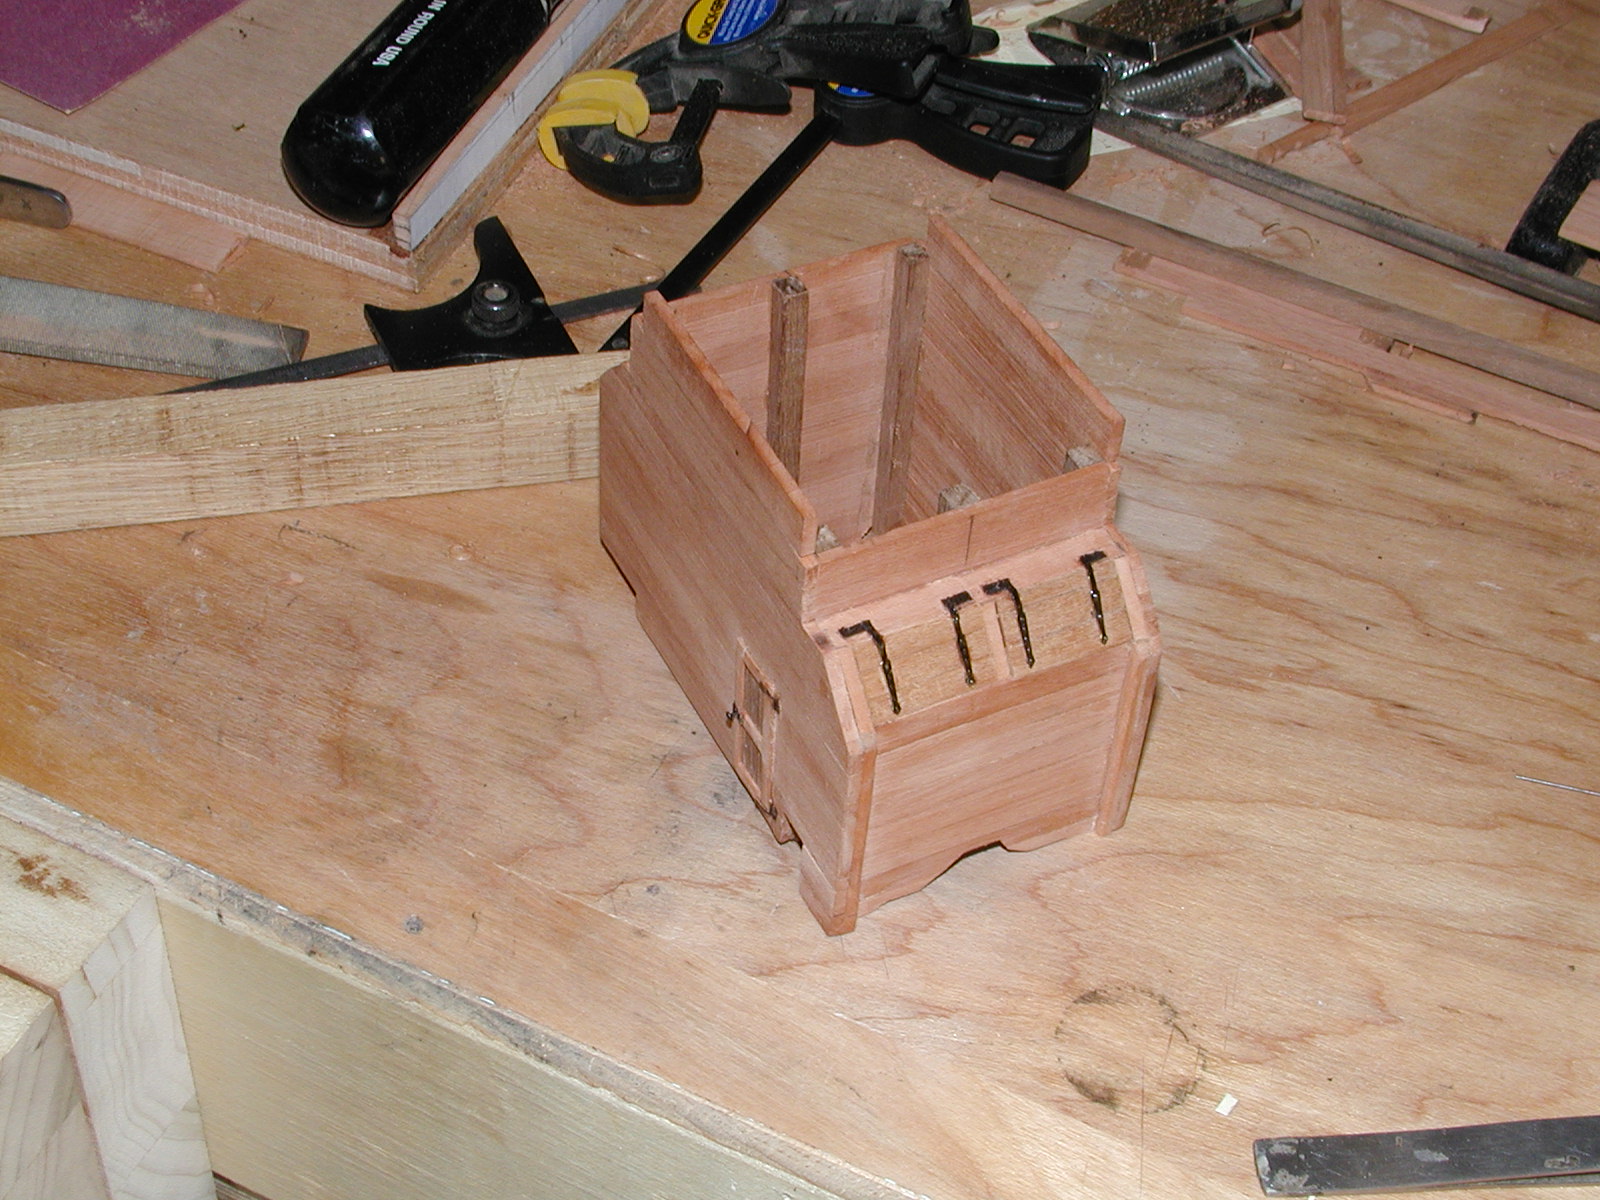
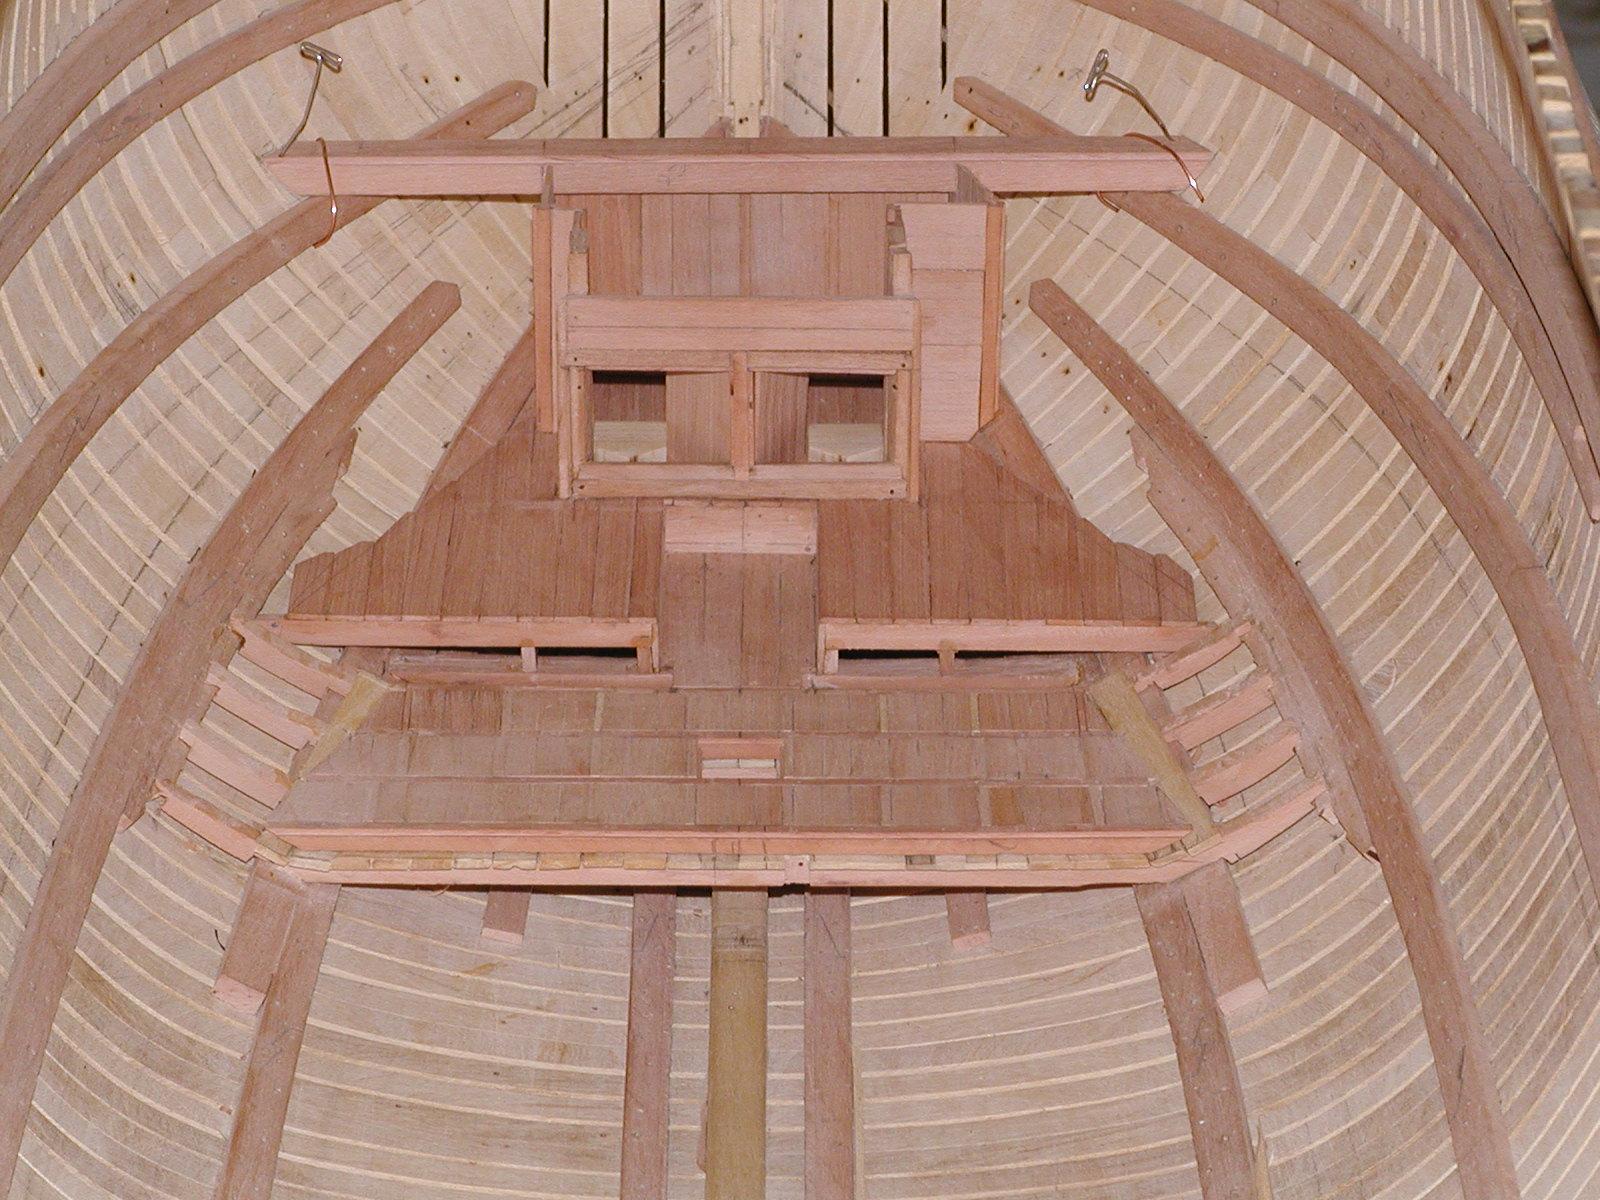
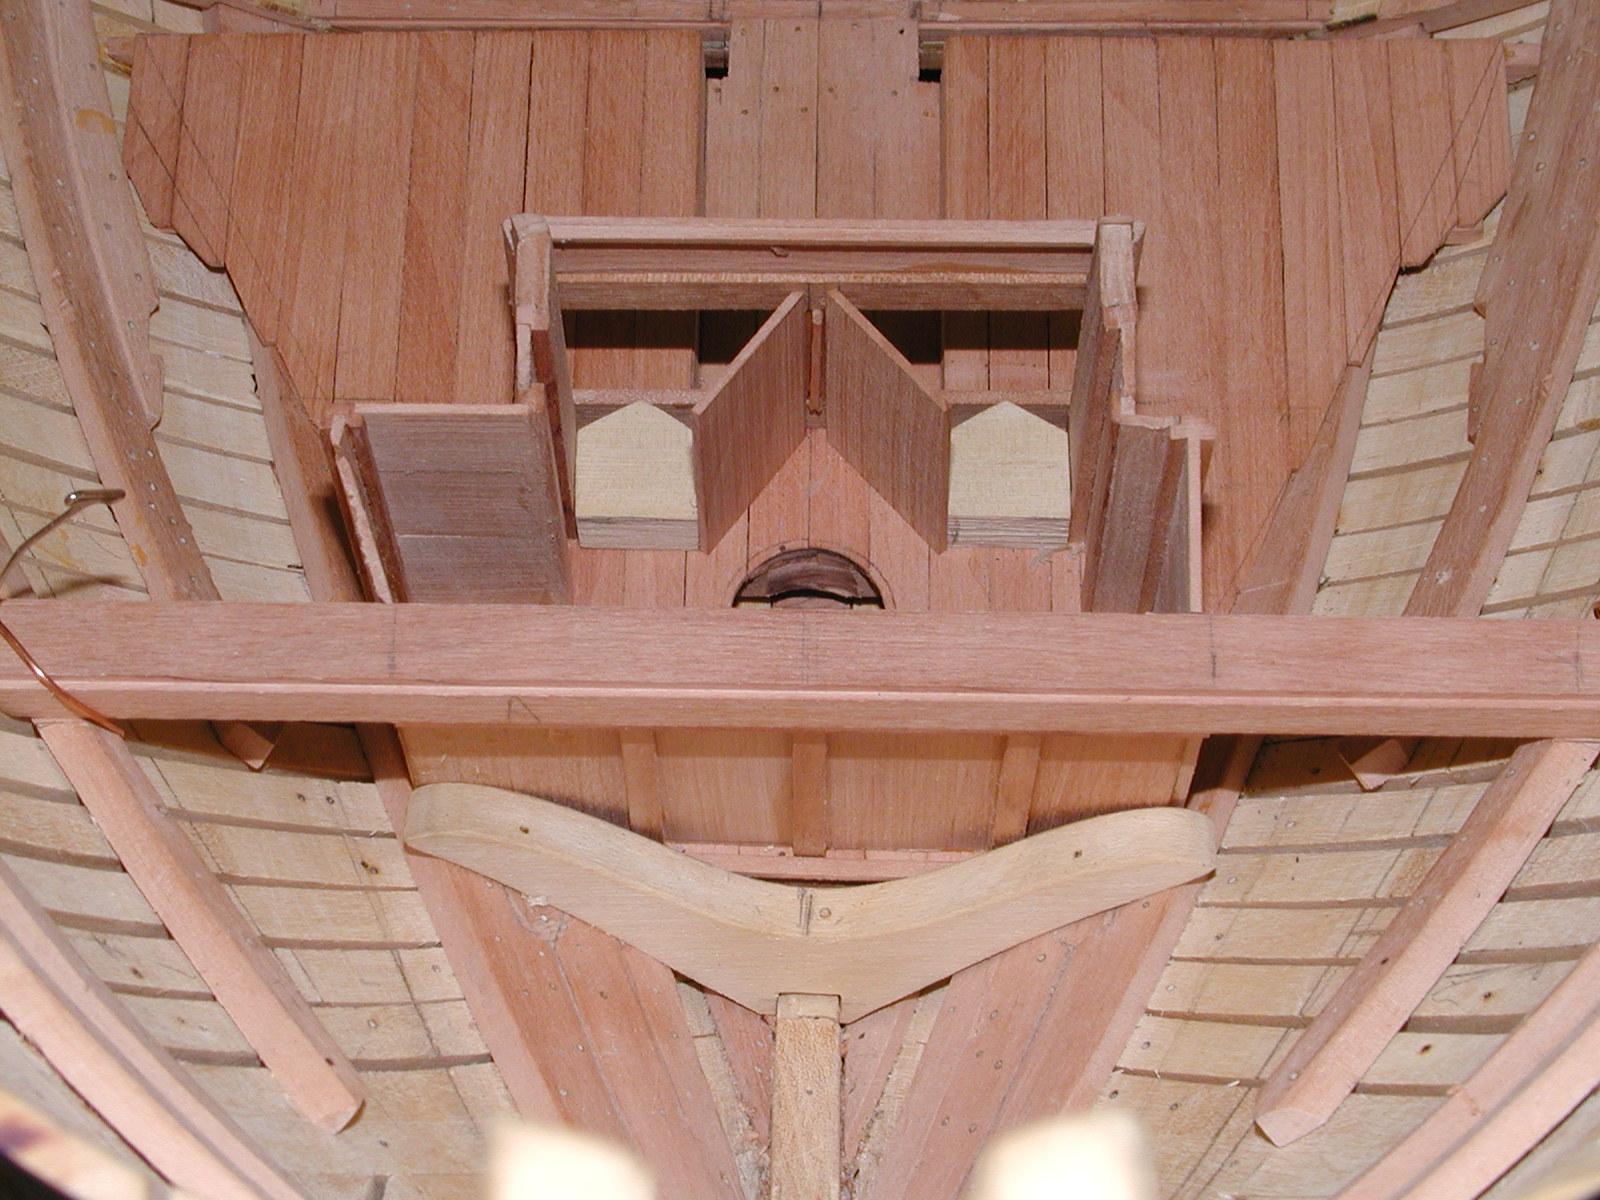
Folks here are a couple of photo's of the building of the hanging magazine. I didn't do to much detail on it but did enjoy building it. Gary
- billocrates, mtaylor, Jeronimo and 5 others
-
8
-
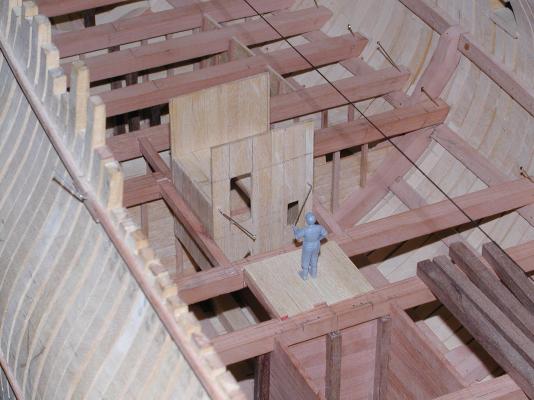
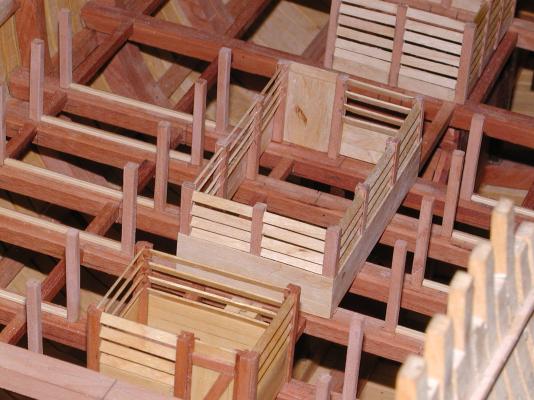
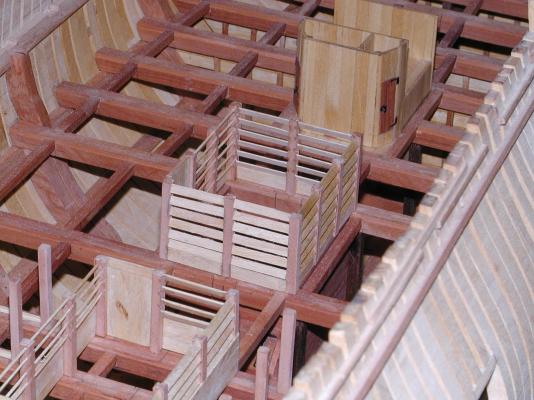
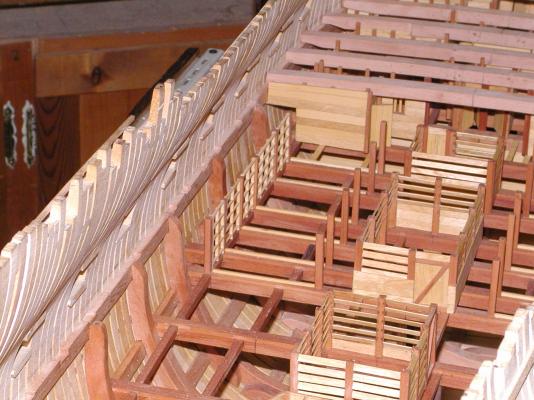
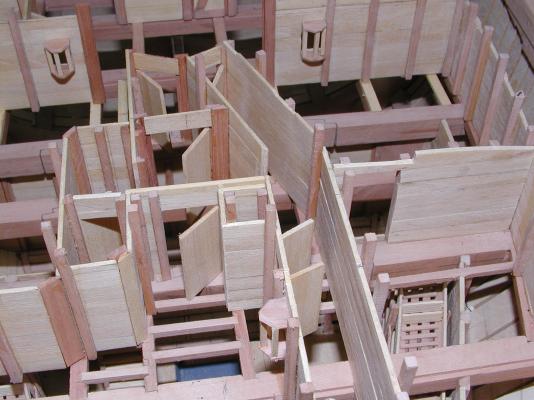
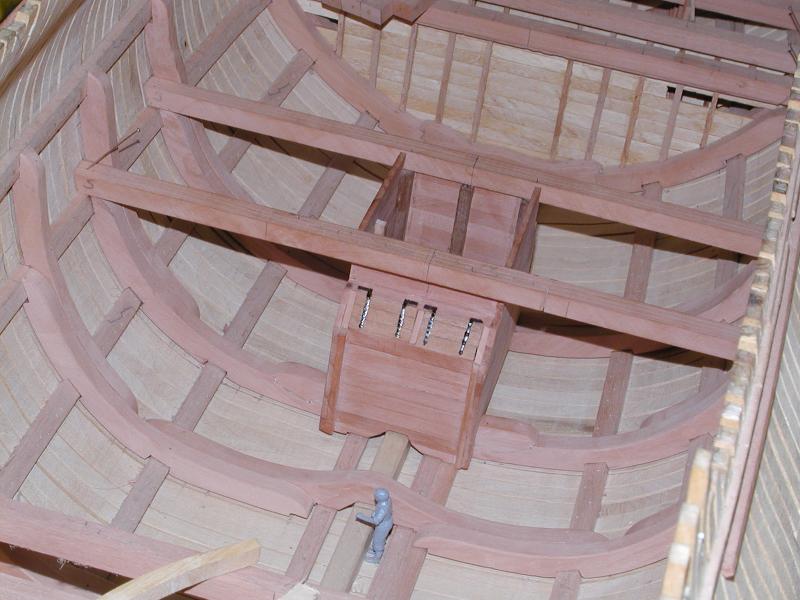
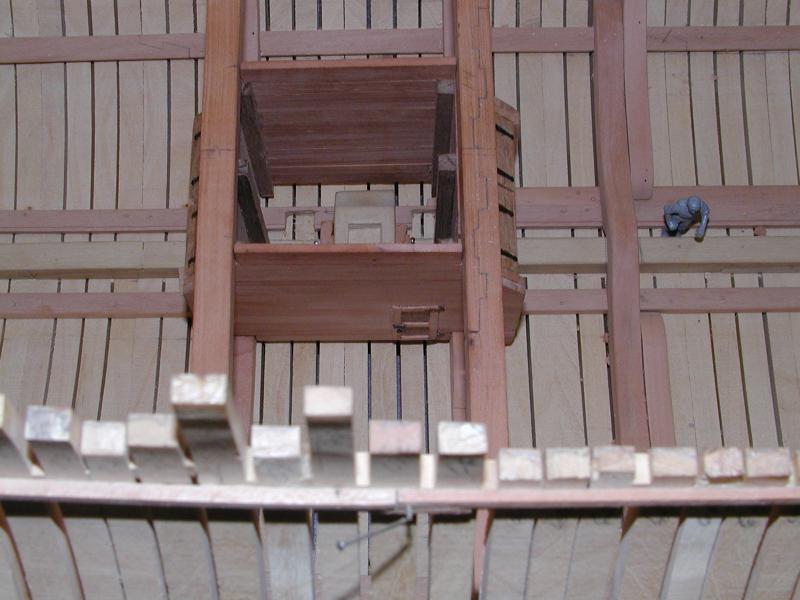
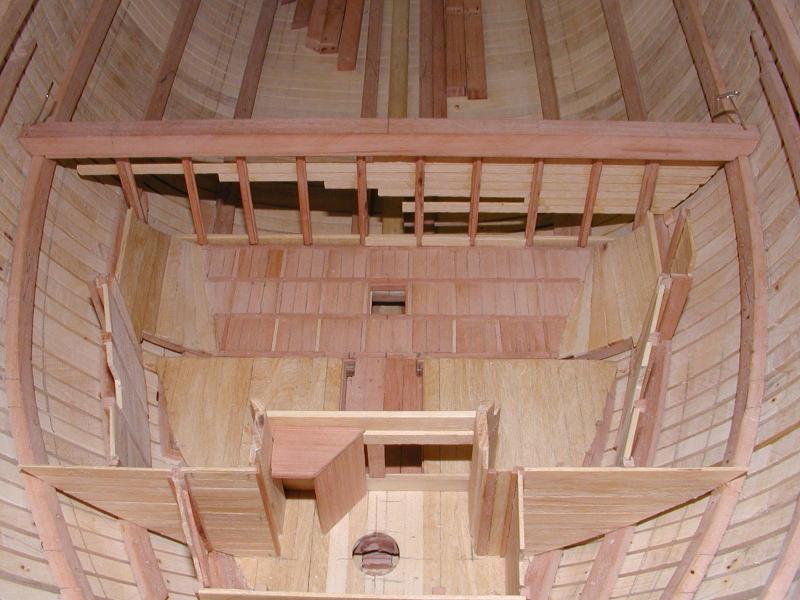
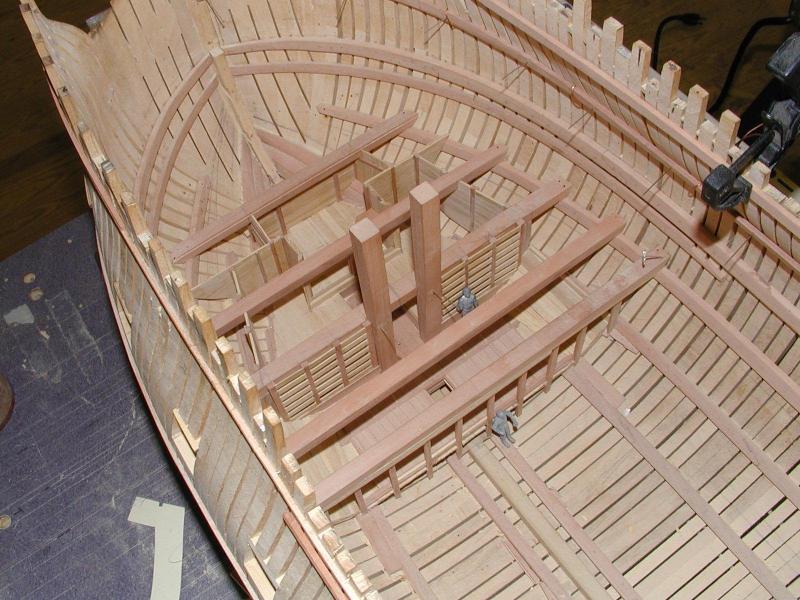
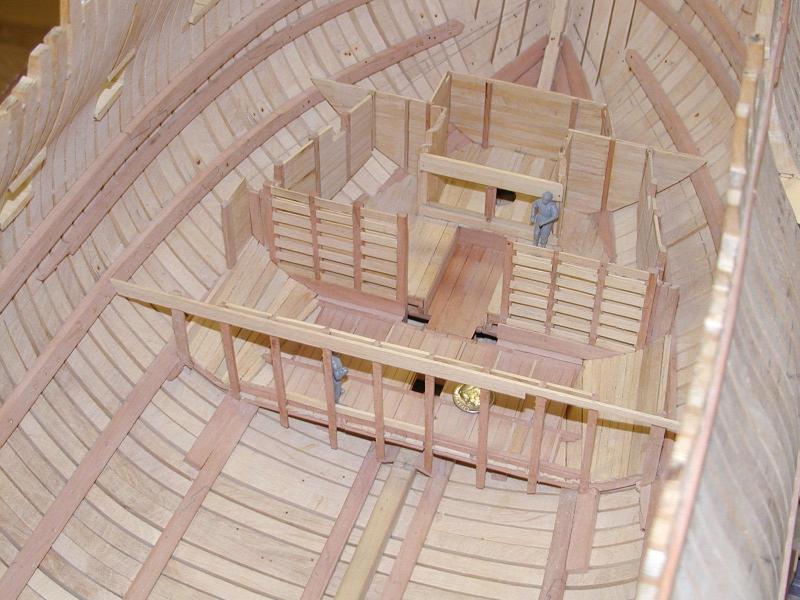
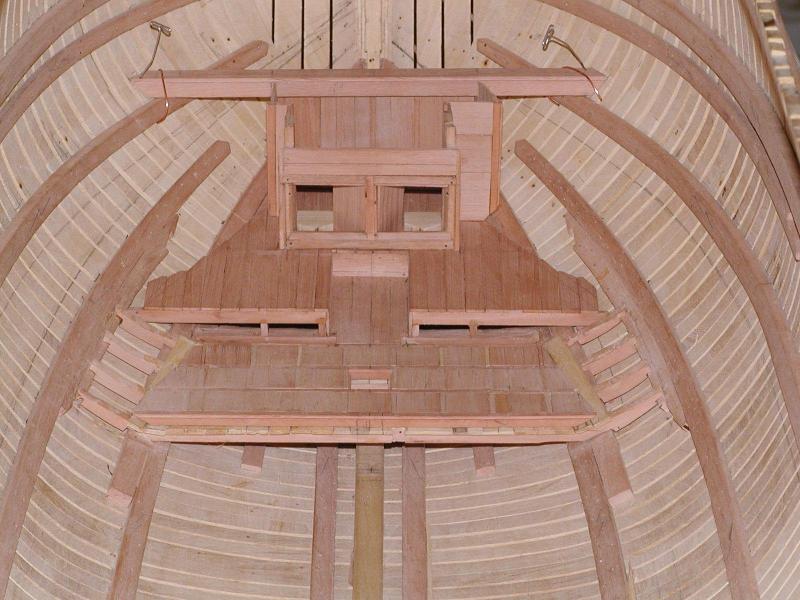
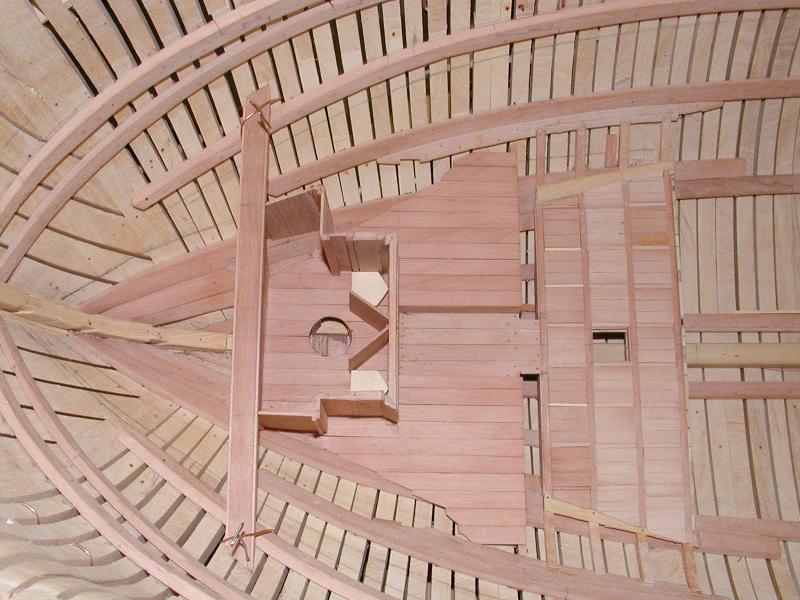
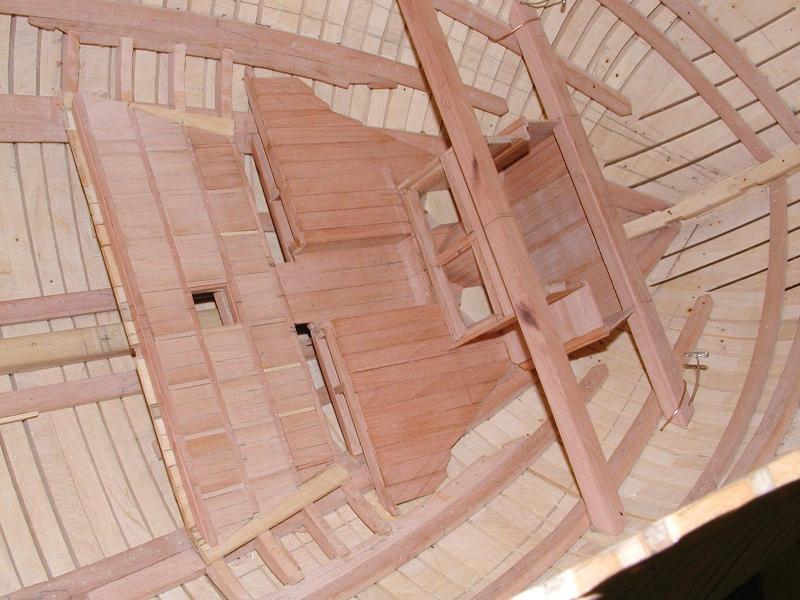
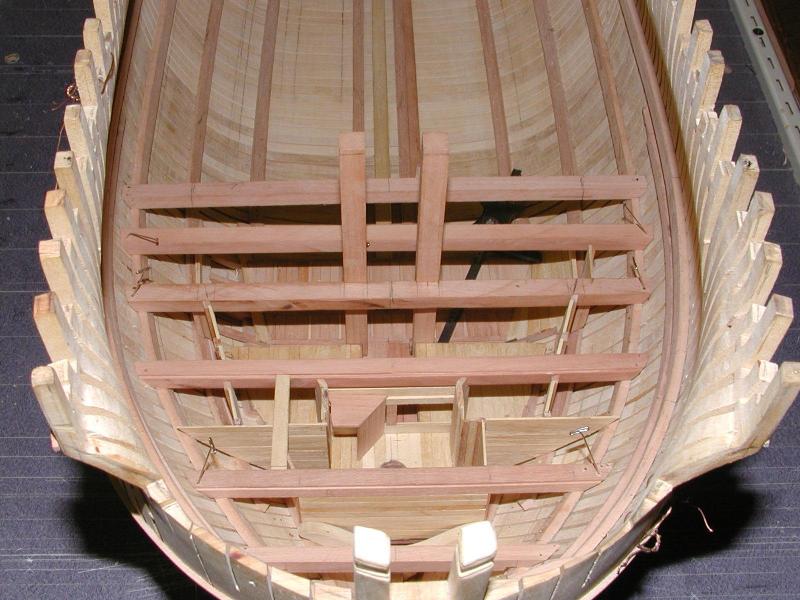
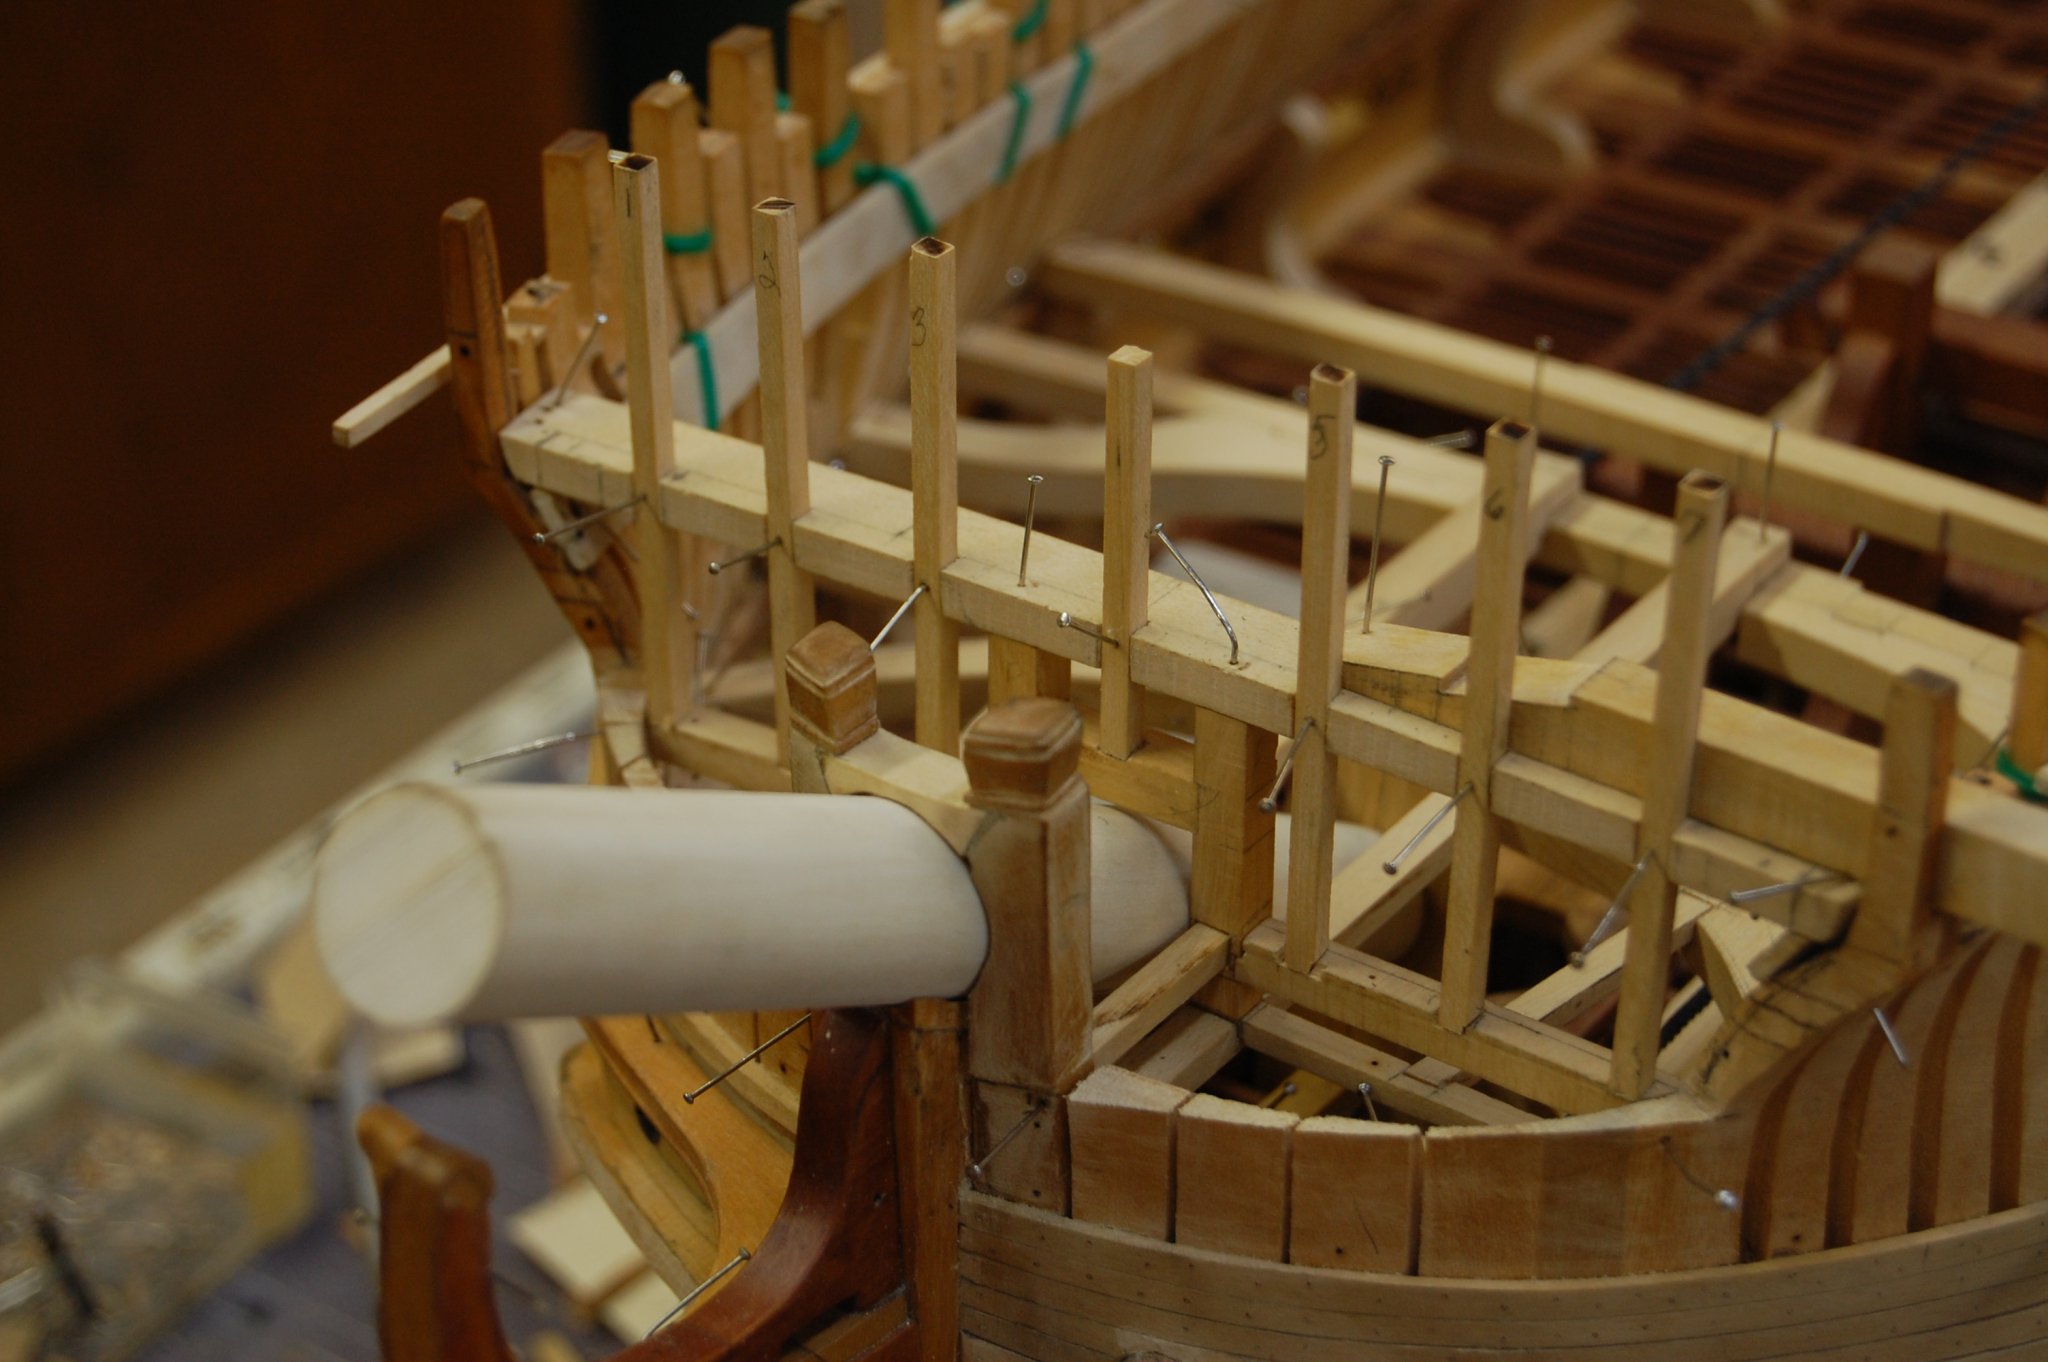
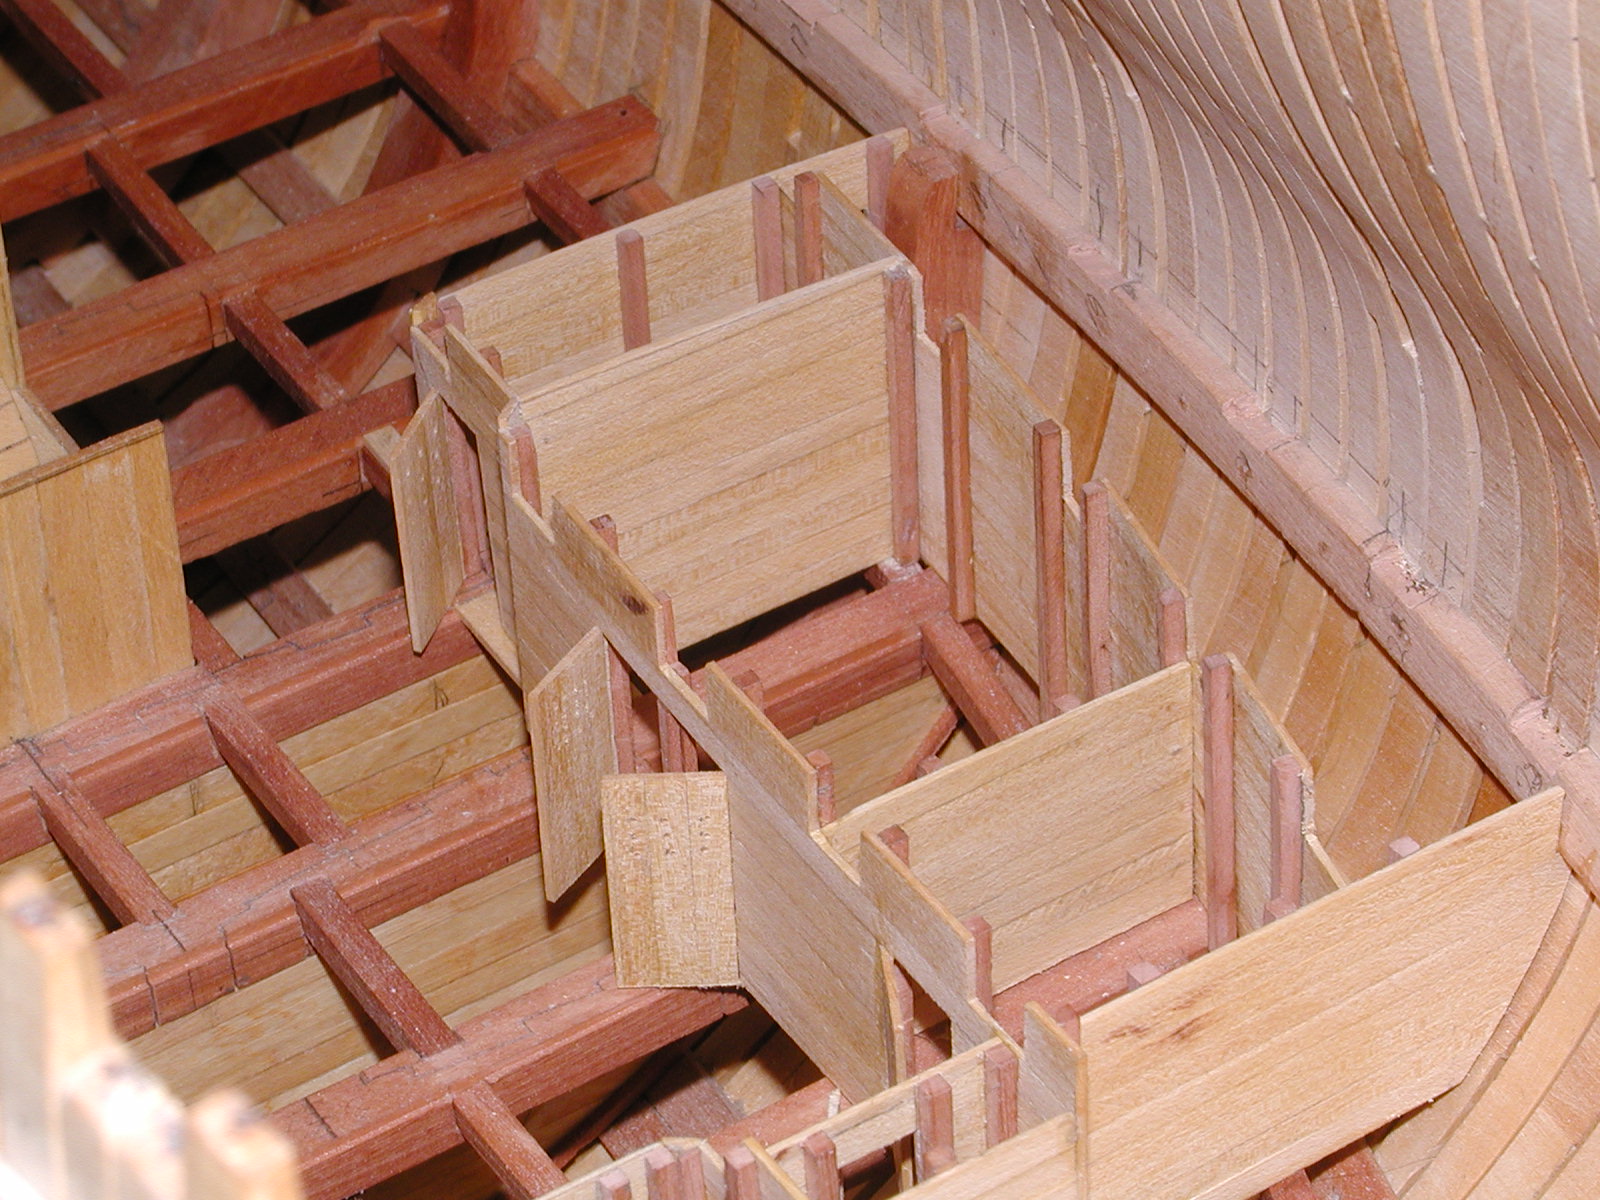
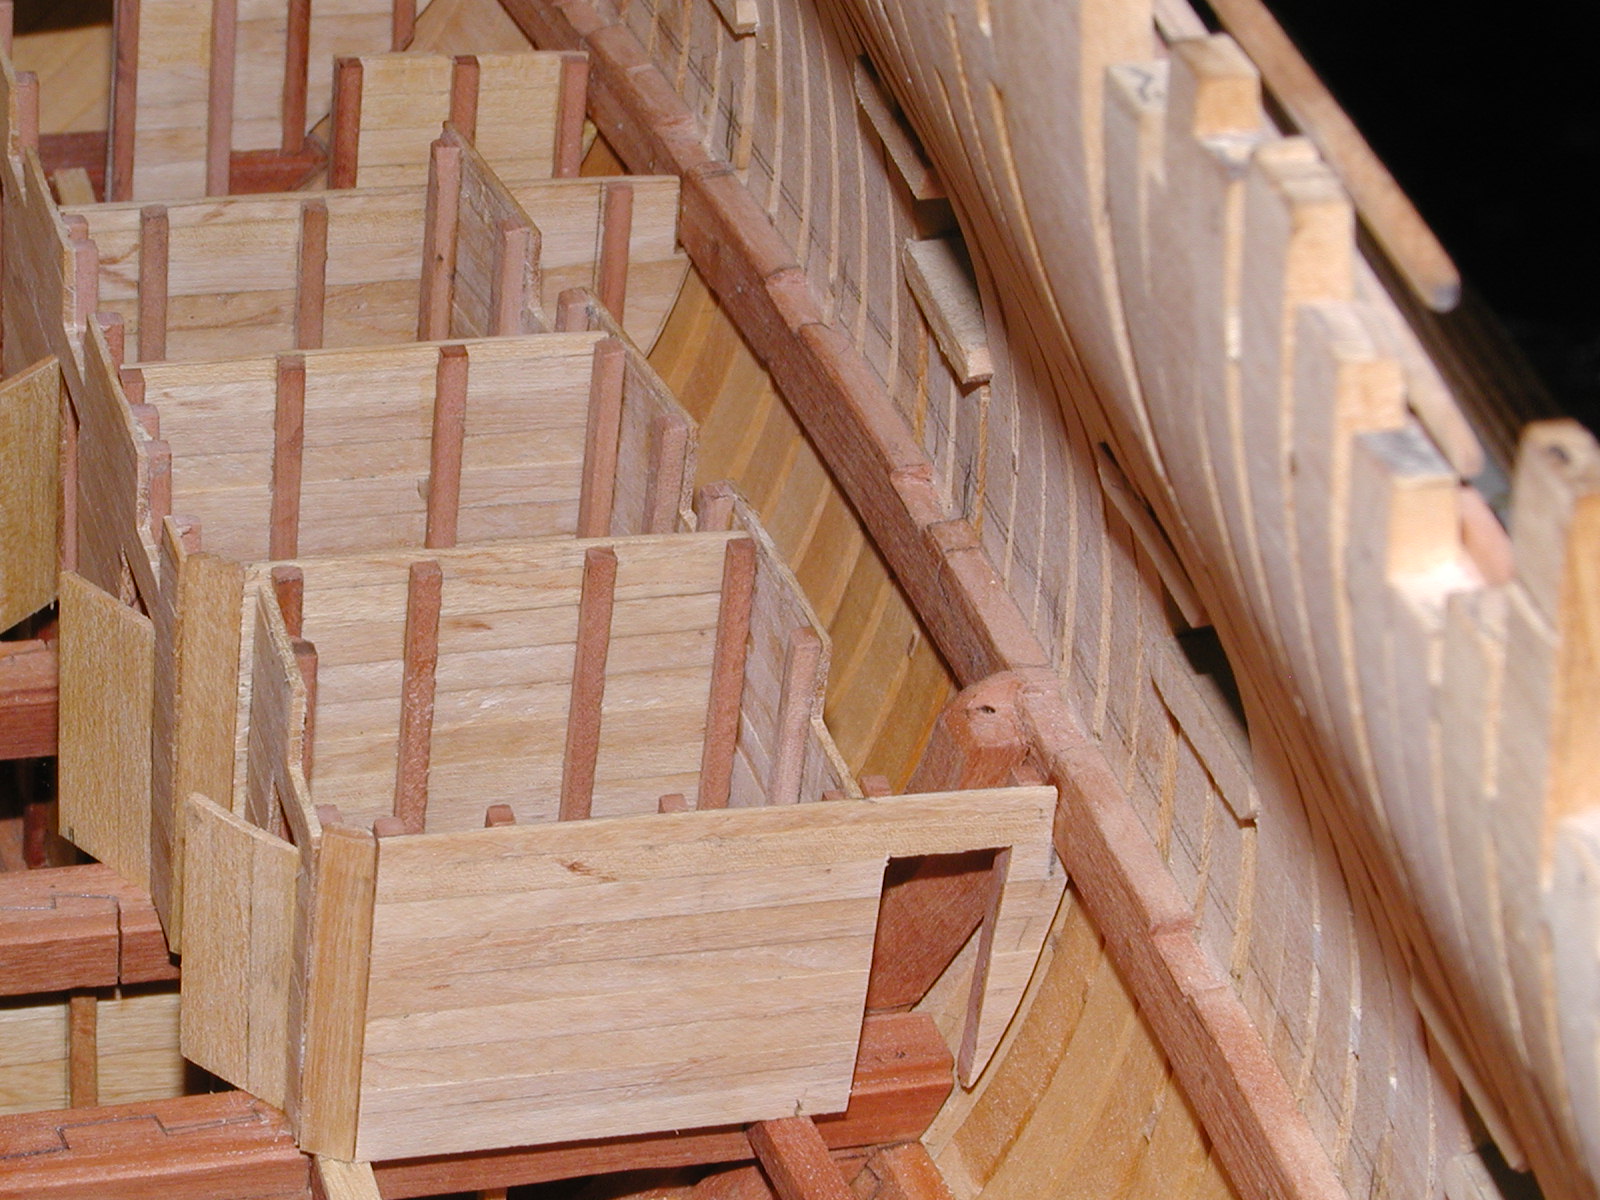
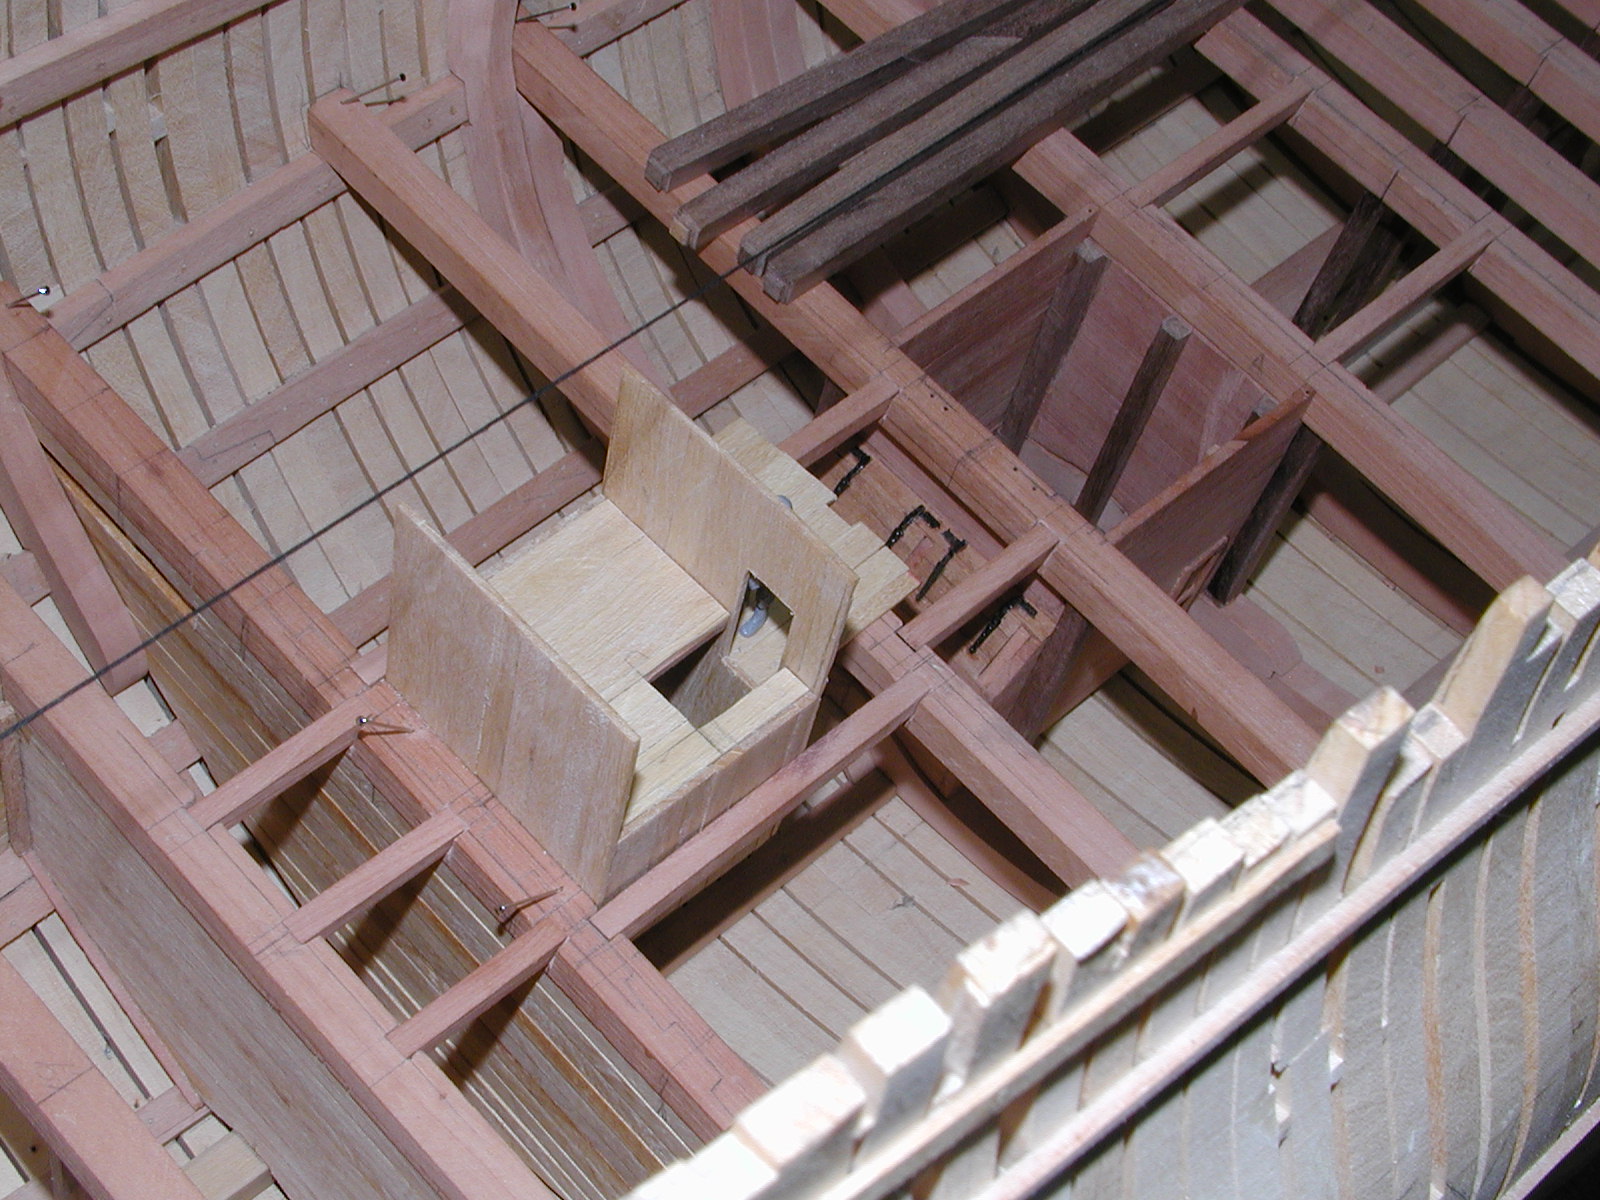
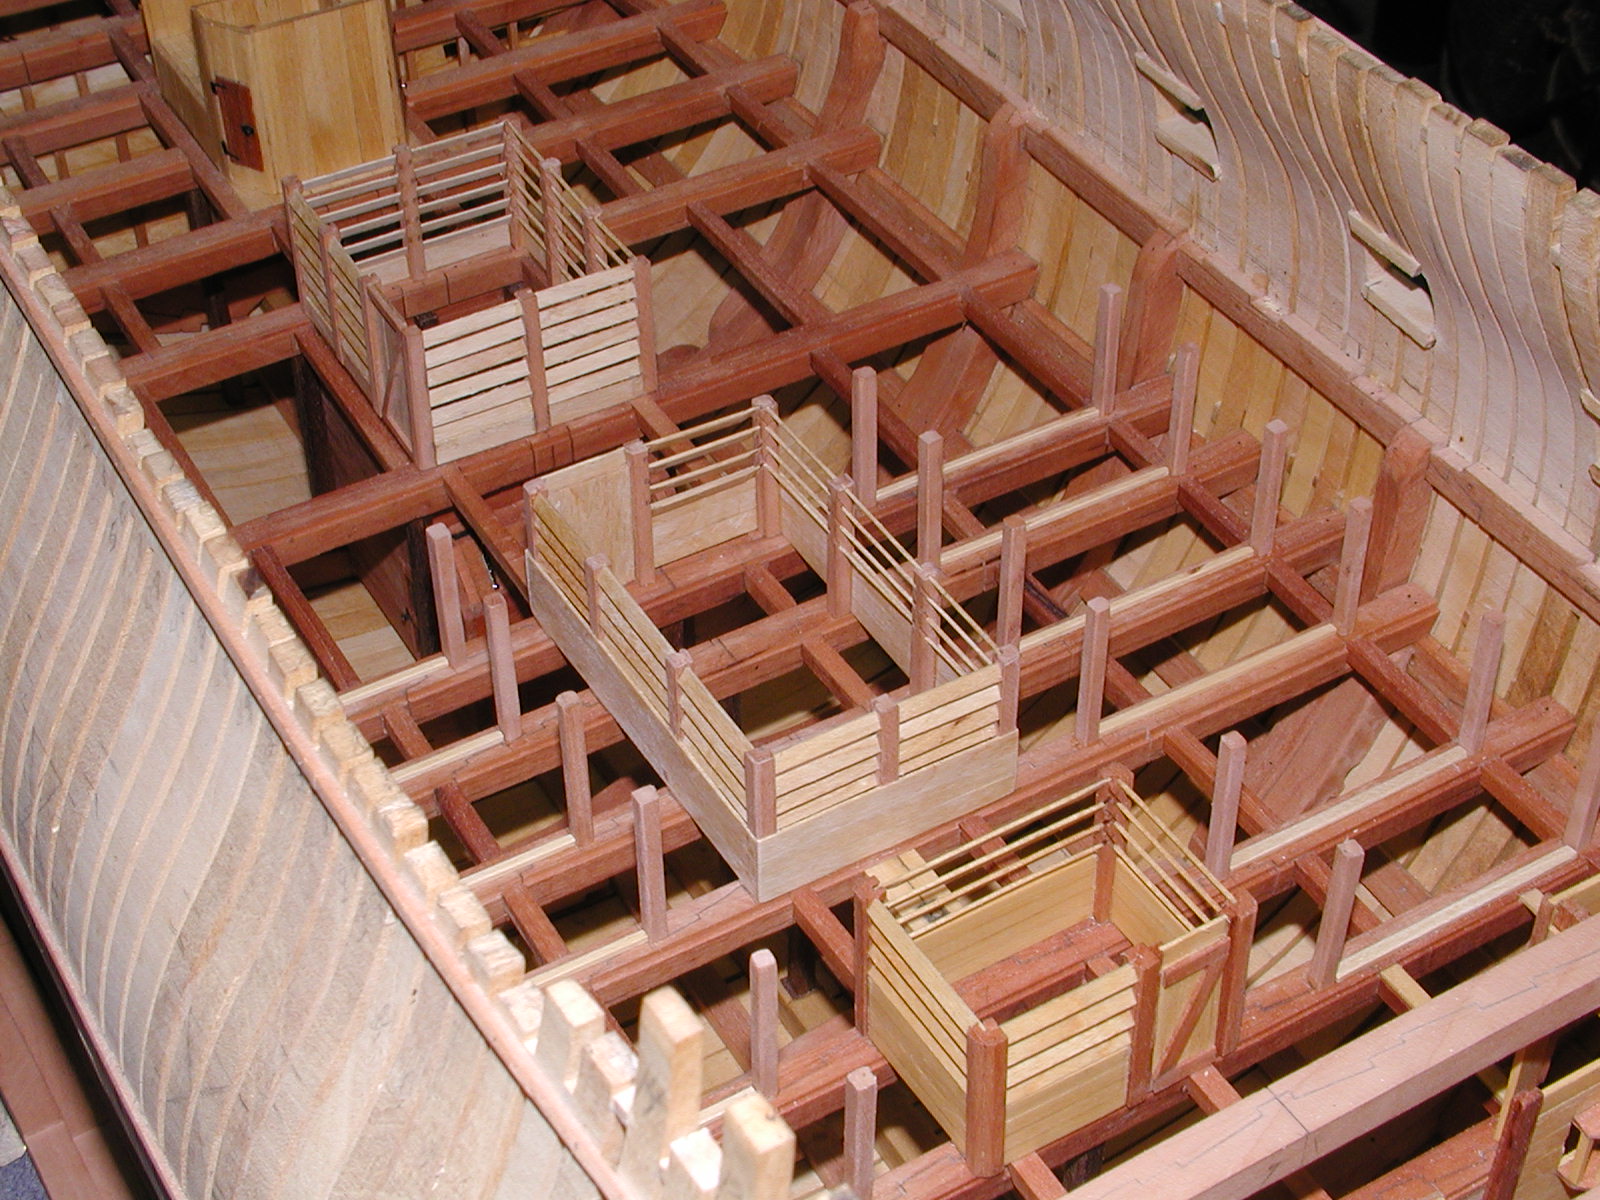
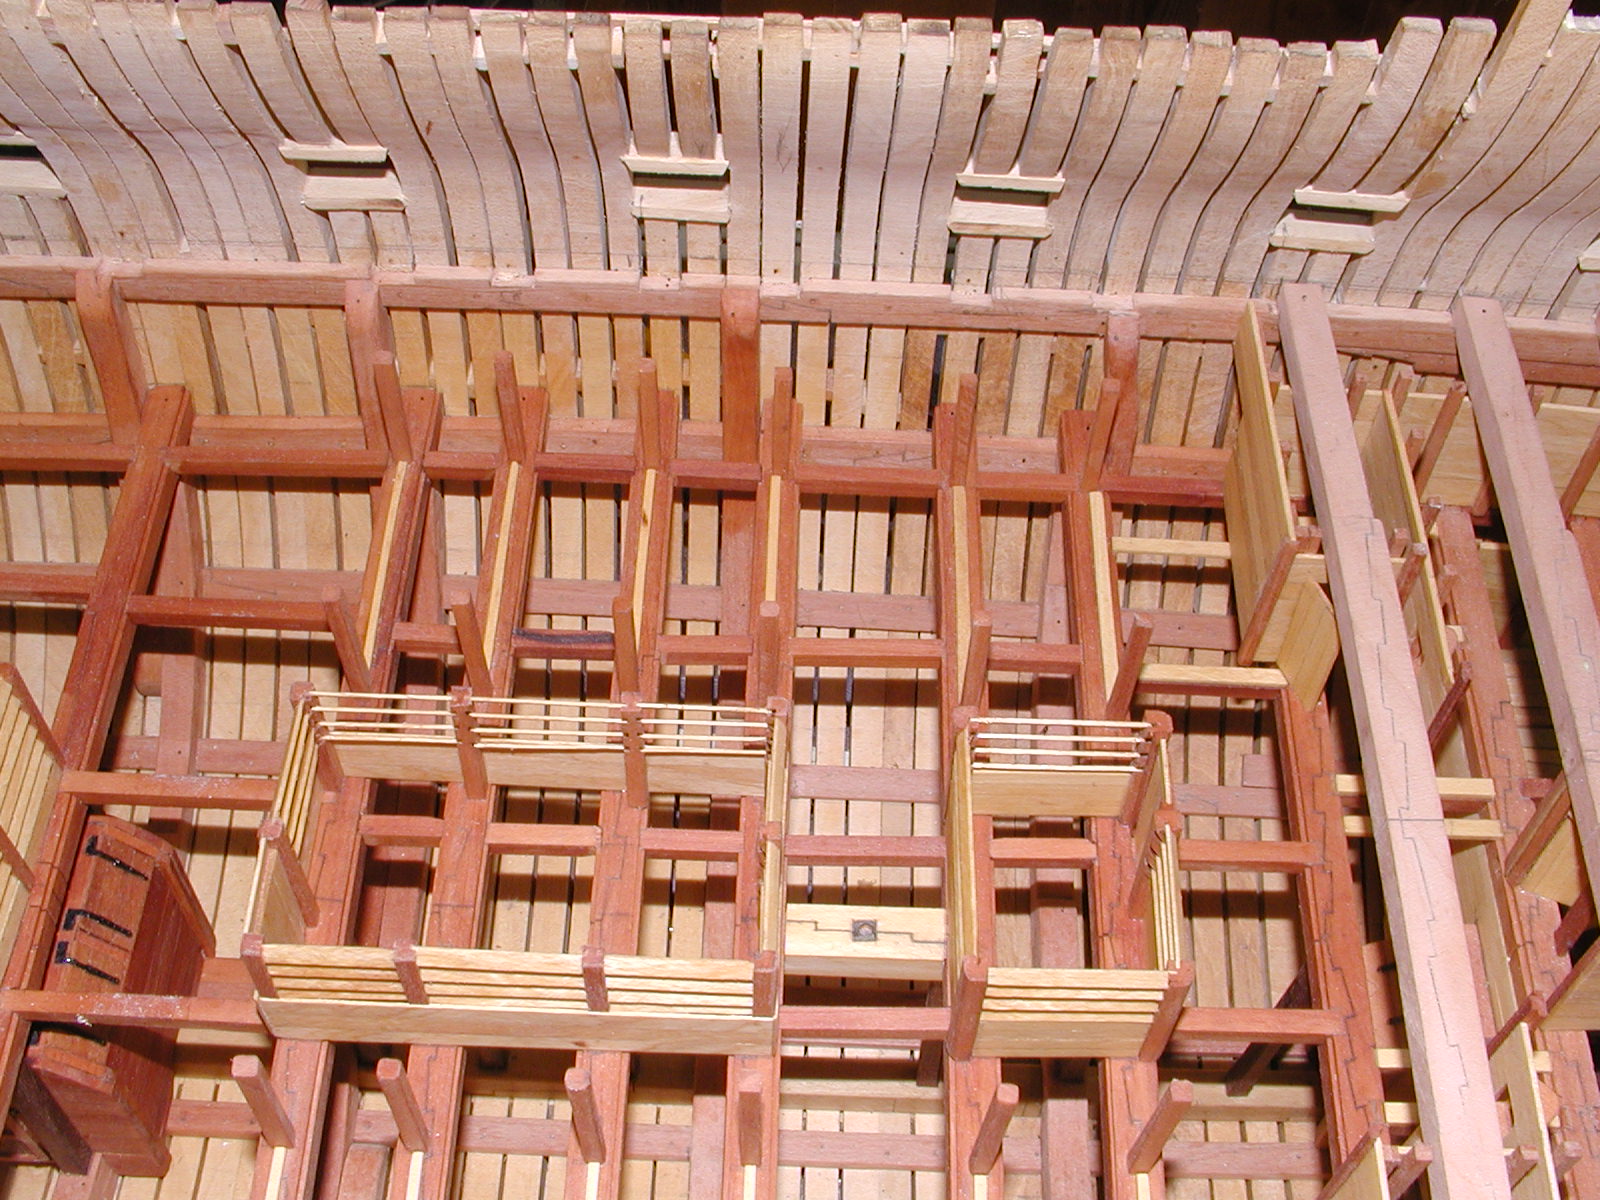
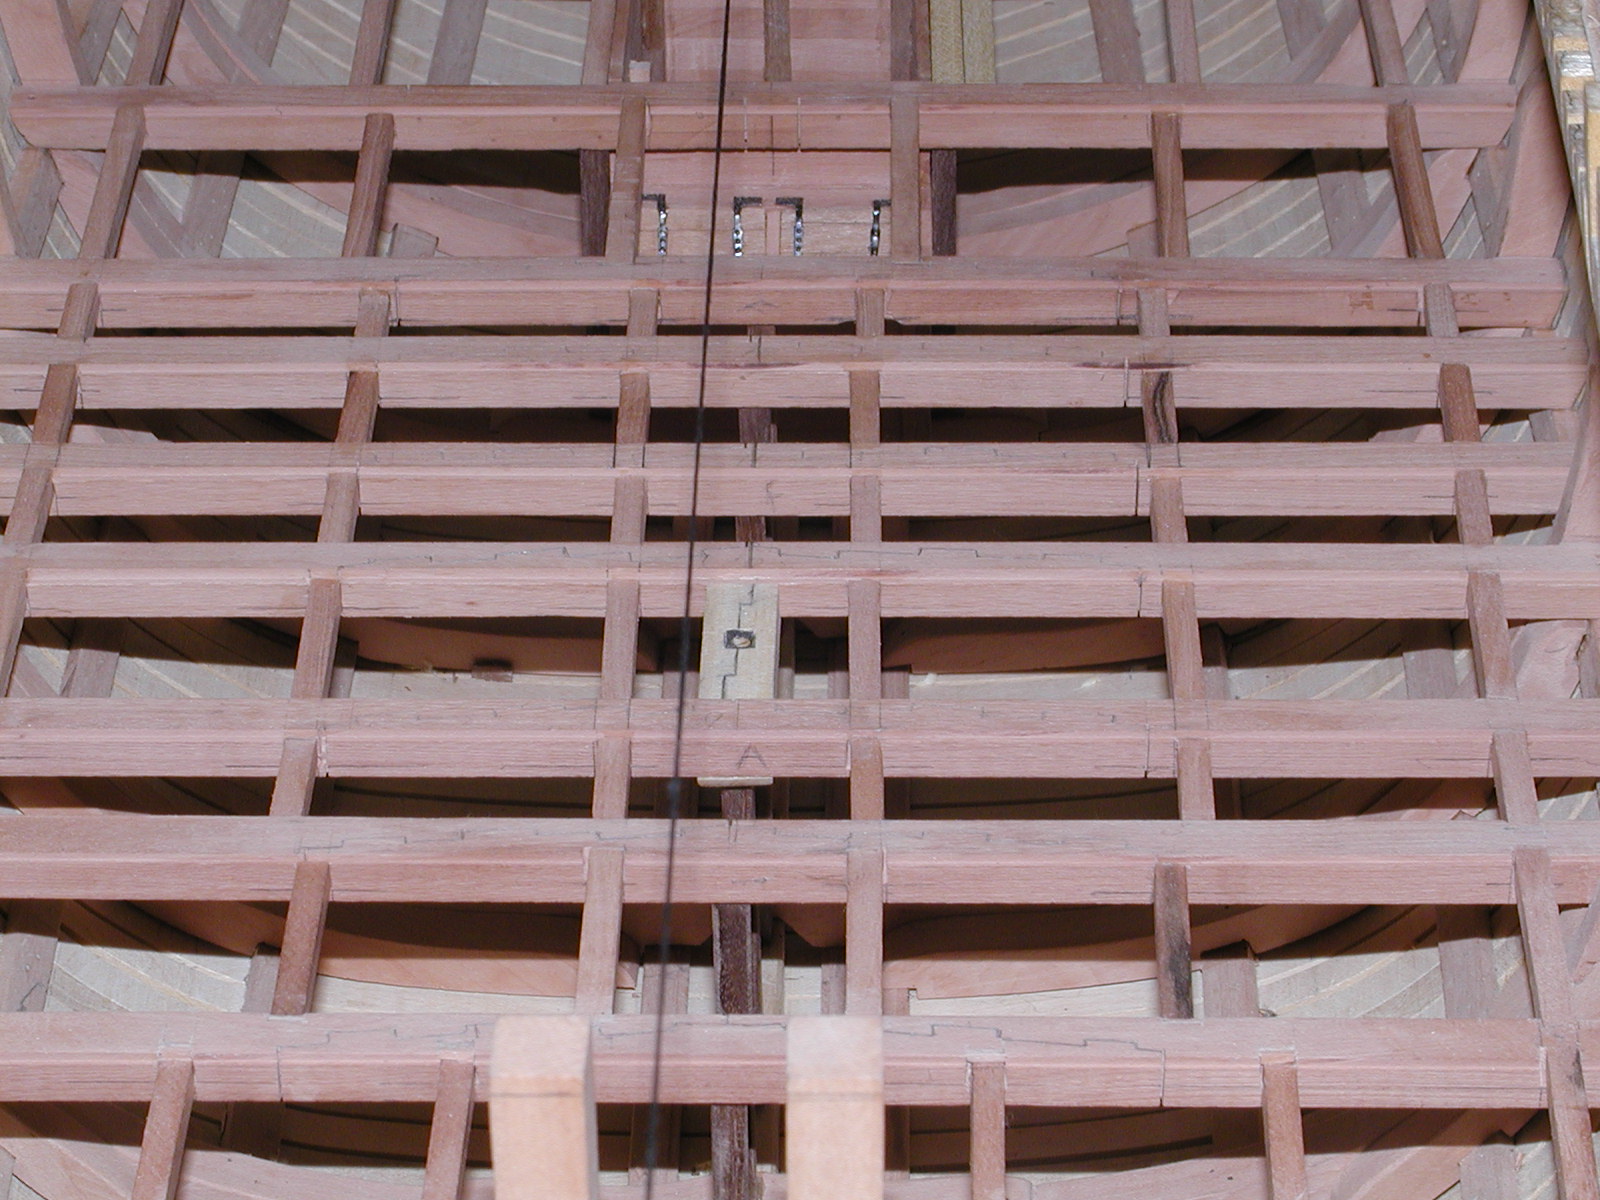
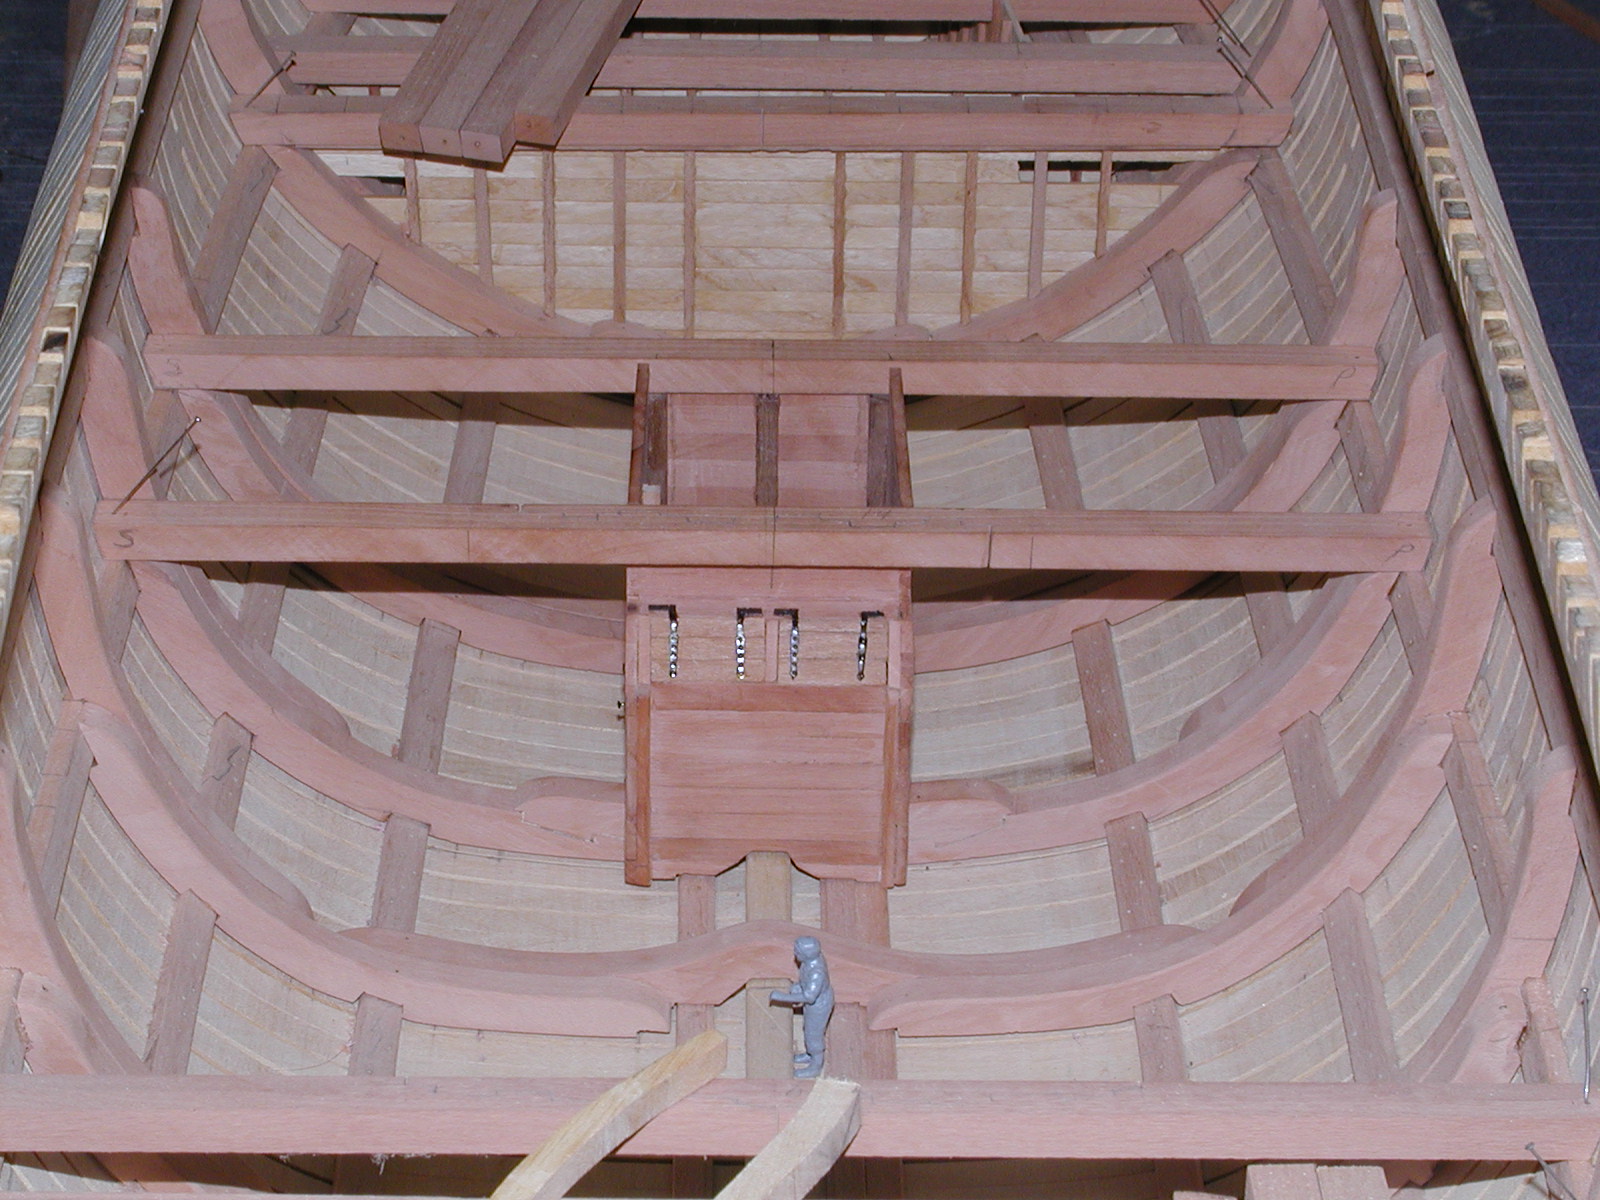
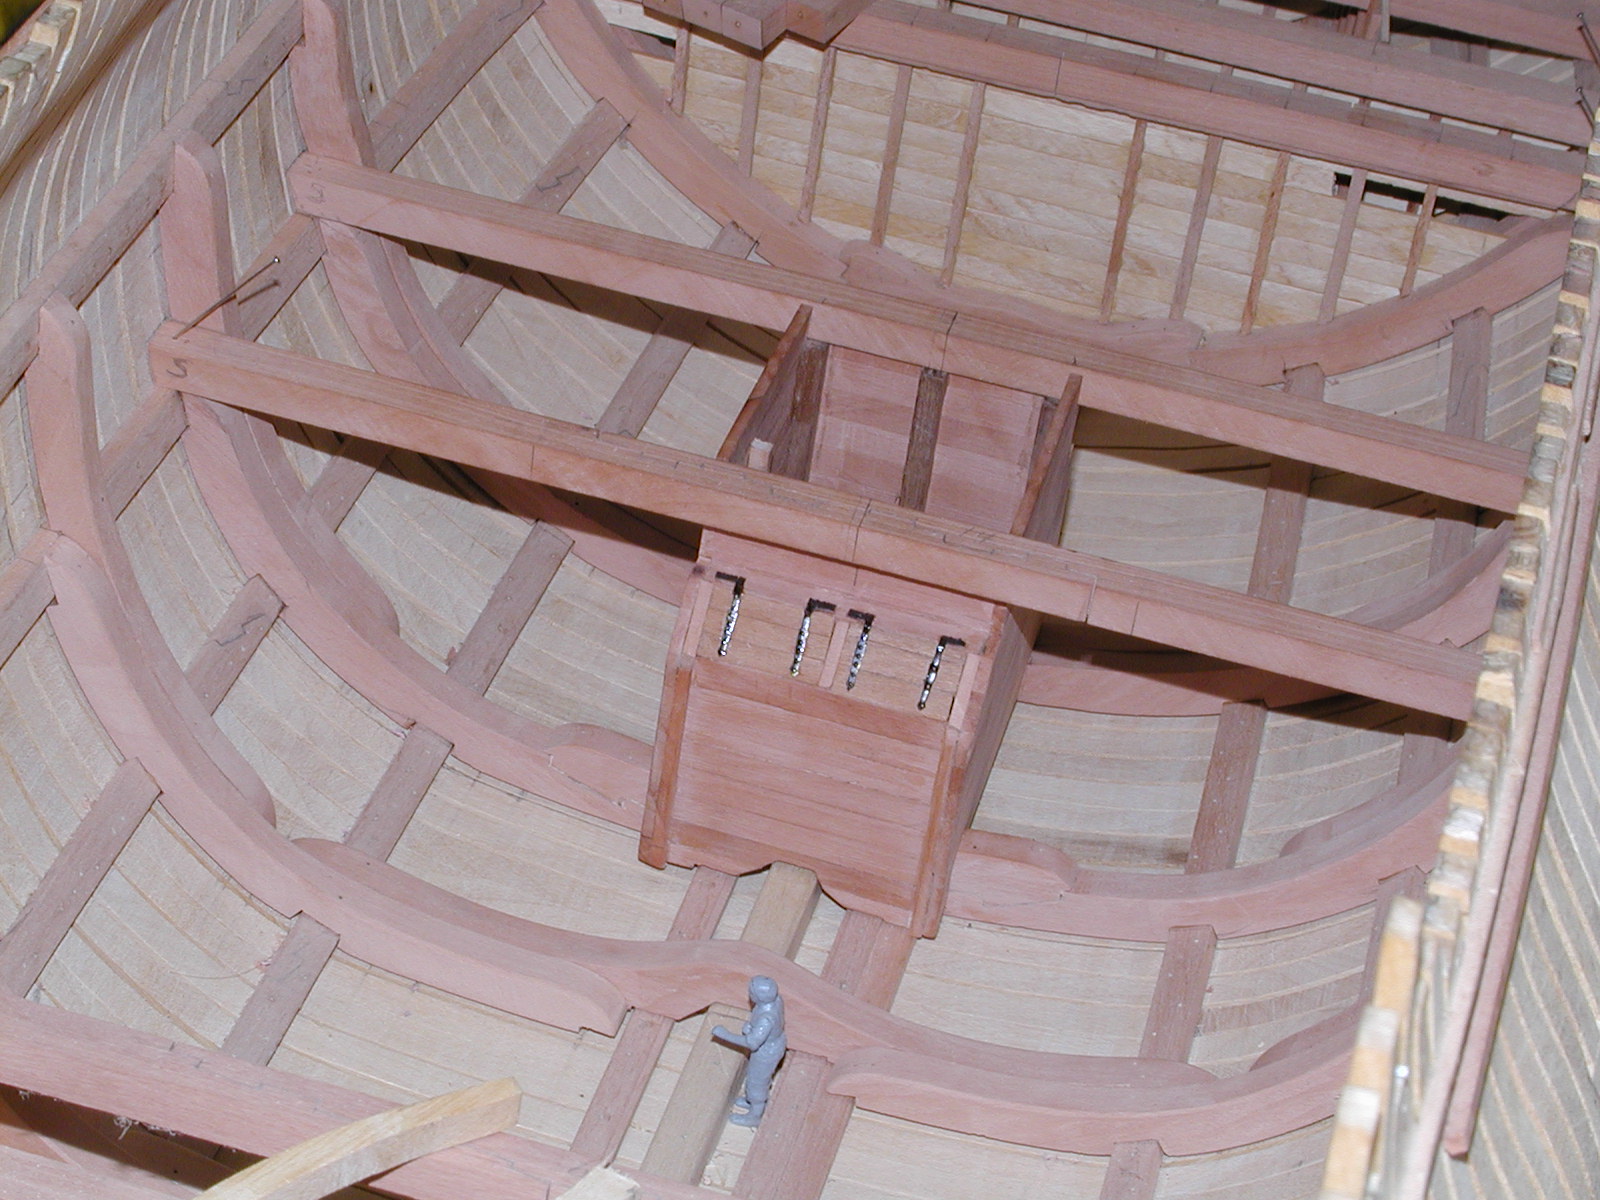
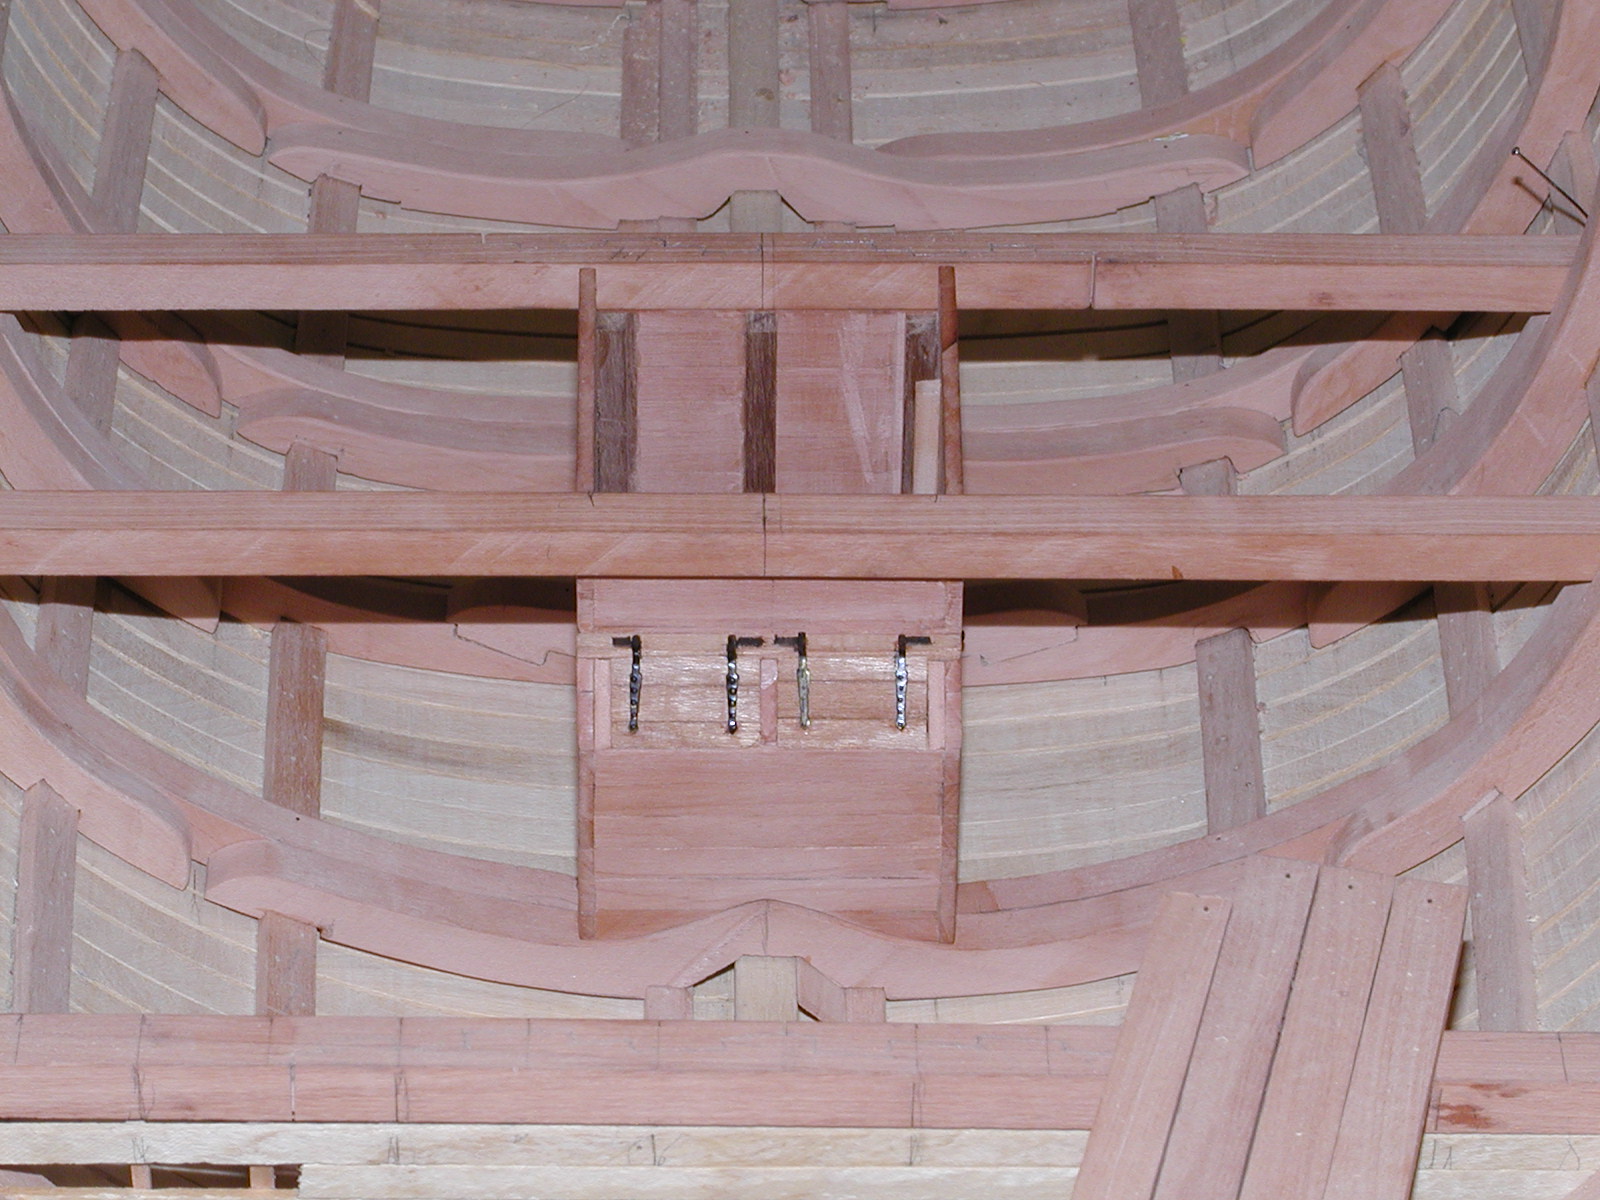
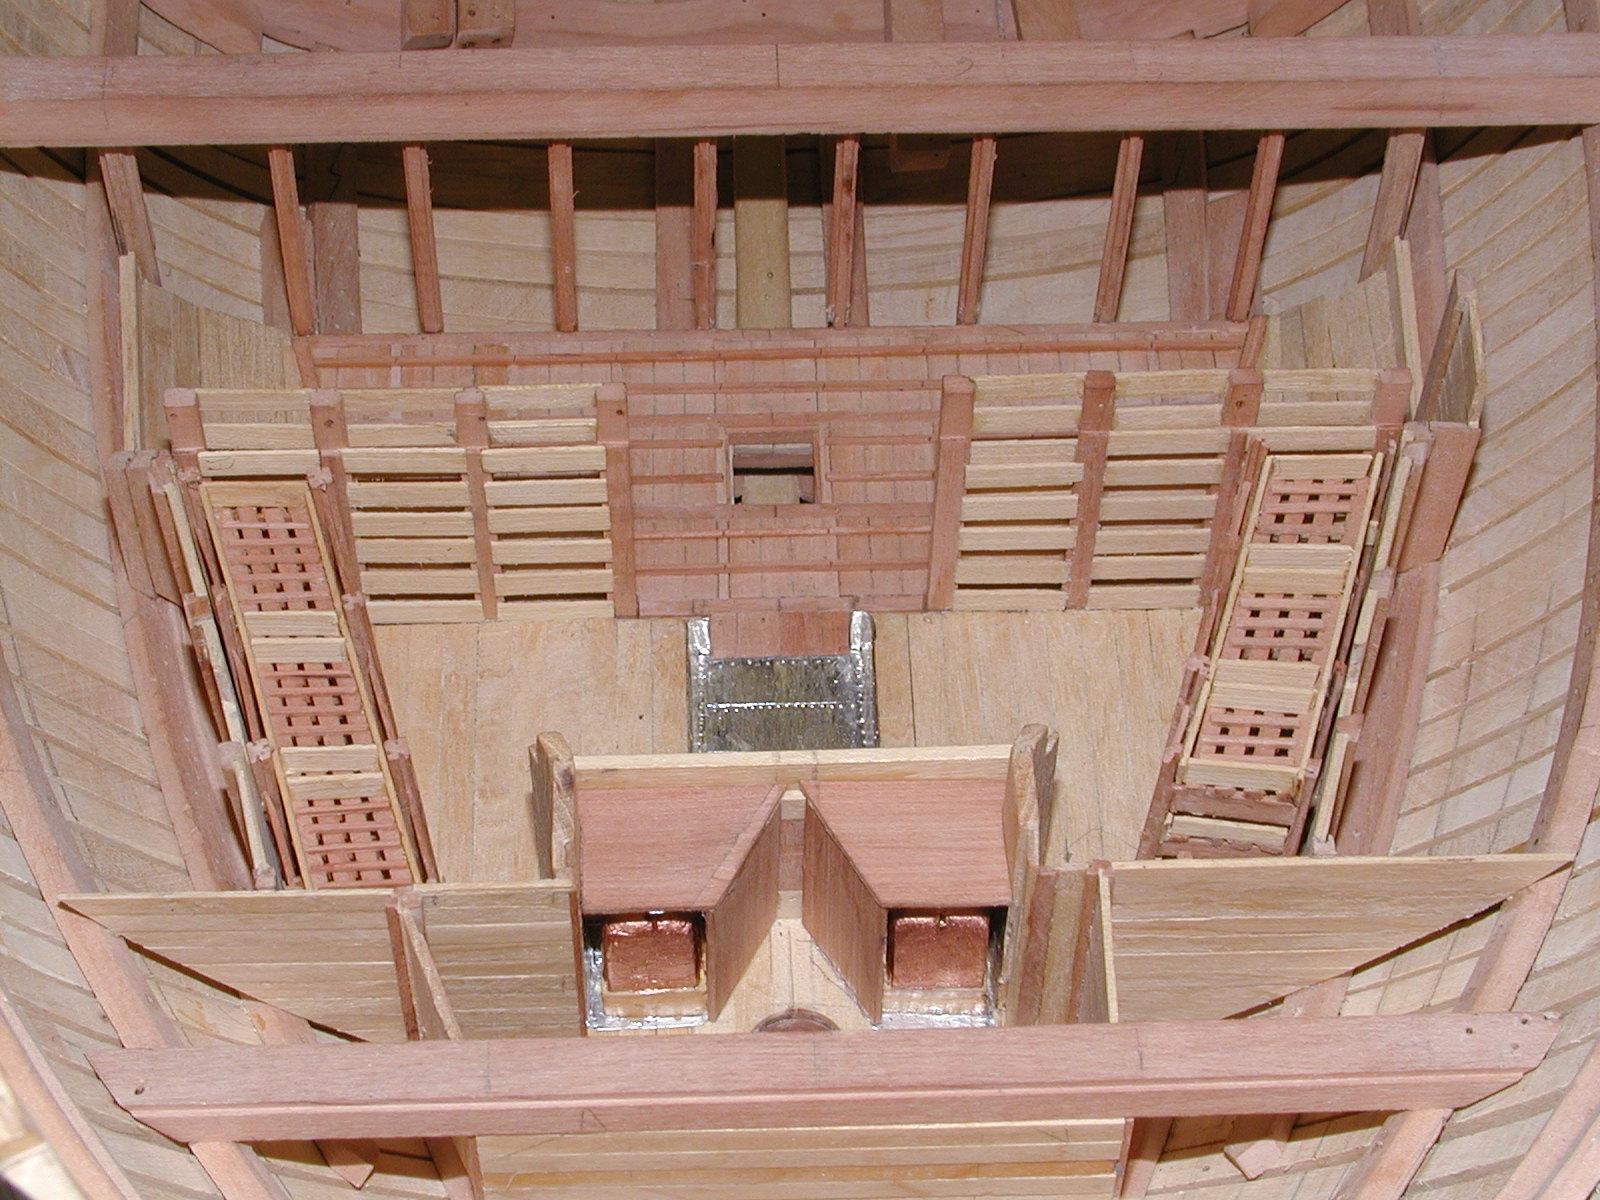
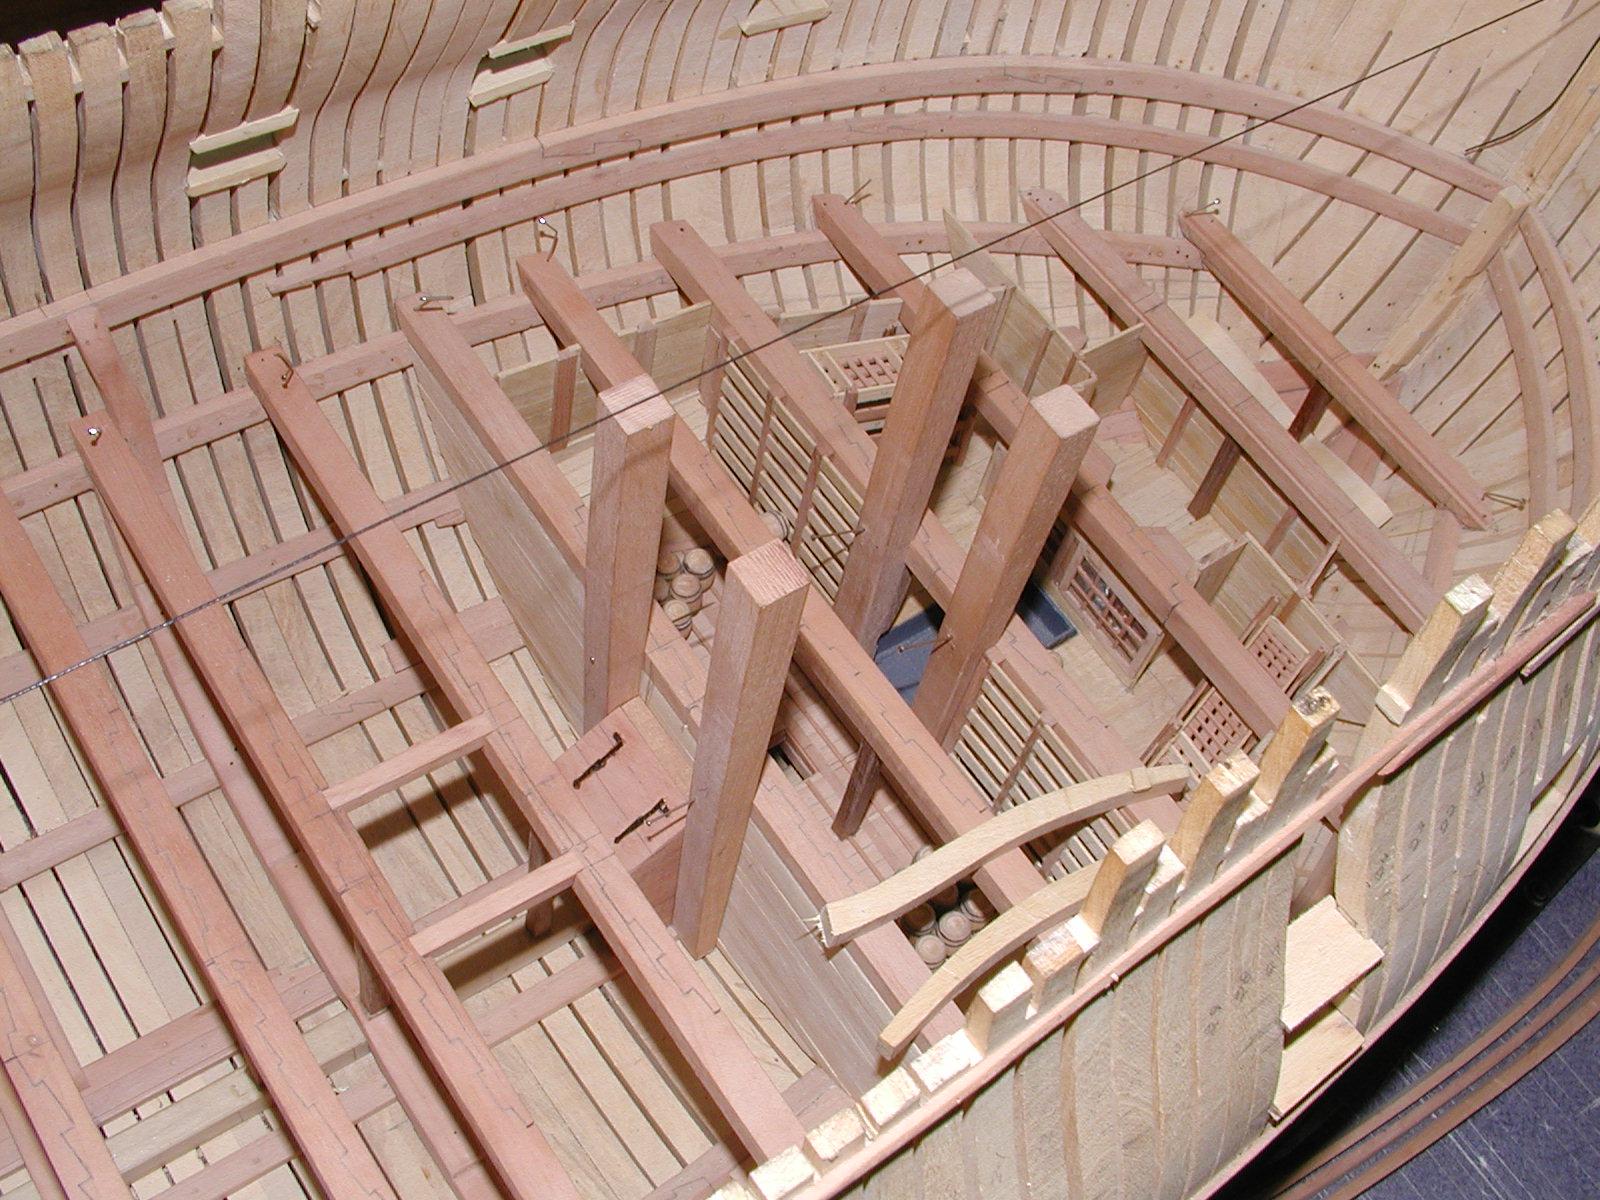
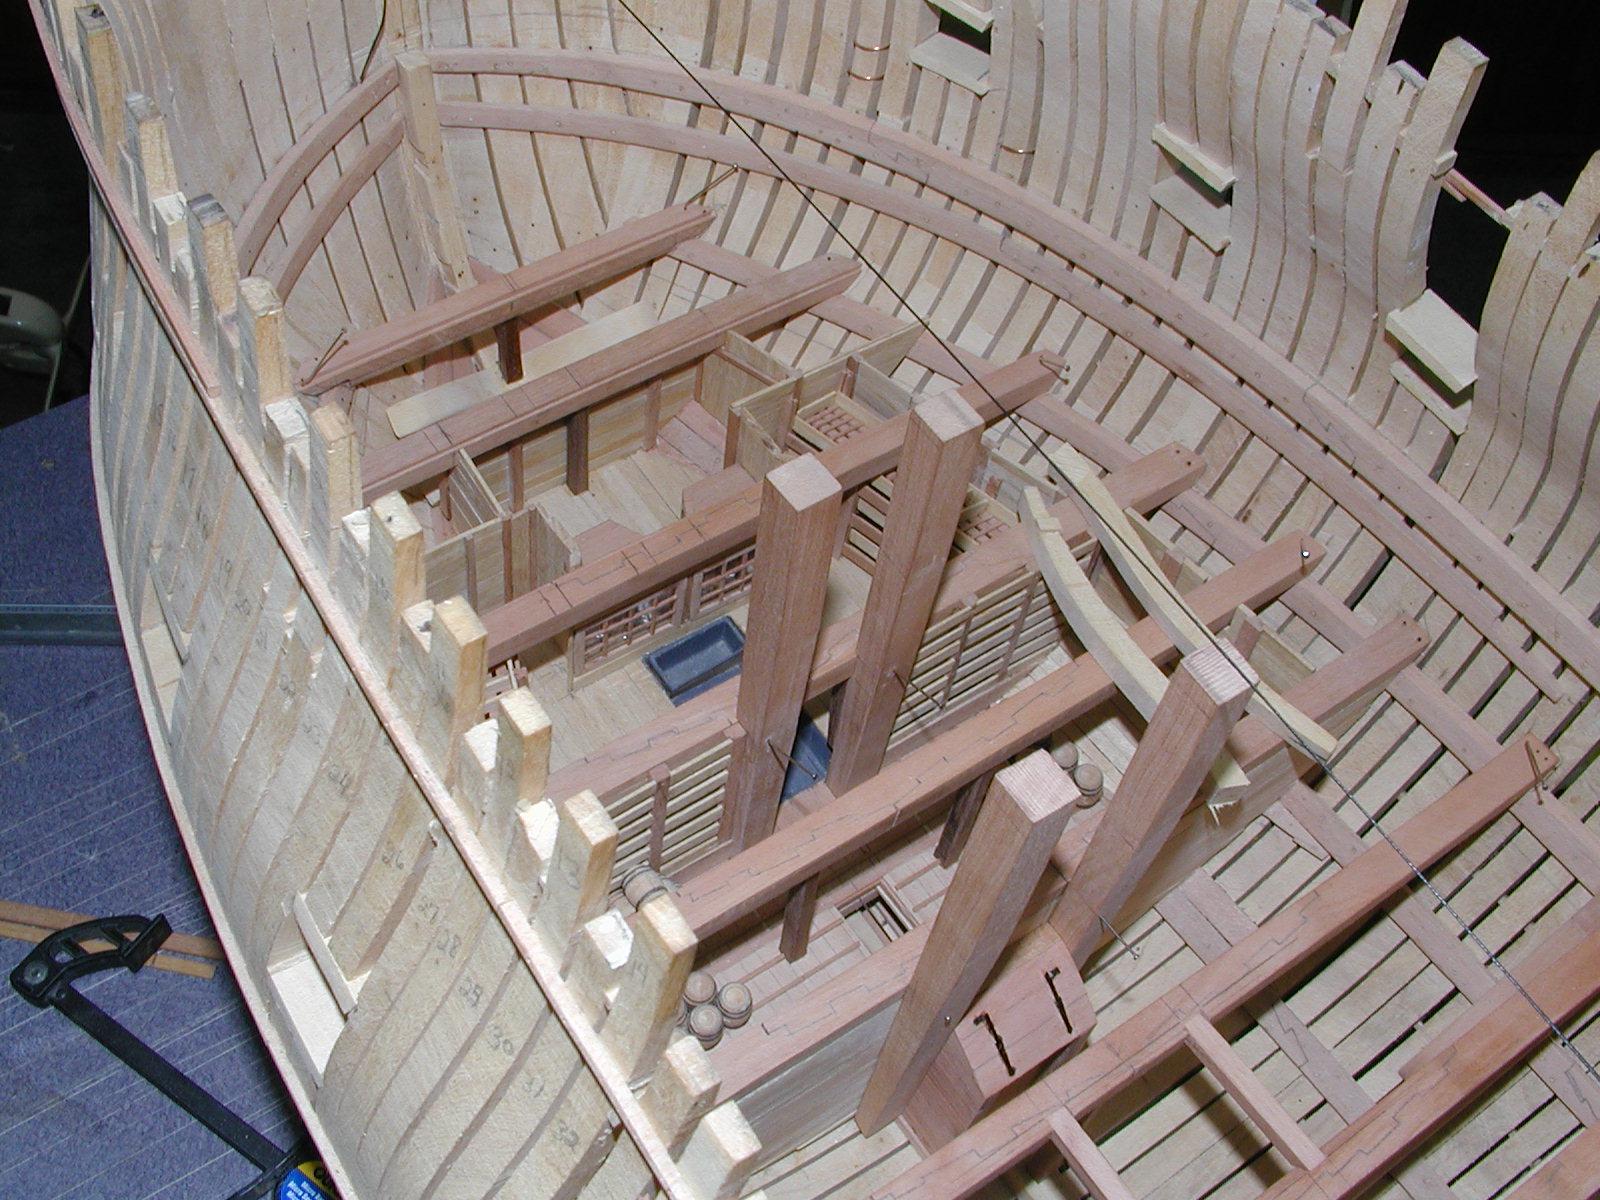
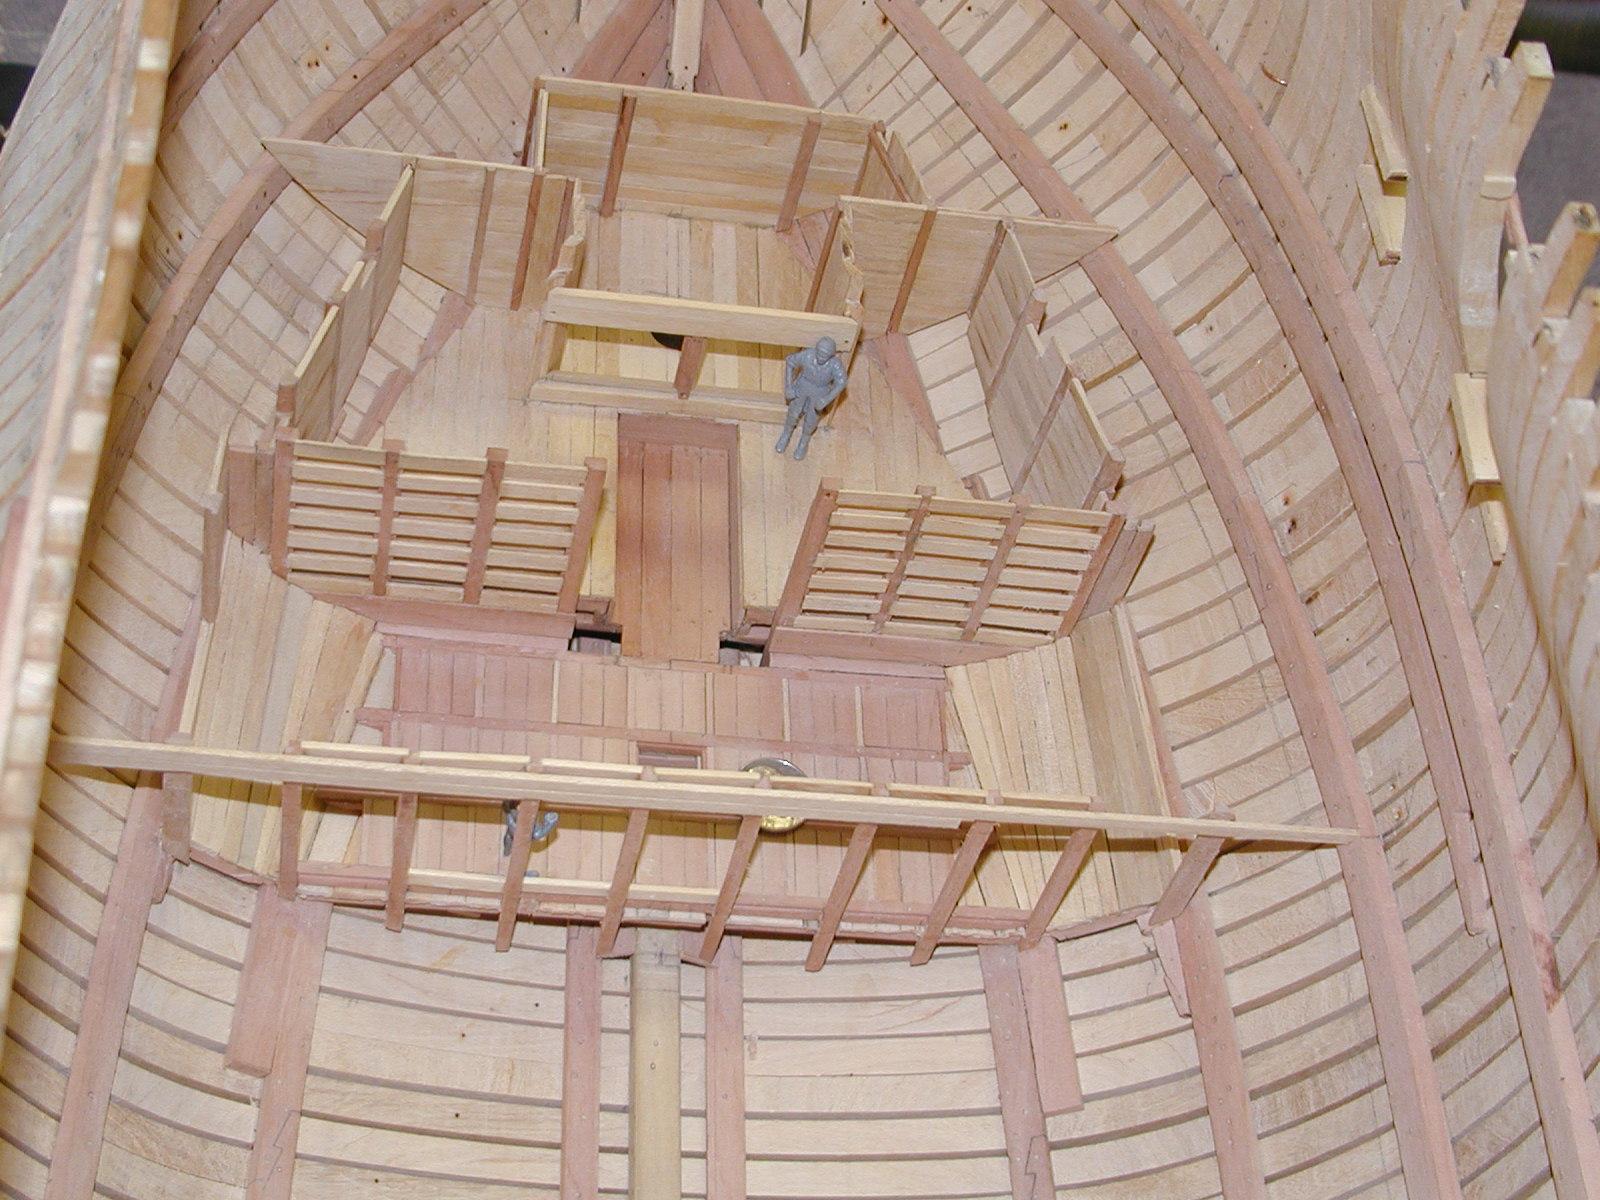
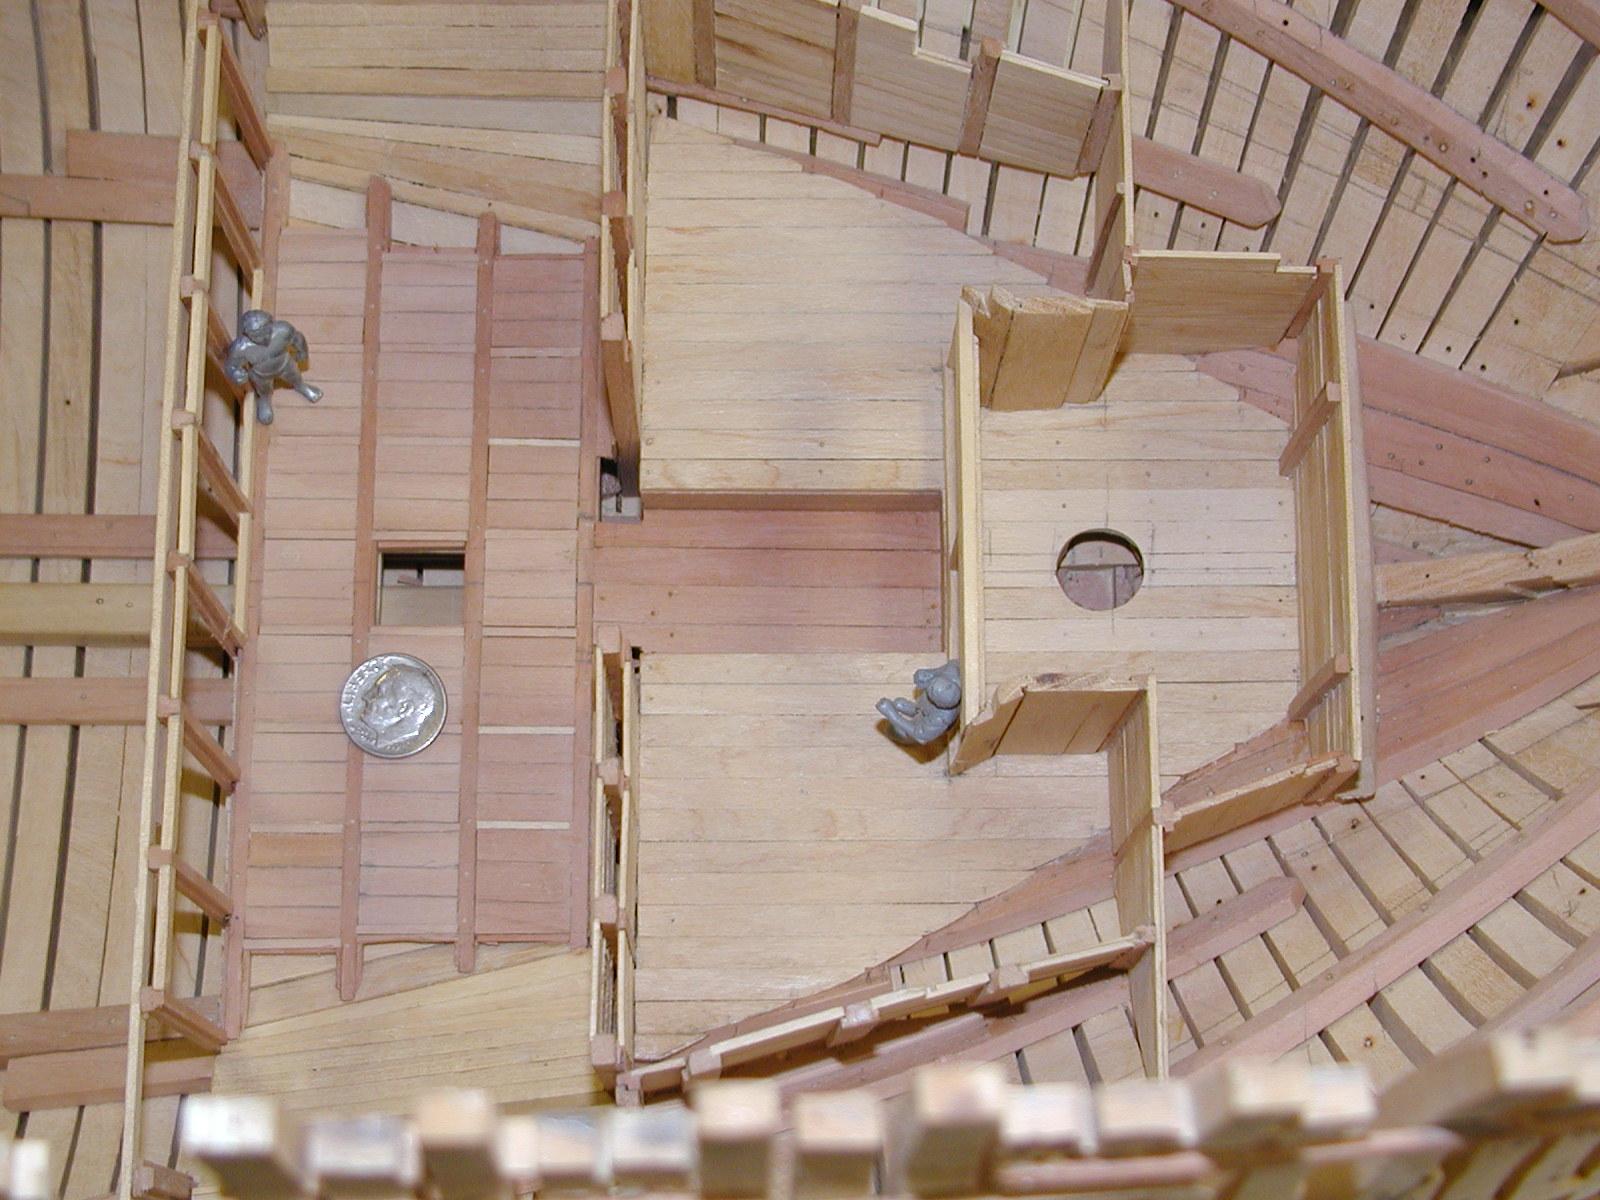
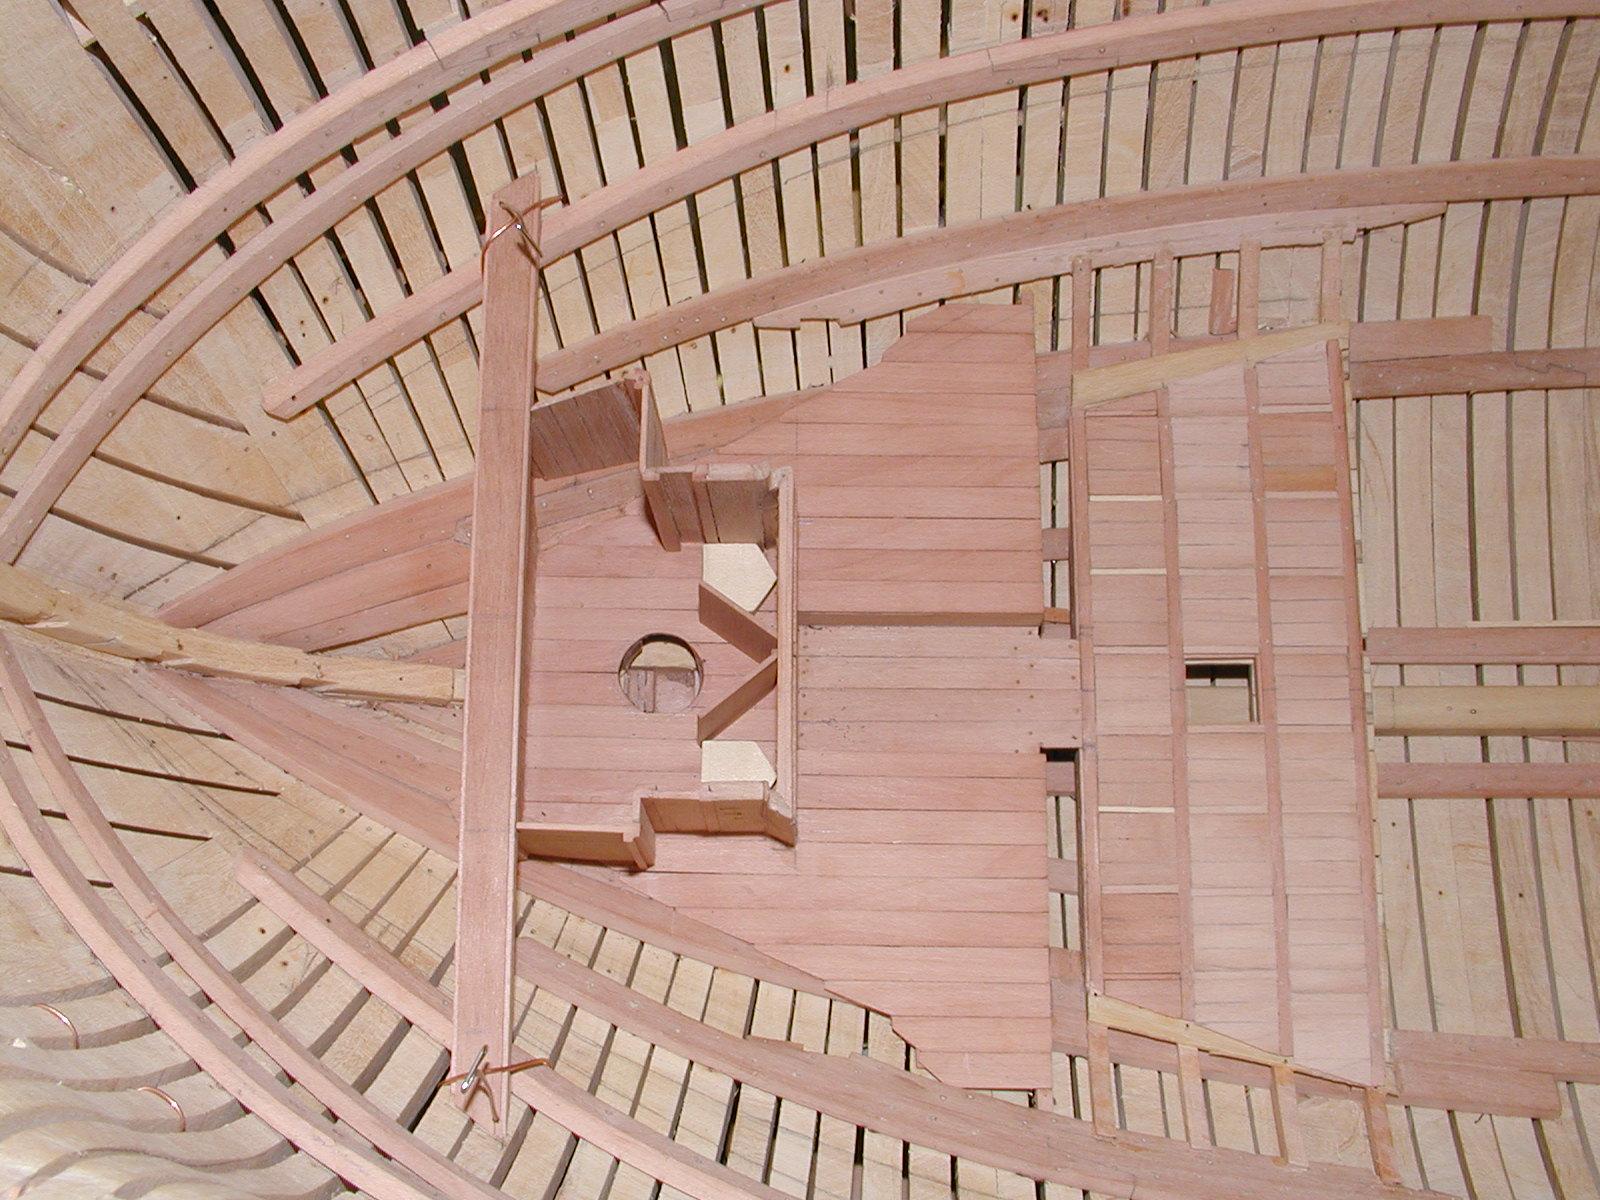
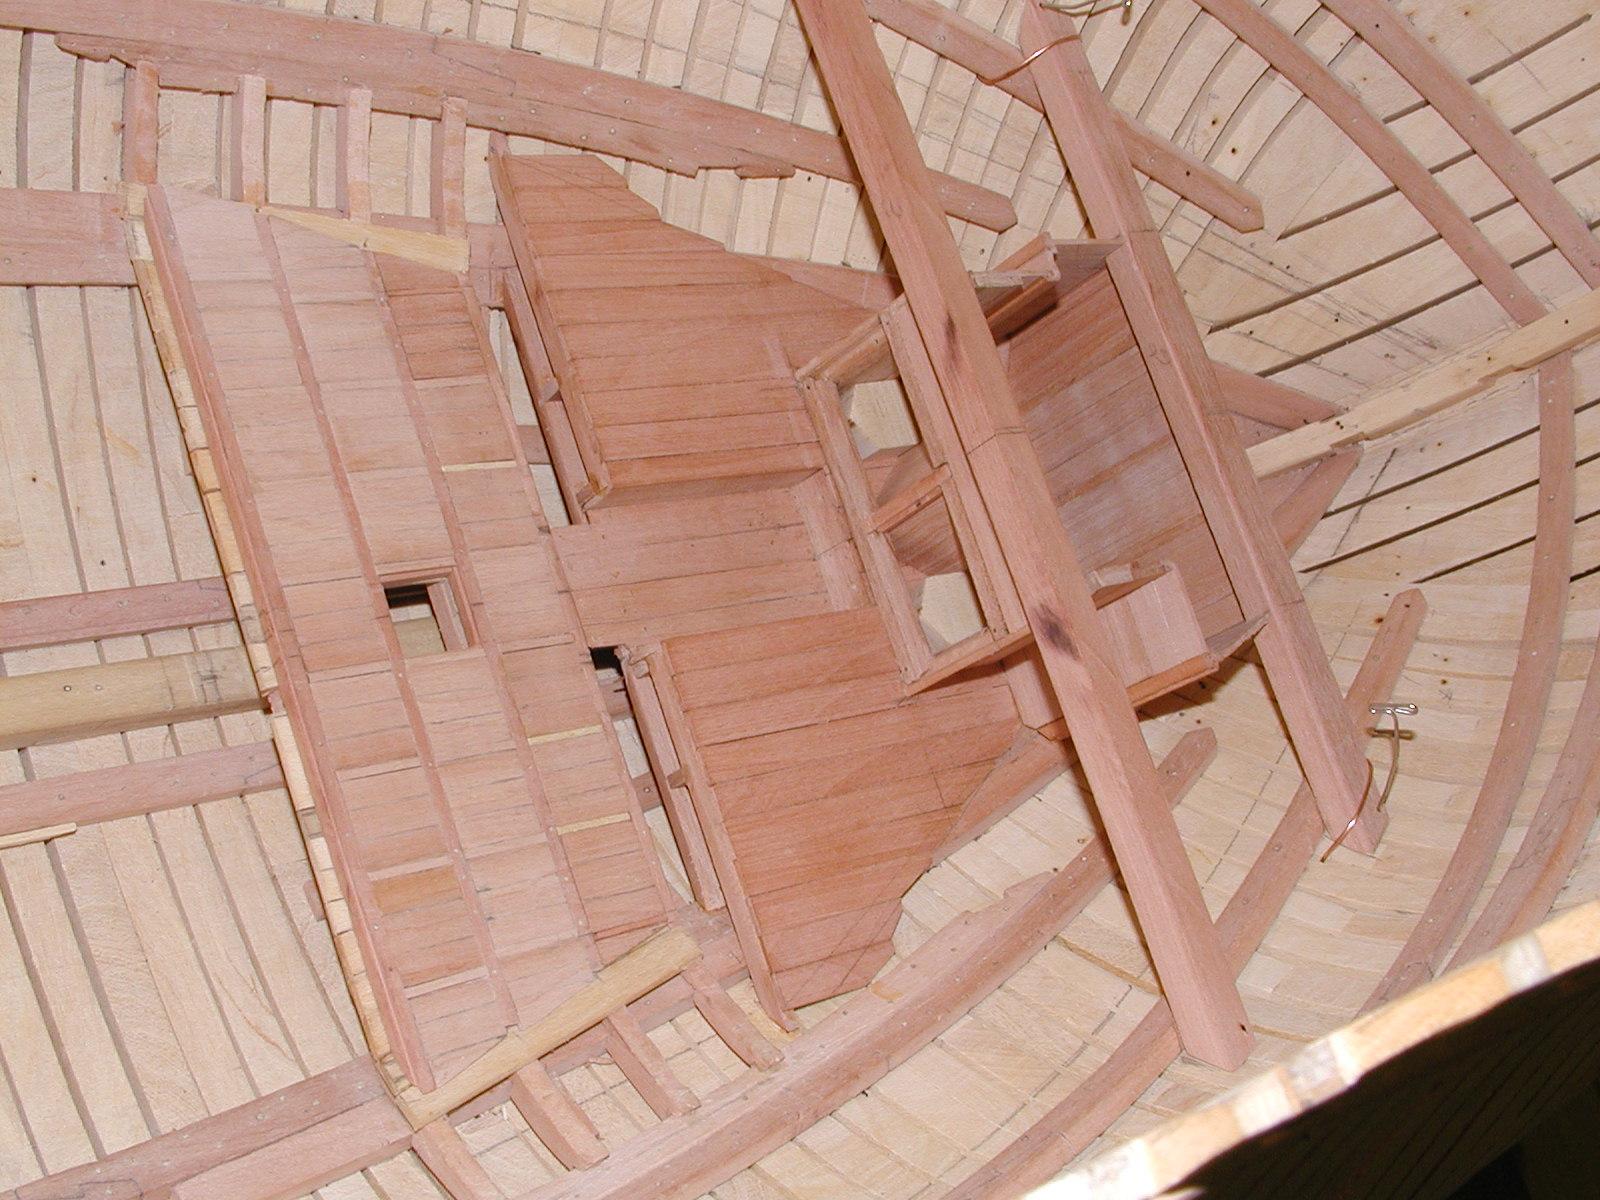
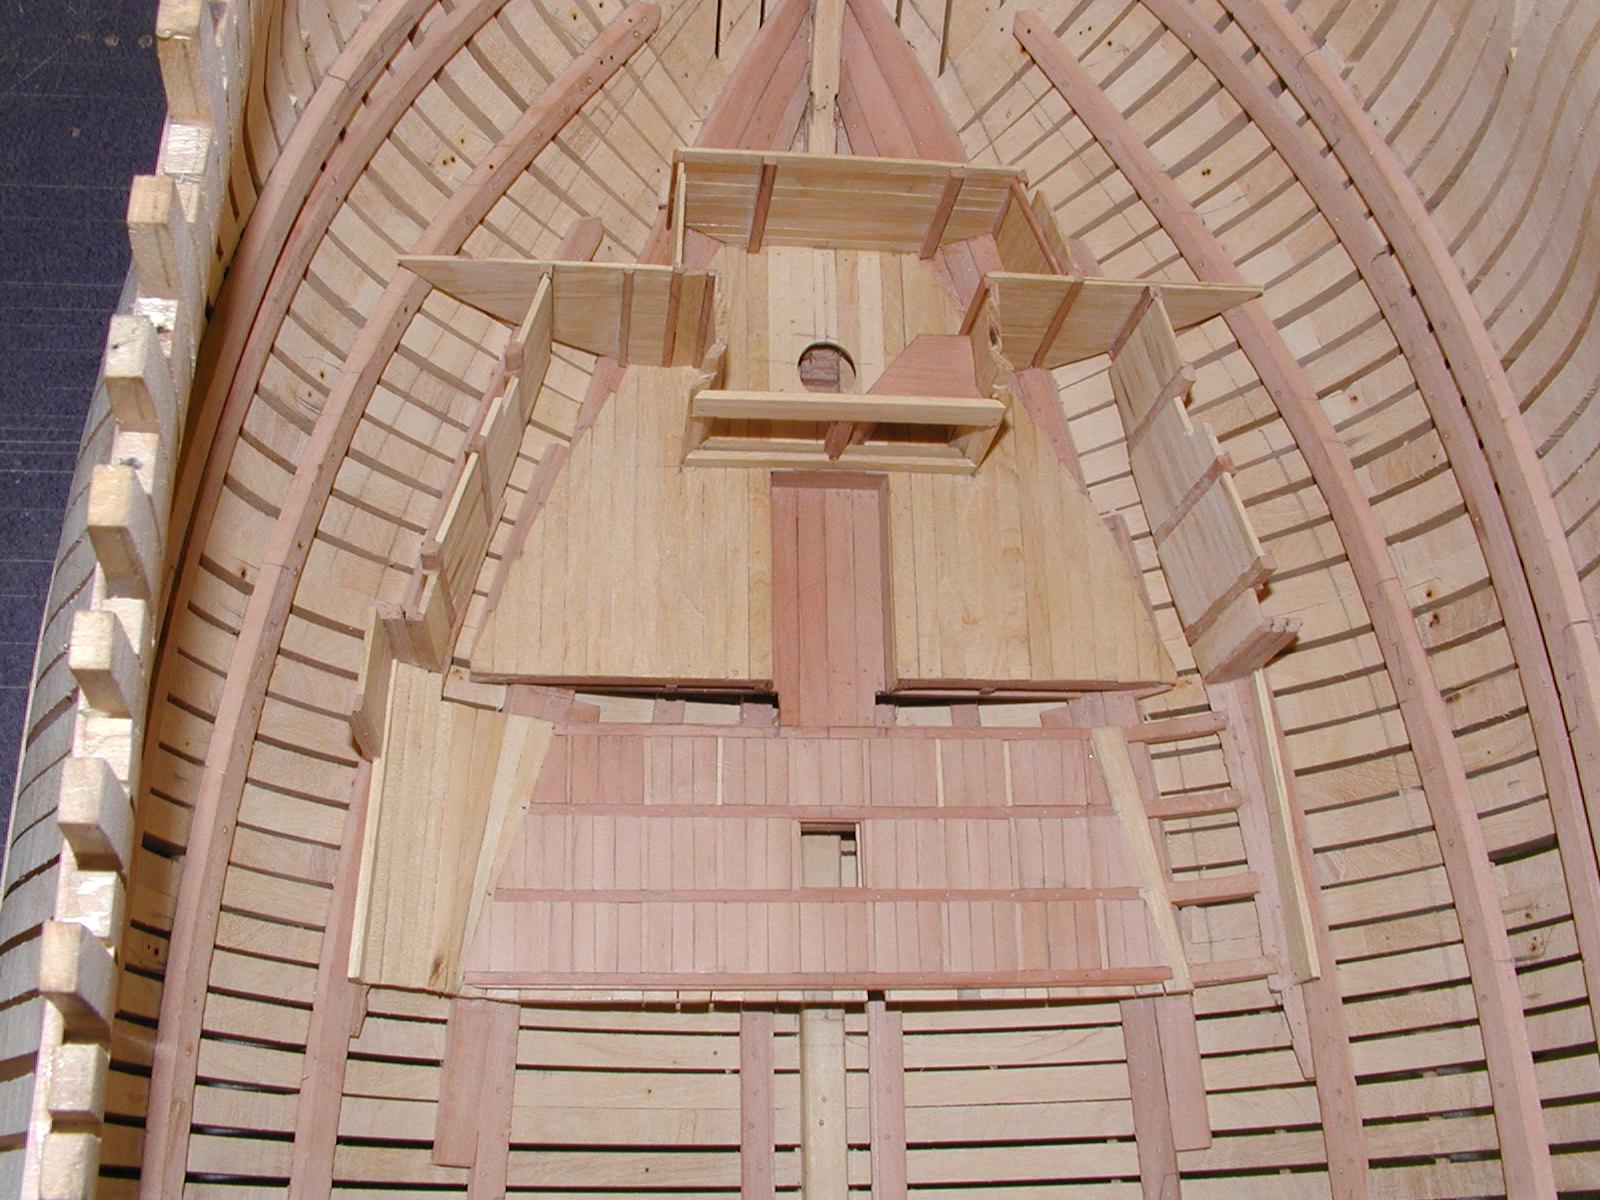
]Thanks every one, your kind words mean a lot. Here is another update on the Orlop deck going aft from the forward store rooms. One item you will noticed is the fore jeer capstan step that was fitted between the forward and aft sail rooms. Reason for the this was to enable the fore jeer capstan to be lowered down to the orlop deck making room for the long boat on the upper deck above. You will also noticed the hanging magazine, which was used to hold cartridges for some of the upper deck guns. The cartridges were made up in the magazine and then moved to the hanging magazine until needed. One of the things about this was that it was constructed to hang below the orlop deck, which I believe to keep the cartridges dry. Other items that you will noticed is the cable tier and a couple of photo's show how the grate was made to fit between the pillars, which help to keep the anchor cable contained. One will also see the shutters above the well that would some what help air flow around the timber's in a very wet area in Alfred's hold. Any question just ask away. Gary
looking fwd on the orlop deck


- billocrates, Mirabell61, fatih79 and 2 others
-
5
-
Hi Mark. As far as getting both sides even, the template helped with that plus lines that were marked across the top of it. Believe it or not that was one of the items that worried me the most and after carefully marking it out worked out fine.
Thanks Joe. Have been a little slow at posting due to life getting in the way along with the Honey dues, such as flowers and yard work. One must keep the misses happy which in turns keeps me happy. ;o)
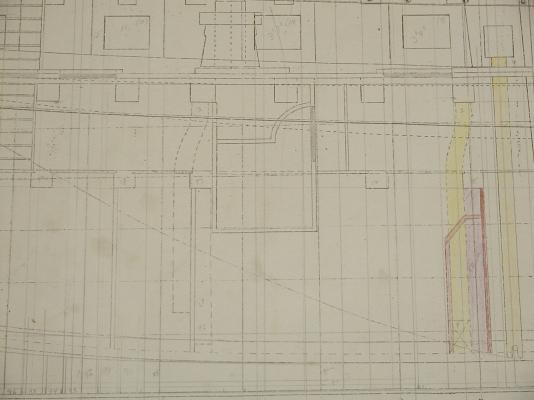
Hi Juergen. Sorry about the delay sir and thanks for your kind words. Here is a couple of photo's and hope they help you on the wale at the counter. Hoping I get around to posting more in the very near future. Gary
- fatih79, st george, billocrates and 5 others
-
8
-
Hi Daniel.
Always amazied at your build of the HMS Victory and how much scratch you put in to them. Did you every think about putting in all the tools used to handle the cannons? At the moment am researching the tools and were they may of been put. I know that some times the were hung on hooks on the bulwarks and some times on the beams them self's. Seems that the beams them self would have been a little on the busy side with the pieces that held the hammocks. Any way can you please tell me were you got the photo etch that you have shown in the last few photo's of your build. Thank you sir and look forward to your next surprise and update to bring her to life. O am always happy to see that your crew are hard at work. Gary
-
Seems that the 1719 Establishment list may be of some help here. You can see this in the back of Peter Goodwin's book Sail Man of War, page 241. Her main gun deck ports were 2ft 4inches. The middle deck gun ports was 2 feet 2inches. Her upper gun deck ports were 1 foot 10 inches. It probably was from the top of the deck plank to the top of the cill's. The main gun deck plank was 4 inch thick, the middle deck planks were 3 inch thick and the upper deck also 3 inch thick. On the quarter deck the plank was 2 1/2 inch thick and the cill was 1 foot 7 inch's. The reason I say the 1719 establishment is what David Lyon said in his book, The Sailing Navy List. As a ship that was generally [sic] approved of her dimensions were taken for the 100 gun ships of the 1719 Establishment. Her great repair of the 1720's is counted as producing a new ship by Lavery.
Gary
-
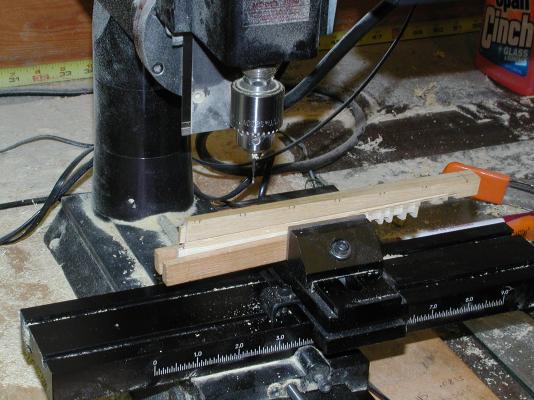
Thanks guys for the response. Just a little in site in to why I ask about how others are making their cannons. If you guys don't mind could you show some photo's of your cutting tools before and after. Maybe in the future some one will show how they did this from start to finish, on cutting the shape in to the tools to blacking the cannons, sort of like a practicum on making cannons. Making one cannon isn't to bad but 74 of them that look alike, ;o(. Any way thanks guys. I have turned cannons before, but have allways been impressed by some of the outstanding work on making cannons such as Alex, and really looking on trying to make a perfect cannon, if that is possible for me. Gary
-
Hum, figure for sure that some of you turned your own cannons but guess not. O well thanks anyway. Gary
-
Hi Every one. Just a question or two. What tools or more like what shapes are your cutter's and how would you go about making them, to be able to shape your cannons? Look fwd to your reply's, and thanks in advance. Gary
-
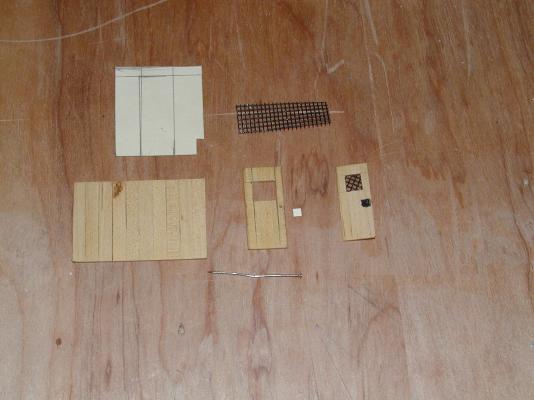
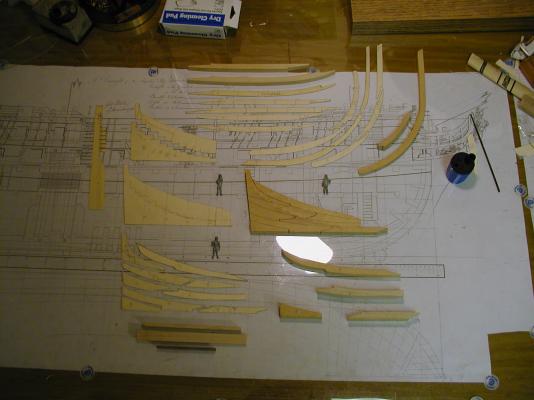
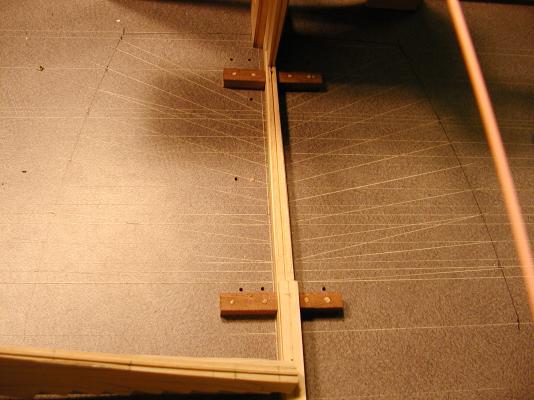
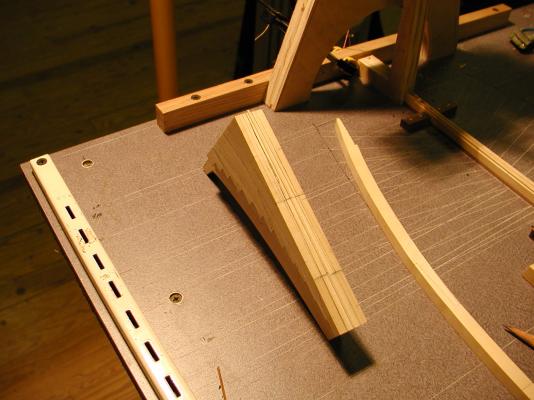
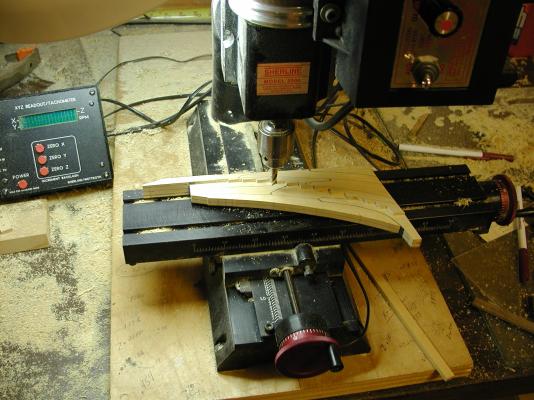
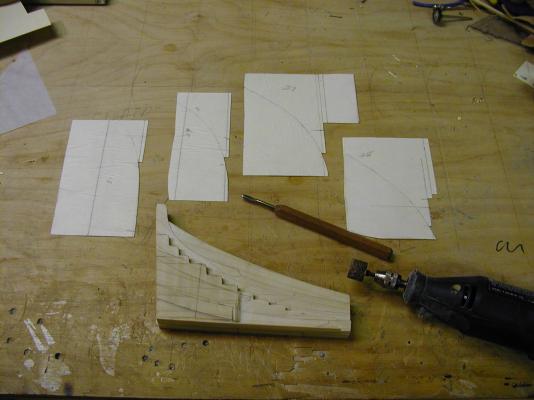
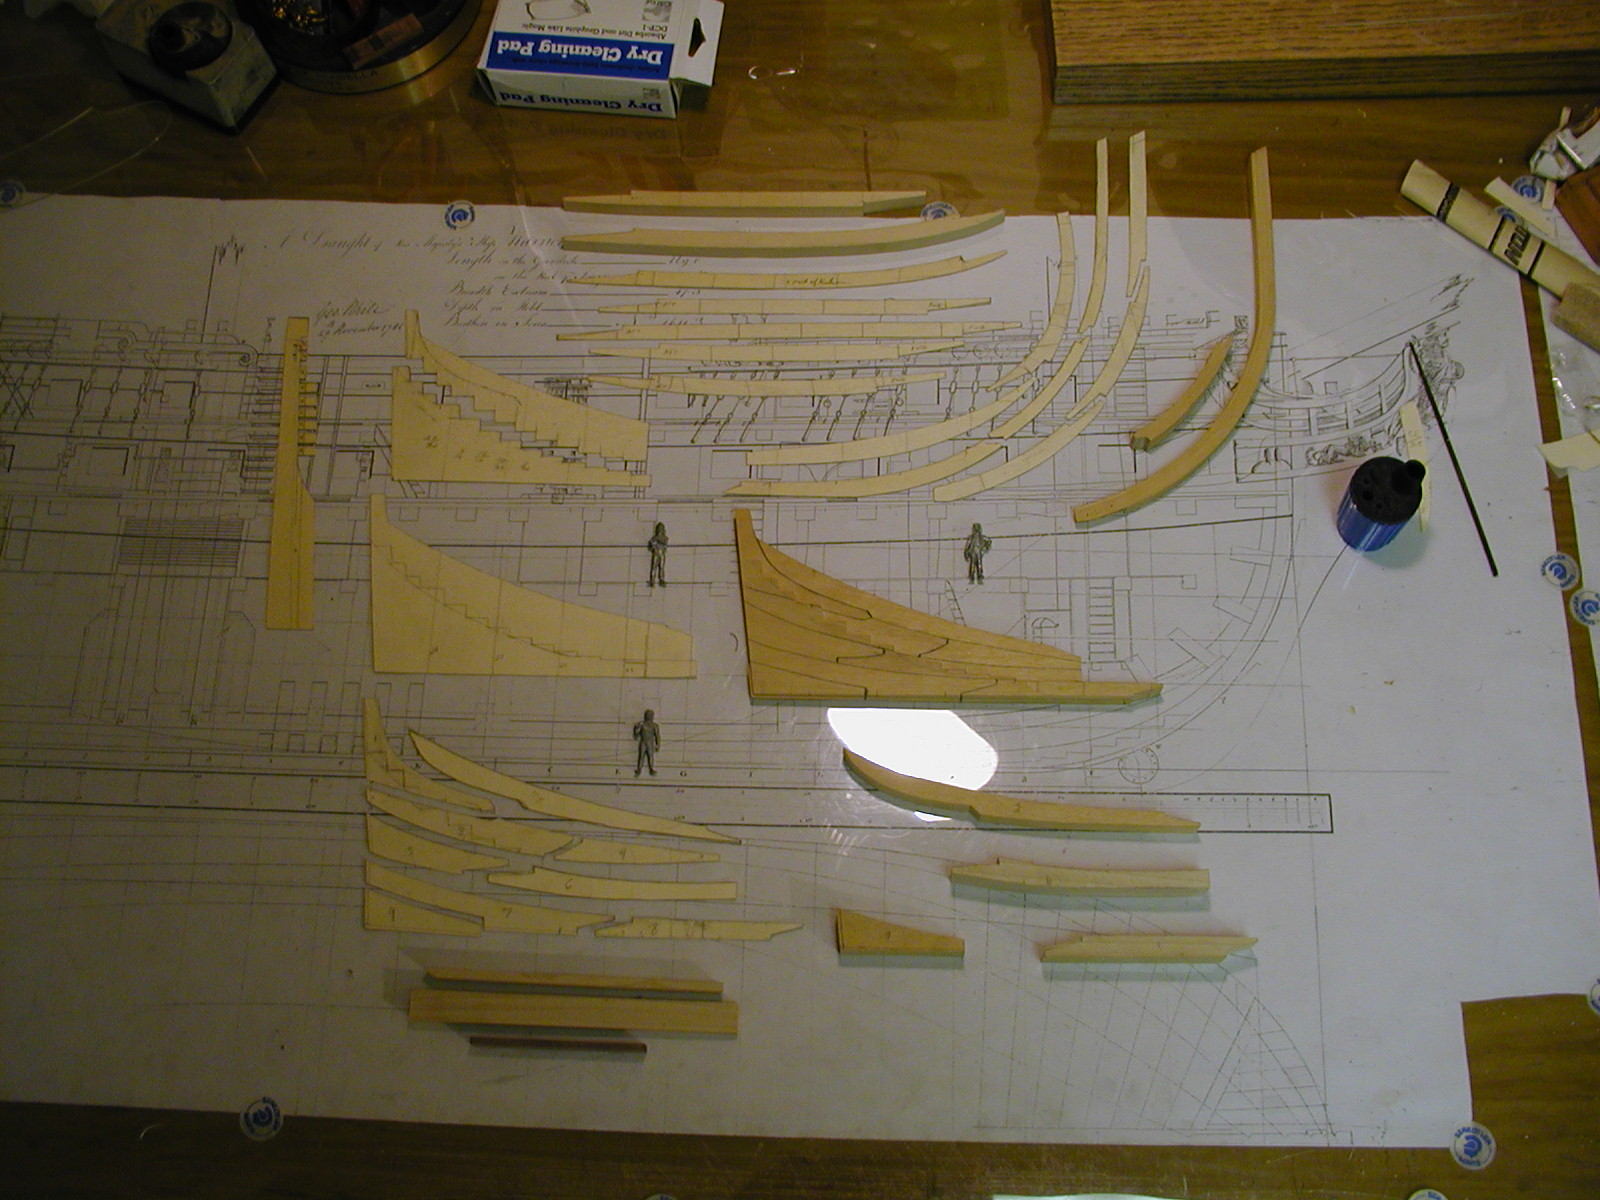
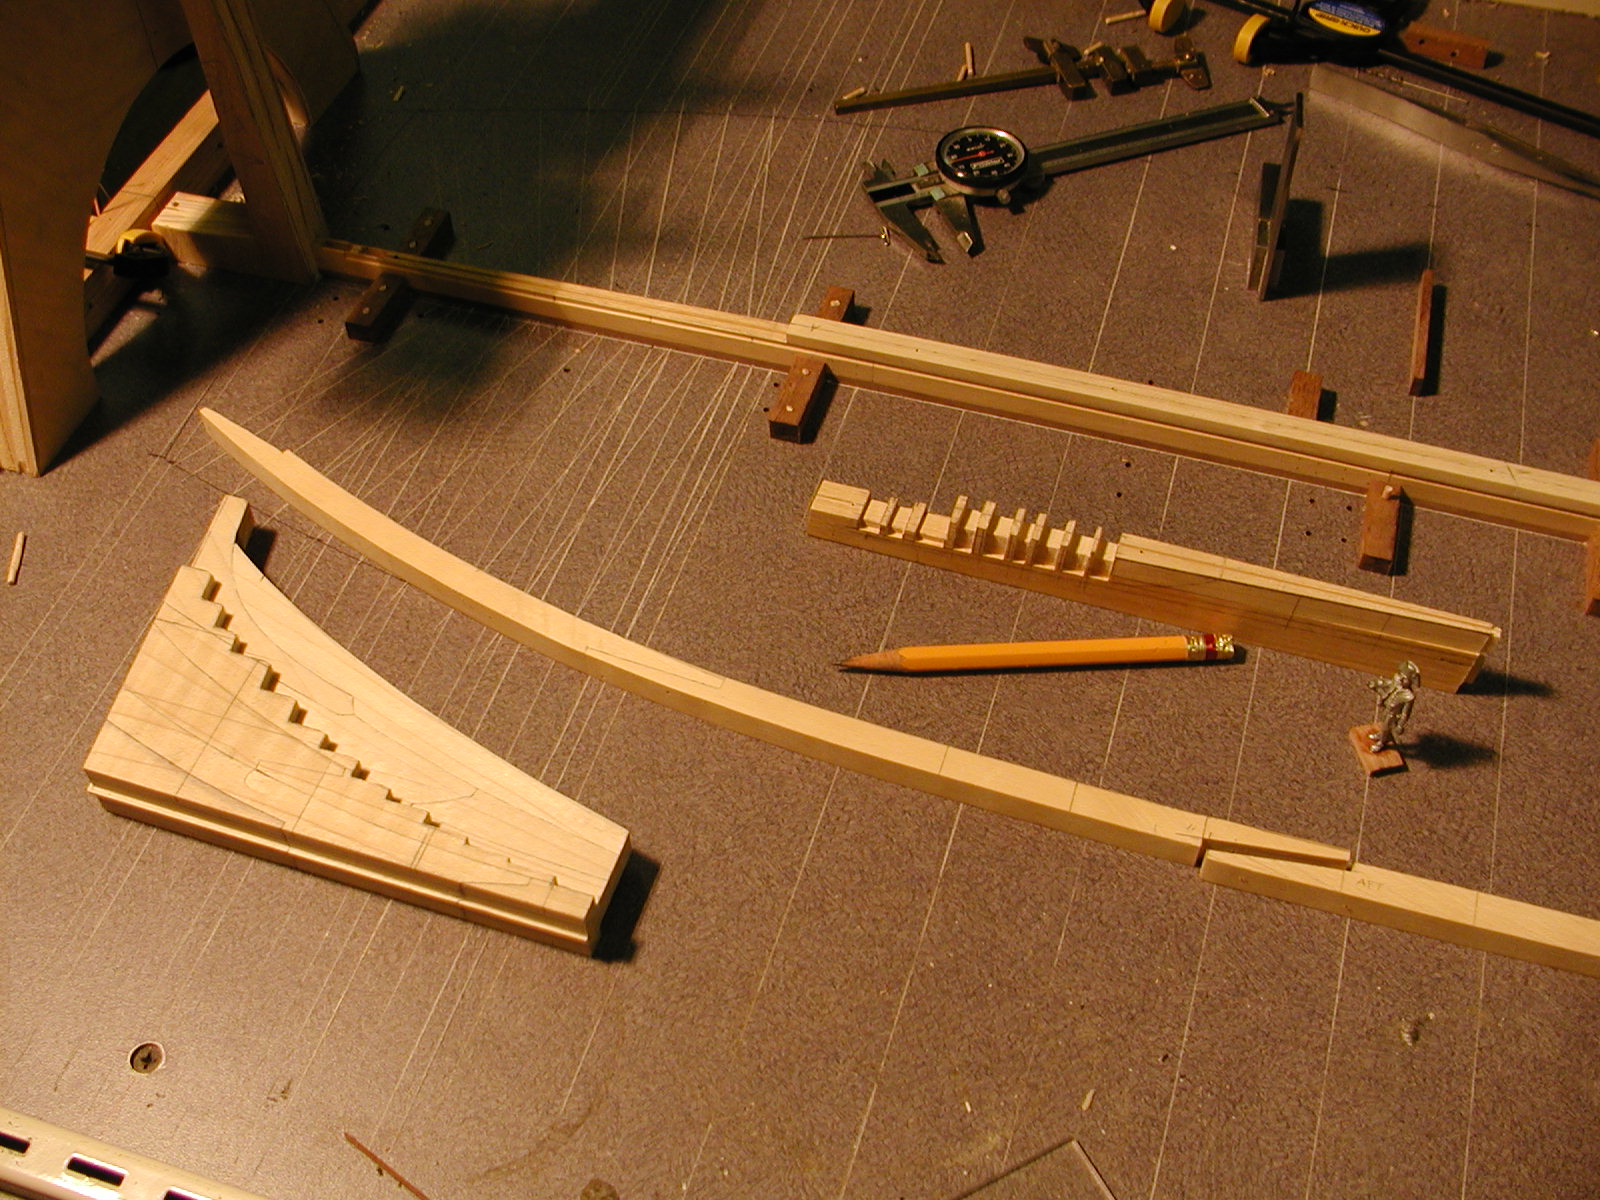
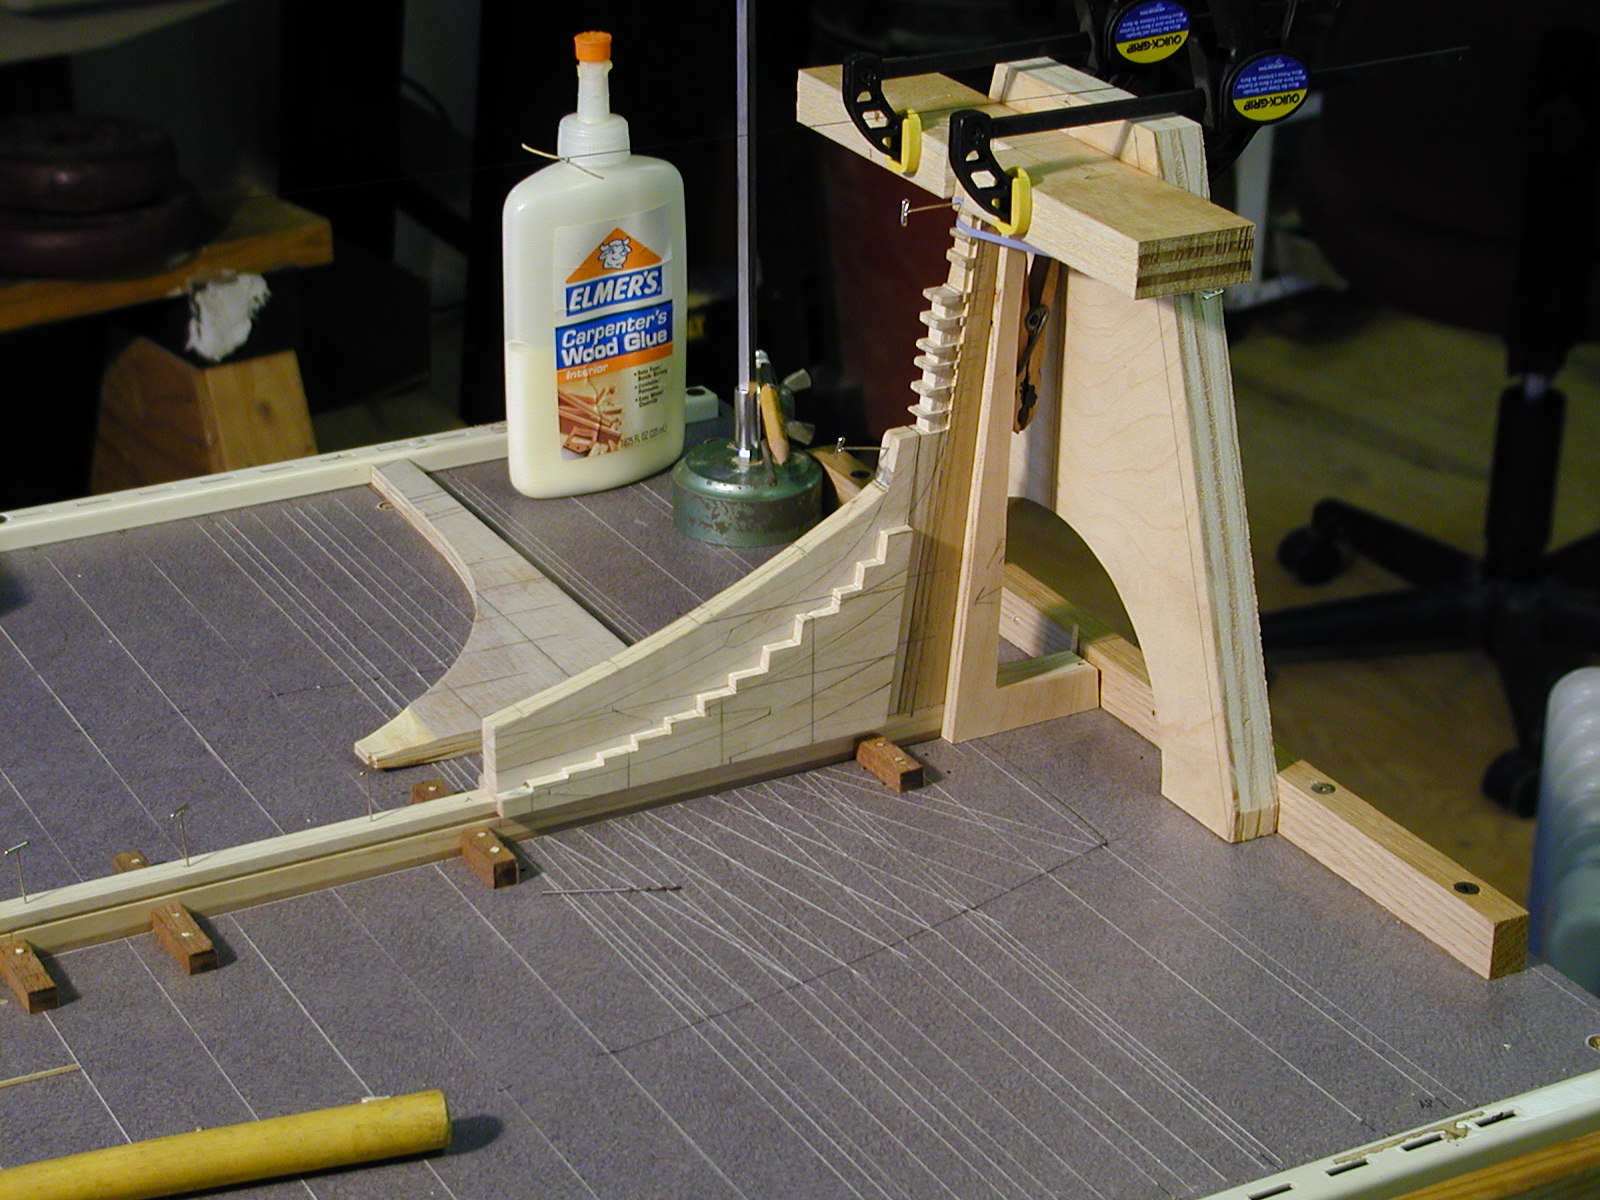
Hello every one and thank you very much. Sorry about not getting back to you sooner. Hi Guy. Seems my log is a whole lot shorter sir and seems that I didn't put in any photo's of building up the stern dead wood. I do have photos showing the templates of the parts and pieces and how her stern deadwood was mounted in a groove that was milled in to the last piece of her keel. there was a male part to this cut on to the bottom of the dead wood itself to help me align this so it would be center on her keel. Hope you enjoy them sir. Seems I just may have to look and see what other items I may of missed in rebuilding her log and thanks Guy for letting me know about this one.


-
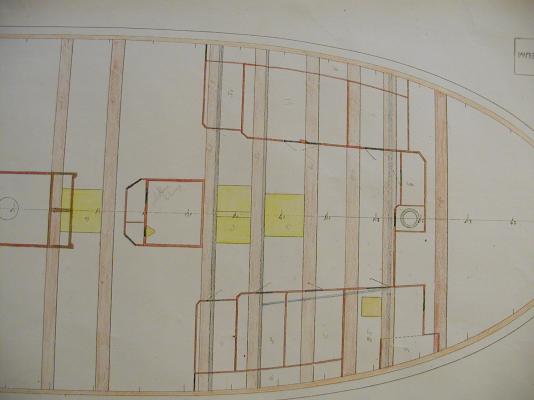
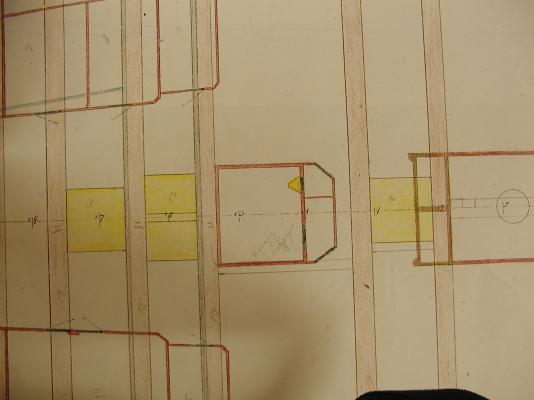
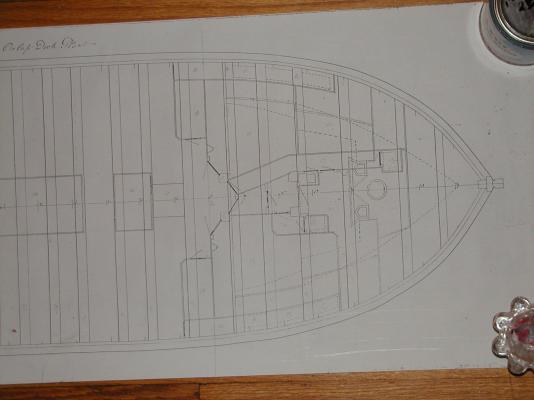
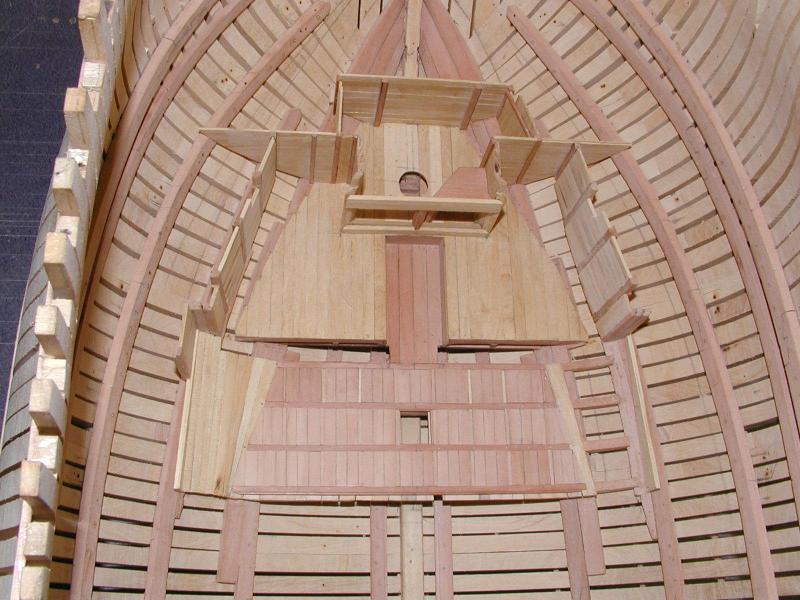
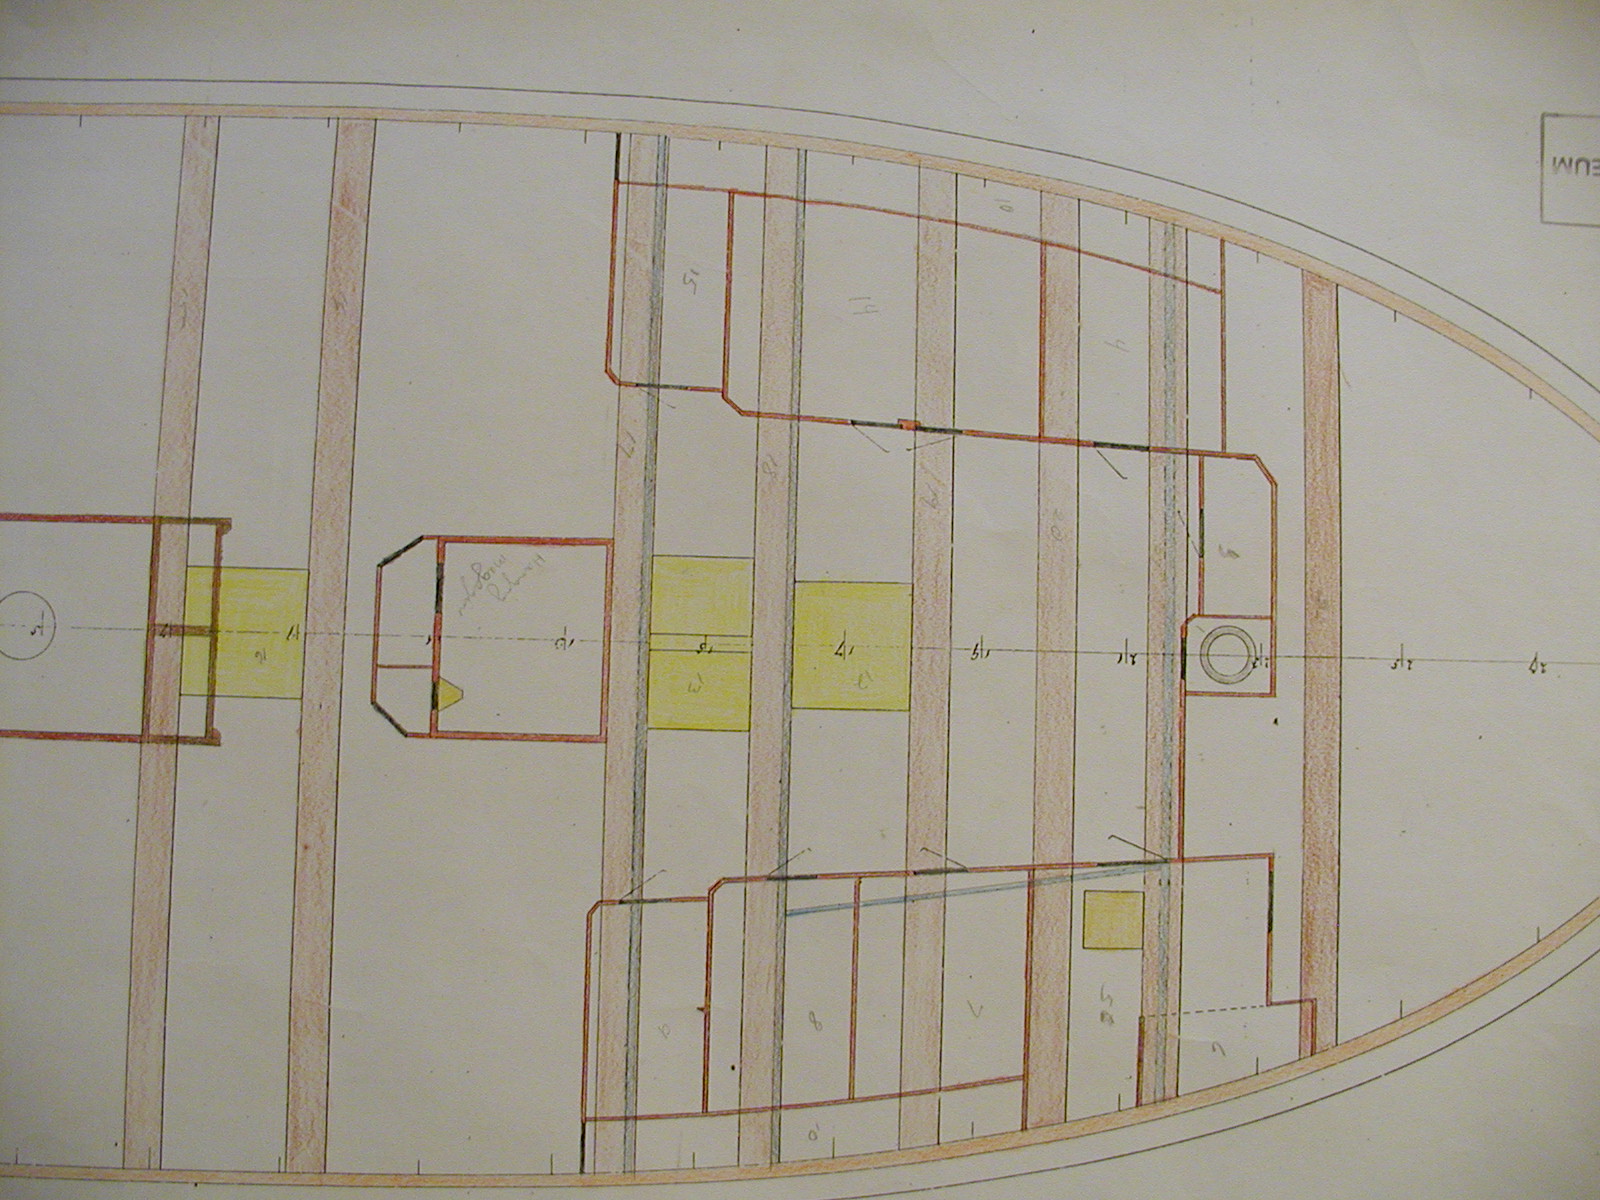
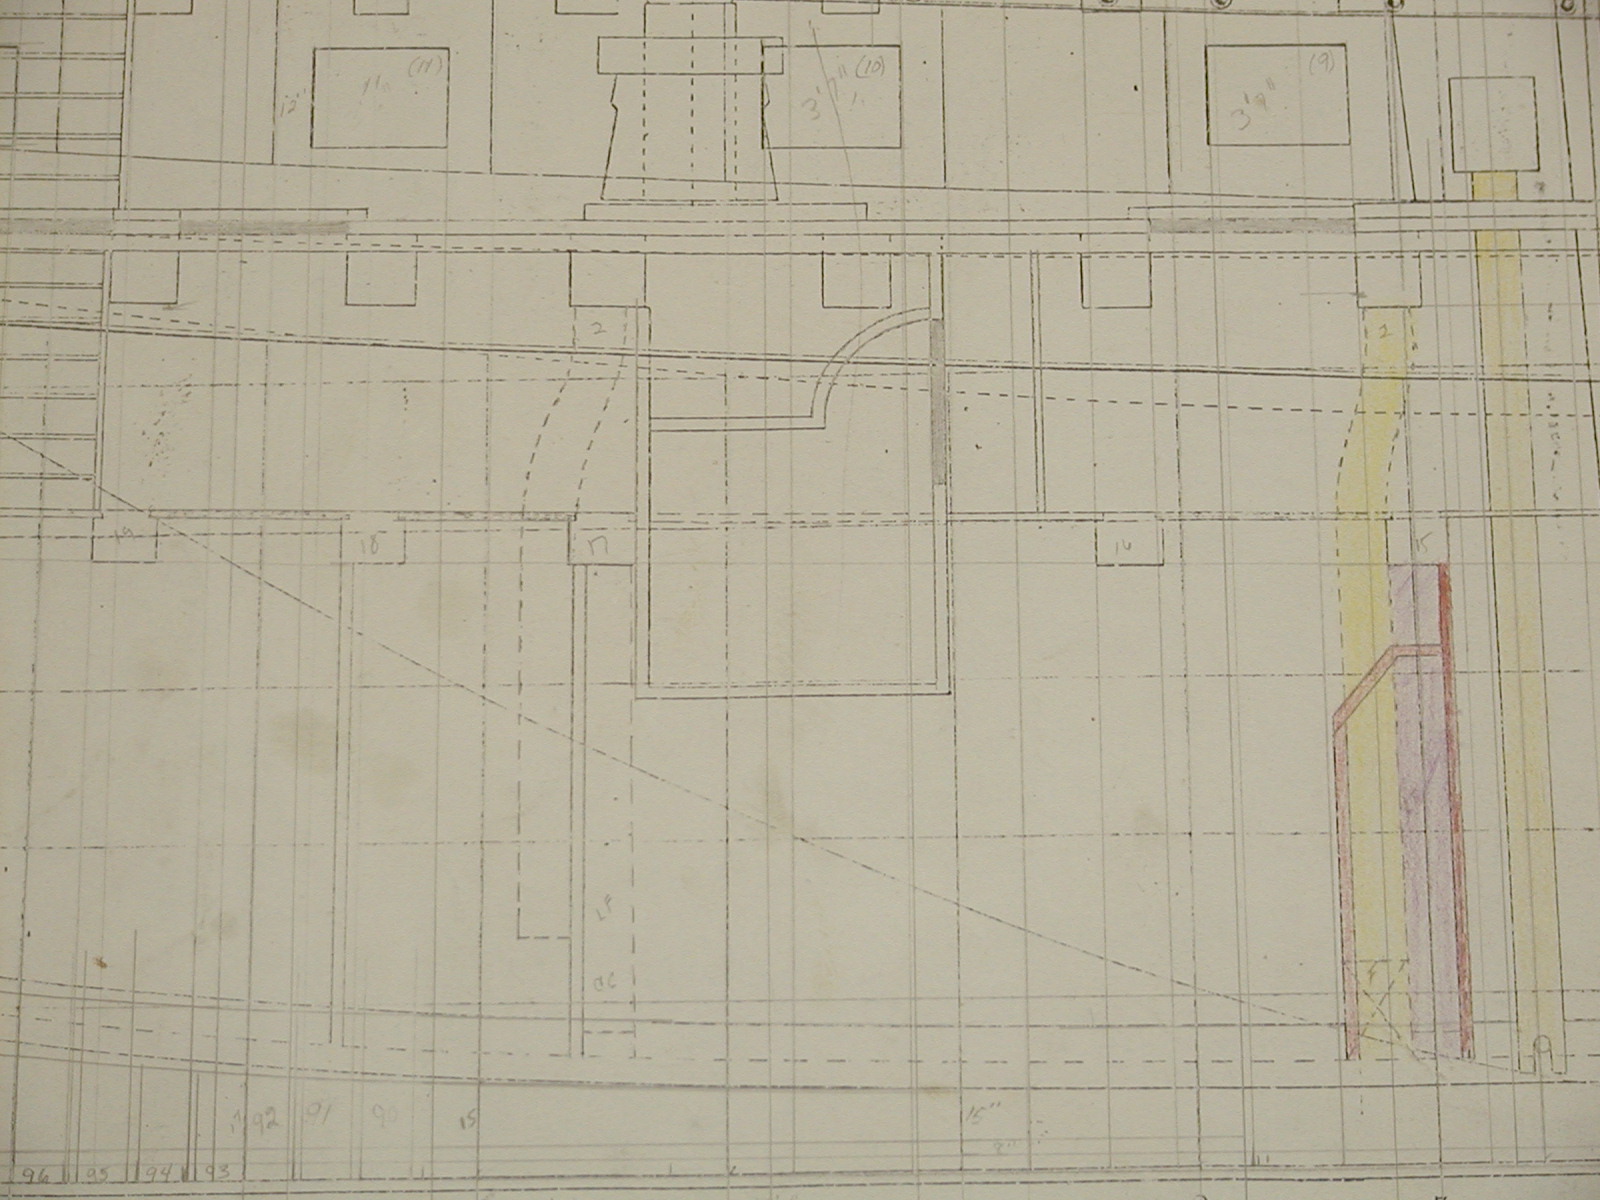
Thanks Guys. Here's another update and this time we head back fwd on the forward store rooms. It does look a little confusing, but have added a layout of her store rooms. If any of you have any question's but take a look in Peter Goodwin book the sailing man of war, page 113 fig 4/2. A couple of items in his drawing and Montagu are diferent. Item-A is really the scuttle going down to the main magazine. He call's it the cartridge scuttle which was really on the port side across from the scuttle going down to the main magazine and access to this was in the passage way to the light room. Enjoy the photo's
-
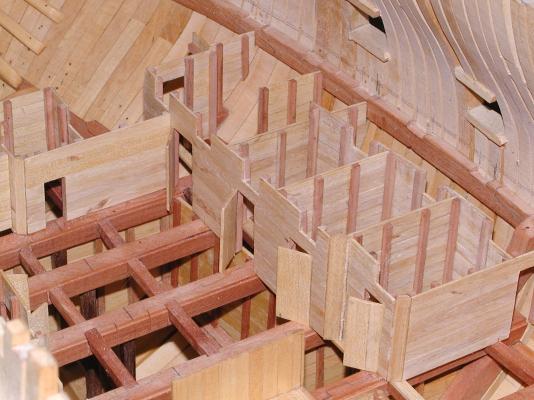
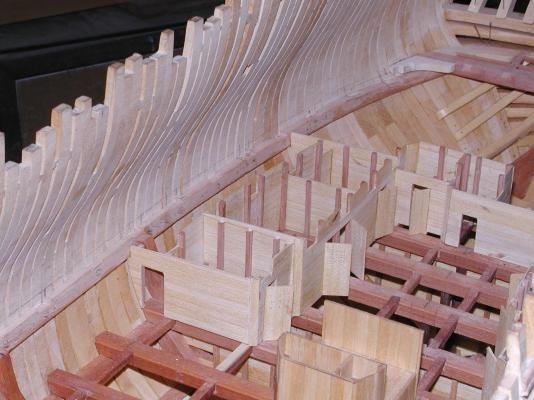
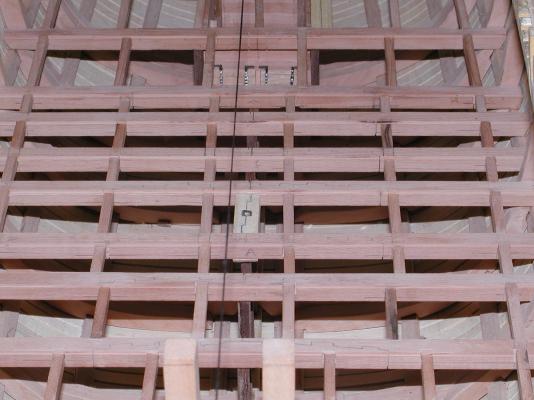
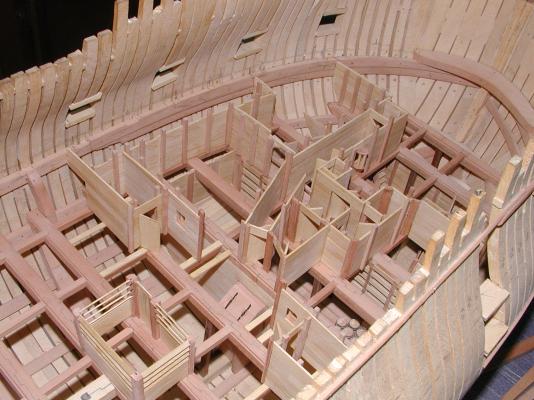
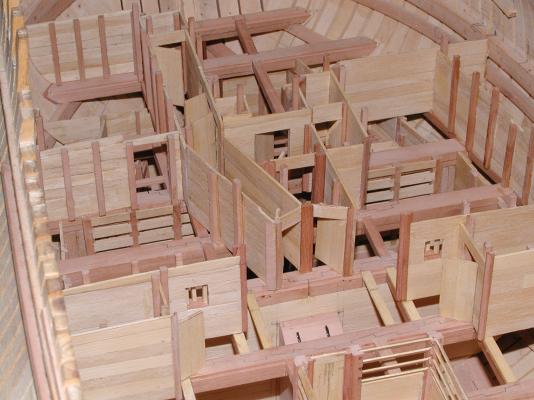
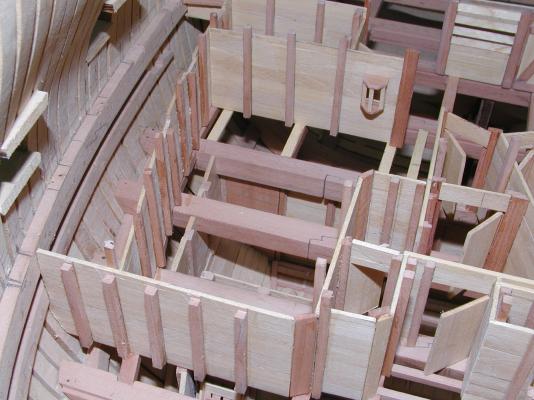
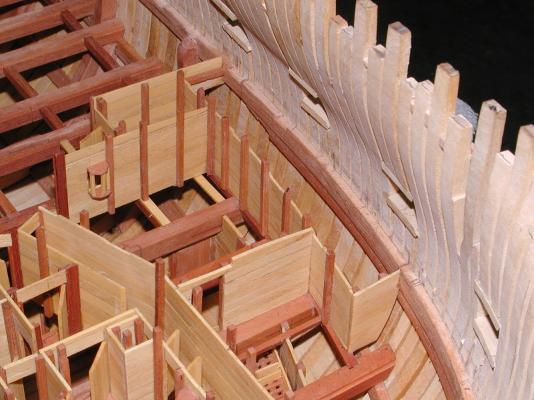
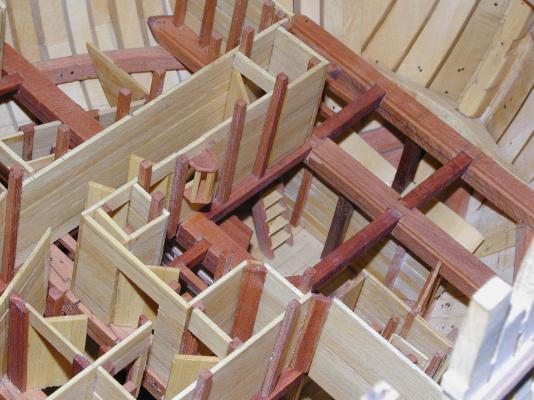
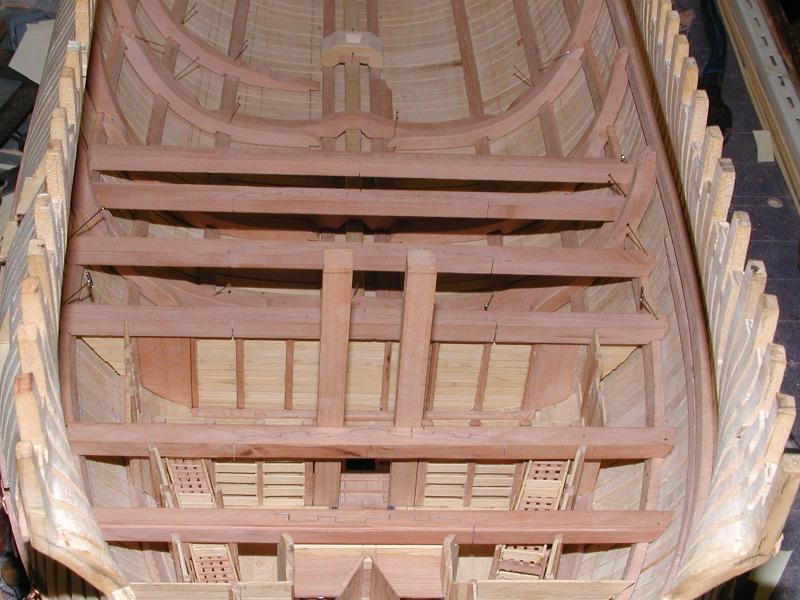
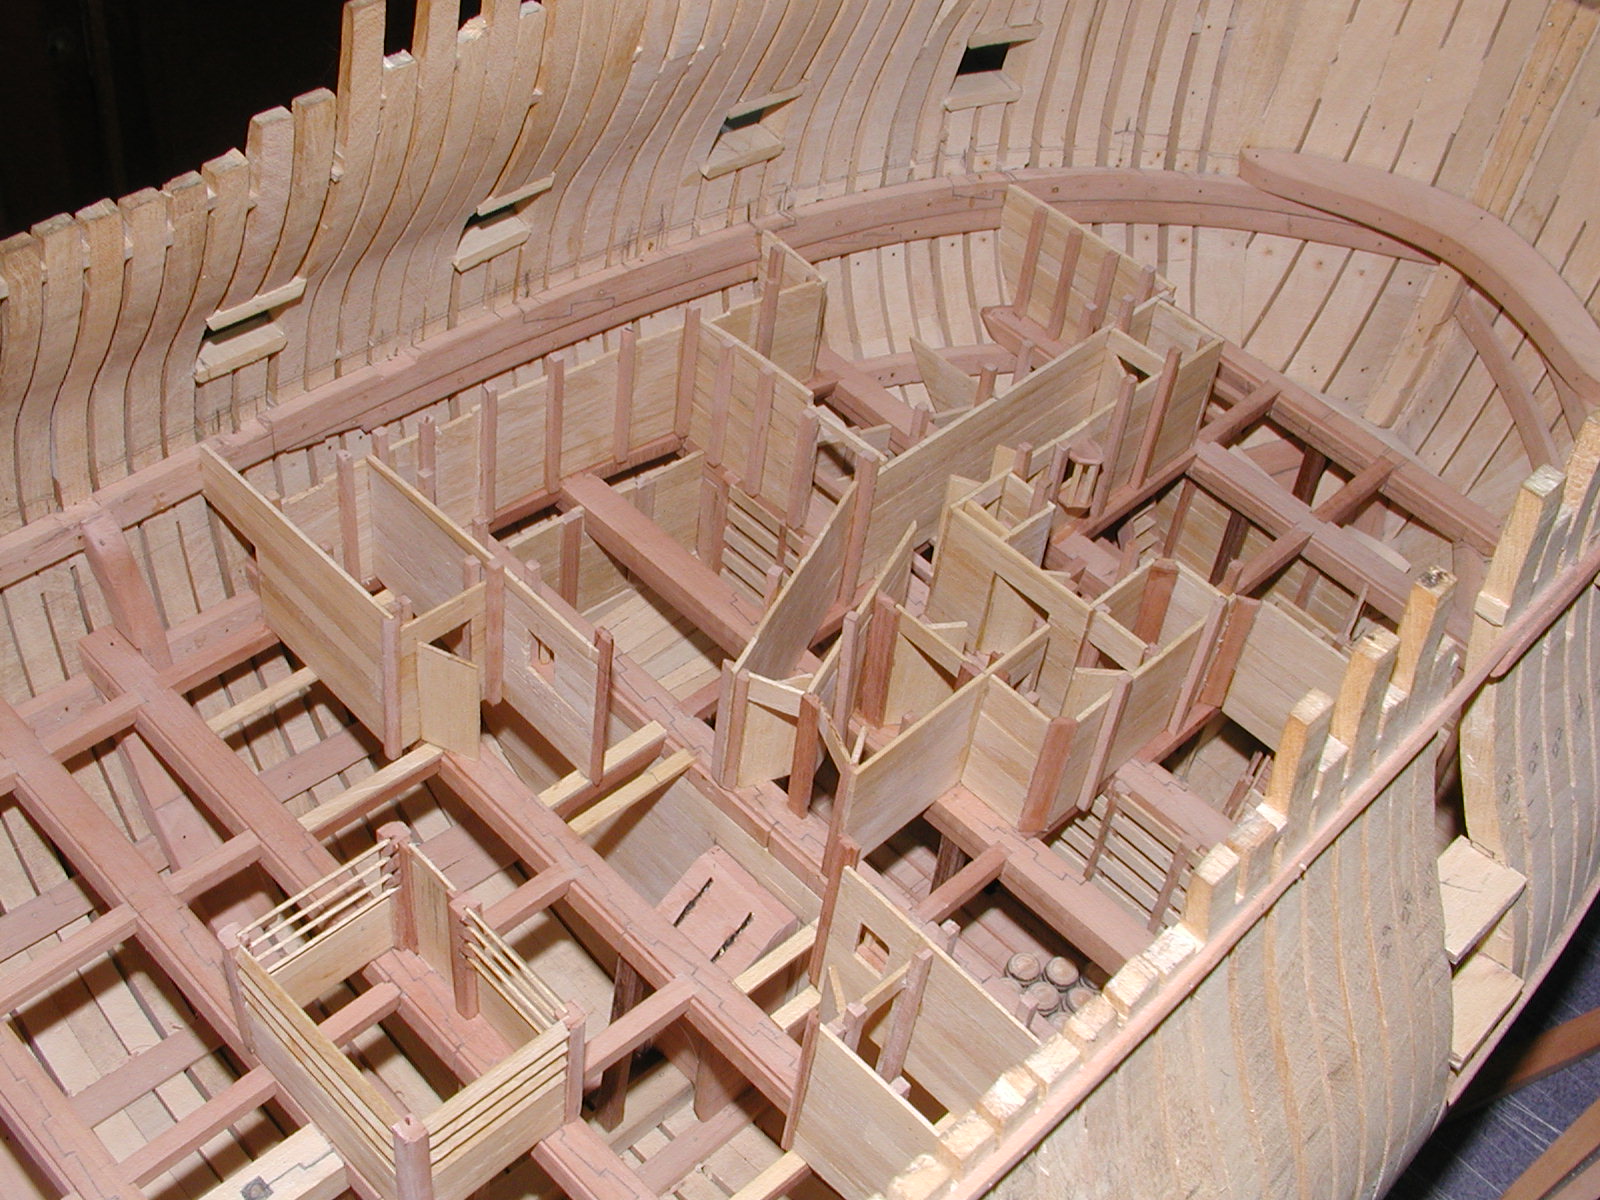
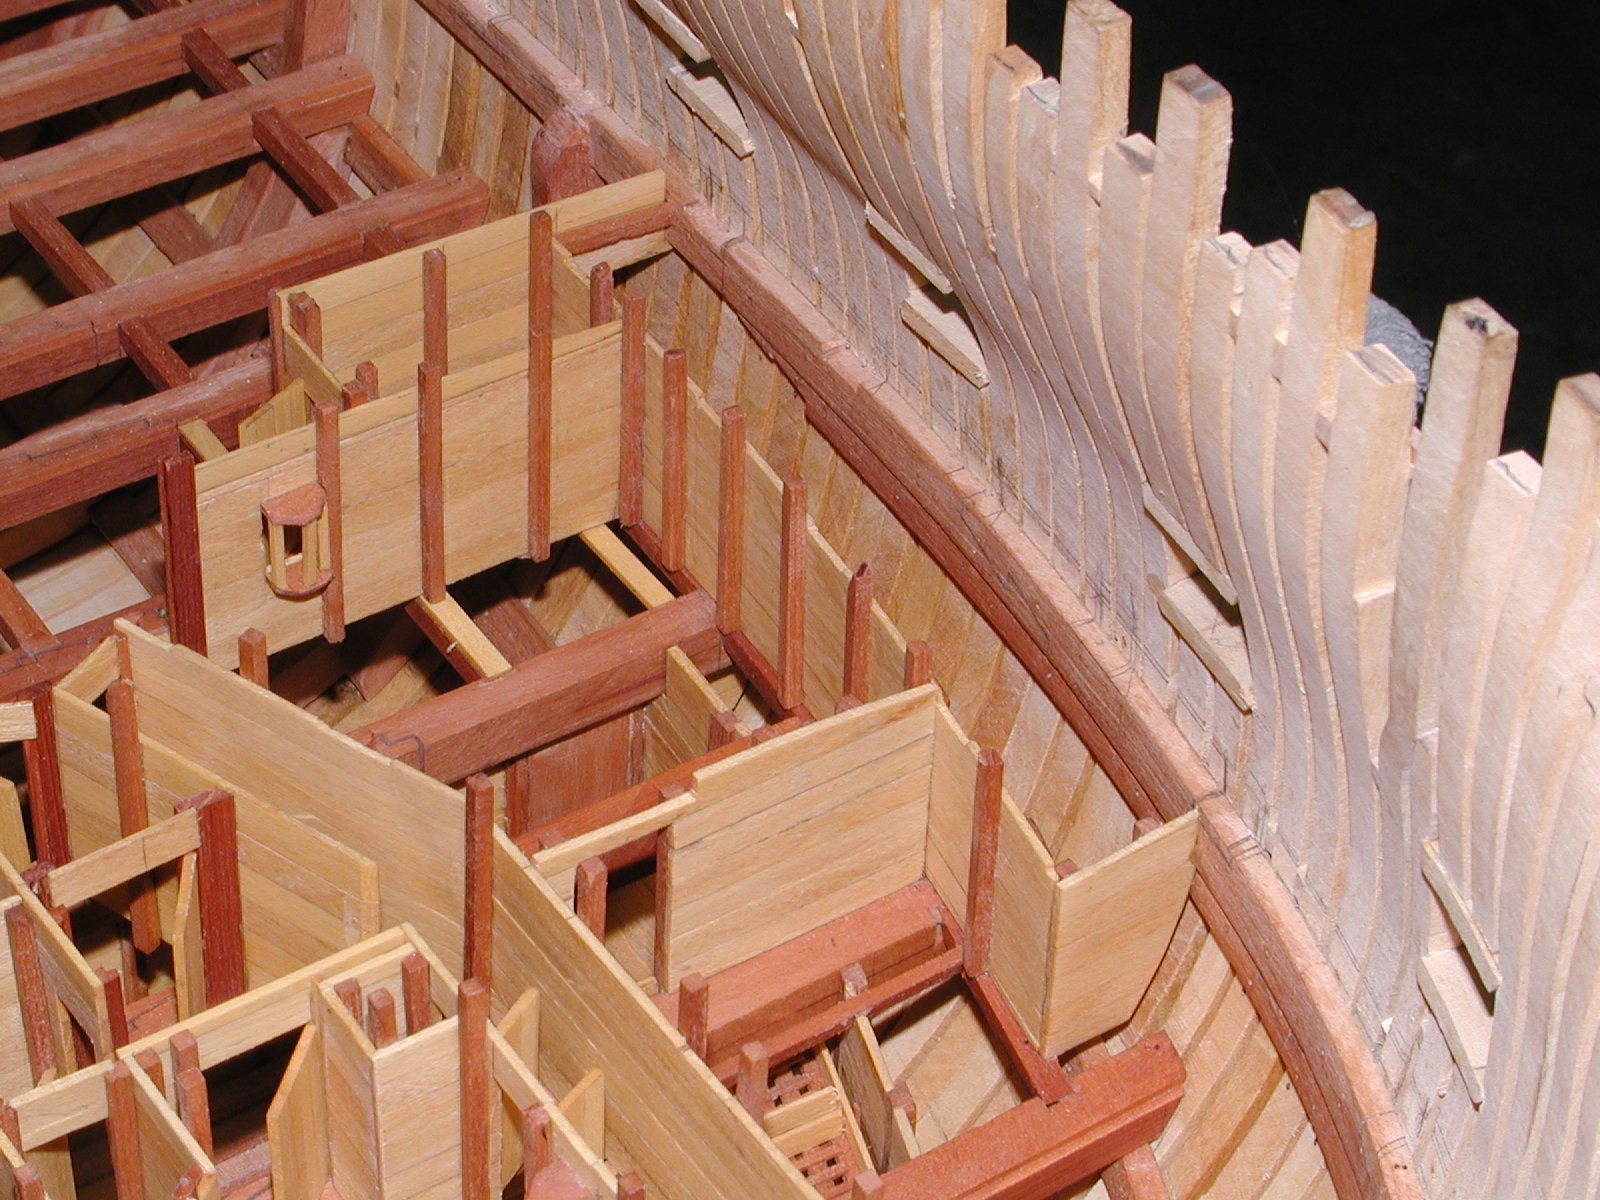
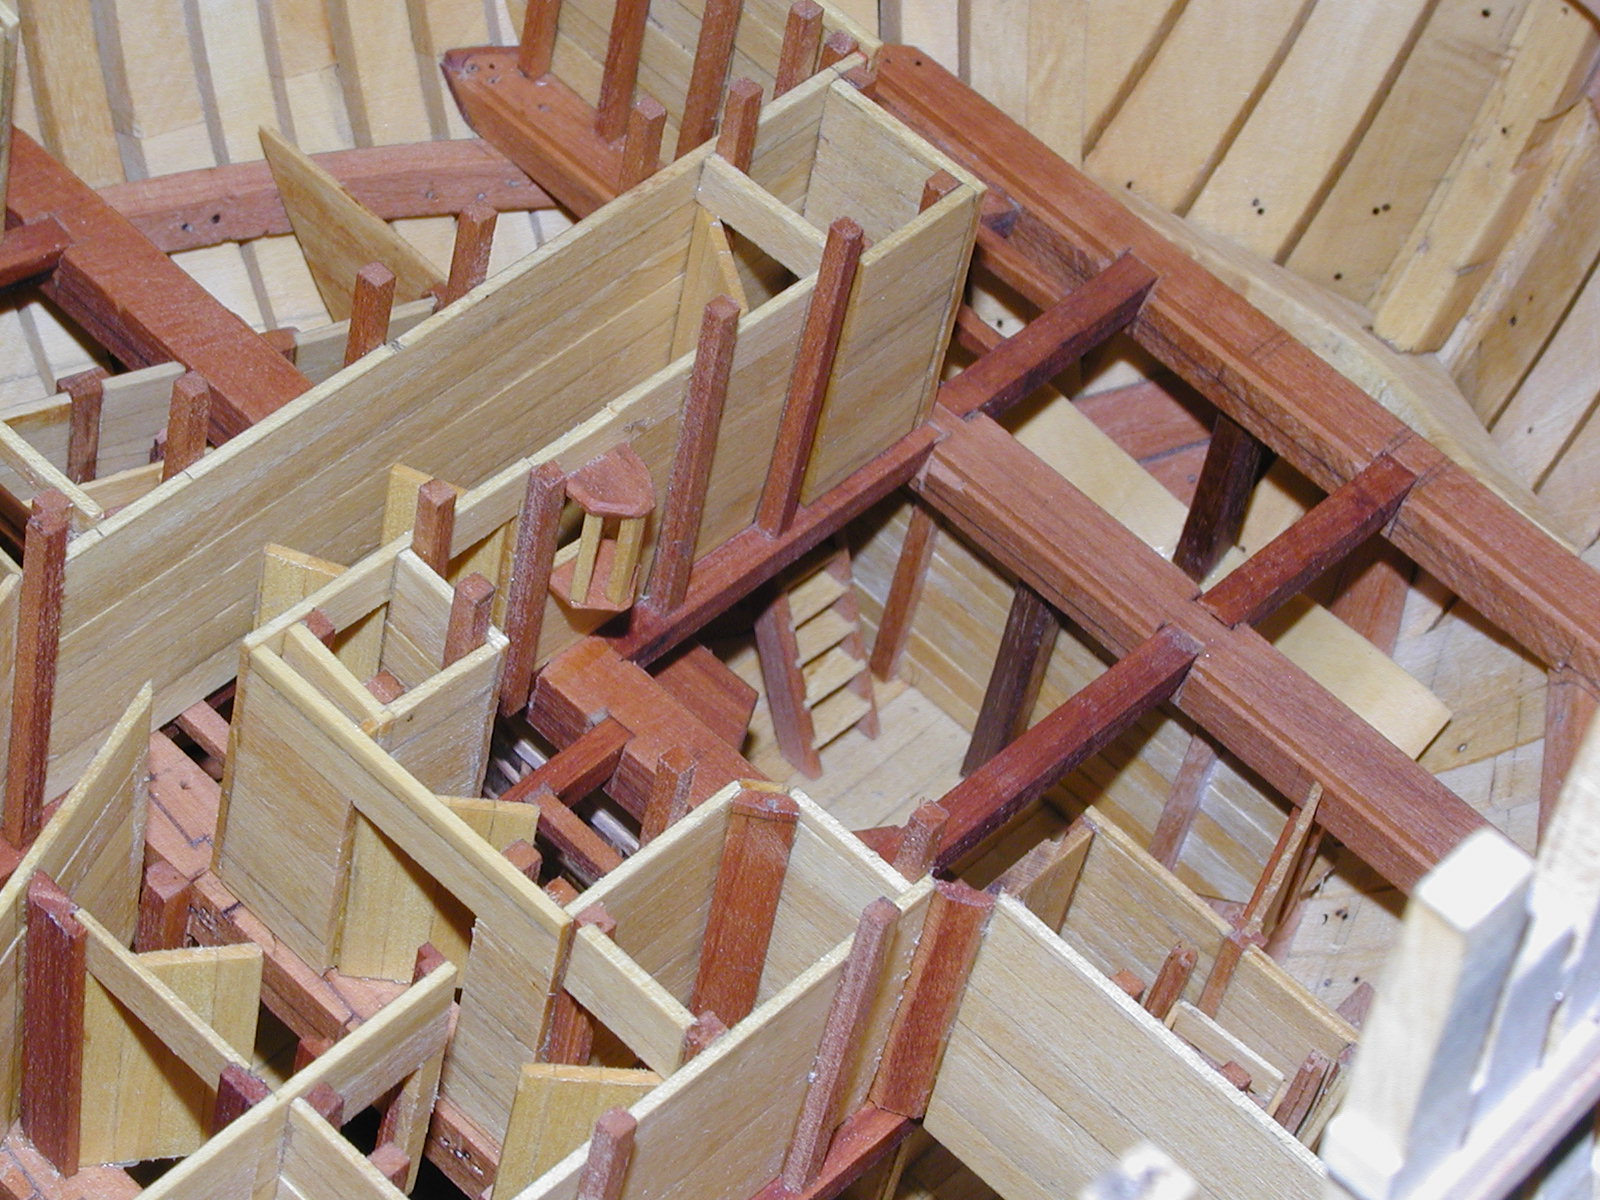
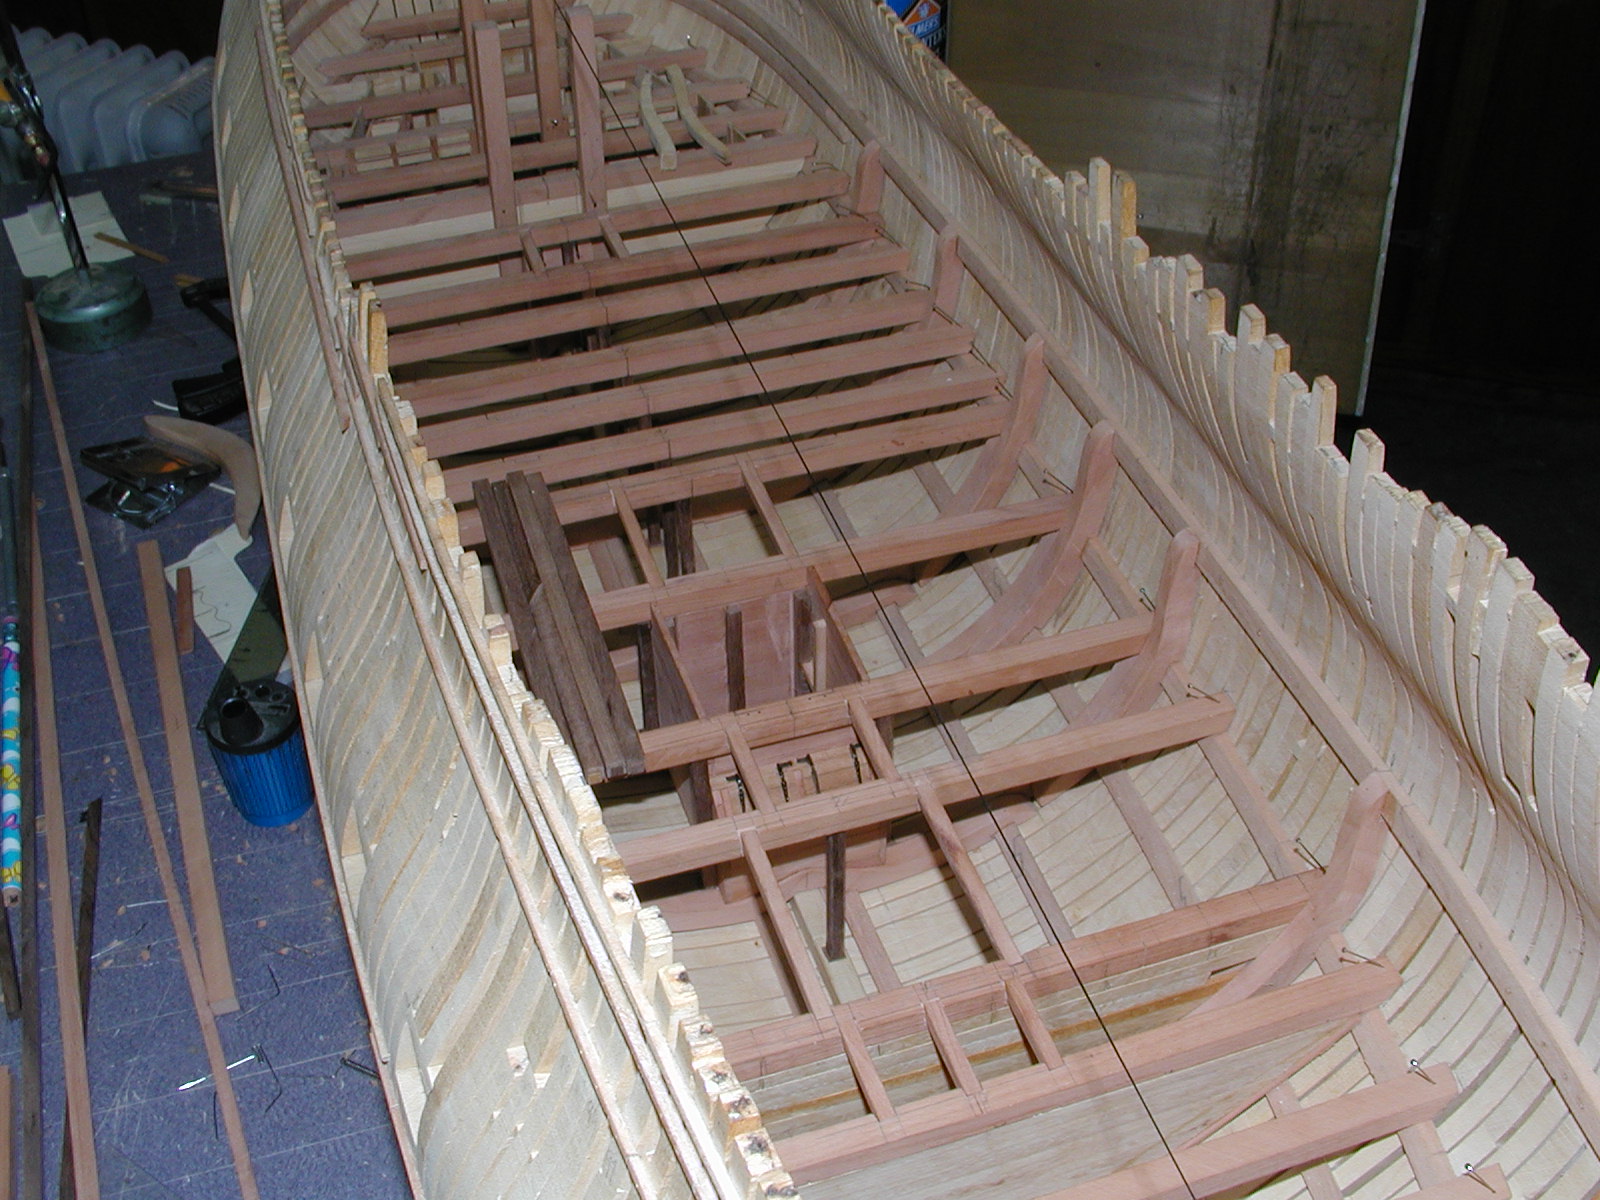
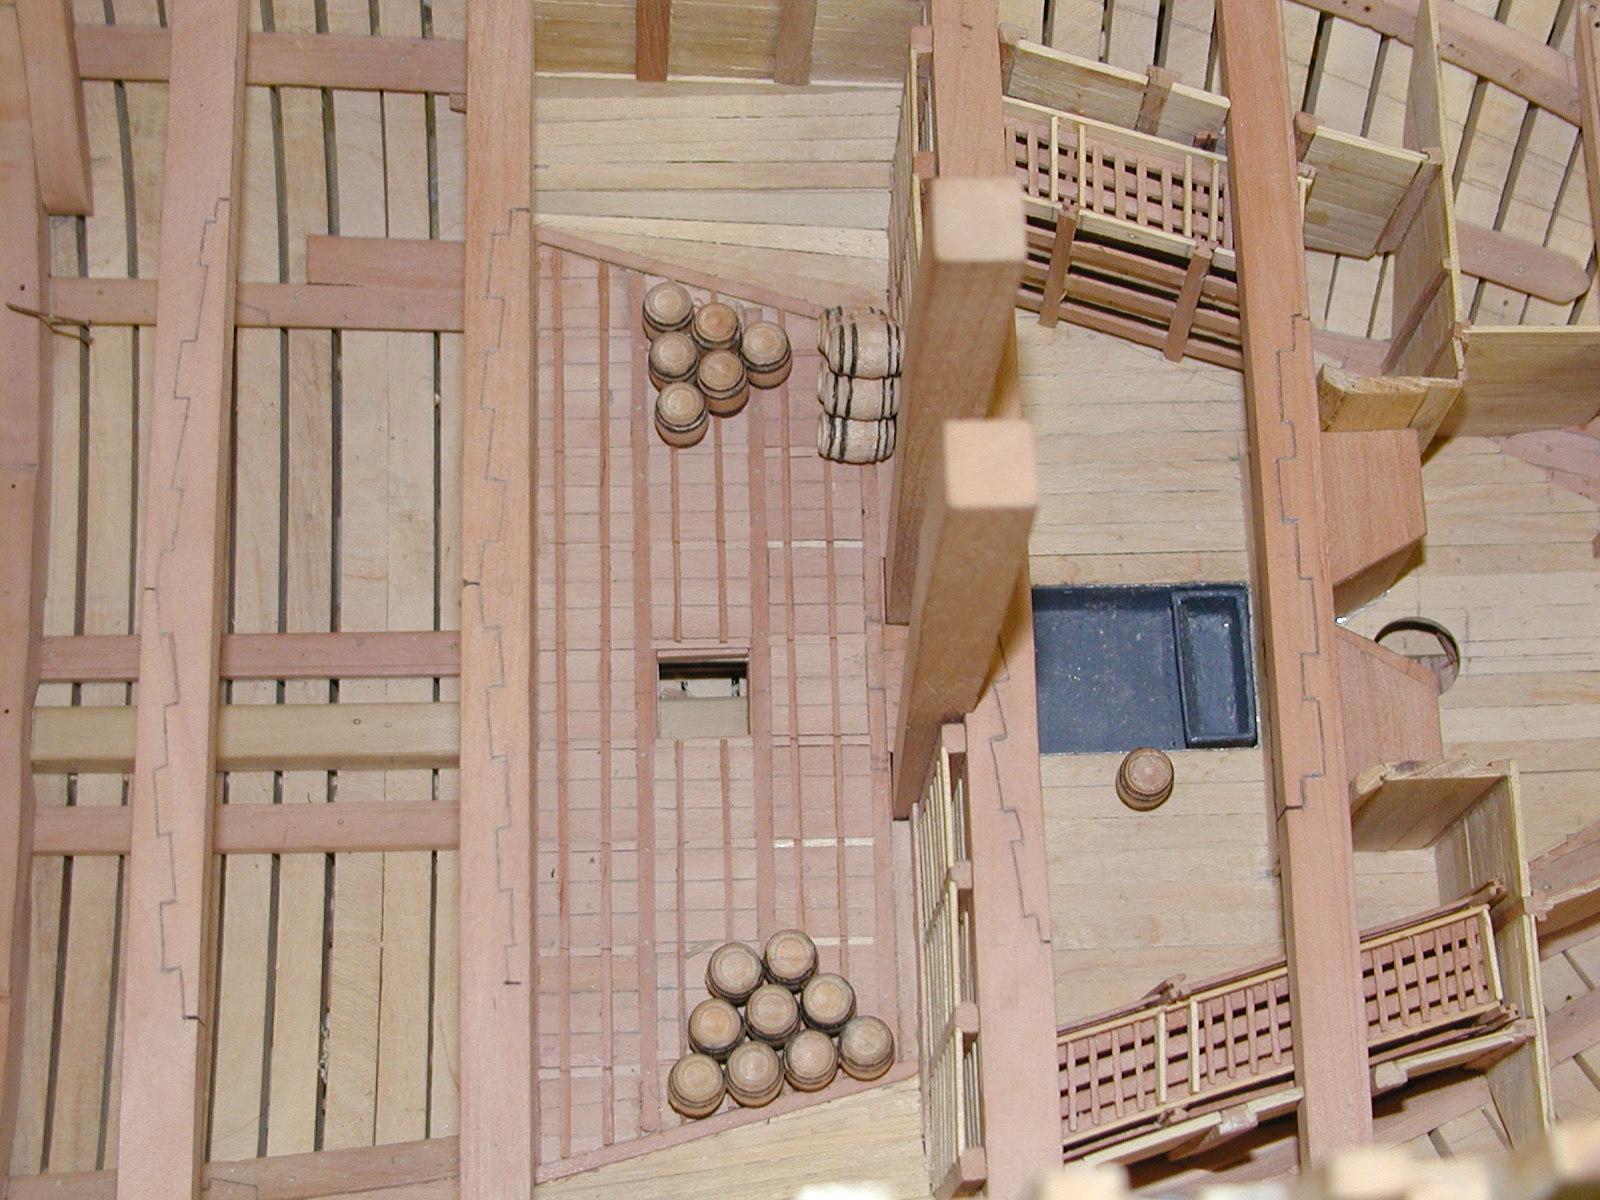
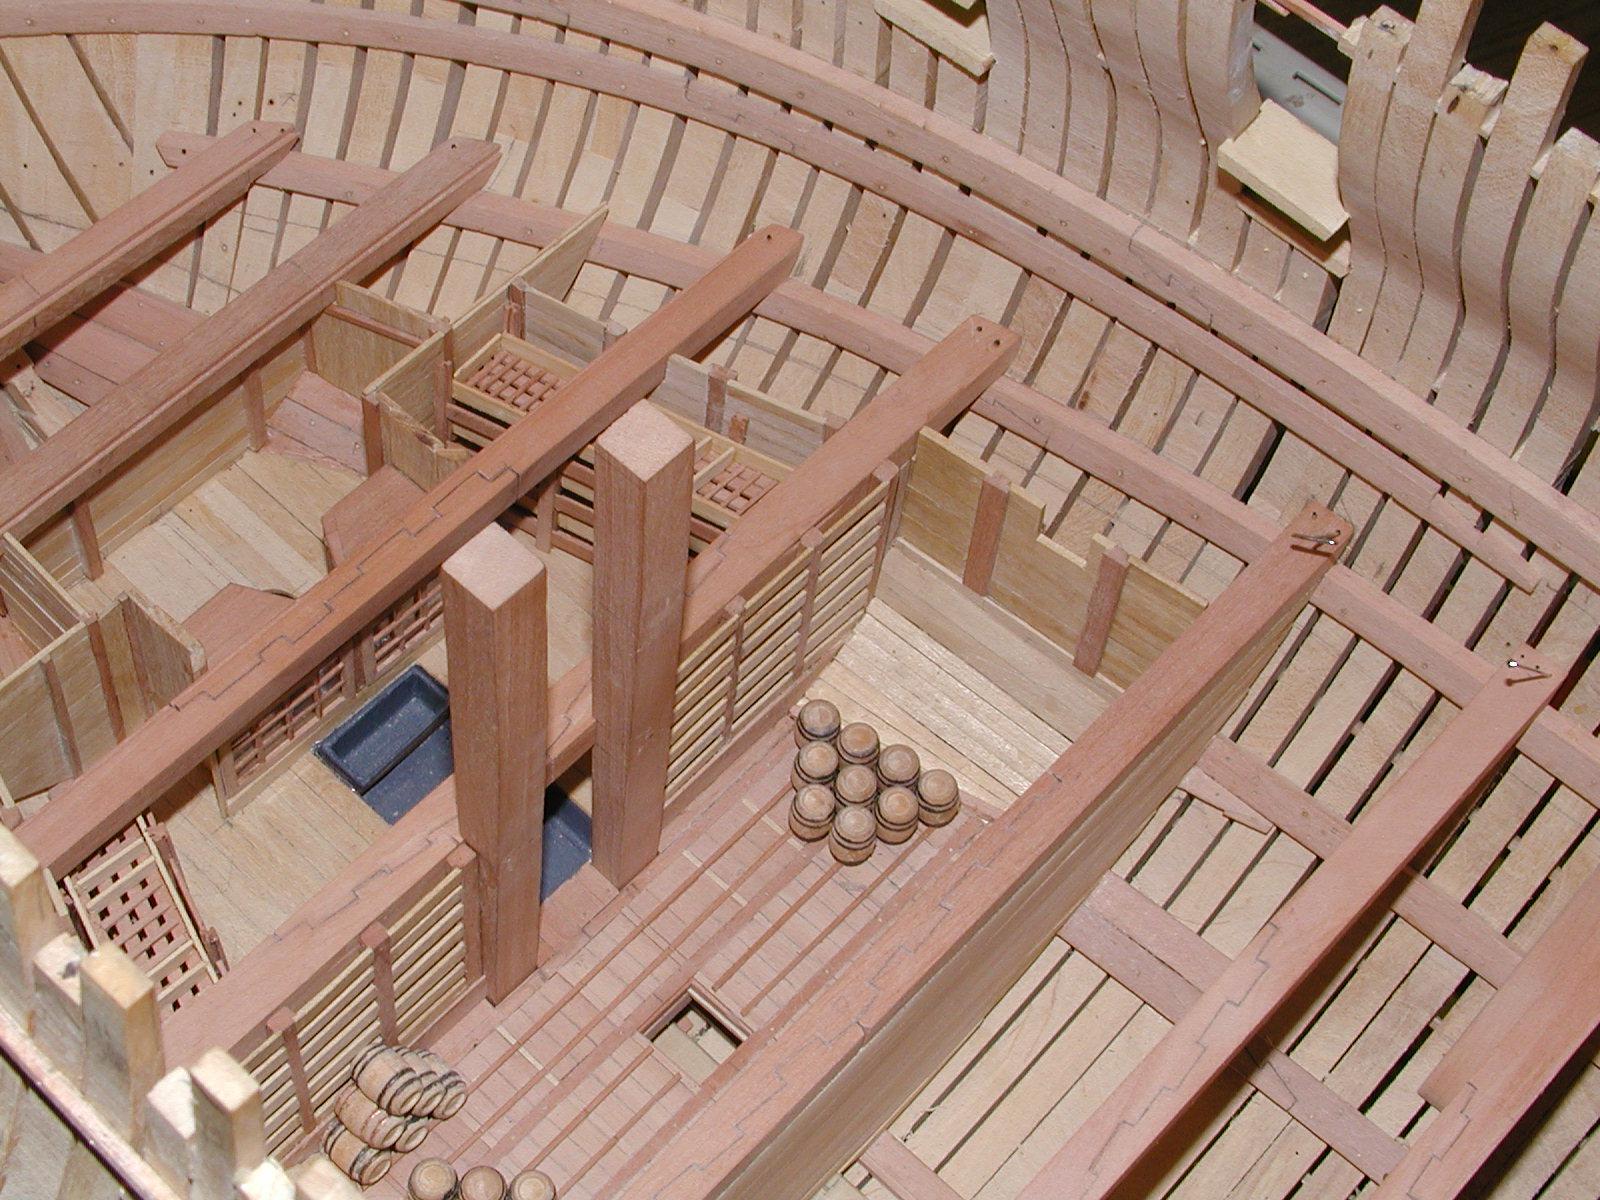
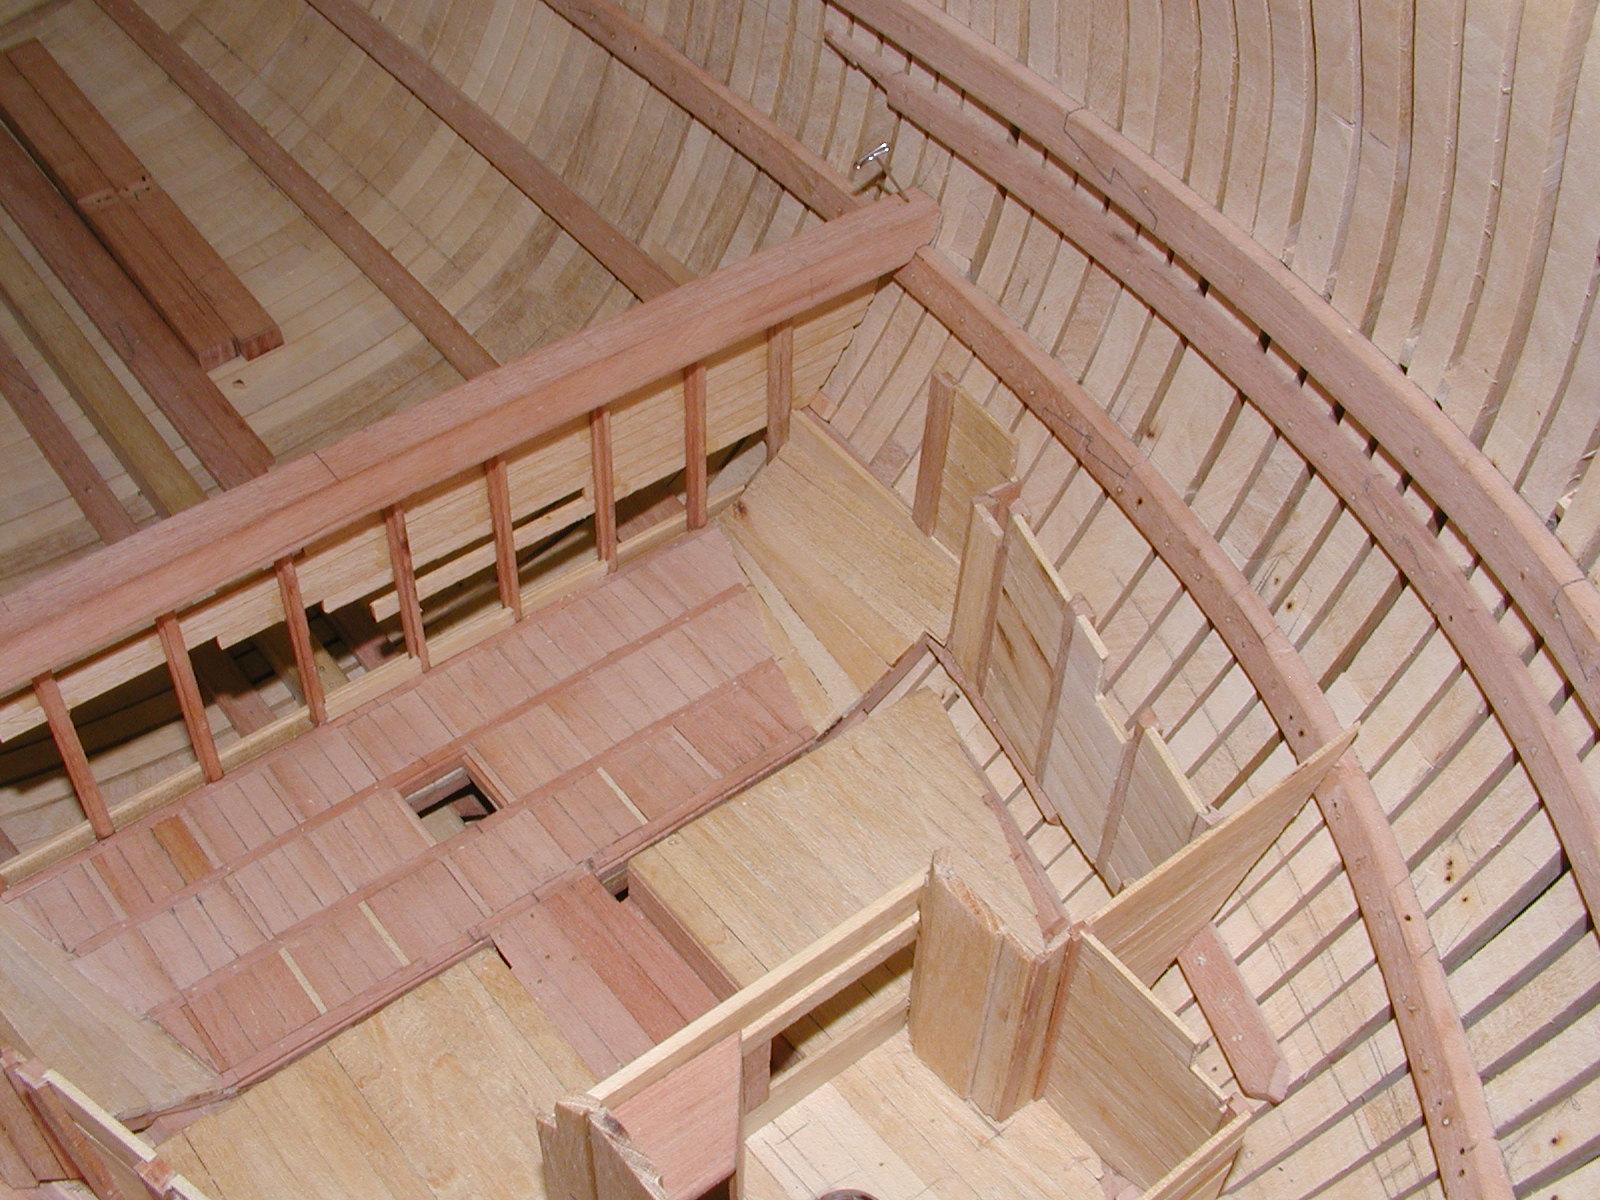
Thanks every one. Seems I have been a little distracted with other things, such as life in general and figure I needed to add another up date. This time its with the bulkheads in the hold. There was a total of only four in Montagu hold starting with the bulkhead that separated the magazine. Going aft one runs in to the bulkhead that enclosed the front part of the spirt room, followed by the fish room and finally the bread room. Wish I had installed some barrels in the hold along with some pig iron and gravel that they would of used to steady the ship. One item that one should be able to make out is the pillars underneath each of the orlop beams. Do hope you enjoy the photos.
Gary


-
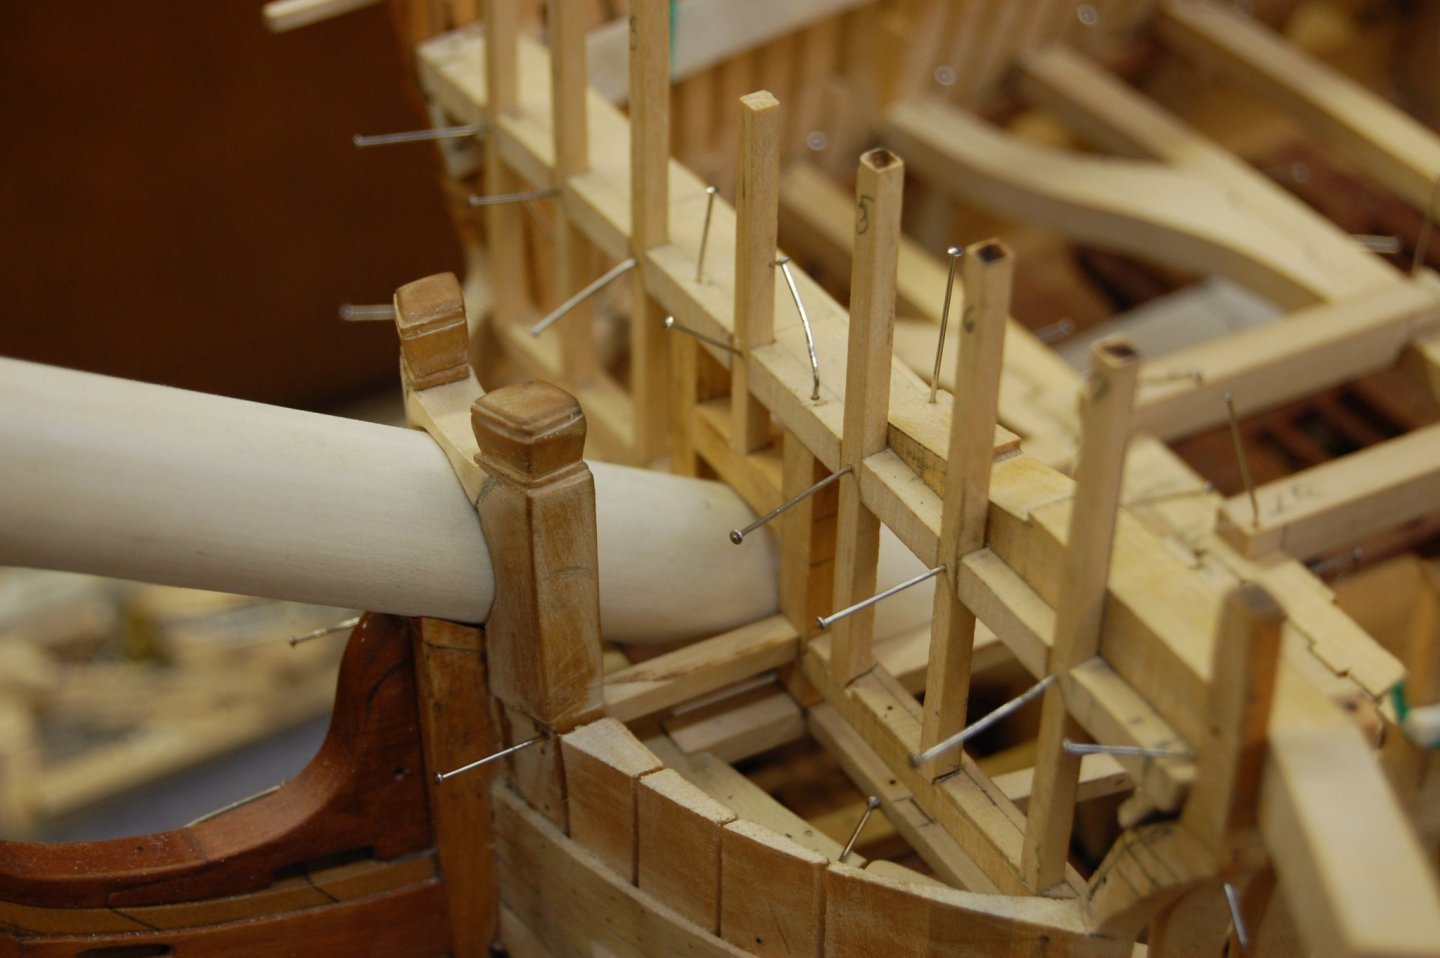
, Thanks every one. Means a lot to hear from other's and their thoughts on one's work. Yarus, if I understand you right, she is the HMS Montagu of 1779, and yes that is my work. Because of the crash that Model Ship World had the log was gone so am redoing it and what you see in those photo's is were Montagu beakhead bulkhead stand today. Once I get the log caught up you will see more of her at this stage.
Gary
-
Hi Ruslan. Your very welcome. I would say that that sounds about right sir. Have been looking for more informatio on it but have not as of yet come up with much.
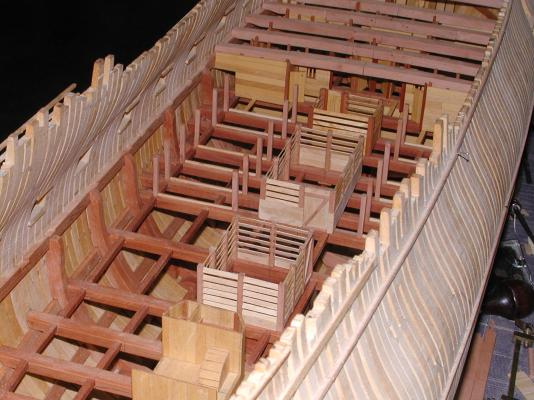
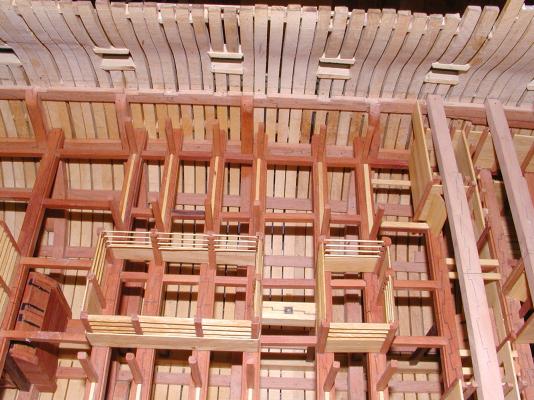
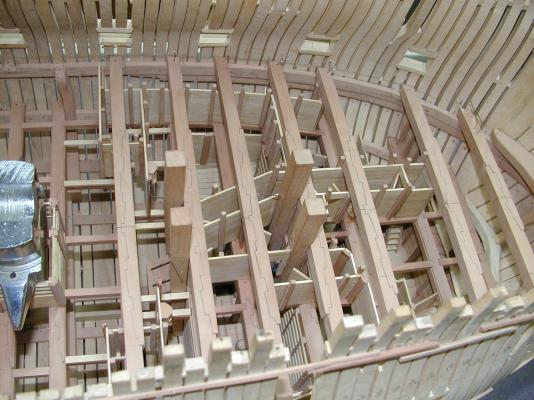
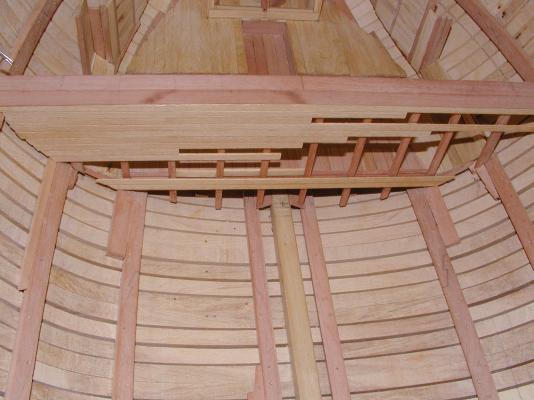
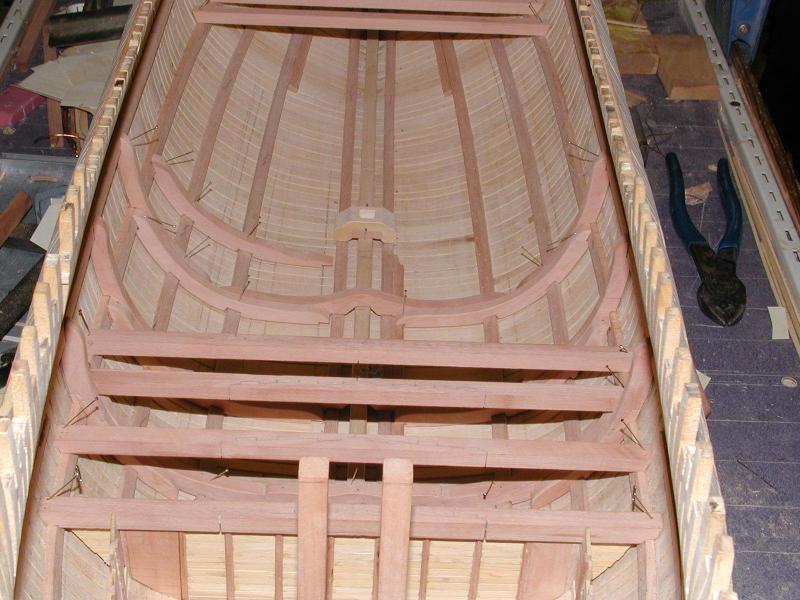
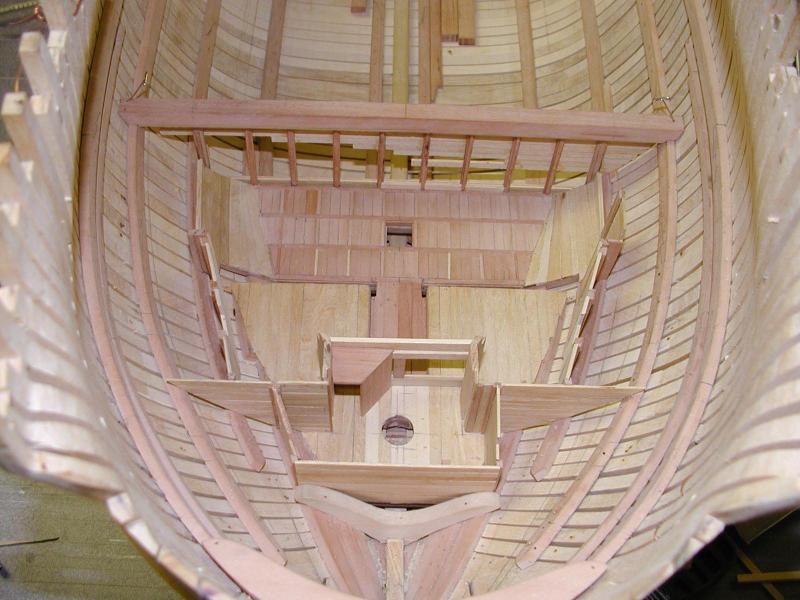
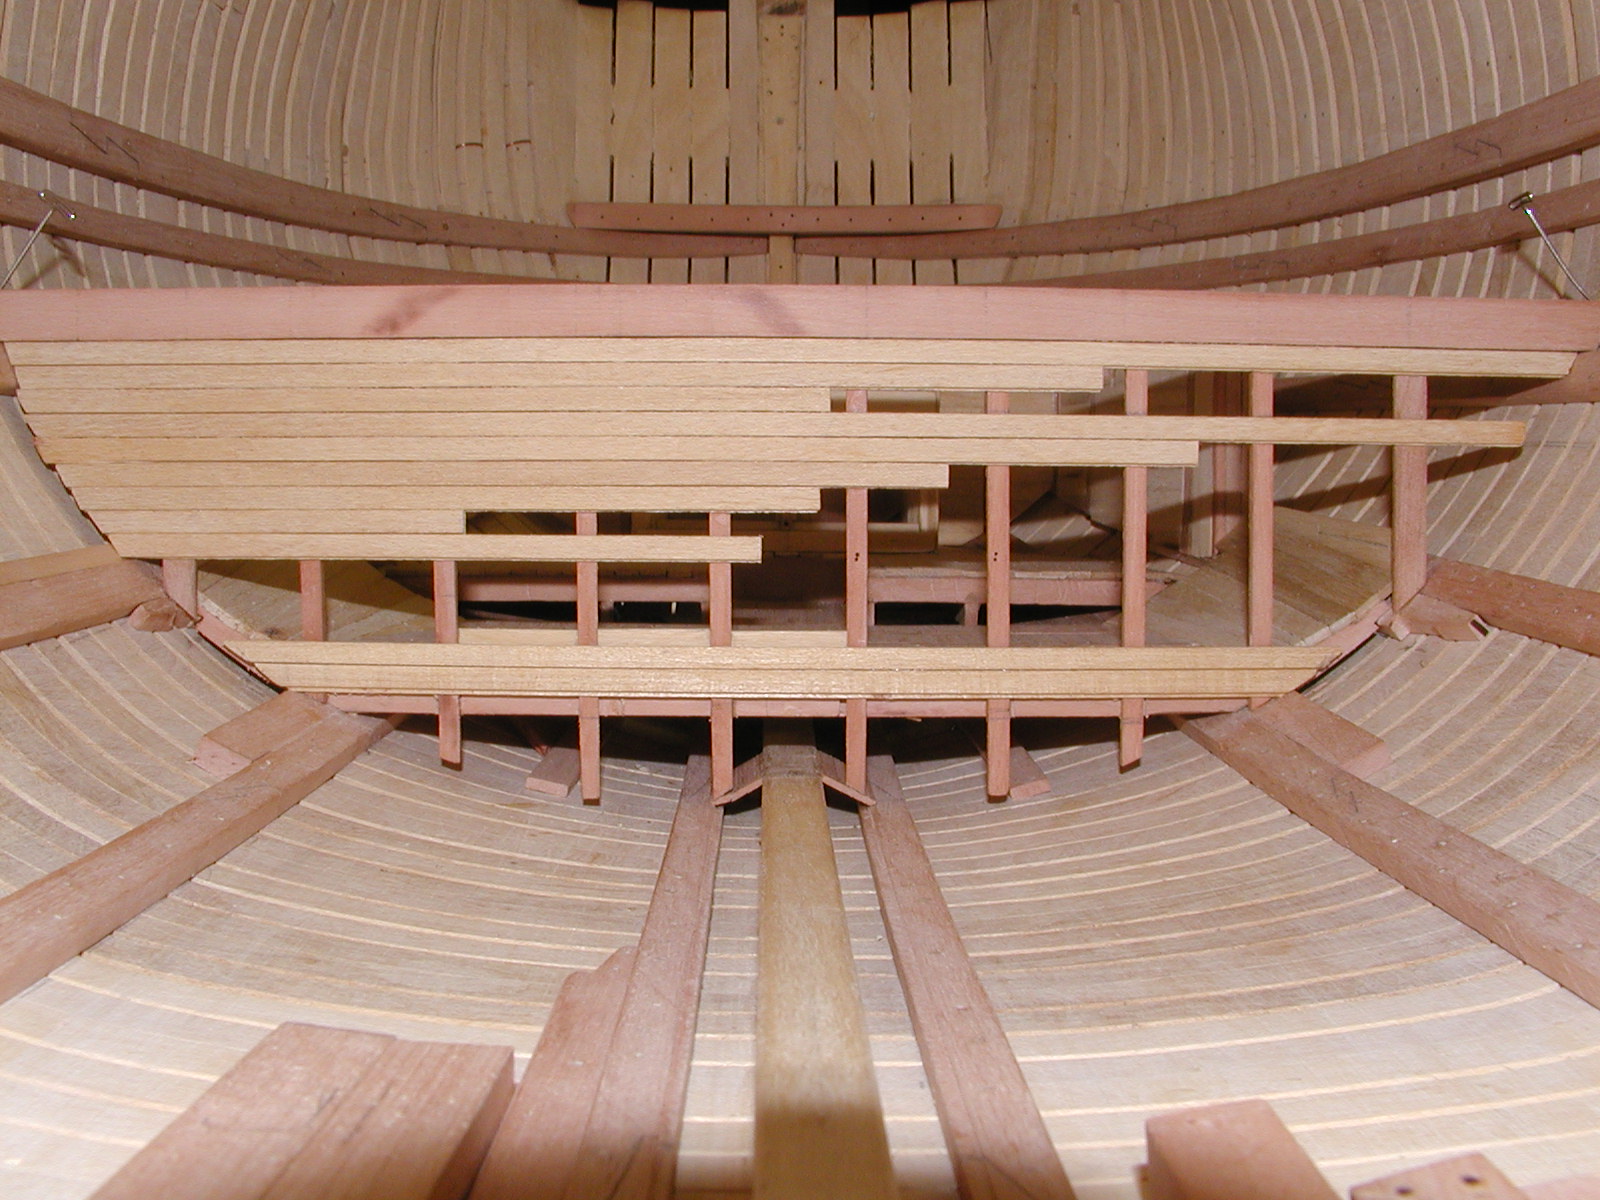
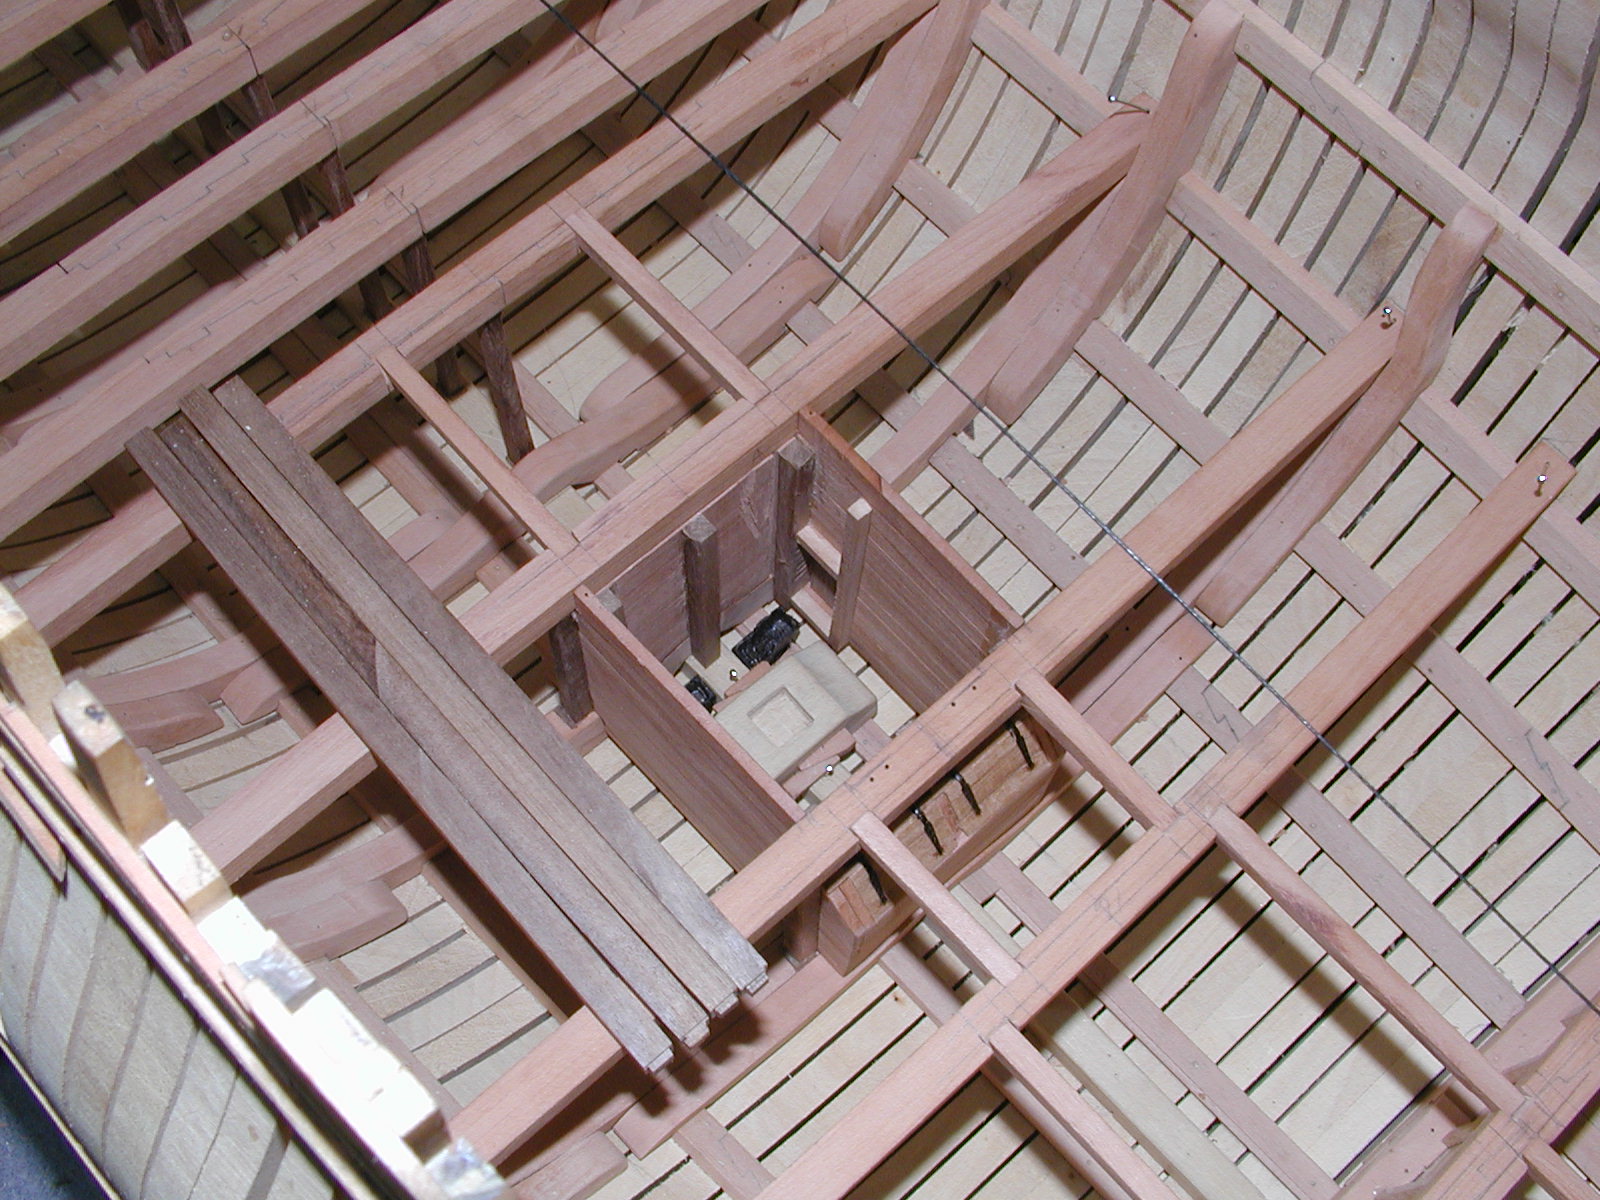
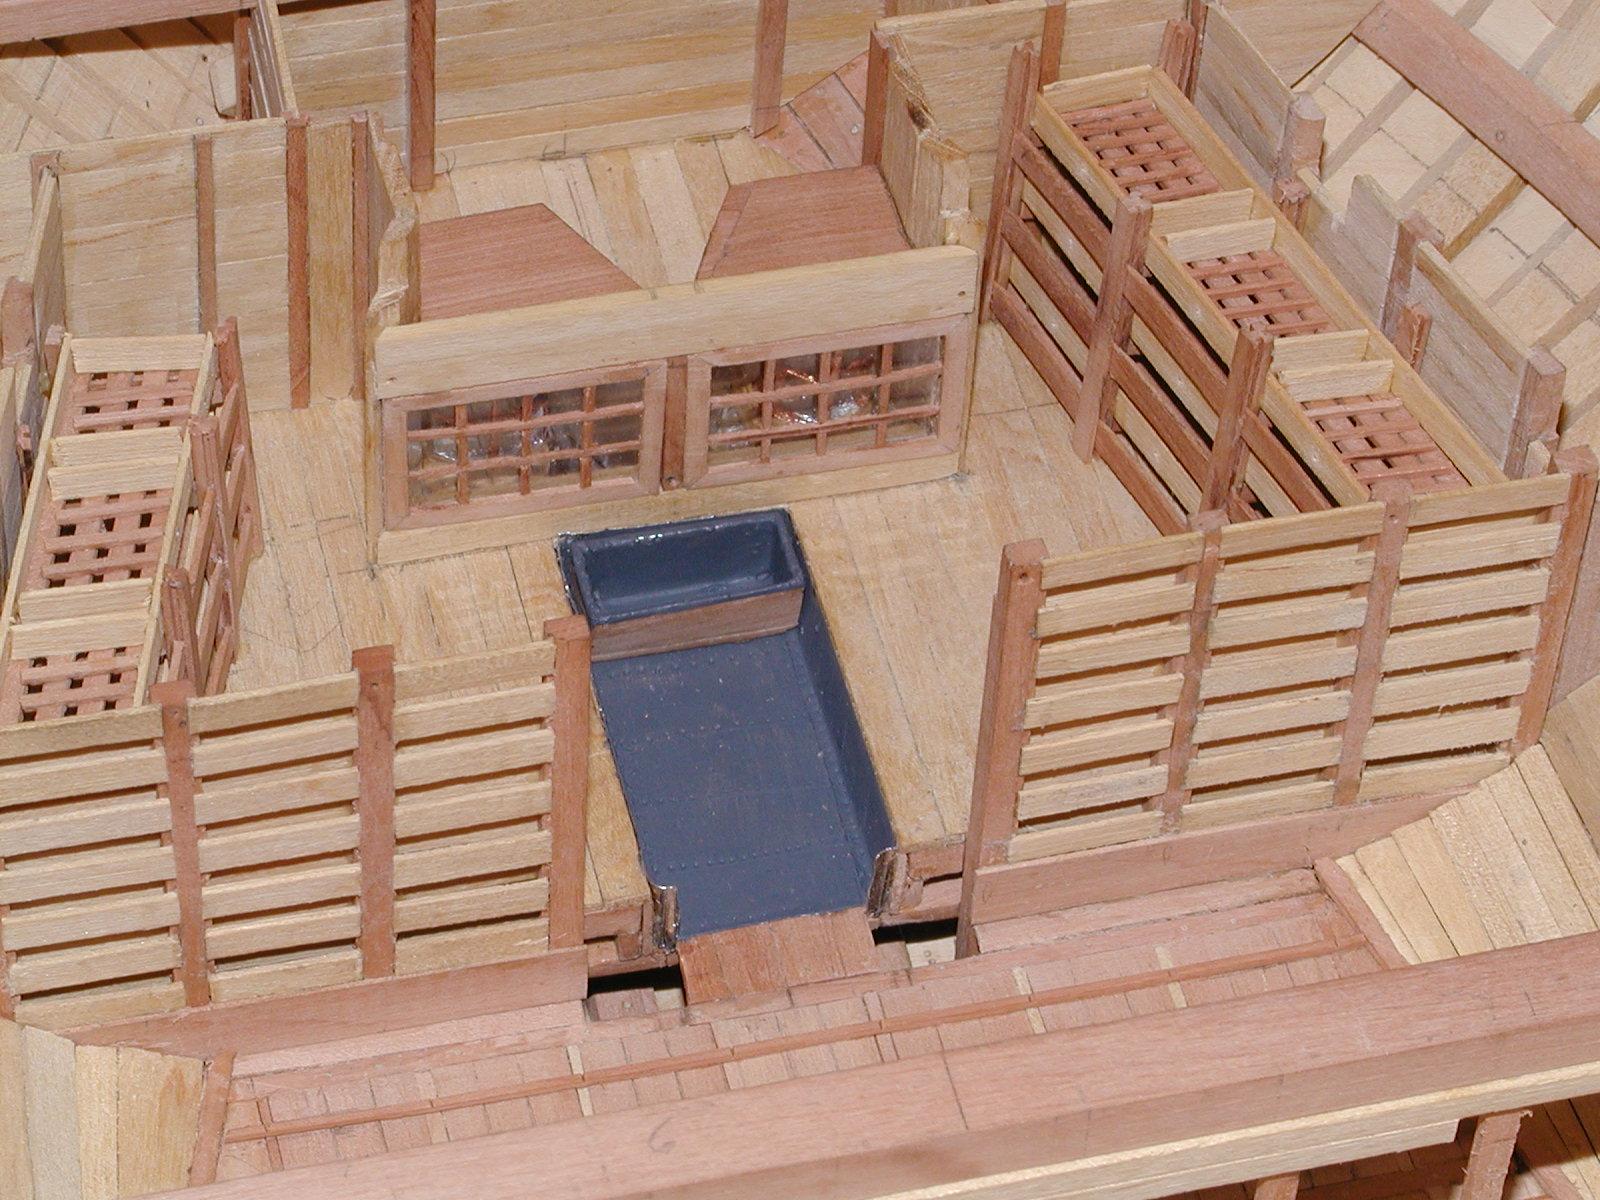
Hi Folks. Here is another update of Montagu hold this time showing her well, along with the pump intakes and shot lockers which was attach to the well. The well was built on the work bench and then installed in to the hold it self. You will also noticed that the floor riders are finished at this time. Another item you will noticed is the pump tubes that are resting on top of the deck beams. They were made of walnut and are still in their square state. The pillar's in the hold are also made of walnut which gives a little bit more of a color to the parts in her hold, with out over powering the other items. Hope you enjoy the photo's. Gary


-
Thanks Greg , Joe and Toni. Your comments are very welcome, like the others, the always help one to keep going on building their ship. Hope to add some more photos before to long. Forgive me Greg for not answering your question but yes it is swiss pear.
Gary
-
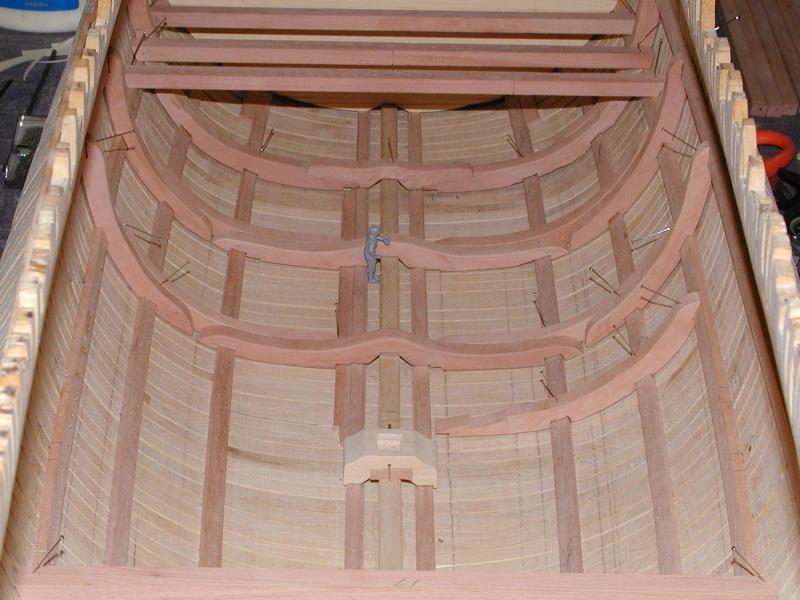
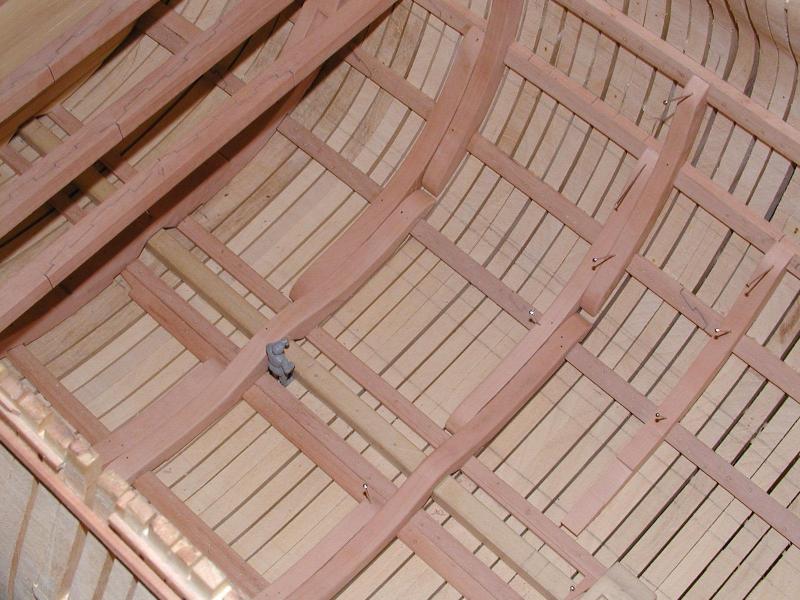
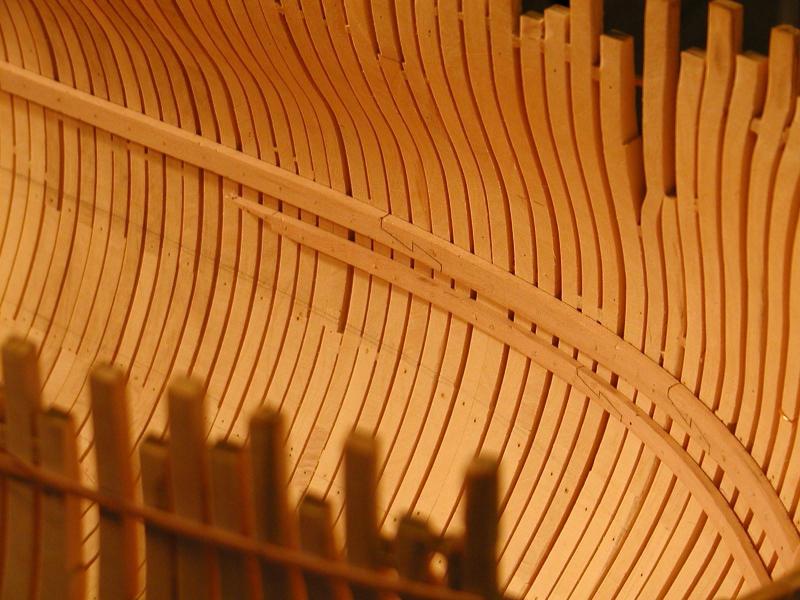
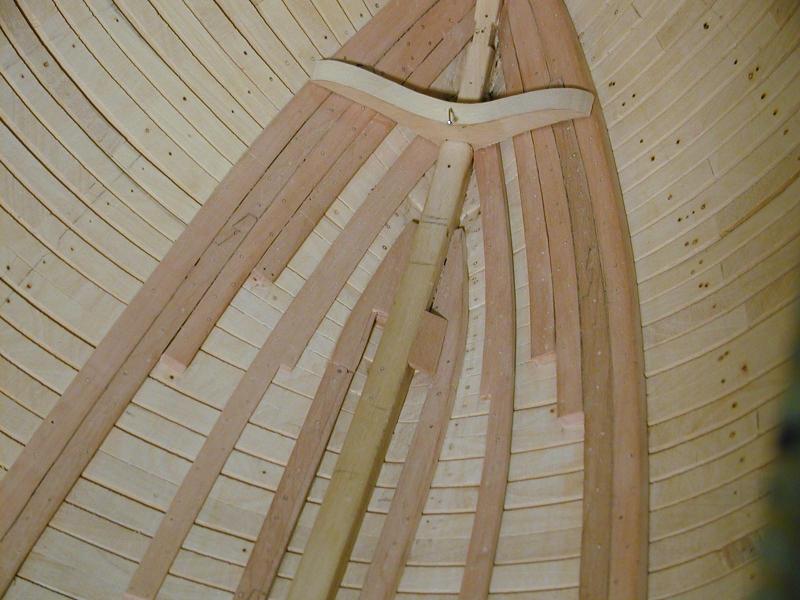
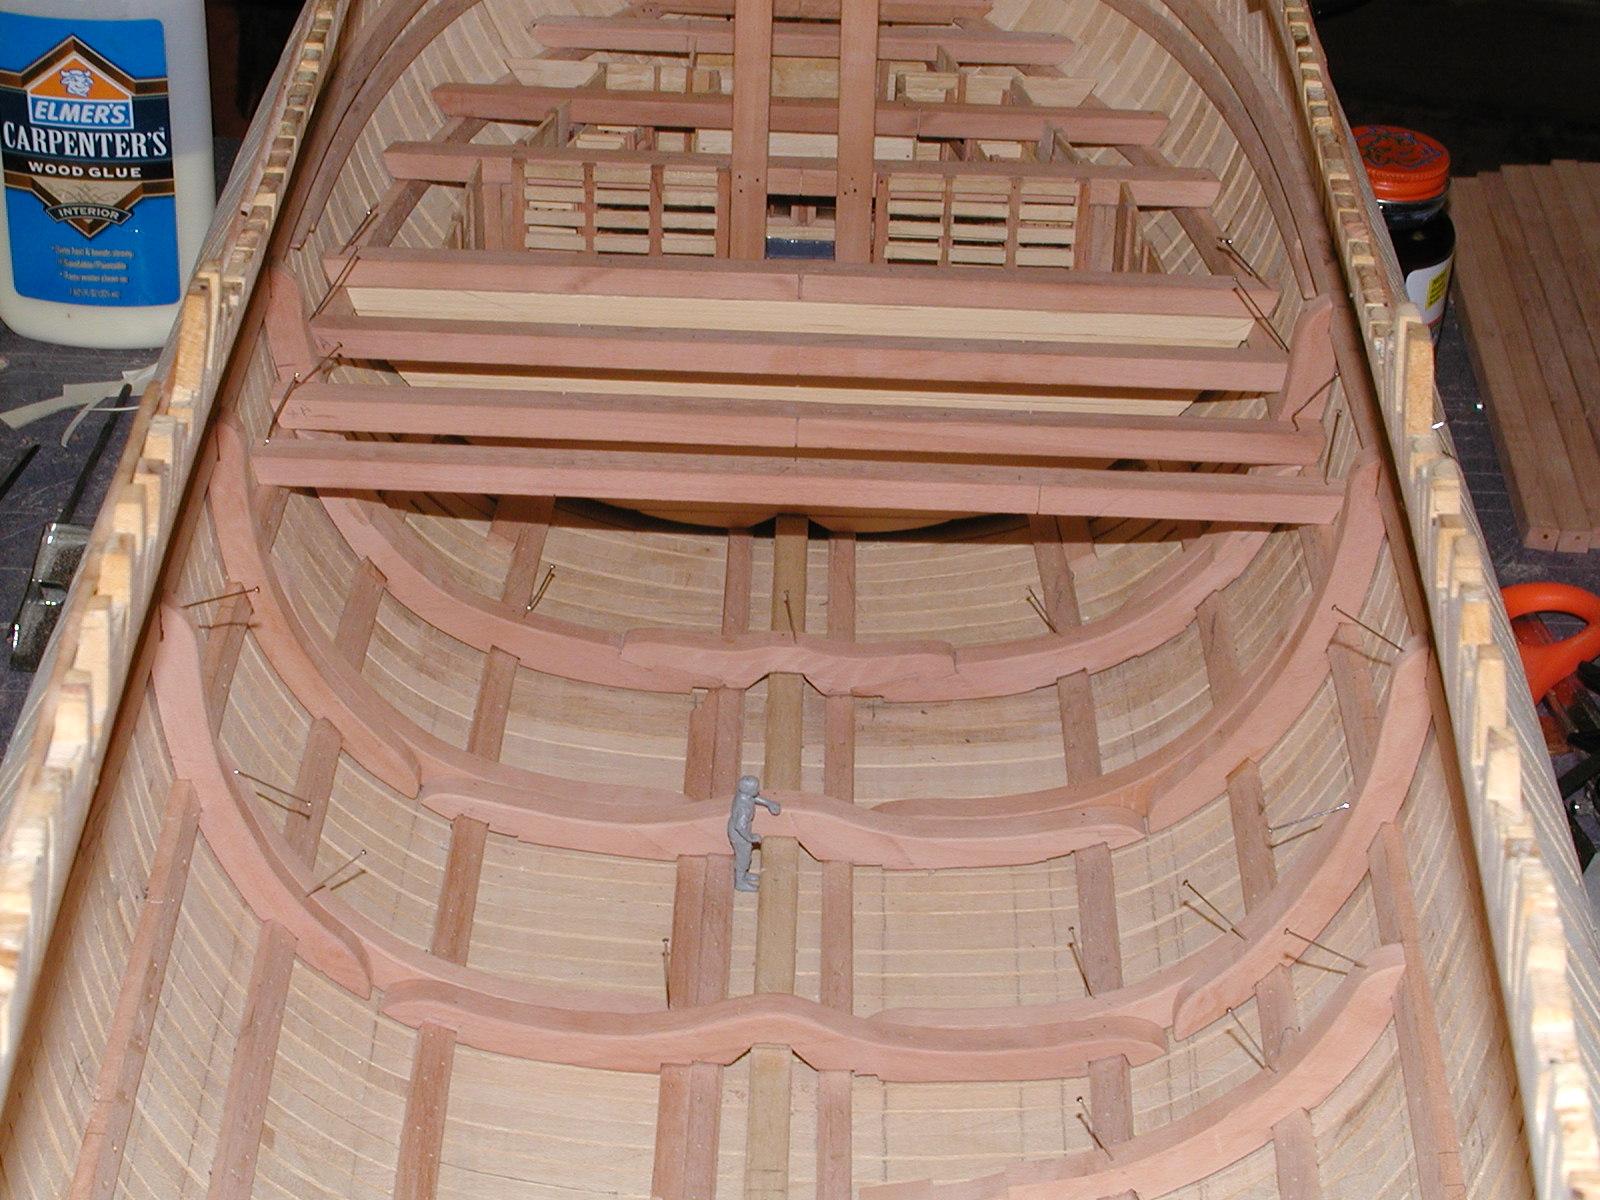
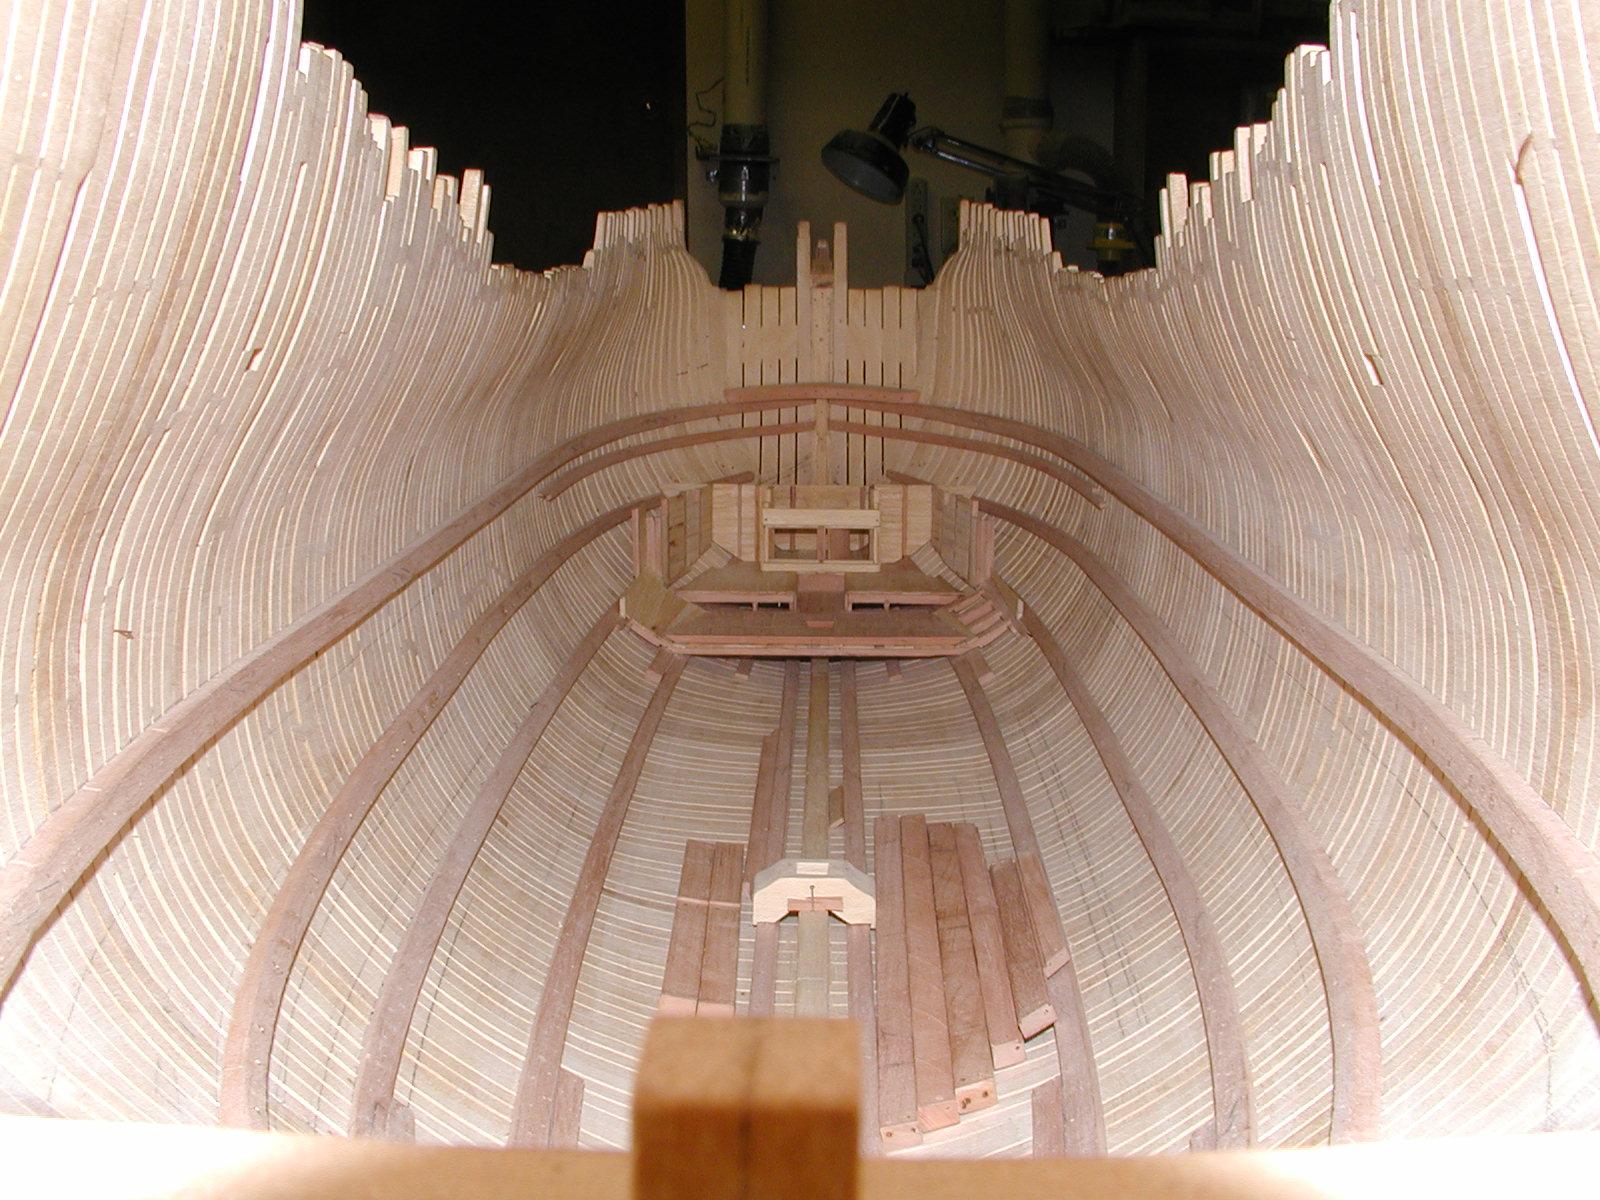
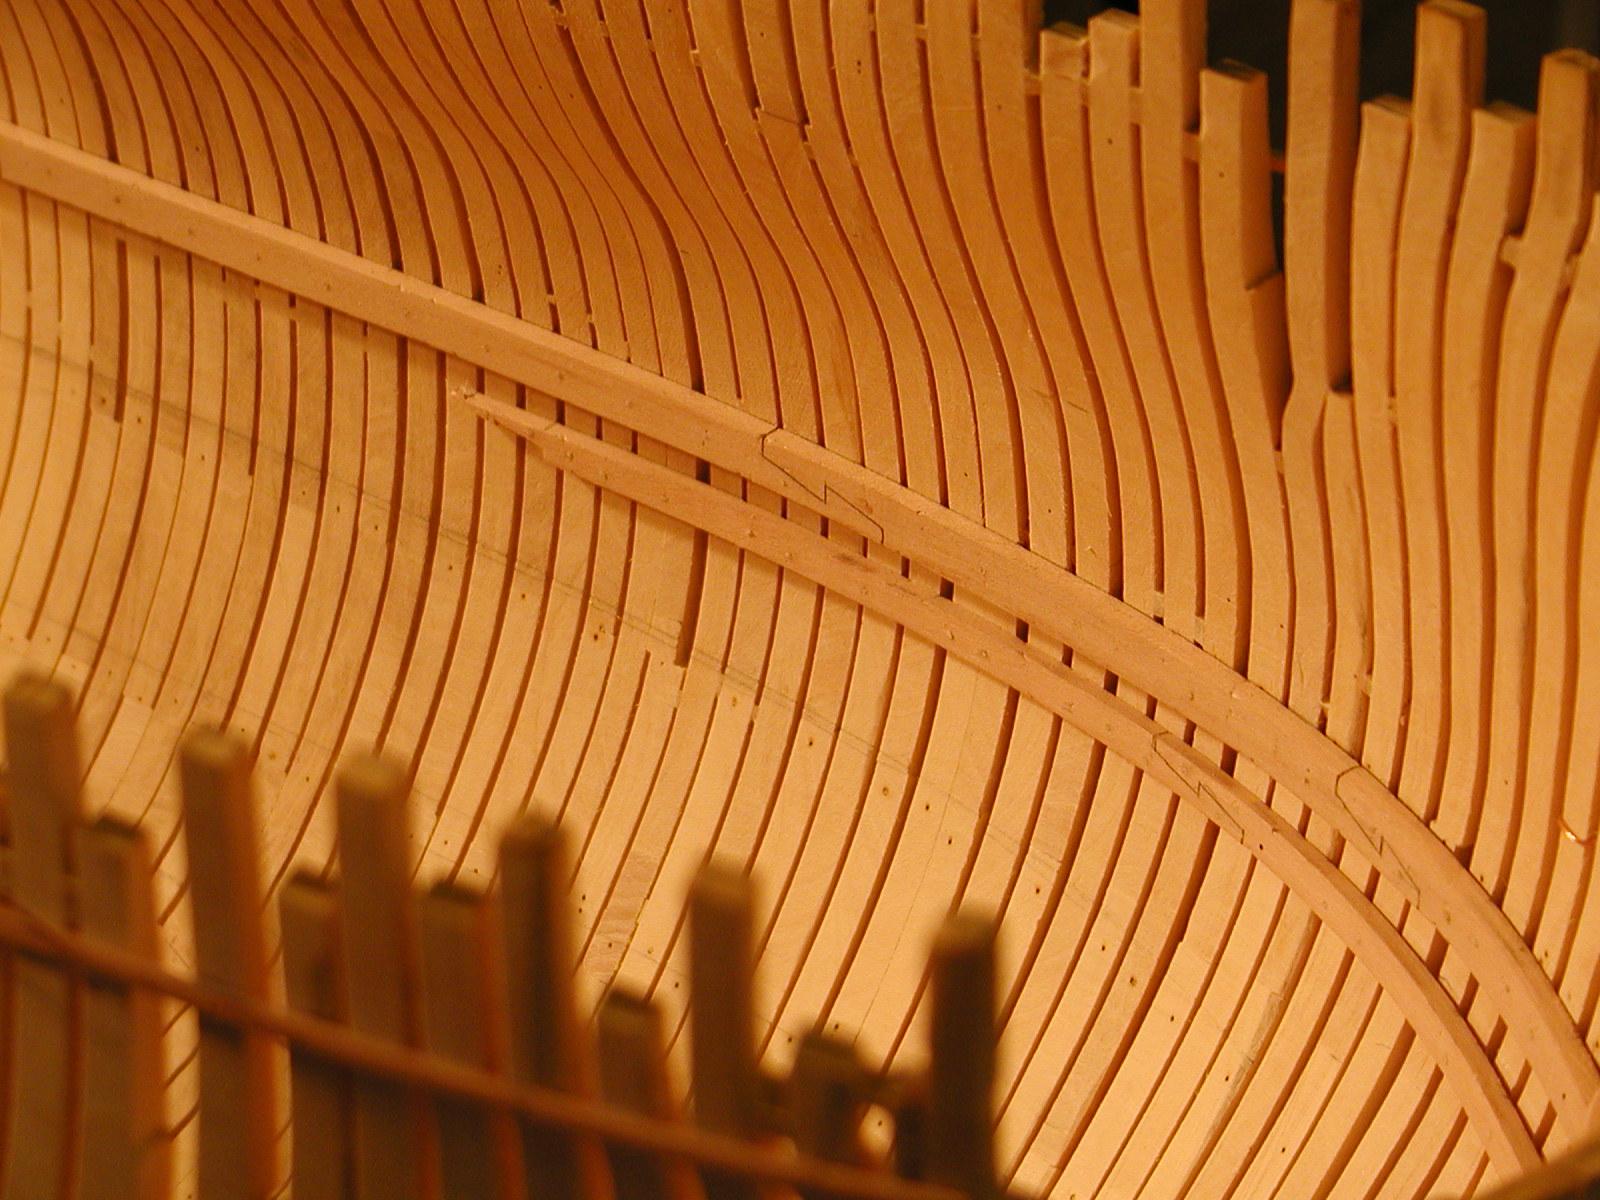
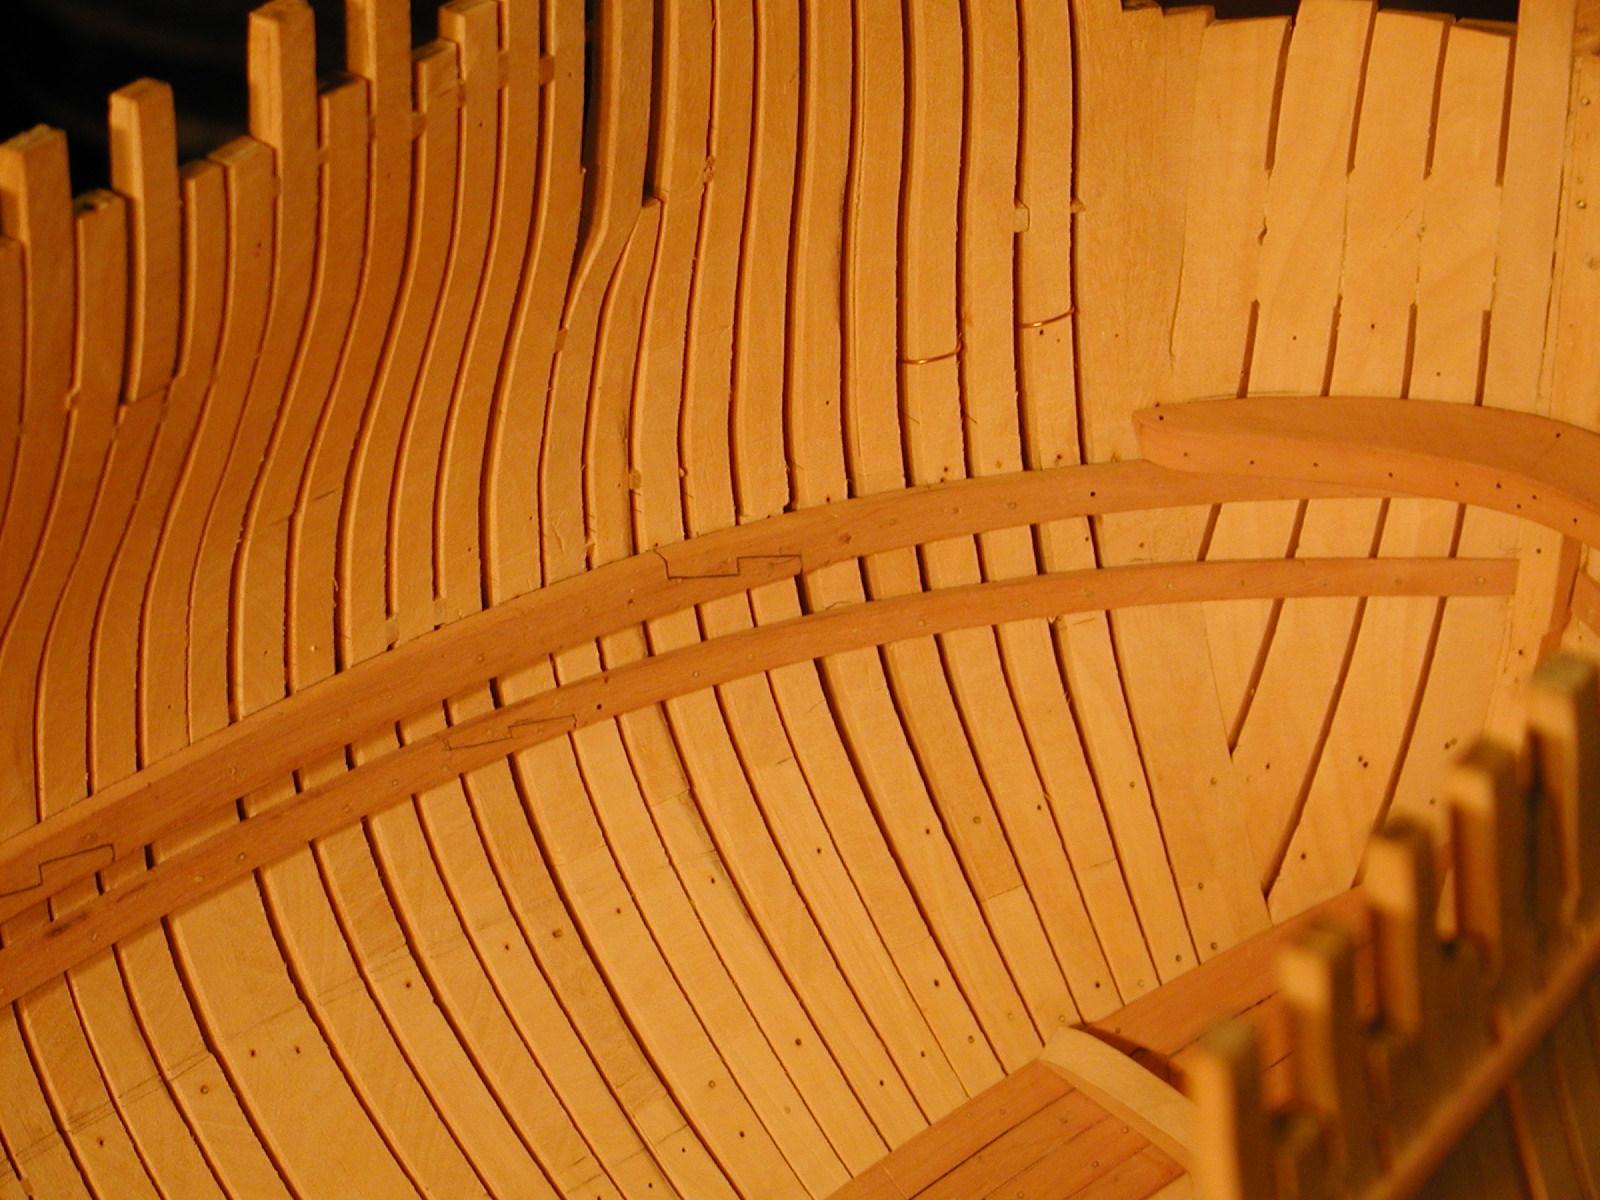
Thanks every one. As Ed stated, am just glad to have the photo's to repost the log. I would really be in tears if I lost them. Any way here is another up date on Montagu, some thing that you don't see very often unless you are building a ship of the line, Moving past the magazine to the hold we have the floor riders. Timbers that were like the frames, accept they were installed to help strength the hull. The were very interesting to build and install and are made of pear wood. There is a set that help frame in the Ships well on the front and back and will show that when we get to building and installing the well it self. Do hope you enjoy the update, even through its the second time around. If I can find any more for this part of the build will post them. Gary


- harvey1847, Jeronimo, billocrates and 3 others
-
6
-
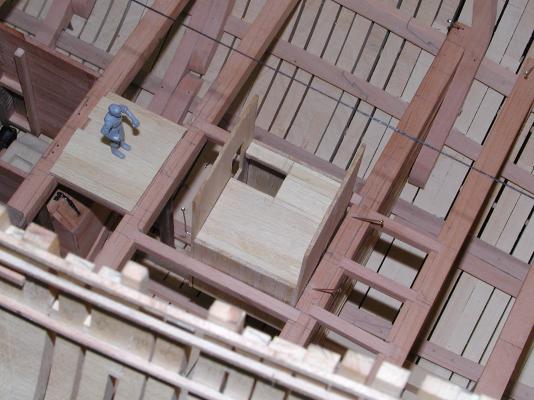
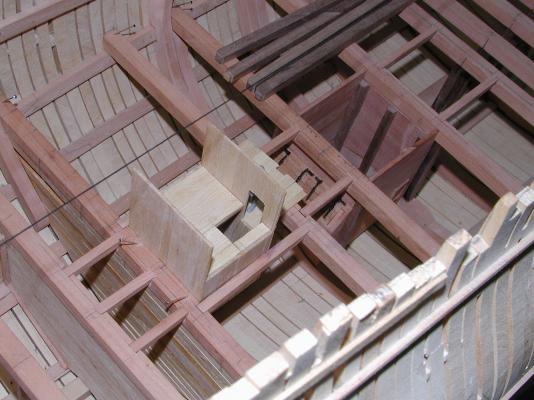
Thank guys. Does seem that it really makes one feel good about the build when good folks like your self tune in. One thing I had noticed during reposting the log is things that I was building and working on that I didn't take picture's of, such as the magazine with just the beams before the deck was laid. Several other's that I just wished I had taken them. Thanks again guys. Gary
-
-
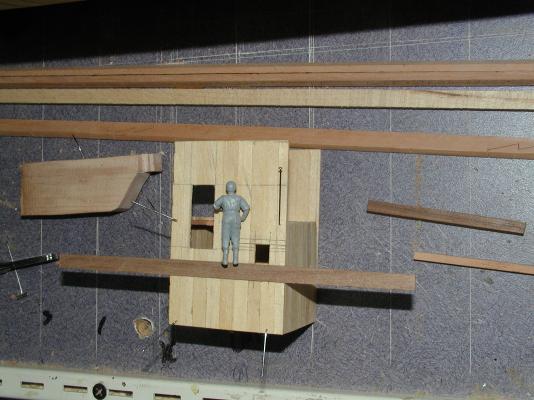
Figure I would add a few more to the magazine build up. Hope know one mind


- fatih79, harvey1847, Mirabell61 and 6 others
-
8
-
 1
1
-
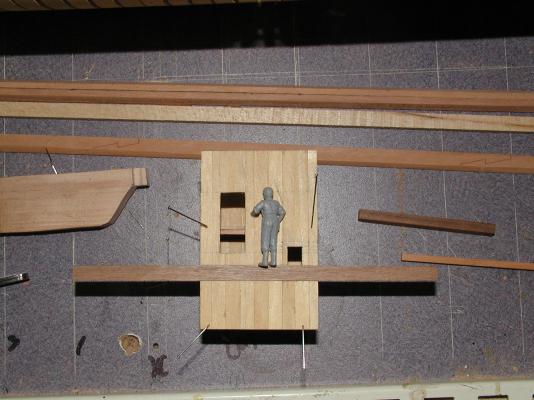
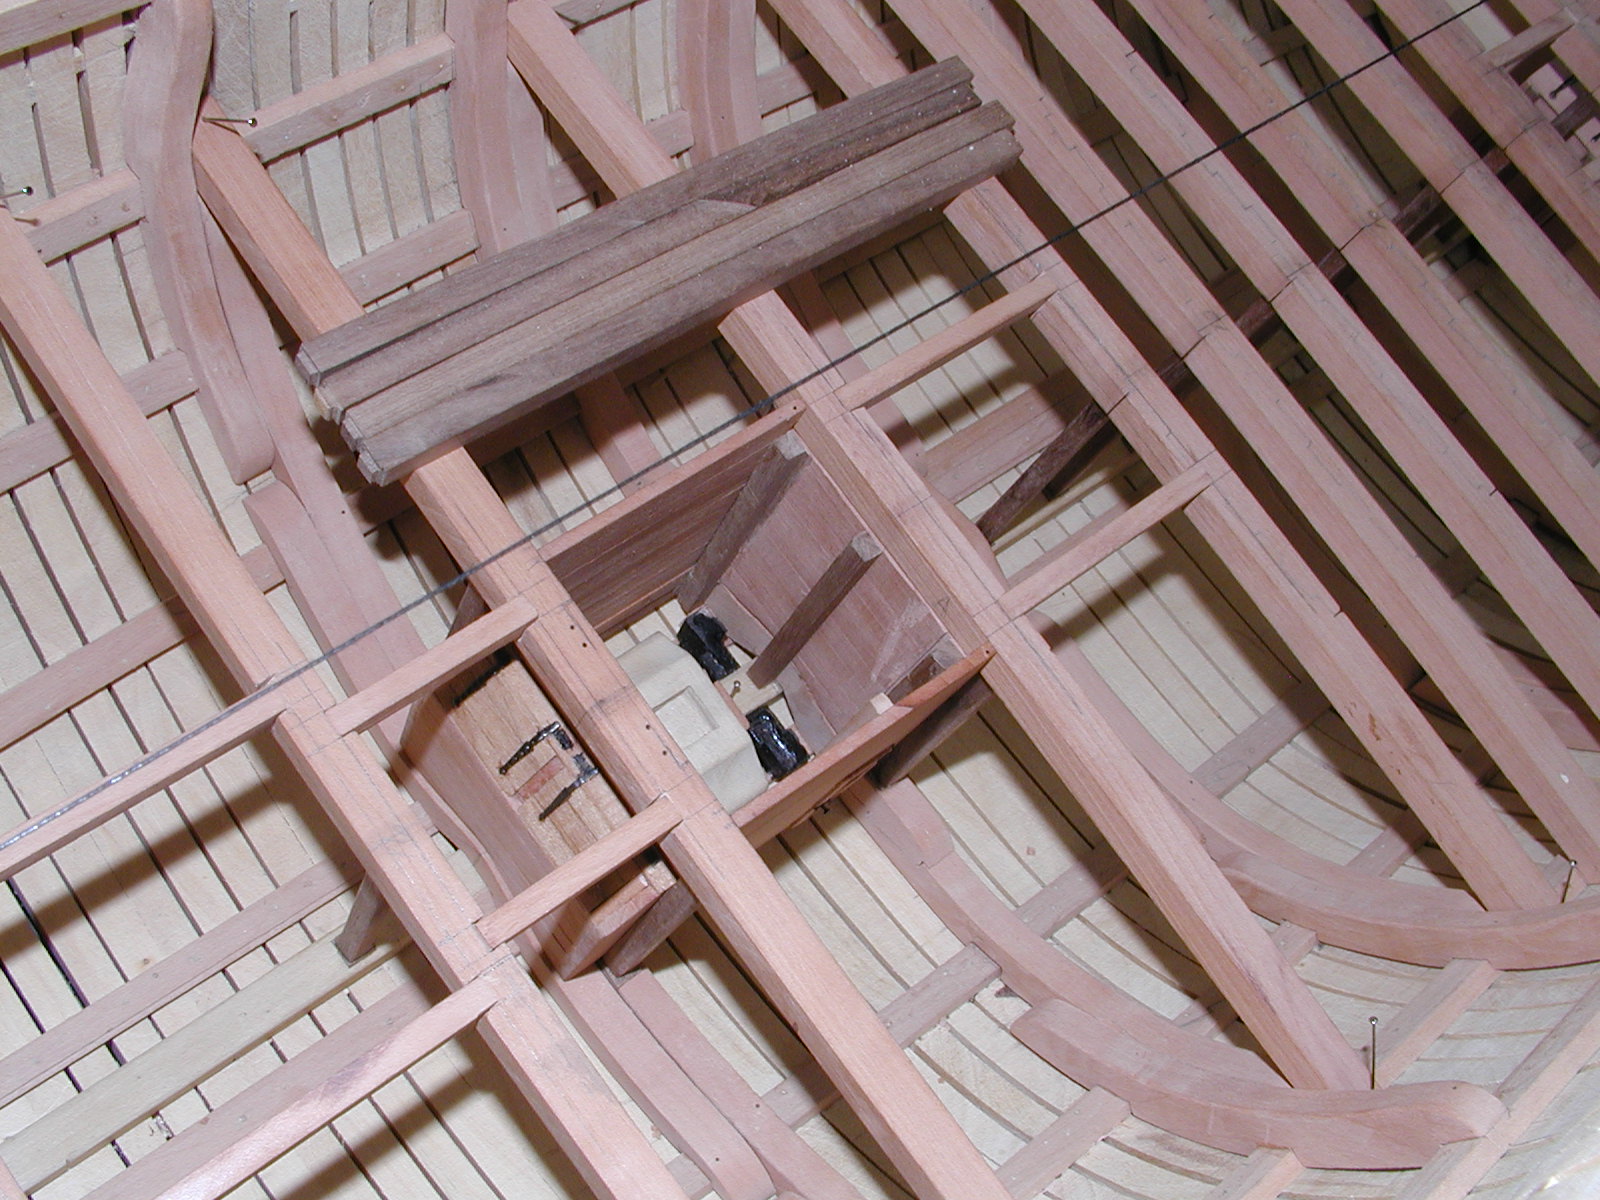
Thanks guys. Hopfully one day I have my log back even if a few of the details might be missing. Of course nothing says that we can't go back and add those later. Figure I would add some thing deep in the hull of Montagu that really brought me a lot of enjoyment researching and building.
One of the most important rooms in Montagu other then the captains room was the magazine. Spending a year researching and building this was enjoyable and at times fustrated. It does seem that once I had the magazine as finished as the research would allow me and covered it up with the orlop deck, came across more research and detail that I wish I had at the time I was building it. Does seem that that is the way it goes. Any way here is a build up of her magazine. If you have any question on the what and how please let me know and will be more then happy to answer them. Gary

- billocrates, fatih79 and Jeronimo
-
3
-
Thanks Joe. Hopfully I will have it caught back up in the next two weeks, at least thats the plan. Of couse it could take me a little longer. I just purchase another great Byrnes tool. This time his disk sander. Been wanting one of those puppies every since he came out with it 5 years ago. Jim forgive me if its been longer. Just might keep me in the shop, making saw dust.
 Gary
Gary -
Here is a couple more showing this part of her build.


- popash42, Elmer Cornish, druxey and 8 others
-
11


HMS Montague 1779 bygaryshipwright - 74-gun Alfred-class
in - Build logs for subjects built 1751 - 1800
Posted
Thanks Russ. Its a good article and the info will come in handy but one item that is not mention is the diameter of the metal of the hooks that was used. Am sure its here some place so will look some more. Do thank you sir. Funny thing is Russ, the simplest things are some times the hardest. ;o)Gary