


Tompslattery
-
Posts
106 -
Joined
-
Last visited
Content Type
Profiles
Forums
Gallery
Events
Posts posted by Tompslattery
-
-
On 7/8/2020 at 1:05 PM, Rick01 said:
When you come to fitting the gun tackle you may want to try smaller blocks than those provided. I've used 3 mm and also added the restraining rope to the carronade itself. Still not as good as I'd like but I just can't handle 2 mm blocks!
I've also dug up a pair of 6lb cannon left over from another build and will add these at the prow. I haven't completed the tackle yet as I'm waiting on a mail order - we're in complete lockdown so it's mail or nothing at the moment.
Rick
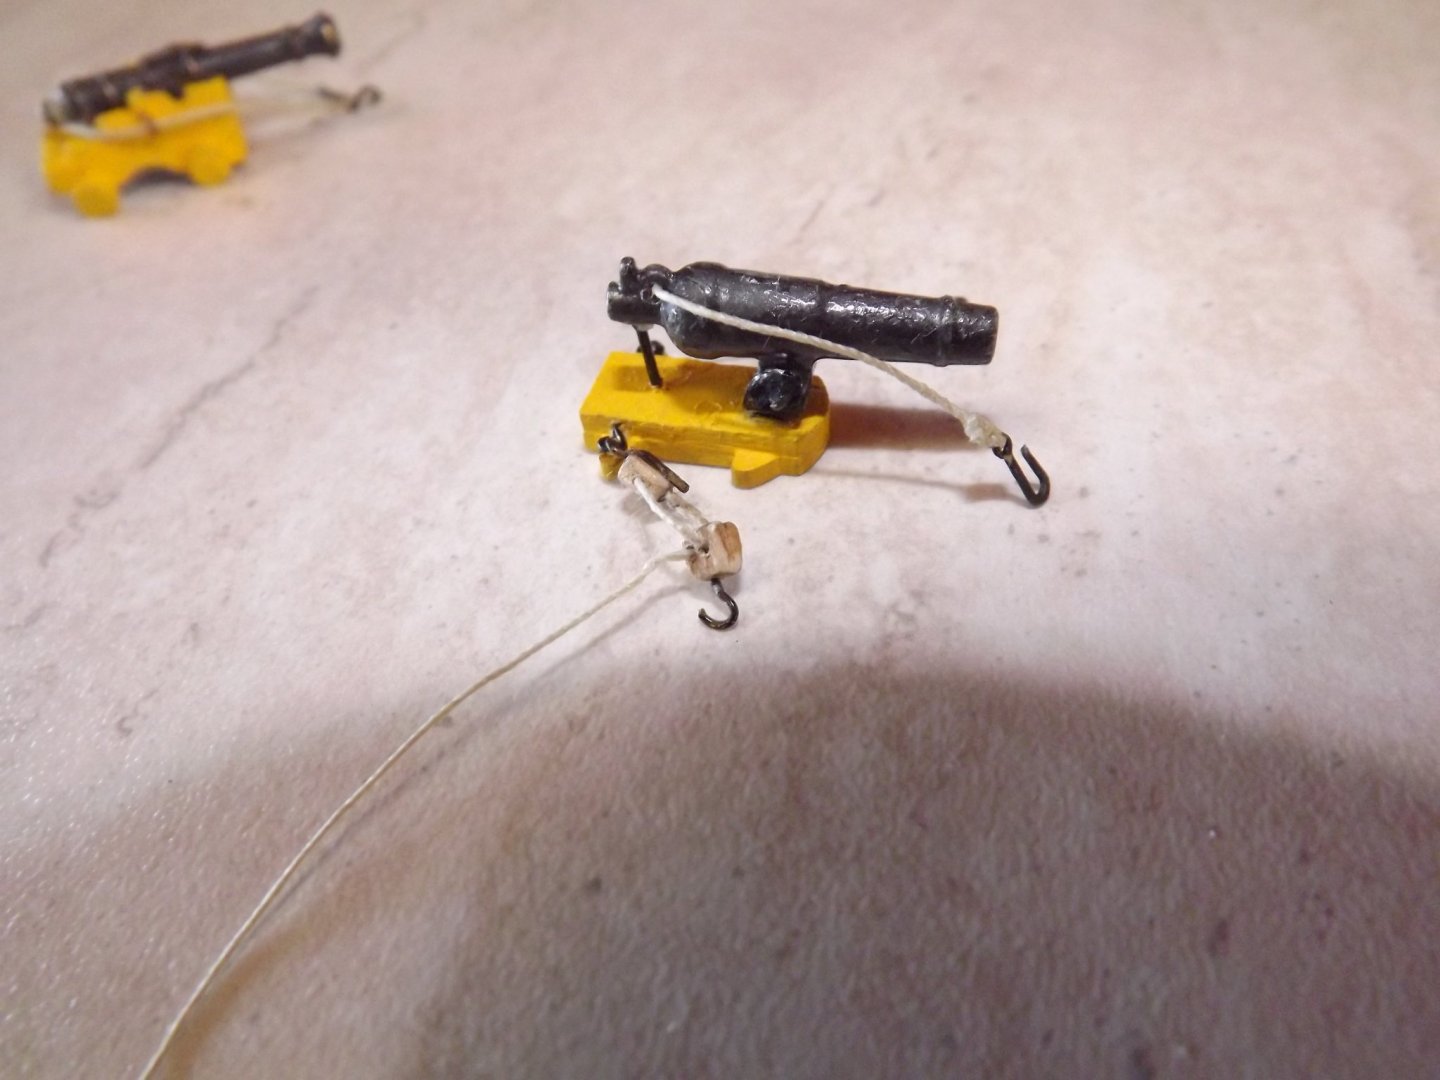
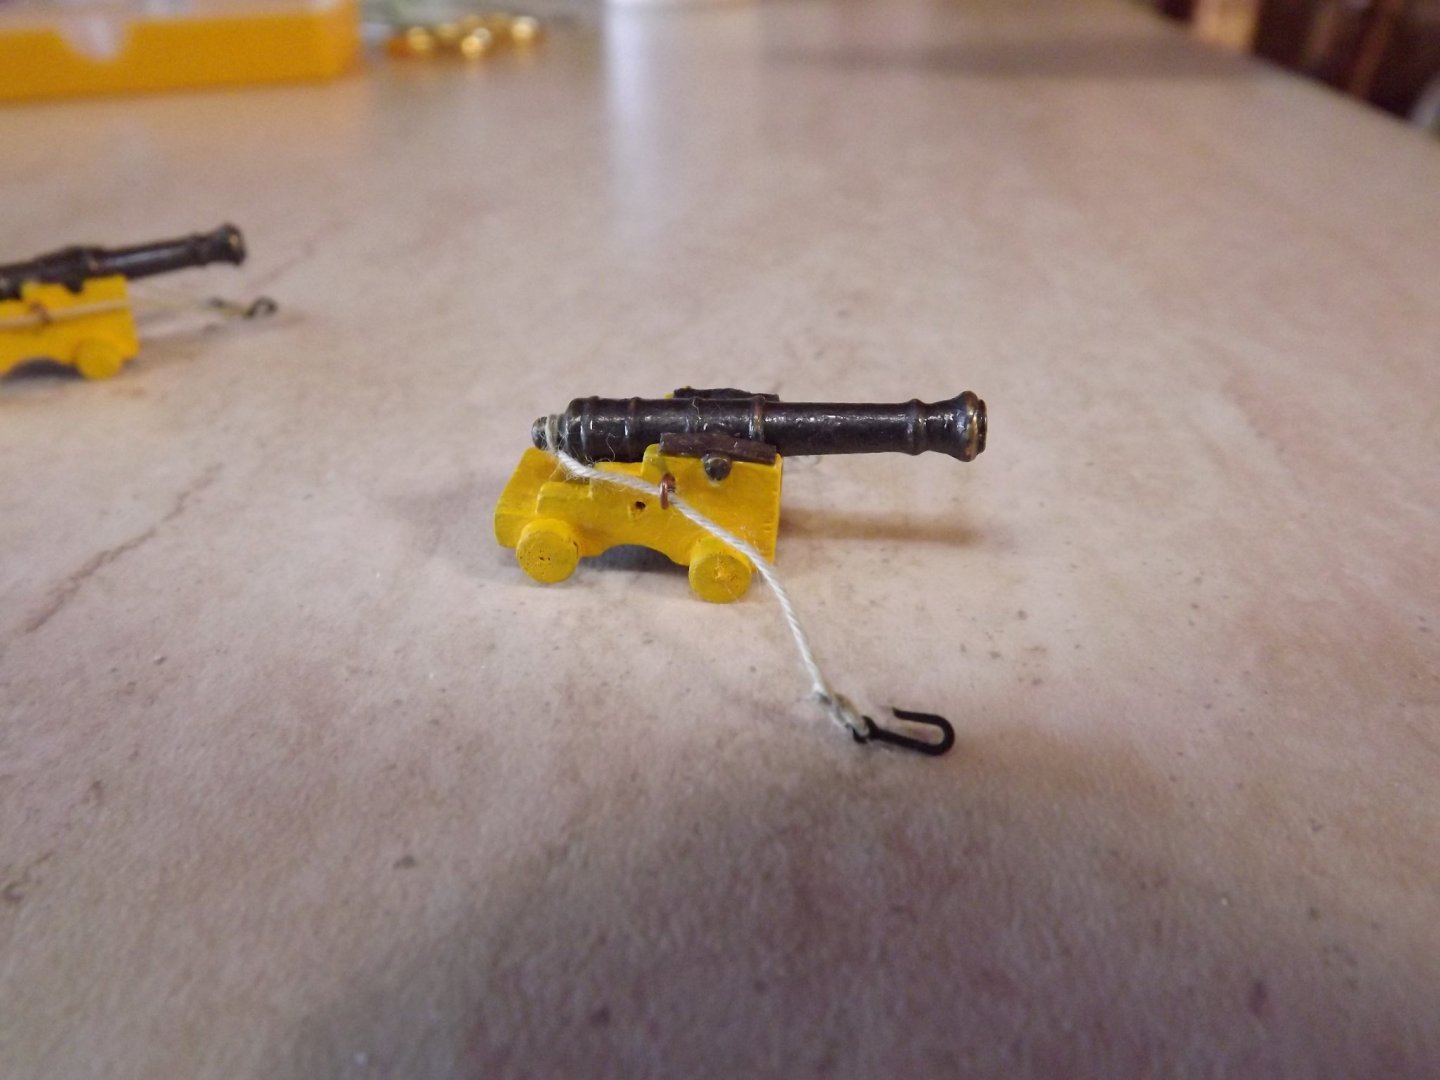
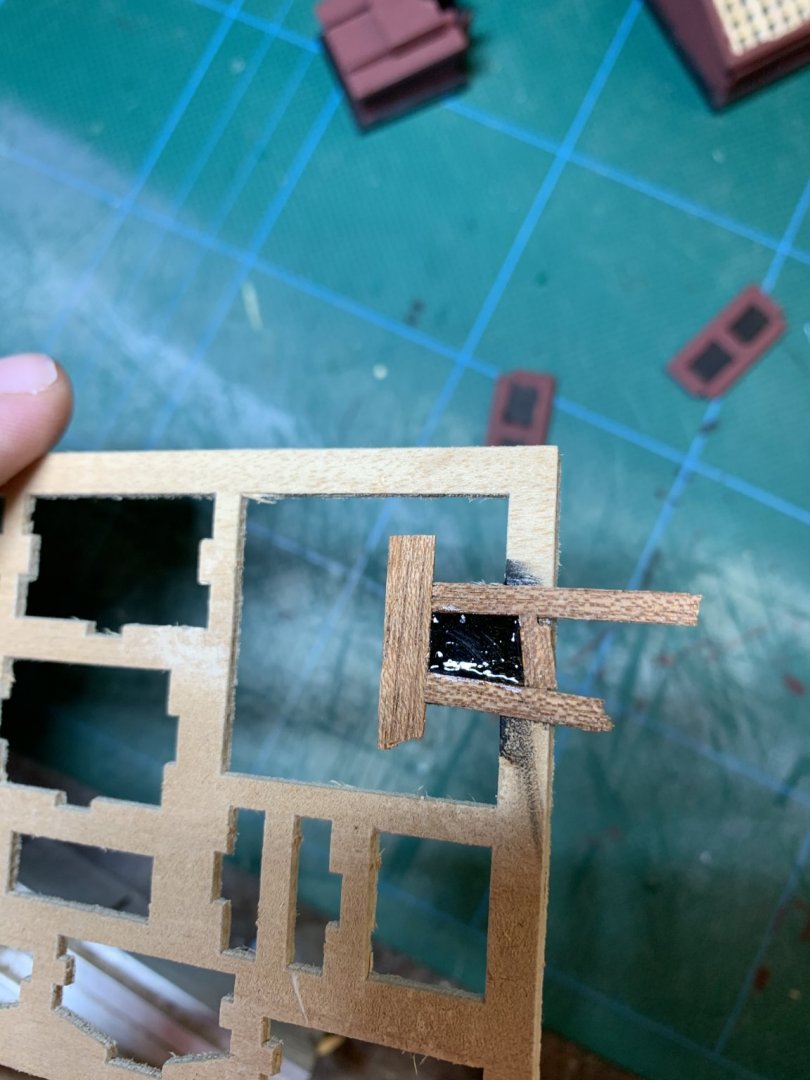
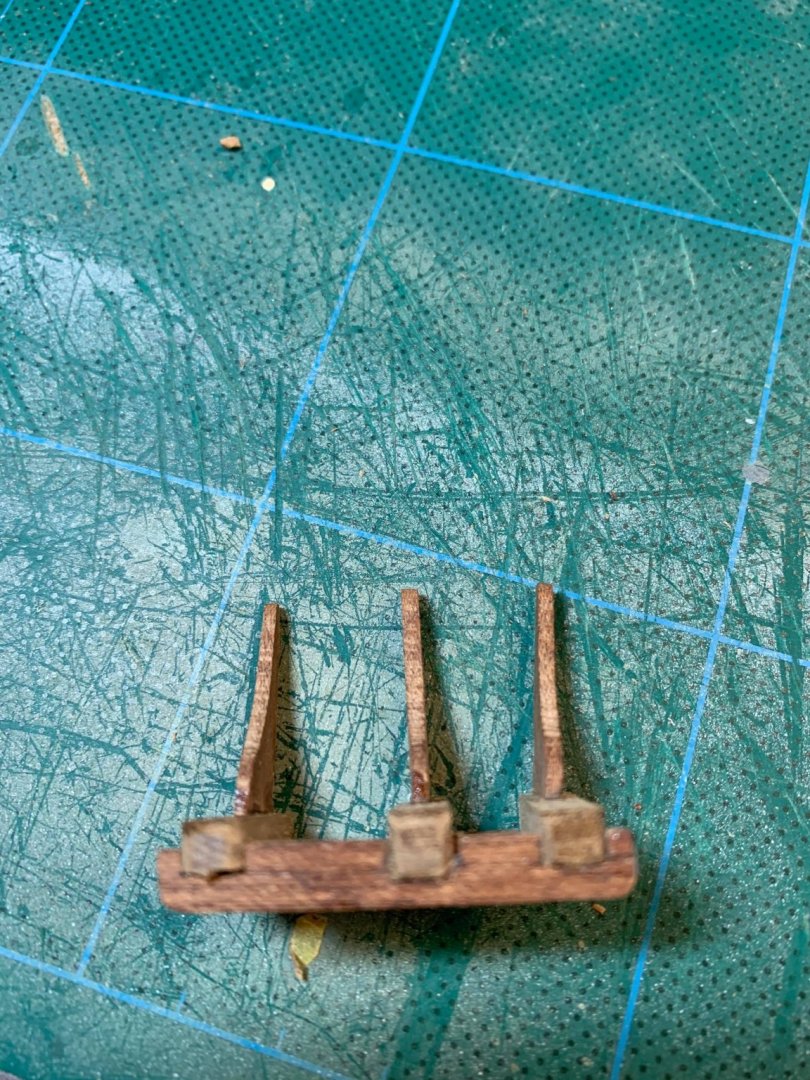
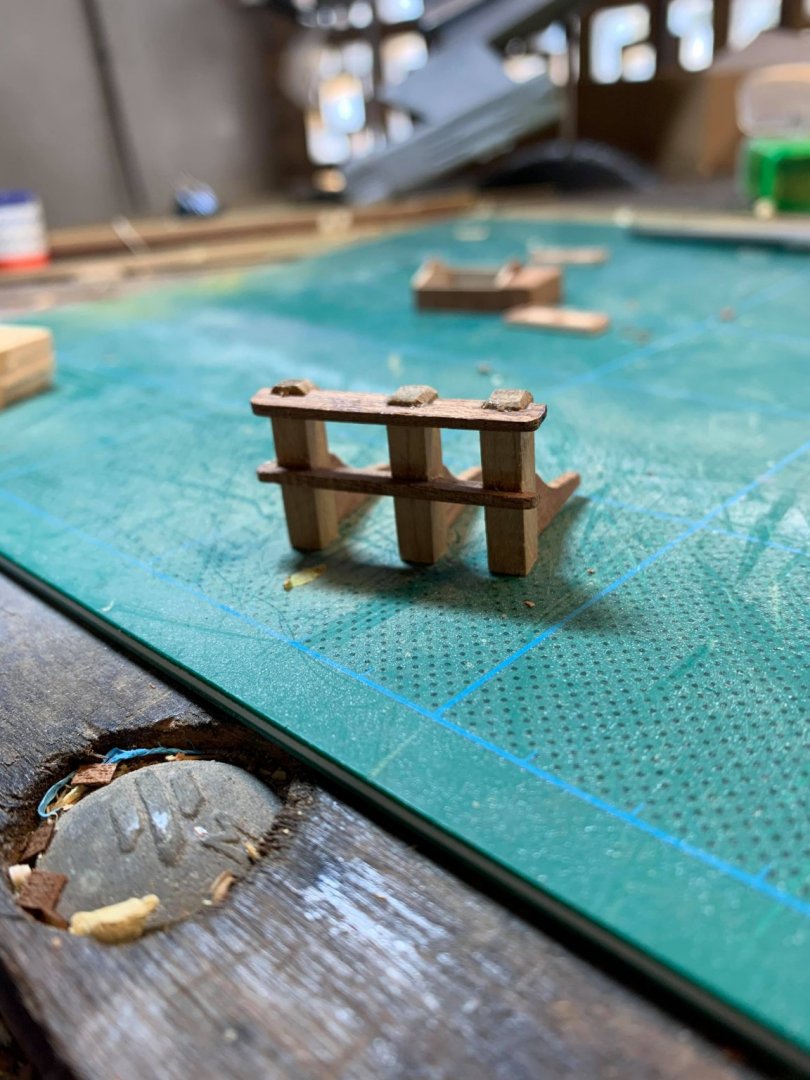
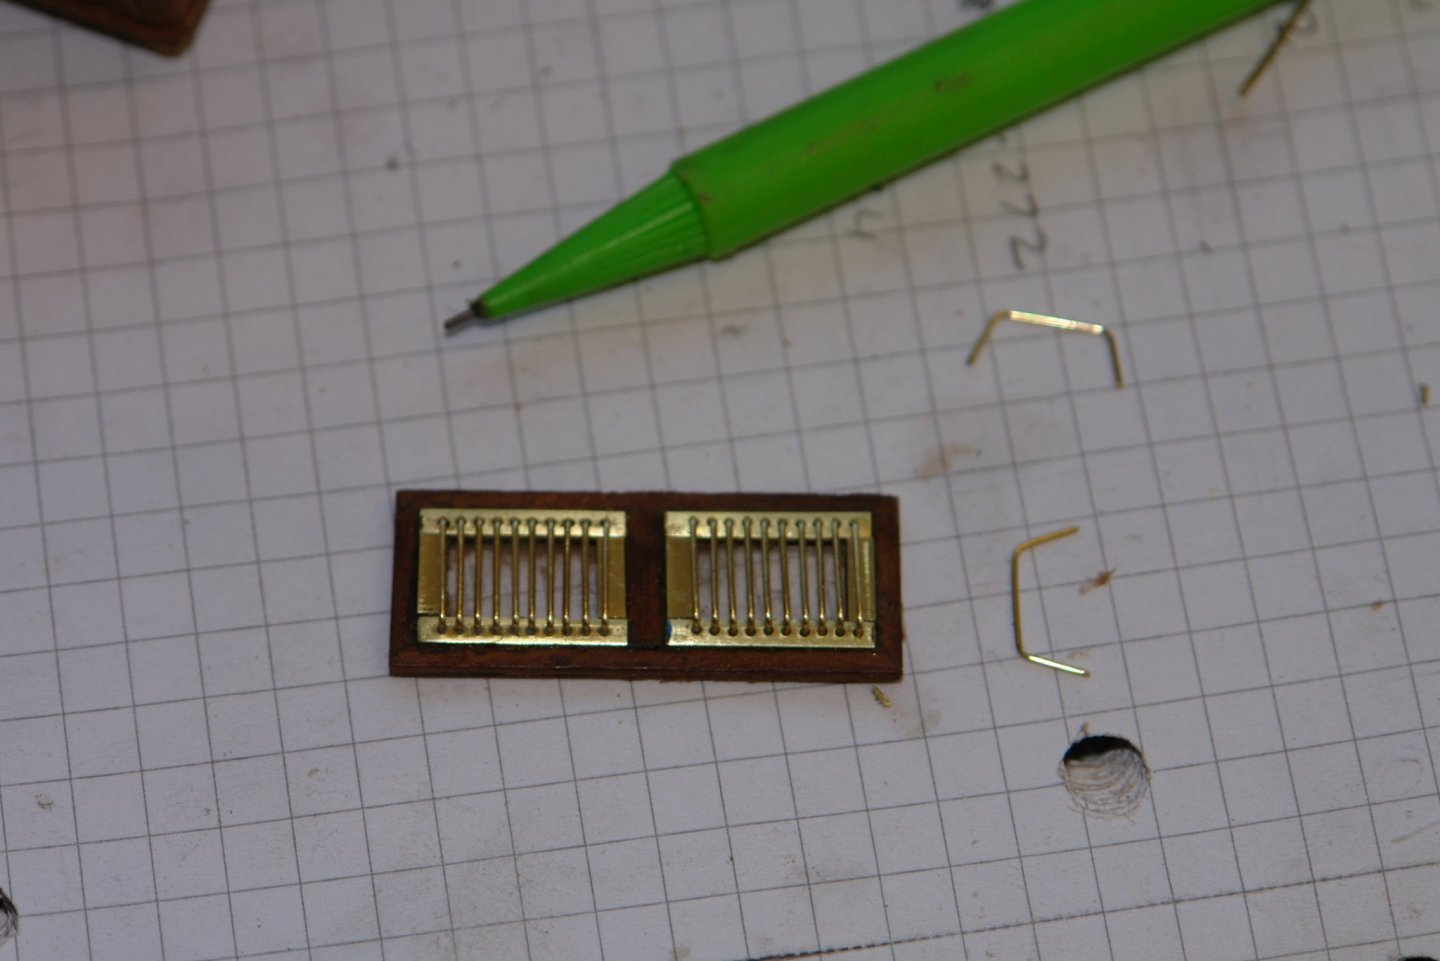
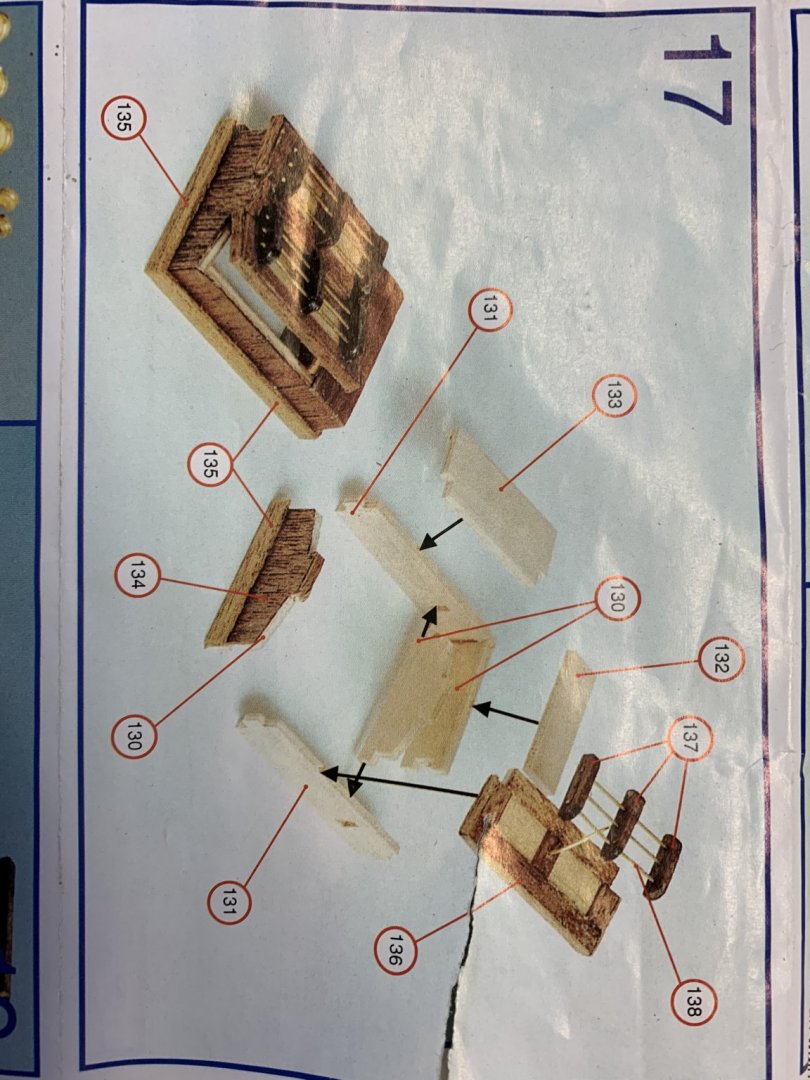
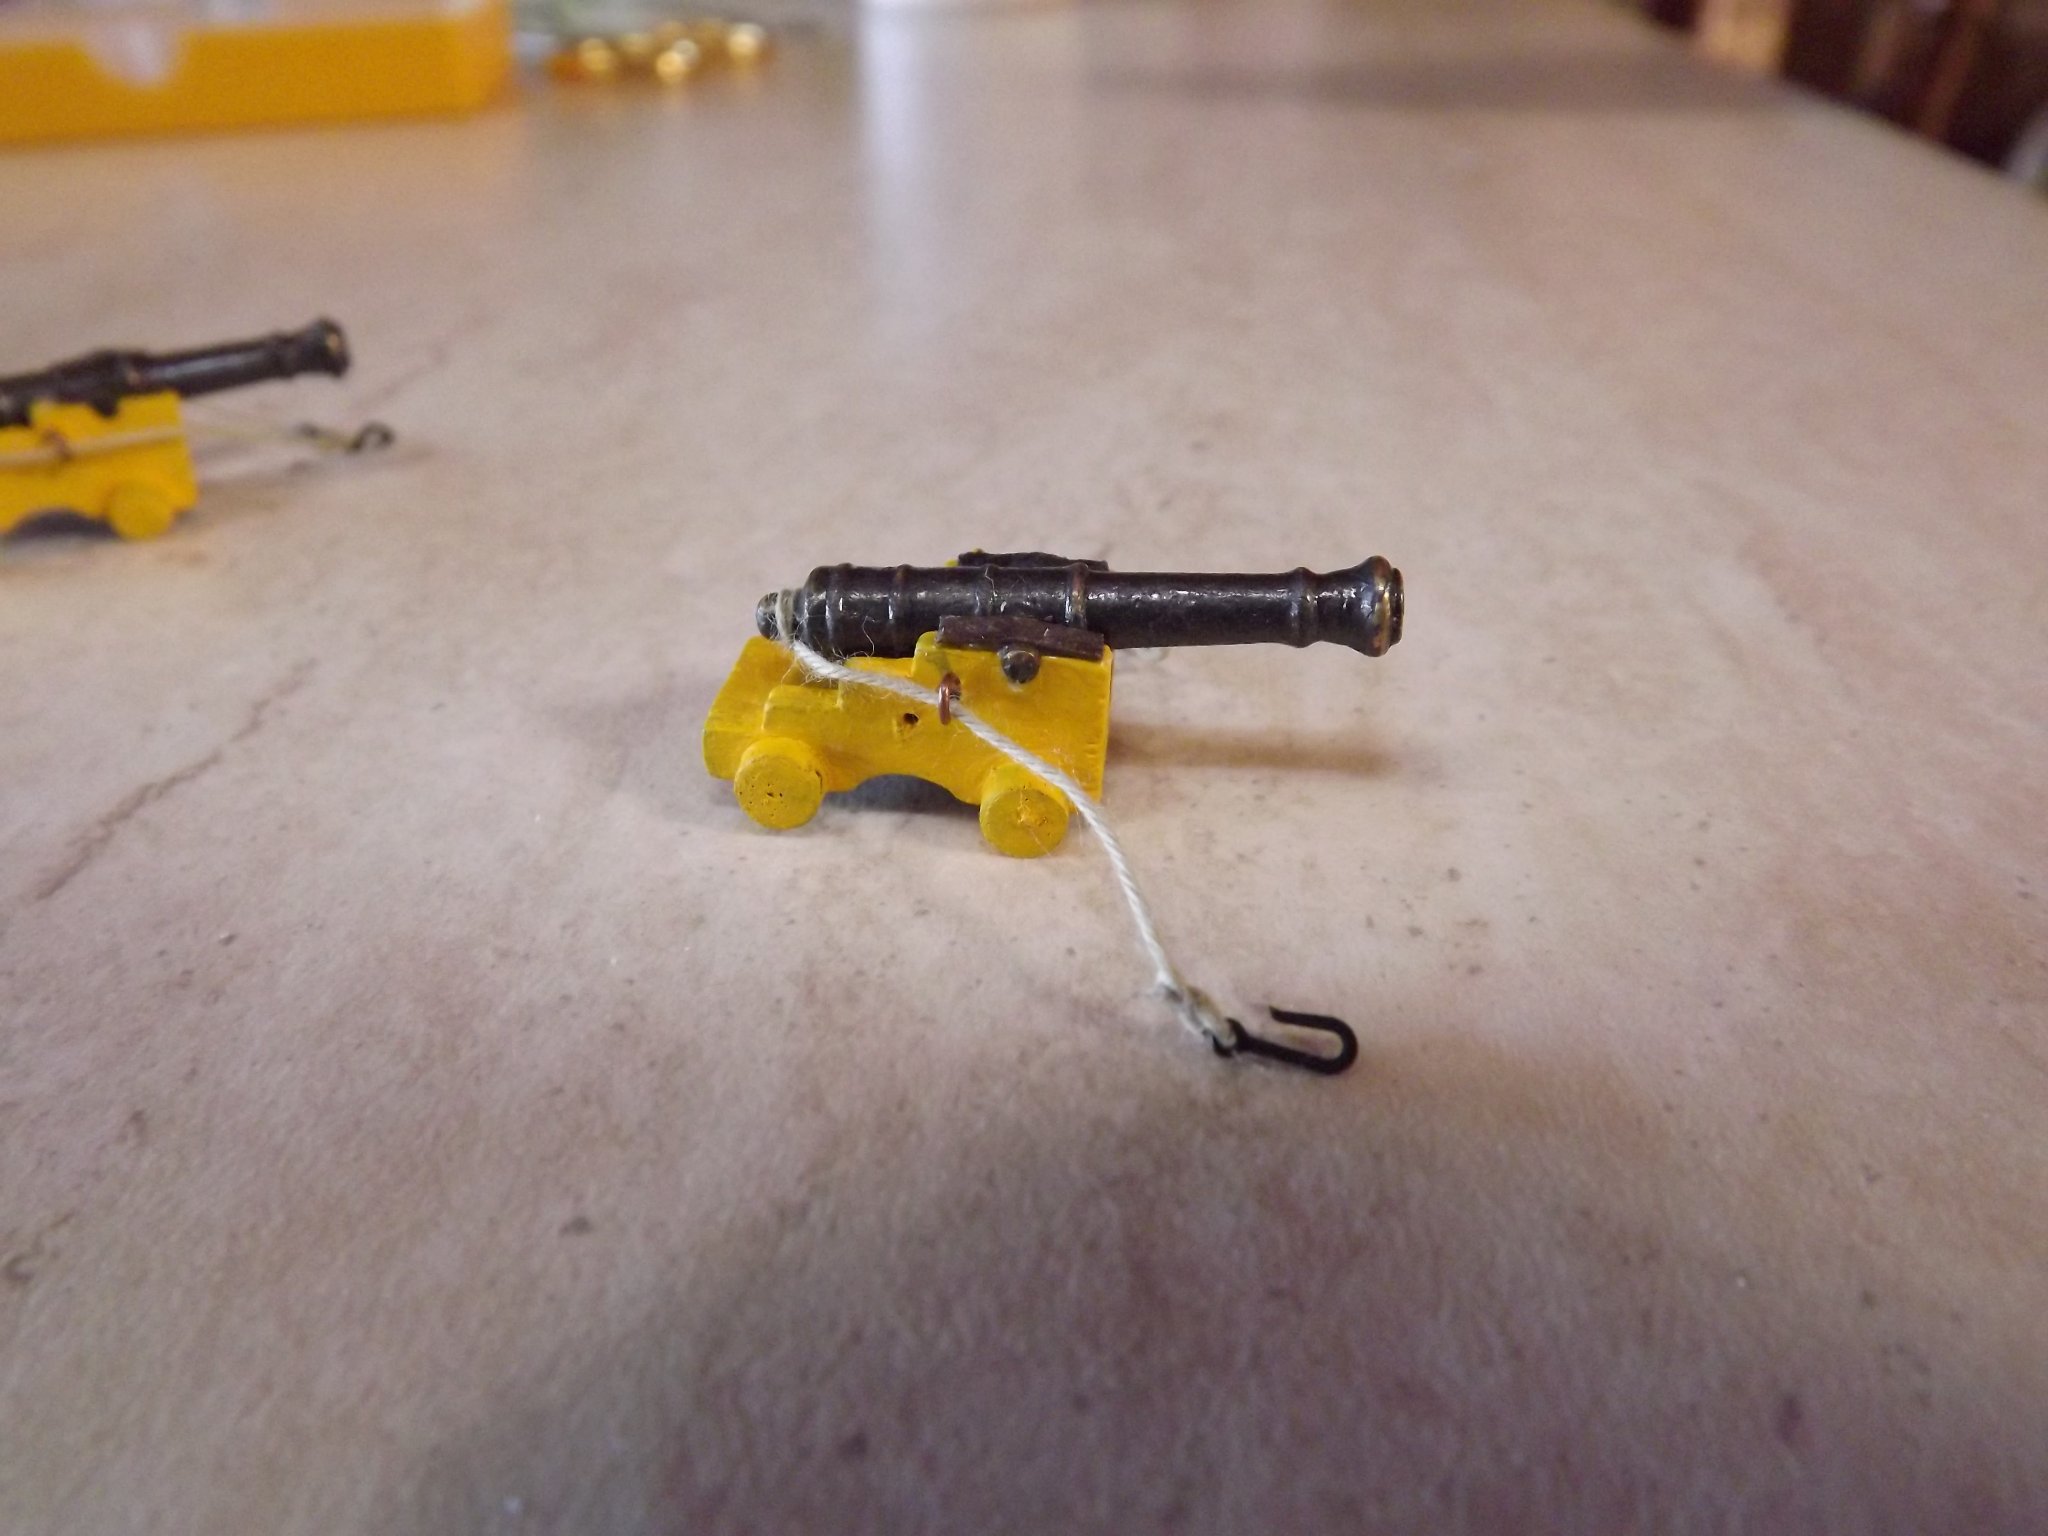
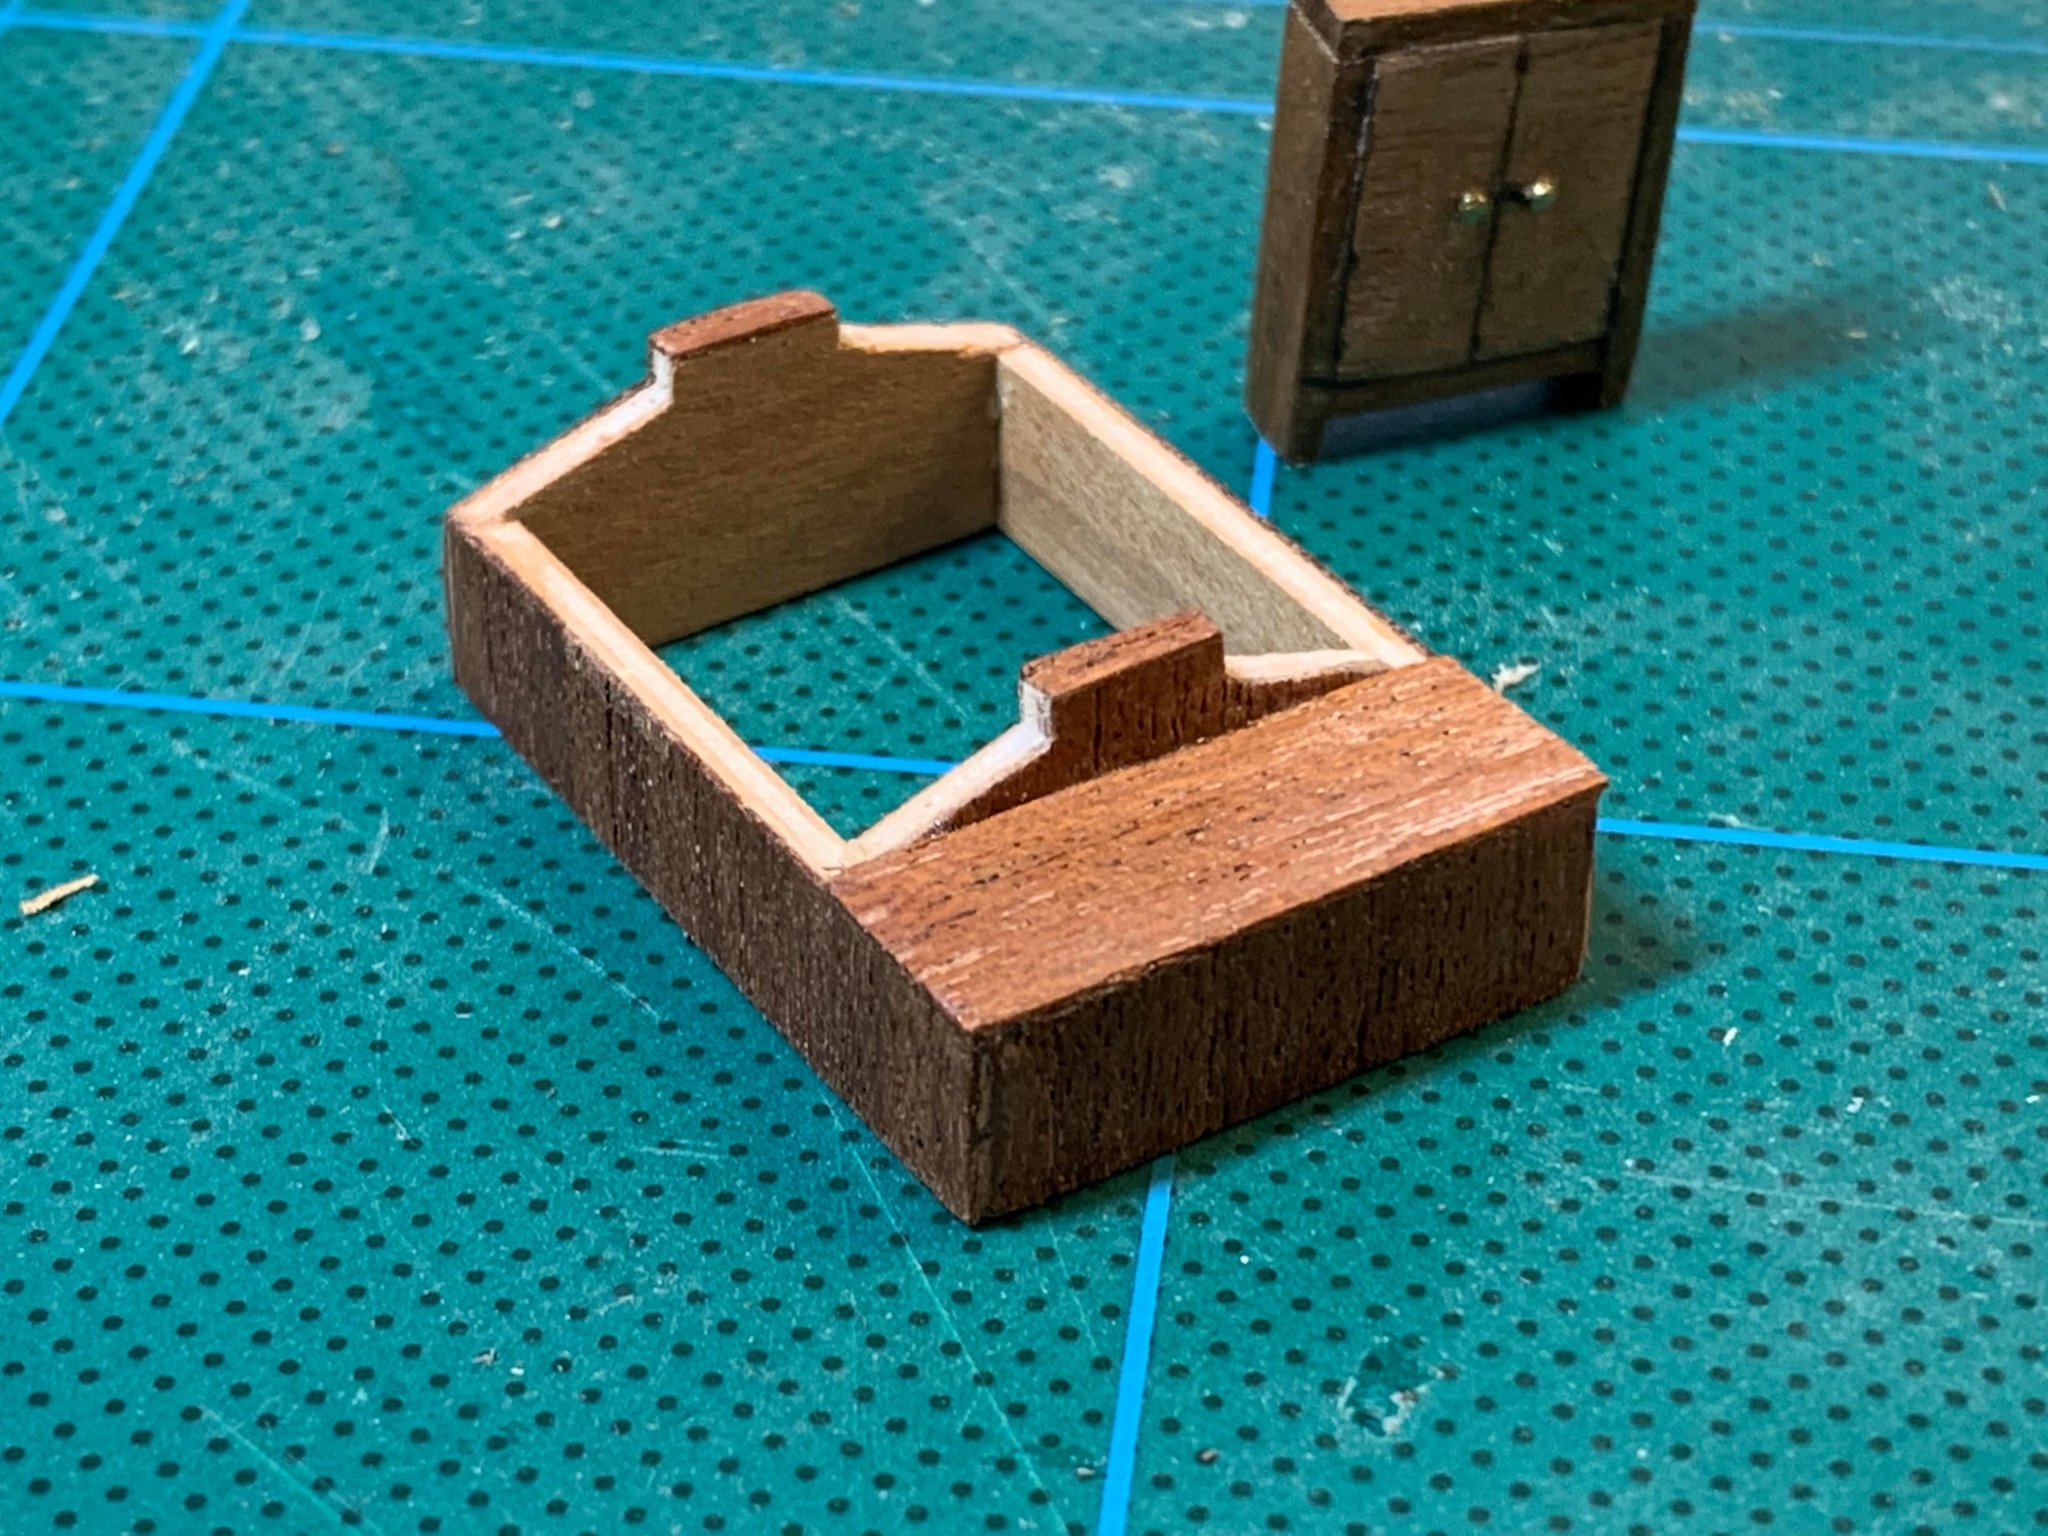
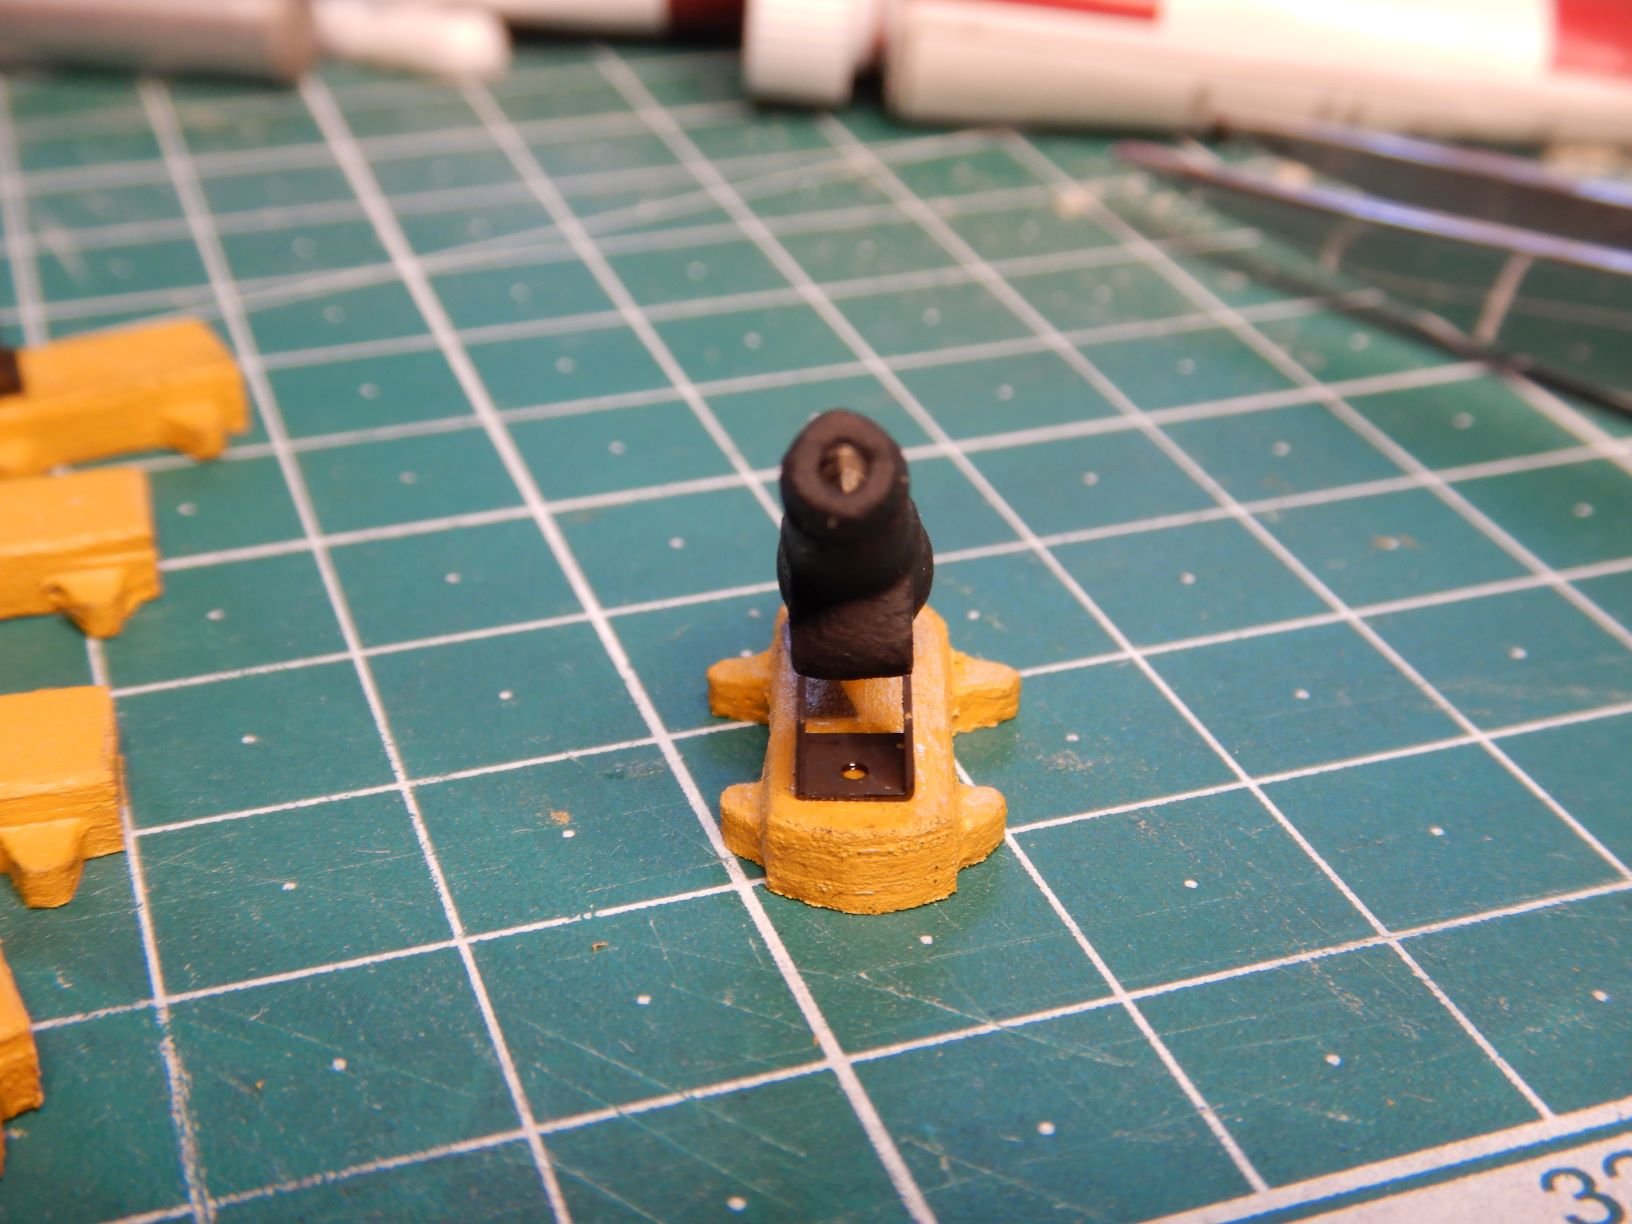
Thanks my instructions didn’t really supply any details see attached. I’ve had an attempt to make sleds but I not happy with them
- Dutchman, Rick01, GrandpaPhil and 1 other
-
 4
4
-
-
On 6/19/2020 at 10:31 AM, Gregory said:
For a simple approach I would try to build it pretty much like the instructions show.
Then, in the areas I circled, you could fill it in with something like this:
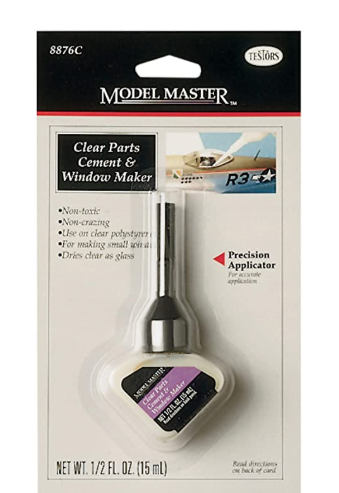
It will look just like glass..
A test using the testors window maker. Think it looks ok
- Keith Black, Duanelaker, Gregory and 1 other
-
4
-
-
Added a coat of sanding sealer/shellac. Will be using this as the finish of some parts and others will be painted.

.thumb.jpg.a7fe5c1981a65ae9768ac9b87ed45808.jpg)
.thumb.jpg.25fea6ec60008c2e6bd068765162a4b7.jpg)


-
On 6/23/2020 at 5:16 PM, Tompslattery said:
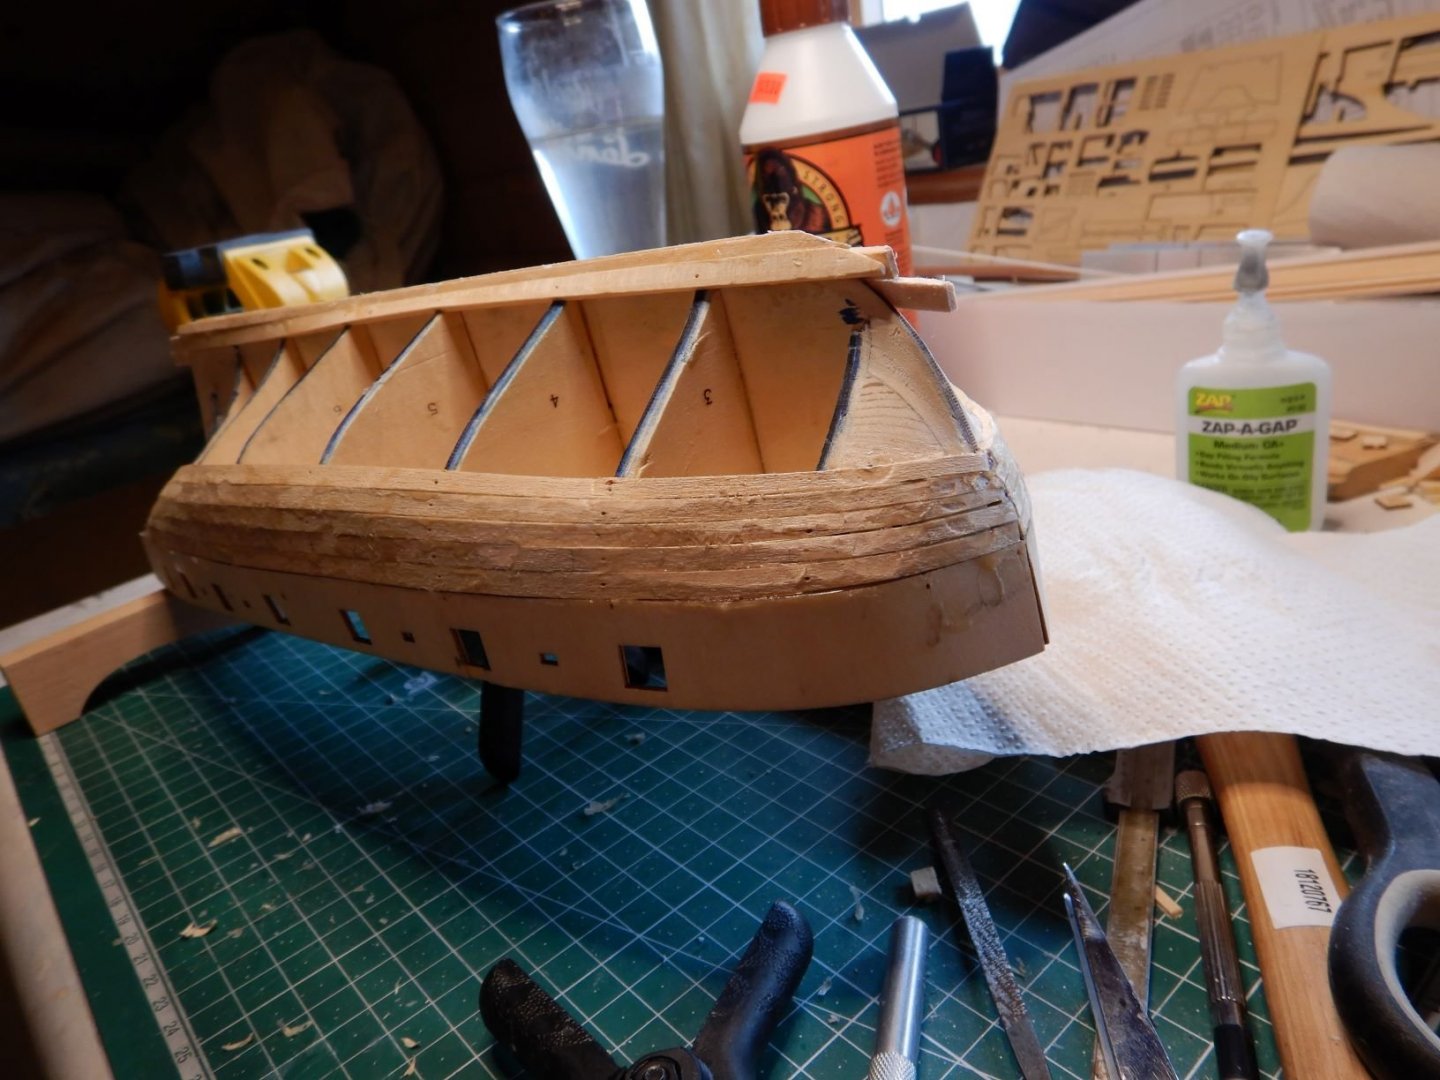
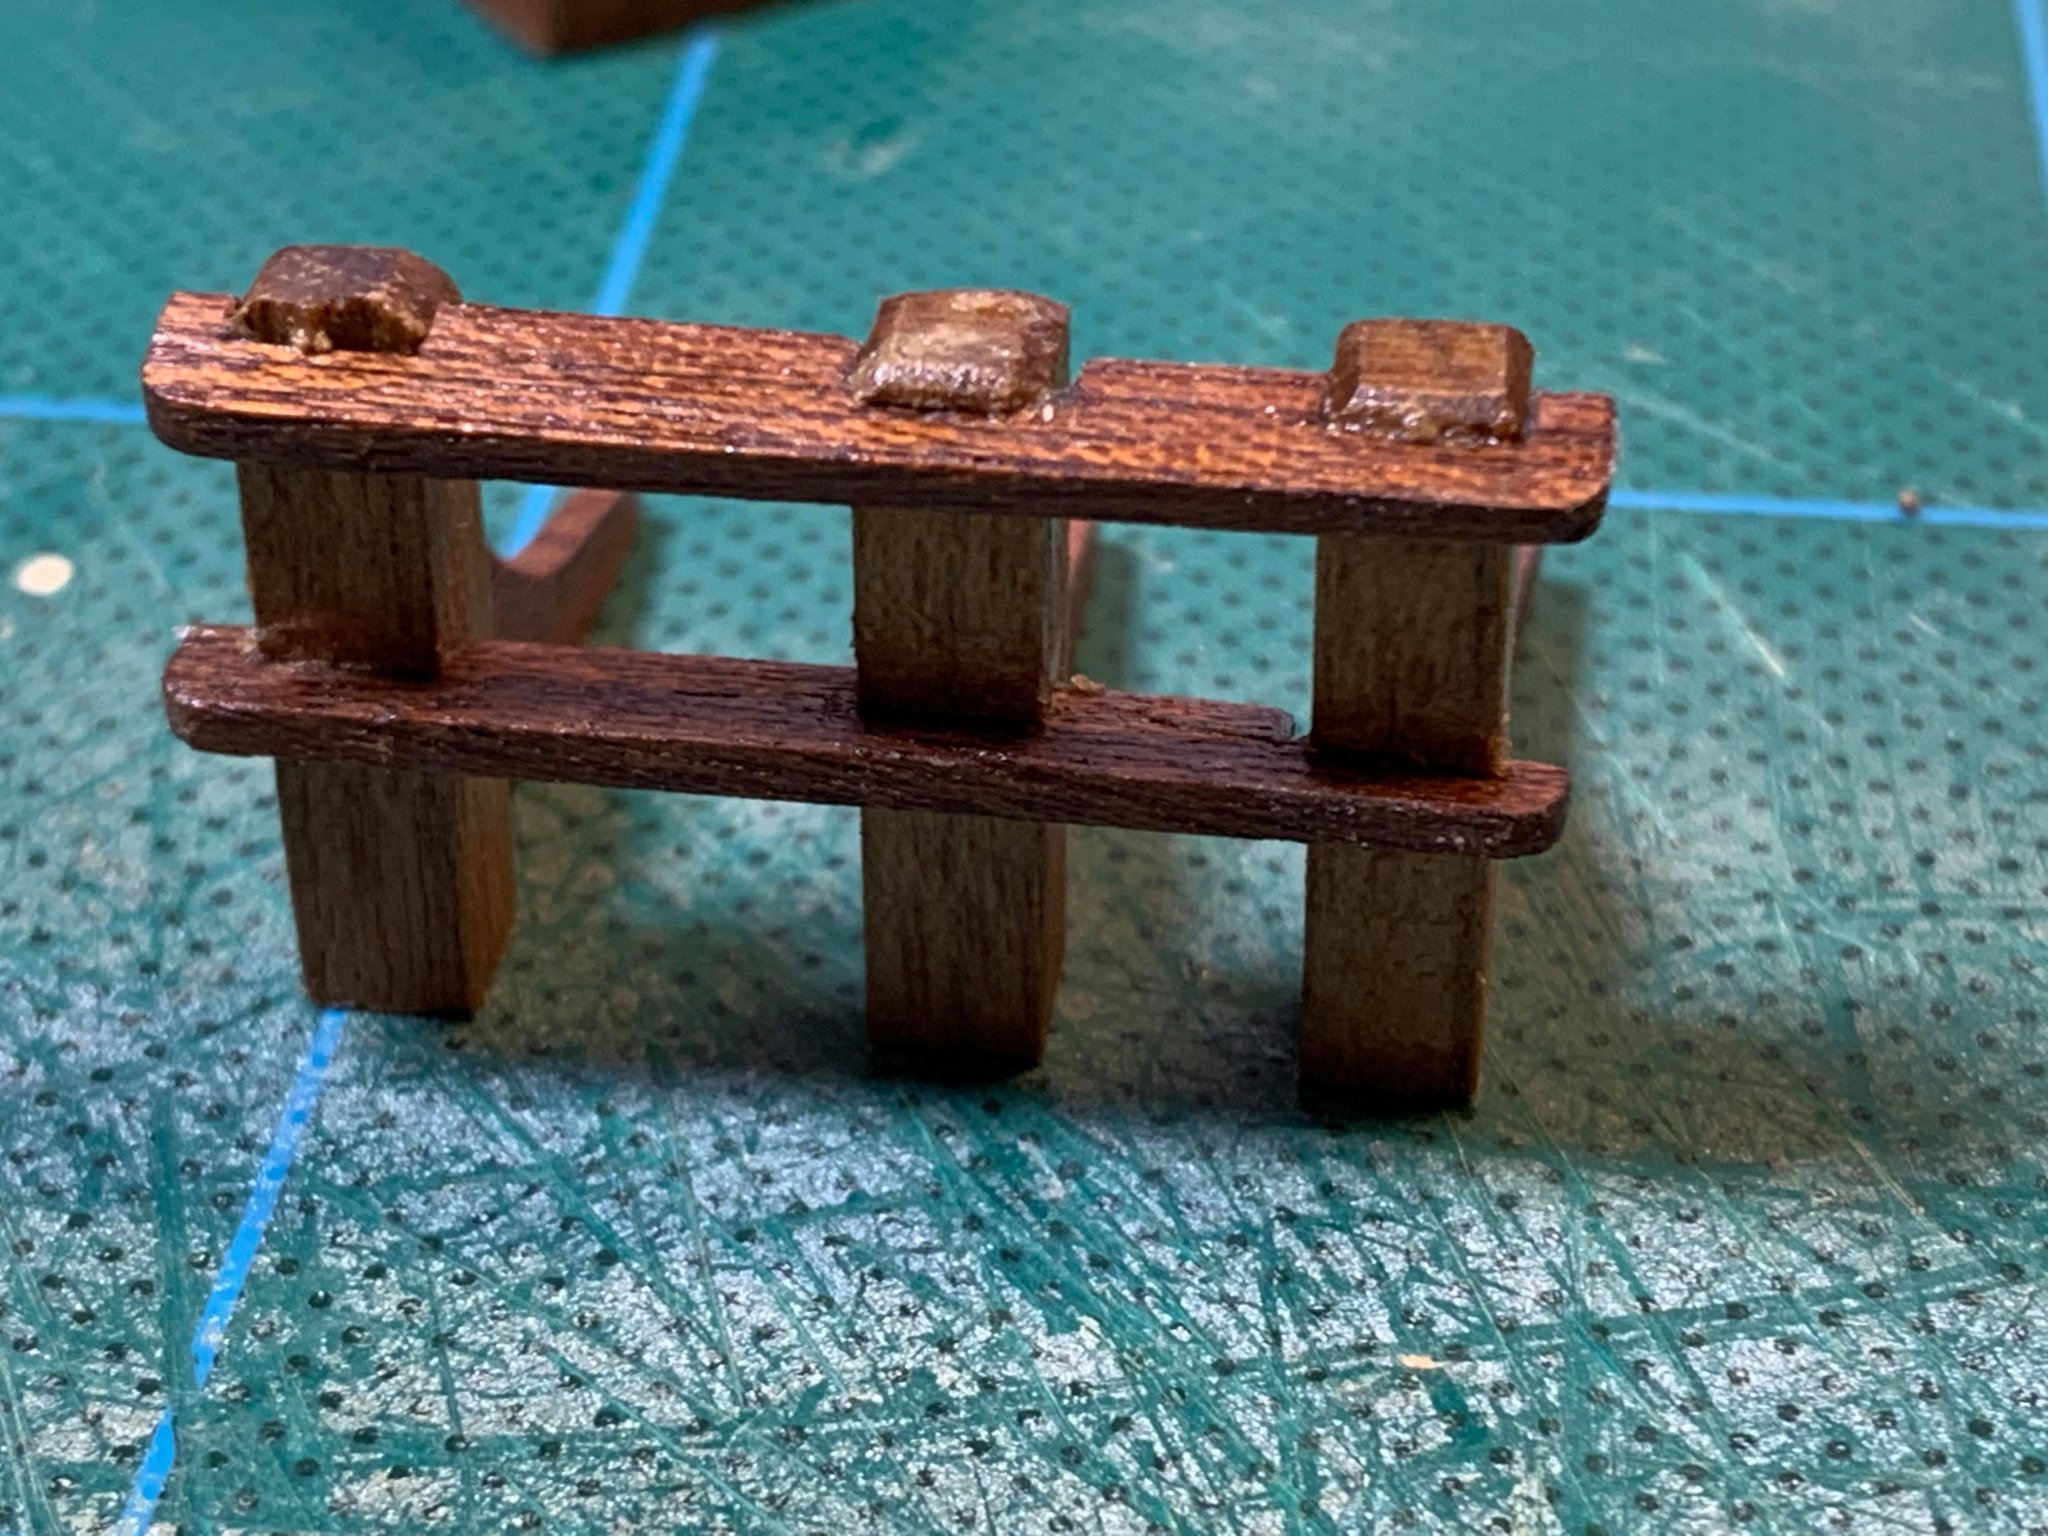
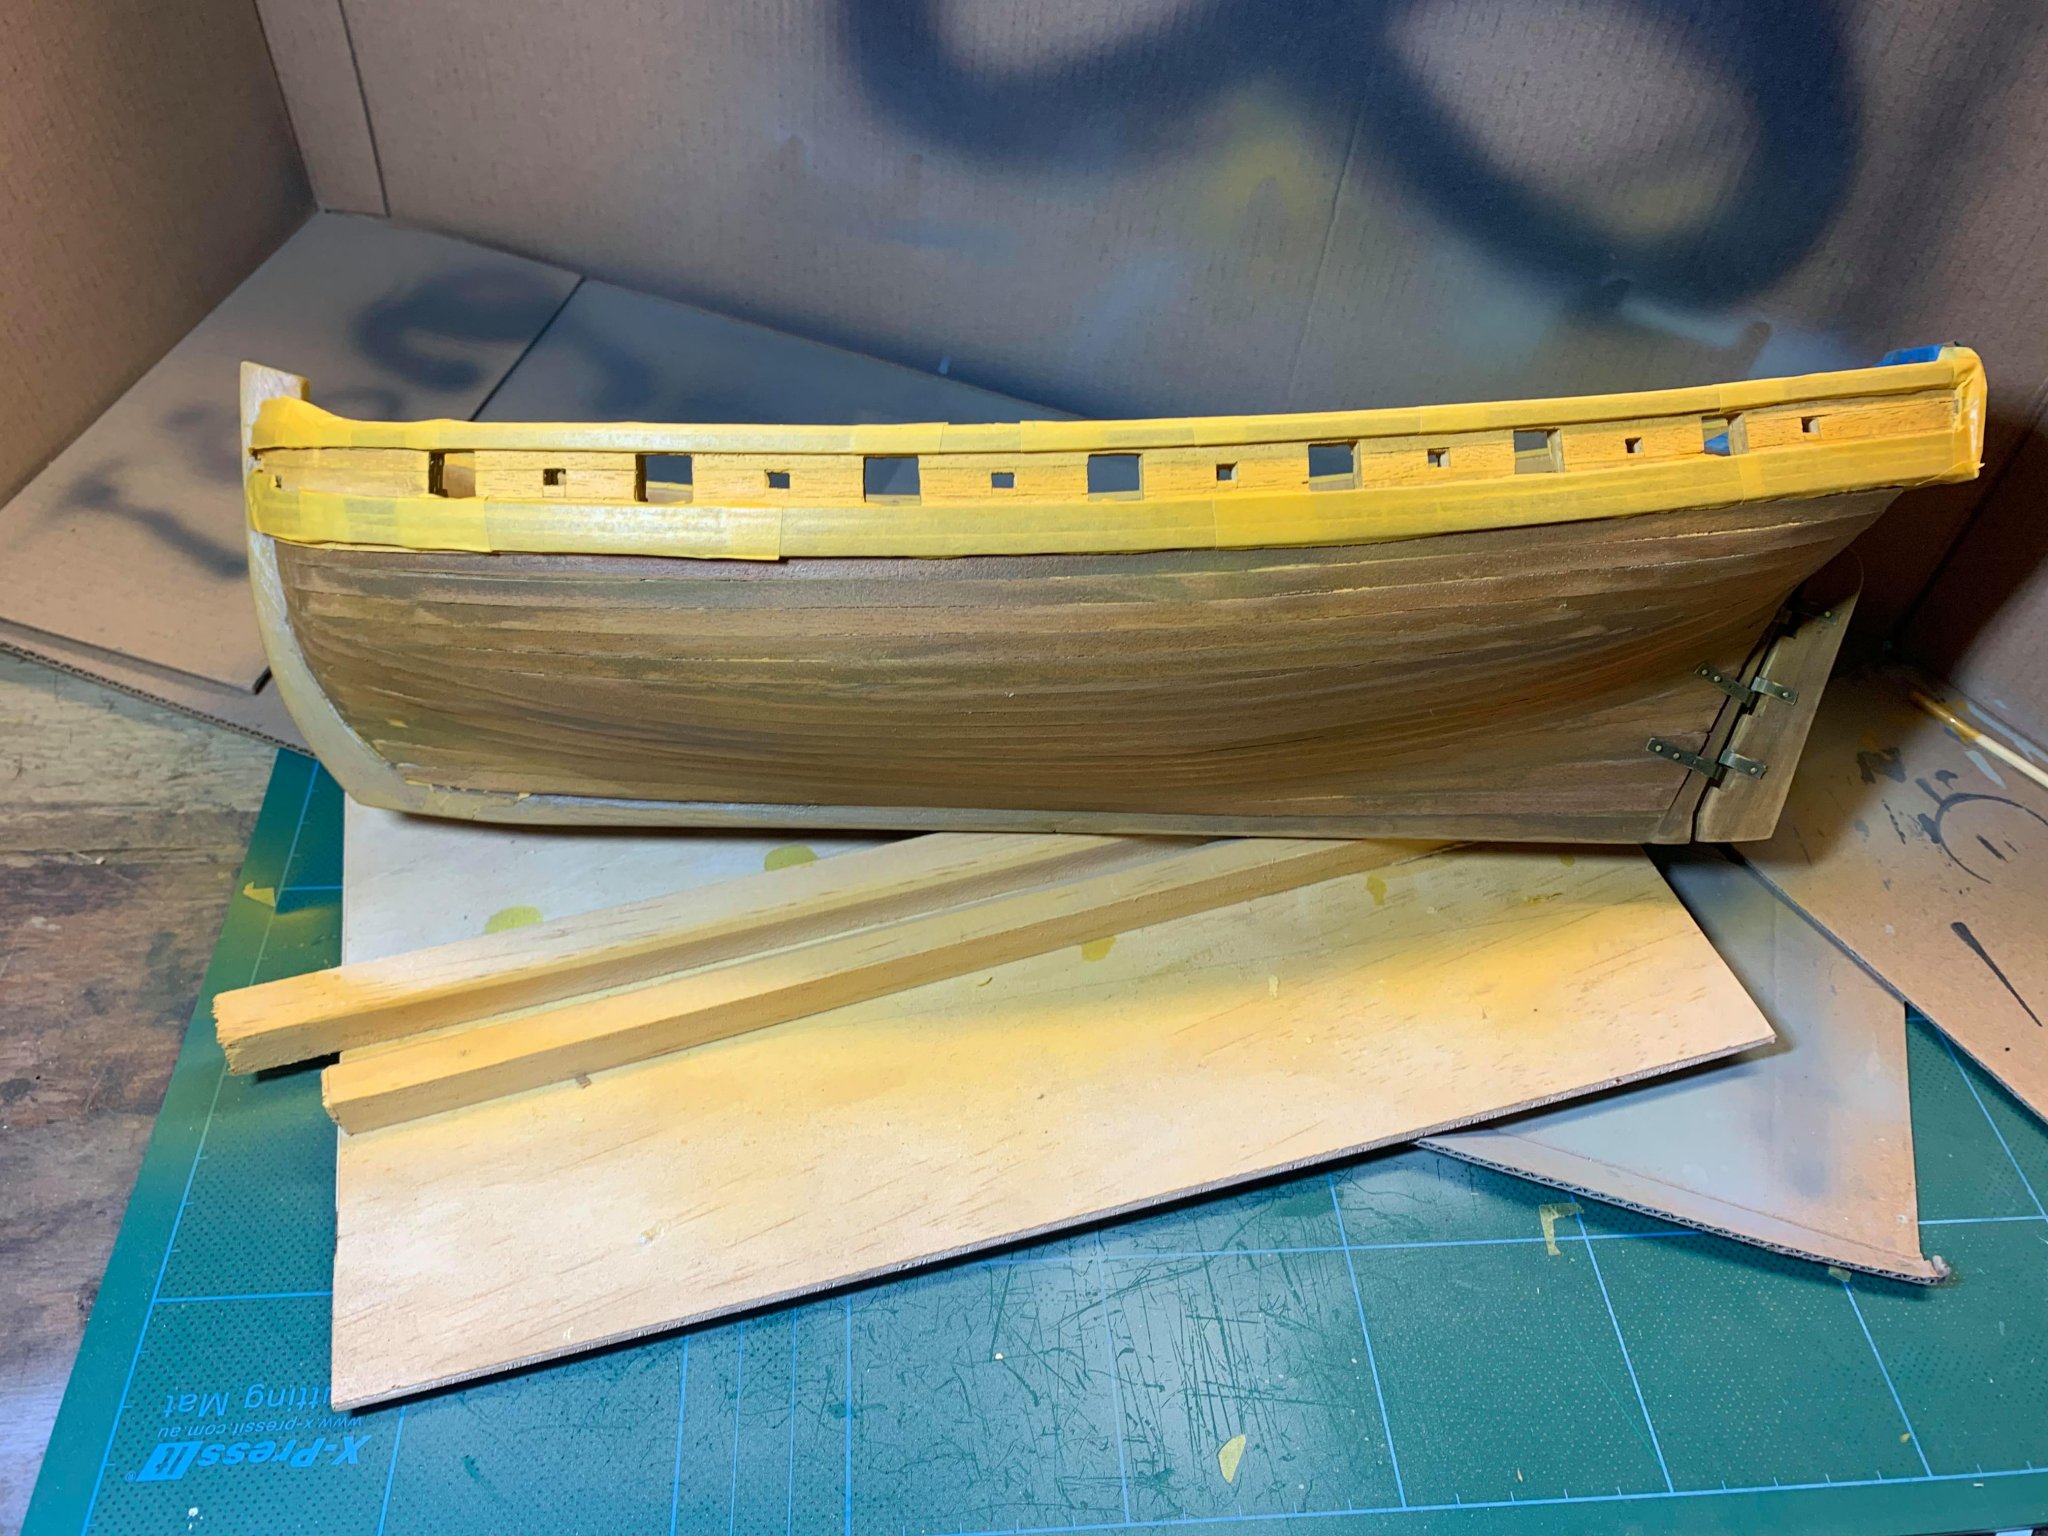
Well tonight could've gone better. I was unhappy with how this railing that the bowsprit slots through turned out, so I decided to try pulling it apart to do it again. Should've just left it. Broke of 3 of the corner ends as well as splitting pieces off longitudinally. Manage to glue most of the bits back onto the rail except for one corner. Now to recut the 3 posts and hope I get it square this time
Not sure if its much of an improvement
-
Well tonight could've gone better. I was unhappy with how this railing that the bowsprit slots through turned out, so I decided to try pulling it apart to do it again. Should've just left it. Broke of 3 of the corner ends as well as splitting pieces off longitudinally. Manage to glue most of the bits back onto the rail except for one corner. Now to recut the 3 posts and hope I get it square this time
- Peter Bloemendaal, ccoyle and Dutchman
-
3
-
On 5/29/2020 at 7:41 AM, Gaffrig said:
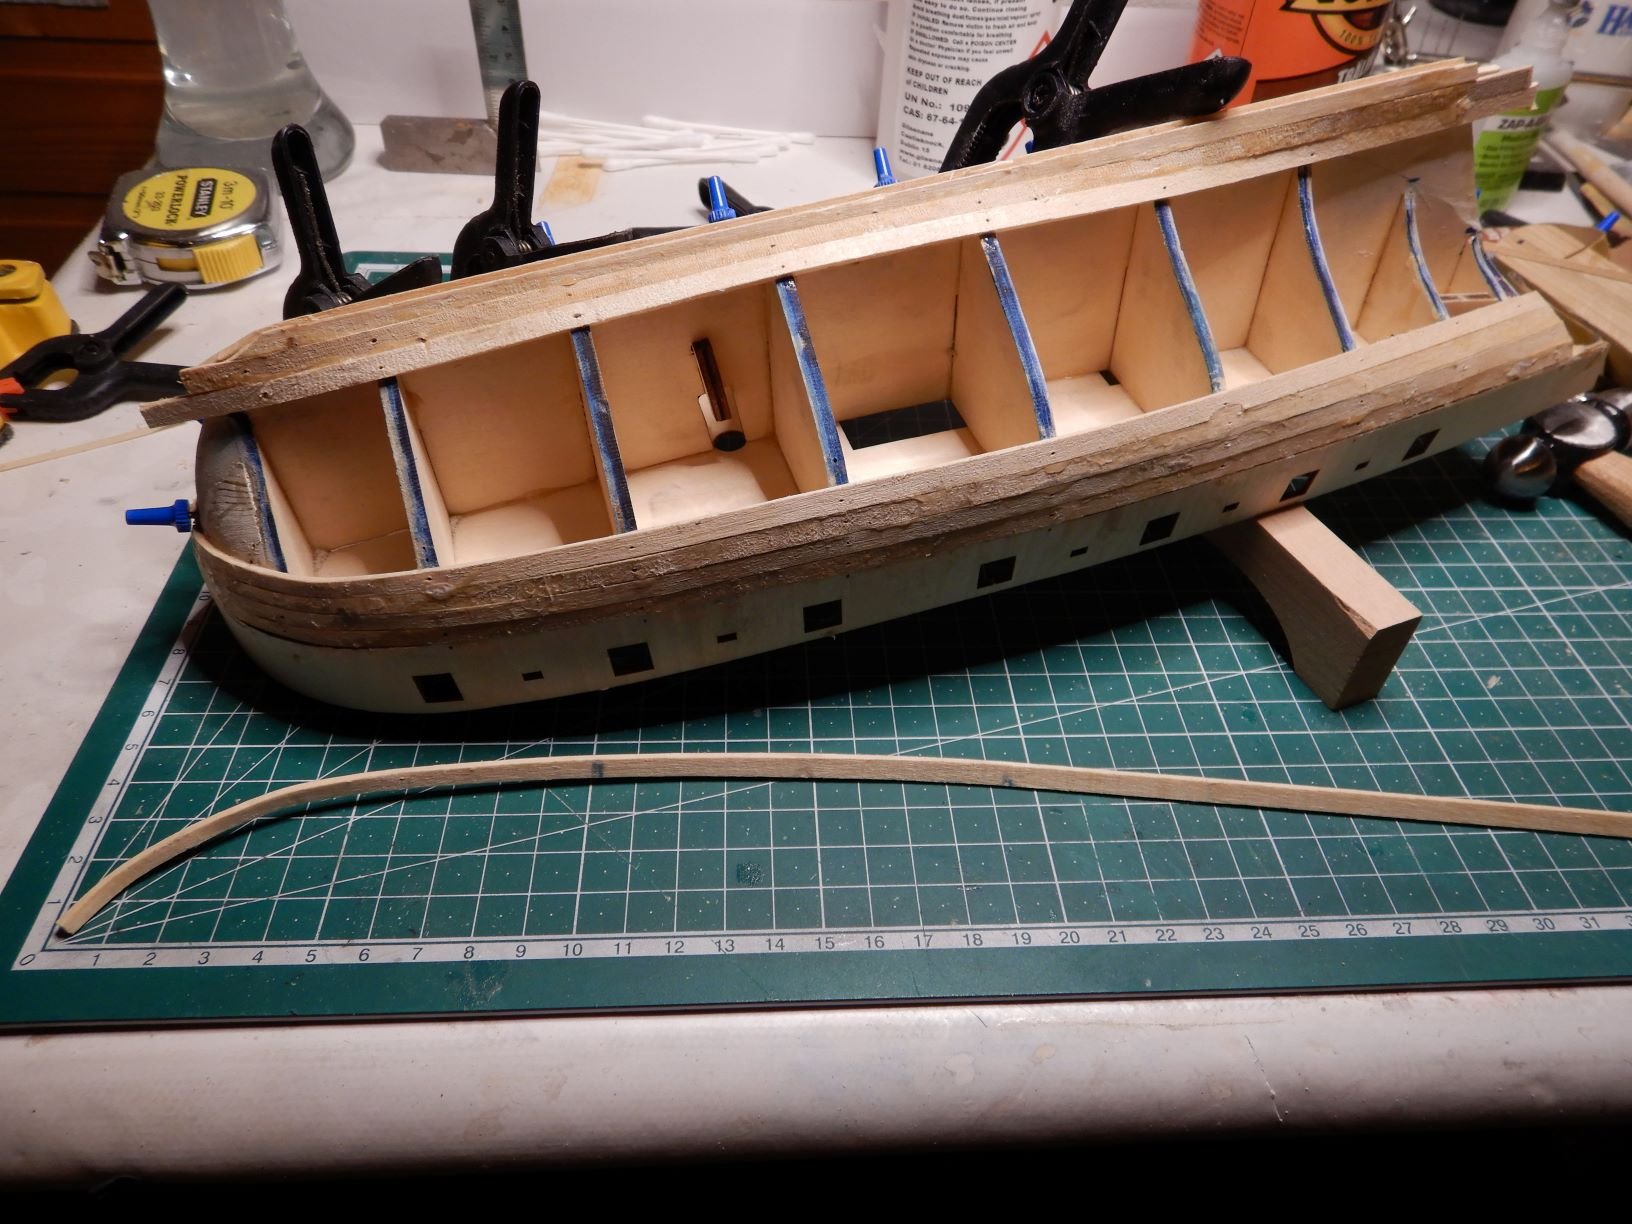
The planking continues..

Got four more planks on both sides. Eight in total.
It's going slow but steady!
Not the prettiest planking, but I think it will smooth out when sanded. The camera seems to highlight all the bumps and edges...
In between waiting for the planks and the glue to dry I've continued on the cannons. Or carronades?
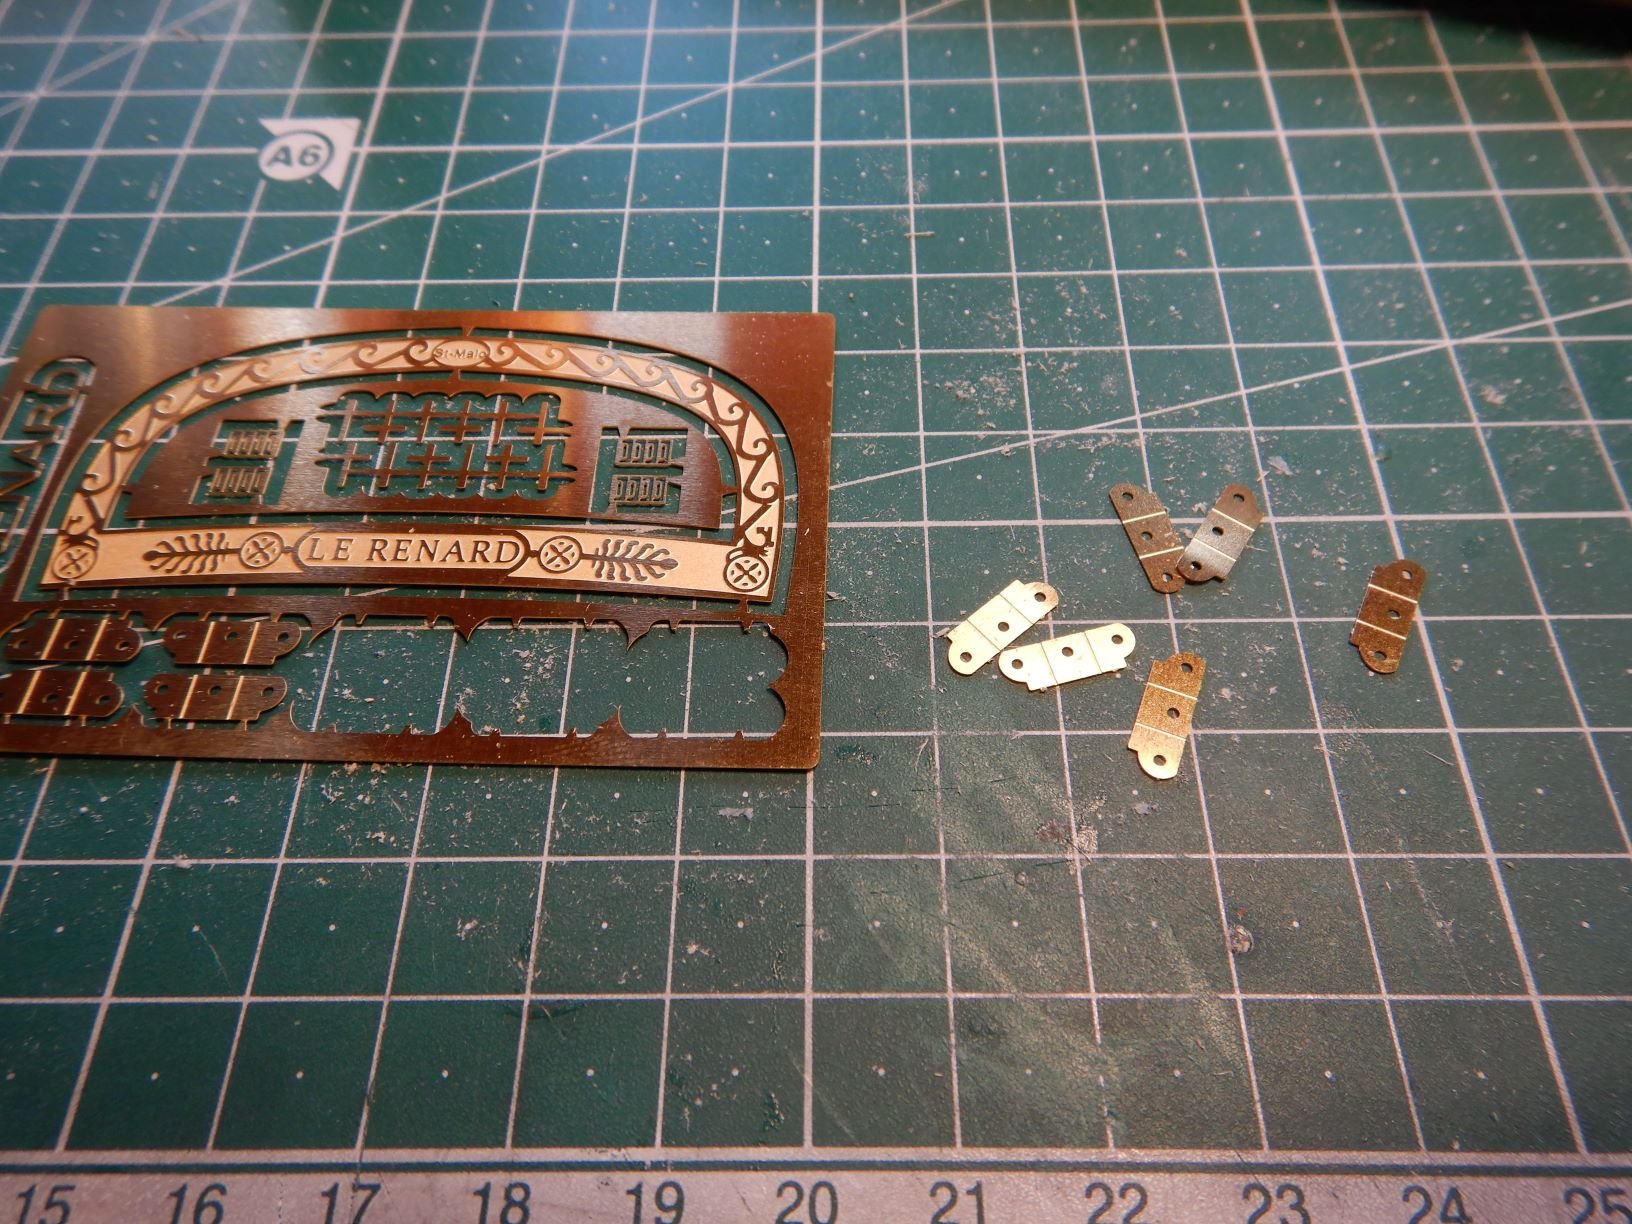
There is some photoetched brackets that I cut loose from the sheet and "folded" and blackened.
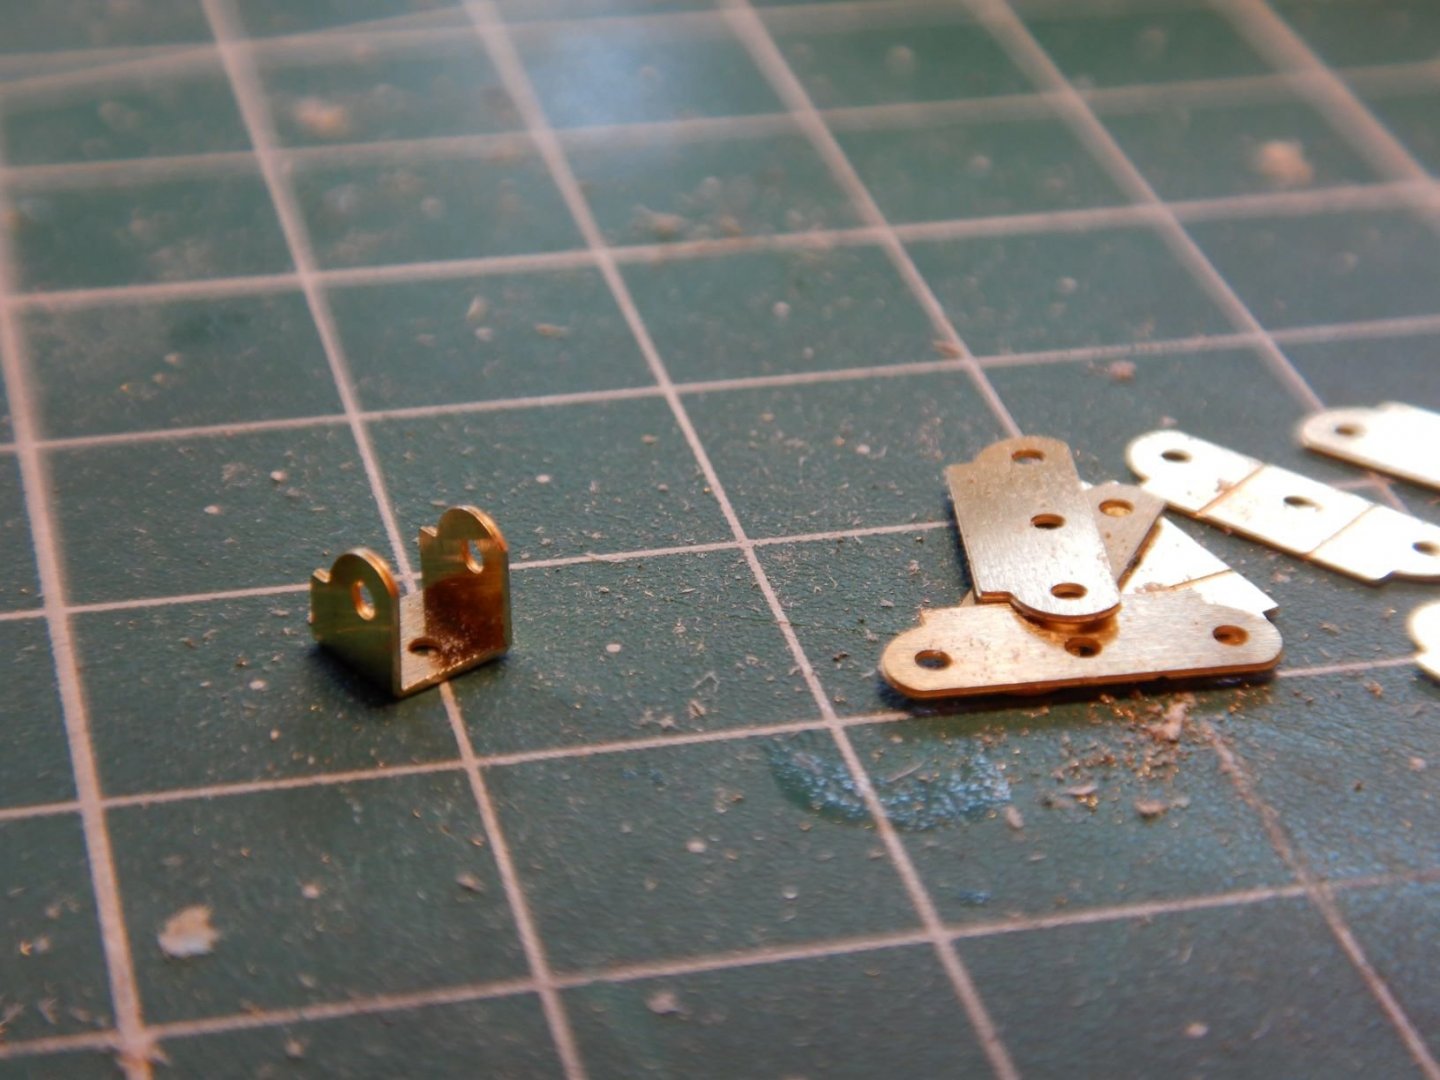
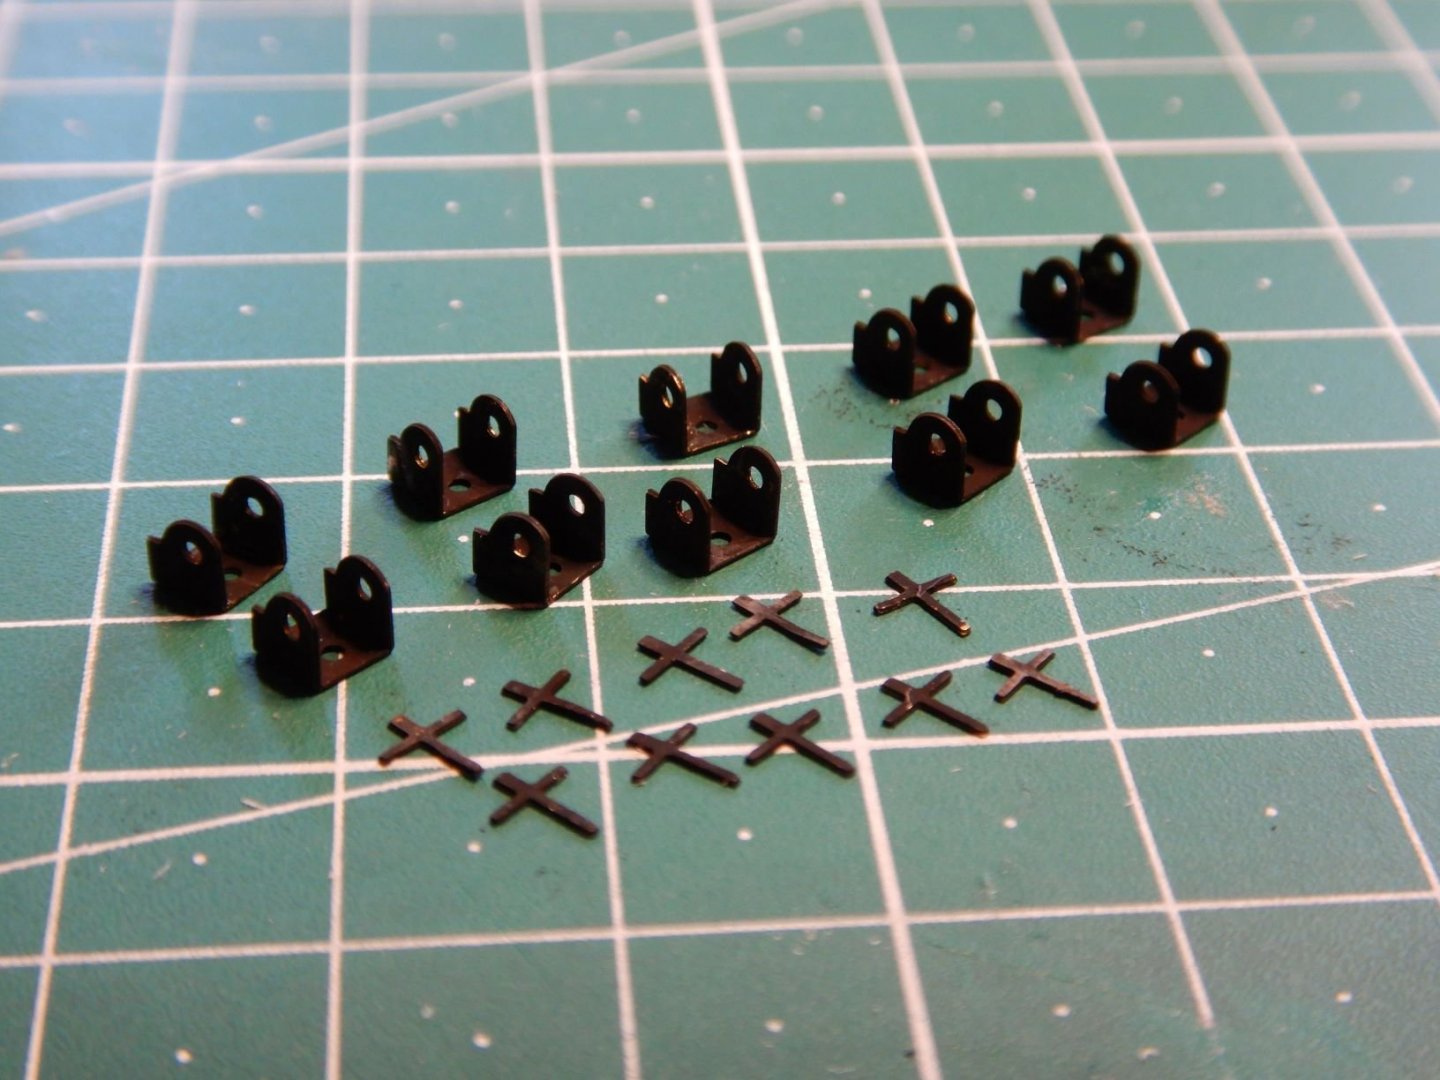
The little crosses are the back supports/adjusters to hold the backend of the barrel to the carriage.
I'm not too sure I like those..
When mounting the gun barrel to the bracket I got a problem with the gunbarrel tab being too wide to fit..

So I have to file down the sides of the tab on my newly painted barrels.. 😟
Oh well. It's one of those little setbacks that's a part of the hobby I guess!
That sounds like an interresting scratch build project! It will be a big model!
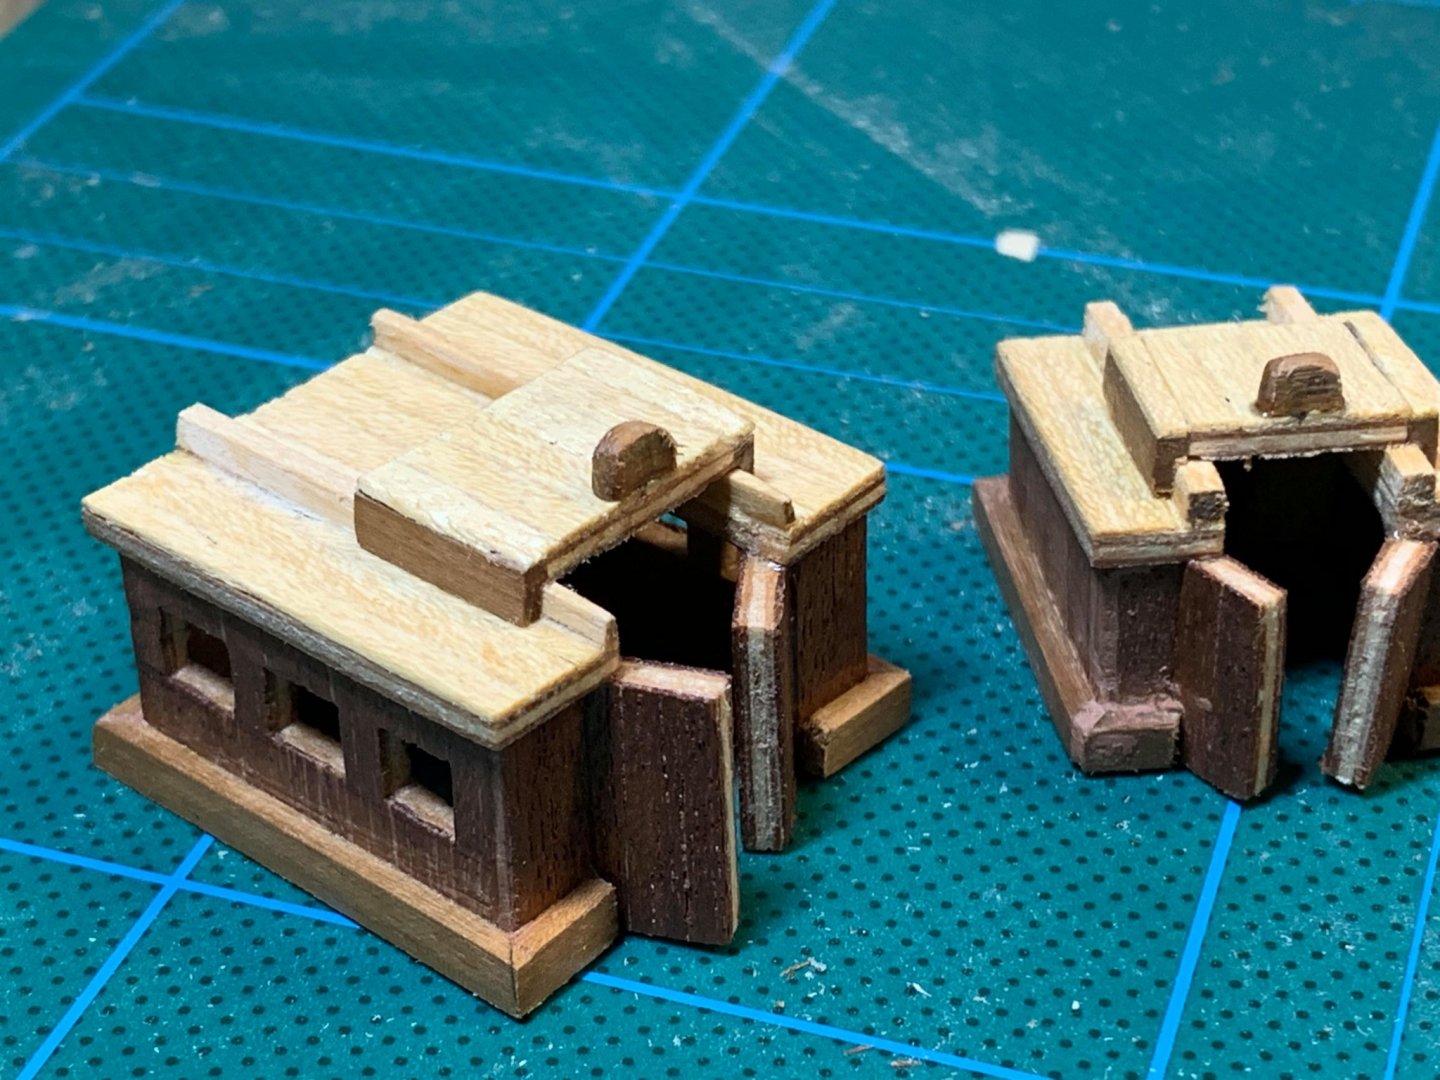
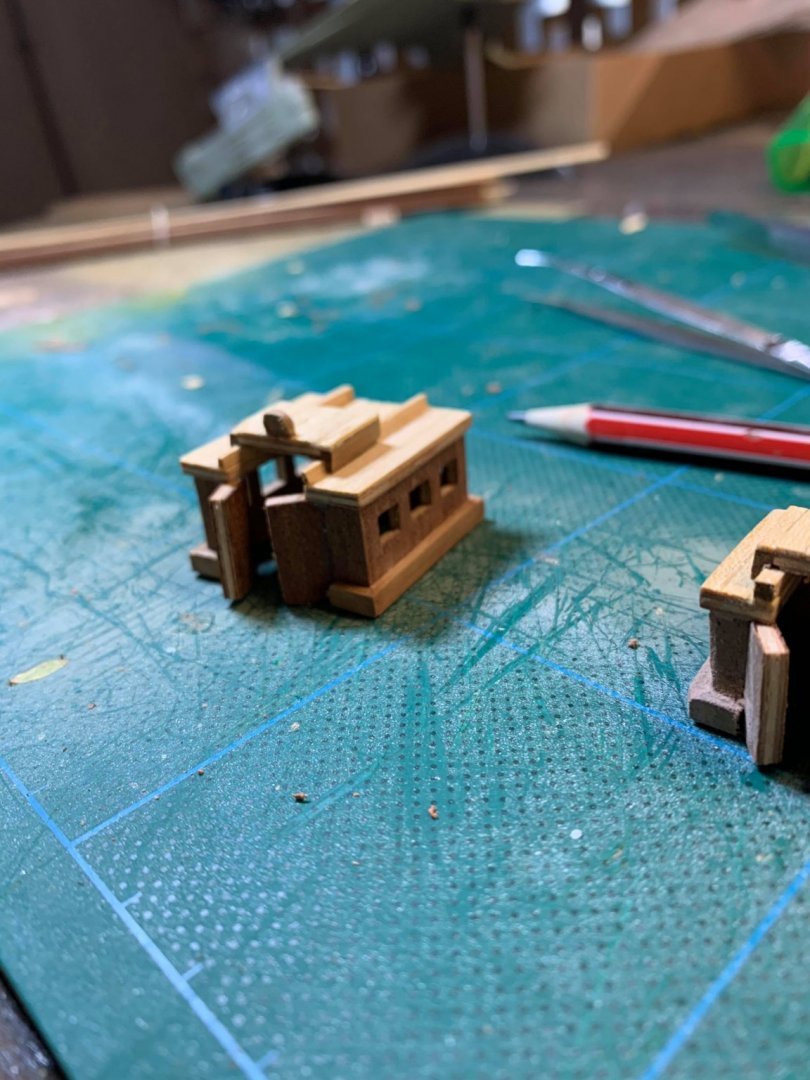
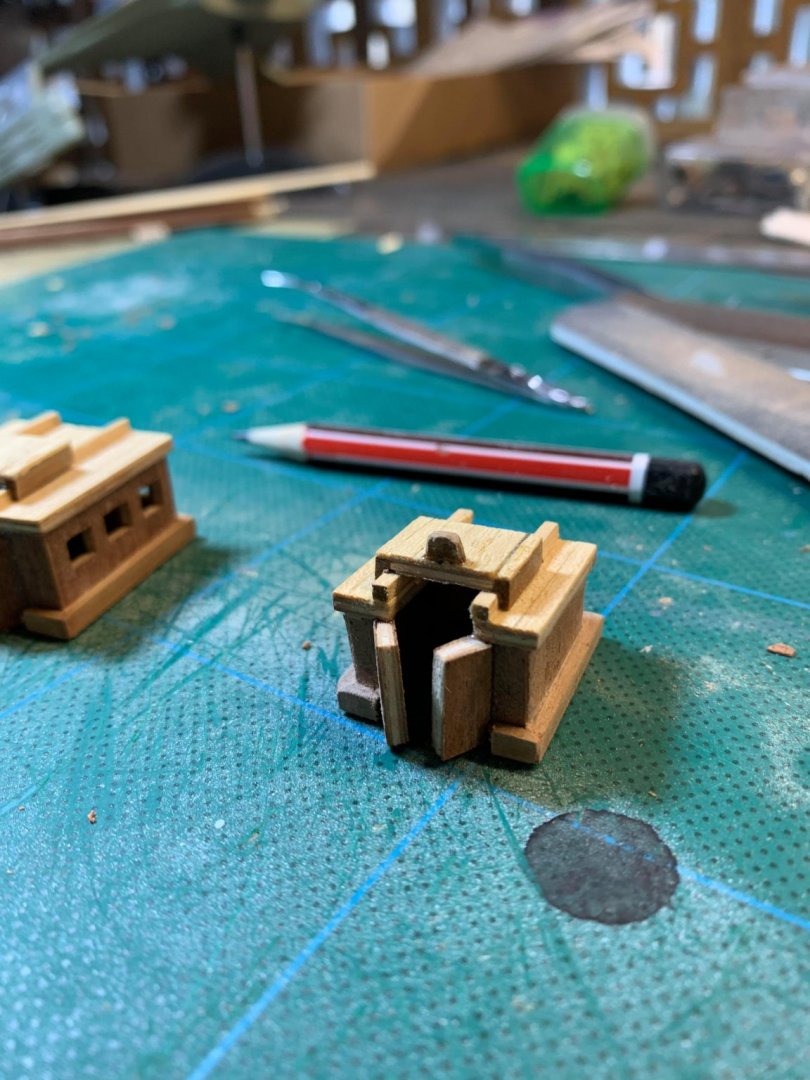
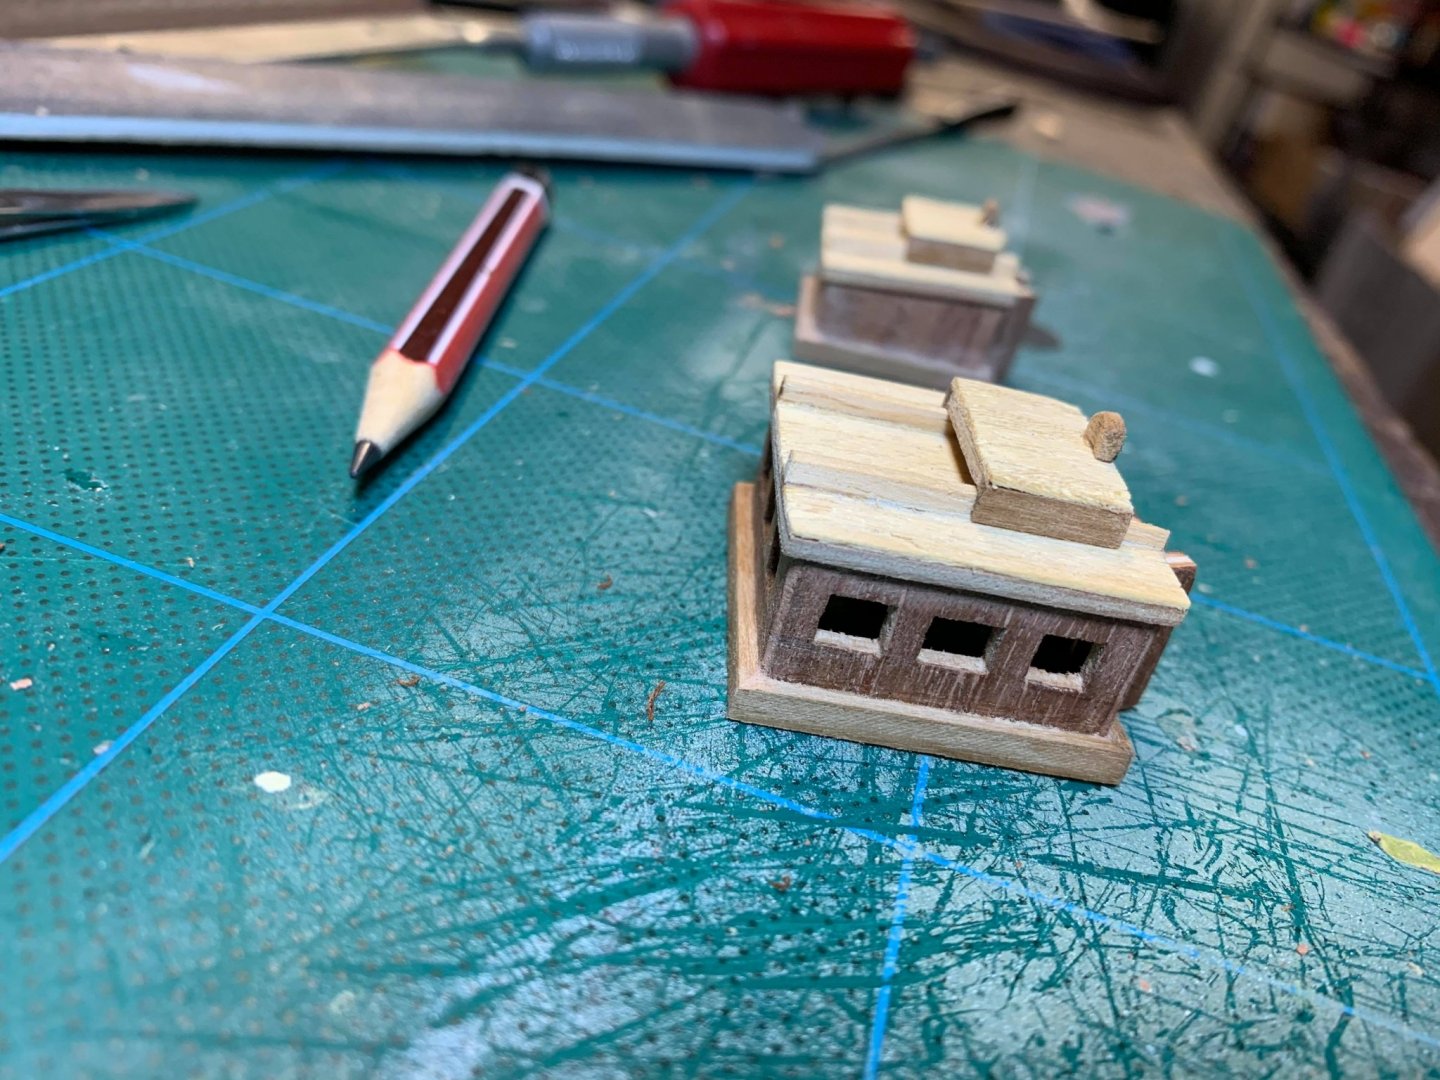
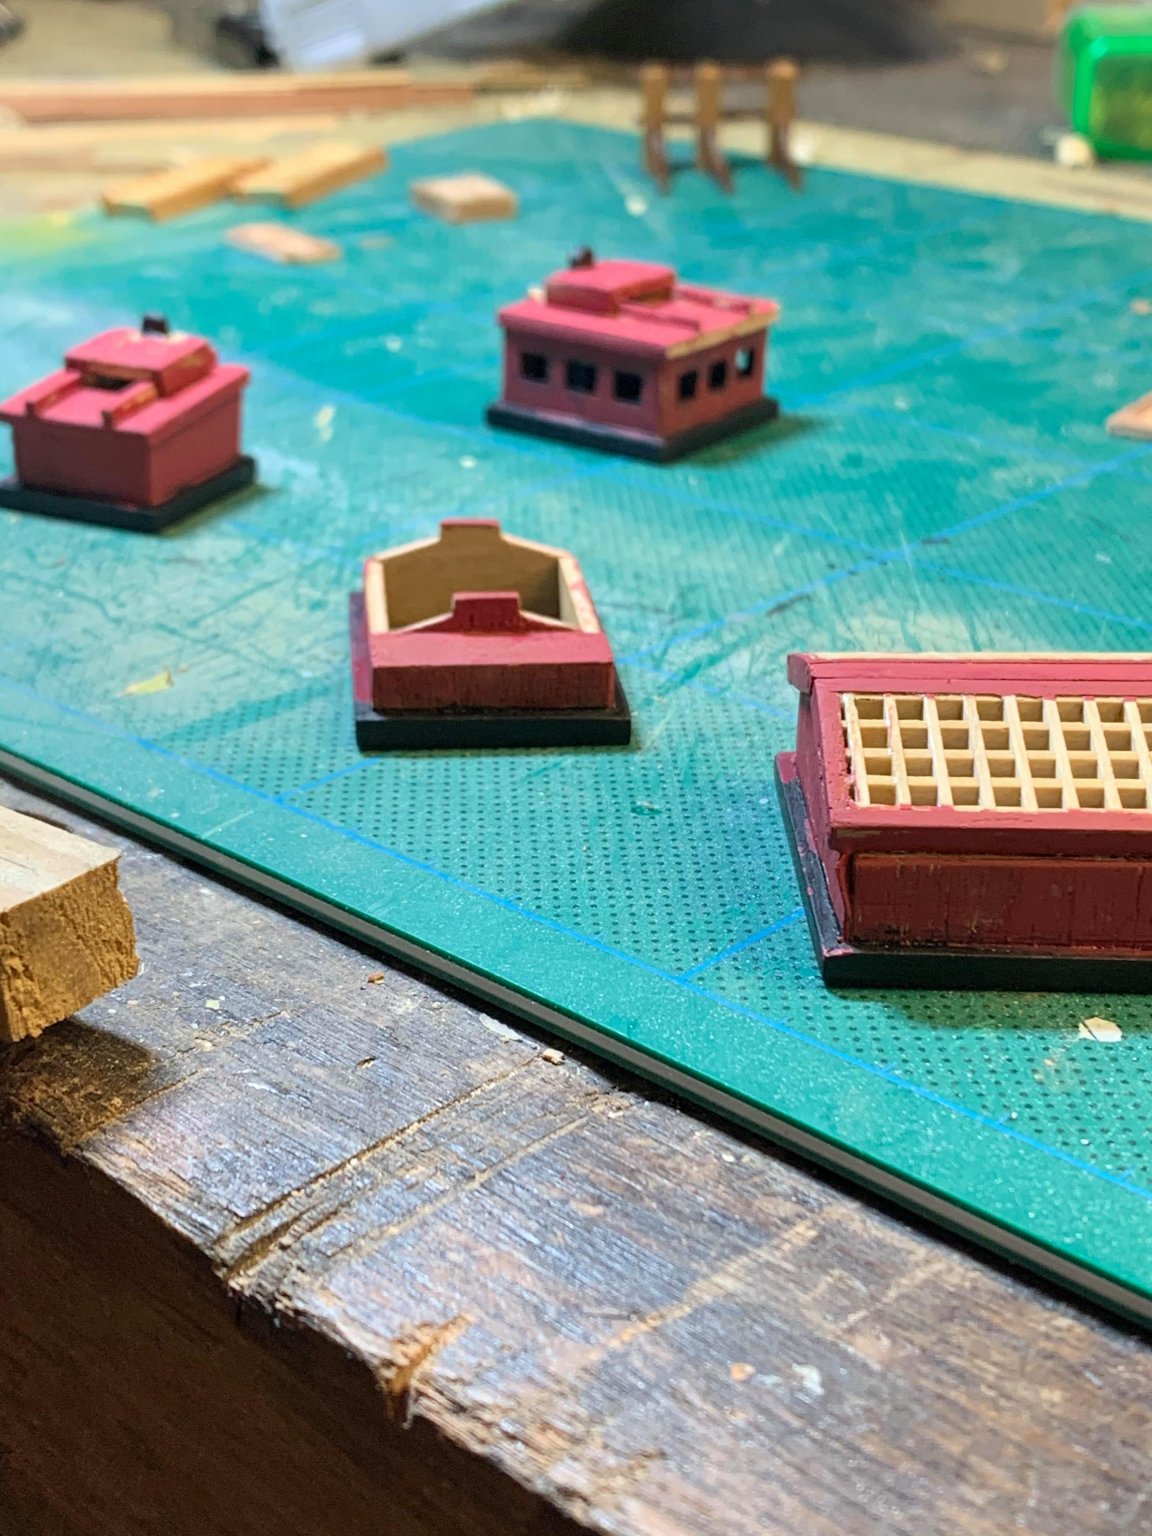
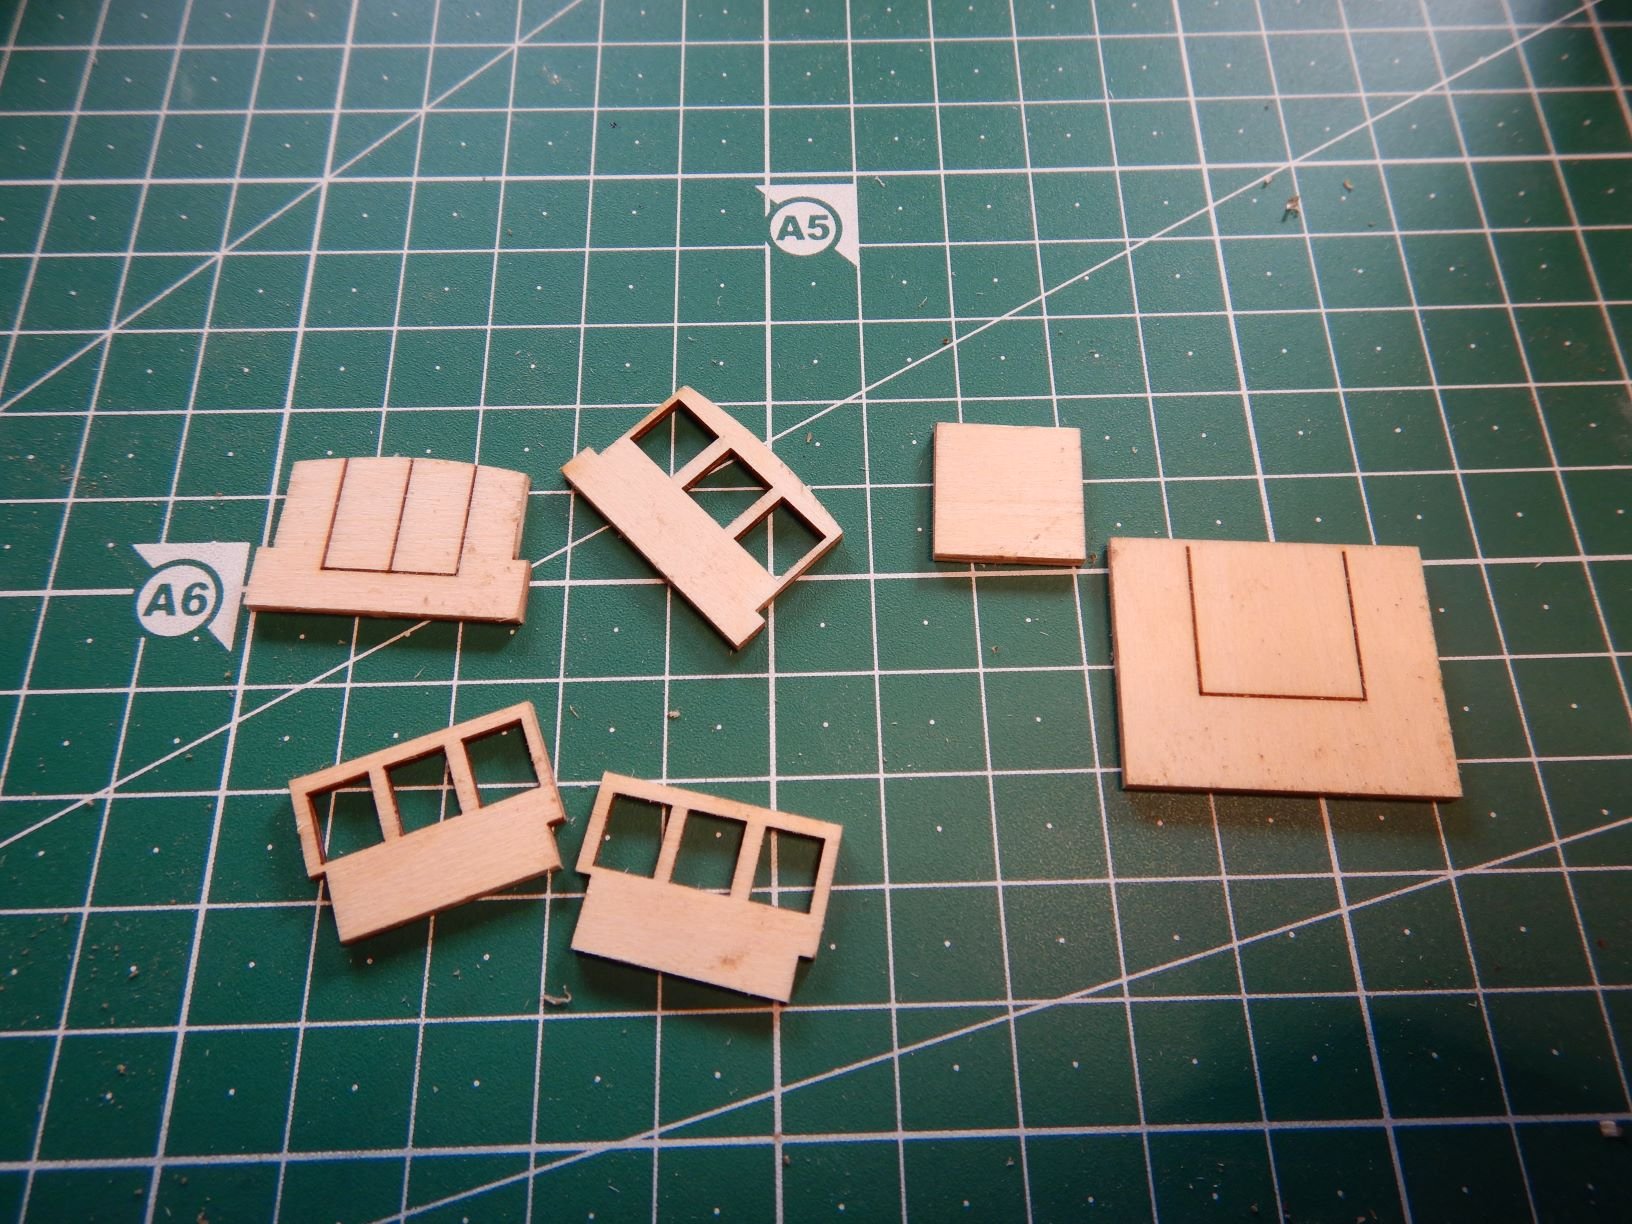
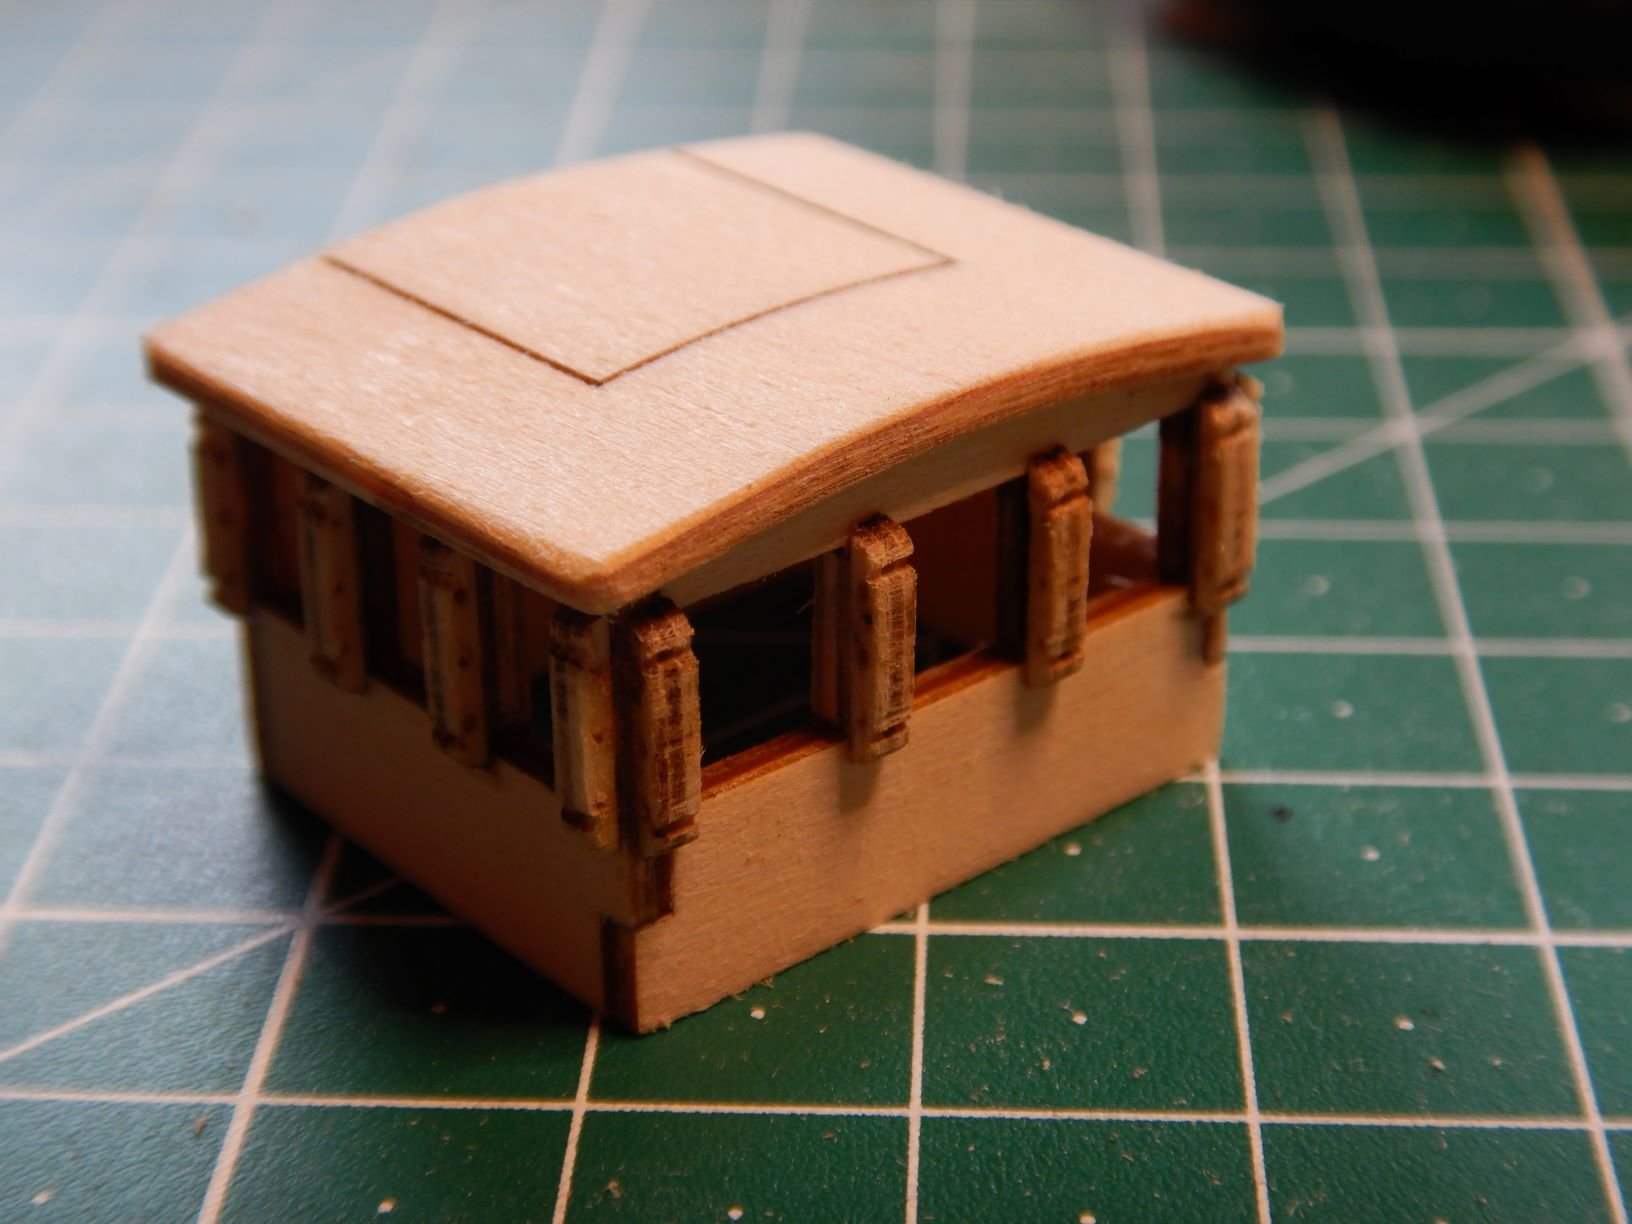
Between planking and guns I also started at the deckhouses/skylights. These are pretty simple affairs of lasercut plywood that fits together pretty well.
I'm jumping a little back and forth in the manual, but it's all gonna be done at one time or another.

The main deckhouse is all that got captured on "film" 😆

That's it for now.
Next update coming soon!
Gaffrig.
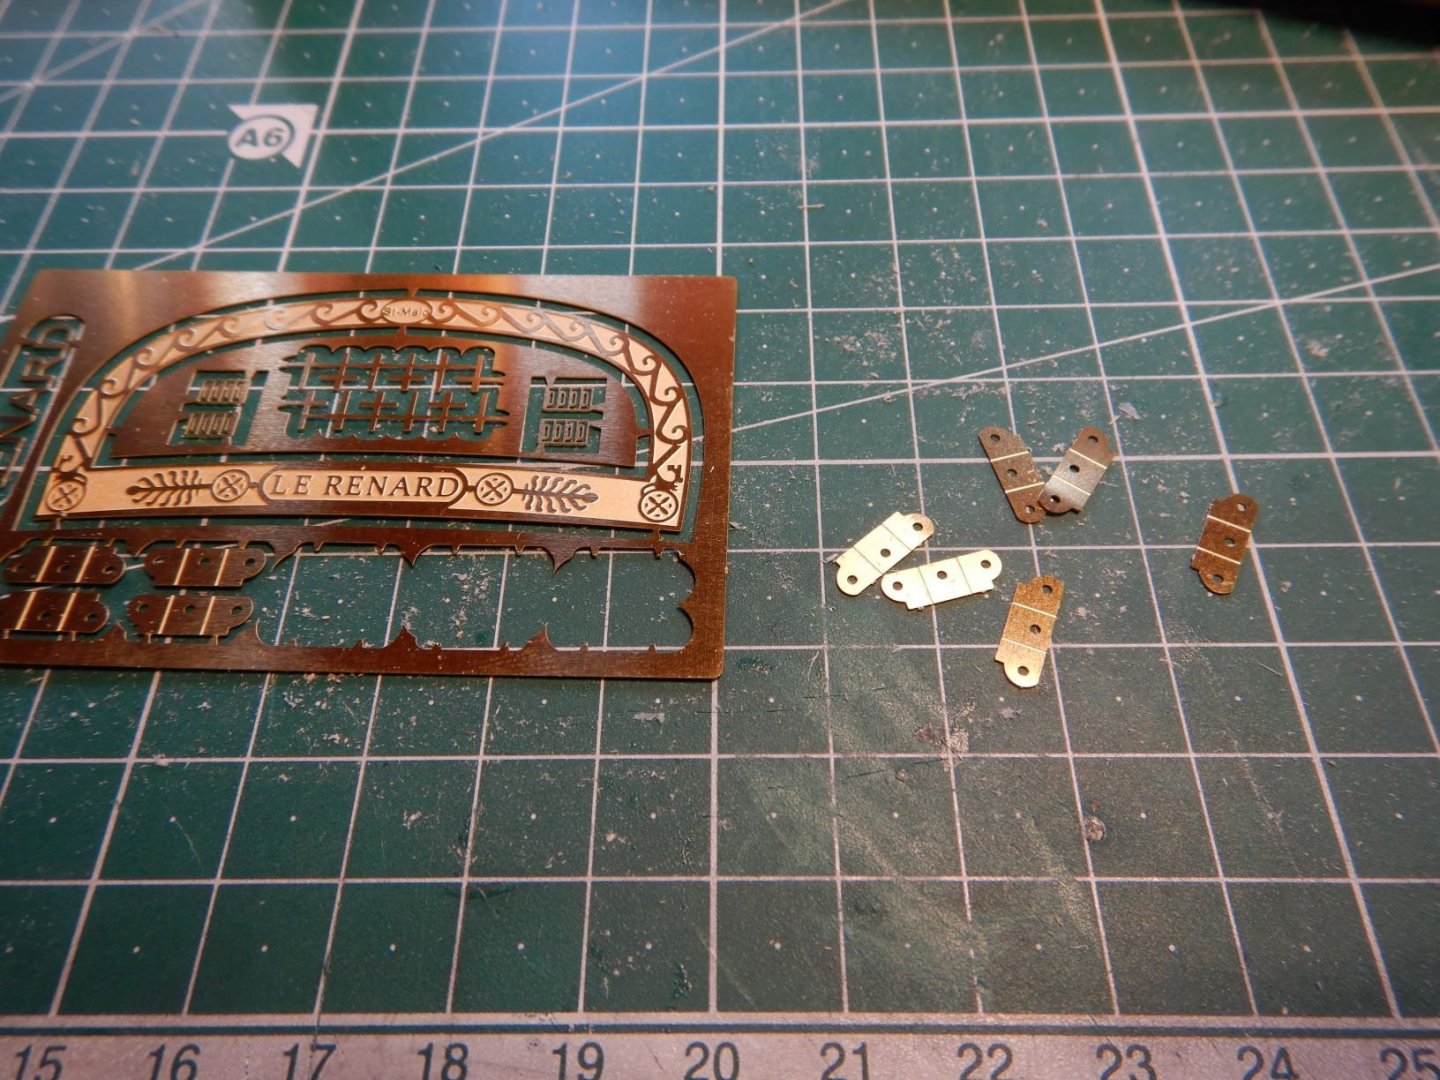
I really like the gun sleds that came with your kit as well as the etched transom piece. Much better than my renard kit
-
-
The weeks progress. Fore-deckhouse and cabin. I looked up the names before posting this time lol 😅

-
1 hour ago, Gregory said:
For a simple approach I would try to build it pretty much like the instructions show.
Then, in the areas I circled, you could fill it in with something like this:
It will look just like glass..
Would you paint the wood underneath black??
- Bob Fraser, mtaylor and Keith Black
-
3
-
On 5/9/2020 at 7:13 AM, KeithAug said:
Druxey, I tried it and this is my preferred method - thank you. I used cocktail sticks reduced from .080" diameter to .070" and coloured them with felt tip pens.
I completed the deckhouse (except the flags). This started with finishing the tops of the two wing structures.
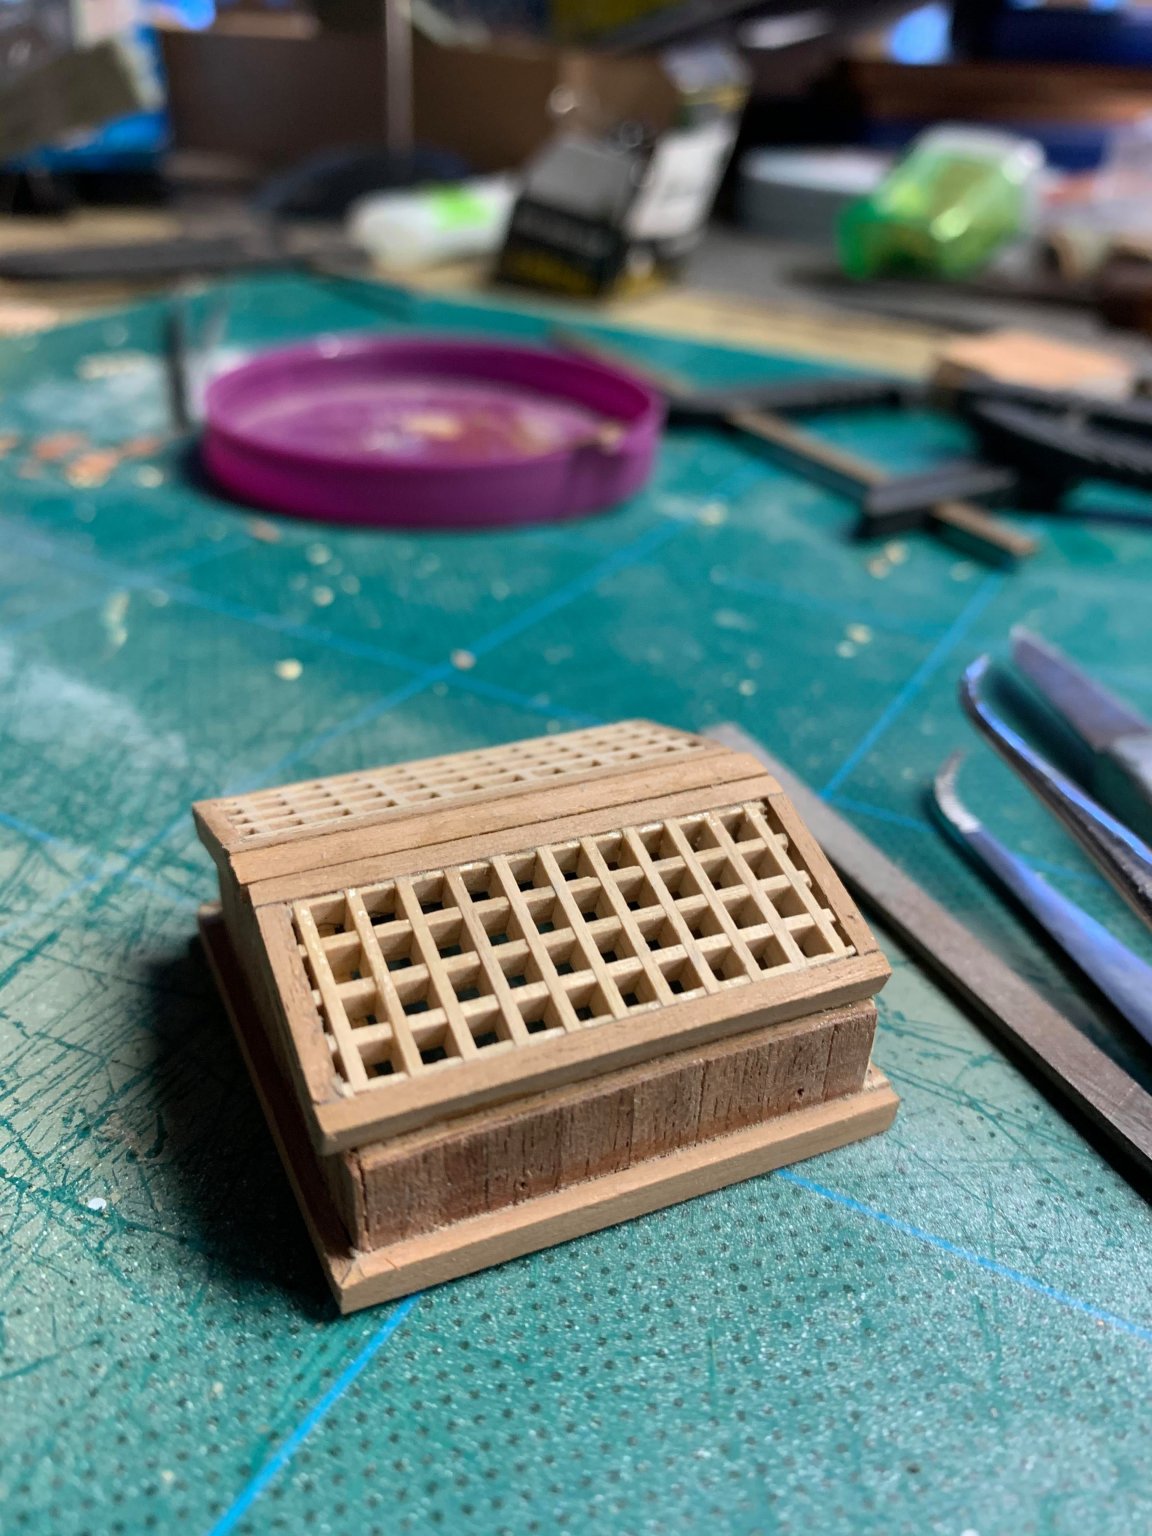
More skylights were required on the starboard wing but these were under half the size of those previously done. They were made in the same way as the ones previously completed.

I now share the sad news of the demise of my magic 0.6mm drill bit. After it had manfully completing 224 holes I took its photograph.
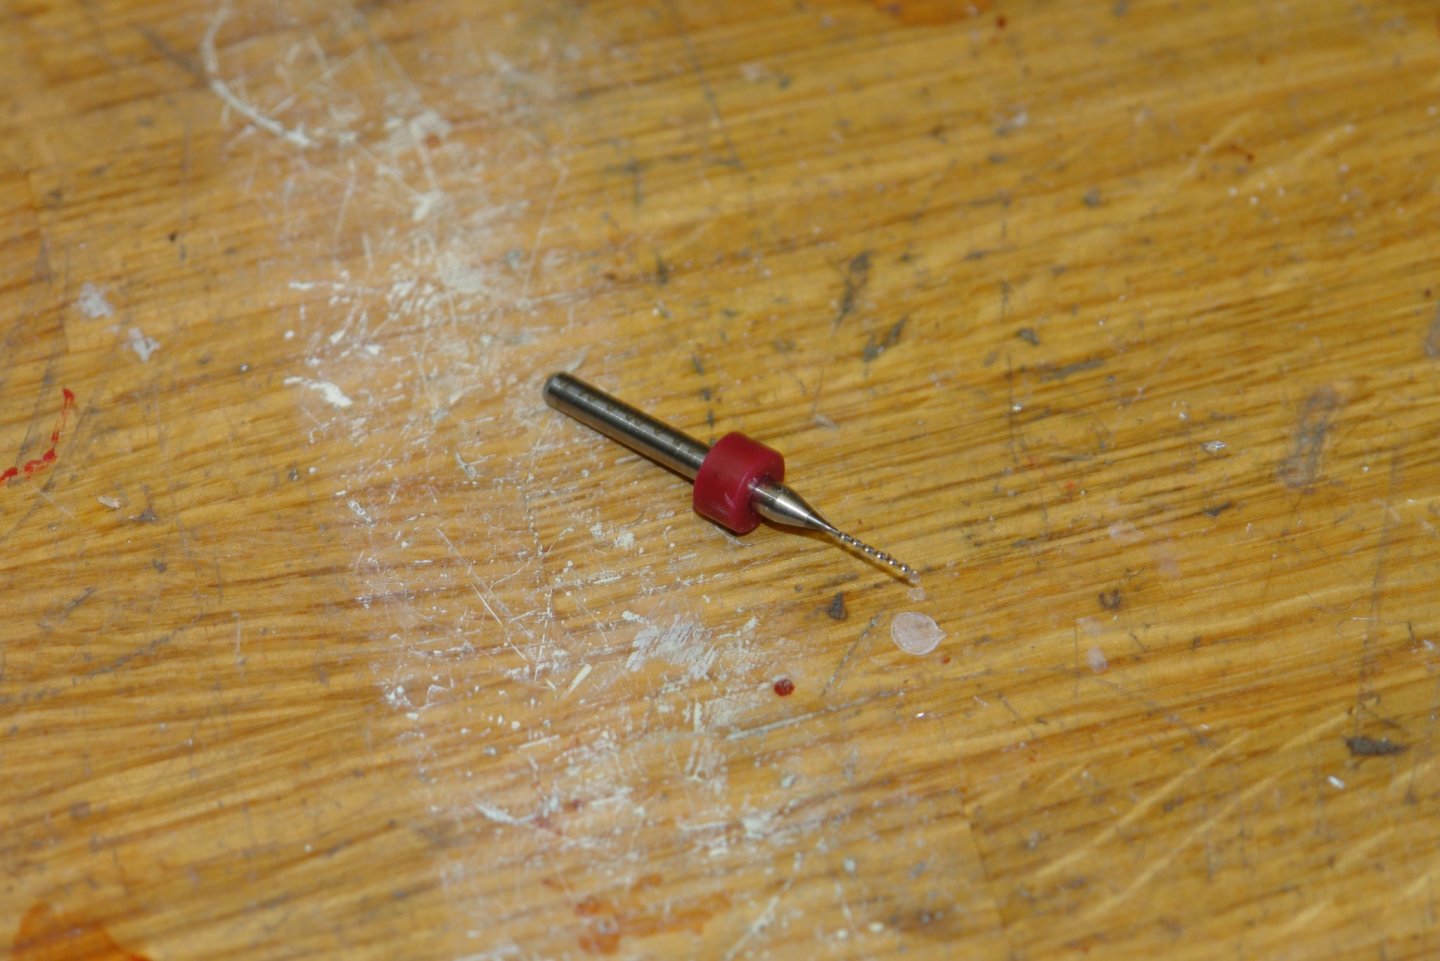
Two minutes later I was using it freehand to clean up another hole and the slight amount of side pressure snapped it ------- RIP.

The final segment to the right of the two skylights was covered in decking planks.
The bi-folding doors were then made from mahogany.

They were glued in place and wire was used to simulate hinges.
I feel that I need a diversion from the deckhouses and so will have a go at the main boom crutch next.
Hi Keith this looks amazing
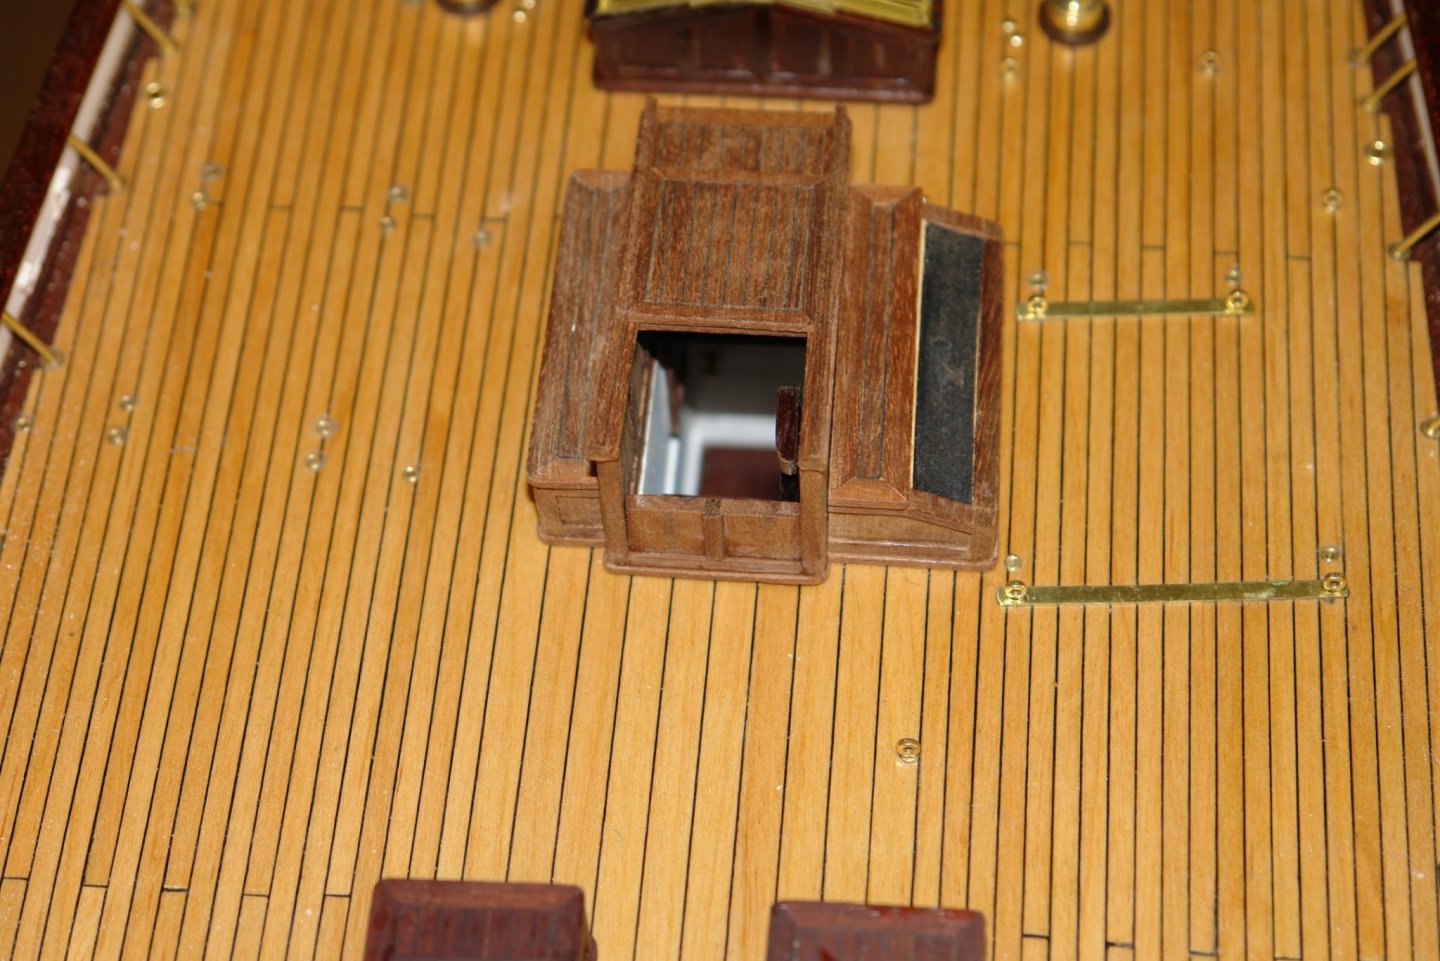
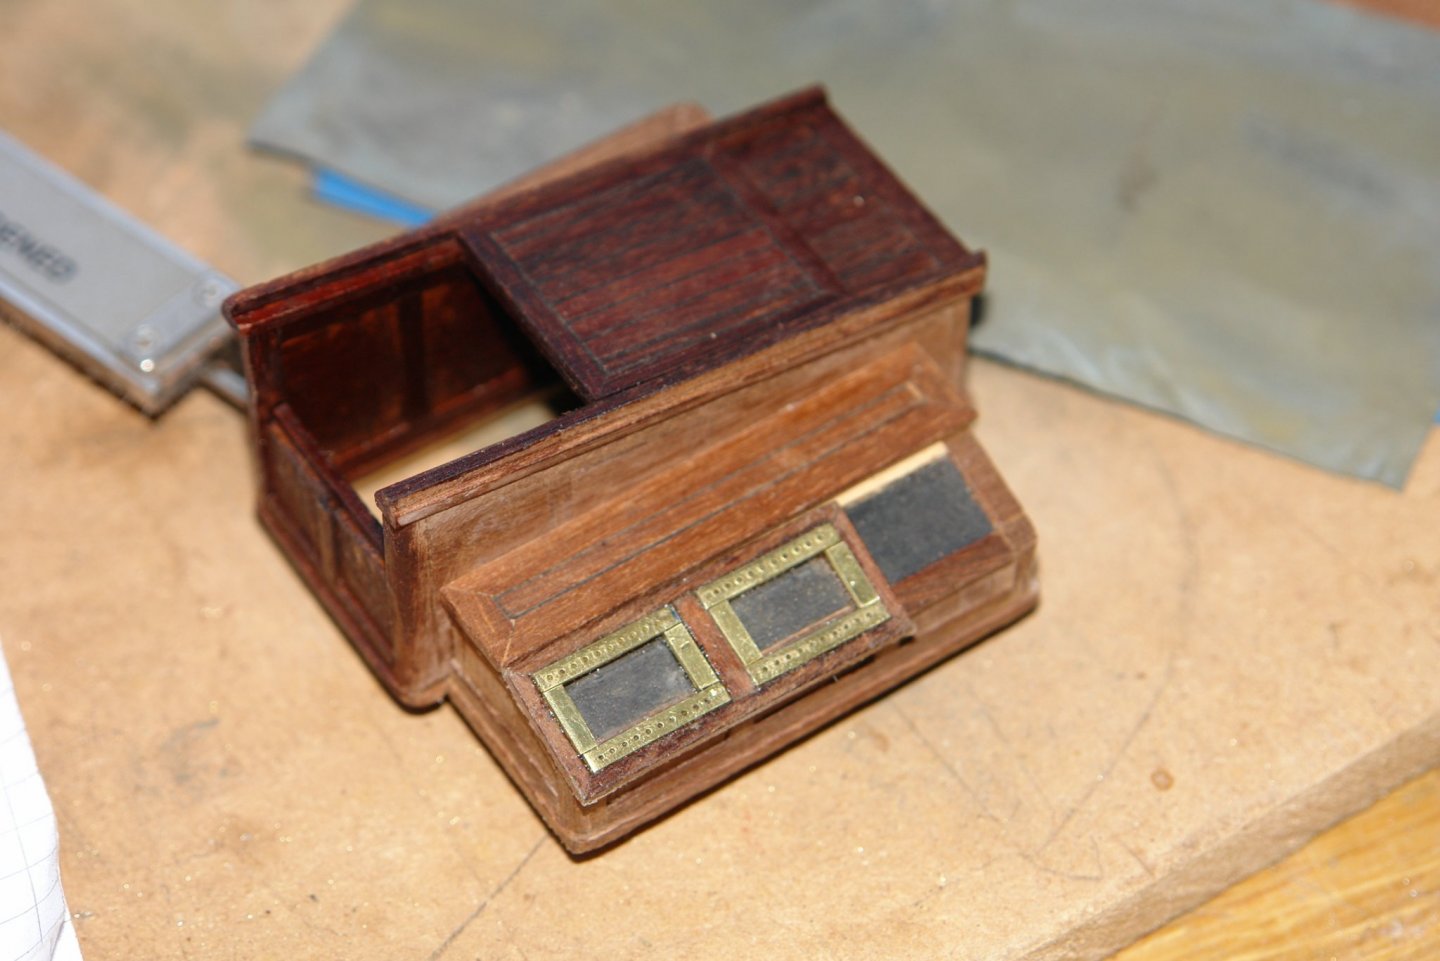
I was wondering what is it you’ve placed under the skylight grills, the blackish bit? You may have already mentioned and I might have missed it.
thanks
Tom
- Mfelinger, mtaylor, Keith Black and 1 other
-
4
-
Thanks will check it out
- Keith Black and mtaylor
-
2
-
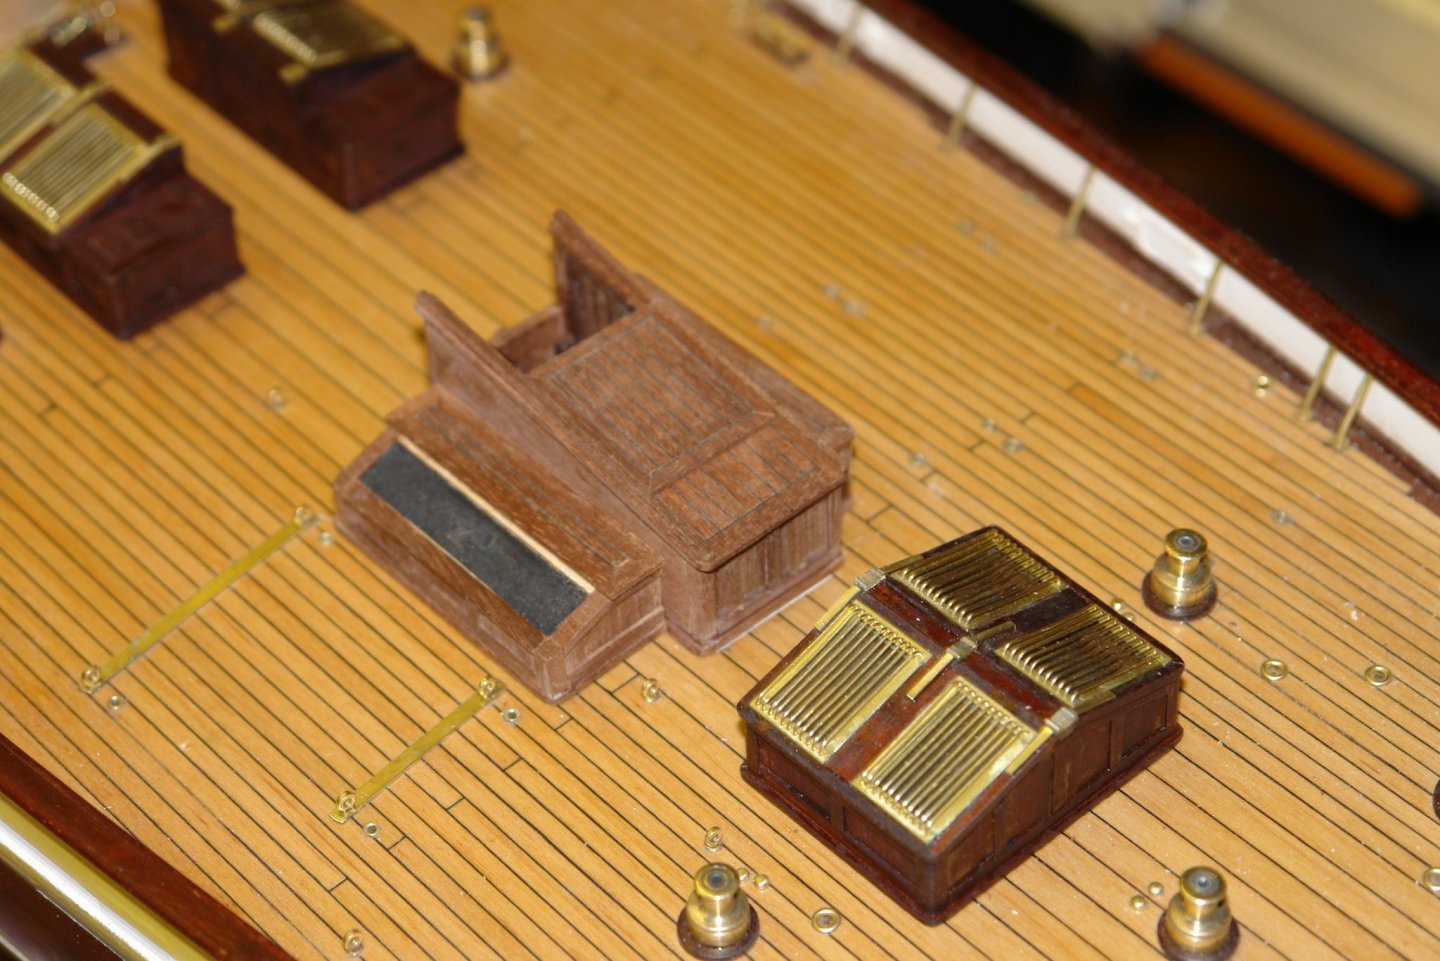
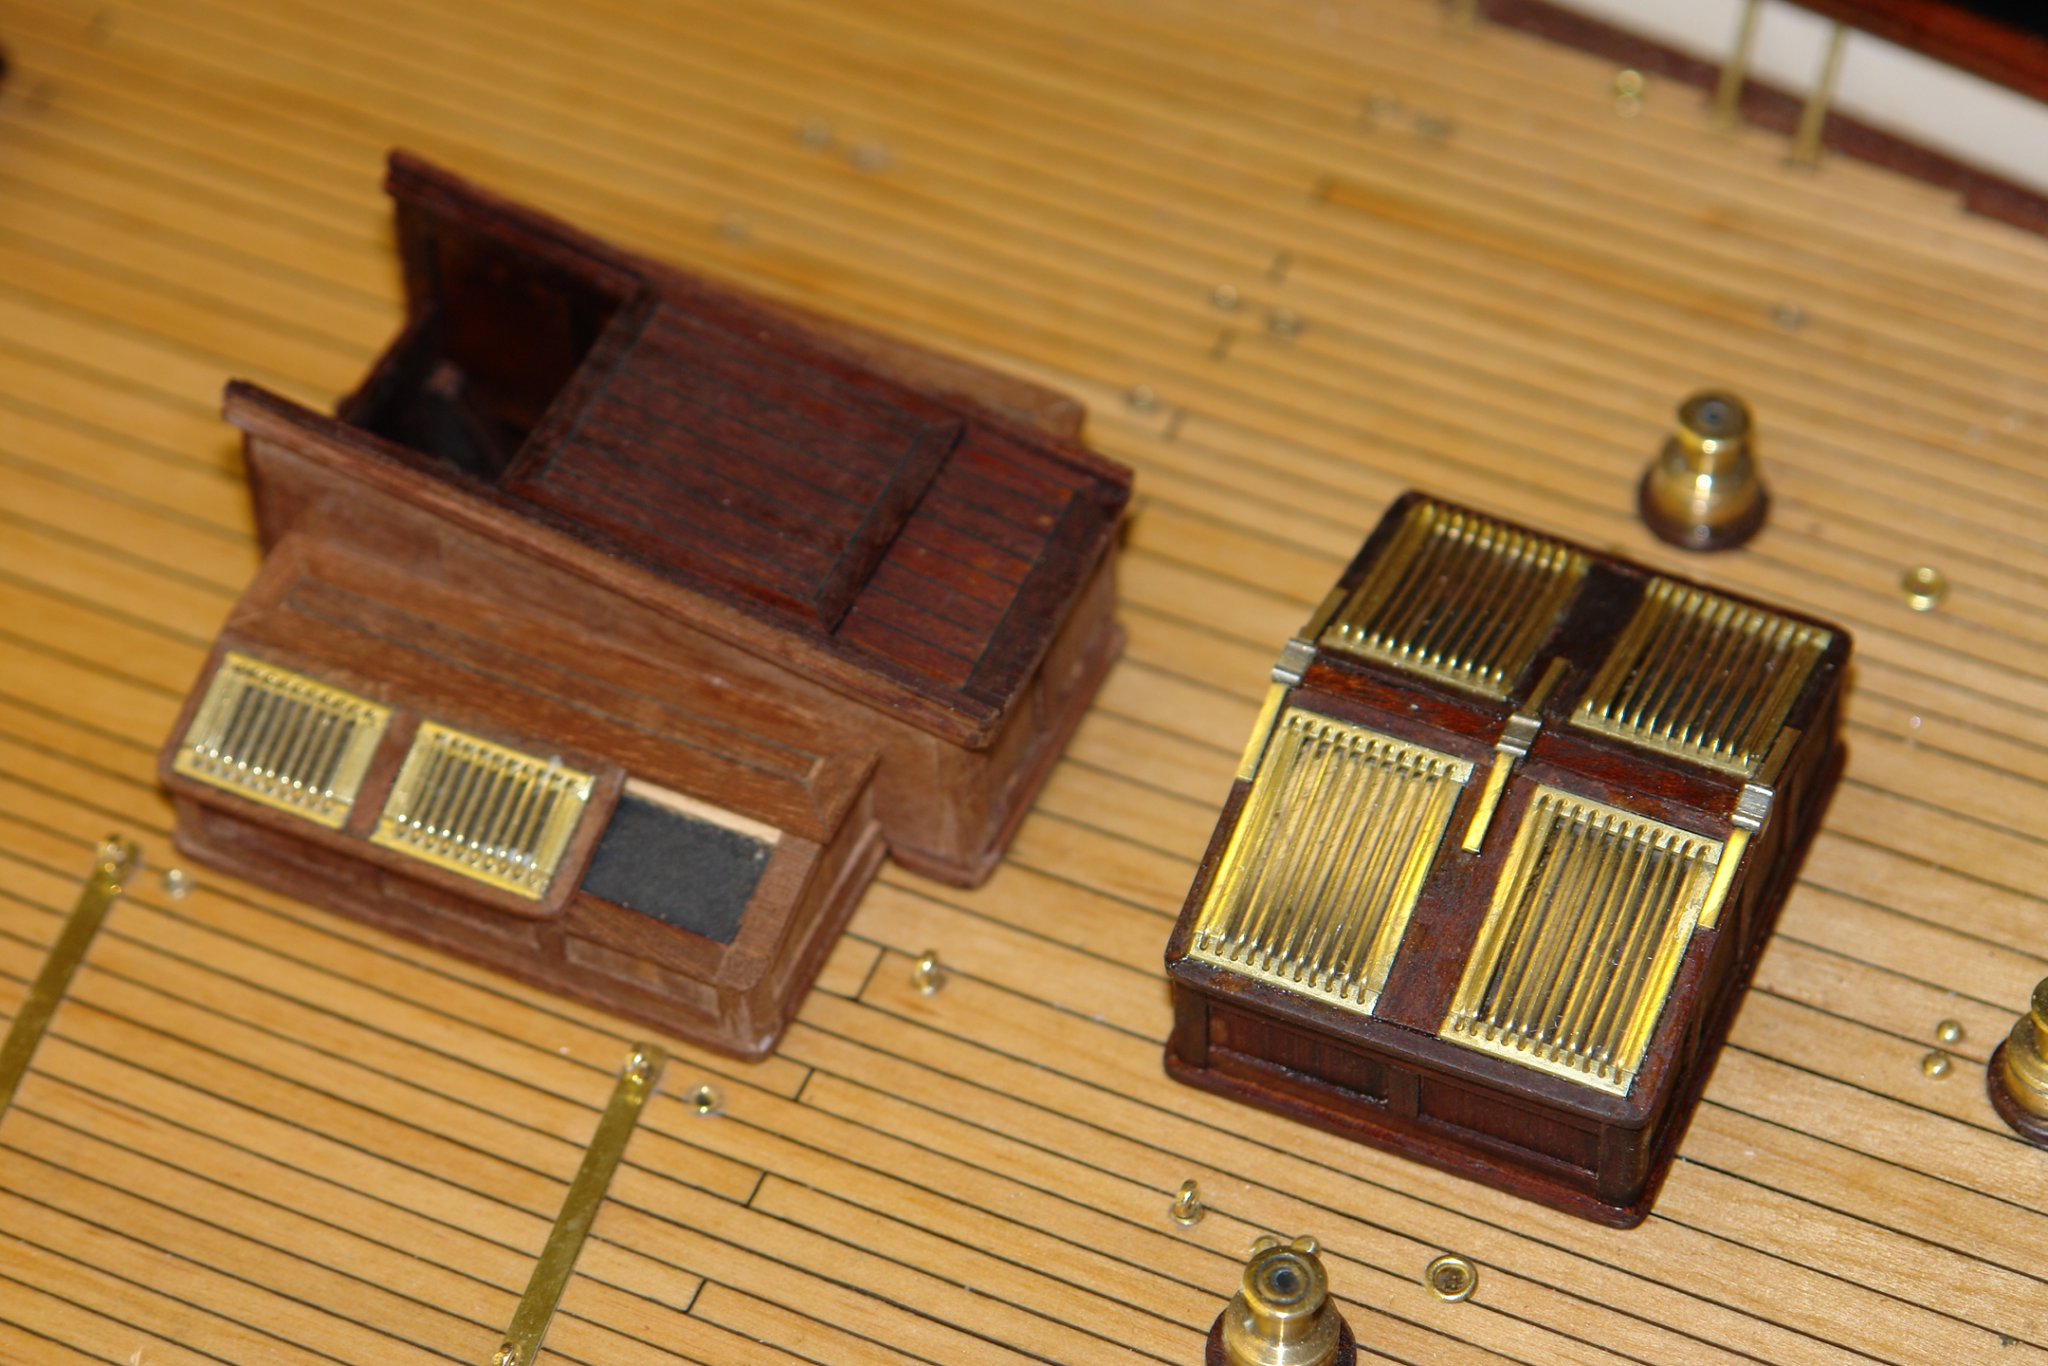
Hi all
this is referred to as a skylight in the plans. I assume the area under the brass bars would be glass???? Does anyone have a suggestions on how to get the right look?
cheers
-
Looks really good. Considering this kit for my next build. If I ever finish Le Renard, 15ish years and counting 😂
-
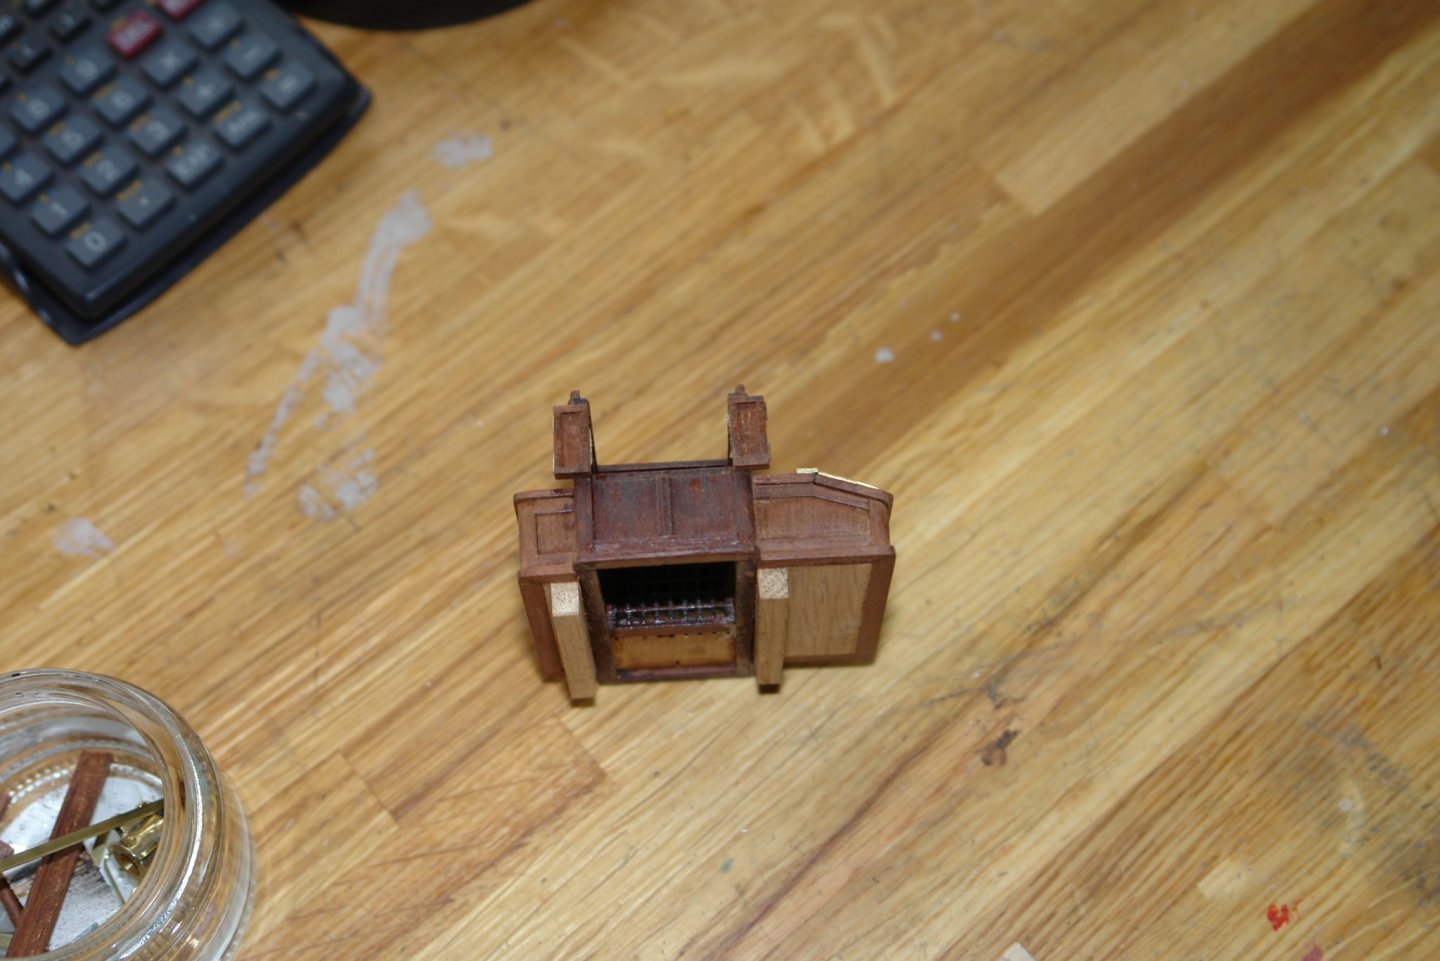
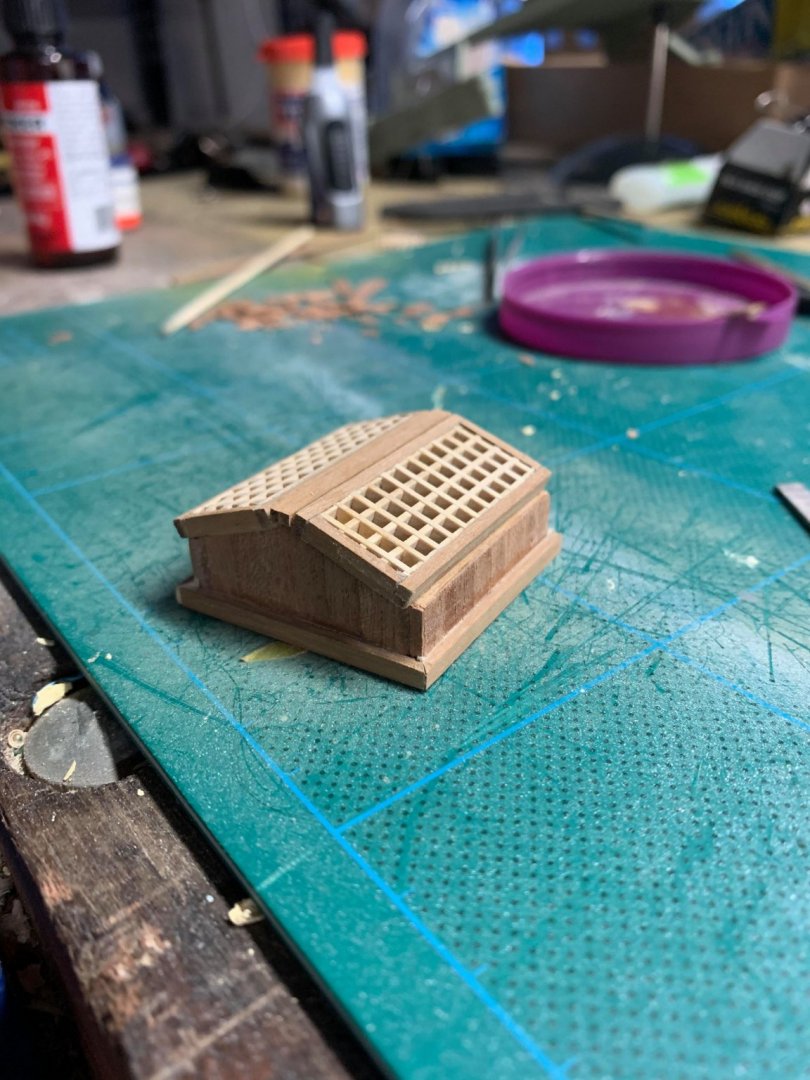
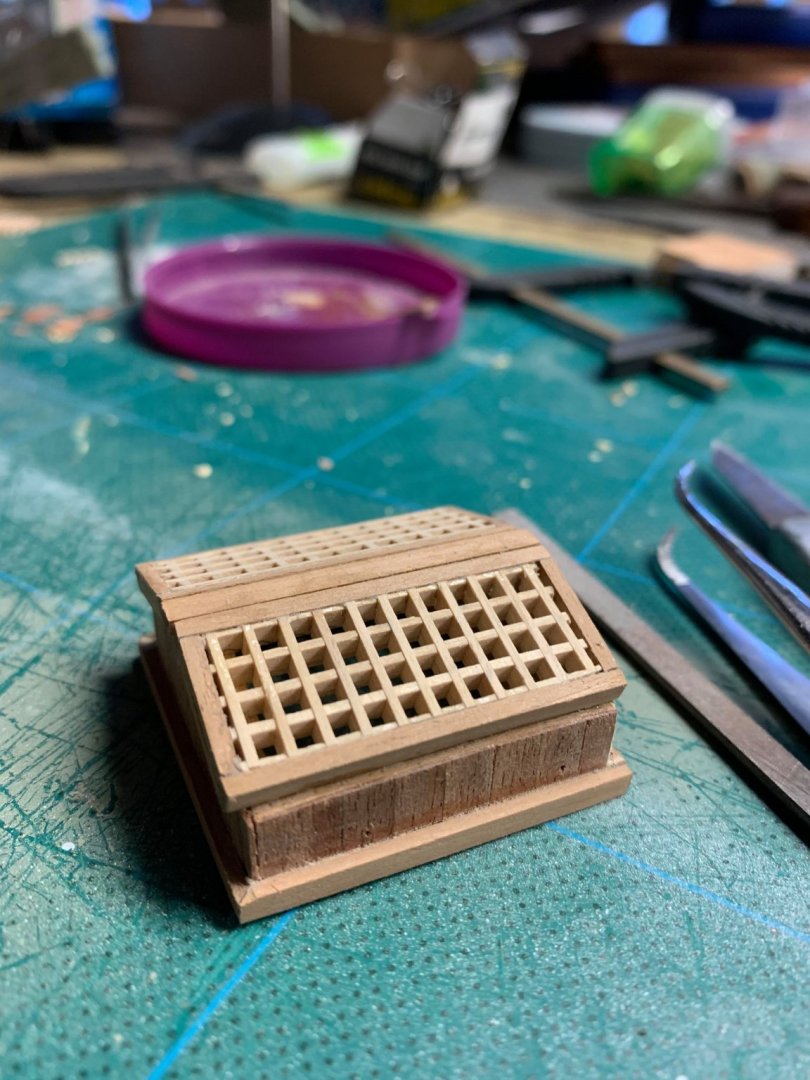
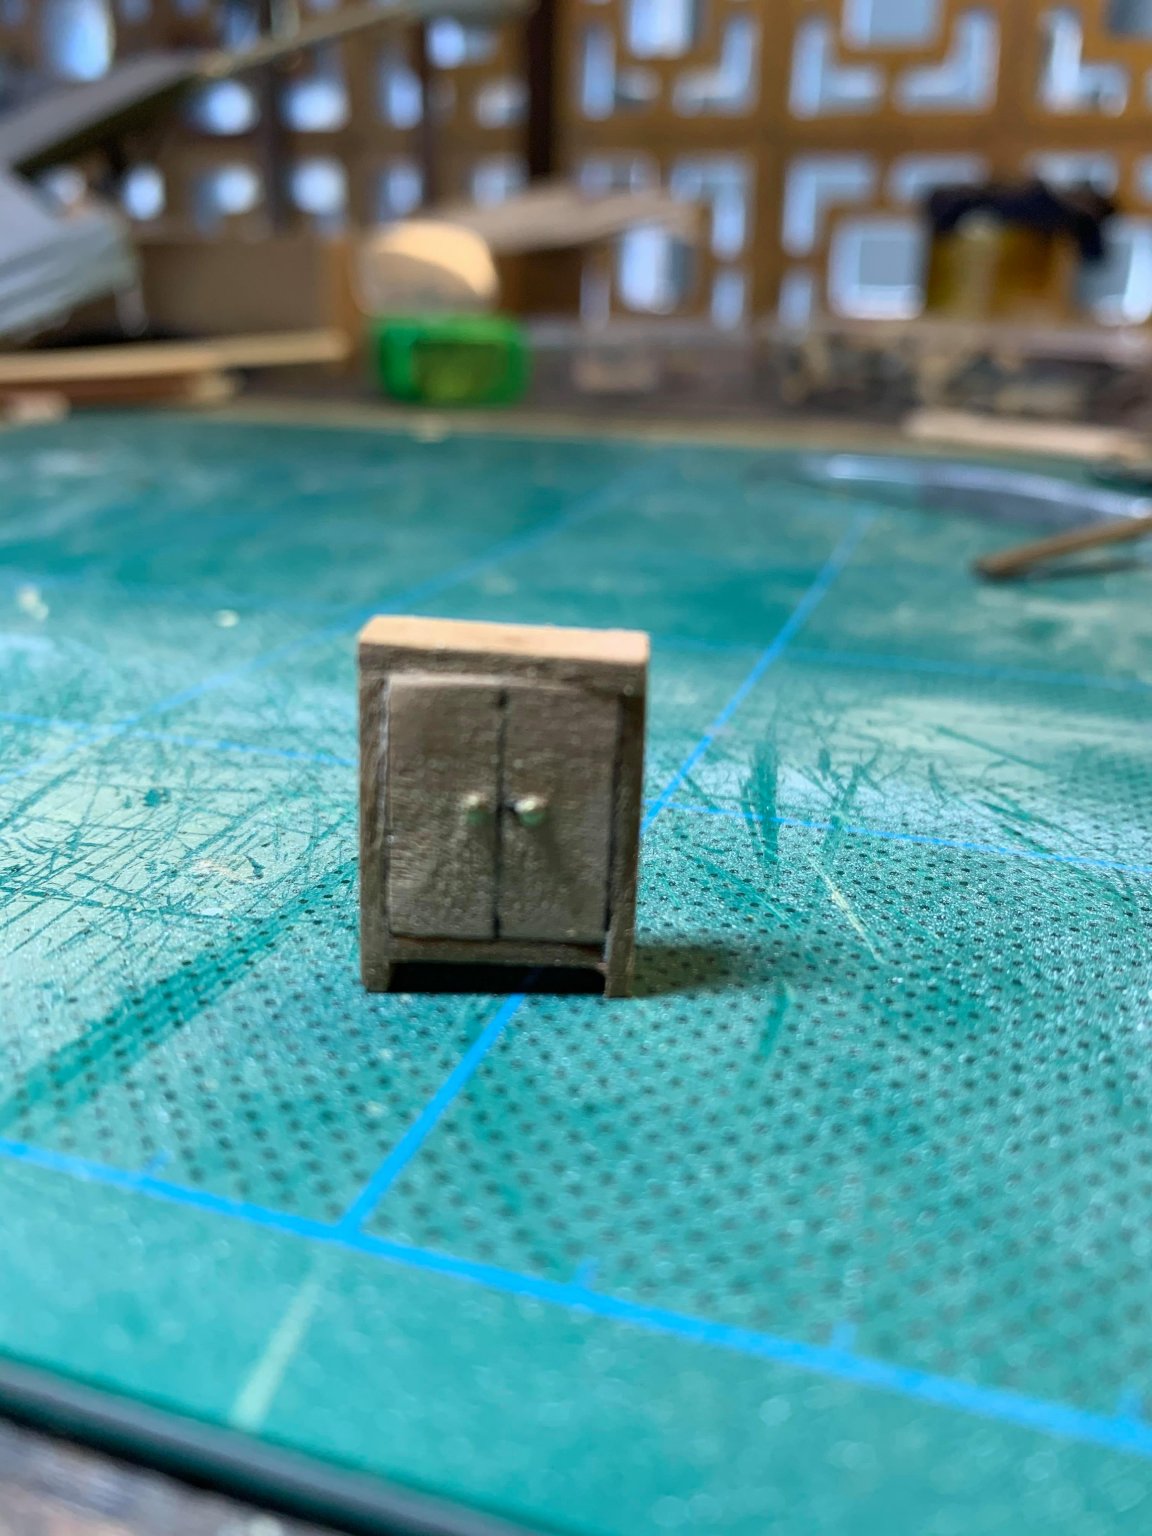
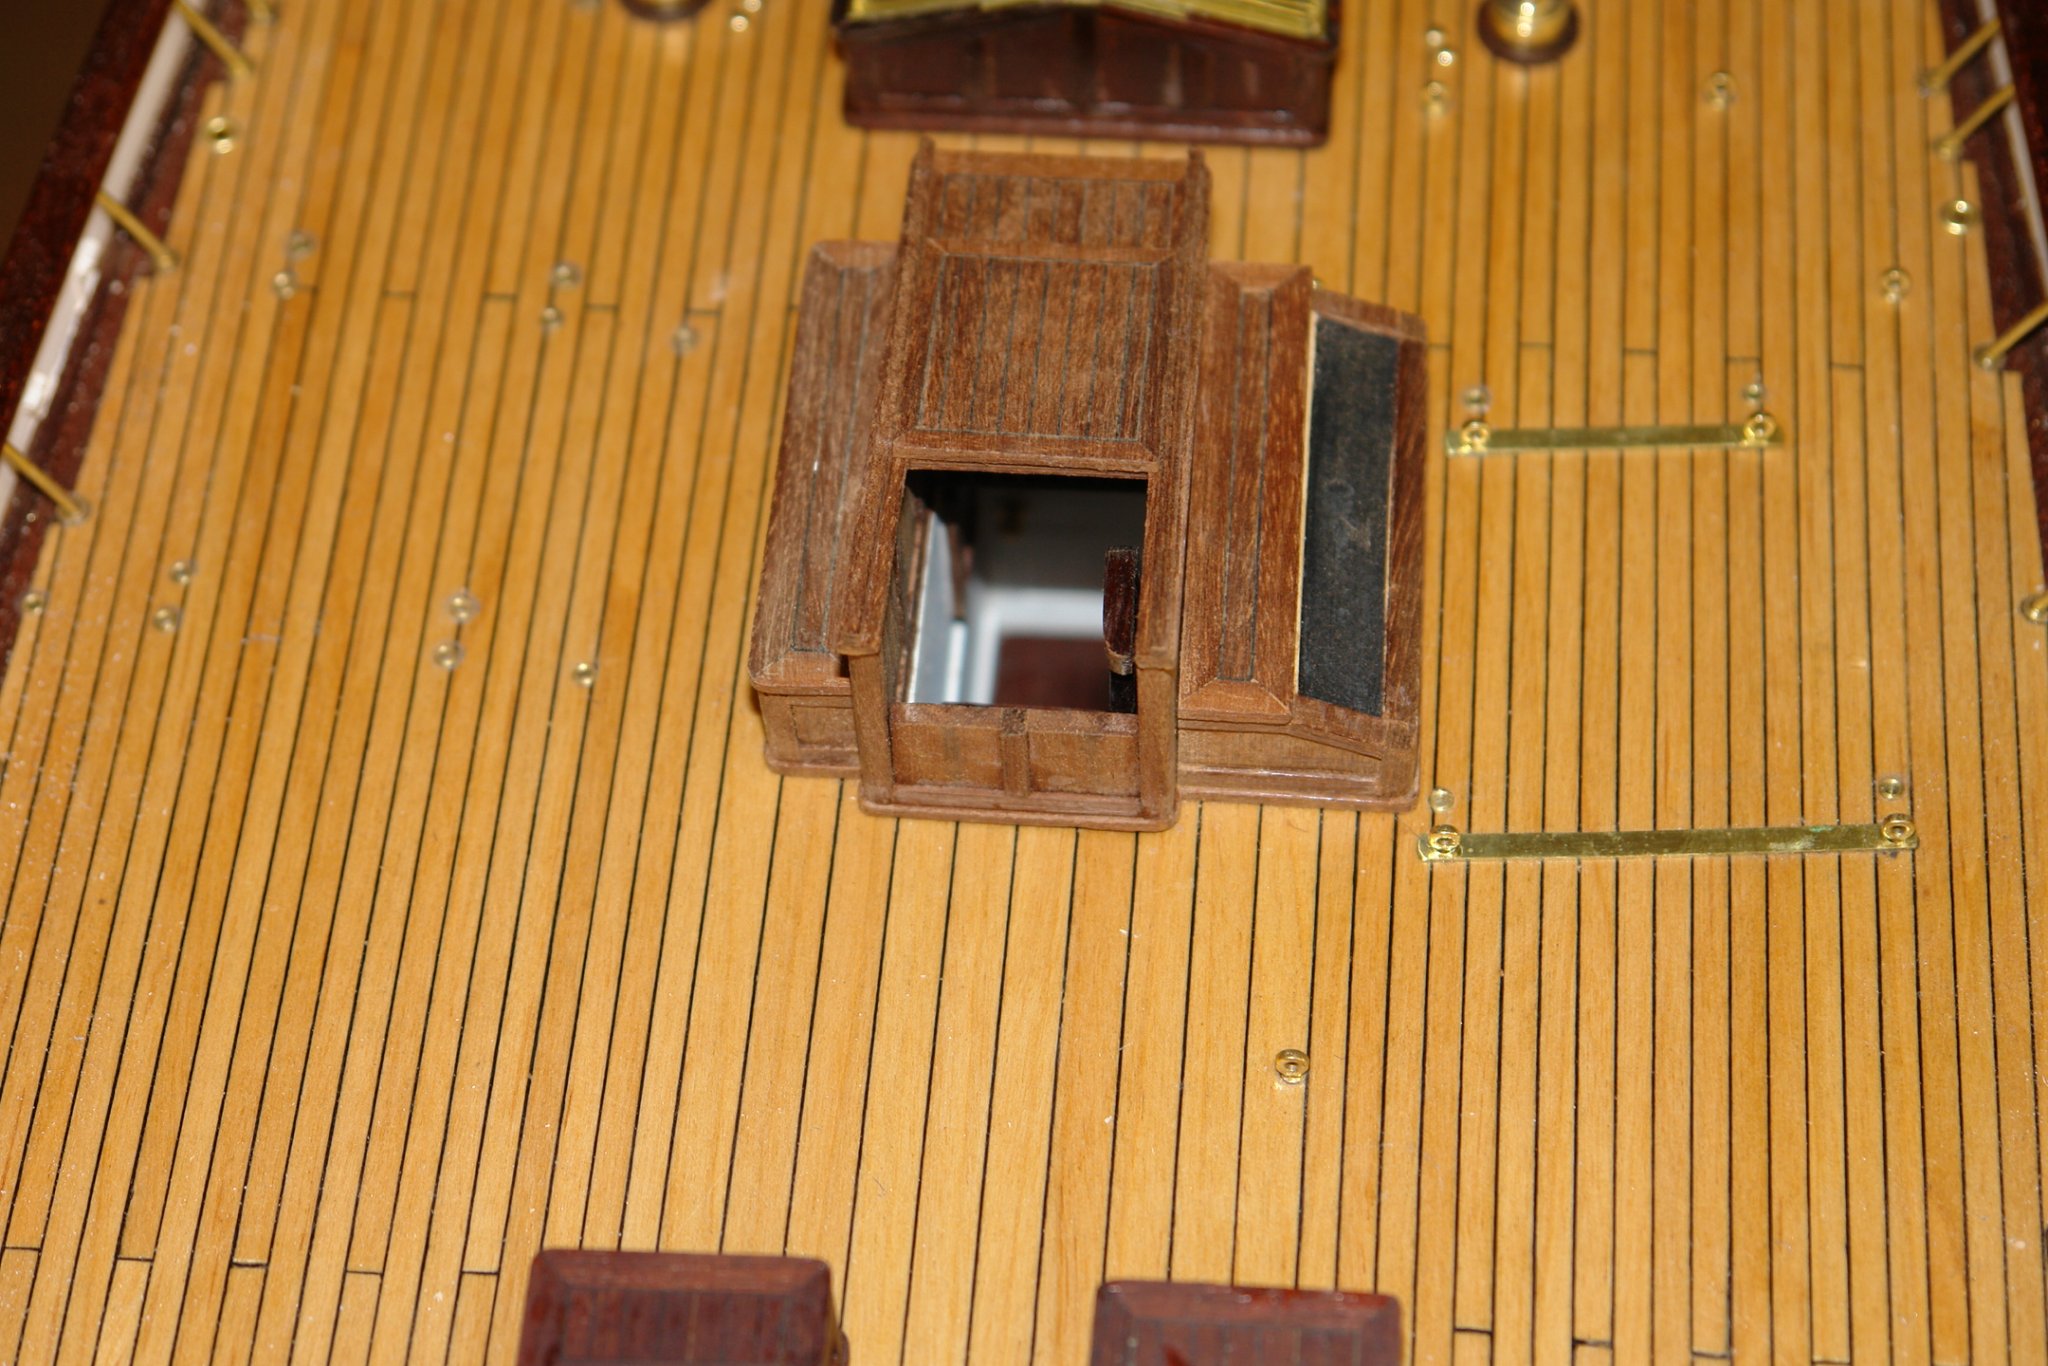
Finished putting together this grating/hatch/deckhouse thing. I'm sure it has a proper name
")
- JpR62, Dutchman and GrandpaPhil
-
3
-
-
-
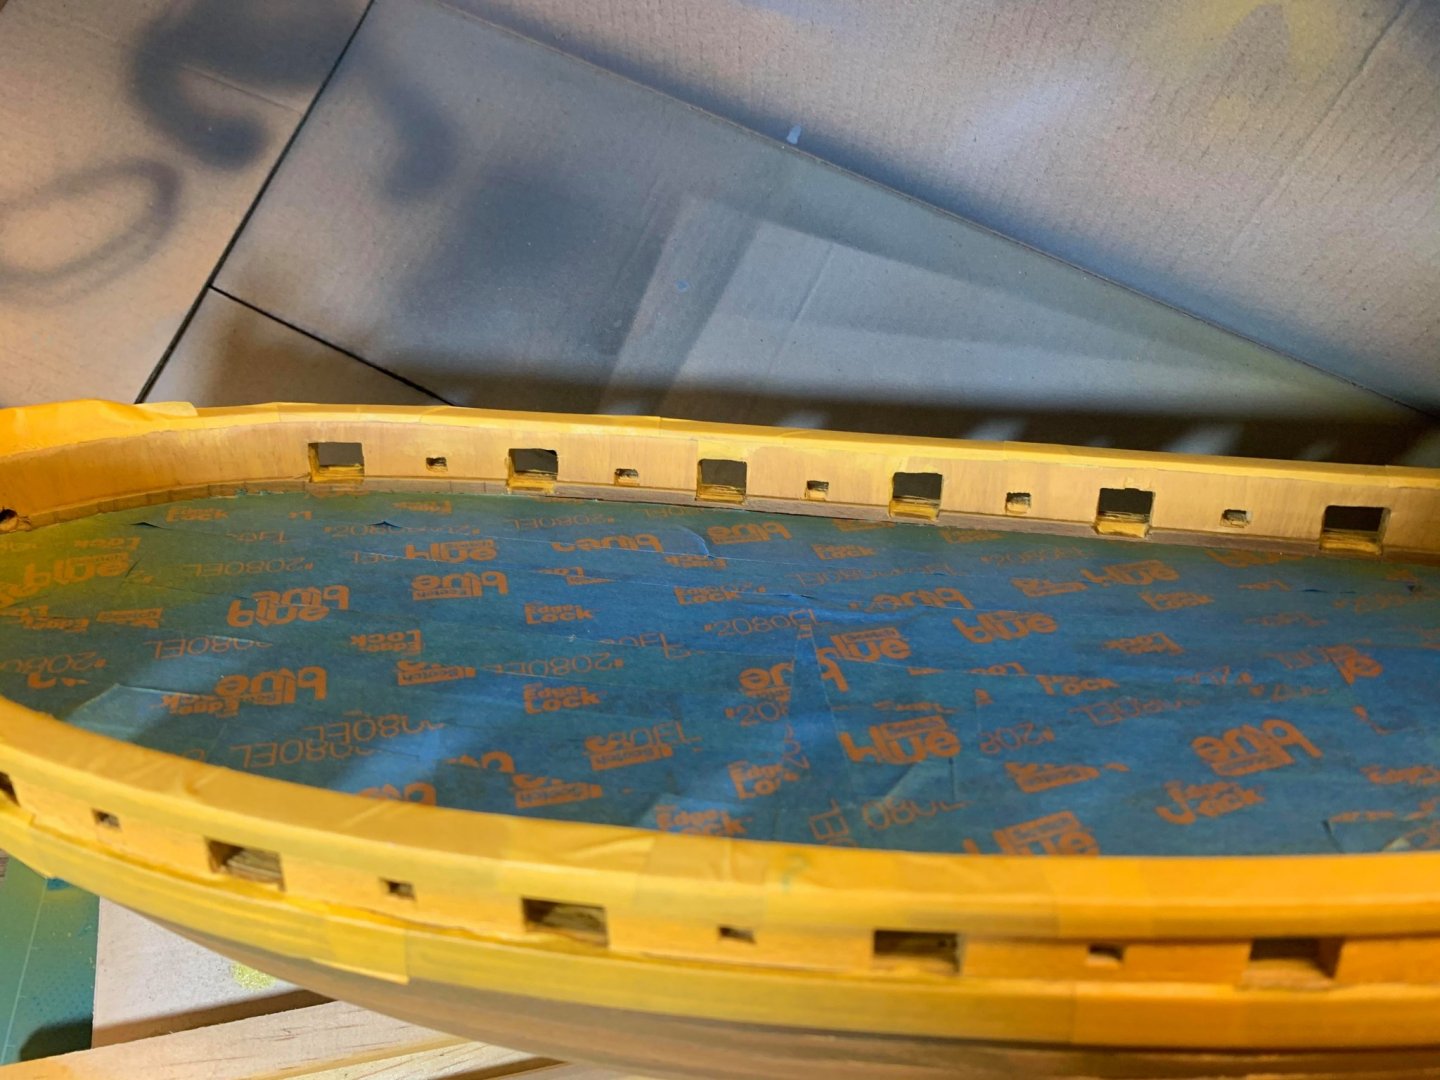
Hi
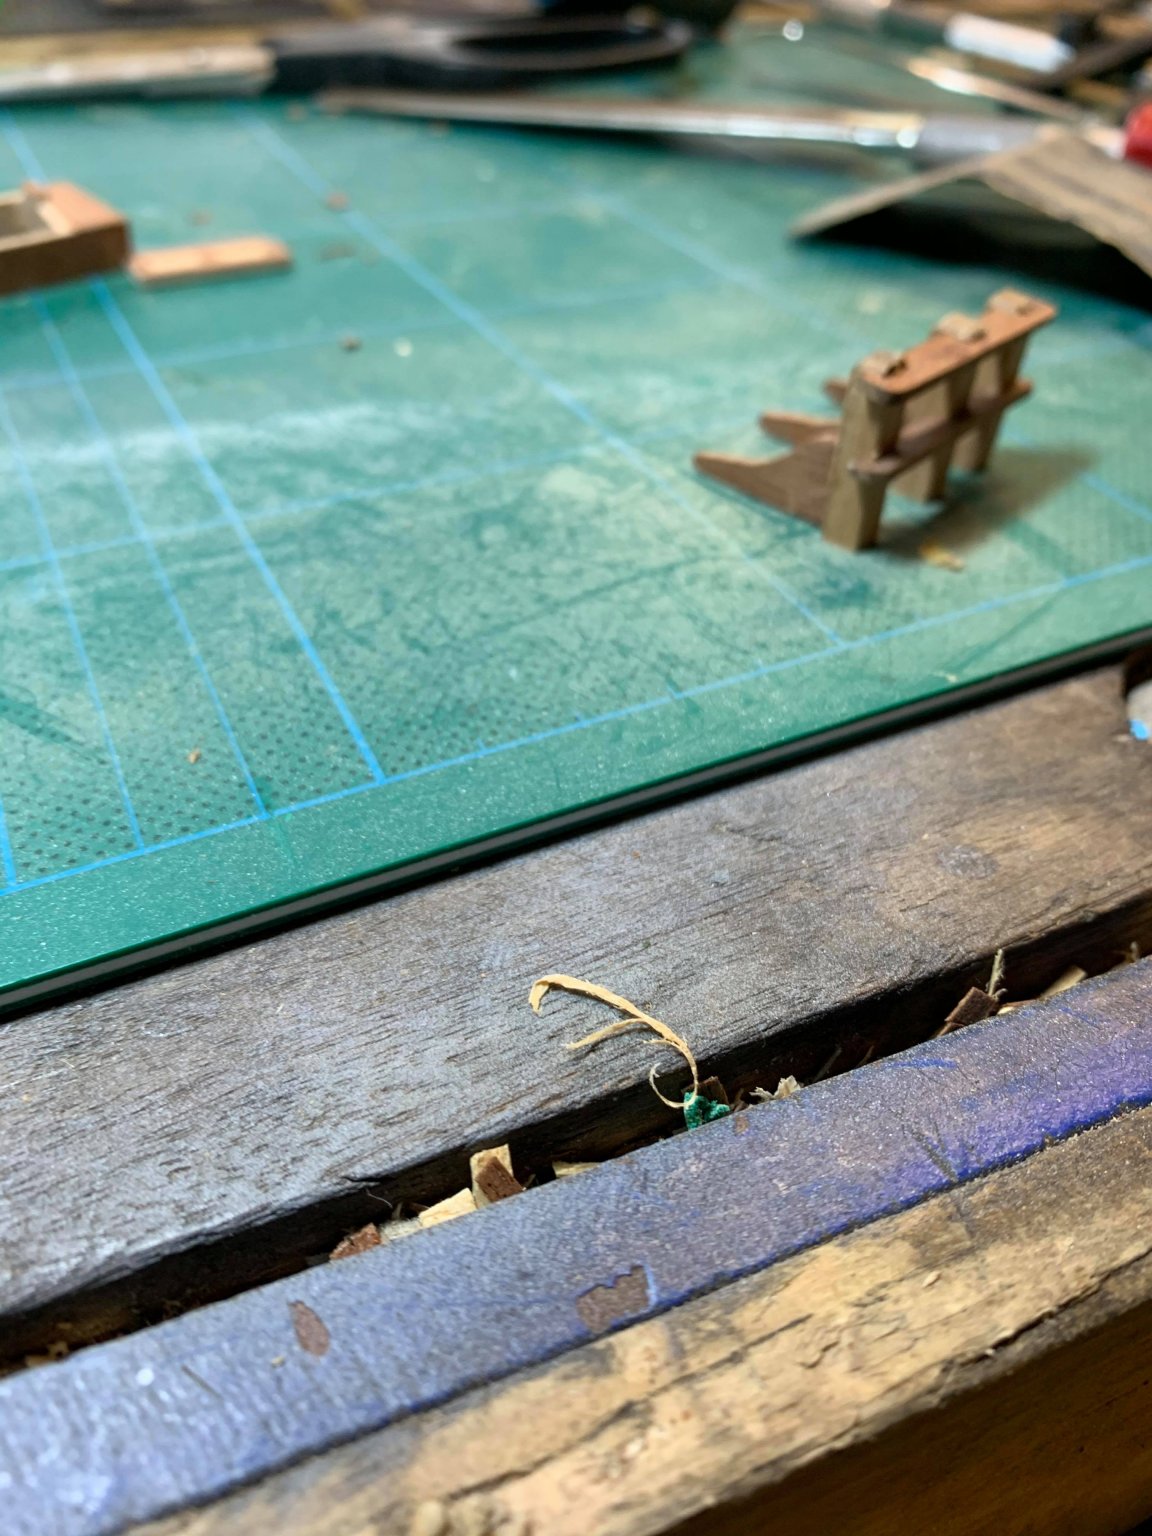
havent attempted to drill the holes for the belaying pins yet but thinking ahead. Is there a method to try and prevent splitting the rail?
cheers
Tom
-
-
One coat of paint done. Think its going to take a few

- Dutchman, coxswain and GrandpaPhil
-
3
-
-
Hi Dutchman
yes, I’ve looked at his log a few times since I pulled the kit back out of the cupboard.
cheers
Tom
-
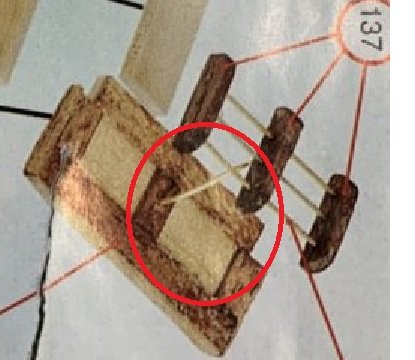
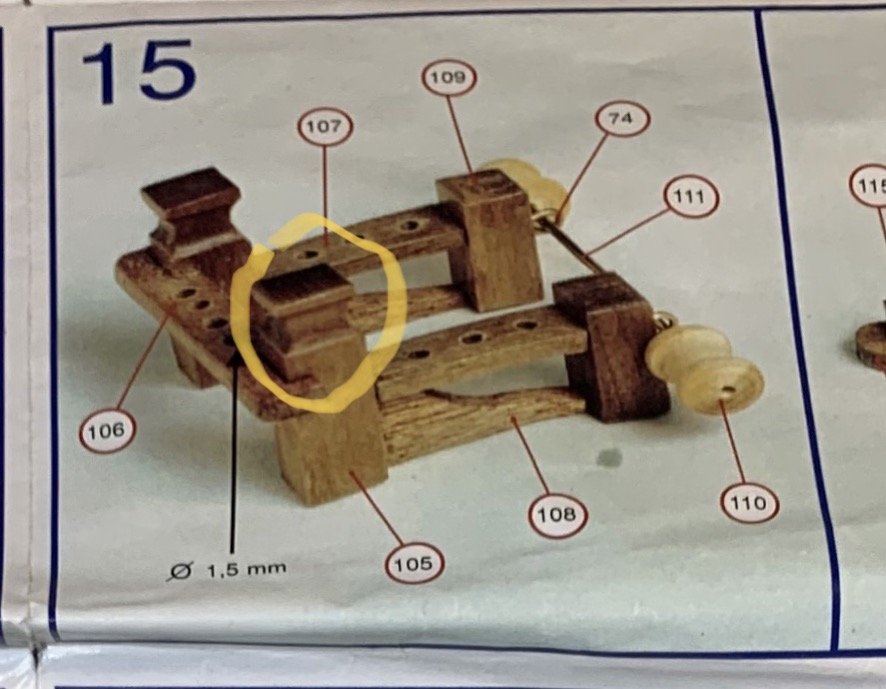
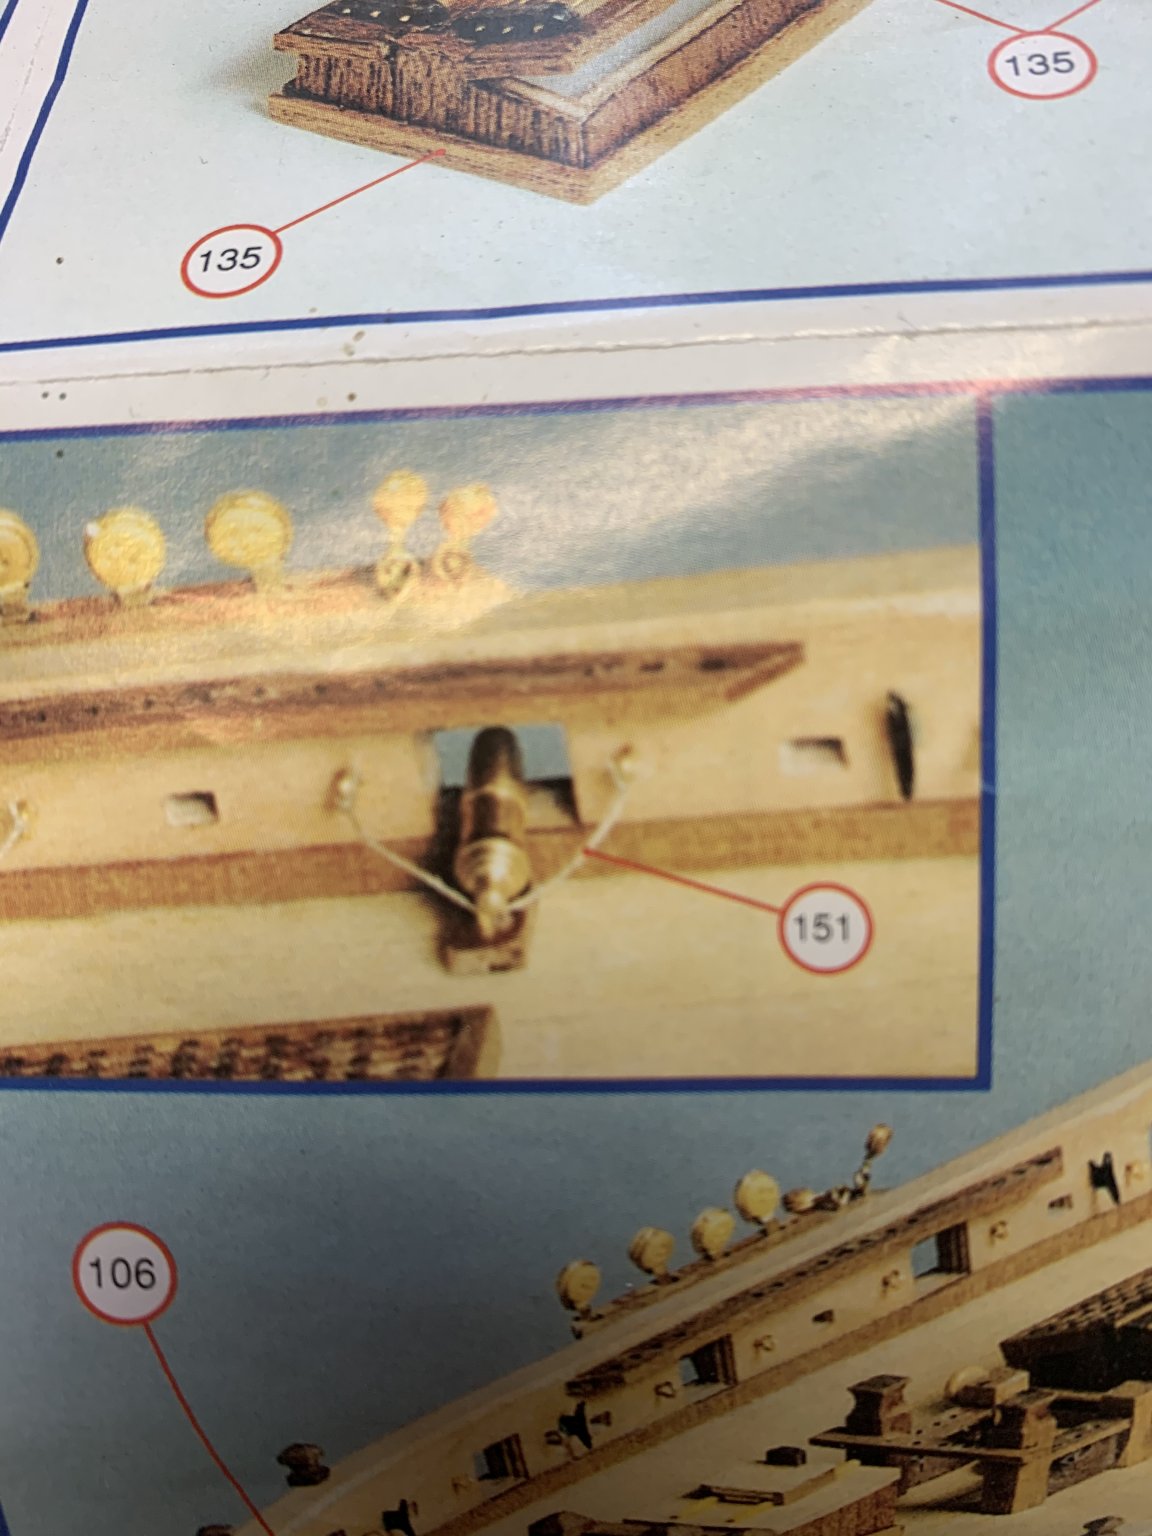
Hi does anyone have any suggestions on how to shape the circled part in the photo?
- GrandpaPhil, mtaylor and Keith Black
-
3


.jpg.280f5fad0fe22f347e2fb50ab733c12a.jpg)
.jpg.eeb6f5b8f0f6e61613c110d76eefba85.jpg)


Le Renard by Tompslattery - FINISHED - Artesania Latina
in - Kit build logs for subjects built from 1801 - 1850
Posted
Been quite slack lately, just got back into it. This is where it's at. Reasonably happy with how the paint came out, the masking tape lifted some off but thats probably because its been on there for months. Hopefully will be able to touch it up so it looks ok.