Beckmann
-
Posts
415 -
Joined
-
Last visited
Content Type
Profiles
Forums
Gallery
Events
Everything posted by Beckmann
-

ancre Belle Poule 1765 by j.guydal
Beckmann replied to j.guydal's topic in - Build logs for subjects built 1751 - 1800
Bonsoir Jaques! Thank you for the pictures. How did you blacken the whales? Is that ebony or colour? Matthias -
Chuck, will you add the bumpkin at the bow? The original model has some rigging here, propably just to keep it in place. Will you go here for a similar design?
- 1,784 replies
-
- 1
-

-
- winchelsea
- Syren Ship Model Company
- (and 1 more)
-
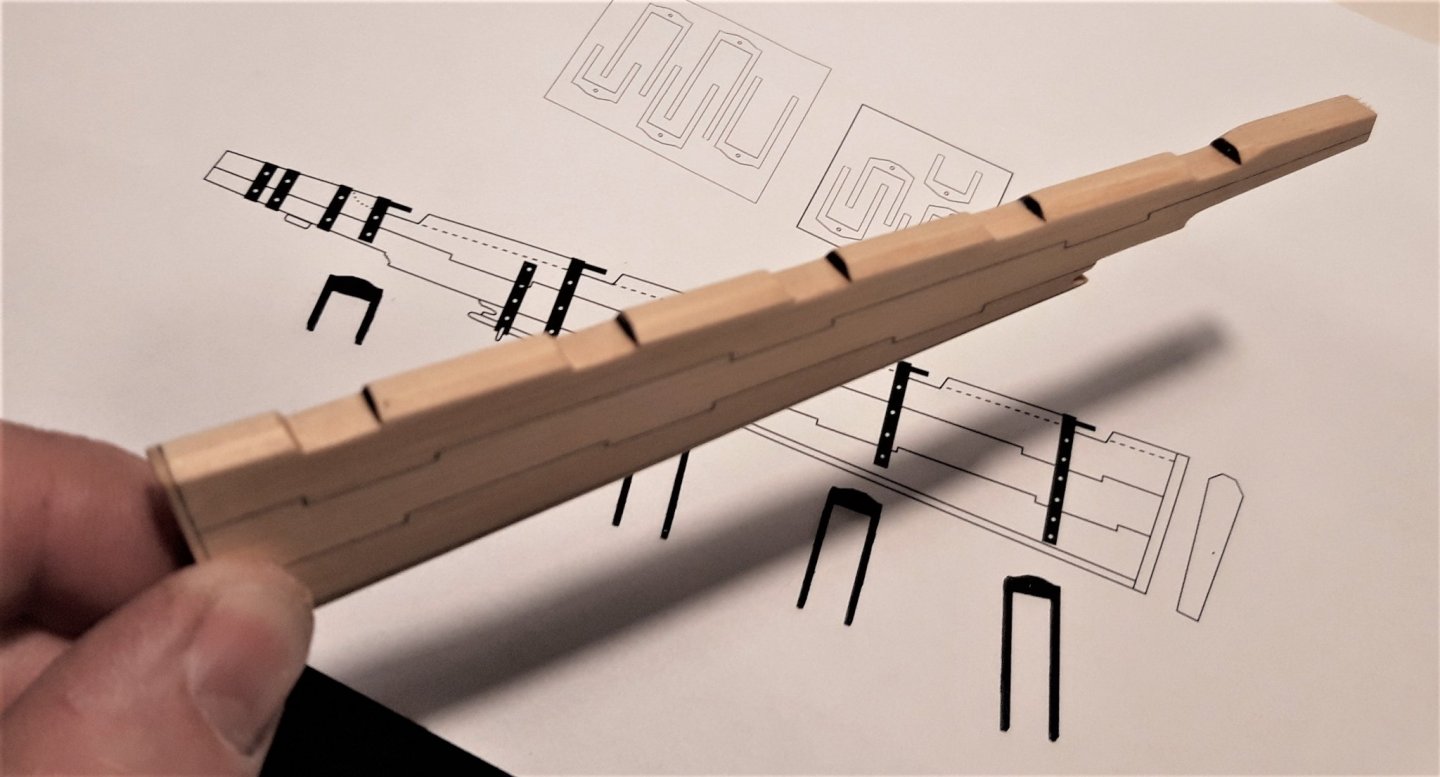
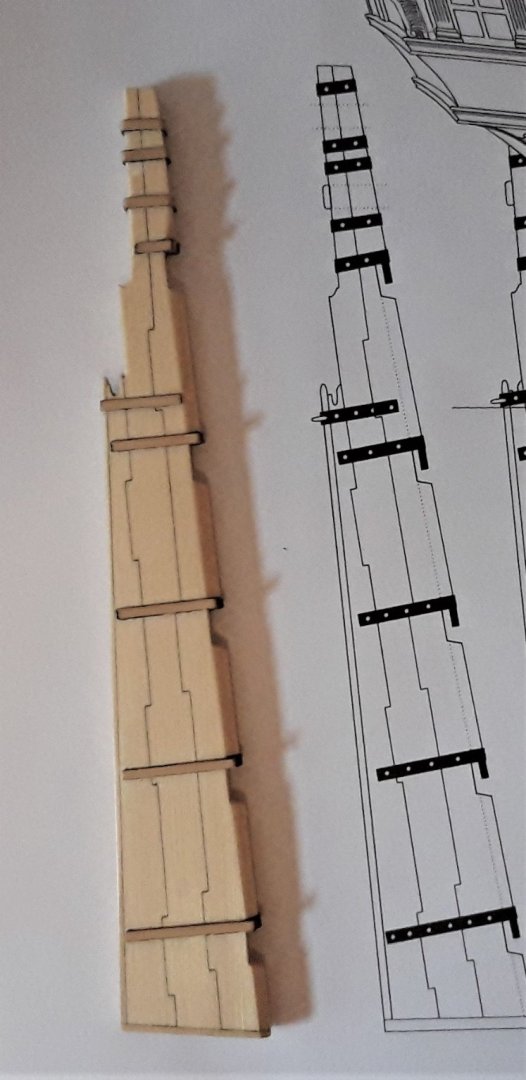
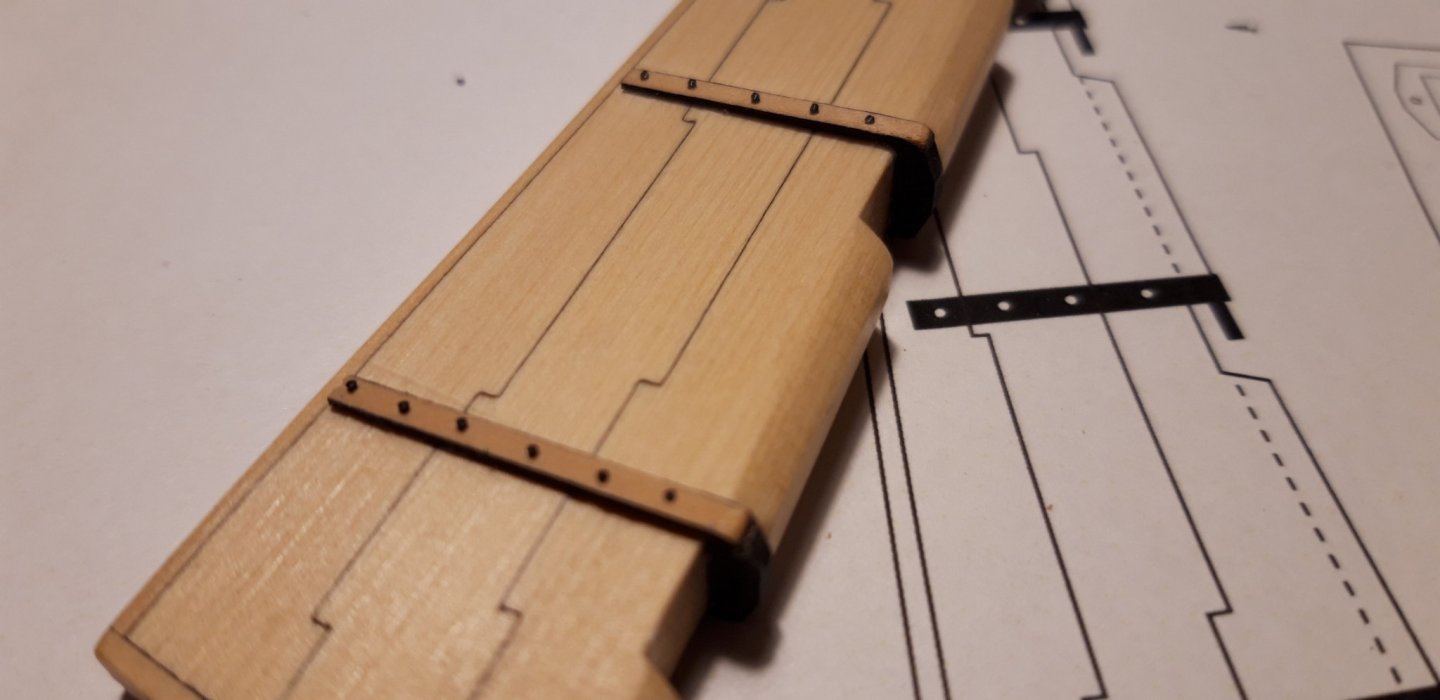
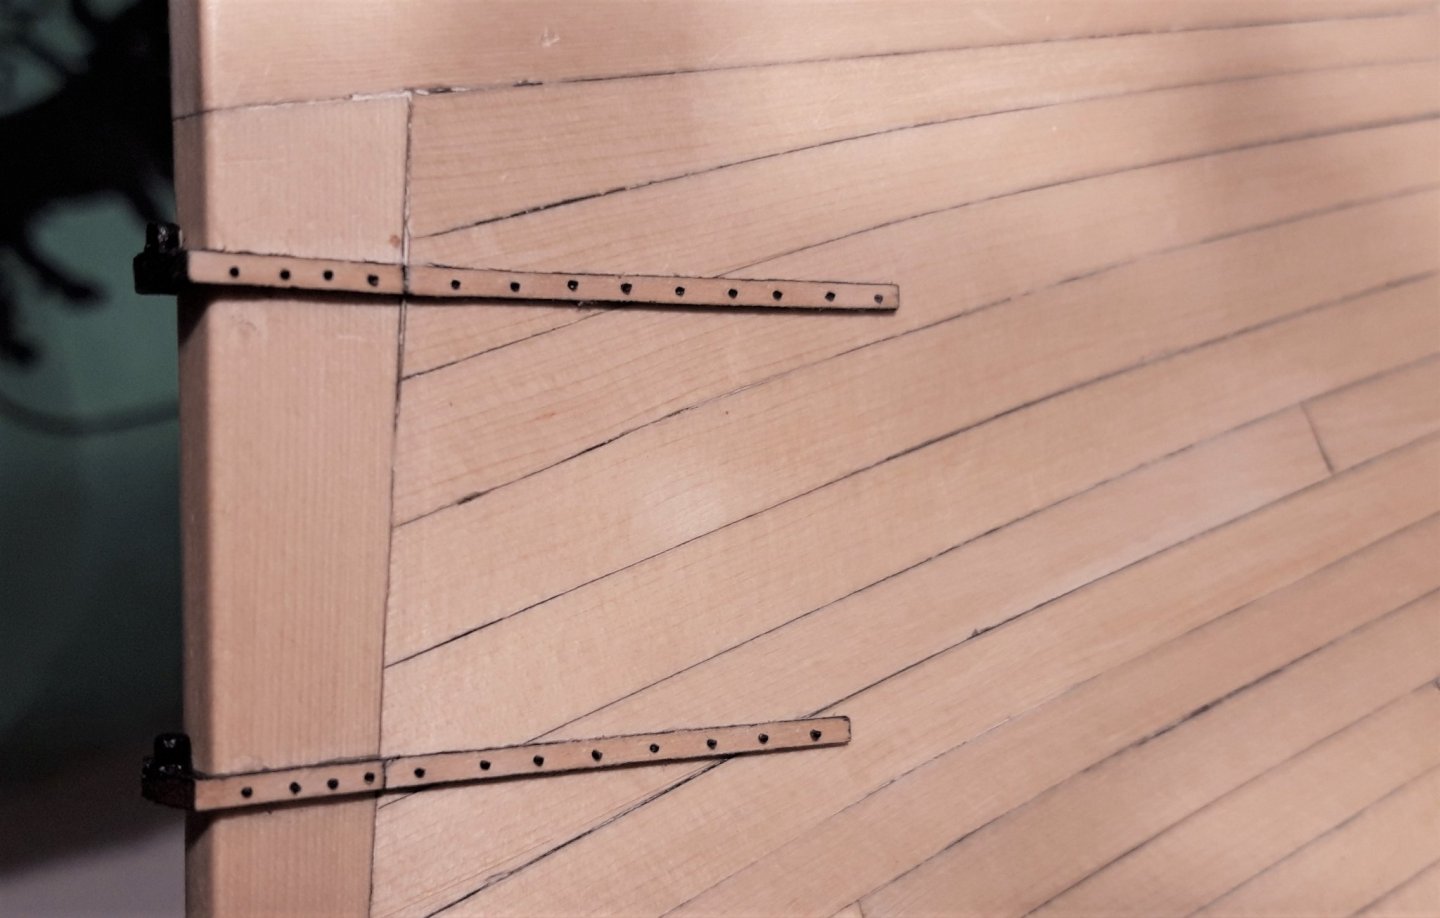
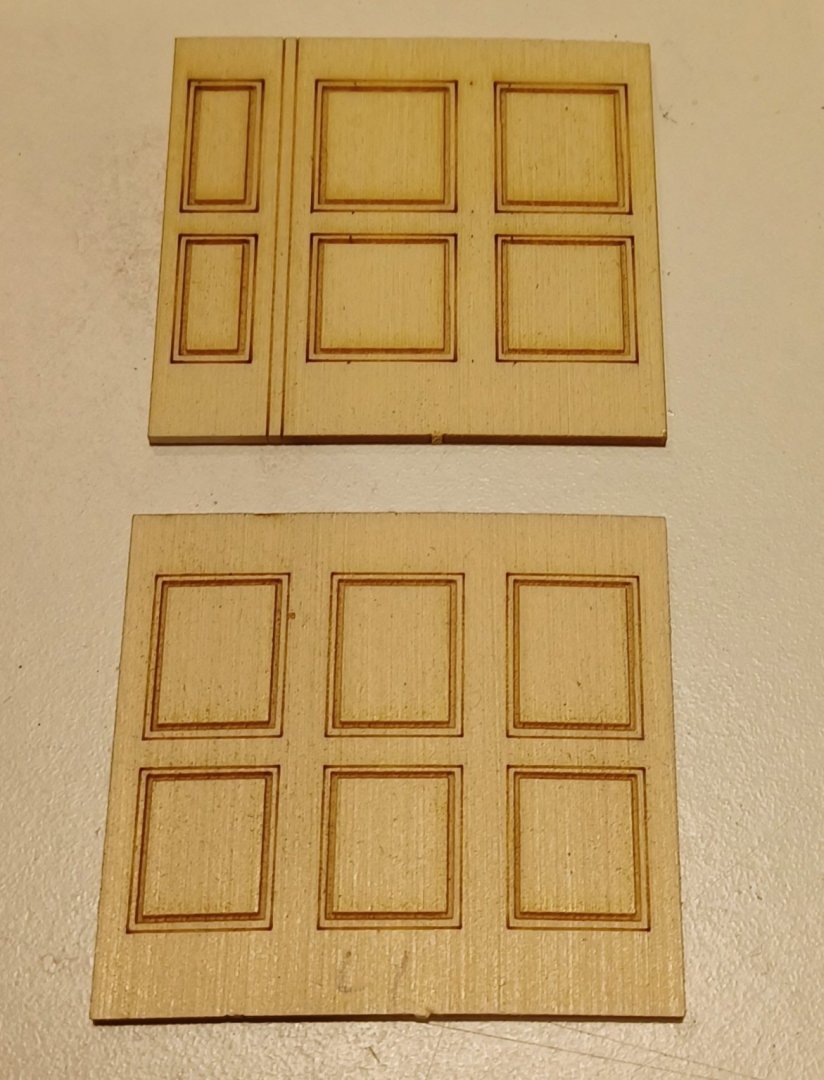
These fittings are really nice. And they are not too difficult to build, for they are already provided in the right shape and cut out. Of course it is worth the effort. I think you are making it very easy for us, to build an extraordinary impressive model with our average skills and average tools. Keep this level, I am enjoying it.
- 1,784 replies
-
- 4
-
-
- winchelsea
- Syren Ship Model Company
- (and 1 more)
-
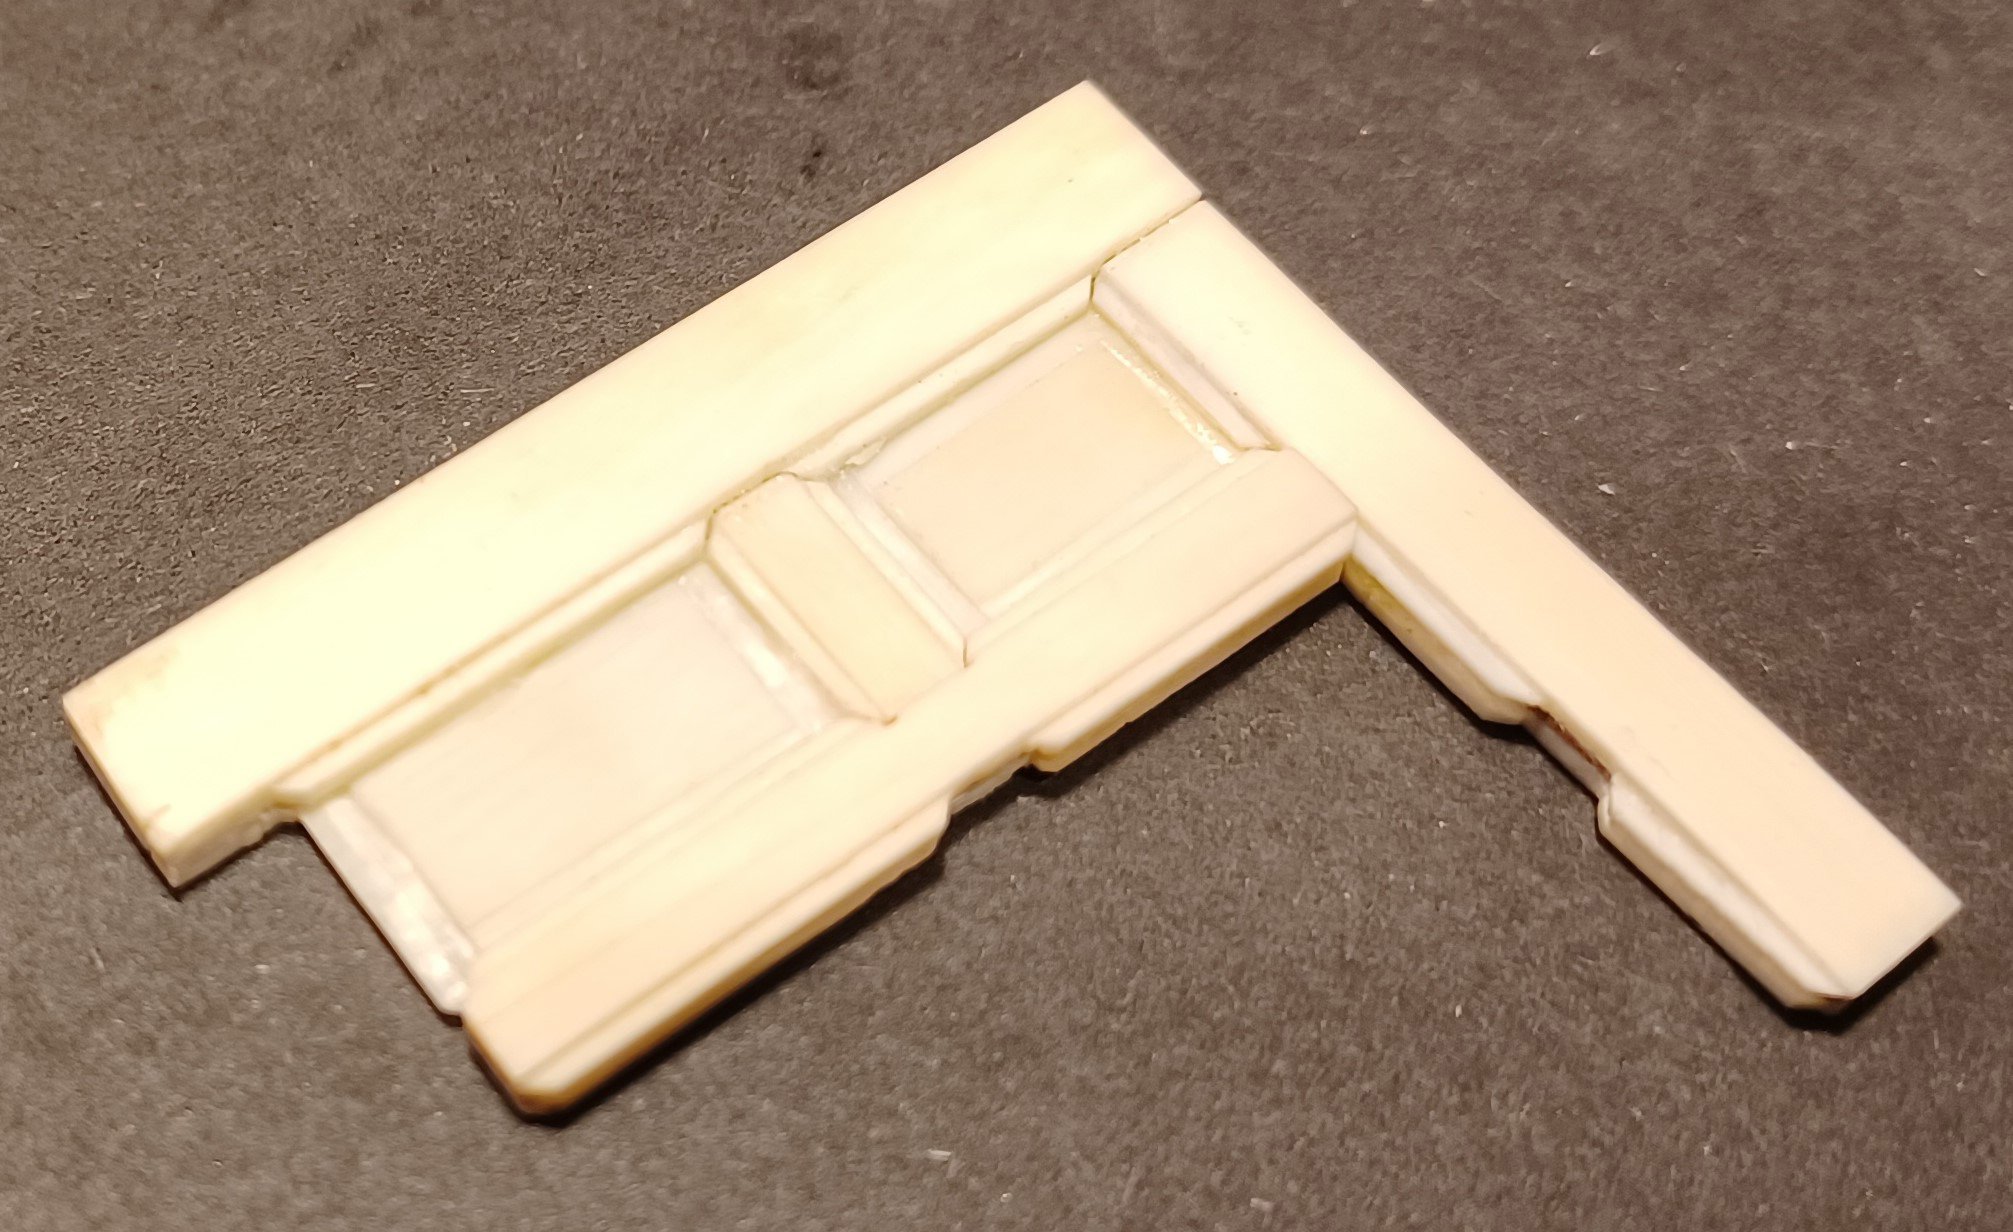
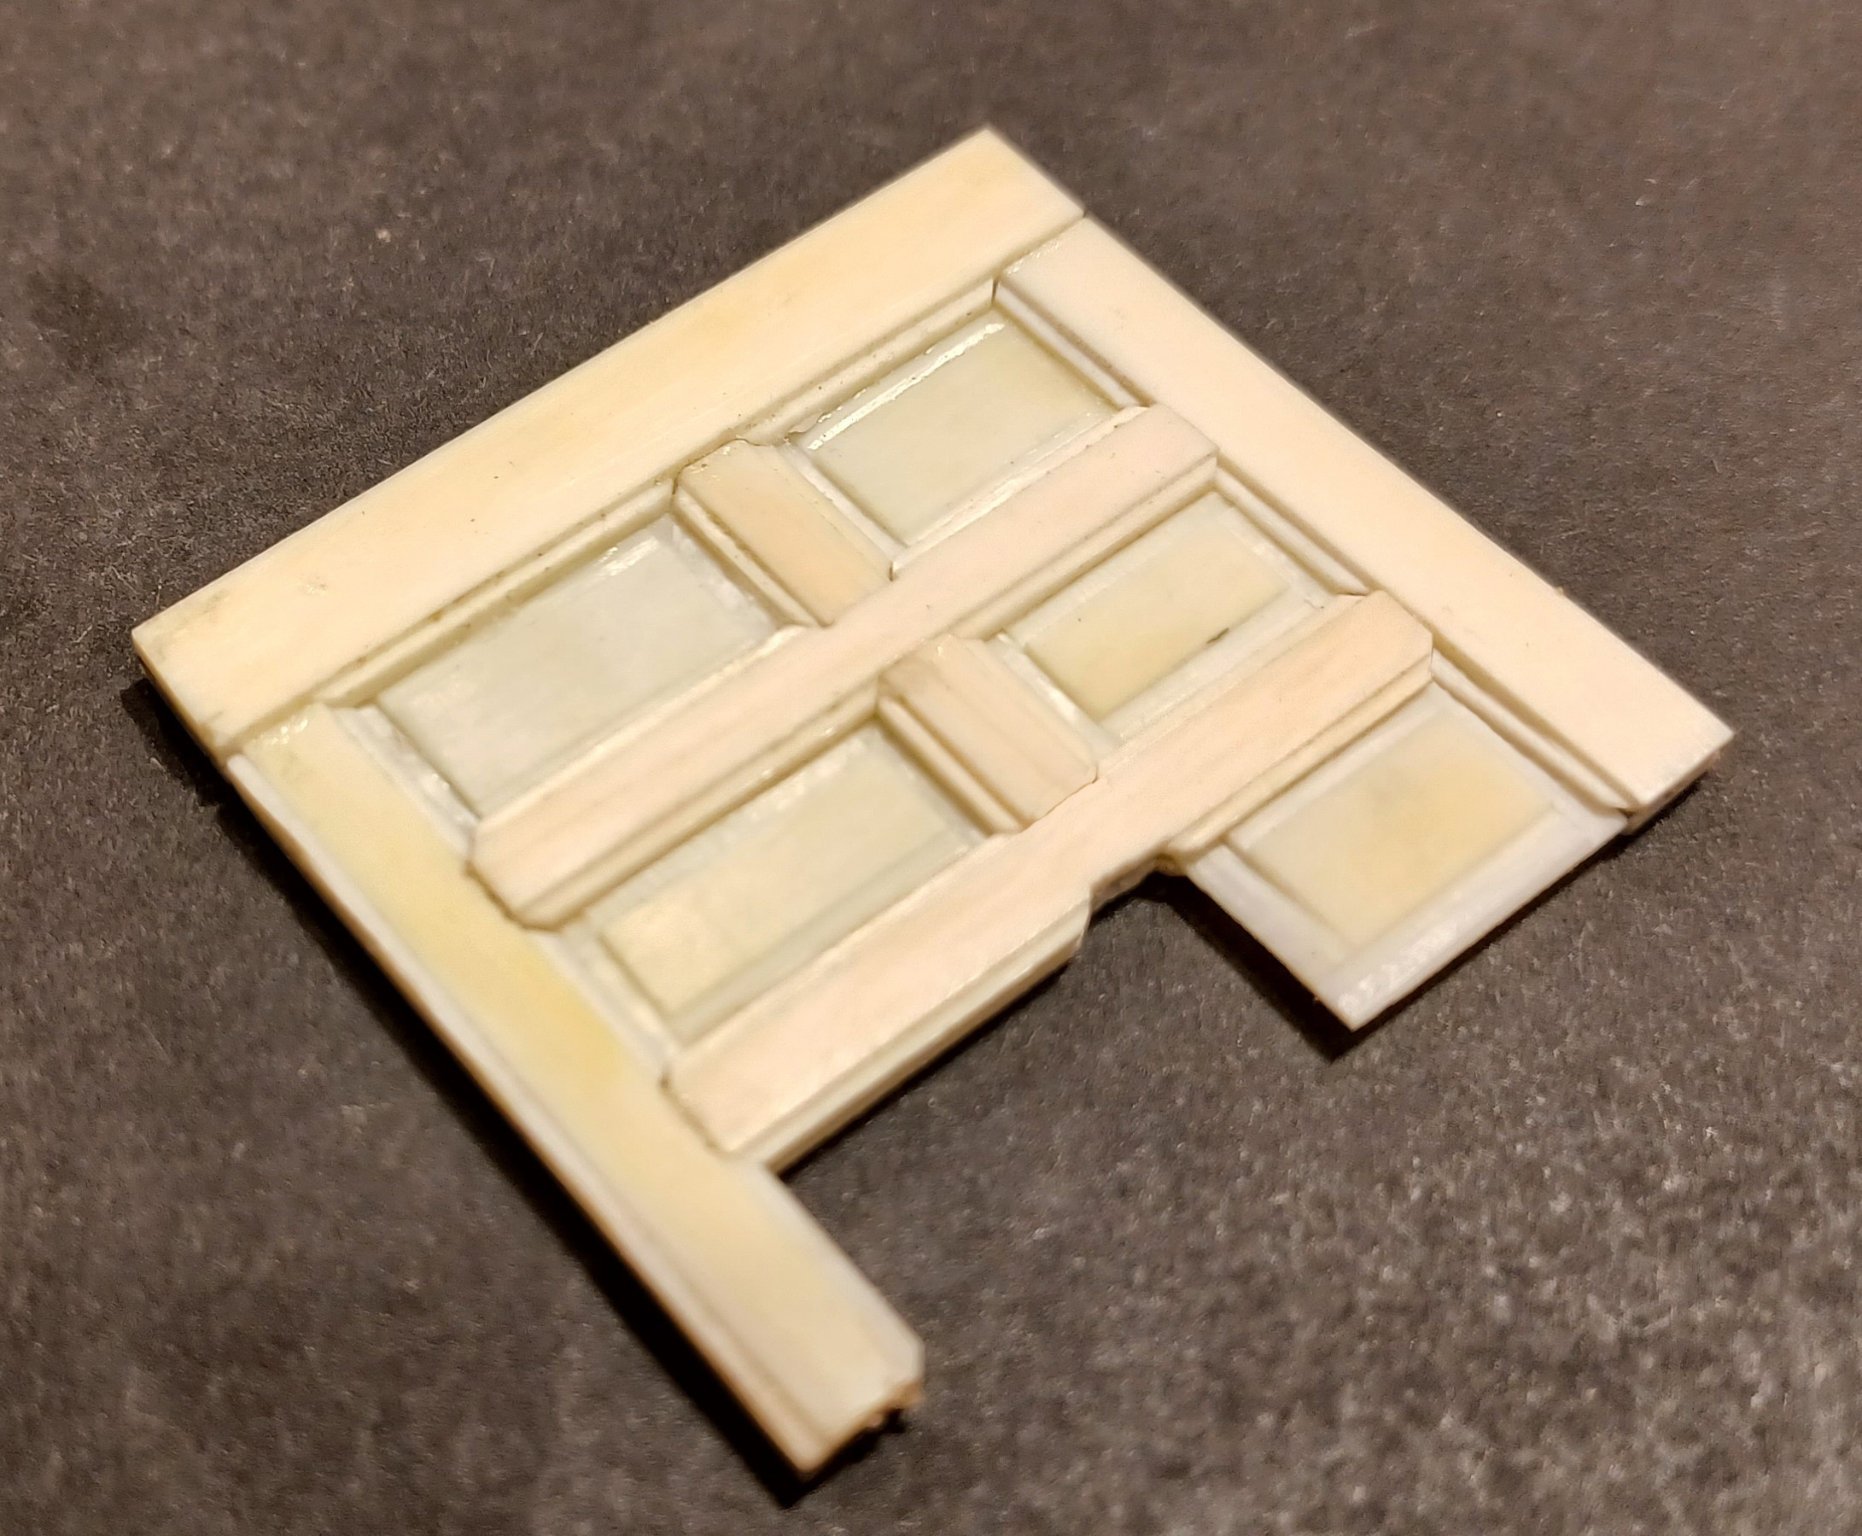
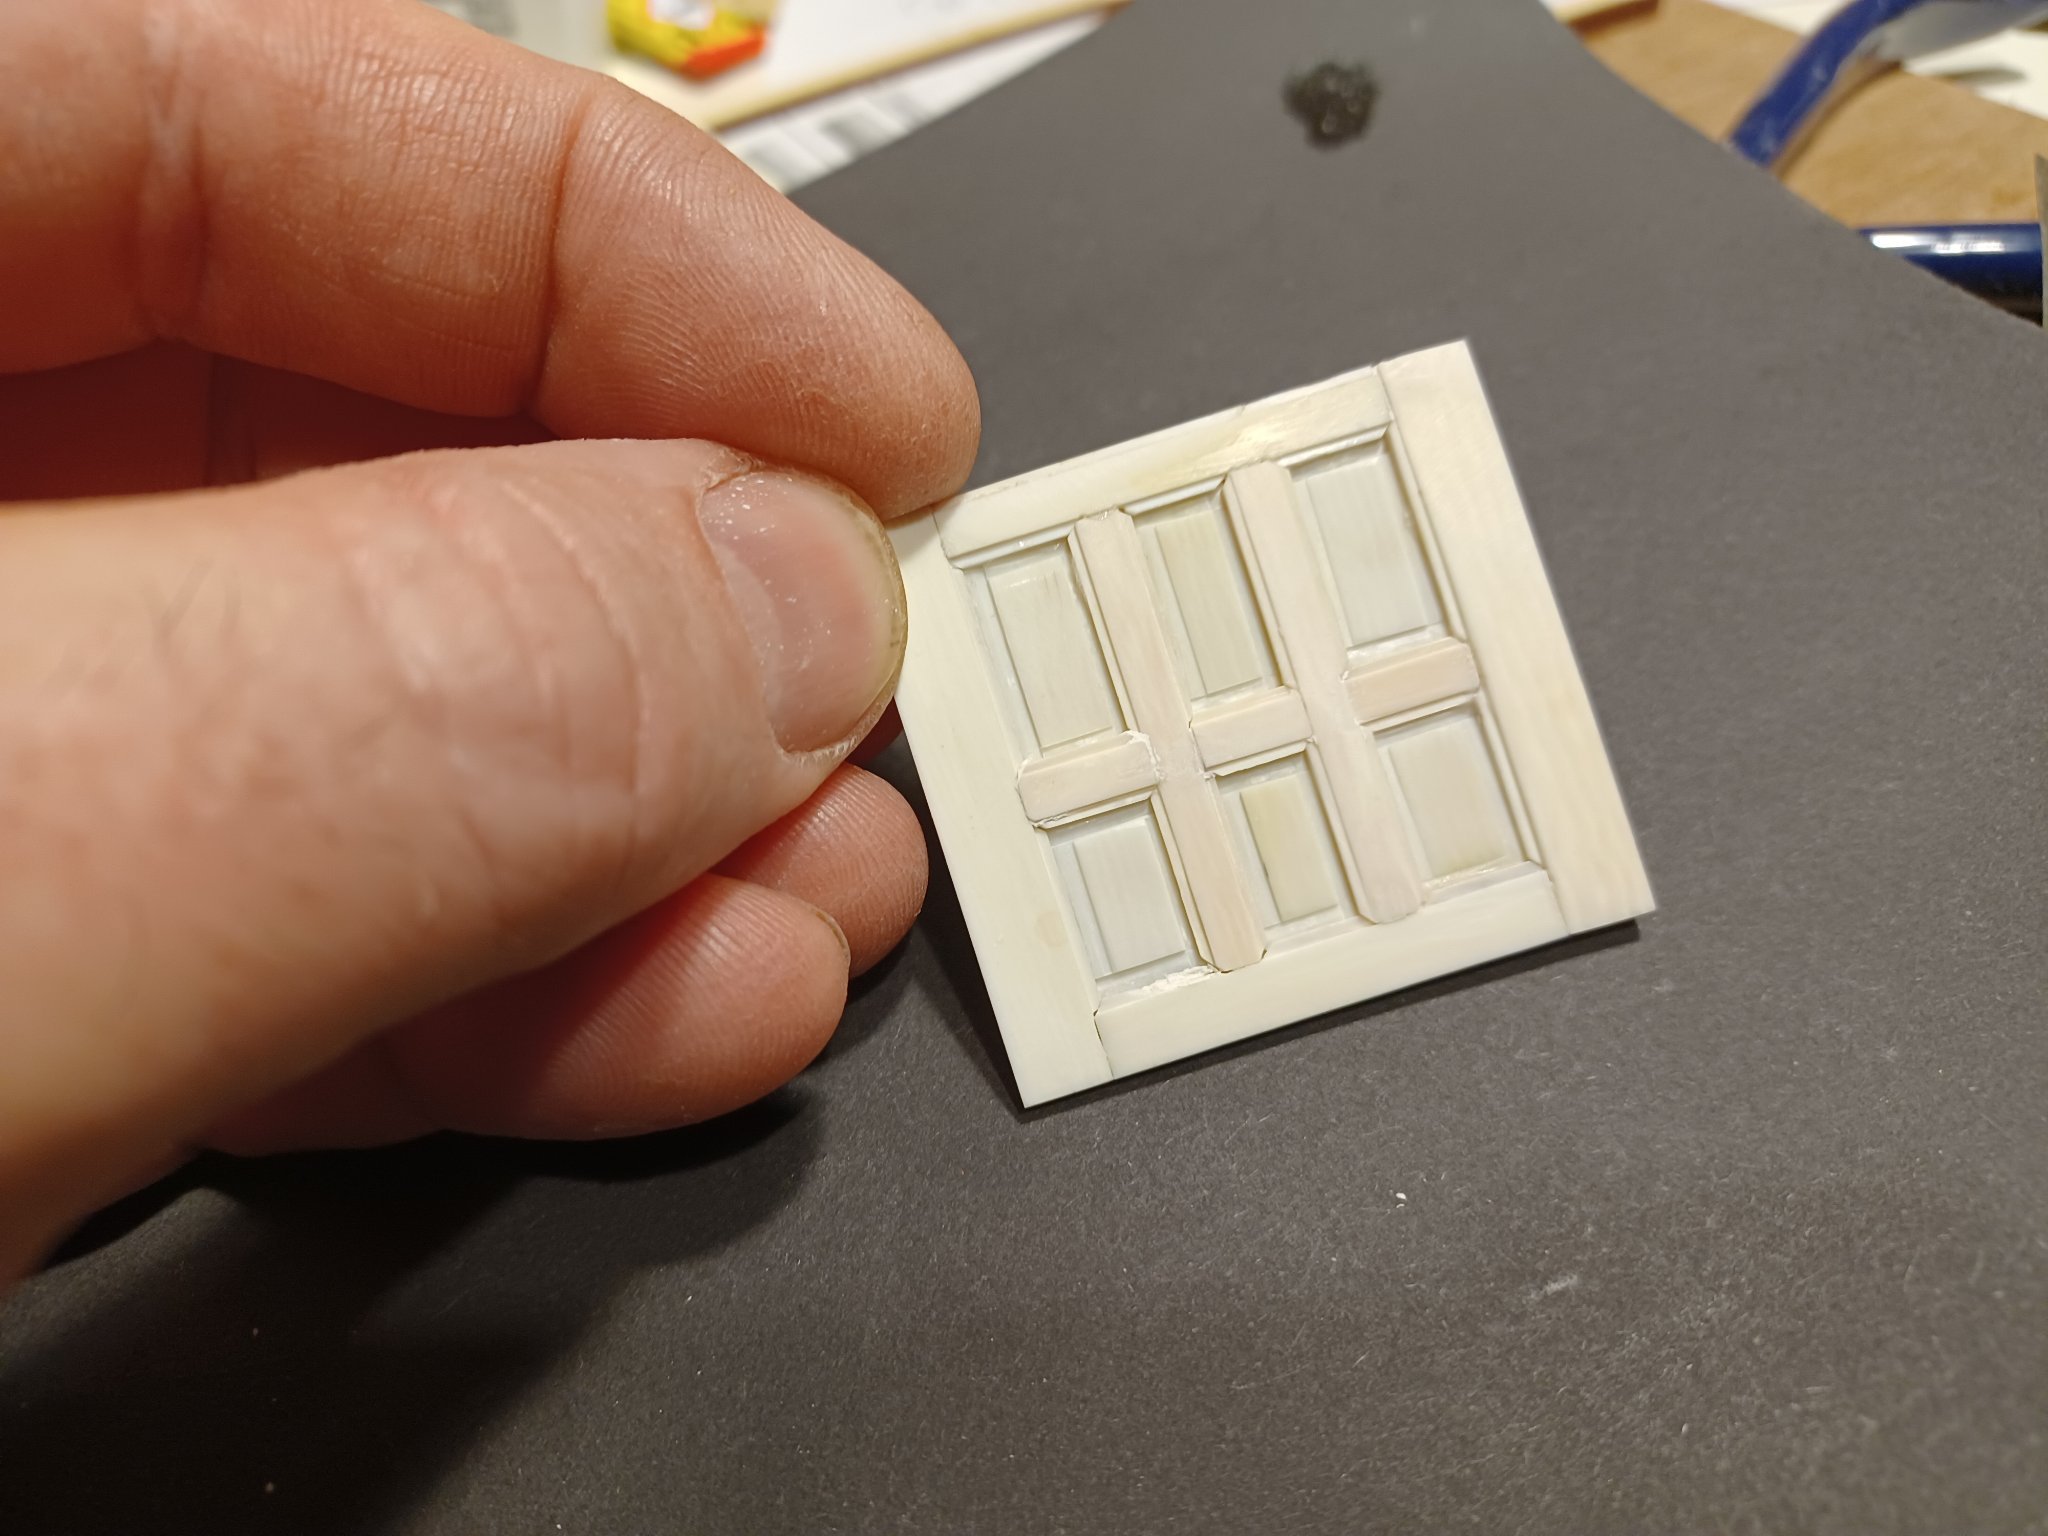
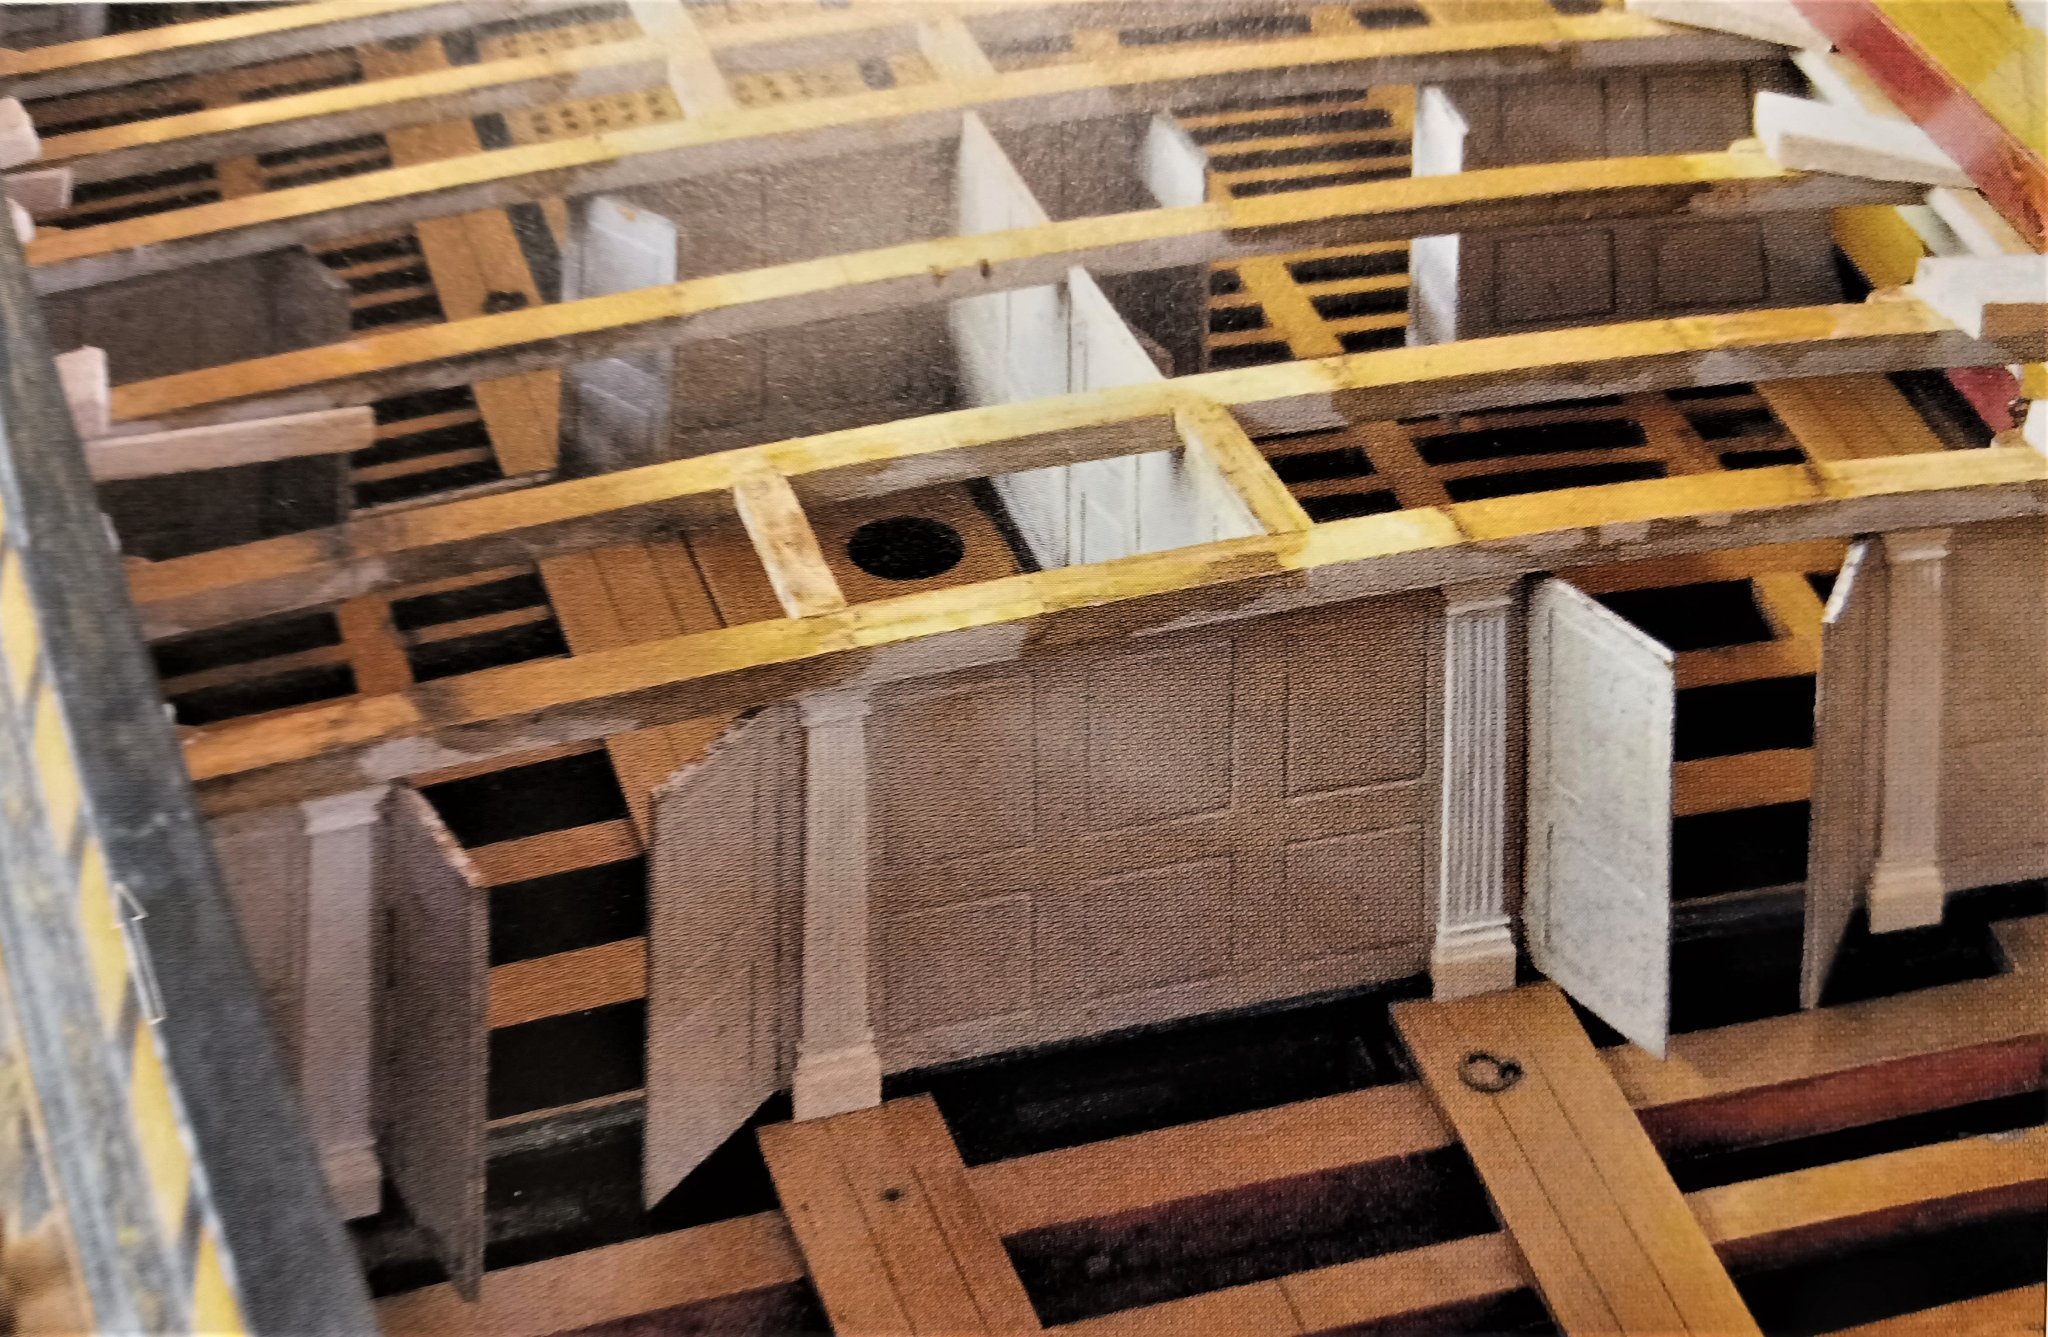
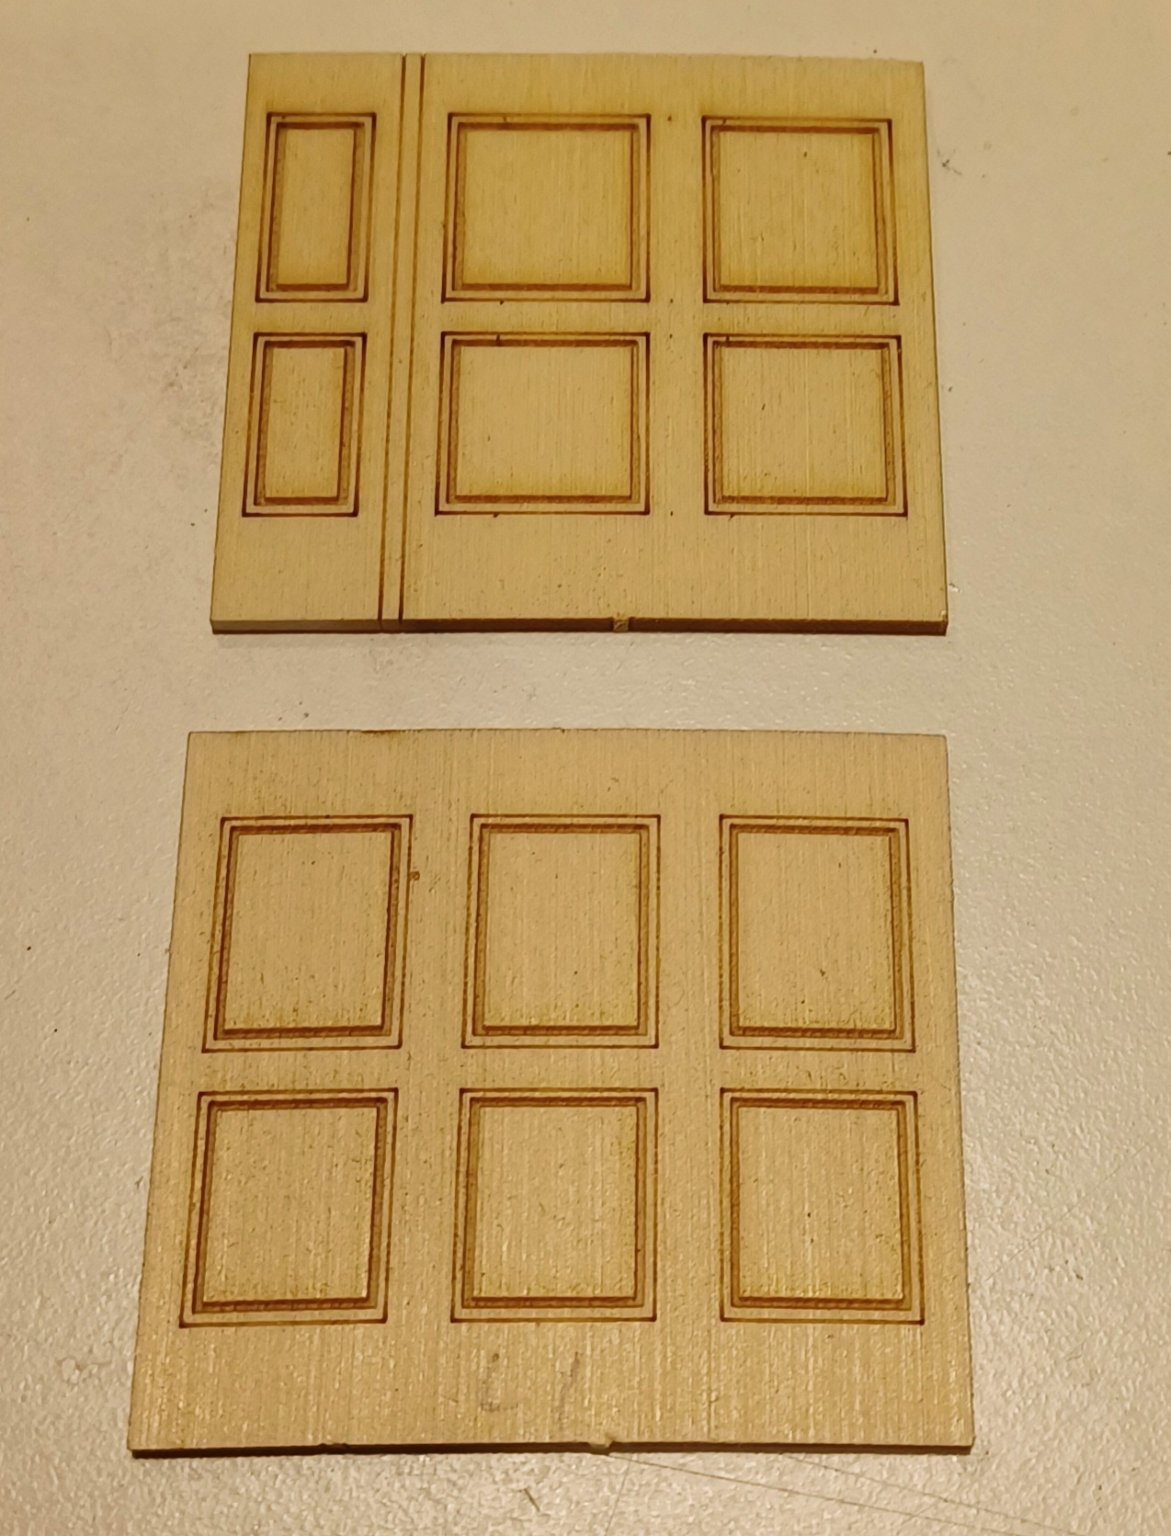
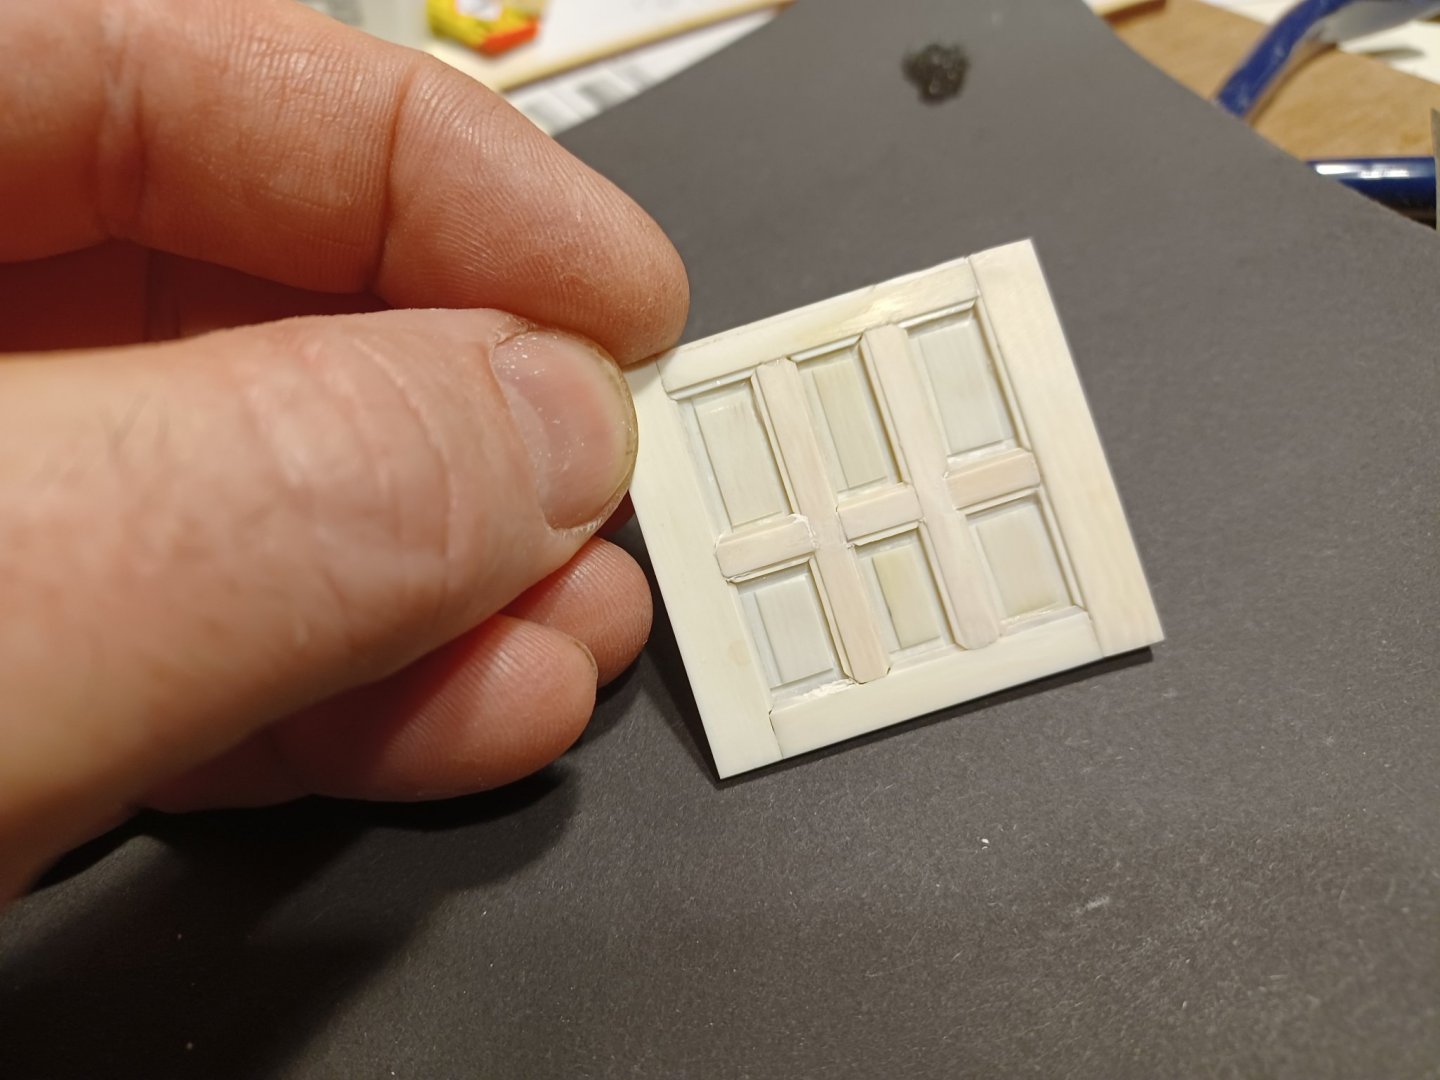
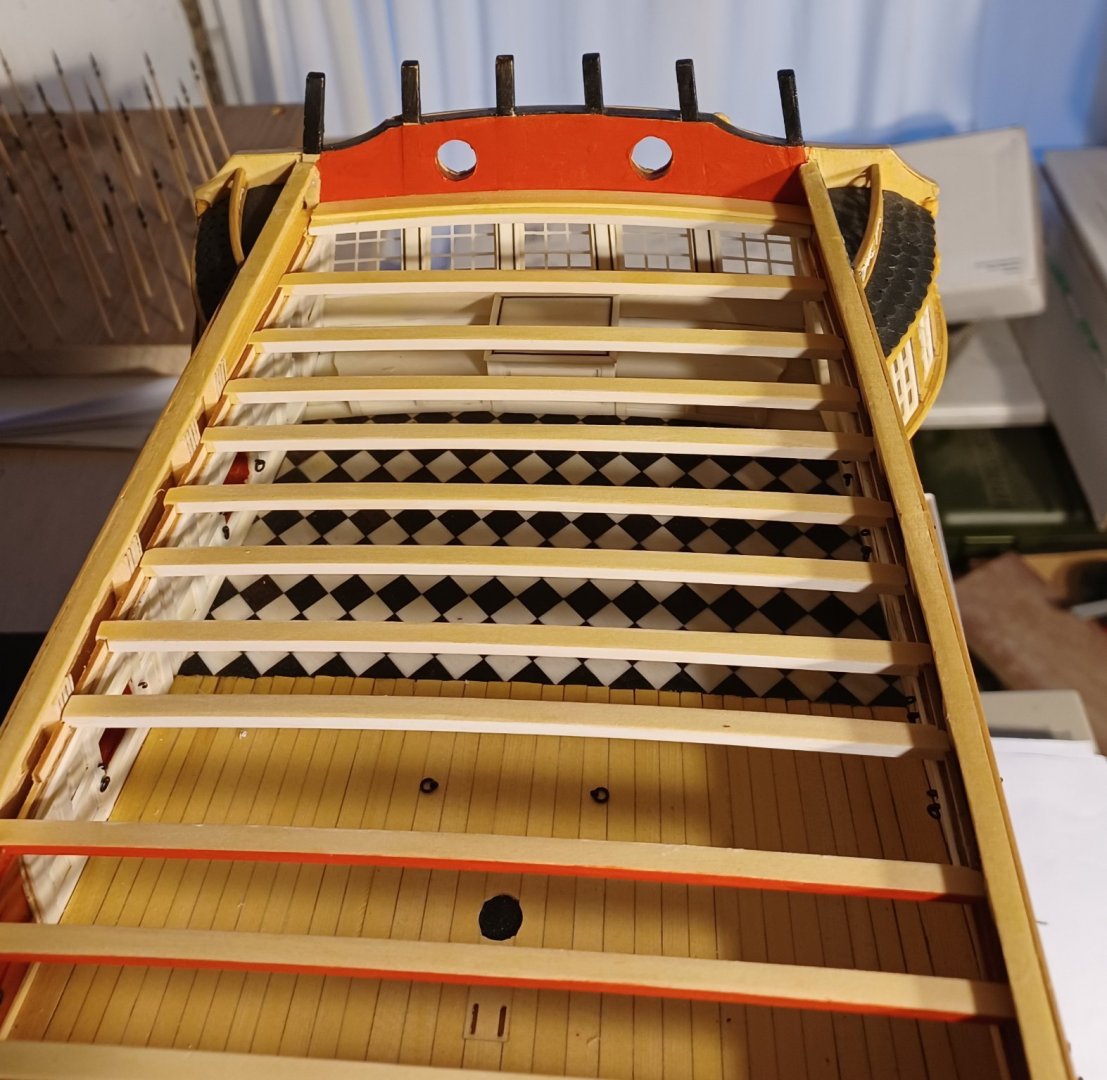
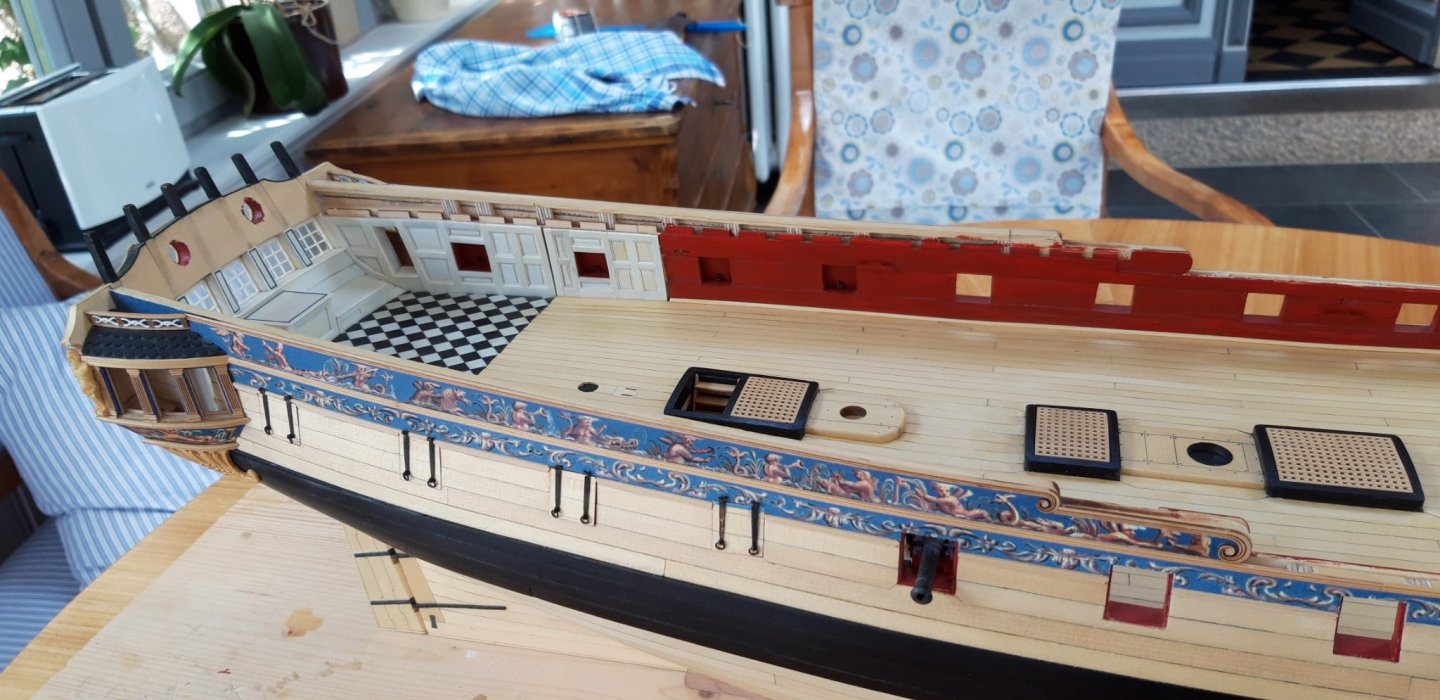
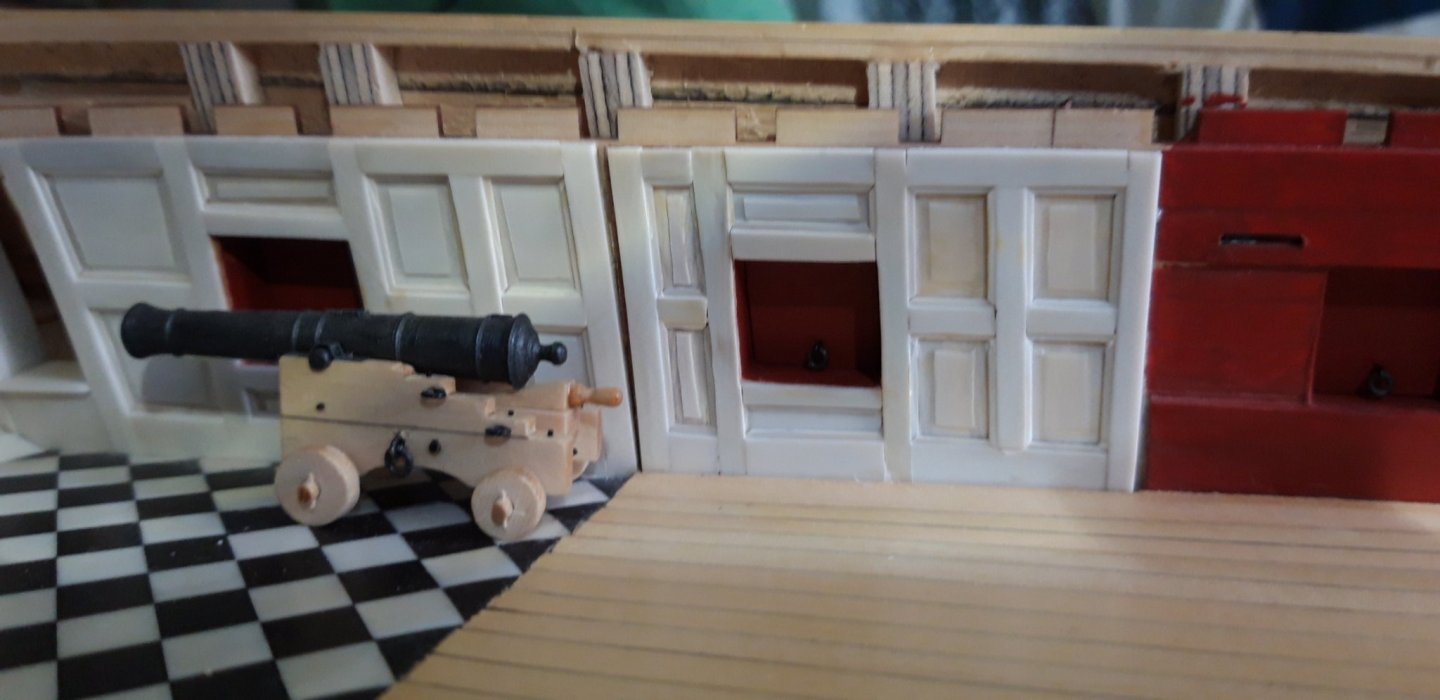
Hello Everybody, here is just a brief comment about my attempt of building the bulkheads around the cabins. I started with the centerpiece of the aft bulkhead. It is more difficult than the panelling of the surrounding cabin walls, because it has to look good from both sides. So it is like building them in 1:1 scale, just without "slit and cone". Next thing will be the doors. Matthias


-
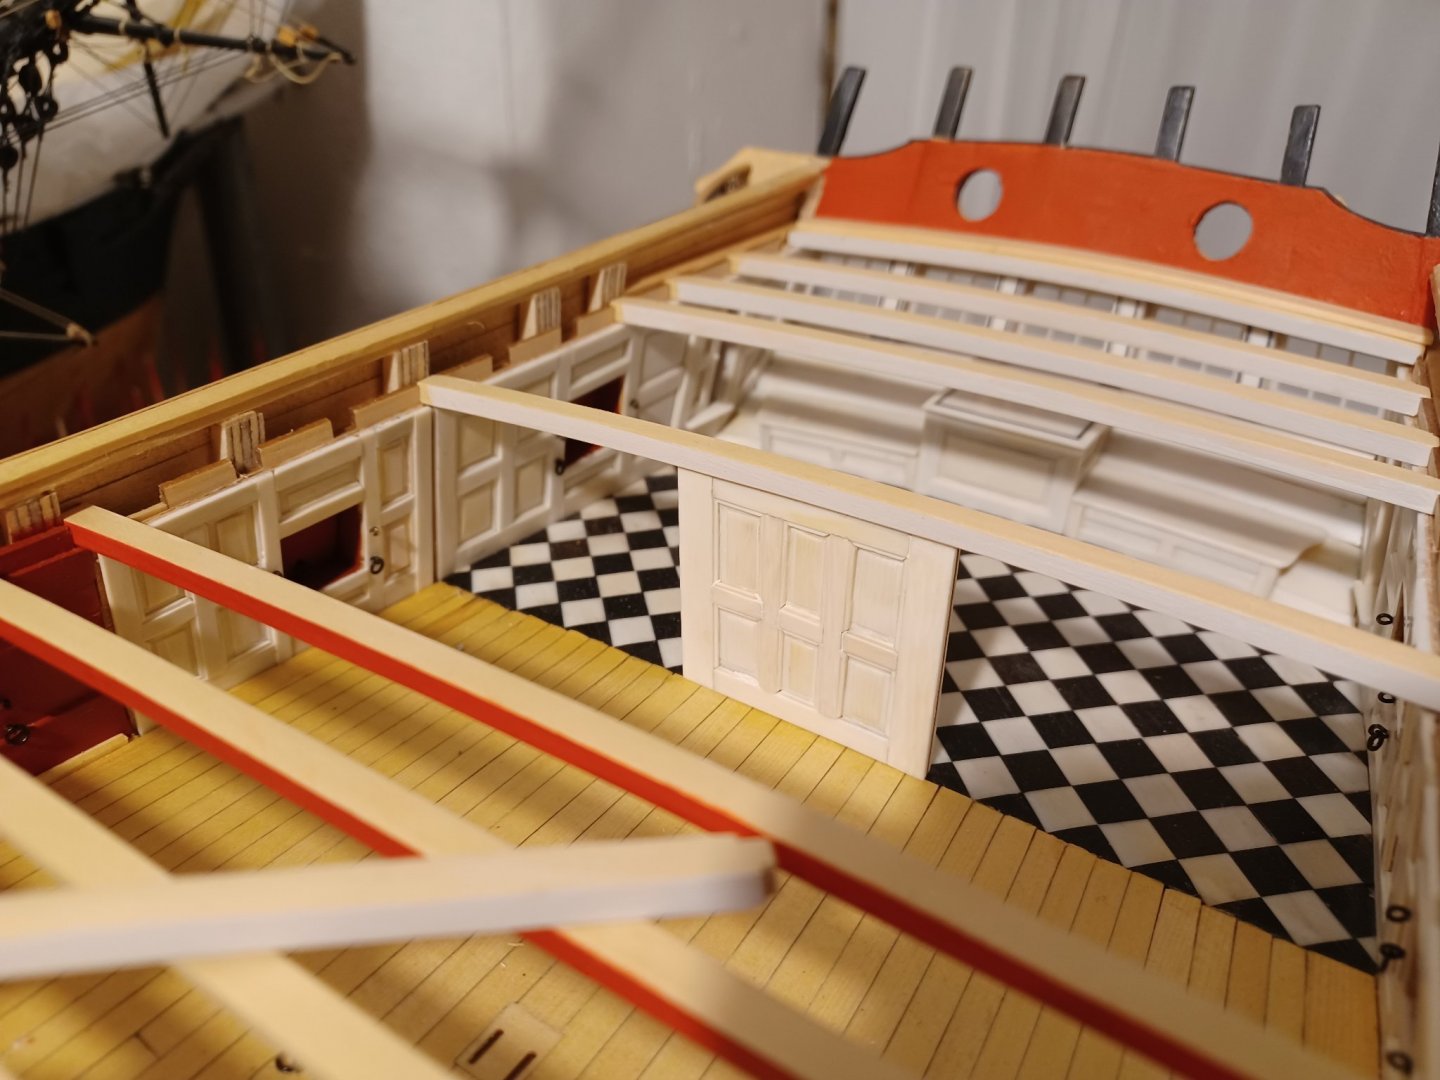
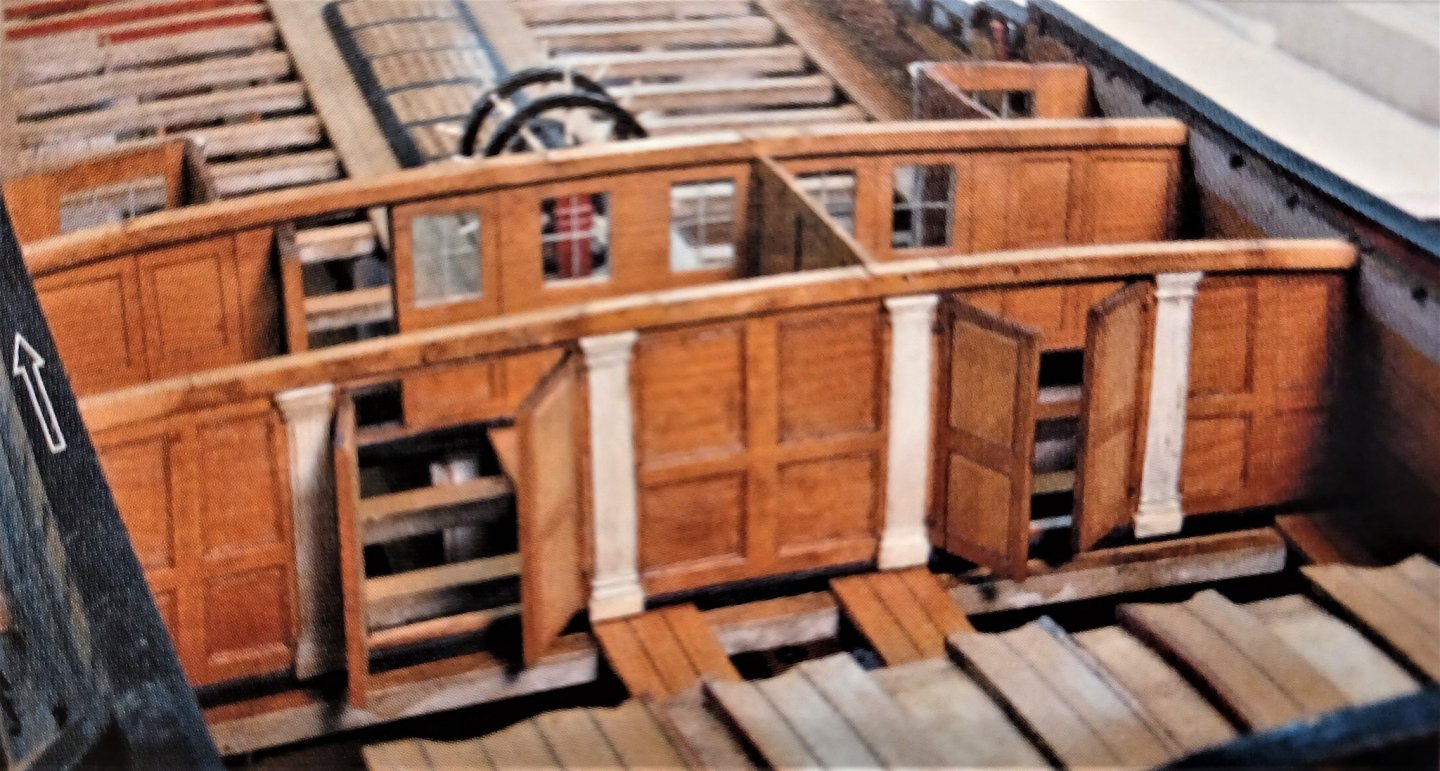
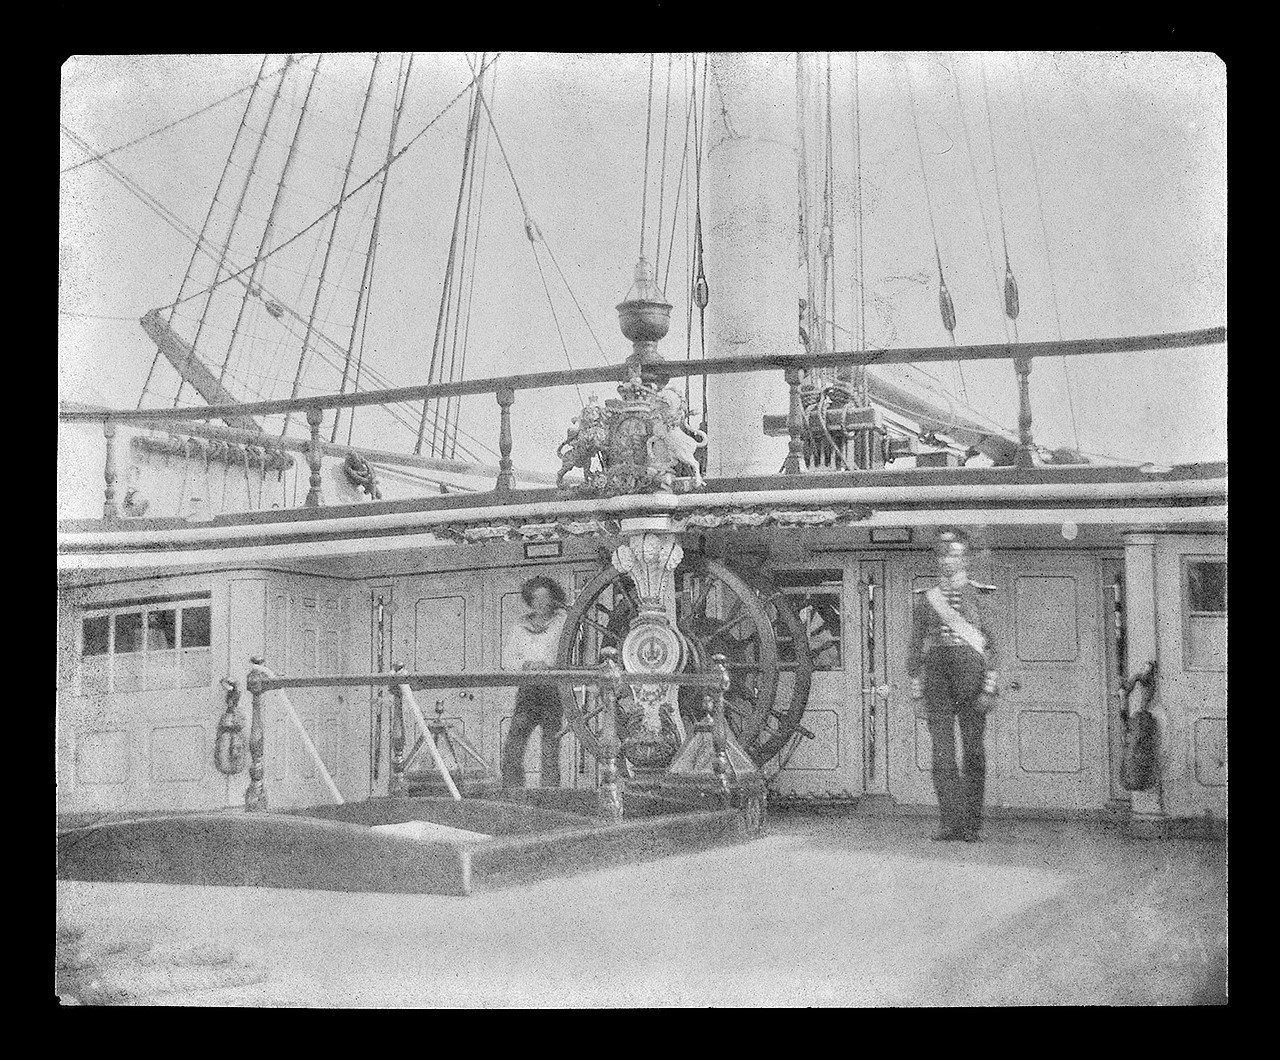
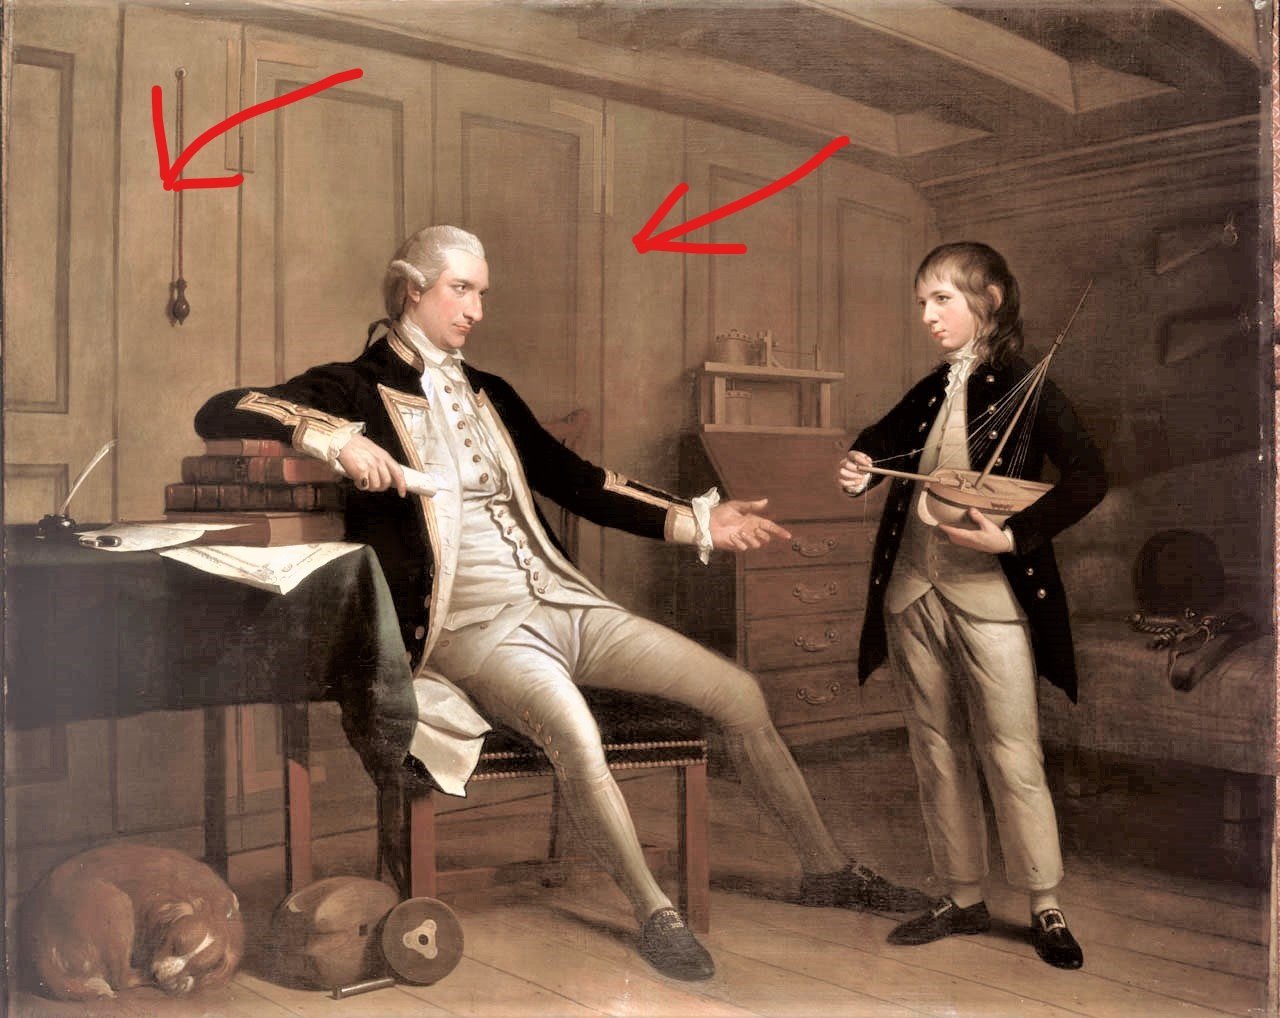
Thanks for your opinions, I found another two examples from the book about the restauration of Princess Royale. I hope it is ok, if I post them here, otherwise please delete them. These photos show the arrangement very well. So my bulkheads inside the cabins will be made from ivory, the forward side of the forwand bulkhead, will be made from boxwood. I hope, I can somehow bring this together. If not, I will just paint it red. Matthias

-
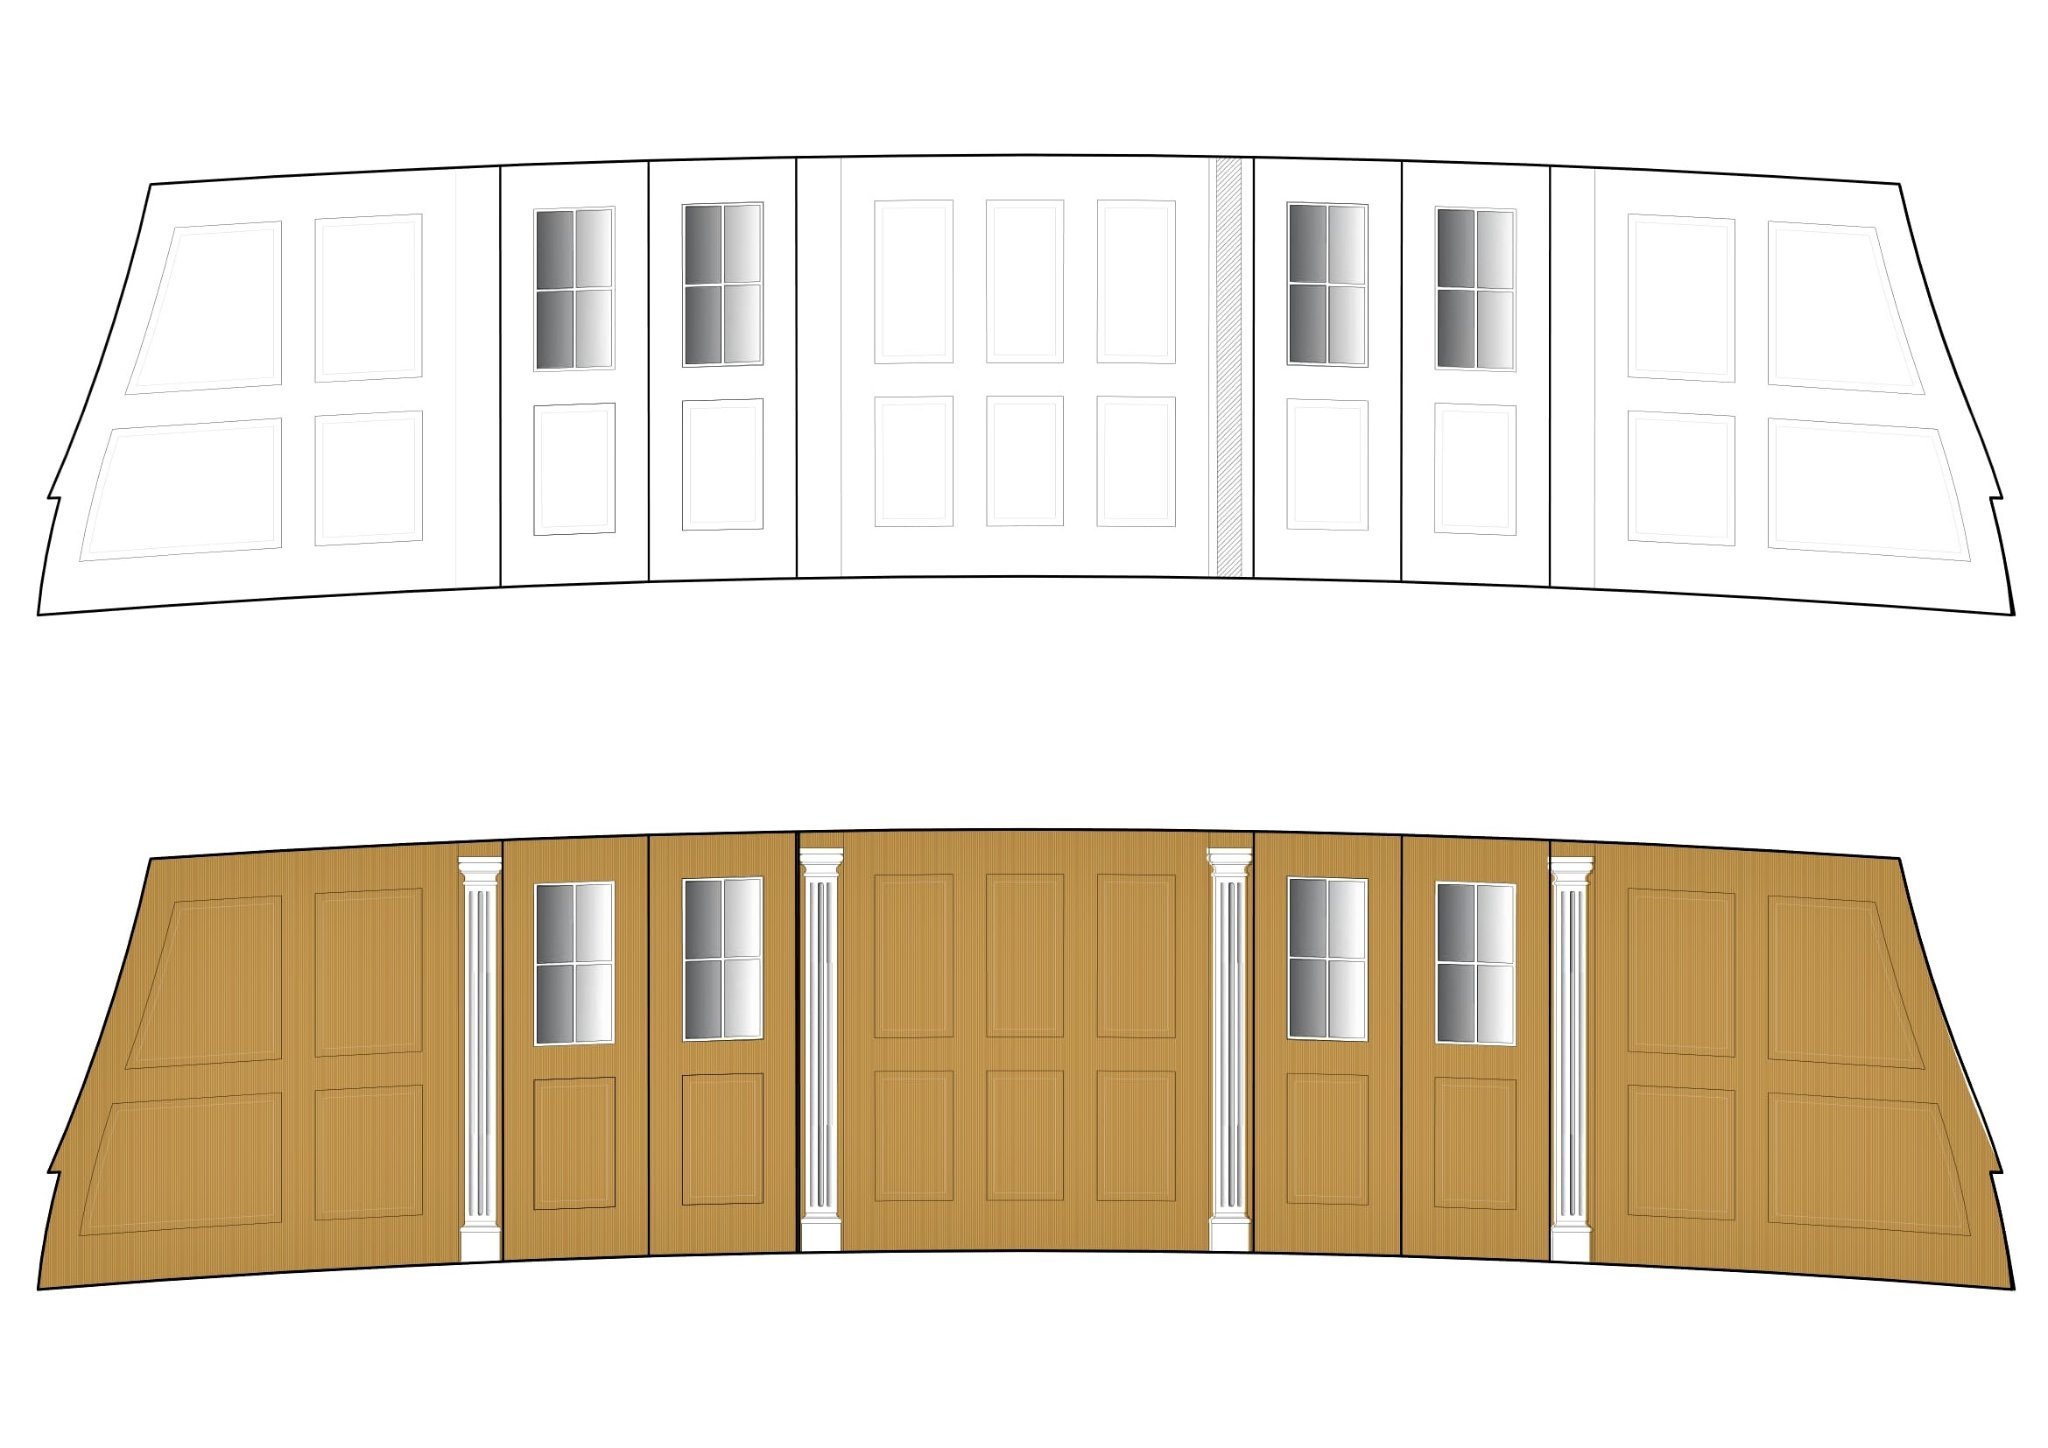
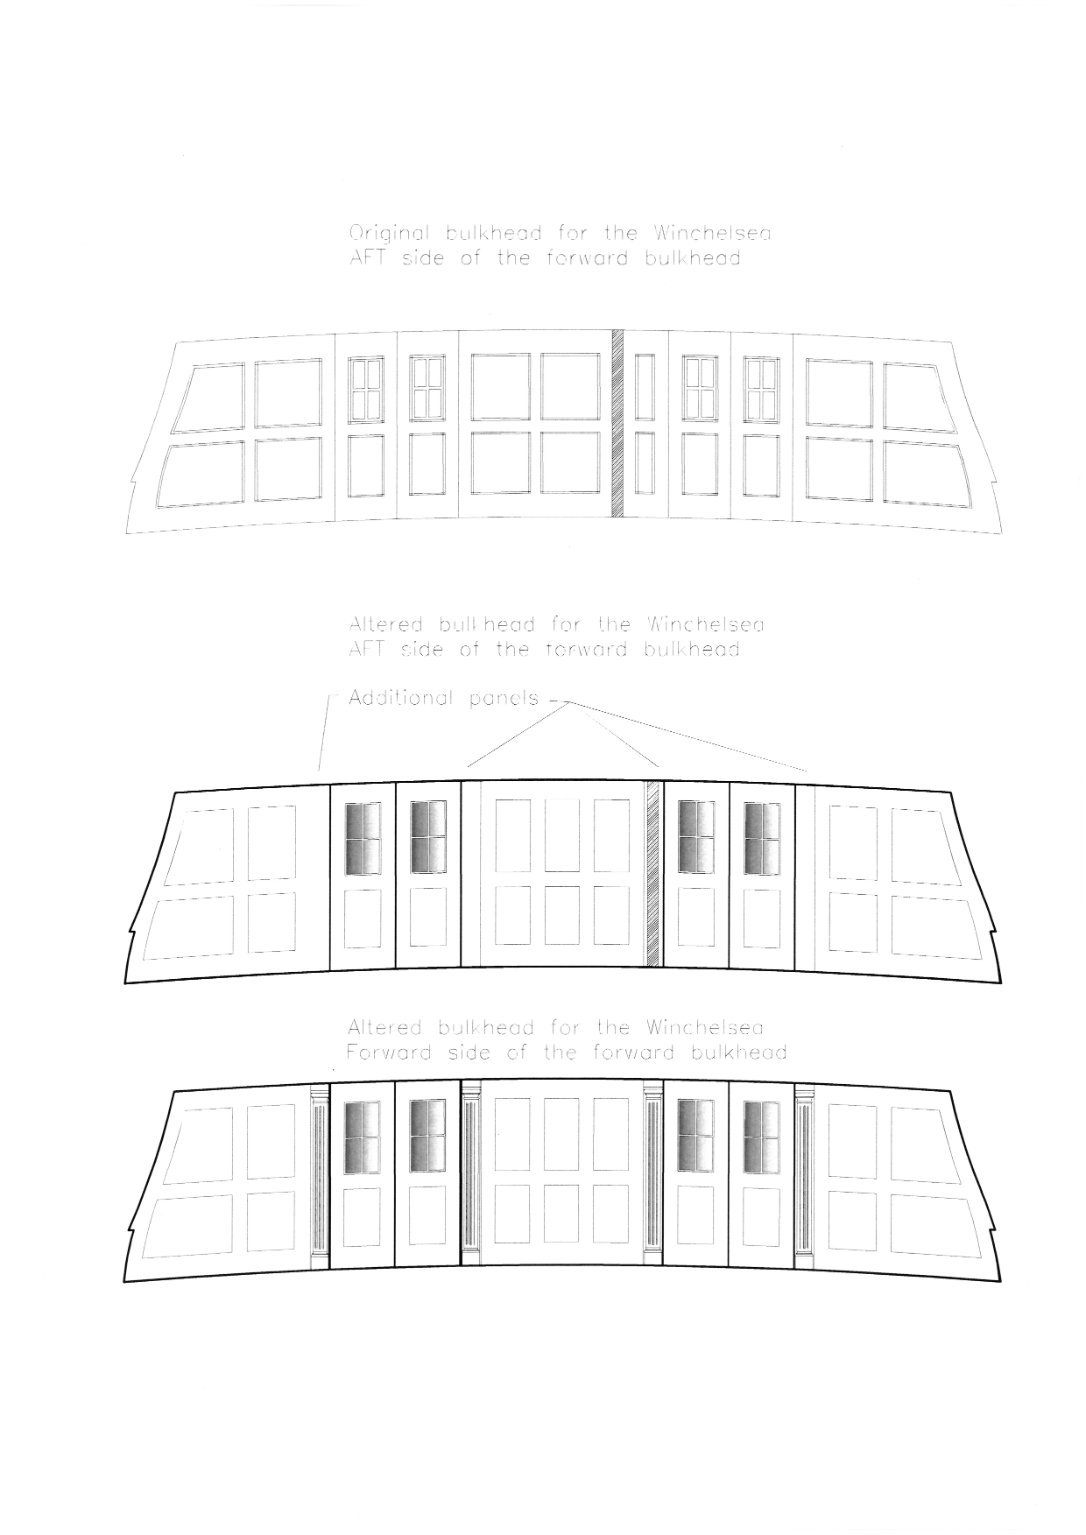
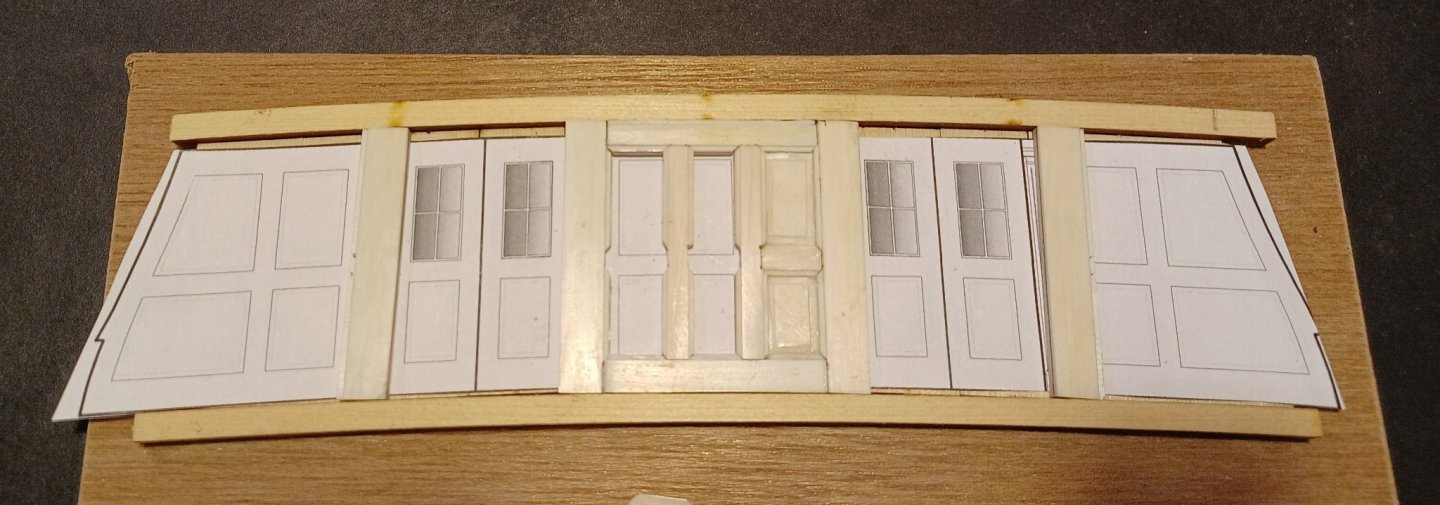
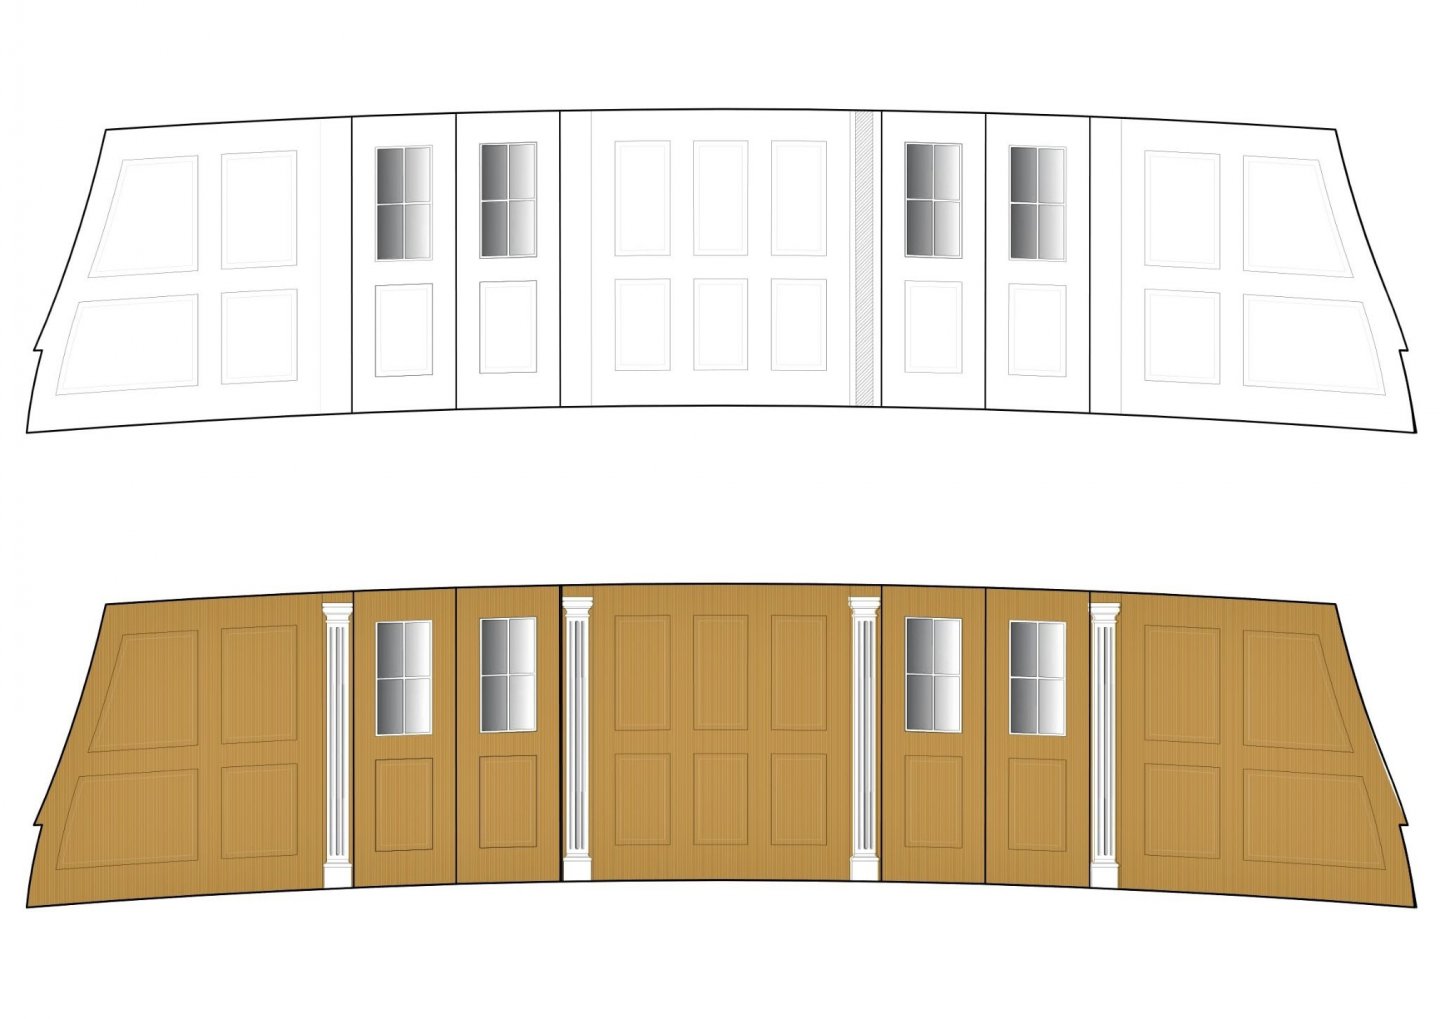
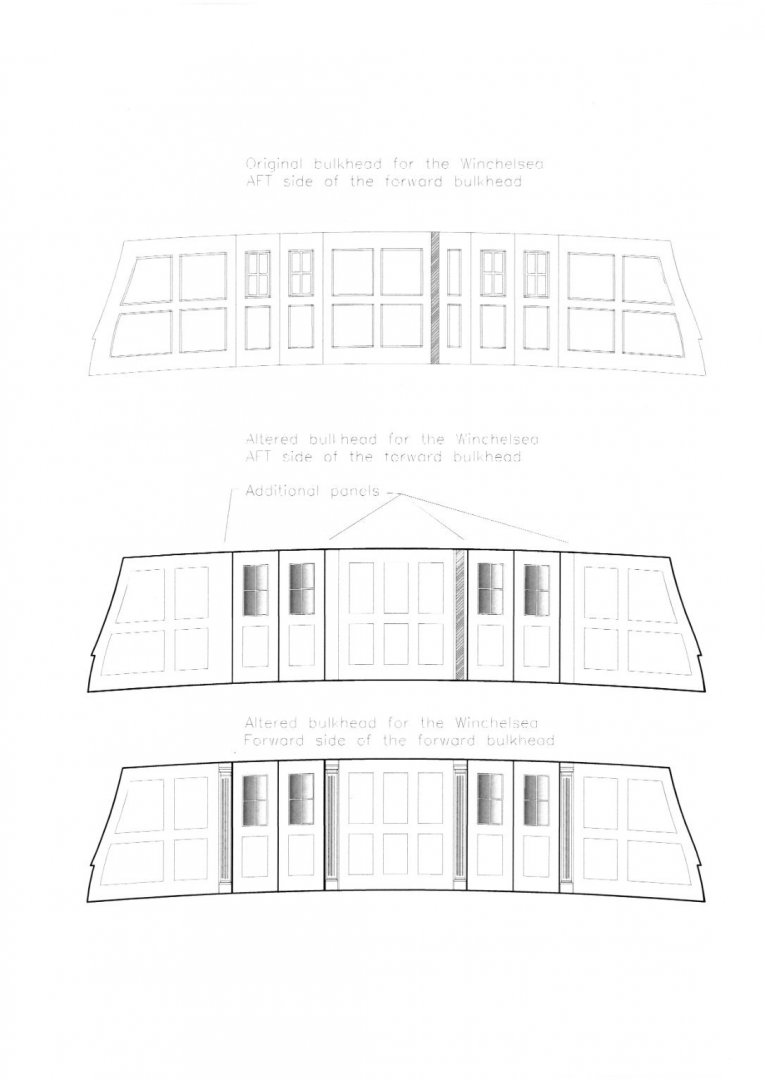
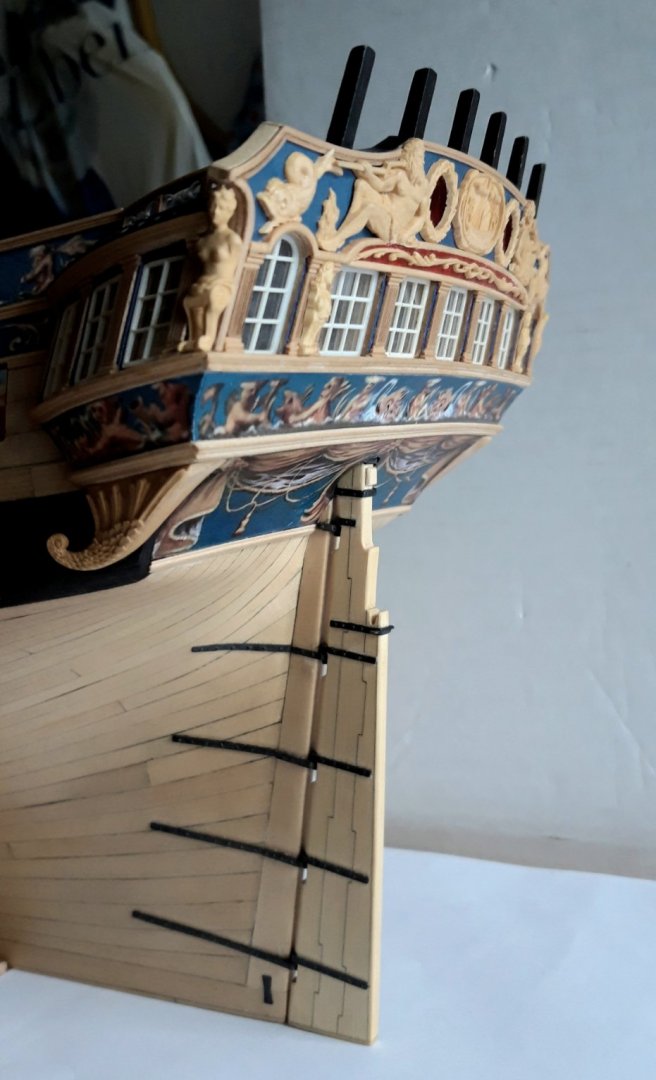
Hello everybody, I have a special problem, and I would like to hear your opinion about this: As you have seen in my build log, I built the panels of the cabins unterneath the quarterdeck with frames and panels. I want to do the same with the bulkheads, wich separate the captains cabin from the forward chambers and the main deck. The problem is, that the center pieces don't look equal from both sides, wich is necessary, if I build them my way. I had a look around, on old photos and drawings and models like HMS Amazon, and some of them show a panel next to the doors. HMS-Victory has them as well An old photo of HMS Superb shows a similar construction And the most important one: the frigate-model AMAZON has them as well. Here I like the little columns between the doors to the main deck. I made an attempt to add this panel which allows a center-piece-arrangement wich is equal on both sides of the bulkhead. Her is my drawingto of the bulkhead. What do you think? By the way, how can I insert pdf-files? I scanned the drawing, because my pdf of the drawing would not apear in this message. Lastly a picture of my model, with the deck-beams painted like on the AMAZON-model, Matthias

-
ancre Belle Poule 1765 by j.guydal
Beckmann replied to j.guydal's topic in - Build logs for subjects built 1751 - 1800
Hello Jacues, I just came across your build-log, wonderful work!! And a very nice flooring in the captains cabin! Any progress since march? Matthias -
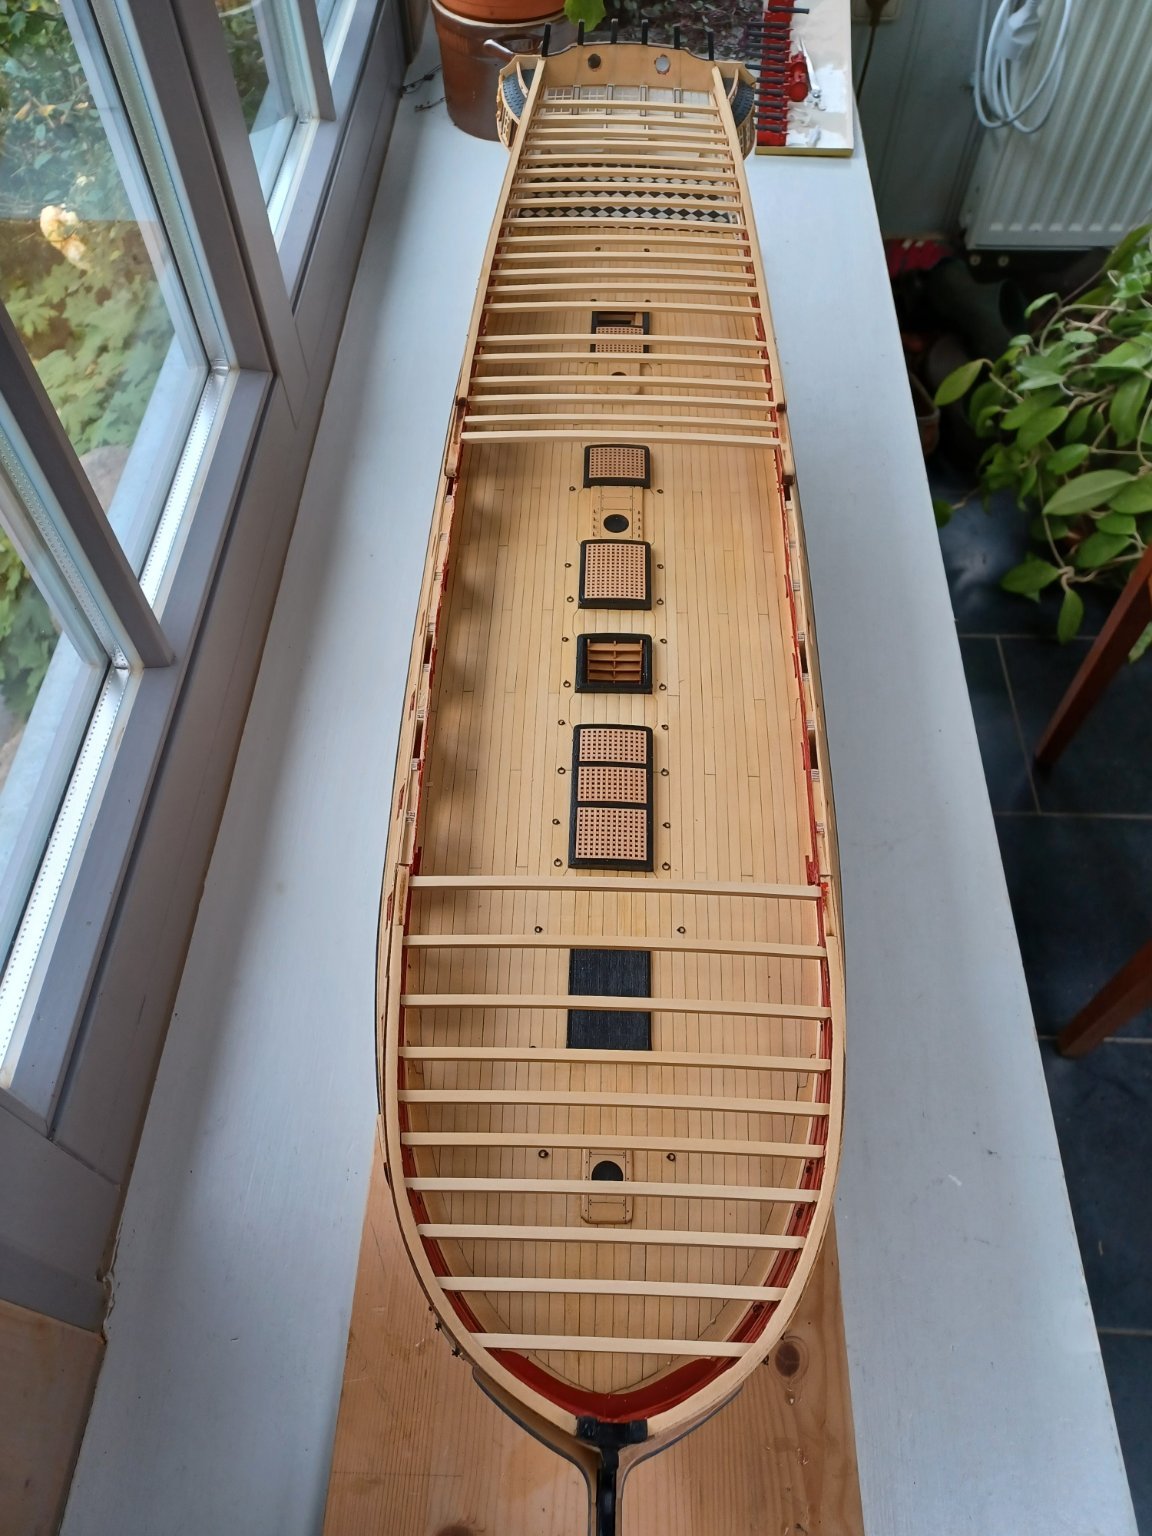
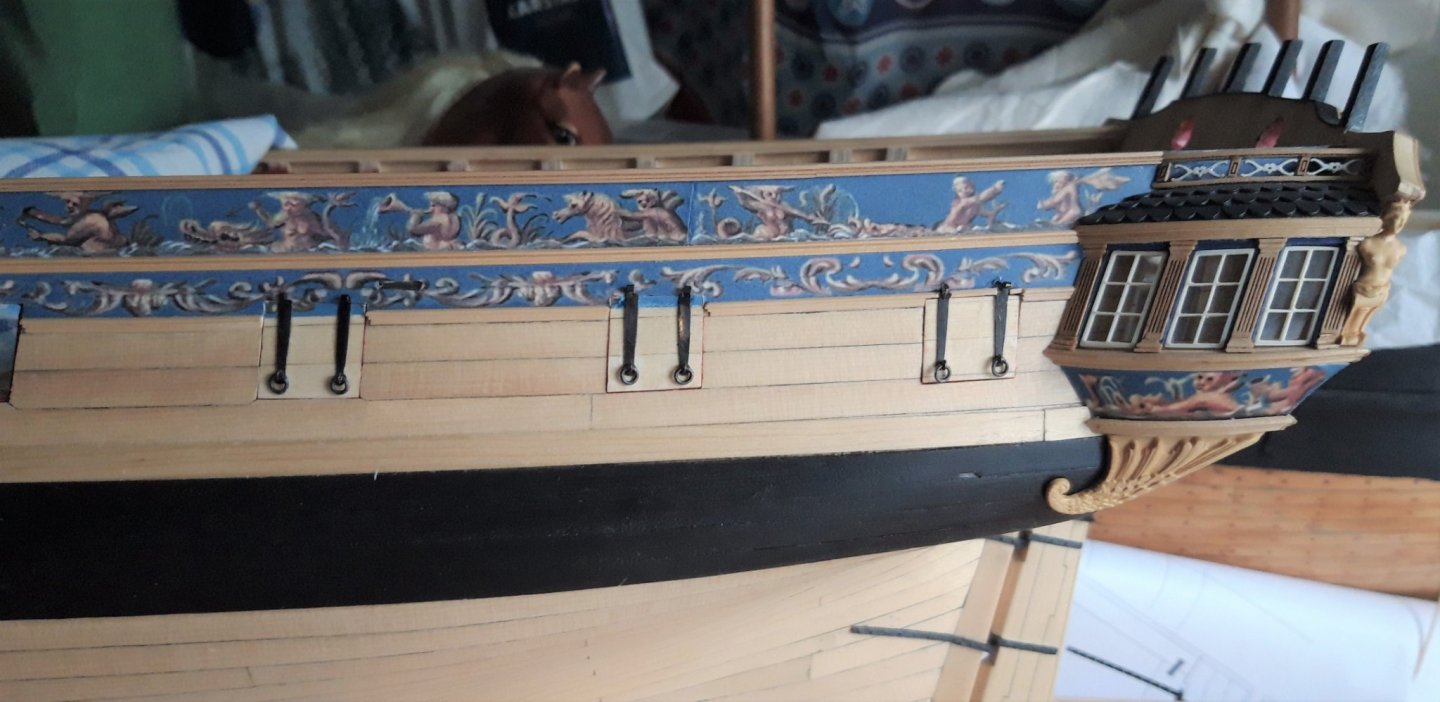
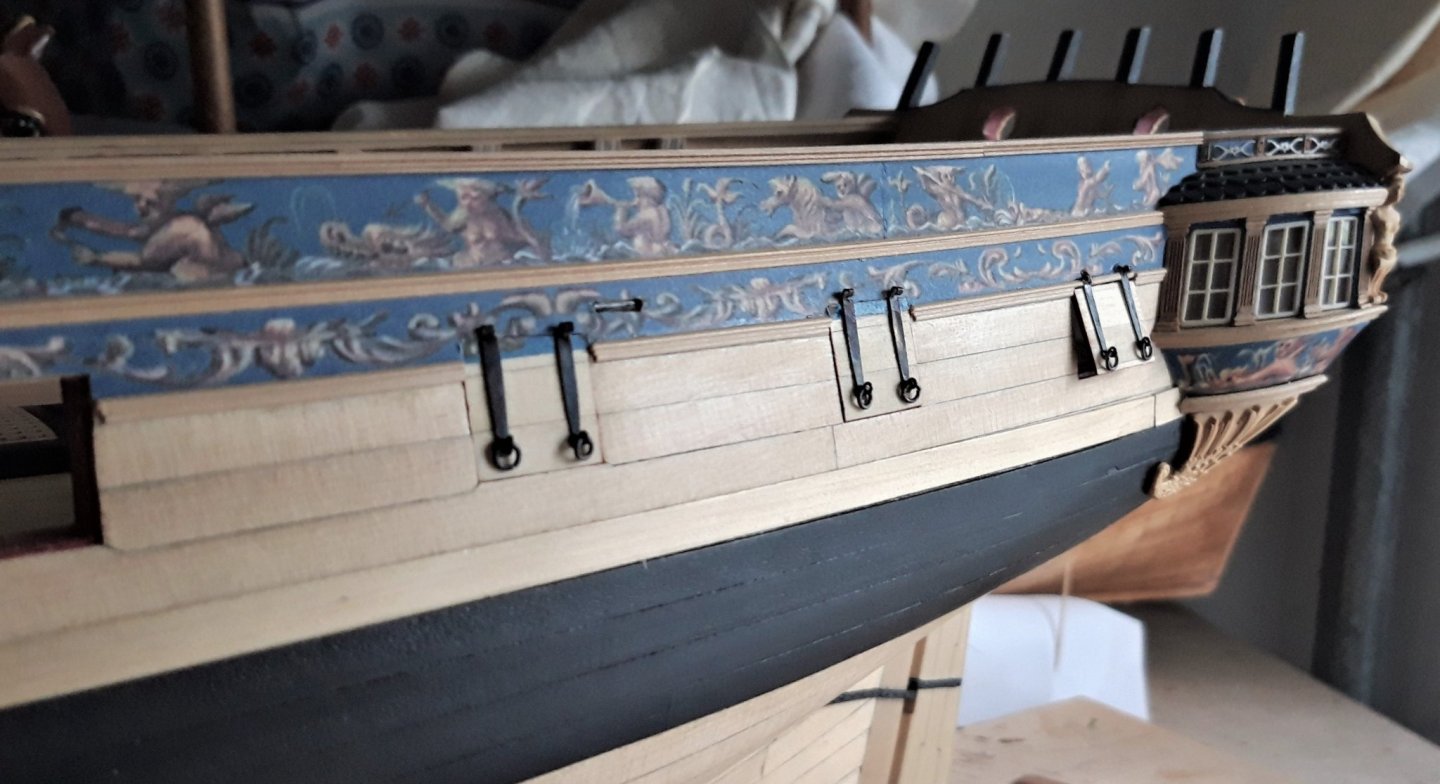
Hello everybody, After adding all the ring-bolts to the model, I proceeded with chapter 7, preparing and dry -fit the deck beams, here are some photos of the model, what a beauty, this is great fun modelling. Matthias


-
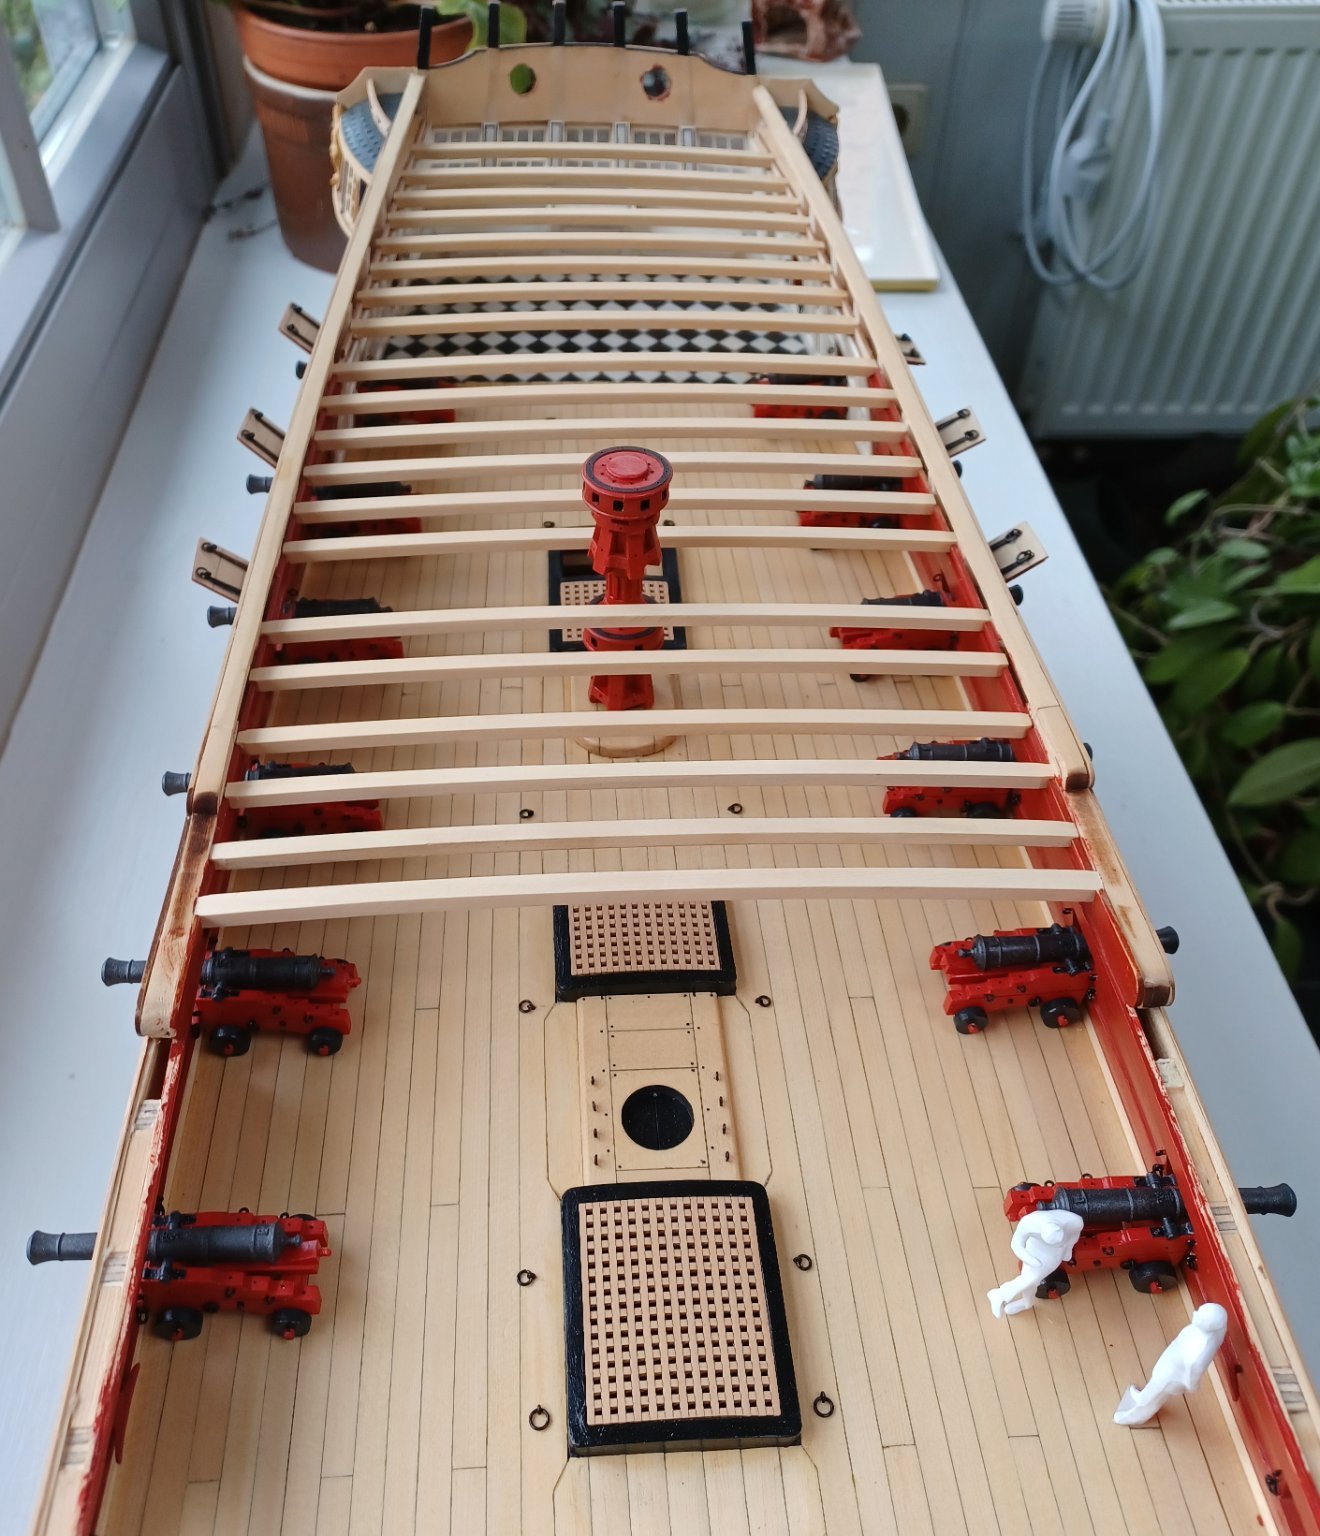
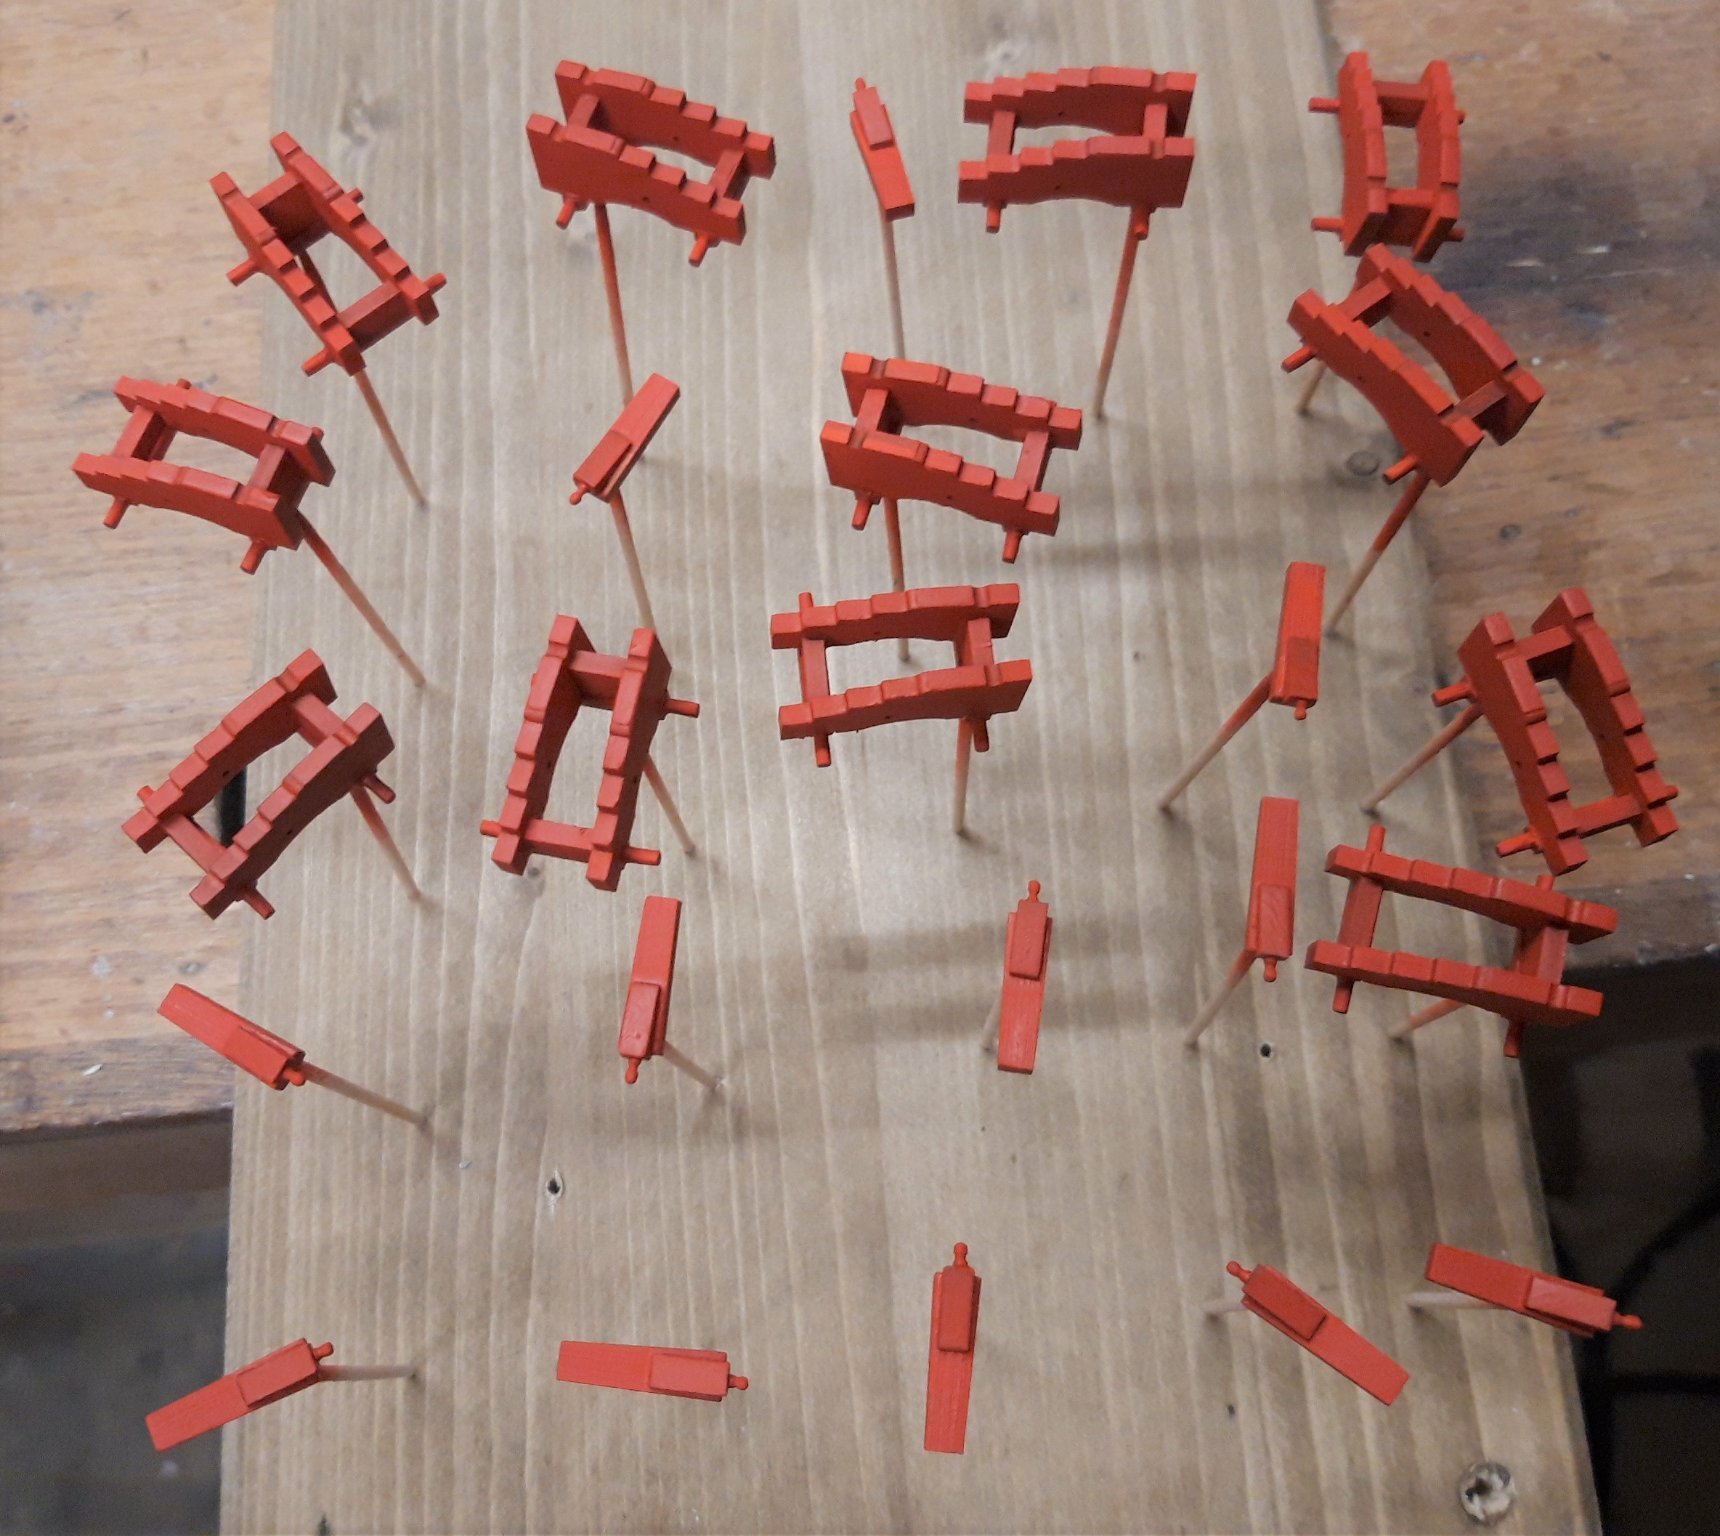
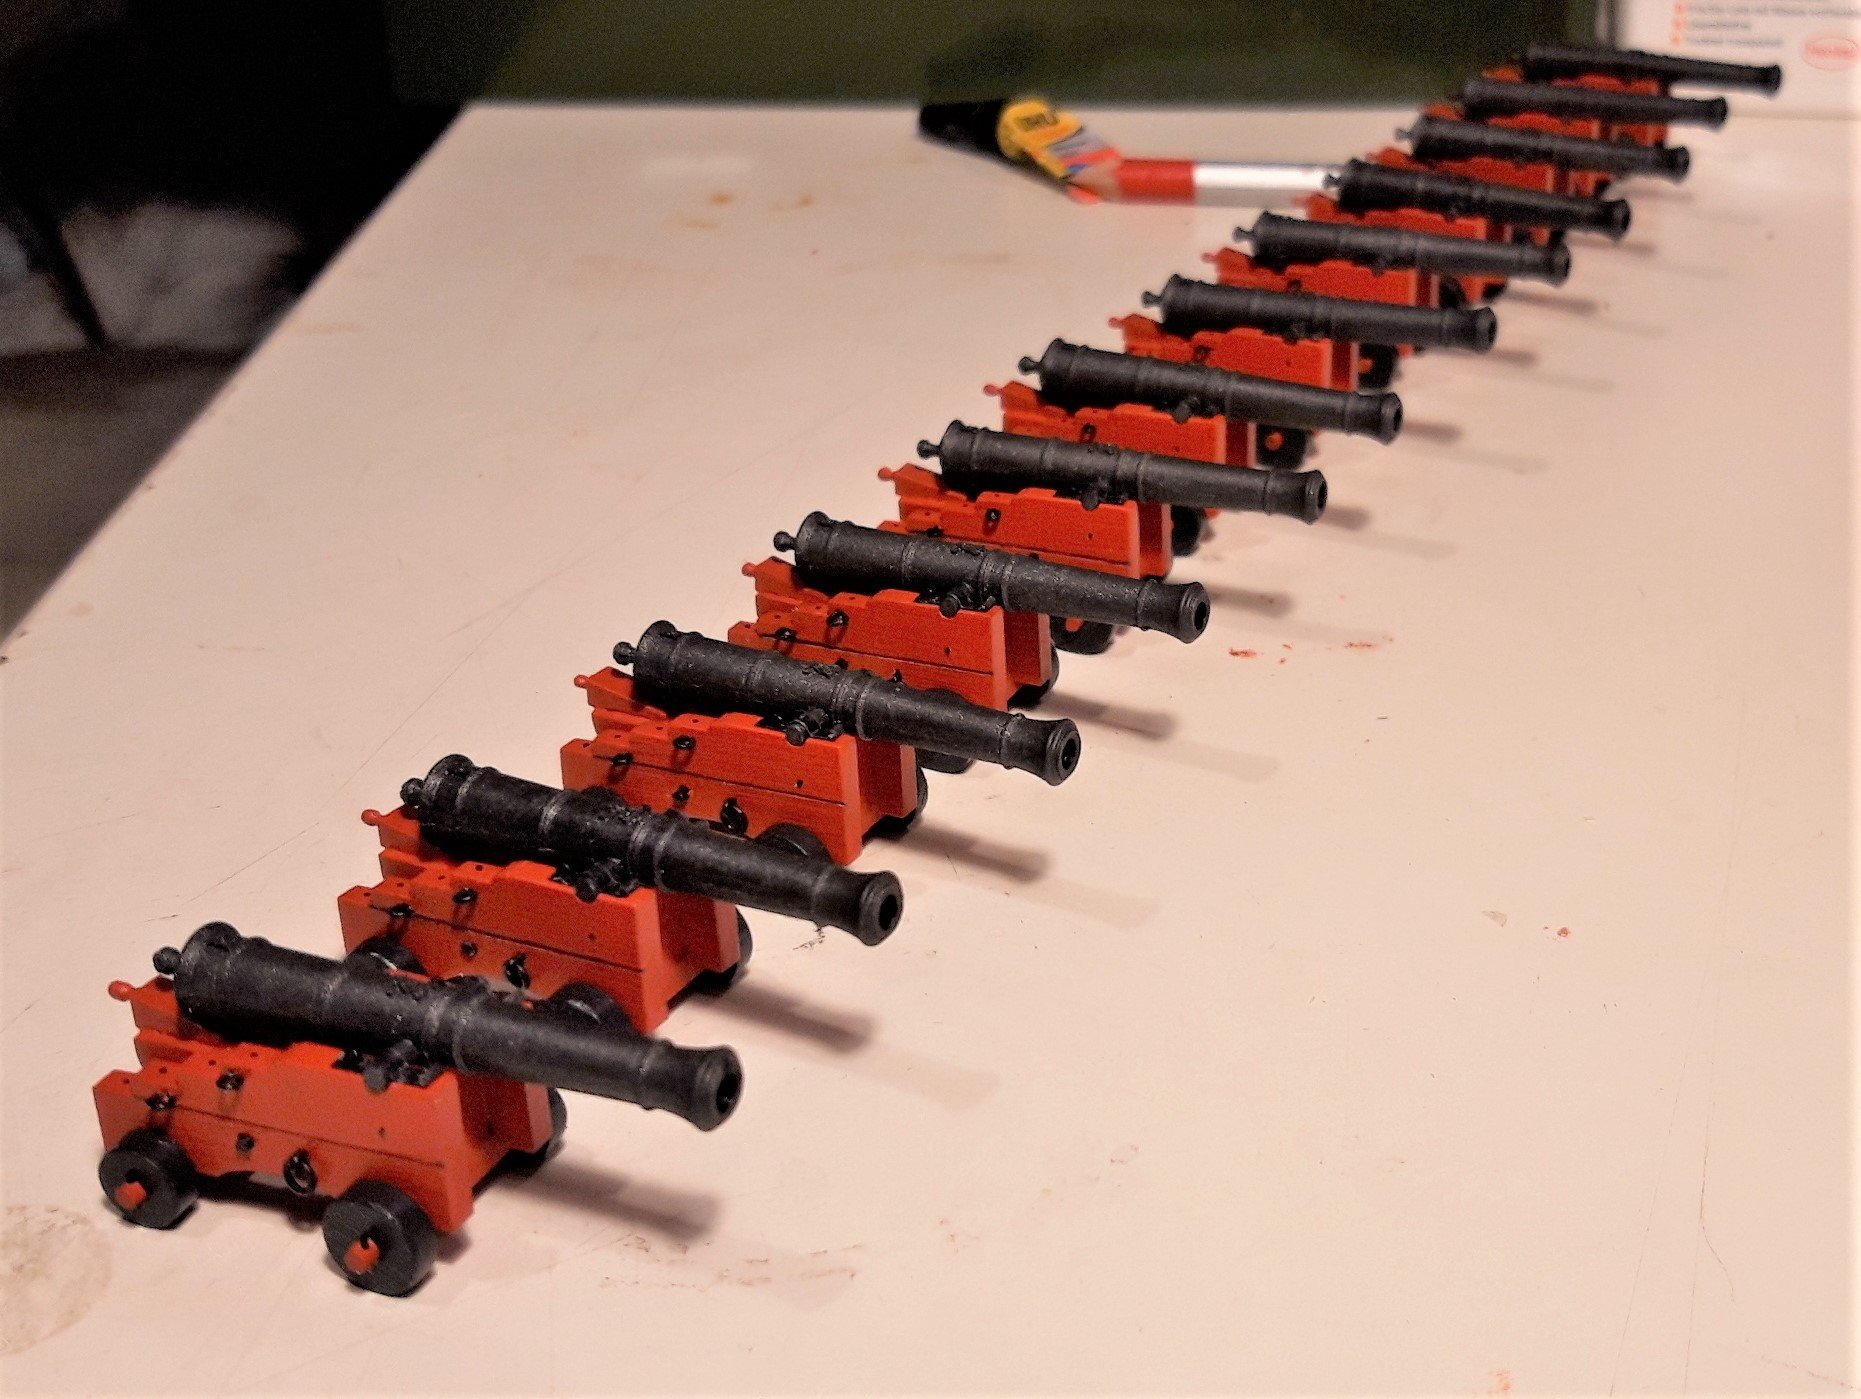
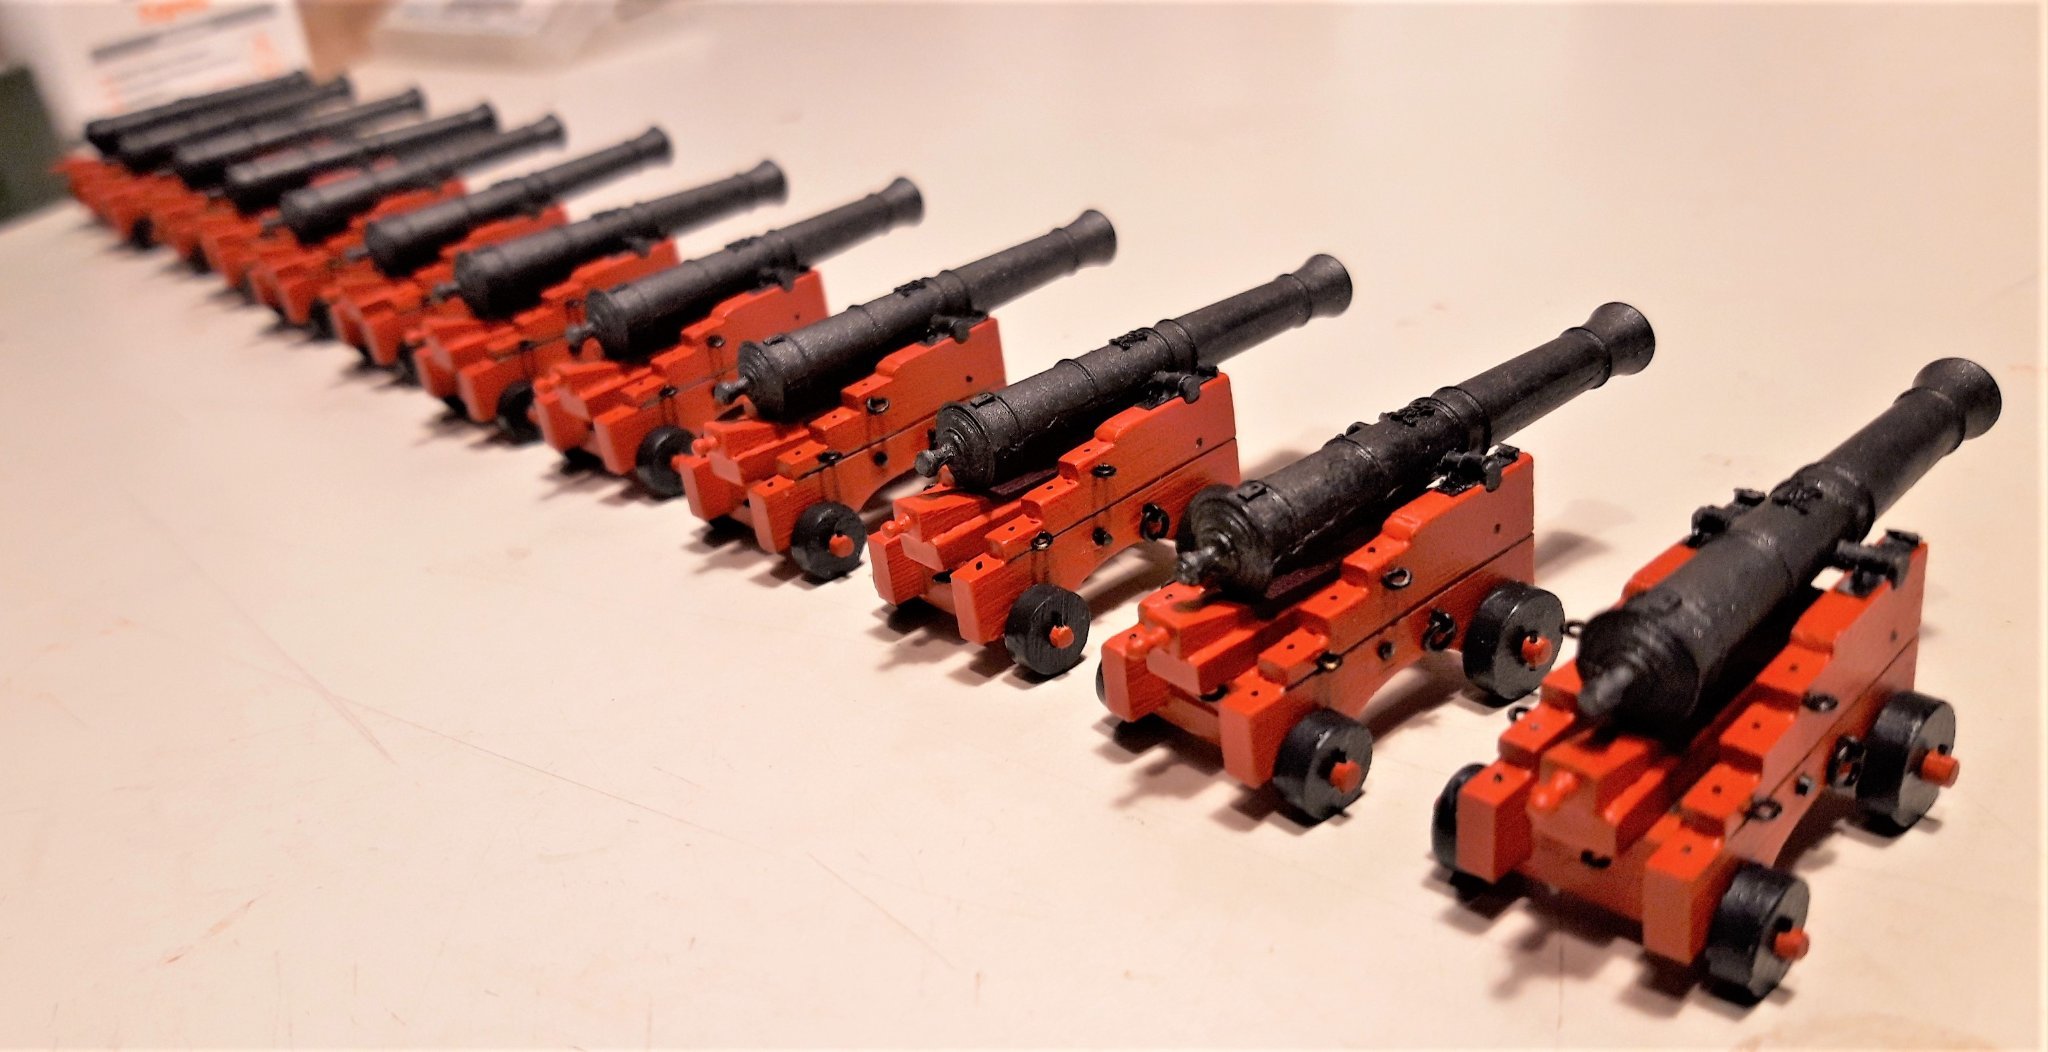
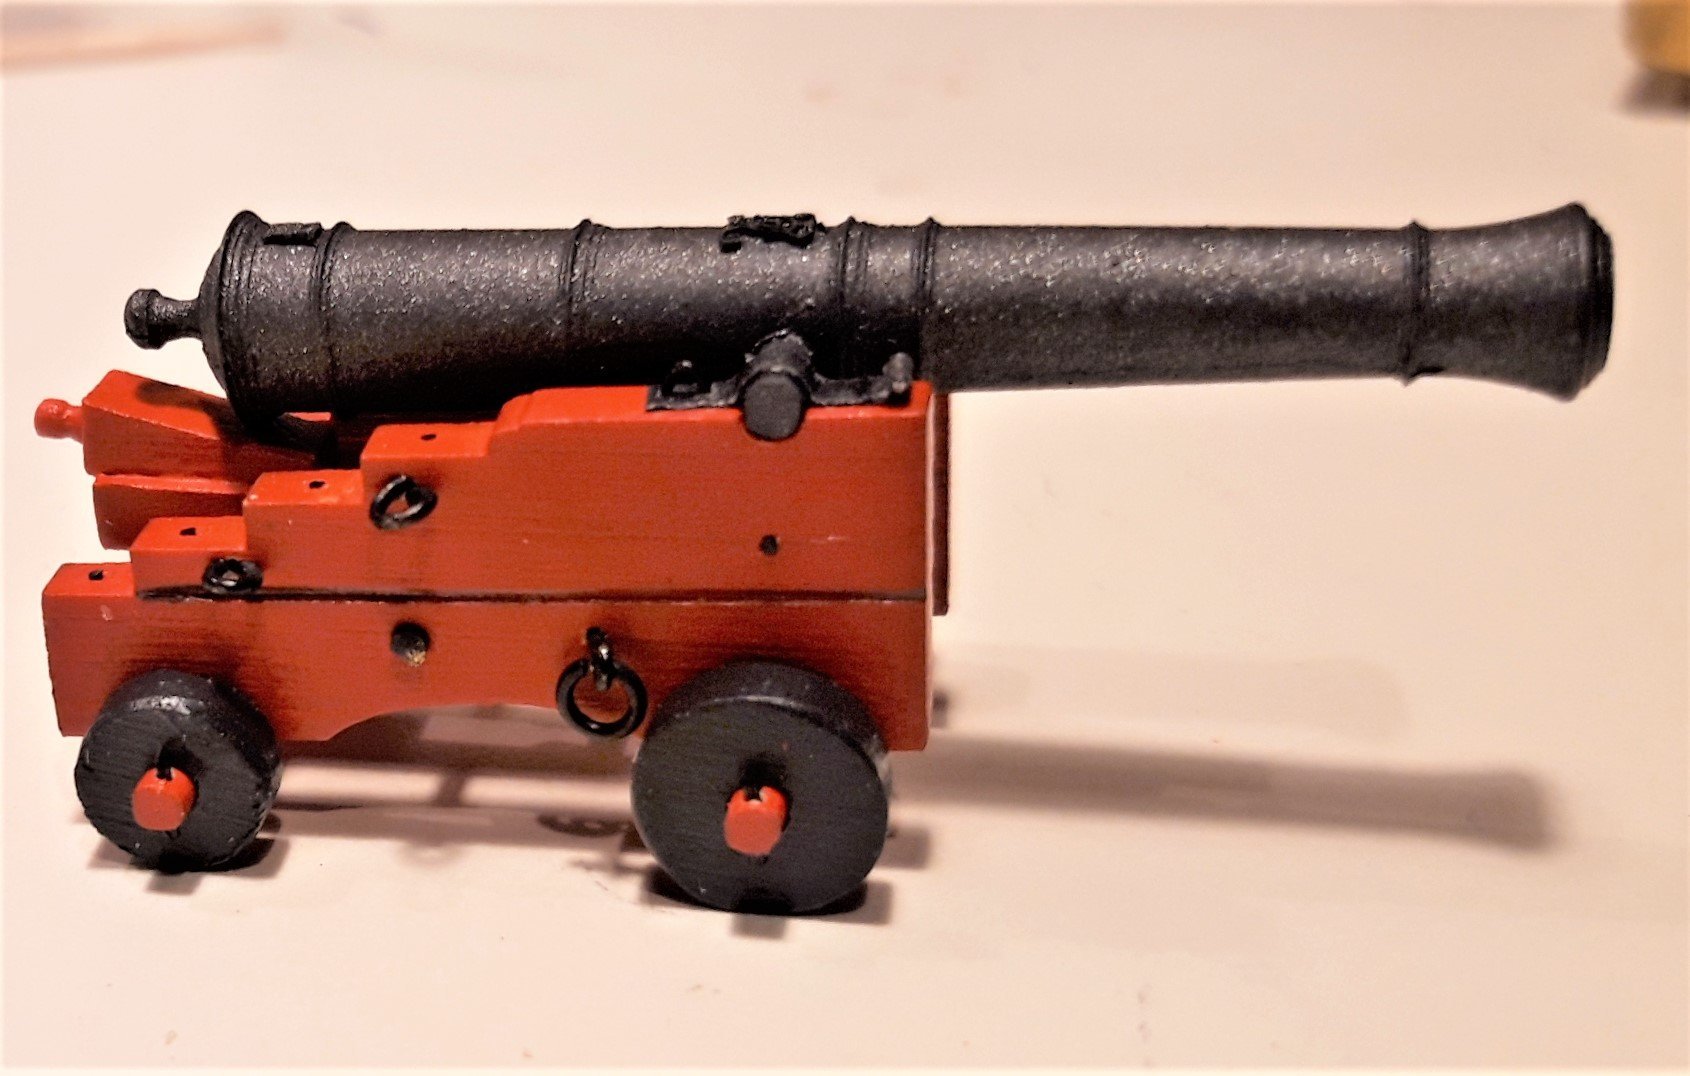
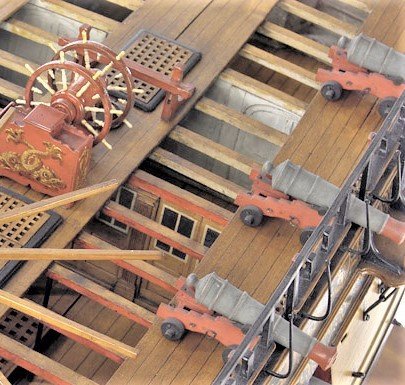
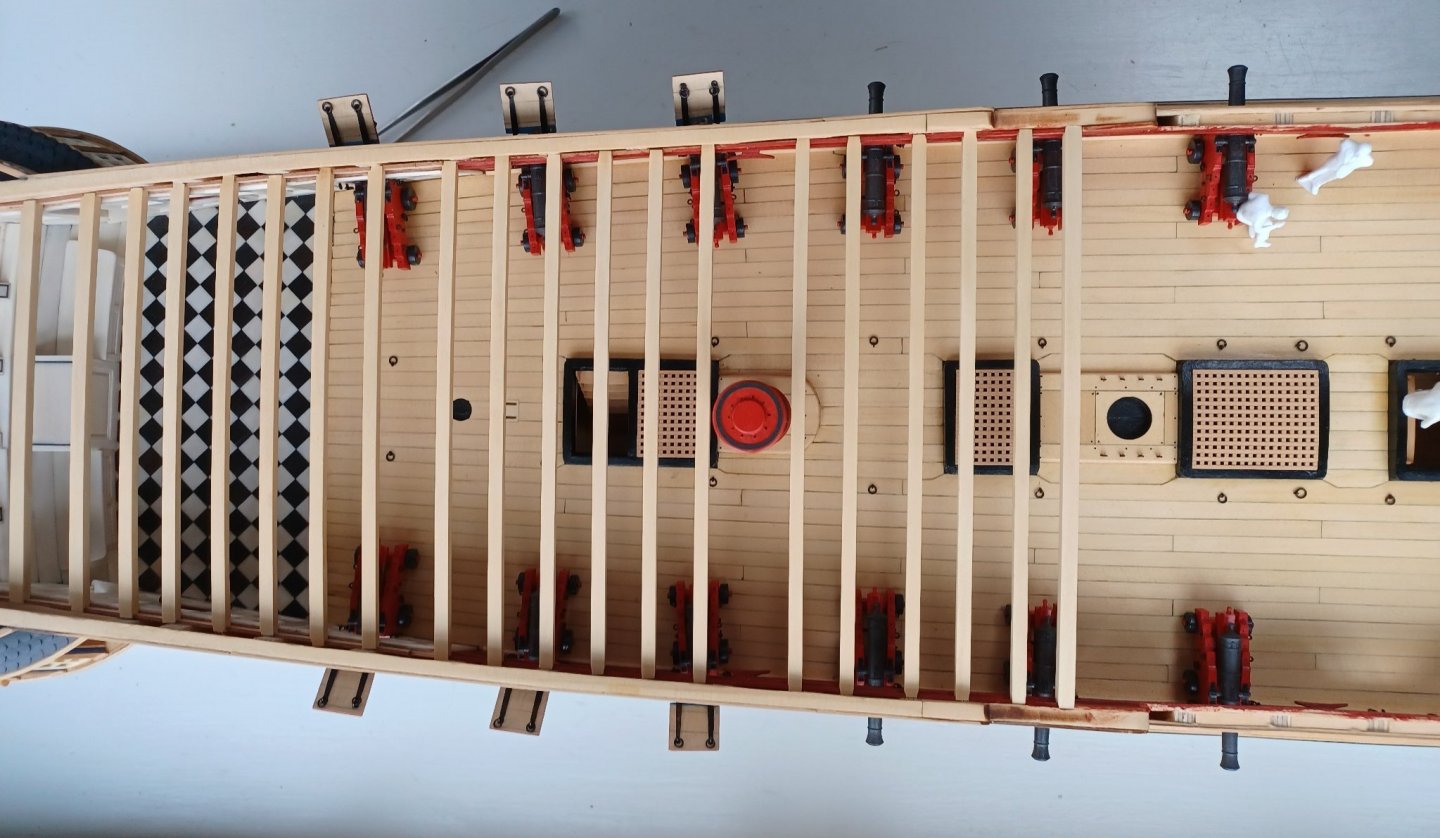
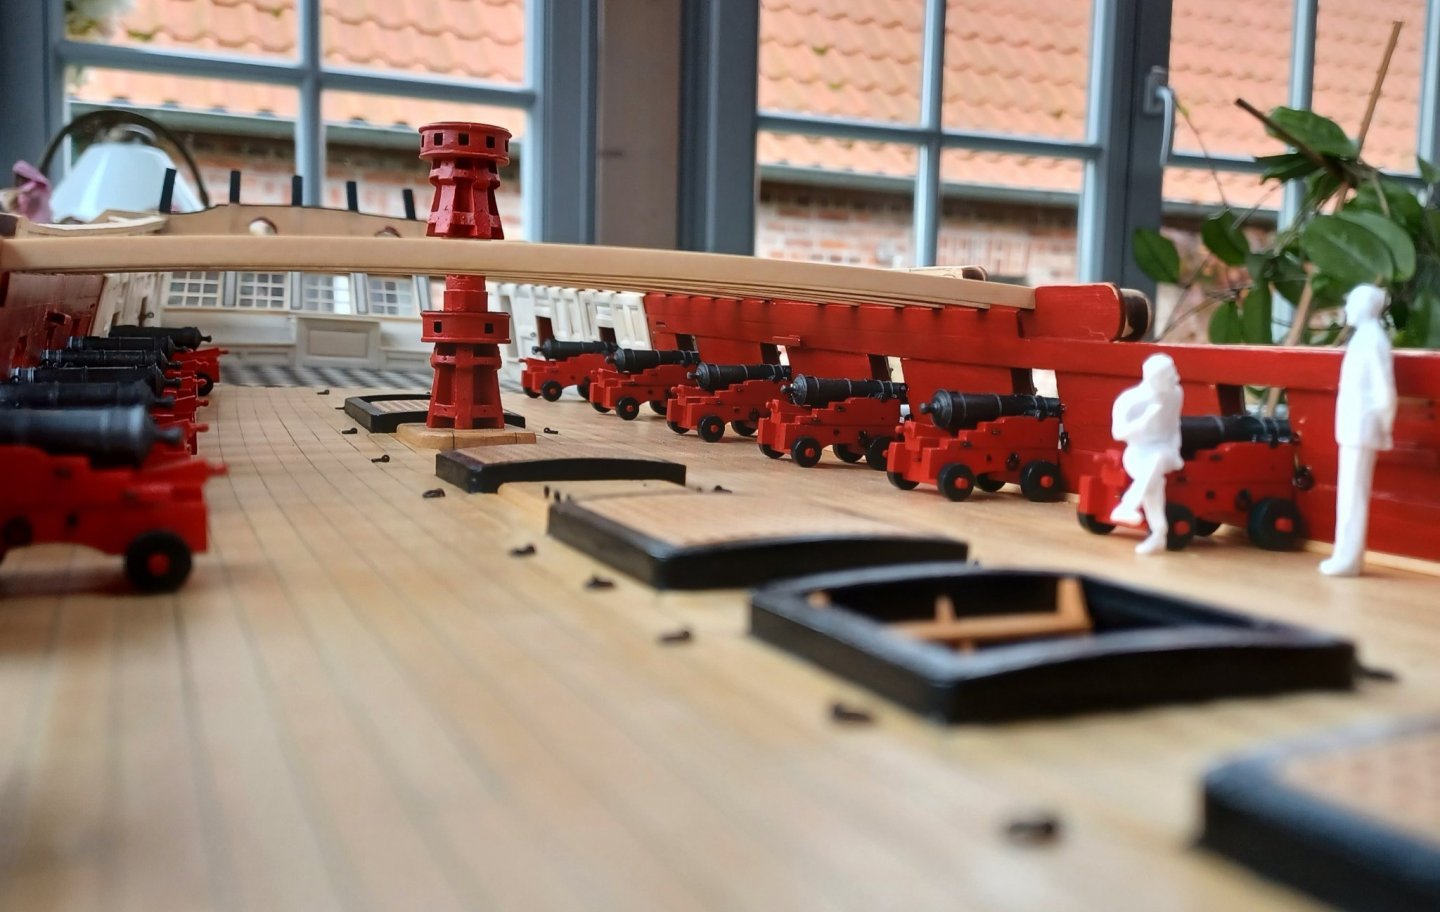
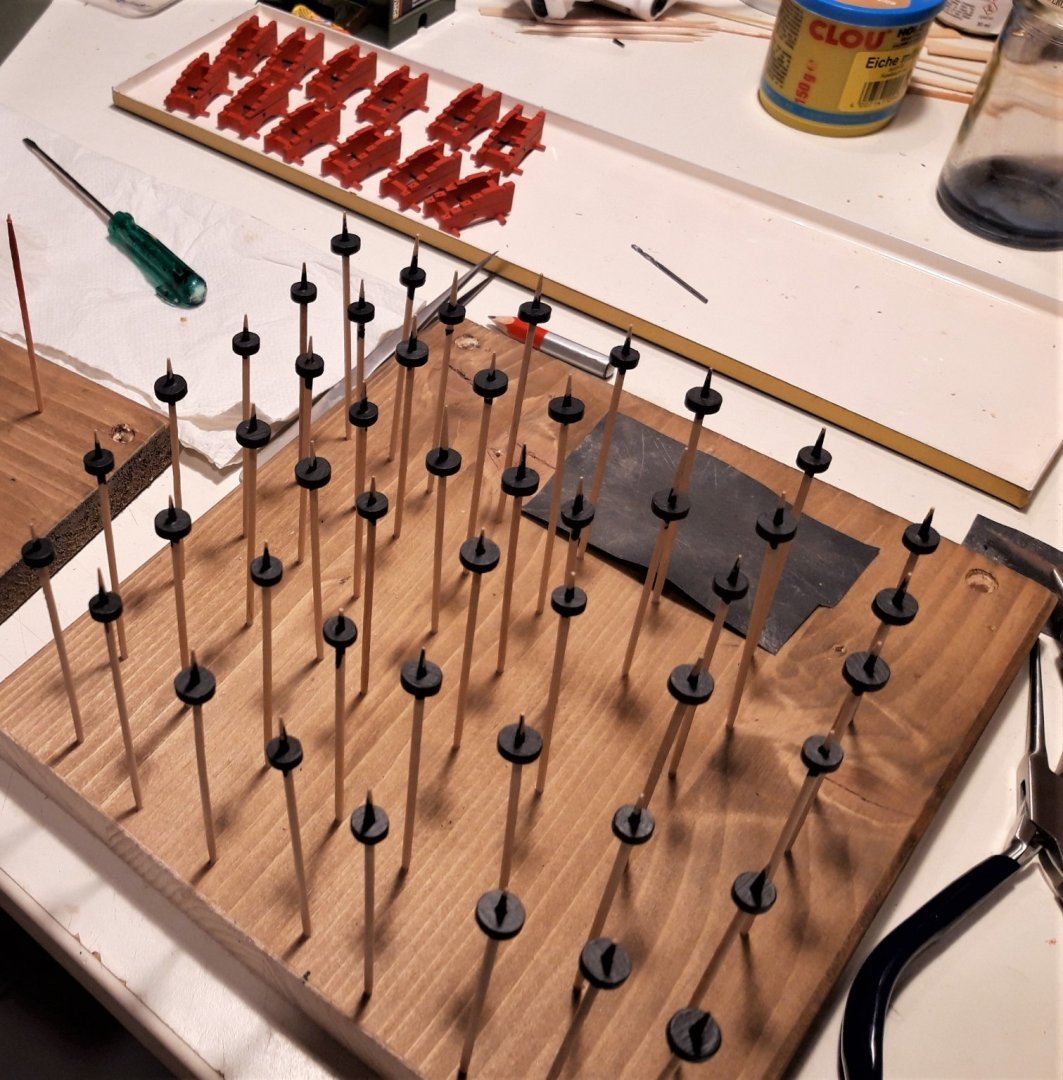
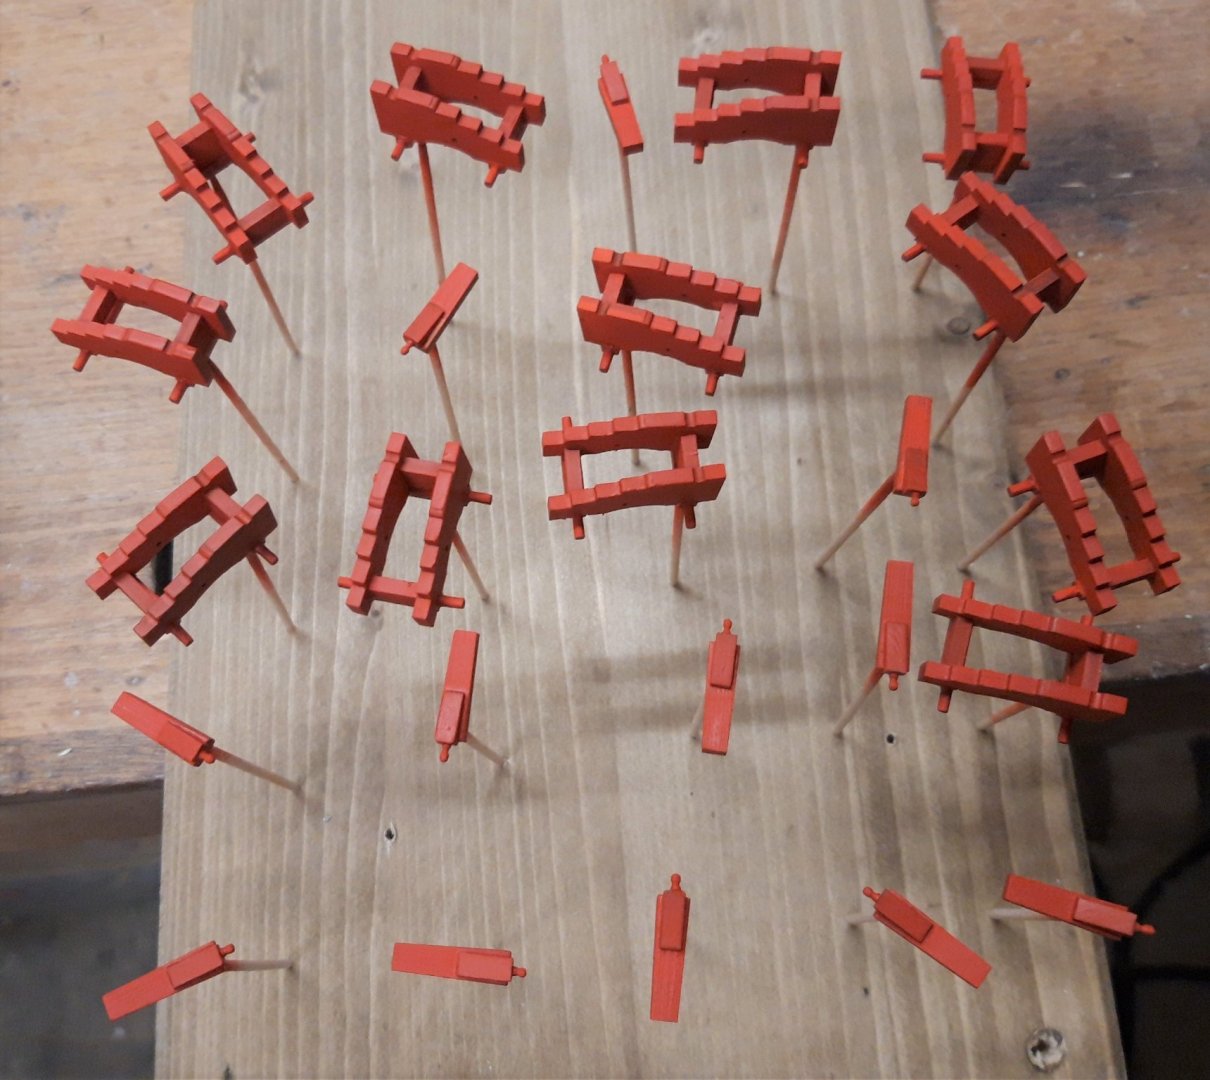
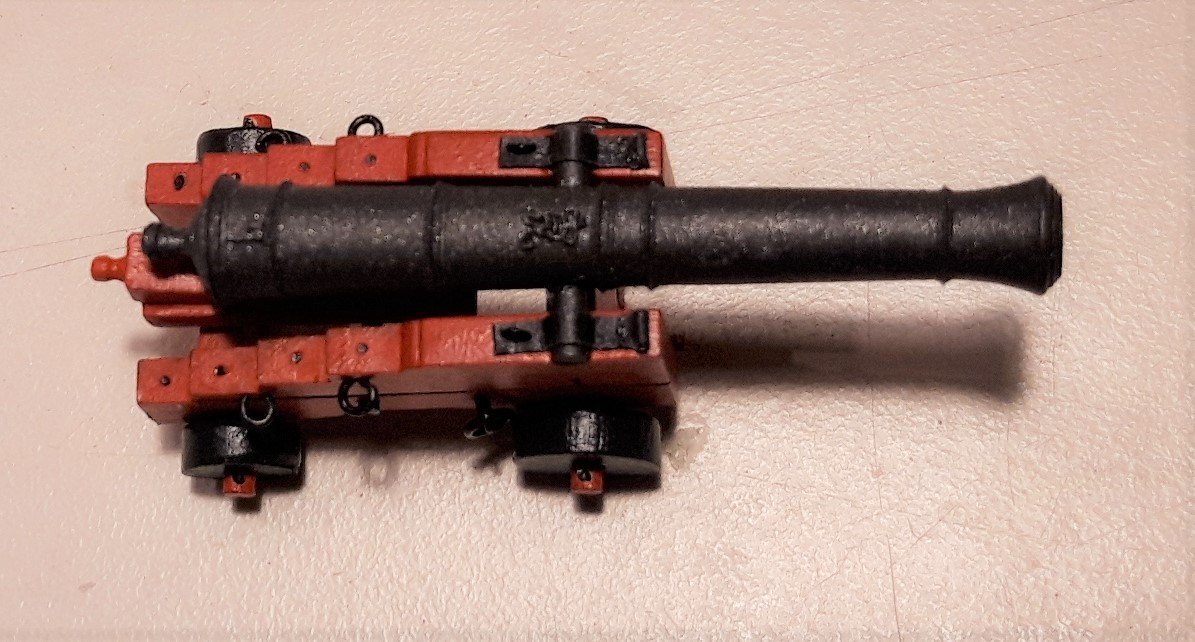
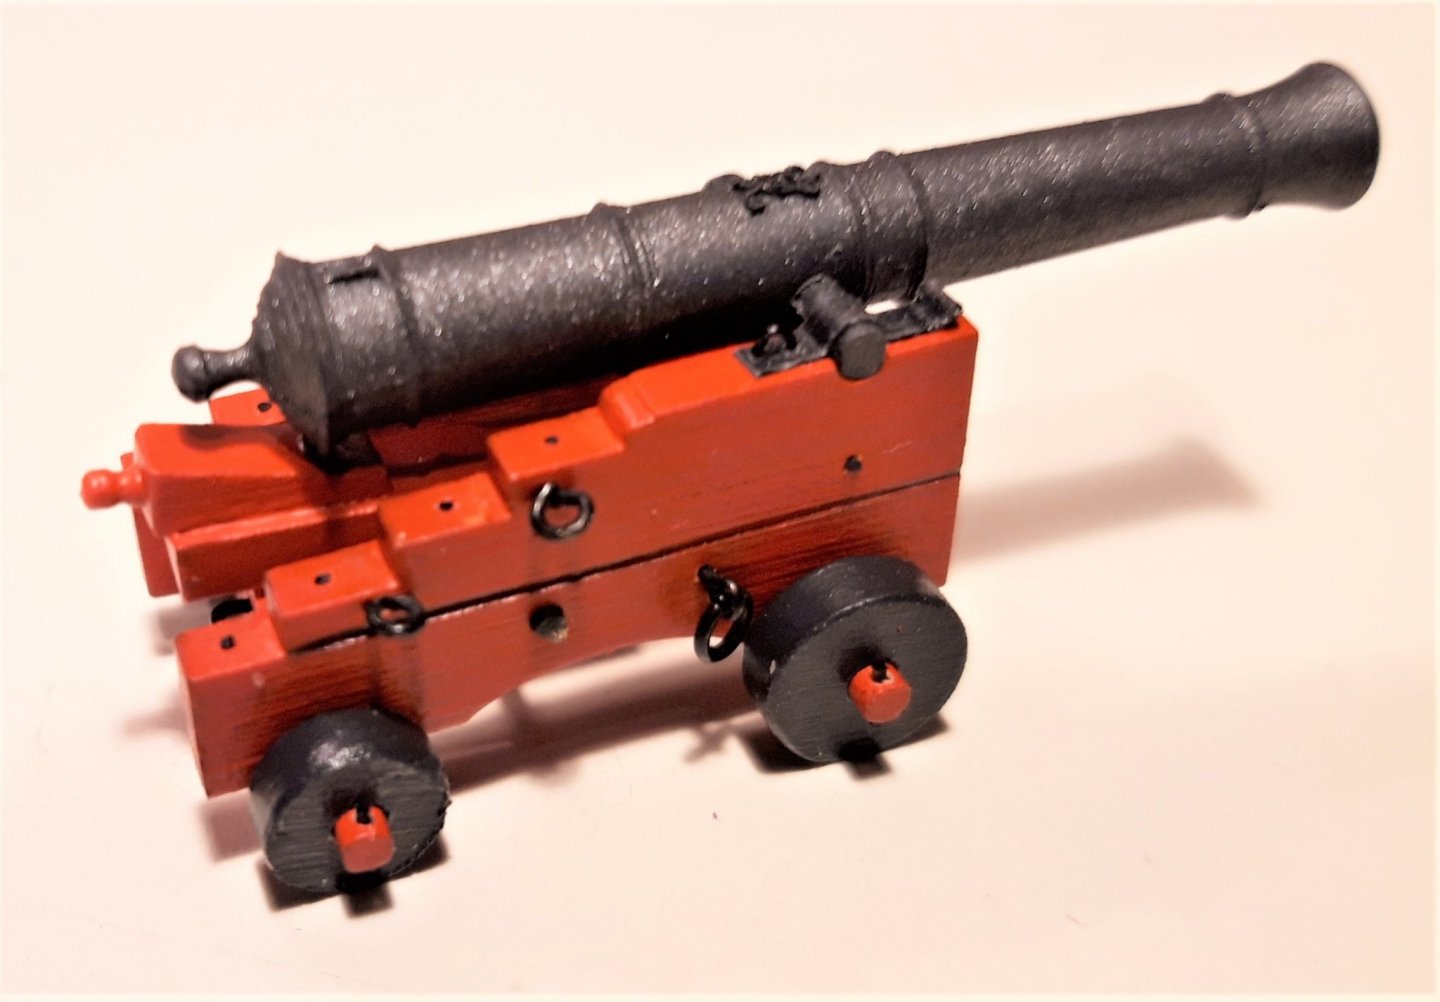
Thank you all for the likes and comments, I finished half of the guns yesterday. They are all little mini-projects and take some time. I bought a paint-brush for the carriages and it I am quite happy with the result. The wheels are painted dark grey by hand. Here are some photos: Next I will add the bolts and rings to the model and start with chapter 7. The rest of the guns will be made later, once I need them for the model. Matthias


-
Hi Mike, That is an excellent method!! I am close to mounting the carriages as well, thanks for sharing this! How do you manage to get the angles of the cannon barrels all in a good alignment?
- 607 replies
-
- 2
-
-
- winchelsea
- Syren Ship Model Company
- (and 1 more)
-
Hello everybody, this weekend, I almost finished chapter five. Just the capstan needs a second coat of colour and the nailings. Matthias


-
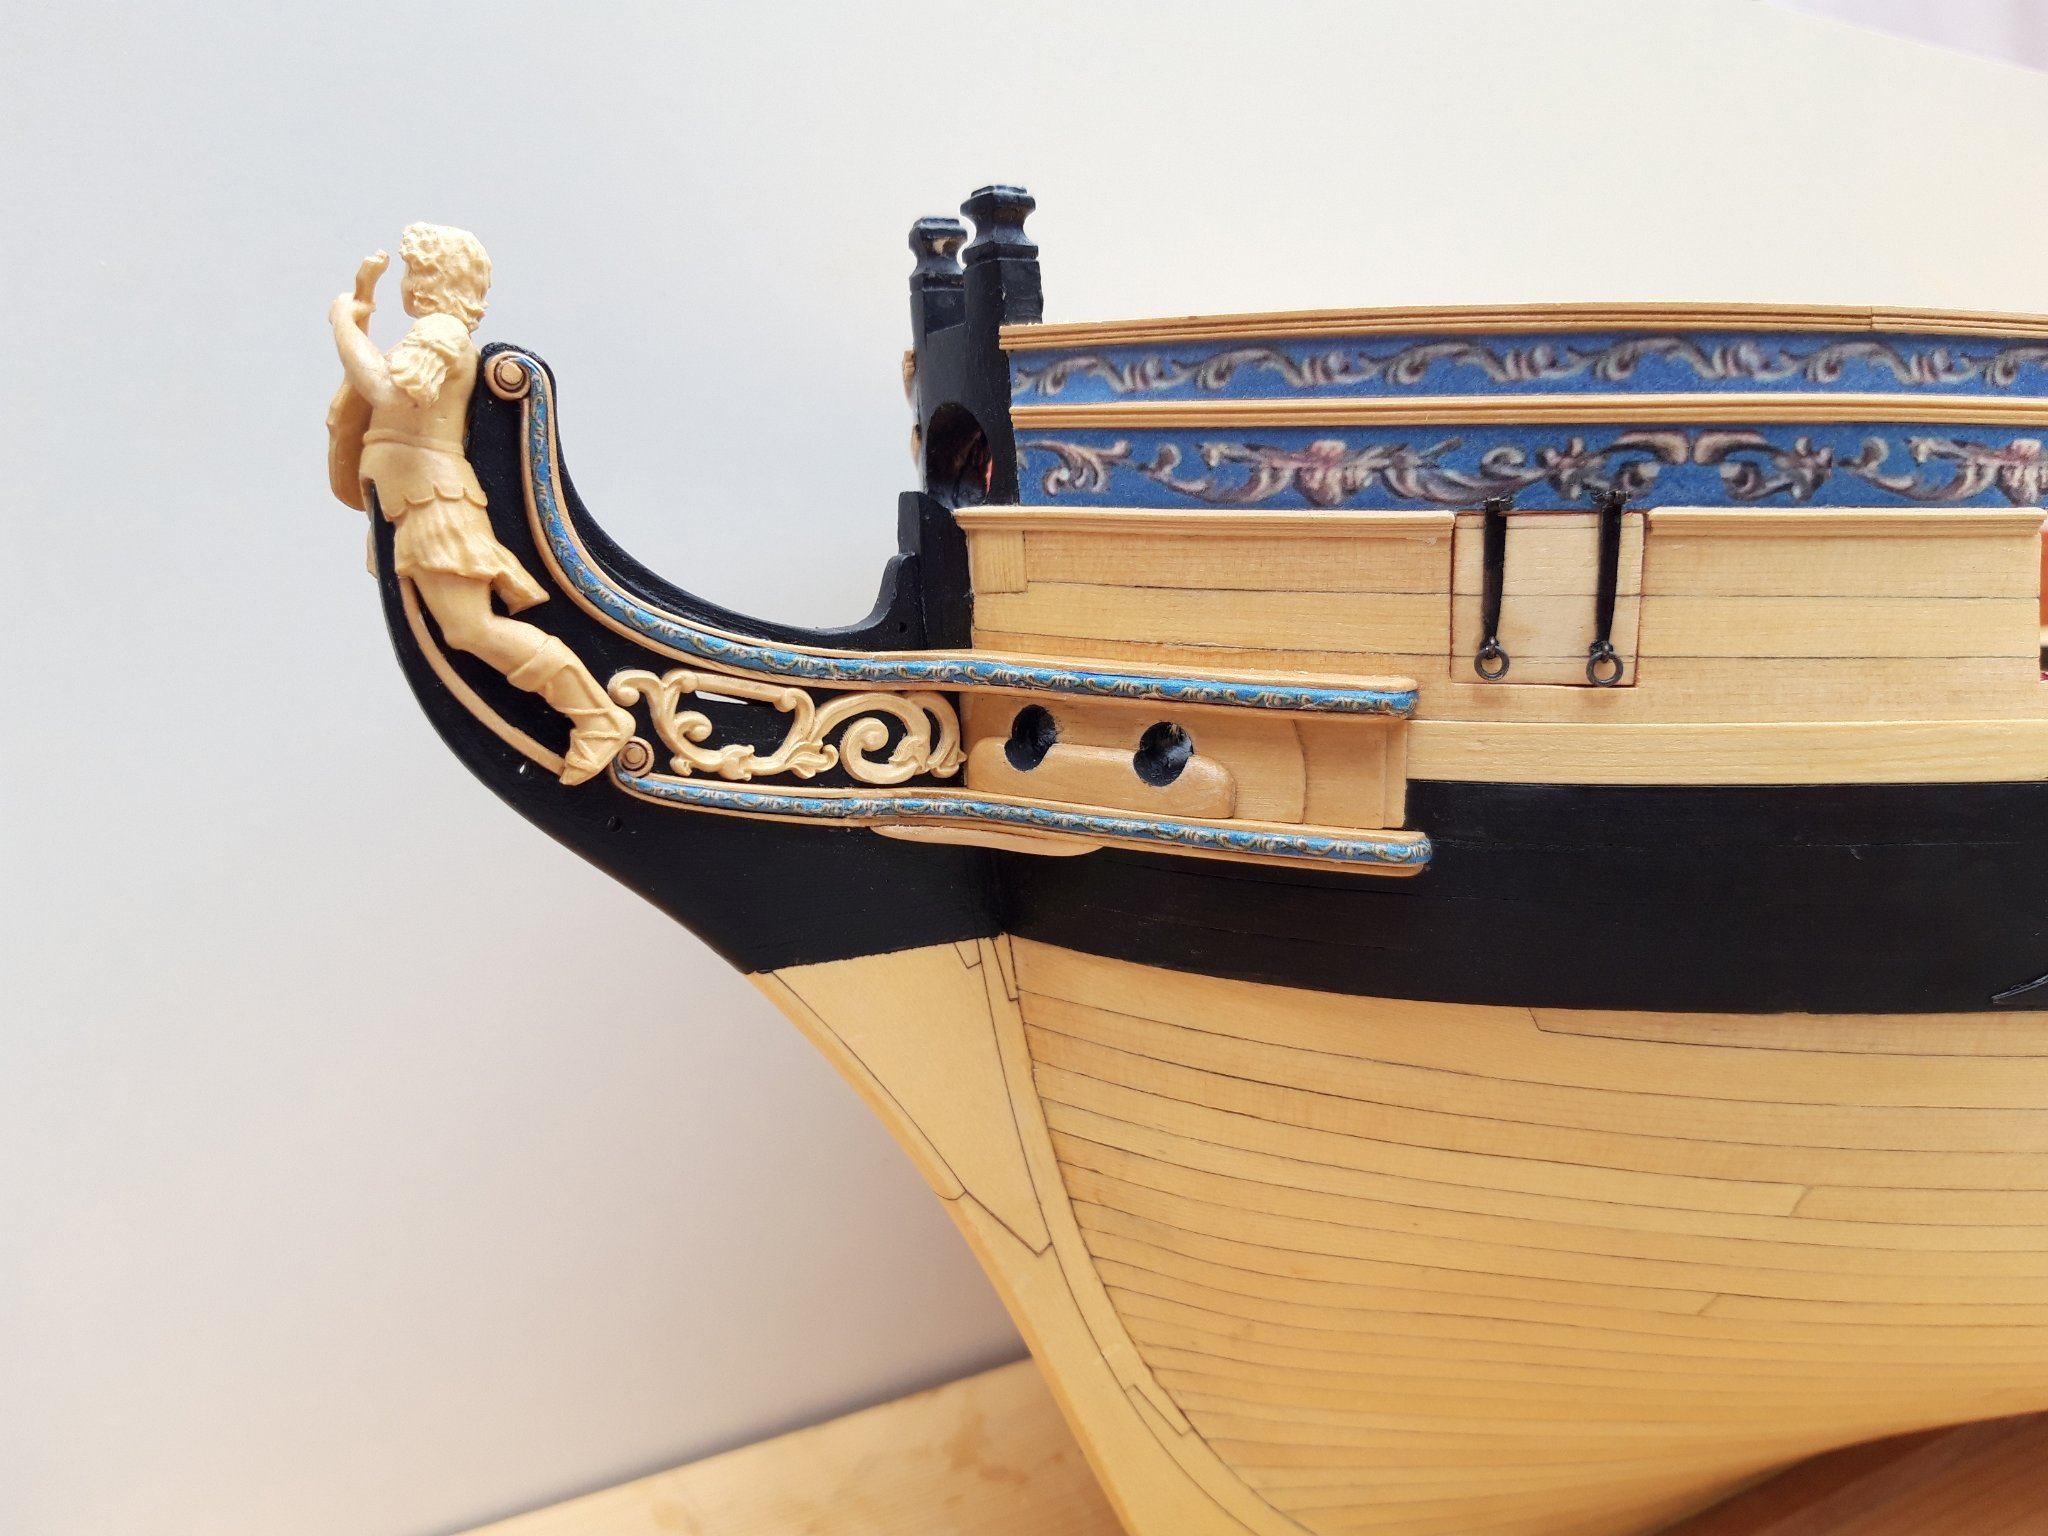
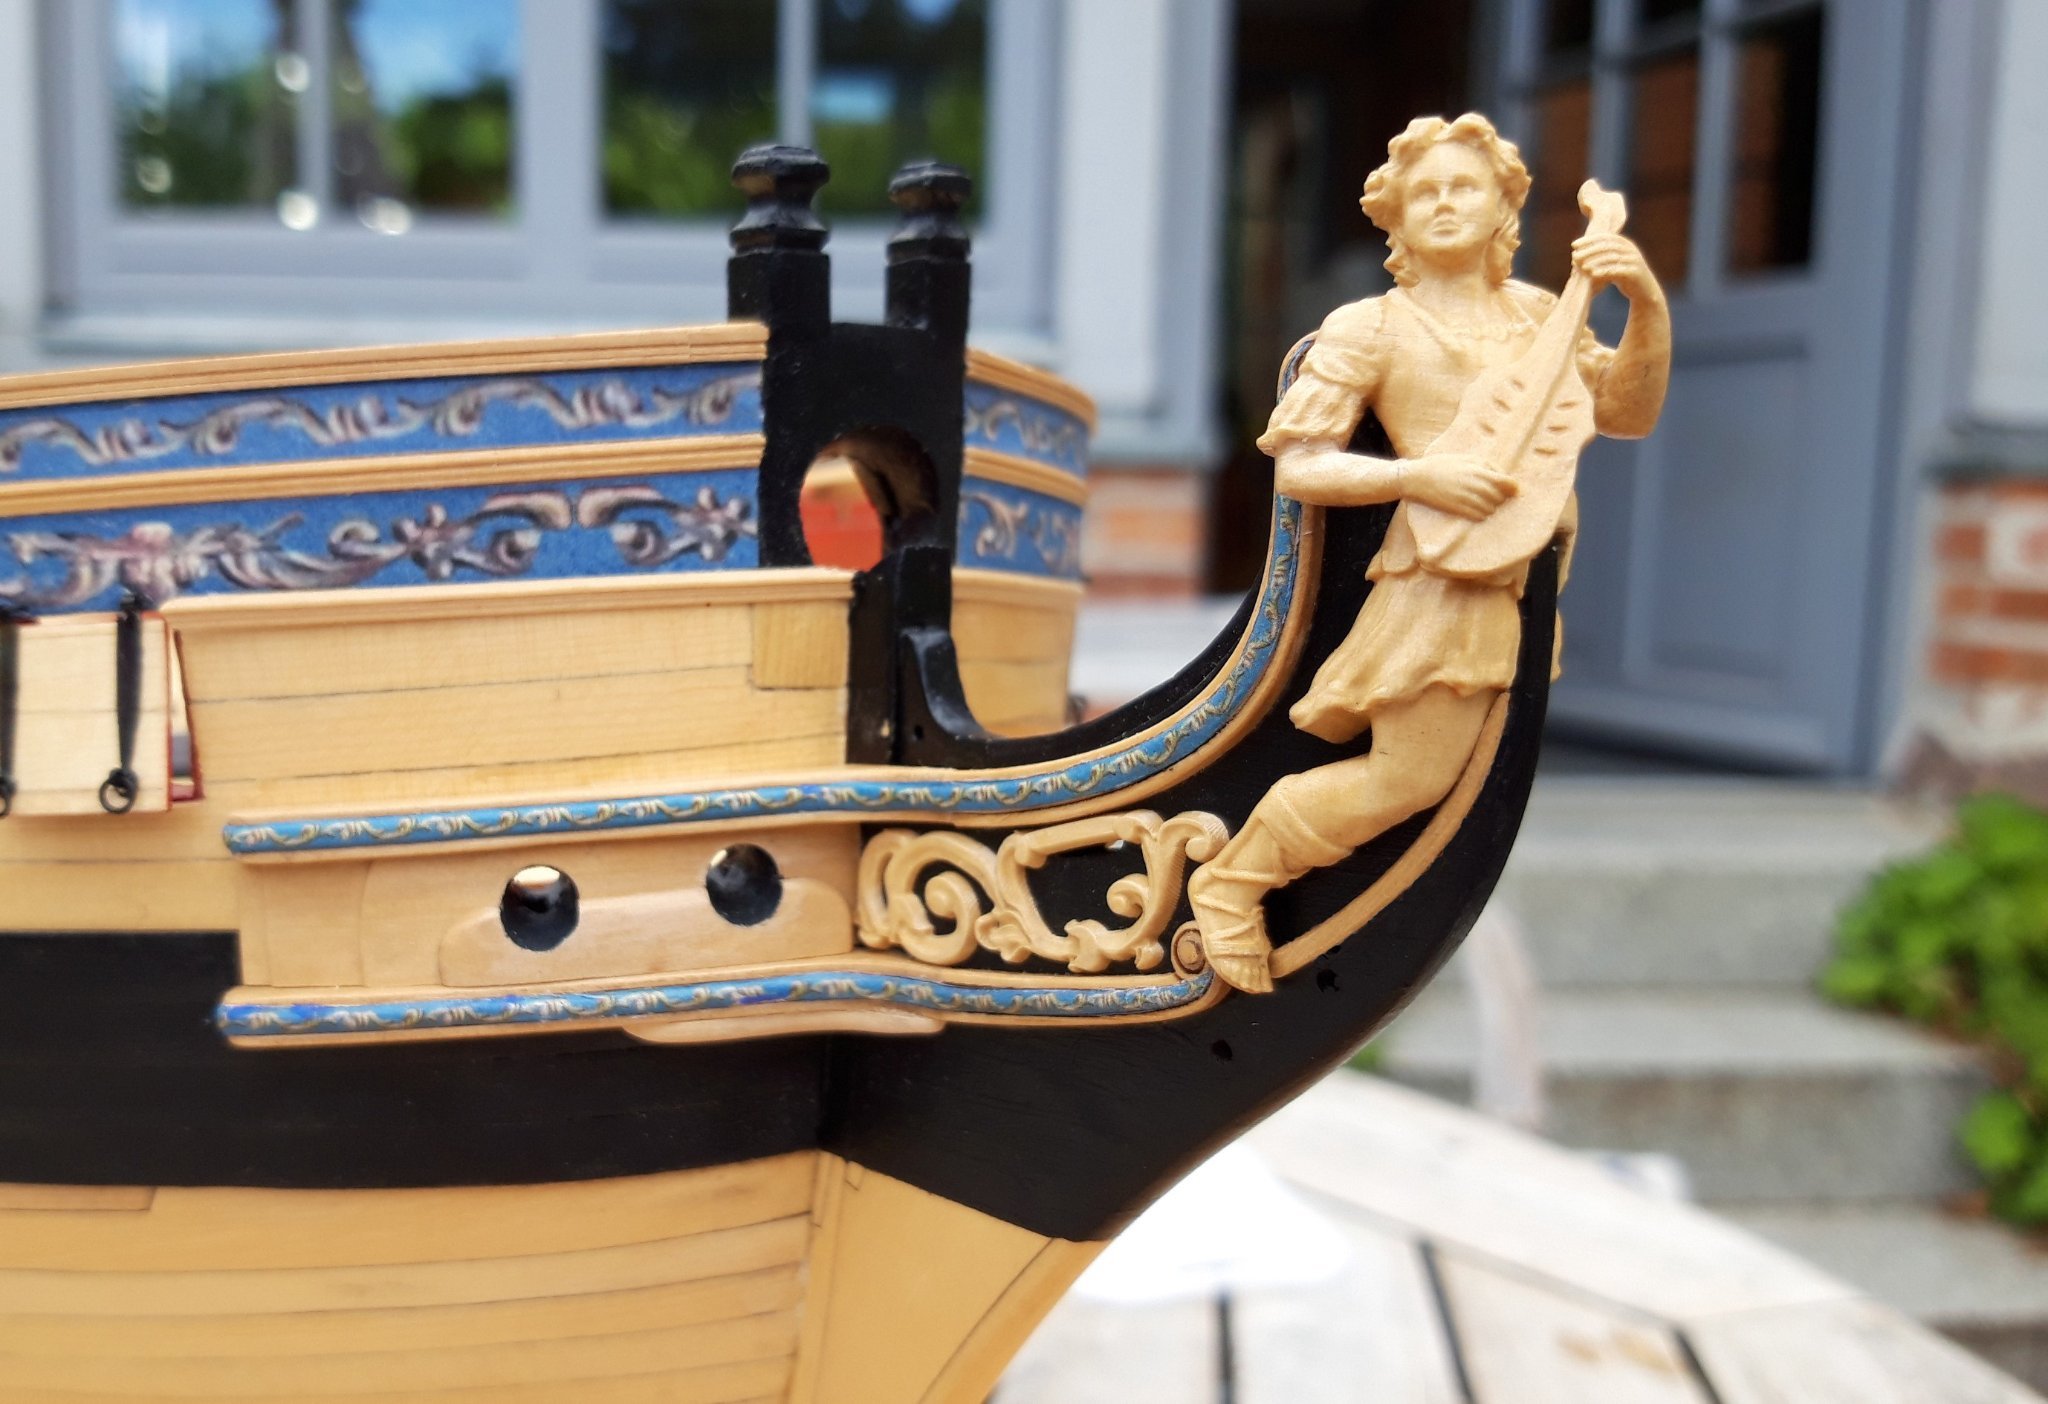
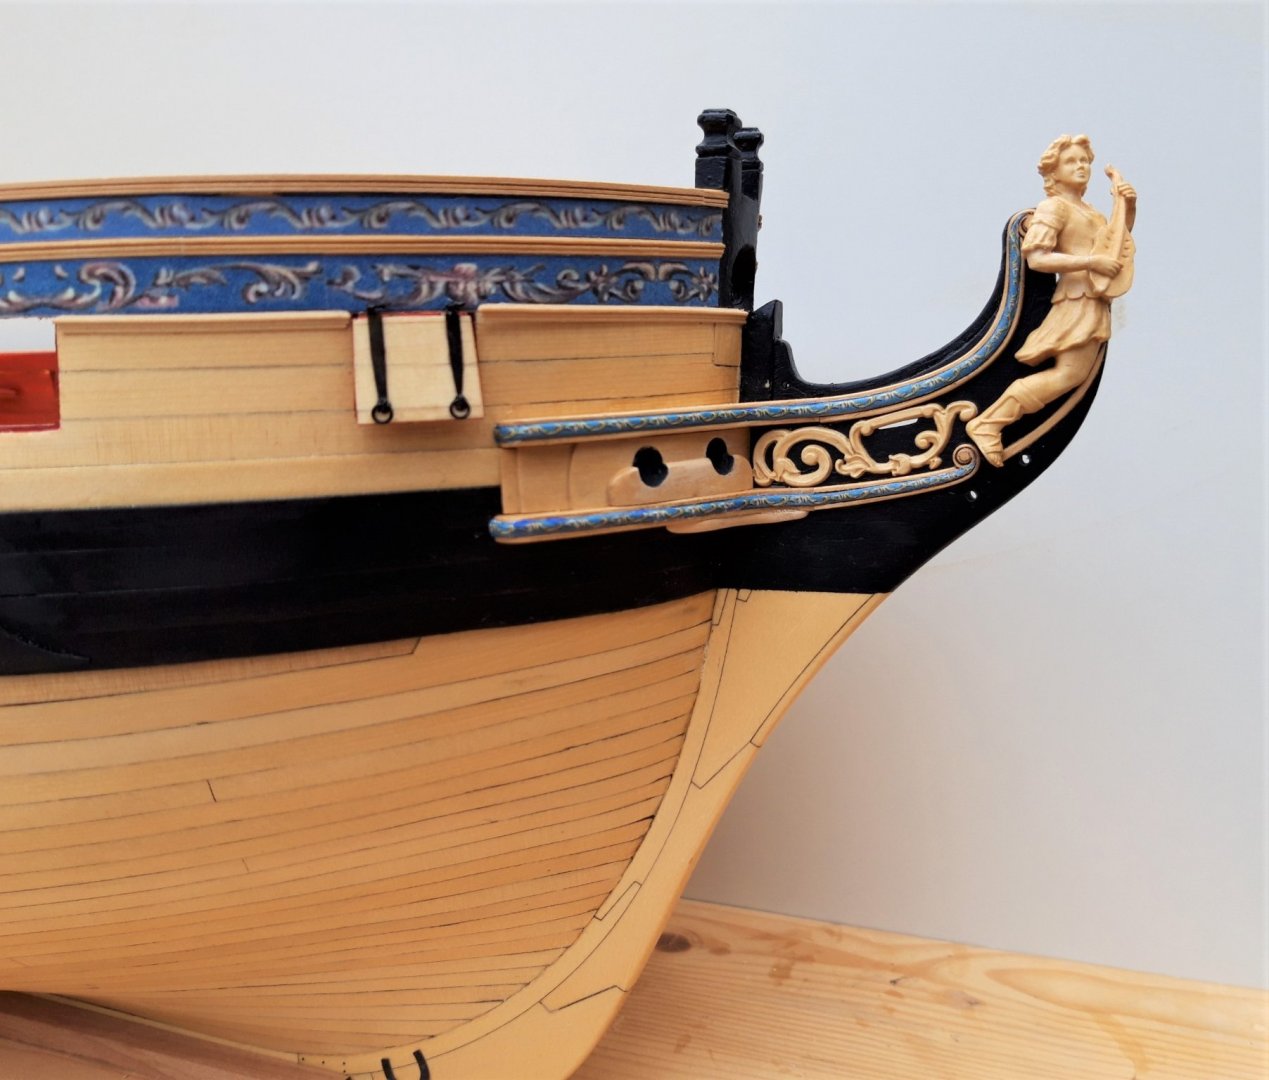
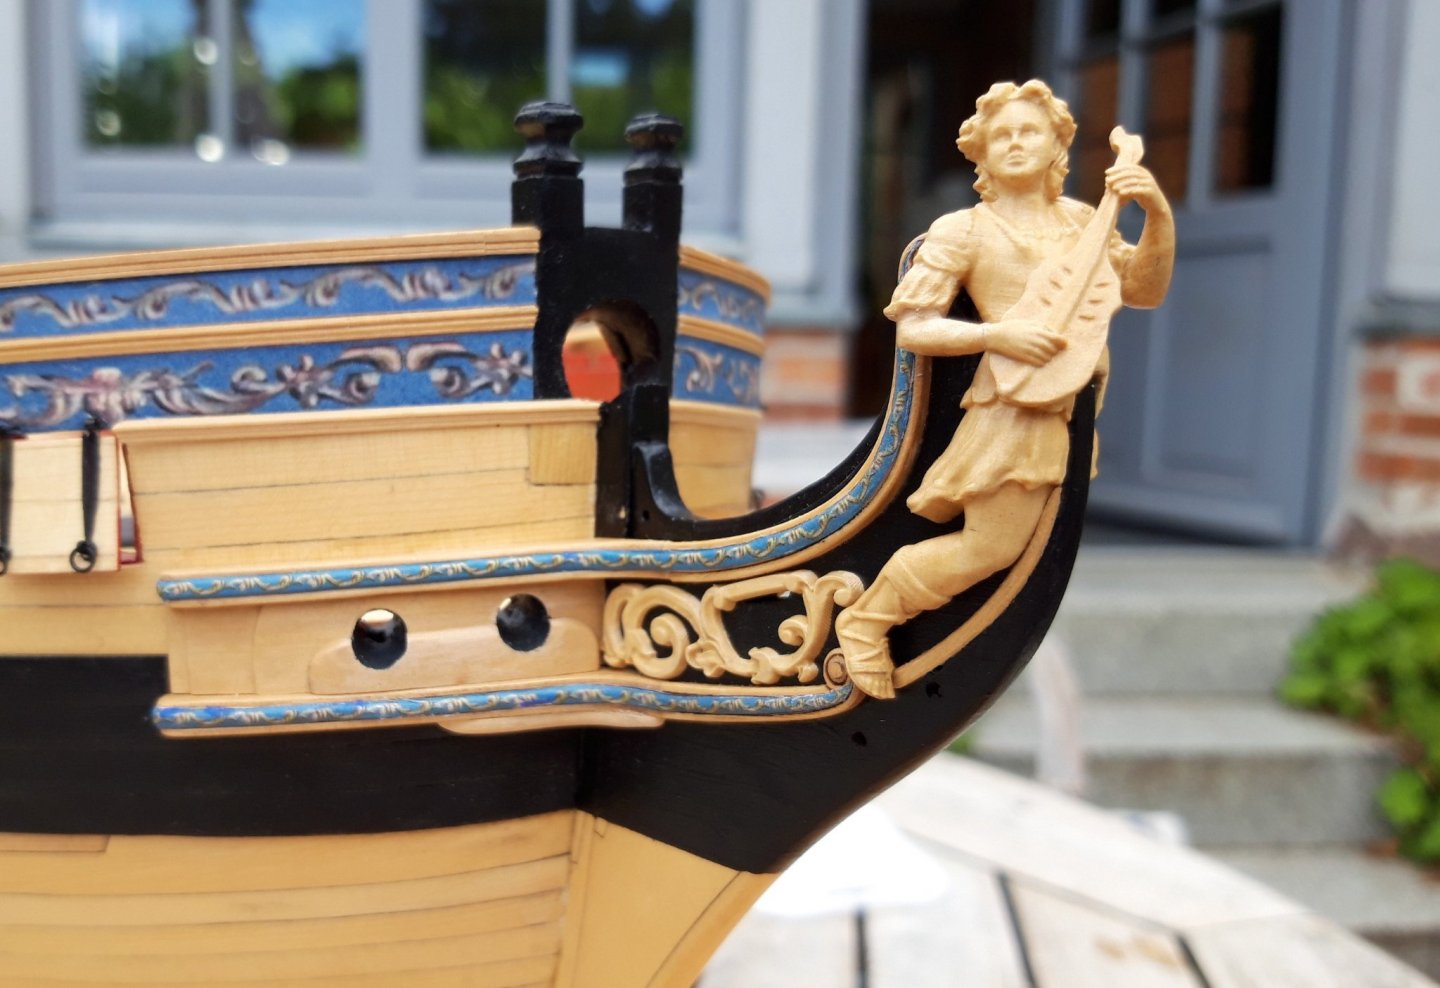
Hi Mike, very well done!!! How did you position the figurehead, so it does not sit too much forward of the stem? Did you remove a bit of the stem behind the back of the figurehead? And did I understand that right: You glued the wooden pieces of the hair brackets to the model and afterwards added the paper frieze? Matthias
- 607 replies
-
- 2
-
-
- winchelsea
- Syren Ship Model Company
- (and 1 more)
-
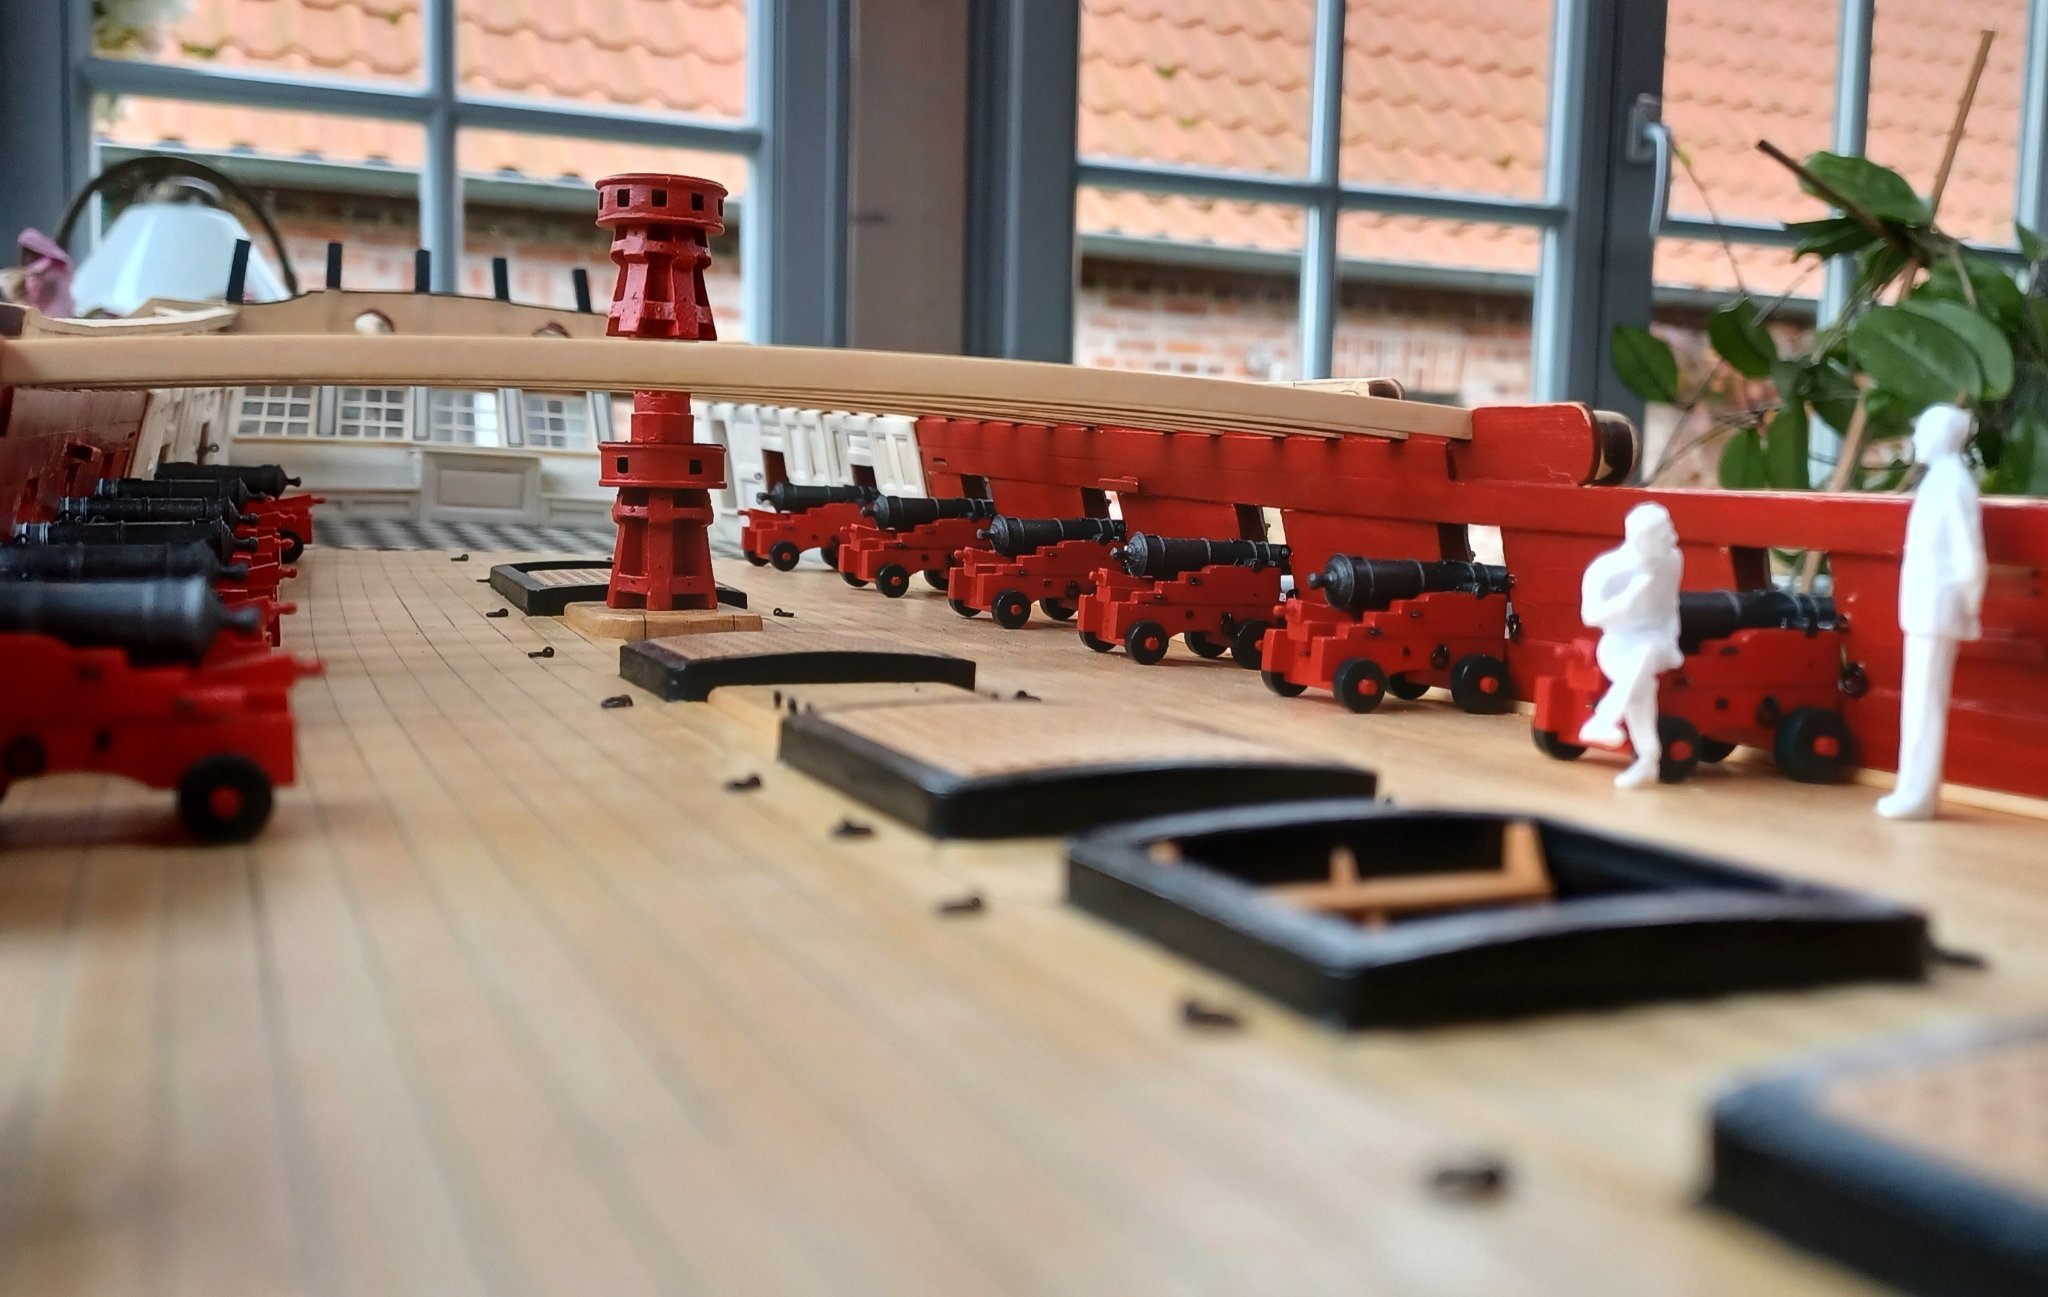
Thanks everybody for the likes and comment. I proceeded with chapter five. The ladders are now installed and I took the model to daylight, to make some photos. Next thing to do will be the hair brackets at the bow and all the lovely scrollwork there. I am especially looking forward to this part of the chapter. Here are the first steps: Matthias


-
Will that be the Size of the Bow Sektion?
-
Very nice design!! Looking forward to see the next steps! Matthias
-
I agree with Christian, that the basic version is my favorite. The prebuild version gets close to the kind of modelshipbuilding of plastic kits. Nothing else to do, than gluing everything together. That is not much of a challenge and not much to be proud of afterwards. ( I know, there are real artists among the plastic-kit builders, who are able to make them look extremely realistic, that is very impressive, but putting together the parts of the kit is usually easy) I think, shipmodelbuilders, who build such a model, should have enough skills to shape these parts by themselves. Otherwise, they will struggle later on, when it comes to planking and making fancy modlings etc. You need some woodworking skills, to start such a project. Matthias
-
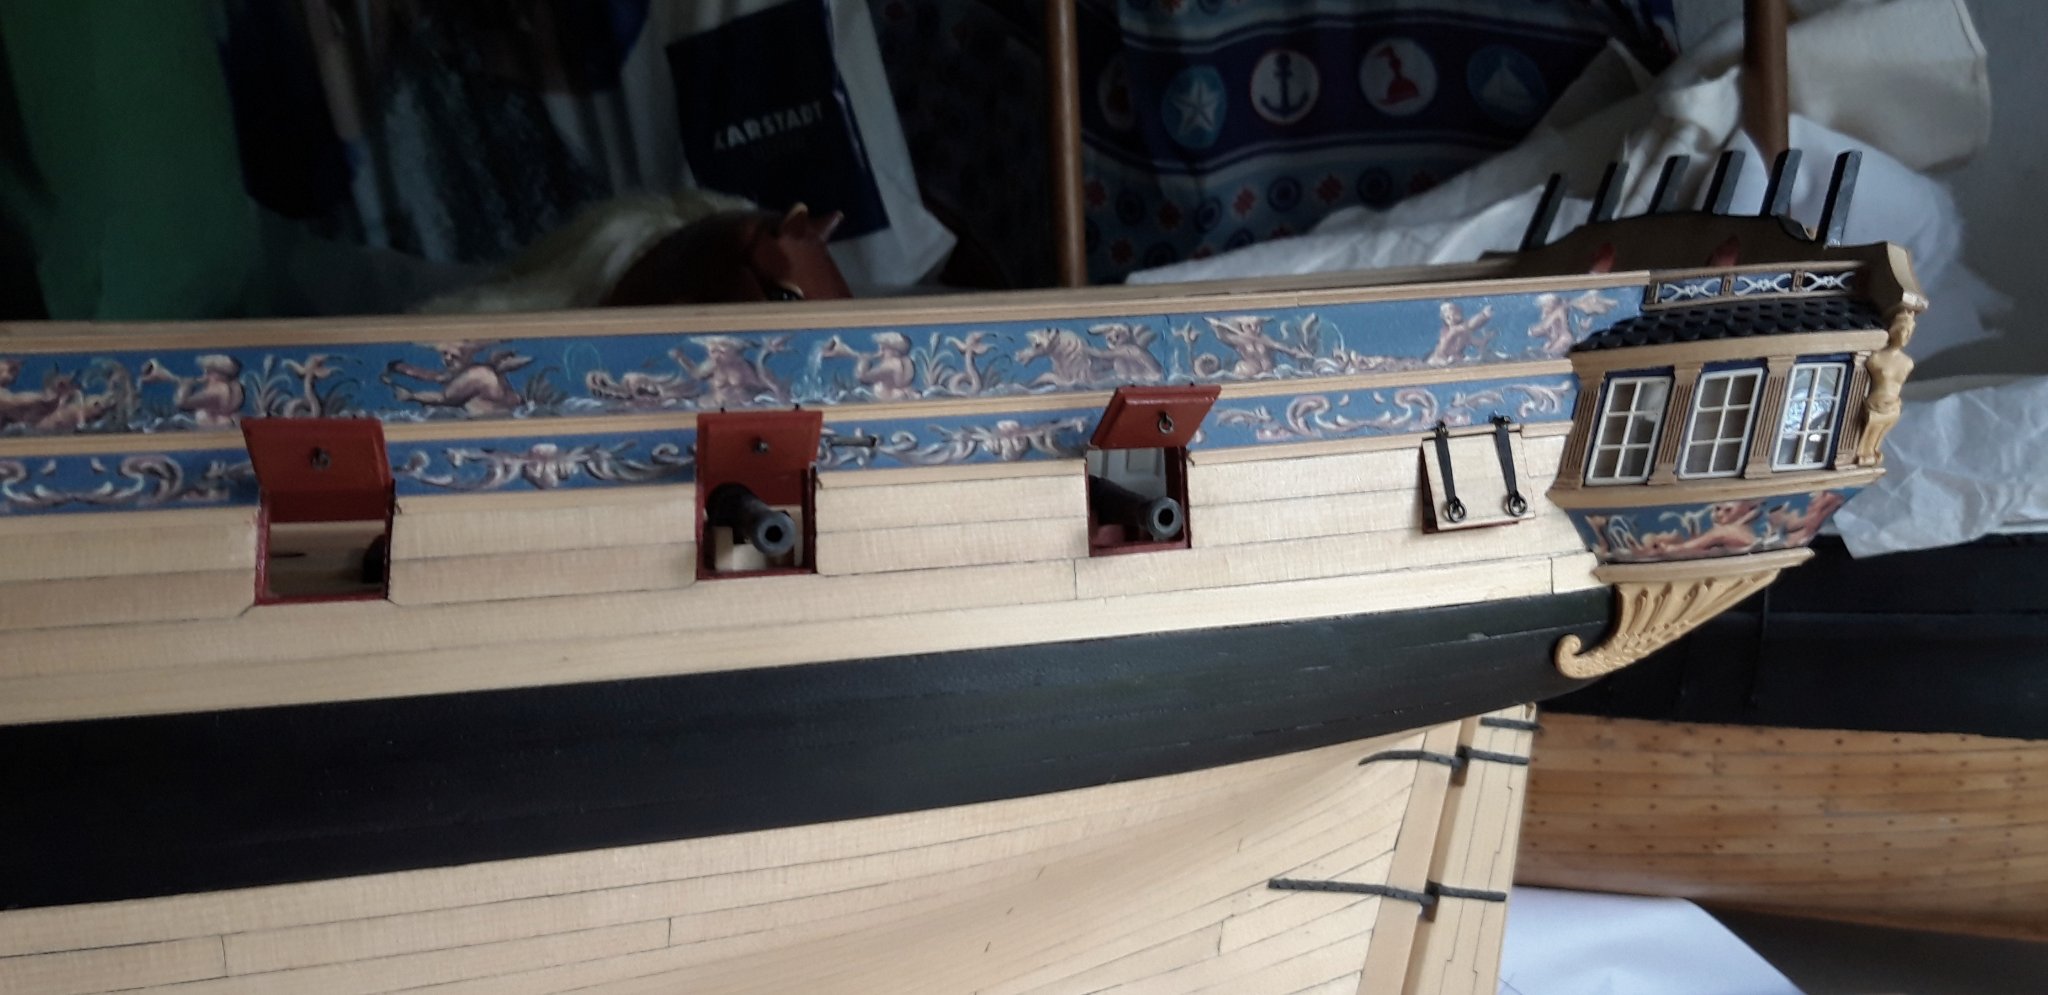
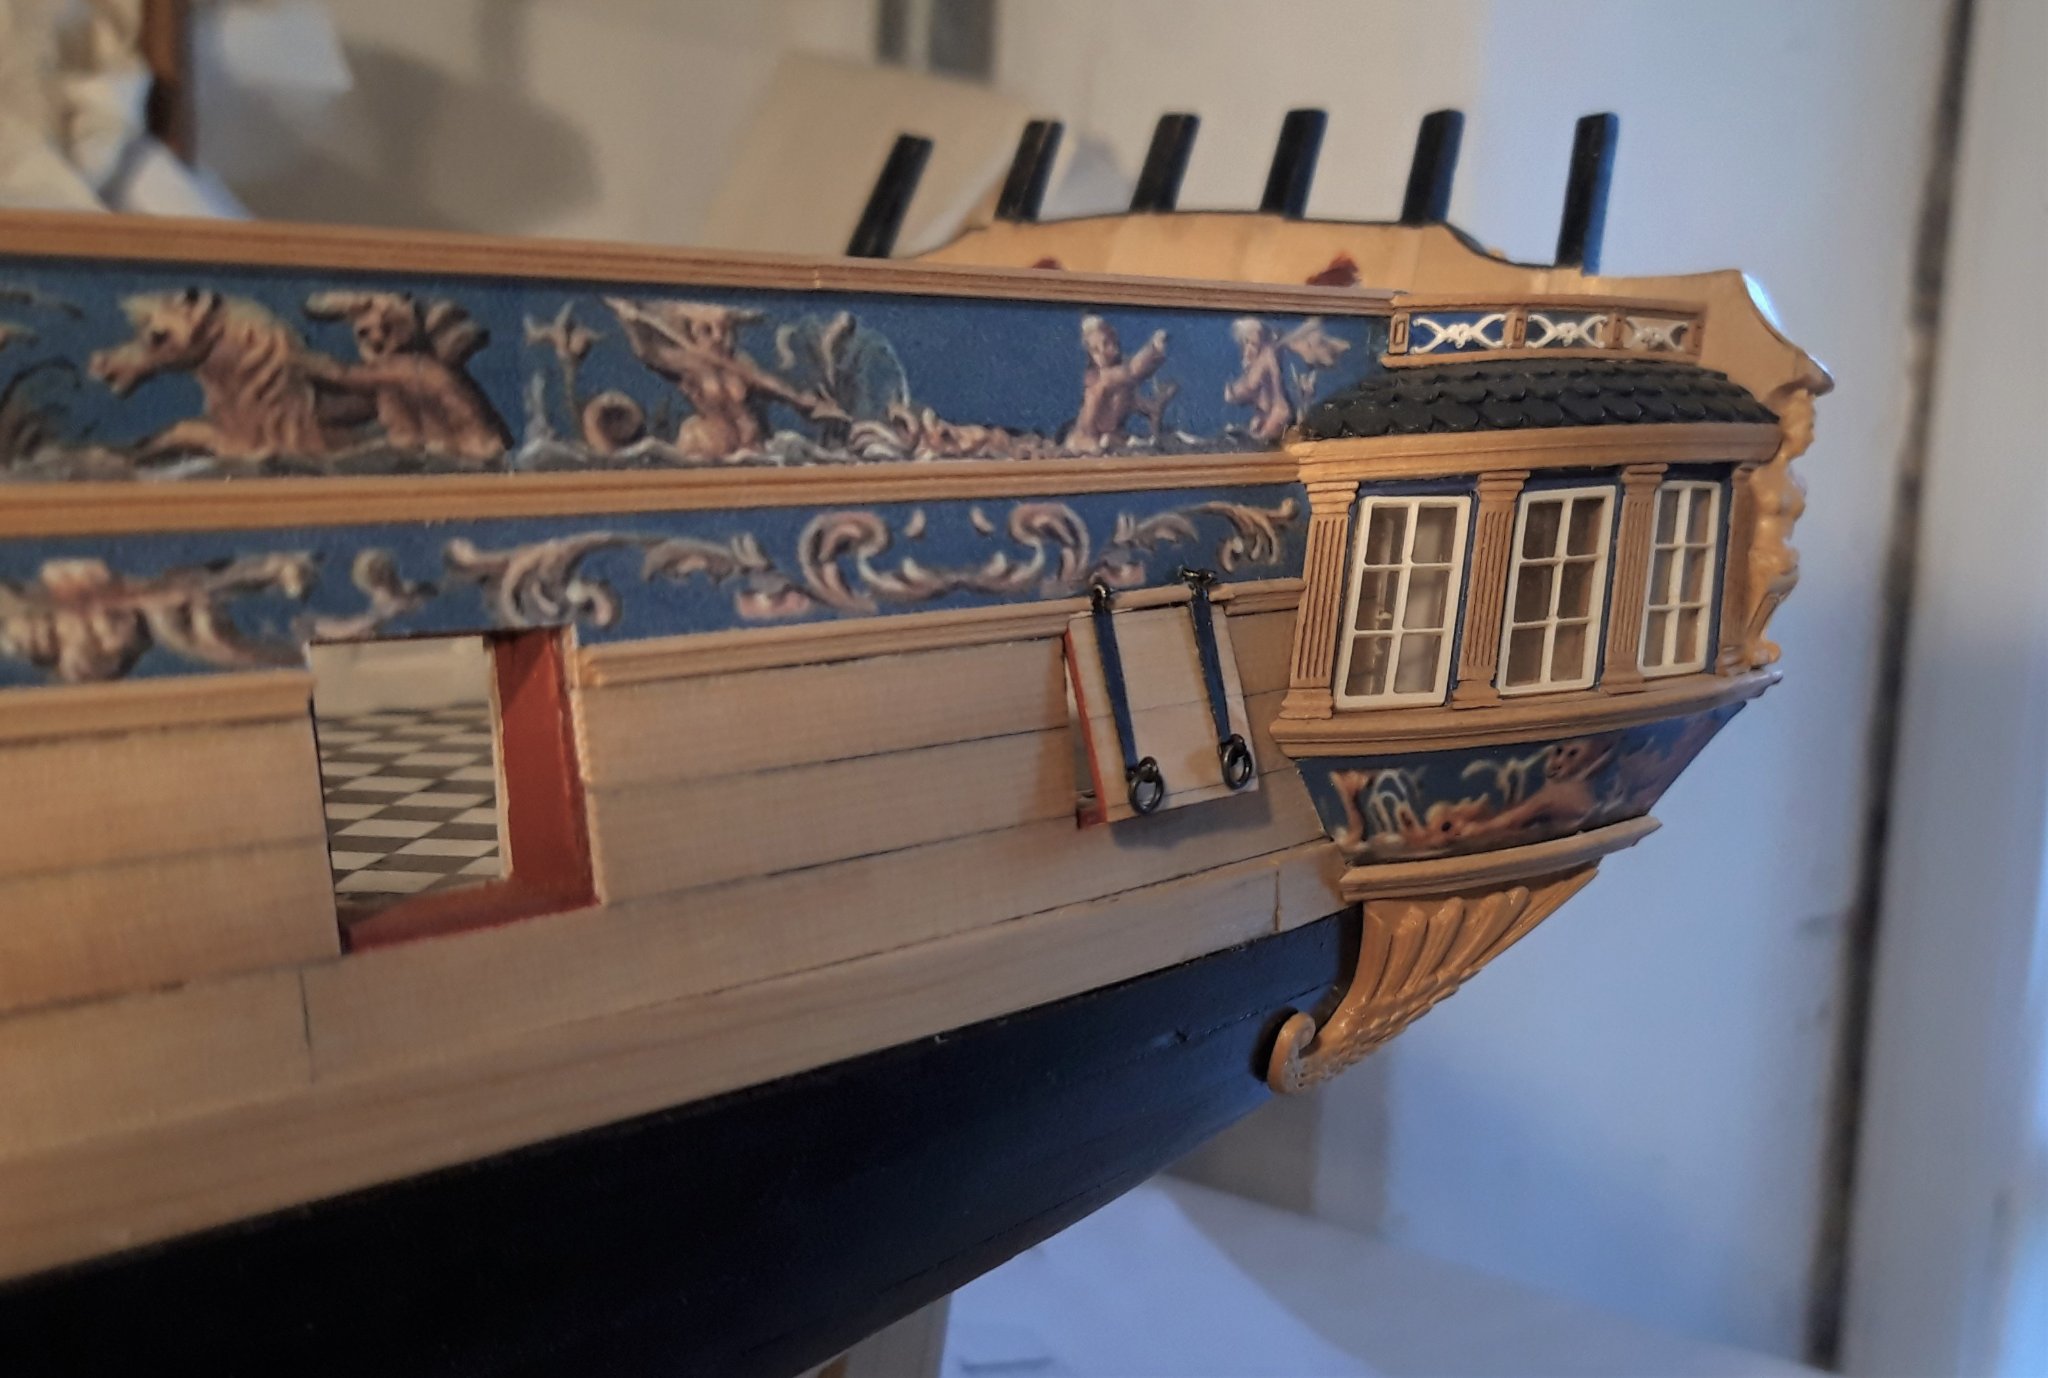
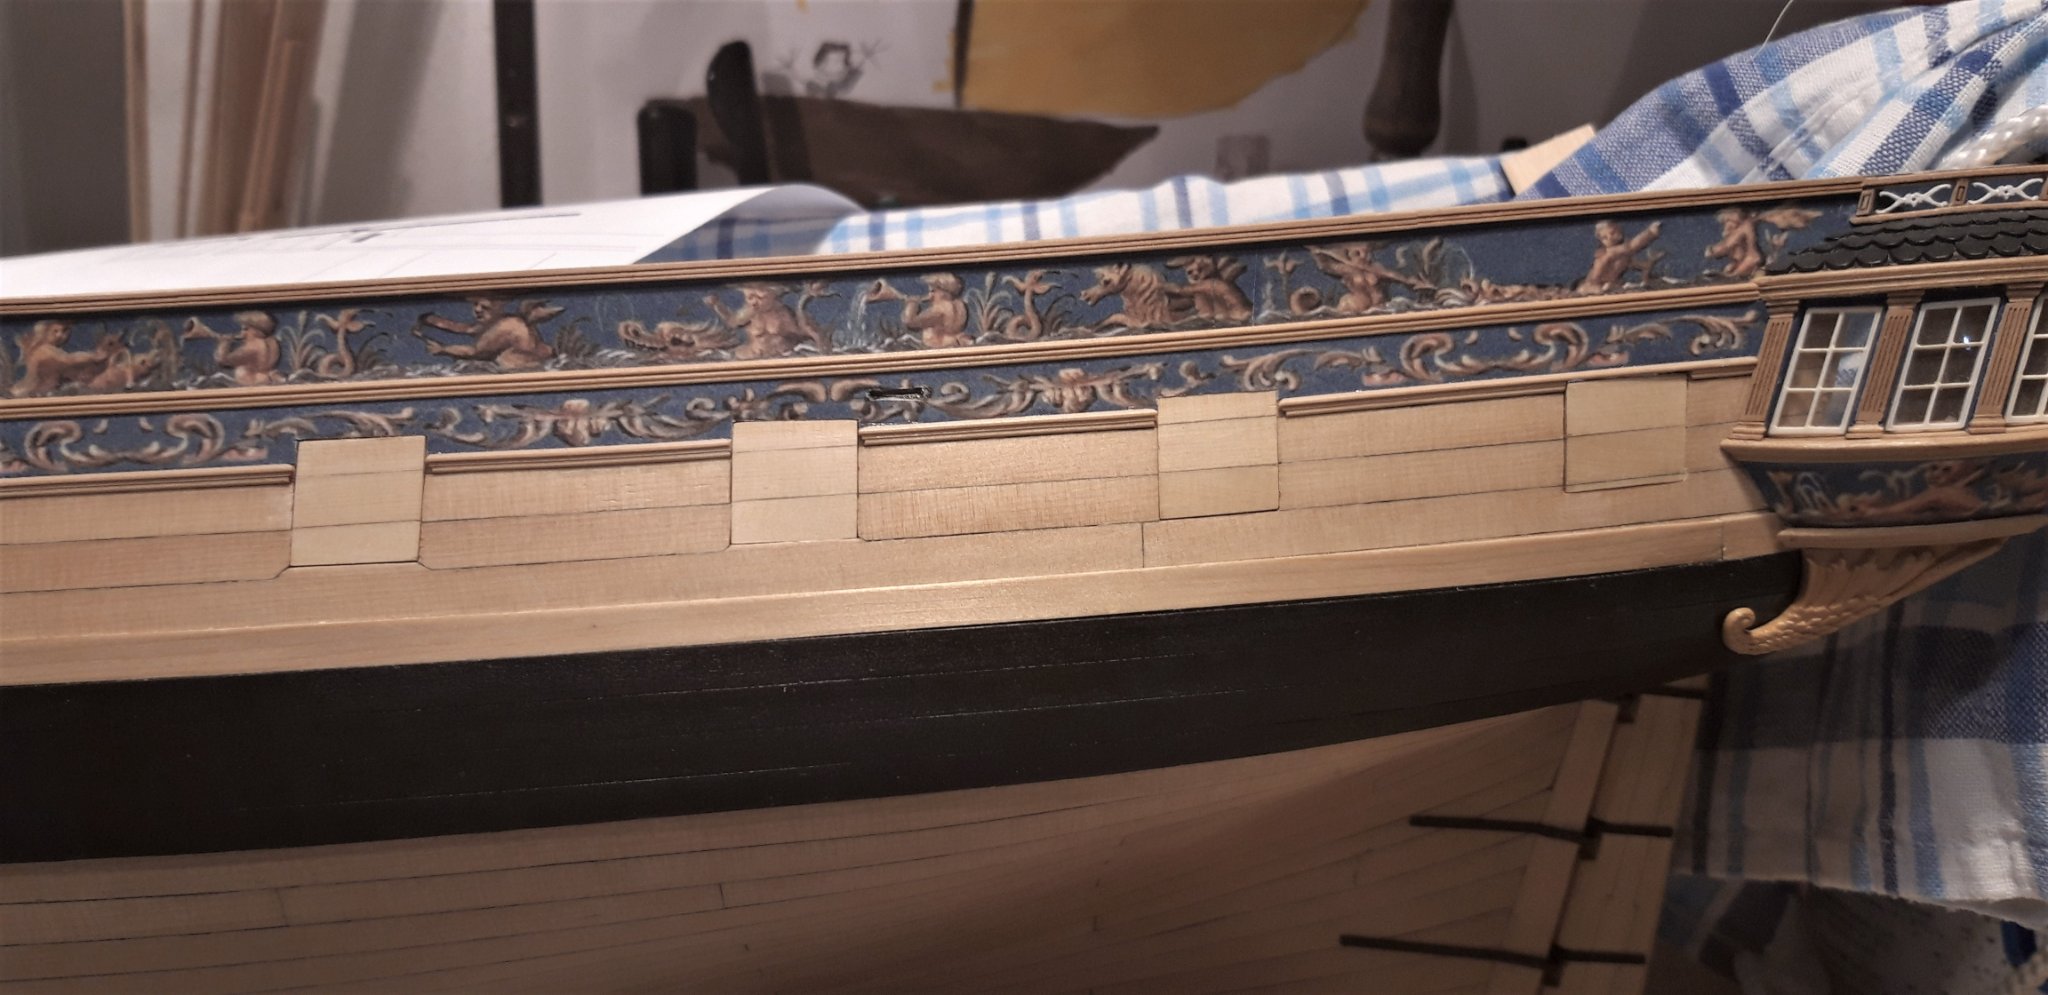
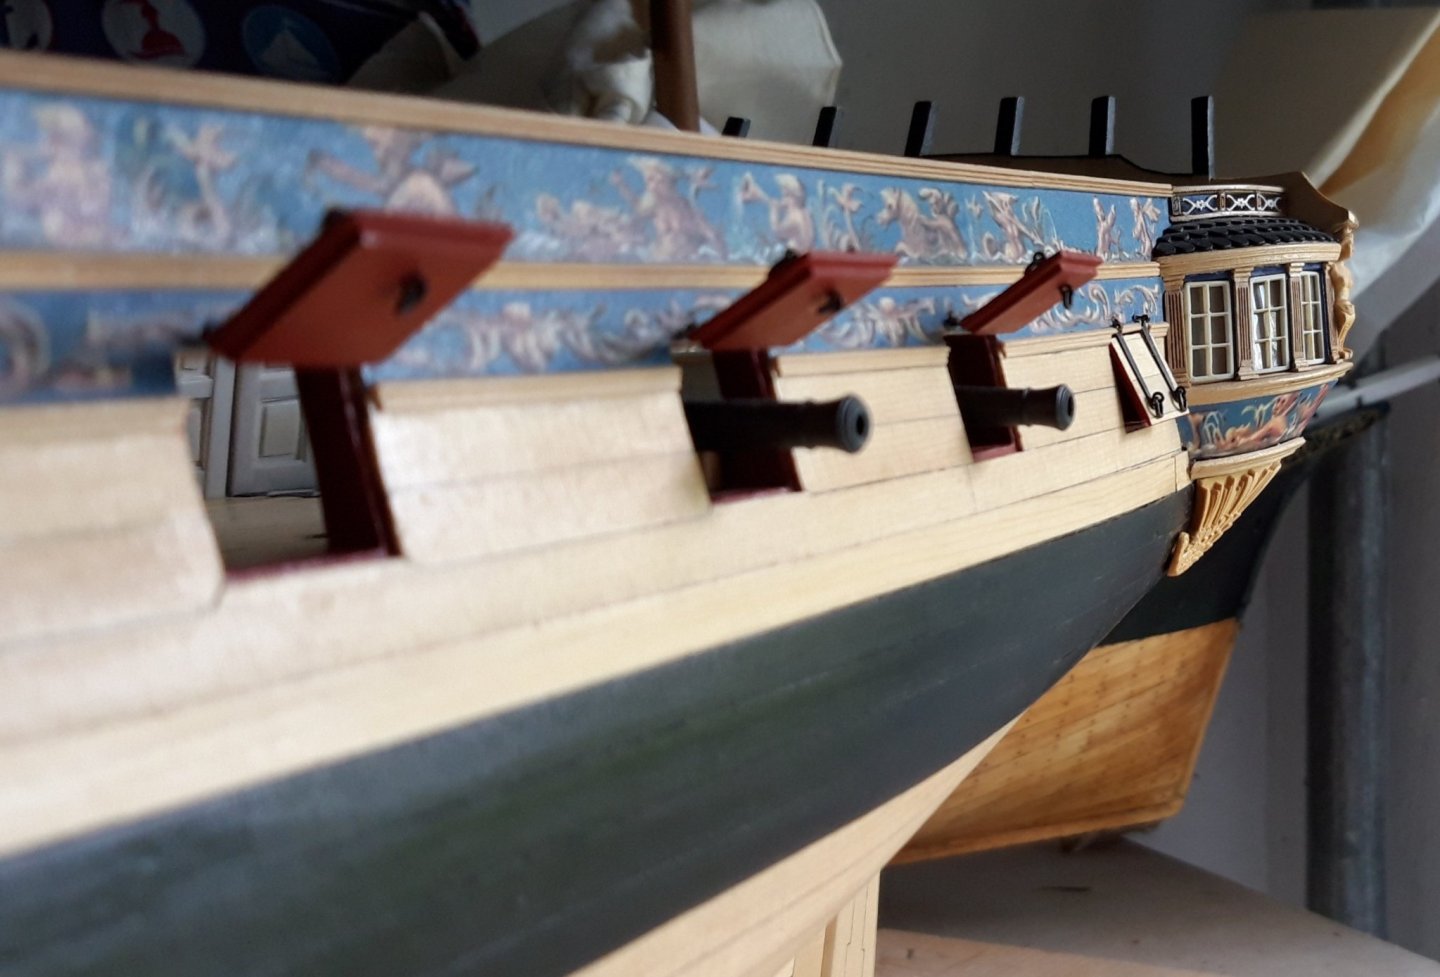
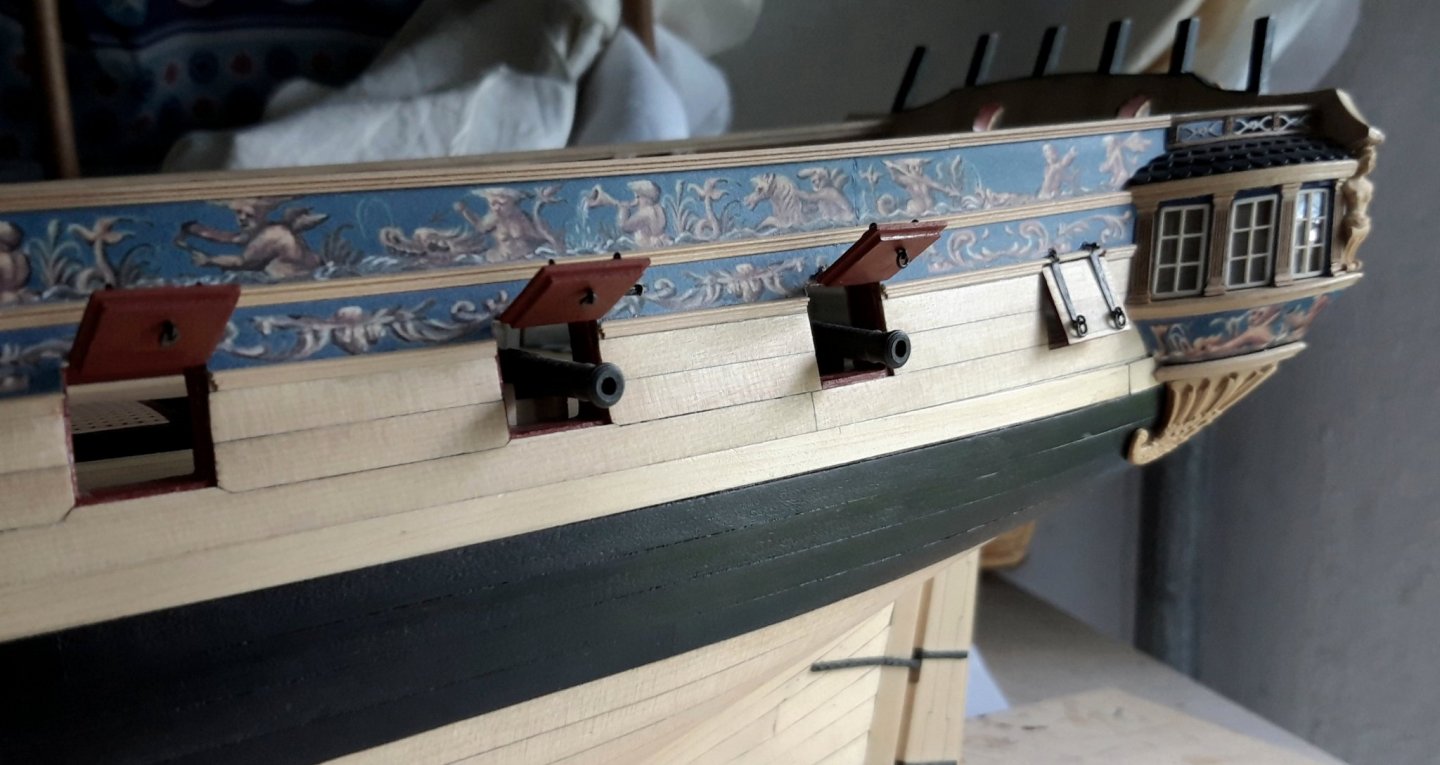
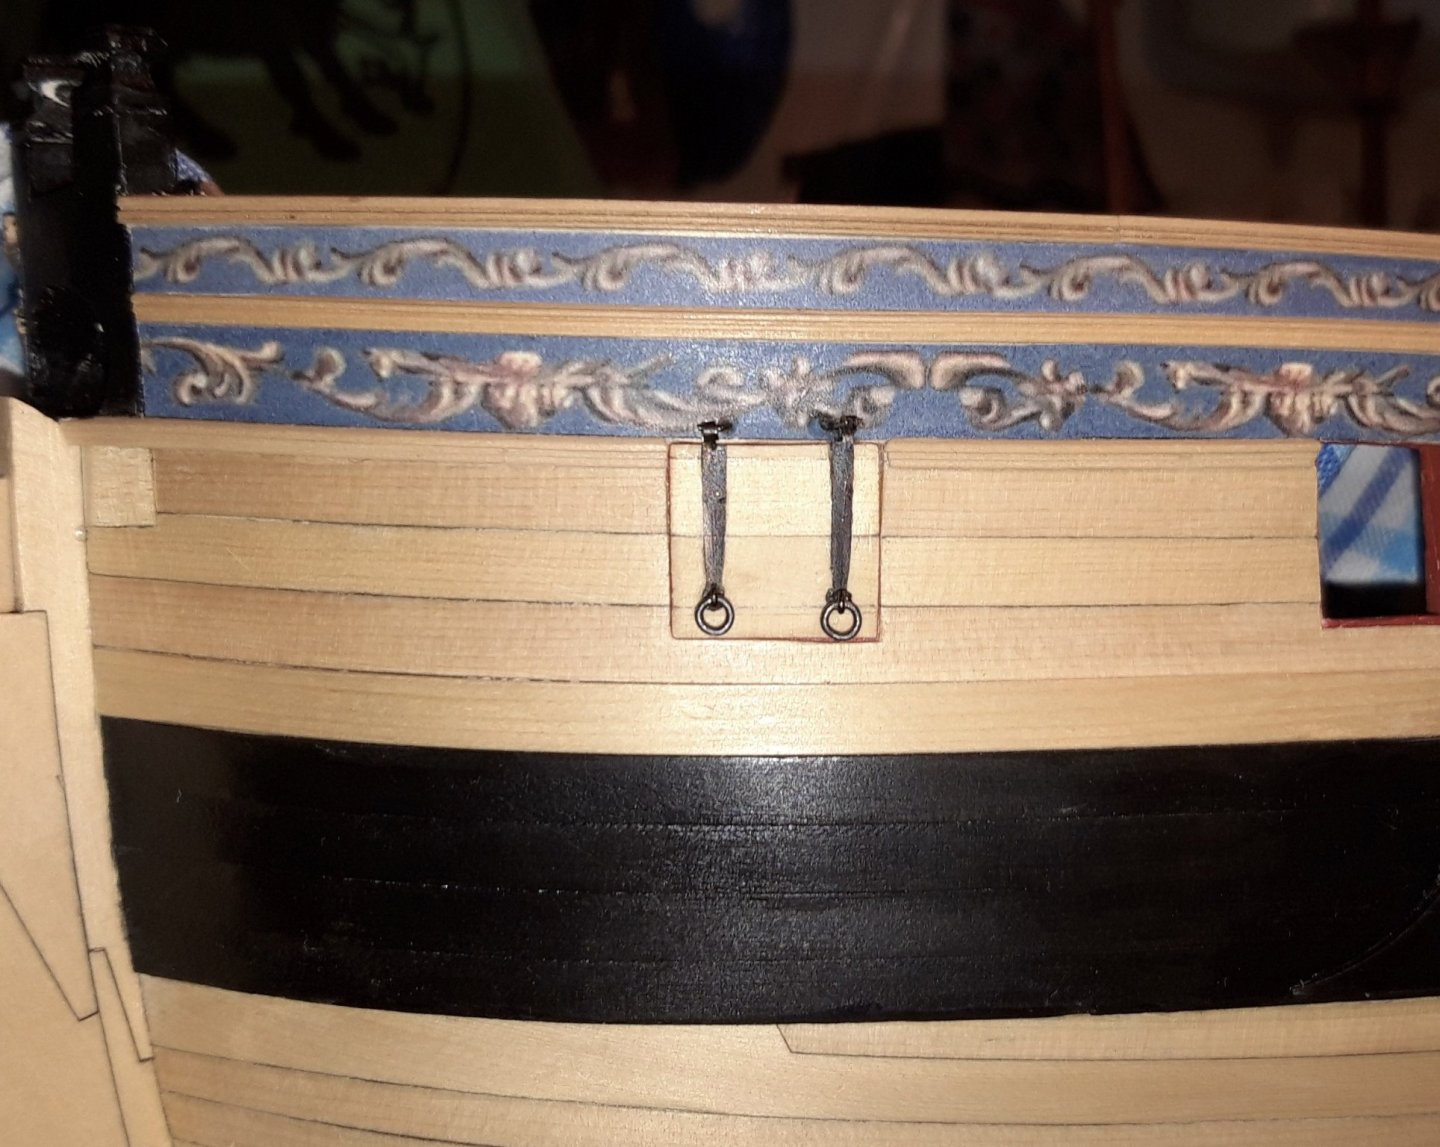
Here are the finished gunport lids. I added one inner ringbolt. Matthias
-
Should one maybe add the Ringbolts inside the gunport lid as well? Many of the contemporary shipmodels show them. , Matthias

-
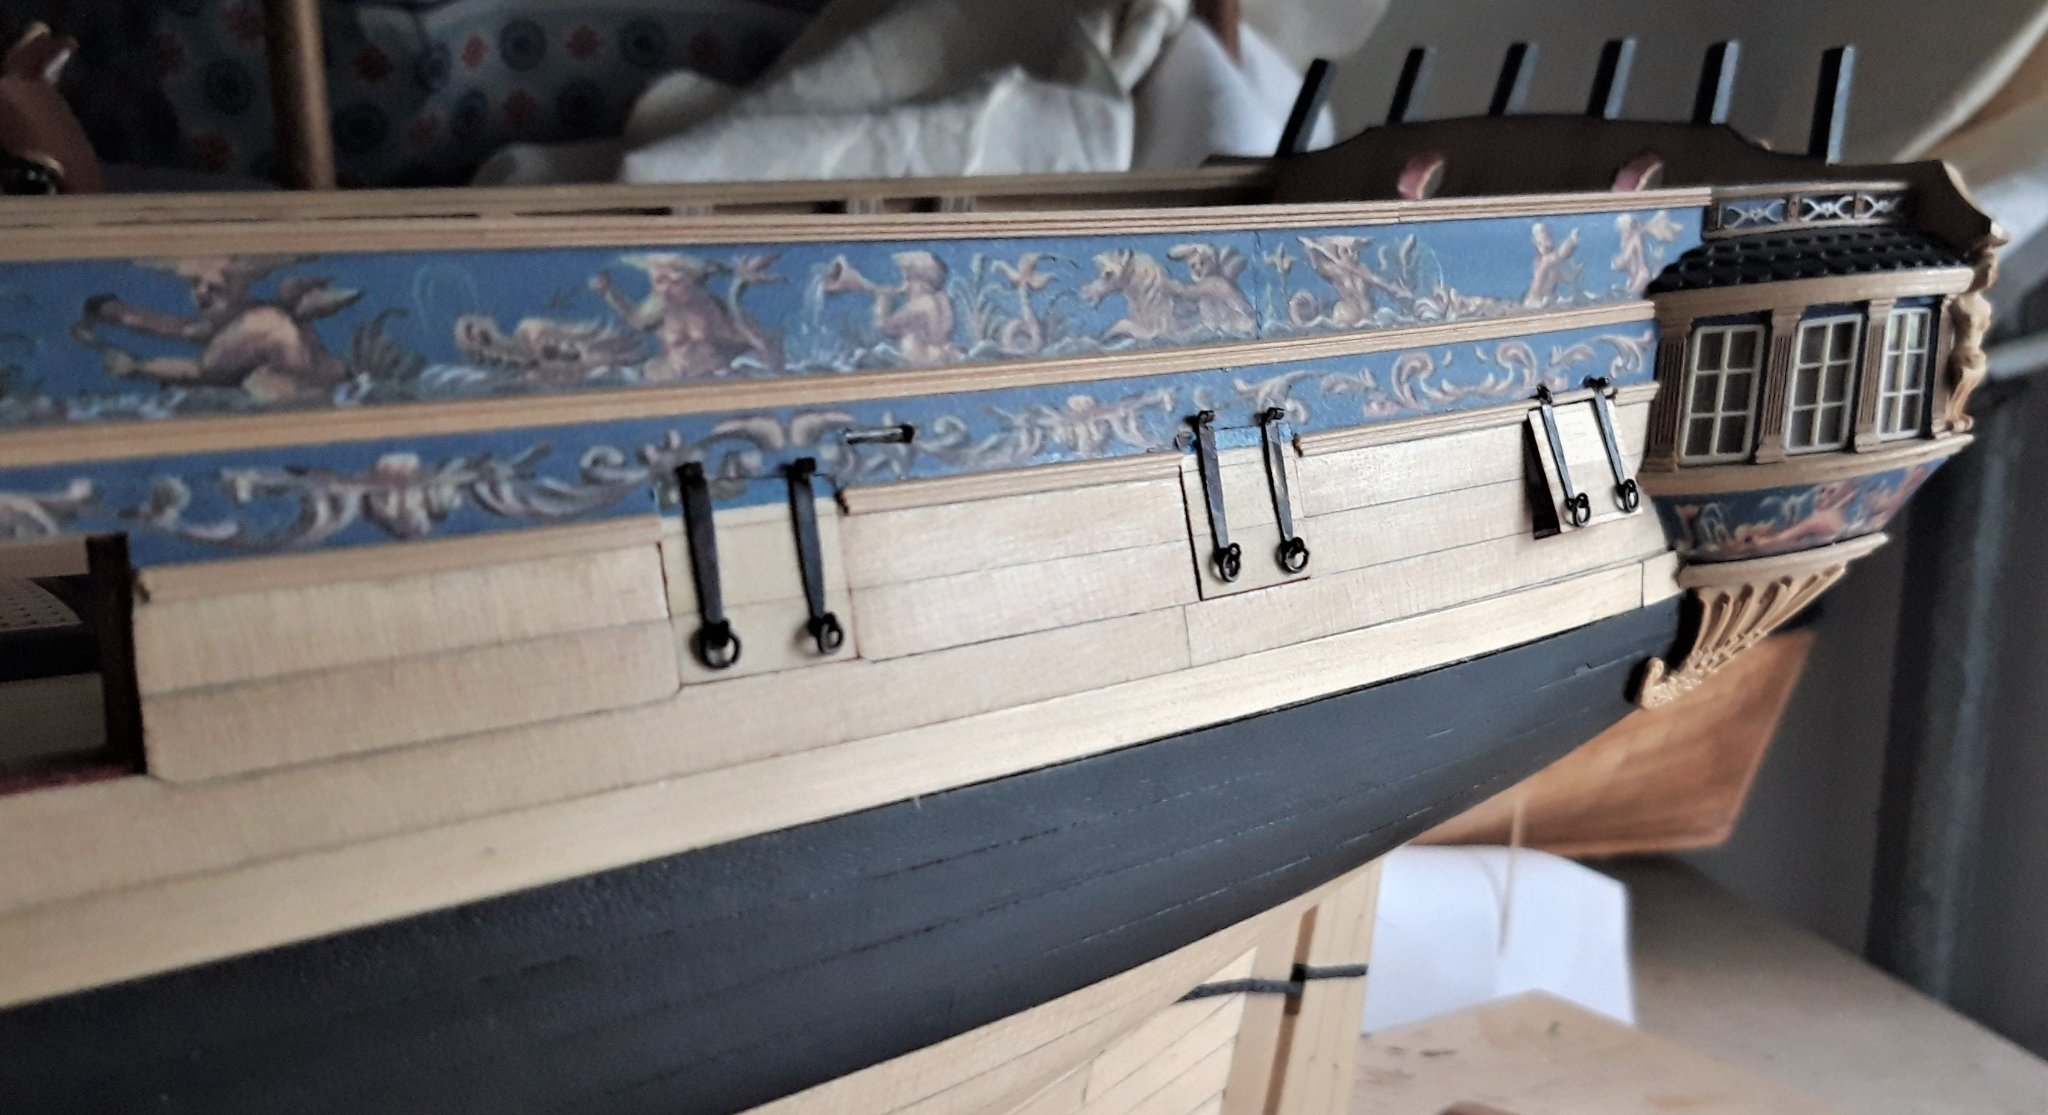
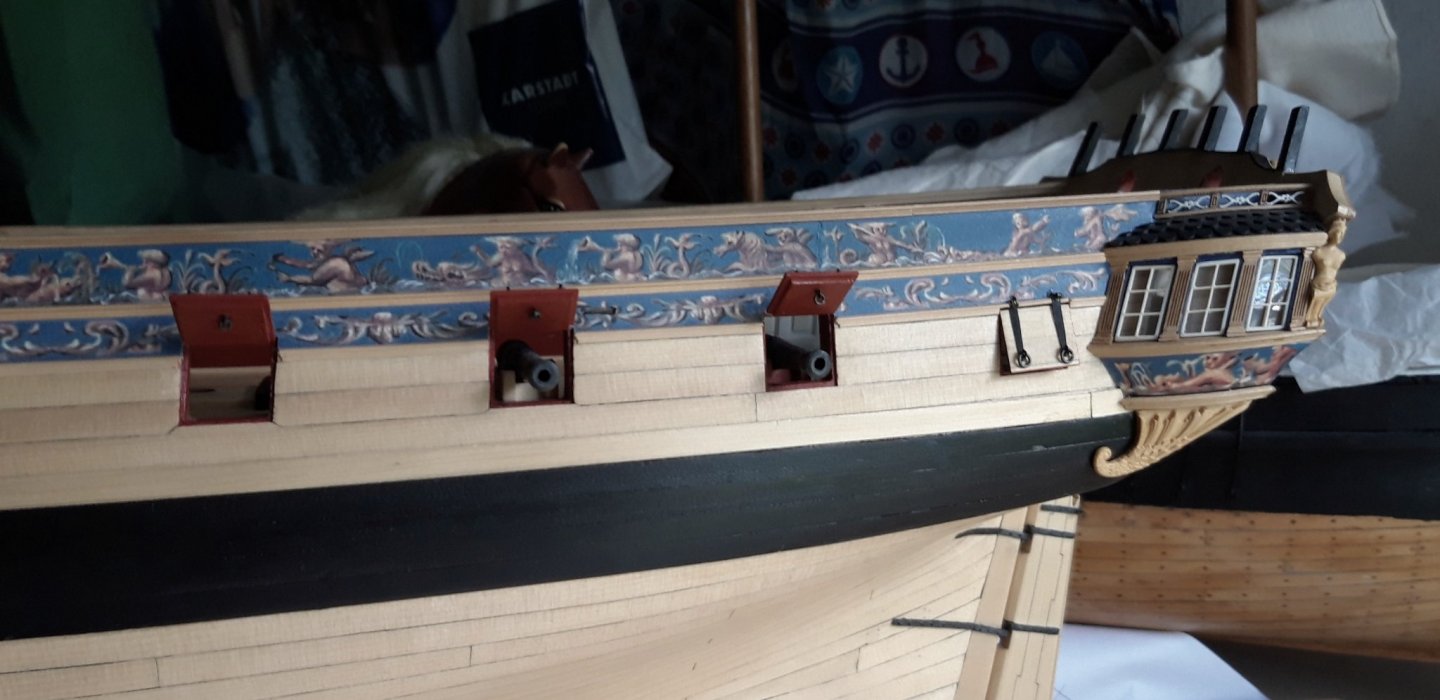
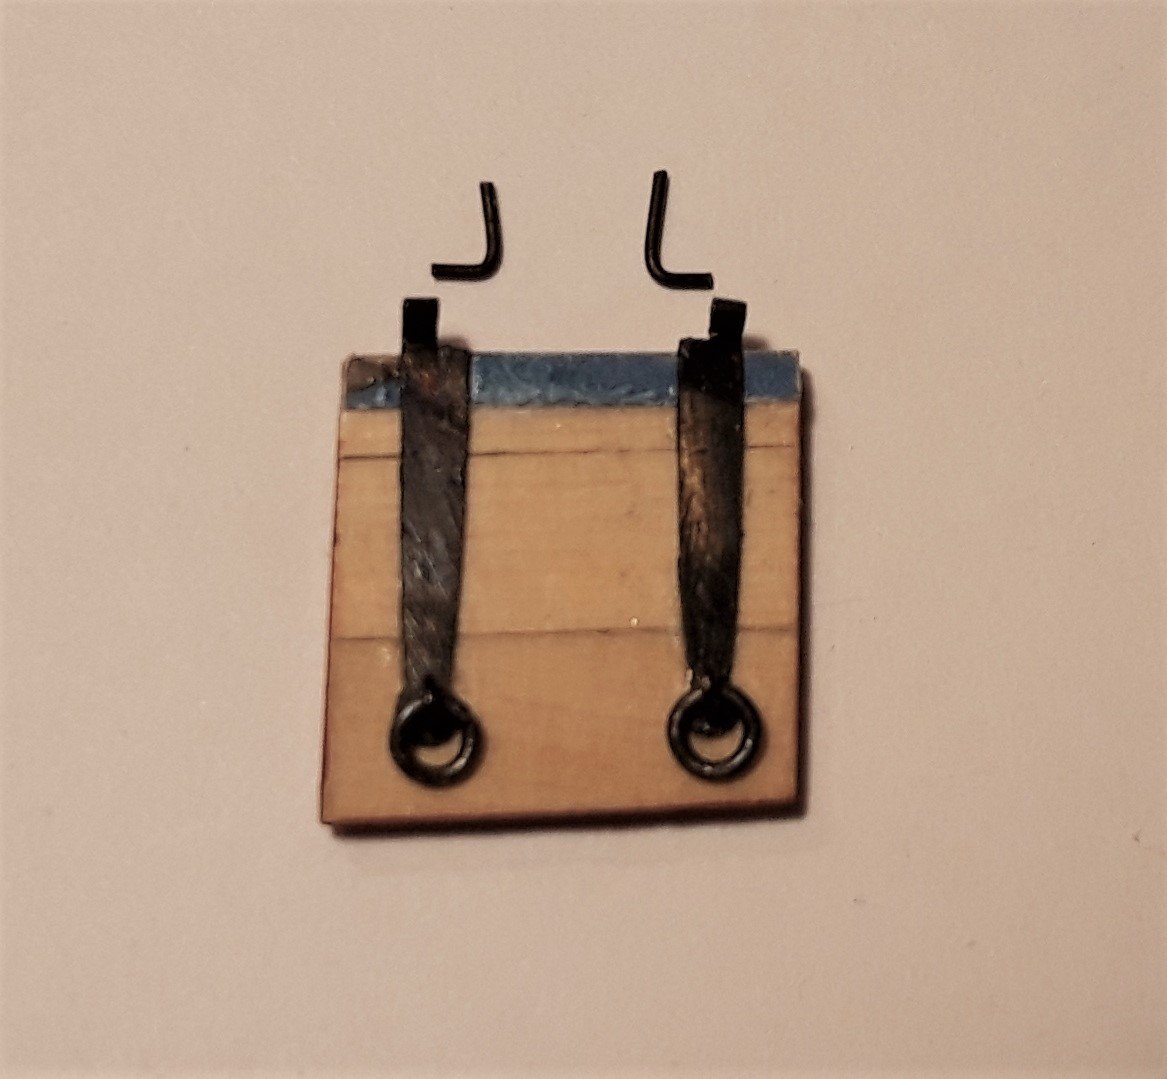
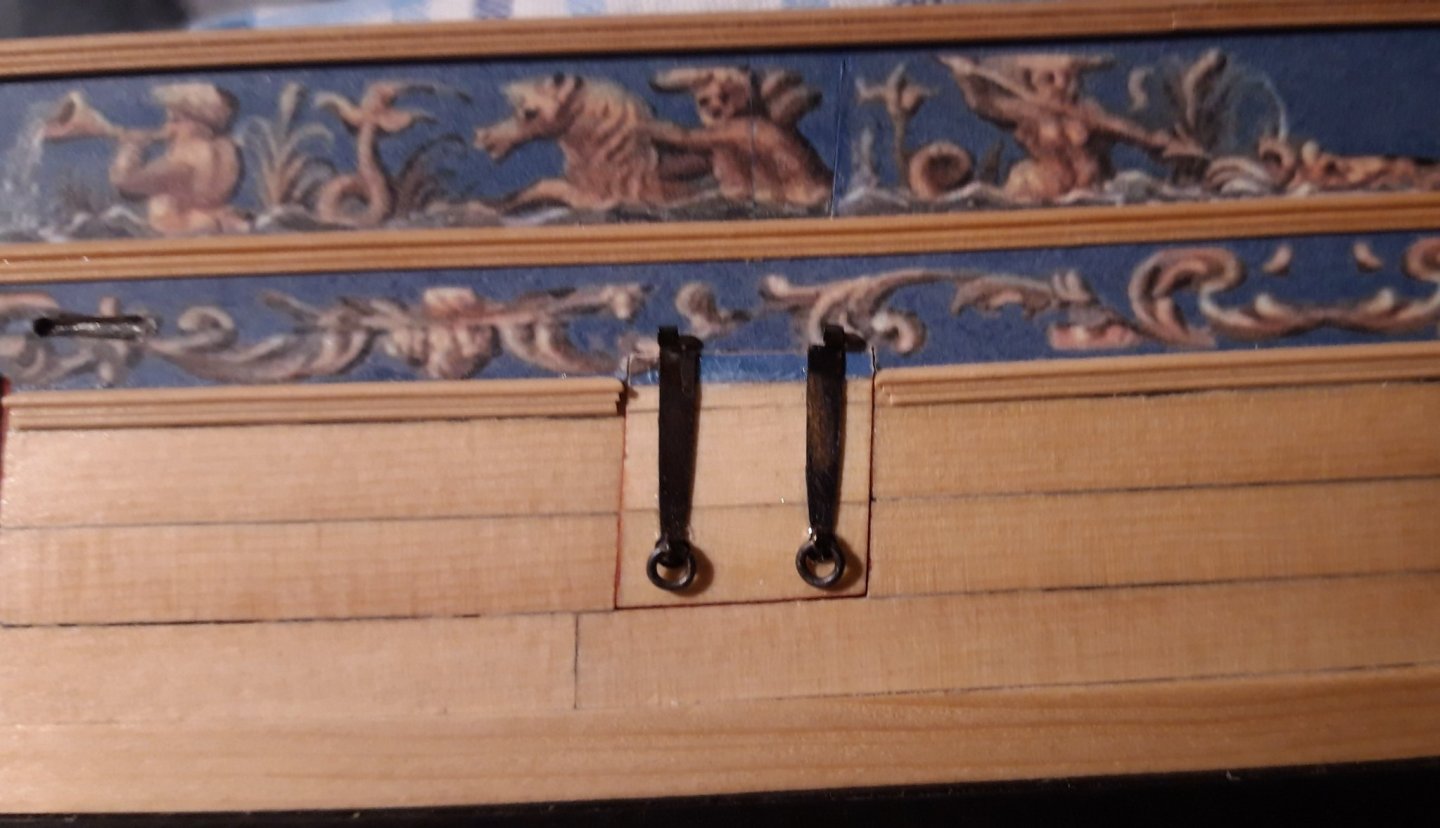
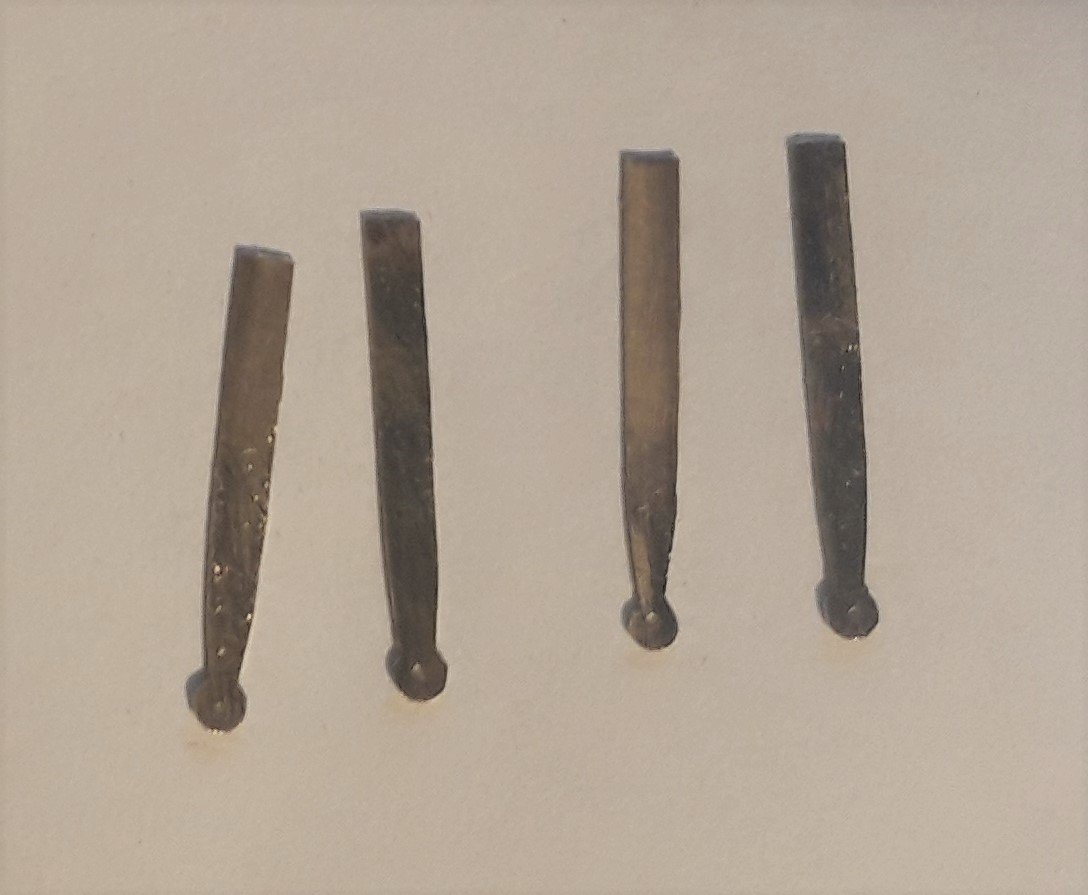
I decided, to overwork the hinges and make them narrower, the gunport lid at the bow and the captains cabin are installed and working, here are some pictures, I think they look a bit more in scale now. Matthias

-
I proceeded with the gunport lids, what do you think, are they too clumsy? I could make them a bit more narrow. Matthias

-
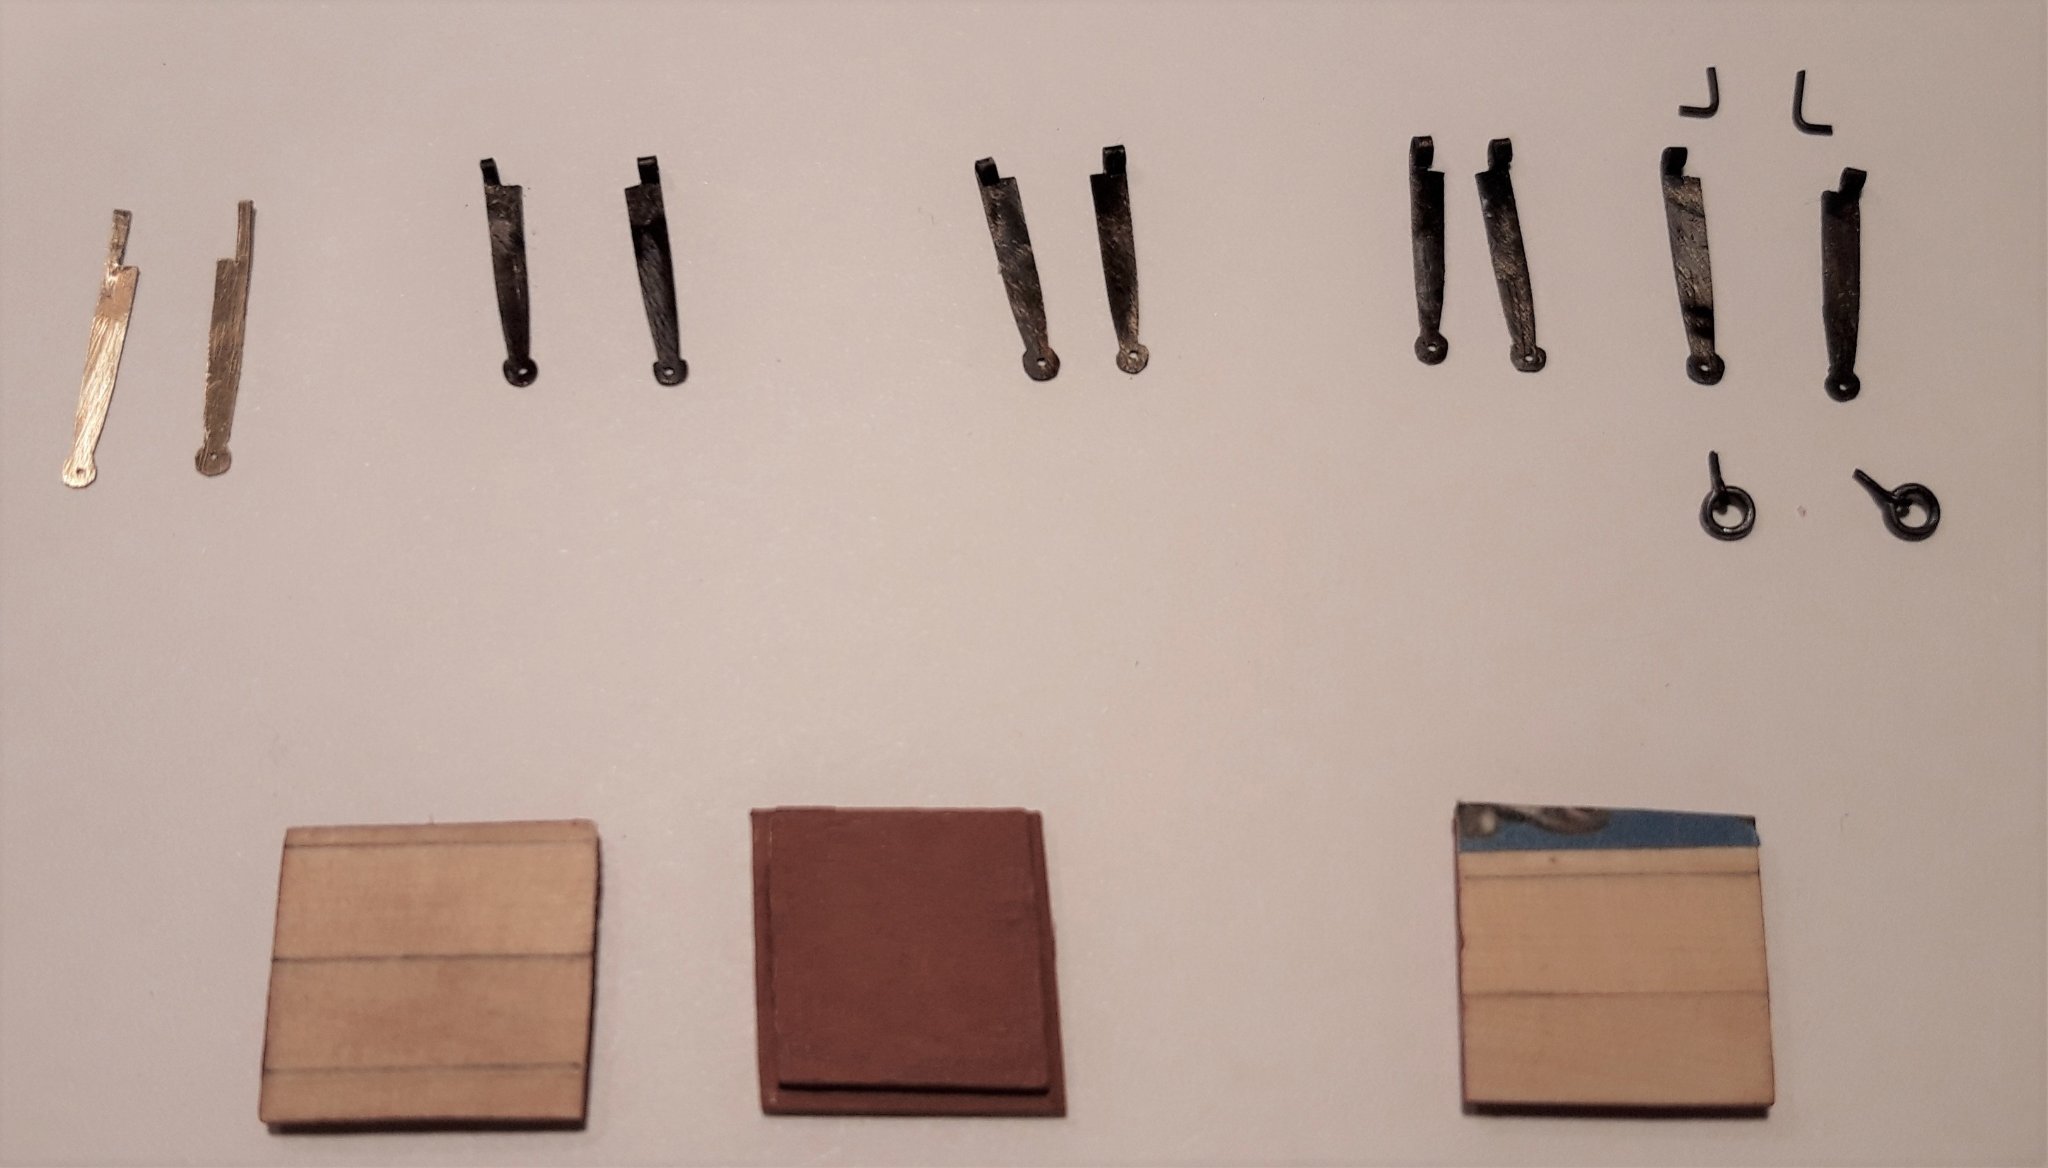
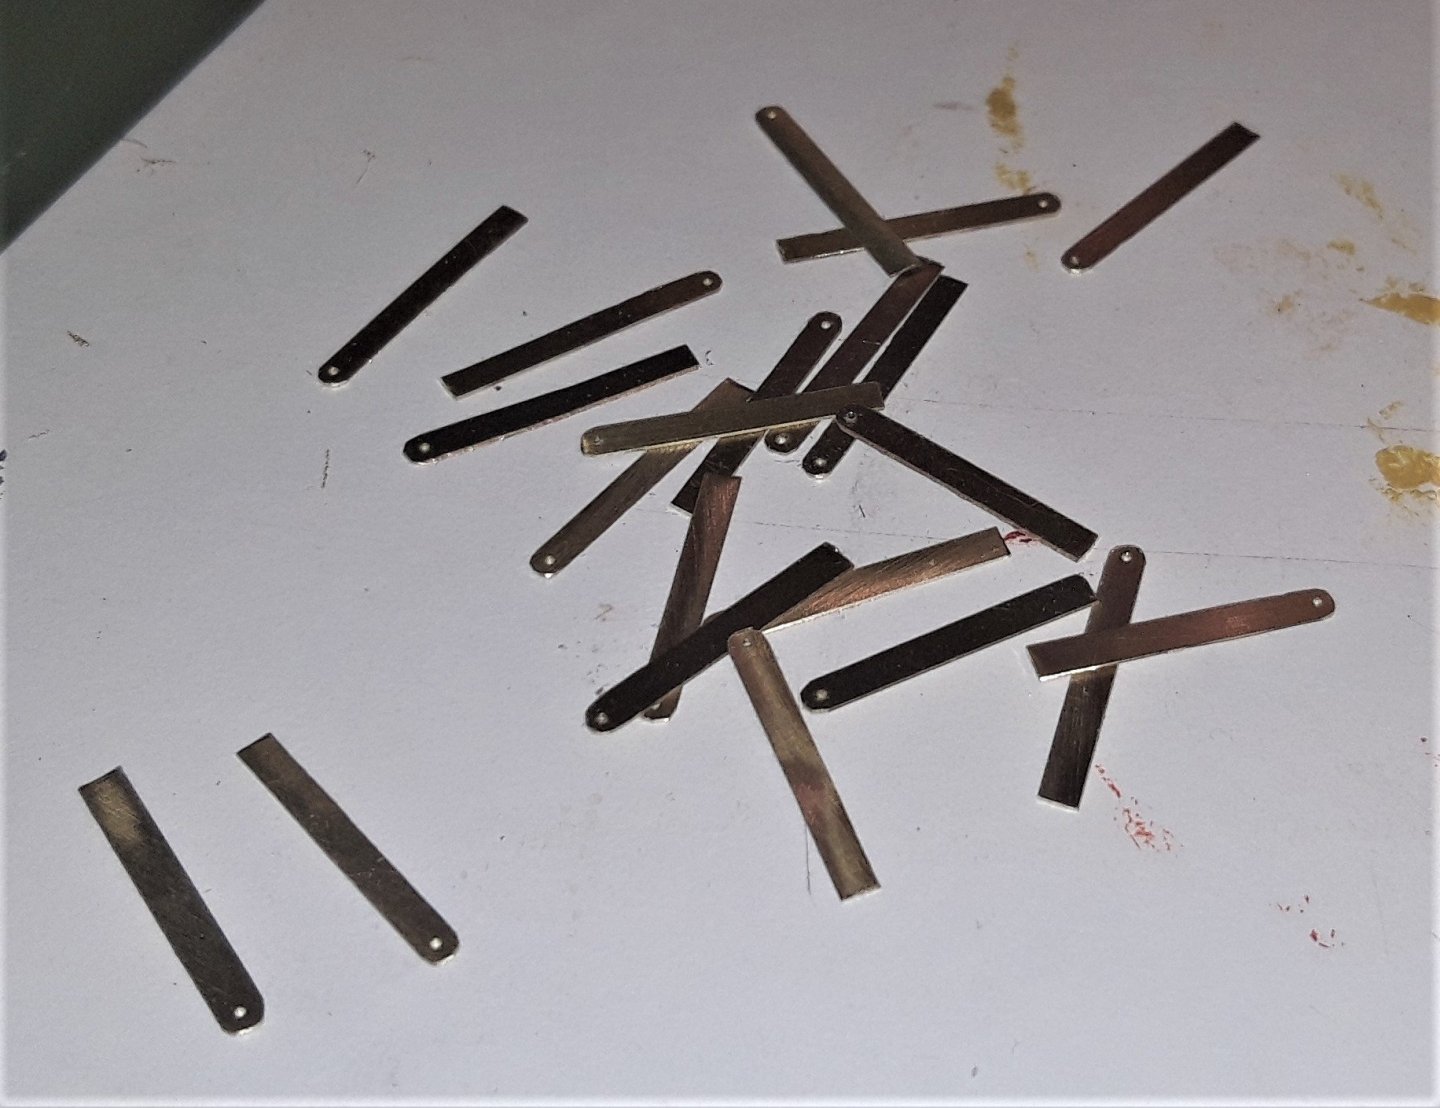
I started with the gunport lids. That is more difficult as I thougt. First of all I made the wooden lids, it took me some time to make a tight fit. Then I started with the hinges from brass. So far for now. Matthias

-
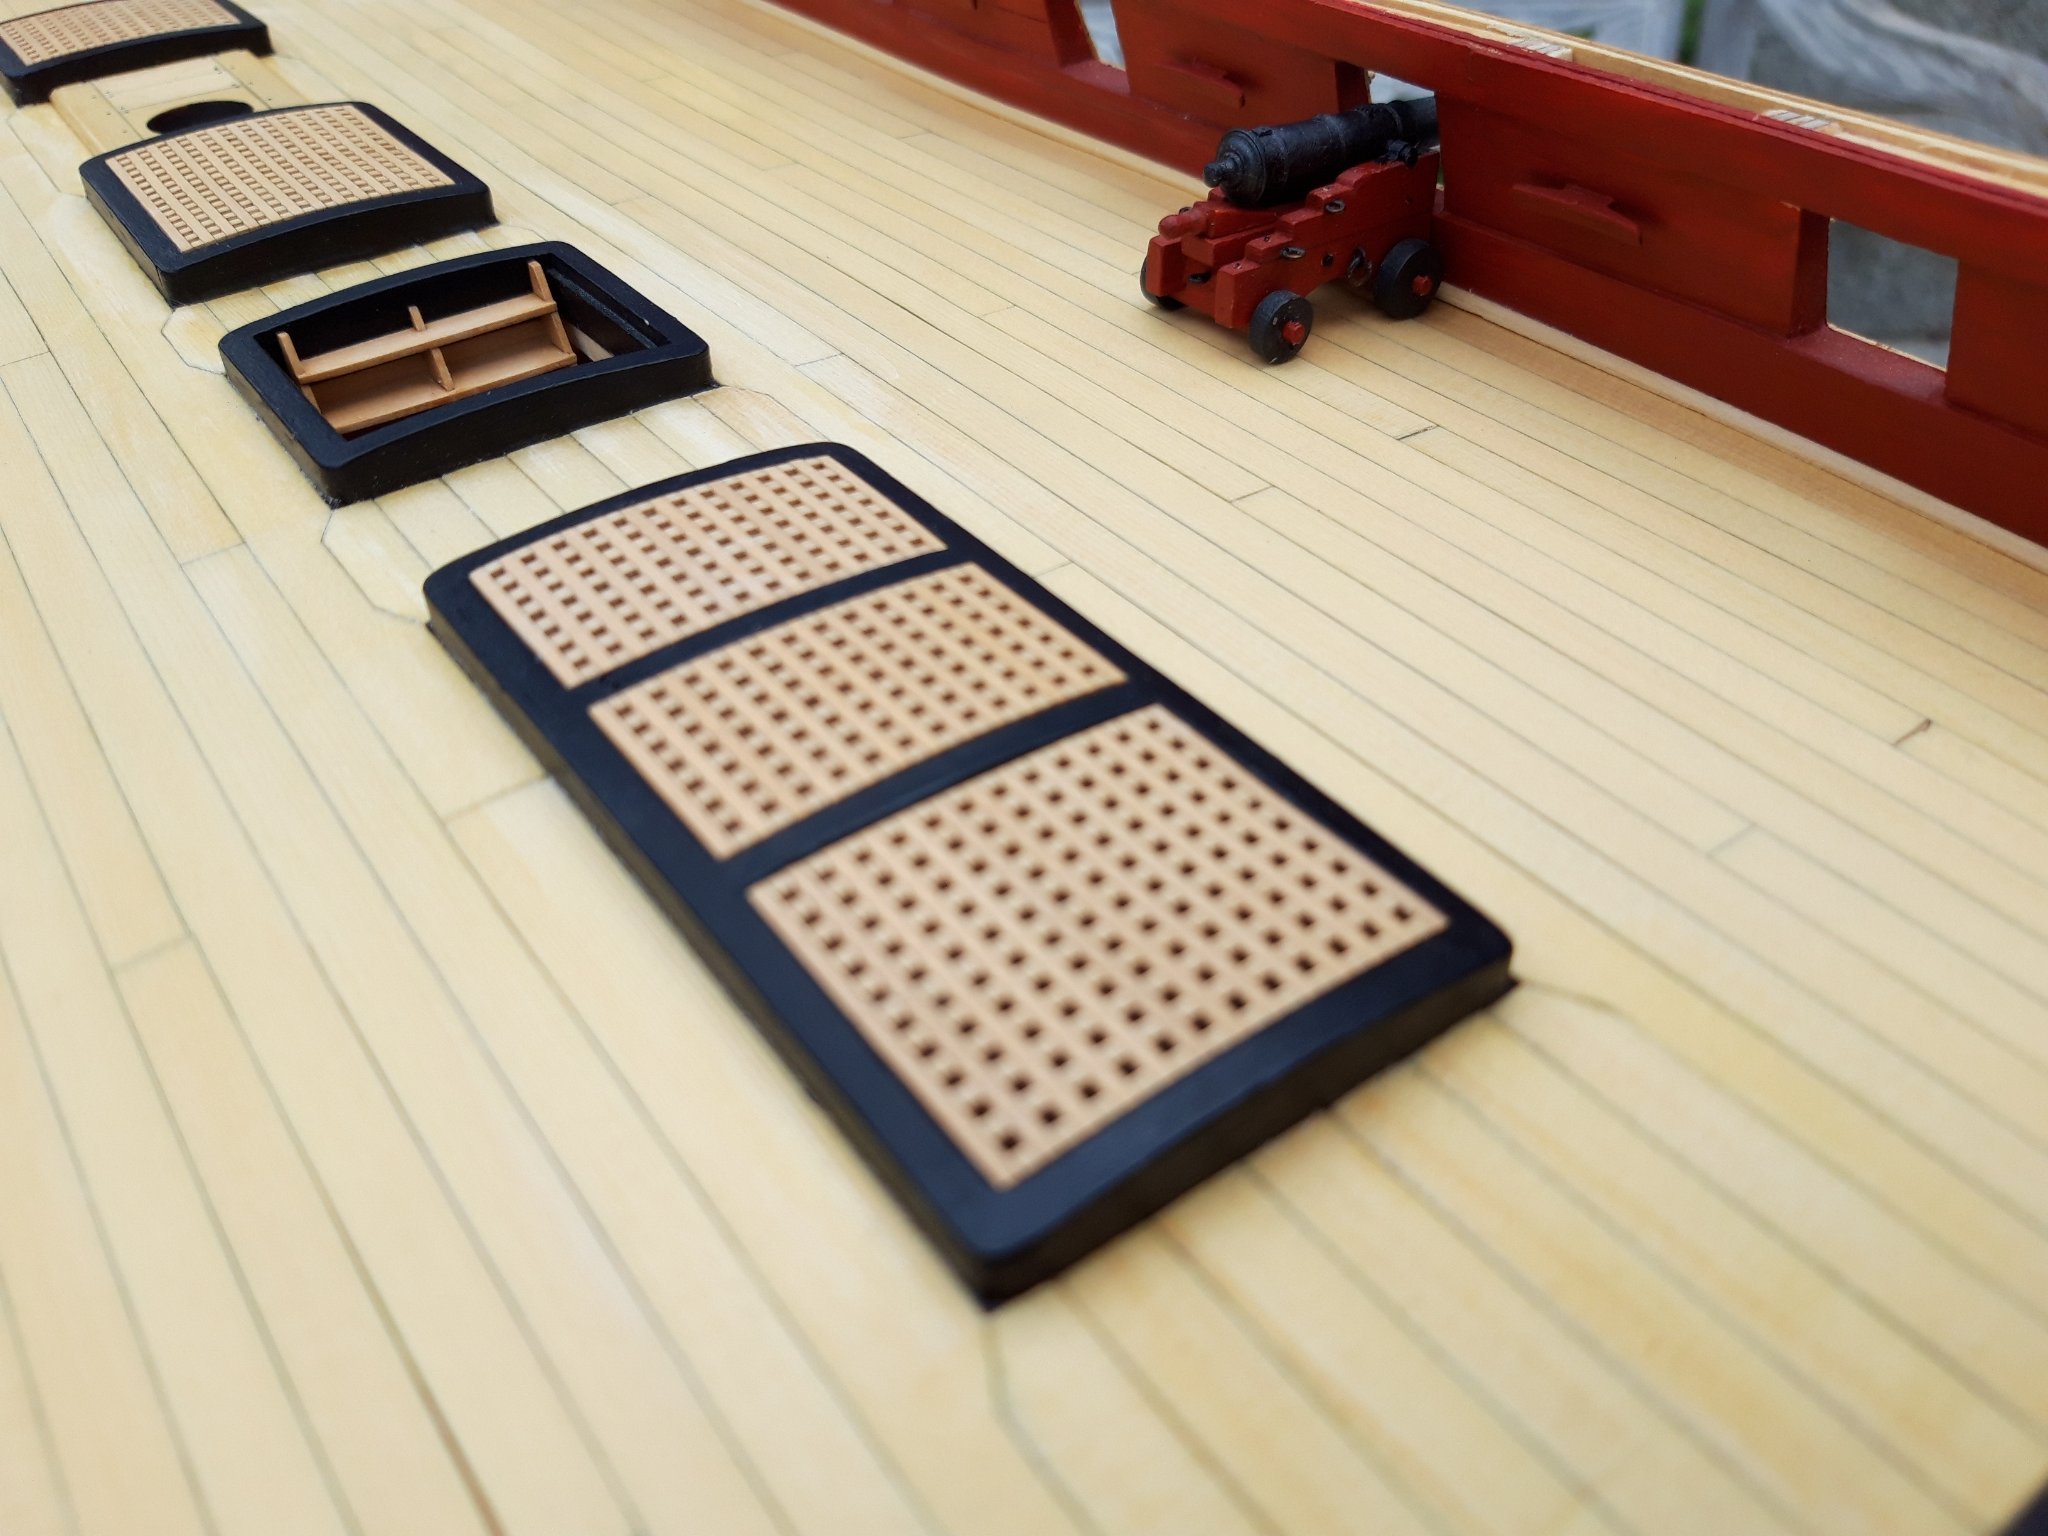
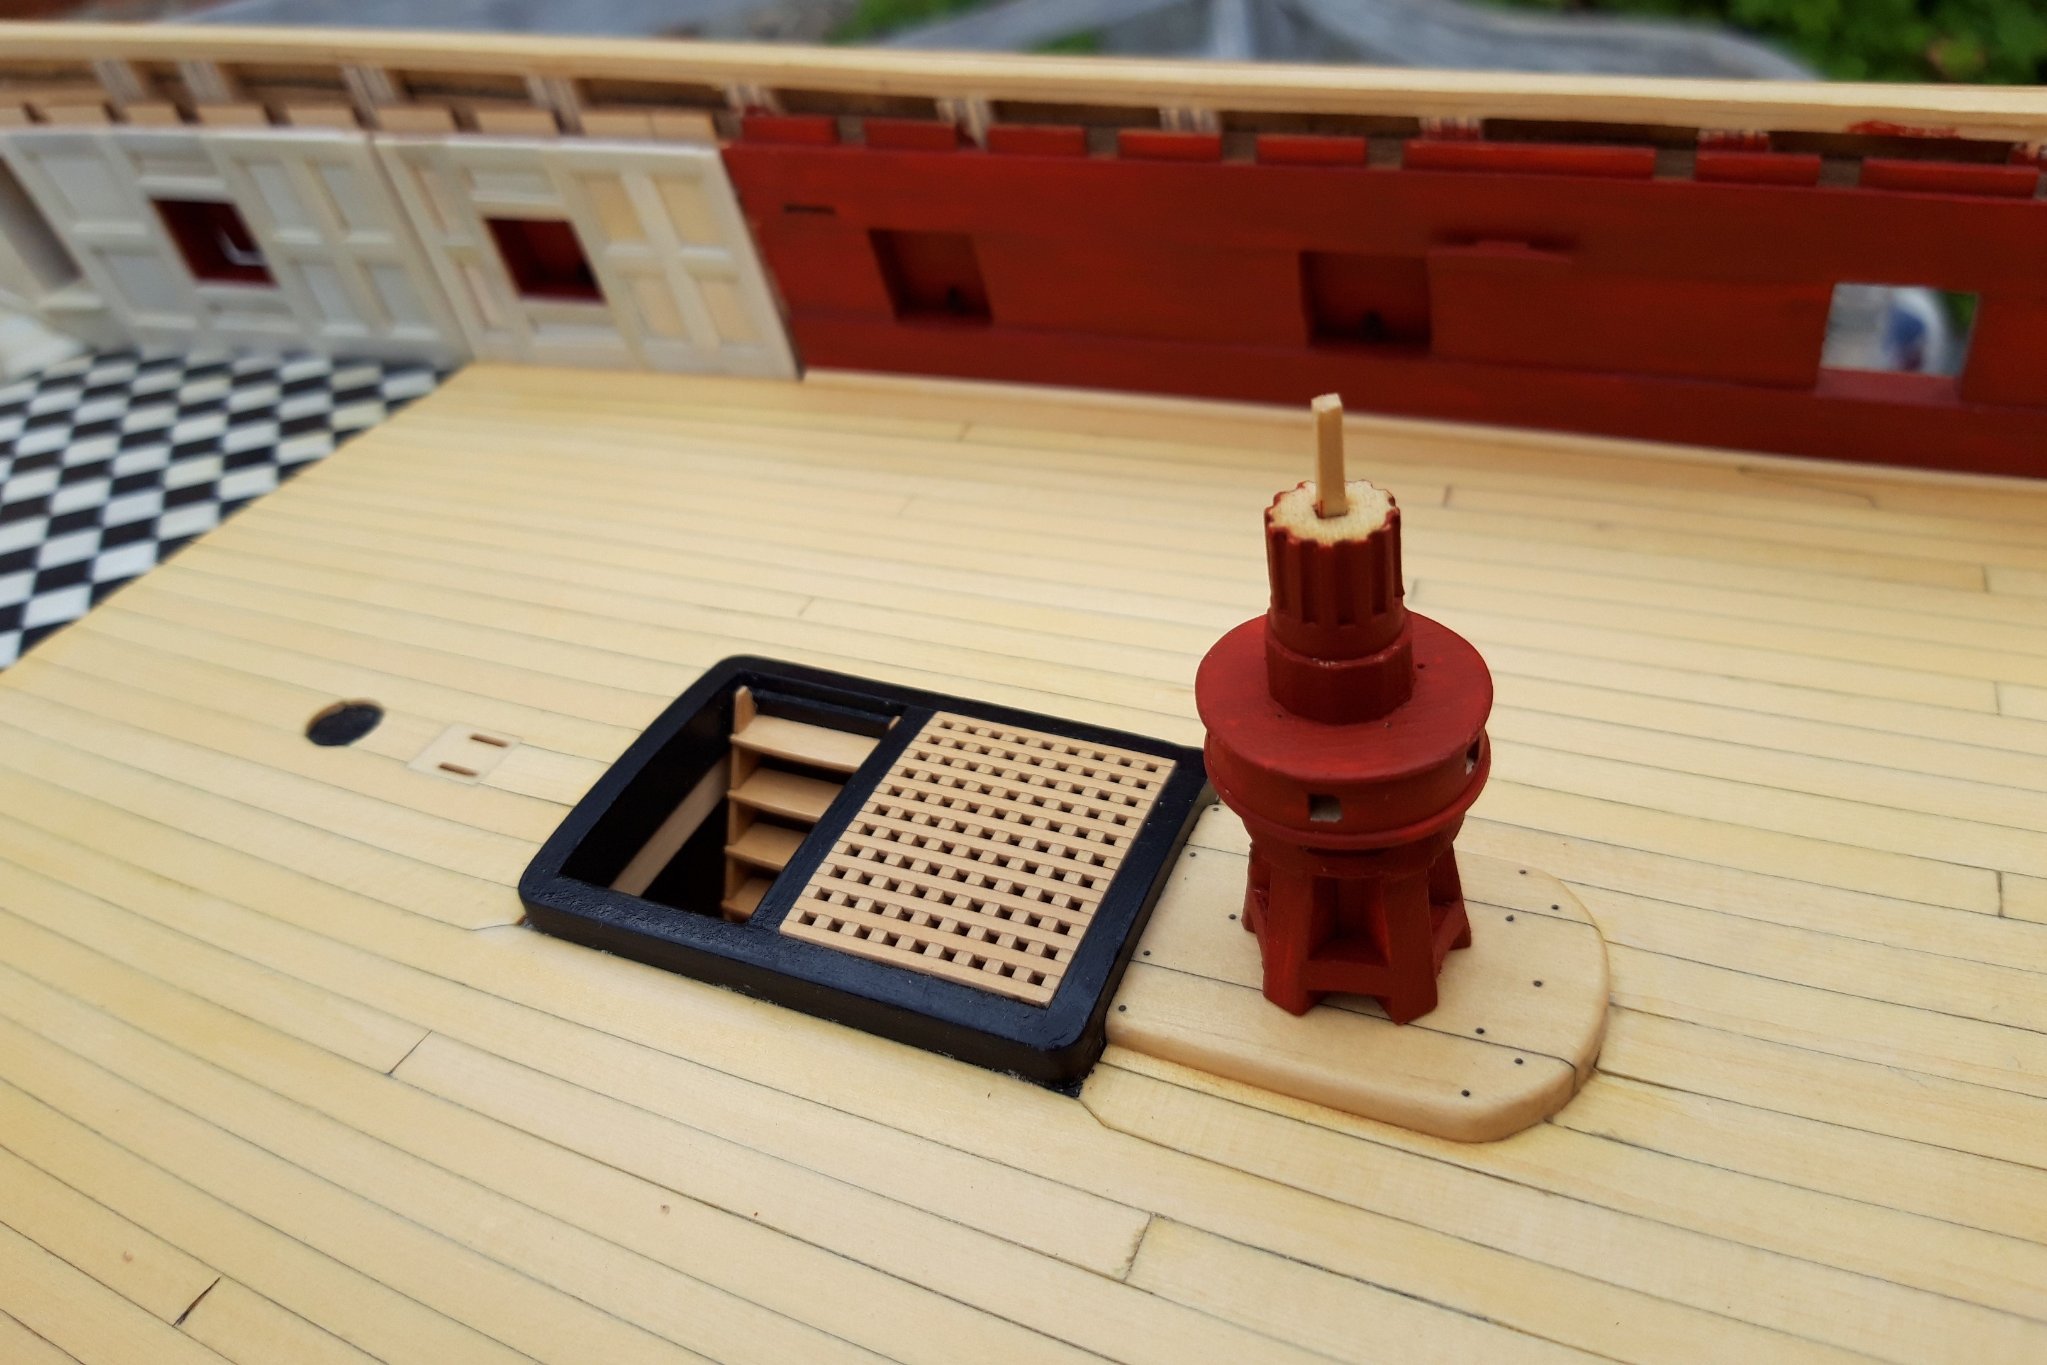
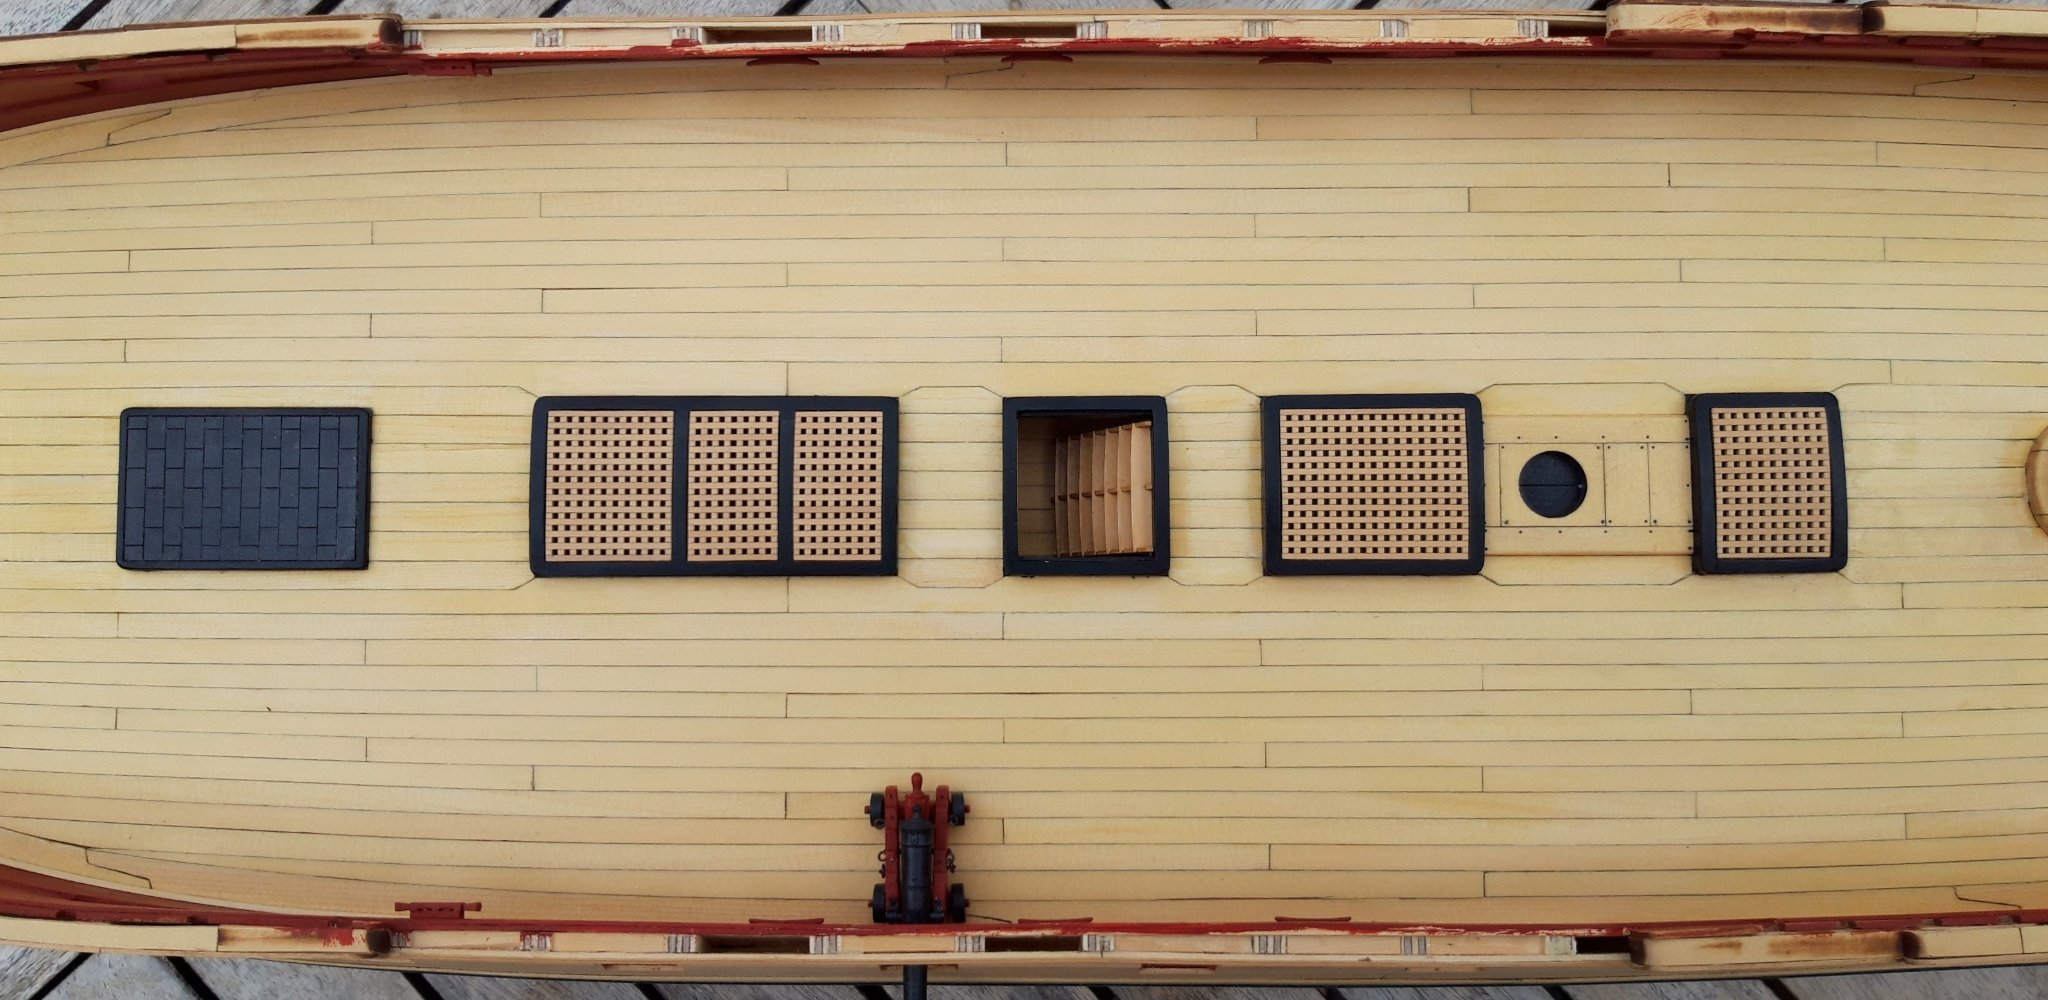
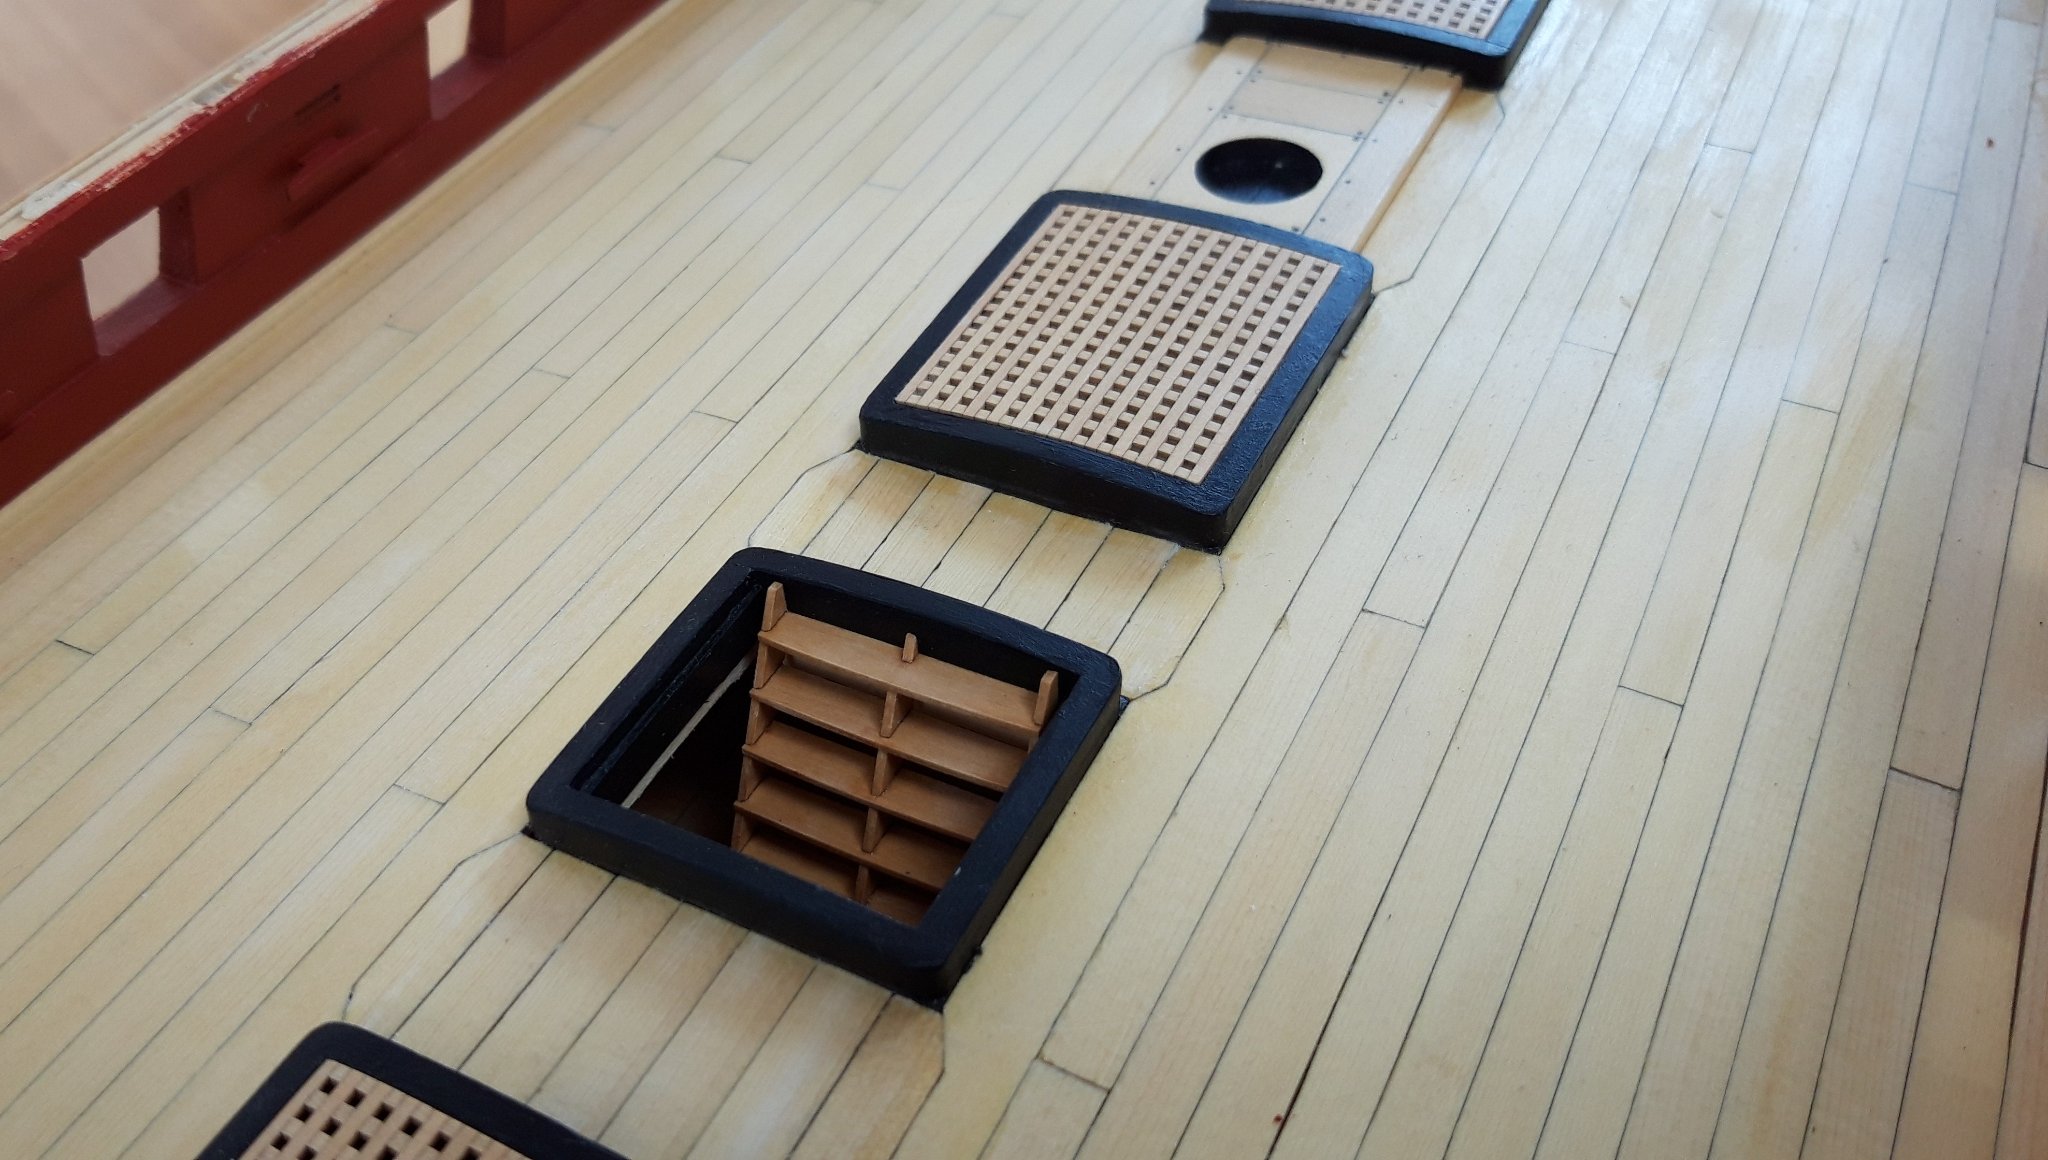
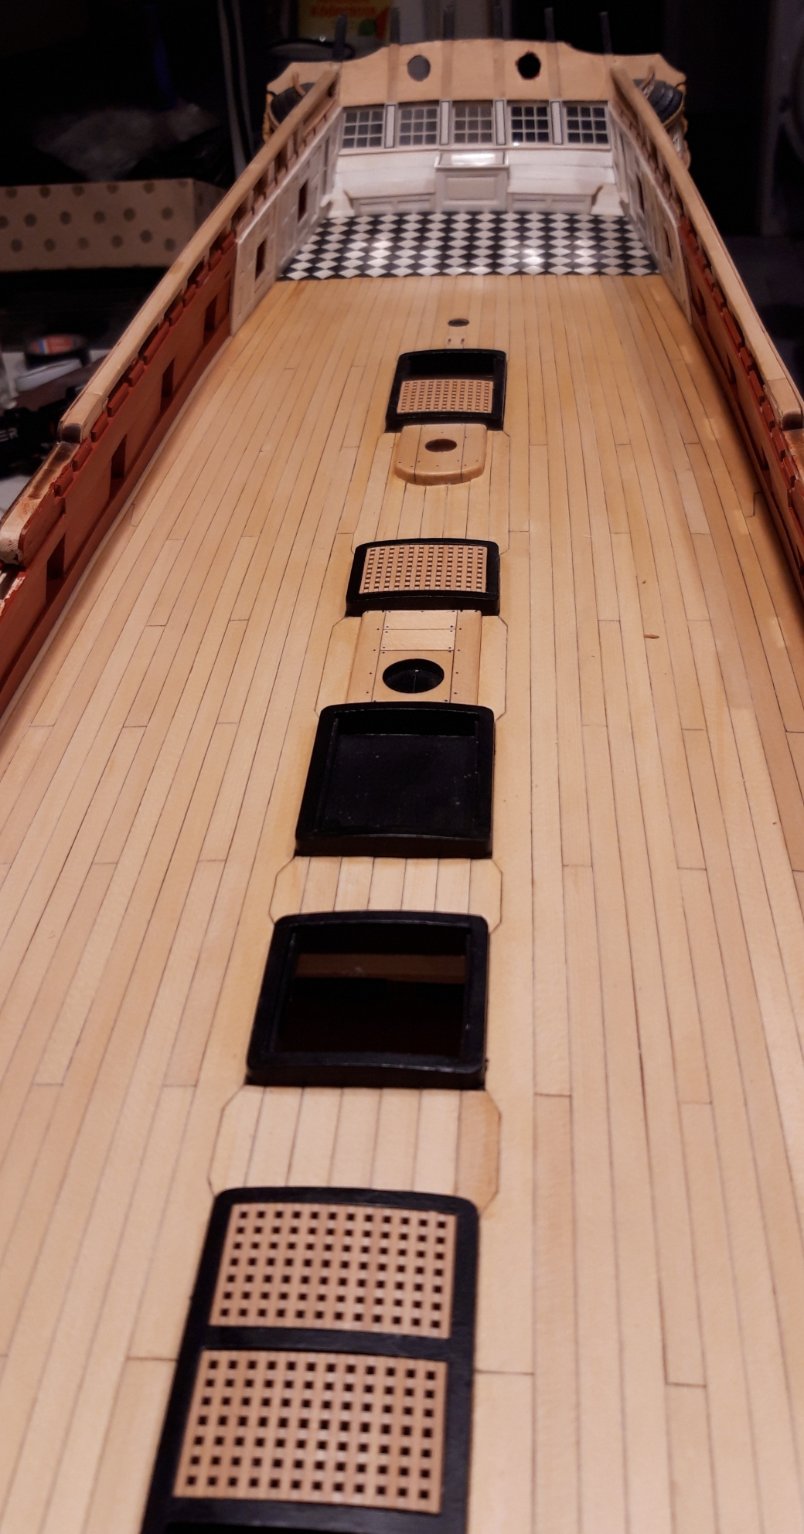
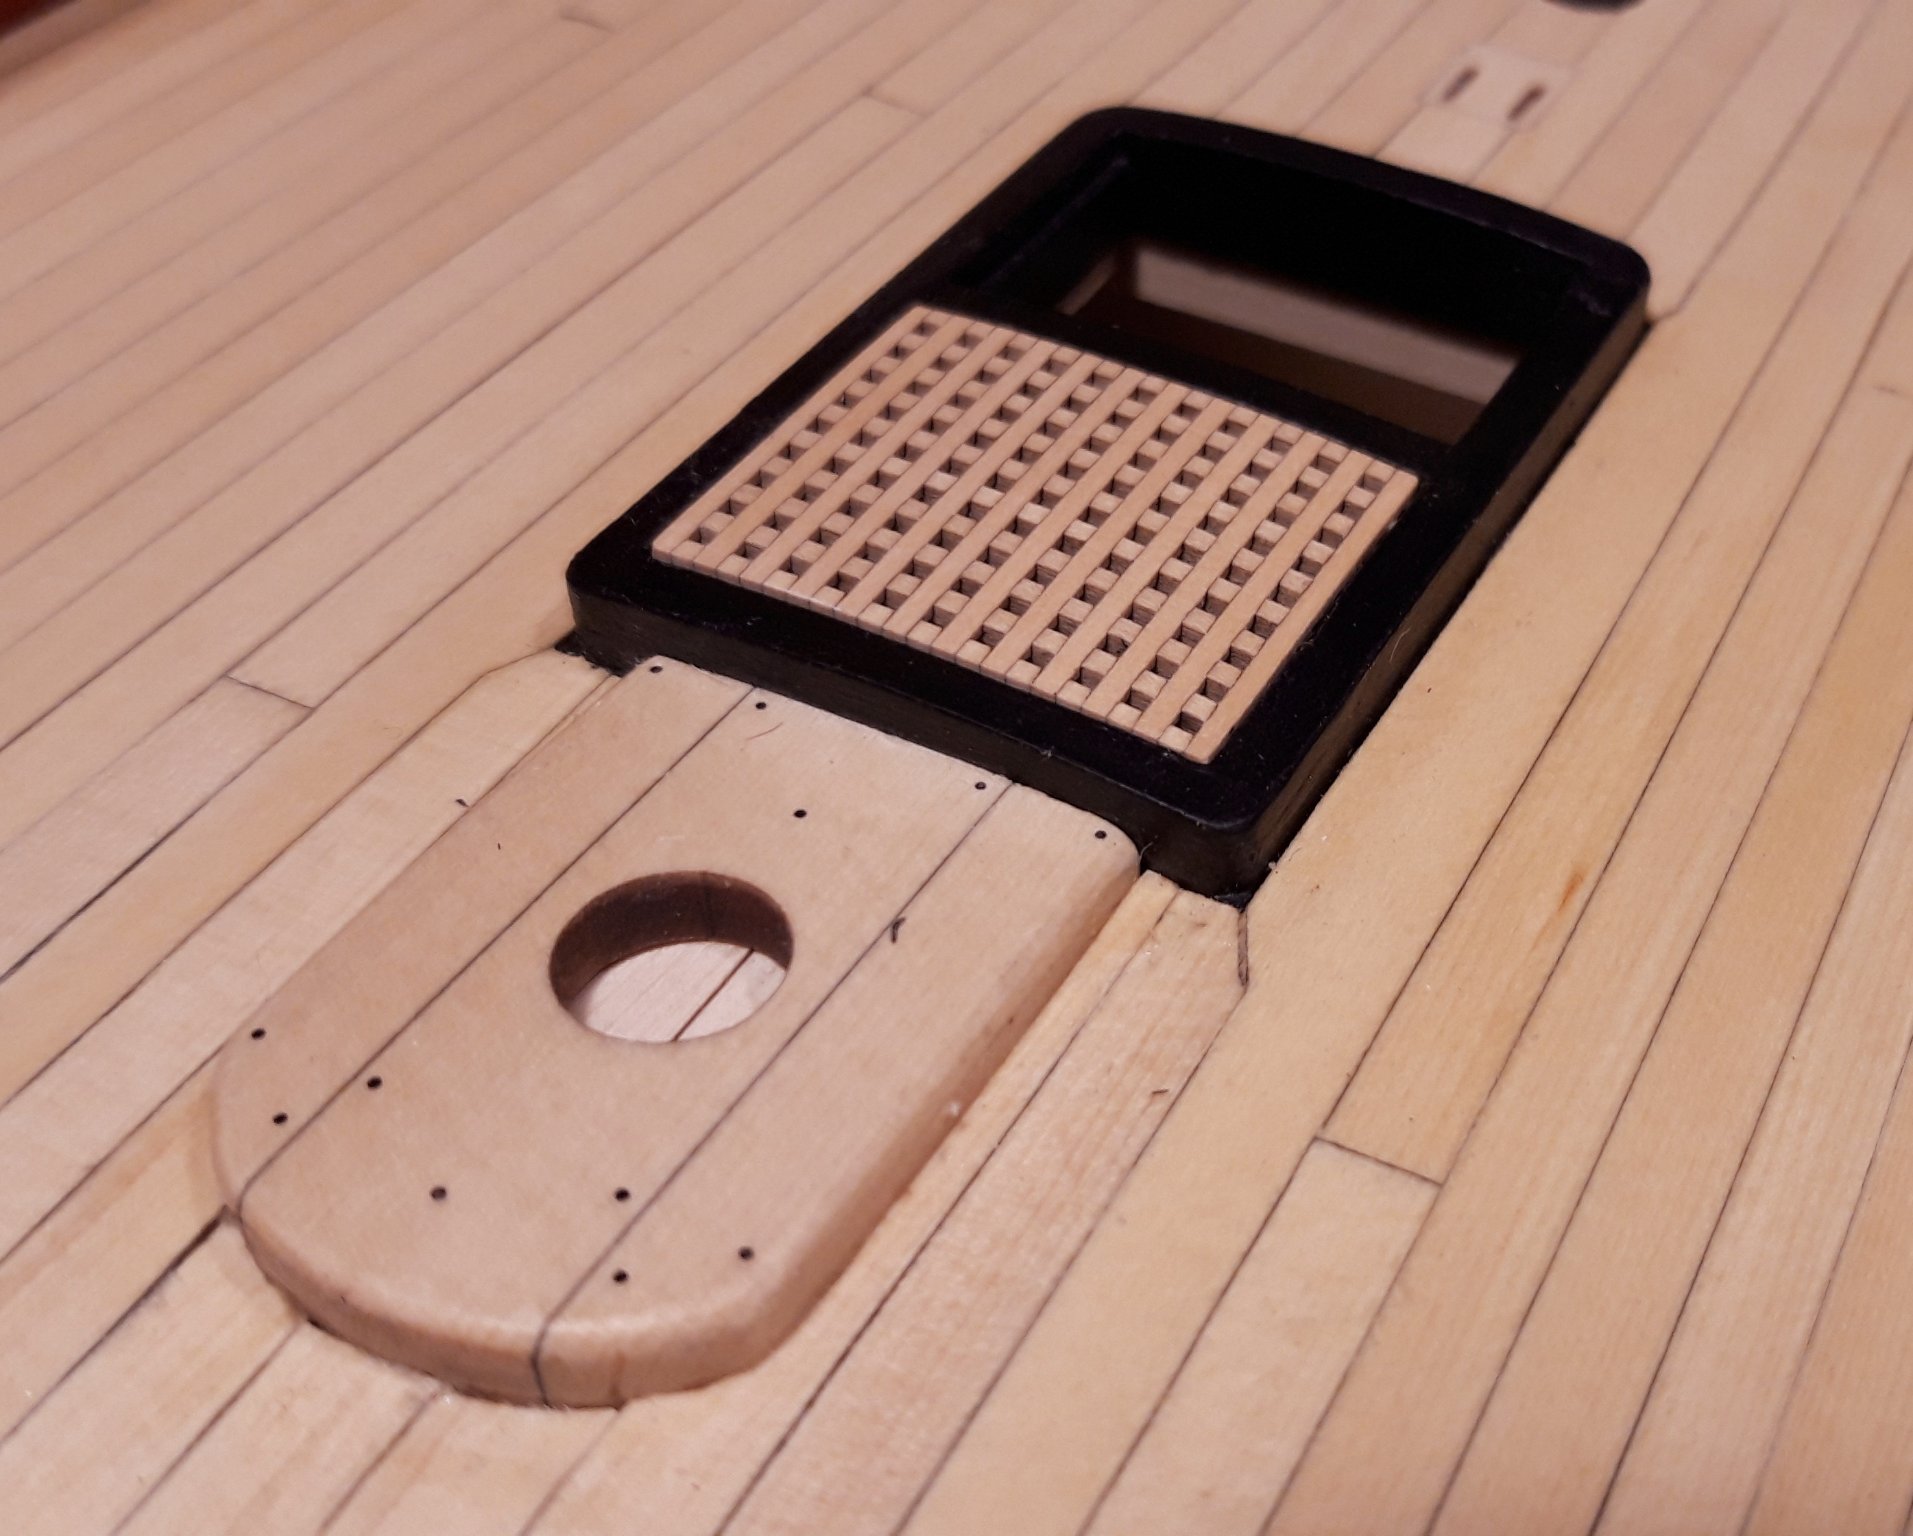
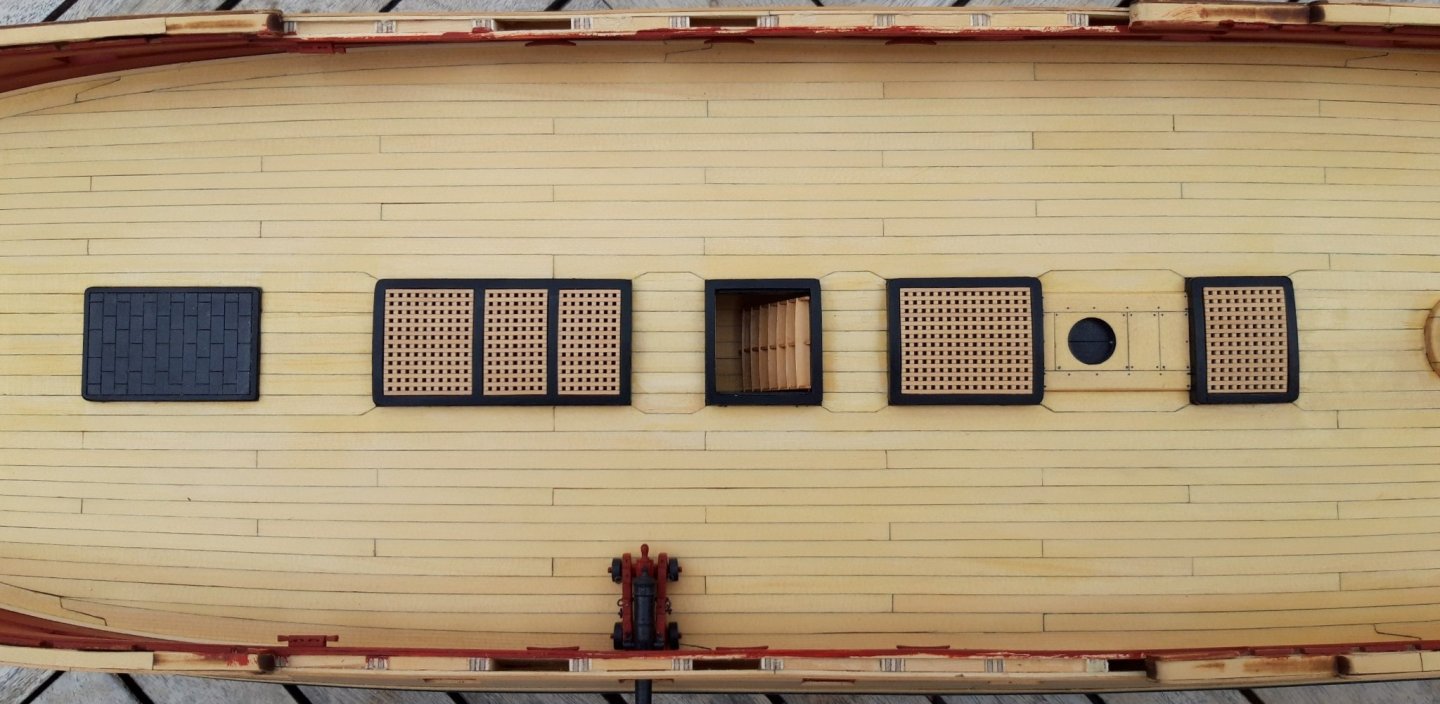
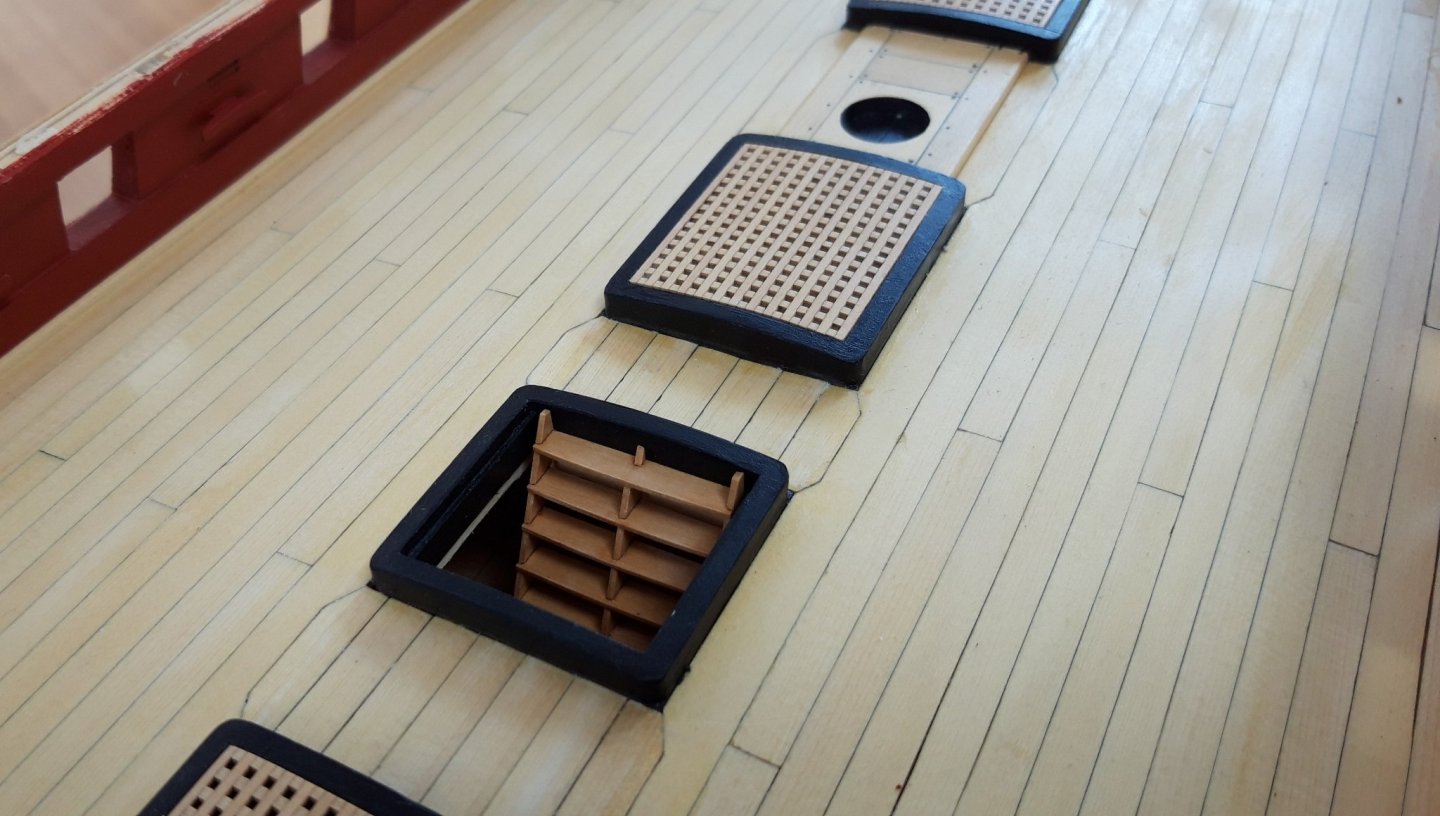
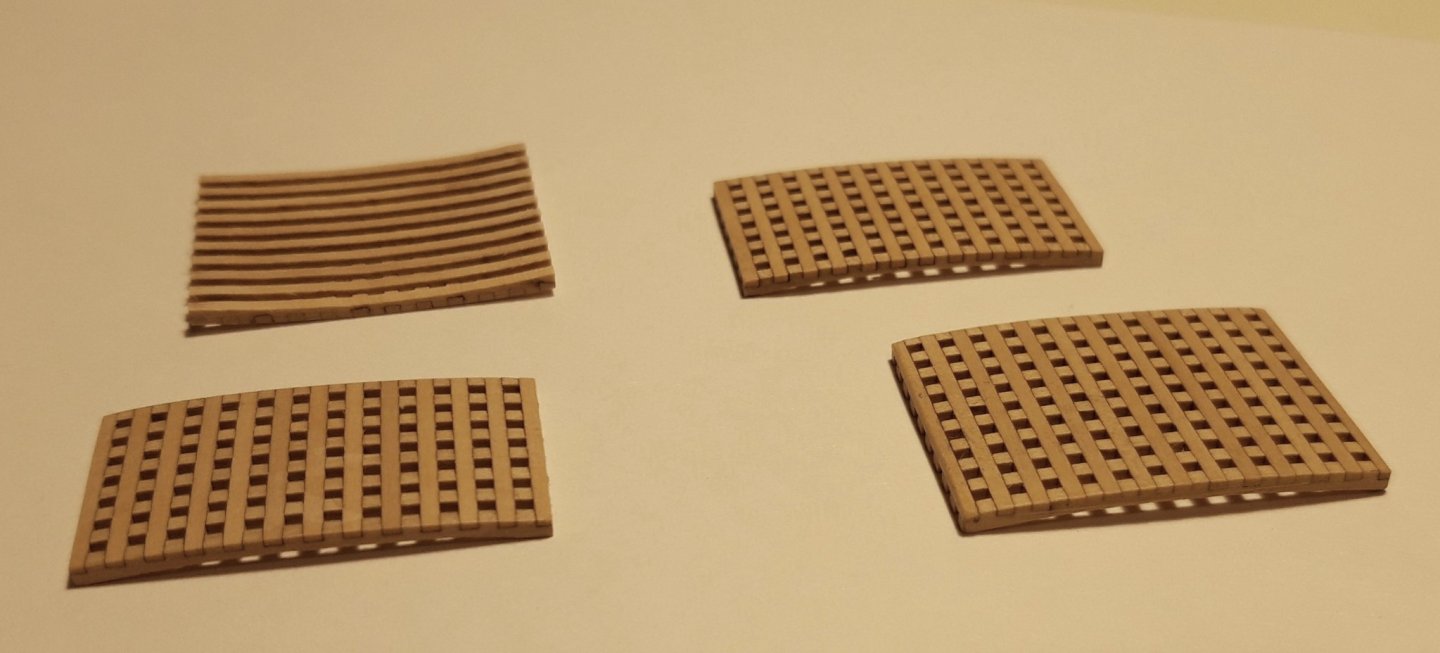
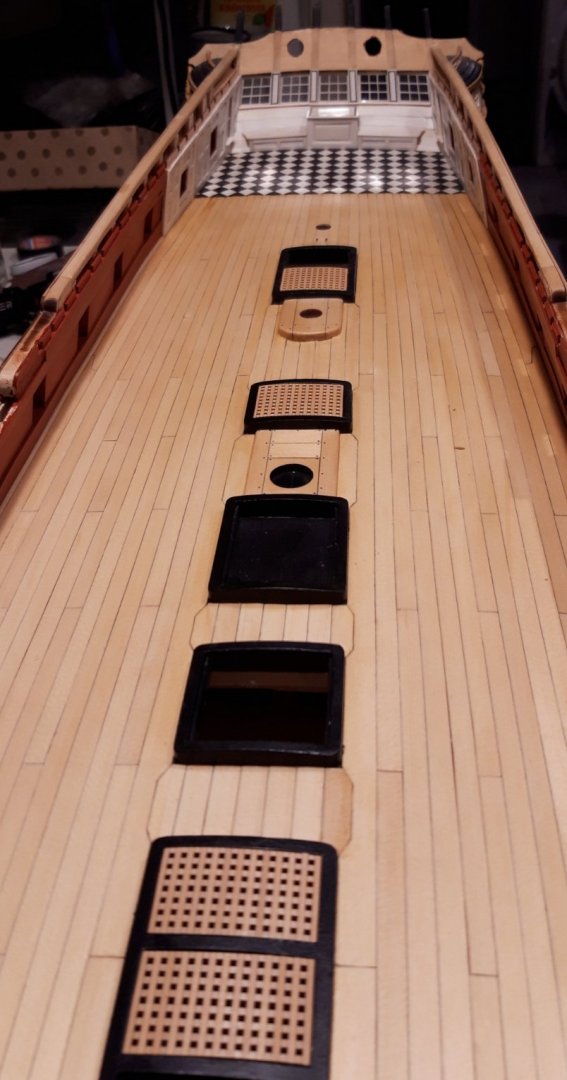
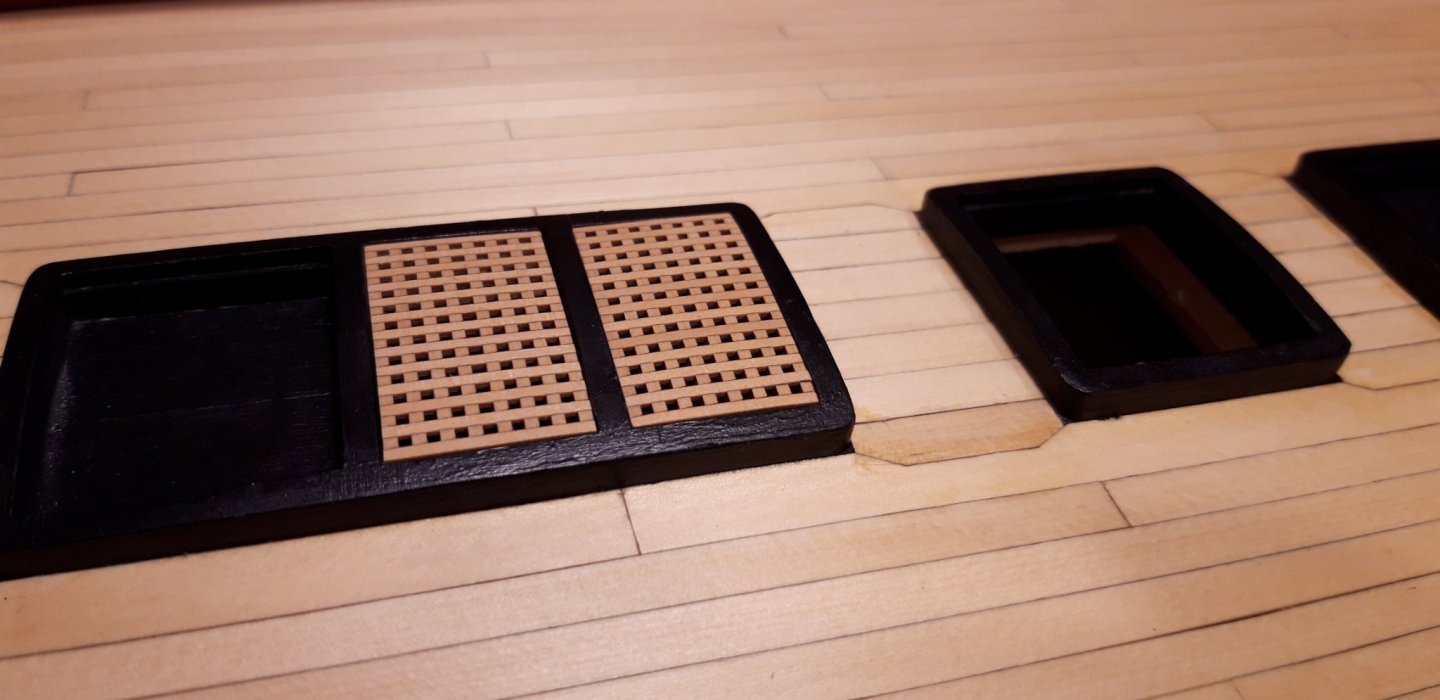
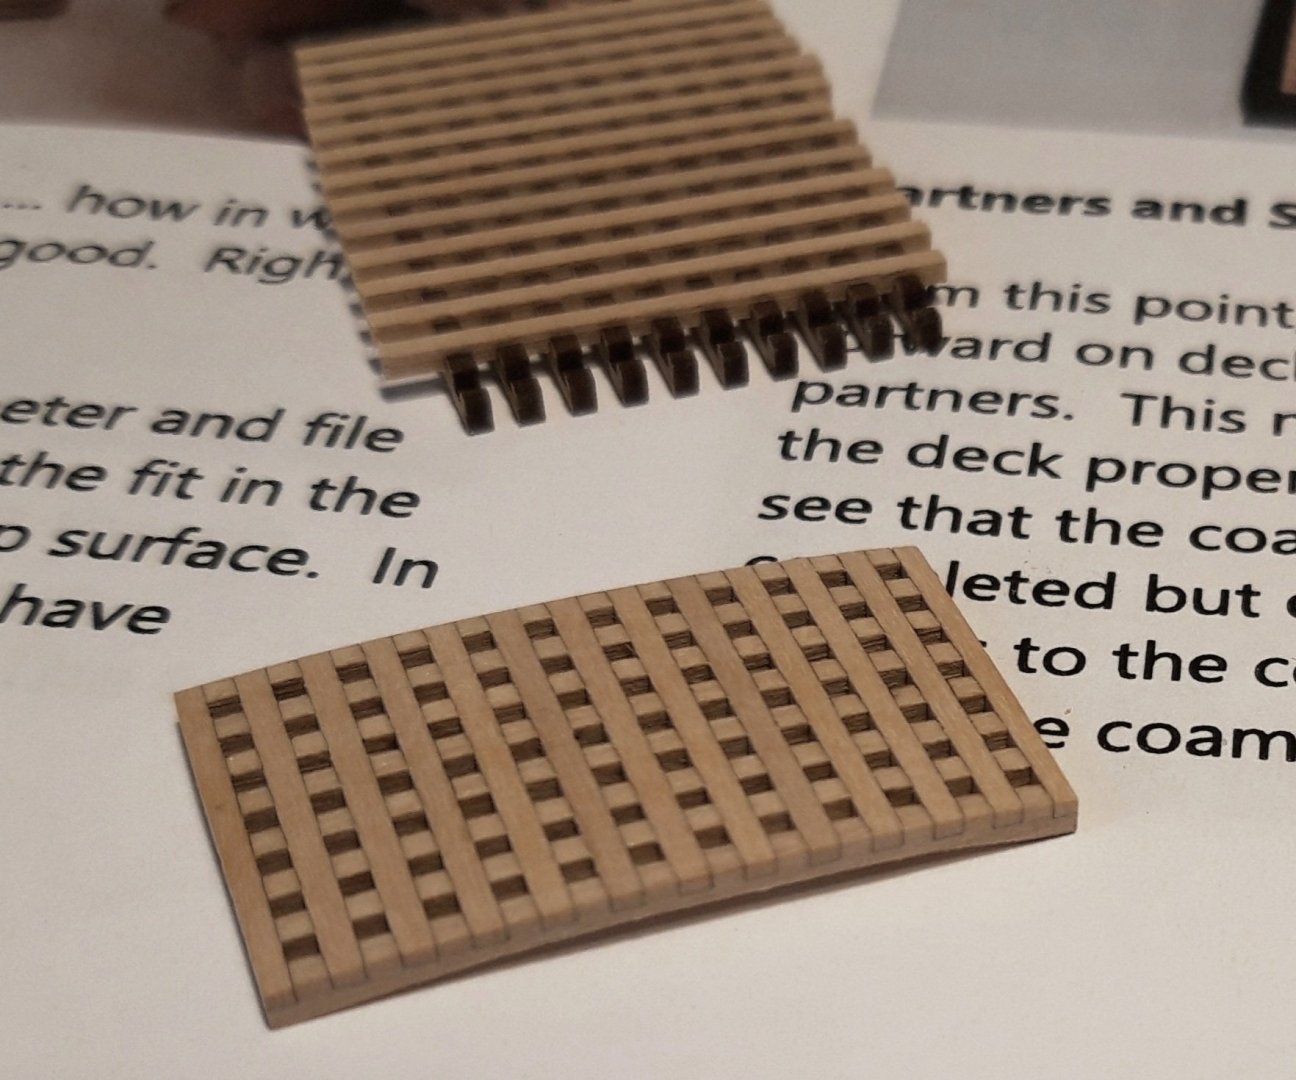
Thank you. The gratings are almost done now. Two of them have to dry over night, I will complete them tomorrow. I sanded them down to almost 3/64" now. Twice one of the strips Fell out, so I had to work very careful. I also had to increase the hight of the rabbet for a good fit in the coamings. So well designed! Thank you Chuck!! Matthias

-
The grating is about 1,6 mm or 1/16" thick now. Is that how you do it Chuck?
-
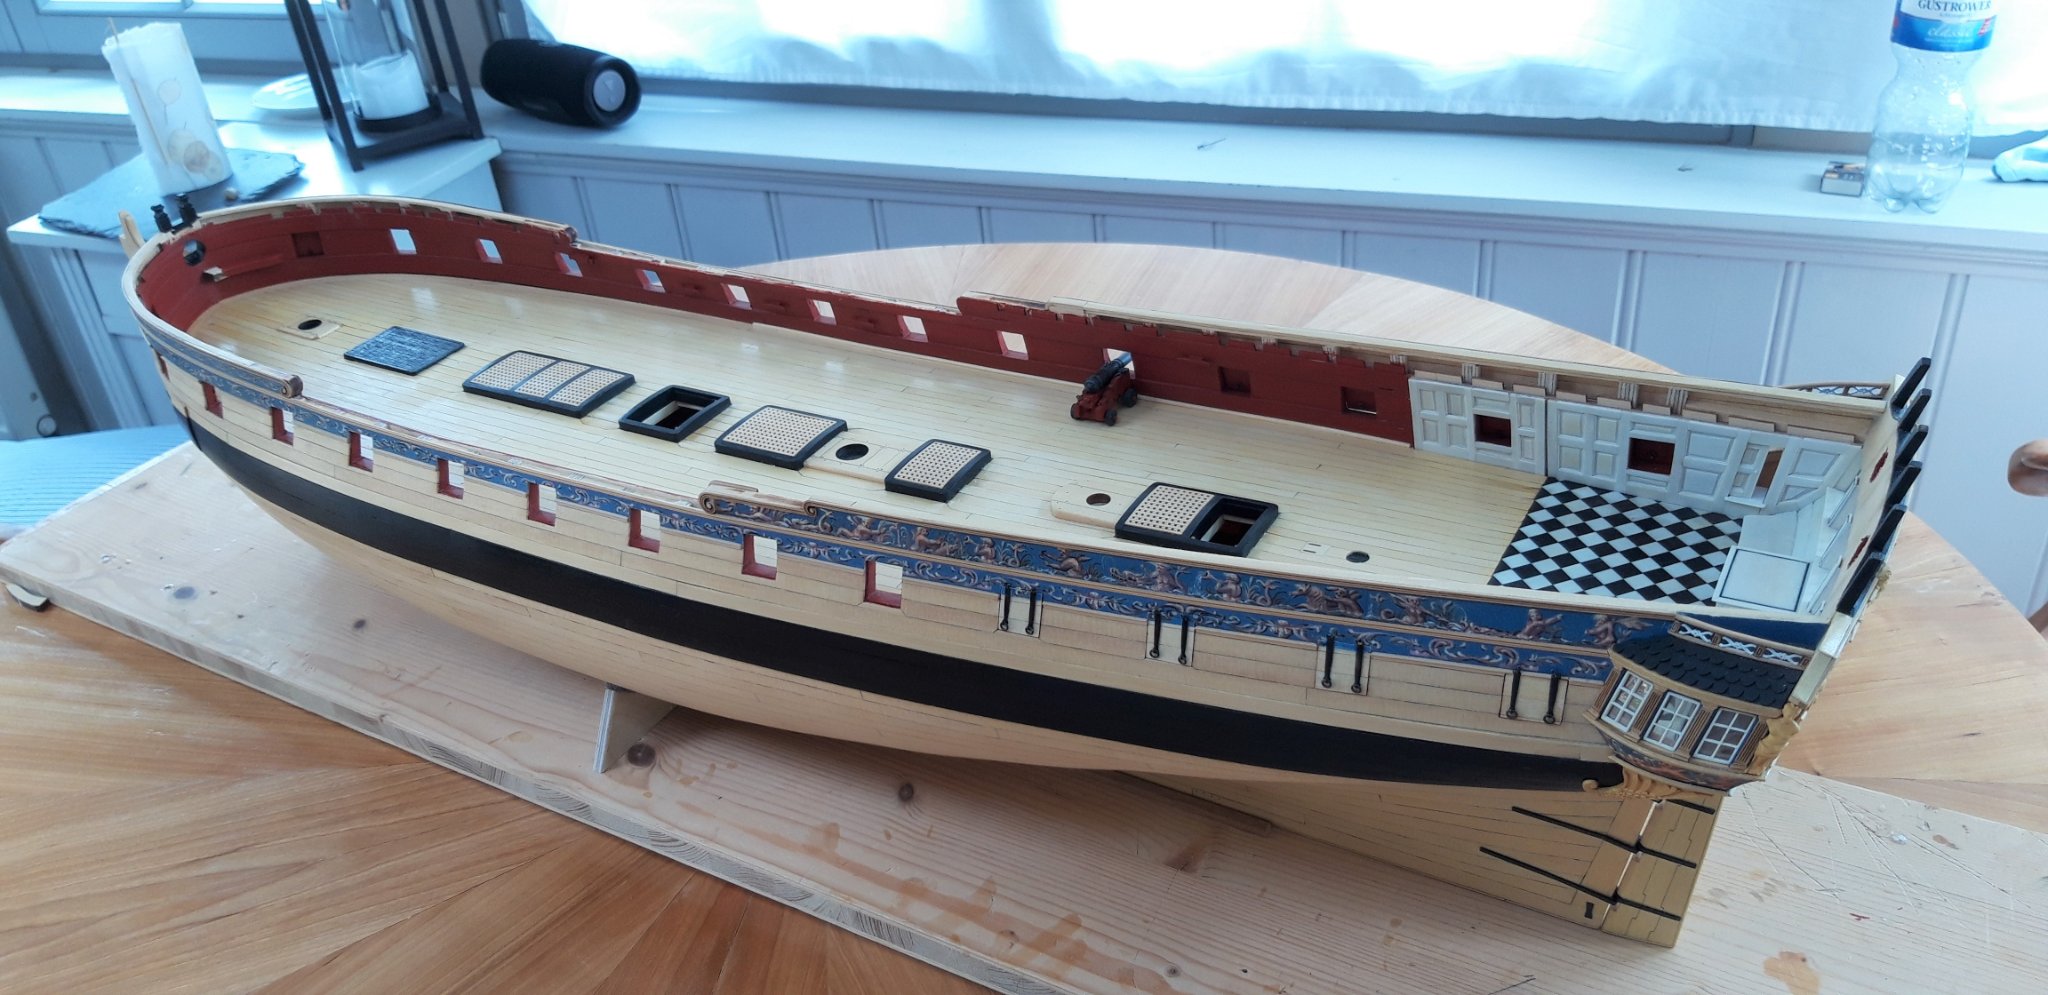
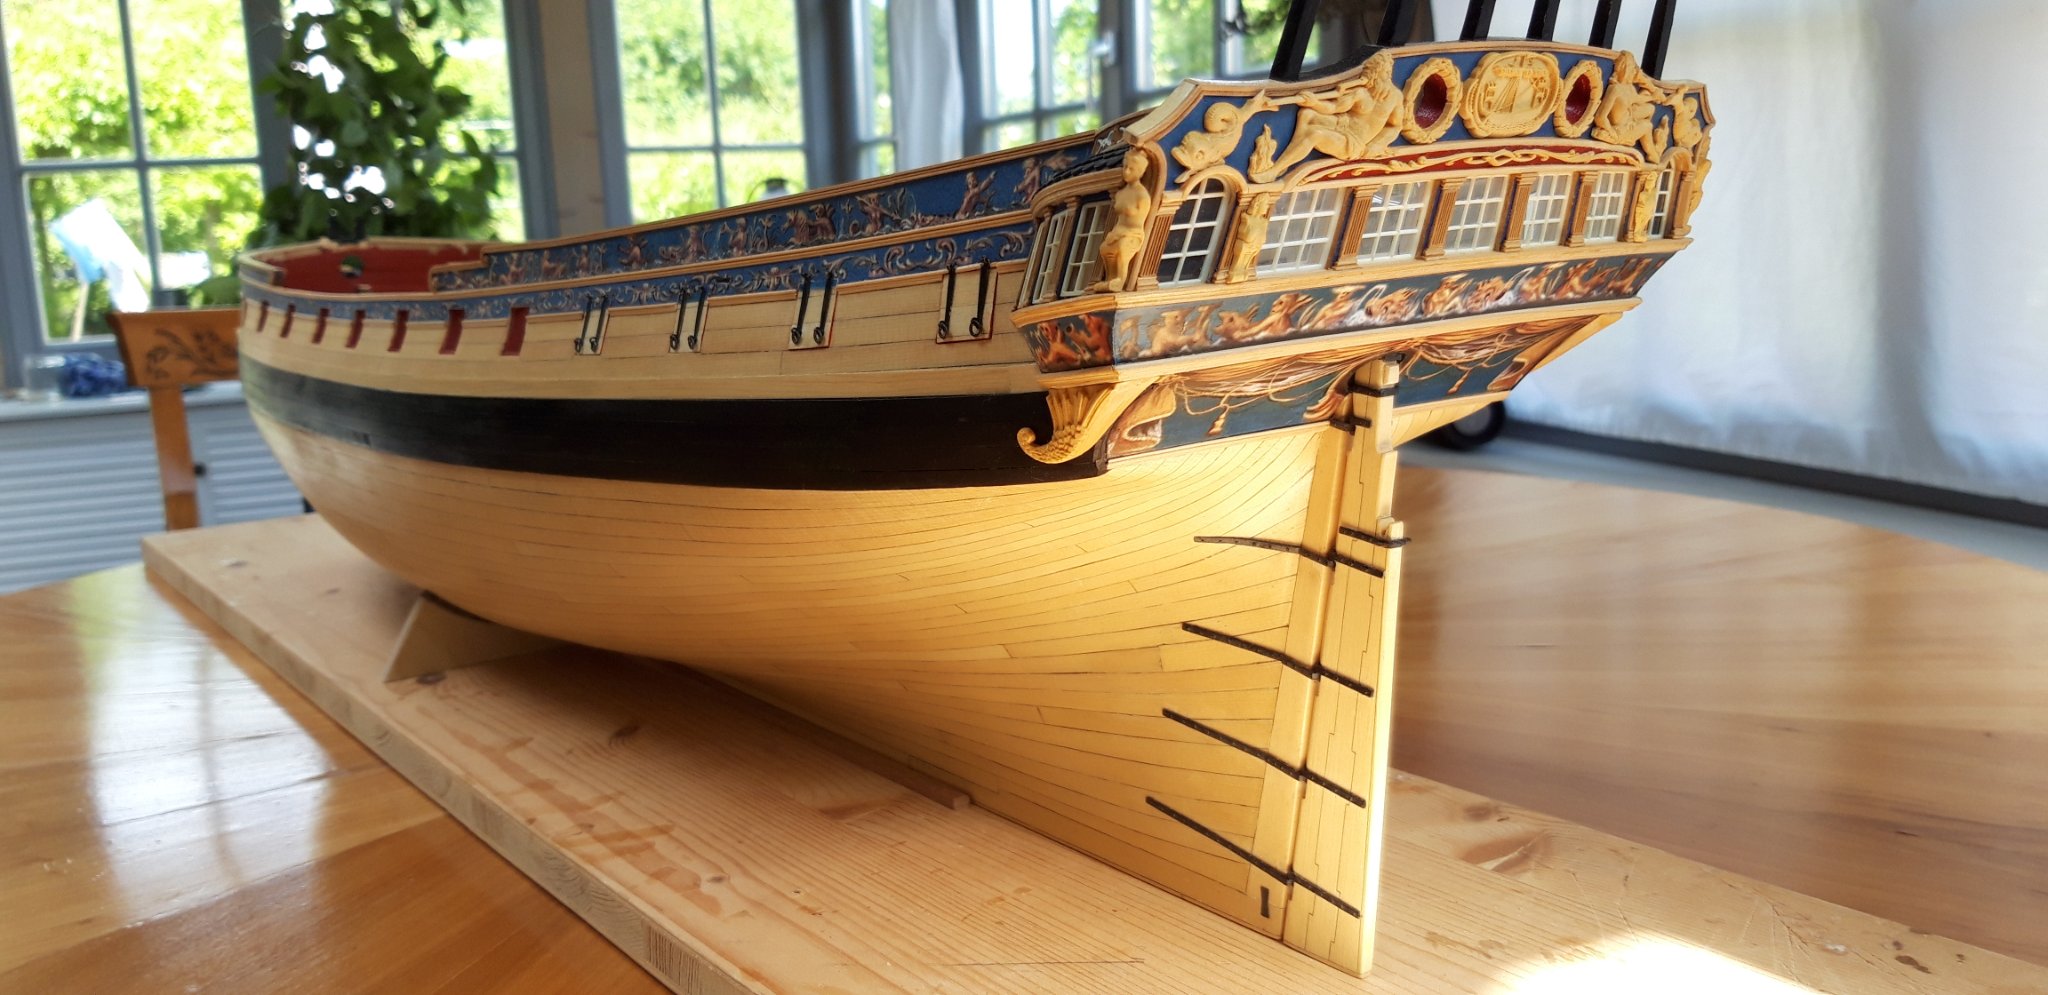
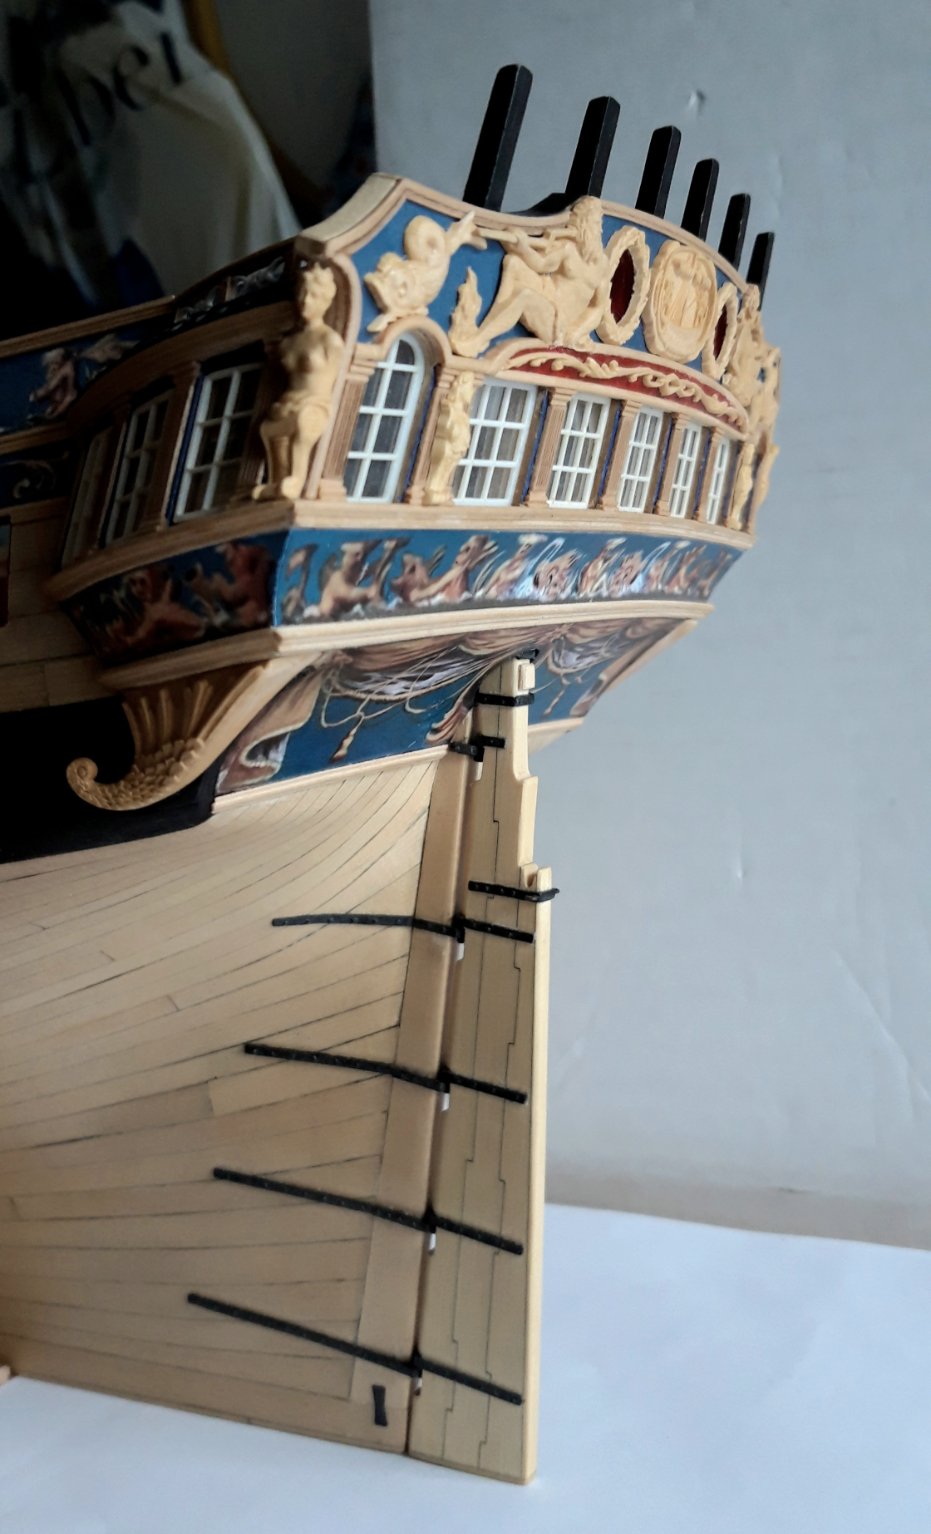
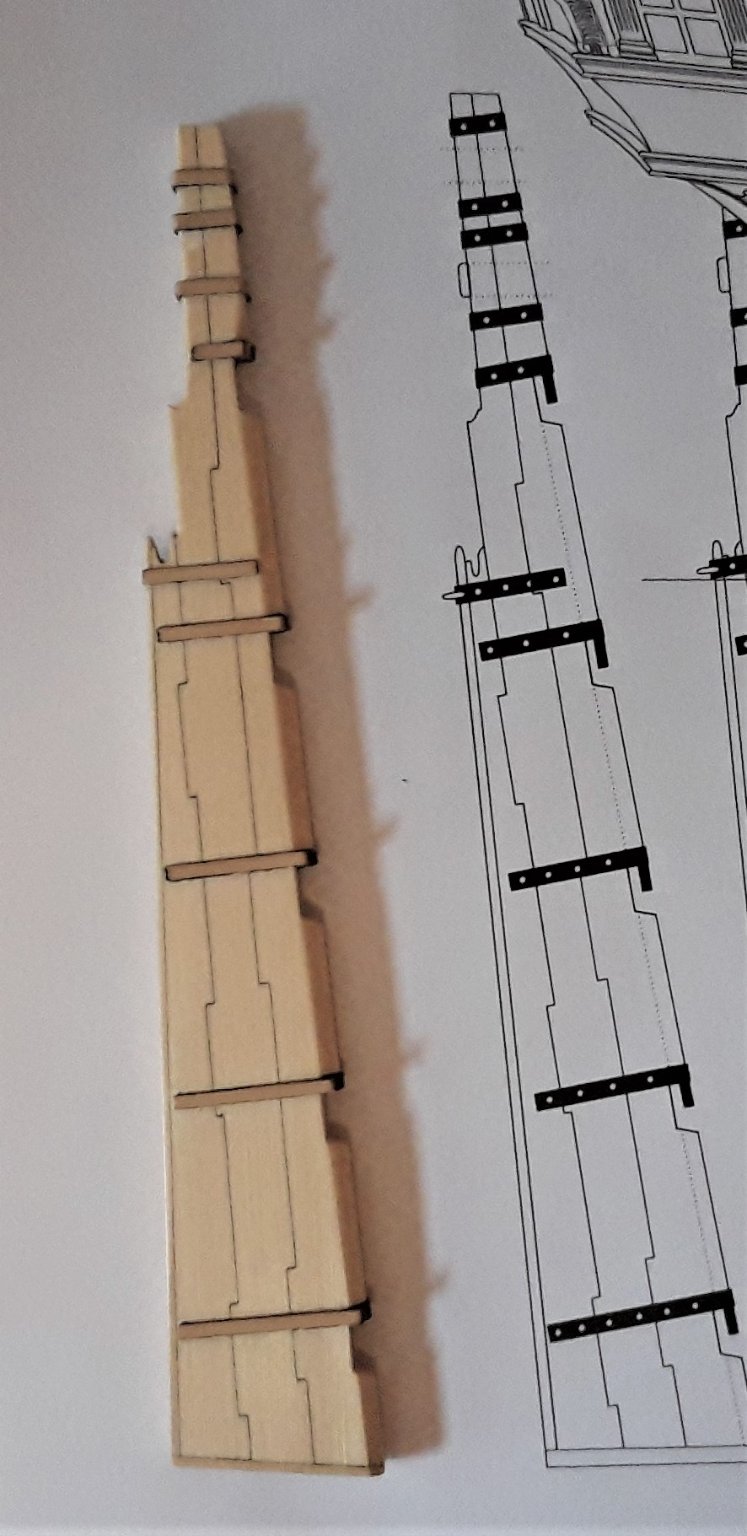
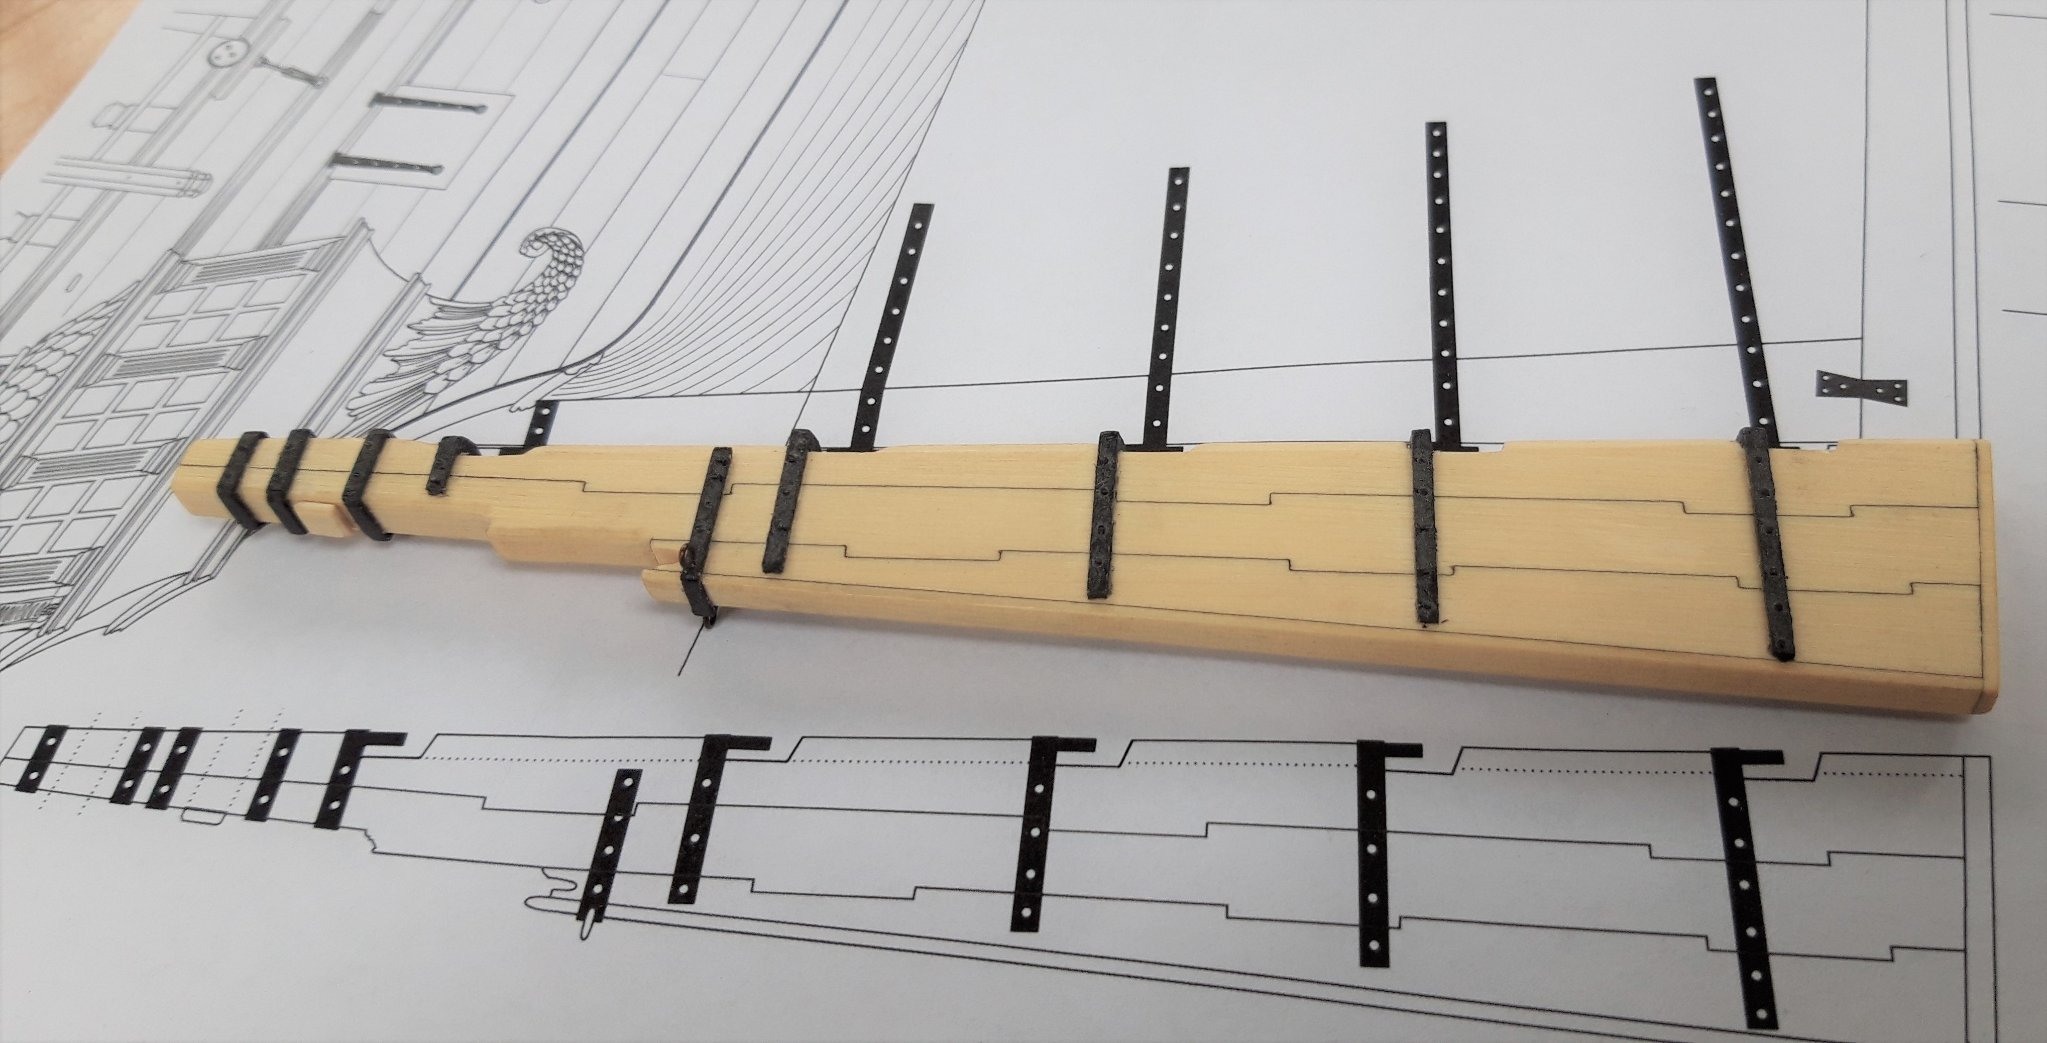
Here we go with the rudder mounted at the model. Matthias
-
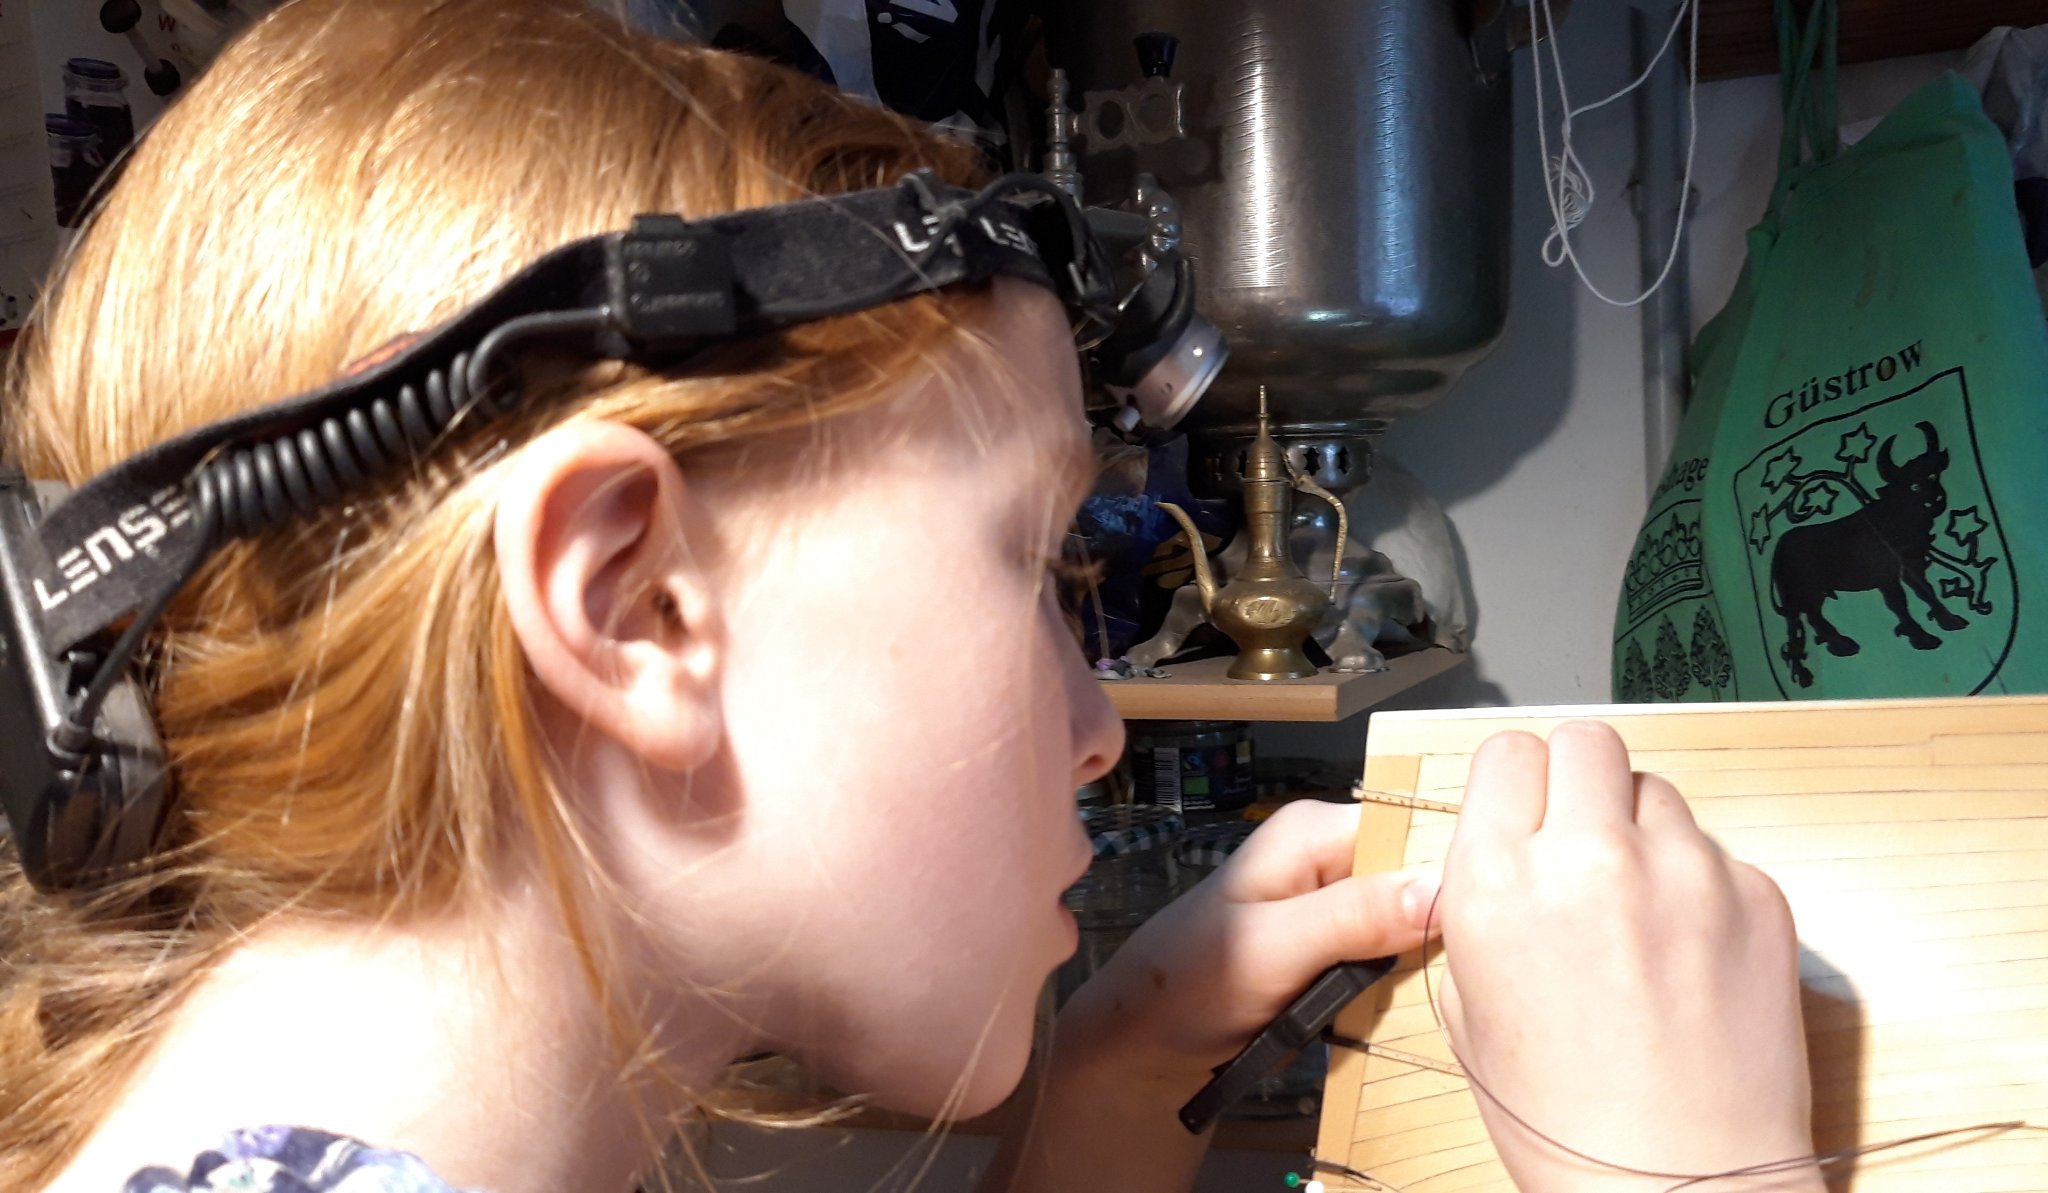
Thank you all for the likes and comments, I proceeded with the rudder, wich was so incredibly well designed by Chuck. Just following the step by step instructions She loves doing the fiddly things and her eyes are better than mine anyway... Not much left to do, and I can turn the hull back over and mount the rudder in its place. Matthias