


drobinson02199
-
Posts
1,018 -
Joined
-
Last visited
Content Type
Profiles
Forums
Gallery
Events
Posts posted by drobinson02199
-
-
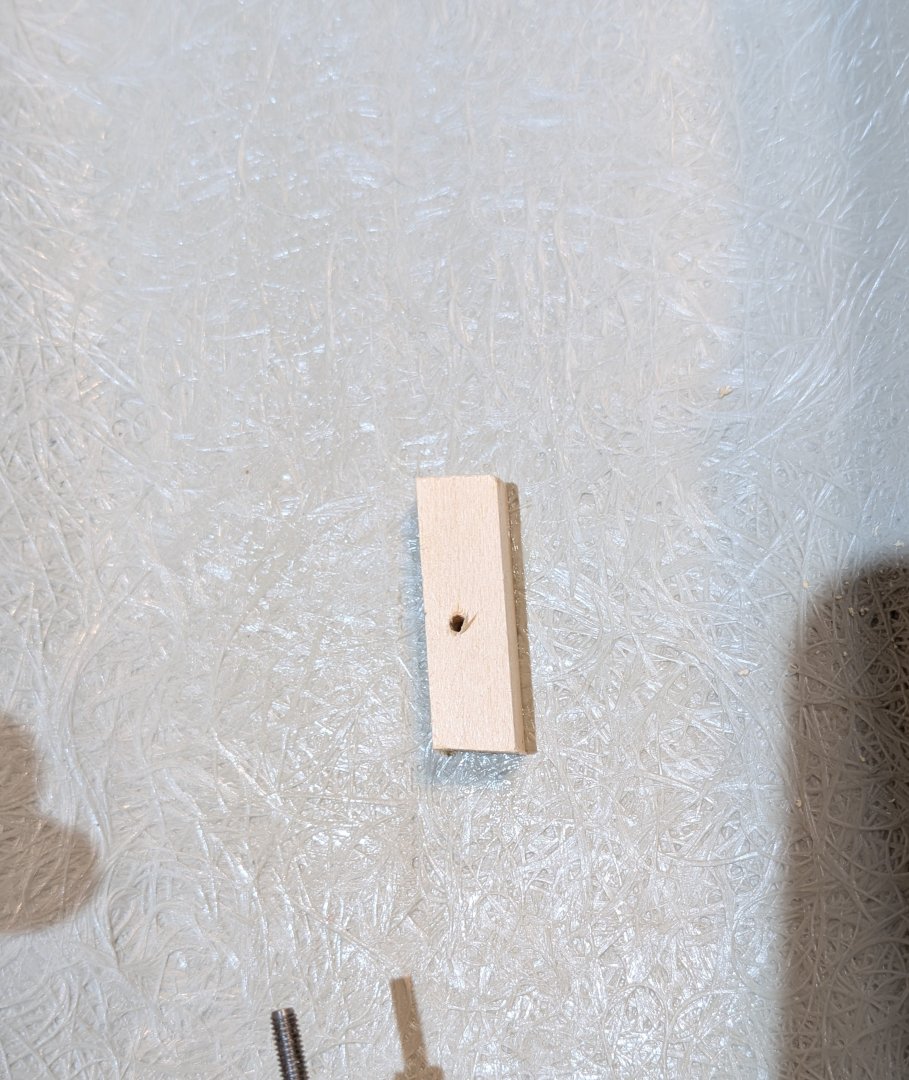
Because the decks will prohibit access to the interior of the hull, I needed to pre-drill the mounting holes. Because the hull is very thin (1mm), I installed wood blocks to give the mounting screws something to bite into. The holes have been pre-aligned with holes on the mounting board. I'll use screws and brass pedestals.
The brass rod you see is the propeller shaft, which I've attached a post to for stability.
Regards,
David

-
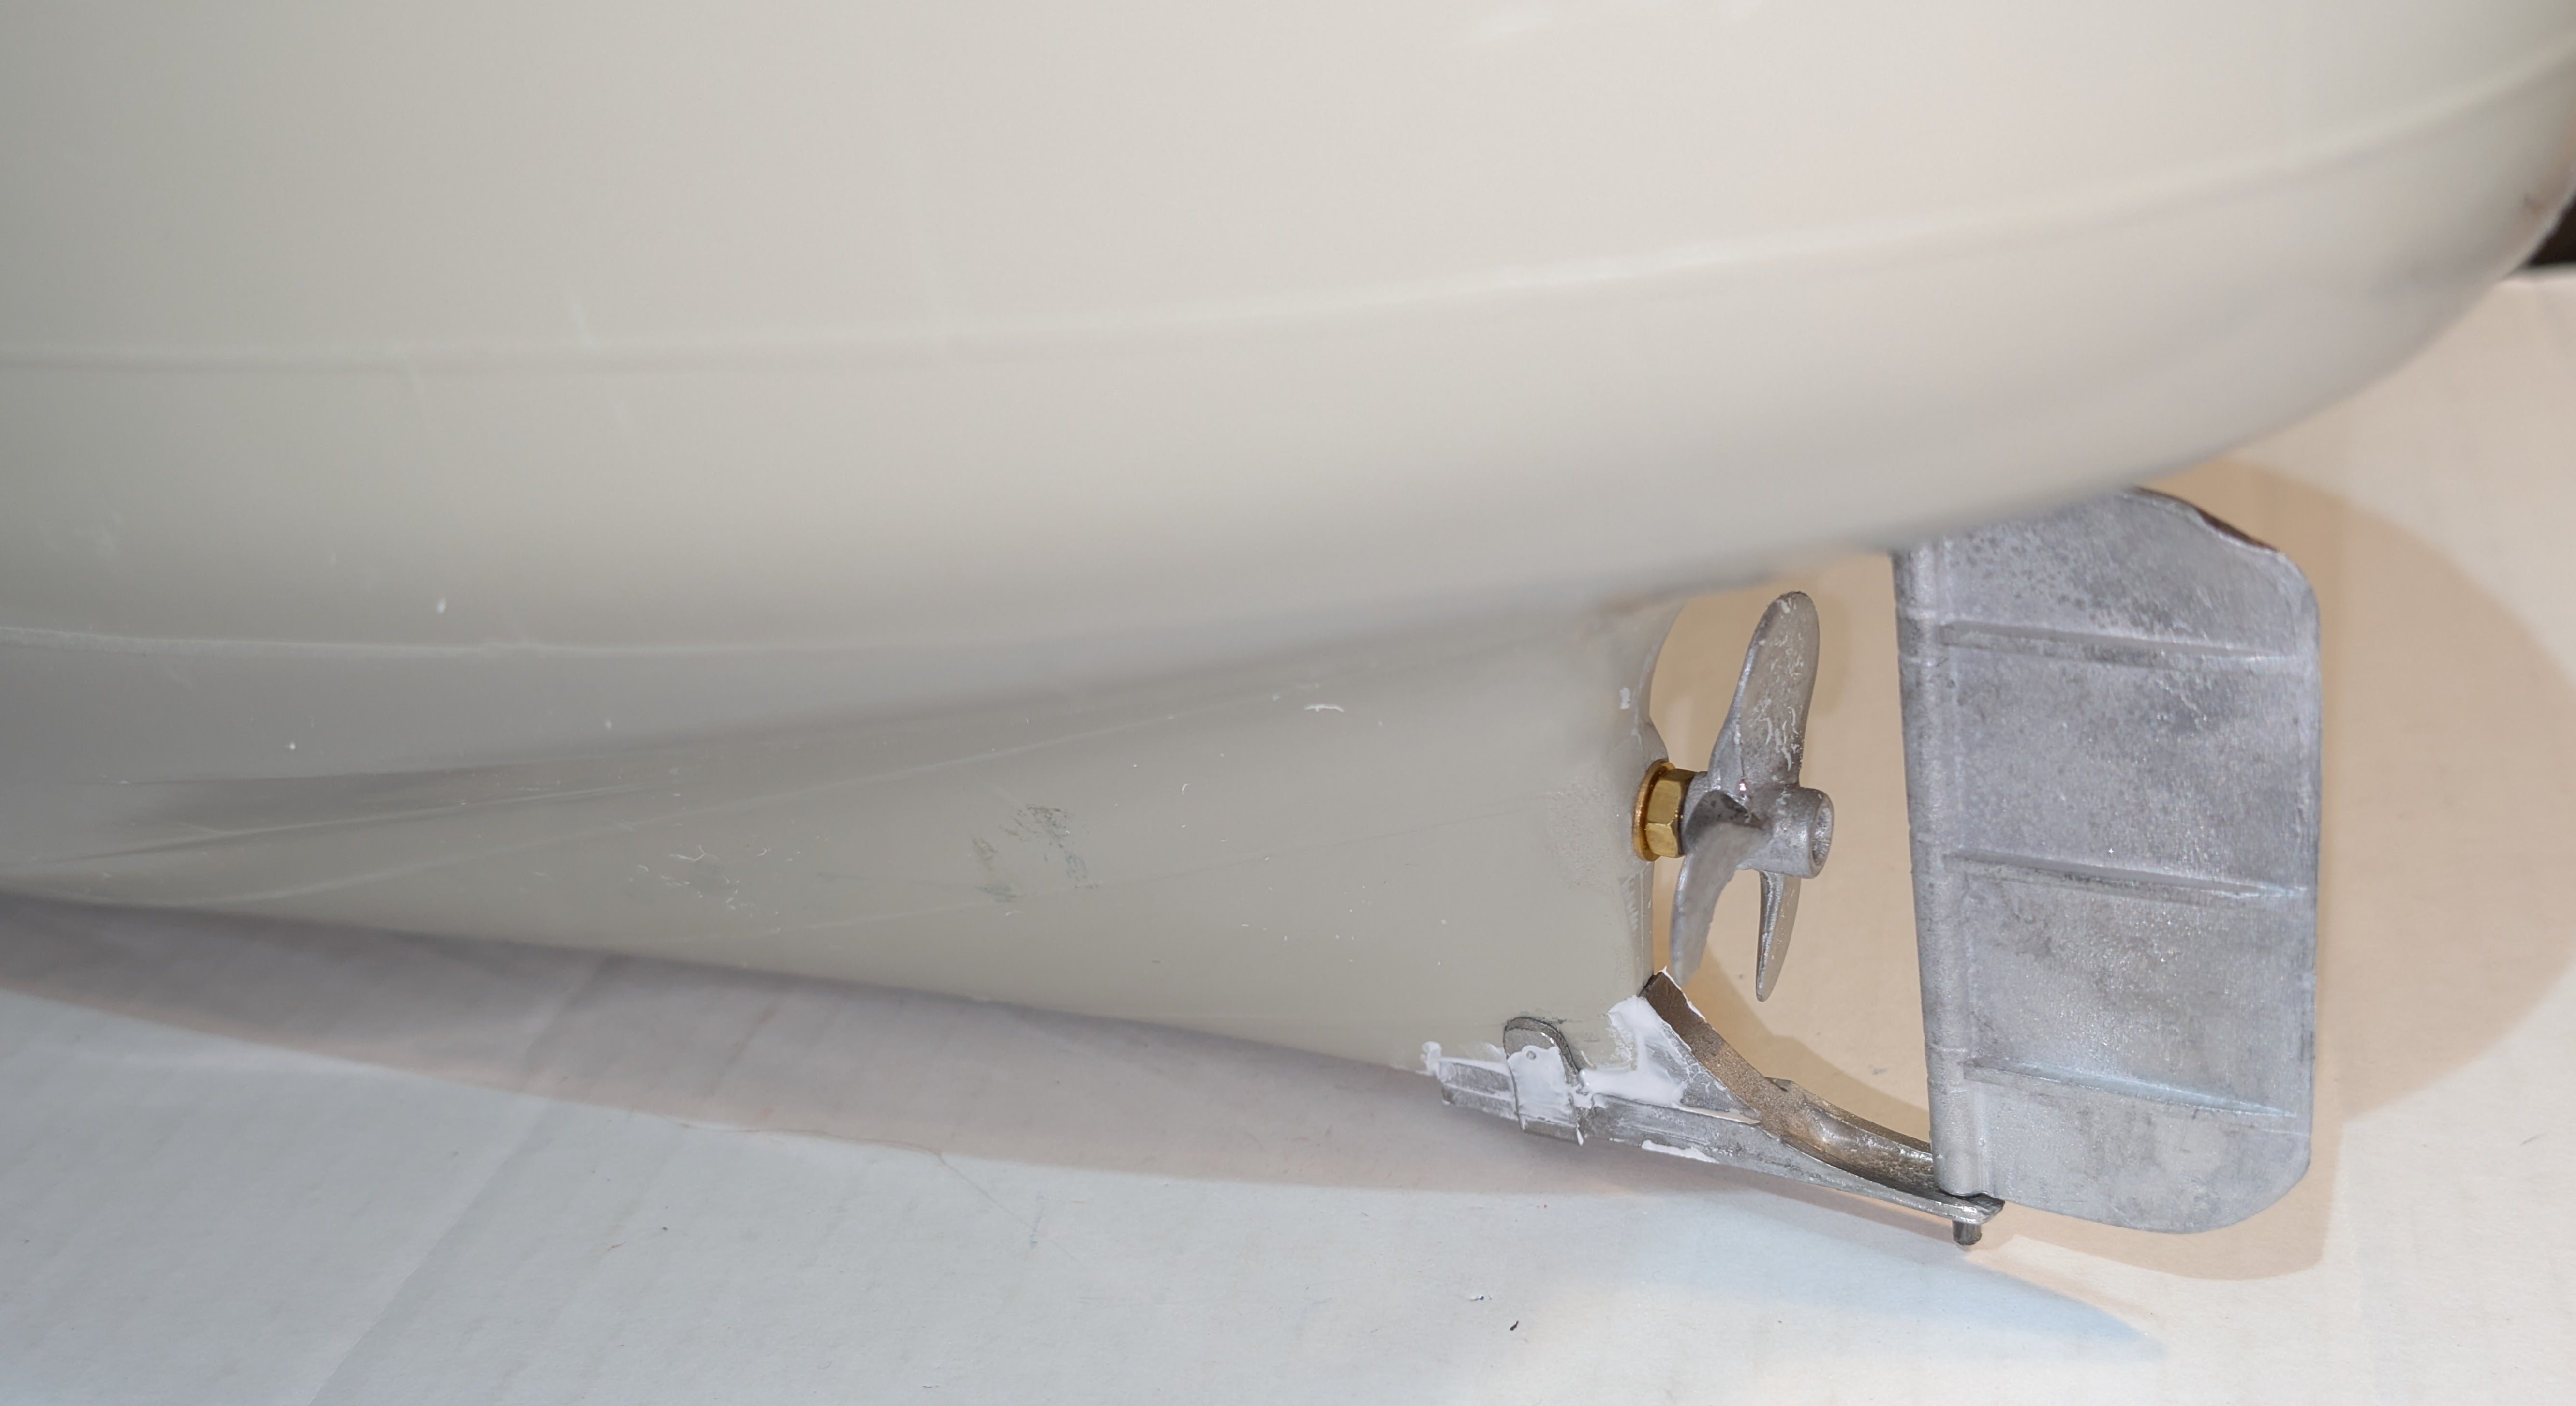
Prop and rudder assembly done. I'm building this as a static model, so I didn't have to worry about some of the running hardware.
One tip: if you follow the sequence of the instrucitons (as I did), you fix the lower rudder arm and then discover that the rudder doesn't fit (look at the picture and you can see that there is zero wiggle room). So I had to bang the rudder shaft down to flush at the bottom -- fortunately it does move inside the rudder if you use a hammer -- fit it, and then carefully bang back enough to create a shaft stub to grab the lower rudder housing arm without dislodging the arm..
A better approach would have been to dry fit the rudder arm, then position and drill the top hole in the hull for the rudder shaft, fit the rudder into the arm and the hull, and then reposition and fix the arm.
The white stuff is some putty to fill the gaps between the arm and the hull.
Regards,
David

- king derelict and yvesvidal
-
 2
2
-
-
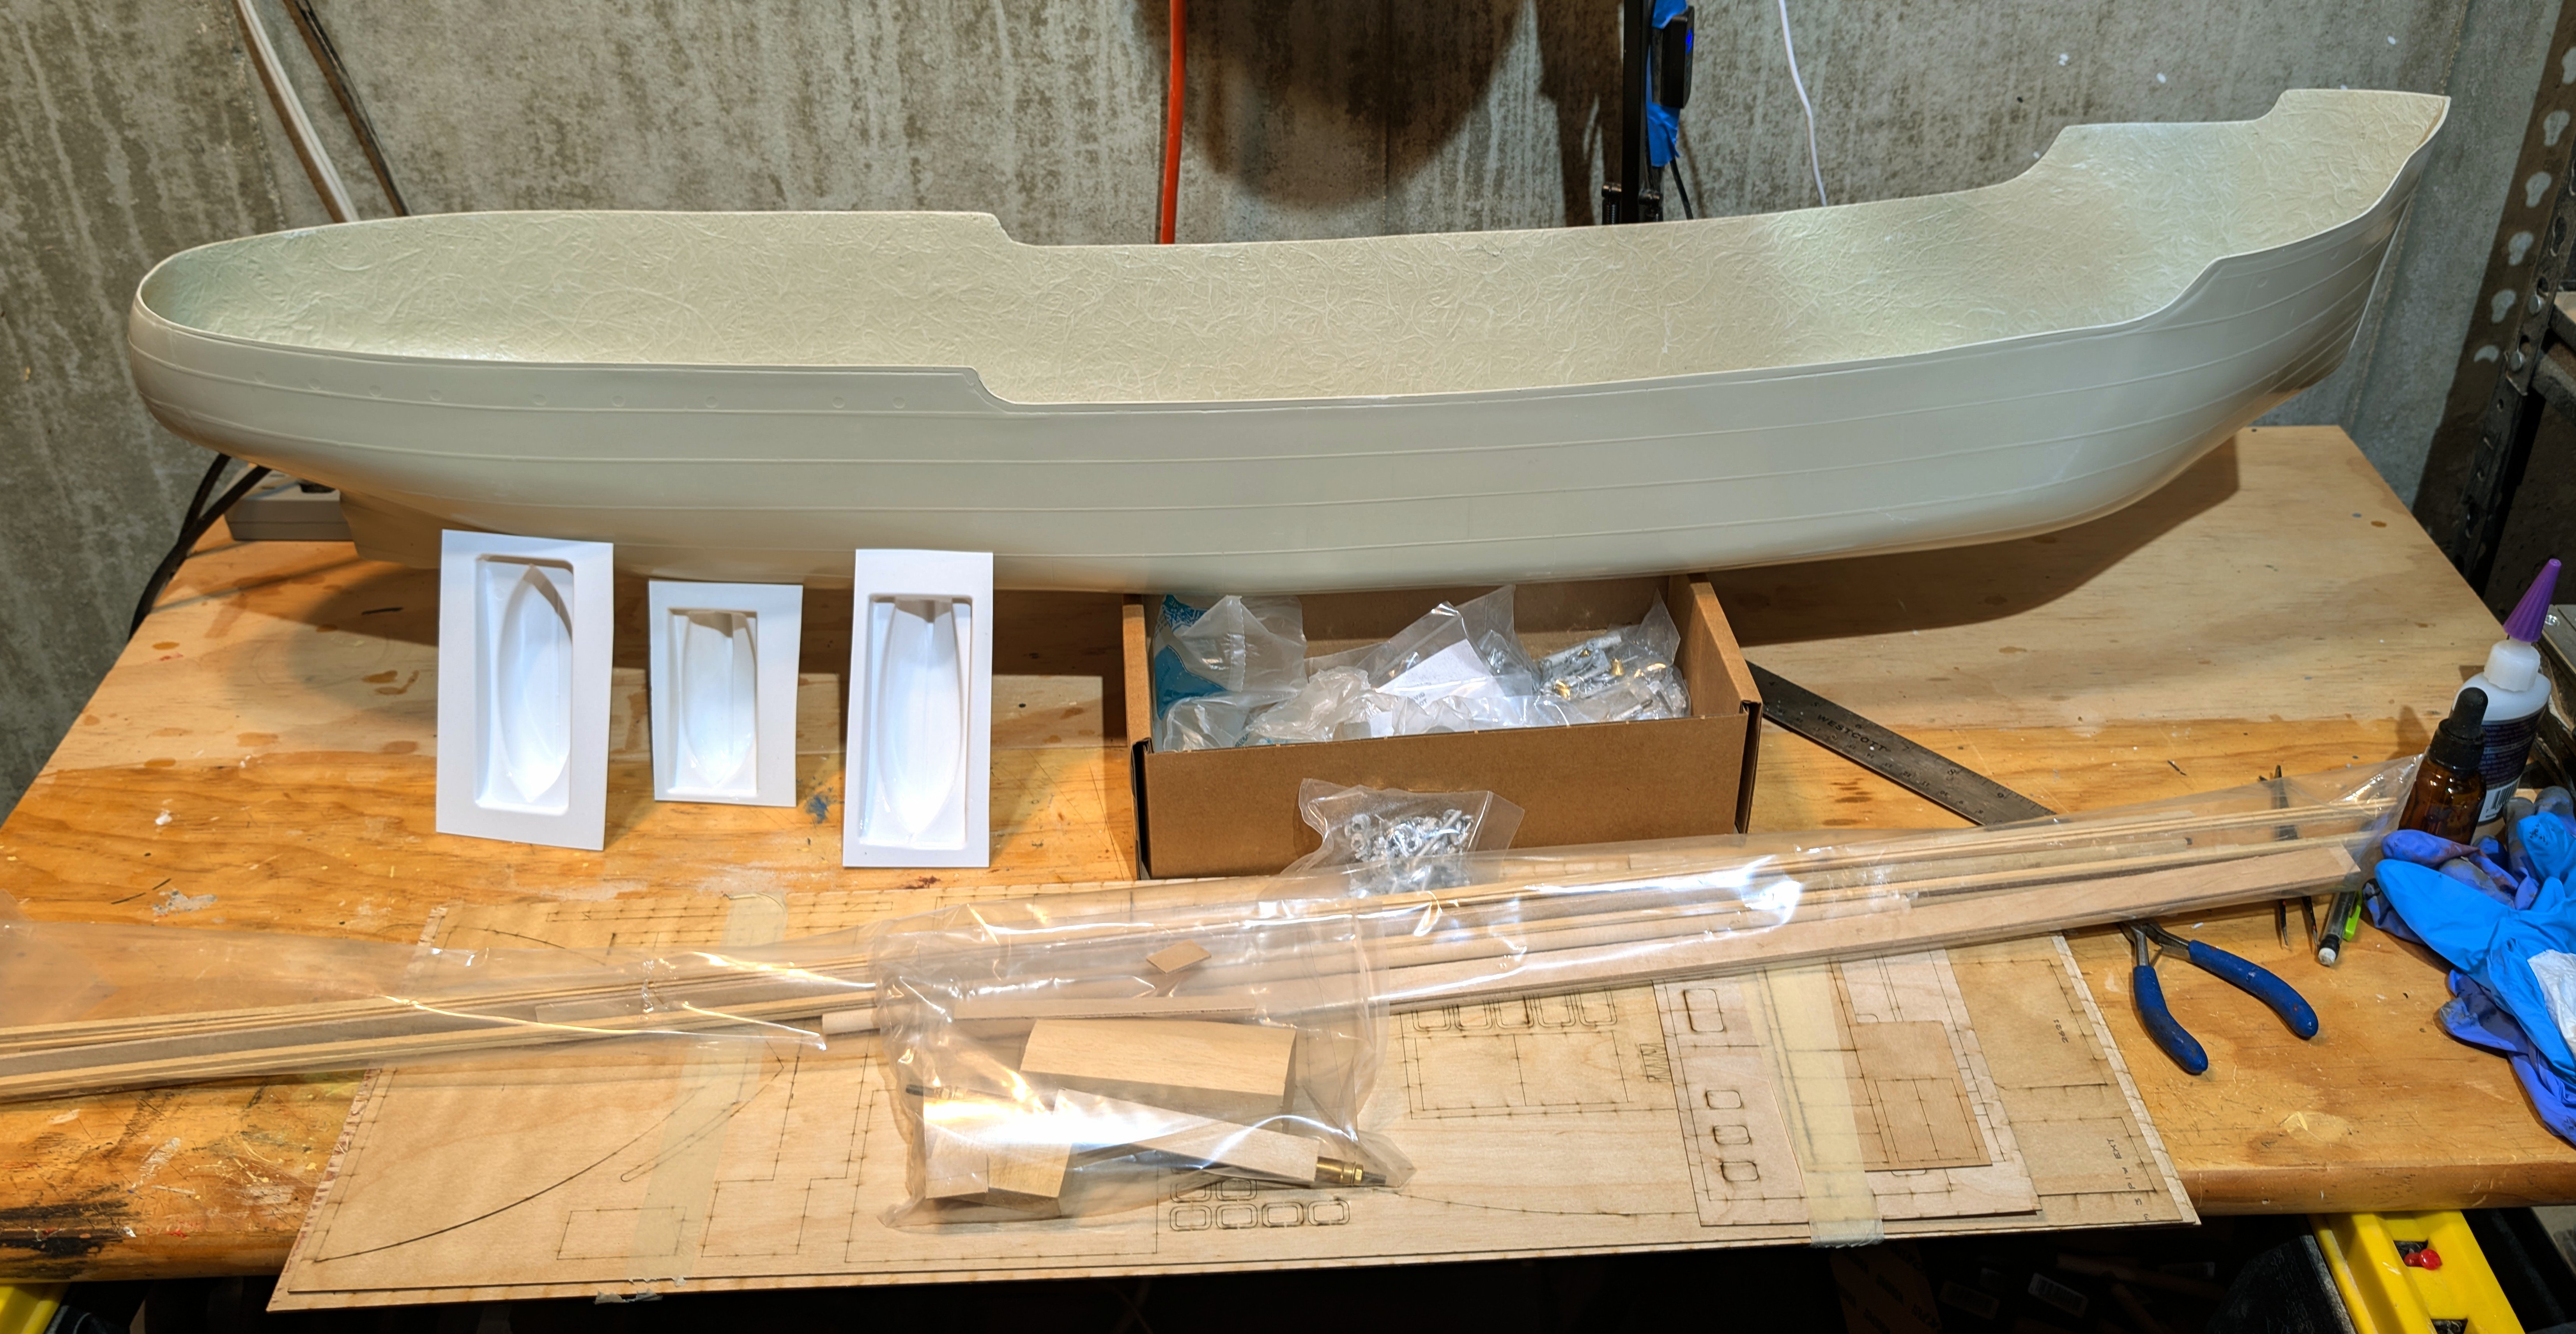
After a break from ship building with the Jupiter locomotive, I've returned to ships. But the HMS Victory really maxed me out on ratlines, so I was looking for something different, and wanted to build a cargo ship. The Caldercraft Brannaren looked like a good bet.
Included here are the tranditional "what's in the box" pictures. The hull is pre-formed since Caldercraft intends this to be a RC model if desired -- but I'm going to build it as a static model for display.
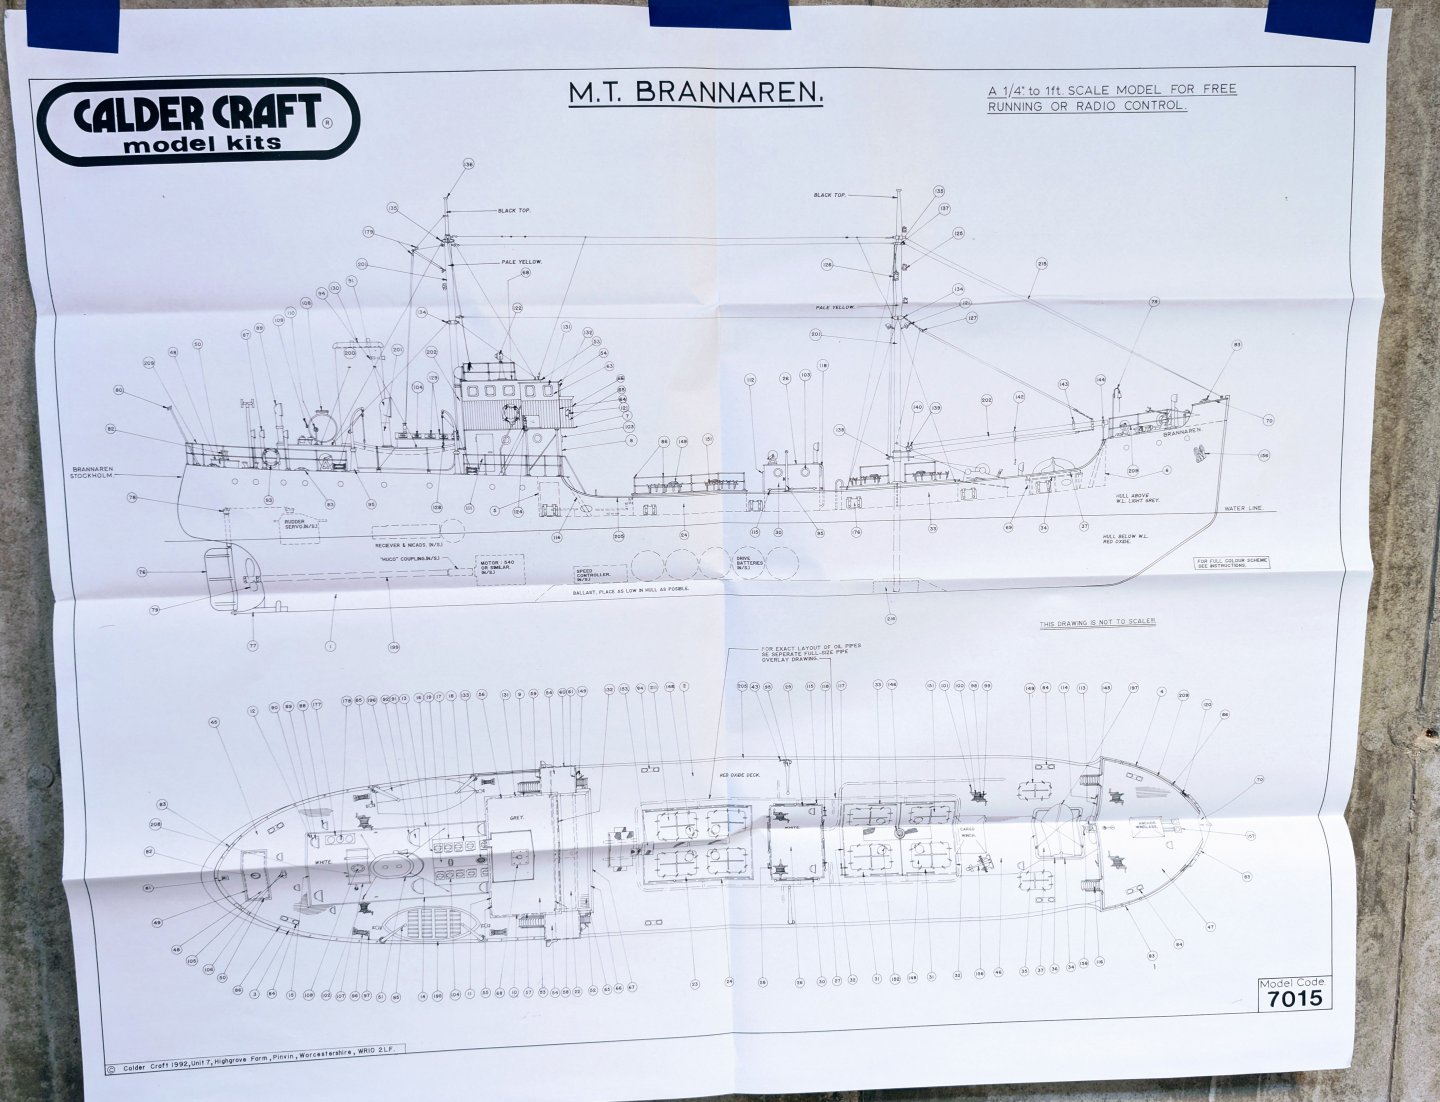
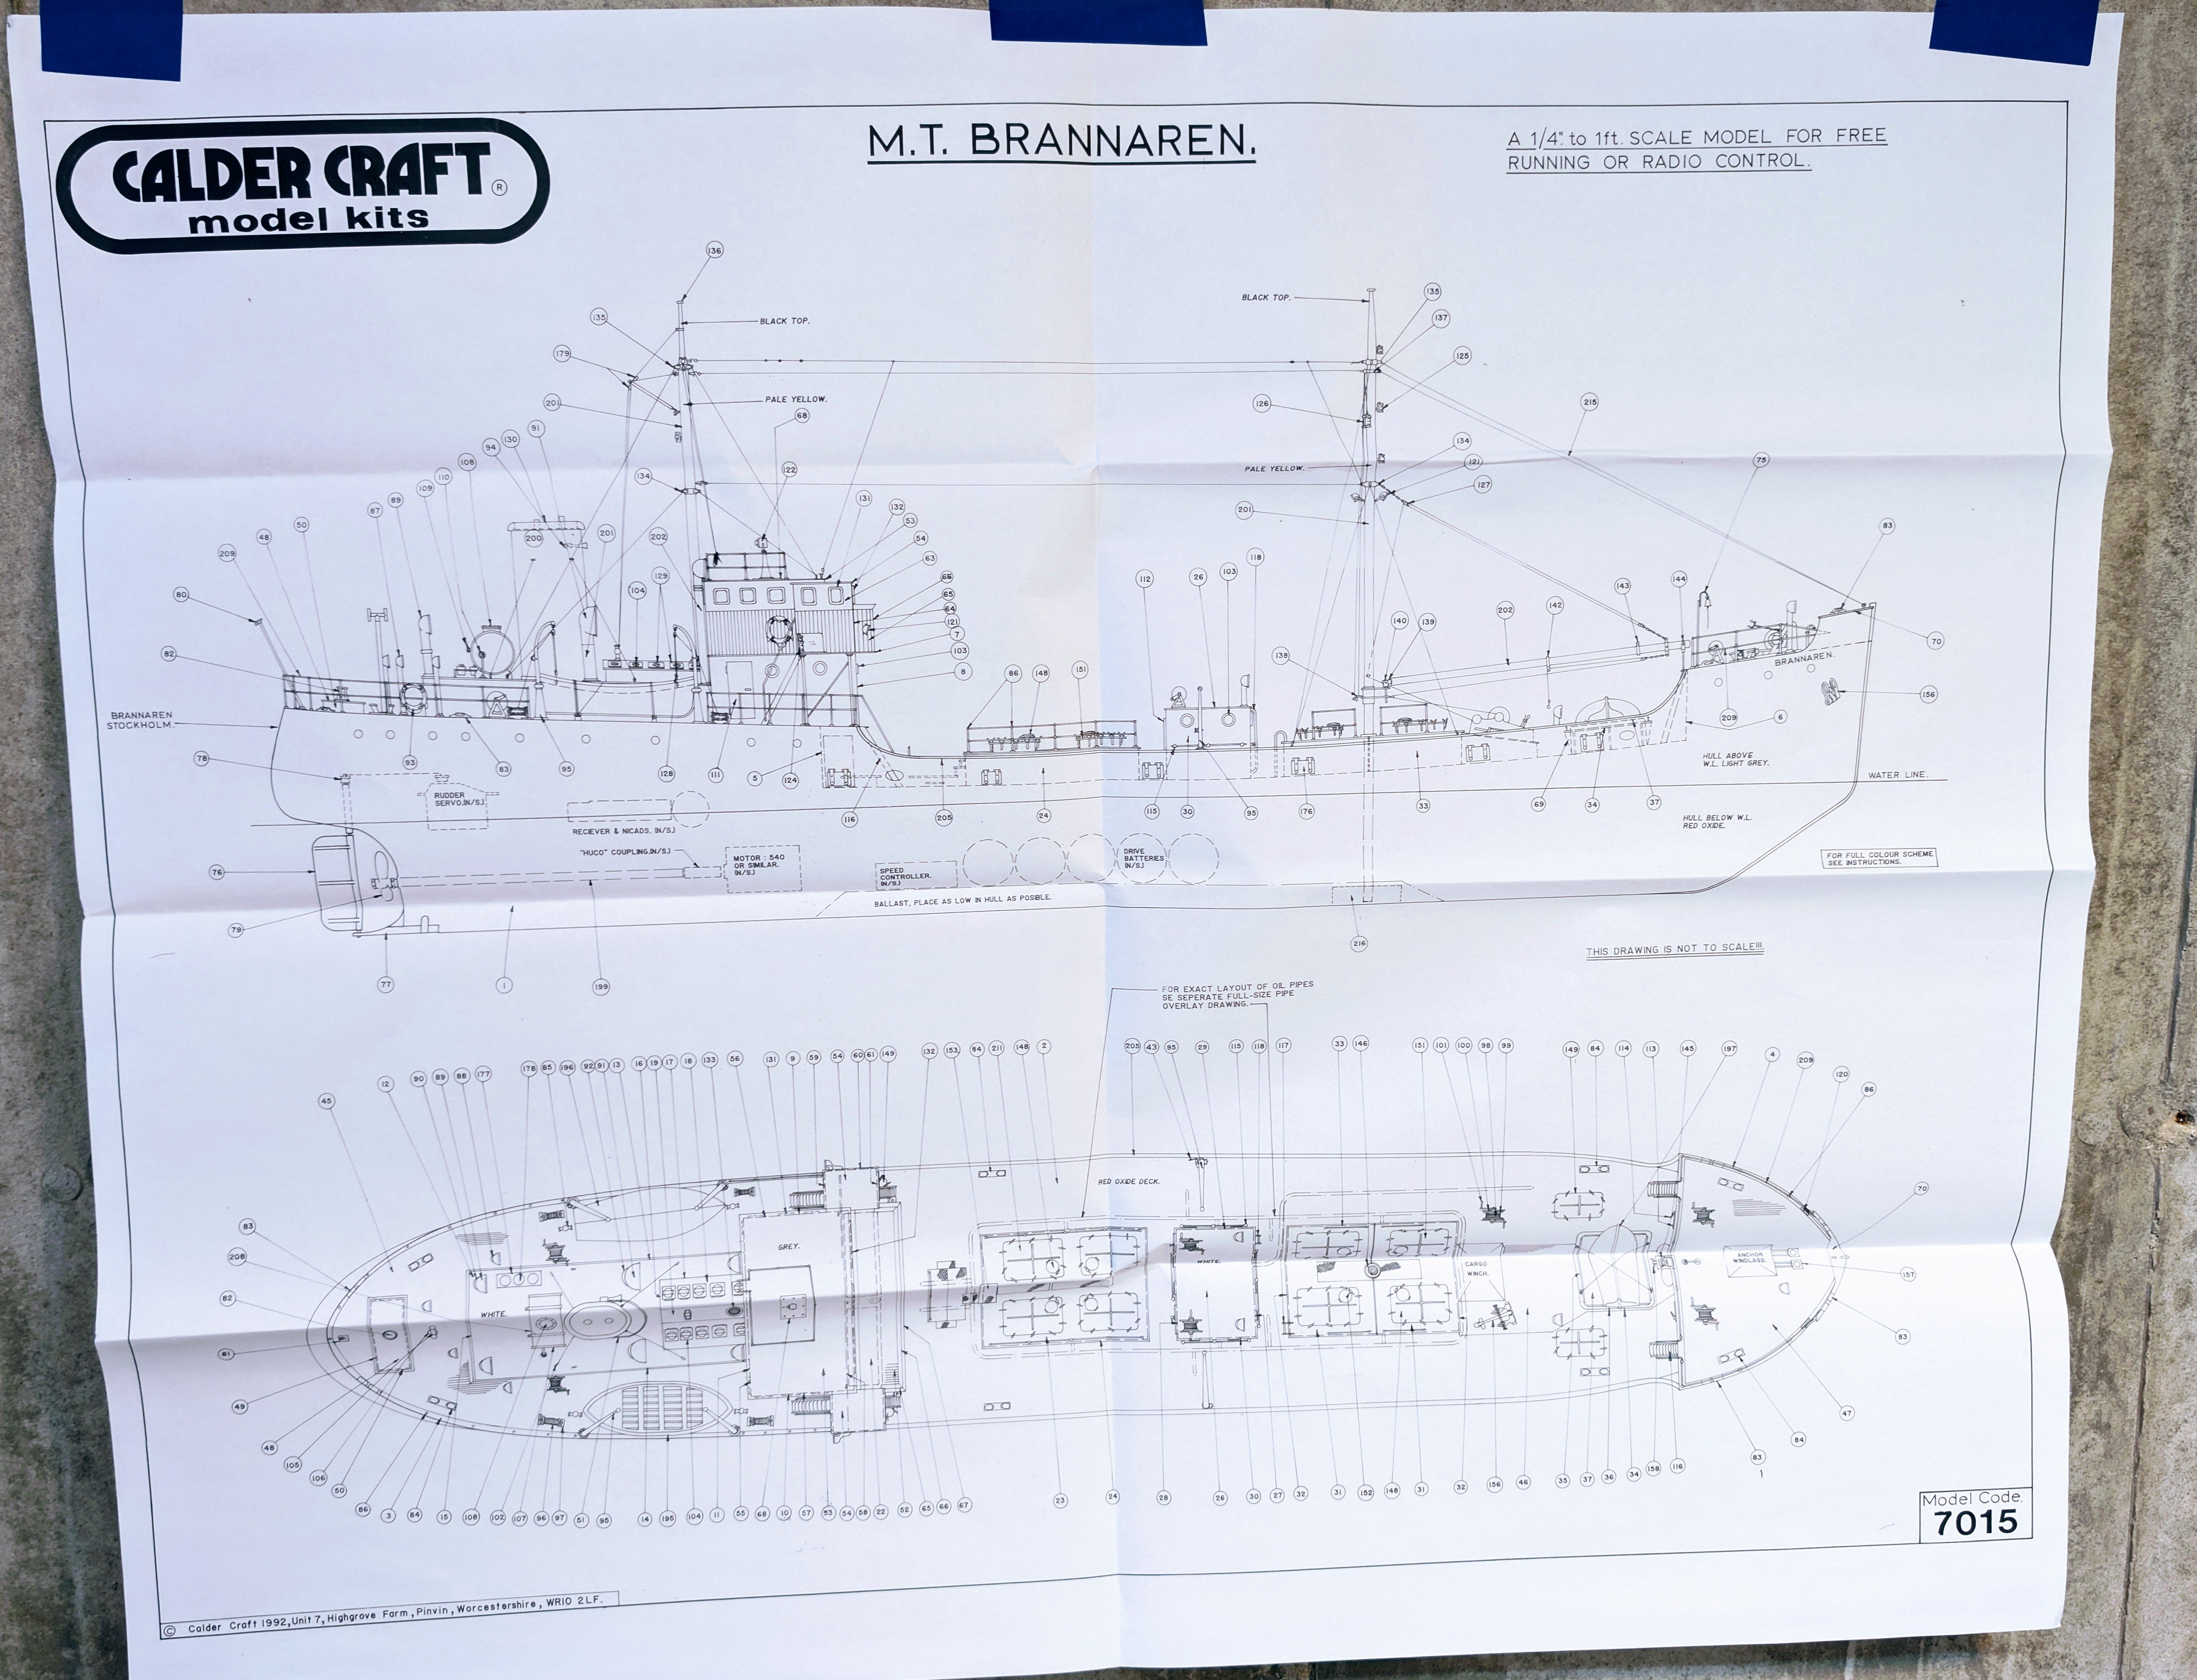
I pulled the manual and quickly realized that sparse is perhaps an inflated description of the written instructions. So I went looking in the box for a bunch of how to build diagrams -- but no dice. There are a few charts -- I've included an example of a master chart -- but for me at least there was a real gap in figuring things out from the instructions. I think Caldercraft's philosophy on this model is best summed up by the following excerpt from the manual: "Piece by piece descriptions of placement of the remainder of the fittings have been deliberately omitted, as it is
thought that the drawings and photo pack adequately describe and show all placements of them."I read this and thought: great, where is the "photo pack". Not in the box. Did some preliminary web searching for pictures, but didn't find much beyond the single stock picture on the kit page at Caldercraft or Ages of Sail or others. Wrote Caldercraft about the "photo pack" but no reply.
So I bore down on Google and searched really hard, and finally found a set of pics from several sources that will provide adequate guidance for construction, painting, etc..
I don't mean my tone above to indicate to any of you that this is one to steer clear of. Far from it: with the pictures I've found I'm now feeling confident and looking forward to the build. With that in mind, if anyone following this log decides to take on the Brannaren, I'd be more than happy to forward the pictures I found, as I think they are essential. I'm not going to post them here as I don't want to clutter up the log or confuse followers as to what I built and what others built.
Regards,
David

-
-
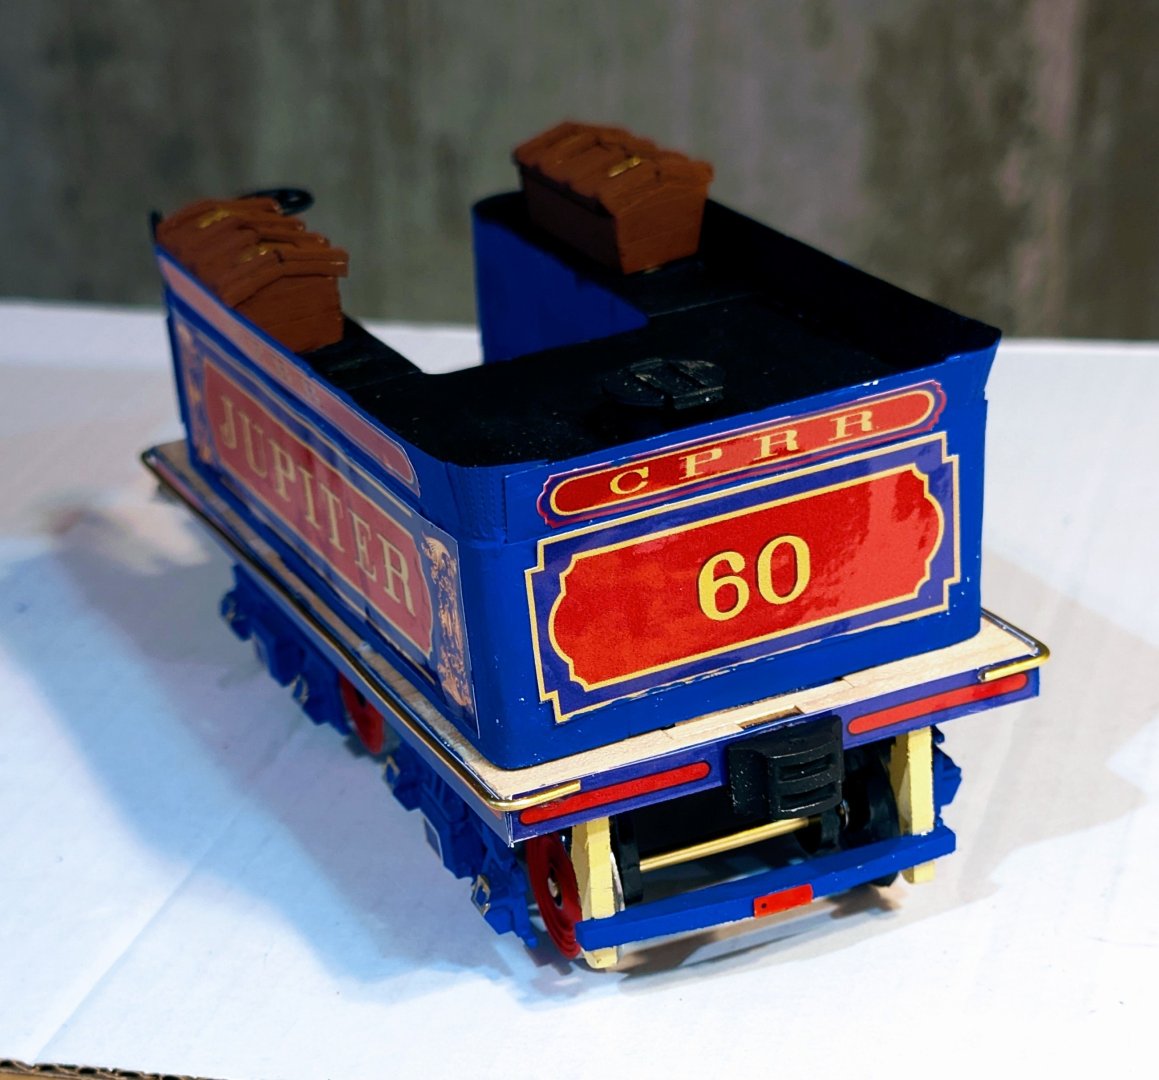
Finished the tender. Now to do final touches and get it assembled on the baseboard.
Regards,
David

-
The forward truck assembly is complete, and mounted on the tender.
Regards,
David


- hof00, Consitution, Old Collingwood and 6 others
-
9
-
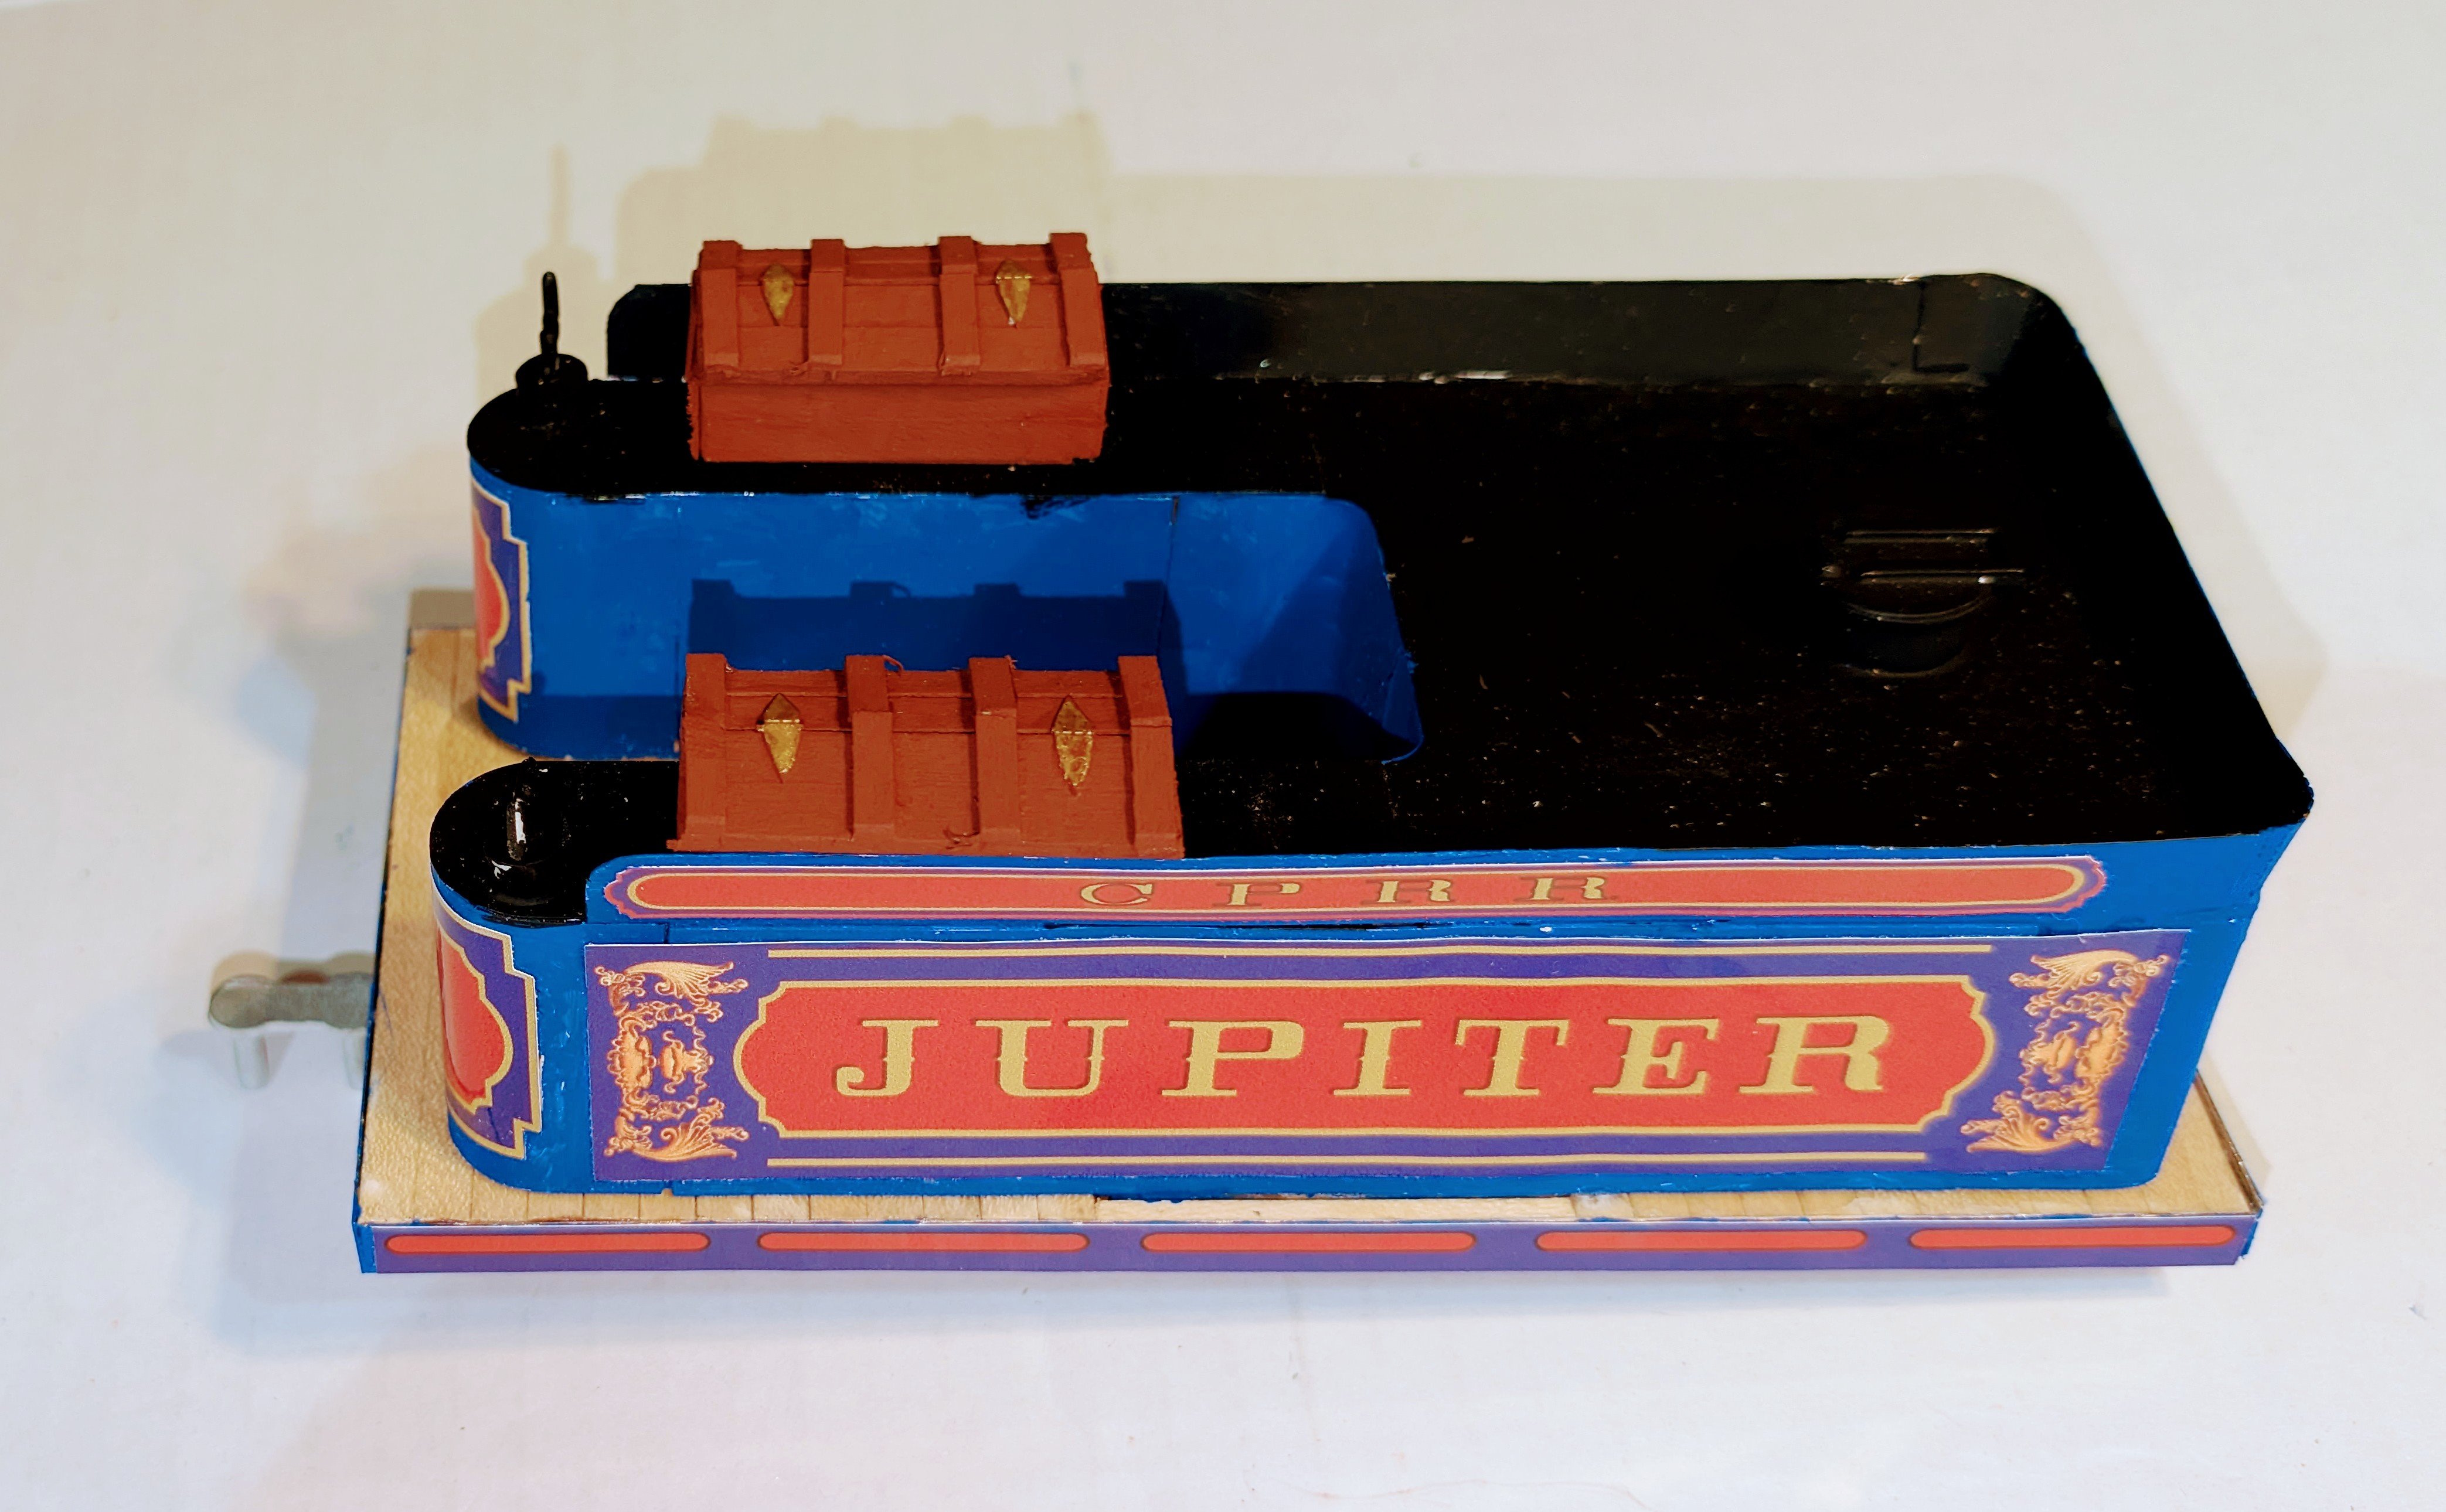
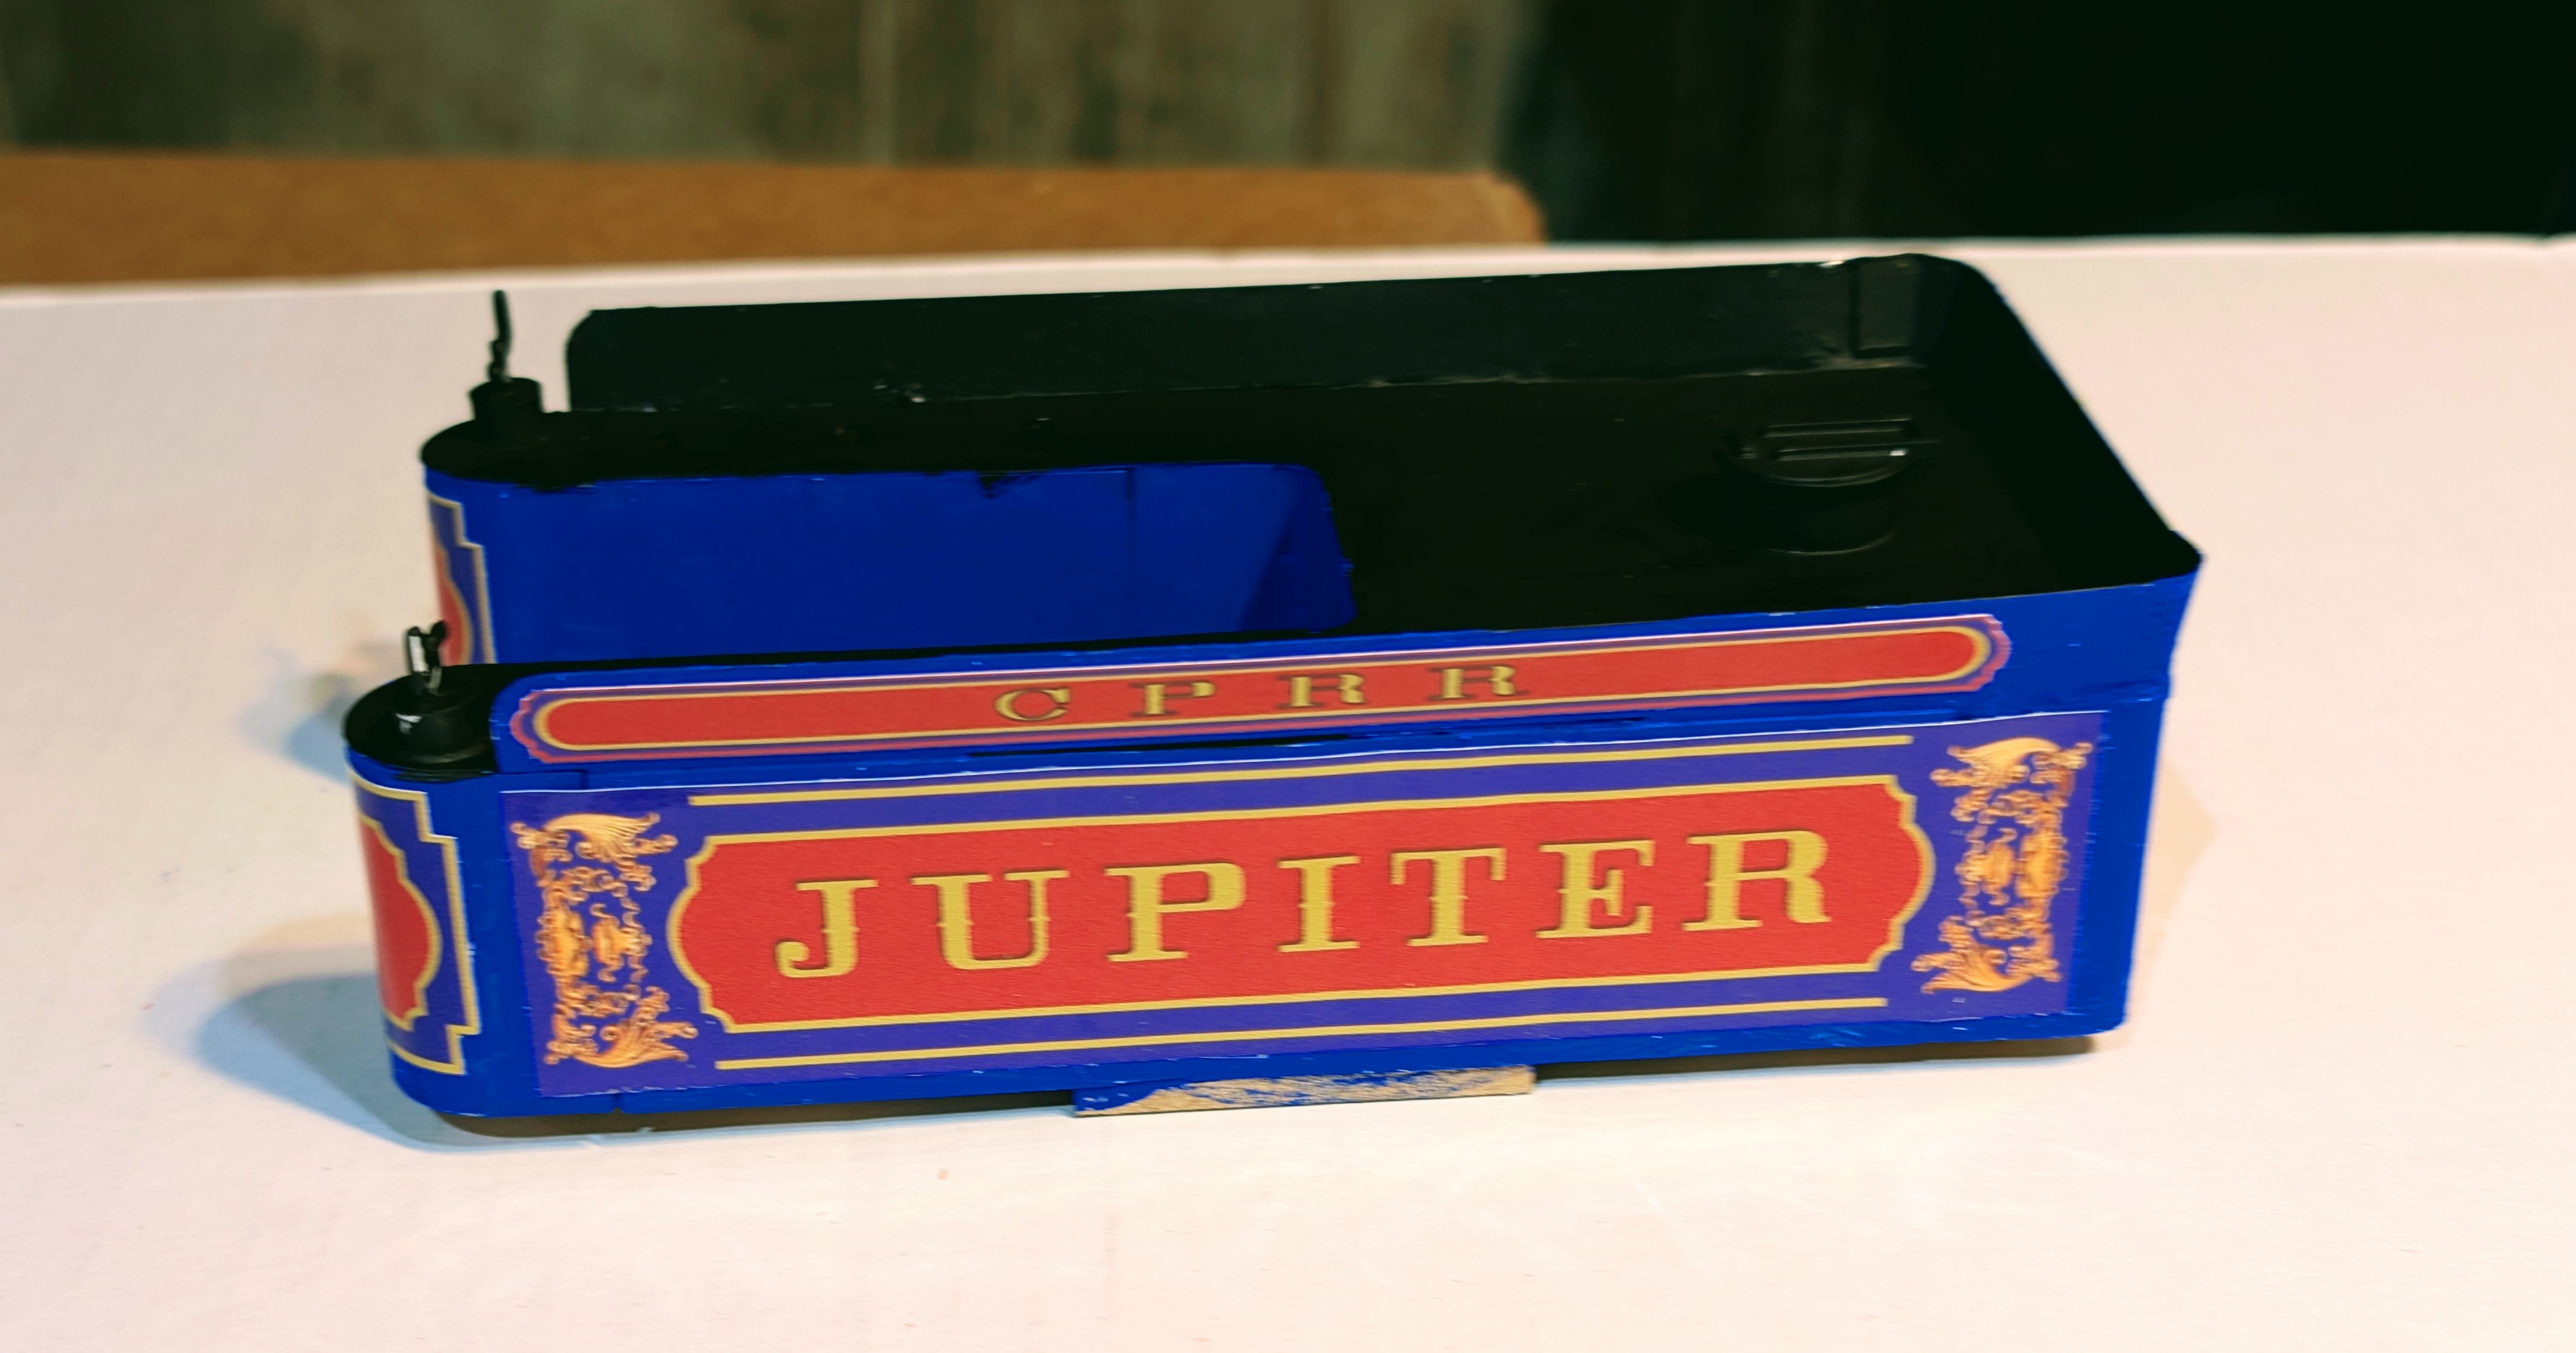
Tender body with storage boxes built, painted and mounted. Coupler attached.
Regards,
David

-
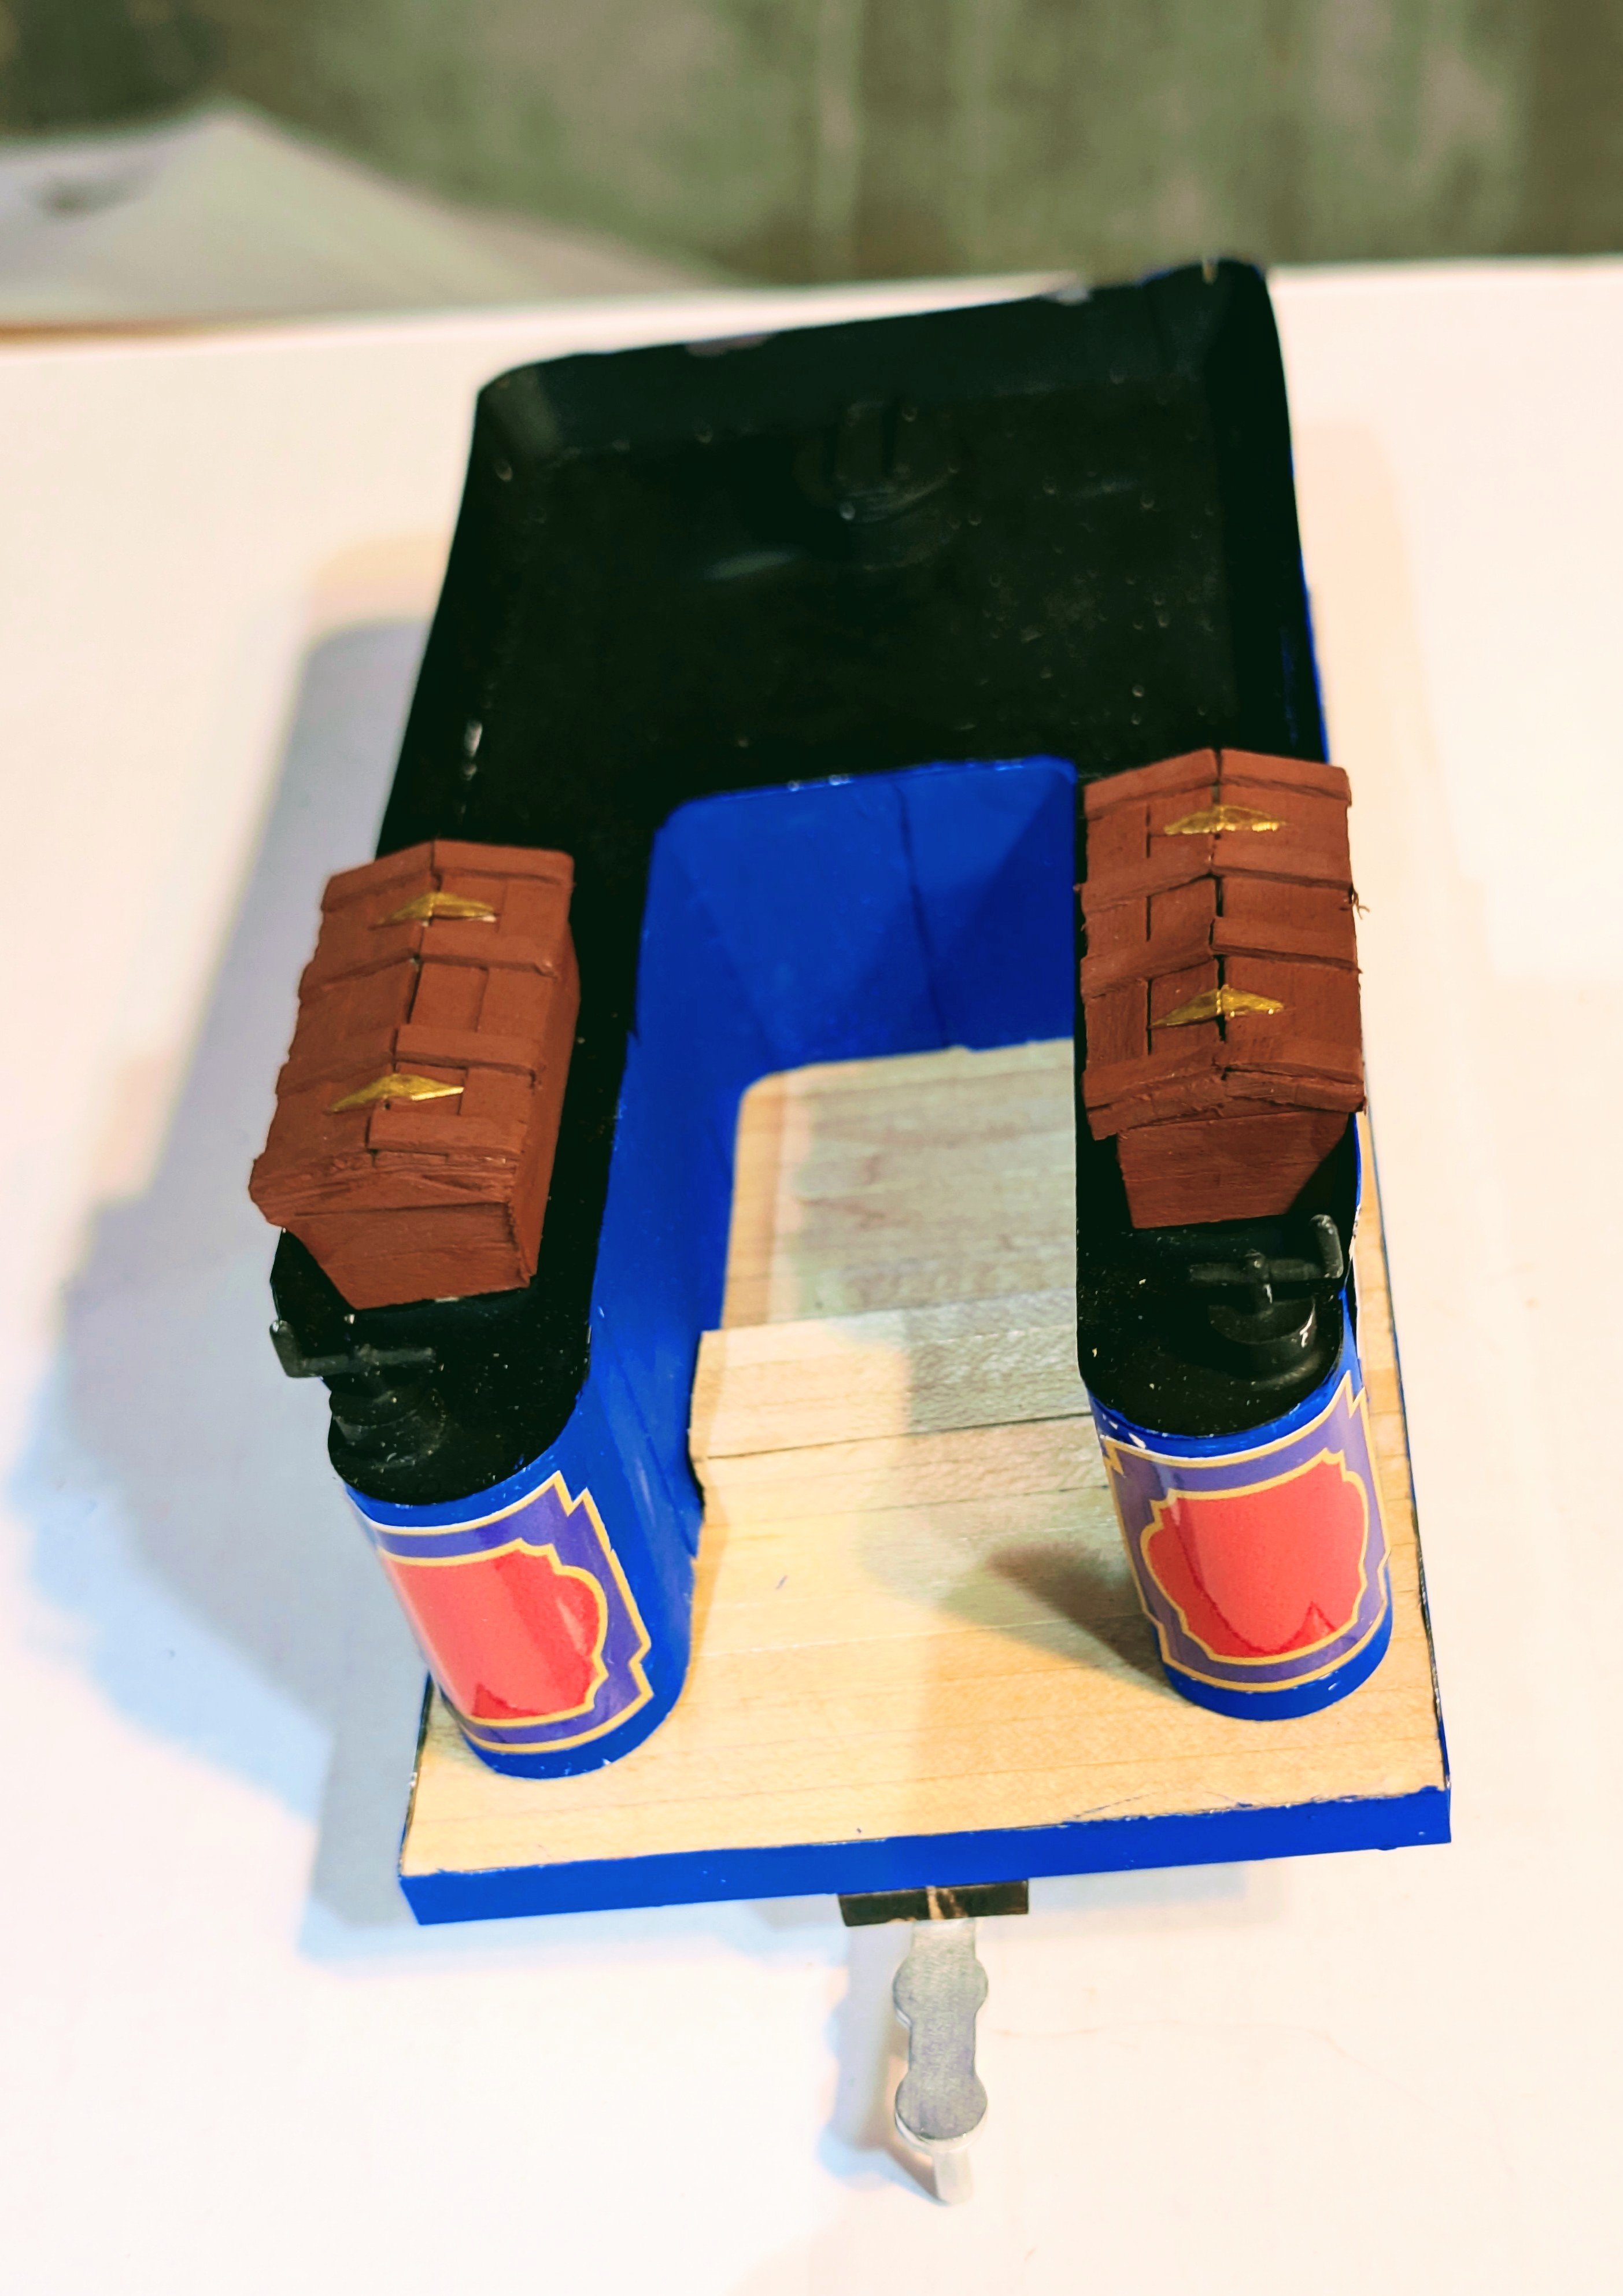
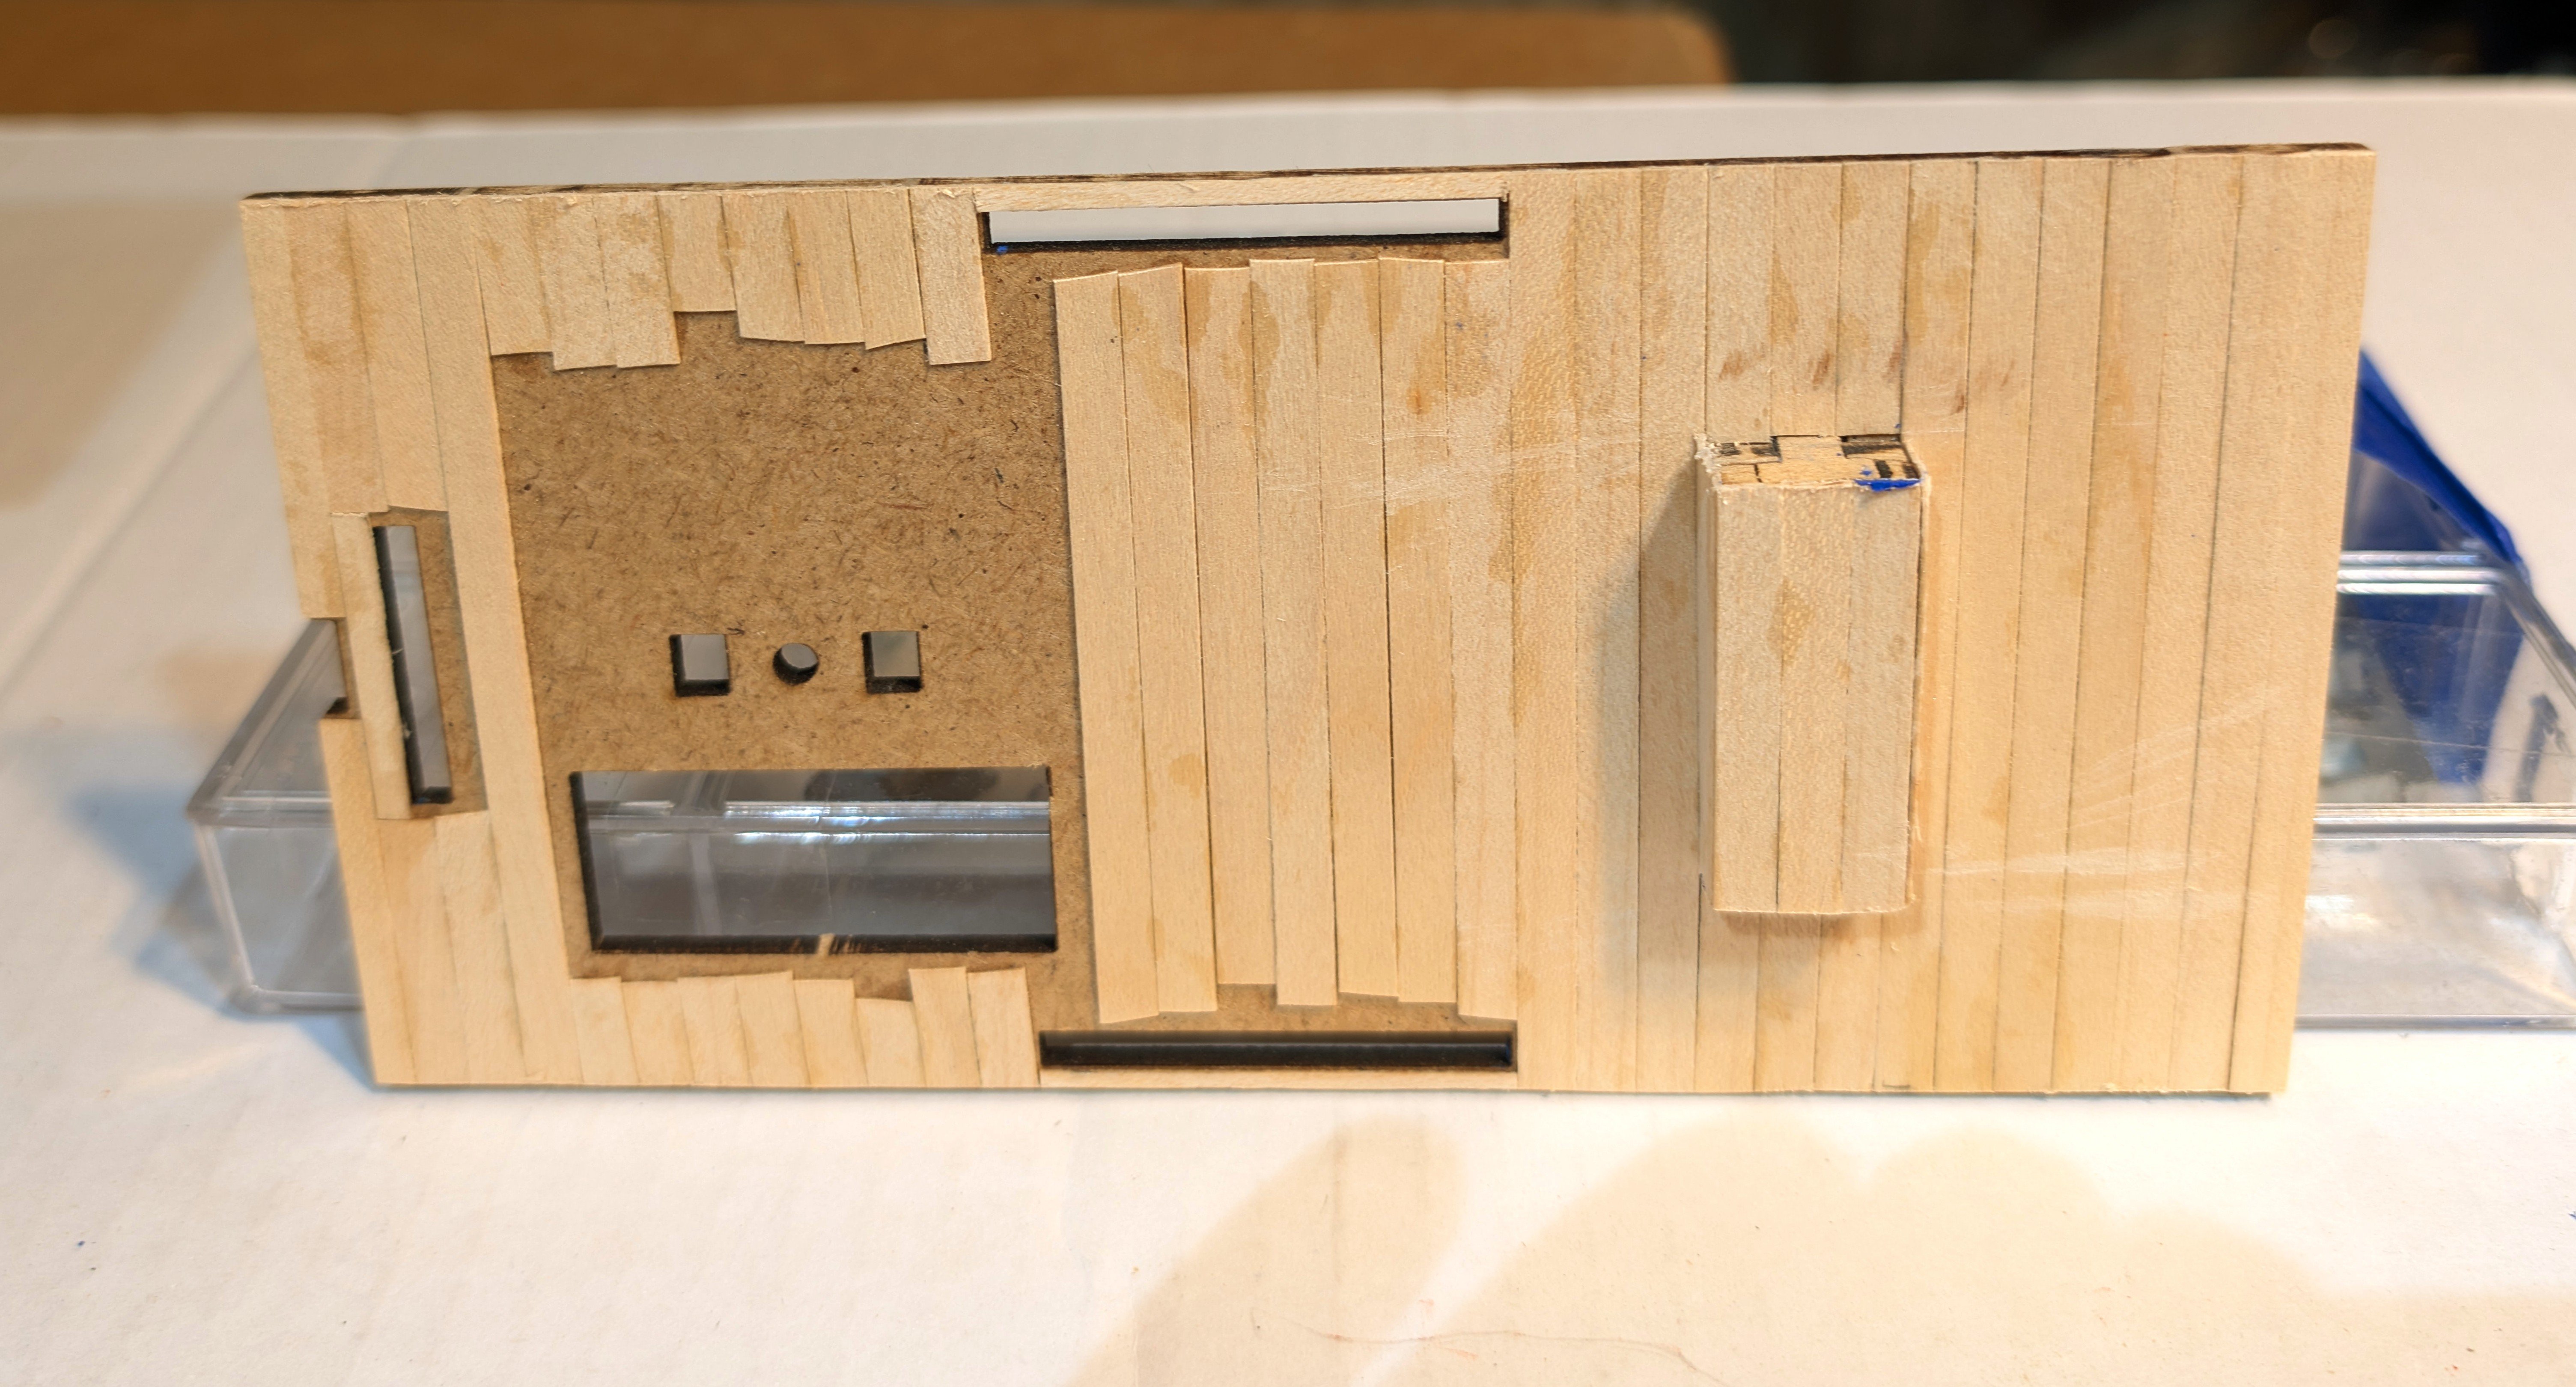
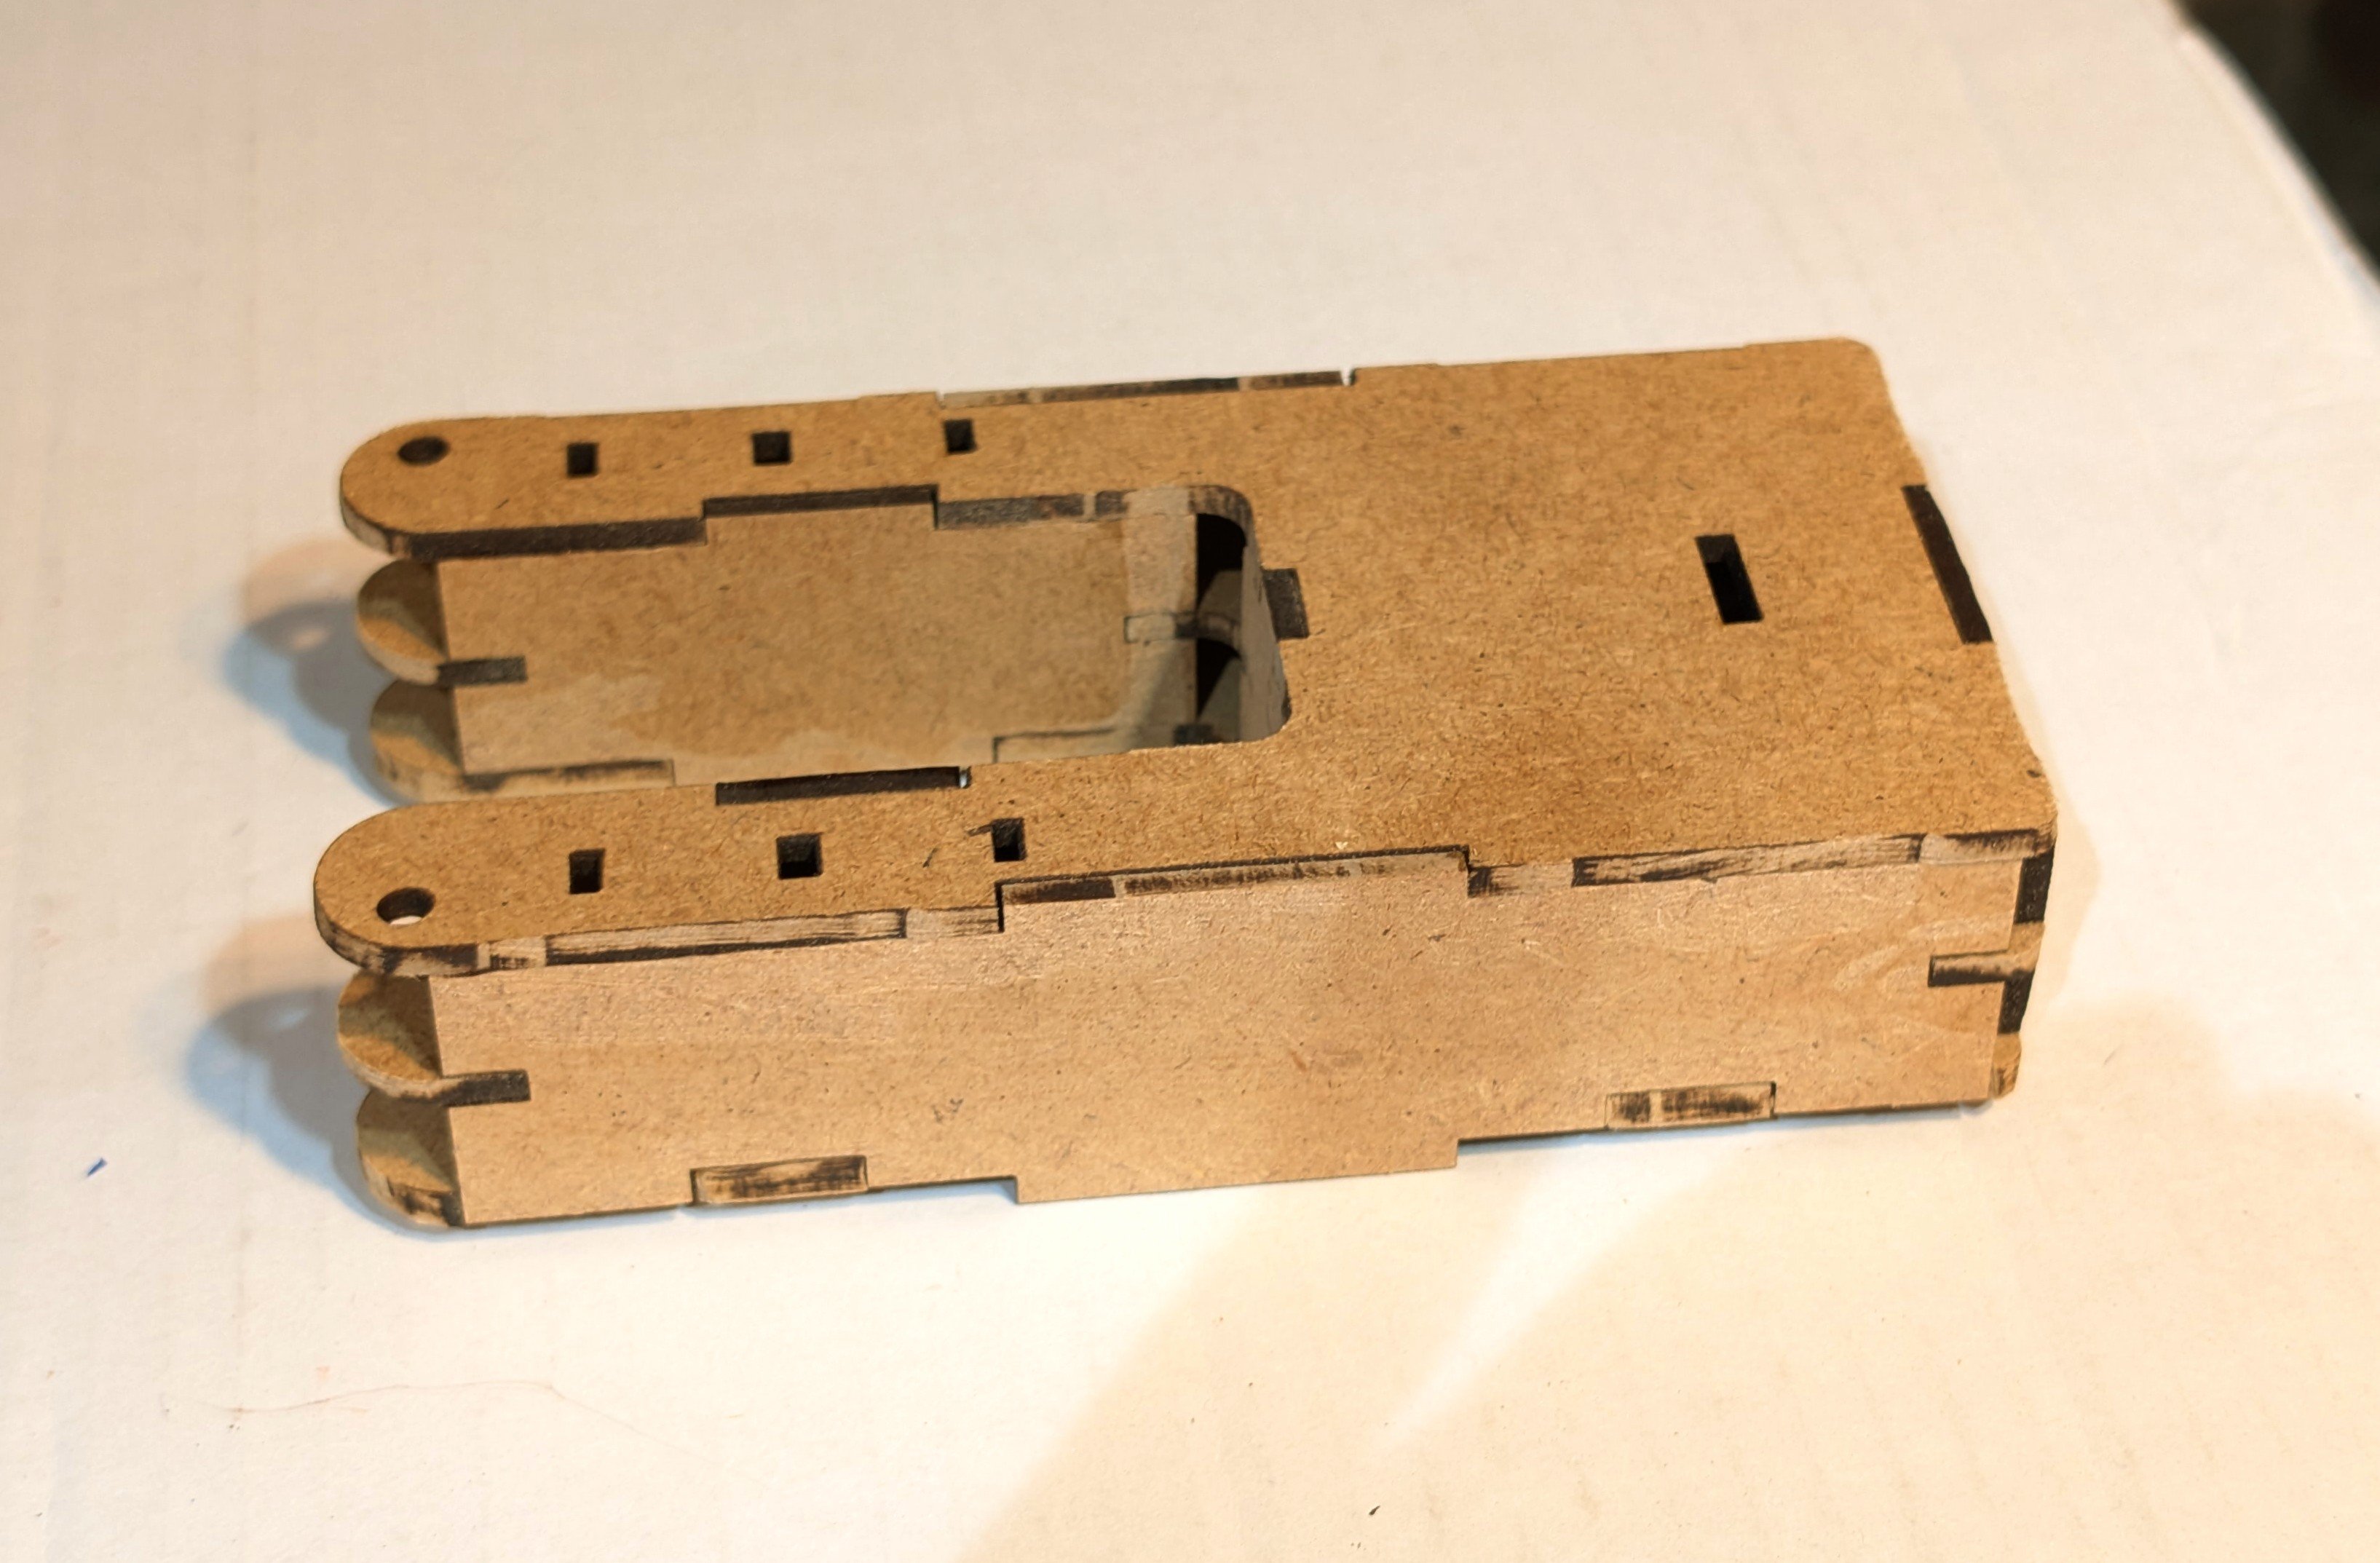
Planked the tender floor (I started to type "deck" out of habit, but this isn't a ship, is it? 😬). While the instructions say to plank the whole surface, if you do that you will have to carve out the different slots and holes. So I looked at where the tender body covers the floor and was able to hold off on planking across the holes and slots. You can see that in the picture below.
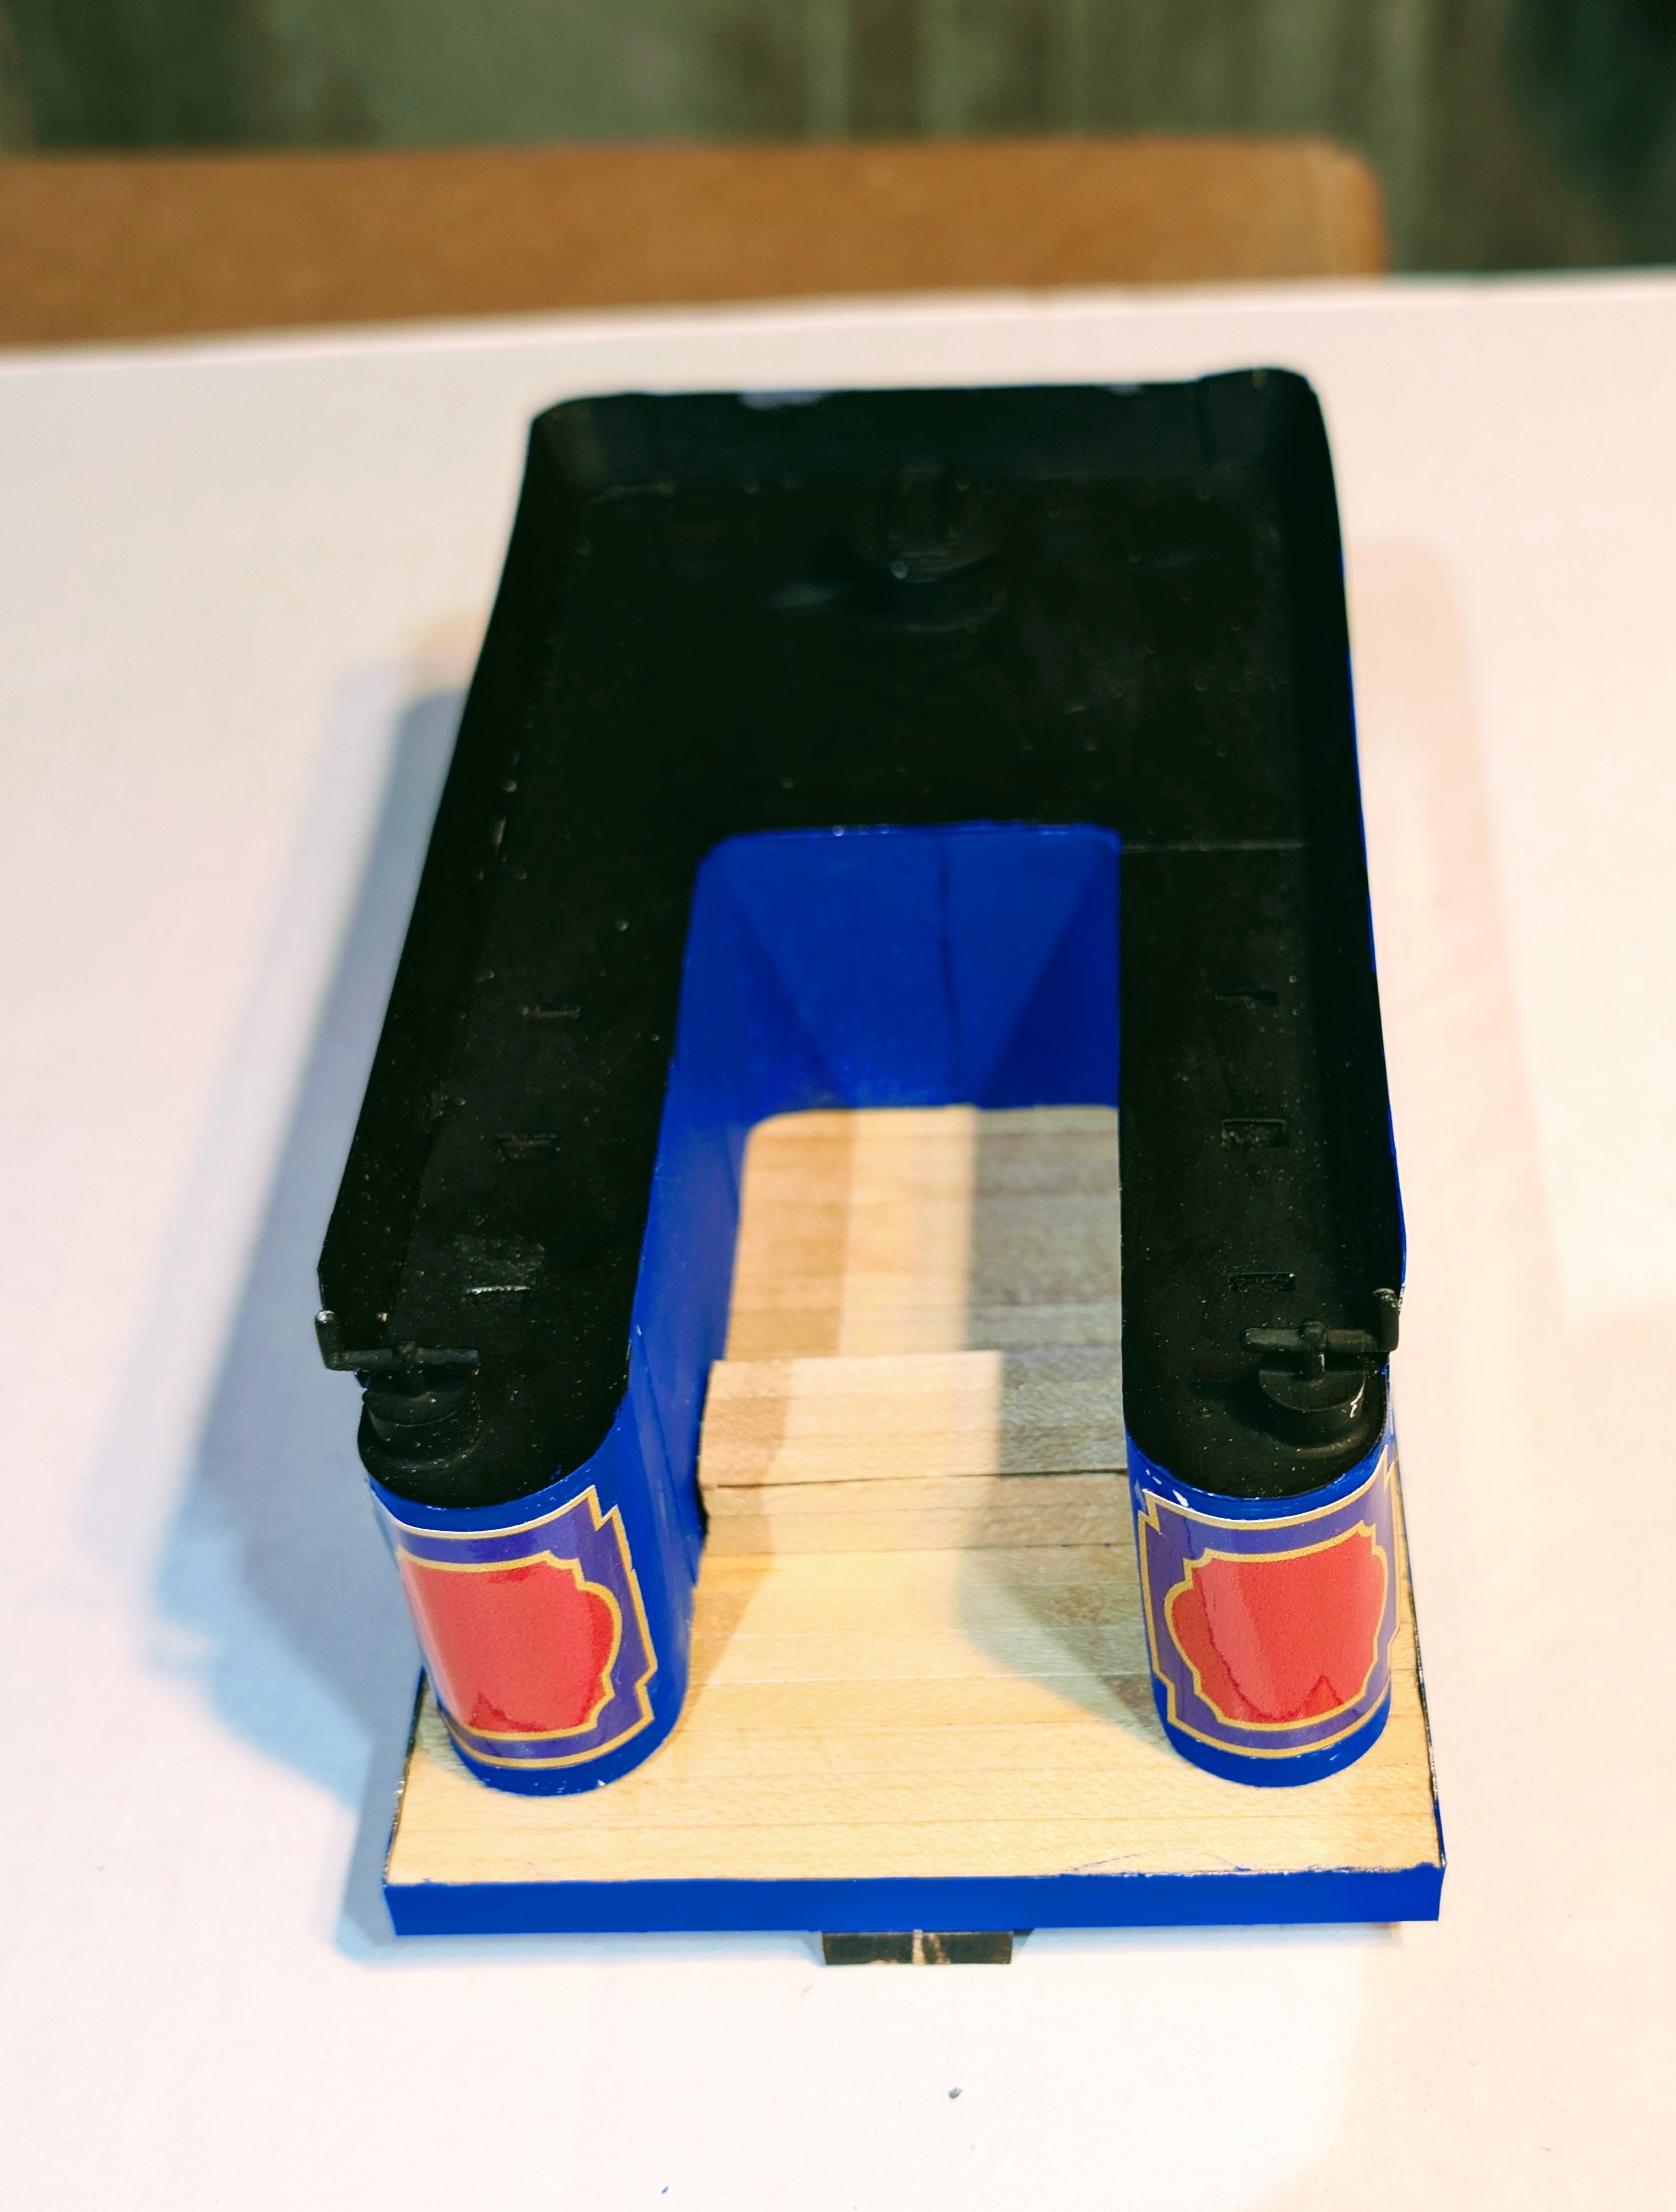
Then some pics of the tender body with the floor mounted.
Regards,
David


-
Jon:
No, I don't think so. I bought this to give me a break from ships, and I've enjoyed Occre's different materials approach. But my next one is going to be the Branneren from Caldercraft.
Regards,
David
- Canute, Consitution, Jack12477 and 1 other
-
4
-
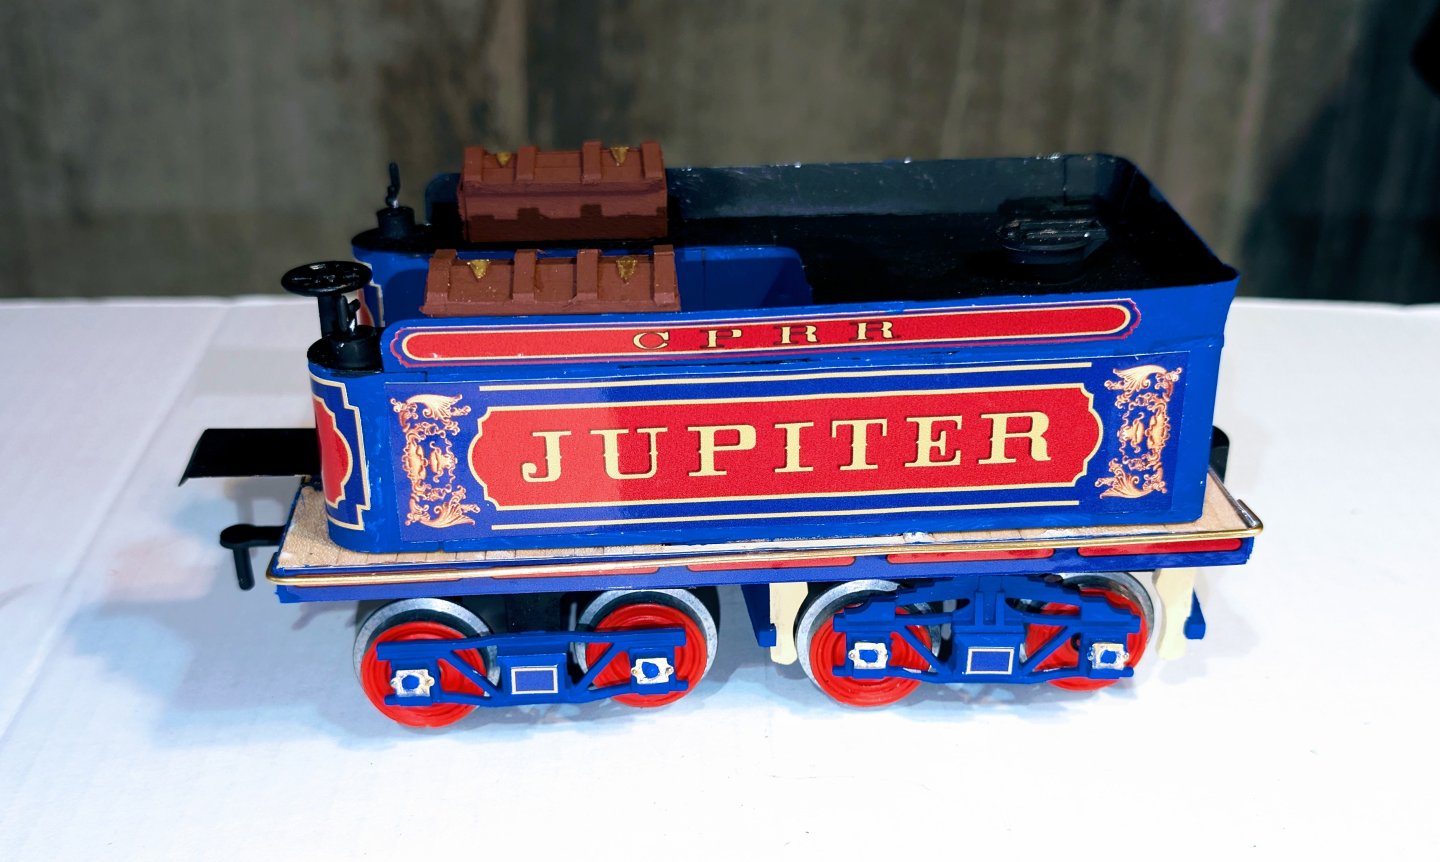
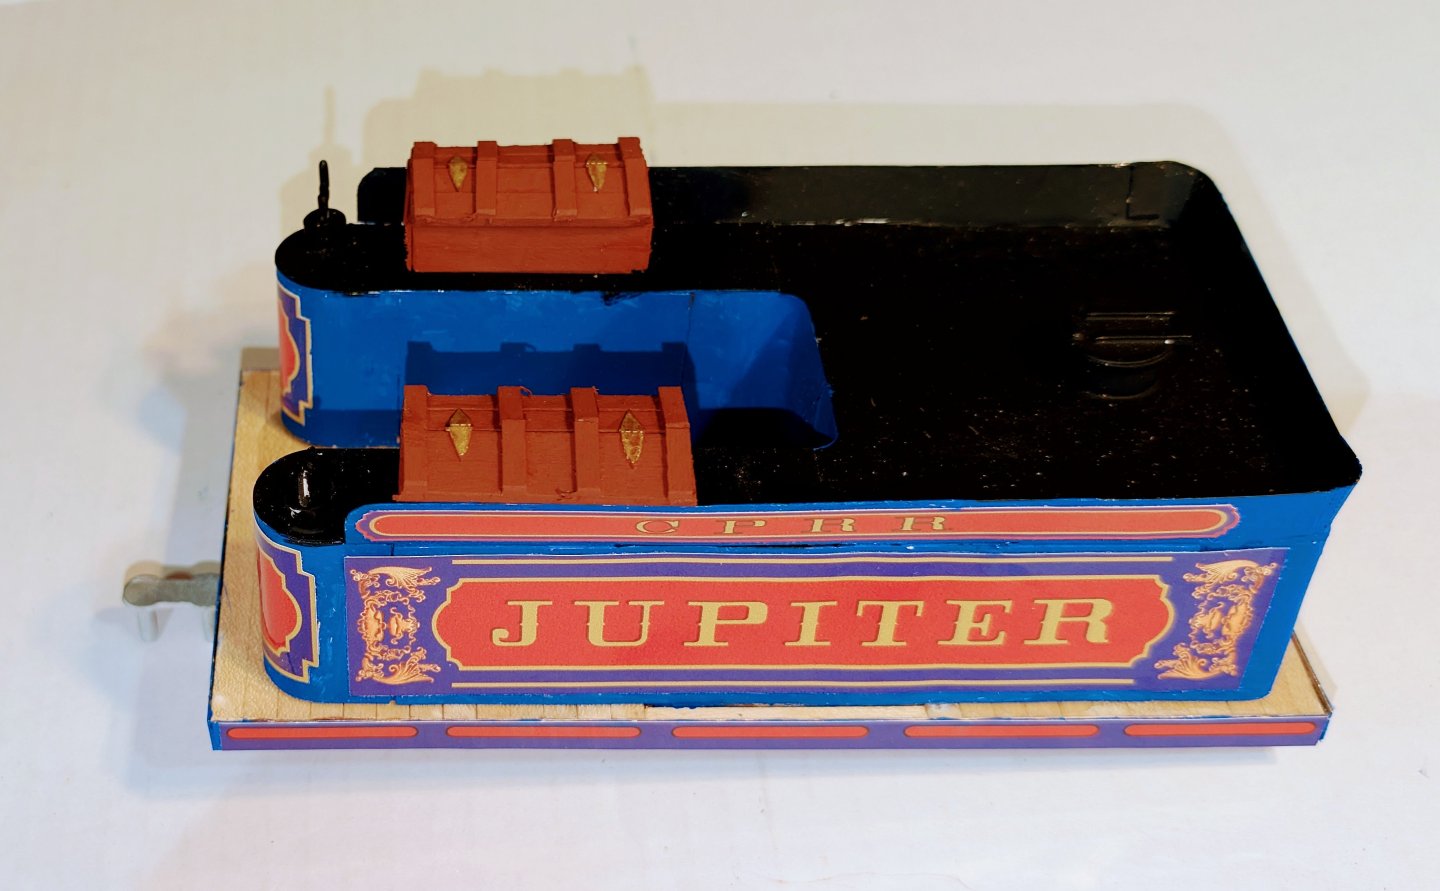
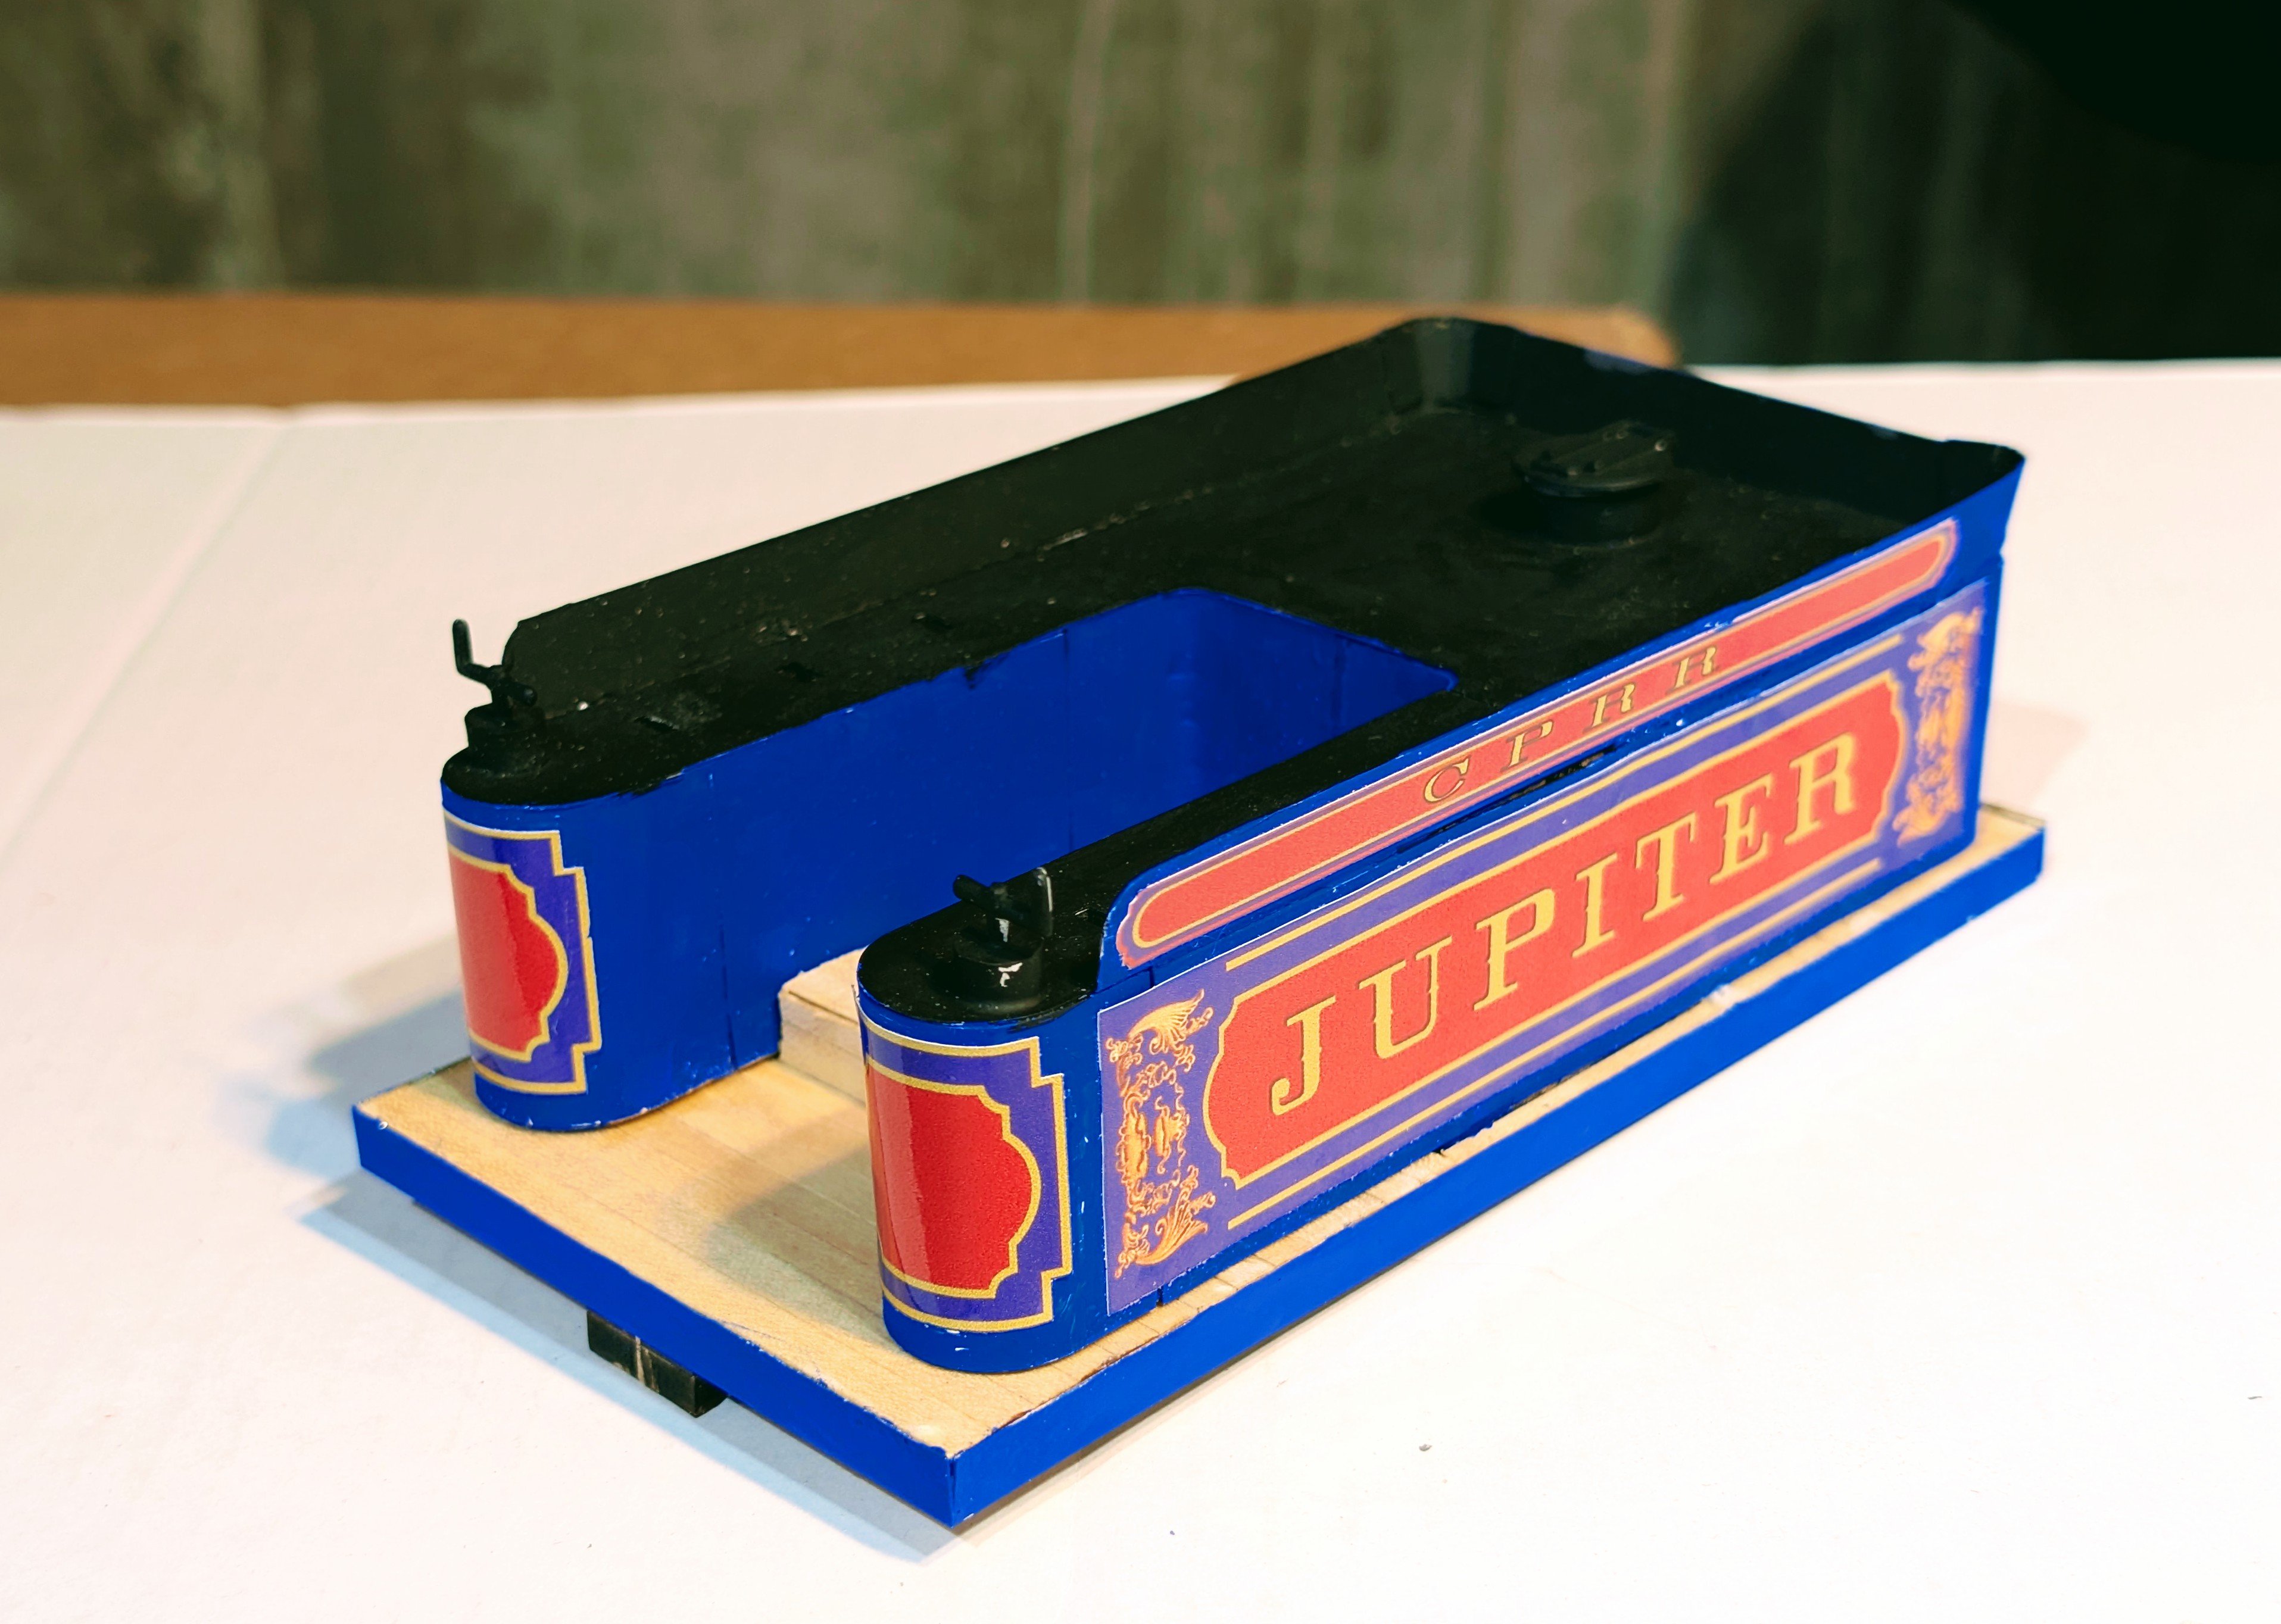
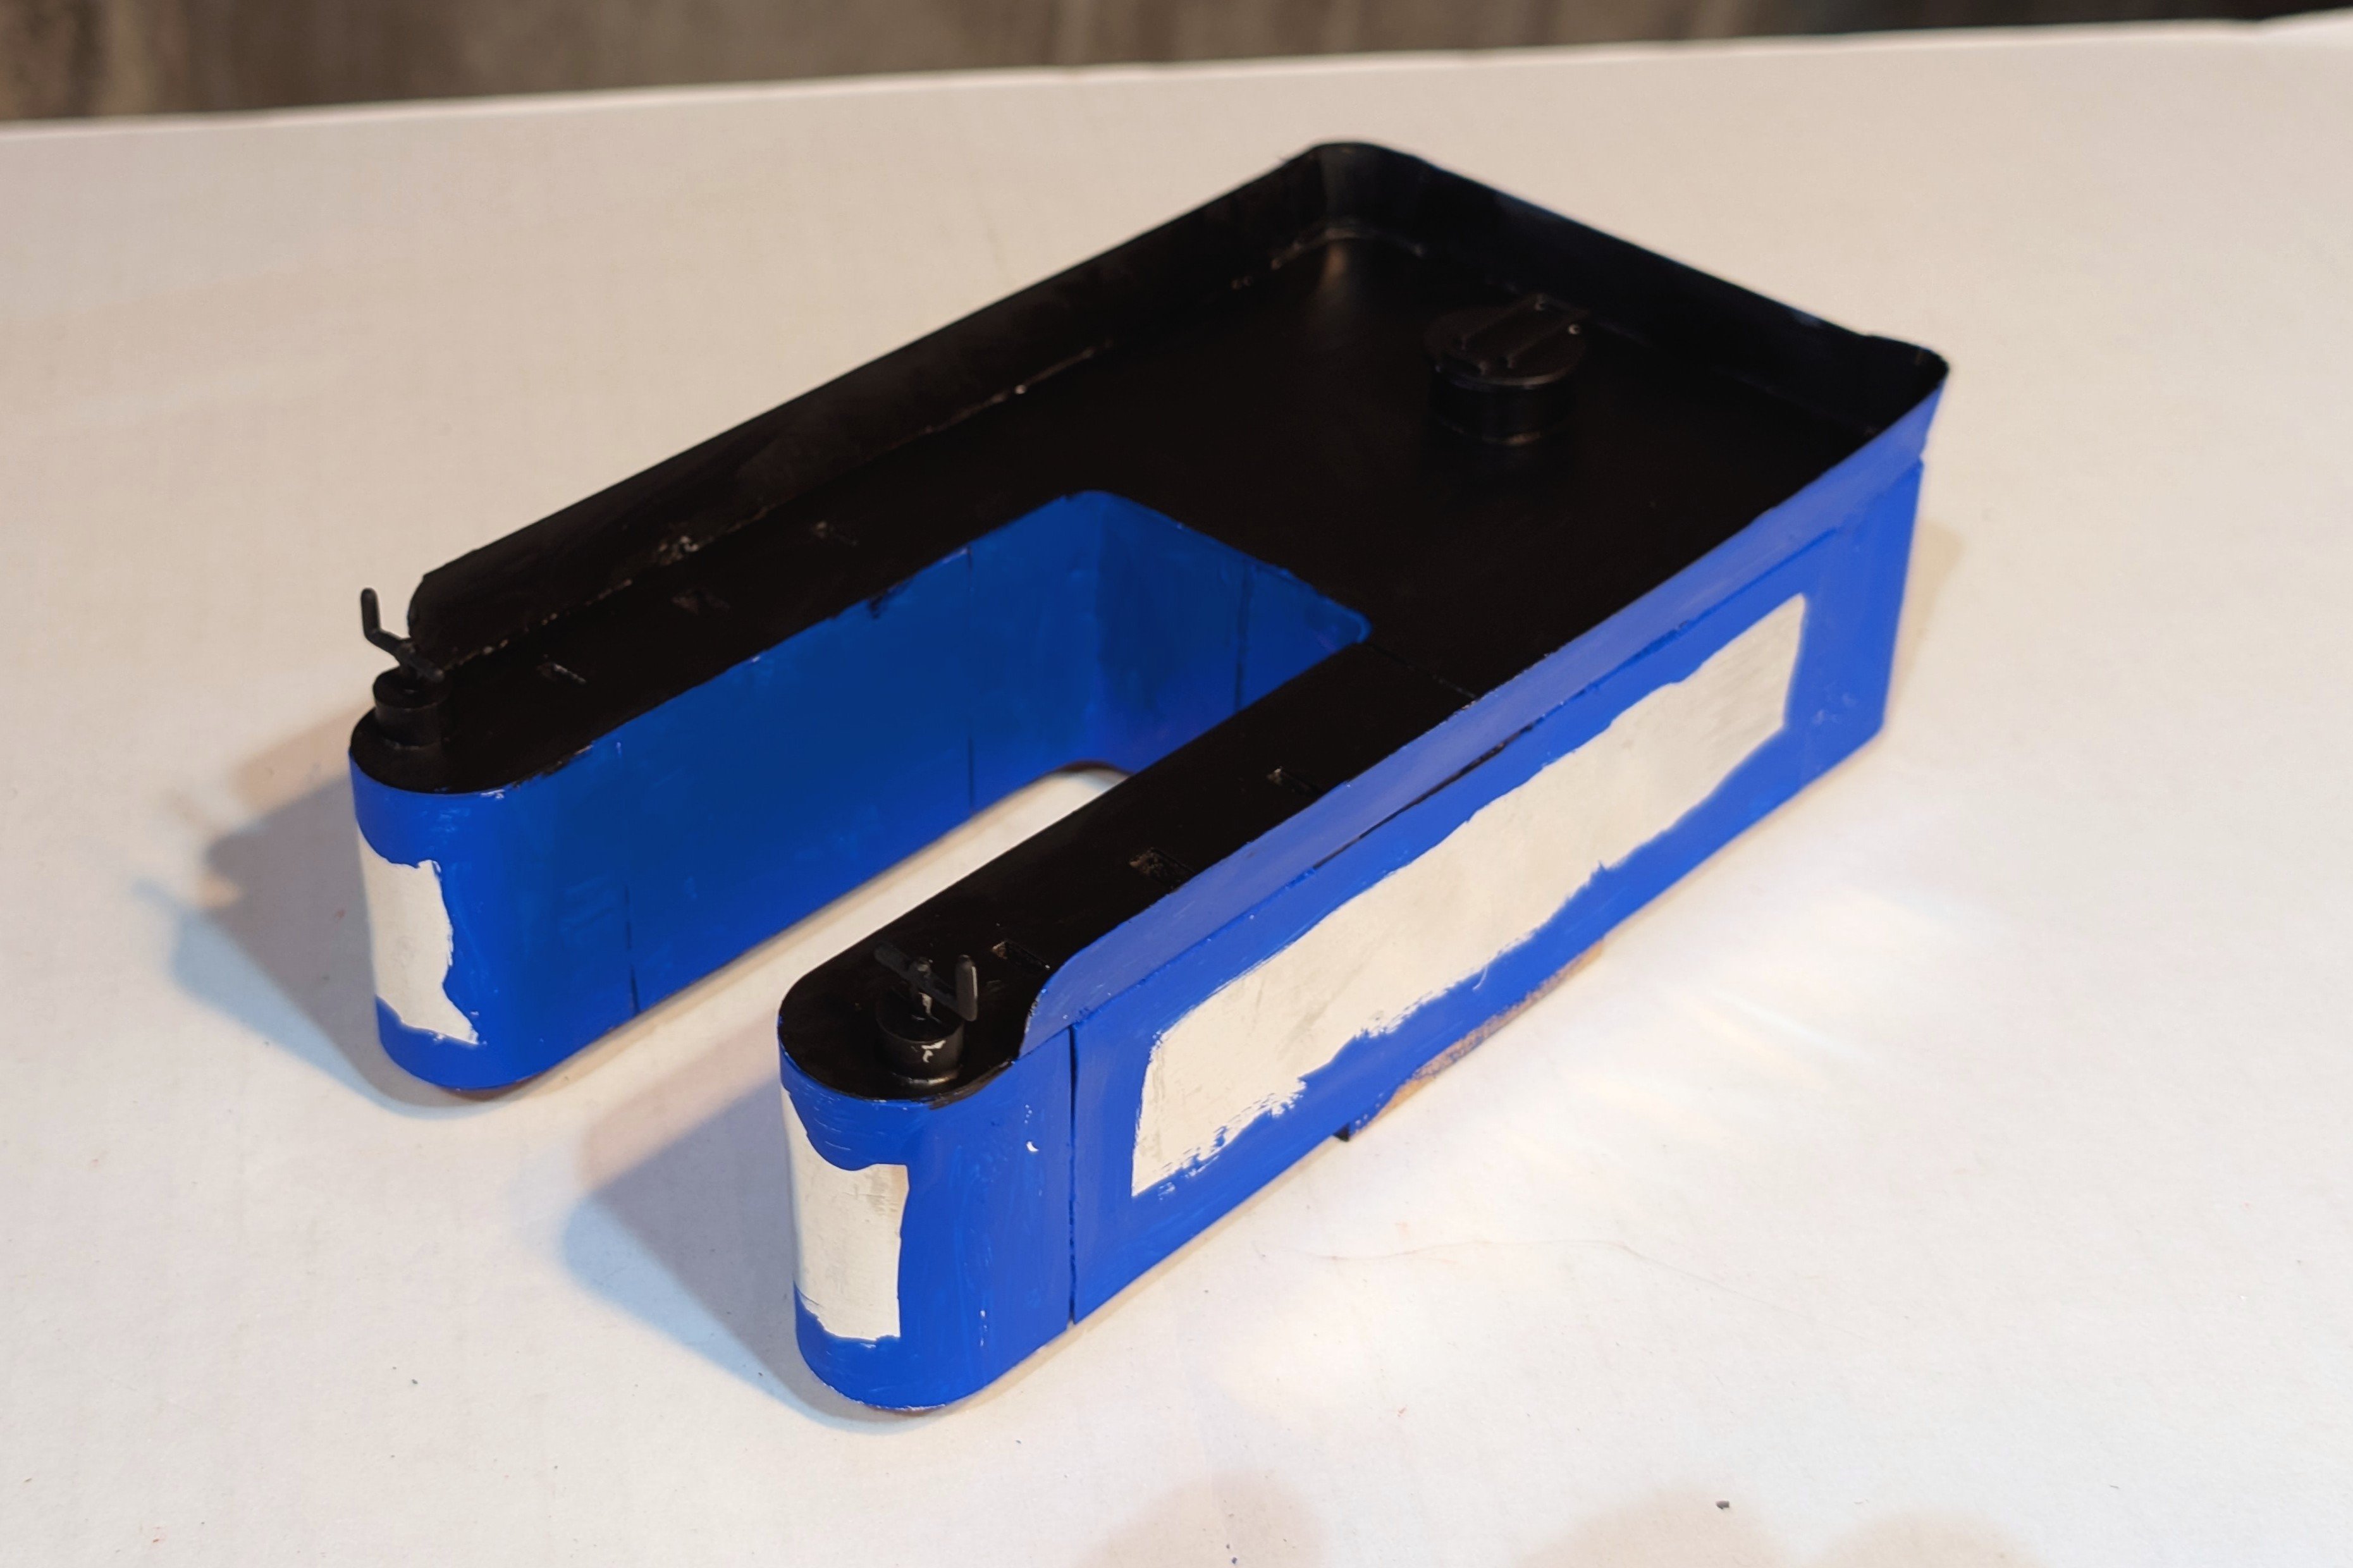
Painted the tender body. Decals cover much of the sides and back, but you need to have enough blue to cover the areas where they don't meet.
Regards,
David


-
Removable jigs determine the angle of the top flange of the tender.
Regards,
David


- Canute, thibaultron, Consitution and 7 others
-
10
-
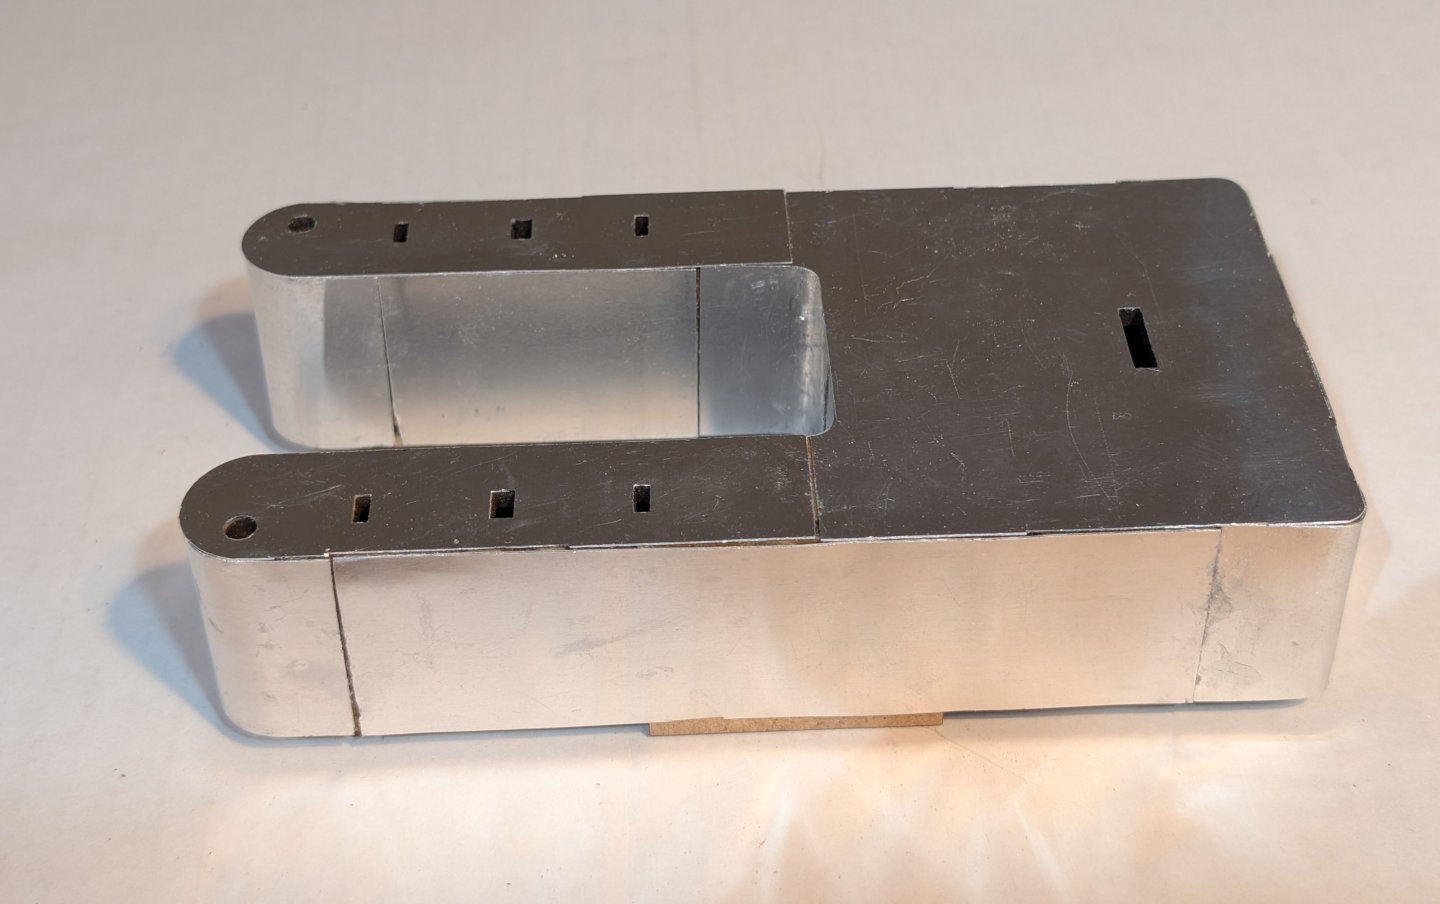
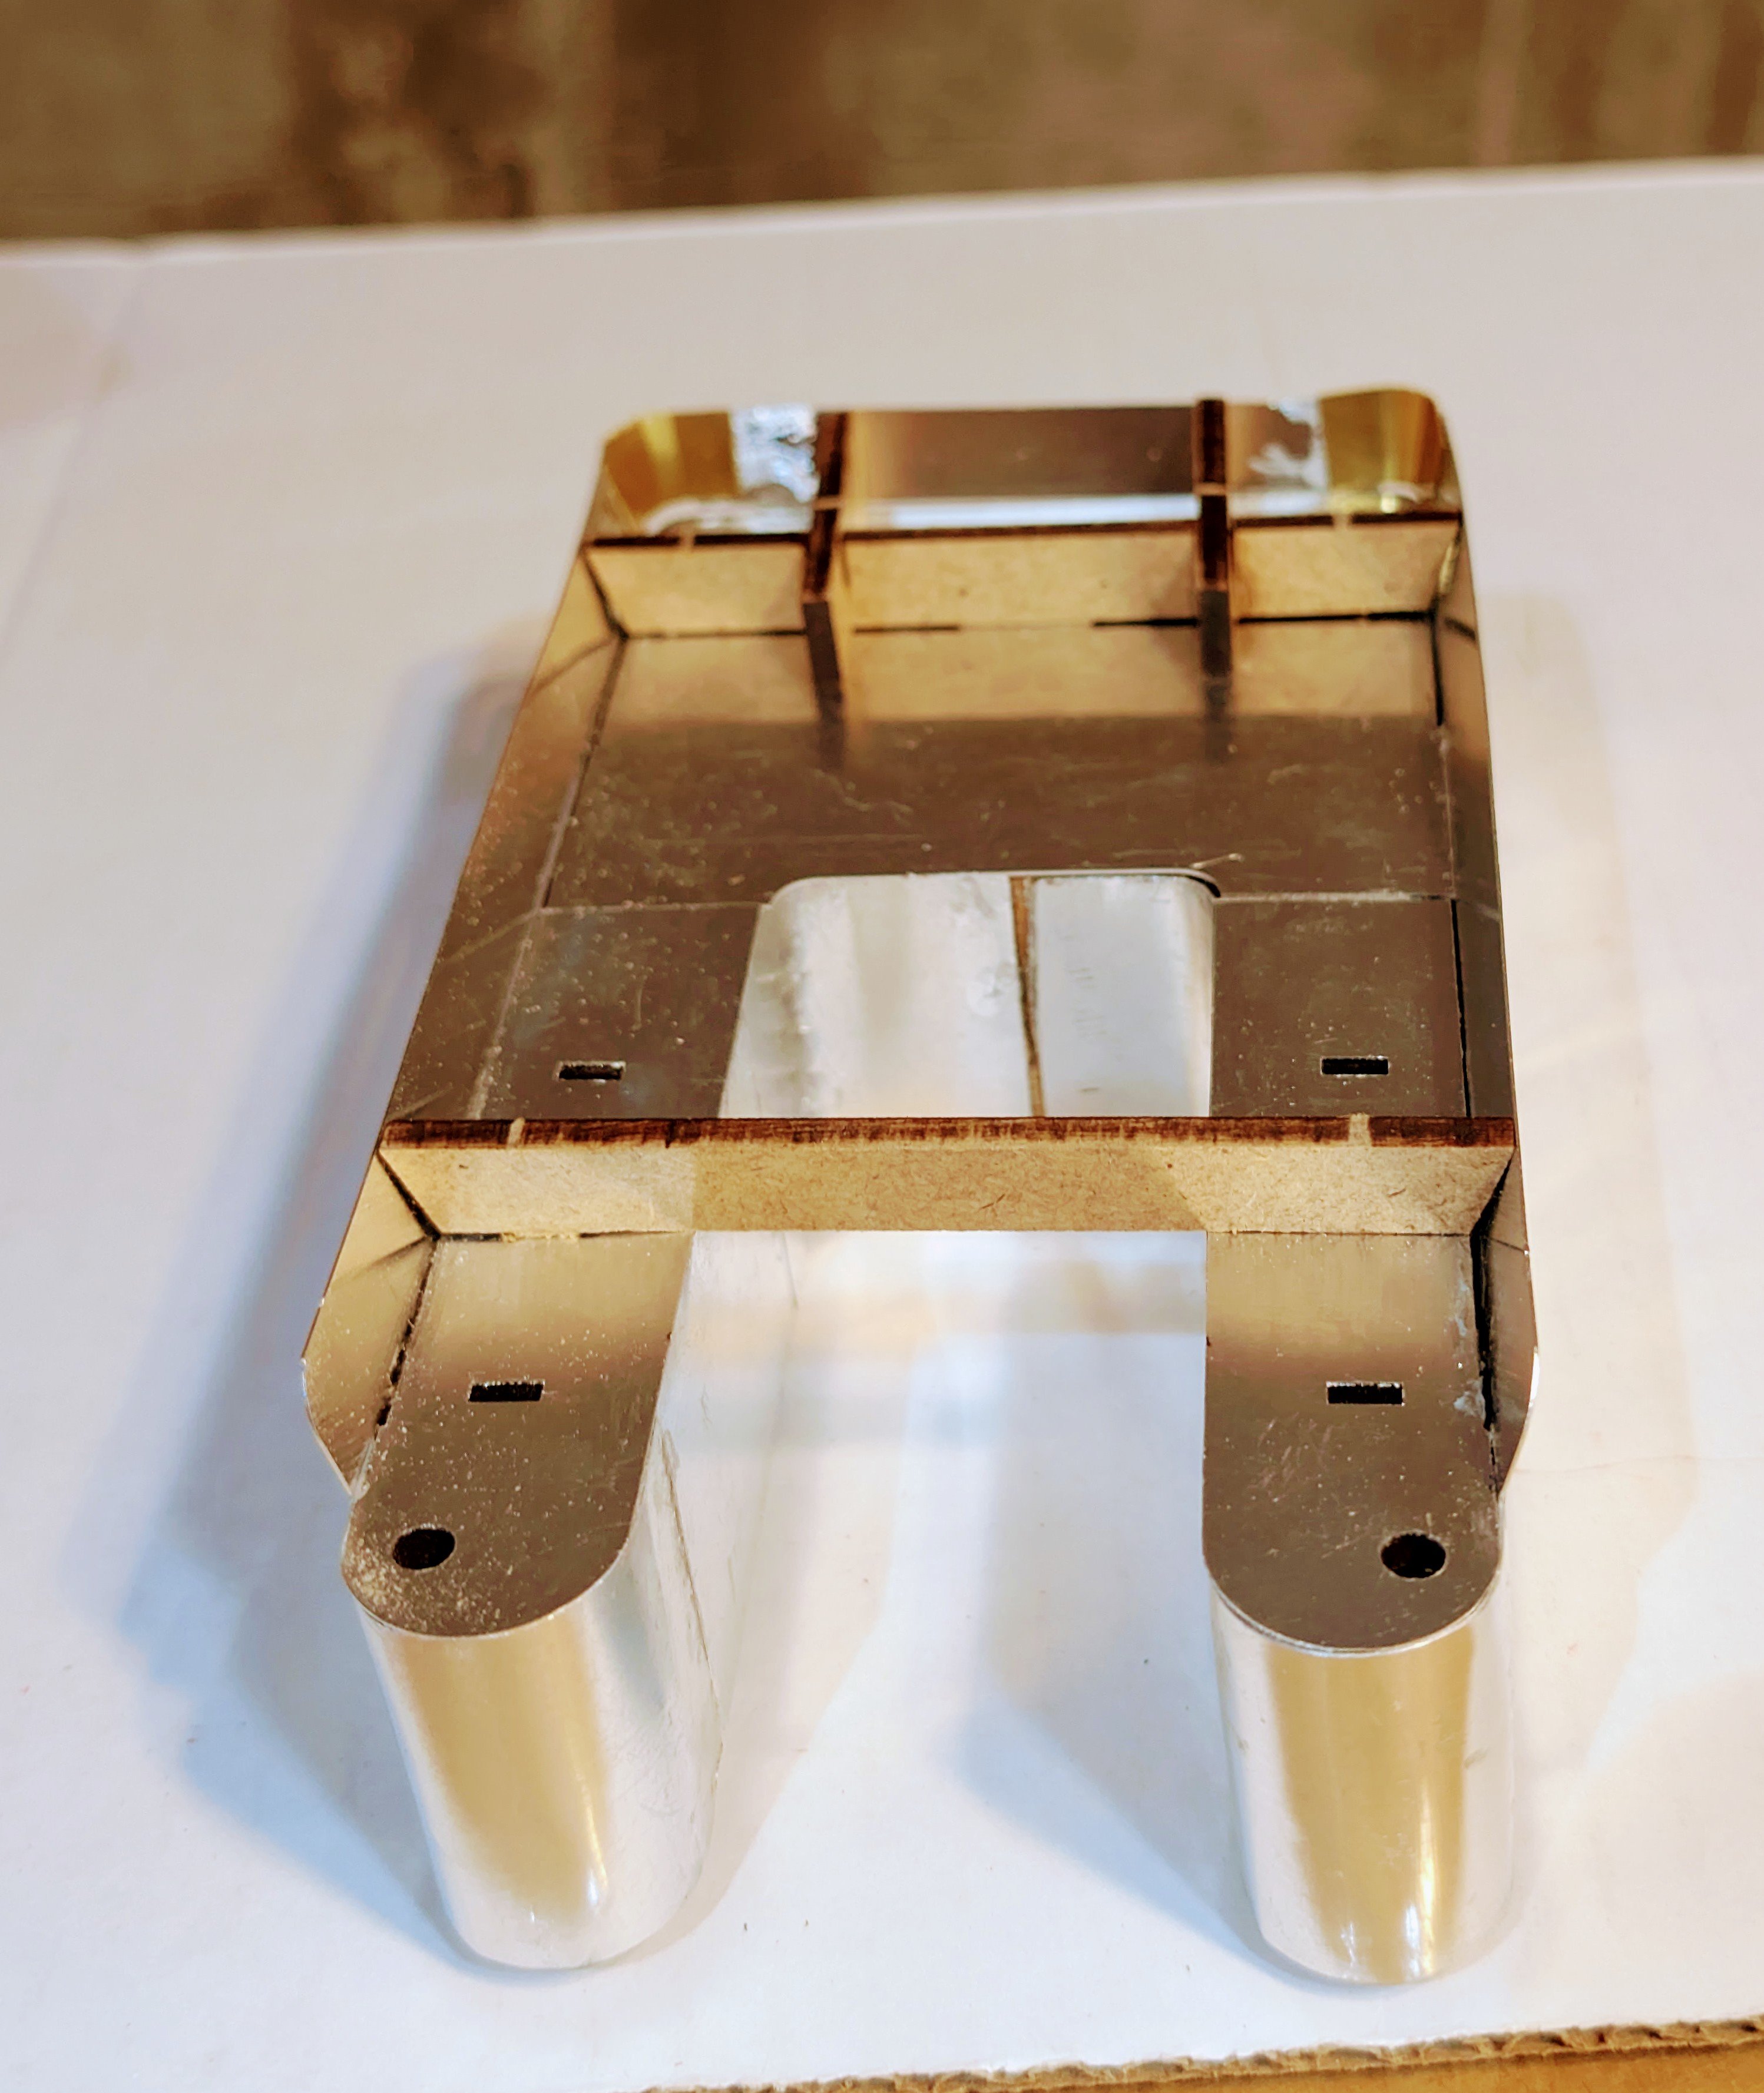
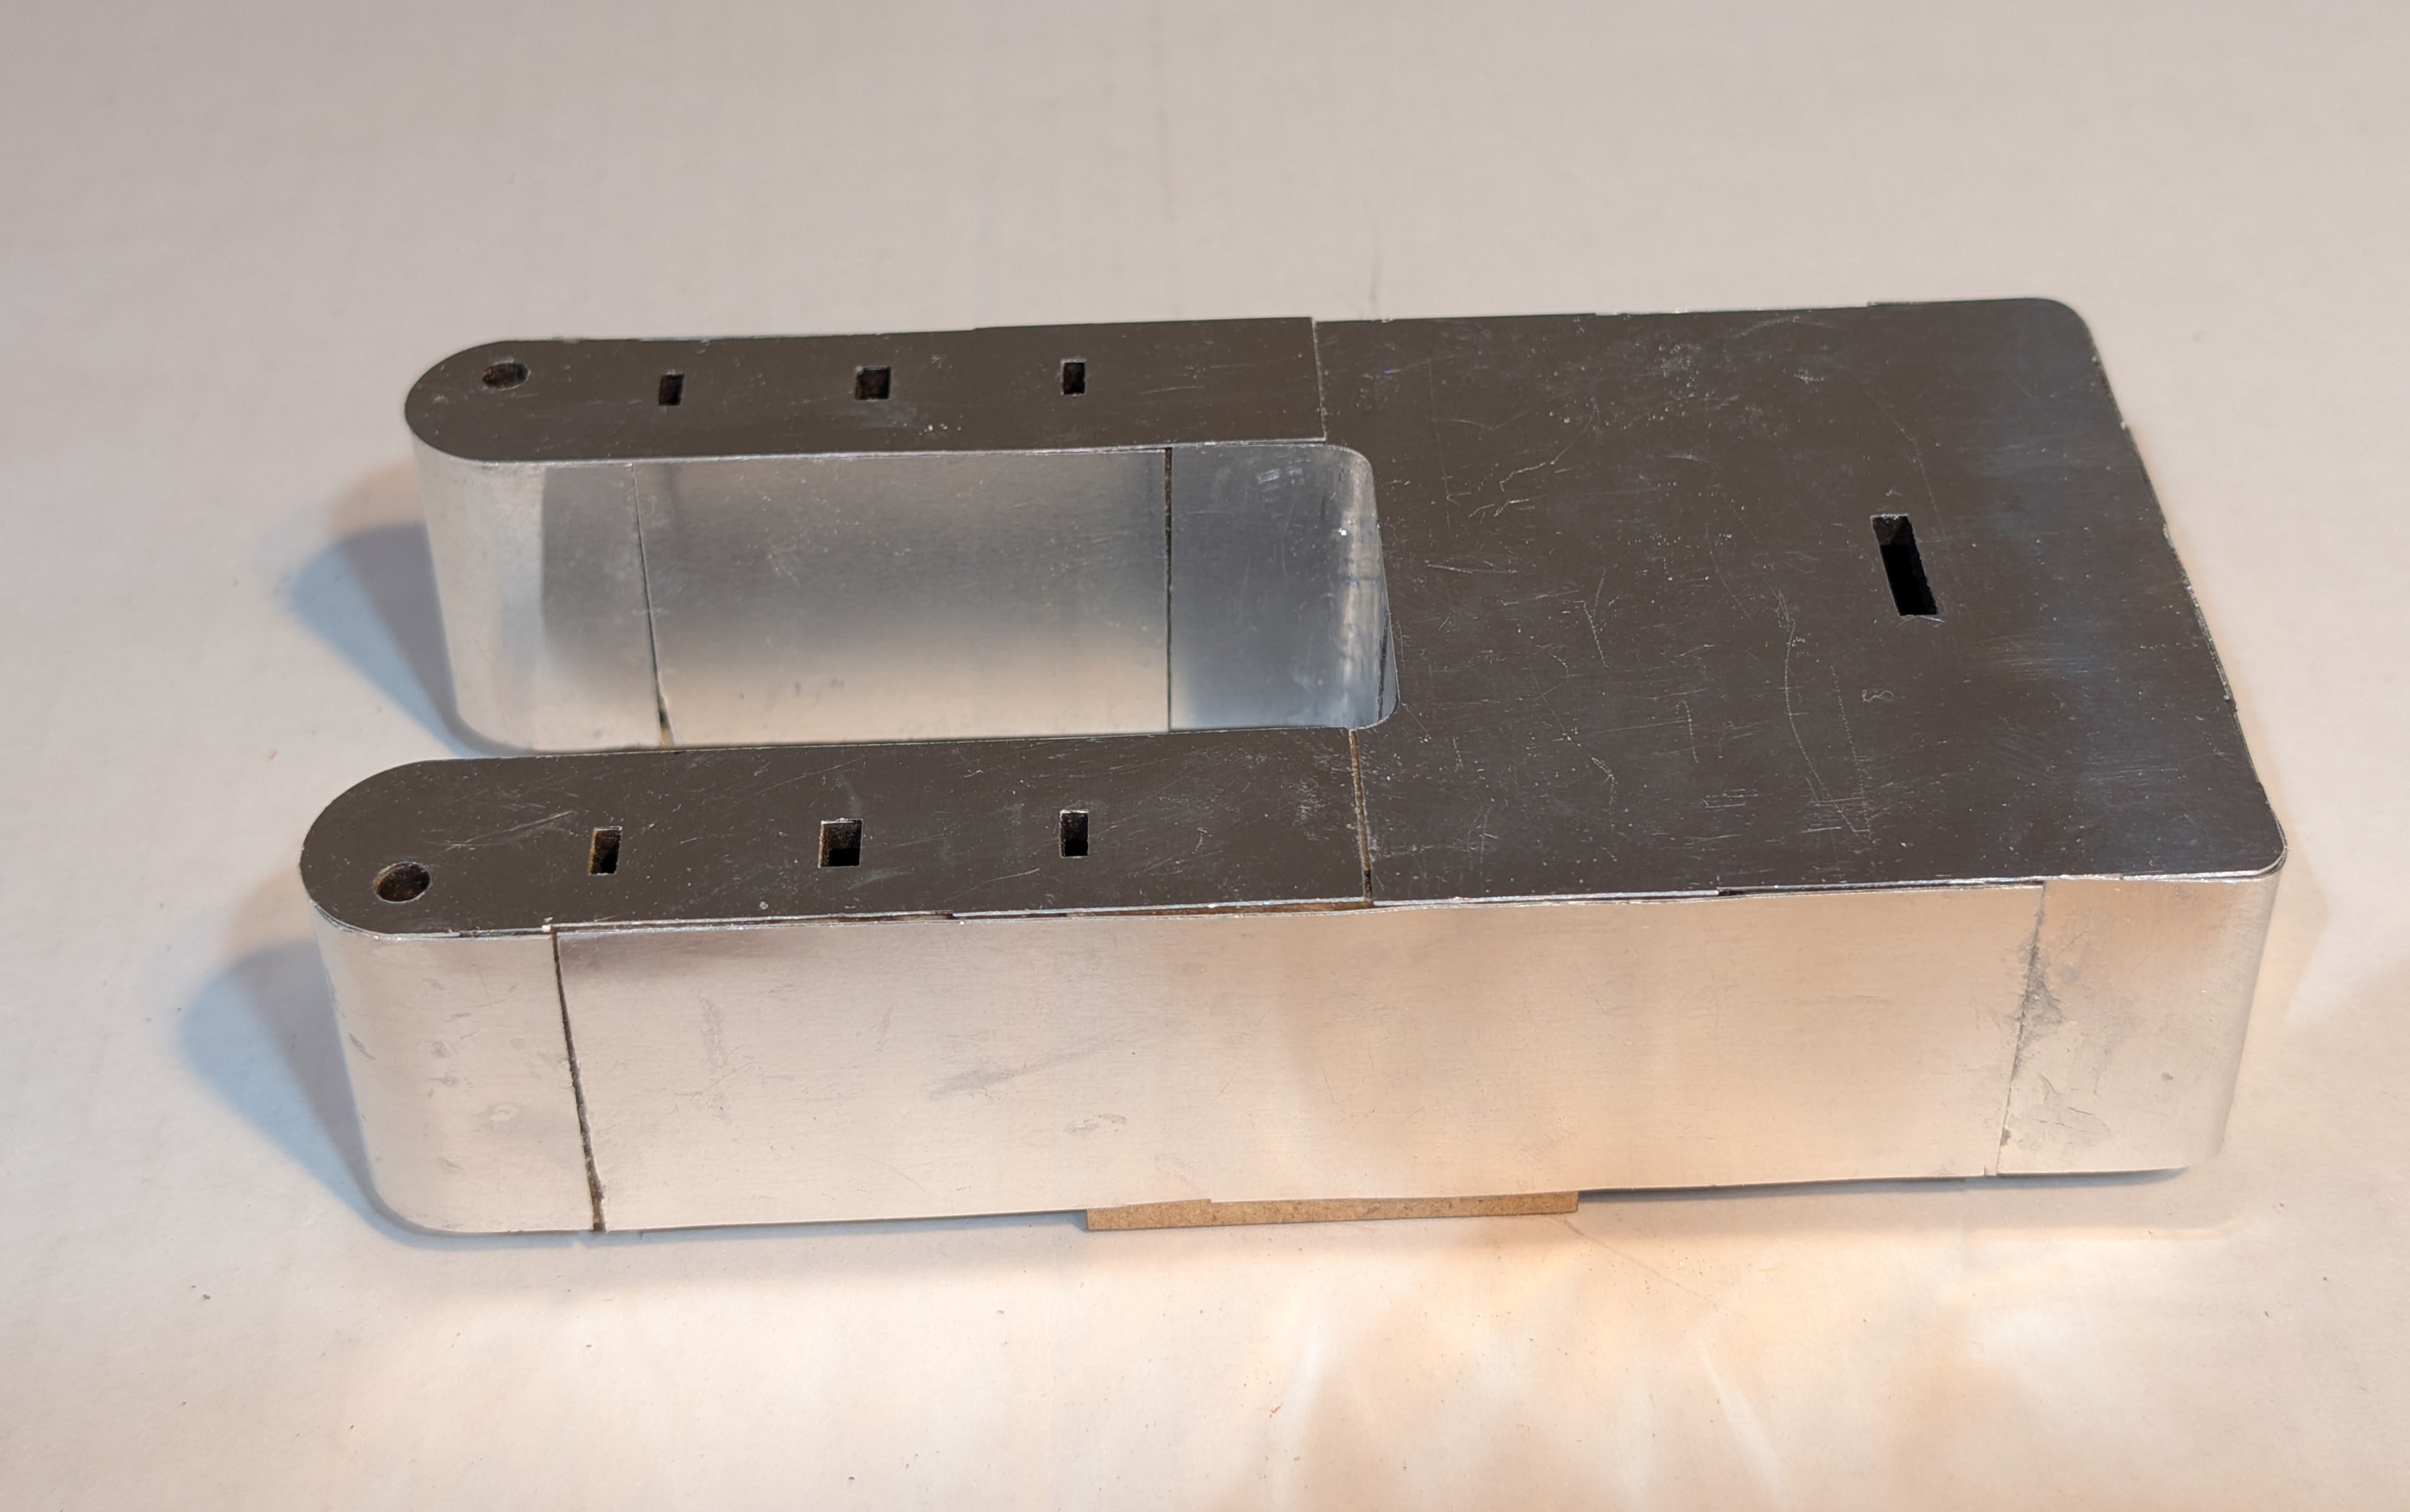
And here it is with the metal sides on. I remembered to use my Dremel sanding drum to rough up the sides that are glued, so gluing set quickly.
Regards,
David
- thibaultron, Canute, Jack12477 and 5 others
-
8
-
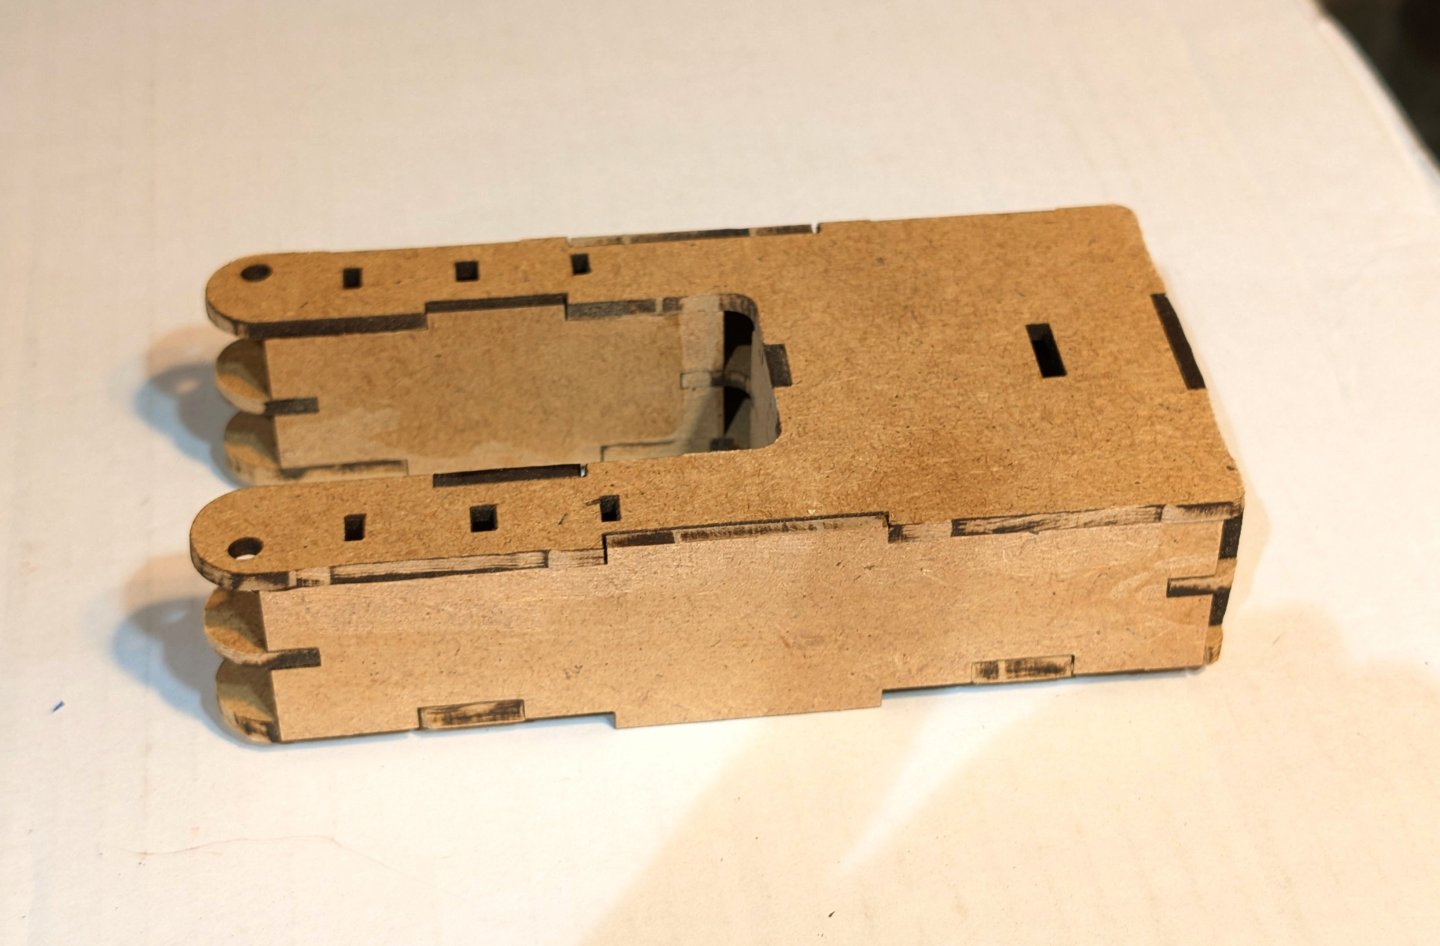
Started work on the tender. Here's the first stage of the body frame.
Regards,
David
- eatcrow2, thibaultron, GrandpaPhil and 5 others
-
8
-
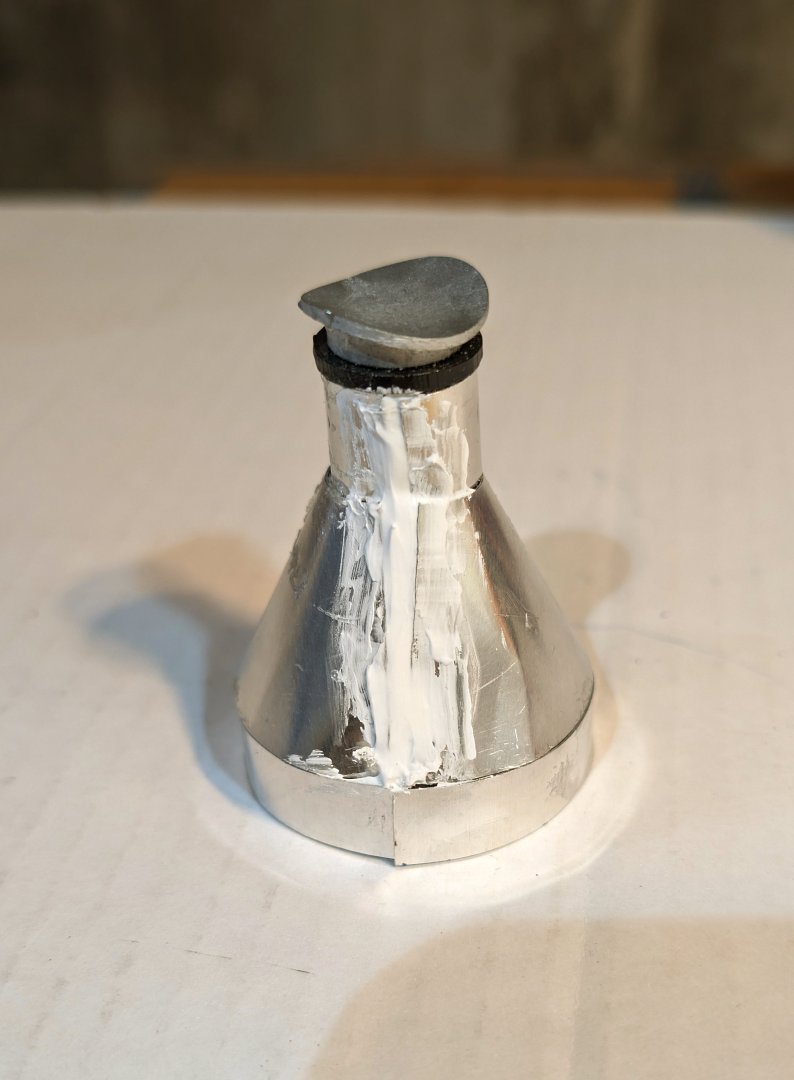
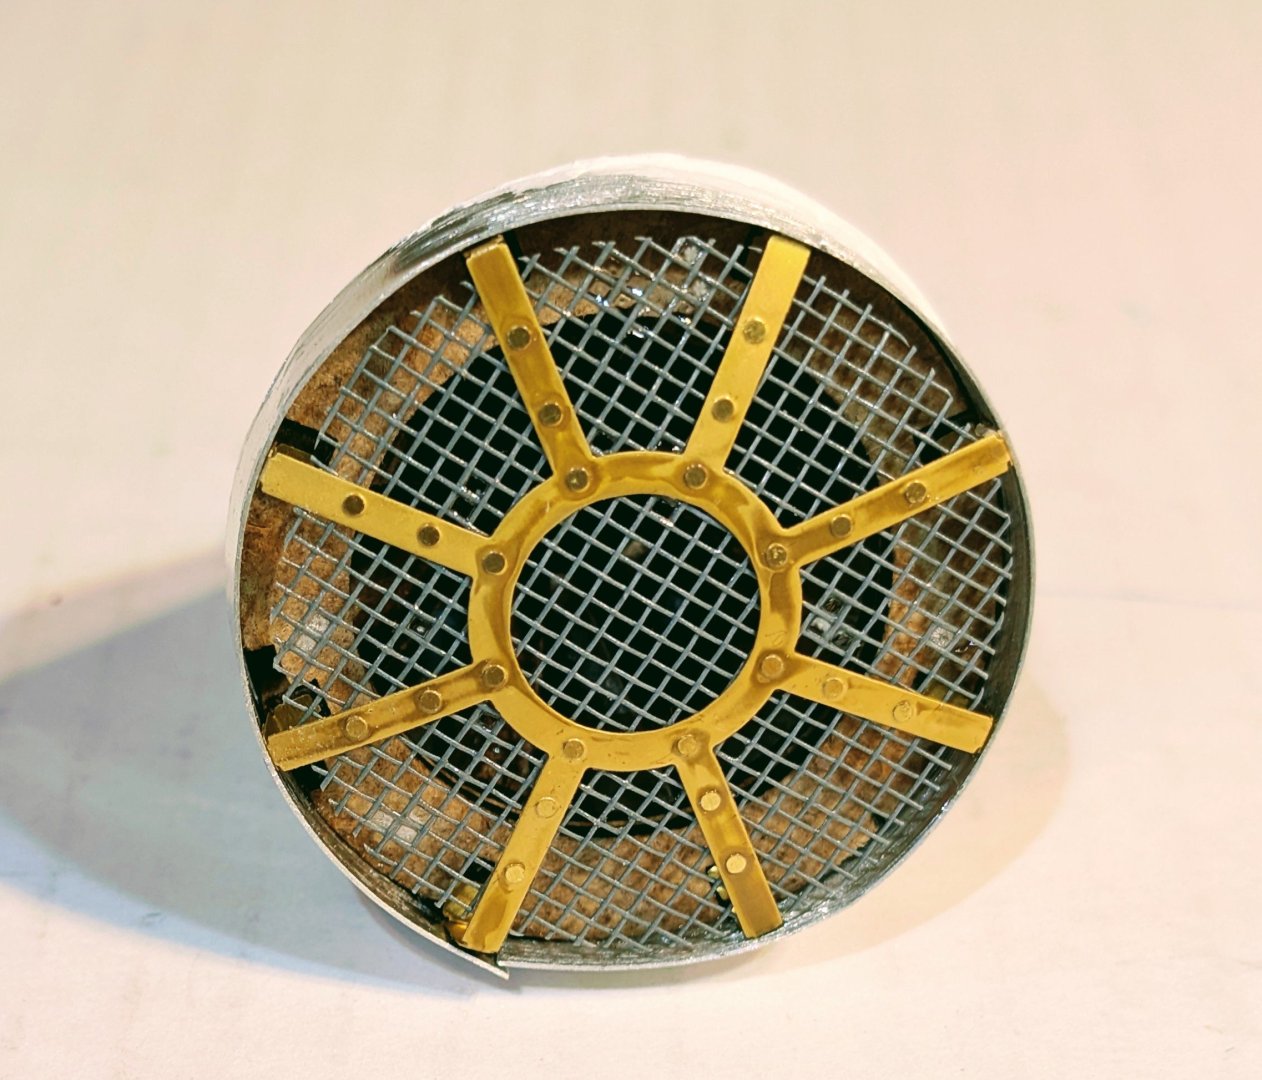
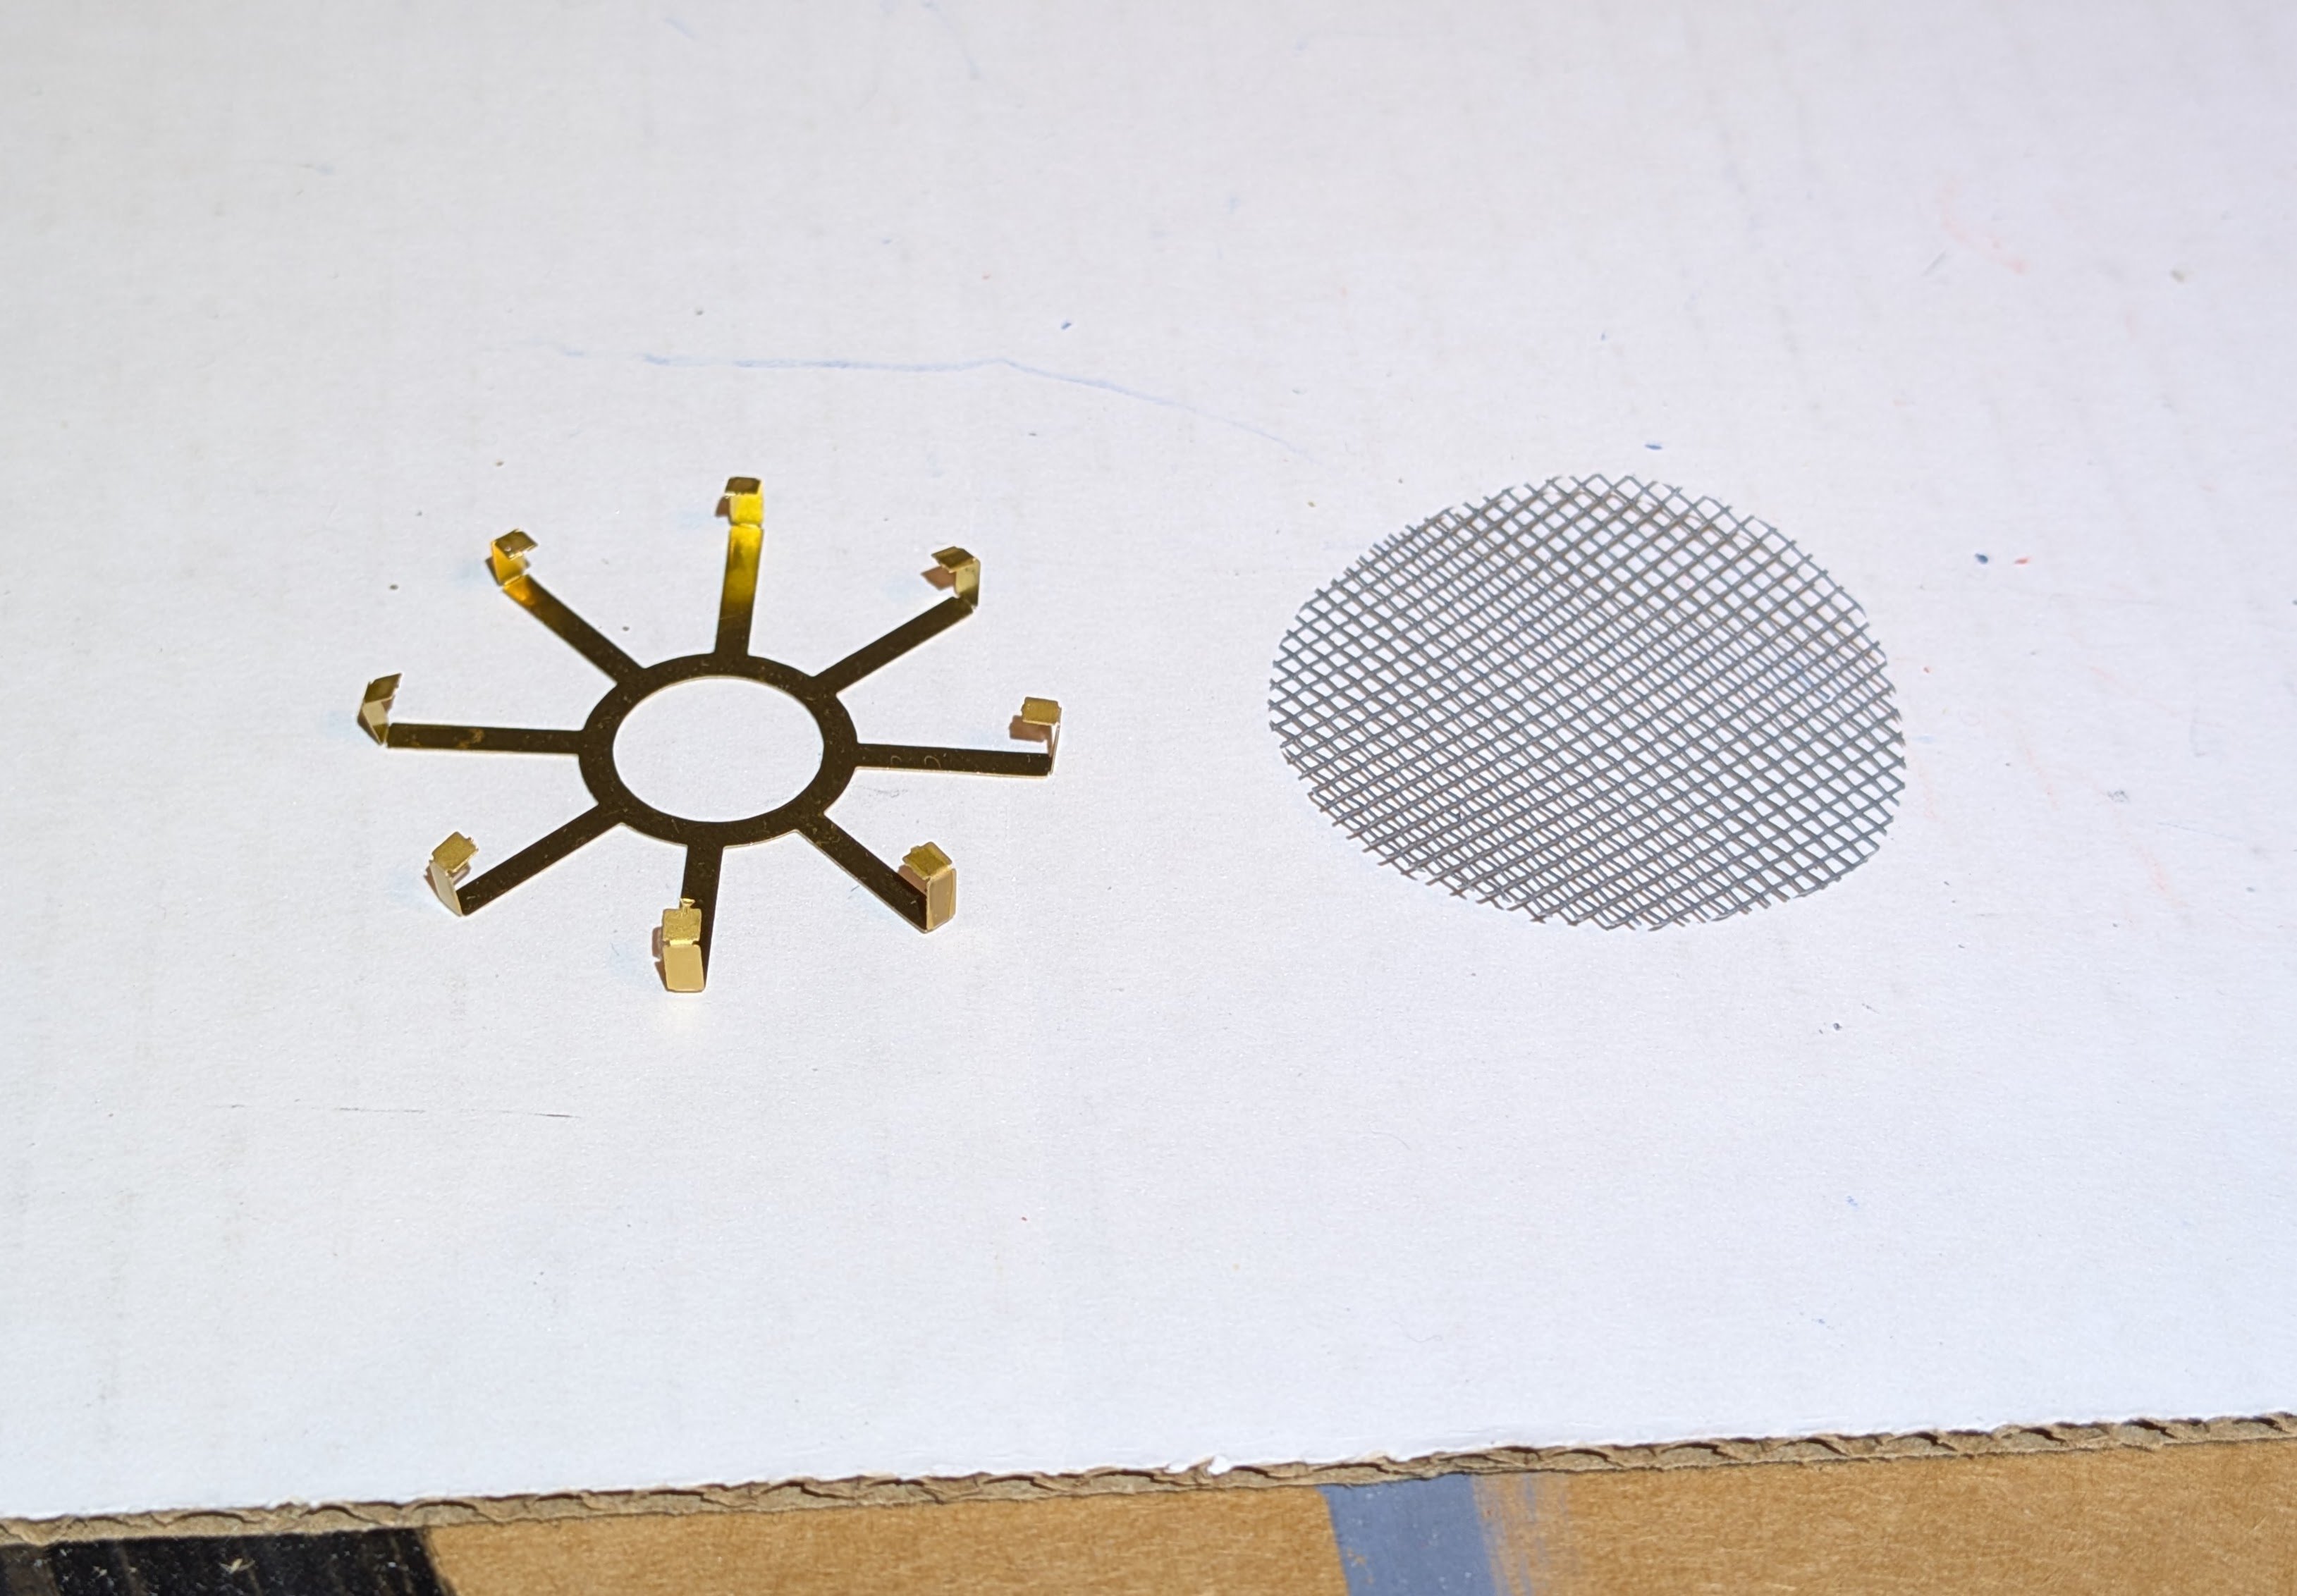
Added the smokestack. This is difficult to build. I had to putty the areas where the conical section joins, but that worked fine and painted fine.
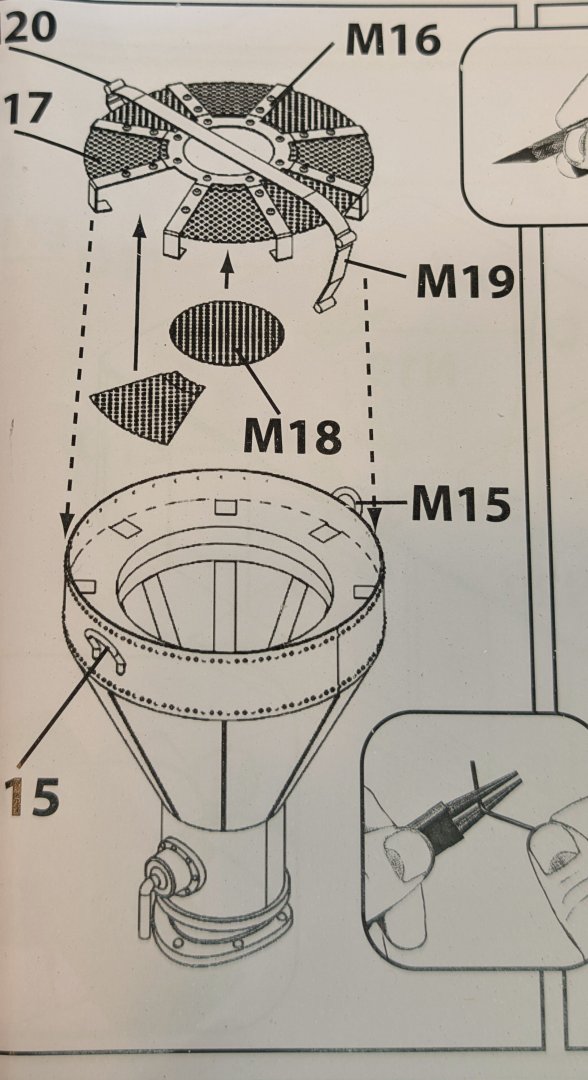
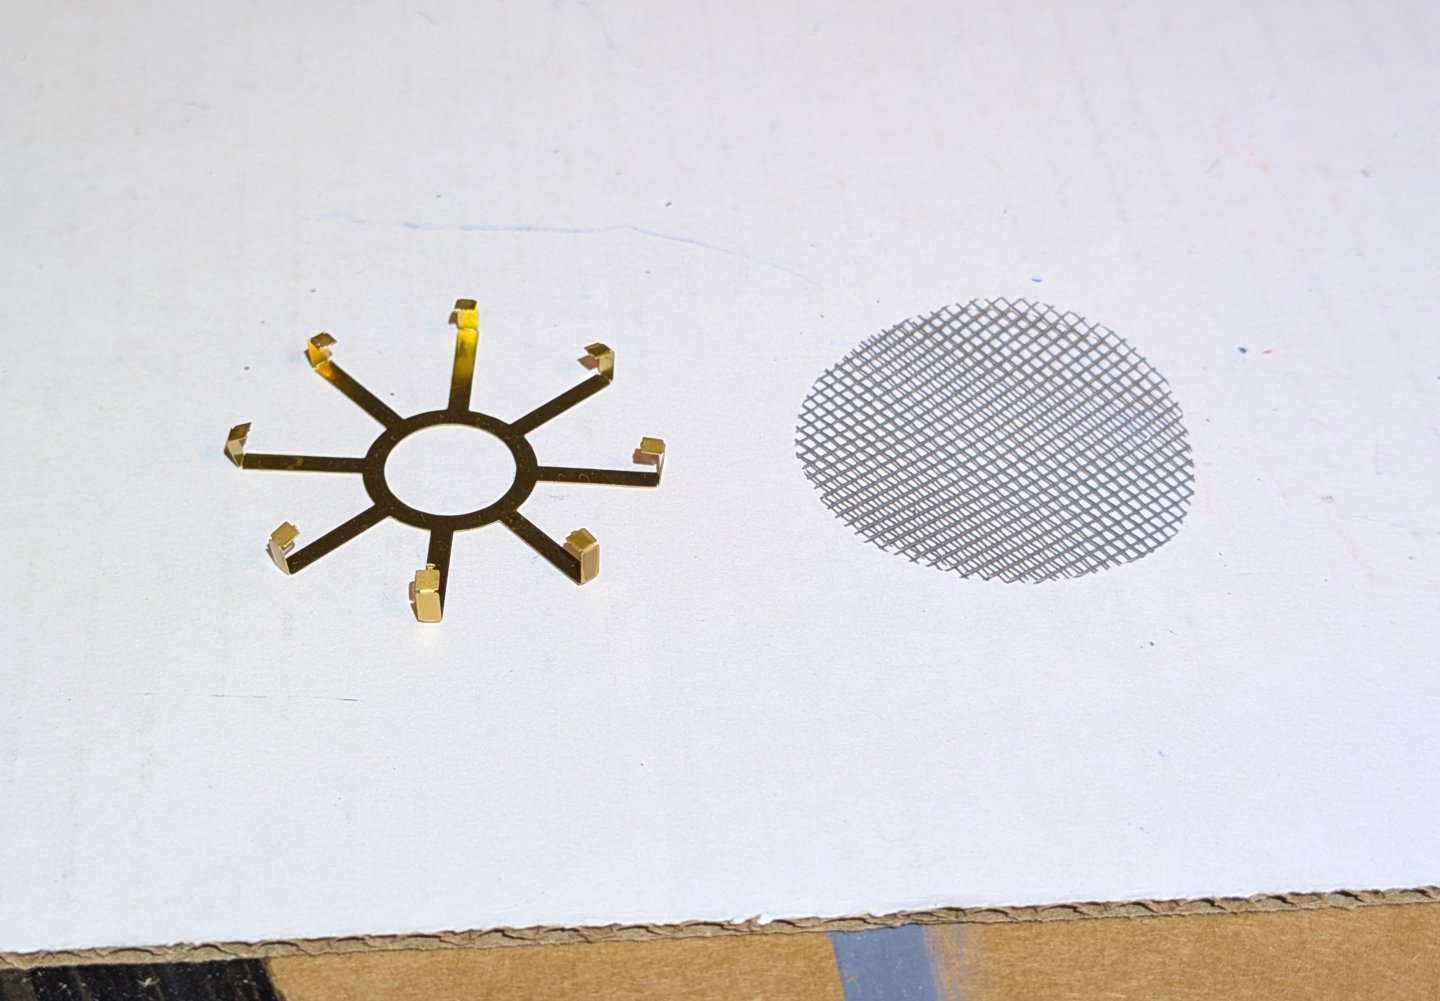
The instructions (see diagram) suggest the most complex and difficult way to add the screening, but it's simpler to just use a circle, and that worked well and looks fine.
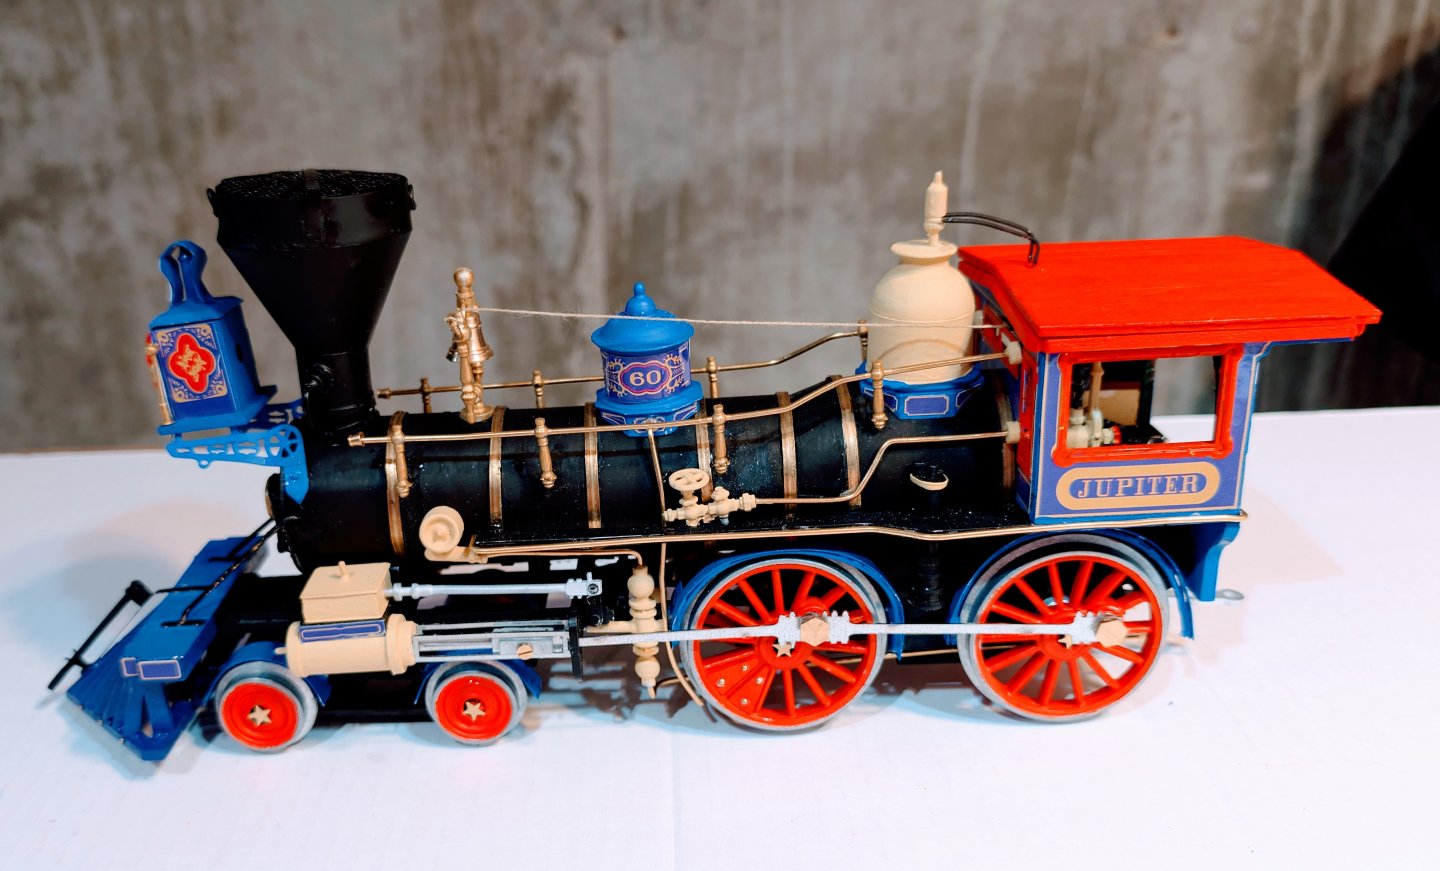
I didn't pay close enough attention to some of the alignments, so if you look closely you'll see that the crossbar on top of the smokestack isn't aligned front to back as it's supposed to be, but ah, well.
Final picture shows the stack mounted, and the bell rope rigged. The engine is now completed, and it's on to the tender.
Regards,
David
-
My portholes are all painted black.
Regarding the nameplates: I don't have the instructions any more, but what I did before mounting was to paint them black, let that thoroughly dry, then lightly sand down the raised letters to reveal the brass underneath. If you do it carefully, you won't disturb the black background of the nameplate. Then you can mount it.
I've attached a photo of my stern nameplate.
Regards,
David

-
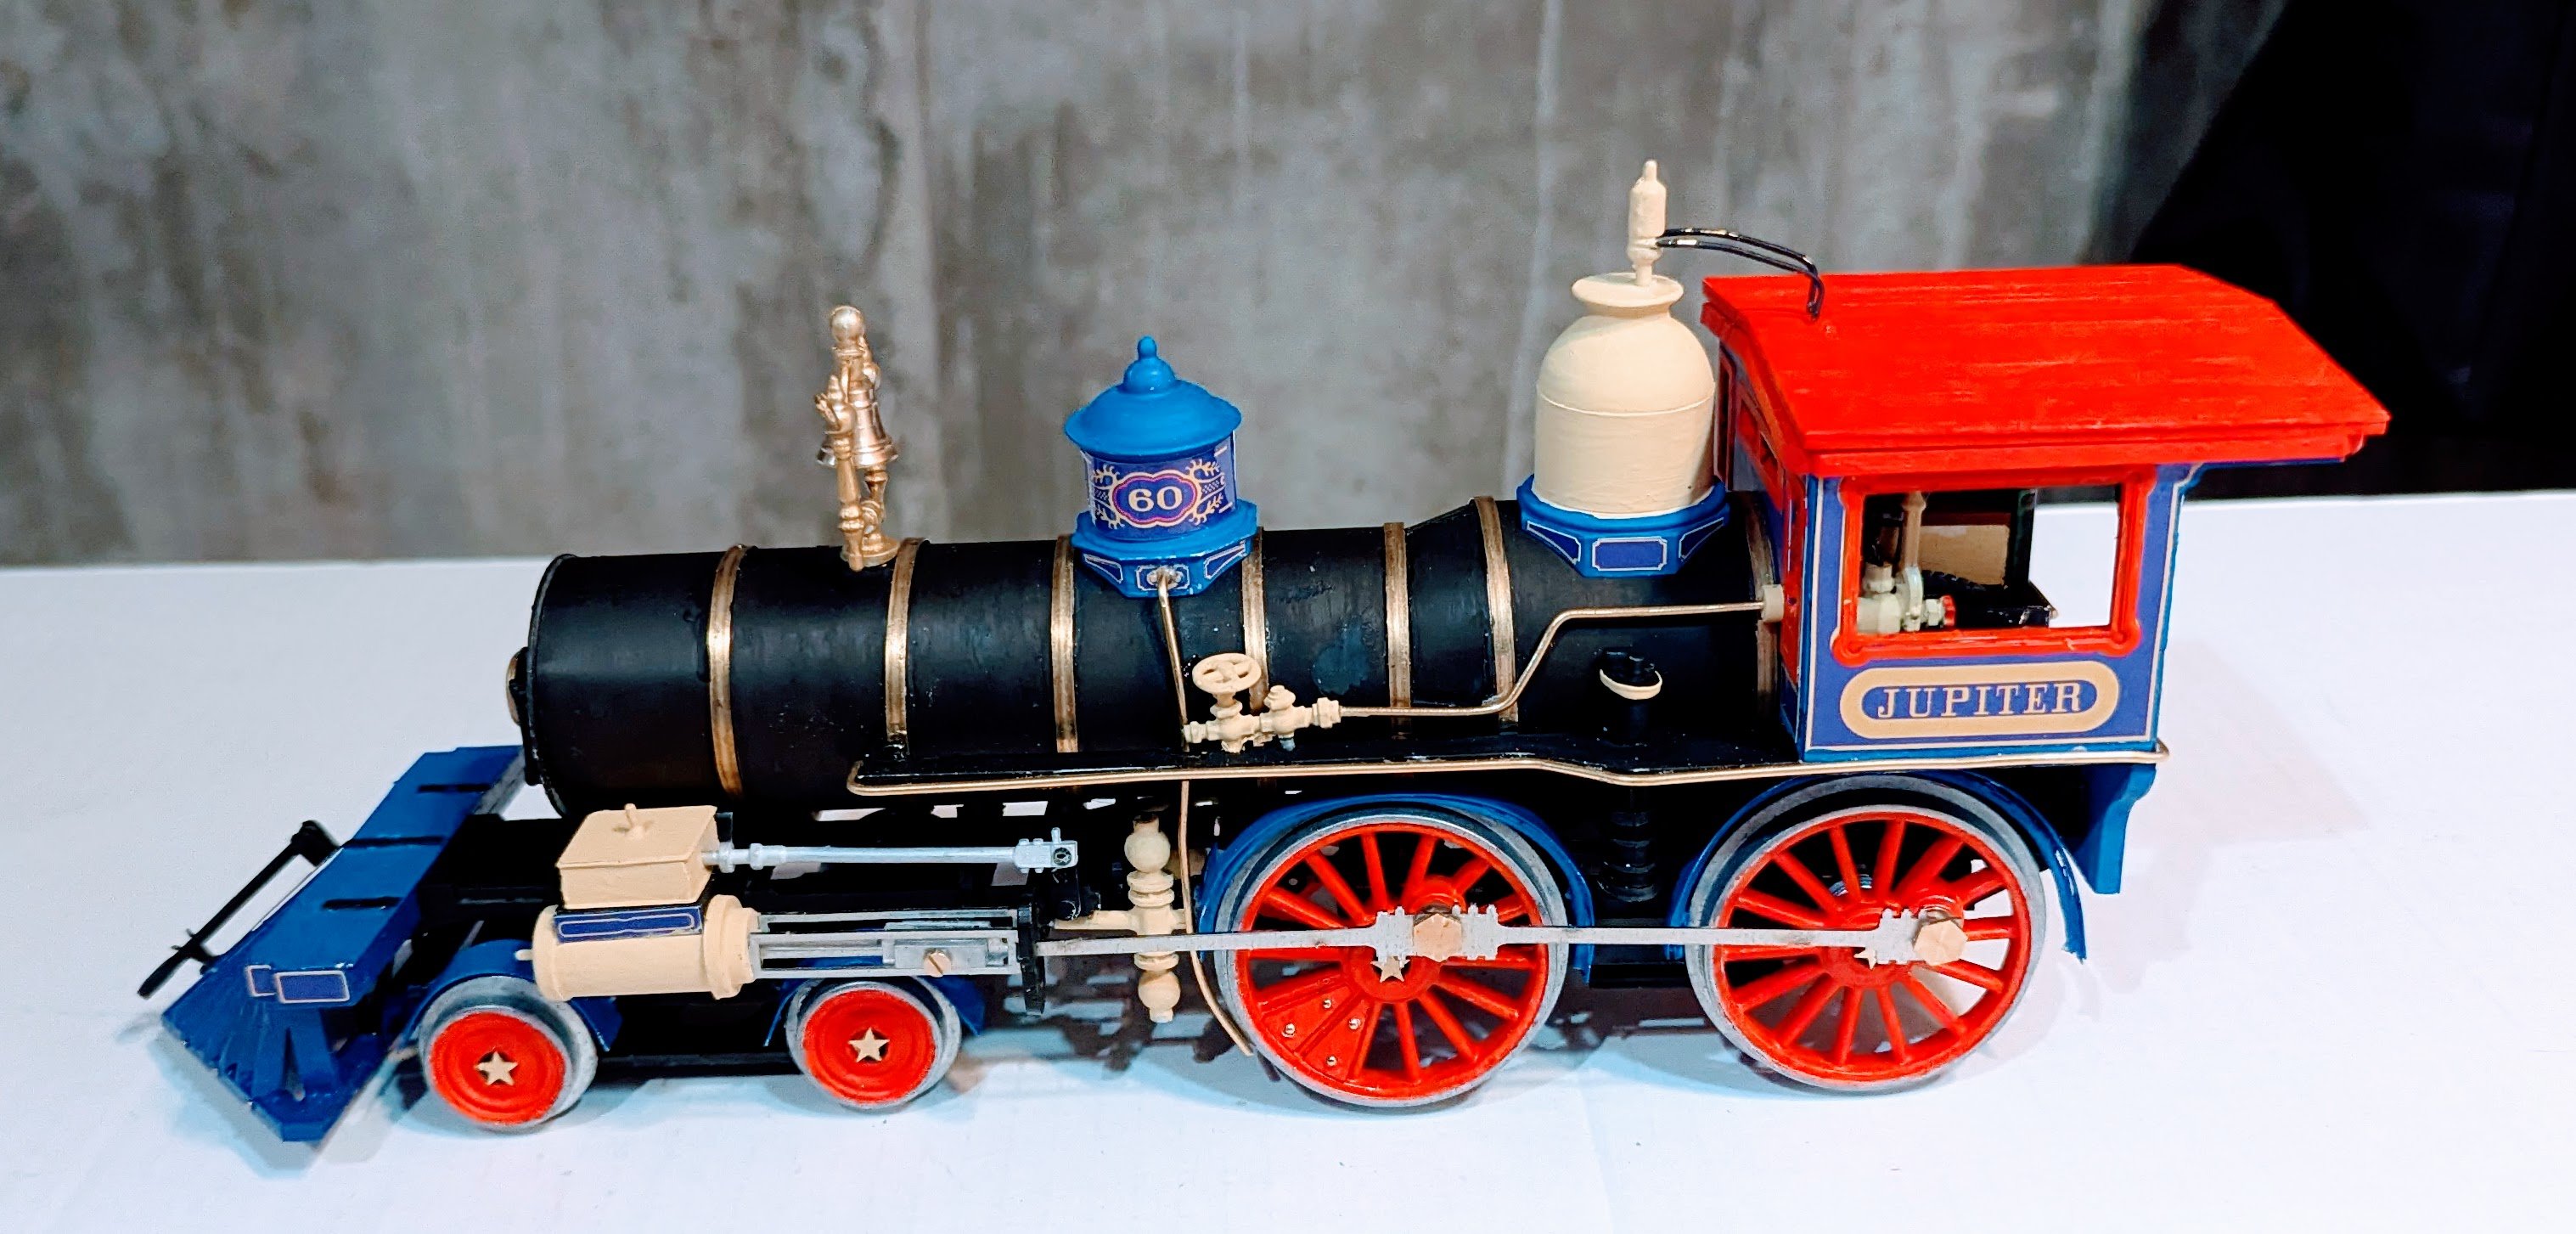
Two things added to the engine:
- Pipes running from the cab across the top of the boiler on both sides. RealWorkingSailor/Andy -- if you see this can you help me out with what these are and what they do? On the model at least, the vertical fixtures do not touch the boiler -- they are attached with brackets and stand off from the boiler.
- The headlight.
Regarding the pipes -- the brackets require drilling into the boiler (as does the headlight), and because it has a curved surface the drill wants to skitter. I broke a couple of bits but eventually got it done -- and then did a LOT of touch up work on the boiler after installation.
To install them, I started by simultaneously fixing the rear end of the pipe to the cab and the first vertical fixture. To get that positioned, I dry-fitted the assembly at those two points, marked the bracket hole, drilled, then glued the pipe at those two points. Then it's a matter of sliding the fixtures on and doing the same. I mounted the brackets onto the fixtures first, then slid them on. Some adjustments to the wire are needed as you go.
The end cap beads supplied in the kit don't fit, but I found some brass buckets from an earlier ship build in my spares supply and they made perfect end caps.
Regards,
David
-
I looked at my model and the ventilators seem to be different sizes. For example, the one forward of the foremost stack looks slightly larger than the one forward of stack #2.
Regards,
David
-
Kgstakes:
Parts are good -- high quality.
Instructions are another matter. You can see references to them in my log above, but basically there are no detailed written instructions. What you get are some step-by-step diagrams with symbols and parts indicated by code -- but there is no way to figure out what part is what without looking at the picture and then searching for it in the parts bag. Laser cut and etched parts are coded on the diagrams of the wood and brass sheets -- it's the loose parts you have to find from the drawings. Strongly recommend having clear plastic cases with dividers so you can categorize the parts and see them clearly when you look for the one you need. I think this is an advanced modelers kit.
I have been able to figure it all out -- you just have to look carefully and pay attention to what needs to be painted when -- and then figure out the best sequence for some assemblies yourself. I'm doing that now with a complicated pipe assembly on the boiler.
Regards,
David
-
-
Added the front braces to the boiler, and also some fittings on the side of the boiler that pipe down to a device in front of the wheels. Brakes perhaps??
Regards,
David
-
Ken -- For all I know, what you see IS the pop valve. None of the parts are given names, so one has to assume. I assumed whistle, but could be a pop valve.
Regards,
David
-
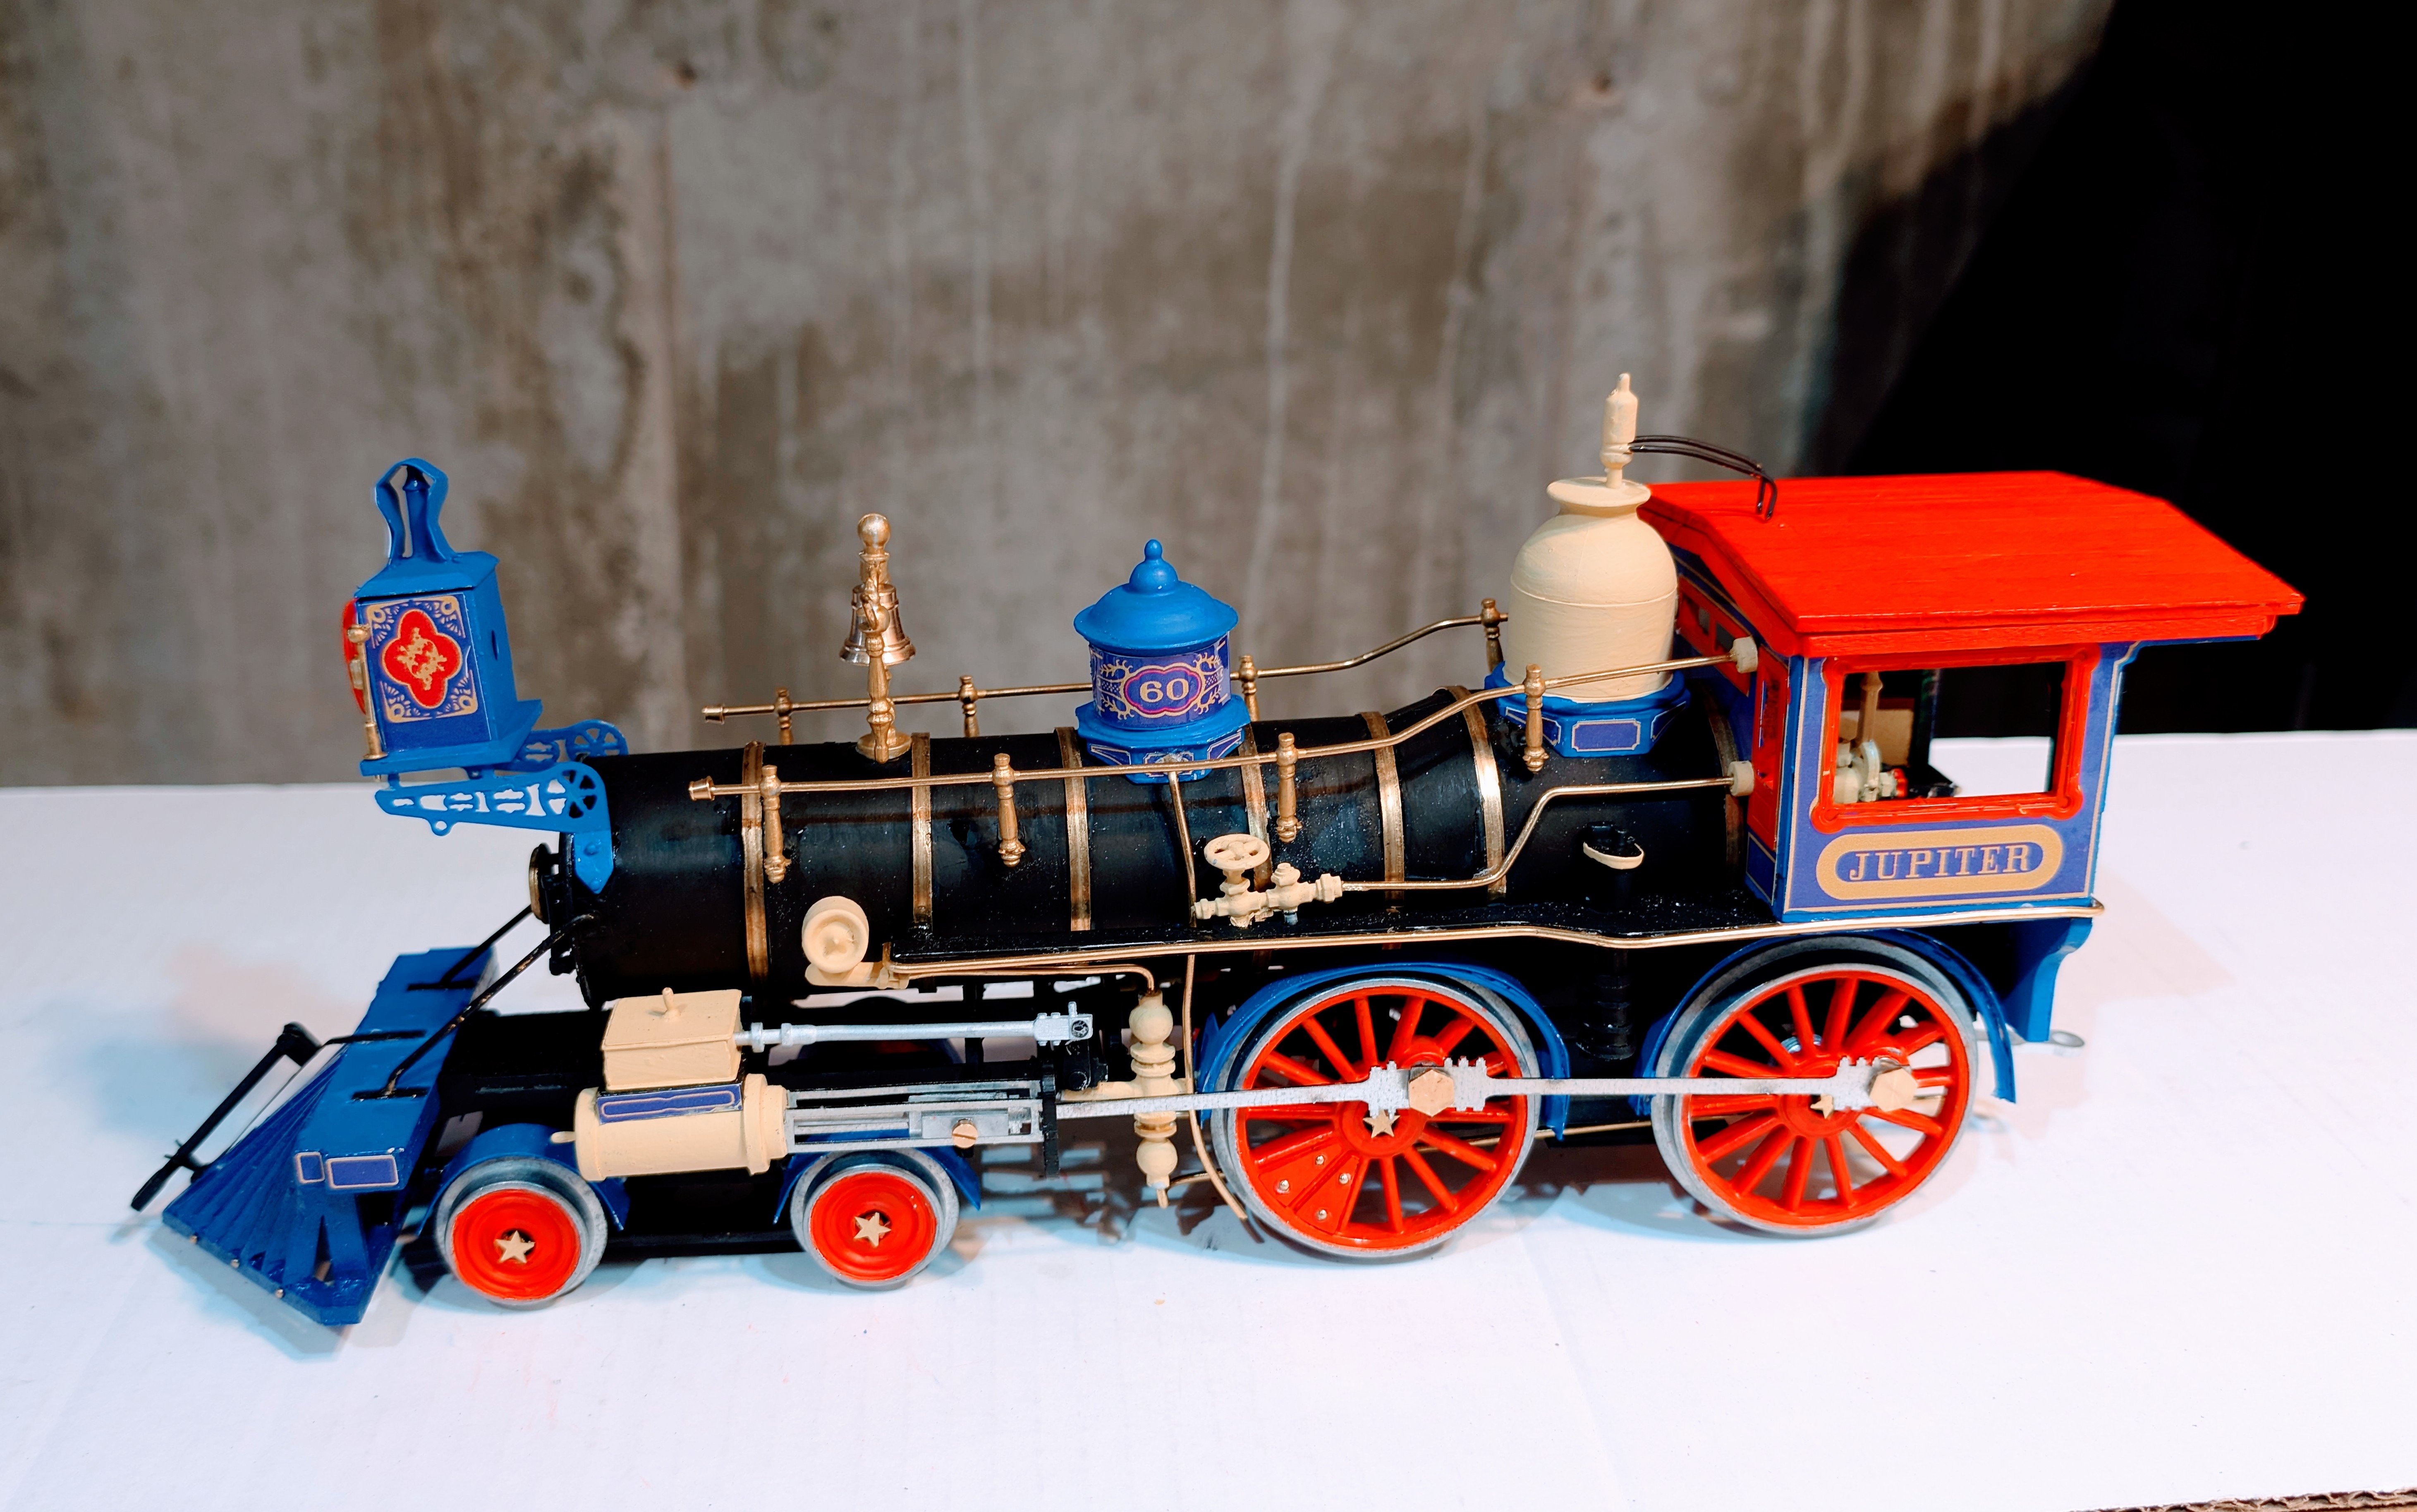
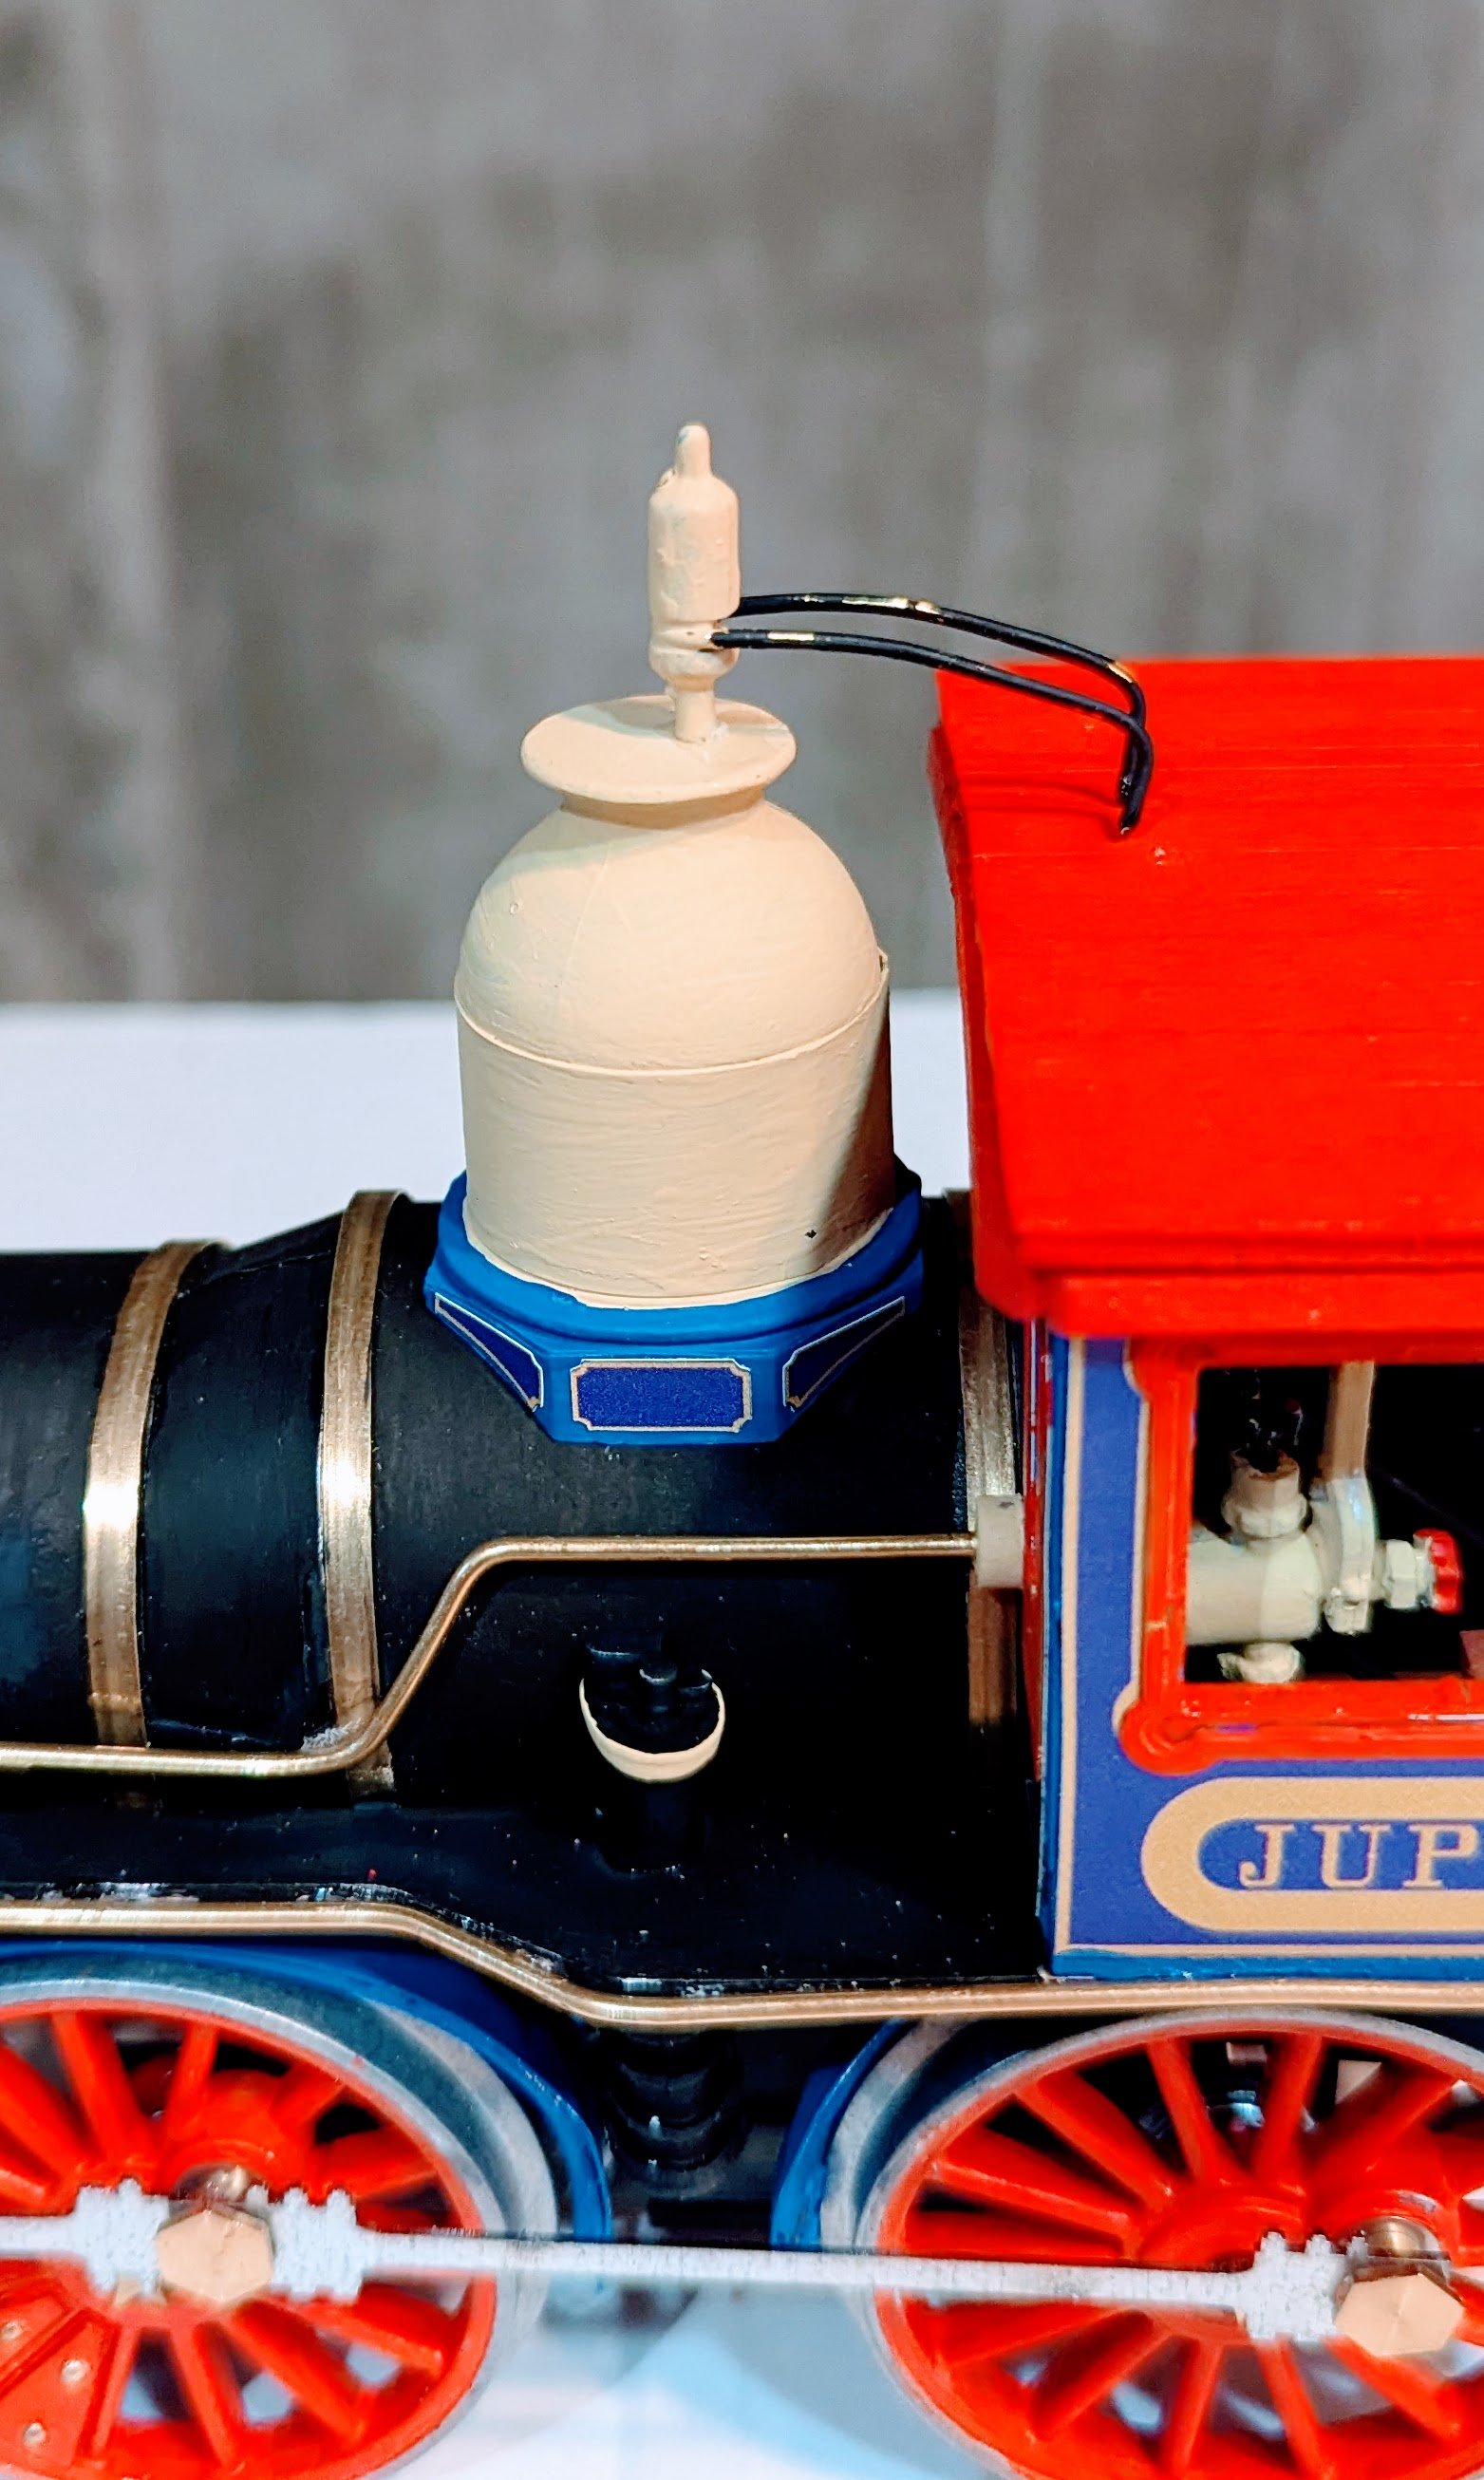
This next item includes the whistle at the top, but I'm at a loss regarding what the large cylinder is for. Perhaps our locomotive expert Andy can illuminate?
BTW, the light colored areas on the black rods are not a sloppy paint job -- it's light reflection.
[WHOOPS -- just looked again. They are areas where the paint came up as I pressed down. Will touch up.] 😋
Regards,
David


- kgstakes, Consitution, Old Collingwood and 4 others
-
6
-
 1
1
-


Brannaren by drobinson02199 - Caldercraft - Scale 1:48
in - Kit build logs for subjects built from 1901 - Present Day
Posted · Edited by drobinson02199
Started on the decks. This is the stern deck, which has to be installed flush with the hull edge, on the inside. It rests on "fillets", which you have to install, so getting those positioned well is key to that flush alignment. I will fill the gaps between the deck and hull edge wiht putty.
Regards,
David