flying_dutchman2
-
Posts
1,735 -
Joined
-
Last visited
Content Type
Profiles
Forums
Gallery
Events
Everything posted by flying_dutchman2
-

Ducati 1299 by Moonbug - Pocher - 1/4 Scale
flying_dutchman2 replied to Moonbug's topic in Completed non-ship models
WOW, never heard of the name. As I like building my ships in a large scale I am going to look into this. I would not have any room for displayi like the Ducati. Make them R/C would be cool. Marcus -
Steven, Went through your complete built and got a good education about a ship from that time period. This ship has been beautifully executed. The plug you created worked out great and I love the lines of the planking, very sleek. Your carved figures look great as well. Putting figures on a ship feels like that there is something going on, like there is a story behind it. Ab Hoving did that as well on his pleasure yacht. On post #144 there are several pictures from Viking longships at that museum. I visited that museum (Copenhagen Viking museum) in 2017 and pretty much spent all day there and took lots of pictures. I especially liked the woodworking shop where they were building a Viking longboat with the tools from that time. They also had trees in pots In 2017, my wife and I flew to Amsterdam, hung out for a couple of days and then rented a car and drove through Northern Germany, Denmark, Norway, Sweden and Finland. We visited every maritime museum on the way. The Viking museum in Oslo has several complete Viking longboats and many artifacts that go into the burial mound one someone is buried (boat, artifacts and the Viking). Marcus
-
So I took the plunge and purchased Gutermann Mara 120, 100, 70, and 30 in the colors in Hemp (854) and Pine tar (696) at a cost of around $3.00 each, totalling about $33.00. I love the colors. Because this is the first time I am making rope I wasn't going to purchase the biggest spools. I need to fine tune my ropewalk and then I'll given it a try. I have a spool of cotton thread which I bought several years ago and it makes nice rope. Marcus
-
DMC Cotton
flying_dutchman2 replied to Wacom's topic in Rope Making/Ropewalks's Discussions about Rope Making
Researched more about cotton and linnen and many sites just have one or two weights. It is difficult to find sites except for (www.redrockthreads.com) that have anything in cotton or linnen but many sites with polyester and in all kinds of colors. Been reading some other ship model sites and on a Dutch site modelbouwforum.nl many people use Serafil which is polyester. I've seen a model of the Prins Willem and all rigging is done with Serafil. Looks just like rope. I asked several of the builders if they cooked there rope and the answer is a No. All they do is make the rope, stretch it and put on ship. So I am trying out the Serafil. Will also check Mara and others. btw, redrockthreads is a huge site that sells all types of thread. Marcus -
DMC Cotton
flying_dutchman2 replied to Wacom's topic in Rope Making/Ropewalks's Discussions about Rope Making
@Jaager The Dutch fleet I built is the 17th century. I never thought much of dyeing the rope but that is a great option. Thank you for the suggestion. @BenD I am not ready for polyester. Chuck describes in too many steps of how to prepare this thread. I don't want to do that. To me it needs to be a simple process. Get thread, put in ropewalk, make line. Polyester maybe something in the future and I do like the many colors thet have. I will check the link and see what they have. What colors do you use? This is to give me a starting point Thanks Marcus -
DMC Cotton
flying_dutchman2 replied to Wacom's topic in Rope Making/Ropewalks's Discussions about Rope Making
I want to start making my own rope and I've been reading as much as I can on cotton thread, it is what I want to try. Chuck mentioned that DMC discontinued there line of thread in most sizes and he is correct. I have scoured the Net and I can only find it in ecru in one or two sizes. So what is the alternative to DMC? Anchor? Mara? Is there anyone who uses cotton and what are the brand names? I am interested in only 2 colors and they are black and dark tan (or something like it). Any advice would be much appreciated. Marcus -
@rcweir I know about this. I have seen those books in a bookstore somewhere. @Bob Cleek You are welcome. @Mark P The books from Michael Robinson are still available on Amazon. @druxey Thanks. @amateur I wish I was going to be in Amsterdam this winter, but that won't be the case so I have the book instead. Marcus
- 7 replies
-
- 3
-

-
- Marine artist
- Dutch
- (and 2 more)
-
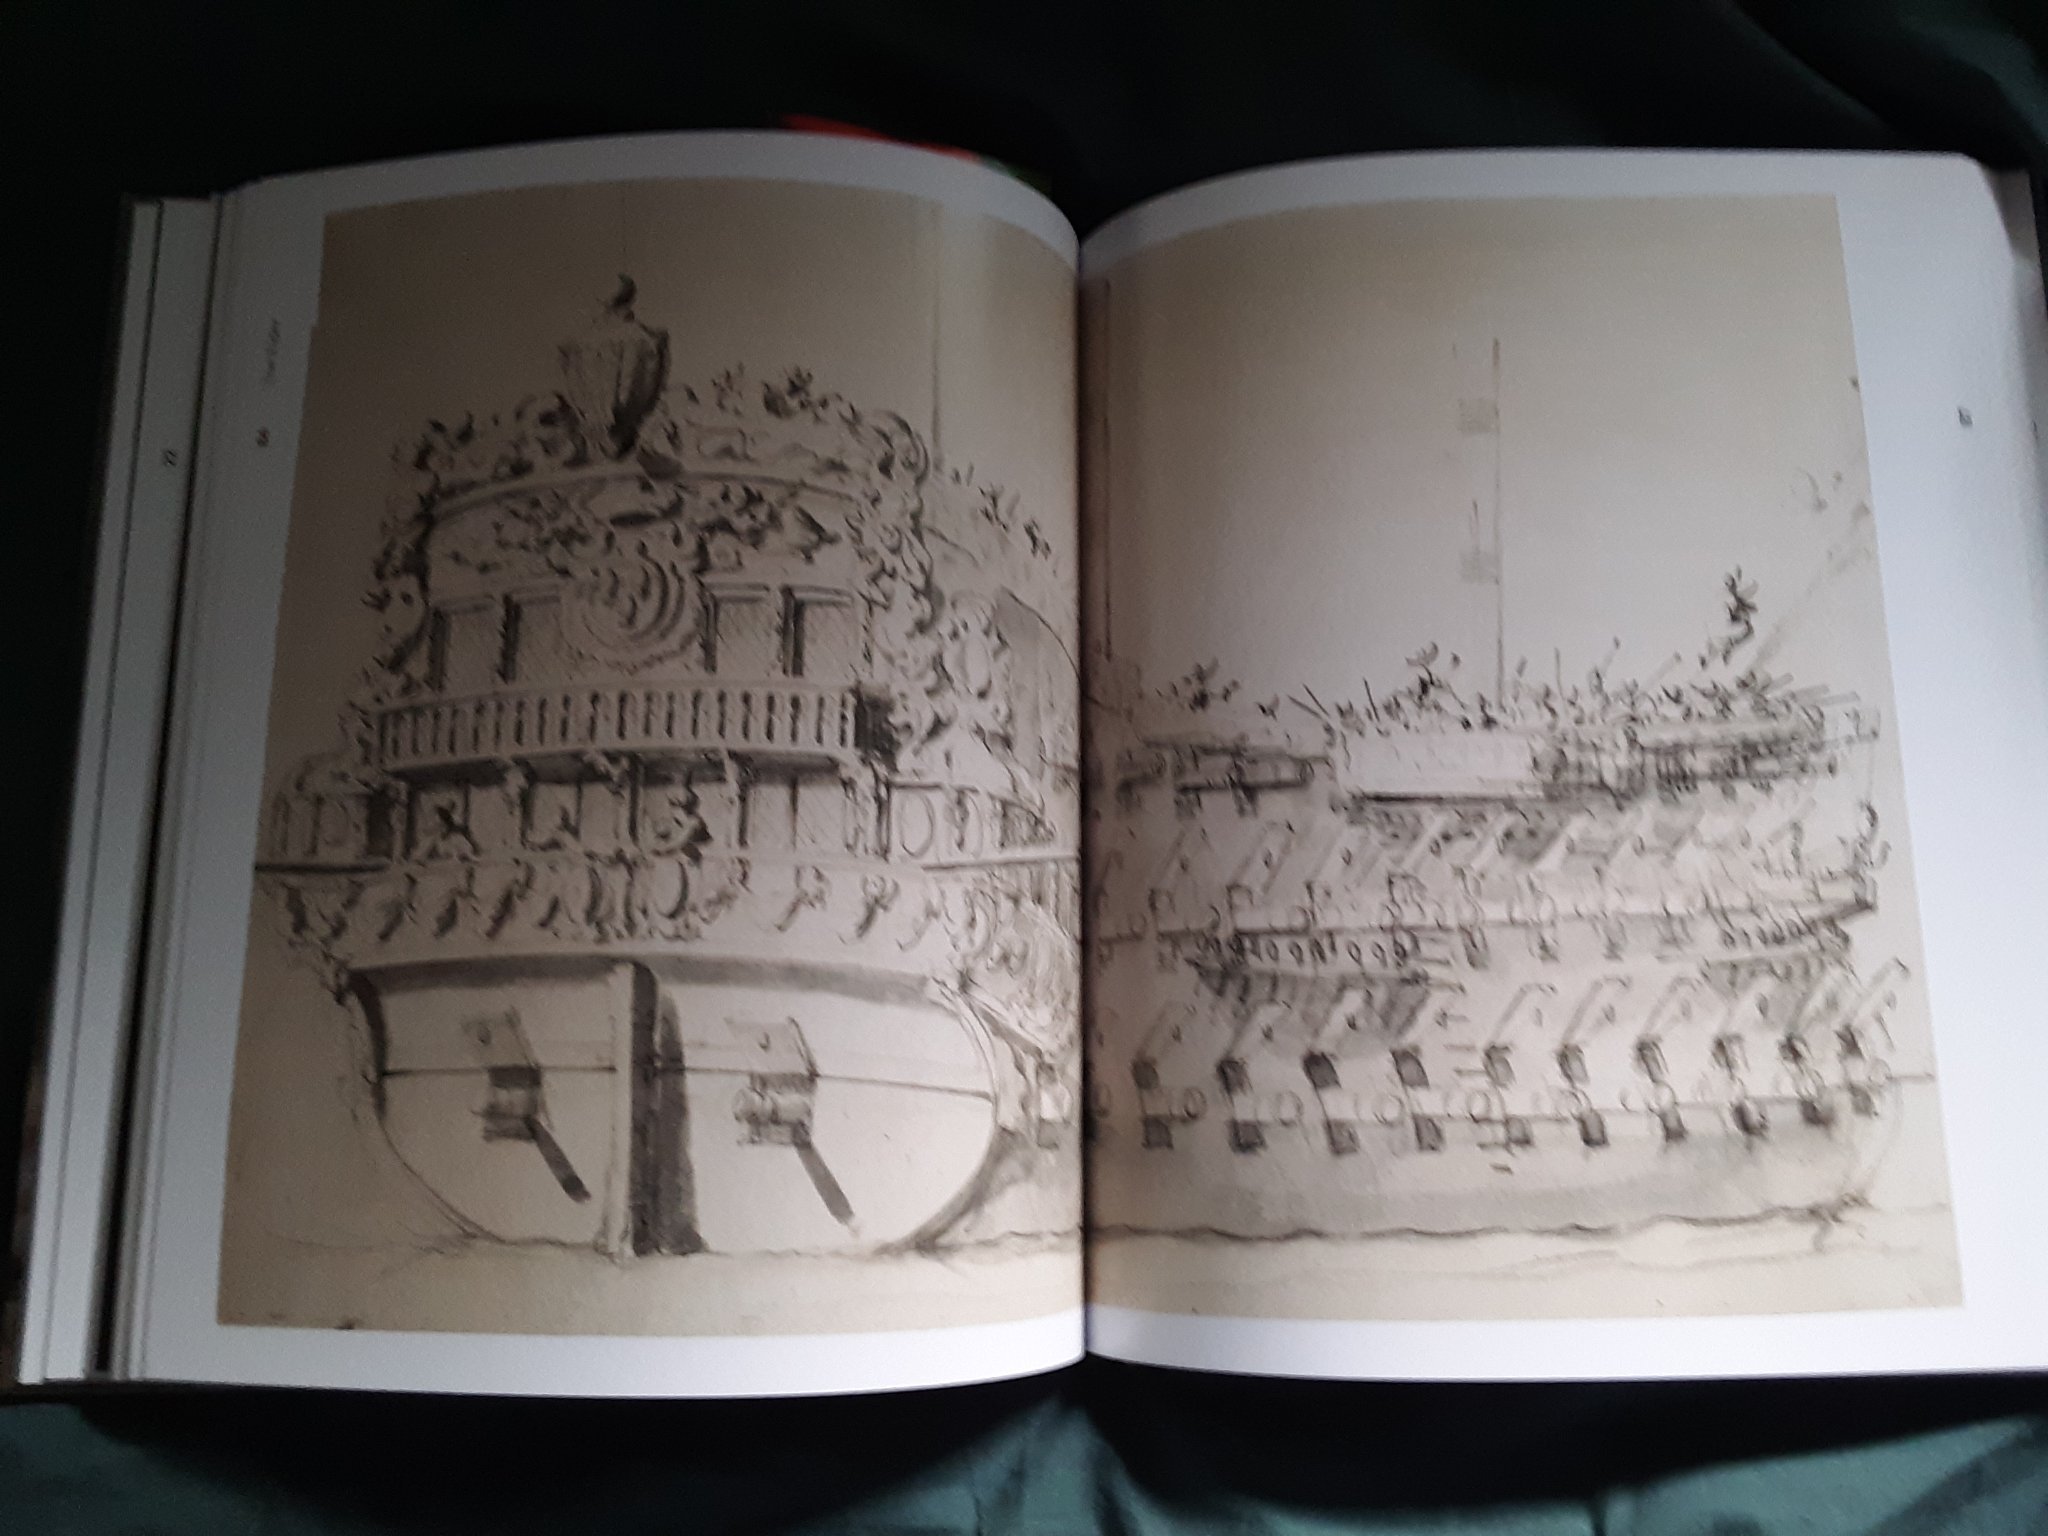
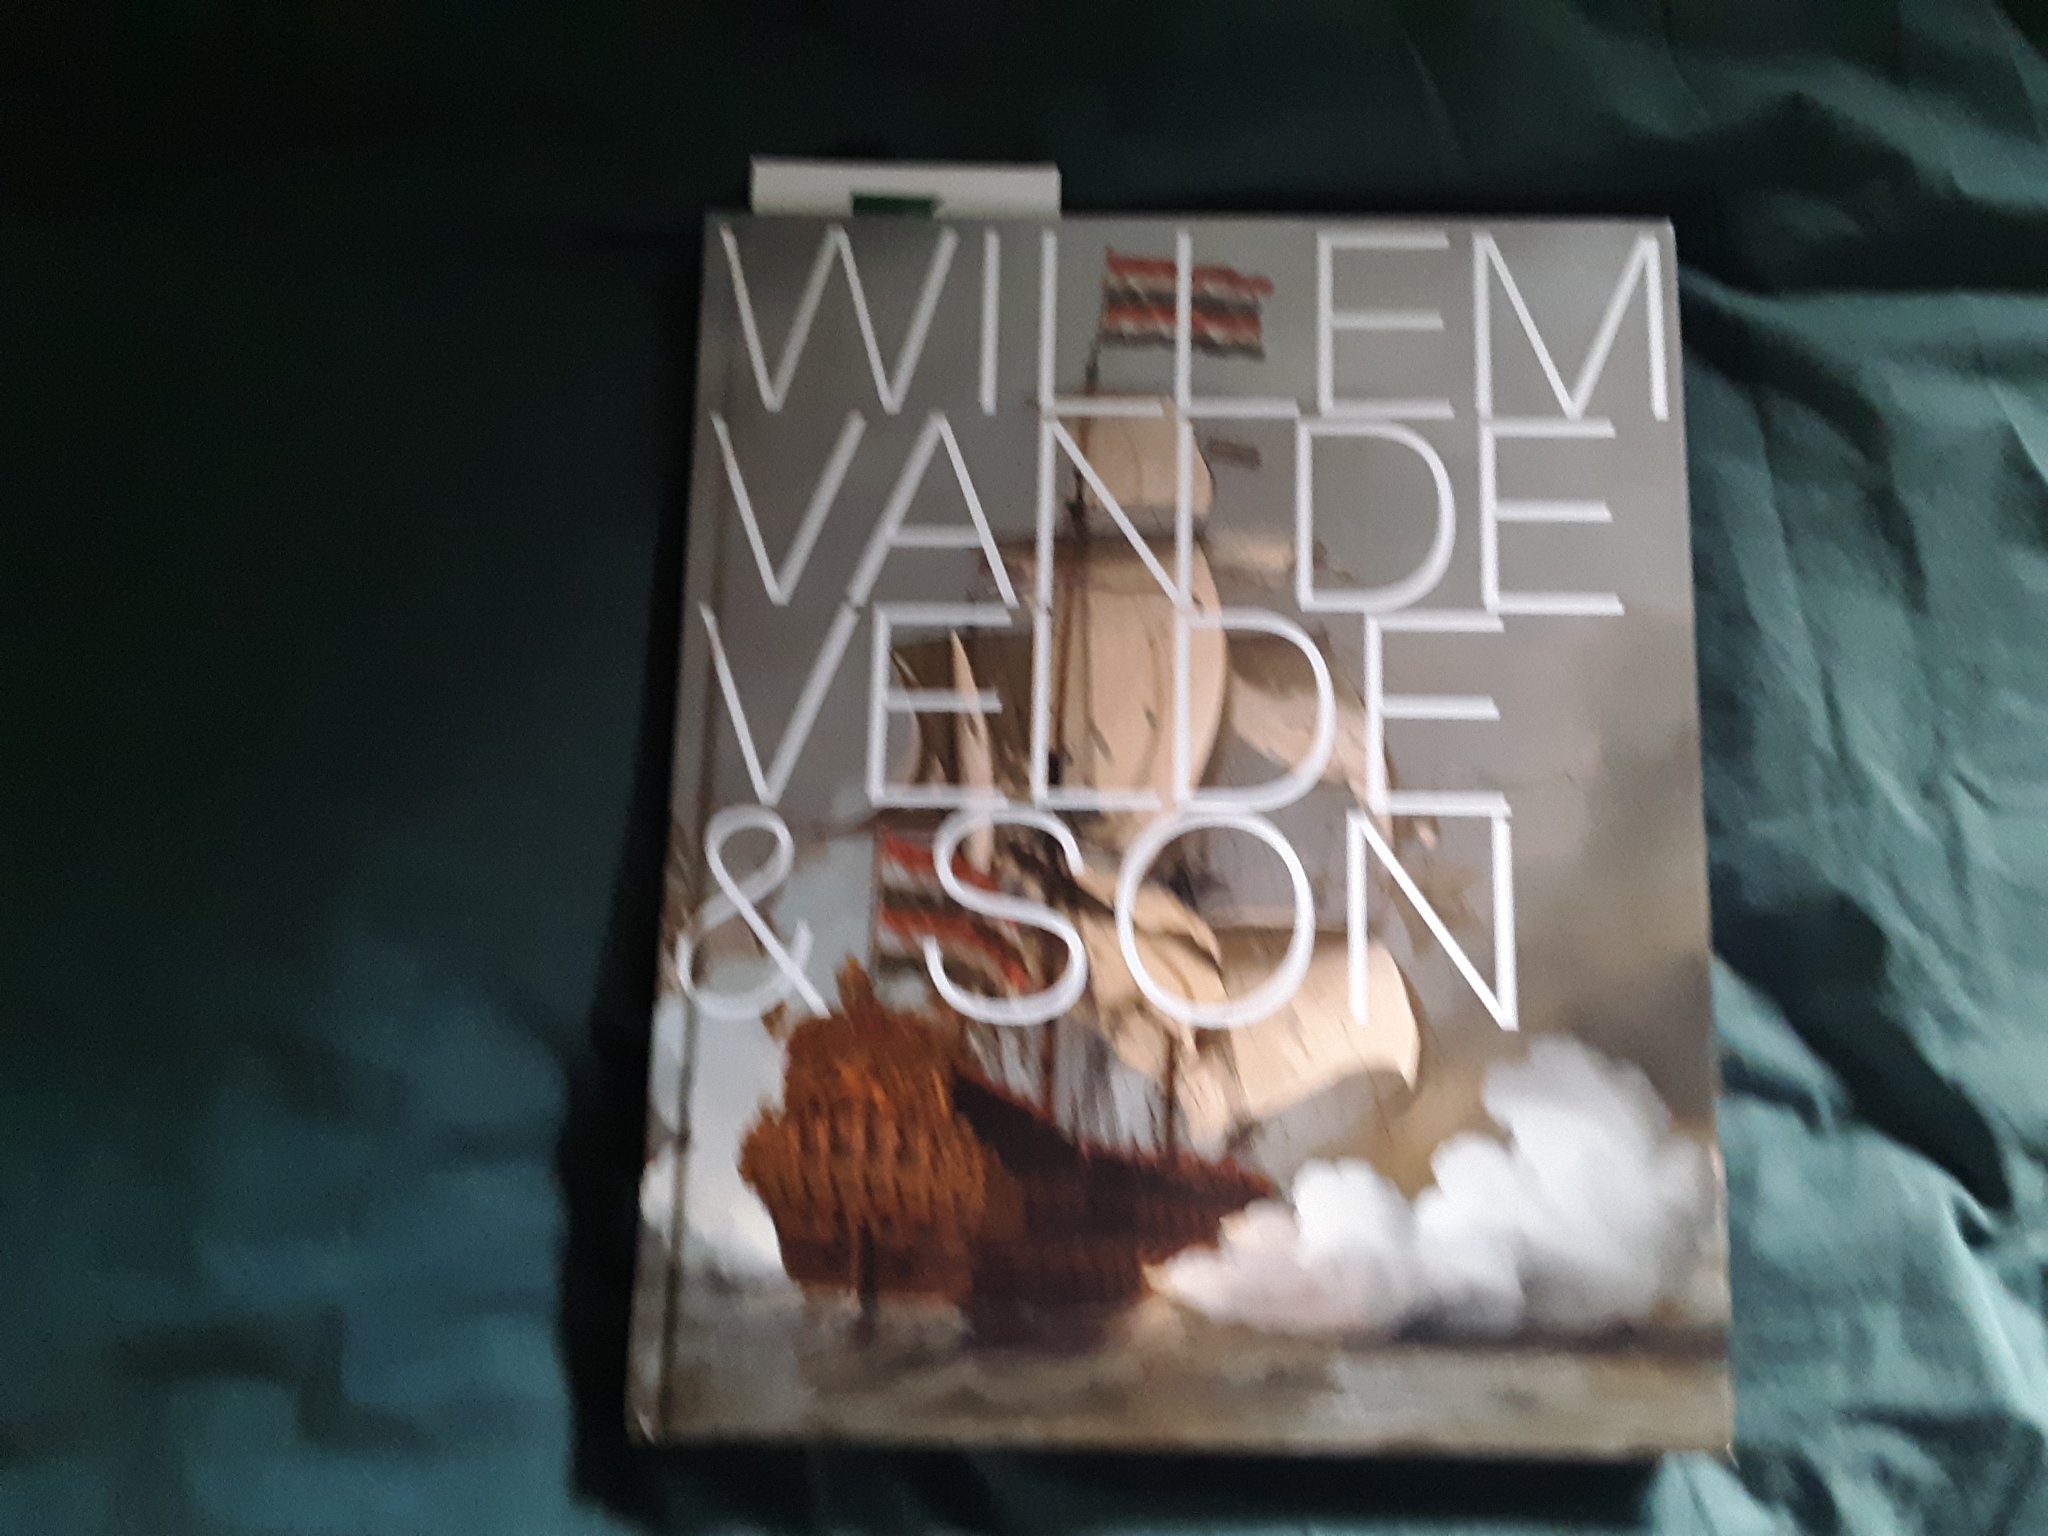
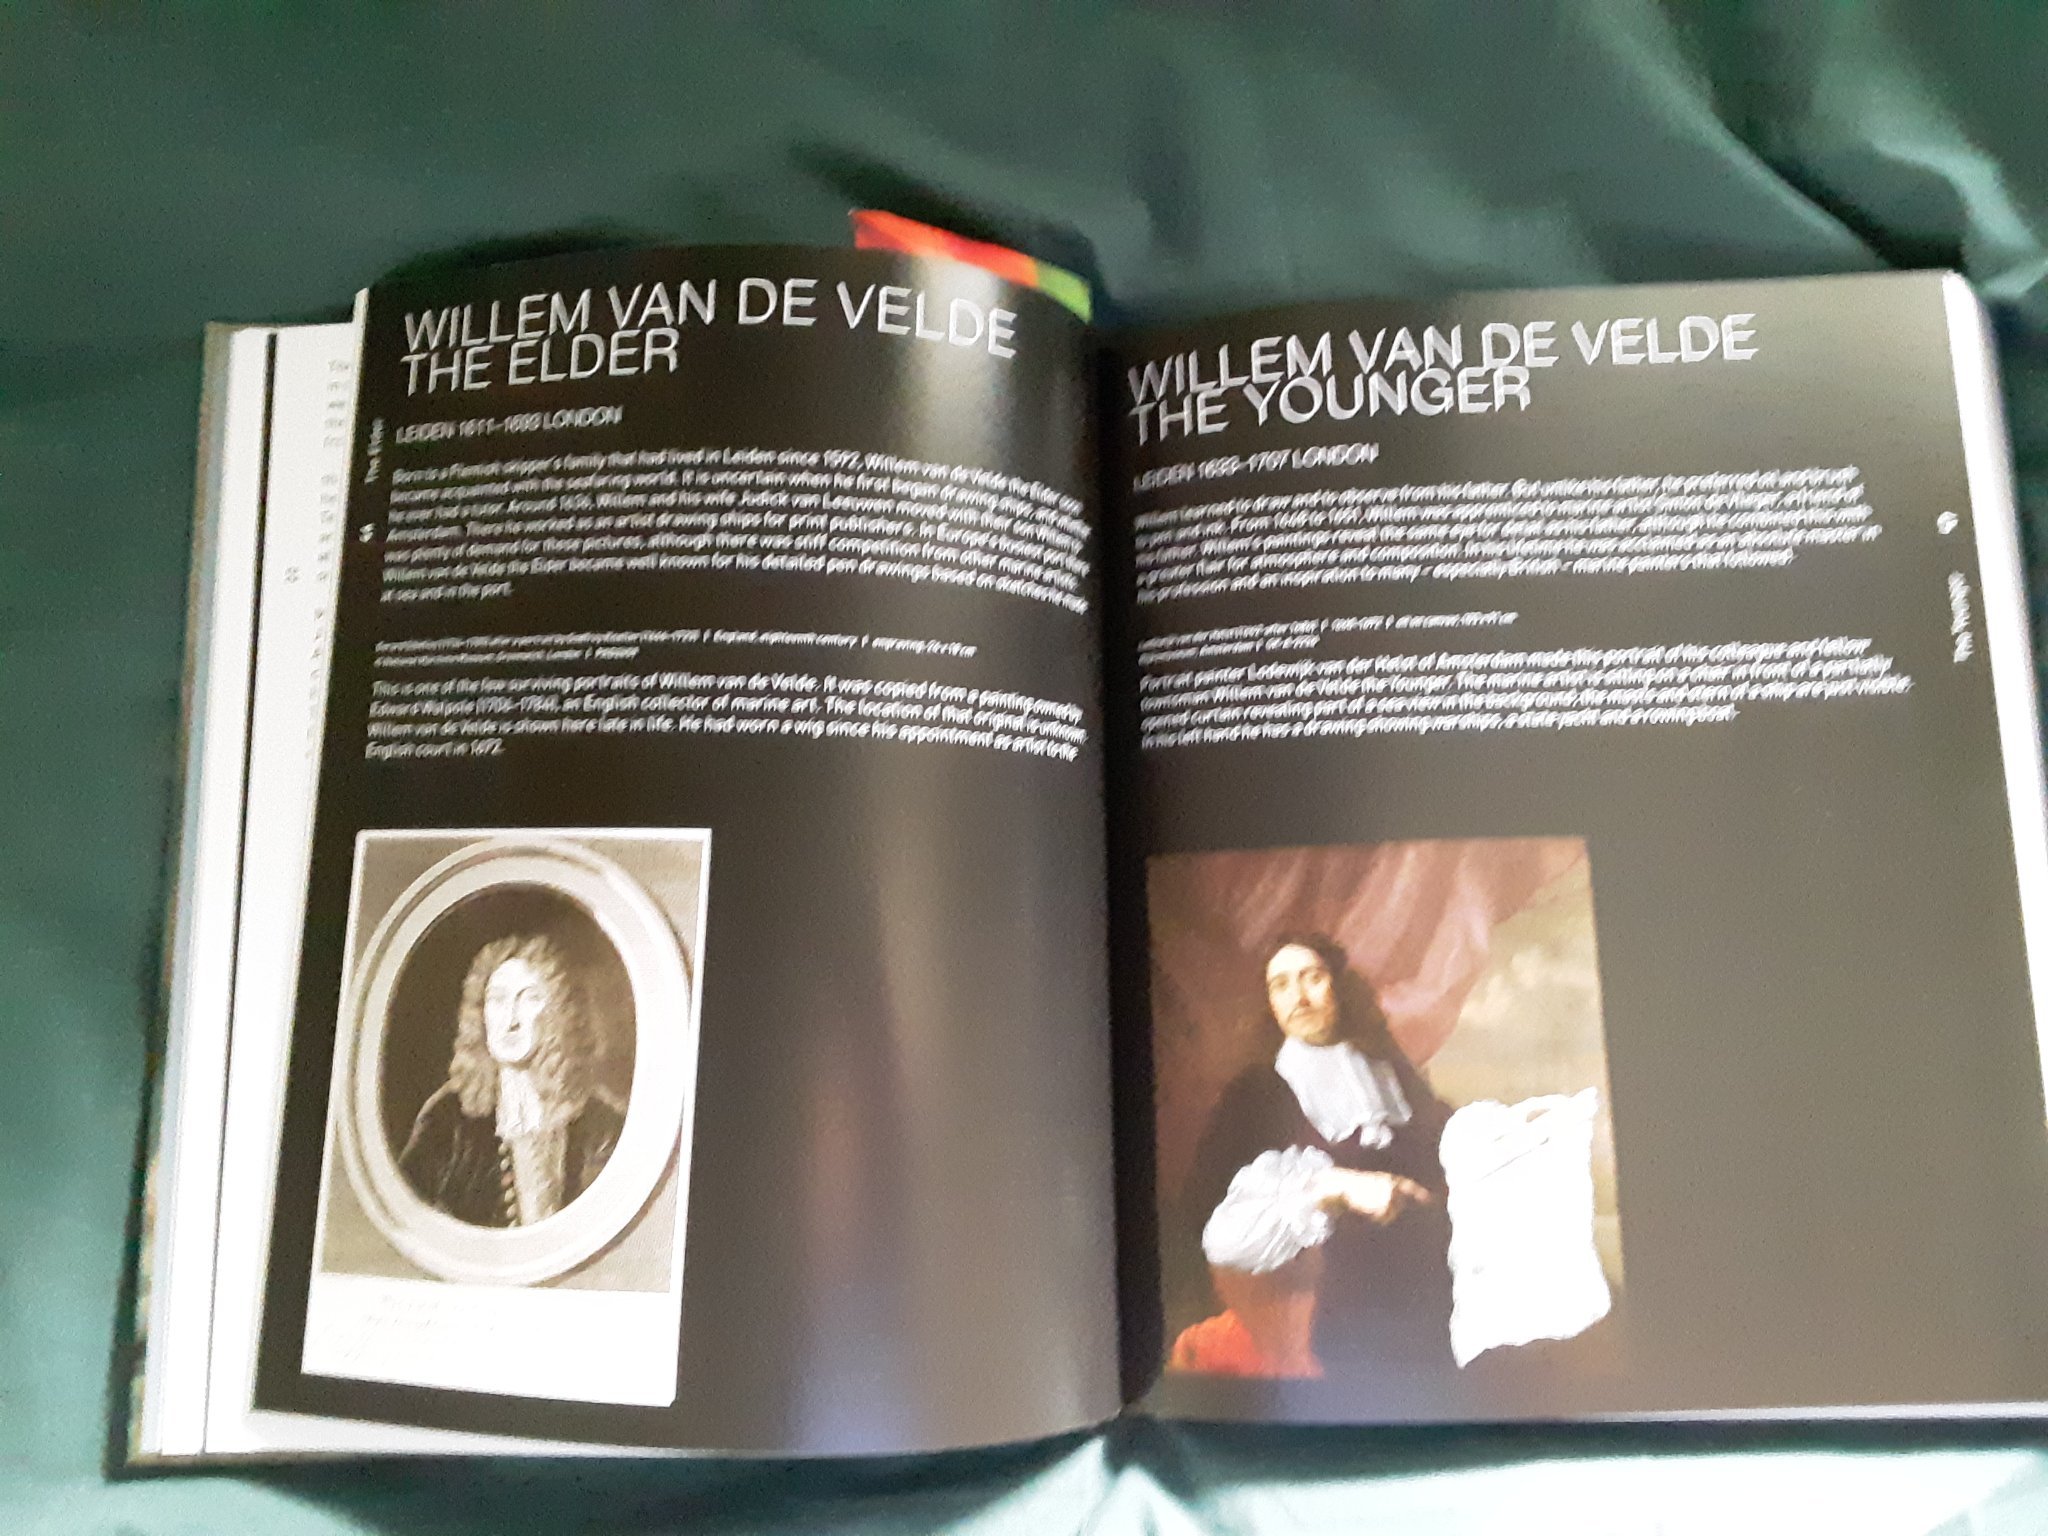
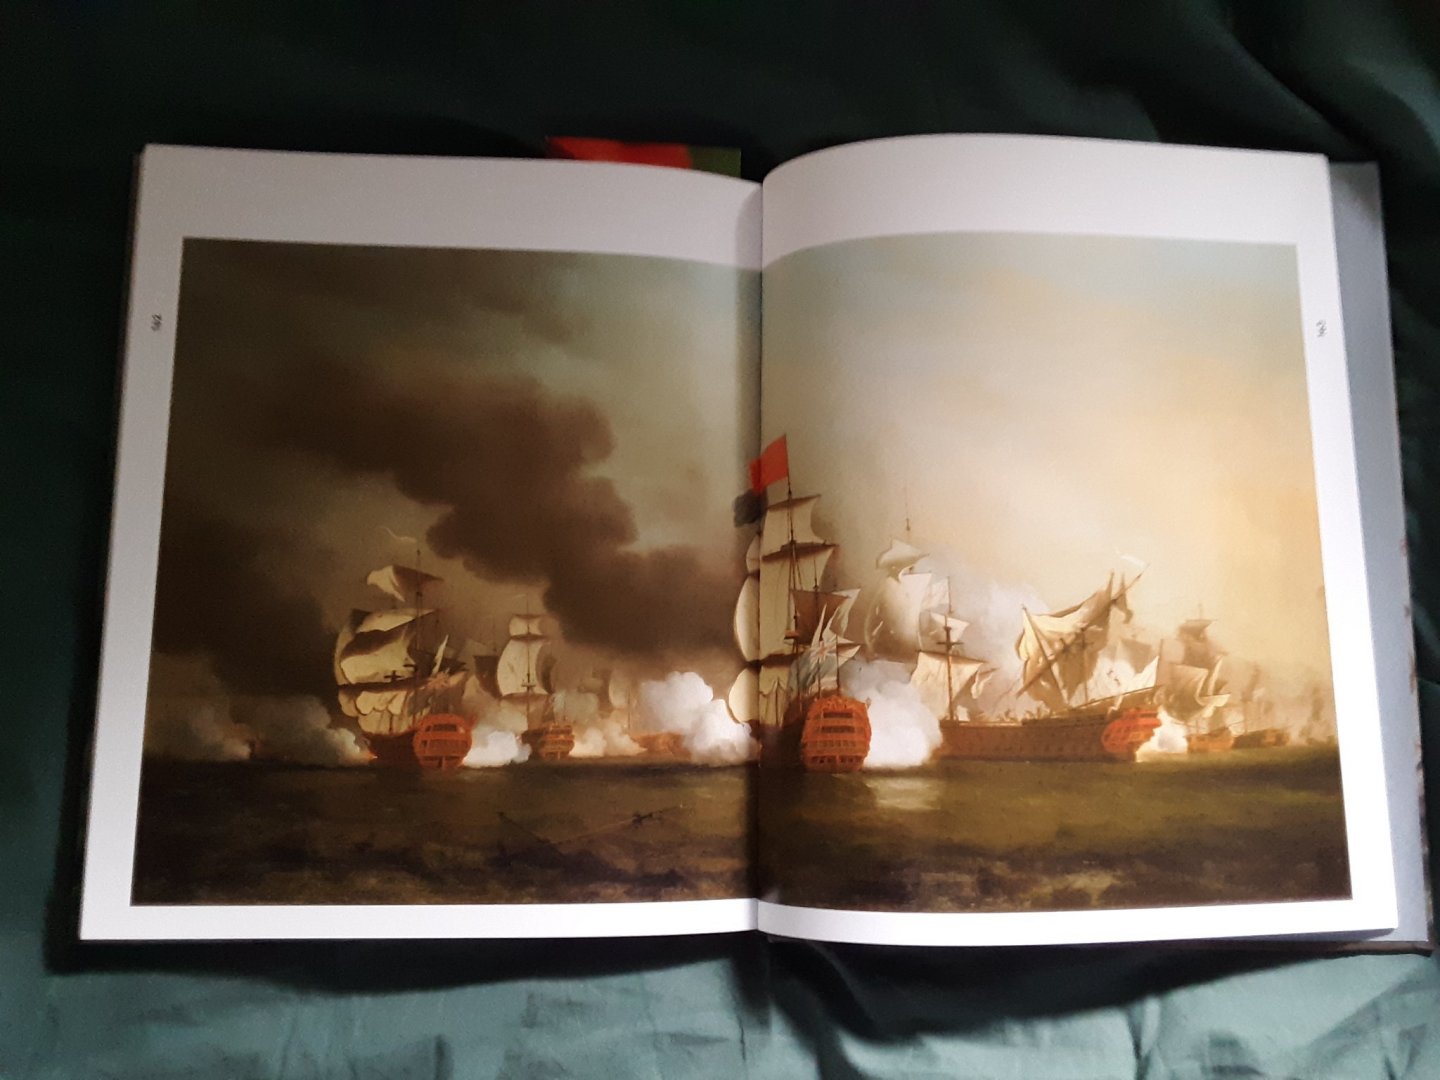
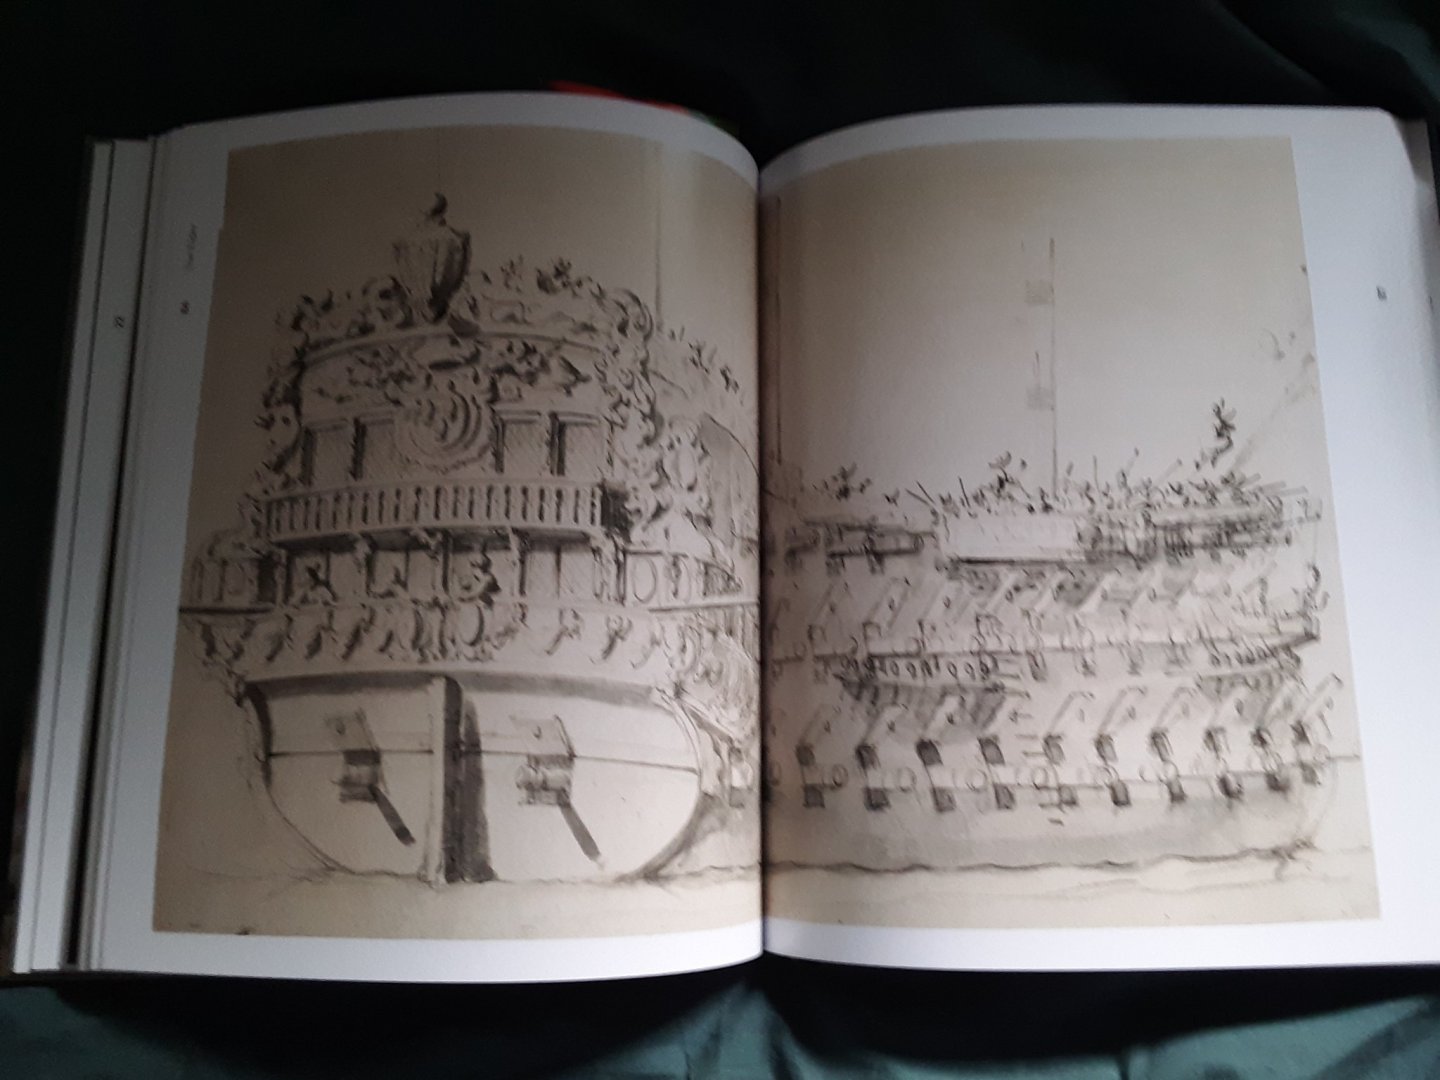
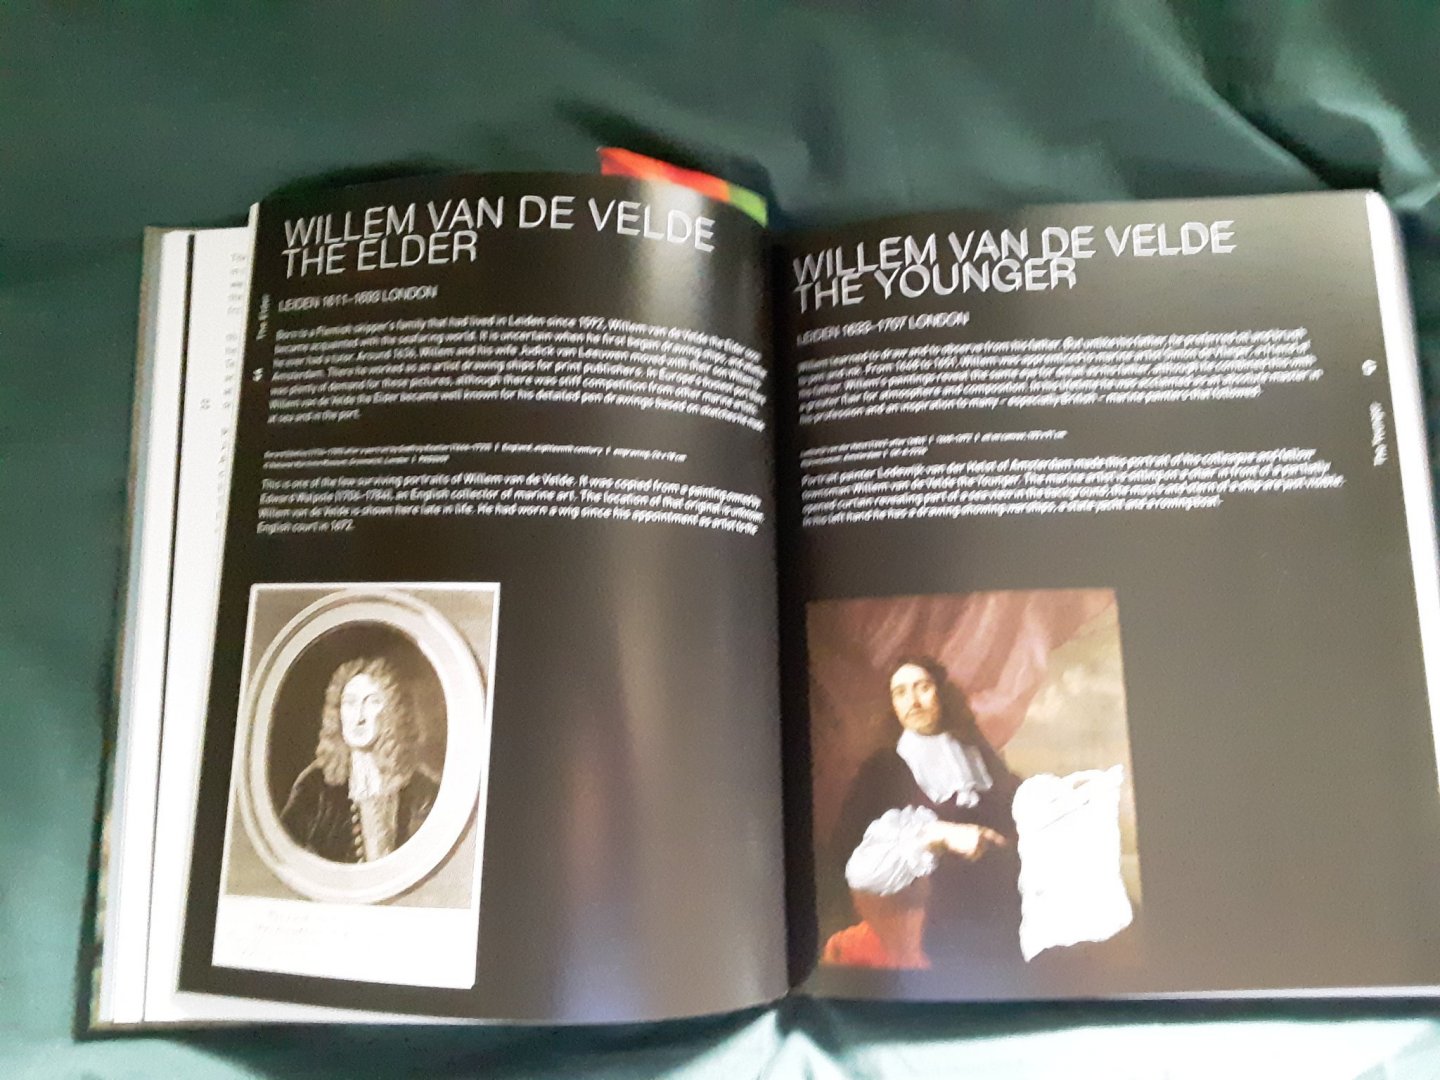
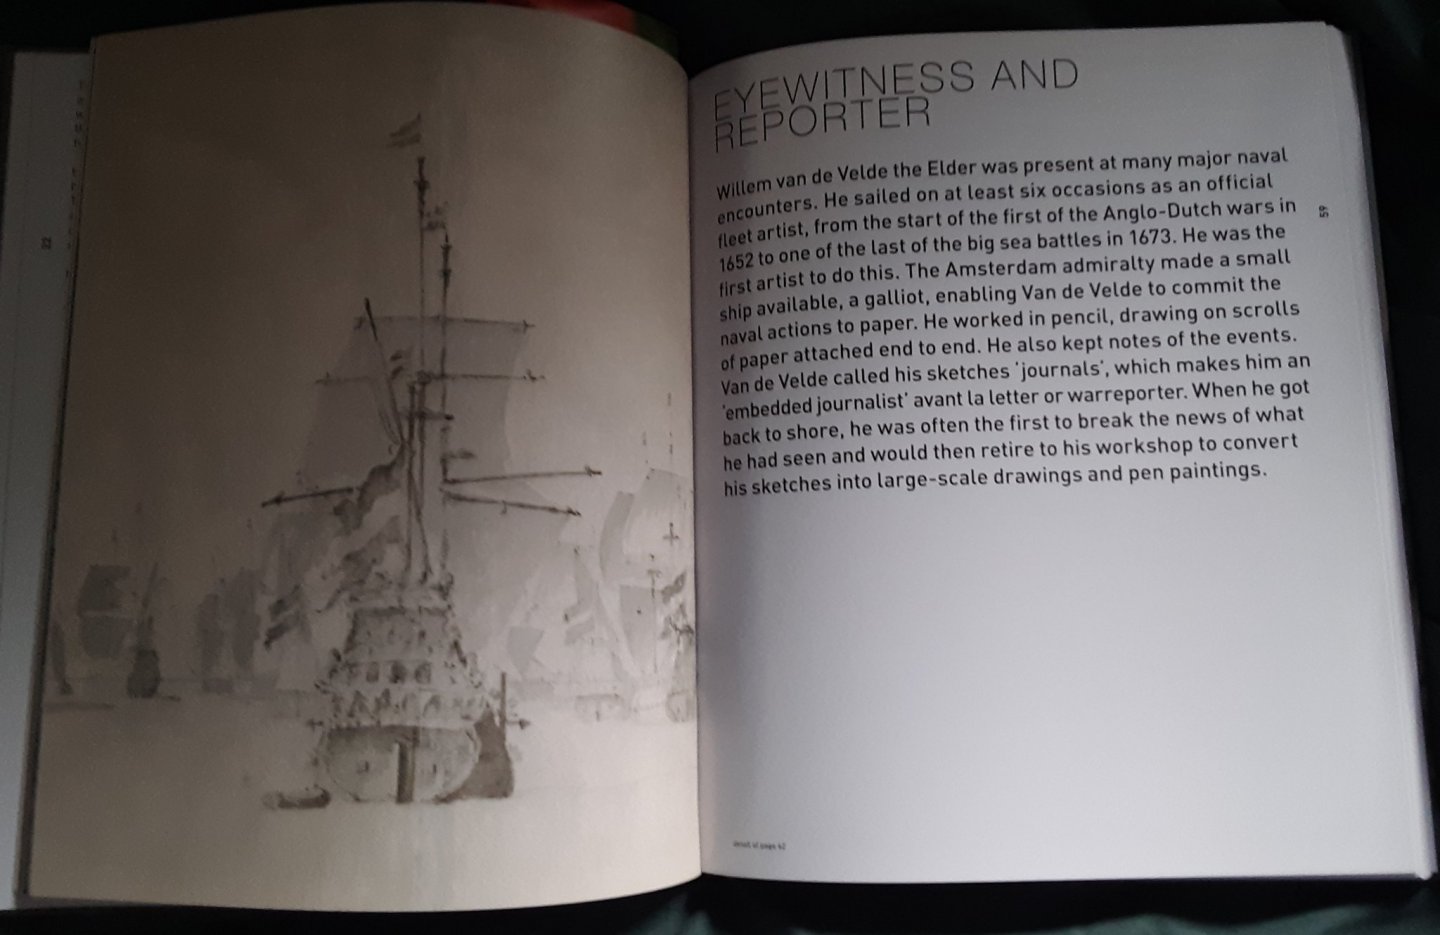
Willem van de Velde & Son Jeroen van der Vliet & Remmelt Daalder Publisher Thoth; 1st edition (September 20, 2021) Language English ISBN-10 9068688421 ISBN-13 978-9068688429 Item Weight 2.47 pounds Dimensions 9.33 x 0.83 x 11.3 inches Suggested retail price. $44.00 Black and white and color photographs. Review. One of the most informative and comprehensive book on these 2 Dutch marine artists I have ever seen. The chapters are well laid out, which gives the reader a good idea of what the van de Velde's did and their life history. Both van de Velde's have produced more than 2500 prints and 800 paintings. Every painting and drawing has a brief description of what it depicts and title, size and location of the piece. Both paintings and drawings are very detailed and have been used to create the many plans from Dutch ships that are sometimes included with books. If you like detailed marine paintings and prints, a piece of important Dutch art history, then this book is for you. Actually it is a book for everyone. The only thing I don't like is that there are not enough pages with paintings and prints. It should have been double the size and both wider and longer. I would have happily paid more for it. Marcus https://www.amazon.com/Willem-van-Velde-Jeroen-Vliet/dp/9068688421/ref=mp_s_a_1_1?keywords=Willem+van+de+Velde&qid=1636038075&qsid=145-9991687-9915549&sr=8-1&sres=9068688421%2C9059973143%2C0856673897%2C0905555627%2C1539956709%2C153995661X%2C1539953939%2C1539953777%2C1539861465%2C1539861325%2CB0157OZJLI%2C3782202546%2C1148178503%2C1376576562&srpt=ABIS_BOOK#featureBulletsAndDetailBullets_feature_div There is another book that I did not get and supposed to be very interesting as well. Van de Velde & Son, Marine Painters: The Firm of Willem van de Velde the Elder and Willem van der Velde the Younger, 1640-1707 Remmelt Daalder Thanks for reading, Marcus

- 7 replies
-
- 7
-
-

-
- Marine artist
- Dutch
- (and 2 more)
-
Where can I find metal wire?
flying_dutchman2 replied to flying_dutchman2's topic in Metal Work, Soldering and Metal Fittings
@Jaager Thank you for the explanation. @Keith Black Thanks for the link and it looks promising. @allanyed Thank you for the method of making it black. Everyone else, the comments made me laugh. Marcus -
Where can I find metal wire?
flying_dutchman2 replied to flying_dutchman2's topic in Metal Work, Soldering and Metal Fittings
@mtaylor Thanks @Roger Pellett I'll check the Ace store for the wire and thanks for the heads up on the over done customer service. @allanyed "better prices online"? Are you willing to share your sources, websites? "blackened by LoS in situ". Please explaine. Thanks. I have bought wood from hobby Lobby but never saw any k&s metals. Marcus -
Where can I find metal wire?
flying_dutchman2 replied to flying_dutchman2's topic in Metal Work, Soldering and Metal Fittings
@Jaager Thanks for the link and will take a look at. Sounds promising. @druxey Thanks for the link and I have heard of that material. @Laggard I don't have access to that and was never planning to use it. @wefalck Thanks. Just for some wire your suggestion is pretty elaborate. @bridgman@bridgman Bob Great idea. There is an Ace store a town over and a TSC (tractor supply co.) couple of miles from here. Never knew they sell K&S metals. Good to know. I know it is a Chicago company and in the past you could not order from them but I checked that recently and it seems that now you can. I always purchased that from Micromark and they are still the cheapest around. Marcus -
Hi, Where can I get metal wire and it cannot be shiny? I am running out of my different types of wire. Such as 18, 20, 22, 24, 26 gauge steel wire. I use it mainly around my deadeyes, chain plates, preventer and some other uses. It needs to be easy to be d into shape and avain I hate shiny material. Any recommended websites or stores? Thank you in advance. Marcus
-
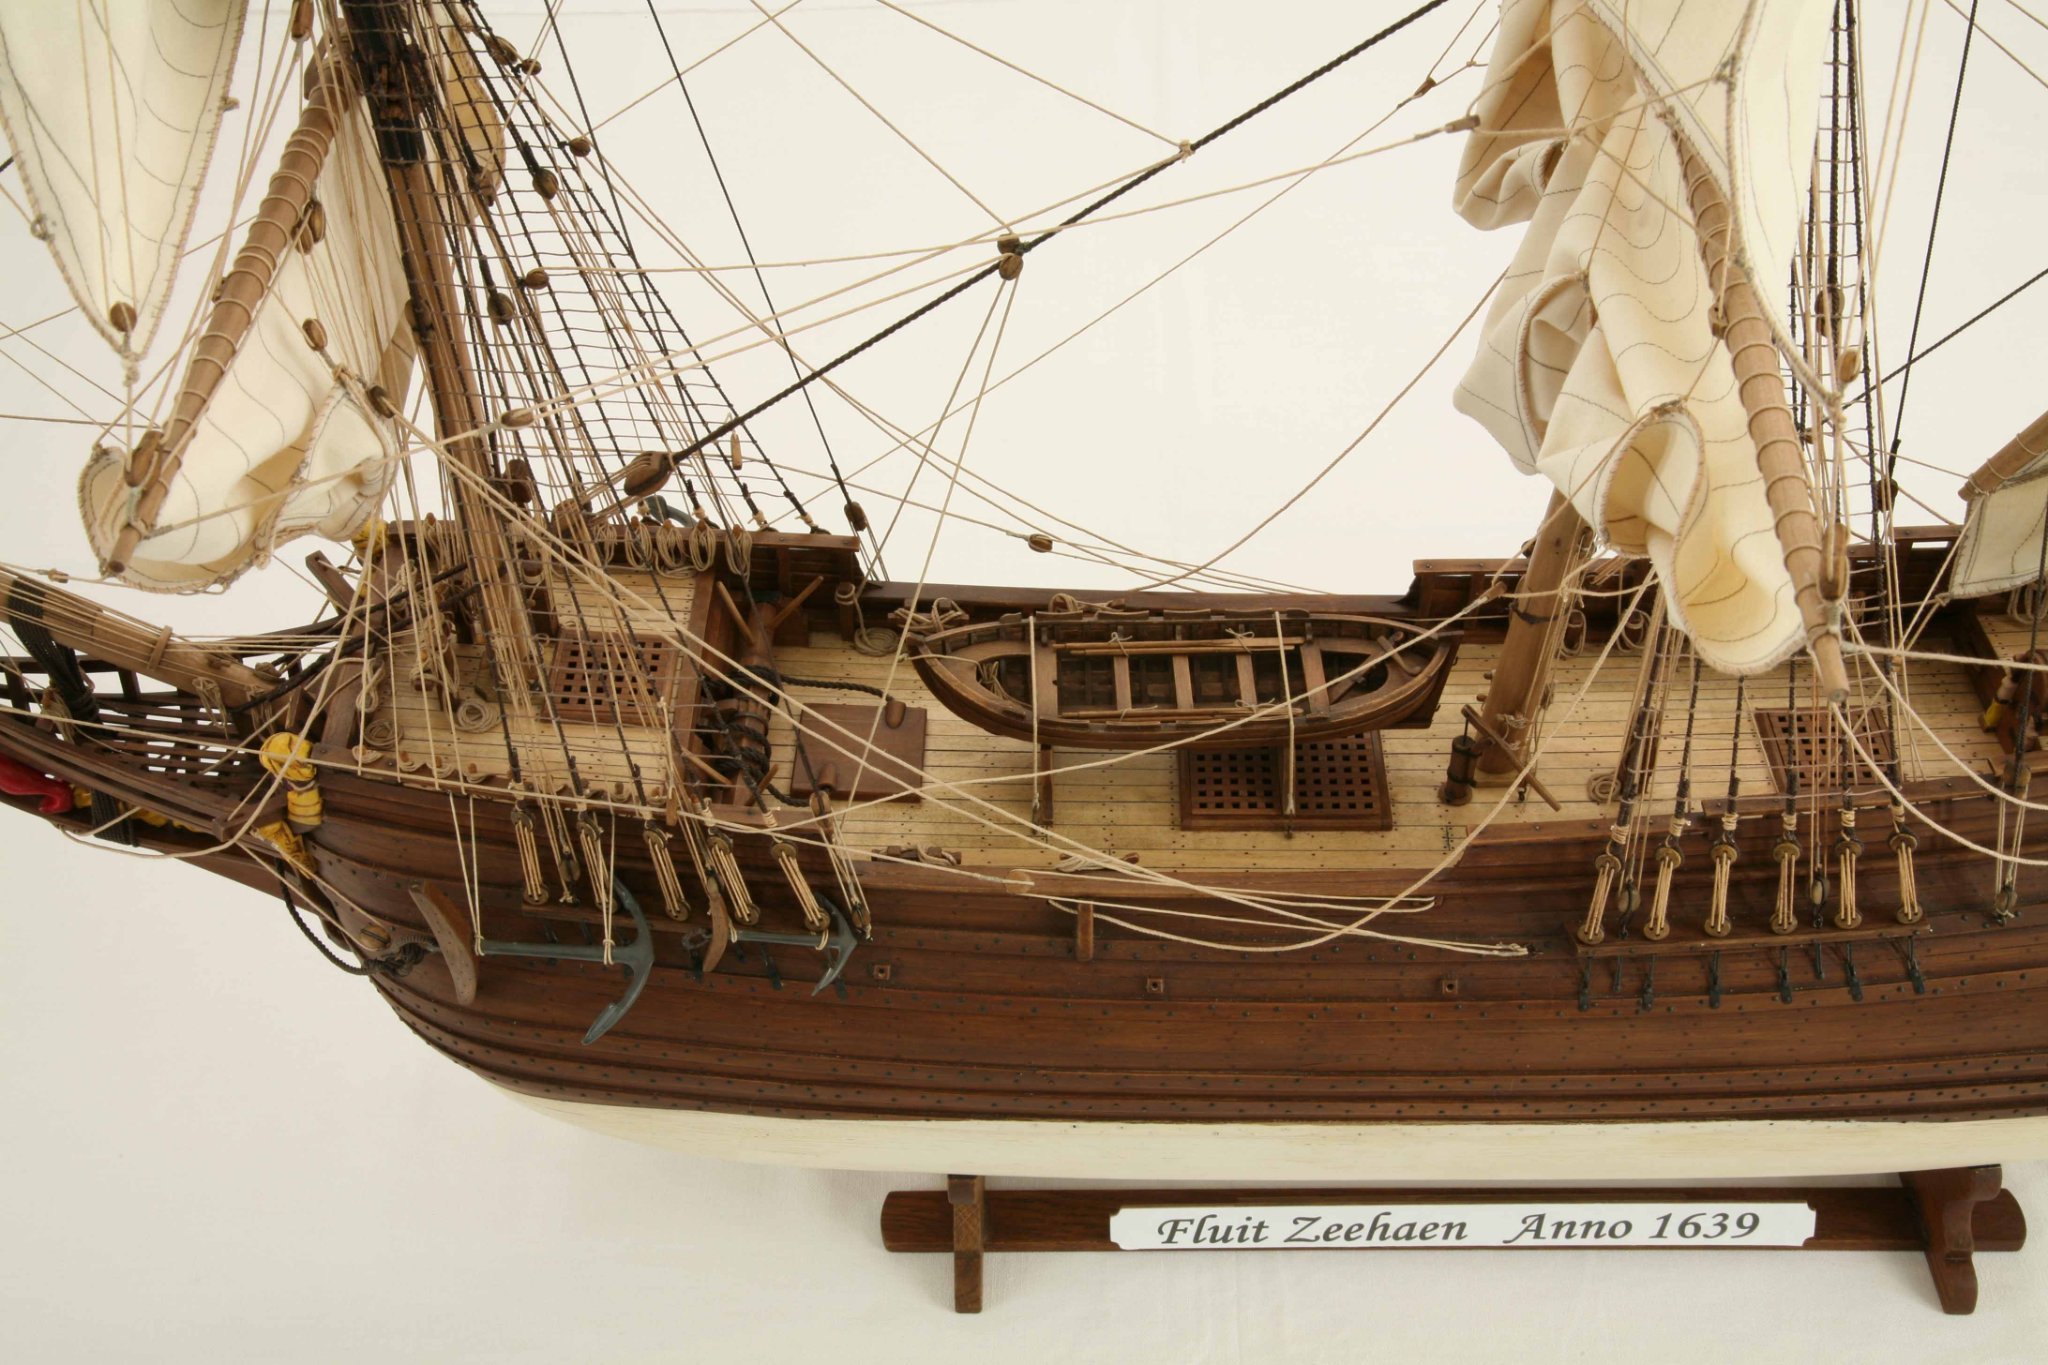
I know I am a bit late on this subject but the Dutch placed their spare masts and yards on the channels. This was without any ring bolts, blocks or rope. I plan to do this with my fluit I am building. Marcus
-
Hi Petr, I am pulling up a chair and will follow your build with great interest. I will probably build a Pinas after I finish my fluit, the Zeehaen. You are in good hands. Ab is extremely knowledgeable on Dutch ships, which will make building the Pinas much easier than if Ab wasn't available. Marcus
-
I have machine tools, but no lathe. I made a jig to hook up a variable speed drill in it and that is my ersatz lathe. I need to register to read it, so I will register and practice my German ☺️ Marcus
- 17 replies
-
- 1
-
-
- windlass
- Dutch model
- (and 2 more)
-
@wefalck When I going to build the Heemskerck (other ship of Tasman) I will follow your method. I made the windlass for the Zeehaen in one piece and the results were very good. Marcus
- 17 replies
-
- 1
-
-
- windlass
- Dutch model
- (and 2 more)
-
As I look at your excellent and meticulous work on your sails, I look at my sails on the Boyer and the Utrecht and we do pretty much the same details. I do all the sewing by hand using many Dutch books for that particular era of the ship I am building. Sails for the Fluit will be much simpler. Marcus
- 756 replies
-
- 2
-
-
- galleon
- golden hind
- (and 2 more)
-
Ab Hoving replied He thinks either 6 or 8 sided existed. Depending on the size of the ship and the power one needed to use it. Free choices. For the Dutch speakers. (Ik denk dat beide varianten voorkwamen. Uitgaande van de grootte van het schip en de kracht die nodig was om te bedienen. Vrije keuze dus. groet, ab) Marcus
- 17 replies
-
- 2
-
-
- windlass
- Dutch model
- (and 2 more)
-
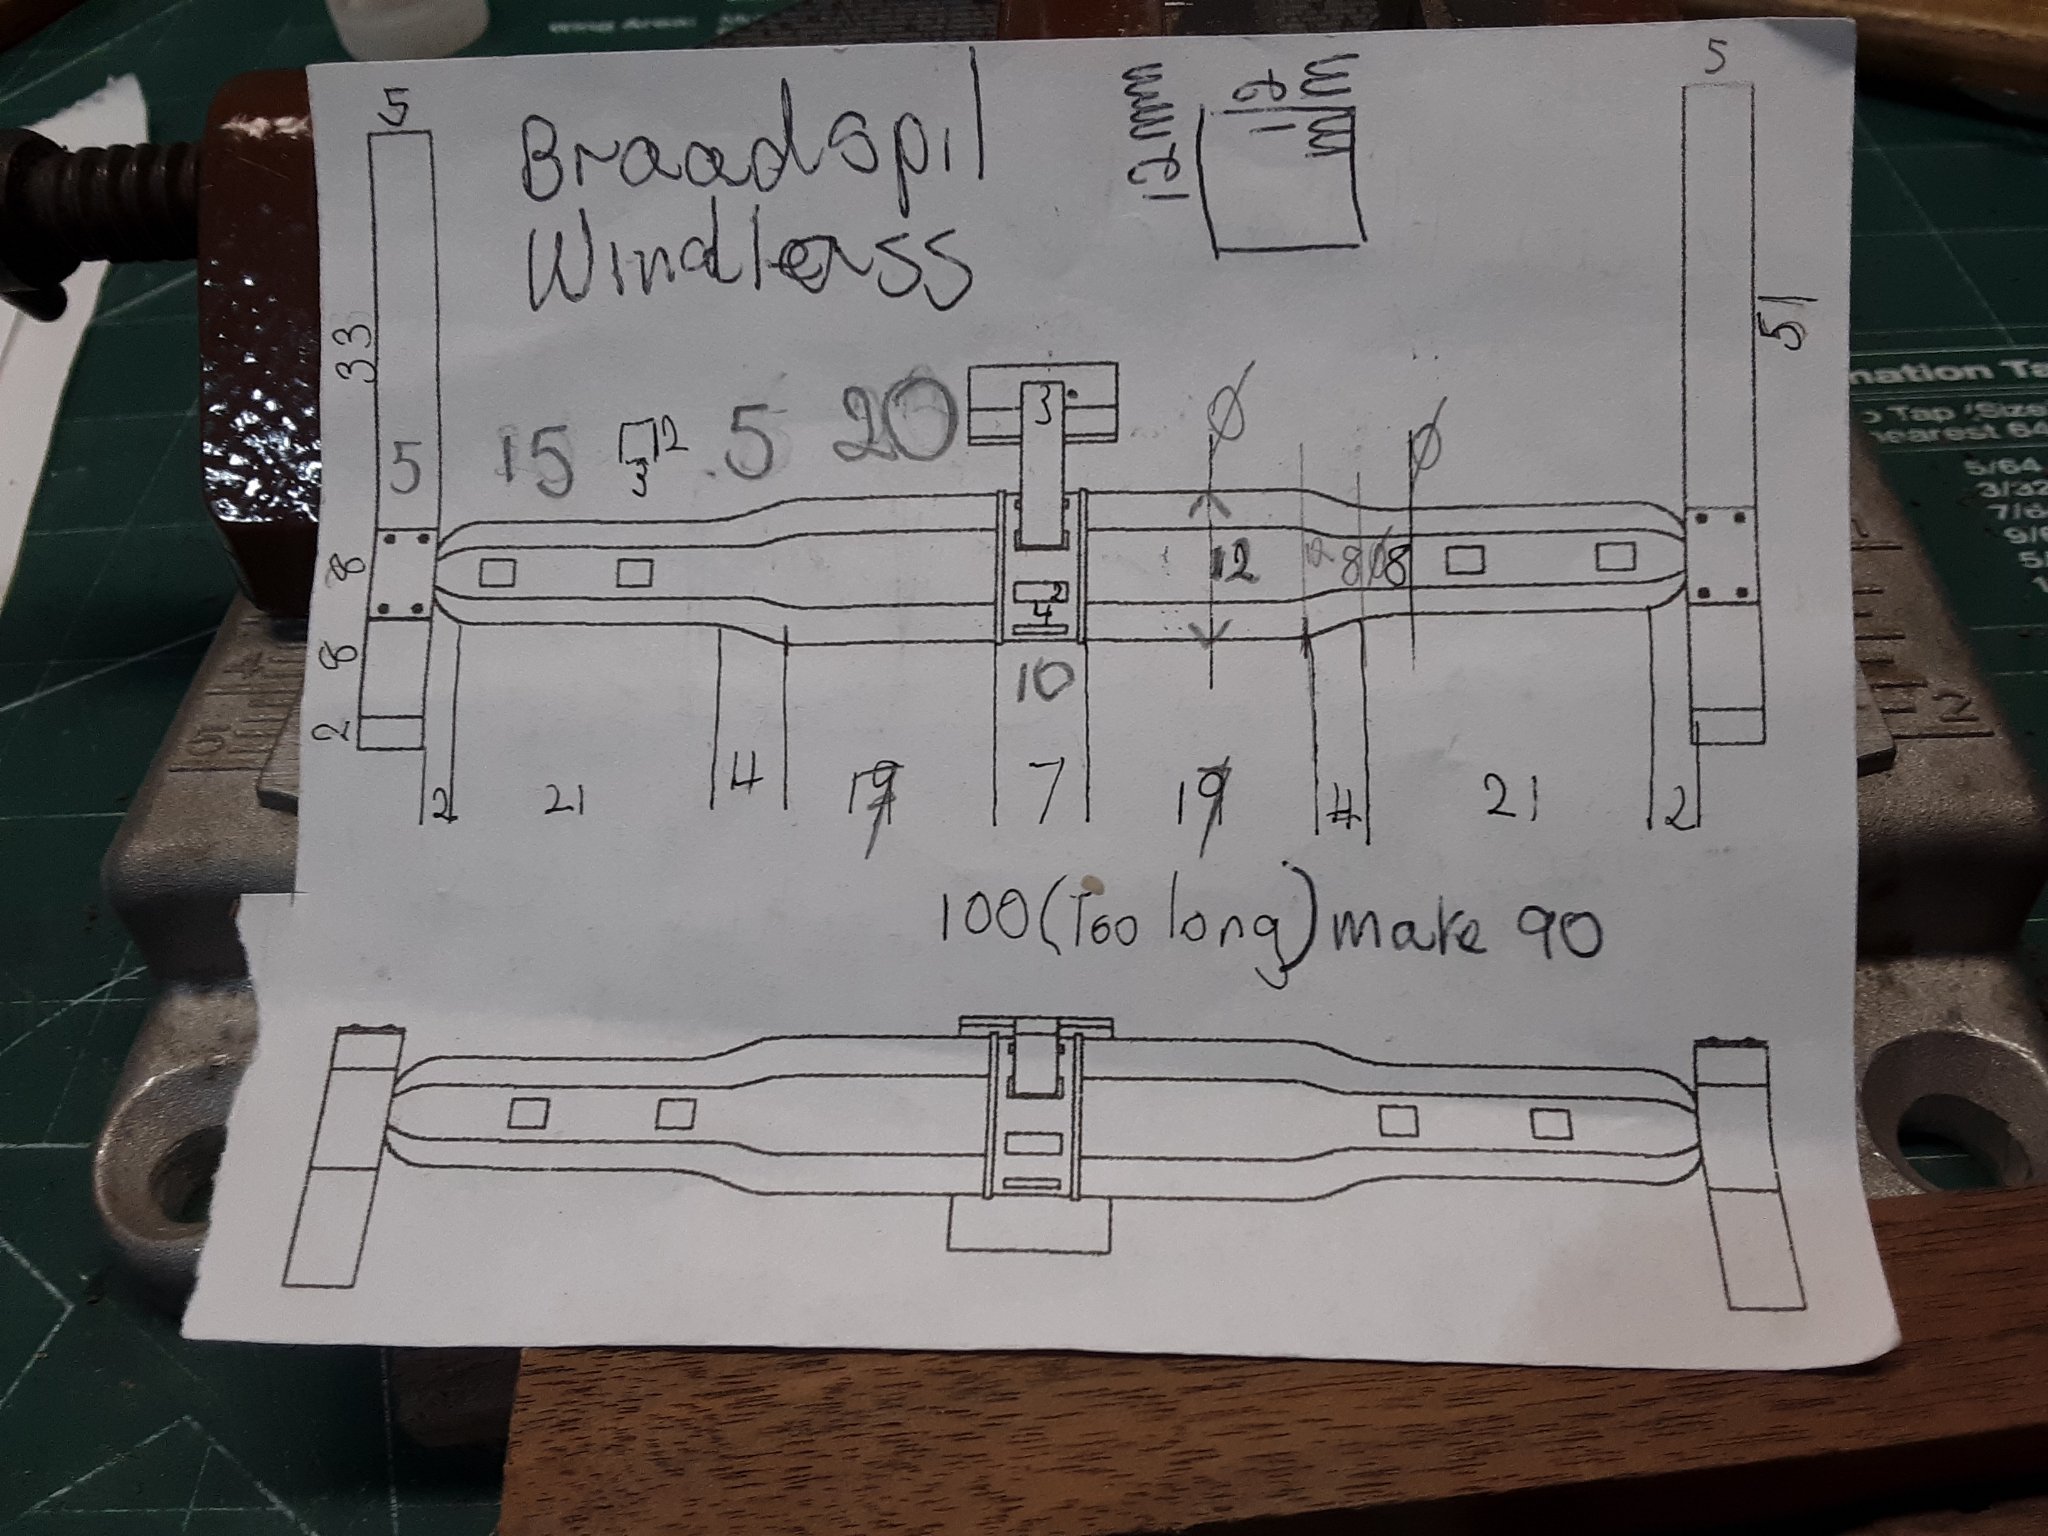
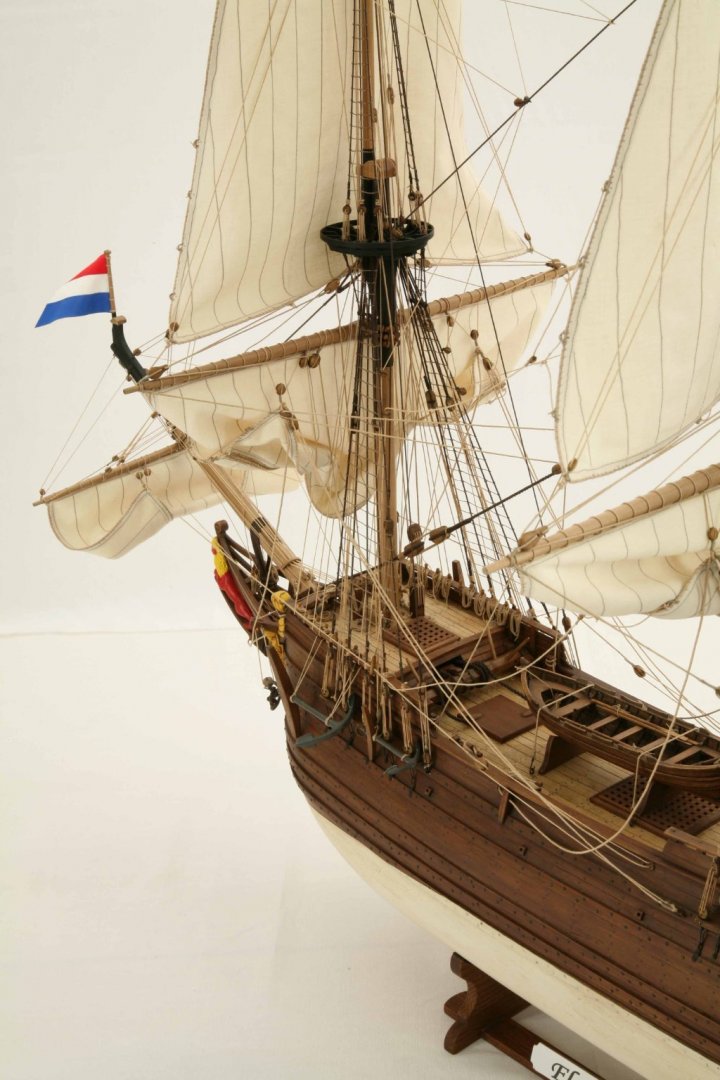
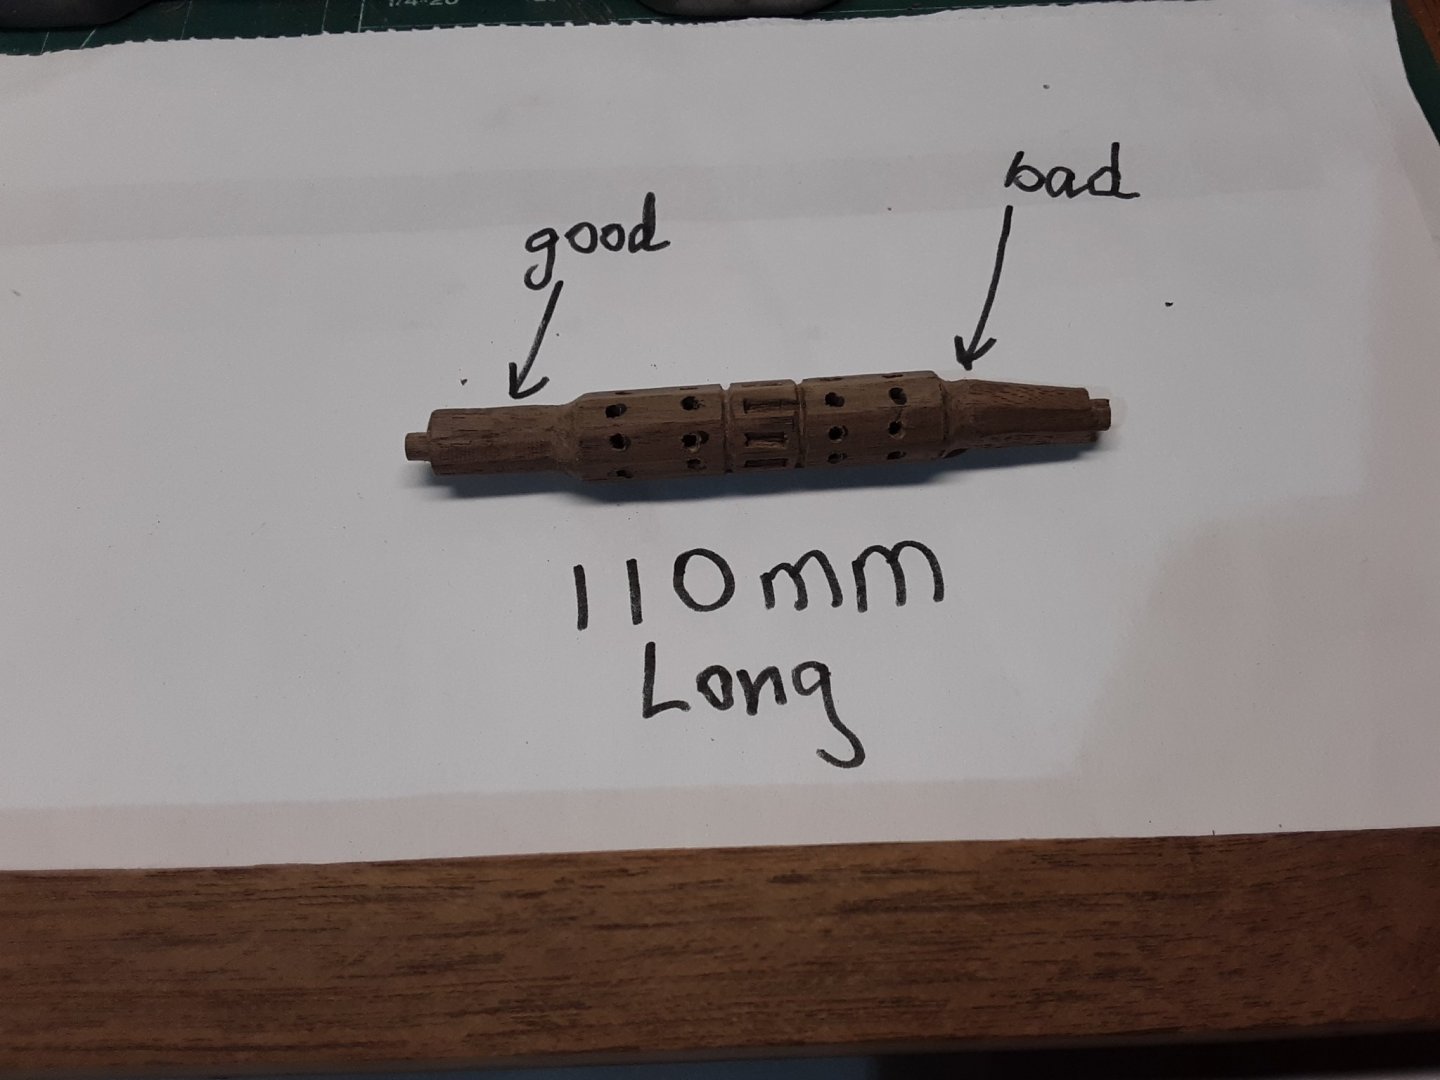
@amateur Hi Jan, Thanks for clearing that up. I looked at all the plans which are all 2D and all the books I have and I can't tell if it 6 or 8 sided. I am just assuming it is 8 sided. I found a picture on another site from a Fluit and he has it 8 sided. From a professional model maker I'll pm Ab Hoving here on MSW and see what his opinion is. He is the expert on 17 century Dutch ships. @Louie da fly Hi Steven, Scale of the Zeehaen is 1: 37.5, so it is 110mm. The plan is 1: 75 and I doubled it all to get a bigger model with more details. Just don't know where to put it once finished. Oh well. Sharp tools is what I use as well, vice for stabilization, glove depending on what I cut. Marcus
- 17 replies
-
- 1
-
-
- windlass
- Dutch model
- (and 2 more)
-
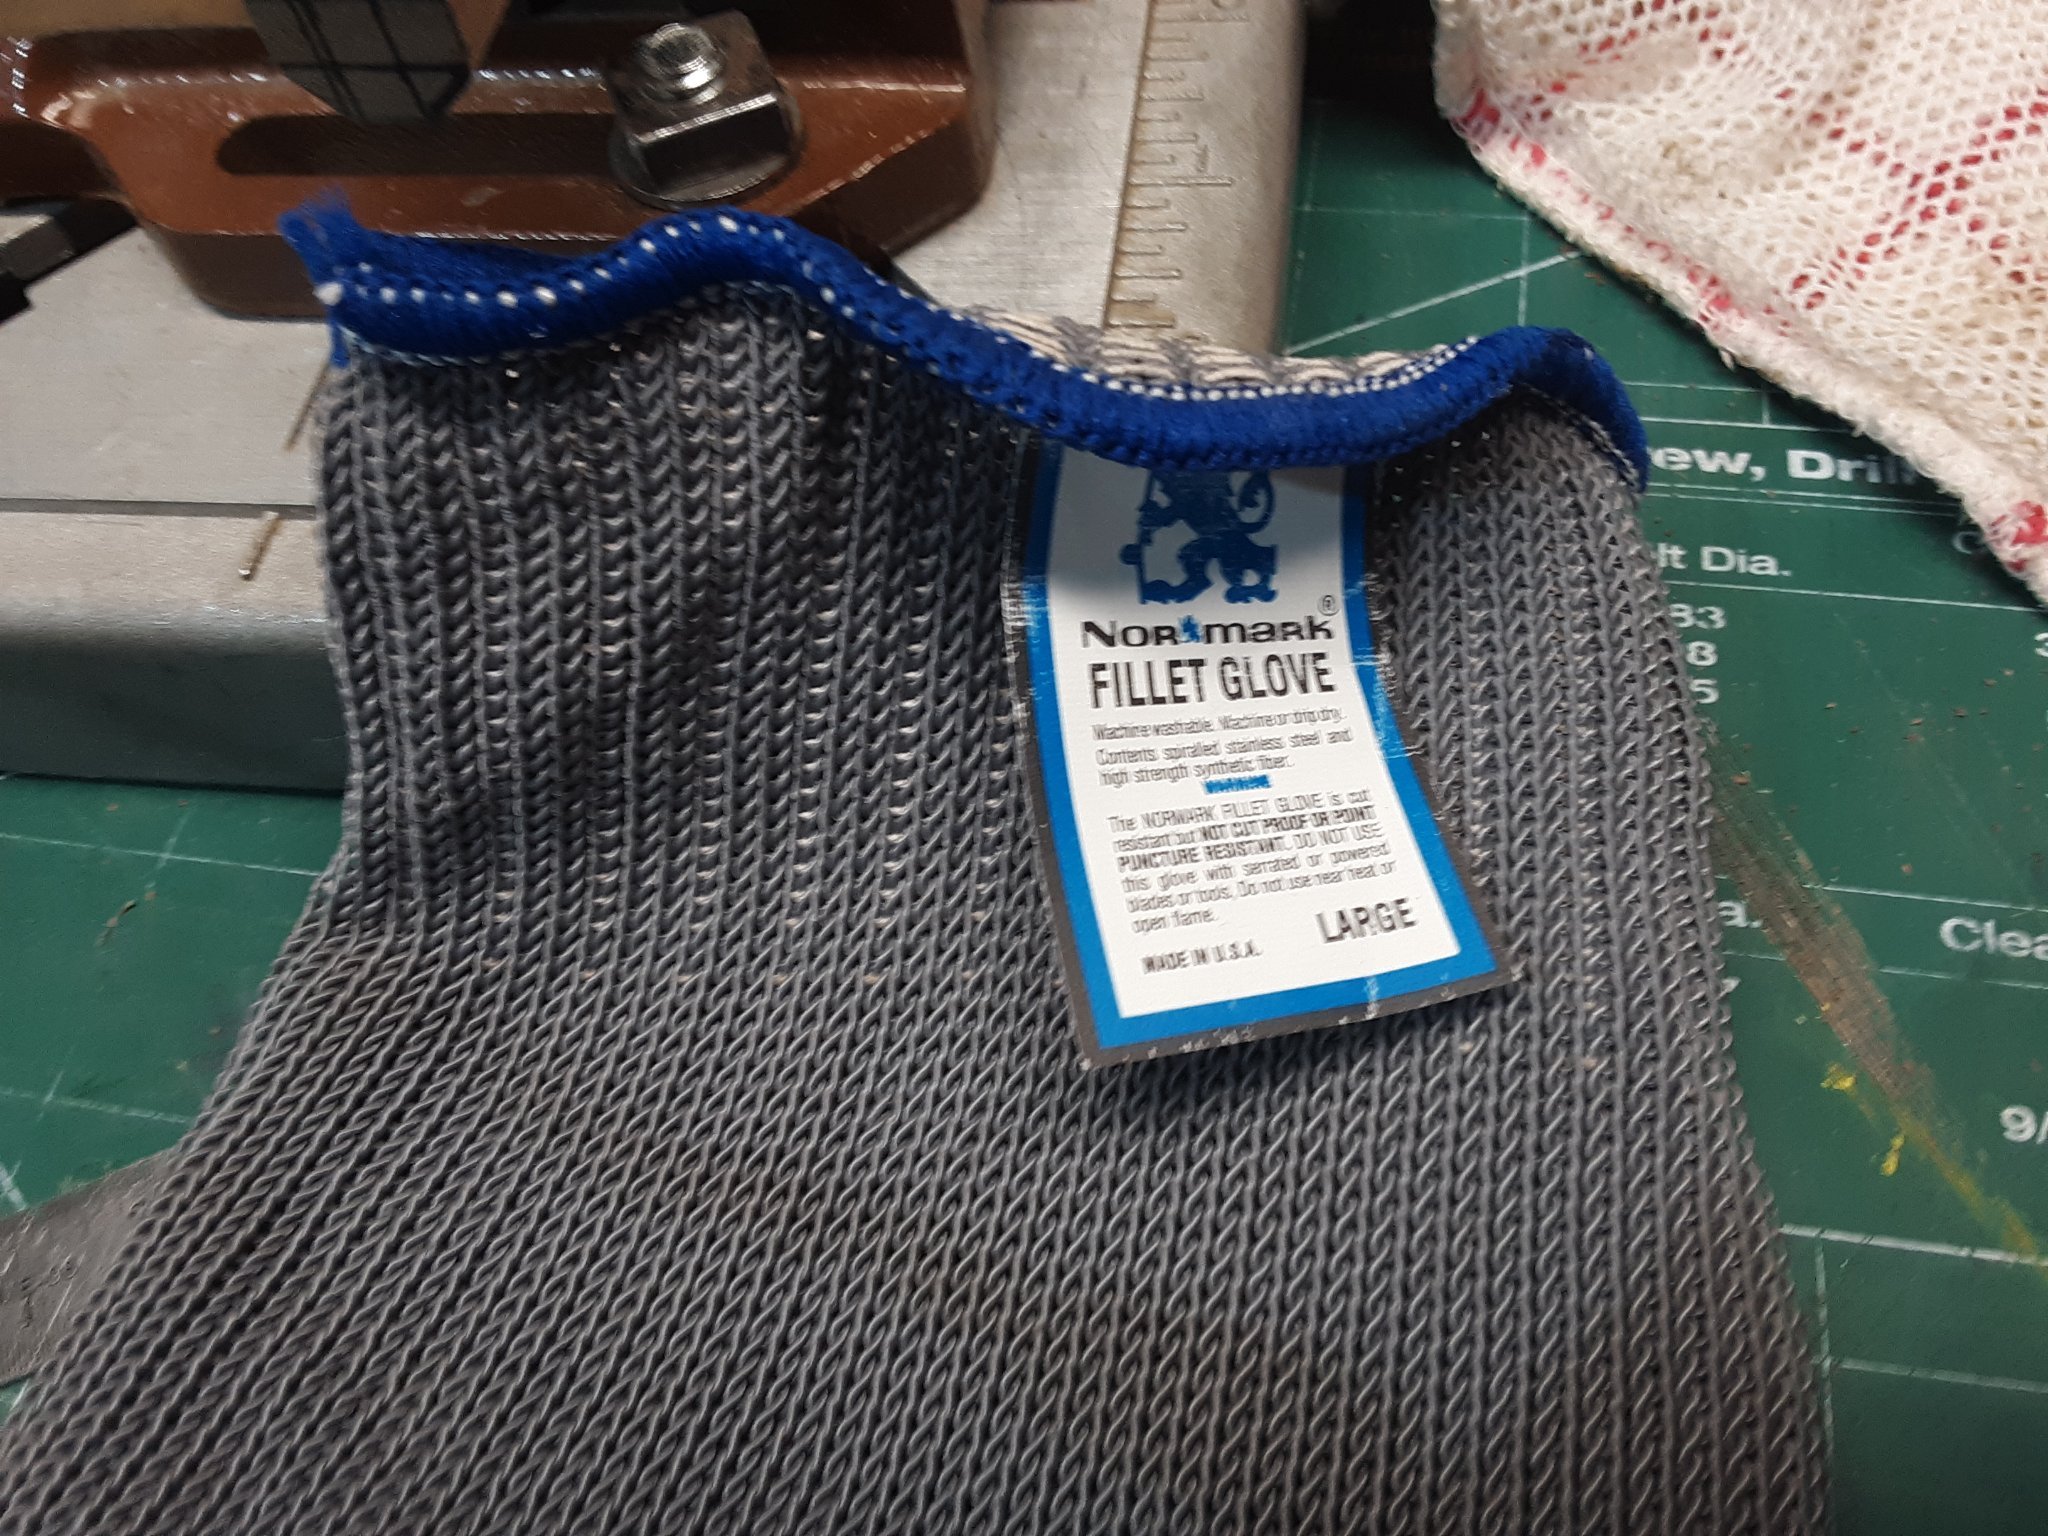
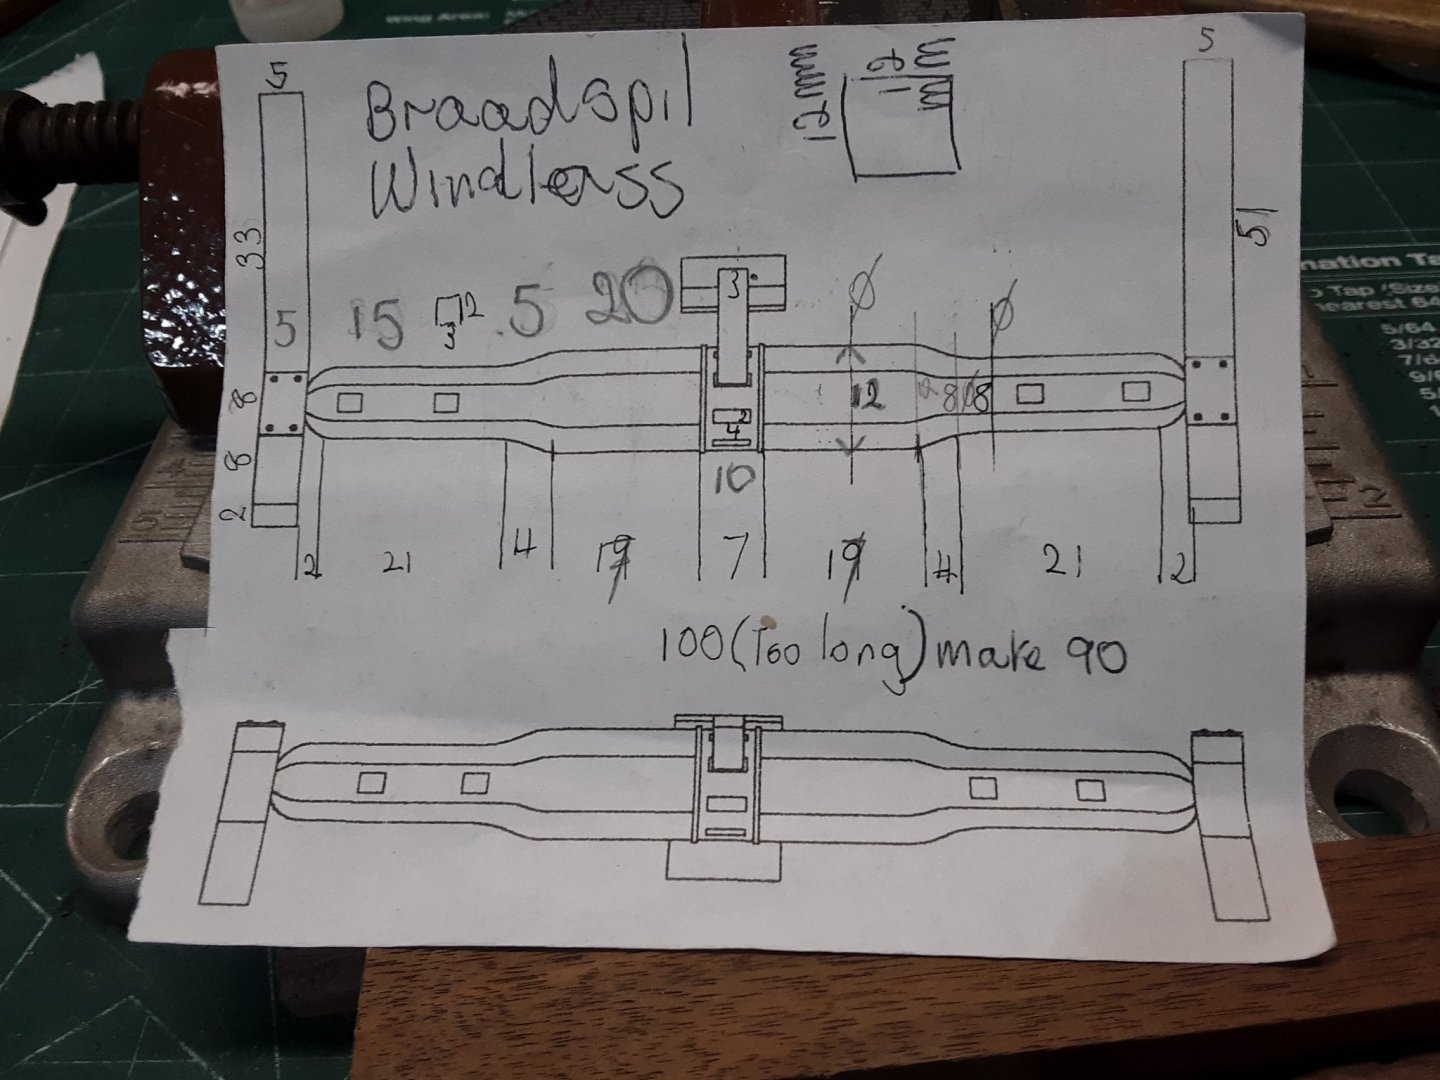
@amateur The drawing shows it is 8 sided. Wierd looking 8 sided so I'm doing a regular 8 sided. I am working on two attempts, one is where I will do it in 3 pieces and gluing them together and one is doing it in one piece, again. @Bob Cleek Using a little vice bolted to a Dremel drill stand clamped to the table. I would not attempt holding it in my hand. @allanyed Allen, Thanks for the advice on the wood, I'll remember that next time when I look in my stash. Not really Kevlar but a fillet glove. Yes, you lose the feel of the wood and the wood slides a bit. I just wished the had little rubber grips and they may make something like it. The glove has protected my hand several times from a knife. It is cut-resistant NOT cut proof or puncture resistant. Marcus


- 17 replies
-
- 2
-
-
- windlass
- Dutch model
- (and 2 more)
-
@Gregory I'll take a good look at Chuck"s windlass. I like the idea that the slats with the holes are glued on. One can make them more accurate. @Bob Cleek You should see my box of tried parts. Some items have been done several times. Practice, practice is how it gets better and that item will only have to be done once on the next ship. You said it "thinner cuts", I need to control my movements better. I'm using the softer parts of the walnut. Sharp tools is what I use and wearing kevlar gloves so my fingers are protected. Marcus
- 17 replies
-
- 2
-
-
- windlass
- Dutch model
- (and 2 more)
-
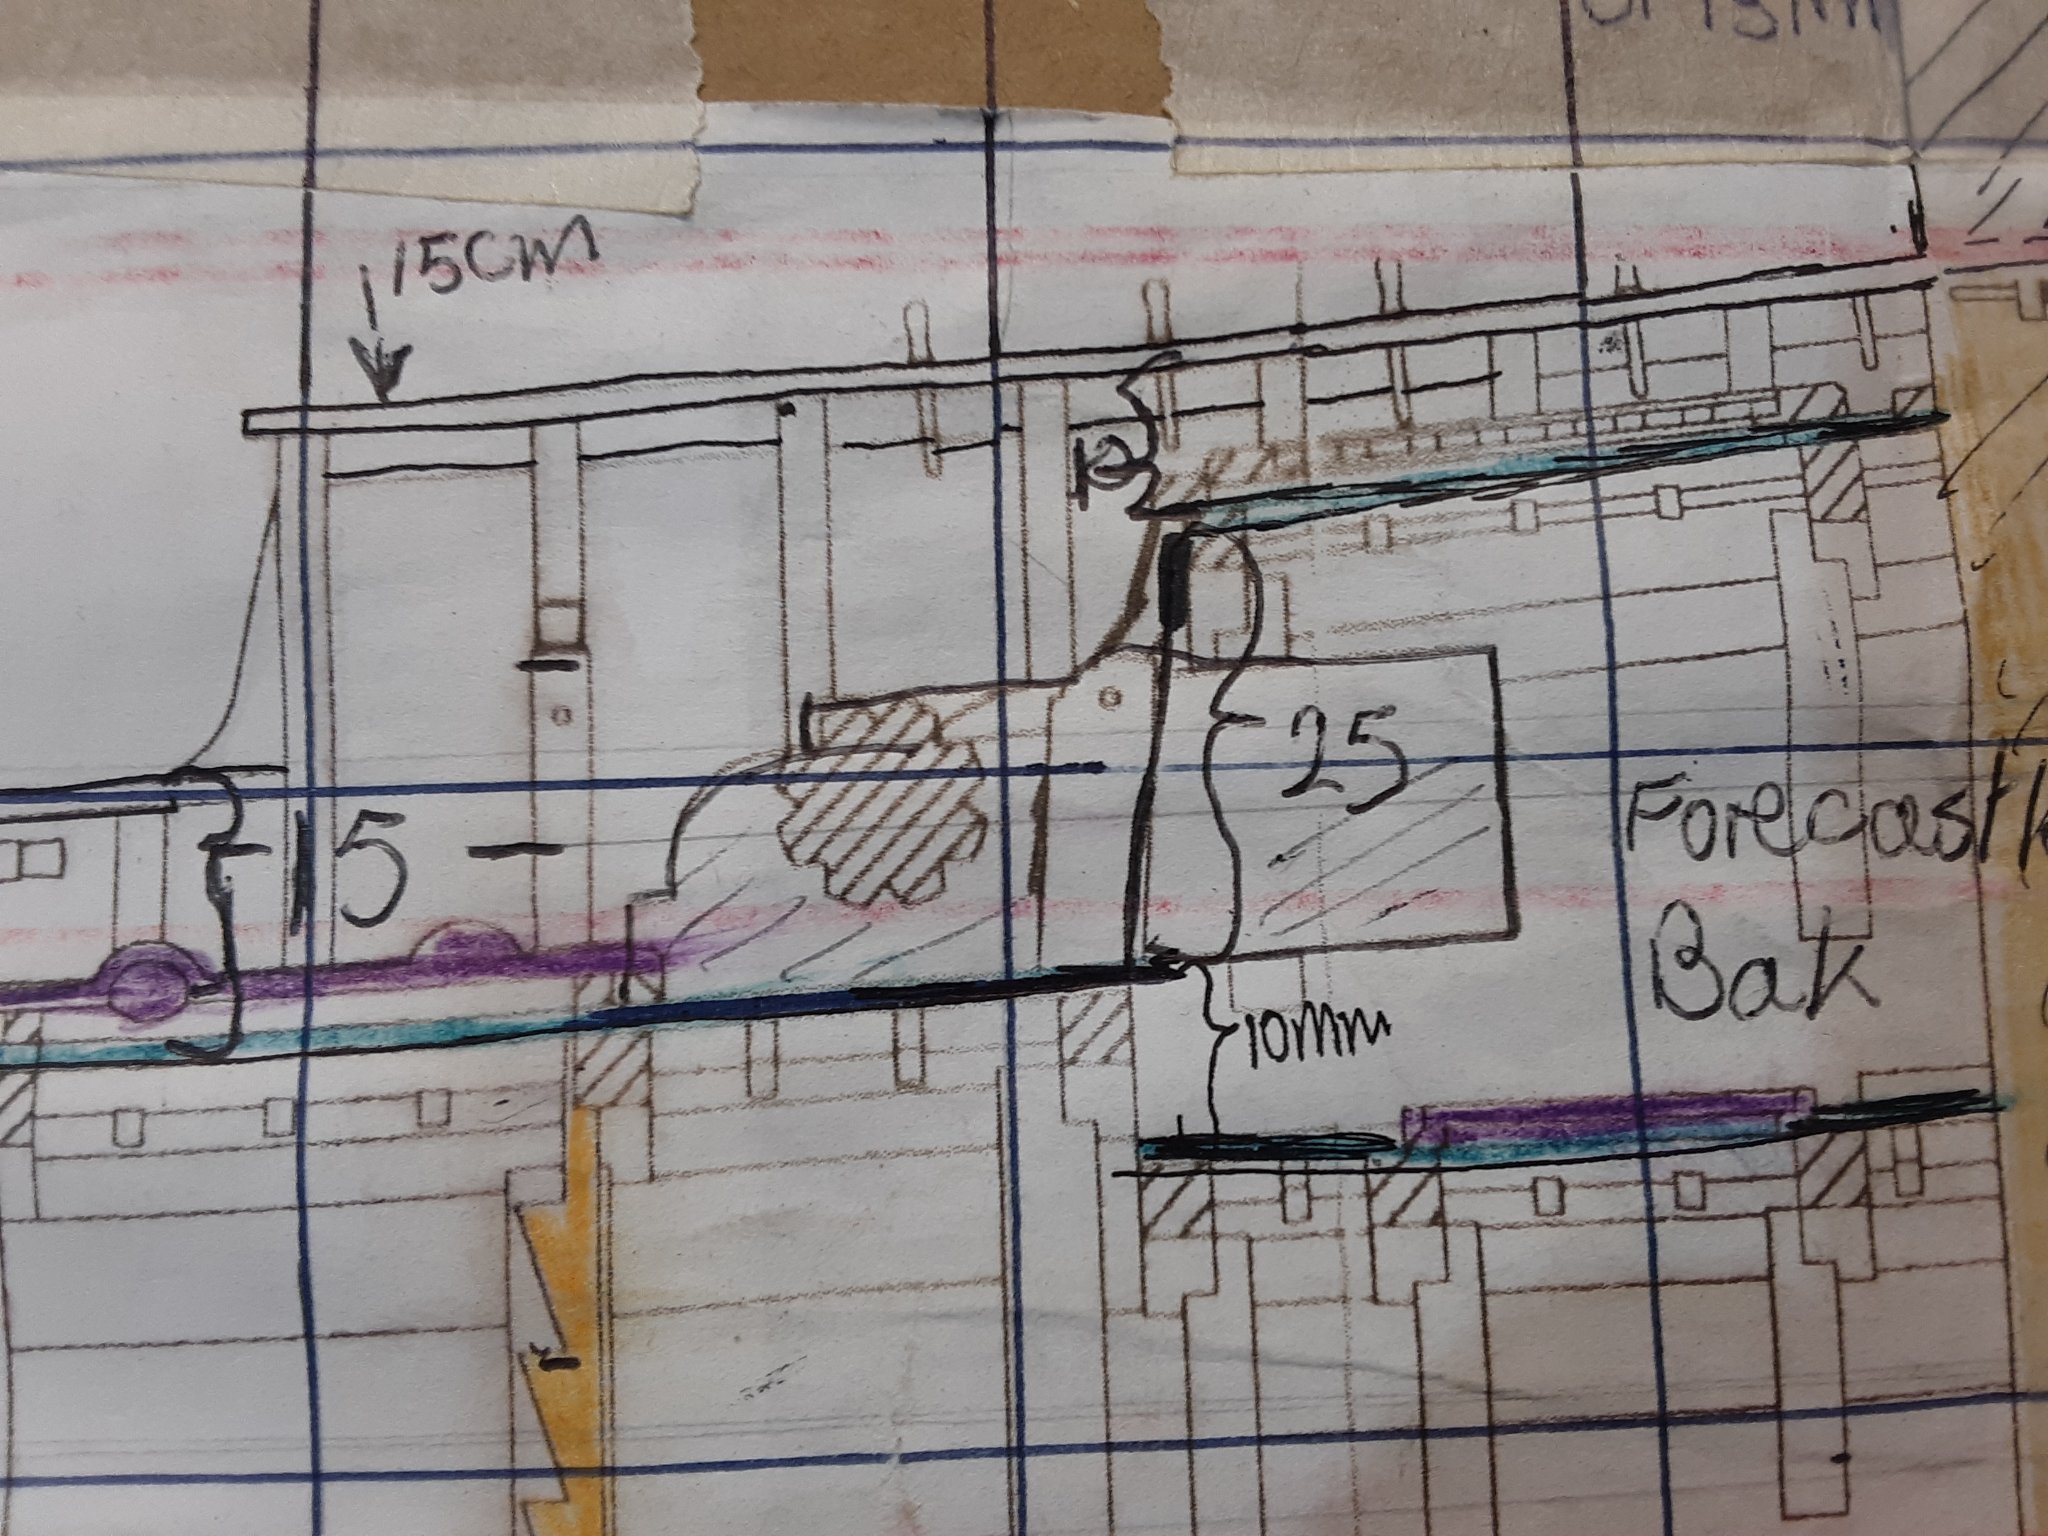
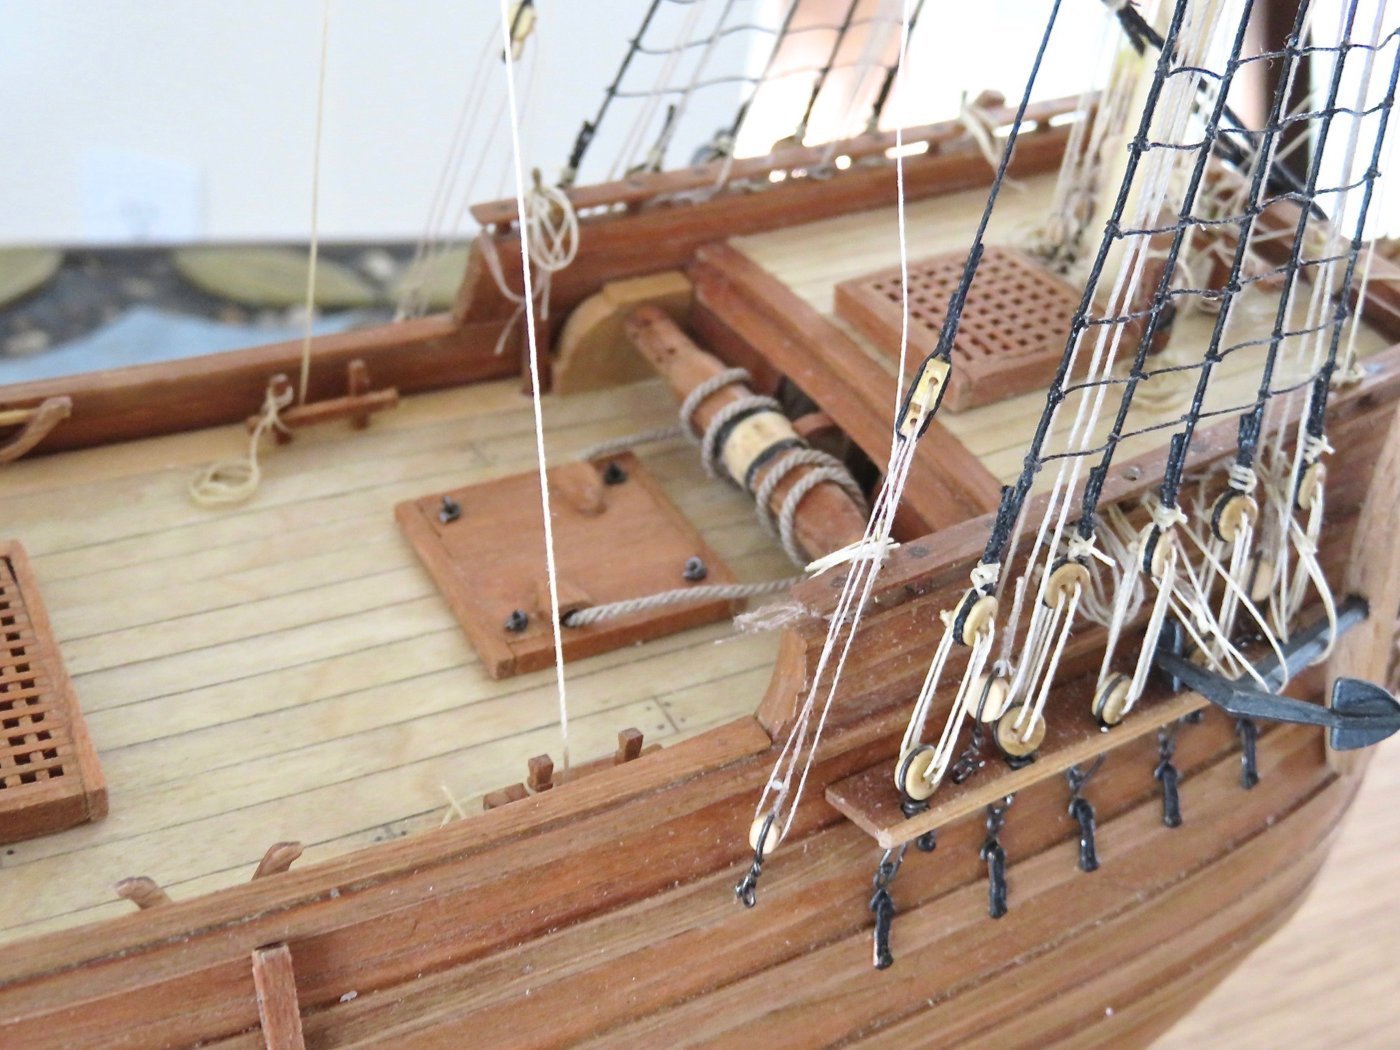
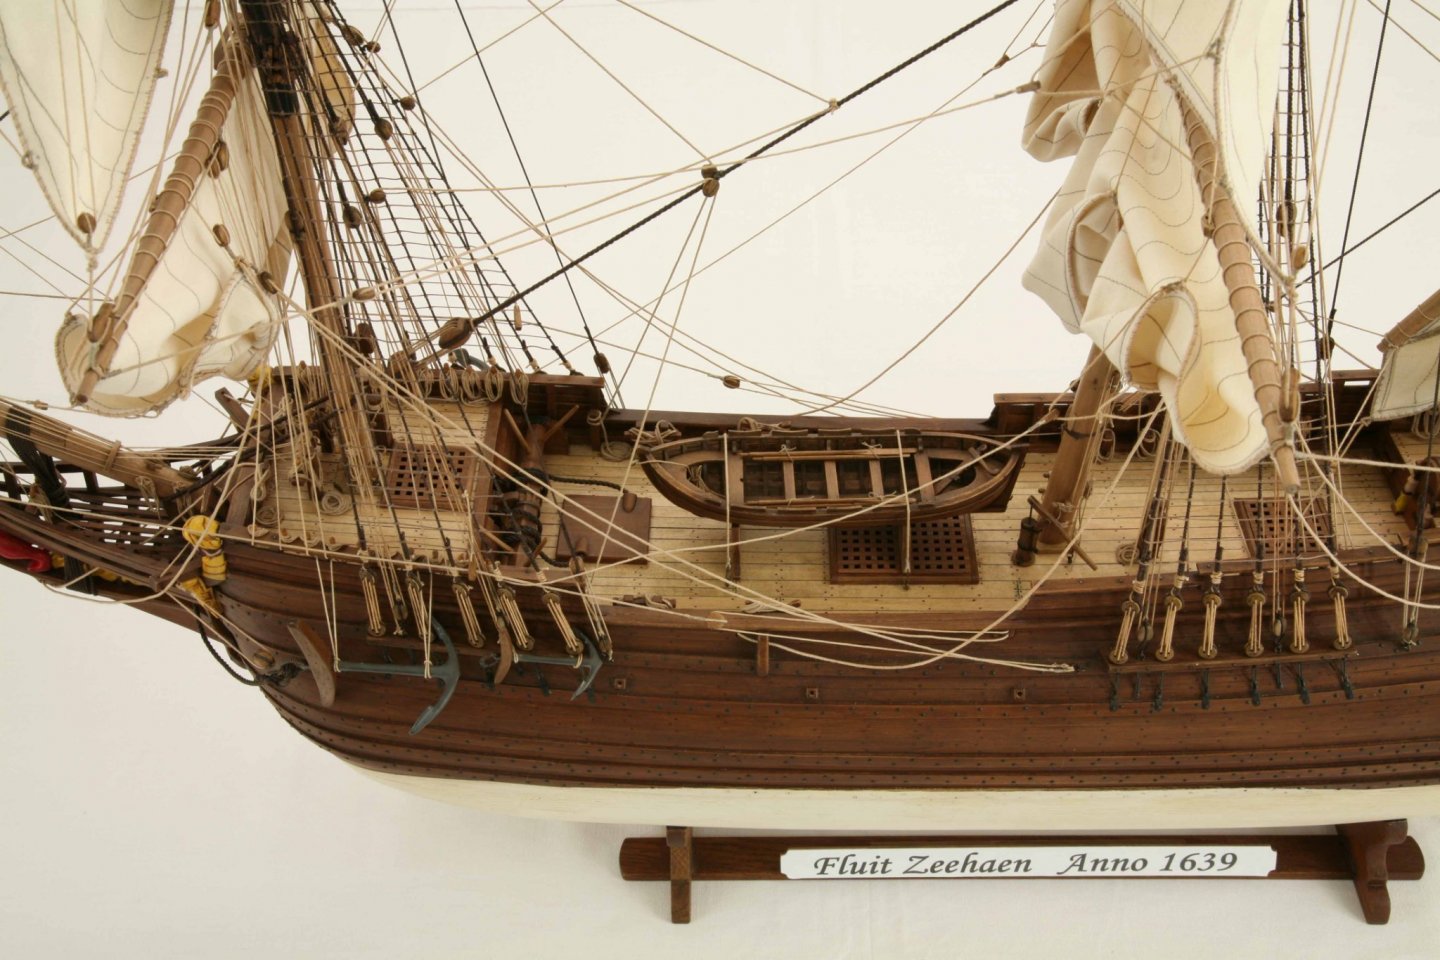
Hi, I am attempting to make the windlass for my Fluit, Zeehaen 1639. I made one but it is off on one side, so I want to make a new one. I make them by hand using a small planer, carving tools, knives, files, home made punches and sand paper. The first one is from walnut and want to stick with that wood as I have a lot of that and easy to cut. The easy part is making 8 sides with a plane and then it becomes a challenge. 1st attempt Original plan (sorry about the measurement scribbles) Question. Is it better to make separate segments and then glue them together or one piece ? Has someone else done this by hand and are there any other posts on MSW about this? All advise is appreciated. Thanks, Marcus
- 17 replies
-
- 1
-
-
- windlass
- Dutch model
- (and 2 more)
-
I was revisiting some of my old builts and I see there are questions. What I liked so much about Bluejacket Shipcrafters models is that the plans are well put together. On the other hand the instructions can be better. My sister has the model so I can't give you more pictures. I thought I had enough on this build. There are others that have built a Cape Cod catboat herre on this site so take a look at those boats and see if your questions can be answered. Marcus
-
The build looks excellent. I like the color green you used. It is not so bright and pleasing to the eye. I follow you on both MSW and on MBF (Dutch forum). Marcus
-
Beautifully executed. Love the nails in the hull. Marcus
- 433 replies
-
- 4
-
-
- open boat
- small boat
- (and 1 more)