HOLIDAY DONATION DRIVE - SUPPORT MSW - DO YOUR PART TO KEEP THIS GREAT FORUM GOING! (Only 36 donations so far out of 49,000 members - C'mon guys!)
×


Timmo
-
Posts
609 -
Joined
-
Last visited
Content Type
Profiles
Forums
Gallery
Events
Everything posted by Timmo
-
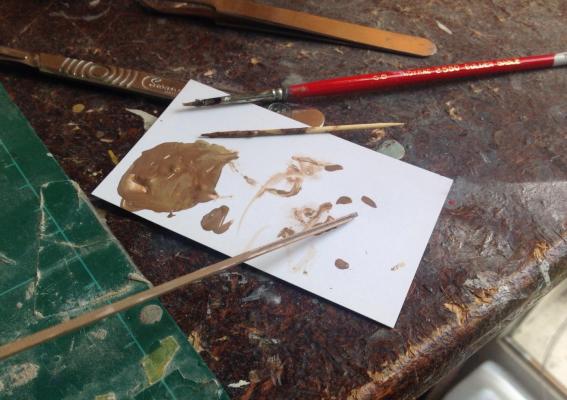
 Great tutorial there Joe- I felt like I was back on a plastic modelling website of the sort I'd abandoned for wooden boats! Those skills of yours from other hobbies are coming in handy. Those castings are looking great under your brush. I find that while turpentine thins well for consistency it often attacks whatever is underneath even if it's an acrylic or other non solvent base. Maybe it's the cheap hardware store variety I've used. After some experimentation I've become fond of a generic enamel thinner or white spirit rom a local hobby store as it's more forgiving on undercoats. Windsor and Newton paints are great fine grained media to use and I'd go with them very time but with a bit of patience and care I've had good results from $2shop Chinese oils also.
 -
That's a fine end to a great build mobbsie. Well done
- 1,279 replies
-
- 1
-

-
- agamemnon
- caldercraft
- (and 1 more)
-
Thanks Jason, mike and all. The yard was turned down from the recommended kit dowel which from memory was about 5 or 6mm and the central section squared off with a blade and file before the octagon was completed. The kit suggests building up the octagon with black paper on some smaller yards but I used a dowel a couple of mm larger and filed it down. It seems a lot less fiddly.
-
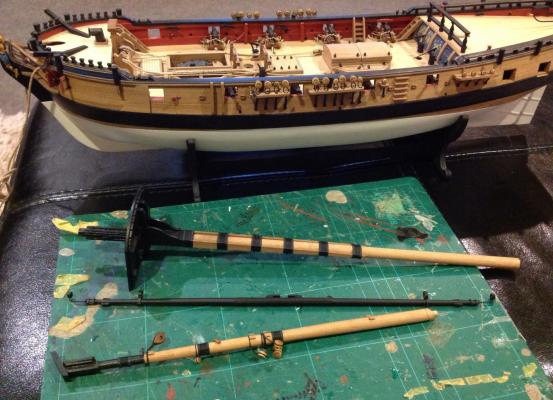
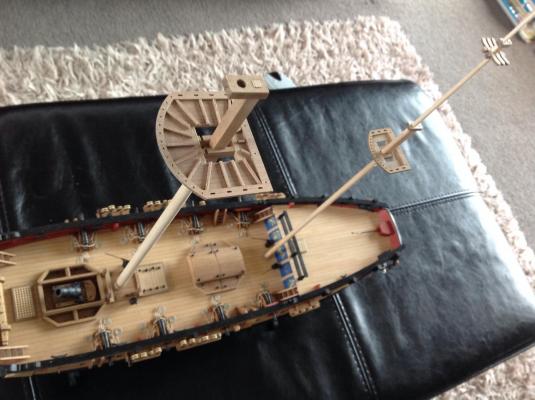
A lot of boring mast work has meant no updates for a while but here's where we are at. The masts were stained to match the rest of the walnut in the kit using very diluted admiralty stain. Main topgallant mast freshly turned and some kit stock as an example. The mainmast cheeks are ply so the faces were painted to hide the laminations. The main yard before painting. Here's the finished result with wooldings on the mainmast and bowsprit rigged at bottom. A new half circle sprit sail saddle was turned from kit stock to replace the ply version which didn't fit too well. The yards etc ere painted with the airbrush to save time, my paint stocks were low but I managed to get caldercraft's admiralty black to flow through the airbrush with some isopropyl alcohol to dilute. The hawse cables and messenger have also been rigged. The thread was lightly stained with dilute walnut stain to give it a more subdued colour. I wish I'd done this with the gun rigging but the difference shouldn't be that noticeable once a mass of rigging is on. New messenger snatch blocks were made from stock walnut as the kit ones were either absent or had been lost in the 2.5 years since the kit arrived. I've tied bowsprit and mizzen rigging and the mainmast is the next stop before some masts will be stepped.


- 366 replies
-
- 14
-
-
- granado
- caldercraft
- (and 1 more)
-
Much better result there Joe. It's always worth the effort if you aren't happy with the first attempt.
- 302 replies
-
- 1
-
-
- granado
- caldercraft
- (and 1 more)
-
That foc'sle looks great Joe. Agree with your thoughts on the walnut colouring. I've just been finishing masts and yards (pics posted when it's worth showing) and luckily had some nice light walnut from a previous kit to make cleats to match the bowsprit, which had been in turn stained to match the rest of the kit. The supplied rod was way too dark. That's the trouble, and beauty of these pre-Nelson ships - not much painted over so harder to hide the botches.
- 302 replies
-
- 1
-
-
- granado
- caldercraft
- (and 1 more)
-
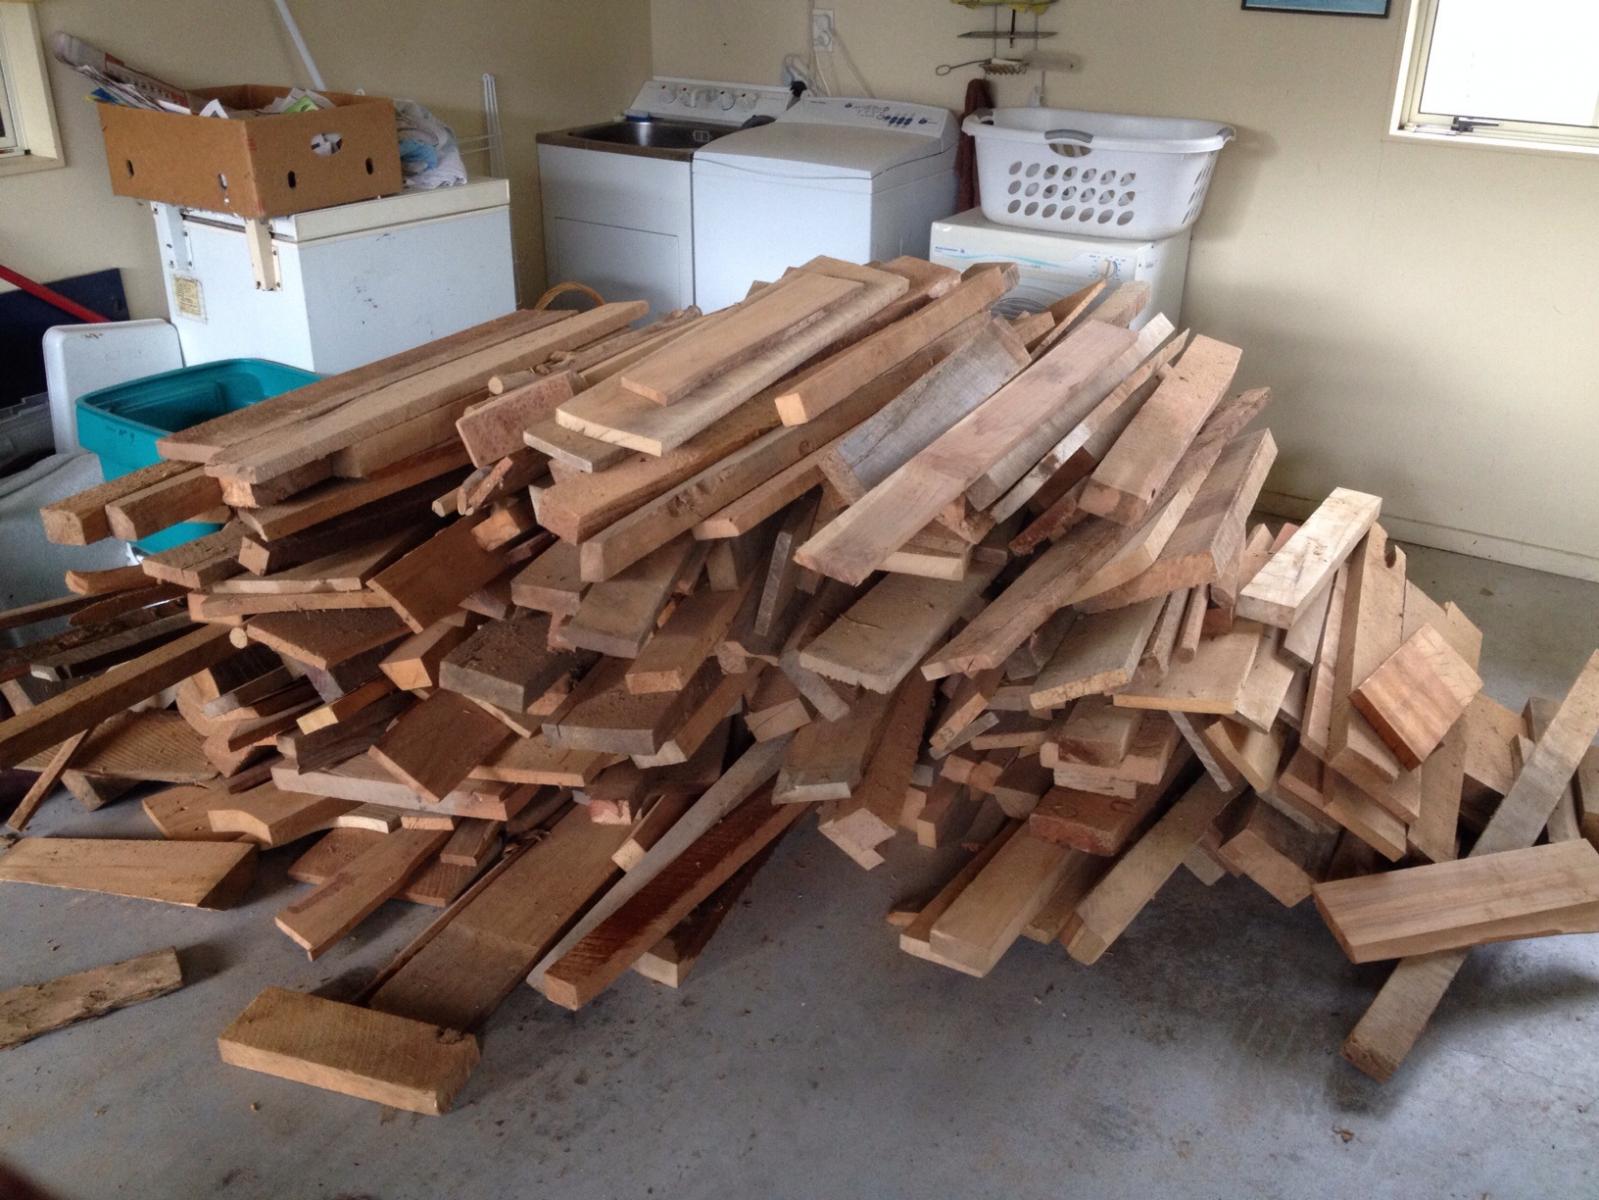
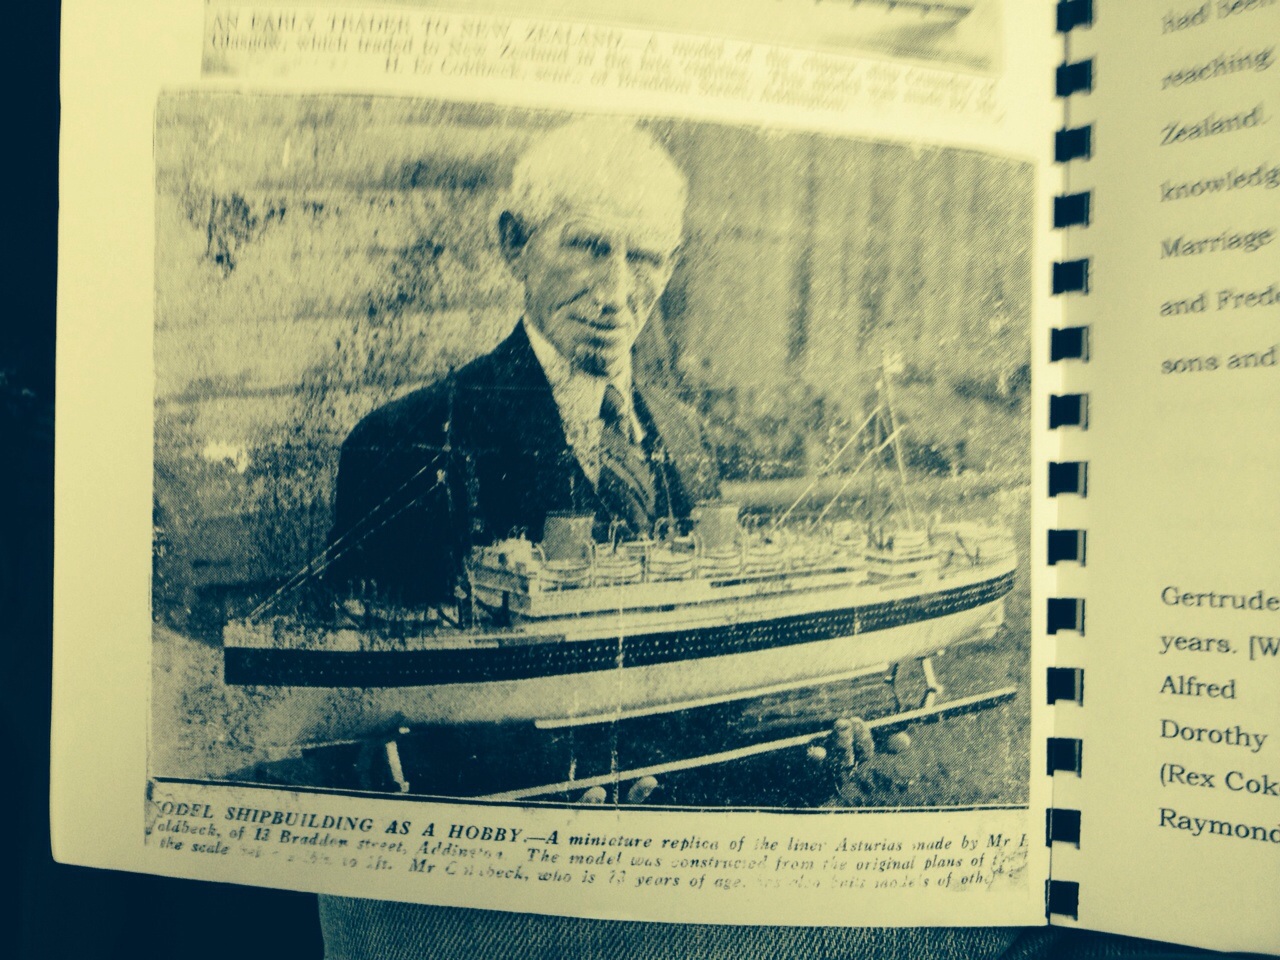
A diversion here- That trip to collect my grandfather's stock of timber netted more than expected. Most of it is rimu which has a lovely warm red glow for the heart timber sort of like pear for those in the northern hemisphere. There's also some outer stock with a lighter colour. The grain might not be tight enough for smaller pieces of ship fittings but I'll be keen to try to work some in somewhere in future builds. My father will be kept in woodwork for many years to come with that pile. Also while on the trip I uncovered a forebear of mine was also a ship modeller. A copy of a newspaper clipping , date unclear, of my great grandfather in his later years with one of his efforts.


- 366 replies
-
- 9
-
-
- granado
- caldercraft
- (and 1 more)
-
Work continues on the masts. The mizzen was done first and was fairly straight forward. I rather enjoy filing square and octagonal sections now. The mizzen is 5mm dowel but it's just a shade under in width. I considered changing it for something slightly larger as it just looks thin but will stick with it after checking with AOTS and realising there's only .2mm in it. A couple of the top mast caps are supplied in two parts to join around the mast tops but I've made one from offcut timber and will continue with the rest.

- 366 replies
-
- 10
-
-
- granado
- caldercraft
- (and 1 more)
-
Nice work on that moulding Joe. The boxwood and blue is a good combination.
- 302 replies
-
- 1
-
-
- granado
- caldercraft
- (and 1 more)
-
It's hard to get that curve completely as suggested in the kit Joe. I had the same issue on my capping rail but to a lesser degree and they just needed a Good sand to get them following the right line. The moulded strip I added helped fill it out also. That foc'sle edge strip looks great next to the treenailed planks. Very crisp
- 302 replies
-
- 1
-
-
- granado
- caldercraft
- (and 1 more)
-
Regularly browsed through your fine log mobbsie but never offered my congratulations on a such superb build. As it's almost finished it's a bit late but well done. Those finely made yards show how crisp it all is. Nice one. I look forward to seeing how you'll display her.
- 1,279 replies
-
- 1
-
-
- agamemnon
- caldercraft
- (and 1 more)
-
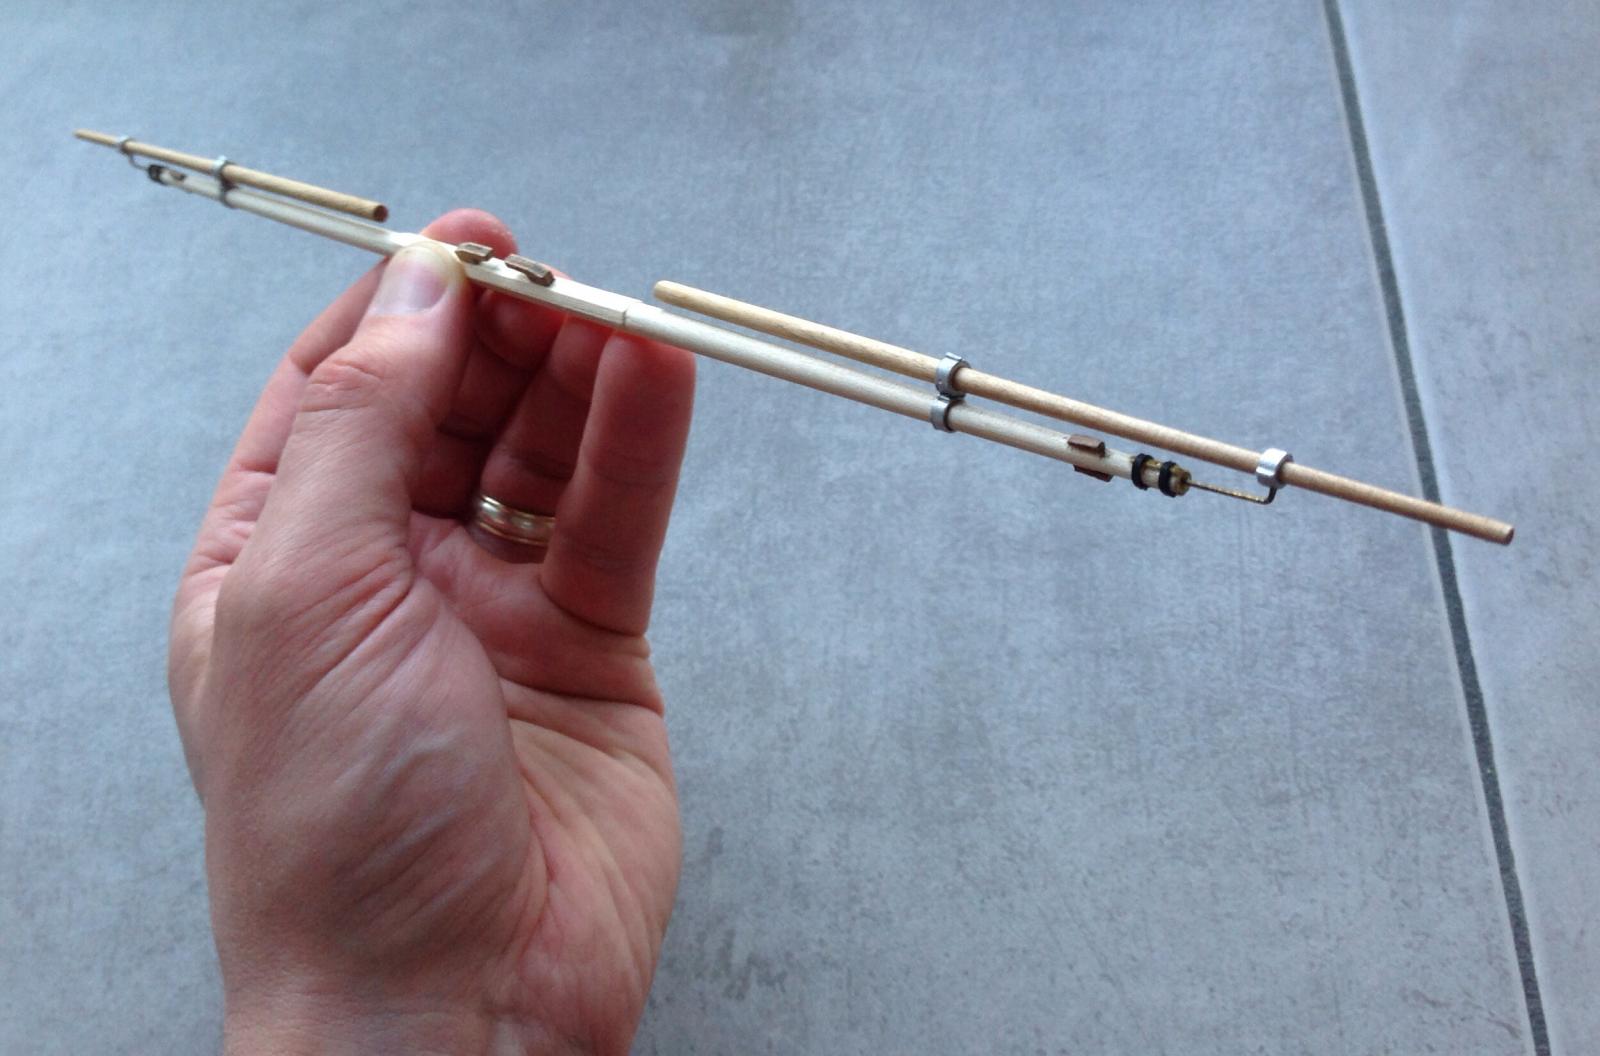
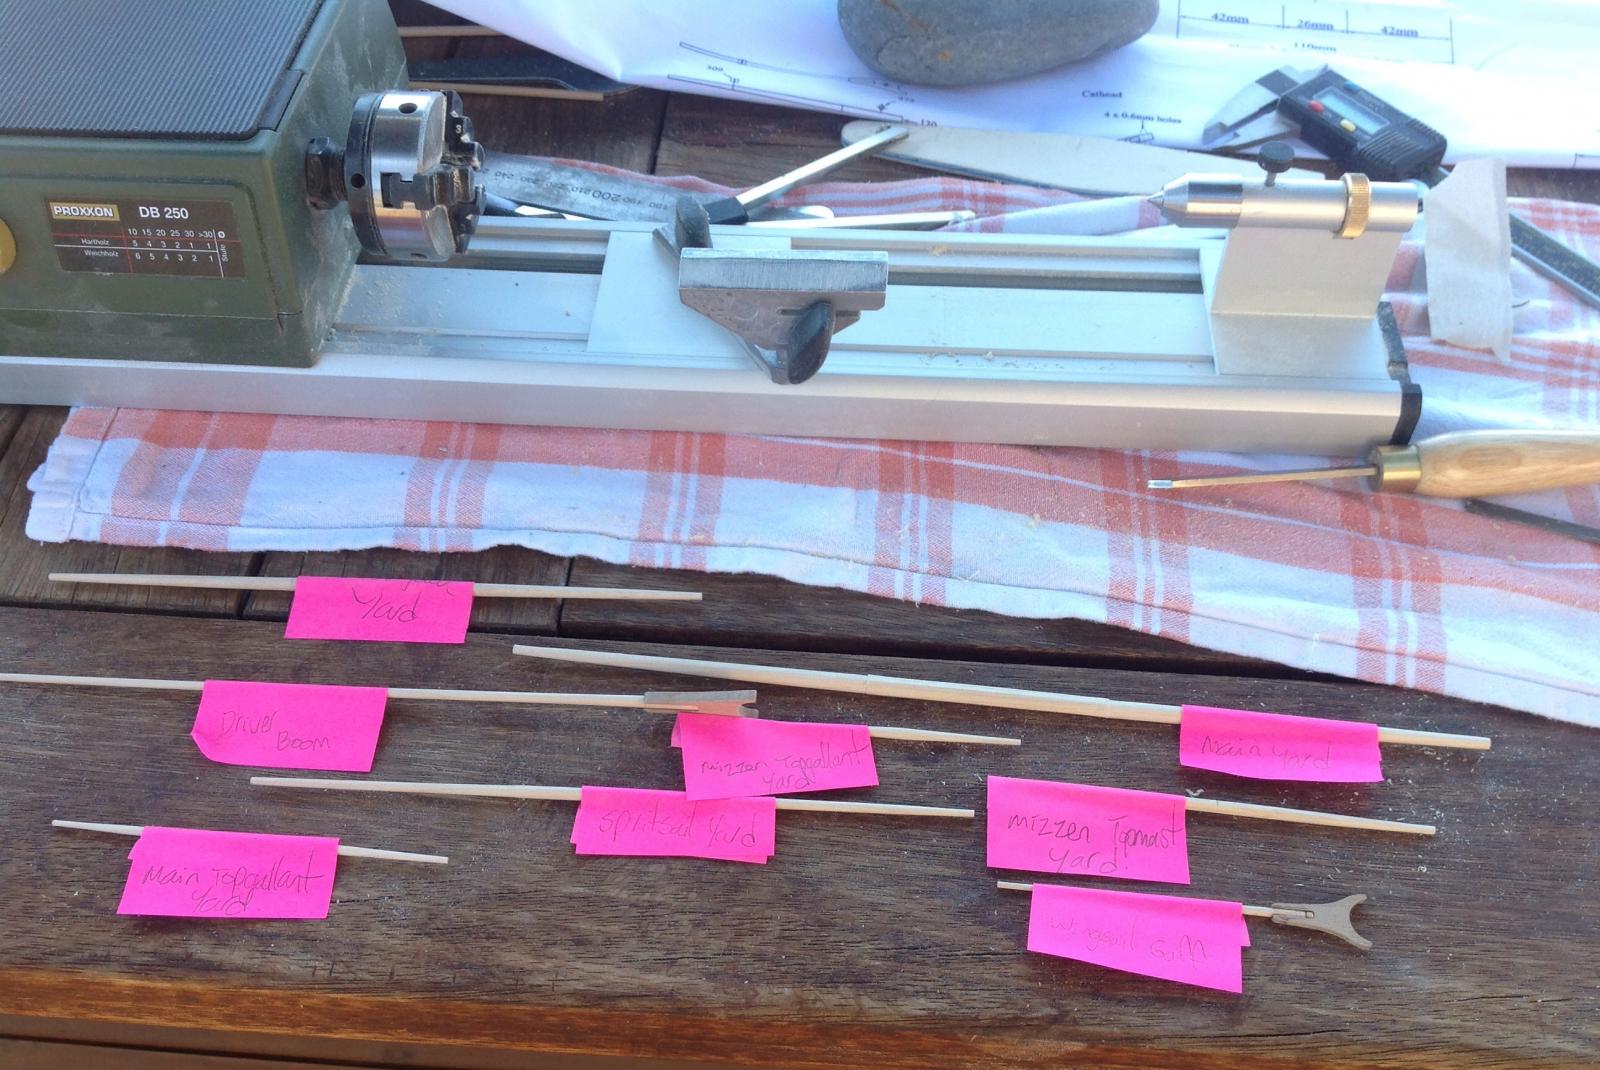
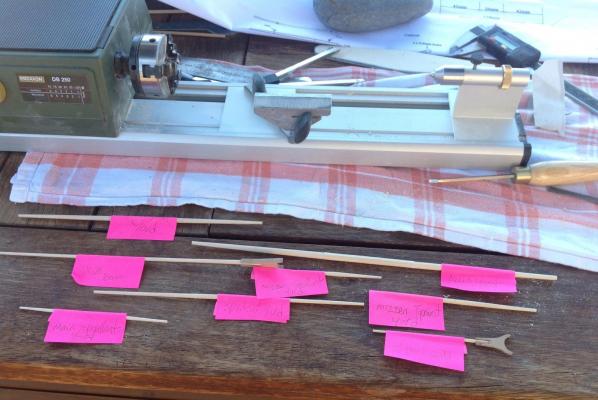
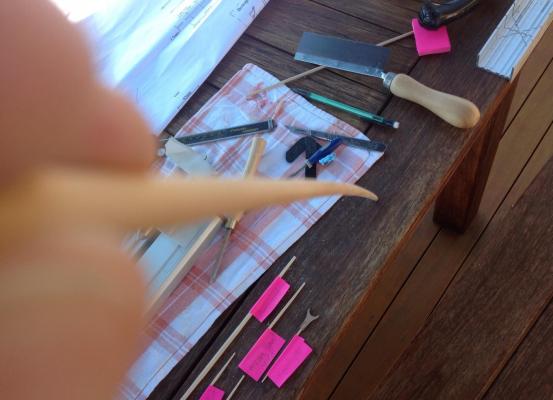
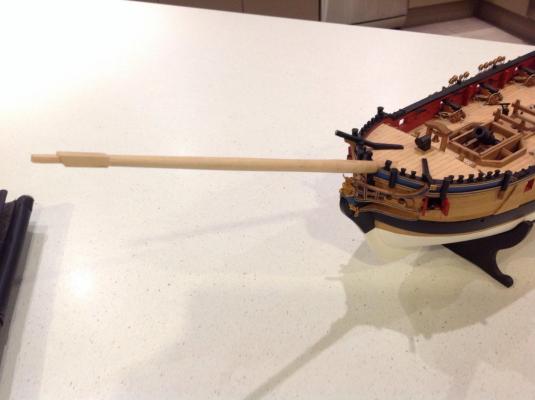
Steadily working my way through the yards at present and the lathe is going well on a beautiful spring day with a modelling set up on the deck outside. Here's a couple of minutes' work that shows what the future could hold with such a weapon in my arsenal.... Some of the kit dowel has warped over the 2 years since I opened the box. Not caldercraft's fault but mine for leaving it in the uninsulated garage. The constant changes in humidity and temperature have done this and taught me a lesson. Some new dowel on the way for the masts and the yards are mainly short enough not to be much affected. This is what the mizzen should be turned from... I don't think so. On another note I've thrown my lot in with ship modelling for good now with all my old plastic modelling mags, kits and books now for sale. I'm divesting my plastic portfolio in favour of ships, woodworking tools and obscure timbers. Speaking of which my father and I are heading down the line in a few weeks to pick up a family stash of timber that belonged to my grandfather. He was a bushman (forester/lumberjack to our northern hemisphere friends) that worked in the central plateau area of NZ pre-and just after the war and operated a fairly large sawmill. In his retirement years he was an avid woodworker and turner and I have memories of him up to his ankles in sawdust and shavings as he turned a great pile of timber collected over the years into all sorts of things. There's a bit of that timber that remains at the old family home and with the elderly aunt that inherited that place now also passed on it's just sitting about waiting to be used. I'm unsure how much is left and in what condition but there should be rimu, kauri, matai, maire, species of beech and possibly kahikatea there. These native timbers haven't been able to be commercially felled for decades so it's a bit of a potential treasure trove that is in danger of becoming firewood. Many have grains and a softness better suited to larger purposes than shipbuilding but the rimu and kauri especially I hope might find a home in some future projects as deck fittings or even slipway stocks to keep the family woodworking tradition alive.

- 366 replies
-
- 8
-
-
- granado
- caldercraft
- (and 1 more)
-
Nice work on the treenails, Joe
-
Hi, I've been a long time fan of this build and hope to head down the scratch build path one day, probably with homemade tools like a thickness sander and table saw. A question on the table saw - is the dremel mounted directly to the underside of the table or is it a flexibility-shaft attachment mounted there? I'm wondering how to get the clearance with a wide bodied dremel under there.
-
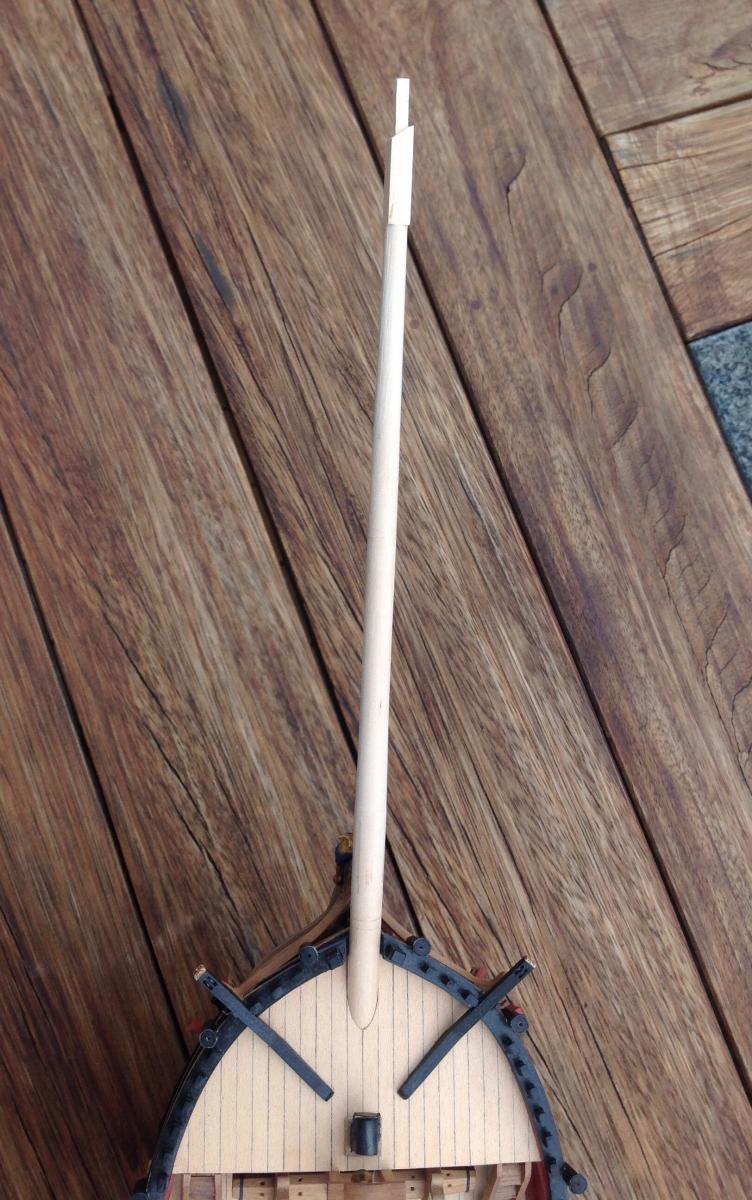
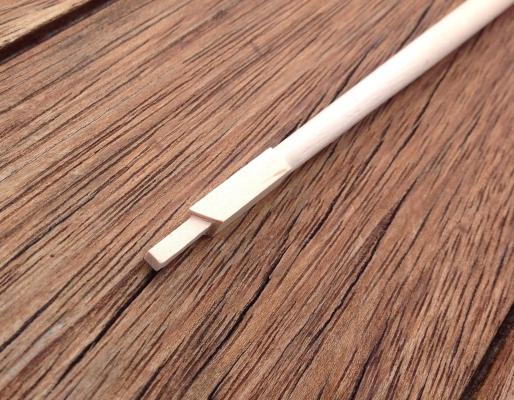
Quite pleased withe the square section on the end of the bowsprit. But- spot the problem. I've cut the angle on the wrong side. It's pointing to the side rather than vertically. Doh. The connecting end was refitted with a piece of dowel and cut again to fit the sprit holder. This is all under the foc'sle so it won't be seen. More care needed. I'm not too flash with filing octagonal sections, of which there's a lot from here on in. More practice needed.

- 366 replies
-
- 9
-
-
- granado
- caldercraft
- (and 1 more)
-
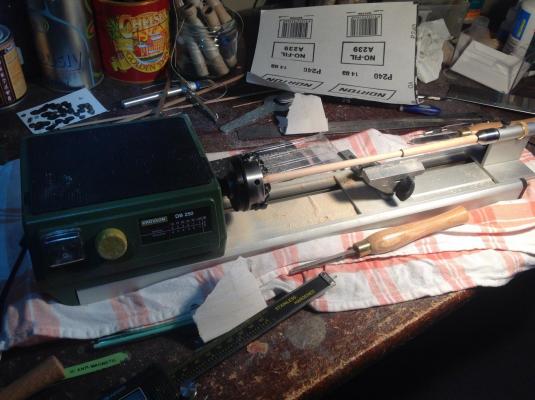
Thanks Pawel. Those are proxxon chisels I bought with the lathe. I'm no expert on chisels but they seem to do the job well on detail pieces. It's a mix of them and sandpaper for mast tapering.
-
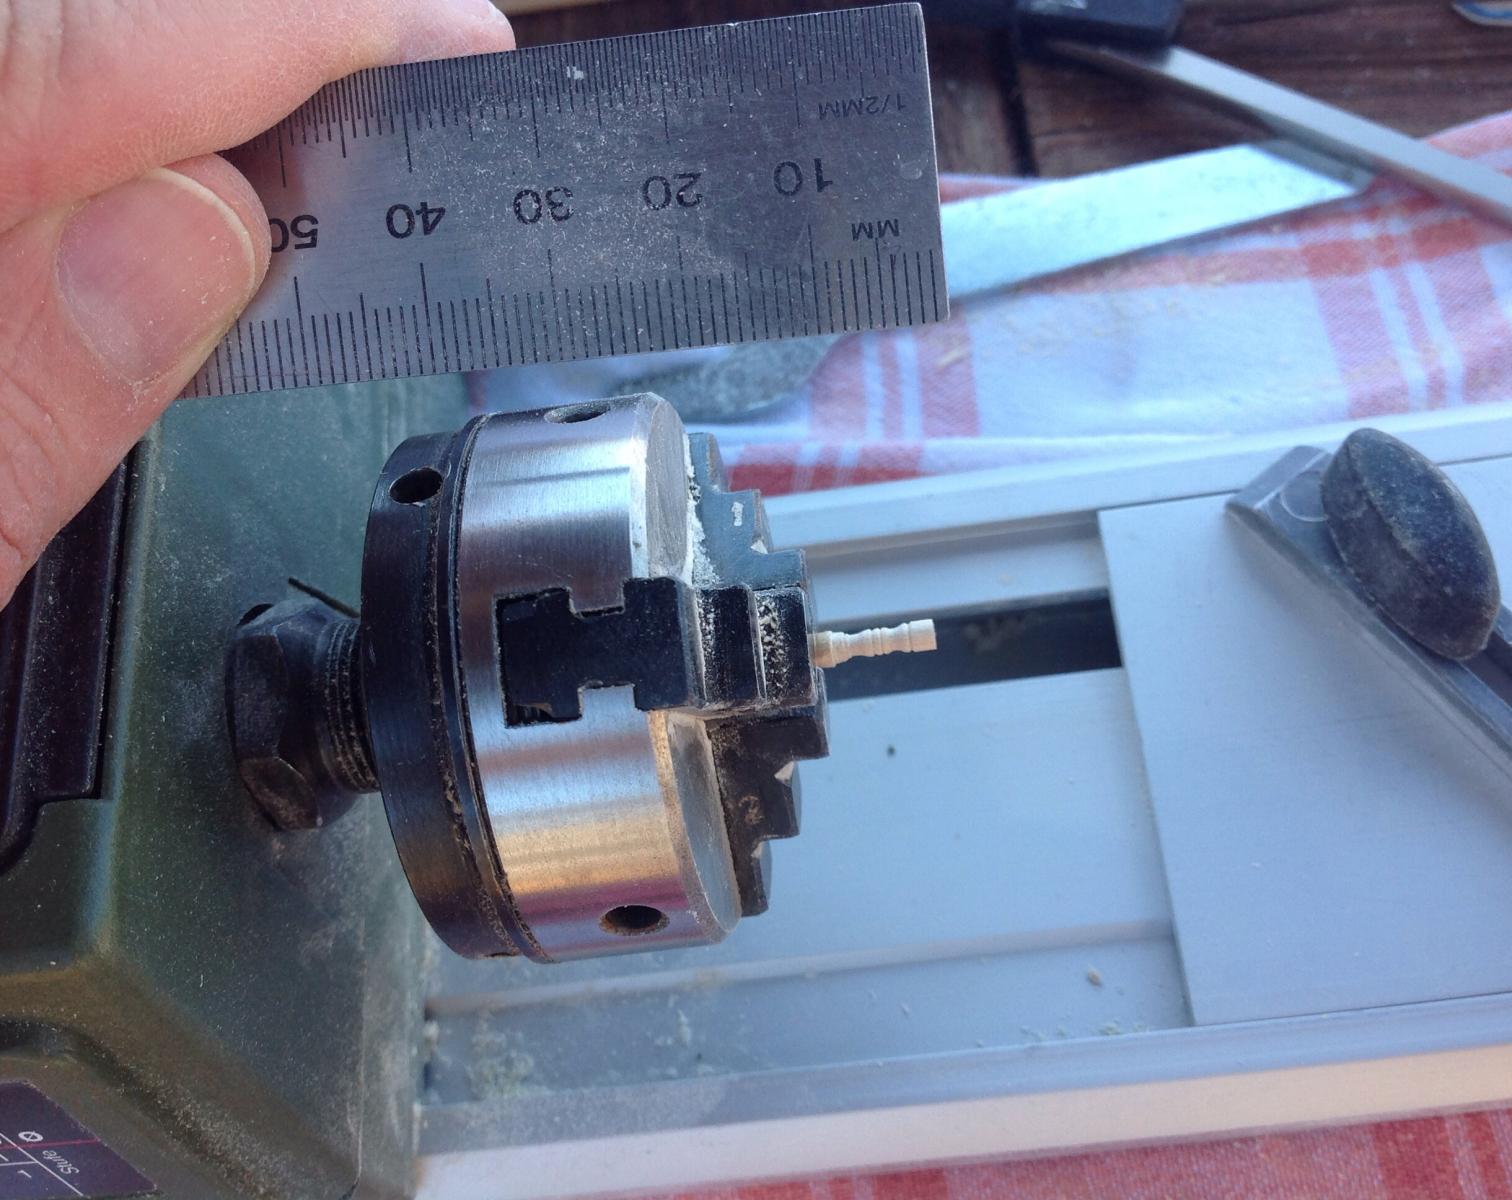
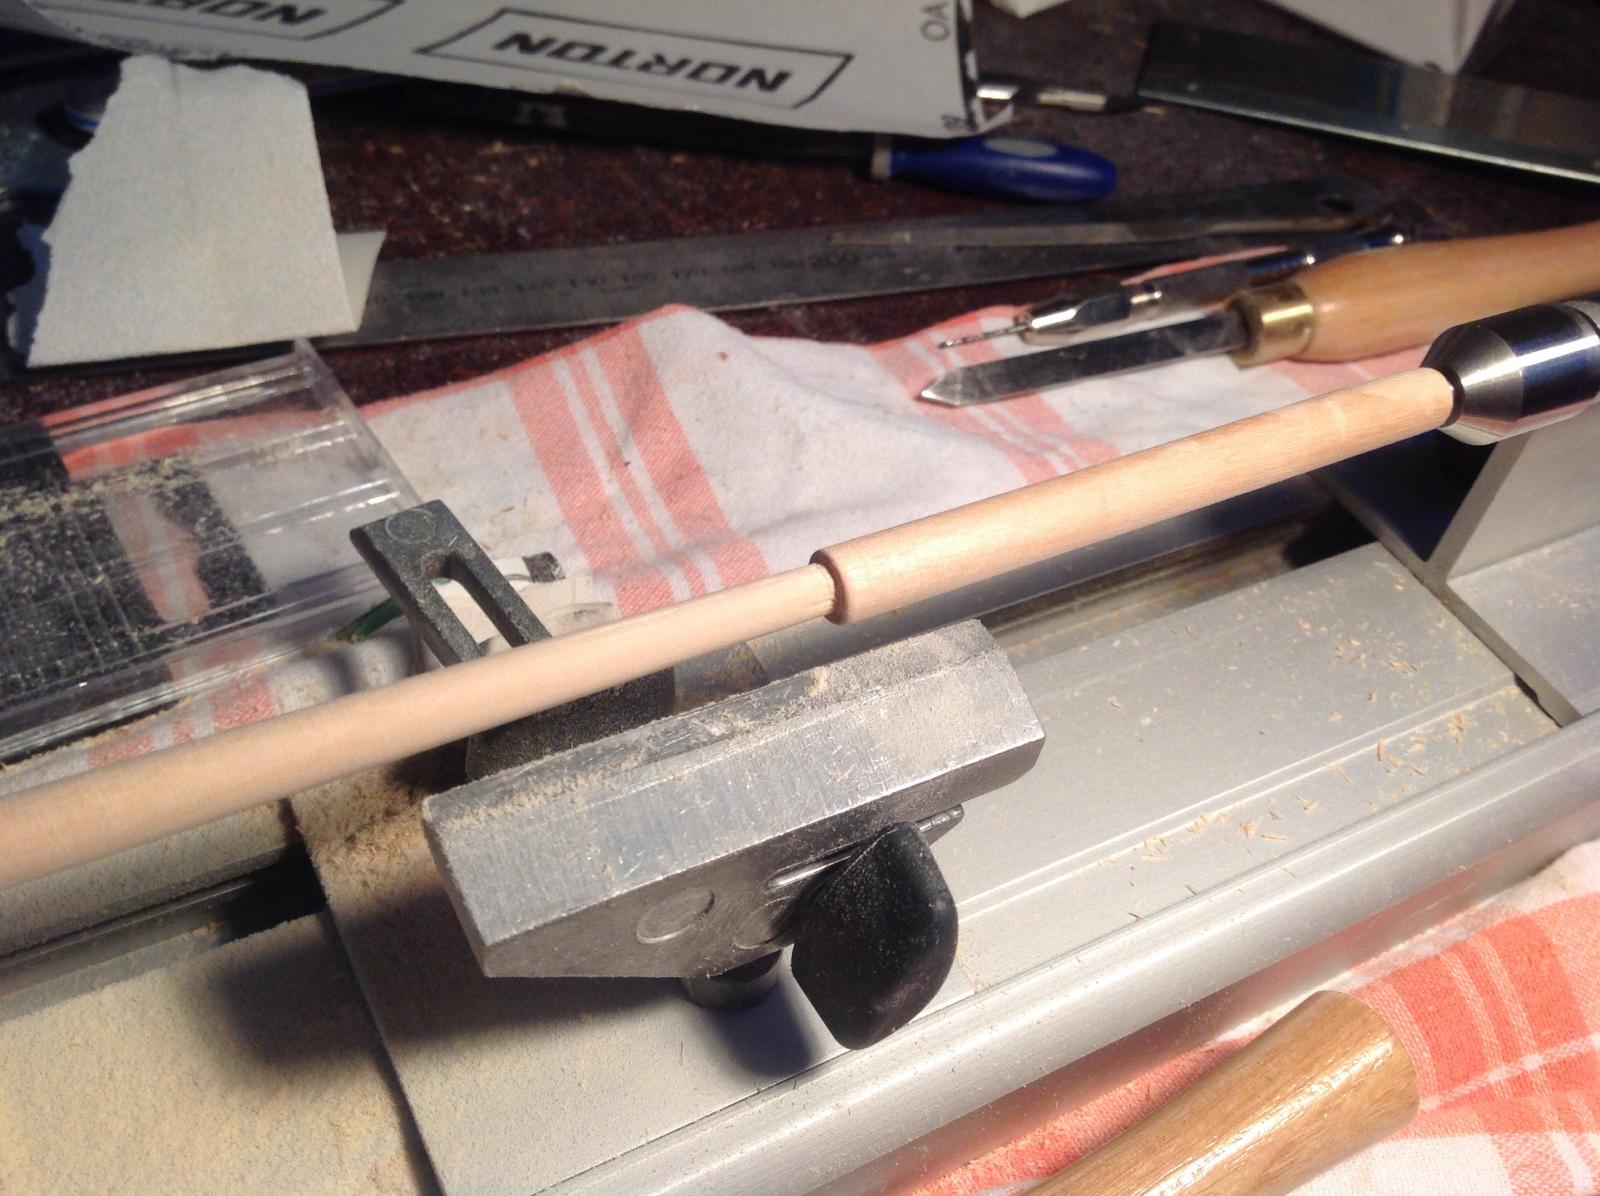
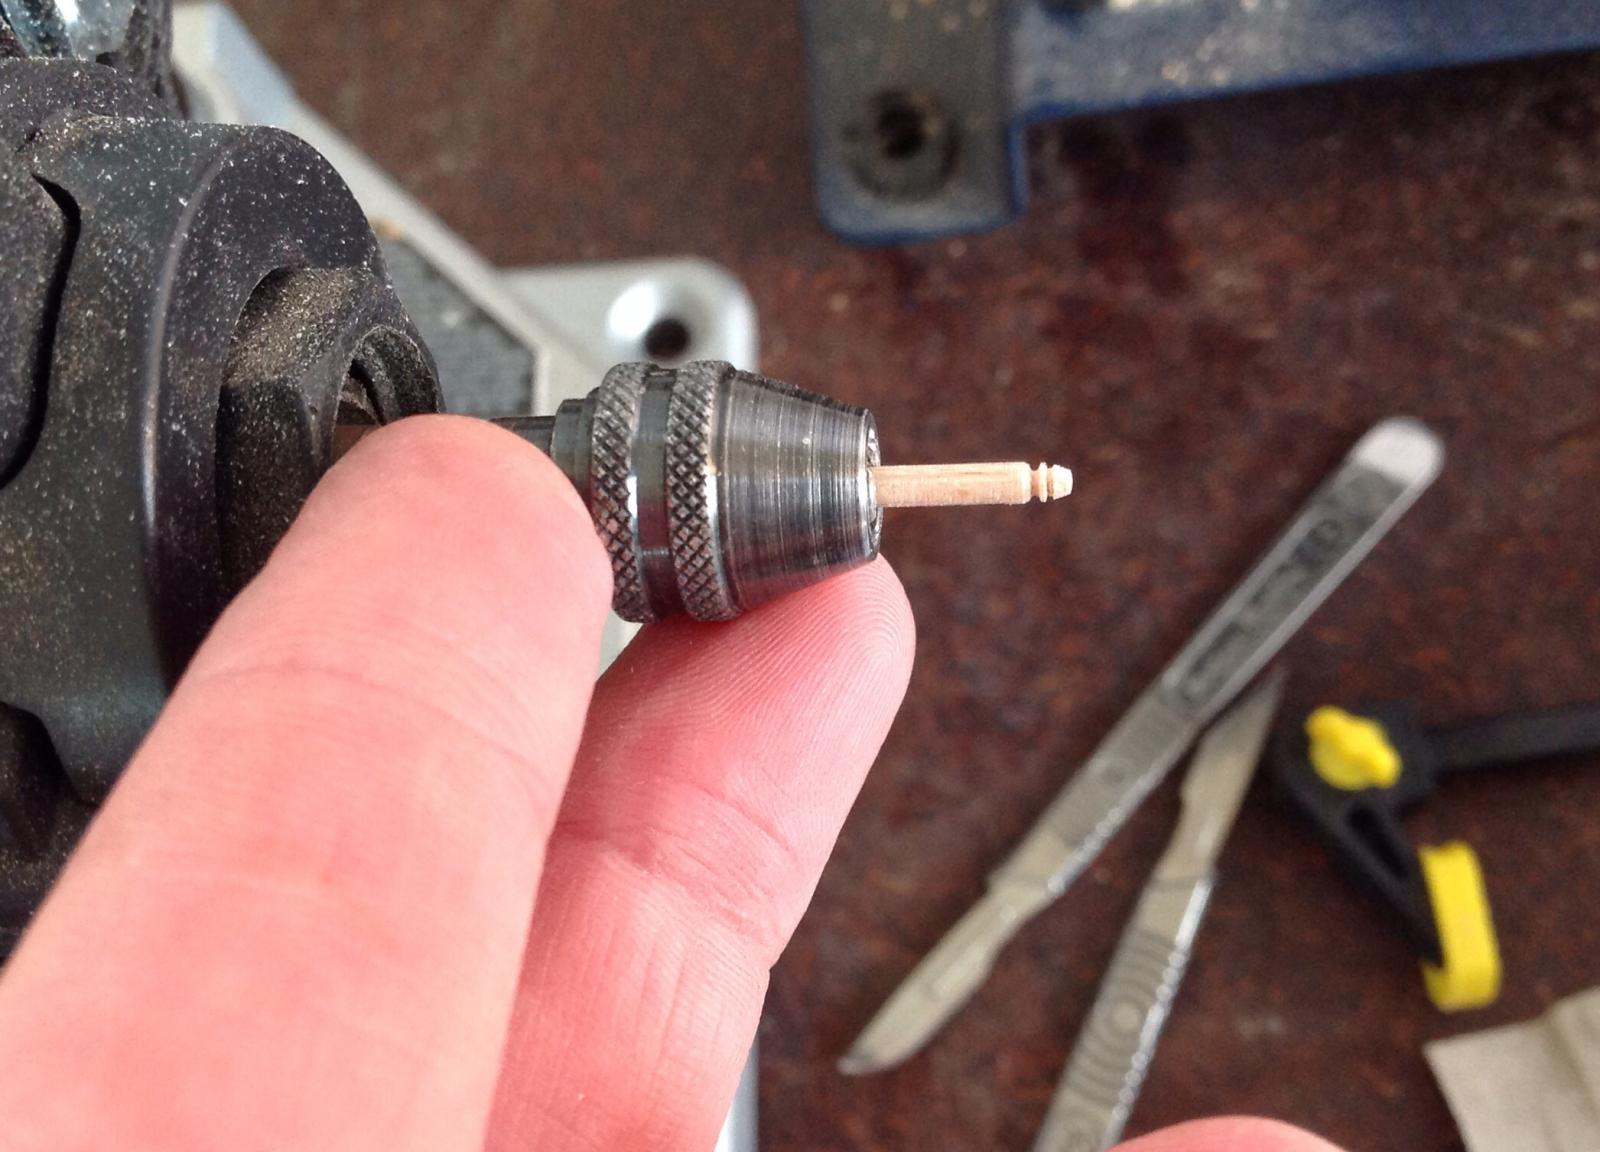
A new toy has arrived in the workshop. A proxxon db250 lathe. I got it from TBS Aachen which is very good for price even with shipping from Germany to NZ. It's even cheap enough that it didn't attract any tax or duty coming in. It arrived on a weekday morning 15minutes before I had to shuffle the kids out of the house to school and myself to work but still enough time for a quick play. My retired father has been making use of it all week but now it's my turn. Now there's time for a better look... I'm not that good at getting dowel centred but have turned some nice ensign staves and here is the bowsprit on the chuck. Practice makes close enough to perfect. It's a lot easier than holding it in an electric drill.

- 366 replies
-
- 2
-
-
- granado
- caldercraft
- (and 1 more)
-
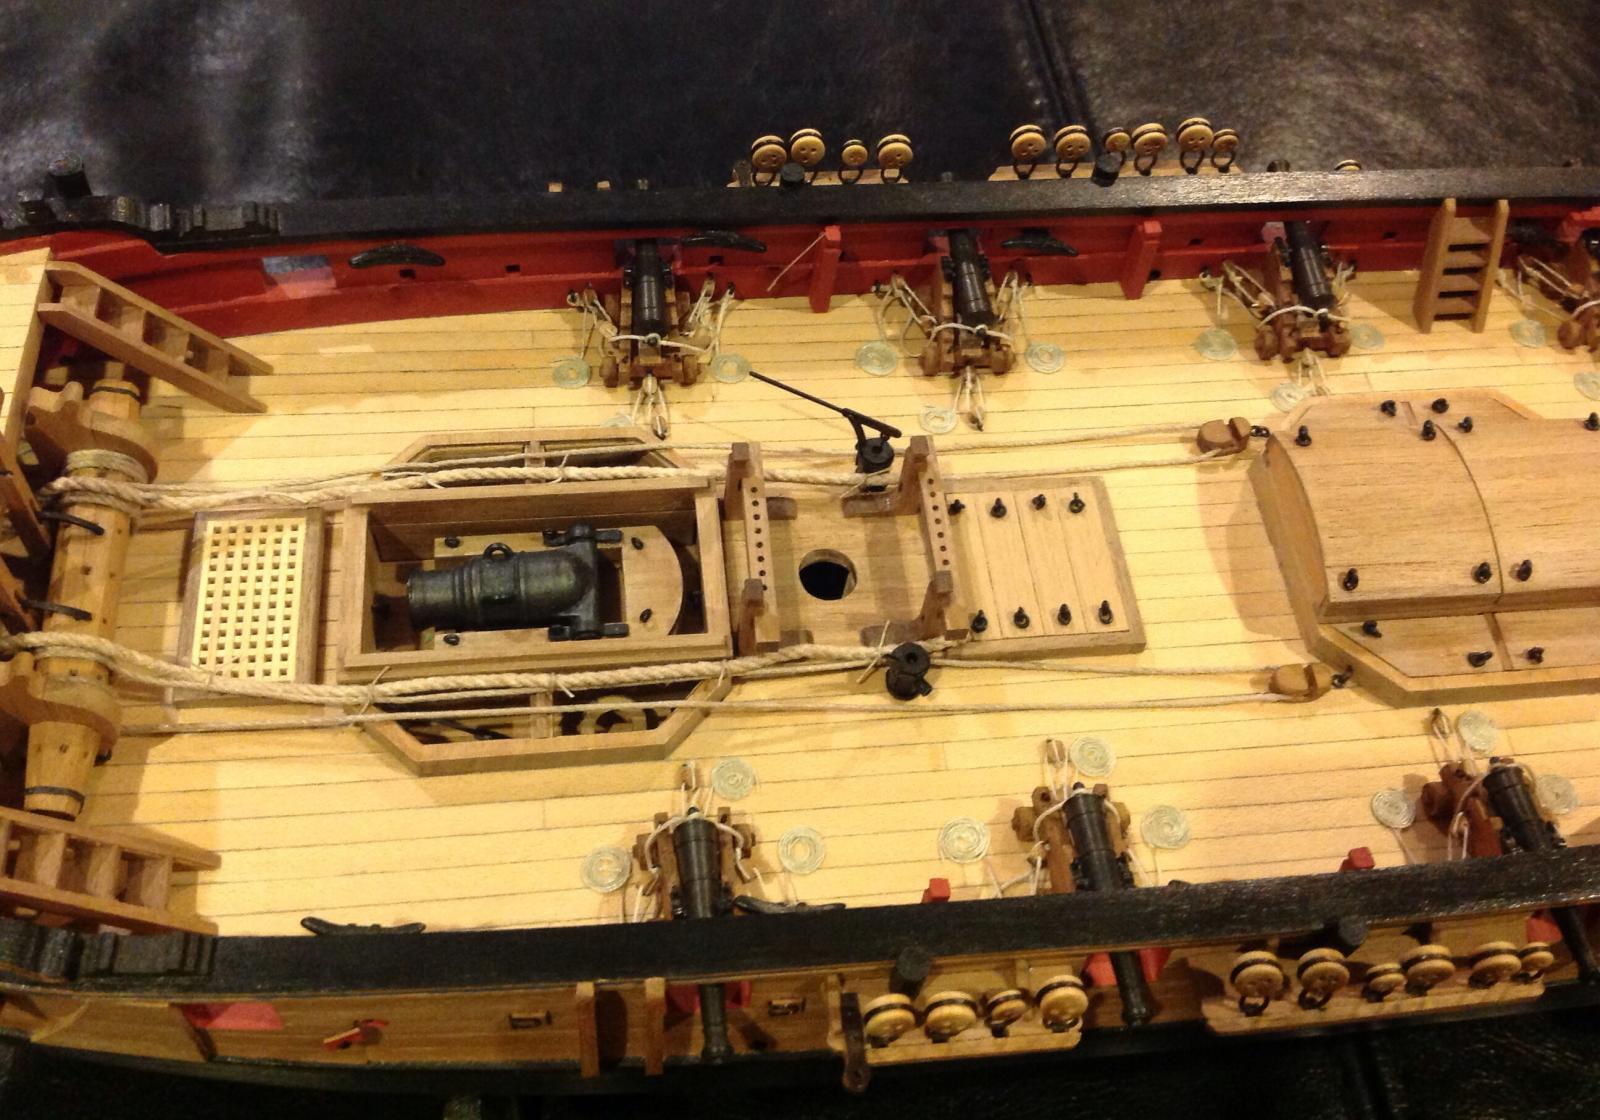
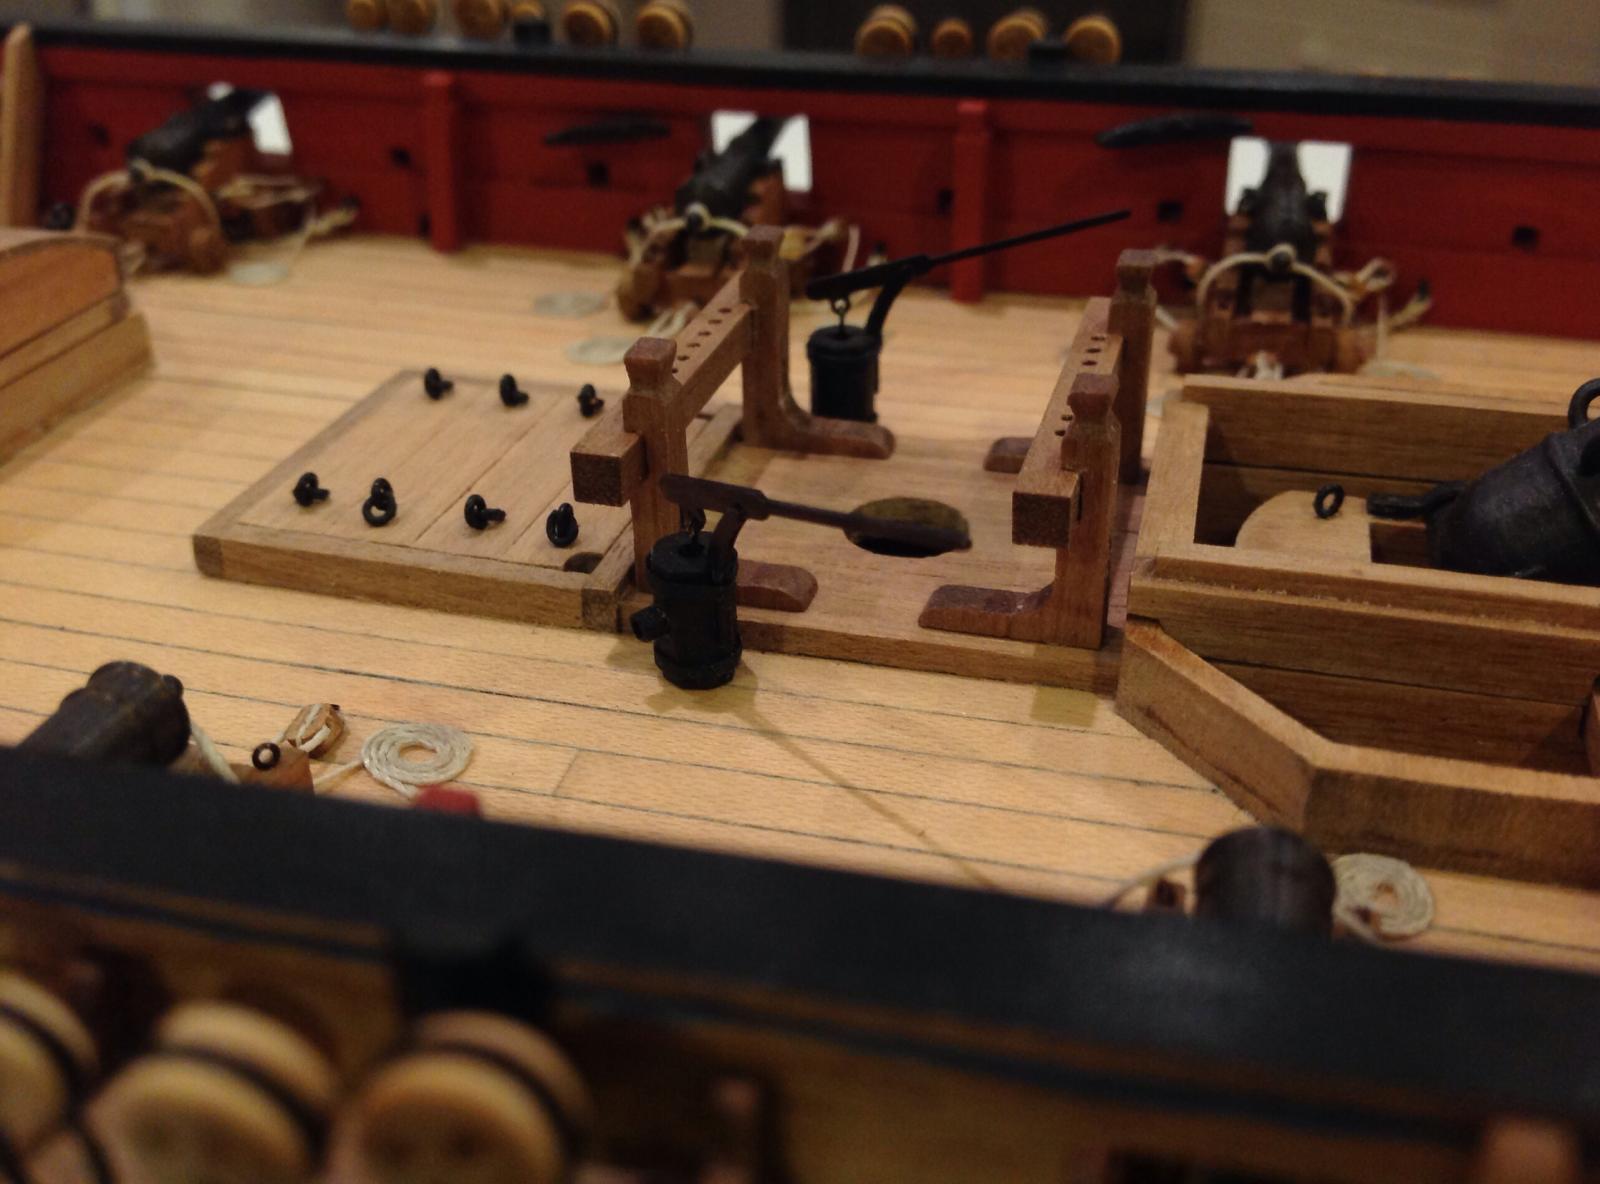
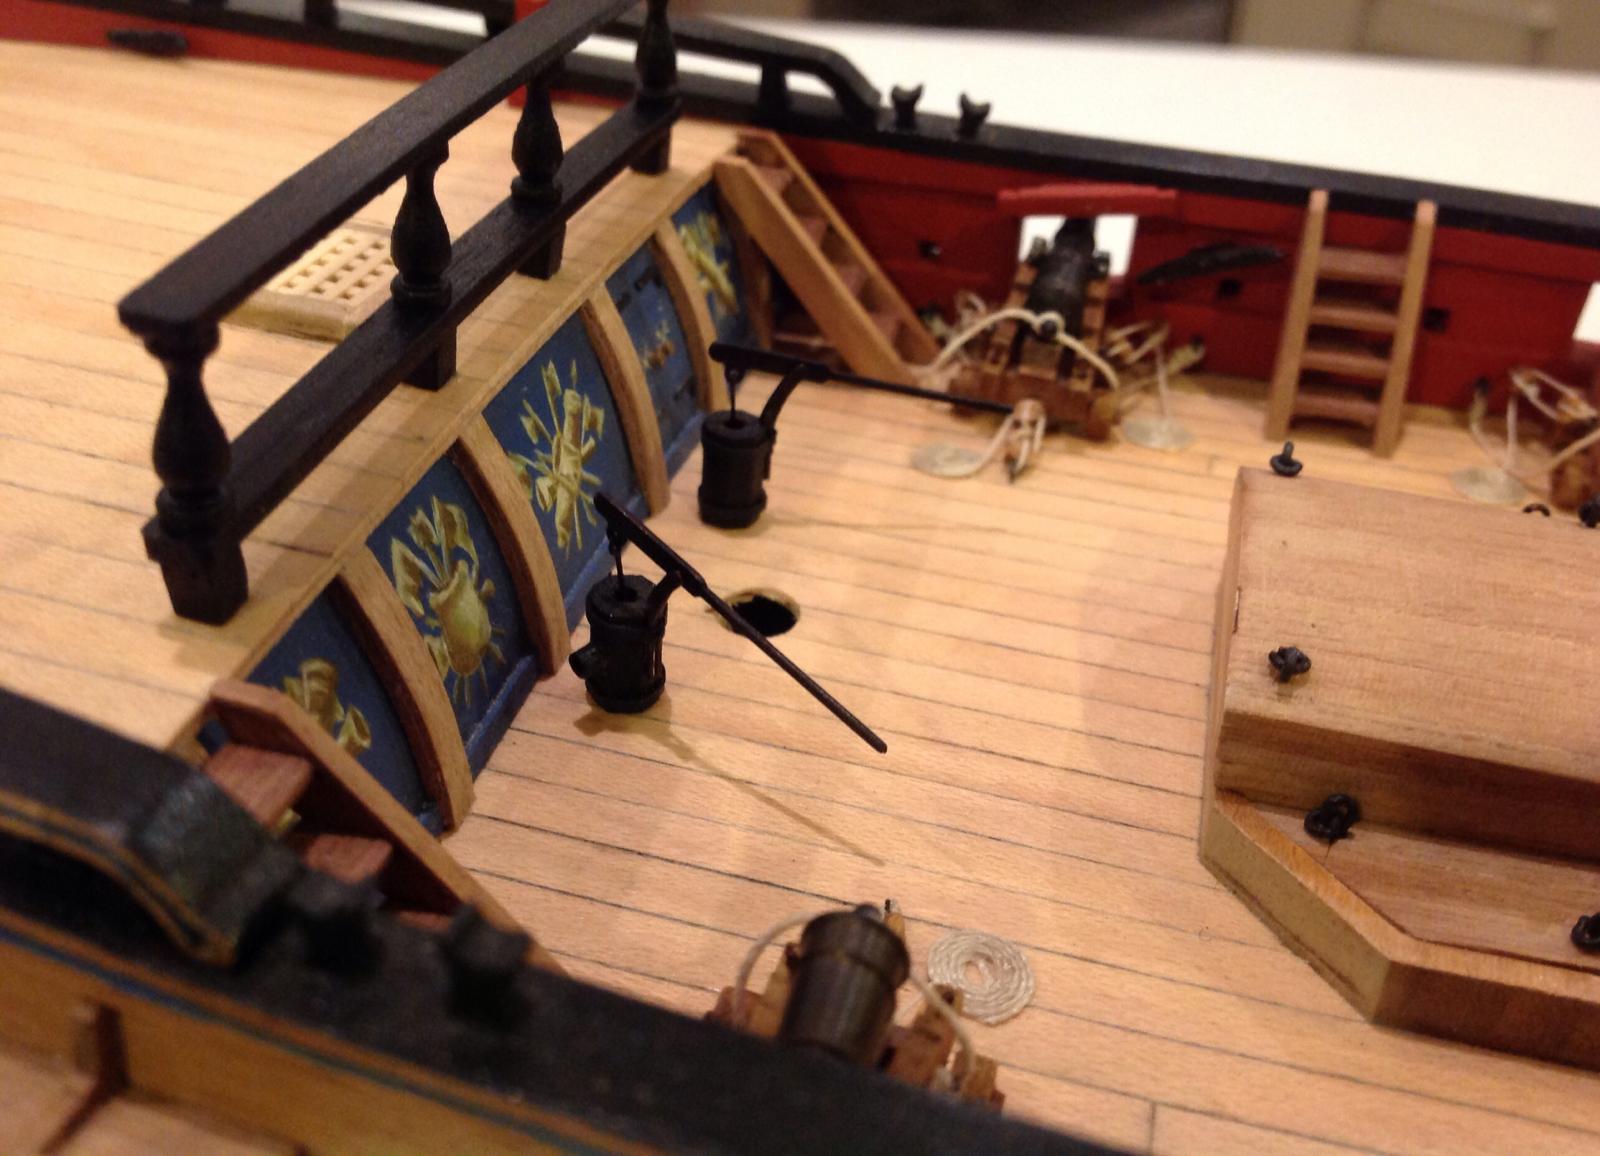
The pumps were built up largely as per the instructions with the addition of some black paper iron banding. The handles were all left blackened rather than painted a woody colour. It would have still looked like a metal piece.

- 366 replies
-
- 13
-
-
- granado
- caldercraft
- (and 1 more)
-
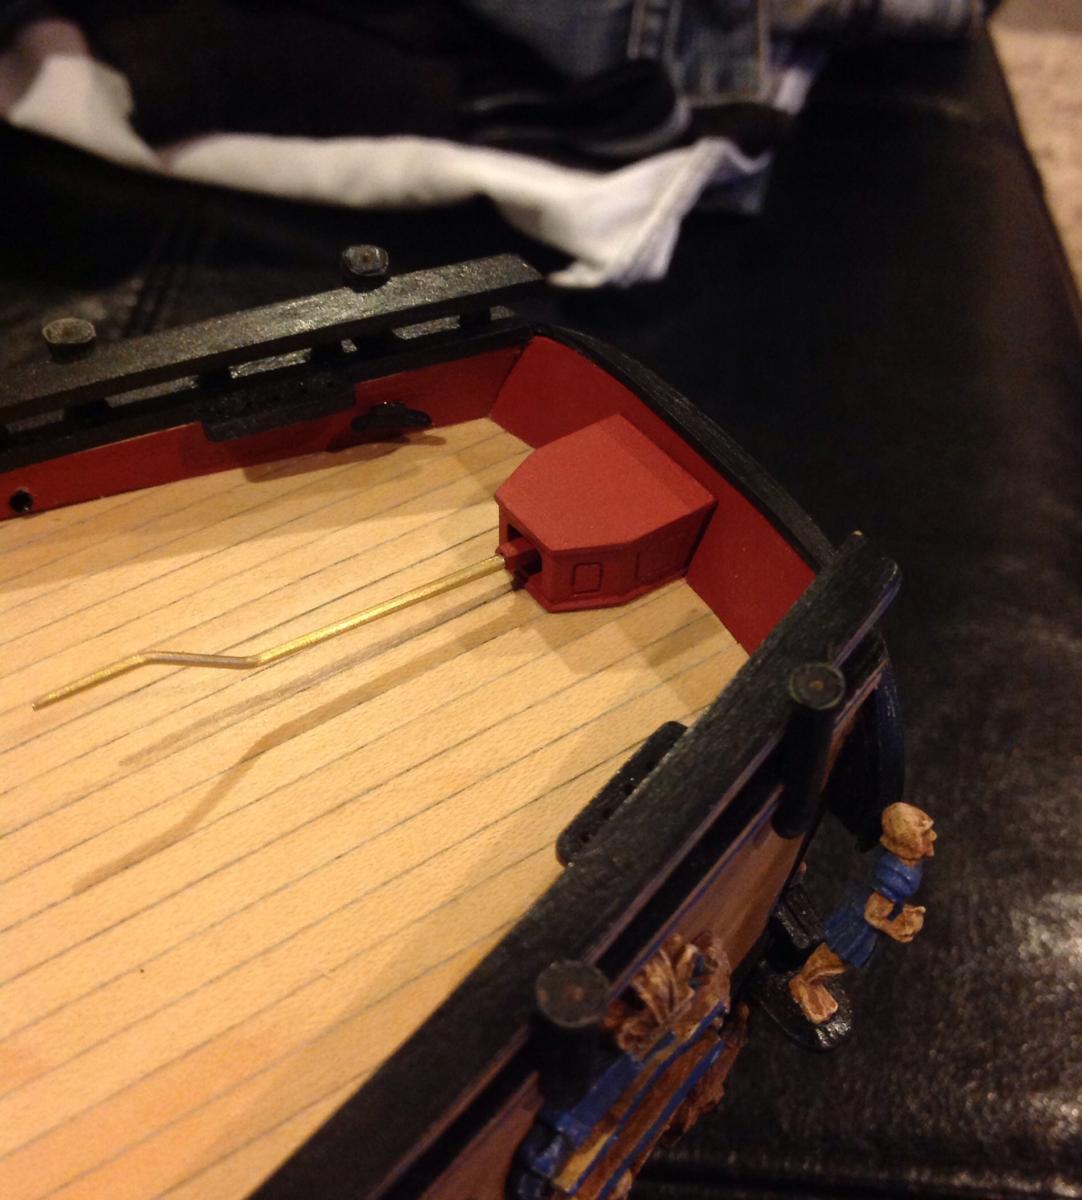
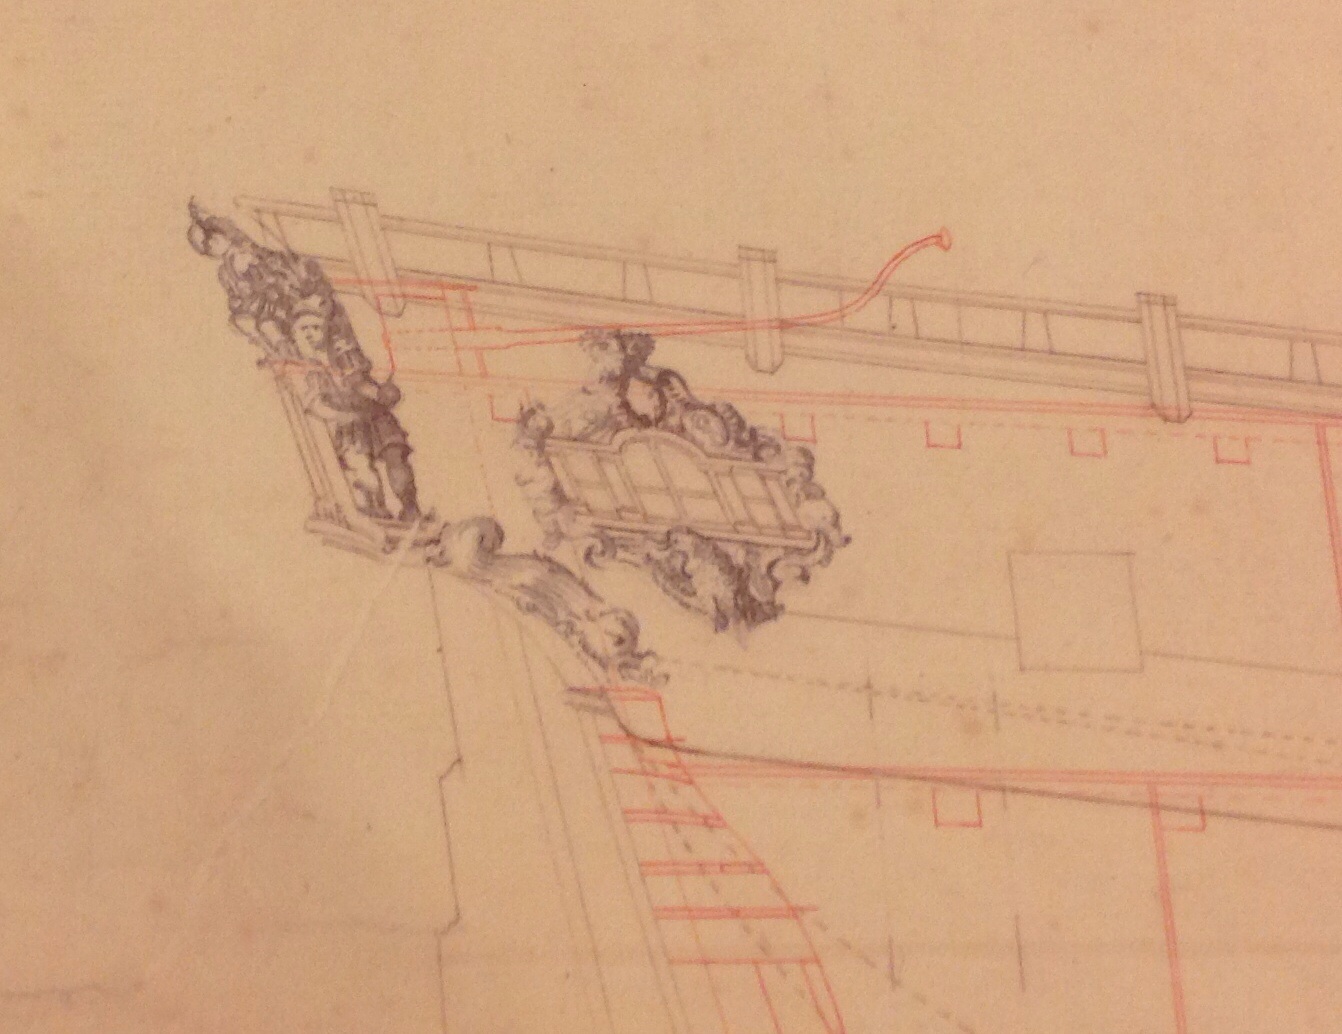
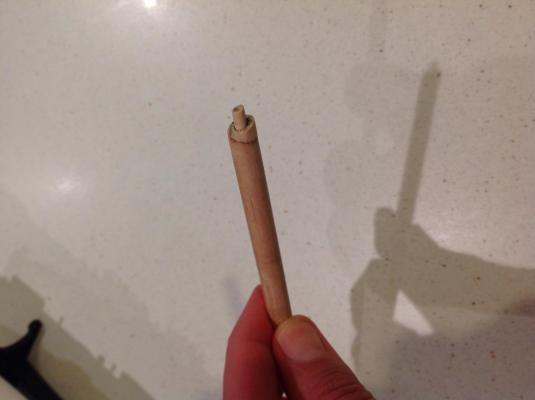
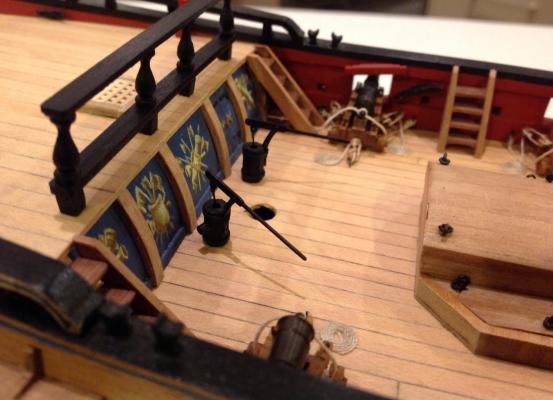
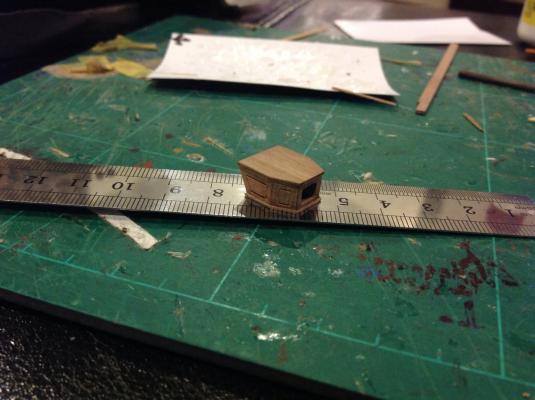
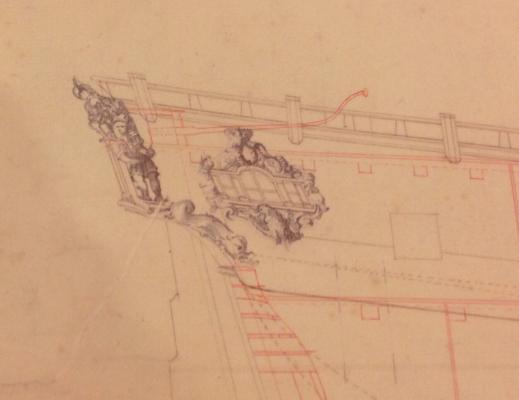
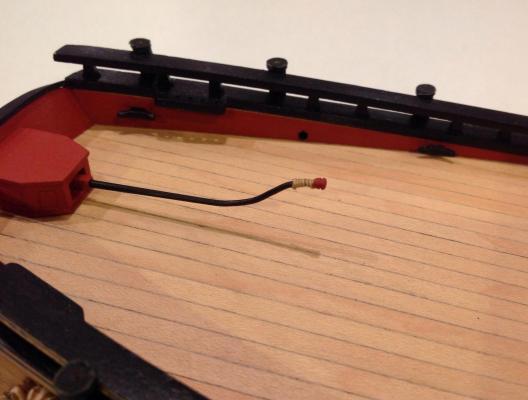
The tiller is the most obvious missing piece of deck fitting. The housing was made up from the kit parts with a decorative square cut in each face. The tiller bar was tapered in the dremel and bent according to the kit instructions. It's a bit of an angular bend and a check with the NMM museum shows a more fluid bend which was copied. An end 'knob' was turned on the dremel from a bit of spare 2mm yard dowel. And the finished result. Some thread was added as a concession to the helmsman who would presumably want some added grip.


- 366 replies
-
- 14
-
-
- granado
- caldercraft
- (and 1 more)
-
Great sails complimenting a top model Peter. Well done.
- 431 replies
-
- 1
-
-
- pegasus
- victory models
- (and 1 more)
-
True, don't attempt a fix if it'll cause more harm. I only know because I've just finished that very piece but Alistair is right that Joe average probably notice. Drilling out a 2mm square timber was ridiculous so good work on nailing that.
-
Julian, nice work on the painting. I think you might have that tiller upside down. I've just done this bit on my Granado. The bend should point up away from the deck to sit about midriff height for the helmsman.
-
Some very crisp wales there Joe. You are moving at lightning speed on this build and I'll keep watching to get some tips when you pass me at some very near future point.