HOLIDAY DONATION DRIVE - SUPPORT MSW - DO YOUR PART TO KEEP THIS GREAT FORUM GOING! (Only 36 donations so far out of 49,000 members - C'mon guys!)
×

Timmo
-
Posts
609 -
Joined
-
Last visited
Content Type
Profiles
Forums
Gallery
Events
Everything posted by Timmo
-
 Welcome to the wonderful world of Granado, Joe. She's a great kit and will reward a builder of your patience and skill. I look forward to seeing her grow. Irony is I was thinking it's about time for something with copper after my Granado.
 -
Peter, I can't believe I've never come across your fine build before. You make sails look easy and a thing of beauty. Top work.
-
Nice, especially with the amended planking. If that's a third of the oars then cruel and unusual punishment awaits people building this beast when it hits the market!
-
Haven't really looked. If it's for stocks/ slipway material for the SOS you could try a demolition yard. Demolition Traders down here has a huge pile of old kauri, rimu etc floor and weatherboards that could be nice very nice sawn into scale beams and blocks under the mighty sovereign's keel. I'm hoping a stash of native timber boards at a recently departed elderly aunt's place comes my way....
- 555 replies
-
- 1
-

-
- sovereign of the seas
- mantua
- (and 1 more)
-
Good luck with those supports Denis. Sounds like just the project to break in that new toy. I'm very jealous.
- 555 replies
-
- 1
-
-
- sovereign of the seas
- mantua
- (and 1 more)
-
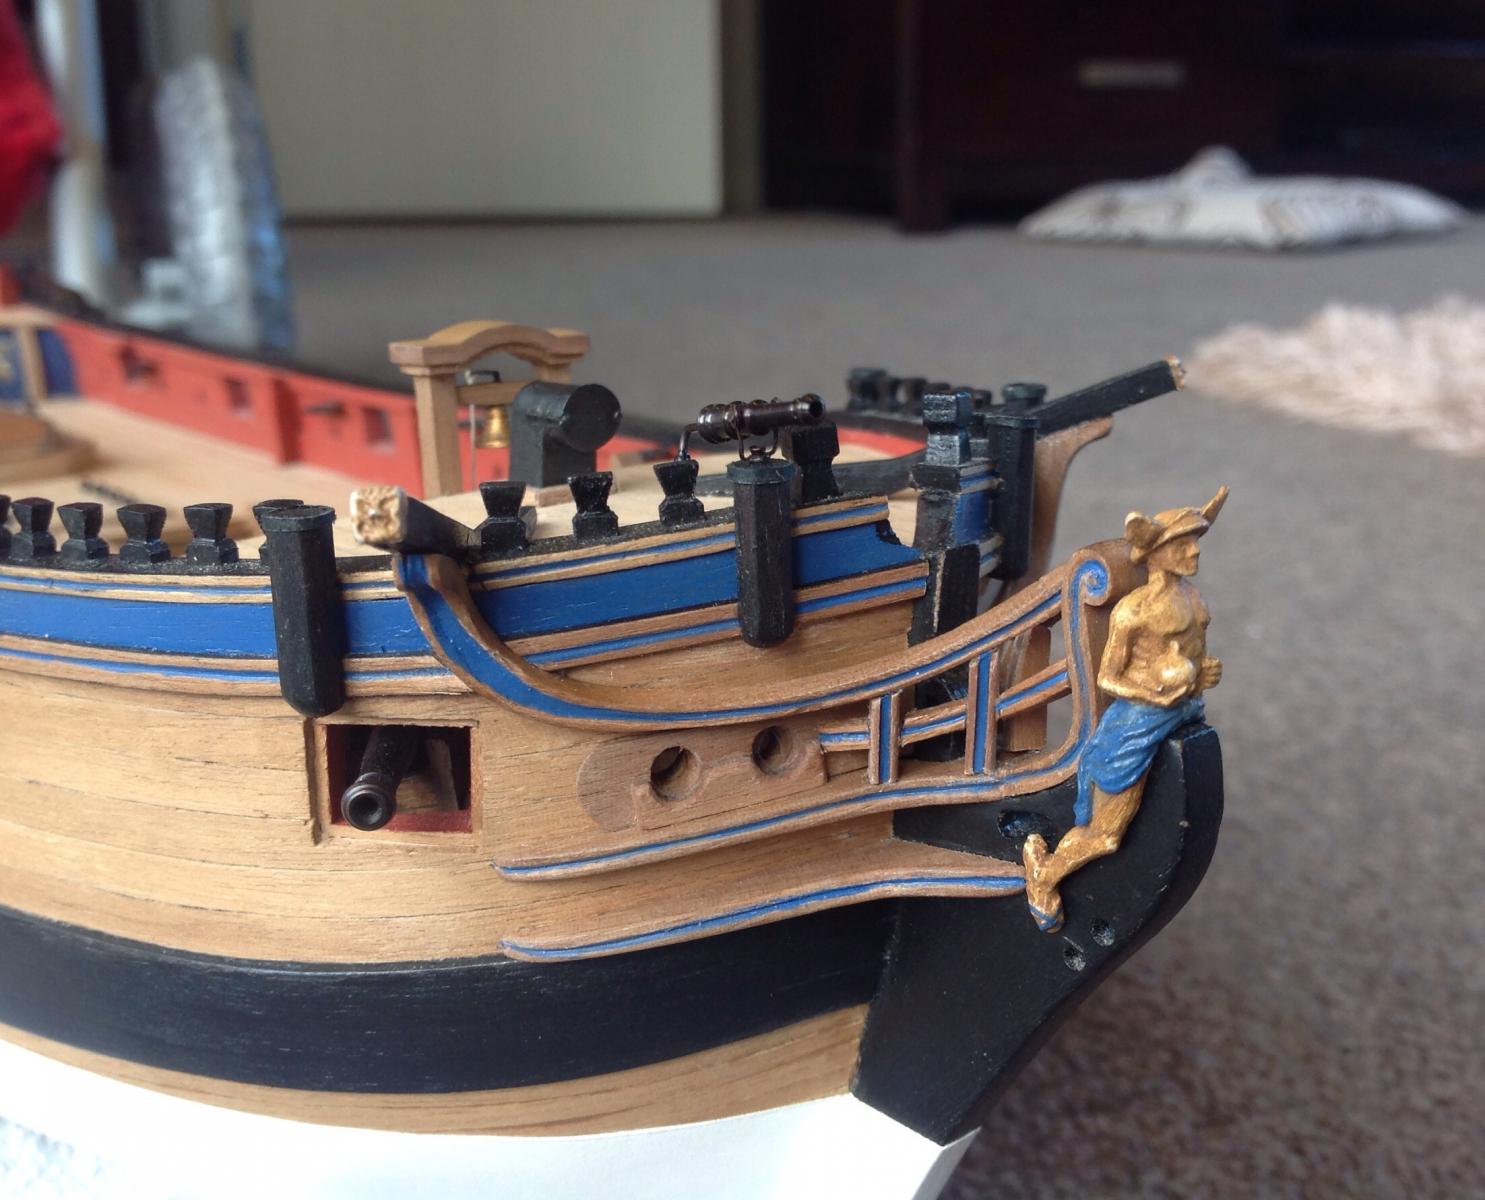
Hints of the glorious bow to come. Nice solution there.
-
That's some very tidy rigging Dimitris. Are those kit supplied blocks. They look good.
- 57 replies
-
- 1
-
-
- bluenose ii
- artesania latina
- (and 2 more)
-
I'll be looking for that build log Joe. Judging by your Prince your Granado will be a beauty. I hope my rigging comes out as clean as yours.
-
Thanks Peter. You are right about the brackets. They shouldn't be taking any load all as the channels are very securely pinned. They are not glued yet but are solidly in place even before an application of CA thanks to the brass pins. It's more about aesthetics for the elbows as it's always going to look like PE to me unless timber is substituted. Also the sweep port will stay where it is. With all channels on it's hard to see which one is the problem unless you look harder. As for the beer, all donations gratefully received if you think I'm suffering for choice. Having it flow so freely from the bottle here in the Southern Hemisphere depletes the stocks!
-
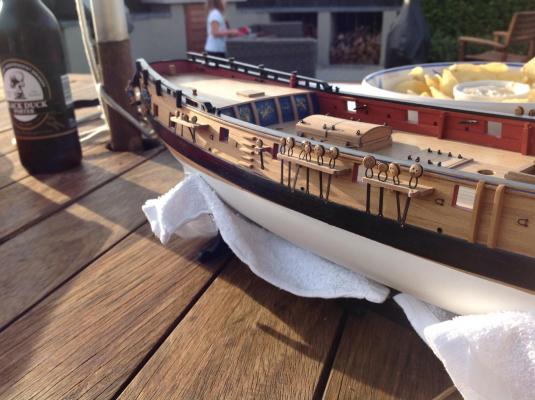
Channels unvarnished but pinned on. There are elbow brackets that sit on the tops of the main channels that are provided in the kit as photo etch but it simply looks too thin so they will be fabricated out of kit walnut. Probably ply with the laminated surfaces painted. There's also a couple of pedestal brackets on each side to sit on the main channels. Building beer of the day is a Black Duck Porter from Hawkes Bay Independent Brewery. A London style porter with some decidedly chocolate and coffee tones and possibly a hint of smoke. Nice but a bit syrupy so one is certainly enough.
- 366 replies
-
- 12
-
-
- granado
- caldercraft
- (and 1 more)
-
Very nice indeed
-
Thanks Jason. That's why I wanted to sleep on it rather than charging ahead with a fix.
-
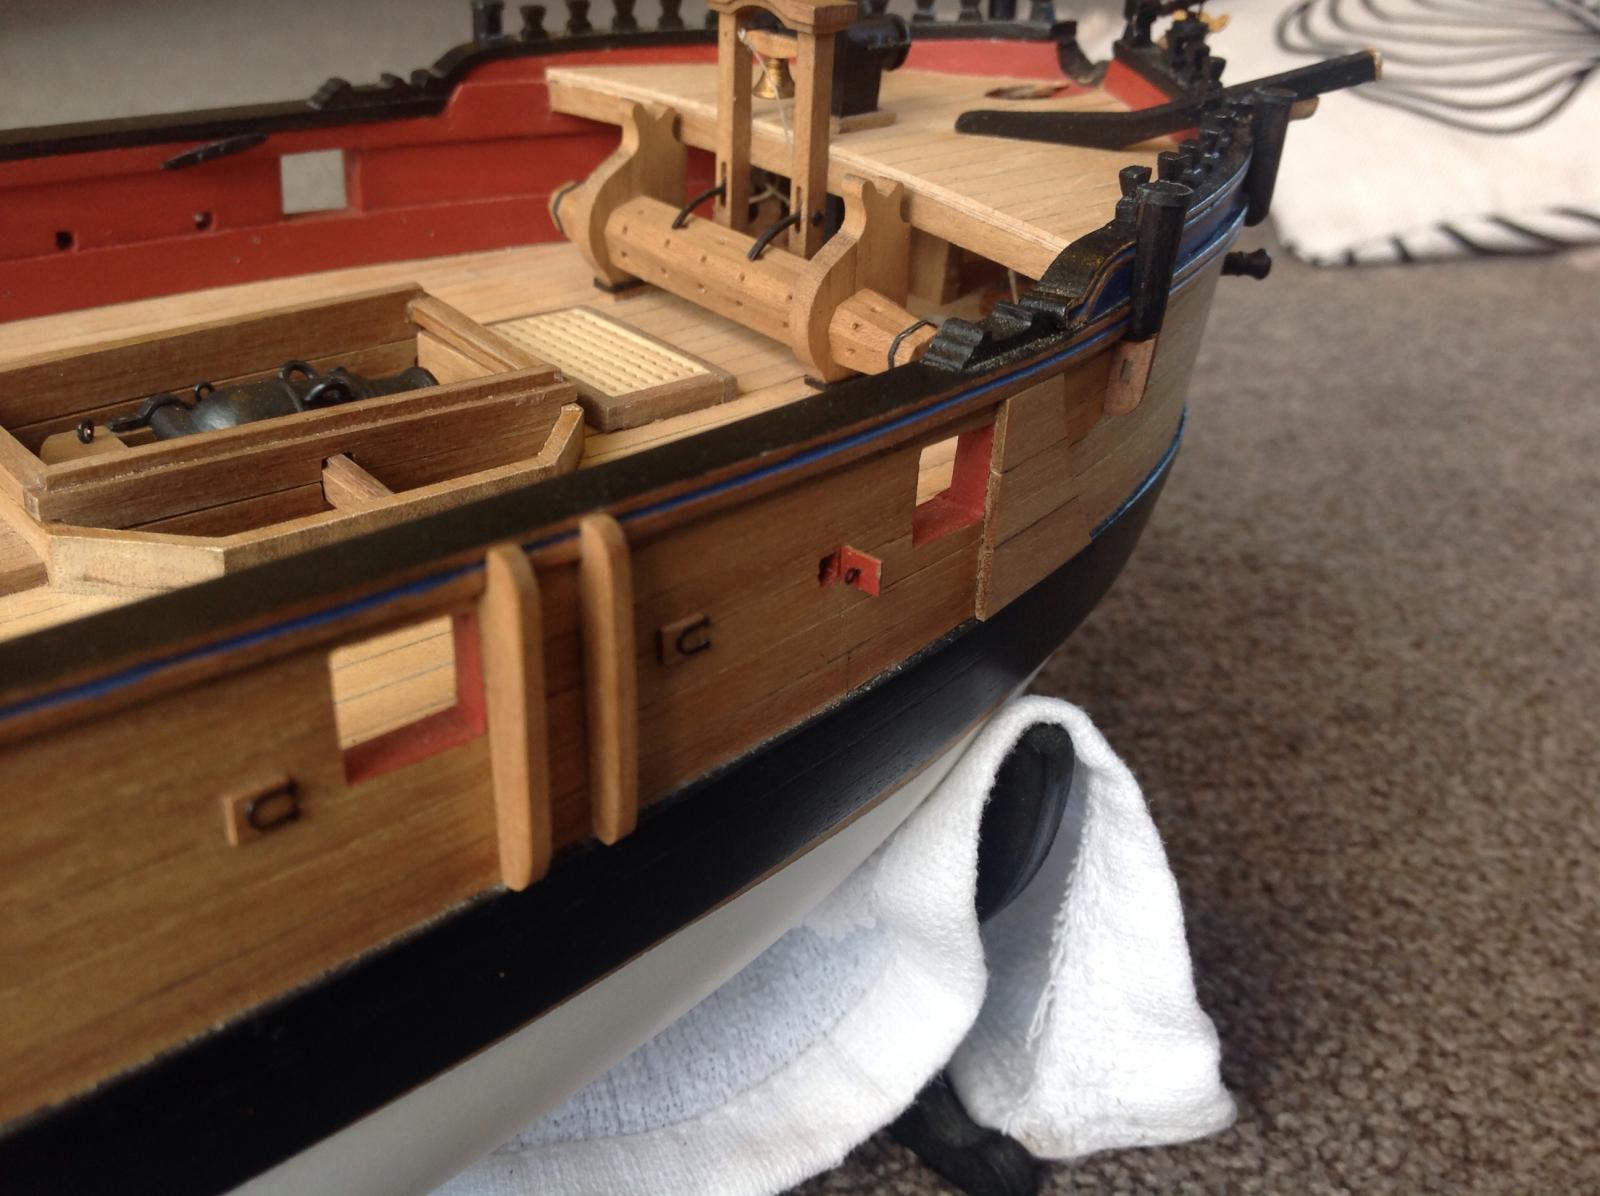
Channels and chainplates under construction. The facing on the outside was 2mm walnut, the 1.5mm recommended in the kit seems too narrow. Facing yet to be trimmed but here is a problem in the offing- one of the sweep ports on the main channel on the starboard side is too far to the rear. As a result it's partially obstructing the chain plate. It's not quite as bad as it appears on the pic as the chain will be slanted further aft but it looks a little awkward compared to the others. The port side is fine but I'm wondering how I got one positioned about 4mm off. Tomorrow I might shave the port lid and hinge off and see if I can shift it forward a couple of millimeters without exposing the port hole. Any other suggestions welcome.
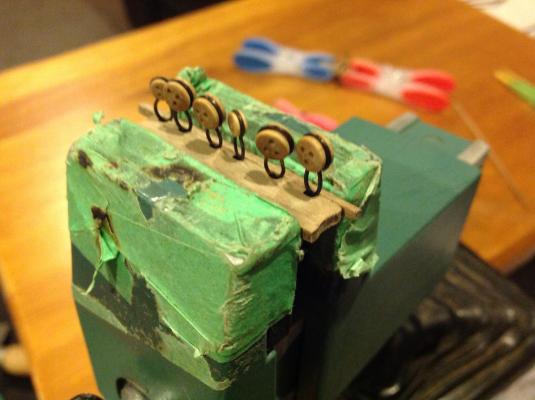
- 366 replies
-
- 6
-
-
- granado
- caldercraft
- (and 1 more)
-
Thanks BE. Too kind.
-
Great to hear Joe. I look forward to following your progress on this fine vessel. I find my mind wandering to possible next projects...
-
Those hinges are in the post Alistair, they should arrive soon.
- 366 replies
-
- 1
-
-
- granado
- caldercraft
- (and 1 more)
-
Top work on that build Dimitrius . That's a very smooth hull and fine paint finish you've got there. Looking forward to see more from you.
- 57 replies
-
- 1
-
-
- bluenose ii
- artesania latina
- (and 2 more)
-
That looks good and crisp Bob. It should come up nicely after a coat of paint. That timber seems to hold an adequate edge without tearing too much.
-
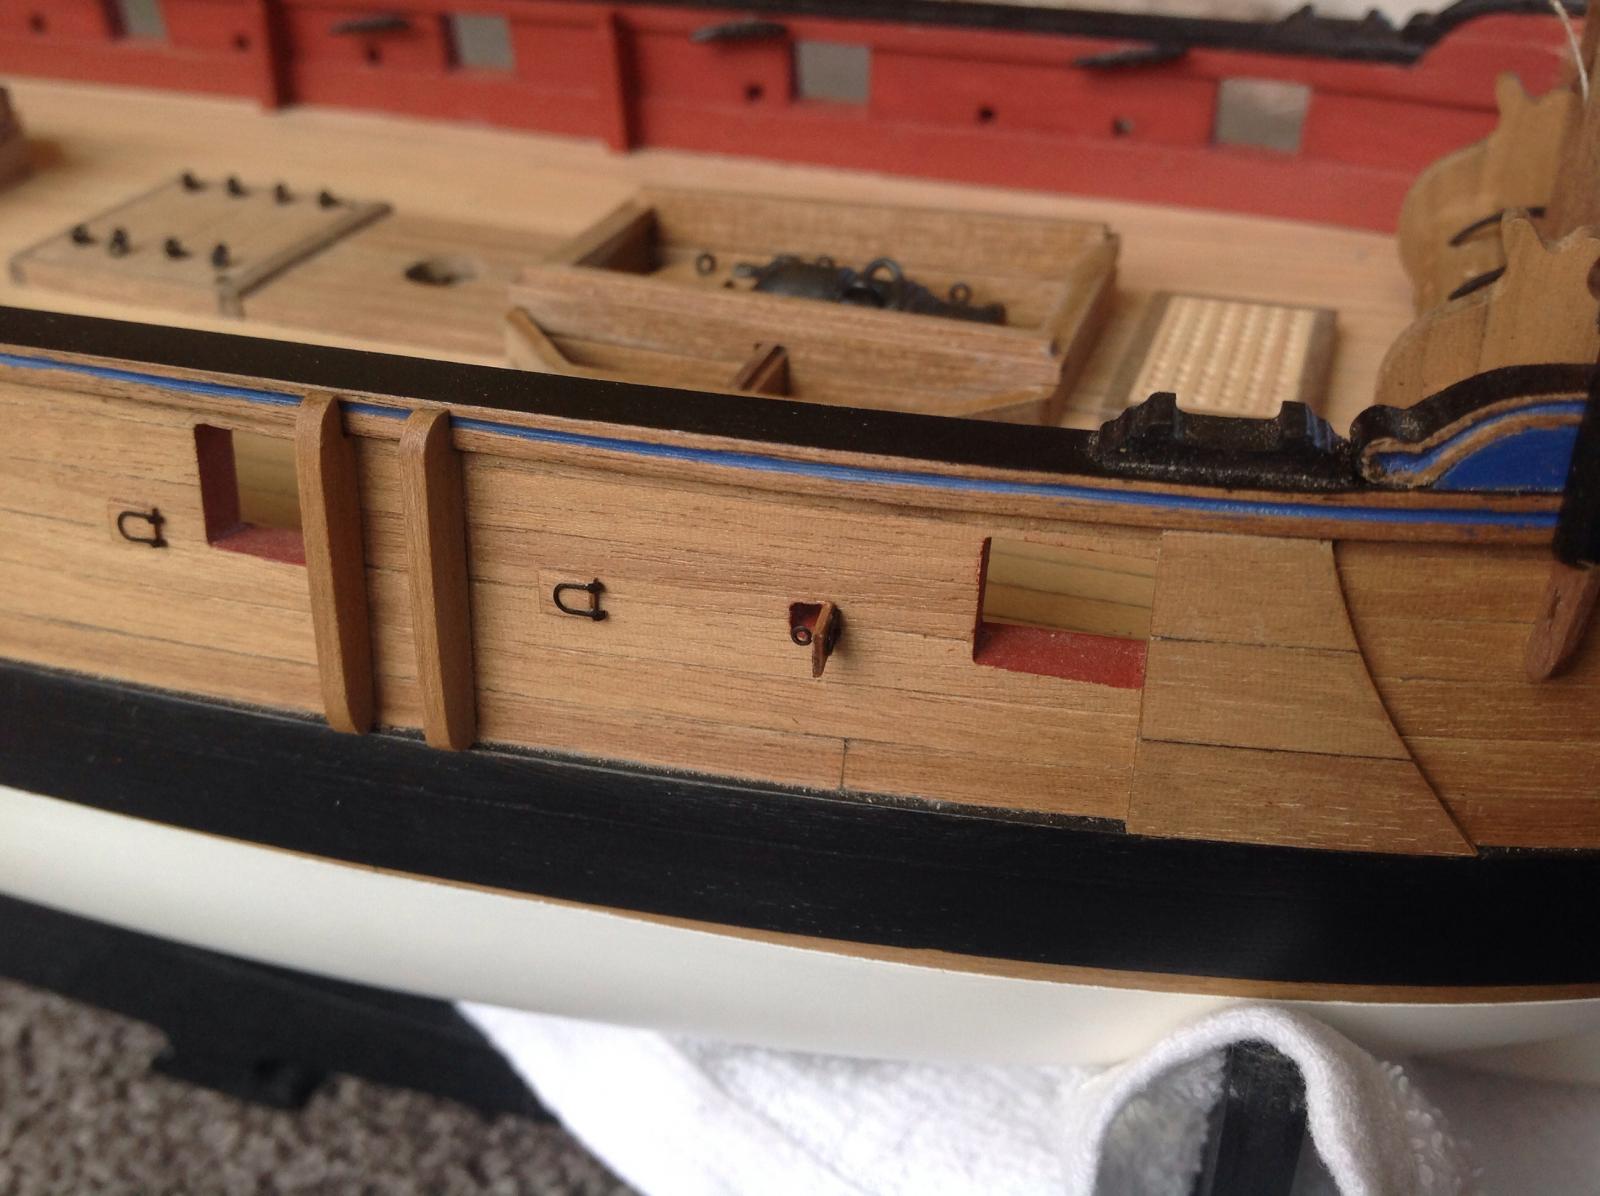
Minor amendment to the open port- I've changed the ring bolt to hang down instead of defying gravity. Channels are next.
- 366 replies
-
- 1
-
-
- granado
- caldercraft
- (and 1 more)
-
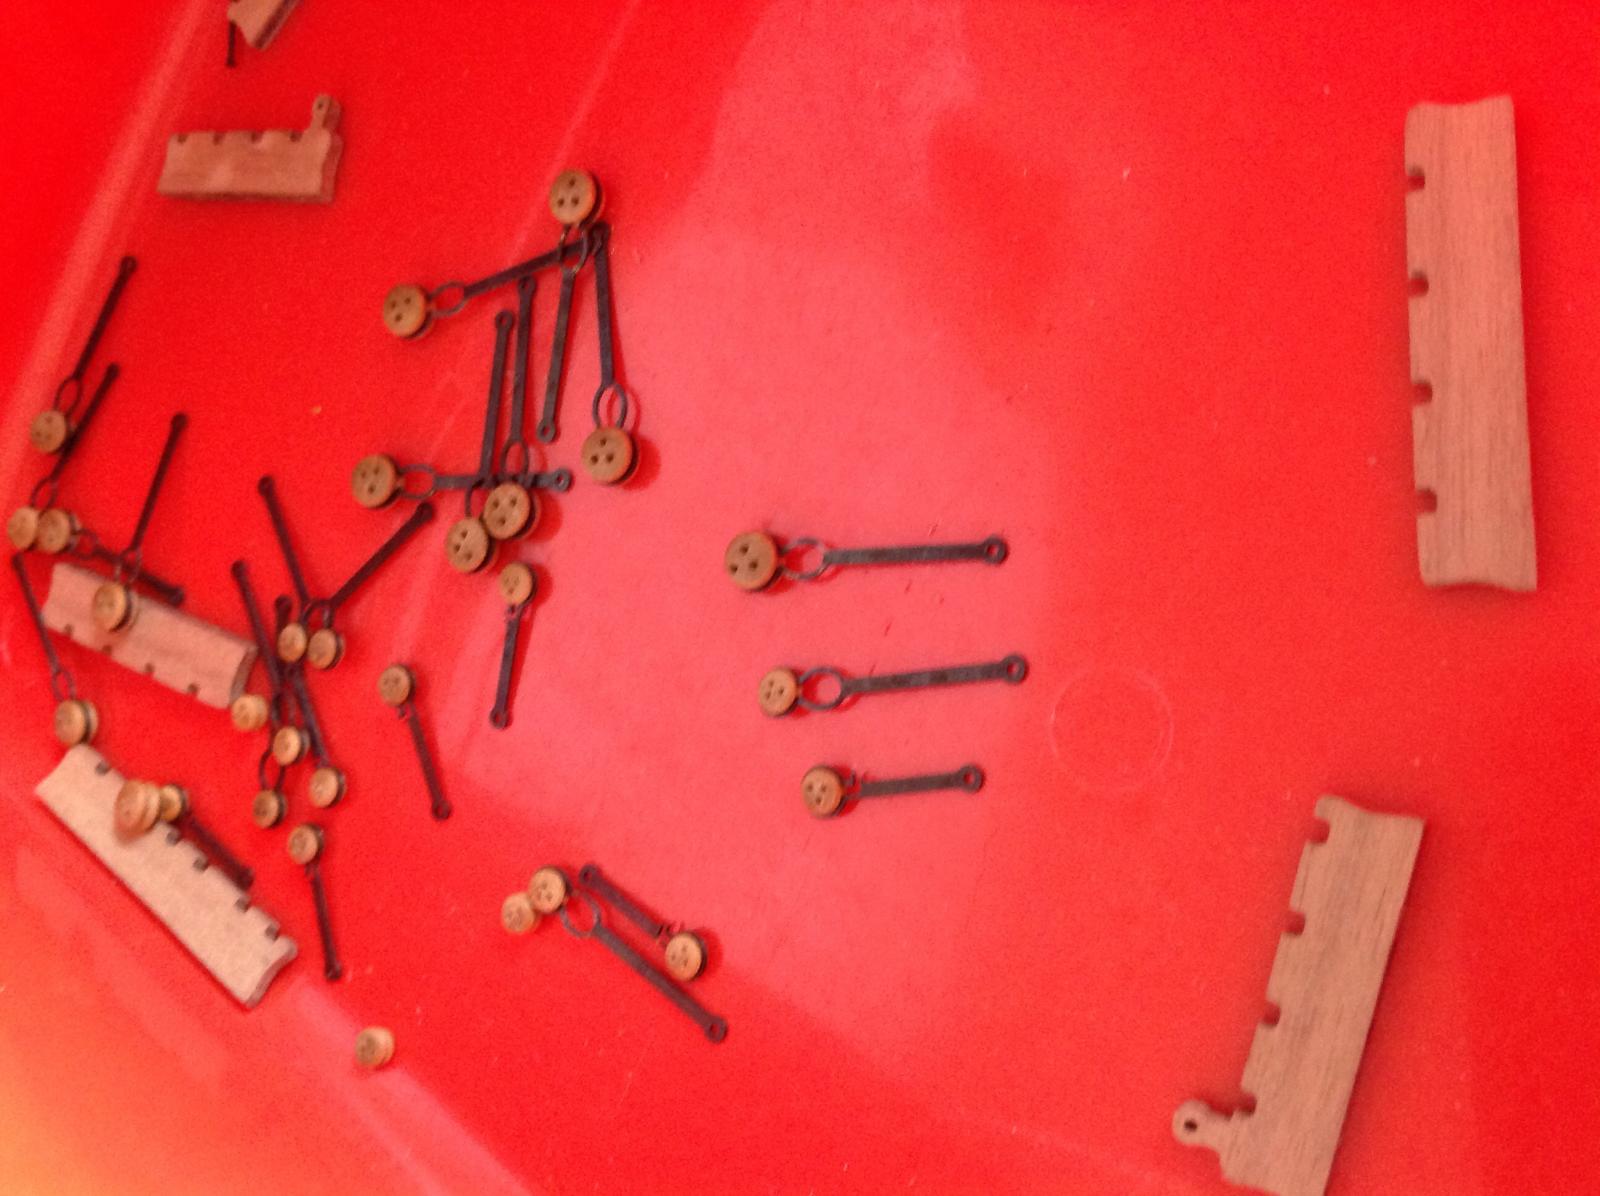
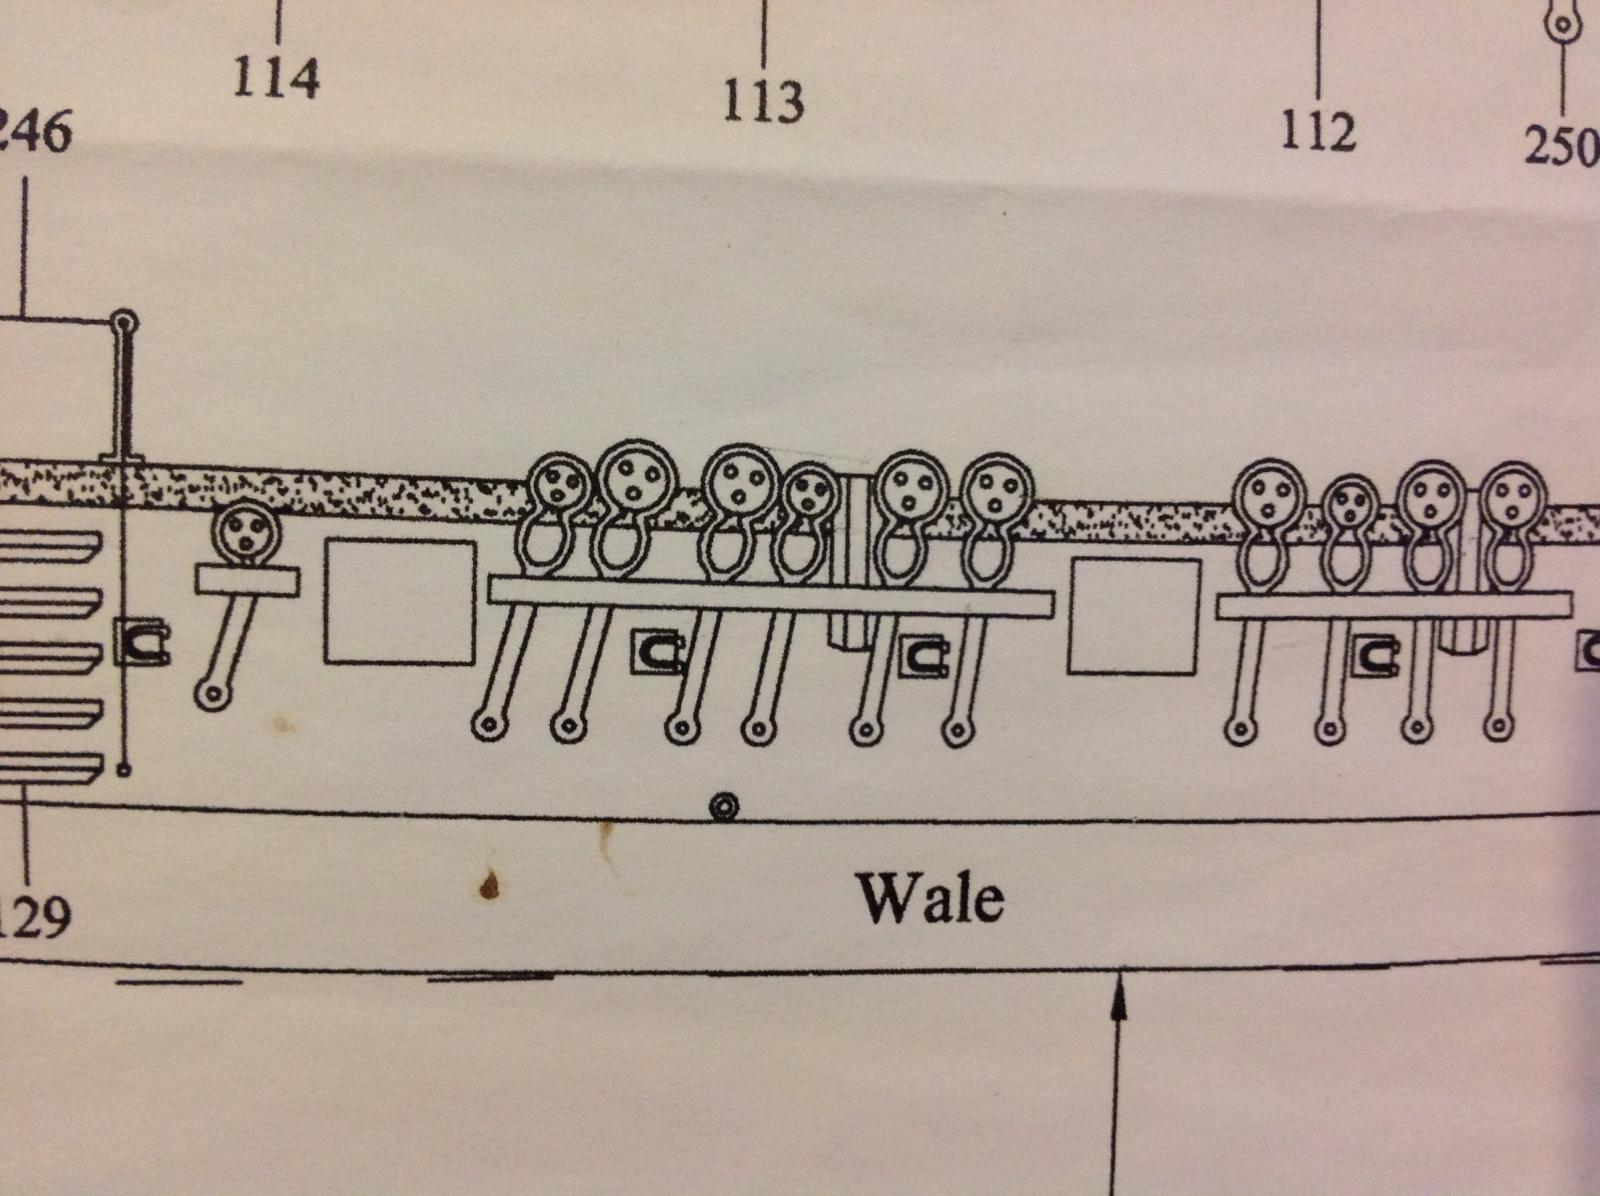
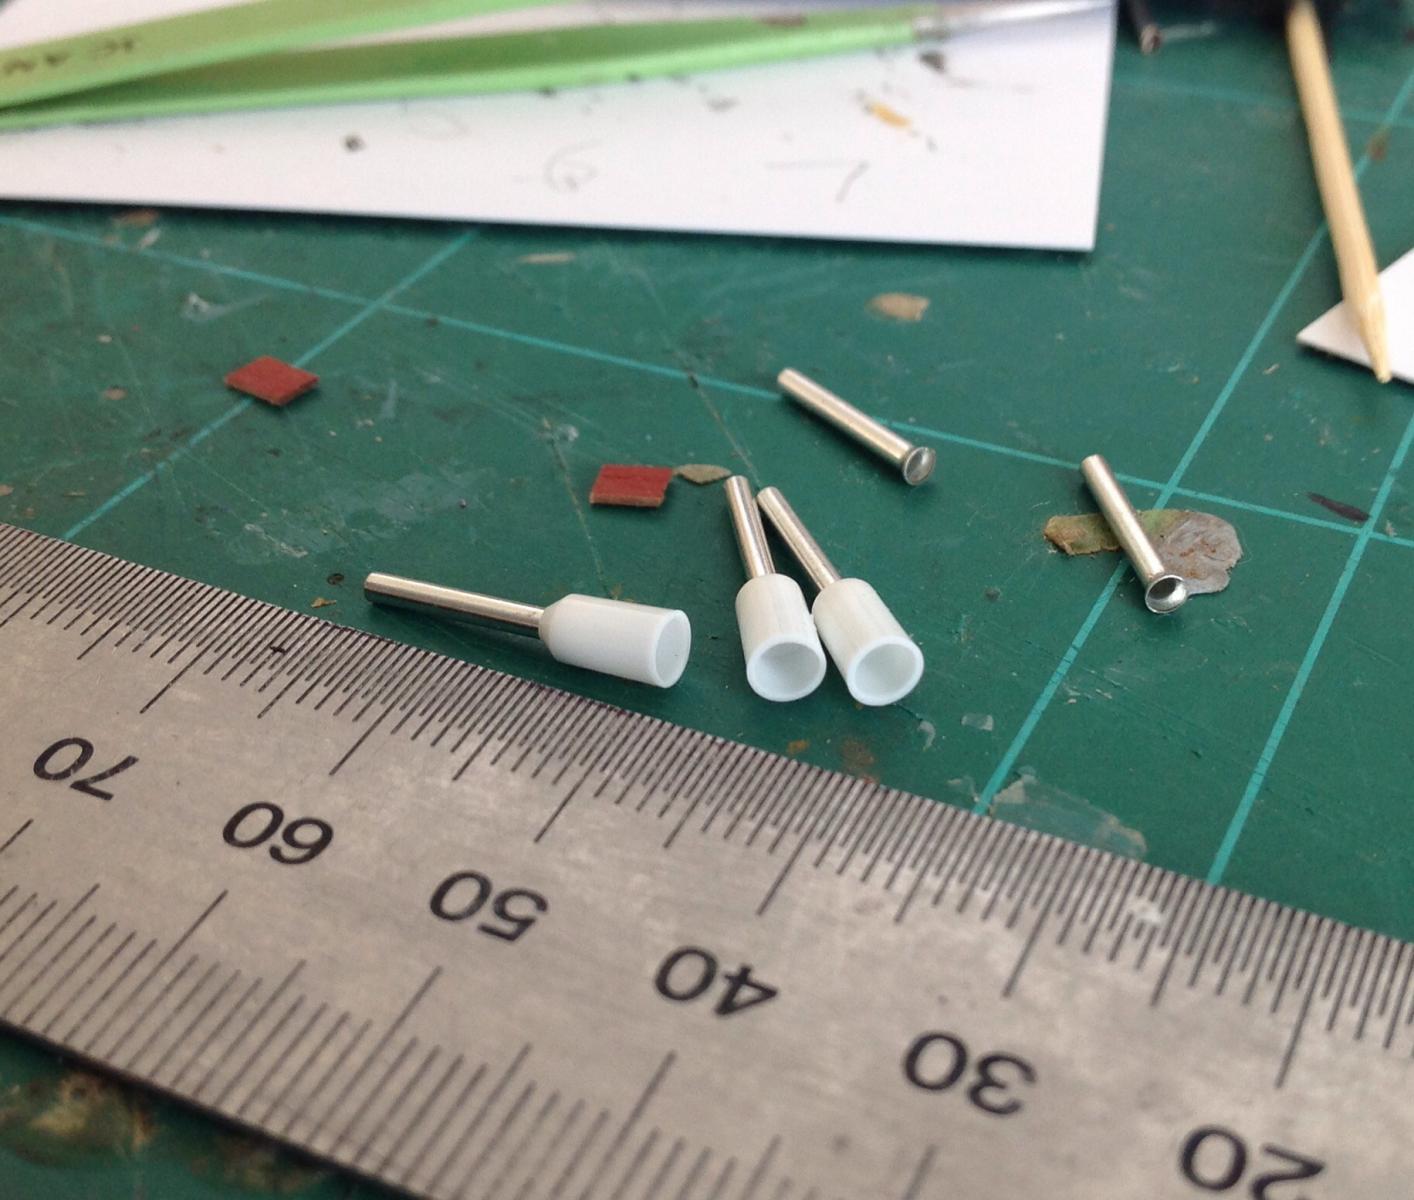
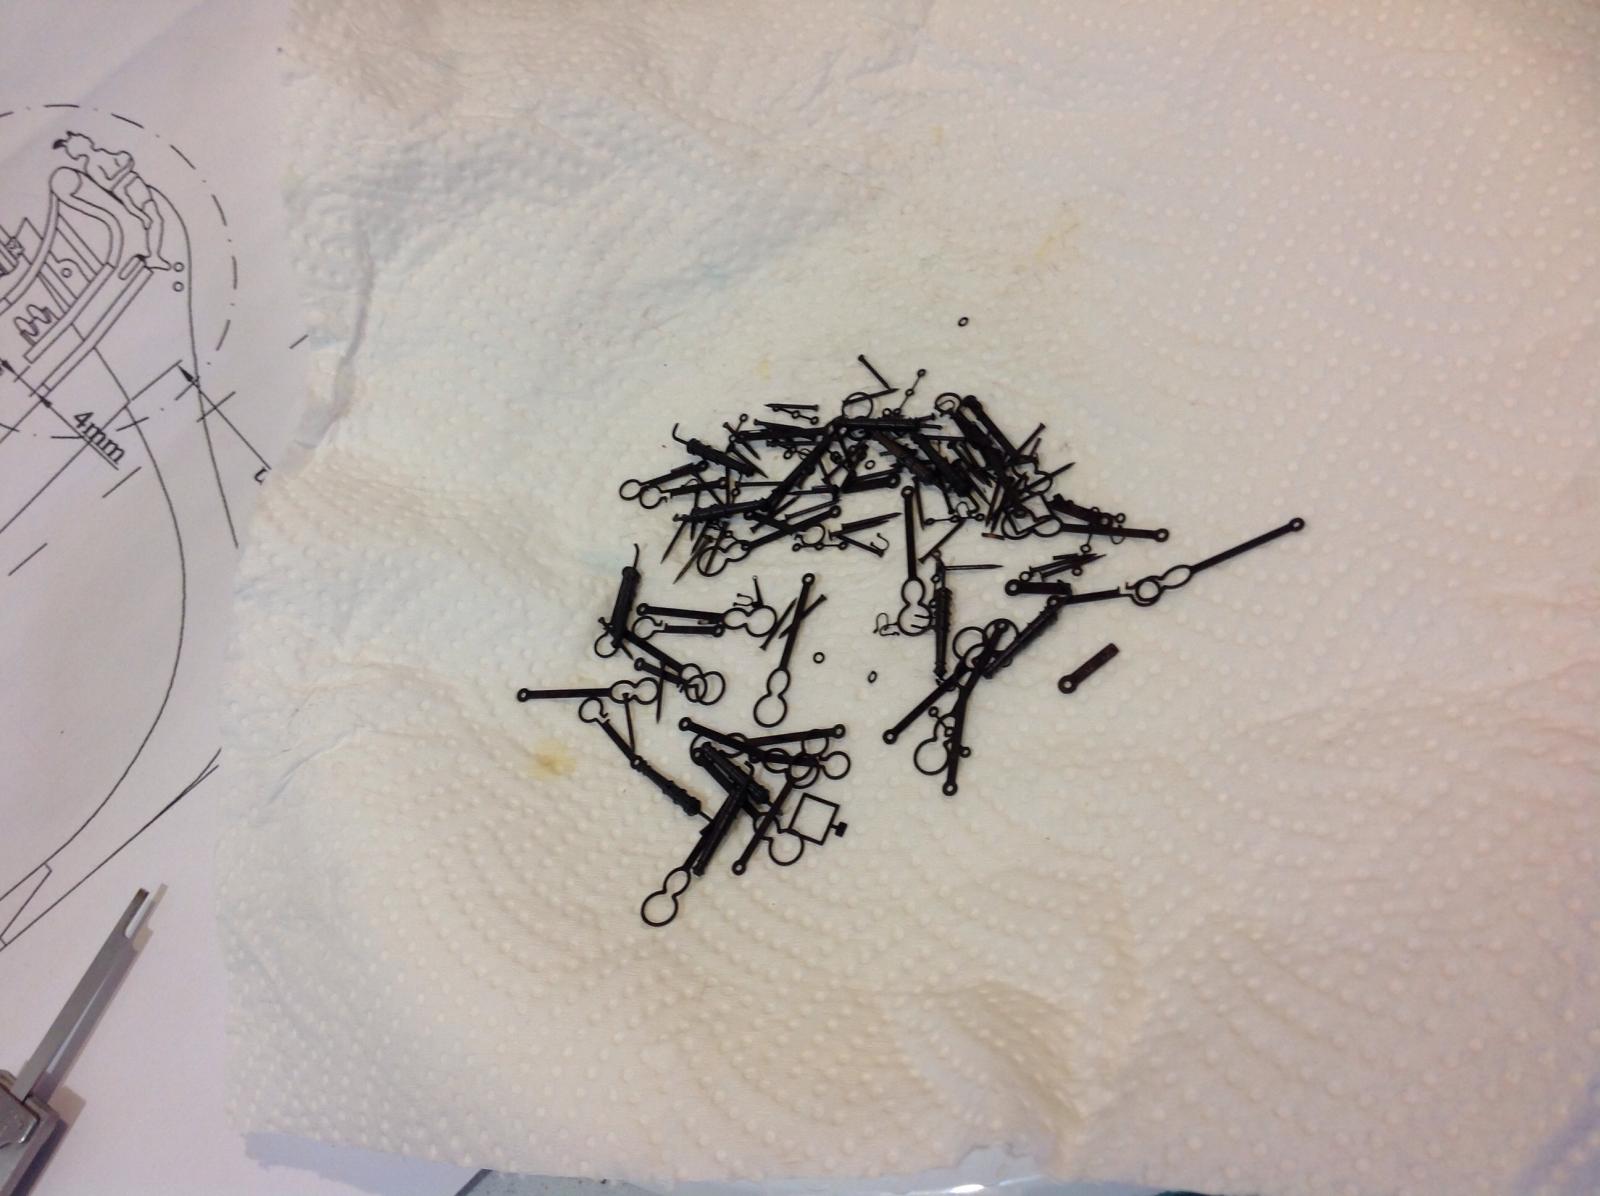
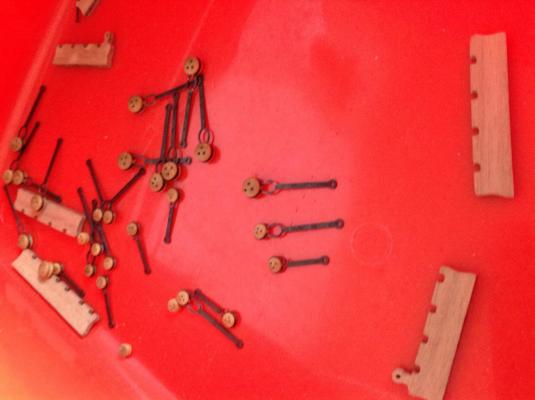
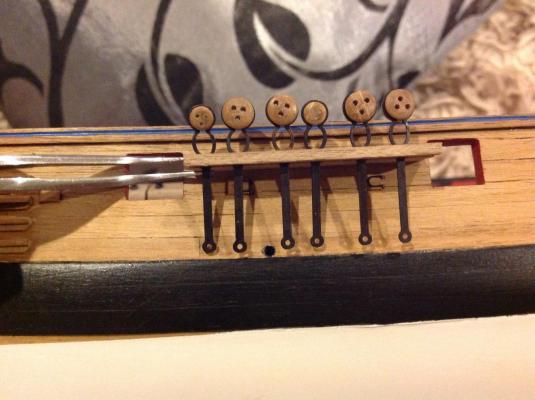
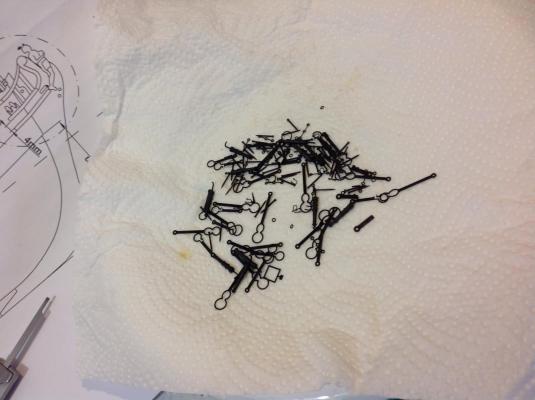
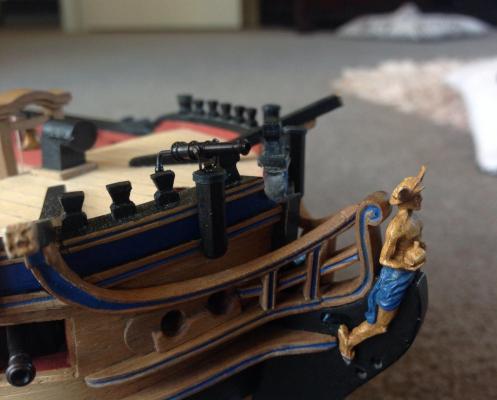
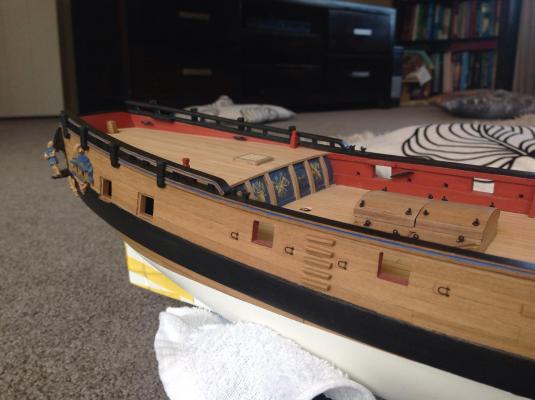
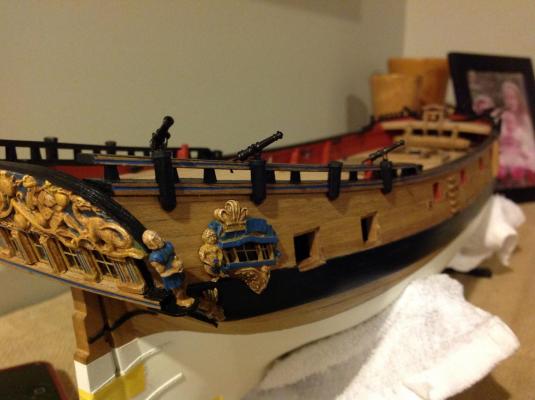
A mass blackening of some upcoming hull ironwork was carried out. I've given up on the dodgy microwaving of solution for heat and use a bowl full of hot water to sit the container of solution in to keep it nice and hot to speed the blackening process. Included in this lot are swivel guns and brackets, sweep port hinges, spanshackles, chainplates and chase port door hinges. Swivel guns attached. The blob at the end of the training handle is painted pva glue. Only one installed for a look. They'll be the last thing put on. A view of the rest of the swivel gun pedestals and sweep port hinges attached. The fore-most sweep ports will be left open. A ring bolt was added to the inside. This wasn't done on the closed ports as it simply can't be seen. This looks delicate and primed for destruction as the build continues but they are surprisingly strong as the hinges are glued a few mm into the hull and edge of the port also provides stability. I'll be prepared for 'I told you so' if I do lose them.


- 366 replies
-
- 12
-
-
- granado
- caldercraft
- (and 1 more)
-
More superb carving Ersin. Nice tattoos, they look Maori inspired - you haven't paid a visit to New Zealand have you?
-
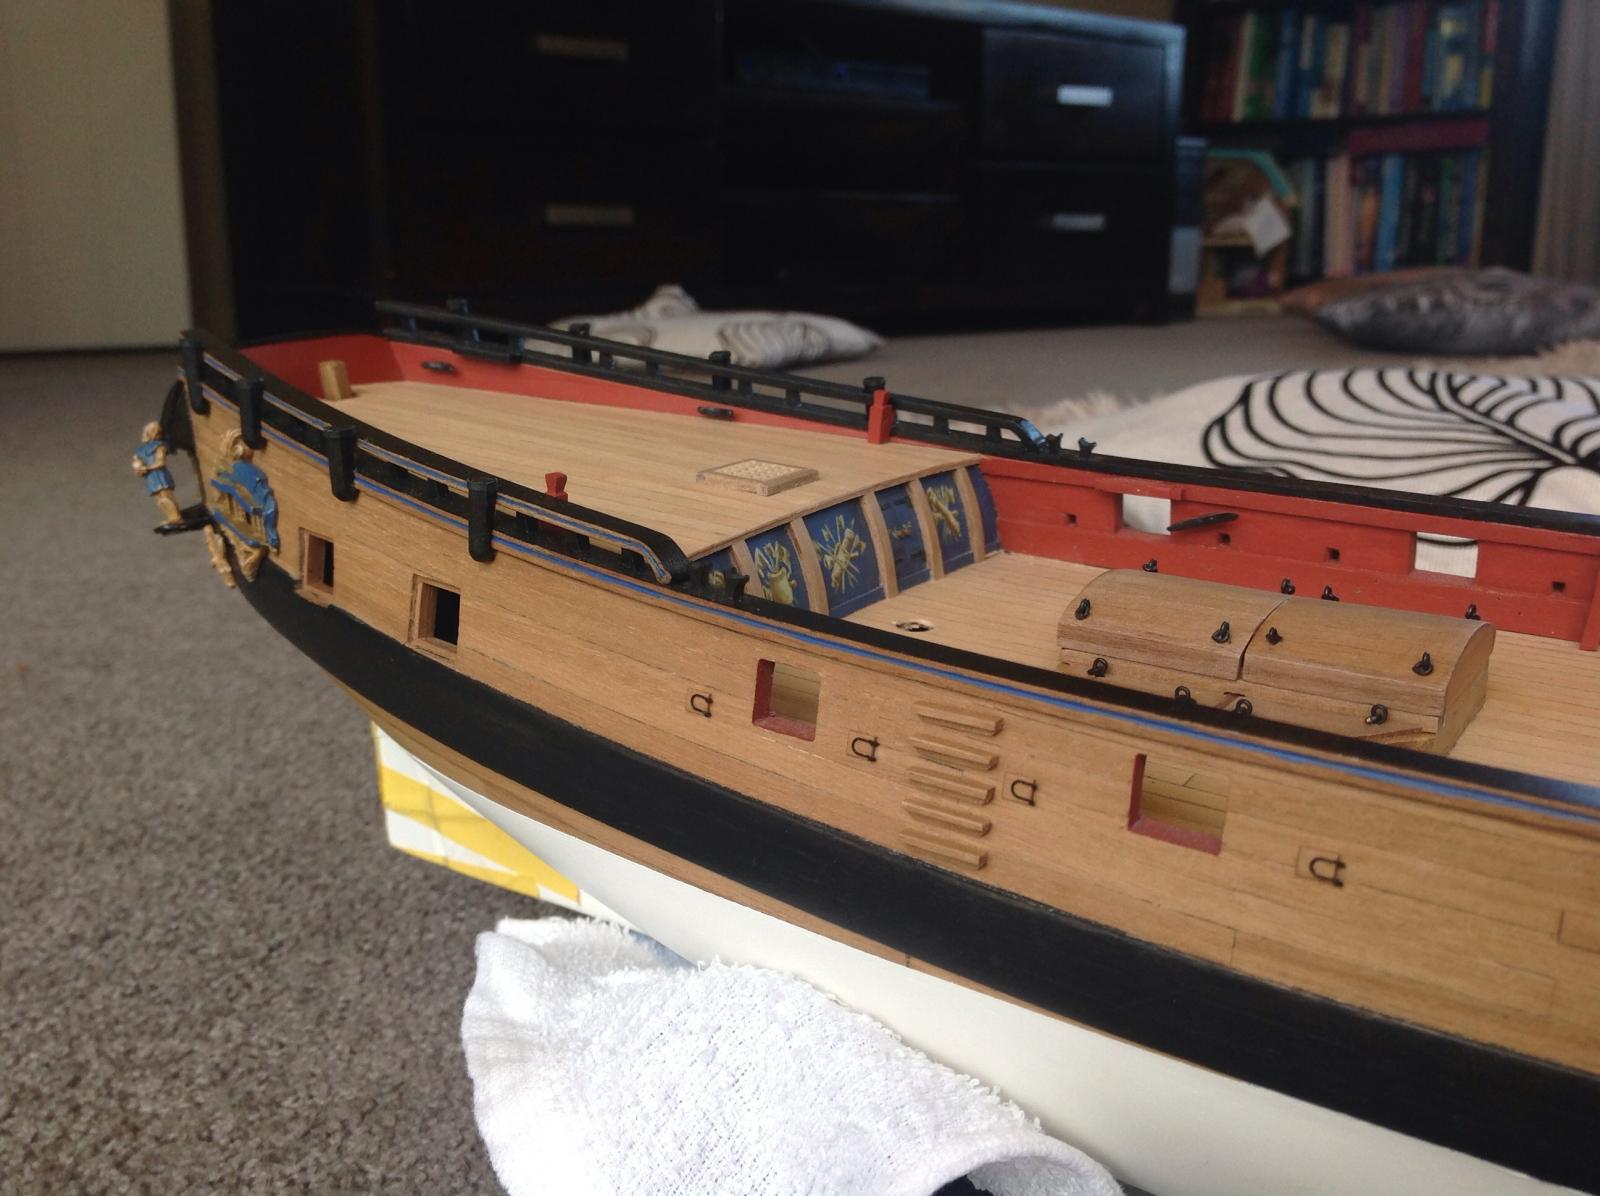
Judging by those stern gallery badges on he Fly you'll have no trouble Alistair.