HOLIDAY DONATION DRIVE - SUPPORT MSW - DO YOUR PART TO KEEP THIS GREAT FORUM GOING! (Only 36 donations so far out of 49,000 members - C'mon guys!)
×


Timmo
-
Posts
609 -
Joined
-
Last visited
Content Type
Profiles
Forums
Gallery
Events
Everything posted by Timmo
-
 Well done Joe and happy birthday mate. It's been a pleasure to watch.
- 302 replies
-
- 1
-

-
- granado
- caldercraft
- (and 1 more)
-
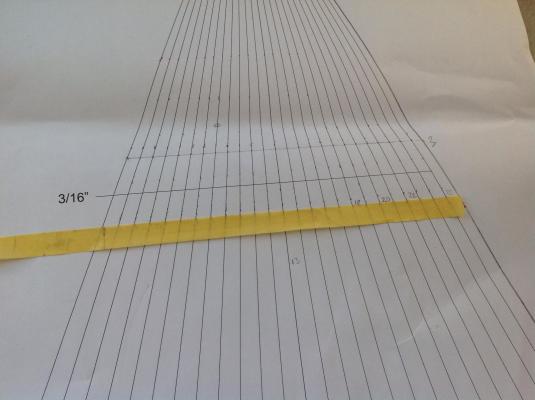
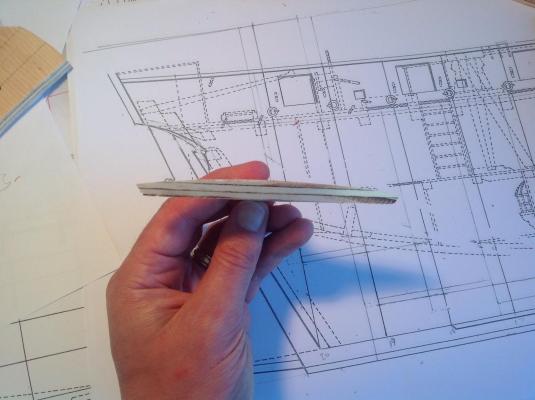
Planking is proceeding with about a quarter of the strakes below the wales on. I had hoped to master the cut, pre-bend and fix method demonstrated by chuck and other luminaries on MSW but the results aren't quite up to their standard. The hull was measured off on each frame point with the use of a planking fan to break the distance into even amounts. According to the original planking plan in Petrejus from the wales to the first contact with the stern post is 13 planks with 25 all up on each side. There's one drop plank at the bow. The wales will be made up of two layers for ease of bending and fitting. The bottom two strakes are wales about 1.6mm thick and are the lower ones (upper when the vessel is righted) seen here. The shadow from the lamp shows how they are thinner than the ones above. The upper second layer of anchor stock wales over top will be about the same thickness again to make them sit out from the rest of the planking, which is about 1.7mm thick. The planking isn't totally flush as the overhead lighting illustrates but it's nothing a decent sand won't fix.


- 141 replies
-
- 17
-
-
Superb work there
-
Thanks Walter. Water resistance and sail handling are my biggest fears. The whole lot is destined for a dousing in epoxy resin and possibly glass fibre on the exterior
-
Hi Walter, the stern post and rudder won't enter the hollow section of the hull itself as the post is attached directly to the ply deadwood and run up that to above the decking line. Anything that comes in would go straight onto the single deck. It's open on the deck side until that's installed so I can alway add more from that end later. I have wondered about following seas and was considering a rudder coat of some sort.
-
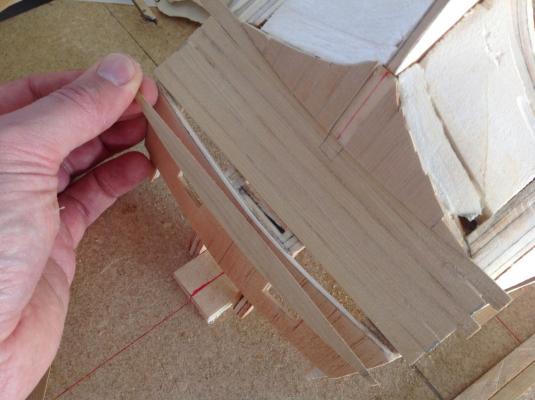
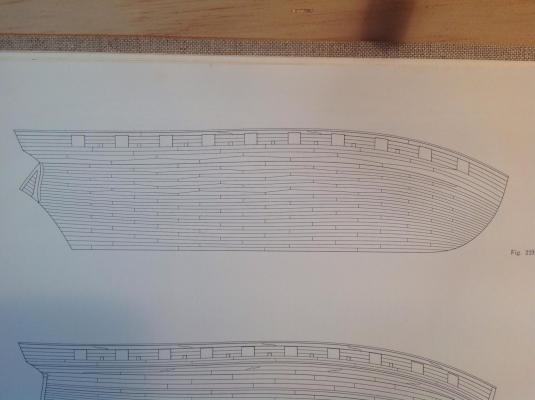
First of the planking on with the lower counter and wing transom planked. Rather than bending them laterally straight planks were used on the counter with shaped planks at top and bottom. Finished counter. There's a small lip of about .8mm att the top of the transom (bottom in the pic) from the thicker planks that will allow a decorative moulding to sit along the edge later on. A slot was cut for the stern post, which is unfixed still. The rudder hole will be cut later. The port filler blok was a bit short so has been replaced with another yet to be shaped. Wales are next. Petrejus says three strakes for the wales but the plans show two in anchor stock pattern. Helpfully, in the appendices is a reprint of the builder's contract for the brig Raven of 1804. This details two main stakes of 4 1/2 inches with a single stake of thick stuff of 3 1/2 inches above these and below with the lower thinned into the rest of the planking. I'll try this when I get a moment in the shipyard.
- 141 replies
-
- 14
-
-
Thanks Joe and Bob. Granado will get some attention when I reach the disheartening bits on this. It'll be too much seeing her sitting there just missing spars.
-
Thanks Jason -I still long to build an Artois as per your build. In the meantime I'll be pillaging your snake build for reference. Jerry, it might have to be a virtual armada on MSW for the time being.
-
The Granado has taken a temporary break just short of the finish line as a new build starts. It's the cruizer class brig but in a different form than I had expected to build.
-
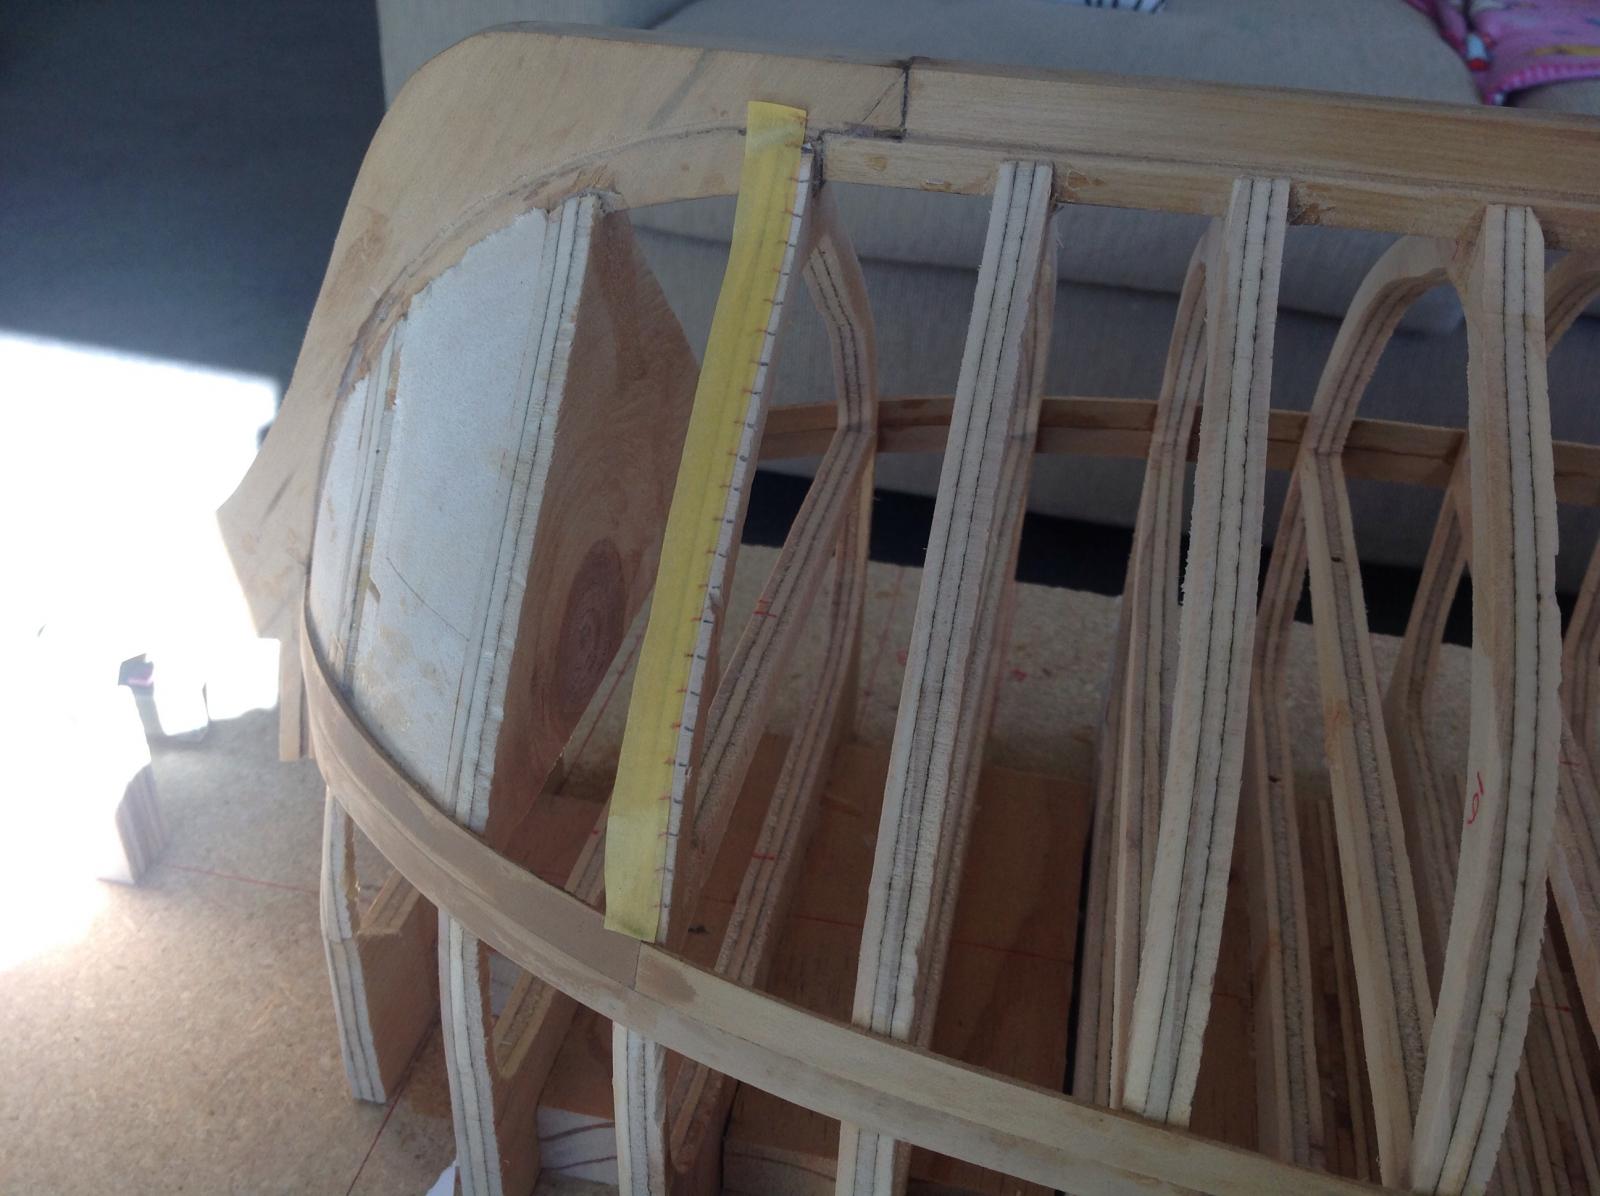
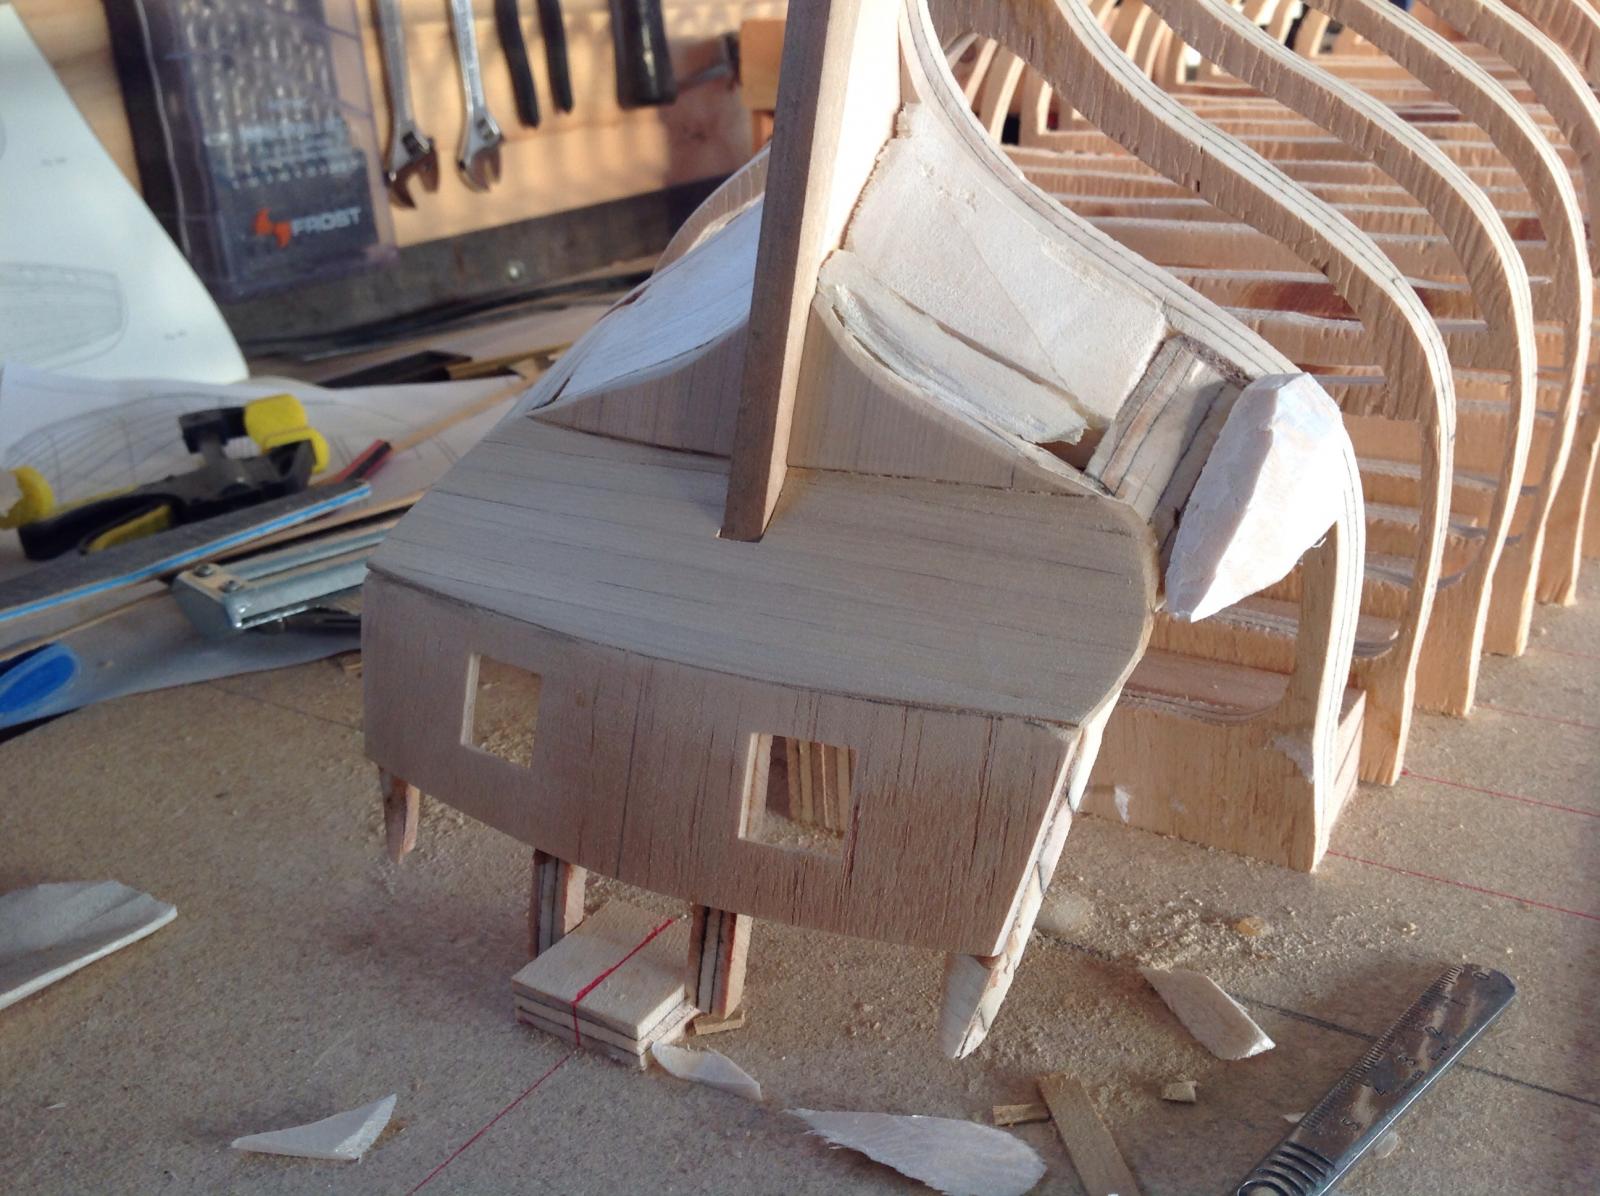
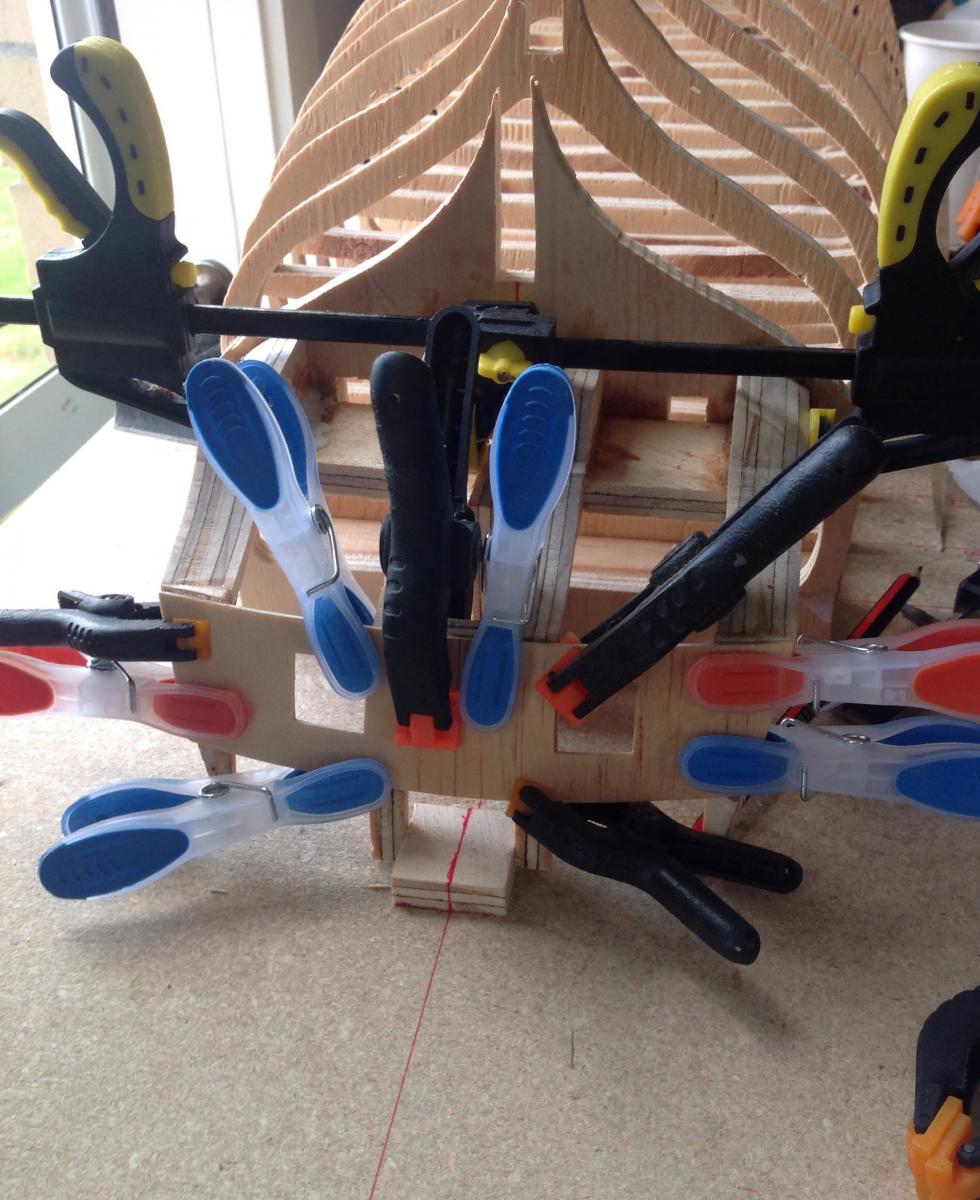
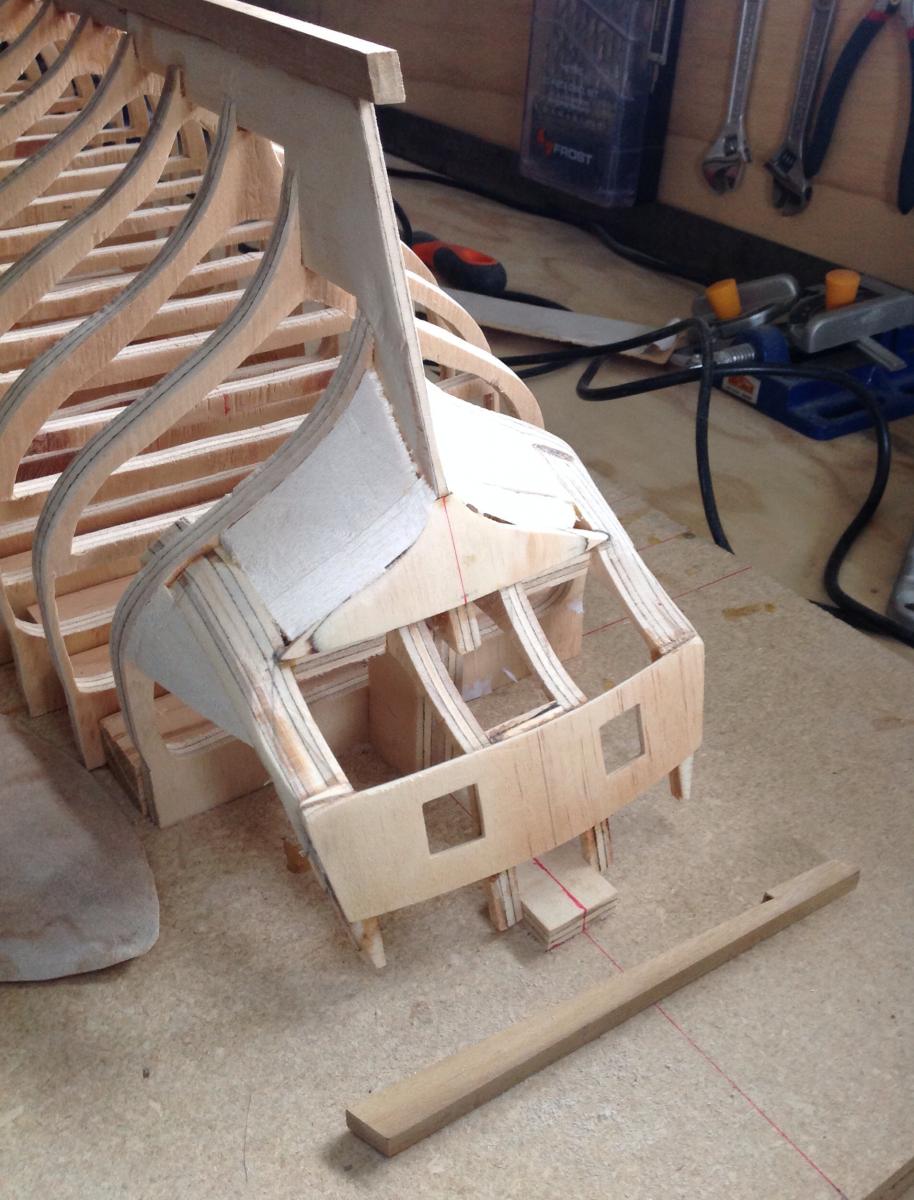
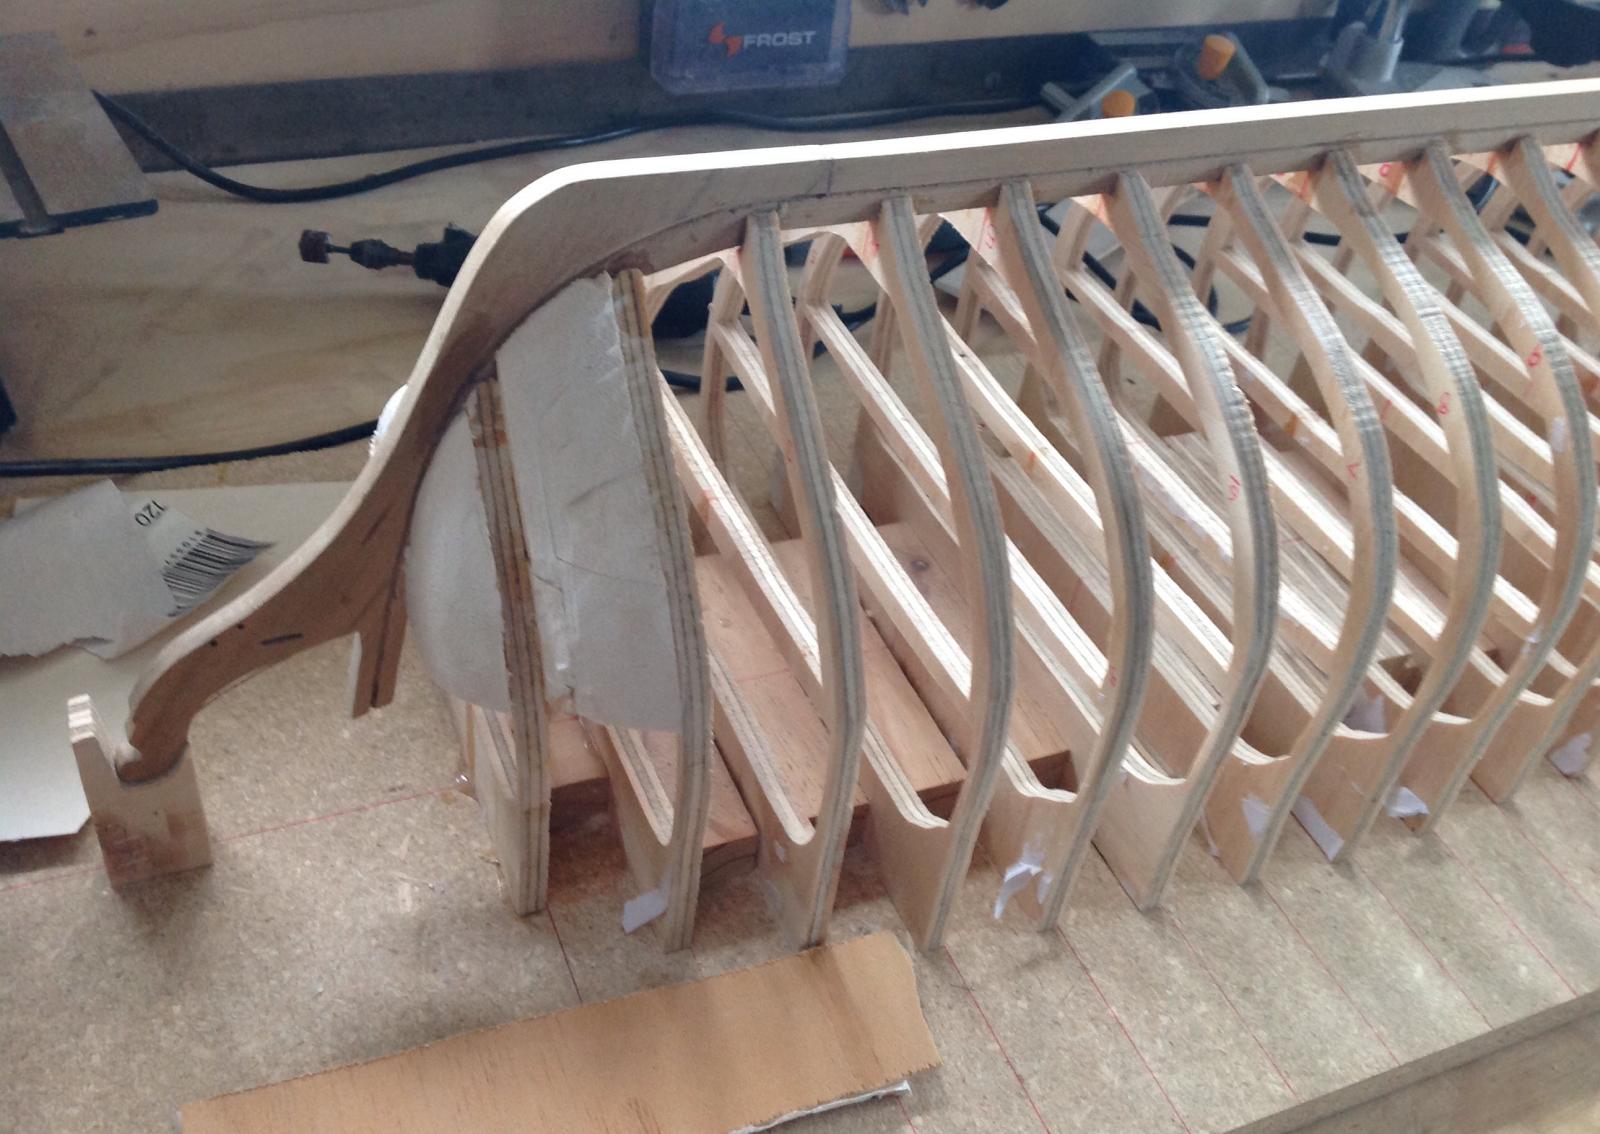
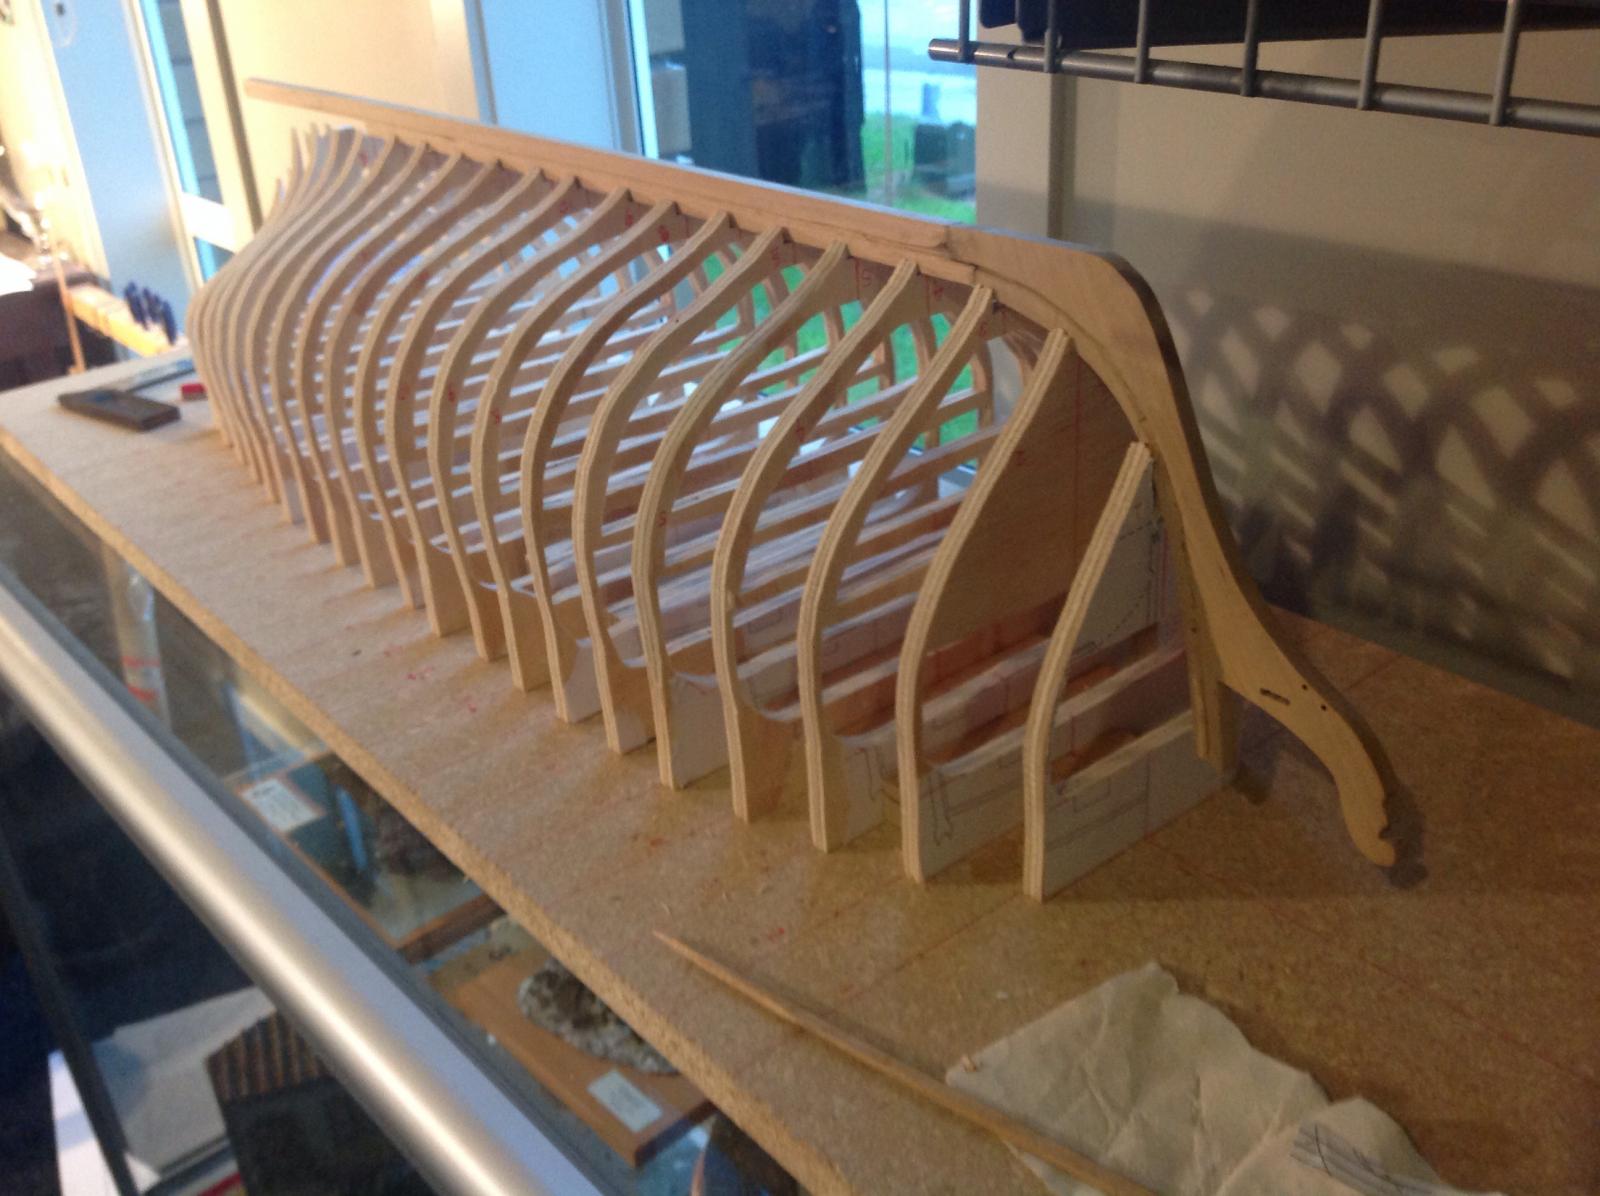
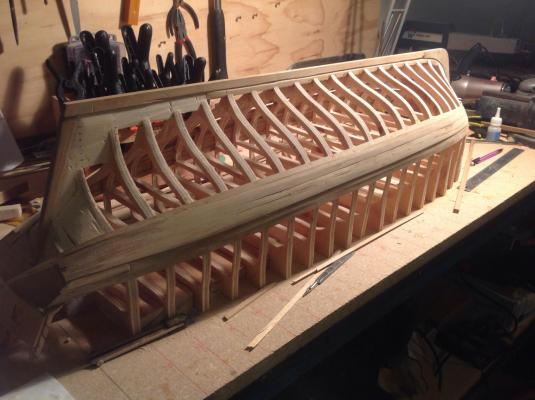
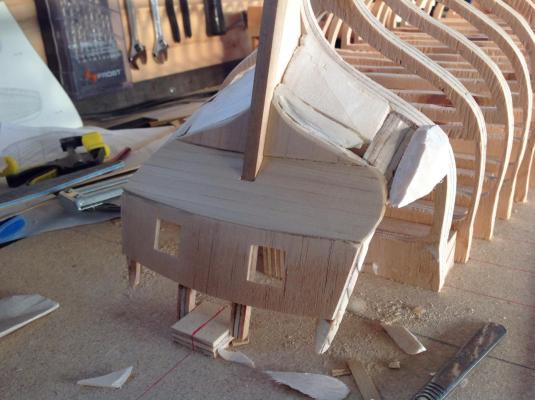
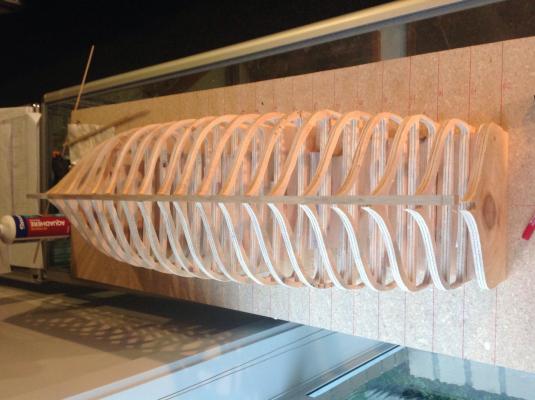
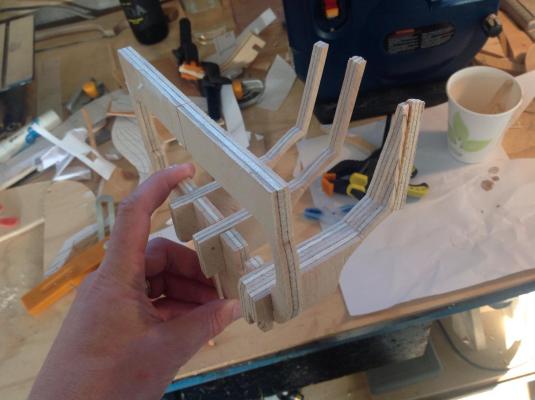
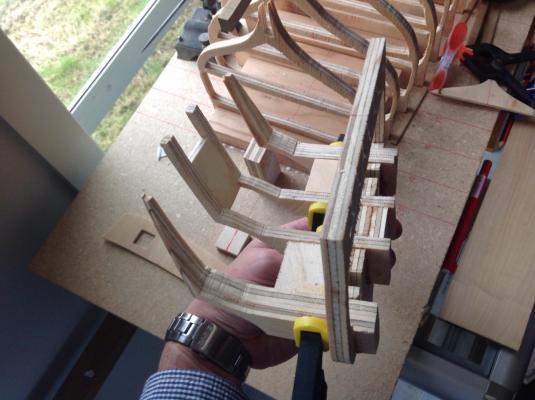
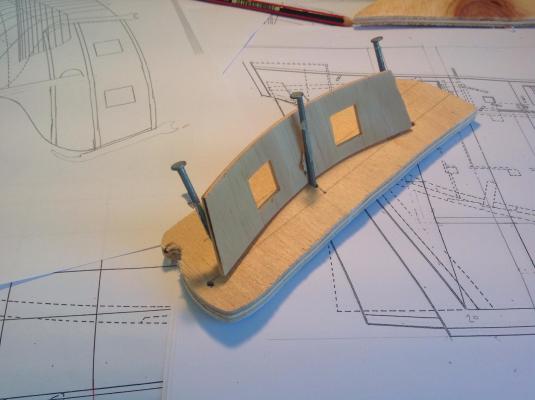
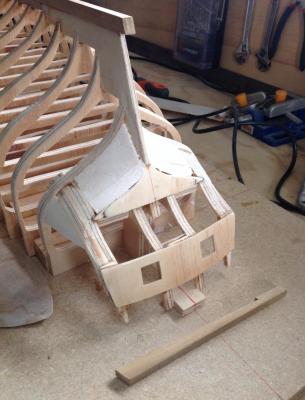
The deadwood was cut from ply and designed to interlock with and to square up the aft-most frames. Here you can also see the frame positions drawn on the building board as per the frame location lines on the plans and support blocks to help square up the frames. The deadwood was sanded down with a beard line to take account of the planking width to come and the keel had also been given a rabbet with a combination of files, dremel and table saw earlier. The wing transom looks simple but has both a camber across the top and laterally. This was cut from ply and sander in. A slot in the deadwood holds it in and the stern post will lock it into position later. The aftmost frame had slots for the stern supports cut in and the supports added. Like many brigs The cruizer had distinctive chase ports and the supports frame these on one side to help with positioning. The stern was cut from 2mm ply and bent to shape before being epoxied into place. Filler blocks of balsa have been added at the bow and stern and are being shaped as the frames are being sanded in preparation for planking. The stern post is visible in the foreground of the stern pic. It'll be installed when the planking is finished.


- 141 replies
-
- 22
-
-
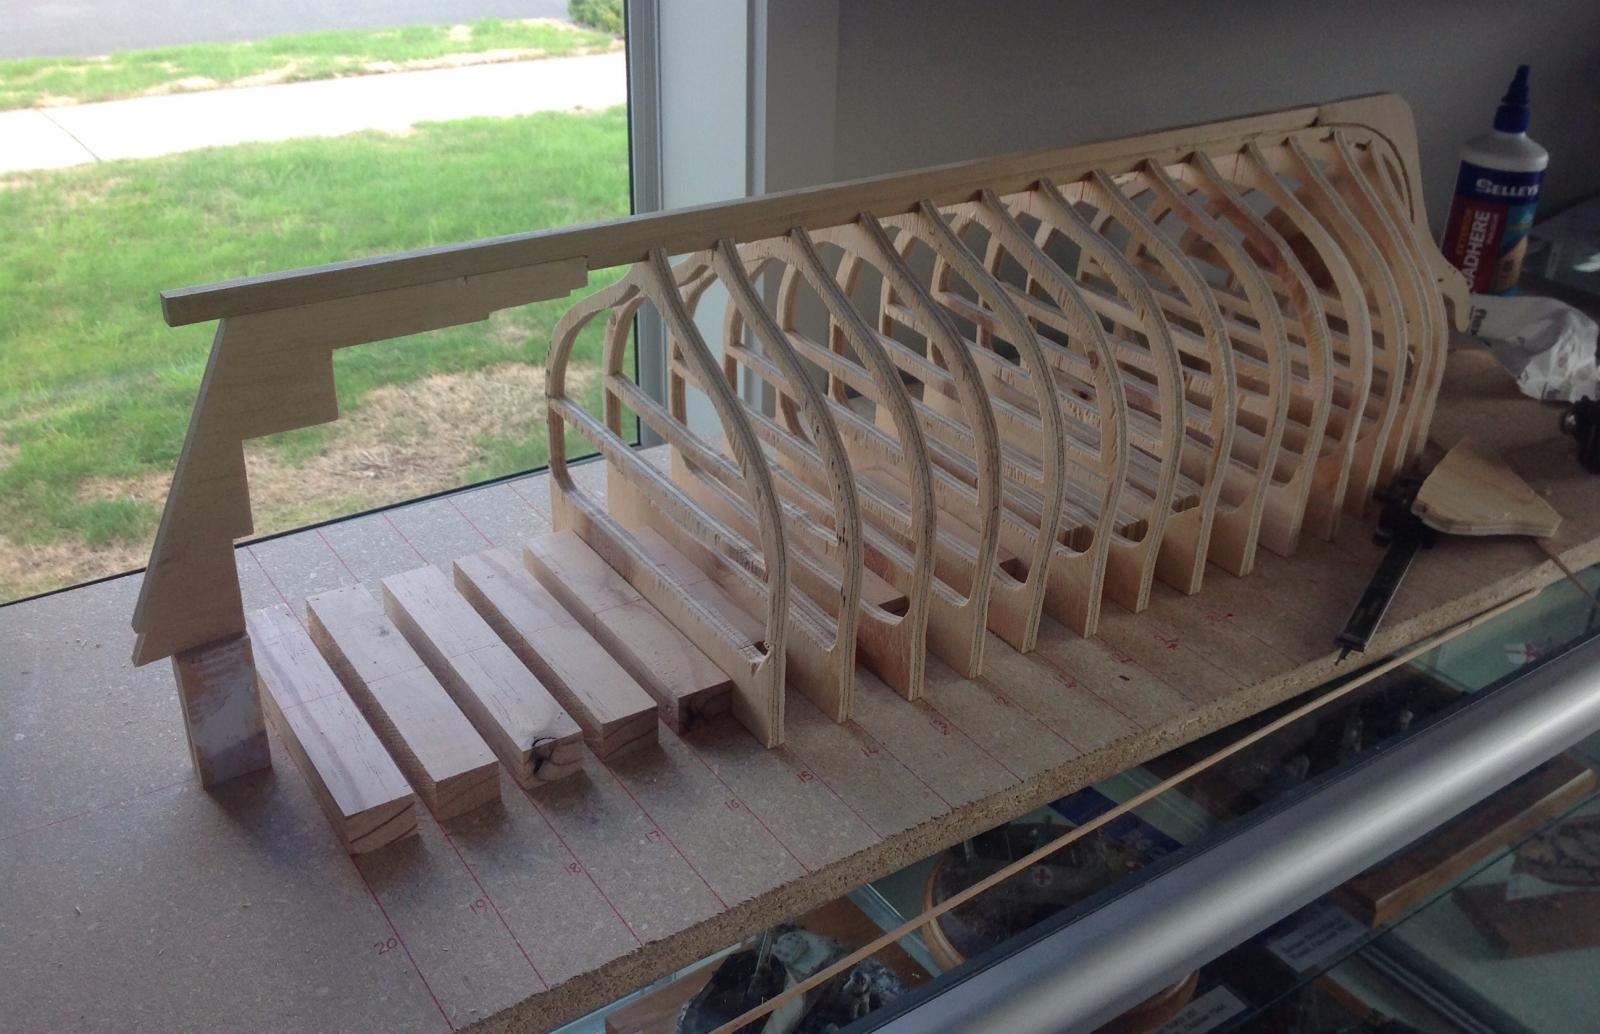
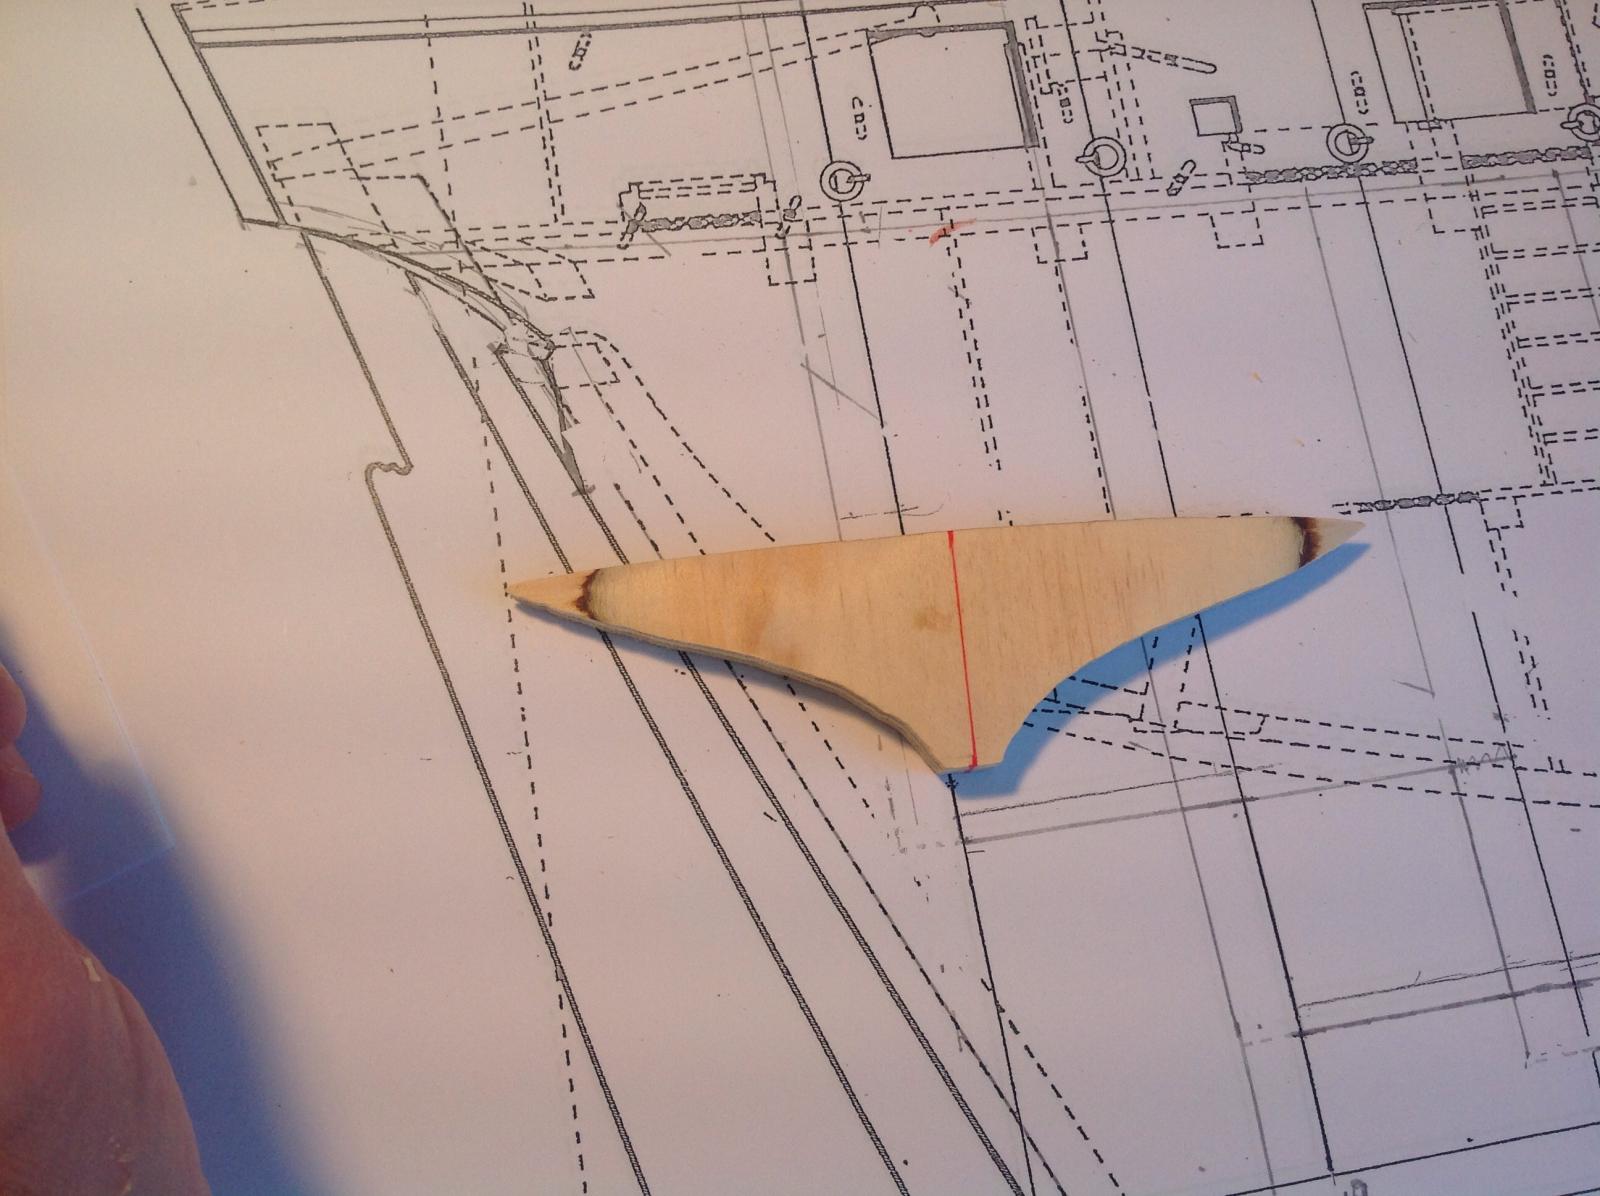
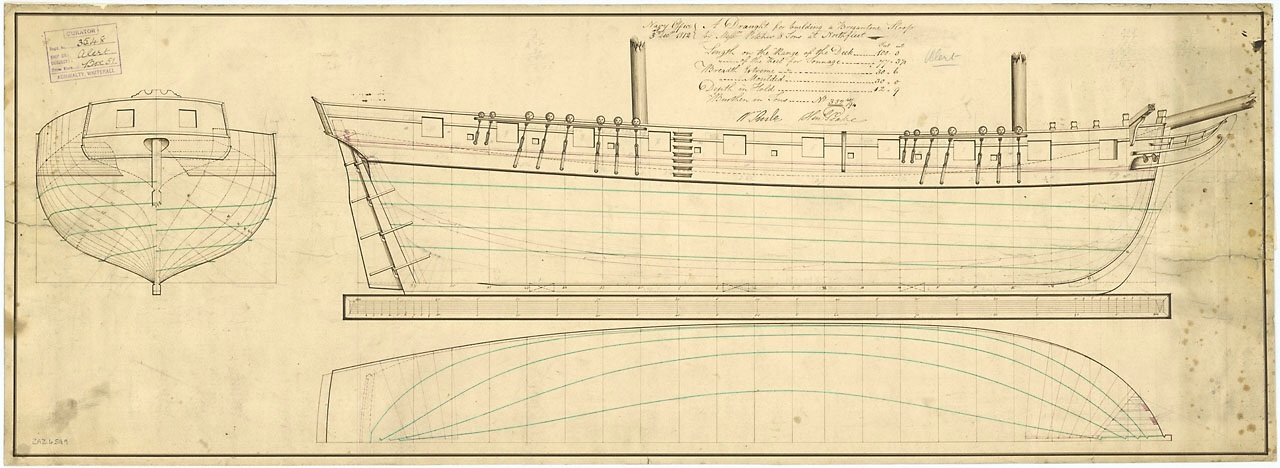
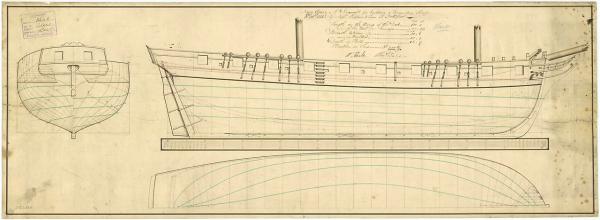
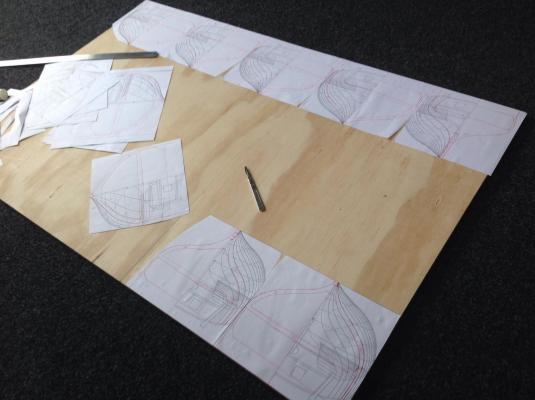
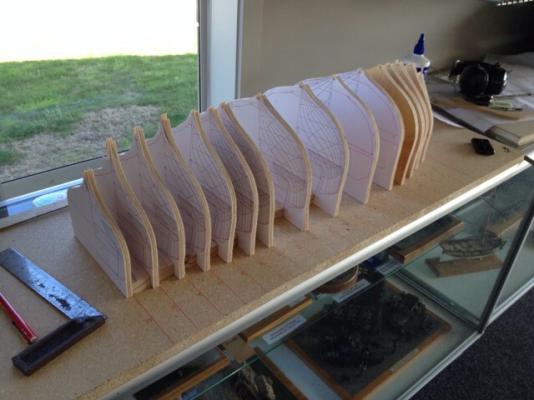
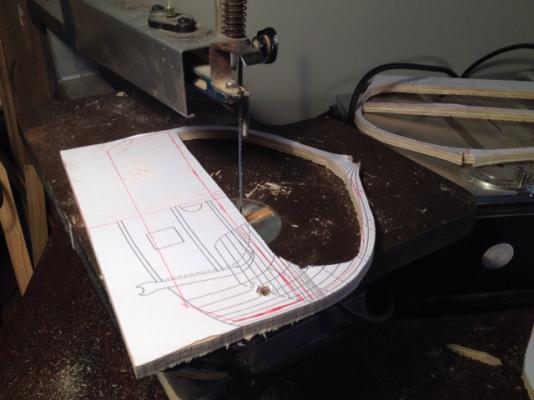
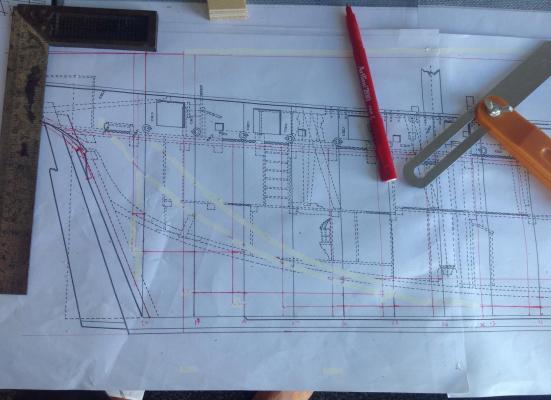
After a month of work on my new project it's at the stage where I suspect it might turn into something worth continuing so here it is... A Cruizer class brig in 1:36 scale which is (hopefully) destined to be a working RC square rigged sailer. I've kicked this project off before finishing the rigging on my current Granado build after seeing a few build logs and being filled with inspiration and a reckless confidence to simply have a go. It's a good vessel to practice on as it's relatively simple with flush decks, only two masts and little decoration. I can experiment with the rc servos, ballast keel and sail operation once the hull and masts are done and if it works then move on to the nice to have items like head rails, carronades and deck fittings. The cruizer was a possibility for my next scratch build originally planned at 1/64 but I'd helped my father build the 1:20 scale Valdivia schooner kit from Robbe a few years back and being so taken with sailing it that I wanted one of my own. I'd love a 1:24 scale RC Surprise or cruizer from Steel Chapman and Hutchinson Ltd http://www.modelsailingships.com/ships/grasshopper.html But it's out of my price range once freight etc is taken into account, hence an effort to scratch build, especially after seeing the very informative logs from Jerry Todd for his Macedonian, Constitution and others. 1:36 was chosen as it's large enough to look the part and have some sailing ability and be easily managed with a length of 84cm on the gun deck. If successful with the brig the ultimate goal is a frigate and at 1:36 scale a large vessel like an Artois class frigate of 146 feet on the gun deck would be just manageable for transport and launch at roughly 120cm. But that's pretty optimistic at this stage and I've got a lot to learn yet. The plans for this vessel are those included in EW Petrejus' fine book 'modelling the brig of war Irene' scaled up with bulkhead widths and deadwood for building purposes etc drawn in. Using relatively cheap materials was a must for this project as there's still an element of doubt over if it will work. If it doesn't I don't want to feel like it's been a huge investment that fails. As such the brig will be built from 9mm plywood for the framing with the keel and planking from matai - a New Zealand native timber which is moderately hard enough to hold detail at this scale while still easy to work and has a nice tone although the brig will be painted anyway. The matai is in the form of old tongue and groove floorboards from a demolition yard that are going for about $6/metre for short lengths that are pretty much unusable for anything else. I can mill these on my table saw and with a home built thickness sander. The hull will be built upside down on a building board for stability and will be cut loose once planked. A base line parallel to the keel a few cms above the max height of the sheer line was drawn on the plans to provide a point from which to measure from. All the bulkheads were drawn with this line as a top (or bottom once upside down on the board) square edge to ensure they would all sit at the correct height from the board and provide a level run for the keel to attach to. A test run of bulkheads on the board. To avoid installing deck beams later these were drawn onto the bulkheads using the camber indicated in Petrejus. The bulkheads were then cut down to ribbing size. In hindsight I should have left the bulwarks above deck ticker to account for the reduction from subsequent sanding but it's nothing major. Most of the framing on the build board here. The keel and stem is matai ripped on a bandsaw and run through my drill powere thickness sander (thanks to MSW member Snowmans for his fine instructions on making one) down to 9mm. The stem was then cut in one piece on the bandsaw and gammoning and bob stay holes/slots drilled.


- 141 replies
-
- 21
-
-
That's it Joe! you've passed me. And to think Wednesday marks the mere three year anniversary of my build. That rigging is looking great. Watch the jib boom. I've had some narrow brushes with mine.
- 302 replies
-
- 1
-
-
- granado
- caldercraft
- (and 1 more)
-
That planking should look good after a sand. Nice work Alan.
-
Nice wales. Easy enough to paint them now and then you won't have to worry about the masking. You can always touch up later if needed.
-
Thanks Joe, you've confirmed what I thought. It's simply too thick, I'll forego accuracy and maybe double end some shrouds and possibly not serve them to get a better scale effect.
-
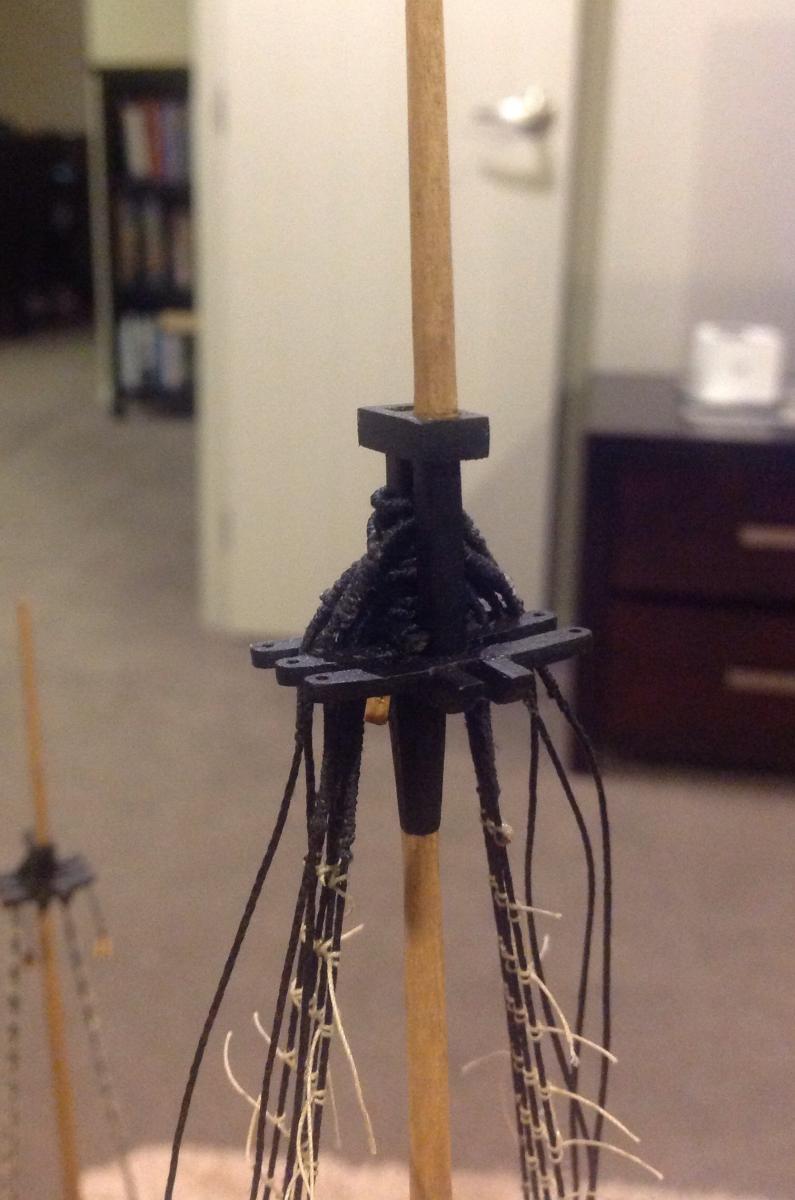
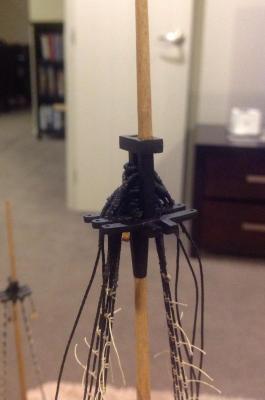
Advice welcome here. I'd served the loops on the main top mast back breast breast etc stays. The problem is it's ended up looking over scale and the loops creep up the mast almost to 2/3rds of the way to the cap and bulge outwards a bit. Reckon it's too much? Maybe I should redo with simple unserved loops. Thoughts welcome. Topmast shroud loops. Mainmast top for comparison

- 366 replies
-
- 5
-
-
- granado
- caldercraft
- (and 1 more)
-
Hi Jerry, just been enjoying both your constellation and Macedonian builds. They are great builds and very informative. I'd love to do something similar one day. What are your ballasting/keel plans?
- 553 replies
-
- 1
-
-
- sloop of war
- constellation
- (and 3 more)
-
Very neat work Jason. She's starting to look like a frigate.
-
Jason, I had been waiting for Chuck's Winchelsea but it seems to be a ways off yet. I've had another look at the Irene book today and have warmed to it again as a simpler build for a beginner like me but I've swung back and forth so many times it could change yet again. I'll likely be bombarding you with questions if I go down that road. Joe, I remember the link and your pics of the naval museum Irene. It really whets the appetite. Might still be a generic model but HMS Pelorus did a bit of charting work around the NZ coast and has an inlet down south named after her. I did remark to my daughter Sophie that there was a Brig named Sophie so she thinks that's the one to build. The book is interesting in that it's got nice line drawings and is packed full of information for a build but wanders off the brig into tangents on other aspects of ship design and naval history. Not a complaint, just an observation as the writer clearly knew his stuff but just needed someone to edit it back on track a bit and make it easy to follow. As an example there's only one mention of the scale of the plans in the book (1/50) and it's easily missed. With the drawings you've got to check the detail pic you are looking at is really for a cruizer and not something else that's been thrown in there as a general illustration. It's got superb rigging detail and explanation that's been helpful with the Granado build.
-
I do have the book Joe. I found a copy in good condition on a local auction site for about $20. Happy to lend it if you ever need it.
-
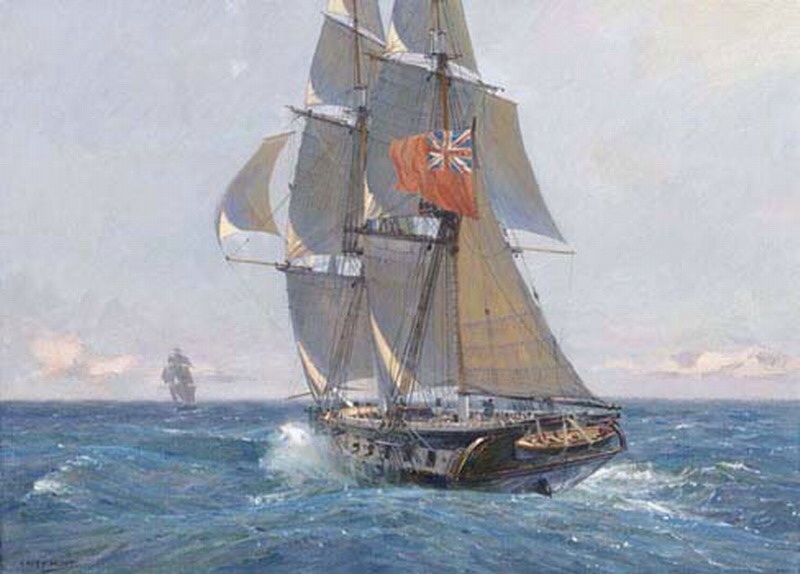
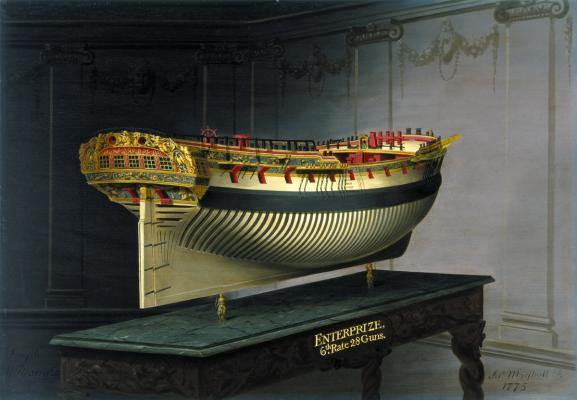
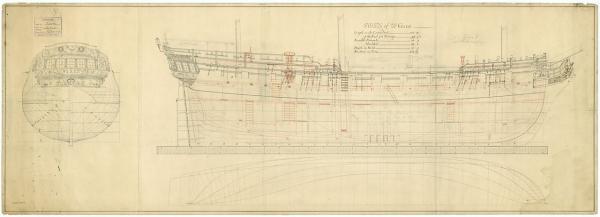
I might be overly optimistic but at this stage I'm hoping to go scratch build. It'll be a plank on bulkhead job as fully framed still looks like dark magic to me. While Granado is a great kit it has made me realise how many of the kit pieces I just wanted to improve and that's the bit I enjoyed most. Also I want to use boxwood on the next build and can't stomach the cost of a kit and almost the same again to replace the timber. Options (both 1/64): -A cruiser class brig using NMM plans and the book The Brig Irene. -An Enterprise class 28-gun frigate based on NMM and Shipyard plans and contemporary paintings. This is the preference as it's a nice size and I'd like something with a gun deck and stern lights. The plans are reasonably detailed but it will require some redrafting of bulkhead locations and shapes from the Shipyard plans to allow correct planking lengths on the hull. Also the shipyard decorations are totally wrong. Chuck's cutter Cheerful would be ideal but It's too soon for another cutter after my Sherbourne.
- 366 replies
-
- 3
-
-
- granado
- caldercraft
- (and 1 more)
-
Nice solution there Jason on both the pegs and the bow shaping block. Looking good
-
Top work there. My wife says similar things to me when I press her for opinions on the way forward. I think they know that we just need someone else to tell us what we already know.
- 302 replies
-
- 3
-
-
- granado
- caldercraft
- (and 1 more)