-
Posts
609 -
Joined
-
Last visited
Content Type
Profiles
Forums
Gallery
Events
Everything posted by Timmo
-

Are there other sites like Cornwall model ships out there
Timmo replied to kpnuts's topic in Wood ship model kits
No response to email orders and phone calls to westbourne and after some online research there's a disturbing number in the same boat. Can't even get hold of them to confirm the presumably undispatched order is cancelled. -
Nice work. Great start to a mouth-watering kit.
- 85 replies
-
- finished
- caldercraft
-
(and 1 more)
Tagged with:
-

ROYAL CAROLINE 1749 by Doris - 1:40 - CARD
Timmo replied to DORIS's topic in - Build logs for subjects built 1501 - 1750
That would be a salute to the modeller from the gun crew, Doris.- 883 replies
-
- royal caroline
- ship of the line
-
(and 1 more)
Tagged with:
-
Thanks Jack, Dominic, there were a couple of victory/amiti Granadoes on the old MSW and I'm sure many would be interested to see the differences. How about a build log?
- 366 replies
-
- granado
- caldercraft
-
(and 1 more)
Tagged with:
-
Top work Ray. I think I'll be making some similar blocks with hooks now.
- 536 replies
-
- diana
- caldercraft
-
(and 1 more)
Tagged with:
-

ROYAL CAROLINE 1749 by Doris - 1:40 - CARD
Timmo replied to DORIS's topic in - Build logs for subjects built 1501 - 1750
Brilliant work as ever Doris. The flags are spectacular while your skill with sculpting and construction is unbelievable.- 883 replies
-
- royal caroline
- ship of the line
-
(and 1 more)
Tagged with:
-
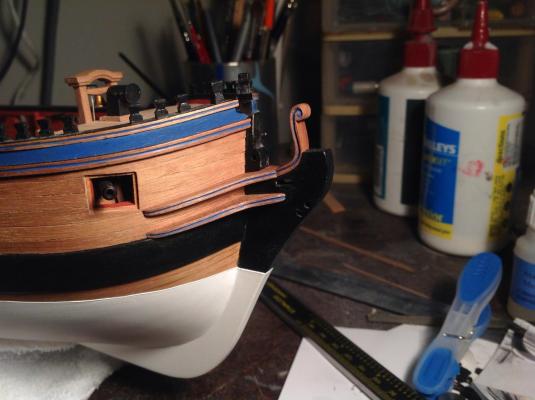
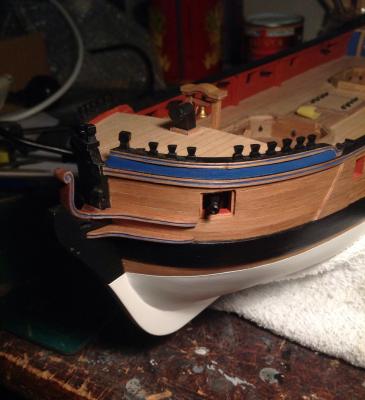
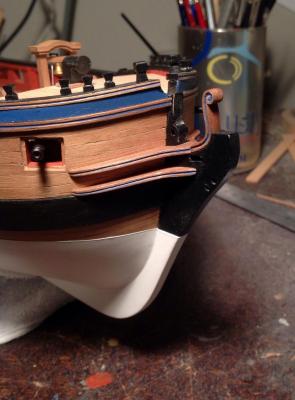
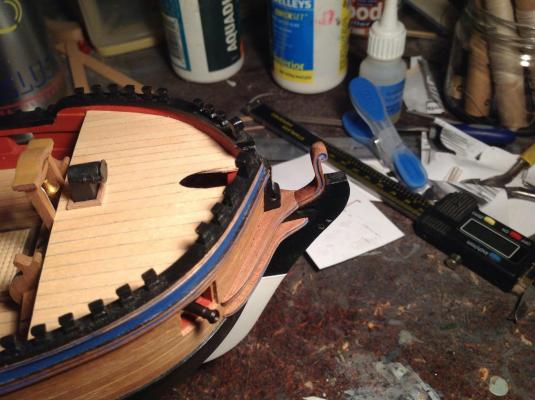
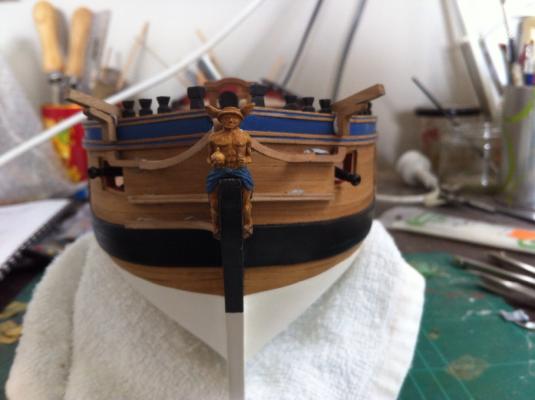
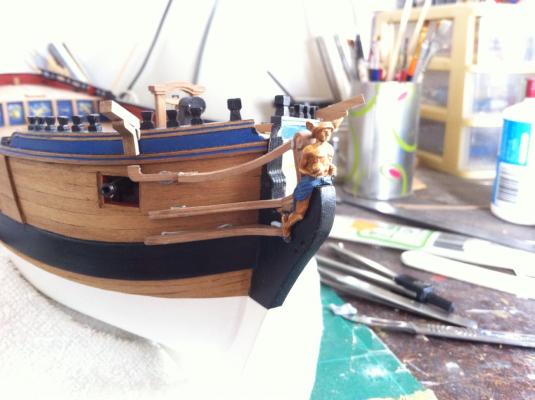
I'd laminated some profiled strip to the front face of the cheeks below the head rails in a burst of activity a few months back. The lamination lines were still visible and not that flash so some new upper and lower cheeks were knocked up from offcuts of the kit walnut cut and shaped to fit. The upper cheeks were made in two pieces with the join on one side. The profile was made with a file as per the others on a ship. The timber was varnished and the blue painted in and tidied up with a blade. The join between the upper cheeks and the head rail will be hidden by the gammoning holding the bowsprit down.
- 366 replies
-
- granado
- caldercraft
-
(and 1 more)
Tagged with:
-
Start and end points marked with dividers and drilled and the rest filled in, or cut out in this case, by eye. It's a short distance so you can get away with it,
- 366 replies
-
- granado
- caldercraft
-
(and 1 more)
Tagged with:
-
Thanks John. The Granado is a nice kit and a good second build. Be sure to post a build log of your first kit. Plenty of encouragement and advice from the fine people on this site.
- 366 replies
-
- granado
- caldercraft
-
(and 1 more)
Tagged with:
-
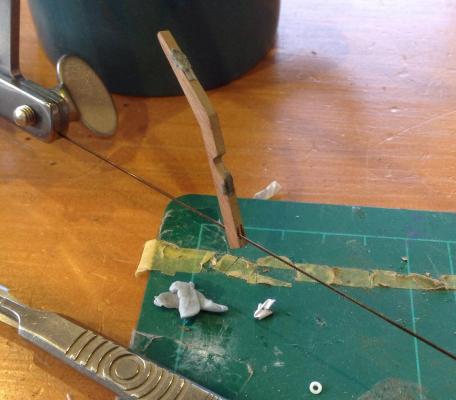
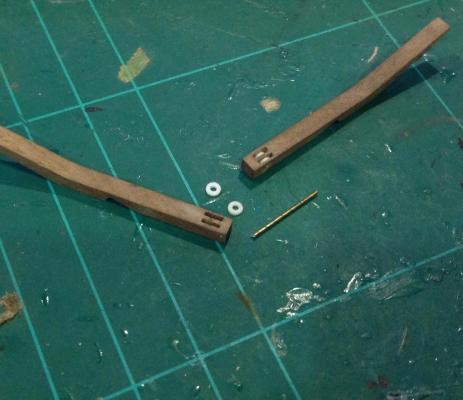
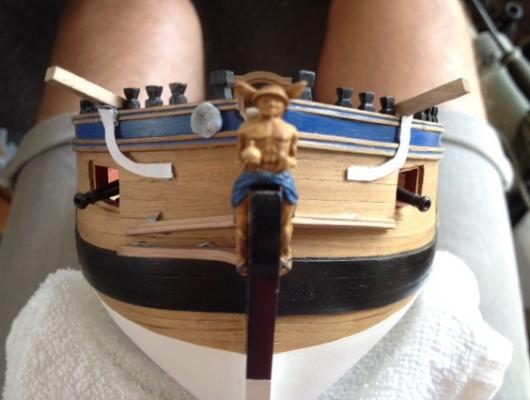
The head rails depend on the cathead for positioning so they have to be knocked out and fitted first. The slots were cut with a jewellers saw. Sheaves were cut from styrene tube and an axle from brass rod. Painting, fitting and the cathead cleat next up.
- 366 replies
-
- granado
- caldercraft
-
(and 1 more)
Tagged with:
-
Wow slog, I haven't seen so much photo etch since my plastic modelling days nicely done.
-
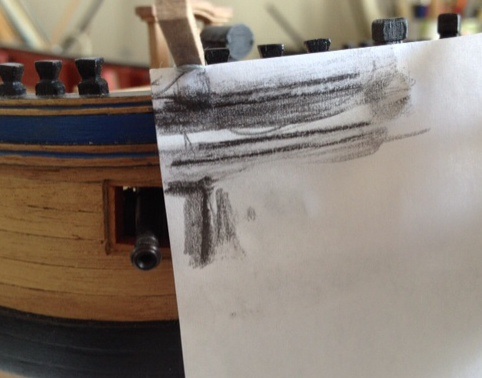
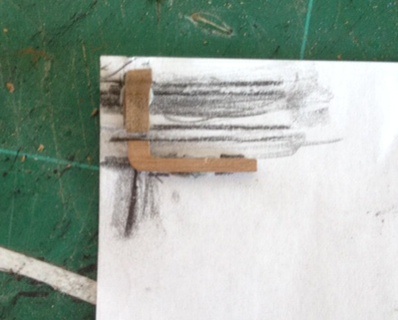
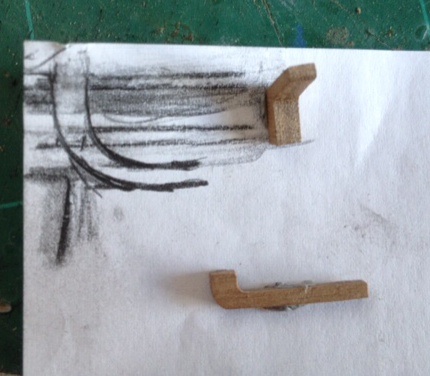
To make a pattern for the knees and head rails a rubbing of the chase port and sheer rail etc was made with a pencil. This was then used to draw in the correct shape for the knee and beginning of the upper head rail. The resulting shape was traced and cut to check it works for the other side. I've laminated some leftover 4mm kit walnut to make some pieces large enough to hopefully cut the knee and entire head rail in one piece, that's it for today. For our northern hemisphere friends it's too hot working in my garage even with a fan on and a refreshing beer close to hand, especially after a morning watching my daughters compete in a triathlon. Great stuff.
- 366 replies
-
- granado
- caldercraft
-
(and 1 more)
Tagged with:
-
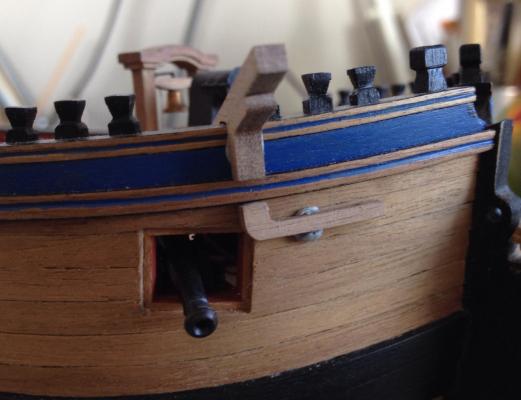
Thanks for the suggestions Kester. I was fairly set on just moving the timber head but I can see now shaping the cathead knee and head rail properly will overcome the problem. I made some mock ups of the kit supplied cathead and head rails to get some idea of how it all should look. As can be seen there's no natural curve to them. It's pretty square.
- 366 replies
-
- granado
- caldercraft
-
(and 1 more)
Tagged with:
-
I'd be interested too Mick. The more people contributing the more opportunities to solve issues like this and help each other out.
- 366 replies
-
- granado
- caldercraft
-
(and 1 more)
Tagged with:
-
Top work Dan. Hard to believe it's the same ship. You're a man of your word sticking with this project.
-
Nice smooth first planking you've got there Eamonn. A great base for the next step. Keep it up.
- 1,039 replies
-
- ballahoo
- caldercraft
-
(and 2 more)
Tagged with:
-
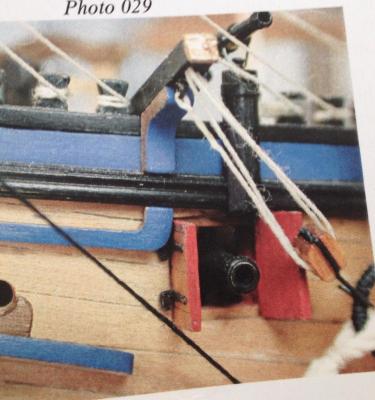
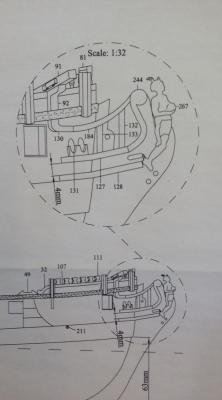
The head rails really take their starting point from the cat heads. Their positioning determines where the cathead knees run down vertically to the top head rail which runs out to the bow. Hence here's an issue which I spotted prior to packing Granado away a few months back - I chose to wilfully ignore it and hope it would sort itself out in the meantime. Unsurprisingly it's been waiting for me ever since. The chase port needs to be positioned far enough back to allow the cathead knee and head rail extension under it to run down from the cathead and clear the chase port like so on the instructions. On my Granado the chase port is too far forward by about 3-4mm it means the timber forming the knee and start of the head rail fouls the port. The port is yet to receive a door which means we need even more room. Here's what it would look like with the stock kit pieces. Clearly not enough room there. Craig and other builders beware and check those ports and shuffle the top rail with their timber head positions if needed. The port side has a little more room but options are: moving chase port ( all but impossible) Shaping cathead knees and head rails for each side so that they follow a natural line away from the port. (Possible but would not do well with symmetry when the hull and head rails are viewed from front. Remove one timber head from the top rail on each side to allow the cathead to move forward to clear the port. (looking the best option so far as there is nothing belayed to the timberhead which would go and few would notice, I'm for the simplest and best looking fix here as this kit was never going to be 100% accurate given my lack of info and skills for many bits.
- 366 replies
-
- granado
- caldercraft
-
(and 1 more)
Tagged with:
-
It's very good and highly recommended. The Granado is a fine model out of the box but I'm lucky enough that my local public library has a copy of AOTS so it's worth adding a few additions.
- 366 replies
-
- granado
- caldercraft
-
(and 1 more)
Tagged with:
-
Hi Bob, Just found your build. Great work you've done on a fine looking vessel. Keep it up.
- 1,477 replies
-
- essex
- model shipways
-
(and 1 more)
Tagged with:
-
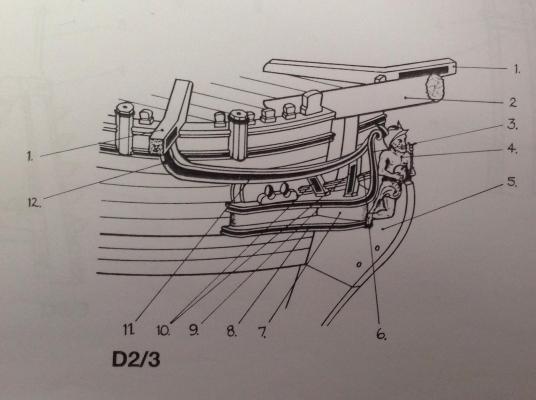
Thanks for the comments Kester. I like your Sherbourne, especially the gaff sail. I battled a long while with sails for mine before giving up as i could never get them o look right for the scale. with the head rails, those are next up once i get back into building. here's what the kit suggests: and here's what the anatomy of the ship has: the kit parts are from walnut ply and might take a bit of bending and shaping to ease a third dimension bend into them but i suspect remaking them will be the best option as i also want the profiled groove running through the centre of the rails as per AOTS and the previous rails I've done on Granado. As for the colour, yes the kit suggests blue but I'll keep it consistant with what i've done so far with a blue strip on the varnished timber. less is more.
- 366 replies
-
- granado
- caldercraft
-
(and 1 more)
Tagged with:
About us
Modelshipworld - Advancing Ship Modeling through Research
SSL Secured
Your security is important for us so this Website is SSL-Secured
NRG Mailing Address
Nautical Research Guild
237 South Lincoln Street
Westmont IL, 60559-1917
Model Ship World ® and the MSW logo are Registered Trademarks, and belong to the Nautical Research Guild (United States Patent and Trademark Office: No. 6,929,264 & No. 6,929,274, registered Dec. 20, 2022)
Helpful Links
About the NRG
If you enjoy building ship models that are historically accurate as well as beautiful, then The Nautical Research Guild (NRG) is just right for you.
The Guild is a non-profit educational organization whose mission is to “Advance Ship Modeling Through Research”. We provide support to our members in their efforts to raise the quality of their model ships.
The Nautical Research Guild has published our world-renowned quarterly magazine, The Nautical Research Journal, since 1955. The pages of the Journal are full of articles by accomplished ship modelers who show you how they create those exquisite details on their models, and by maritime historians who show you the correct details to build. The Journal is available in both print and digital editions. Go to the NRG web site (www.thenrg.org) to download a complimentary digital copy of the Journal. The NRG also publishes plan sets, books and compilations of back issues of the Journal and the former Ships in Scale and Model Ship Builder magazines.


