rwiederrich
-
Posts
5,520 -
Joined
-
Last visited
Content Type
Profiles
Forums
Gallery
Events
Everything posted by rwiederrich
-
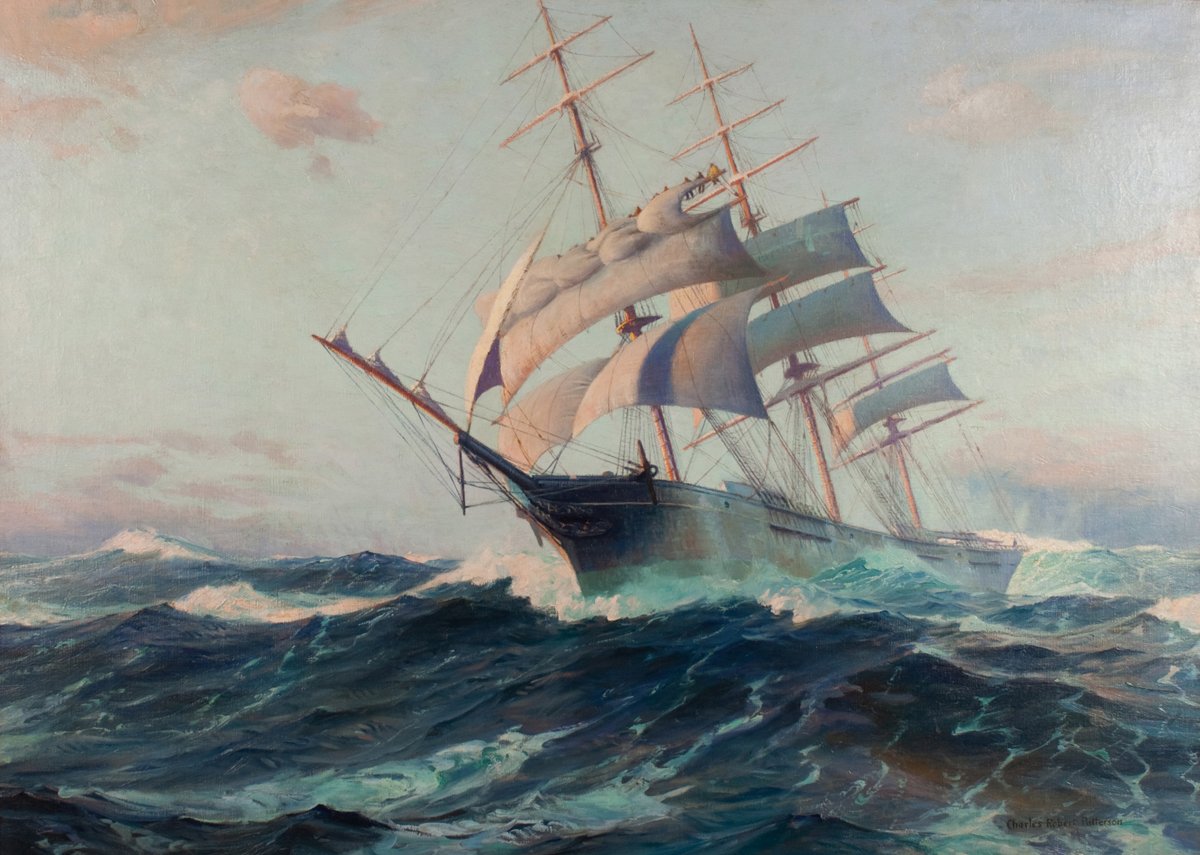
Just for giggles....here are some more images of her bow...photos and paintings Though in the painting, her cheek ornamentation (beneath/behind her figurehead) did not extend onto her hull.
- 3,560 replies
-
- 1
-

-
- clipper
- hull model
- (and 2 more)
-
I wish to share an edited email I received from Michael. It sheds some light on our discussion. The main reason why I want to be patient. "We have to remember that both Patterson and Walters were both professionals but that they were not infallible (Other artists such as Charles Waldron, George Ekren---who commanded Glory in 1902, William Coulter, and several others also made paiintings of her. Whereas, the actual photos do not lie and the launching image which distinctly shows her stem as straight below the waterline can be discerned when you put a straight edge next to the photo image. That is one of the images Ron Haug worked from when he did his drawing and he has the skills developed from being a shipwright for all of his working life (he is 83 years old). I will be writing him a letter this coming week and I will send him copies of photos (I don;t recall what ones I sent to him ten years ago) and ask him to see whether he sees anything different than what he did. Please note that I have close to 80 drawings which Ron has done over the years and this includes his preparing drawings of many of McKay's clippers. He not only worked from builder's models but also worked from offsets preserved in U. S. Customs records held by National Archives. These offsets, derived from Custom House admeasurements are the actual dimensions derrived by government employes to establish gross and net tonnages by actually measuring the interior of a hull according to Custom House regulations. Unfortunately, the original admeasurement for Glory was burned in a filre at the Boston Custom House in the year 1893 so we have to 'guess' what she looked like other than photo analysis. My 'challenge' is indexing all of my existing photographs and catagorizing them by period. When you figure, I first started gathering information on Glory of the Seas back in the year 1957 and thereafter have accomulated photos of her besides getting copies of plans drawn by a number of people My goal is to incorporate this into a revised set of plans similar in format to those I drew in 1979" Rob
- 3,560 replies
-
- 2
-
-
- clipper
- hull model
- (and 2 more)
-
The ultimate consequence of using the medium of wood to construct your creations. All I can suggest is that you, as myself, wait for Michael to provide photographic evidence to aid in any conclusive decision concerning her lines. Physical evidence(such as what we are gathering) is tough/hard evidence....and we both see the same things in each photograph....but Michael assures me there are so many more images to scour through that any premature conclusions....regardless of how convinced we may be from what we have already gathered, so we must be patient to gather all available data. And Brother...we haven't seen everything. But if this is all we had...then I think we could be close. Keep at it...your tenacity is assuring. Rob
- 3,560 replies
-
- 2
-
-
- clipper
- hull model
- (and 2 more)
-
One reason why I am holding out from making a final decision...waiting on Michael to provide more images to aid in either aiding in our conclusions or diminishing them all together. Tell Michael we are so excited and the passion for accuracy is what drives us to be as precise as possible. Rob
- 3,560 replies
-
- 1
-
-
- clipper
- hull model
- (and 2 more)
-
Michael tells me that her gunwal was over 6'....Evidenced by first hand accounts of her crew commenting on how high her sides were from deck level...making a simple look over her sides a near impossibility for the average sailor. This causes one to conclude that all those folks hanging over her rail amidships in her launching image..must have been standing on something on the deck....possibly finishing lumber or kneeling on her pin rail. See how tall her sides were. Great sleuthing..... Rob
.jpeg.0938f8e98445d6baf06fb411a75ebf6d.jpeg)
- 3,560 replies
-
- 1
-
-
- clipper
- hull model
- (and 2 more)
-
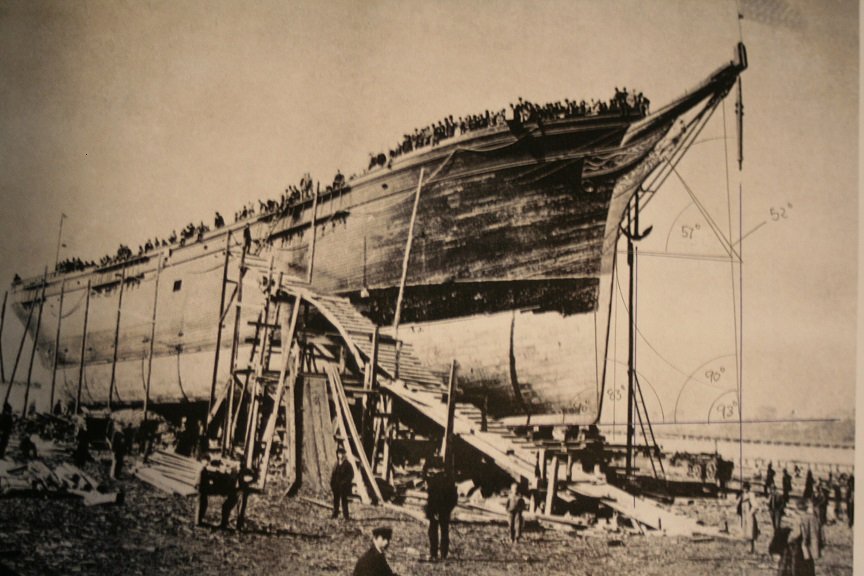
Here are some more measurements. thangle hasd to be reversed from the line drawn down from the martingale. the 90deg is established from the line of the keel. Note the 90deg on the hull. All of the angles are noted. Remember the ship was on her ways..probably(from my measurements was roughly 3deg. It appears from my measurements that the incline of the stem was roughly 83deg, I noted both angles for the stem curve from the cutwater to the figurehead. One from true plum(from the martingale) and one from the actual 90deg. from keel horizontal. Upon further eval it appears the curve of the stem is a slight paraboloid. But photographic anomalies might be at play..due to the angle of the photograph. Your view/opinion up to now? Rob
- 3,560 replies
-
- 4
-
-
- clipper
- hull model
- (and 2 more)
-
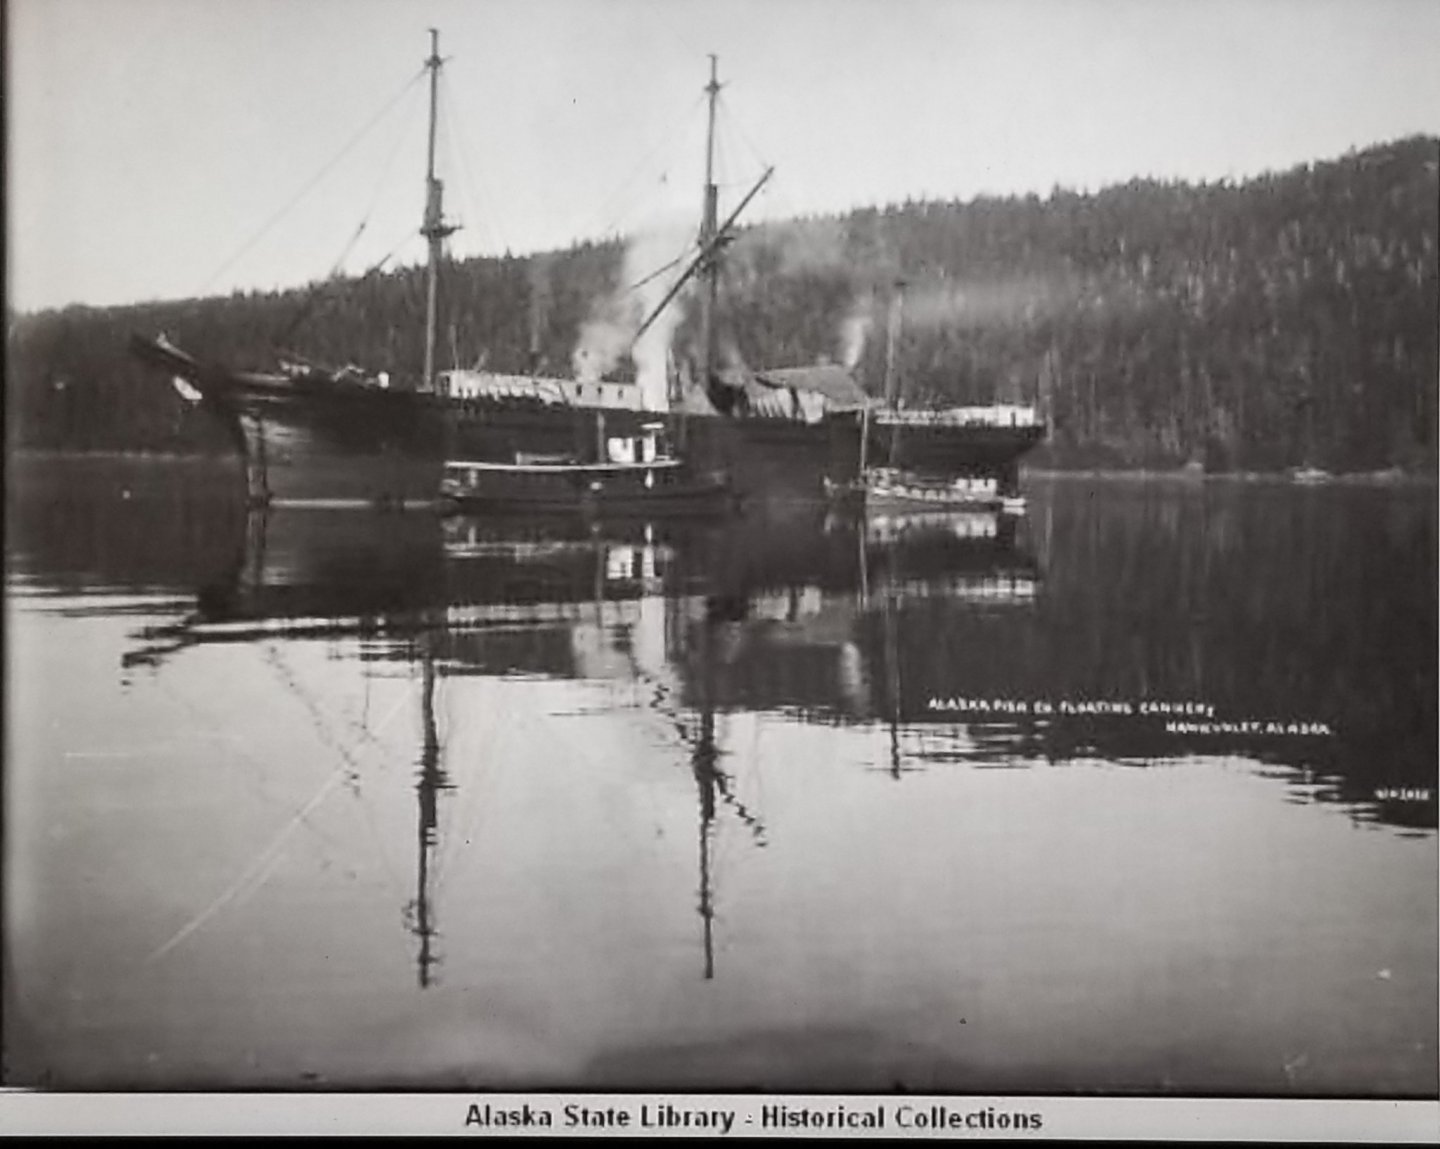
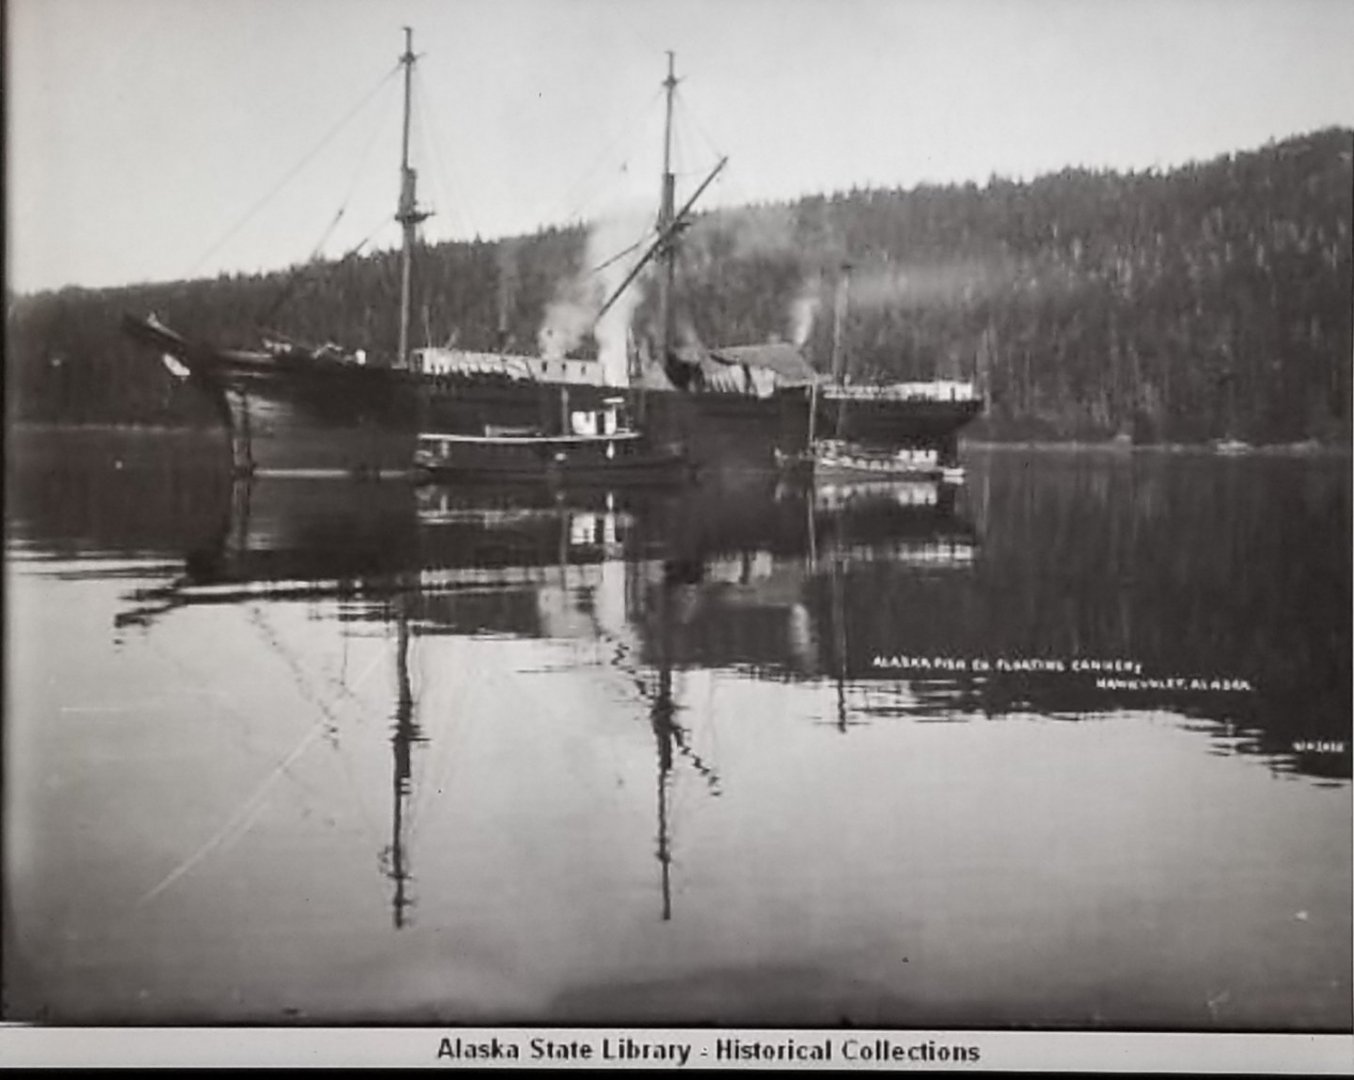
Isn't it interesting that in the top picture..she retains her royal masts....but this is after she received her helm house up in the mizzen....but when she was first hauled up to Alaska she didn't have the helm house nor the royal masts..not to mention the backstays required to maintain them. Just another weird mystery. Rob
- 3,560 replies
-
- 2
-
-
- clipper
- hull model
- (and 2 more)
-
Where did you get that...I want one. Just found one and bought it...yeah! Rob
- 3,560 replies
-
- 2
-
-
- clipper
- hull model
- (and 2 more)
-
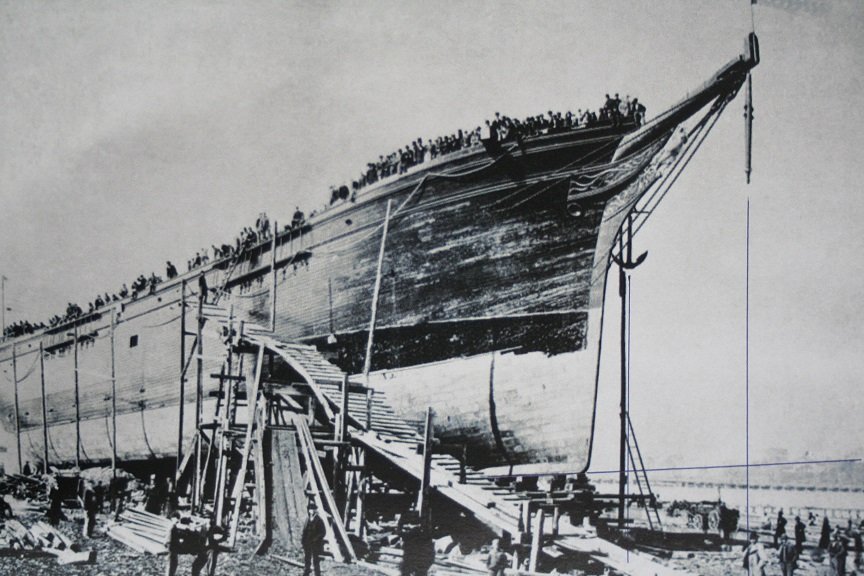
Here is another image with some elevations and measurements...note the slight angle to the bow from true perpendicular/vertical. Rob
- 3,560 replies
-
- 1
-
-
- clipper
- hull model
- (and 2 more)
-
Indeed your arguments are compelling for sure..and one who has a keen eye myself..can't find fault in your evaluation, however I still think it best to wait for further images coming from Michael before we conclude anything. I made some further measurements to the Launching image and found the curve of her prow is spherical from the foot of the figurehead to the cutwater/coppers edge..then flowing at a slight 5 or so degrees aft and down to the keel head. This is so fun, I hope our enthusiasm doesn't fail us for impatience. Rob
- 3,560 replies
-
- 2
-
-
- clipper
- hull model
- (and 2 more)
-
Thought I had that book...but I do now... Thanks. Rob
- 3,560 replies
-
- 1
-
-
- clipper
- hull model
- (and 2 more)
-
Either plum will provide adequate reference. Good thing we are not trying to compensate for Chromatic anomalies that were prevalent in the lenses of cameras of the period...such as coma and astigmatism. It takes an educated and attuned eye to compensate for all the aberrations we are working against...but I think we are roping her in. Rob
- 3,560 replies
-
- 2
-
-
- clipper
- hull model
- (and 2 more)
-
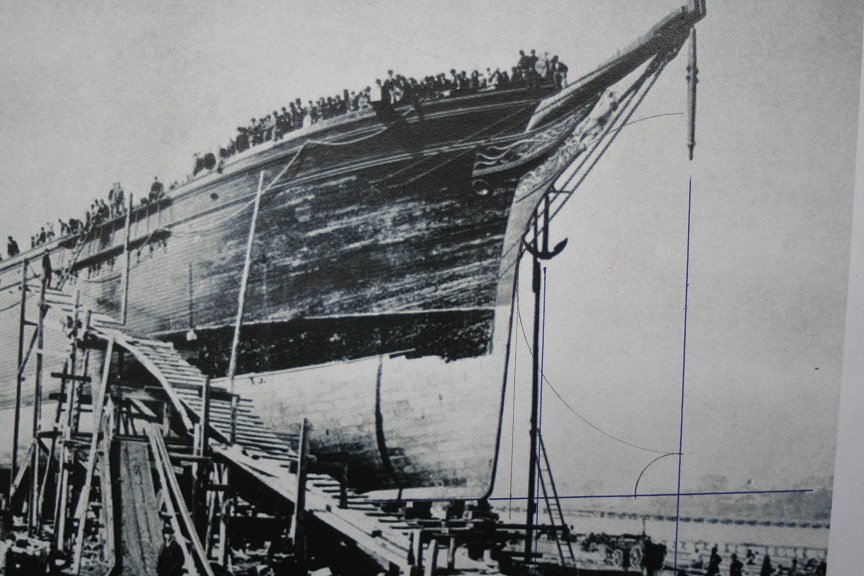
Clipperfan....I took your original image that we all know of Glory on the ways...prior to her launching, and added plumb lines off the anchor and the martingale. then I drew the keel inclination. It is clear the horizon point is evident in the progression to the distance. Now you can see the stem inclination...it is evident it is NOT vertical...but as you can see the right angle established from the conjuncture of the X and Y axis is slightly off...due to the horizontal incline...formed from the angle of exposure. Basically a distortion from the angle were the picture was taken. I believe you were attempting to describe this effect yourself. Any input? Rob
- 3,560 replies
-
- 1
-
-
- clipper
- hull model
- (and 2 more)
-
Ashore...it was socially prudent and morally acceptable to be respectable and honorable of the female figure....Buuuut when at sea me hearties were bold, brash and lusty. I think clipper ships were far more accepting of partially nude figureheads then any military vessel. They tended to burnish military , animal or inanimate subjects. Clipper figureheads represented the physique of the vessel...Beautiful! Rob
- 3,560 replies
-
- 3
-
-
- clipper
- hull model
- (and 2 more)
-
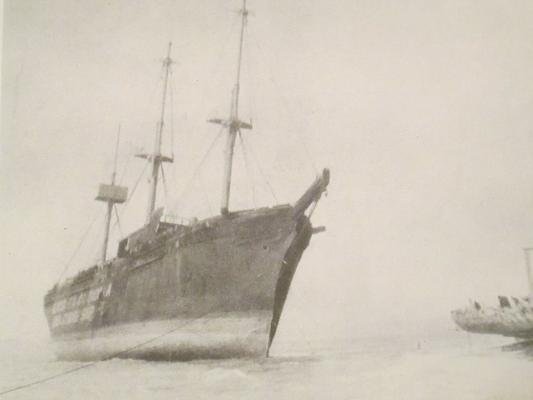
Clipperfan.....for as much work that has already gone into devising the most accurate hull for Glory...your position is far from without merit and I agree. Because I, as you recall, made the same measurements and calculations as you did and presented them myself...but with evidence like the new beach image of her profile it makes determinations that much unclear. Too much distortion for sure. Before I make my final decision, I want tot wait and see more photographs from Michael. Beautiful work by the way....I appreciate your efforts for sure. Rob
- 3,560 replies
-
- 2
-
-
- clipper
- hull model
- (and 2 more)
-
Vladimir, I know too well your own interest in Glory since are conversations last year. Michael Mjelde has been so gracious and he is truly a Vault of information. Still...it is hard to settle on a final drawing until one is fully confident it represents the most accurate depiction...again..this is difficult because it is based on photographic and artistic evidence....which is highly subjective.....relying upon the observers perceptions and perspective. Then again Michael has informed me that he possesses many more photographs of Glory that have never been published...one in particular of a head on view of her in Donald McKay's yard before launching. This may show us the true sweep of her bow curves. Waiting for these additional photographs of Glory from Michael(and there are over a hundred), I am hesitant to make any final conclusions of her true dimensions. Michael is considering allowing me to correct the models stem that he brought to my house and also to finish her...that will be a thrill for sure. Thanks for the fine compliments Rob
- 3,560 replies
-
- 2
-
-
- clipper
- hull model
- (and 2 more)
-
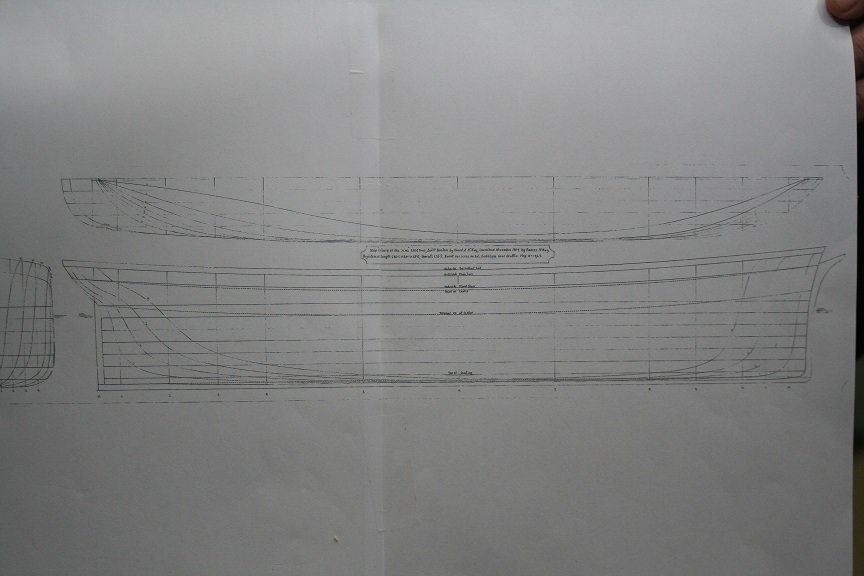
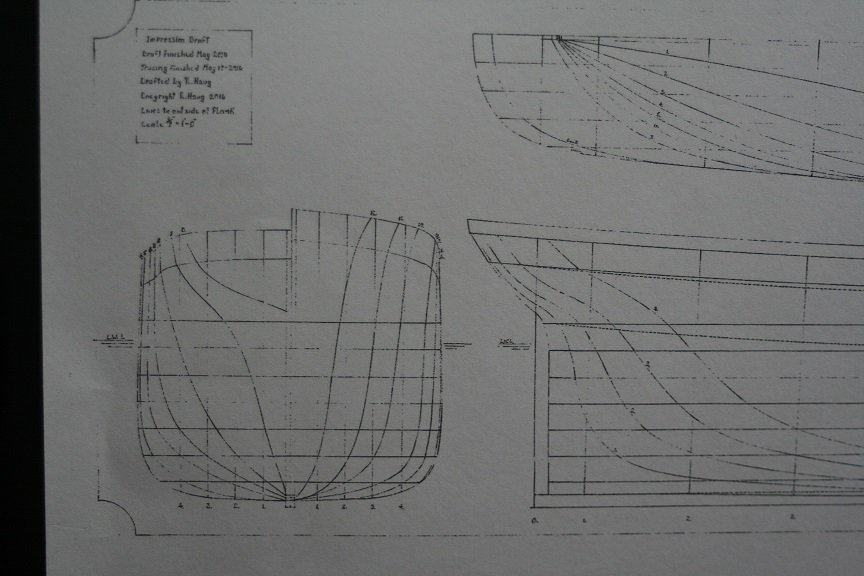
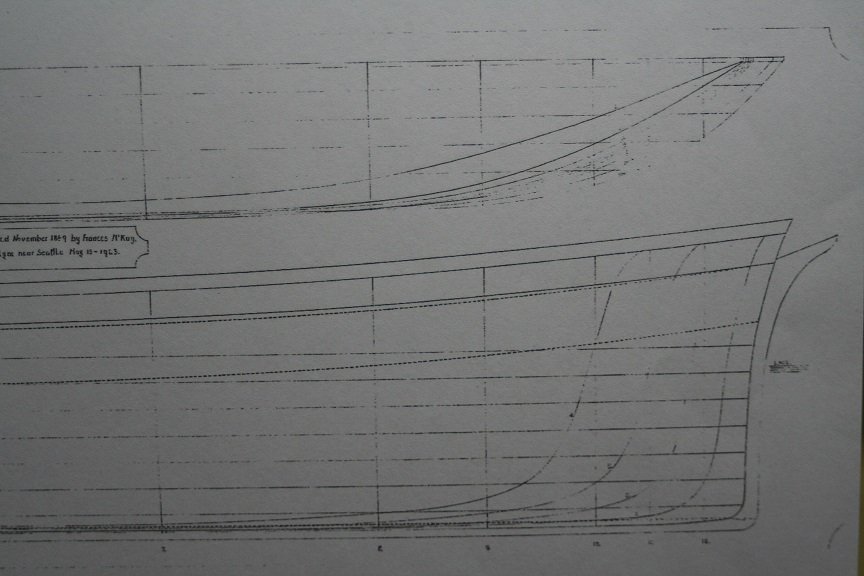
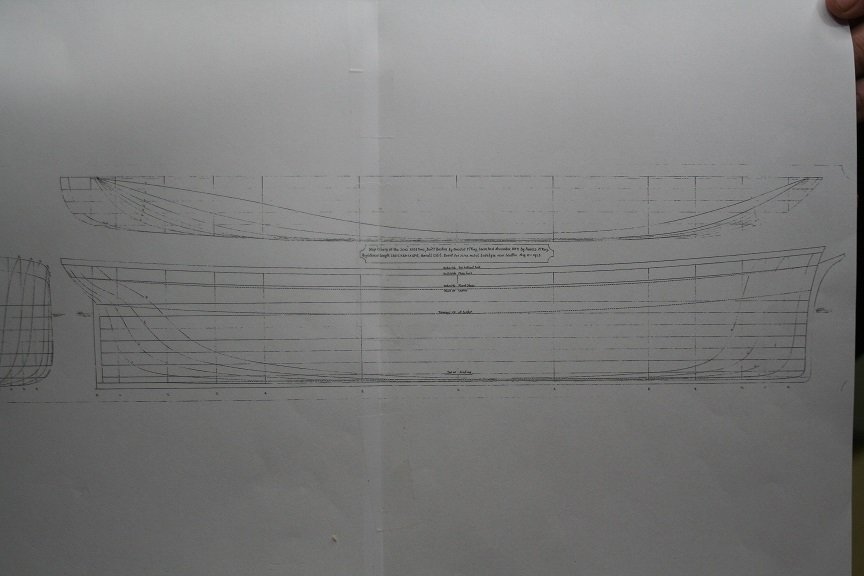
Several point I’d like to make. One, I think the new drawing doesn’t represent the curve of the stem nor the hood very accurately. Though that may not be the focus of the corrected stem and entry compared to Mike’s original drawing. Secondly, I think the unclear example you presented can’t be held without its own issues.......namely the ever exaggerated sweeping cut water. , which I think is too extreme, based on other photographs. Apart from some minor corrections to the foot of the figurehead and the length of the hood , I think my representation mostly mimics that of the last image I posted of her on the beach...and that of her launching photos. Please remember, I still need to correct the curve of her rail. Please correct me if you find fault in my assessment.
- 3,560 replies
-
- 2
-
-
- clipper
- hull model
- (and 2 more)
-
Here is a copy of the new drawings...on several pages Note the bow and the entrance lines. Compare these to Michaels old drawings.
- 3,560 replies
-
- 4
-
-
- clipper
- hull model
- (and 2 more)
-
I sped it along so you will probably receive it on Monday. I know how I would feel(Inside), knowing a signed copy of a book I chrished was or could be, inches away from my grasp....and knowing that it was altogether an impossibility. I felt that way for you...and knowing that, you knew, that I spent time with a historical hero we both admired so....and was a procurer of said signed book.....well....I took the next joyous step and wanted to pass along the thrill to you. It really wasn't all that difficult....it just took the thought and then the action. Do unto others as you would have them do unto you, is a good creed to live by. Happy days. I'll put together the accurate drawings and take a pic and post them here. Rob
- 3,560 replies
-
- 2
-
-
- clipper
- hull model
- (and 2 more)
-
Michael...you're a man after my own heart. I too build diorama scenes and play with model railroading. Your shop is absolutely amazing...my lathe and mill are out in the garage for metal working. I would love to see anything you wish to post concerning these other *Side hobbies*. Rob(Oh... and the pilot cutter is looking fantastic)
-
I'd appreciate seeing all that you have on the figurehead. I know you've been working on it for some time now. The book is all packaged up and is going out to the Post today. Rob
- 3,560 replies
-
- 1
-
-
- clipper
- hull model
- (and 2 more)
-
Interesting...if I had their name..my wife is an excellent sleuth and she might be able to locate the family and from there, the whereabouts of the model. Rob
- 3,560 replies
-
- 1
-
-
- clipper
- hull model
- (and 2 more)
-
I knew Mike had 3 models made, but I was under the impression the one you brought was the only one he possessed? *Bare bones* hulls can be completed...I wonder if Mike would entertain the notion of allowing me to finish it? Rob
- 3,560 replies
-
- 1
-
-
- clipper
- hull model
- (and 2 more)
-
I too have thought about contacting the Peabody museum myself for this very purpose. I encourage you to go full steam ahead and find out all that you can. I'll be very interested in what ever you find. Anyone who posts a picture(the cover picture of Michael's book) of the Glory of the Seas as his avatar is, in my book deserving. All the best Rob
- 3,560 replies
-
- 1
-
-
- clipper
- hull model
- (and 2 more)