HOLIDAY DONATION DRIVE - SUPPORT MSW - DO YOUR PART TO KEEP THIS GREAT FORUM GOING! (Only 36 donations so far out of 49,000 members - C'mon guys!)
×


rwiederrich
-
Posts
5,518 -
Joined
-
Last visited
Content Type
Profiles
Forums
Gallery
Events
Everything posted by rwiederrich
-
Compare to my example as she currently sits...without modifications. Rob
- 3,560 replies
-
- 6
-

-

-
- clipper
- hull model
- (and 2 more)
-
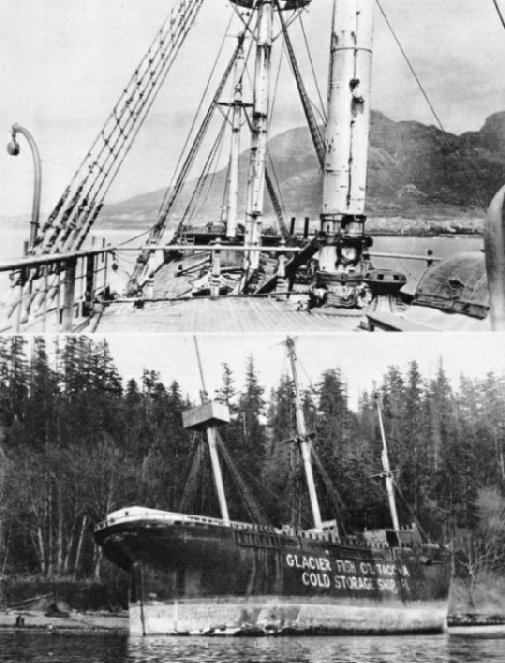
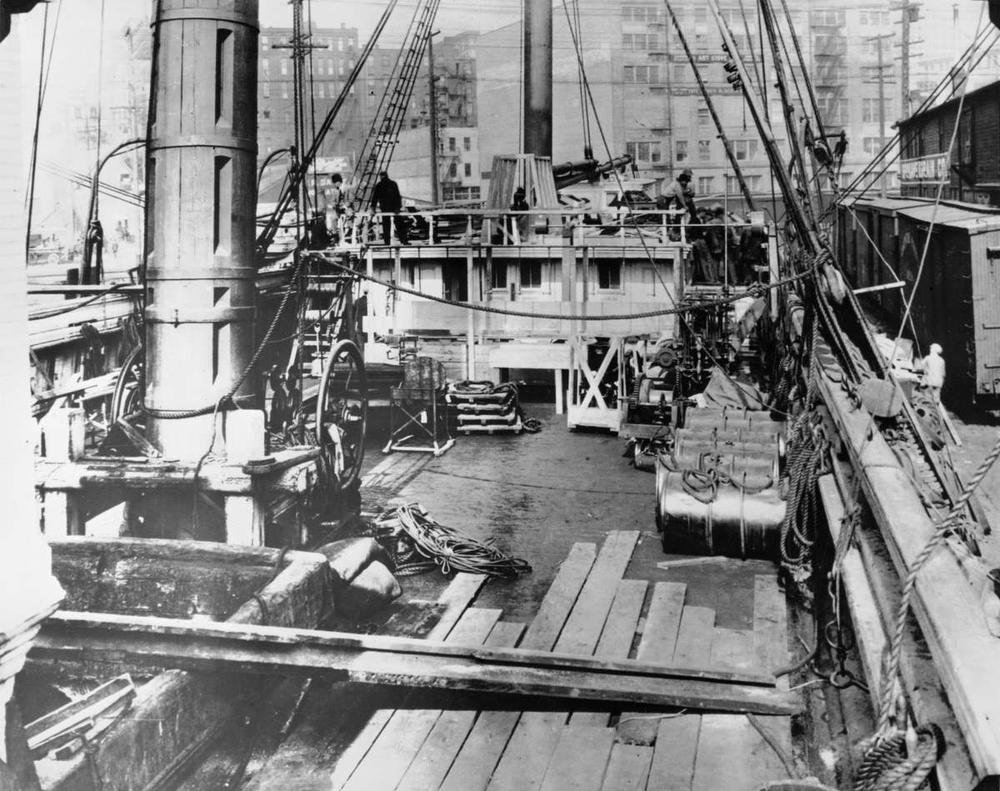
This new image of Glory as she rested on the beach at Endoline...definitely shows here near vertical entrance....verifying what our group had speculated. Rob
.thumb.jpg.b40da3e797fb3f2bf492f6d3cf96d8e9.jpg)
- 3,560 replies
-
- 7
-
-
- clipper
- hull model
- (and 2 more)
-
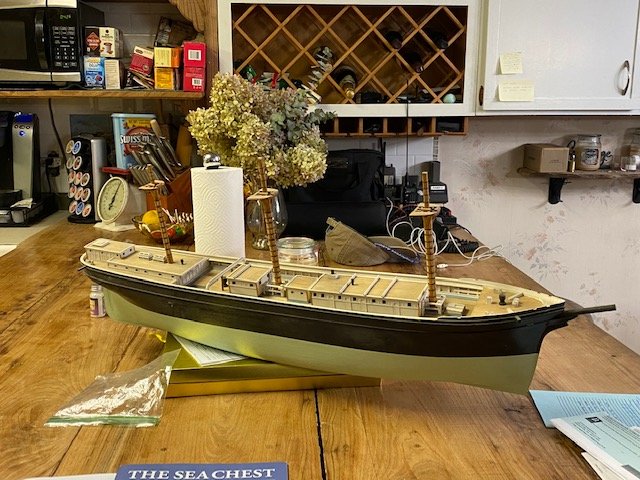
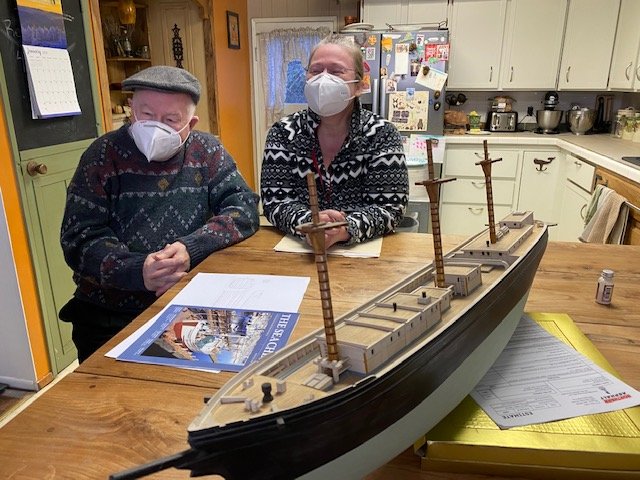
One image of the fine model. The model shipwright Michael employed over 40 years ago did a magnificent job. And this model was built entirely from Balsa...it was finely detailed and as light as a feather. Impeccable. She was built in her later configuration with extended helm to the poop cabin and both the cabin boy house and the chicken coop over the main hatchway.
- 3,560 replies
-
- 10
-
-
- clipper
- hull model
- (and 2 more)
-
Much of our conversation revolved around Glory's history and of the many revelations he gained along his long journey of exploration. His daughter Arina is quite the historian in her own right. We are discussing the many side topics concerning Glory crew members family and how Michael acquired so much history. This meeting was a highlight of my own historical endeavors. I was so blessed to have them in my home and to enjoy their subject matter expertise.

- 3,560 replies
-
- 7
-
-
-
- clipper
- hull model
- (and 2 more)
-
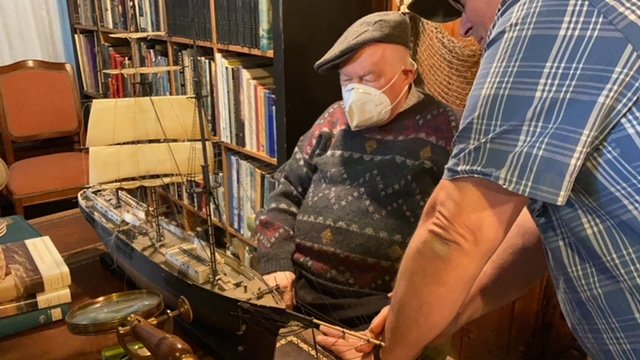
He was enthralled by my Great Republic. He himself is not a modeler, but he was so impressed...he knew I would create a superior model of Glory based upon the new drawings. I was so honored.

- 3,560 replies
-
- 9
-
-
- clipper
- hull model
- (and 2 more)
-
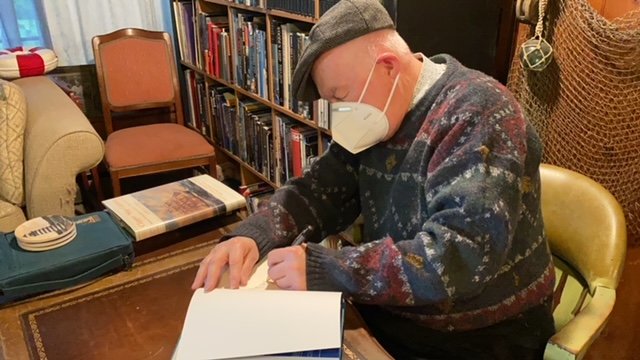
I could not let this encounter slip away without a proper book signing. He signed three of my books. We talked about the third book that he has at the publishers about the last voyage of the Gory....exciting!
- 3,560 replies
-
- 5
-
-
-
- clipper
- hull model
- (and 2 more)
-
I'm showing Michael my original composite build of Glory, explaining to him how I modified the hull of an old Revell Cutty Sark. He was impressed......as I was enjoyed.
- 3,560 replies
-
- 8
-
-
- clipper
- hull model
- (and 2 more)
-
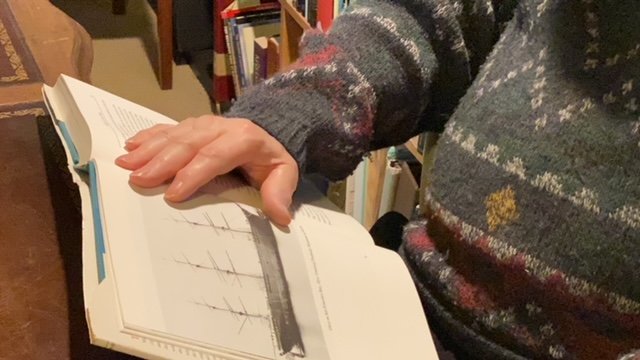
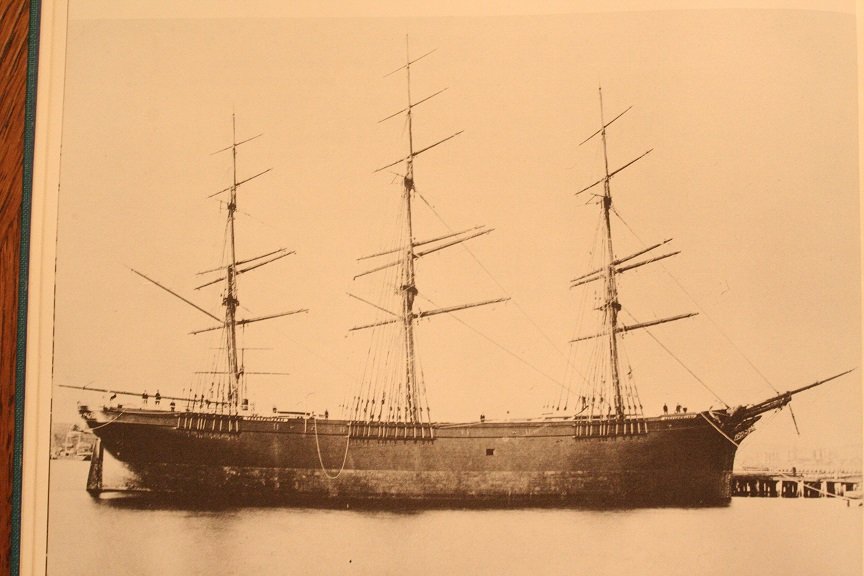
Michael explaining the error in the identification of this famous image of Glory. He told me that it was not of her in San Francisco...but actually of her just after launching in Donald McKay's yard...
- 3,560 replies
-
- 3
-
-
- clipper
- hull model
- (and 2 more)
-
Well here is a brief description of my meeting with Michael Mjelde and his daughter Arina(The authors daughter). We enjoyed several hours of discussion and quite frankly....astounding revelation. Michaels involvement in Glory's history is far more reaching then anyone could ever imagine. I learned that there are over a hundred additional photographs of her that he has acquired from family of former crew members and other sources...that have NEVER been published. Even original hand written letters from Donald himself. Needless to say at this news I was overwhelmed. So much history that I was unaware of was discussed. History that I hope to be introduced to in the near future. Michael brought with him an original model that he had commissioned by a model shipwright over 40 years ago....built from the vary original plans he had devised. they did contain some of his original errors...but since having the line drawings remade and corrected...a new model...a more accurate one can be built. Not failing to recognize the extreme quality of this model...the builder was very experienced. I'm enclosing several images with a mild description of each. First...Michael with Arina discussing the original model.
- 3,560 replies
-
- 8
-
-

-
- clipper
- hull model
- (and 2 more)
-
Yes the Donald McKay clan figurehead spent years in this field by that tree..before it was collected up and donated to the Seaport Village in Mystic.

-
Bob...as with most of your observations....your descriptions are worth a pot of gold. I entirely agree with your observations and applications. Rigging and sails, as you rightly depict, are the greatest scale violations in model ship building(IMHV). Rob
-
Coming along nicely. I like the idea of painting her green as originally designed by McKay....getting the *right* green may be more of an issue. It may take some research to find what color compositions existed for green back in the 1850's. Rob
-
Nic...she's beautiful. wonderful job for sure.....just wonderful. Where ya gonna put her on display at? You making a case for her? Rob
-
Arina....you've been instrumental in the entire process of introduction to your father. I've only read of other artists(Model shipwrights) having an audience with your father...but to imagine myself in that company is a real honor for me. Thank you. Rob
- 3,560 replies
-
- 4
-
-
- clipper
- hull model
- (and 2 more)
-
I told Michael of the wonderful membership of fellow model shipwrights and our cooperation in working out the most accurate hull of the Glory and how we concluded that the drawings he made over 20 years ago were inaccurate. He completely agreed and was excited to hear of our project that nearly mirrored that of his own and his Australian accomplice. I’m so excited to show him our communitive progress. I have so much to discuss with him......and to show him my collection of Glory artifacts.
- 3,560 replies
-
- 3
-
-
- clipper
- hull model
- (and 2 more)
-
I've been in contact with Michael Mjelde and boy oh boy do I have some news for you all. Mike has been in touch with a professional shipwright in Australia who through much effort by using every available photograph and being a designer of *DownEasters*, has designed and produced accurate drawings of the Glory of the Seas. Mike is meeting with me this weekend and we will discuss my own current project and he will be giving me a copy of the hull plans......... I will be getting him to autograph my two volumes he has written on the subject and If I am very fortunate I might get a peek at his new manuscript of his new book on the Glory of the Seas. I am like a kid in a candy store. Best wishes to all.... Rob
- 3,560 replies
-
- 5
-
-
- clipper
- hull model
- (and 2 more)
-
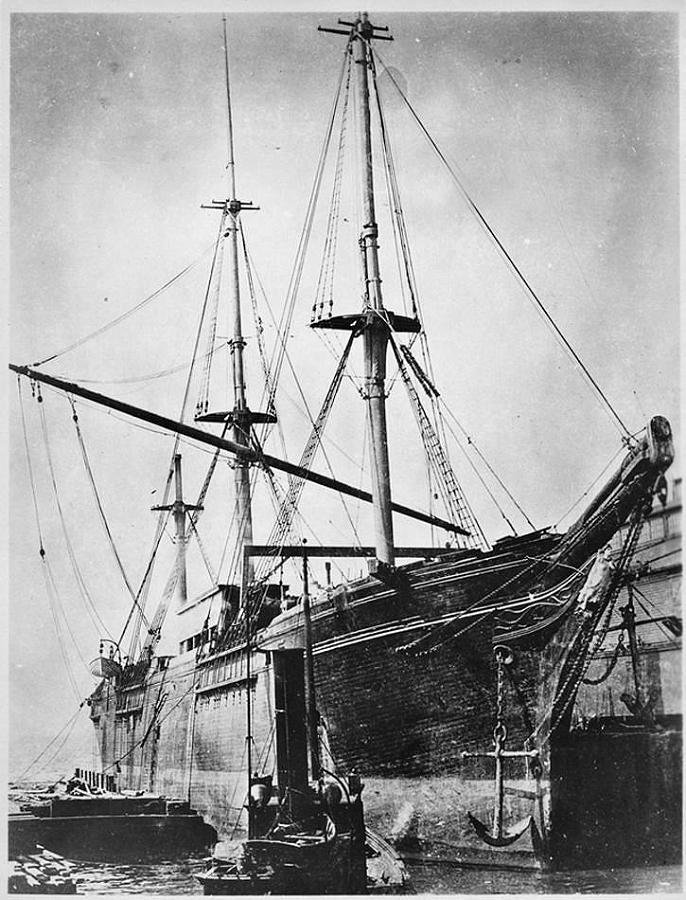
Well I completely disagree. This vessel is not the Young America. This vessel has only 5 yards on her for and main...the YA had 6. this vessel definitely has the shrouds and deadeyes originating from on or within the bulwark (a typically British method for her composite ships). The stern ornamentation location is incorrectly located...not to mention the blatant poop rounded exterior...which is very much a British clipper design. Lets not forget the chain plates and channels which are NOT exterior or below the planksheer. These items alone would require significant hull and rigging modifications. Note the existence of a fifth shroud on the mizzen. If Ed did his do diligence,(And I know he did), he would have never made this mistake on his model. And I find it hard to believe she would have been modified to mimic a British clipper. No Monkey gaff and the gentleman in the for ground appears to be wearing a Bowler hat......come on....(Had to throw that in there). I can see far too many inconsistencies for me to be comfortable saying this vessel is the YA. Personally I think this old image was incorrectly identified by an uniformed bystander. Rob
- 3,618 replies
-
- 1
-
-
- young america
- clipper
- (and 1 more)
-
Well since it's getting cold outside...it usually means I have to have the material laid, and trawled out in about 10 minutes. If it was warmer even less. That mean the initial set has occurred and I can begin carving down any over exaggerated material shortly there after. I generally prefer the material to be totally dry so I can carve and sand without clogging my discs. I spent some time sanding and filling also tonight...this I'll let cure over night and will work some more after work tomorrow. Just to keep this build interesting...I plan on using lots of dental materials in its construction. I will be using UVL cured cements to afix the main and monkey rails..not to mention any and all the sheer and chainplate structures and moldings. UVL cements cure instantly and become a hard plastic...10 times stronger then typical type cements. Plus this makes the build go by far more rapidly. No waiting for glues to dry...just zap the cement with a UV light and done. We're getting there folks. Rob
- 3,560 replies
-
- 3
-
-
- clipper
- hull model
- (and 2 more)
-
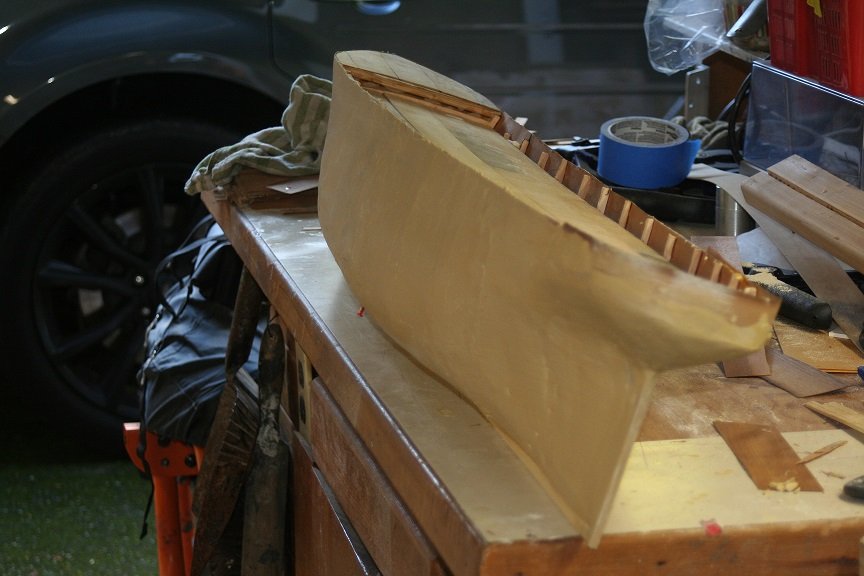
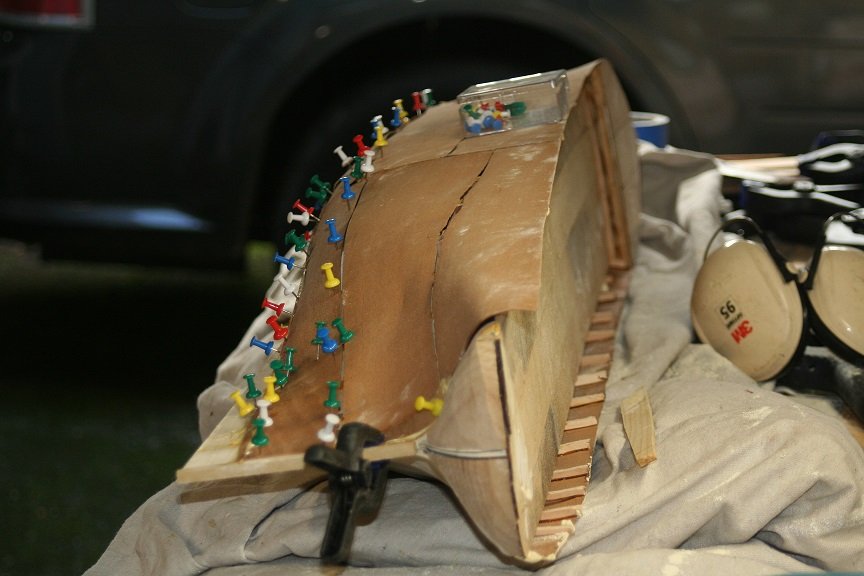
Spent some time working and adding material to the starboard side.

- 3,560 replies
-
- 9
-
-
- clipper
- hull model
- (and 2 more)
-
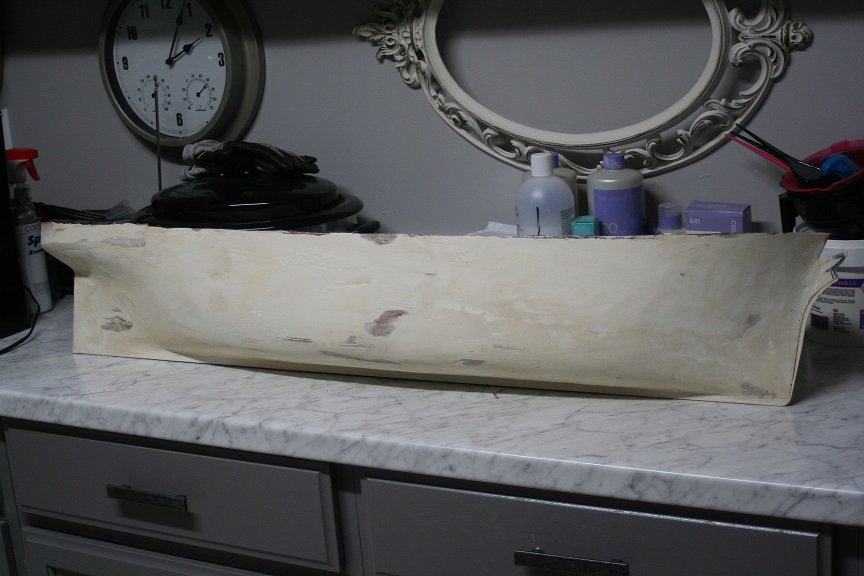
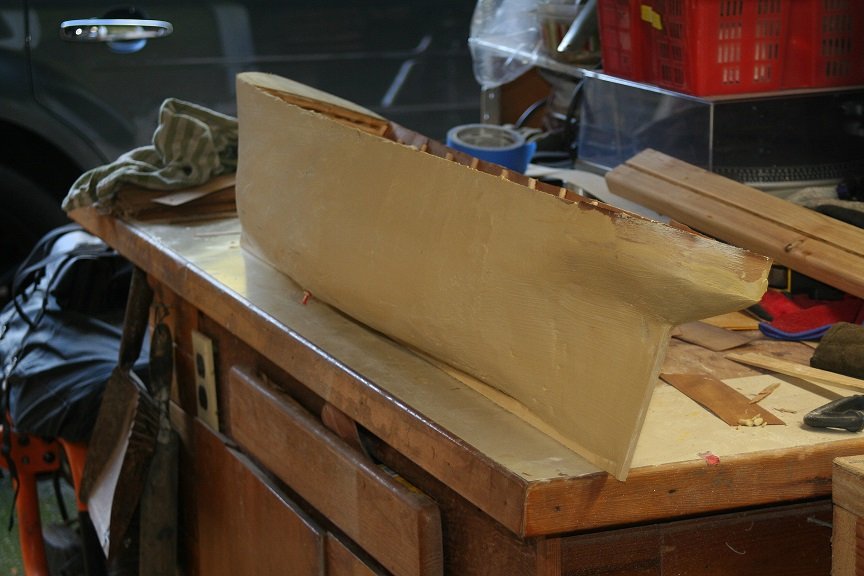
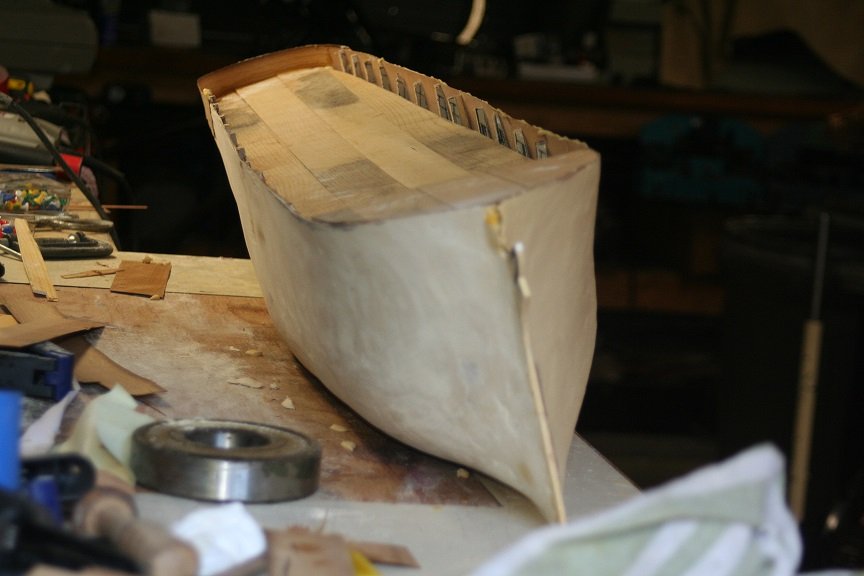
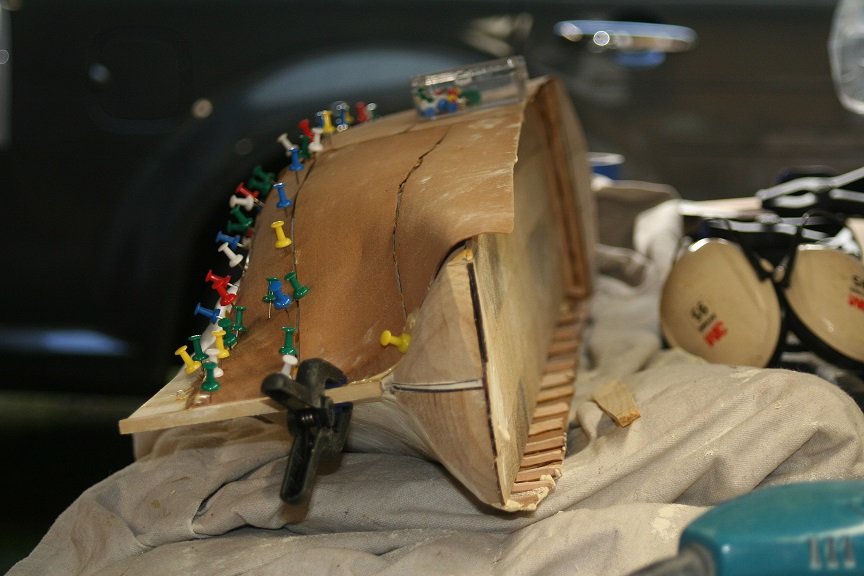
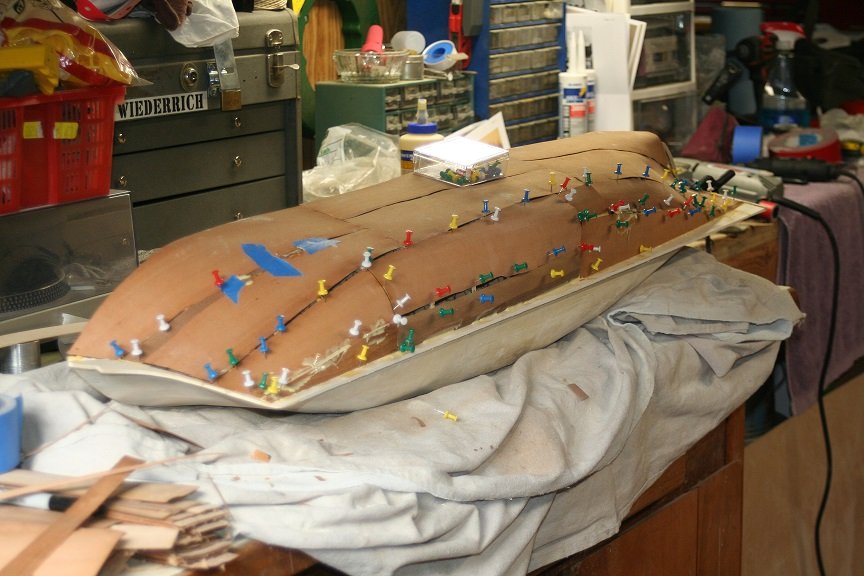
Spent a little time prepping the starboard side for silicone stone application. Rob

- 3,560 replies
-
- 7
-
-
- clipper
- hull model
- (and 2 more)
-
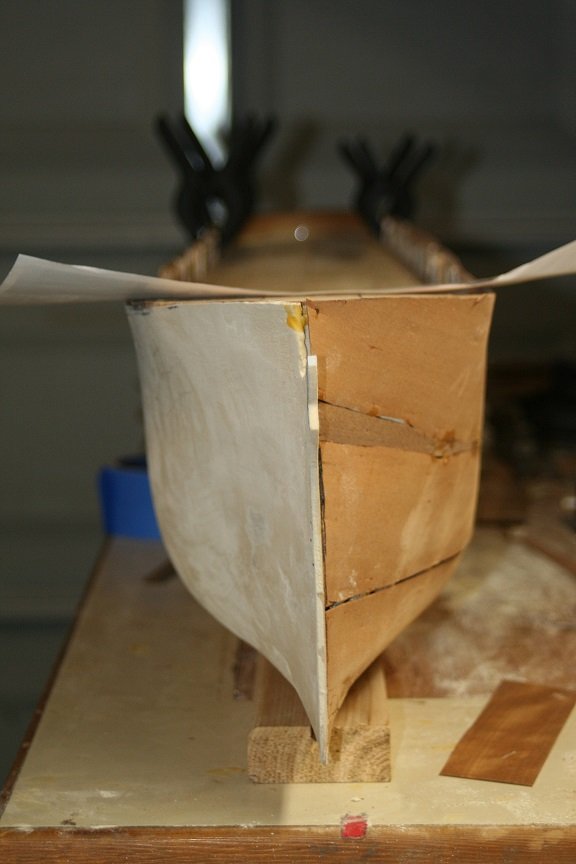
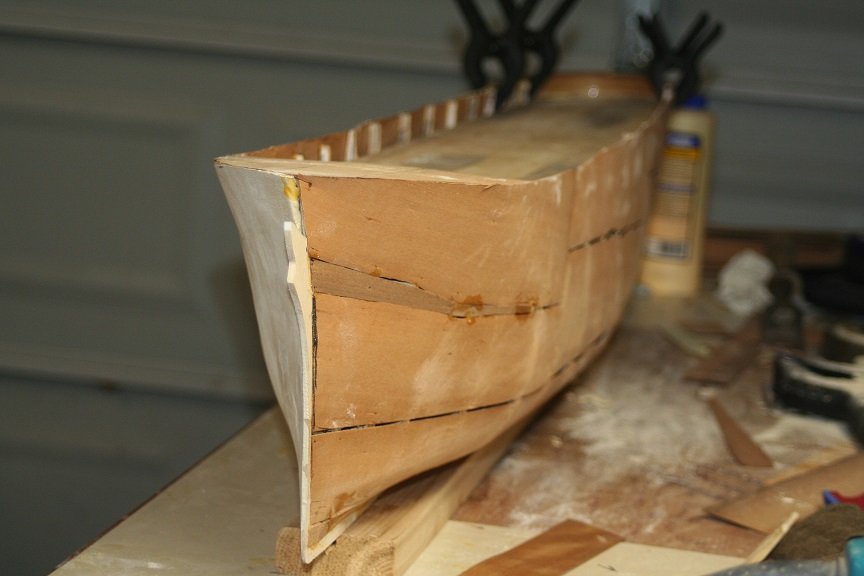
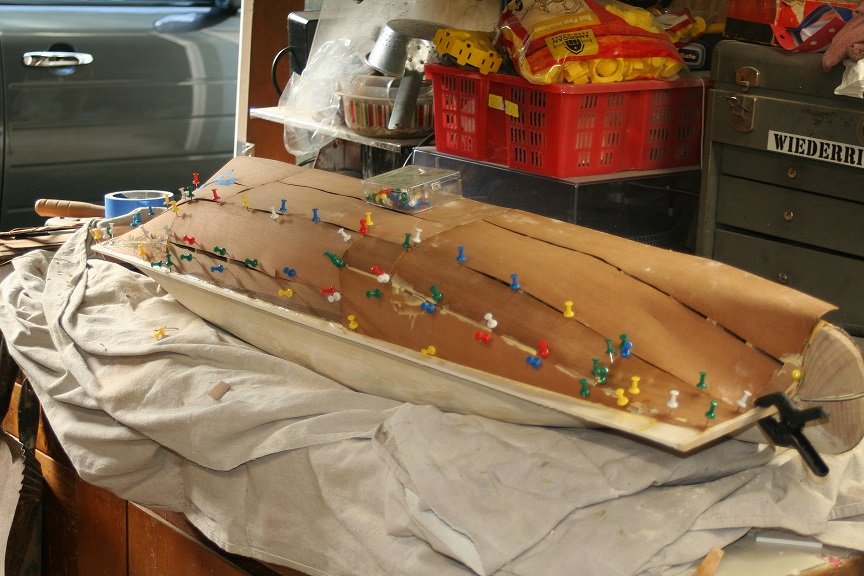
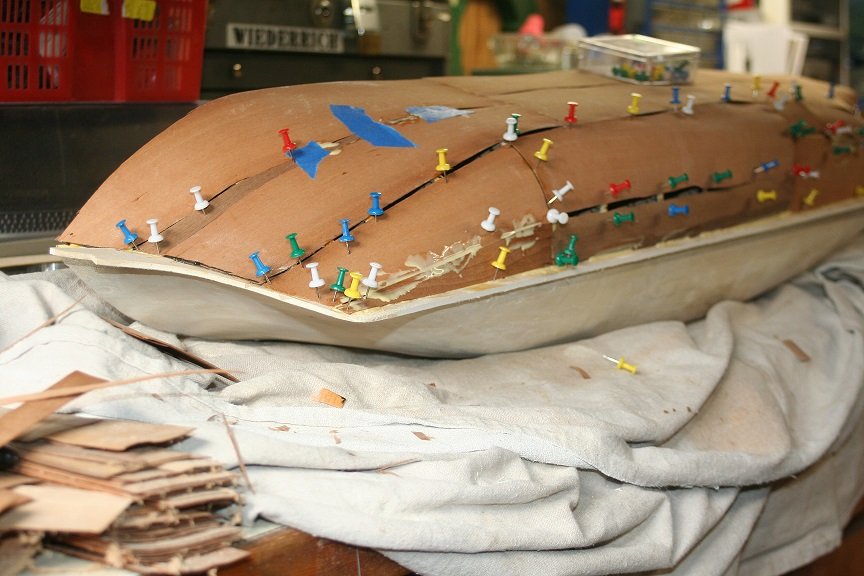
Back to my insanity. I laid down the sub veneer on the port side....once dried I will then again begin adding the coats of acrylic stone to form this side of the hull. The starboard side has its second coat already and it is dry...a few more touch-ups and it will be ready for final finishing. I'm waiting to get the starboard side to the same level of finish before I finish both sides together. I pray, I have not lost a faithful audience...thinking I have gone completely mad..straying away from hard and true planking techniques for a back alley quick remedy for success. However I have always contended that I use unorthodox techniques and materials when I build my models. Remember friends it is the finished product that maters...not how we get there. Here are some pics of the doings from my frankensteinian laboratory...... Rob
- 3,560 replies
-
- 9
-
-
- clipper
- hull model
- (and 2 more)
-
Great sleuthing Clipper fan. I had realized she had very tall sides...39 1/2 ft was my goal...but the new eval of 40' 10" makes sense. Just use deductive comparison analysis....look at these already posted images to see what I mean. Look at the height of her sides above the copper line and the height of her gunals from main deck level.
.jpeg.37e29255d37a0f23740223c73ffe069d.jpeg)
- 3,560 replies
-
- 9
-
-
- clipper
- hull model
- (and 2 more)
.jpg.2612769fb2016a4b91546f4ce518026f.jpg)