HOLIDAY DONATION DRIVE - SUPPORT MSW - DO YOUR PART TO KEEP THIS GREAT FORUM GOING! (Only 53 donations so far out of 49,000 members - C'mon guys!)
×


rwiederrich
-
Posts
5,518 -
Joined
-
Last visited
Content Type
Profiles
Forums
Gallery
Events
Everything posted by rwiederrich
-
I'm also toying with the idea of vacuum forming the billows and then gluing them together at the buntline seams...this idea seams to have great possibilities. Then the final product will get a good coat of paint. I can create wood molds that I can then put in my vacuum former to create the pieces to form the entire sail....... This idea sounds good too...... Oh my mind is a whir of deep cosmic transient thoughts....... Something genius will pop out I'm sure...... Rob
- 1,208 replies
-
- 4
-

-
- great republic
- clipper
- (and 1 more)
-
One other note: Just as one would modify furled sail material(Not using the full sail to furl), I will cut and modify the sail to appear to be reefed up(along with the actual bunt and leach lines). One must utilize forced perspective to achieve the desired result....and visually modifying the sail to *appear* as if it is being let out or furled, without going through the tedium of folding each billow and crease within the sail. Rob
- 1,208 replies
-
- 1
-
-
- great republic
- clipper
- (and 1 more)
-
Indeed...I have Separator used for sealing against acrylics made for plasters and dental stones....it will do the trick. It will be like working with paper machete ...... just without the starch. I have a feeling this technique will develop as I go along. Rob
- 1,208 replies
-
- 2
-
-
- great republic
- clipper
- (and 1 more)
-
I've decided I will make a mold out of plaster and form the wet paper sail to it to create the billowed sail..... Pics will follow as I develop the mold...... Rob
- 1,208 replies
-
- 3
-
-
- great republic
- clipper
- (and 1 more)
-
Yes...a convincing billow with all the activity of the buntlines and sheets does present a real issue...however, working with paper that has been wetted and then molded into a convincing shape and then dried can be done successfully. Once fully dried the sail is then painted and rigged just as I have outlined with the other sails. I appreciate your opinion...and I tend to agree with you. I'll fully experiment with the technique before I conclude it will be good enough for the model....but I have high hopes. I'll keep everyone informed of my progress. Rob
- 1,208 replies
-
- 3
-
-
- great republic
- clipper
- (and 1 more)
-
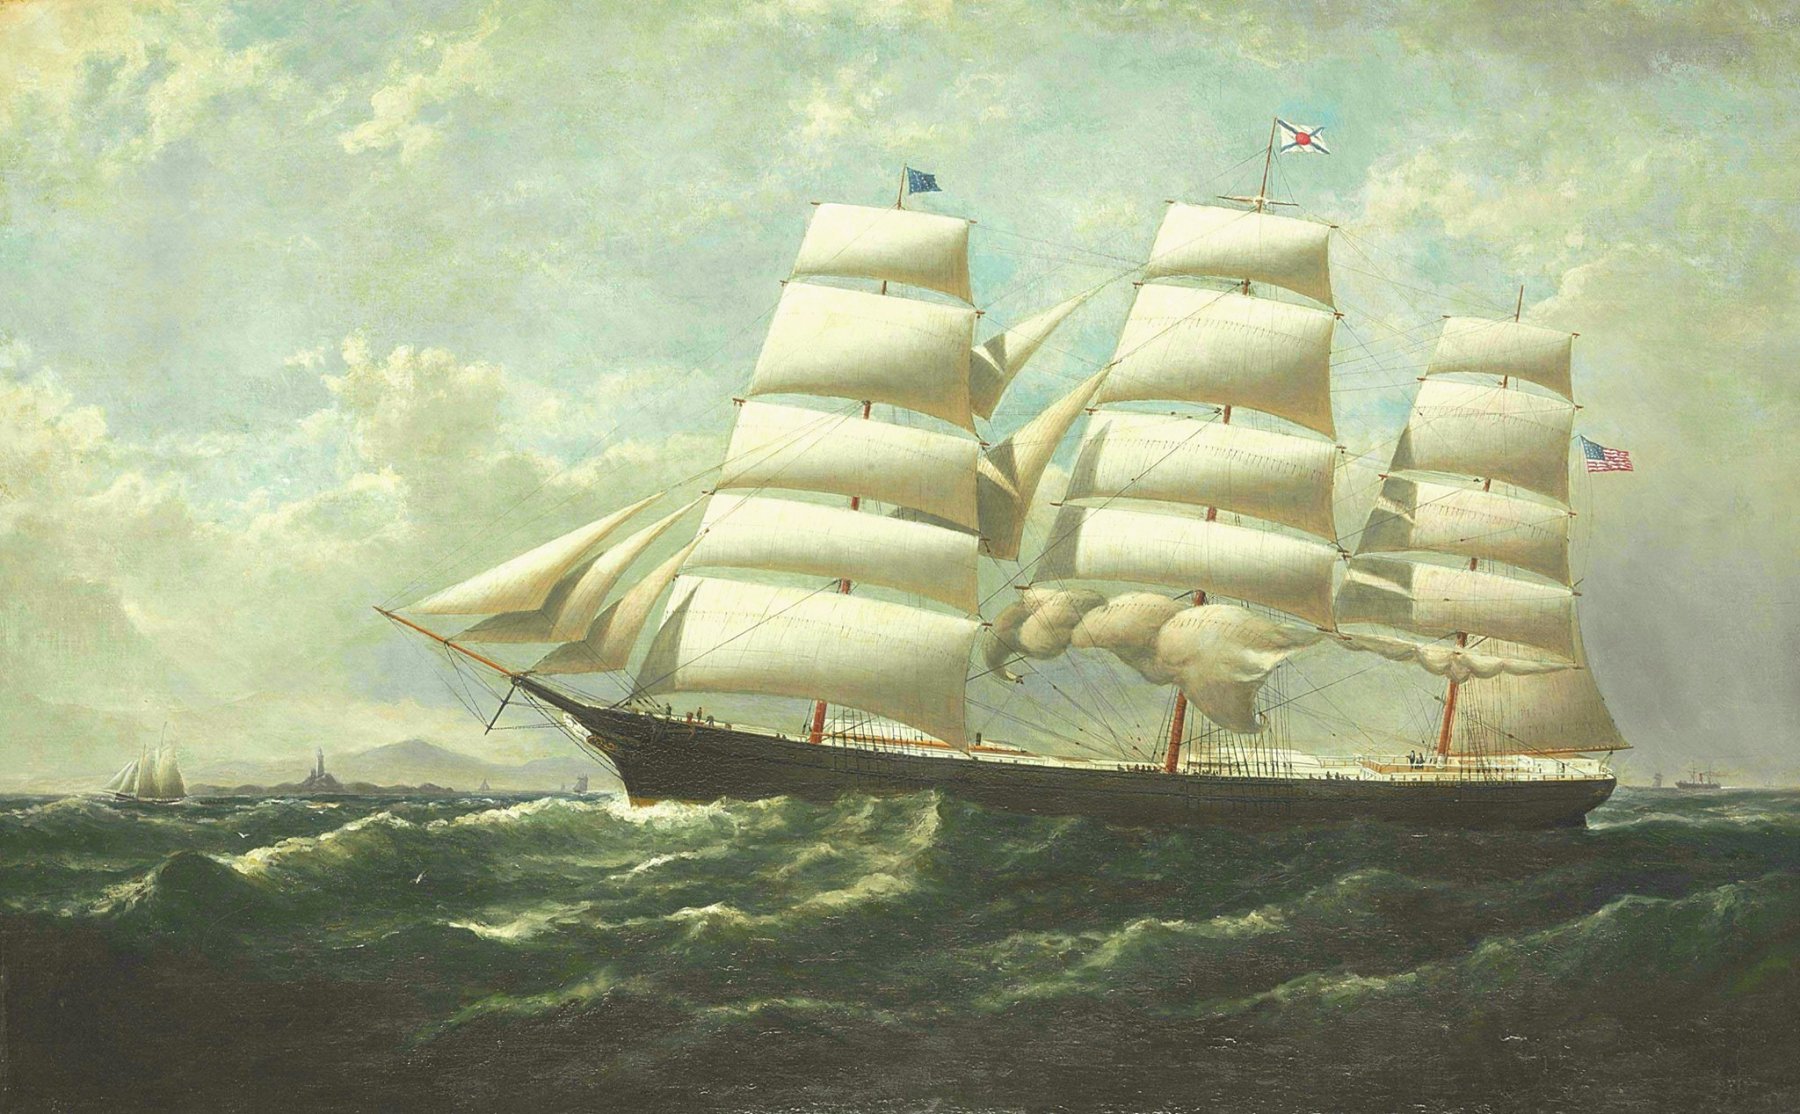
When I begin the lower topsail...I had hoped to create a bit of wear on the sail by creating a discolored panel...or simulate several repaired panels by making them slightly darker. It was not unusual to have even fairly new canvas that was not perfect looking....there were slight differences in the panels. I think the added detail will greatly add to the authenticity of the sails. I even toyed with the idea of making the main sheet billowy as if being furled or nearly unfurled. And the Mizzen main furled. Similar to this image of Glory of the Seas. Any opinions with that idea?

- 1,208 replies
-
- 4
-
-
- great republic
- clipper
- (and 1 more)
-
Fantastic work Doris...just amazing. It is extremely clear you are a master sculptor as well as a ship modeler. I was reading up on another friends build and he used *Sculptamold* for his moldings....is your material similar? And the question did come up about shrinkage...have you notice any in your carvings after you bake them? Third question....are you simply creating a putty mold of the original and casting more to form the other 3 sides you will need...or will you be going old school and creating each individually? Rob
- 1,035 replies
-
- 7
-
-
- royal katherine
- ship of the line
- (and 1 more)
-
Thanks for the update Ed....will be patiently awaiting your new images install. Rob
- 3,618 replies
-
- 3
-
-
- young america
- clipper
- (and 1 more)
-
Thanks for the fine compliments everyone.... Two mast stepped and shrouded.......half way done with that...... Miles to go. Rob
- 1,208 replies
-
- 2
-
-
- great republic
- clipper
- (and 1 more)
-
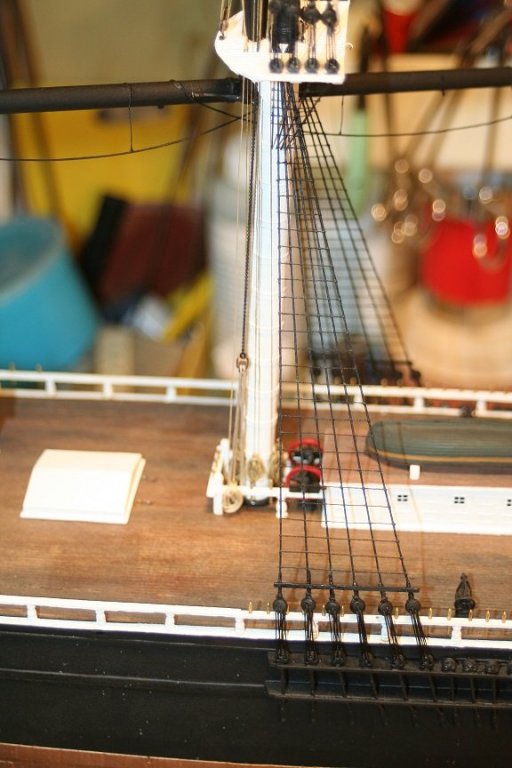
Finished with the ratlines....Now onto the lower topsail fabrication. Rob

- 1,208 replies
-
- 11
-
-
- great republic
- clipper
- (and 1 more)
-
Thank you very much. I too, tend to pay close attention to details that may go unnoticed on other folks models. As you rightly pointed out..some, young in the hobby, make mistakes unbeknownst to themselves...and others, cleverly disguise or distract alterations/modifications for some unknown practical purpose. (Not forgetting the need at times for great artistic license due to lack of credible information). Both of these characterizations will cause the discrete educated observer to question. I appreciate your observation and most of all your desire to point out a blaring error that without proper explanation could leave a model and its builder with less than a reputable reputation. I'm no expert....but I'm also no novice. More like a *Hack* then a purist. Rob
- 1,208 replies
-
- 5
-
-
- great republic
- clipper
- (and 1 more)
-
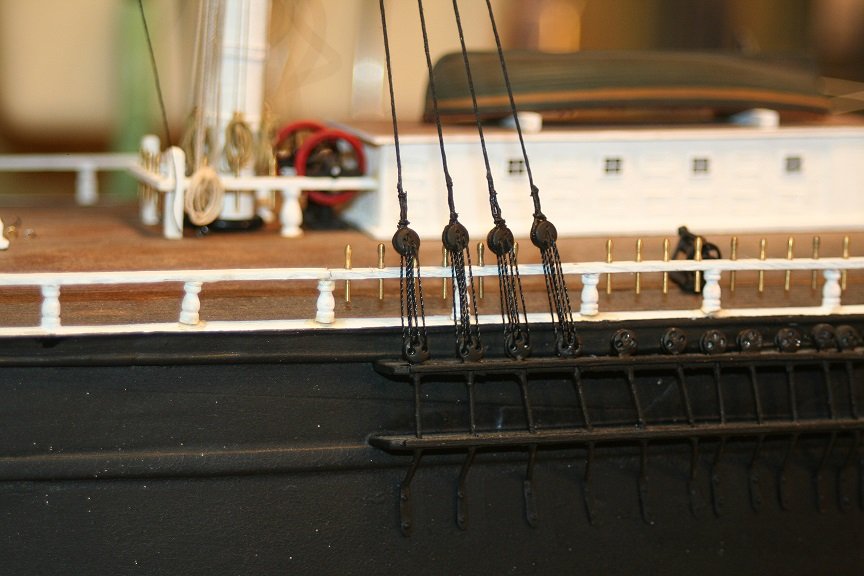
Good catch.....I intentionally placed the channel deadeyes upside down to facilitate the means by which I attached the deadeyes to the channels. Holes were drilled up and into the deadeyes so a wire could *bolt*(In my case glue) the deadeye in place. if the scale of the model had been larger then 1/128...say 1/96 or 1/72...I would have stropped the eyes with banding as would have been typical. I chose the more expedient compromise. Like I've said before...I'm not a purist...but I sure know the difference. Nearly 48 years of passionate study of the subject allows me the license to alter minor details to satisfy the need to actually have a completion date for this model...... In my case the modification nearly goes unnoticed....unless close-up pics are provided to give away the modification. I've been found out. Here are some finished foot ropes...that are NOT typically fixed with clove hitches.
- 1,208 replies
-
- 8
-
-
- great republic
- clipper
- (and 1 more)
-
Today I begun the rigging of the main mast shrouds. I hope to have them done today, along with the ratlines.

- 1,208 replies
-
- 6
-
-
- great republic
- clipper
- (and 1 more)
-
Hopefully dangerous enough to spur you to action...and you attempt to build her as a receiving ship. I'd follow that log with great interest. Really, all one needs is the two hull halves of a Revell 1/96 version and they can scratch build the rest with the help of HO scale lumber from any number of HO scale logging kits....or simple strip styrene...scale windows can be had easily as well...... There...I got you started.....ready....set.....go. Rob
- 1,208 replies
-
- 2
-
-
- great republic
- clipper
- (and 1 more)
-
Well executed....and wonderfully mounted. Lovely. Rob
- 131 replies
-
- 4
-
-
- bottle
- the old man and the sea
- (and 1 more)
-
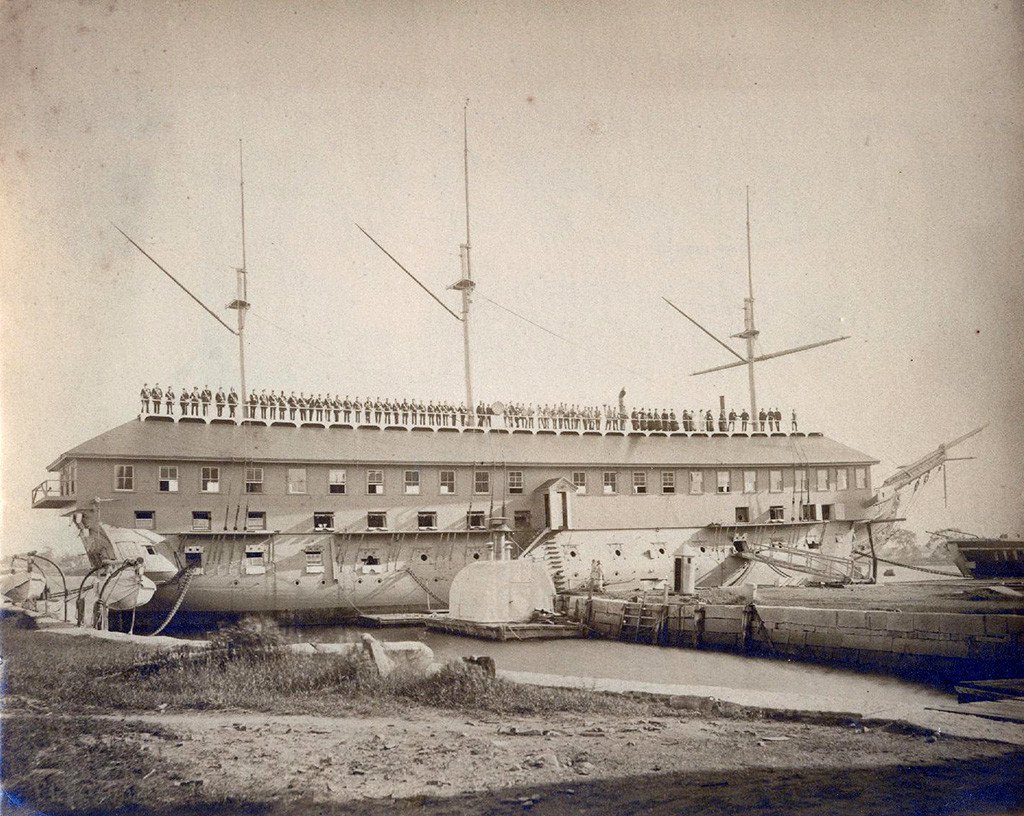
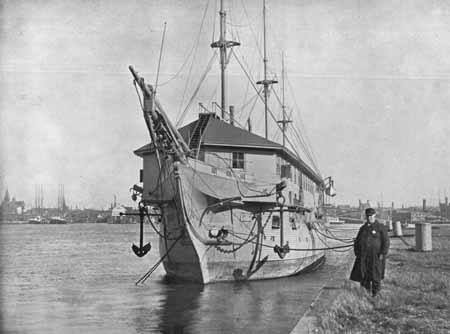
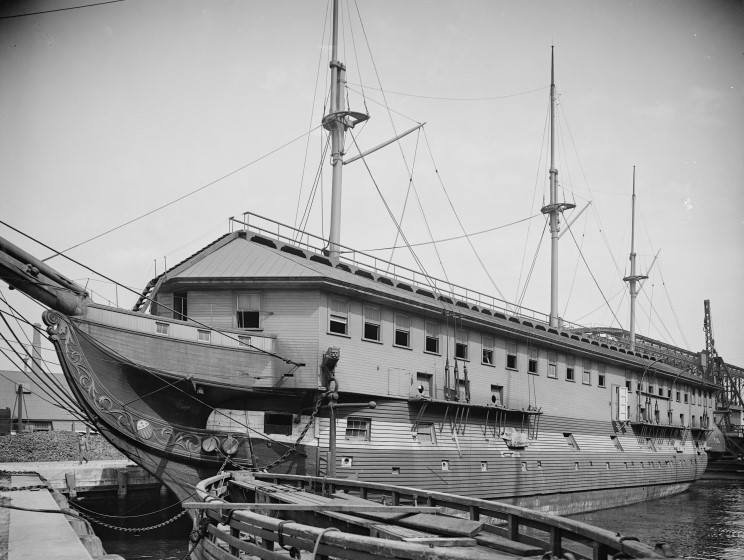
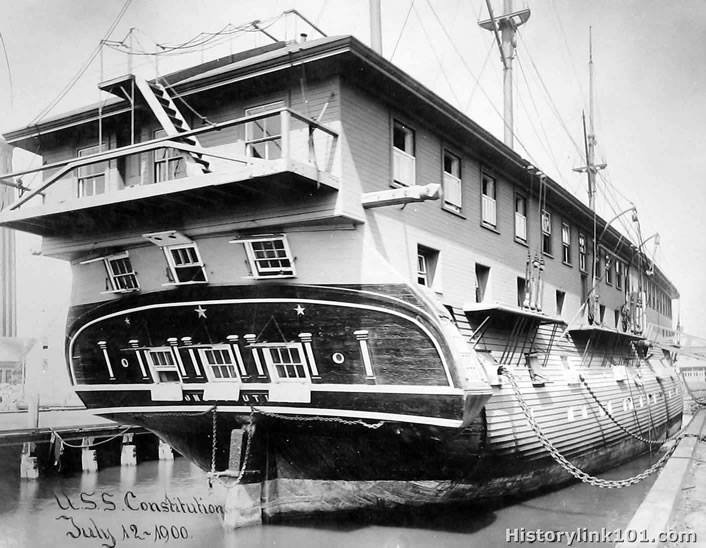
Harvey...From what I gather.she was resided only in clapboard to simulate her *building* appearance and to *clean her up* as it were. I will provide some more images for your pleasure. I completely agree...in this state...at this point in her history..she would make a fascinating model. Something you just don't see everyday. There are plenty of models of her during her original rig and some during the war of 1812 and even later...but none of her in her less attractive days as a receiving ship. I'd love to know if you would consider building her...I'd love to follow that log. There are lots of images and articles about her as a receiving ship on line. Good luck. Rob

- 1,208 replies
-
- 5
-
-
- great republic
- clipper
- (and 1 more)
-
Wonderful mod...Doris. Nice solution to correct a slight distance error. Rob
- 1,035 replies
-
- 7
-
-
- royal katherine
- ship of the line
- (and 1 more)
-
HMCSS Victoria 1855 by BANYAN - 1:72
rwiederrich replied to BANYAN's topic in - Build logs for subjects built 1851 - 1900
Pat...I revisited your log and I have to say I copied an image(Lat year) of your build when you just added the figurehead,,,,but failed to comment since. You are creating very impressive work...fine, clean and accurate. Very impressive for sure. I fully enjoyed my revisit......Love your work. Love the subject too. Rob- 1,007 replies
-
- 4
-
-
- gun dispatch vessel
- victoria
- (and 2 more)
-
Personally, I think a 1/96 model of the Constitution as a receiving ship would be an awesome project....I'm considering it. I did the derelict Ferreira(AKA Cutty Sark). What a conversation piece. Few people realize that the Constitution served in other capacities.
- 1,208 replies
-
- 8
-
-
- great republic
- clipper
- (and 1 more)
-
I have an extensive library...and I just added *Deep Water Sail* to it.....Thanks. Rob
-
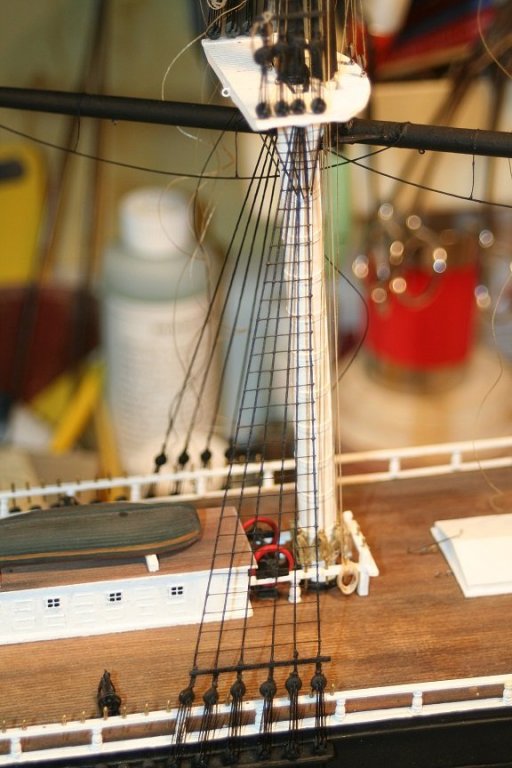
I read an account that briefly noted the distinct red color of the counter wheels....not sure if it was a preference of McKay's or not. (I'm sure there was a logical reason). It makes for a far more dramatic note then simply being black as was typical....but the Great Republic was not to be typical. She was a ship of *Firsts*. Just how McKay designed her...he did it his way. Twice as big as any other clipper, carried the most canvas hung on the longest yards, used a steam engine to work winches, had 4 full decks with 8ft ceilings, complete/full extended weather deck, patented building ventilation and tween deck lighting, four masts, the list goes on. I'm just sad that many modelers won't even model her because they do not like the way the spanker mast appears to be ill designed, giving her an off balanced appearance of afterthought. Comparing her to more modern German cargo carriers that were of the 4 masted barque design. Personally, I think this is a shortsighted view to base their opinion on. There is so much ingenuity and distinctiveness about her to make her a centerpiece of any collection IMV. My preference in ships is clippers...and(for modeling purposes), not just the *average* clipper, but those of distinction....those so unique that conversation surrounding them with expert and novice, can lead to a greater fondness of the lore of these magnificent ships. Rob
- 1,208 replies
-
- 6
-
-
- great republic
- clipper
- (and 1 more)
-
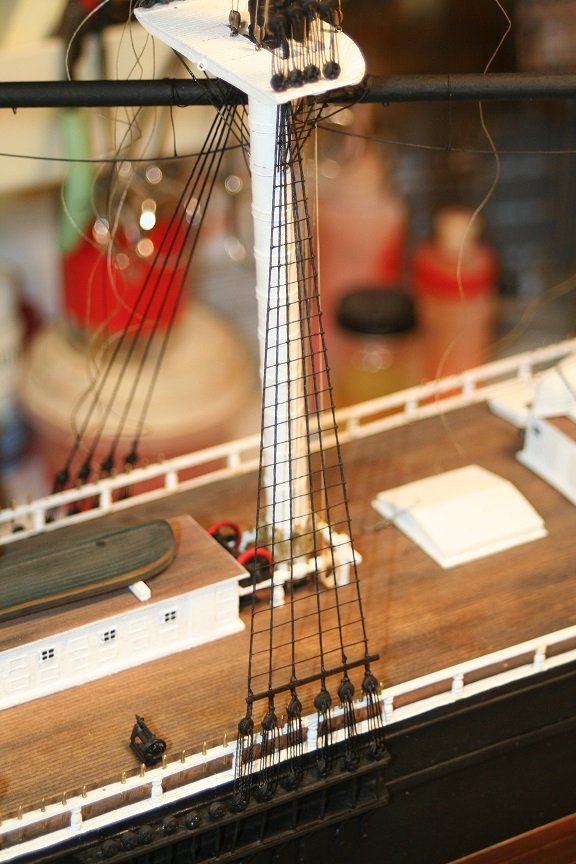
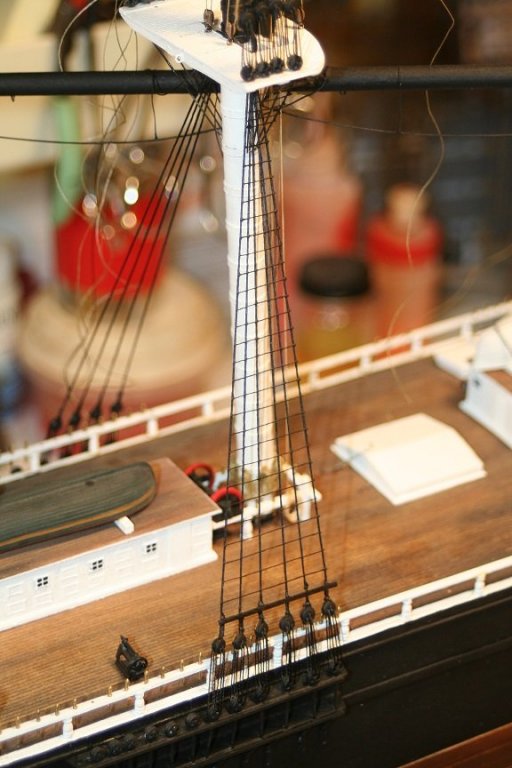
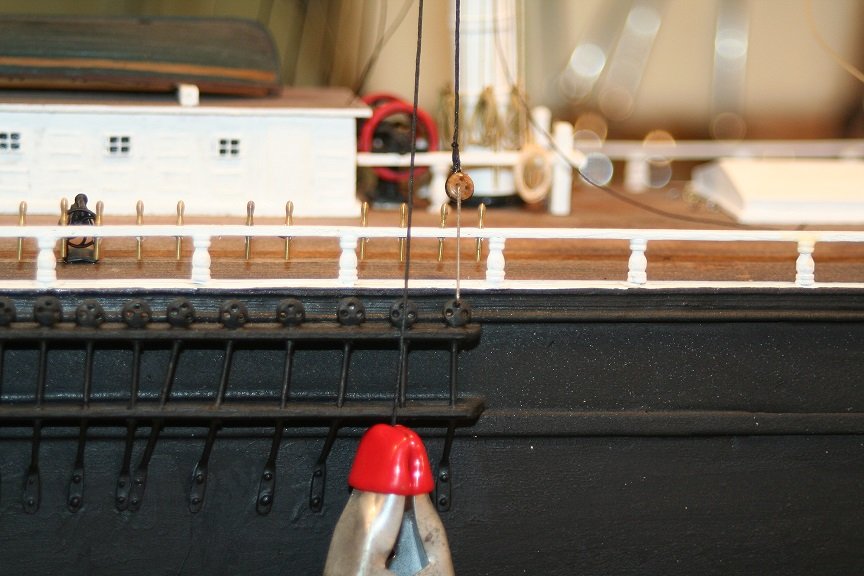
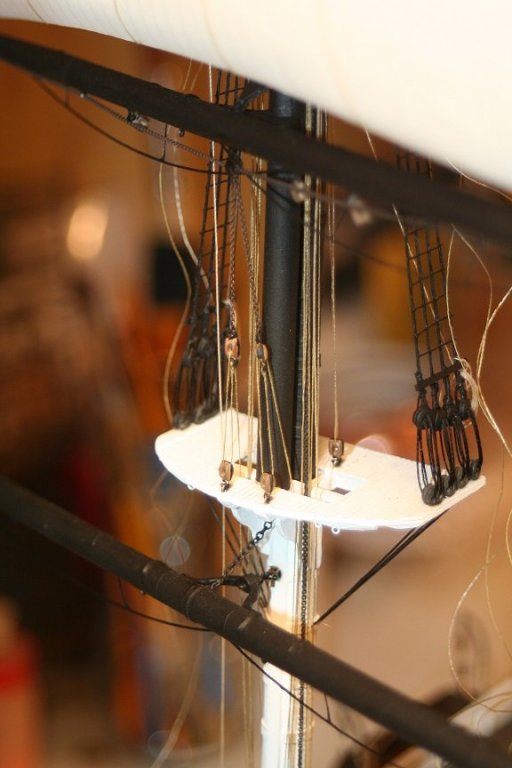
Some top detail of the topsail sheet blocks. The spaces around these items is extremely limited and I have already damaged several things by bumping into them with my hand....Grrrrrrrrrr I hate repairing hard to fix rigging....... This is why I'm slowing down on the main mast rigging....when I finally get to the shrouds...I'll be out of real danger for the most part..but as I begin to work around these fragile yards and masts...I need to slow down and make each move count. Repairs behind me..... For the time being.
- 1,208 replies
-
- 8
-
-
- great republic
- clipper
- (and 1 more)
-
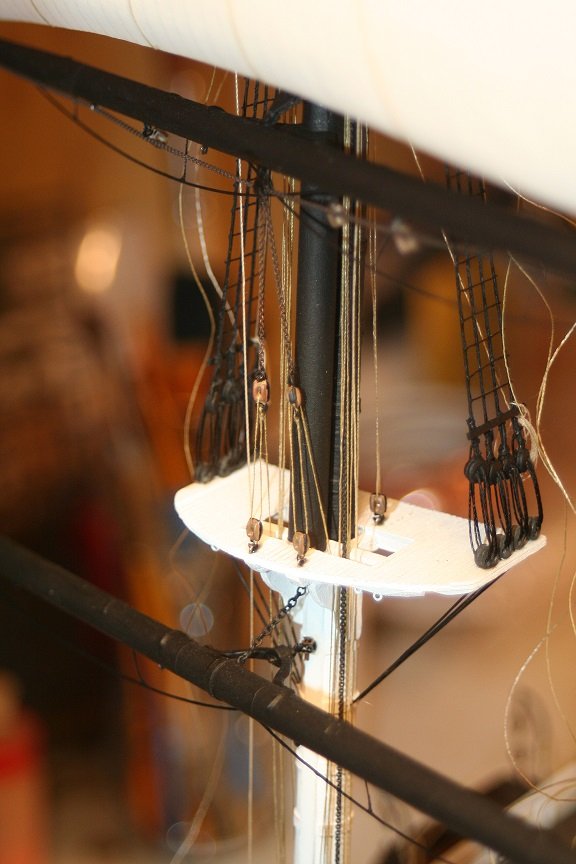
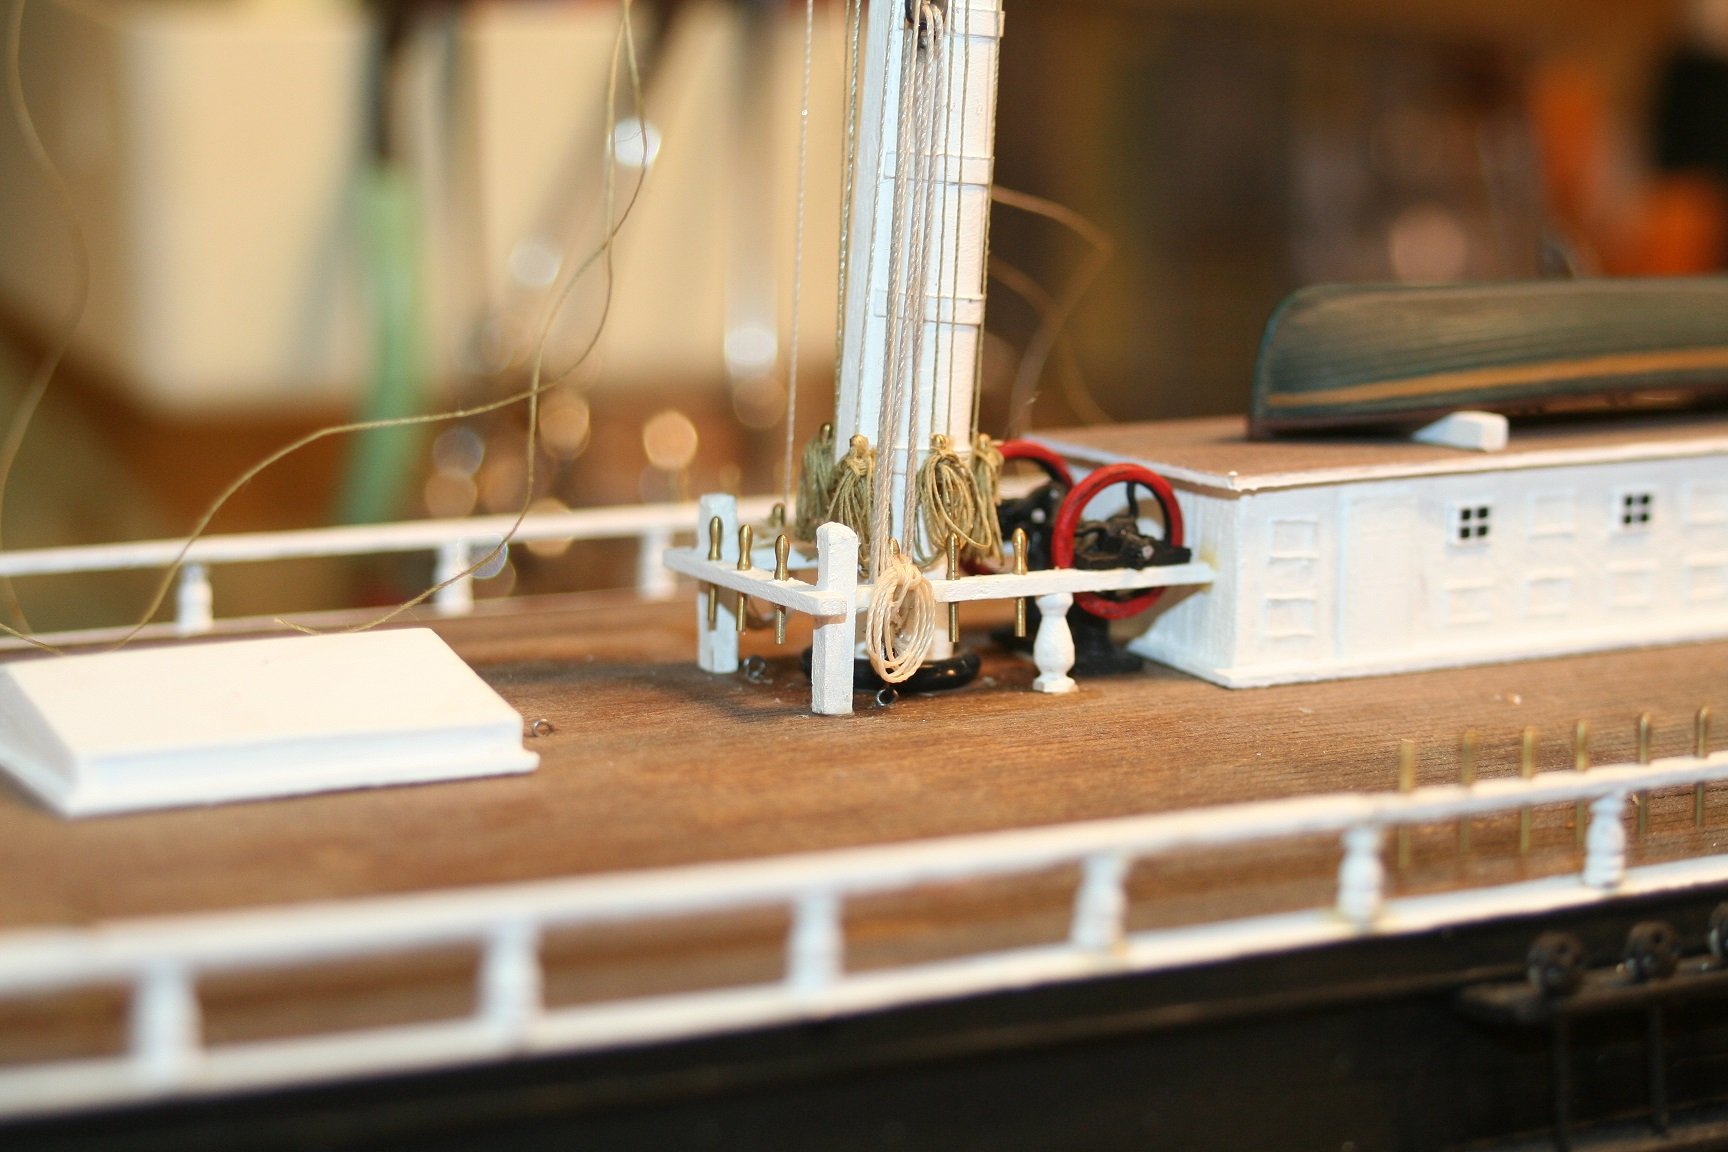
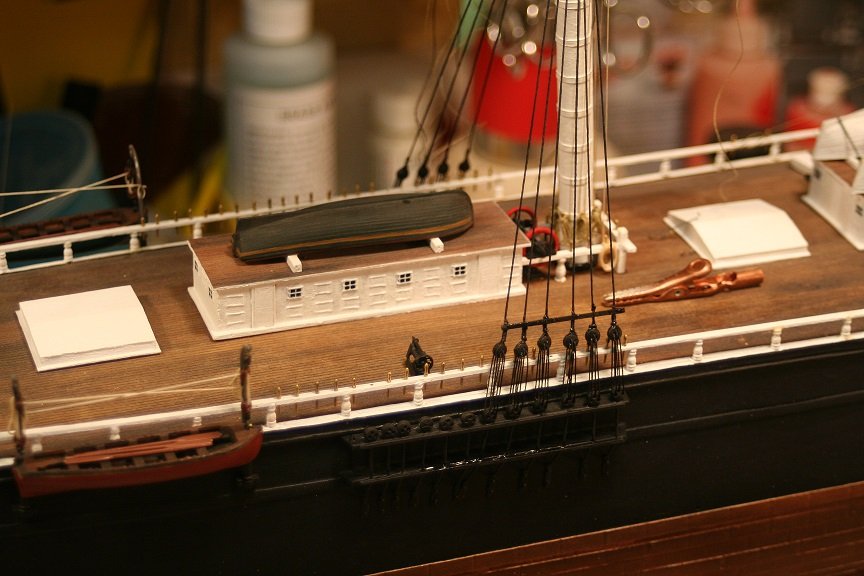
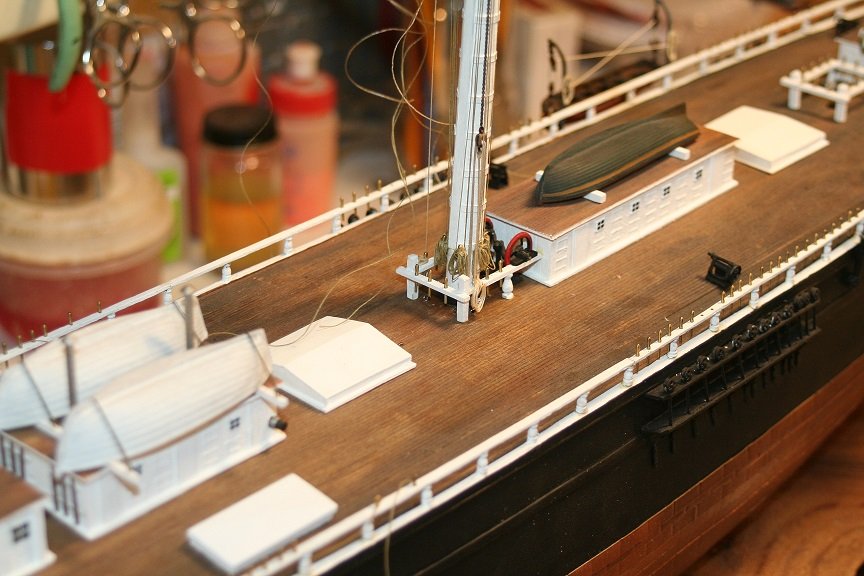
Did a bit more work on the main fife/spider rails..and installed the pumps.

- 1,208 replies
-
- 9
-
-
- great republic
- clipper
- (and 1 more)