


rwiederrich
-
Posts
5,520 -
Joined
-
Last visited
Content Type
Profiles
Forums
Gallery
Events
Everything posted by rwiederrich
-
Yes...you can easily fare out the inner edge to reduce the *flaring* of the lanyard. Still it is no real problem....remember not all of these bullseye's lanyards have to be the same length...they are indeed meant for tightening. But to keep things shipshape and Bristal clean...do your best. I'm currently reading the book *before the mast in the clippers*....to compilation of diary entries of a young man....and on several occasions he notes hours of painting the rigging and his hands were black as coal. Even historical accounts demonstrate the practice. So if the most accurate and detailed model is your aim...why not continue to be correct and rig properly too. Great job on your CS. Rob
- 481 replies
-
- 1
-

-
- Cutty Sark
- Revell
- (and 2 more)
-
Just paint the ones you already did black..... Rob
-
Just look at mine and see how they just blend in. Look at my finished Great Republic. Look at any painting or photograph of an old ship to be convinced. Rob
-
After 4-5 years of construction you might become an assassin. Rob
-
Even professionals make artistic calls…….however historical practice can never be re-written…….no matter what you call yourself. The images I provided mimicked tarred rope but was black nylon. Nothing yucky to get on you, while staying with historical accuracy. Rob
-
The use of my words mean no disrespect to anyone. Through the years, most that I have encountered have simply and unknowingly mistaken the lanyards as running rigging…….therefore they rig them in tan rigging……unbeknownst to them it is inaccurate. Being ignorant of something does not imply anything but lack of knowledge. Now if they rig the lanyards out of choice or by way of artistic license…….then that is all together their right as the builder to do so. No judgments from me. Rob
-
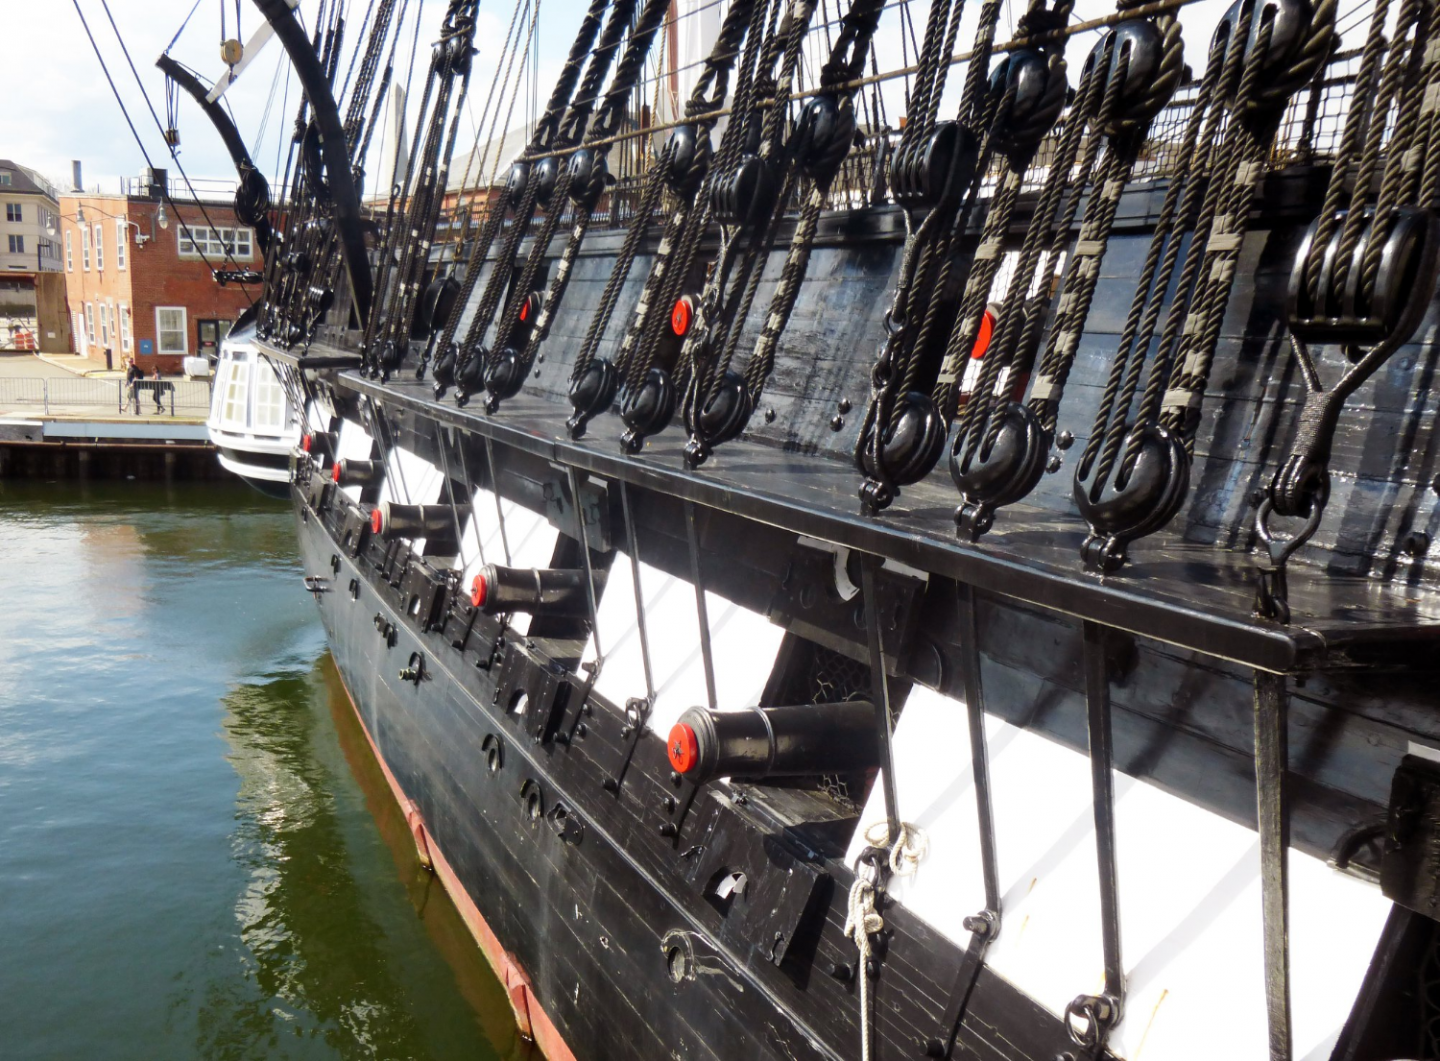
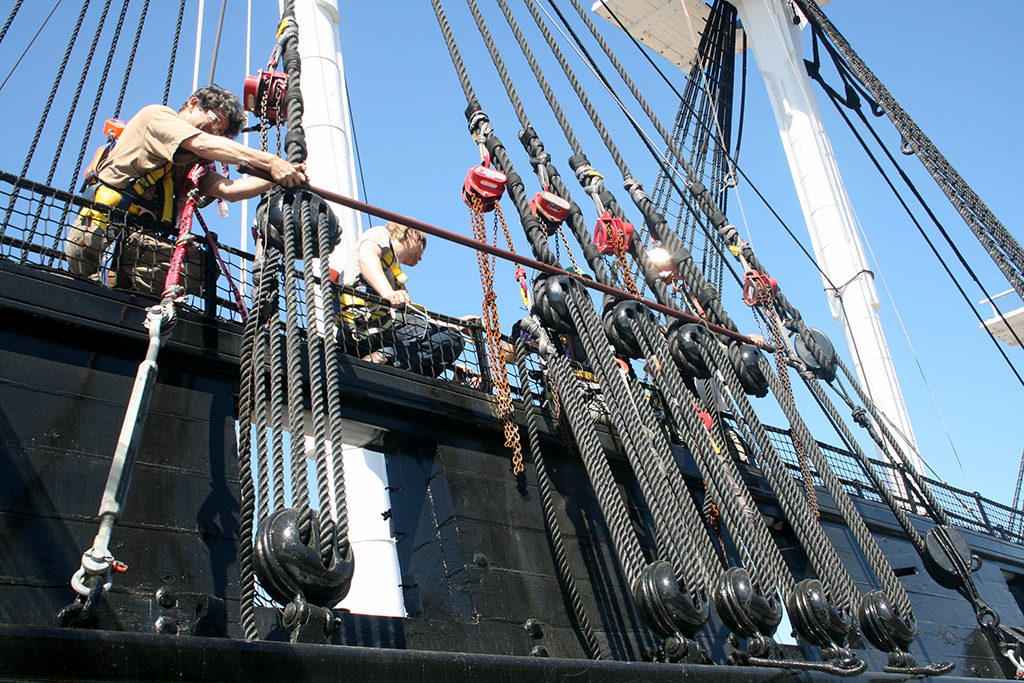
Poetic ignorance, if I may boldly say. If a model shipwright wants to build his model to the finest, remote detail...and they boast of their accuracy, then, he/she must not distract from the detail of properly weathering the lanyards on their models. they are not and have never been running rigging. Standing rigging is always protected against the weather...bullseye's, deadeye's lanyards are no different. Note the re-rigged Constitution...the naval architects and shipwrights new this and followed suit.
-
Great job Bob...but remember...any lanyards used on bulleyes or deadeyes were considered part of the standing rigging...even though they, at times were used to tighten the system. These lanyards were coated in dark to black preserving tar material. They would not be left untreated. So, light lines are not typical of these systems. This is a common mistake most folks make because they think the lanyards are running rigging. they are not.. Rob
-
Printing when all the cad work is done on the computer is done sounds fun. Watching your item materialize in front of you is cool for sure....but designing it on the computer isn't. Reminds me of astrophotography....you don't just aim your scope and camera at a celestial object and *click*. you have to stack hundreds if not thousands of images....add in *blacks* to keep the dark dark and *lights* to keep the lights light...then a little(A lot actually) computer wizardry...you can produce a wonderful image of a galaxy, or some other deep space object. The process is more computer work then actual photography as we know photography. Same goes for 3D printing. And the cost of a good printer is problematic for some. However, my 50 years of acquired kills, makes most scratch building easy for me. Rob
- 444 replies
-
- 1
-
-
- Cutty Sark
- Revell
- (and 2 more)
-
One trick is to dry brush...but that can be technique sensitive. I use chalks...or Cerium oxide in my case. Chalks are simply scrubbed across a fingernail file(Hobby version)...collect the dust.....then brush the dust on the dark black item....it will weather and fade the color...spray with dull coat sealer if you like. Rob
- 444 replies
-
- 1
-
-
- Cutty Sark
- Revell
- (and 2 more)
-
Unbelievable. Just draw it up and print it out.......Man. I build everything from scratch....typically one-off. the only time I had to make many of a thing, was the monkey winches for the Great Republic....six of those bad boys all exactly the same. But this.......this is just stunning and quite detailed. Gonna put me outa business. Oh wait......I ain't in the buiz.... Great job Kevin. Rob
- 444 replies
-
- 2
-
-
- Cutty Sark
- Revell
- (and 2 more)
-
Bob.....Make your own...its simple, repeatable and easy and you have to spend hardly any money. You can make them any size you need. I'll put together a pictorial tutorial, how and the materials you need. If you like? Rob
- 481 replies
-
- 2
-
-
- Cutty Sark
- Revell
- (and 2 more)
-
HMCSS Victoria 1855 by BANYAN - 1:72
rwiederrich replied to BANYAN's topic in - Build logs for subjects built 1851 - 1900
Is it possible to drill them out prior to soldering, and then just run a drill through to clean them up afterwards? Rob- 1,013 replies
-
- 2
-
-
- gun dispatch vessel
- victoria
- (and 2 more)
-
McKay had secrets. If most general items on a clipper were needed for function……what deeply guarded secrets did McKay keep to himself? Surely it wasn’t the use of capstans, or the use of cabin ventilation. It was structural. McKay’s habit was to use superior materials and processes in construction. Even putting the first steam Donkey engine on a clipper(Great Republic). I agree with Rich……..the Naval Hood….is almost unique to a McKay clipper, and if such a structural devise was utilized on the last clipper McKay build…….which I might add, was considered by most historians, as his greatest creation, then why not on all of his history making clippers? Duncan MacLean seamed to think it was a significant attribute. I agree. Rob
-
Rich……..you hit the nail on the head. This looks exactly how I see her. Beautiful work Rob
- 3,560 replies
-
- 1
-
-
- clipper
- hull model
- (and 2 more)
-
That is why I posted her…… If McKay did anything he followed what worked in one of his fastest clippers. Rob
-
Beautiful Rich. I placed the bit slightly farther forward then you have depicted here……..but no problem. Lots of room for entry and exit off the forward hatchway. Super! Rob
-
Personally...Mike's collection of images alone would make for a fantastic display. But couple them with my Model of her... I think that would make a wonderful exhibit. Something to work on. Rob
-
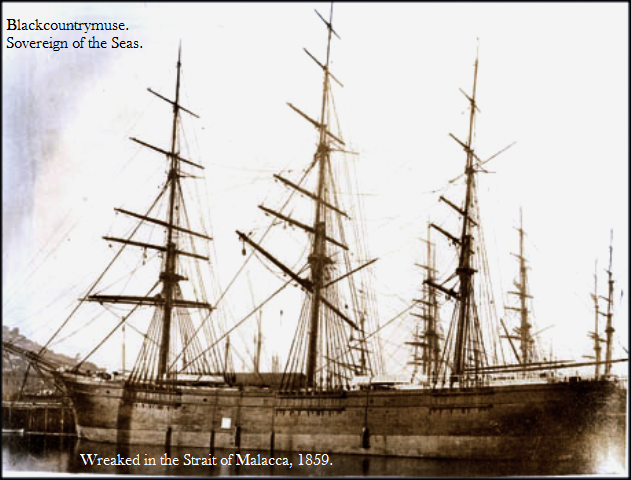
Sovereign of the Seas rig is extremely close to that of Glory....Cept for the addition of the spreaders...which Glory had originally.
- 3,560 replies
-
- 2
-
-
- clipper
- hull model
- (and 2 more)
-
Bruma...your yards look amazing. You and I follow quite similar techniques. I use chalks for my *dry brushing*. The trick is highlighting and adding weathering. Great job. Rob
- 399 replies
-
- 2
-
-
- cutty sark
- revell
- (and 2 more)
-
I would surely like to now where these model makers get their data from to make such decisions? What body of photographs or first hand accounts do they draw from? As far as I know...I and my *team* have put in several years of precise research, thanks in great part to Michael Mjelde's own life time work. The reason I ask...is so many kit drawings depict structures that do not follow the historical pattern of the Builder. Trade marks shall we say. Rob
-
I recall that as well. It appears that the only history, folks of today want to preserve, is that known as *Re-written* history. They tare down historical monuments...neglect our maritime history in lieu of a hateful agenda. And to let you know,...that Montaque Dawson painting is one of my favorites as well. And he is one of my favorite nautical artists to boot. I'm doing my own small part in preserving a significant historical element....be it in model form. I'm still wondering if any of the Seattle/Tacoma nautical museums would be interested in Glory when she is complete....since she lived her last decade running the West coast trades and frequented Seattle/Tacoma to Alaska ports? I'll need to do more research into that question. I wonder if Mike knows folks who may have that answer.... his own exhaustive photographic catalogue coupled with my model....would make a great exhibit in of itself....in a museum setting. Rob
- 3,560 replies
-
- 3
-
-
- clipper
- hull model
- (and 2 more)
-
Those poor misguided workers just ripped through her forward chainplate , channel and gunwale to remove equipment from her decks. Poor old girl. Thanks Rich and thanks Mike. Rob
- 3,560 replies
-
- 2
-
-
- clipper
- hull model
- (and 2 more)
-
Thanks Rich. To be honest, I am quite hard on myself……because as much as I do my research, I am not as apt or diligent to accurately translate that research into reality. In short, there is so much detail, I actually overlook some in my haste to reach completion . Some model shipwrights exclude certain details to reduce the clutter, or omit entire systems to make their construction easier, (cuz it can get so busy down there), it becomes impossible to even complete the work cleanly and accurately. Rob
- 3,560 replies
-
- 1
-
-
- clipper
- hull model
- (and 2 more)
-
No Problem Pat. However in Glory’s case, Several pics show her with double fore stays and others with a single. She had her masts replaced several times and probably had her stays up or down graded. Her 1877 image I’m replicating, she had a single fore stay, probably seized double that split at the Pad eyes on deck. Probably because she had a composite fore mast. Not sure. The main mast stay was a double seized and then split at the foremast fife bit. Rob
- 3,560 replies
-
- 1
-
-
- clipper
- hull model
- (and 2 more)
