HOLIDAY DONATION DRIVE - SUPPORT MSW - DO YOUR PART TO KEEP THIS GREAT FORUM GOING! (Only 68 donations so far out of 49,000 members - Can we at least get 100? C'mon guys!)
×


rwiederrich
-
Posts
5,518 -
Joined
-
Last visited
Content Type
Profiles
Forums
Gallery
Events
Everything posted by rwiederrich
-
HMCSS Victoria 1855 by BANYAN - 1:72
rwiederrich replied to BANYAN's topic in - Build logs for subjects built 1851 - 1900
Sweet work Pat...fine machining. I've yet to use my rotary table to make spider bands...you did magnificent. It's this kind of precision work that sets your model as the bar to be aimed for. Rob- 1,013 replies
-
- 3
-

-
- gun dispatch vessel
- victoria
- (and 2 more)
-
I've got your books in my library and I reference them all the time...though I do not go that *Deep* with my builds...the terminology and research you have done has paid off in dividends. Thanks Ed. Rob
- 3,618 replies
-
- 3
-
-
- young america
- clipper
- (and 1 more)
-
I'll re-evaluate...I'm still not truly convinced yet......thanks for the intel. Rob
-
Remember...we cannot be sure of where these dimensions actually have their origins. 24' from actually where? this corner or that edge? That is why at times I rely upon my own acute eye to aid in aligning what looks right. Rob
-
I noticed that right away. the curve of the deck is the establishing criteria for aesthetic lines. The aft carriage house roof follows this curve...it is natural to assume any harmonious design would continue this aesthetic. So we are looking at 4 doors and 4 windows. I say that because in keeping with the harmony with the spatial arrangement of the forward wall it appears only logical to have doors on either side....there is ample room for them and the photograph surely shows the outlines of a door. These door were push slide doors. they probably sat in a grooved guide that allowed the occupant to push it out and slide it to the right along is routered slide. I've seen this unique design on very hold houses, windows and interior doors. Images show a similar design was employed on her main deck cabin where her donkey engine was stored after her major refit in the 1870's. Doors on ships didn't *swing*....they slid to the side. I don't mean to be critical of your drawing Rich, but I think she had 2 more sliding doors on her aft cabin (Corners)....facing the main deck. What do you think? Rob
-
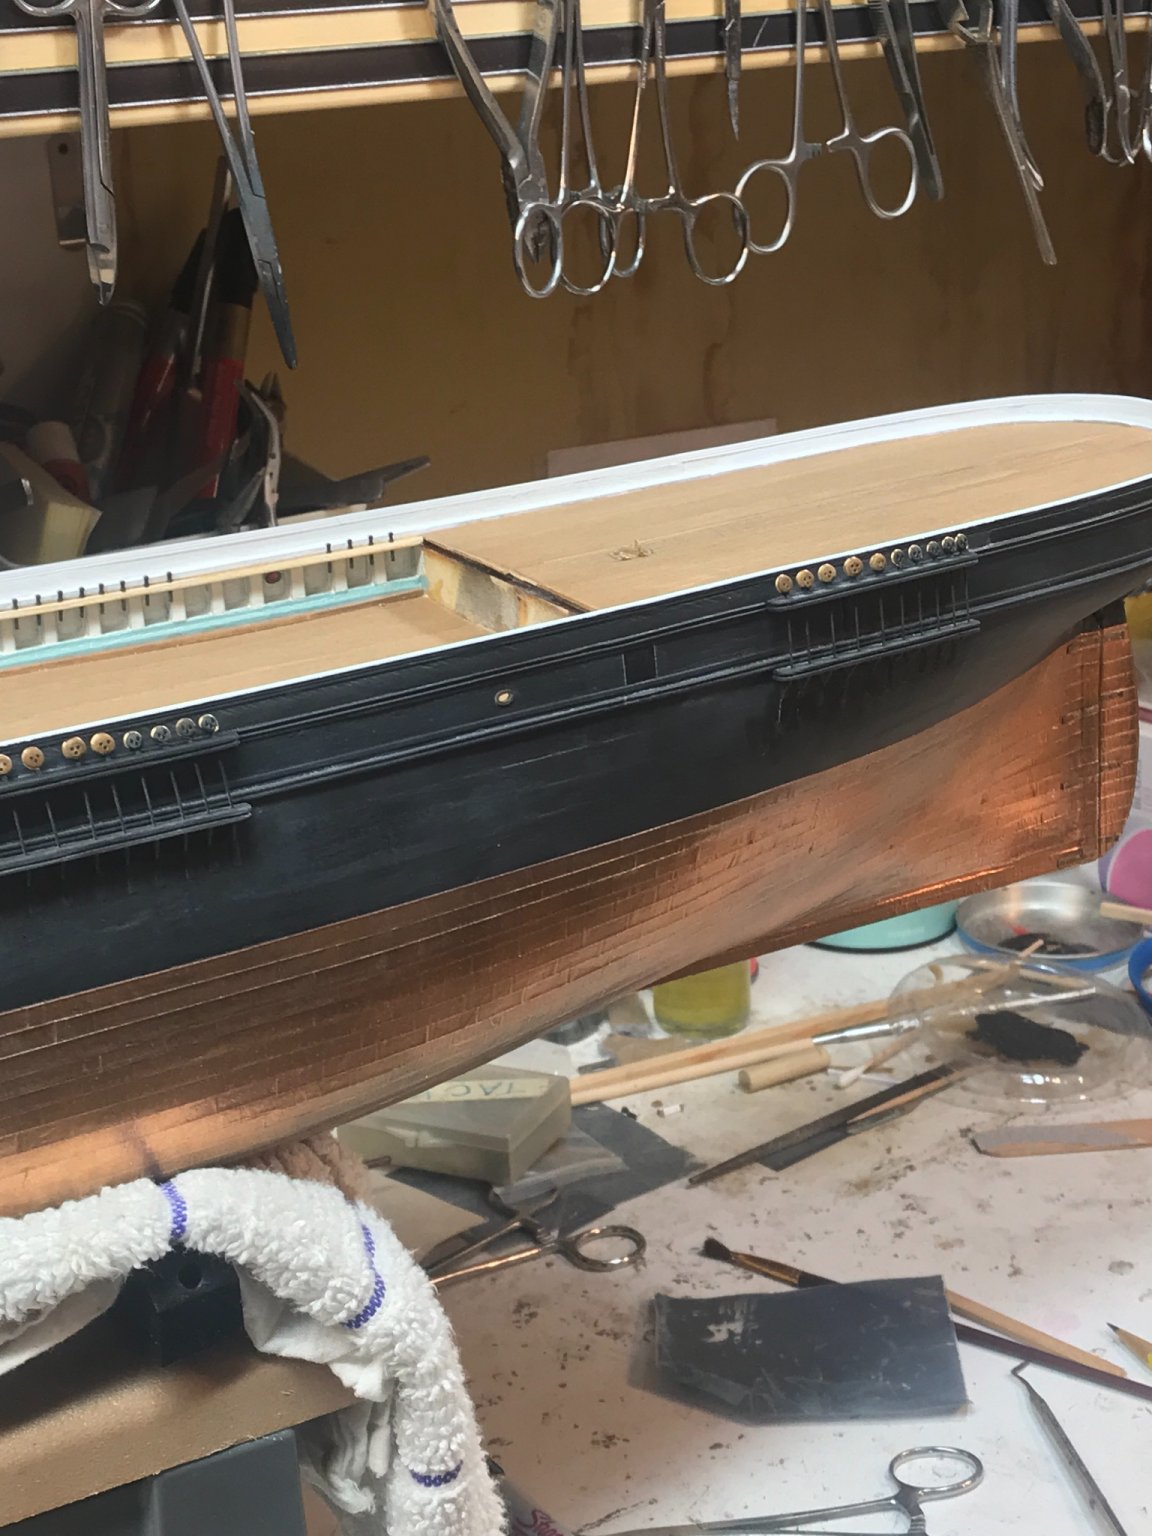
Rich. By evaluating the height based upon the men standing by the rail...averaging in that they are probably around 5:8ish...and seeing that the rail bisects his crotch area....I determined that the stanchions are roughly 26~28" tall...adding the thickness of the rail itself, roughly 2.5~3"...you have roughly a 30" rail. Could be slightly taller or shorter when including the rail base the stanchions are bolted too. Definitely shorter then what we would consider today to be *safe*, but when you are negotiating a pitching deck, you are probably bent lower or even slightly crouching to stabilize your movements. The aft rail around the poop and helm house follows the same dimension, based upon the average mans height.....evidenced by the men posing there. Rob
-
Pretty cool huh? Saves me loads of time..to have my own naval architect/draftsman on hand......😃 Rob
- 3,560 replies
-
- 2
-

-
- clipper
- hull model
- (and 2 more)
-
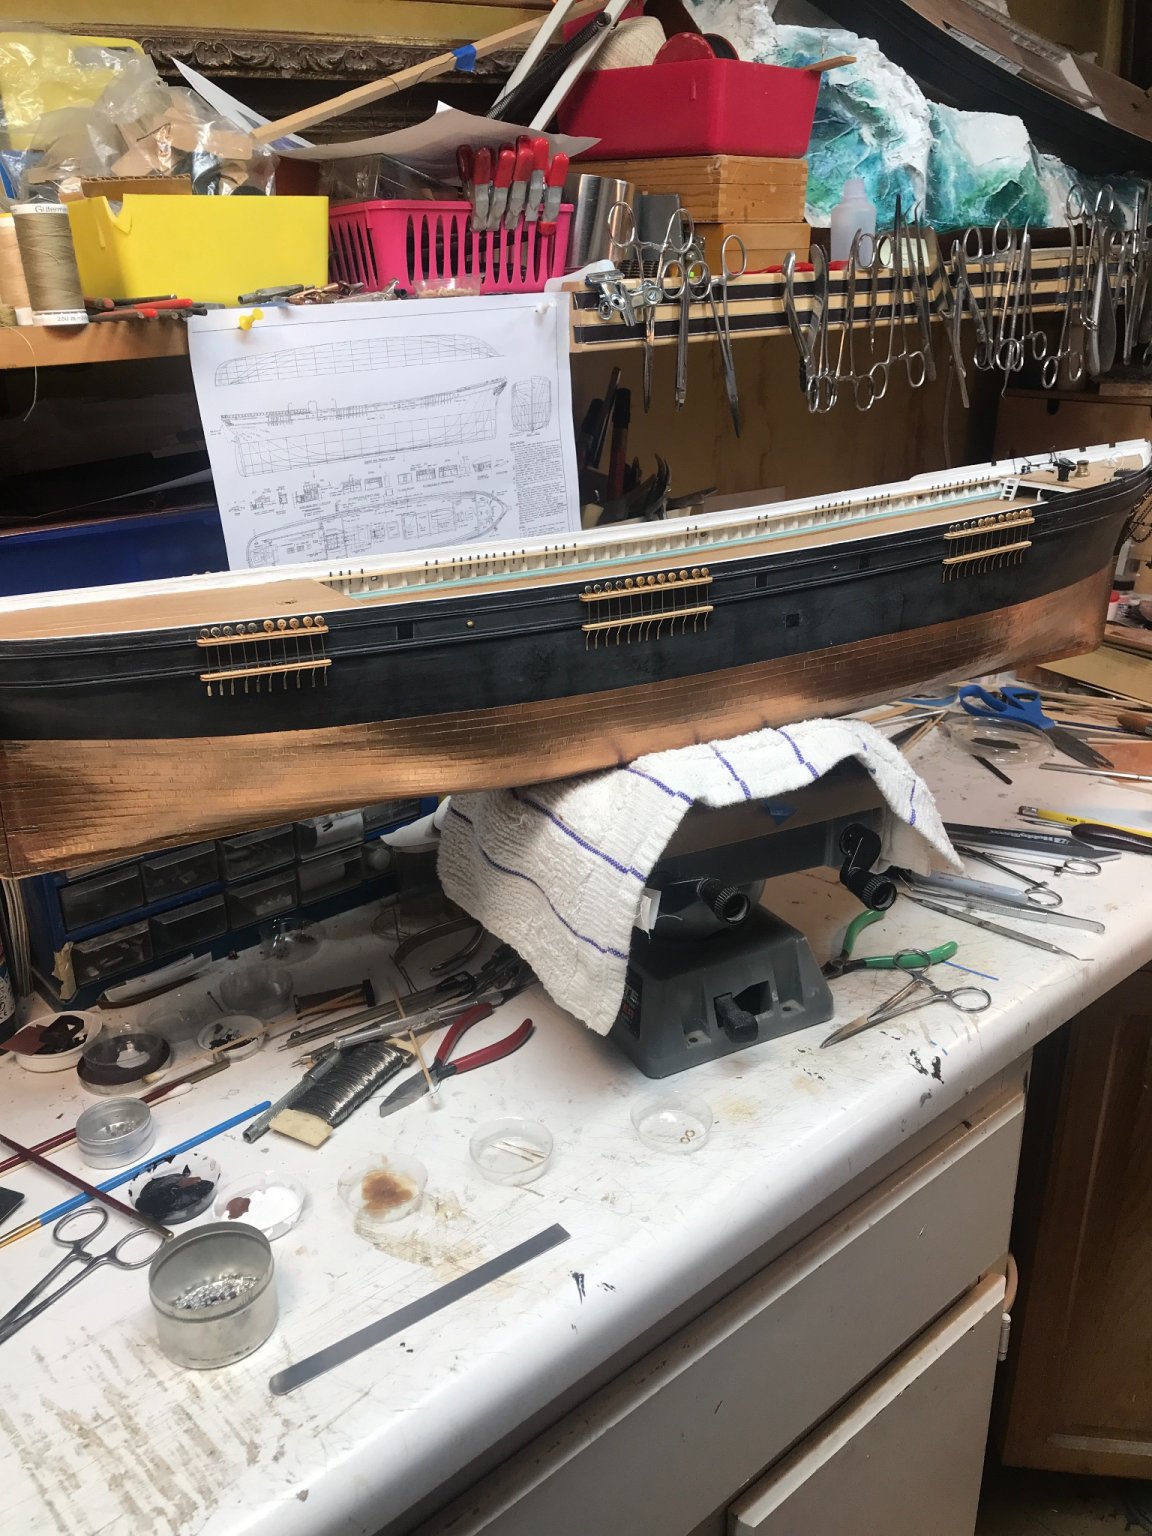
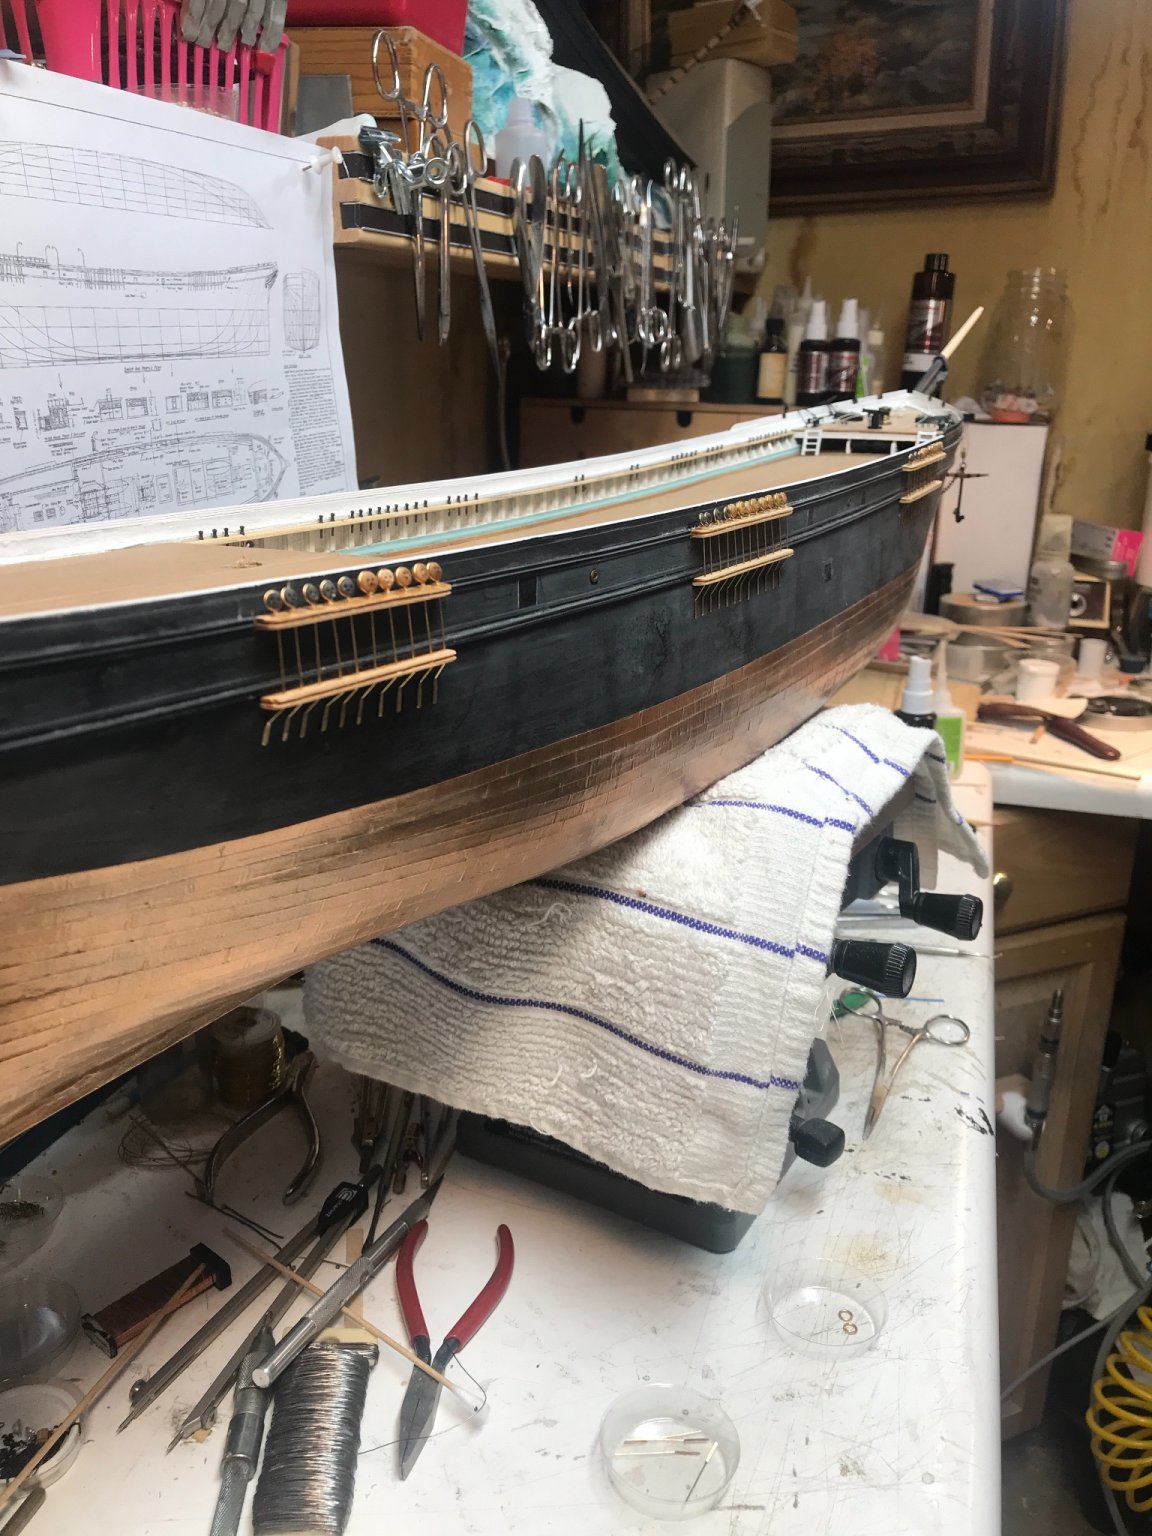
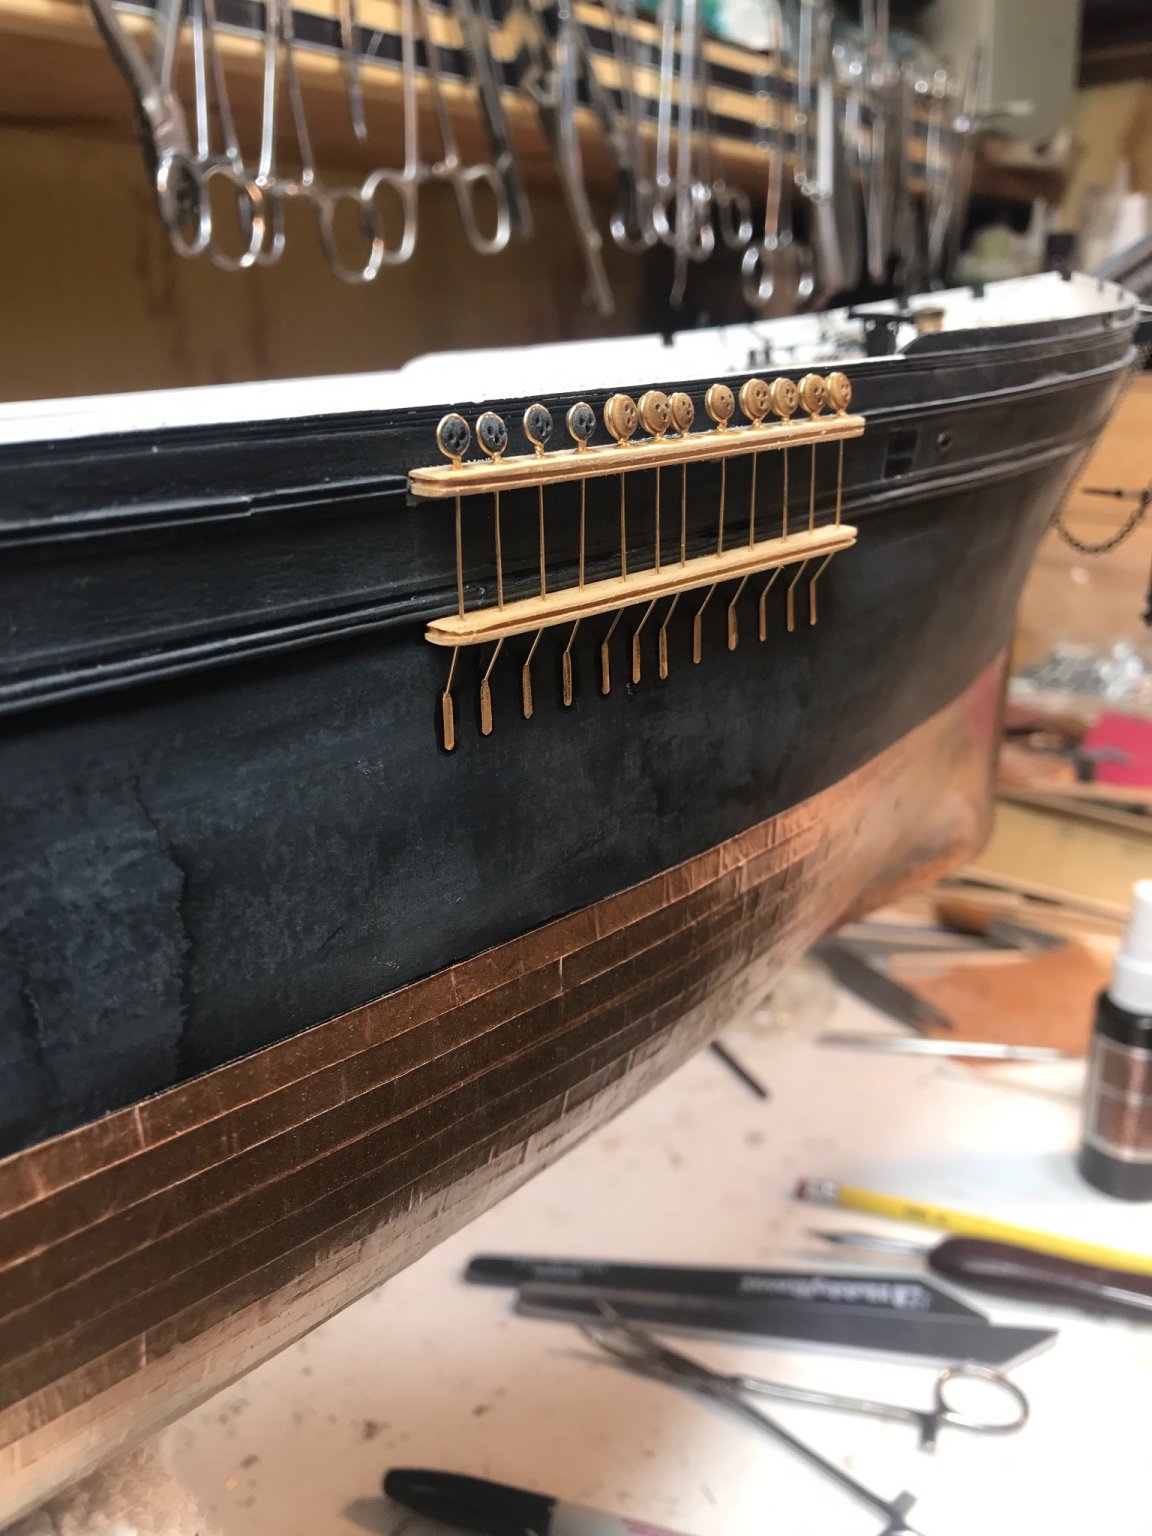
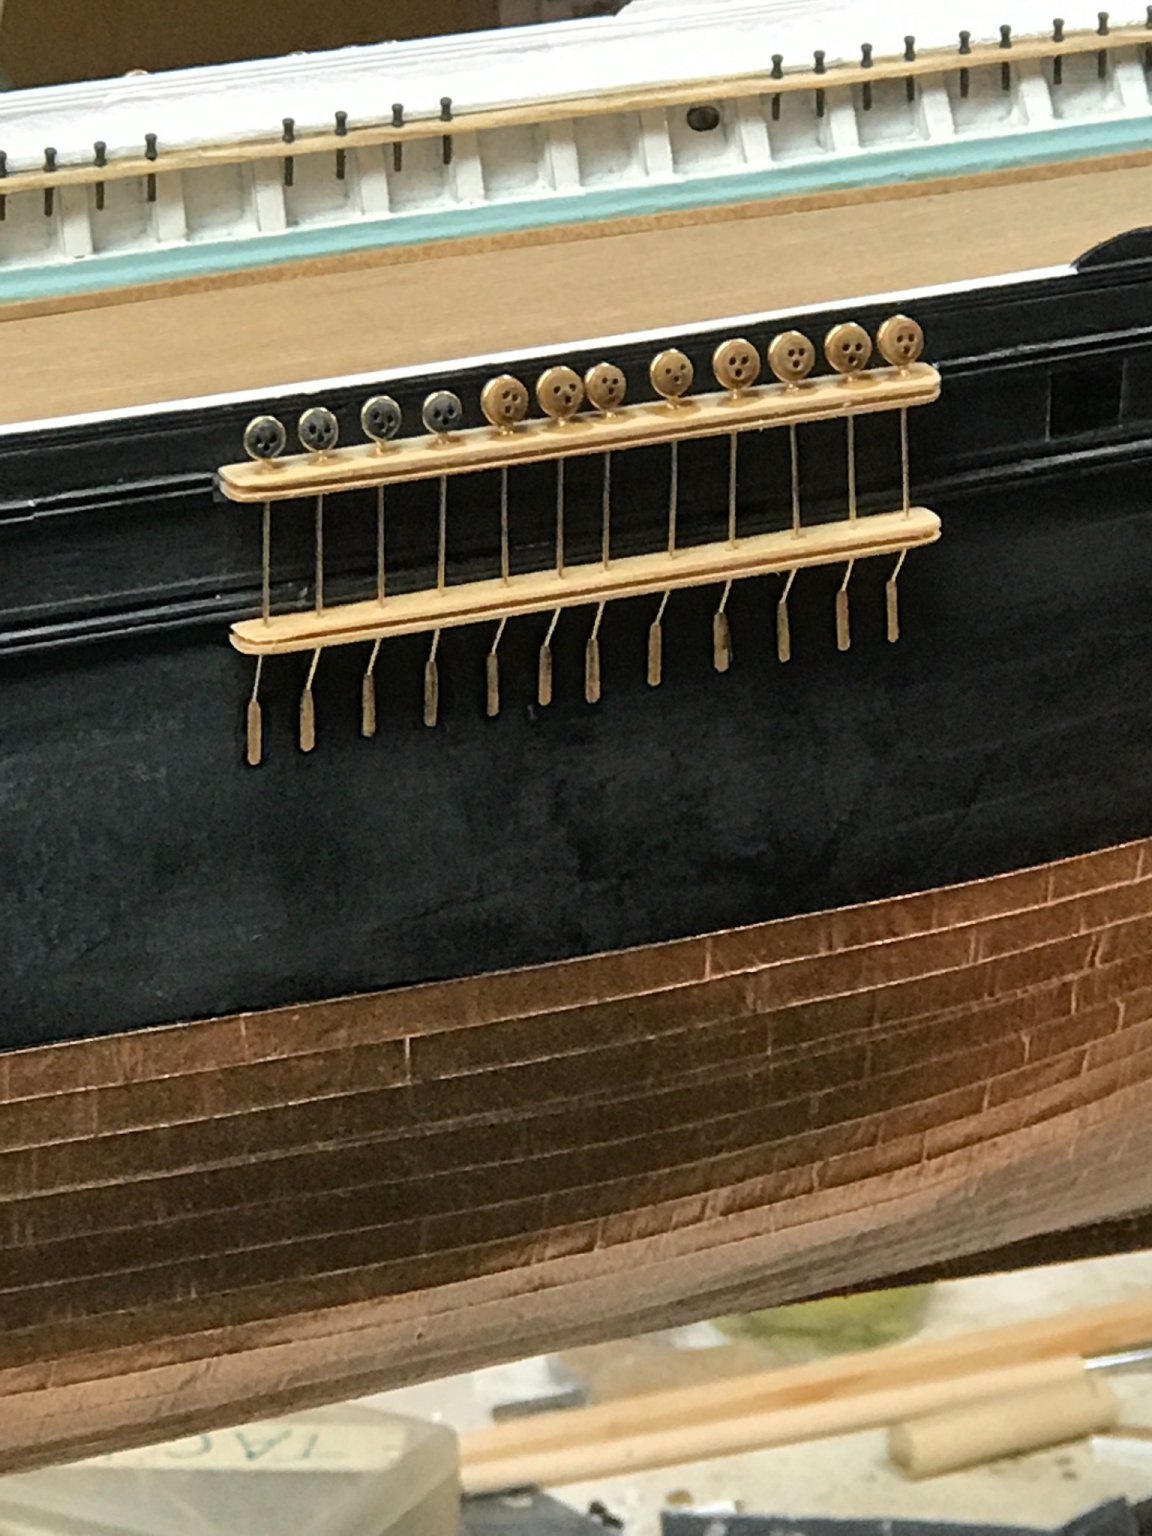
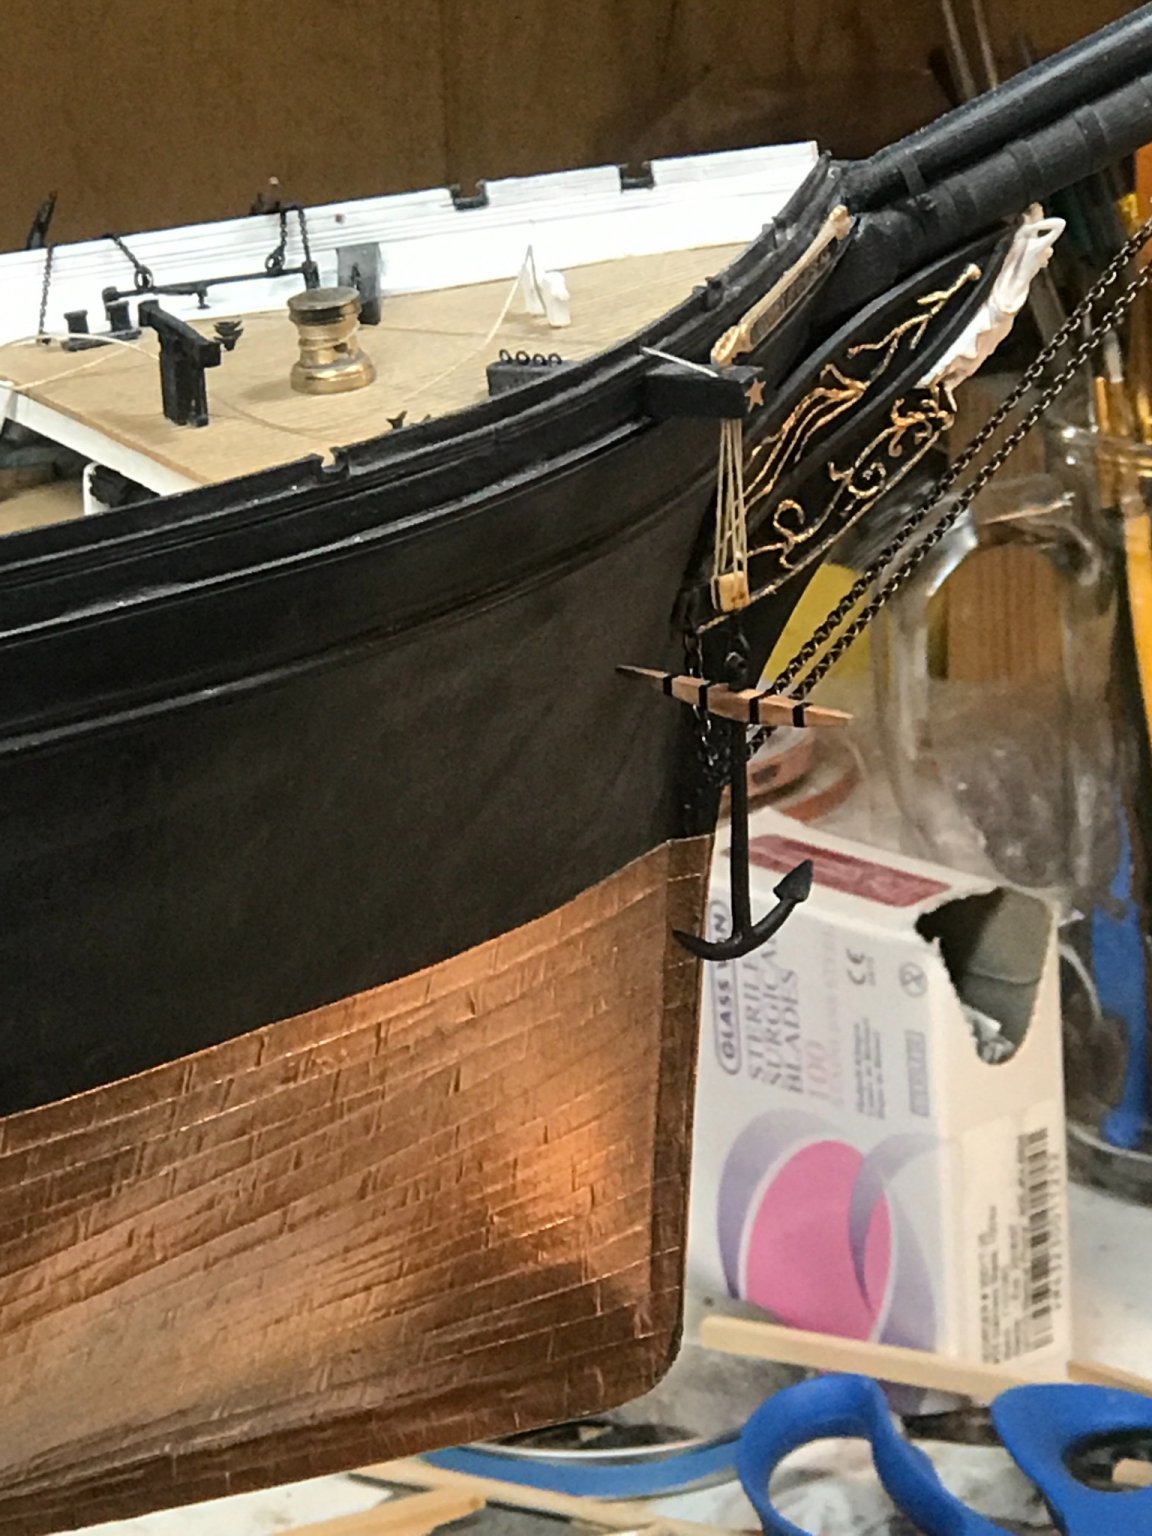
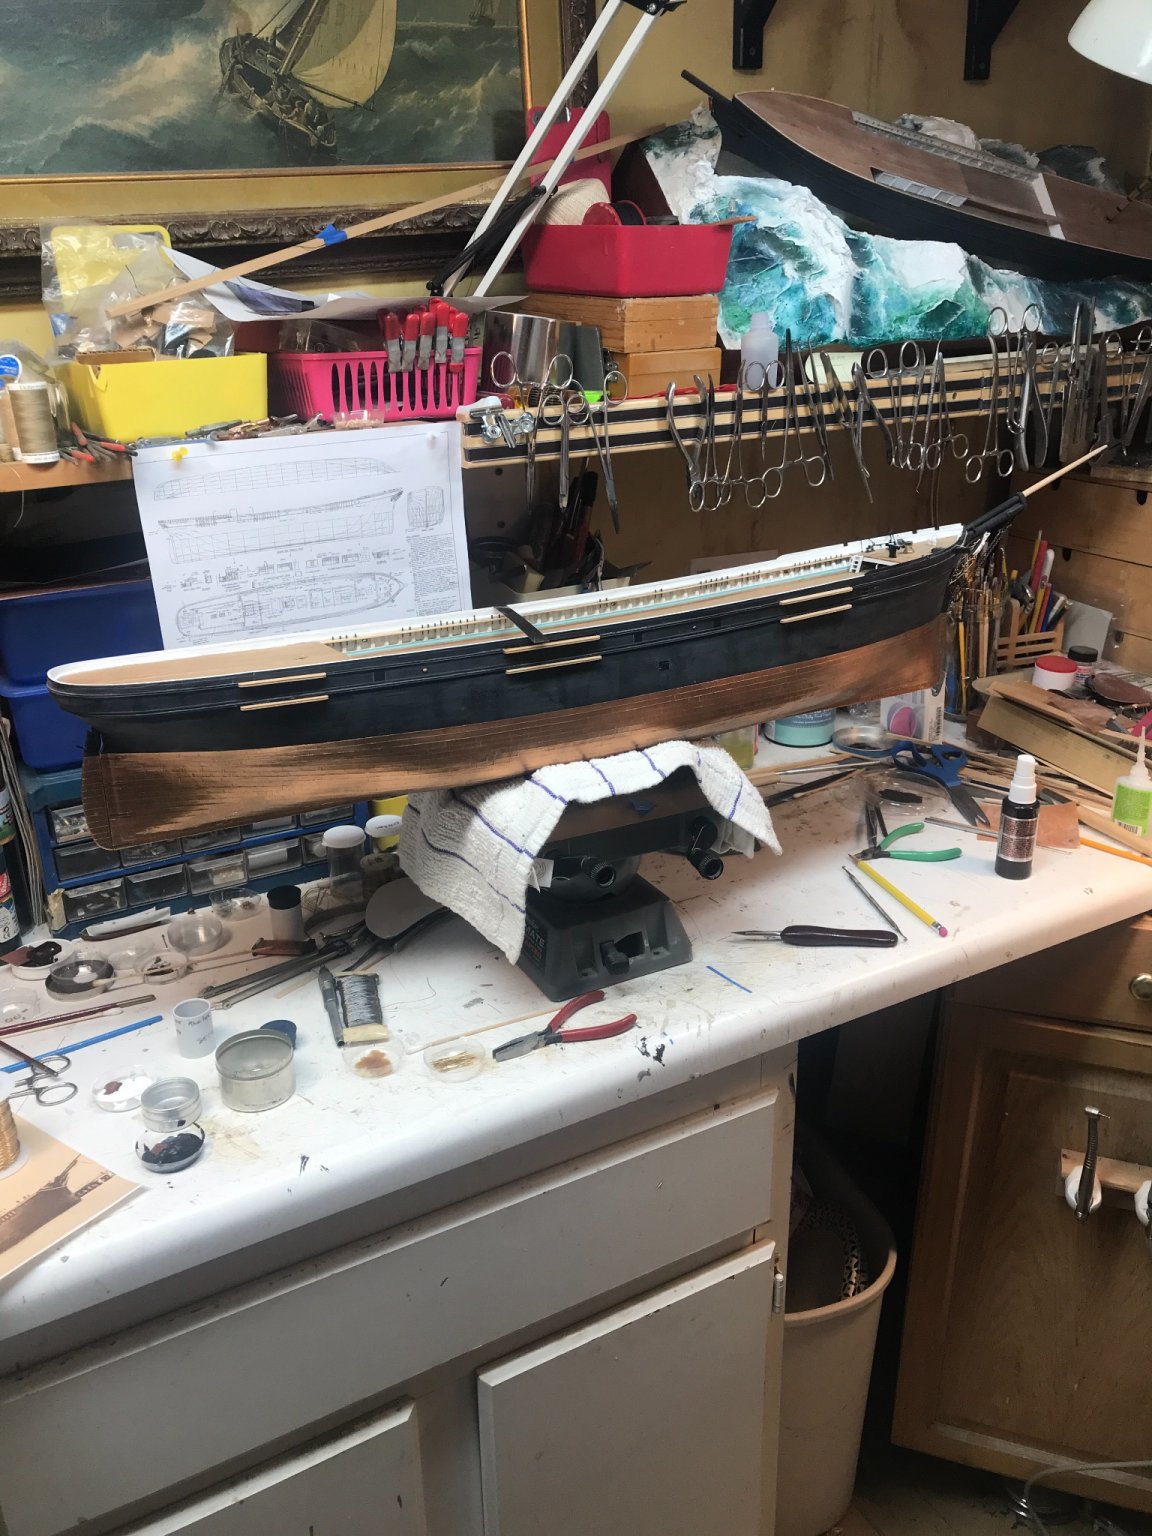
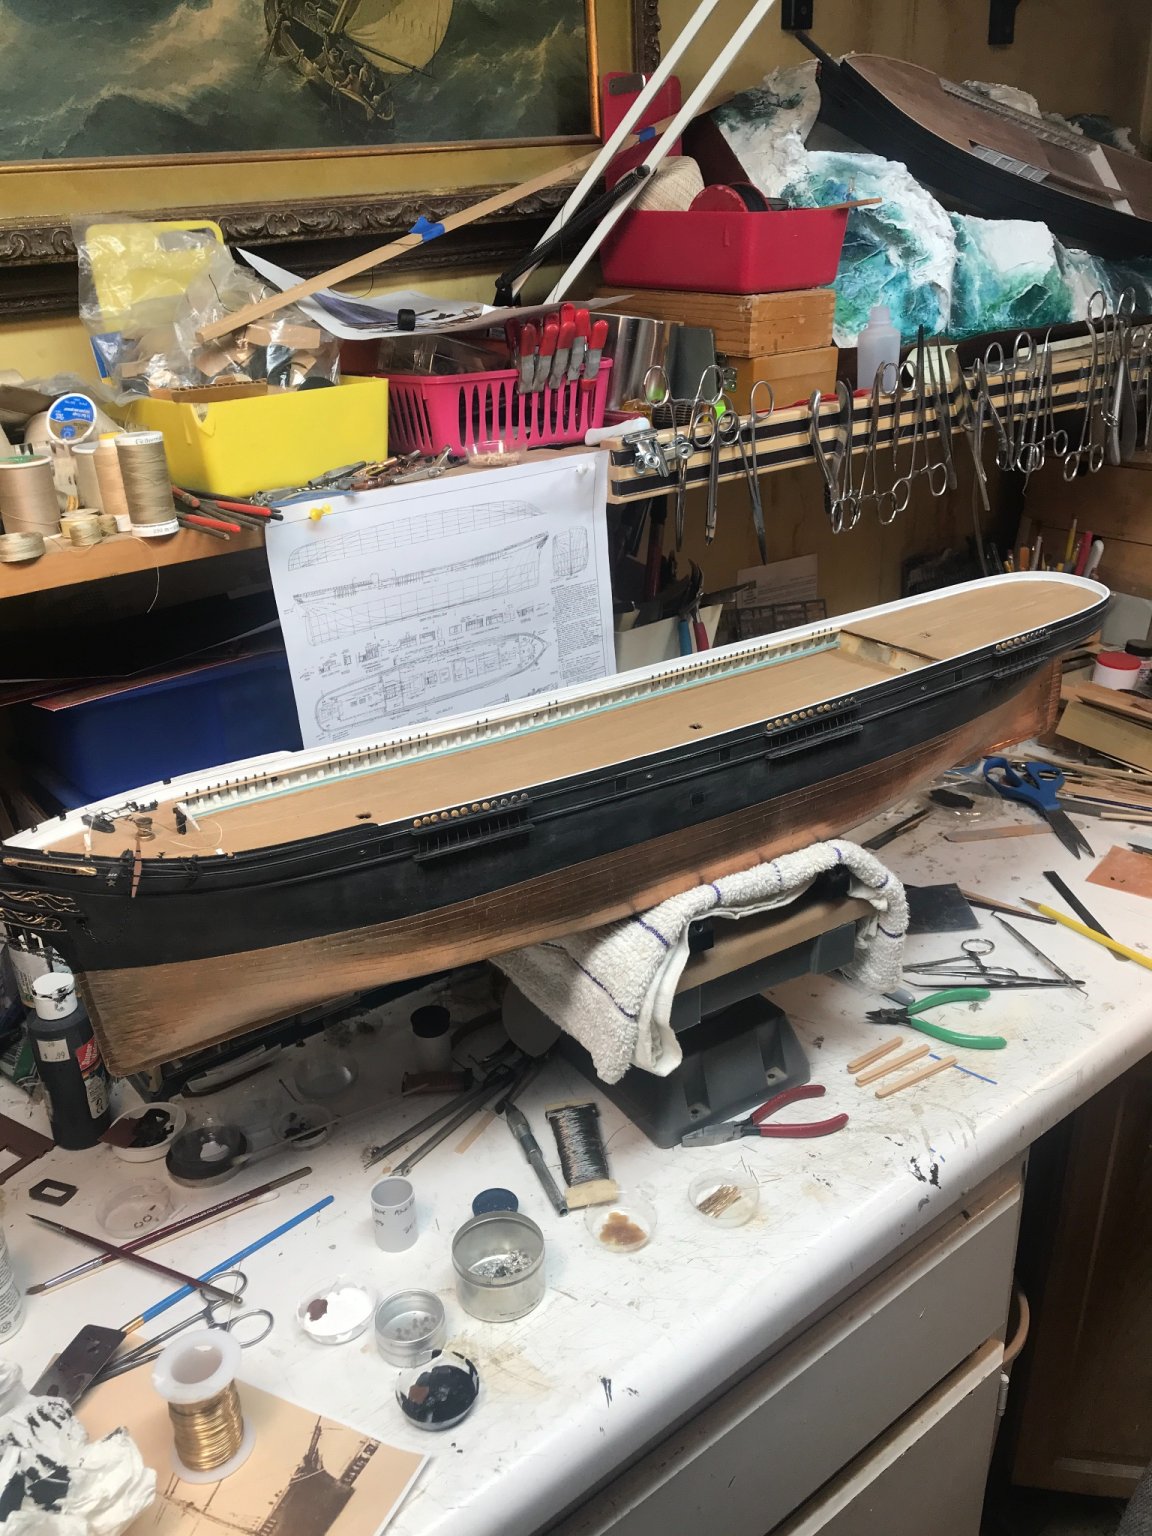
Worked a bit on the channels by painting the port mizzen


- 3,560 replies
-
- 4
-
-
- clipper
- hull model
- (and 2 more)
-
Great drawing Rich. I’m going to use it for my own build if you don’t mind?
-
Thanks my friend. Please let me know about your drawing and Mike’s involvement. Rob
-
Thanks Rich...he was a favorite uncle...one of my wife's dads(who is passed away), brothers. My wife now has no aunts or uncles from that side.....or her parents.😒 I hope to get back to the Glory...finish painting her port mizzen channel/chain plates and then move onto the starboard side. I have all the parts pre-made...so they should go by faster. Rob
-
Beautifully done. Nice sheen. She is a true replica. Great job Vlad. Rob
-
Interesting that the fore chainplates use *Preventer plates*, Or backing links as you call them....but during her 1920 refurb she did retain all her fore, main and mizzen preventer plates...they must have been removed or misplaced because of damage or some other mishap. Rob
- 602 replies
-
- 1
-
-
- Flying Fish
- Model Shipways
- (and 2 more)
-
Vlad...is that printed on the wood? the caulking seams and treenails are extremely neat and clean...for sucha grainy wood? Rob
-
Wonderful That Richard McKay book is a must for any serious library. Rob
- 602 replies
-
- 1
-
-
- Flying Fish
- Model Shipways
- (and 2 more)
-
I think this product is what I’ll paint the houses with, prior to white highlights. Thanks Rich Rob
-
I originally painted my bulwarks a similar pearl color and highlighted with white. The end result was IMV not very flattering. It could be the “pearl” I used was too dark. So I opted to go with a pearl that I imagined to be more of a aesthetic pearl, which is slightly bluefish in shade, Kinda opaque, then I highlighted in white and with blue waterways. I hope you can figure out a combination that works for you. Rob
-
Mmmmm. Looks like an average of 1 1/2 degree rake. I knew the Sovereign nearly had vertical masts. I was in error. I’m not home but in Oregon for a funeral, so I’m going from bad memory. Good call. Rob
-
Beautiful, just beautiful. Is this the final color you’re settling on? Rob
-
I plan the mast out....but will not add them until the deck is furnished out first. Houses and all. I had originally intended to fully build my version. Masts, rigging...the who ball of wax......😁 Are you using the same dye method you used on your CS build......or are you trying something different? Will you be adding the chain plates and deadeyes as well....or just the channels? Rob
-
Yeah...I found the angle inclination for the Great Republic....it was published. So I might conclude that the angle could be be similar if nothing comes available. I think it was Sovereign of the Seas that had a true vertical mast step, but I can't be sure. I do know several McKay clippers did. If McKay follows his own practice he might have mimicked some of his other designs, such as Flying fish or Lightning. Thanks for the help and for the homework project. Rob
- 3,560 replies
-
- 1
-
-
- clipper
- hull model
- (and 2 more)
-
Yep....white on top and inside and black on the outside. Thanks for your fine comments....I'm just plugging along. Rob
- 3,560 replies
-
- 1
-

-
- clipper
- hull model
- (and 2 more)
-
Thanks Rich. I beat myself up a bit...don't I? Any way, I'm glad you brought up the mast stepping issue, I'm not quite sure what the deck angle was for each mast. 1 or 2 degrees? Again...thanks. Rob