HOLIDAY DONATION DRIVE - SUPPORT MSW - DO YOUR PART TO KEEP THIS GREAT FORUM GOING! (Only 51 donations so far out of 49,000 members - C'mon guys!)
×

Heinz6672
-
Posts
205 -
Joined
-
Last visited
Content Type
Profiles
Forums
Gallery
Events
Everything posted by Heinz6672
-
 Hello Kevin, I think you have done a really good job. I like it very much. Looks like a clean and beautiful work. Congratulations! Best -Heinz-
- 1,319 replies
-
- 4
-

-
- caldercraft
- Victory
- (and 1 more)
-
Hello Robert! welcome back! I could not wait to see your Vic growing and how you implement "my idea" :-) Good luck for your planking!!! -Heinz-
-
Hello Michael, oh my god... over 3 years ago... and so many problems since I work on my victory... I am not sure, but I guess that I had to work out the bulkheads too. But I really could not say if it was 1mm on bulkhead 13. Sorry, Michael! - Heinz -
-
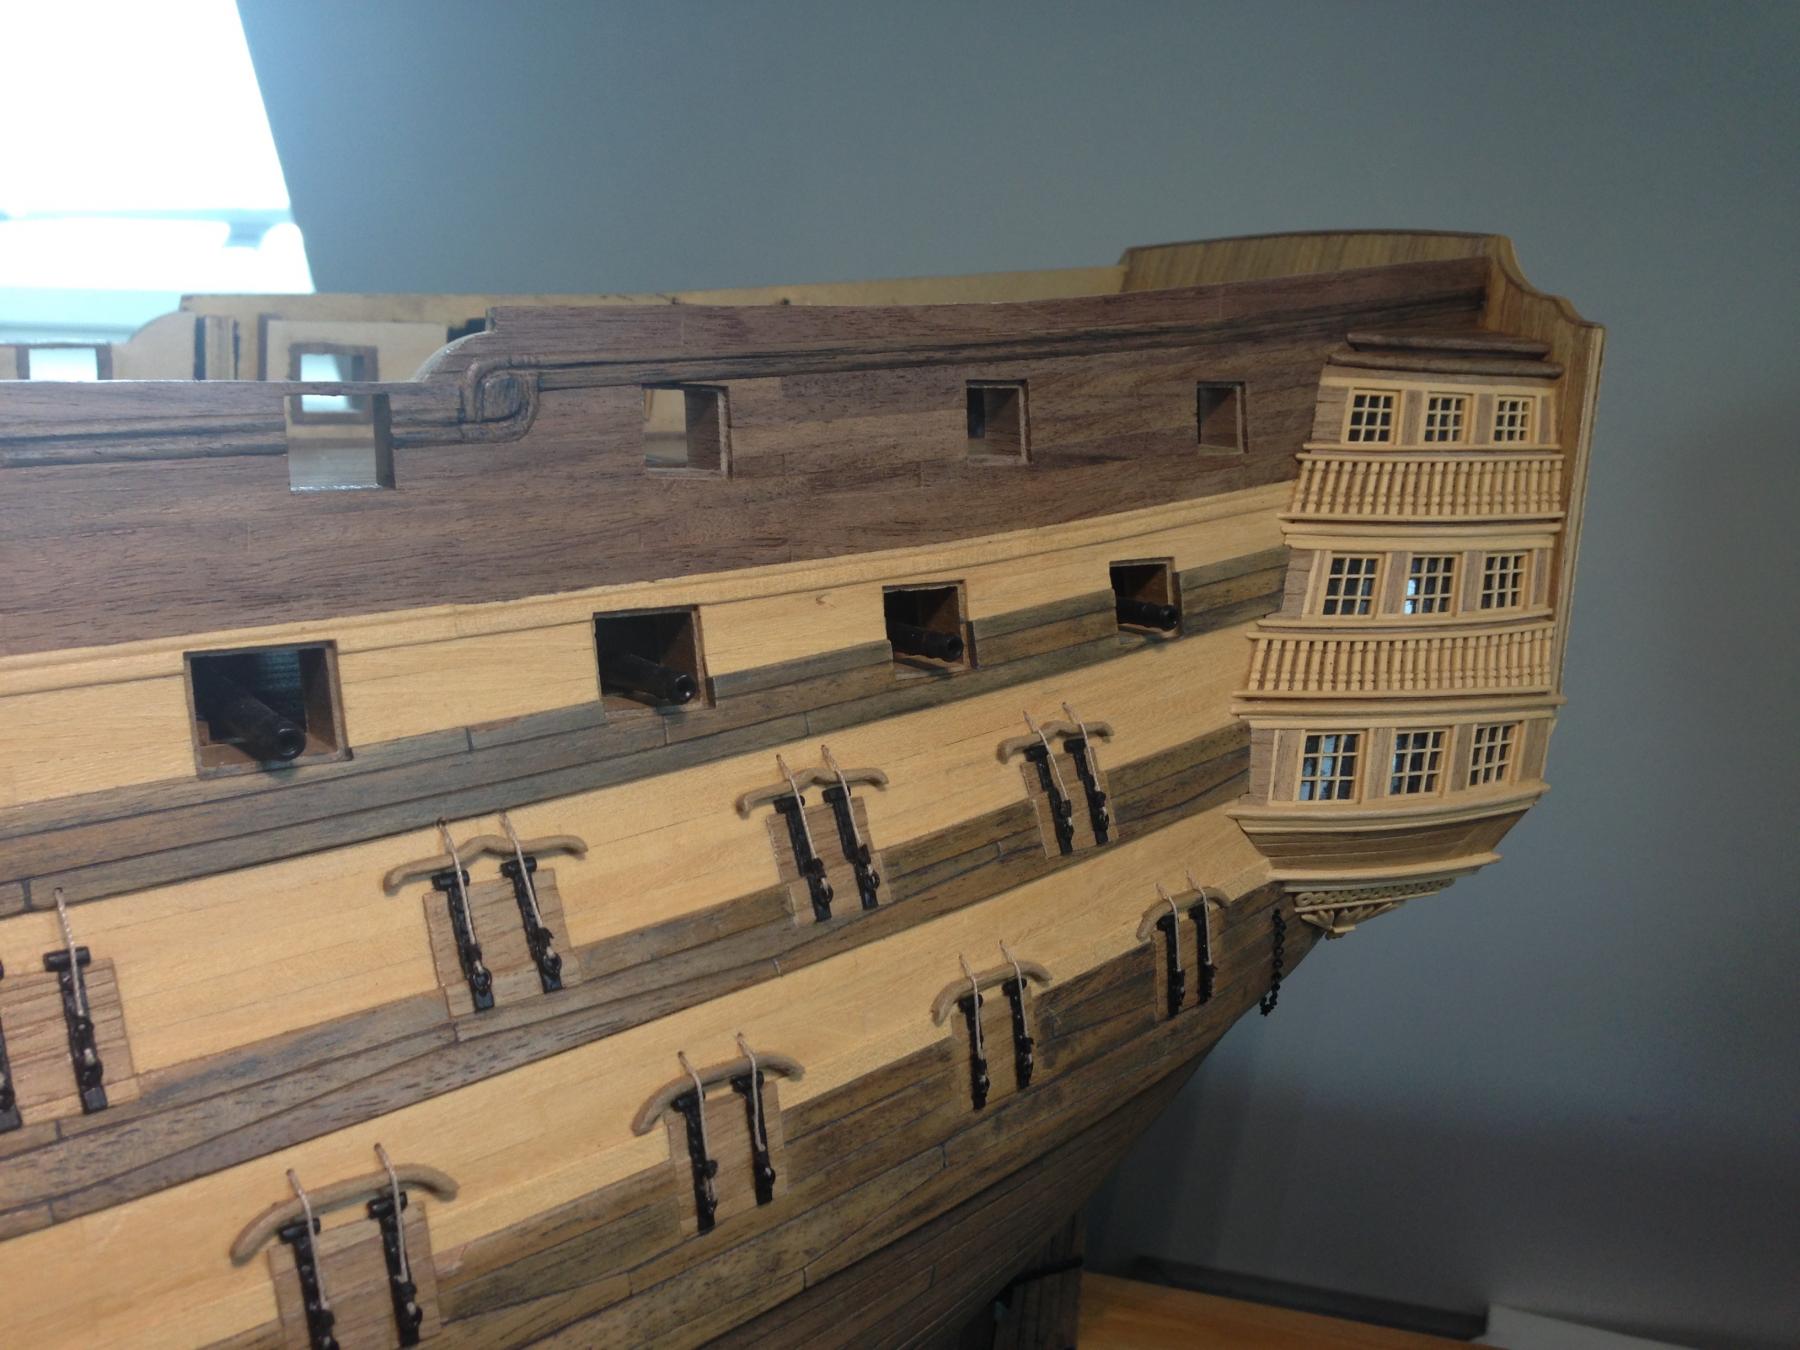
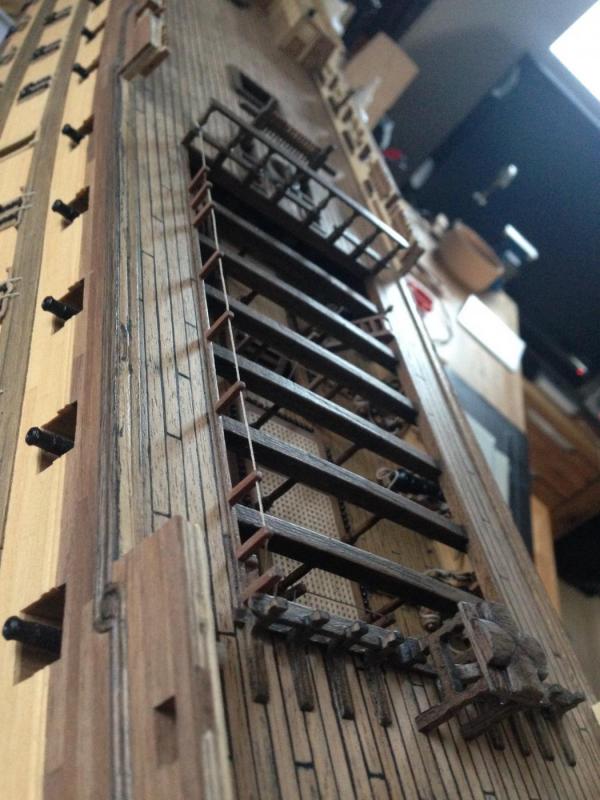
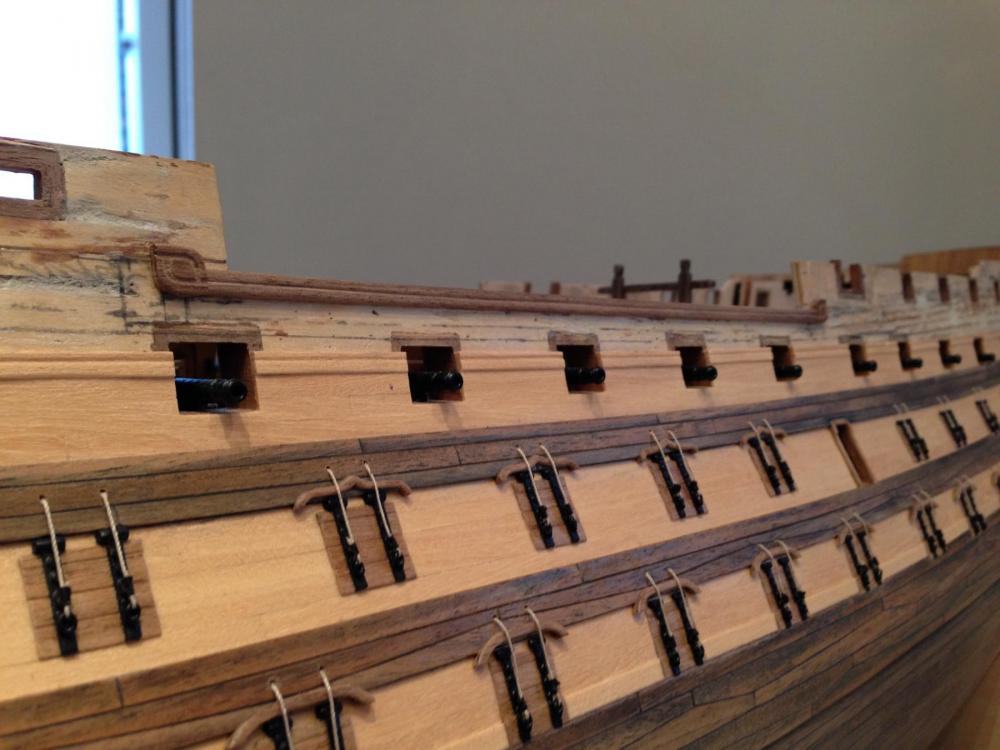
Thanks a lot for your likes and the nice compliments! @ Ian: I am not sure if I really understand you right, but I try to answer you: I have not taken the sheet hinges from the kit. My hinges are made of wood strips 0,5 x 2 mm. So there was no problem to cut them in the way I needed them. One piece thrusts up to the wale; the next piece is on top of the wale. Some nails, an eyelet and an old chain link ... all colored with black metal color... finished. I don´t made good experiences with the sheet pieces from the kit. Mostly when I cut them out of the frames, they are kinked and bent. And it´s very difficult to glue them without to mess up everything around. But maybe it´s only a lack of my craftmanship ... :-) I hope this answered your question. If not... please write me again. I do my best to help you! -Heinz-
-
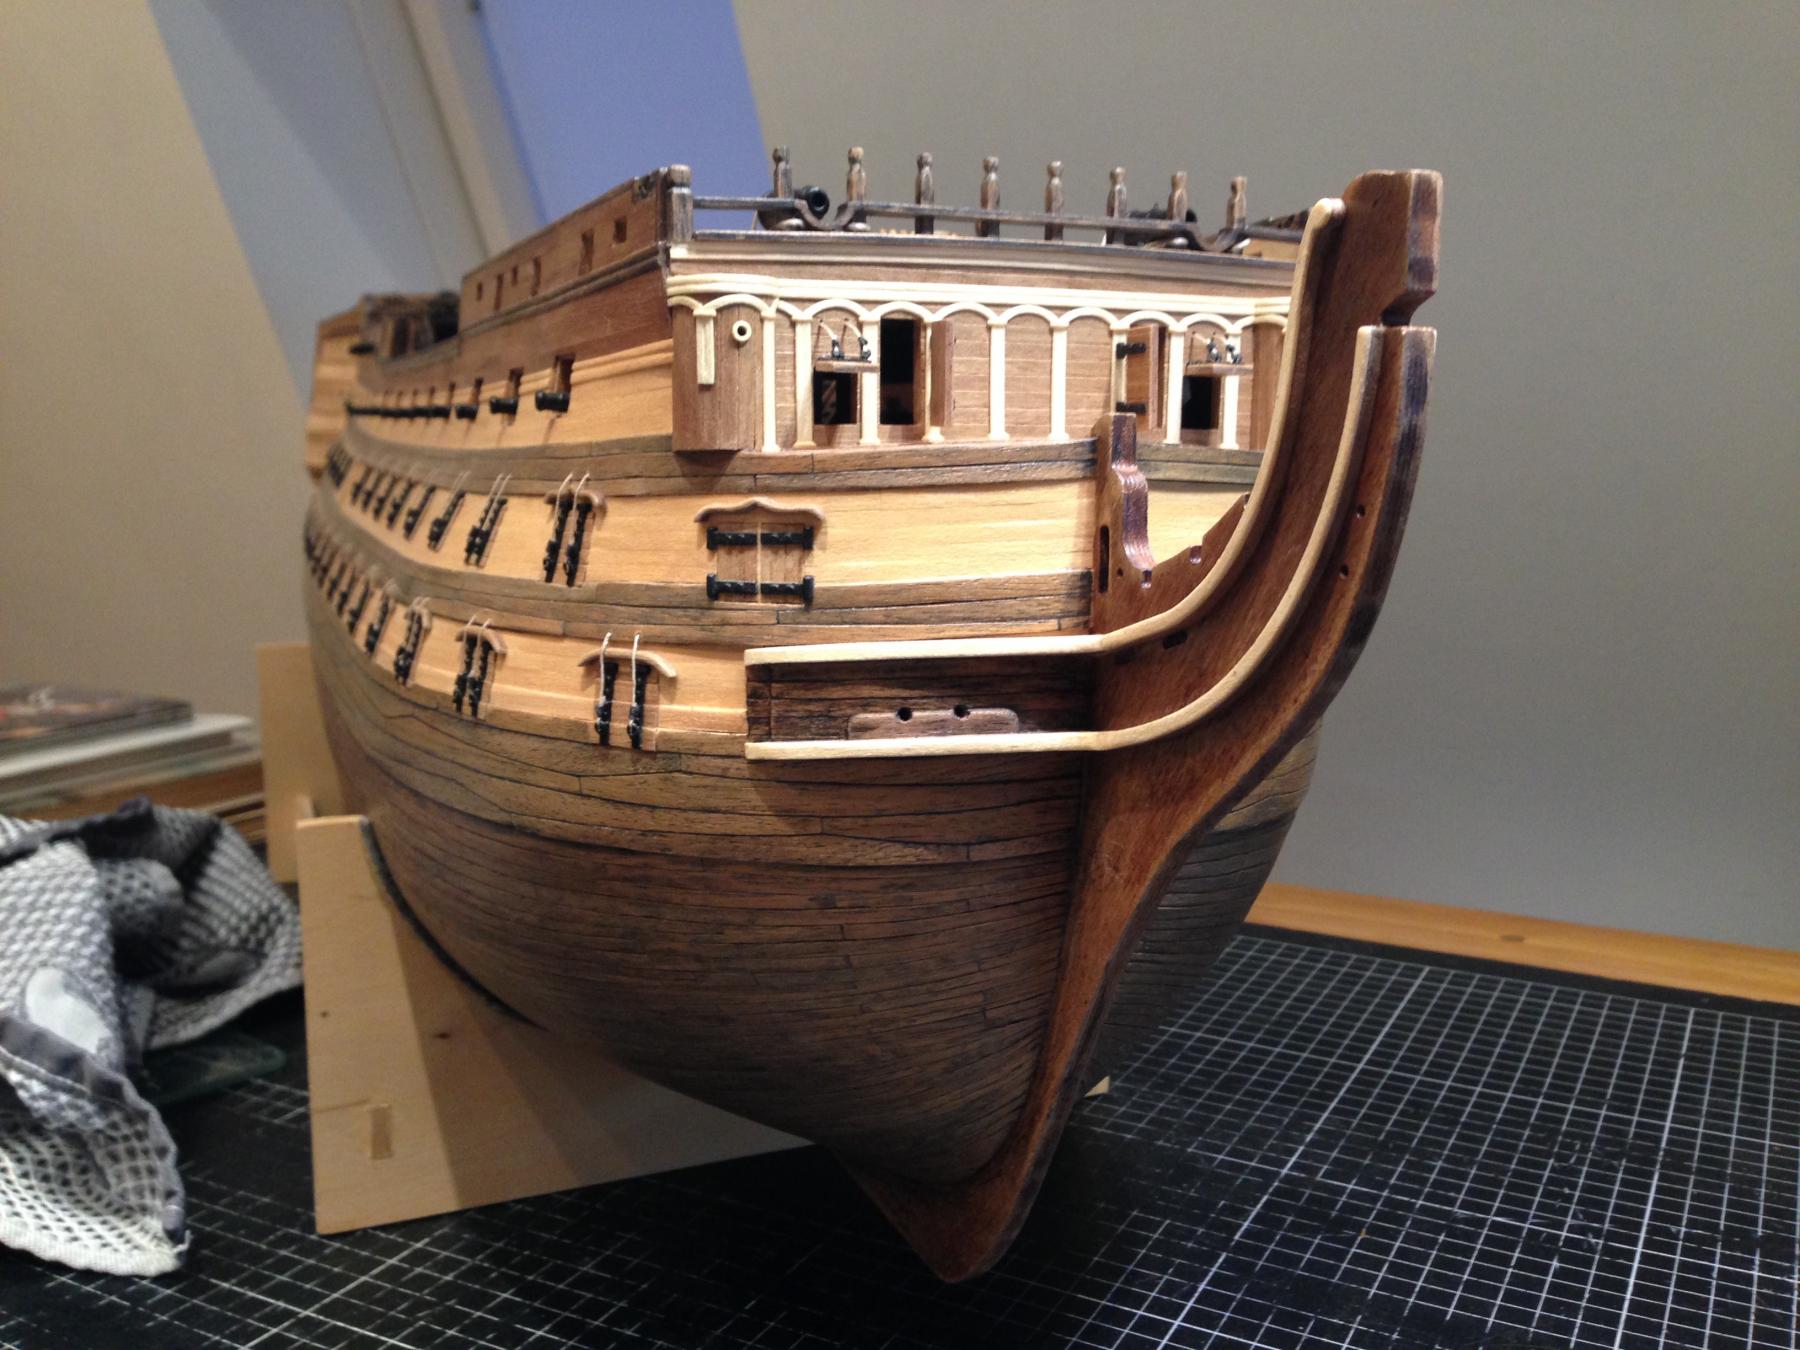
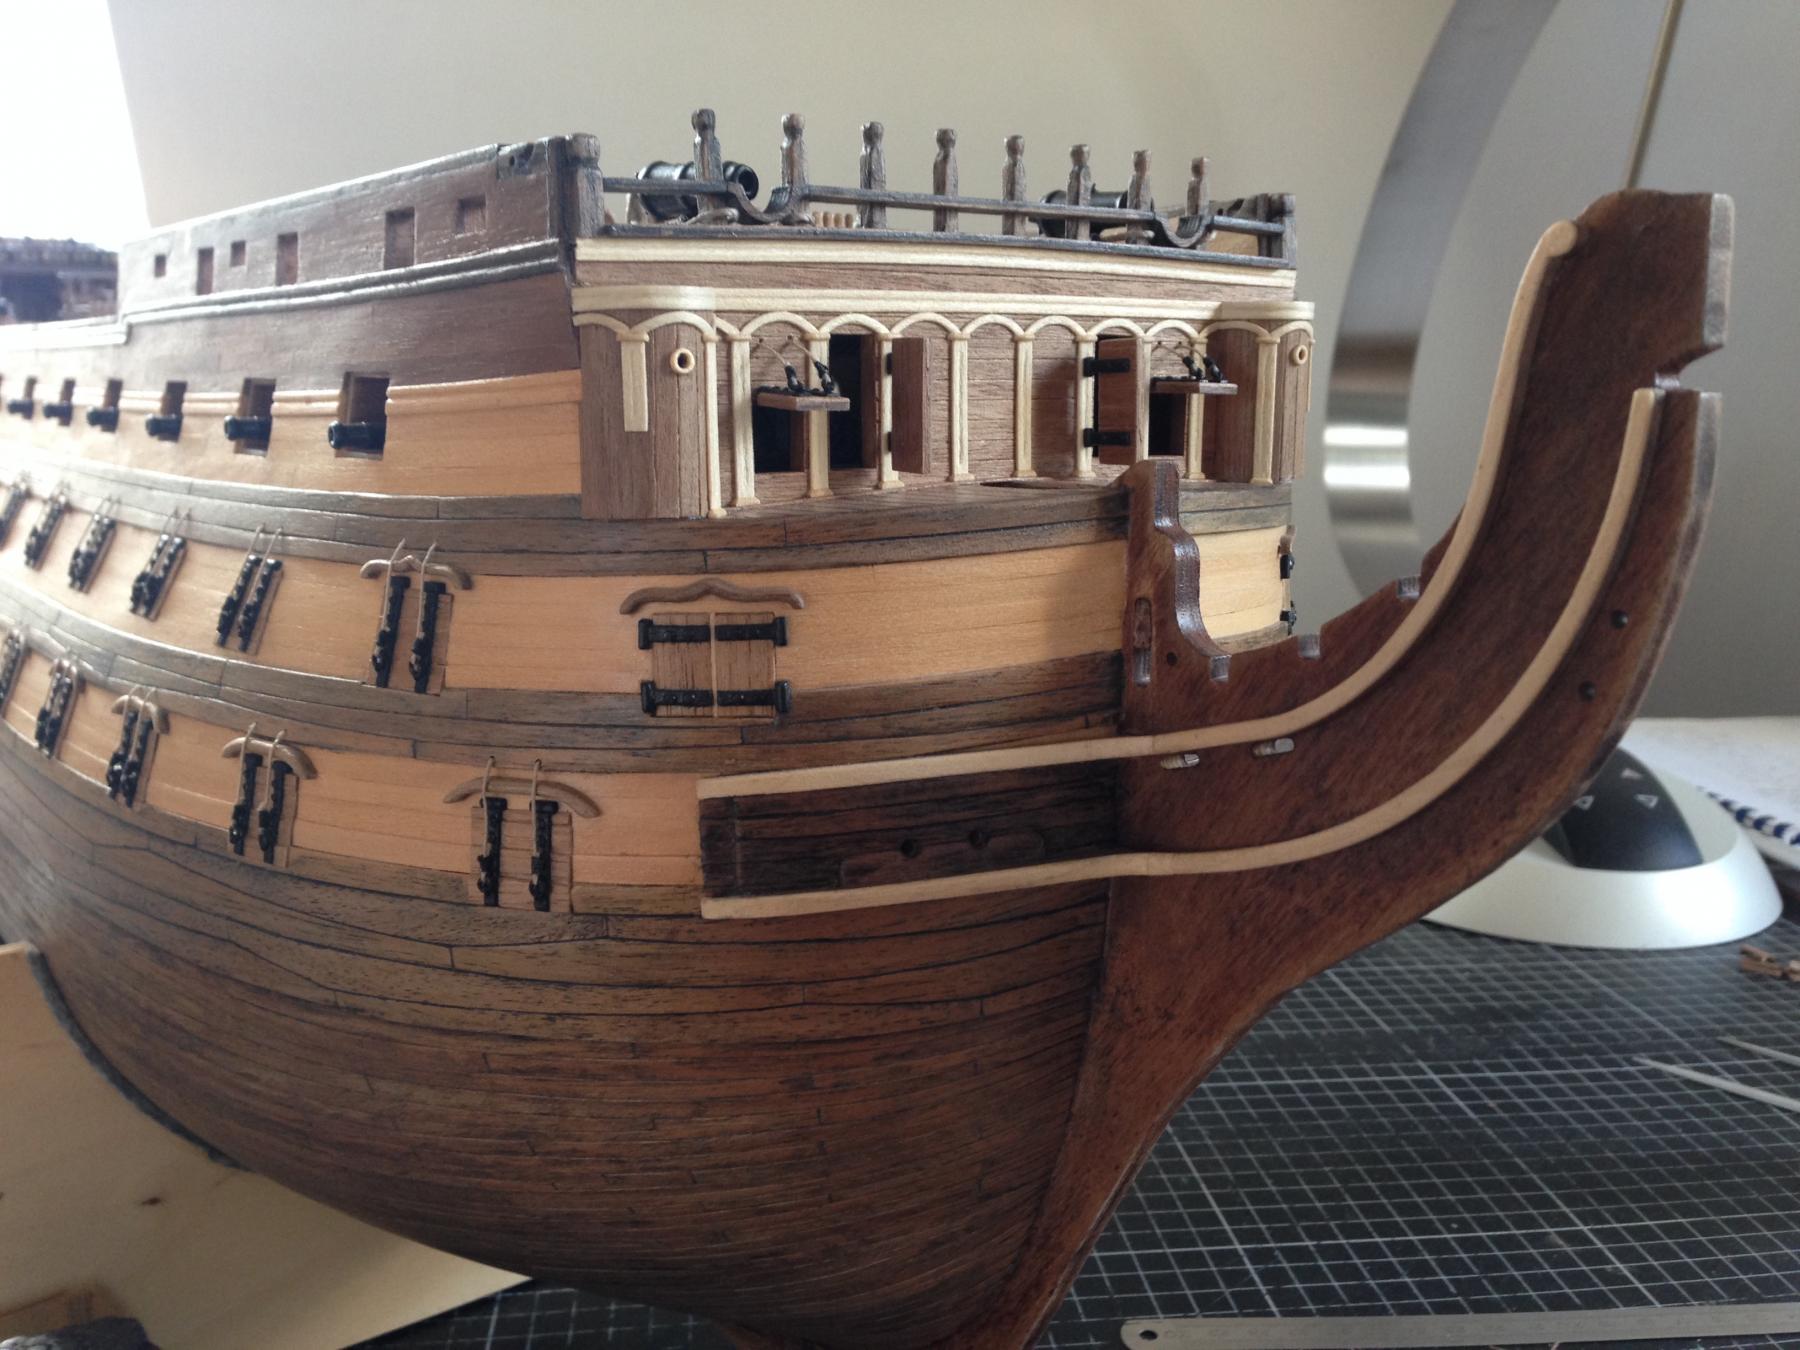
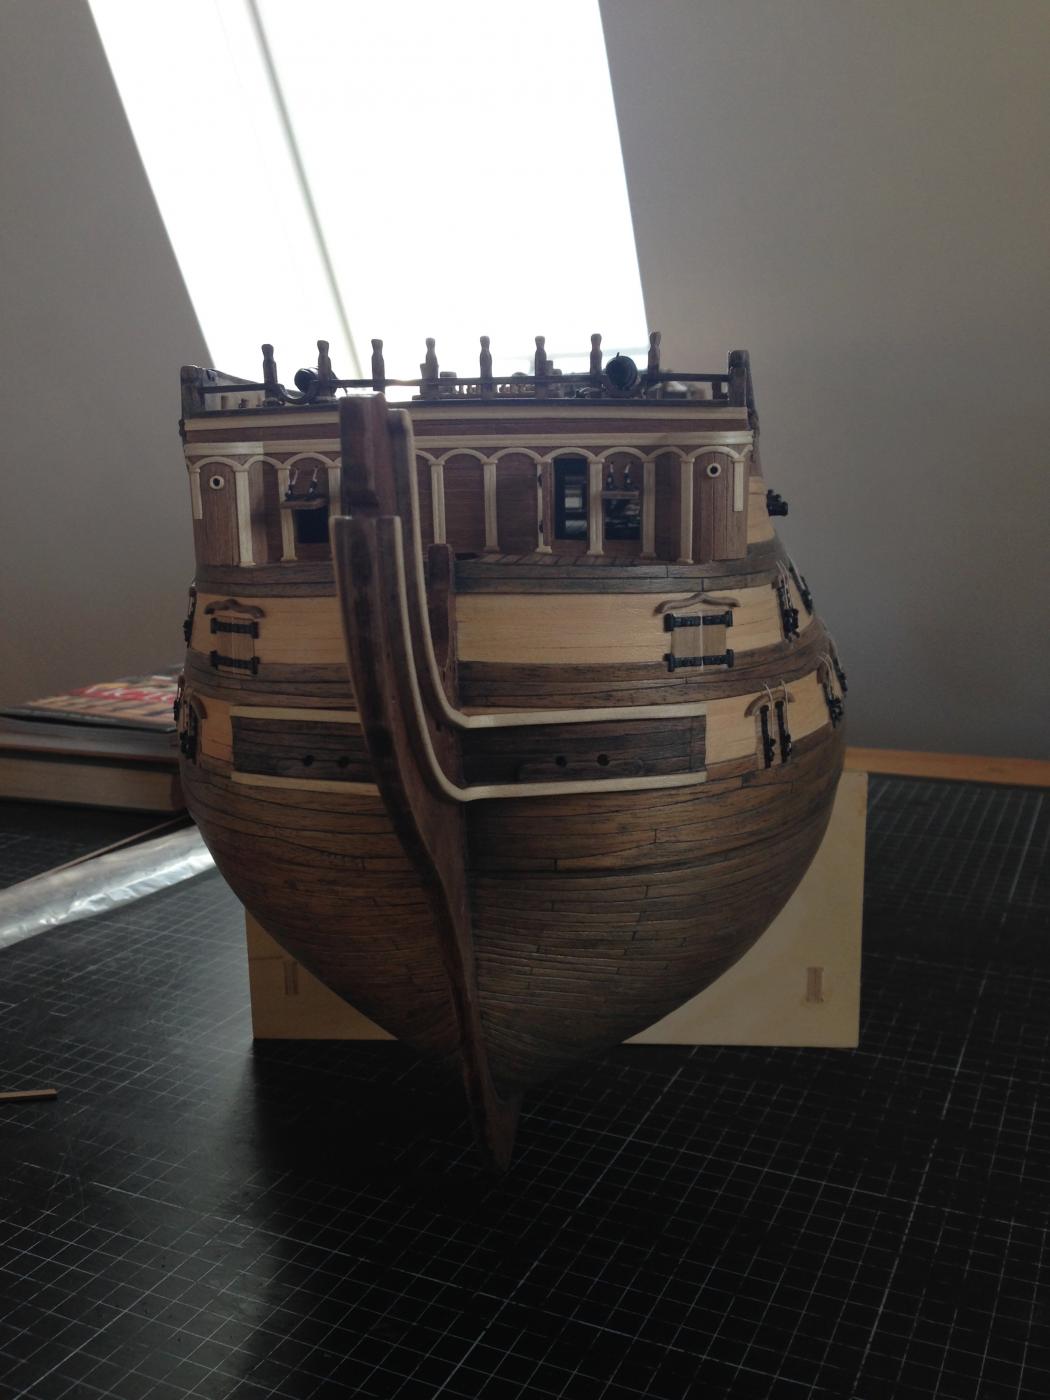
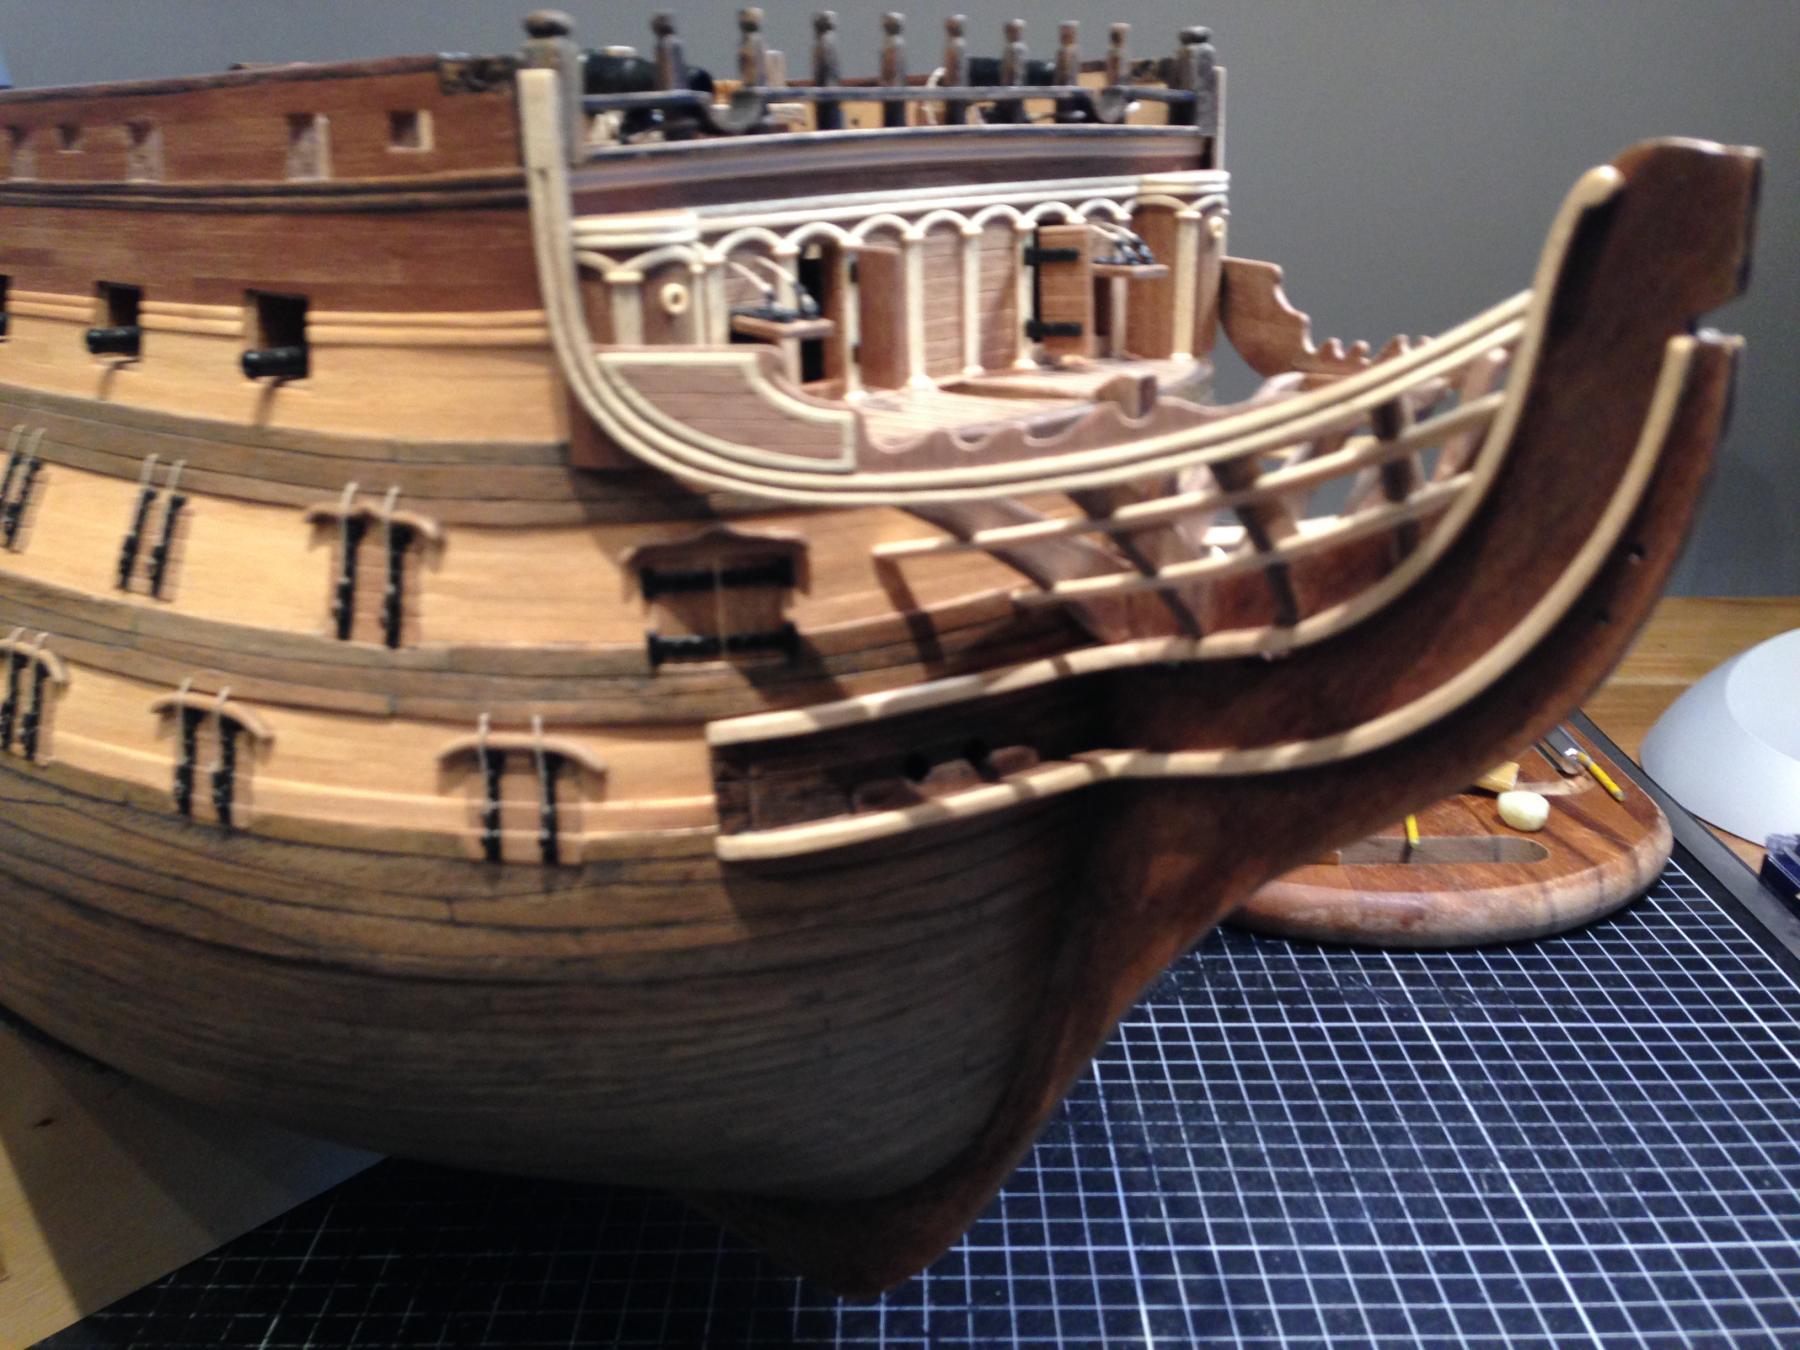
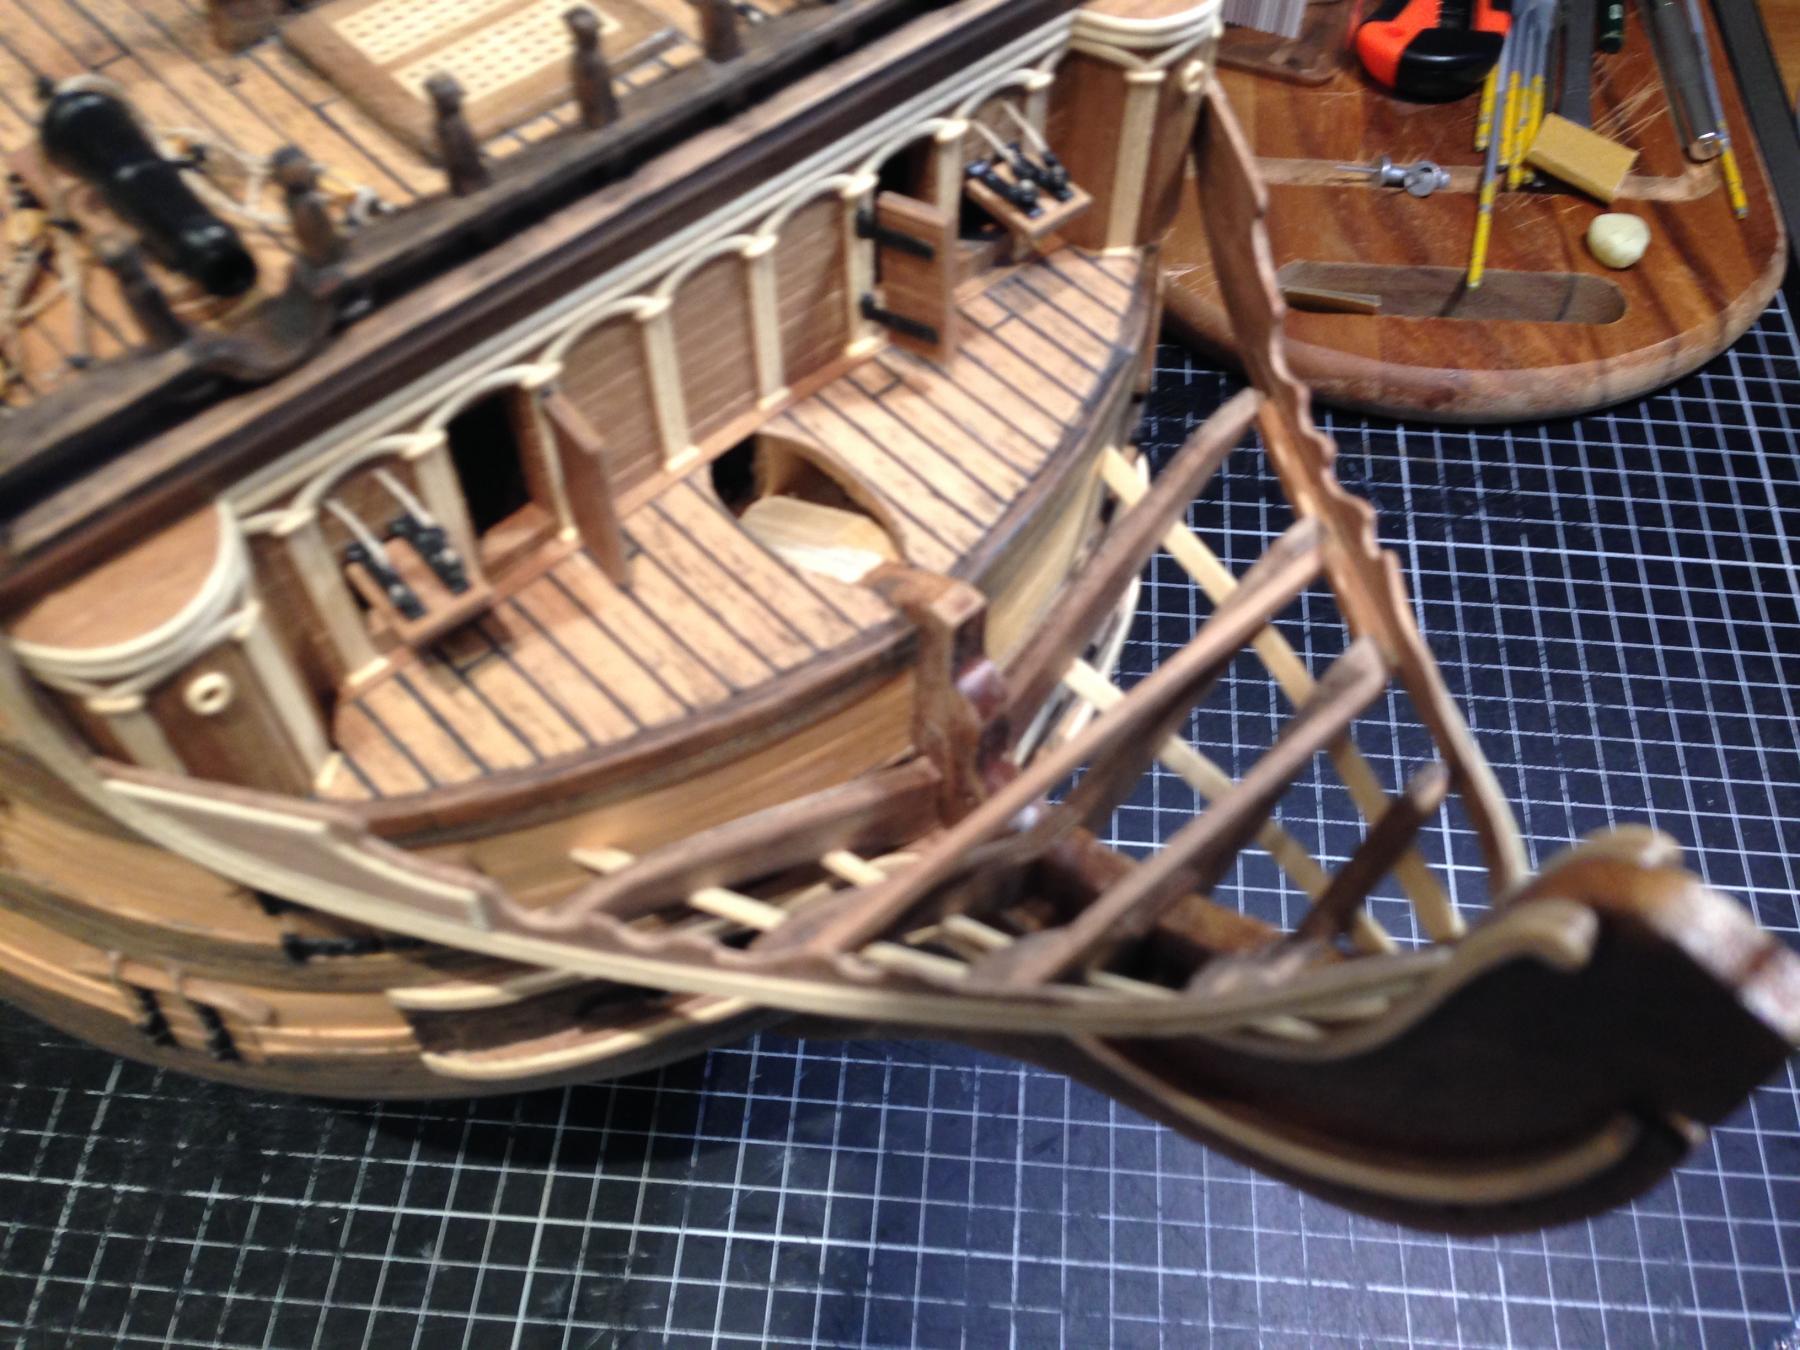
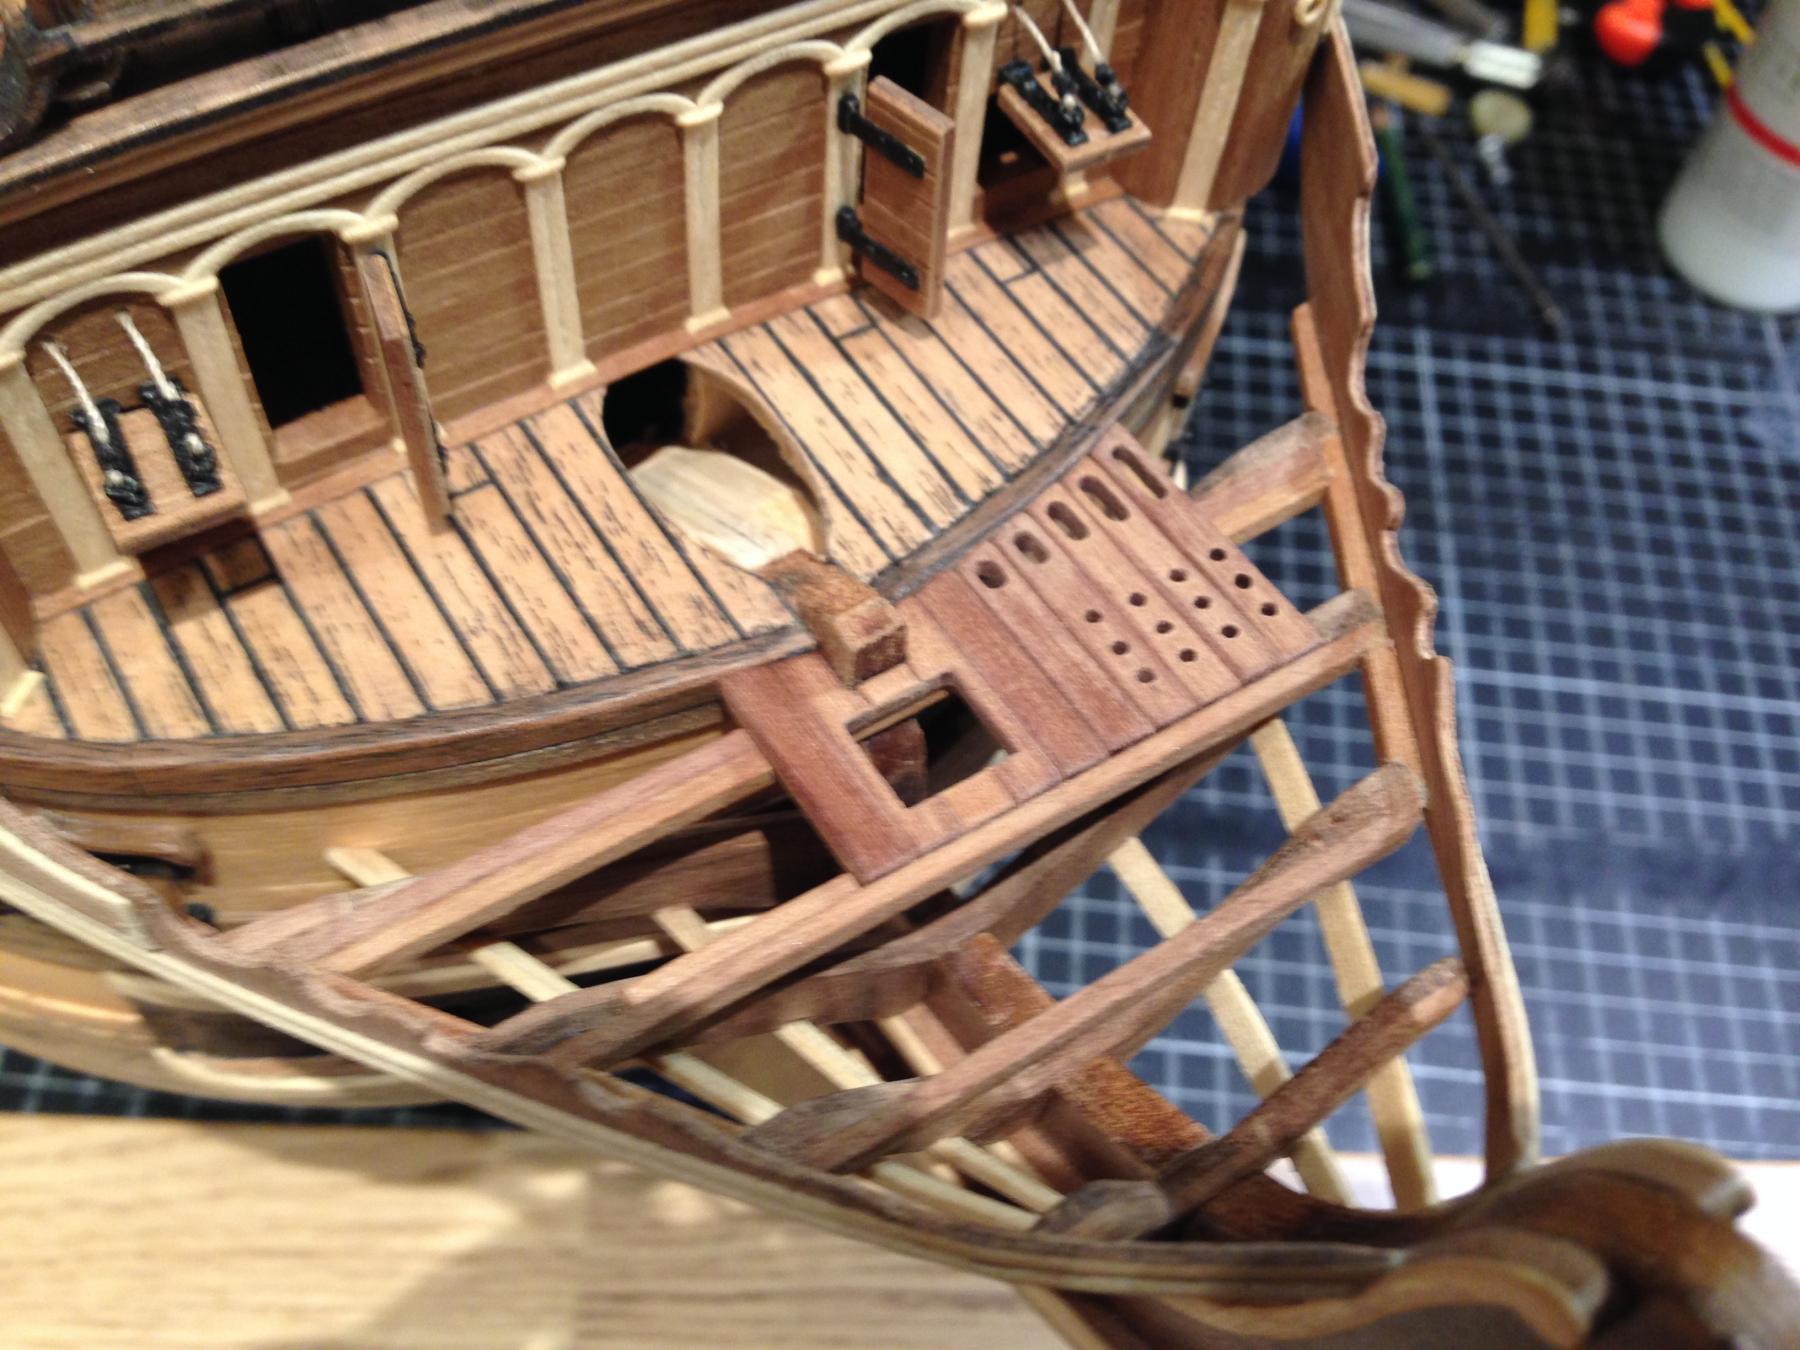
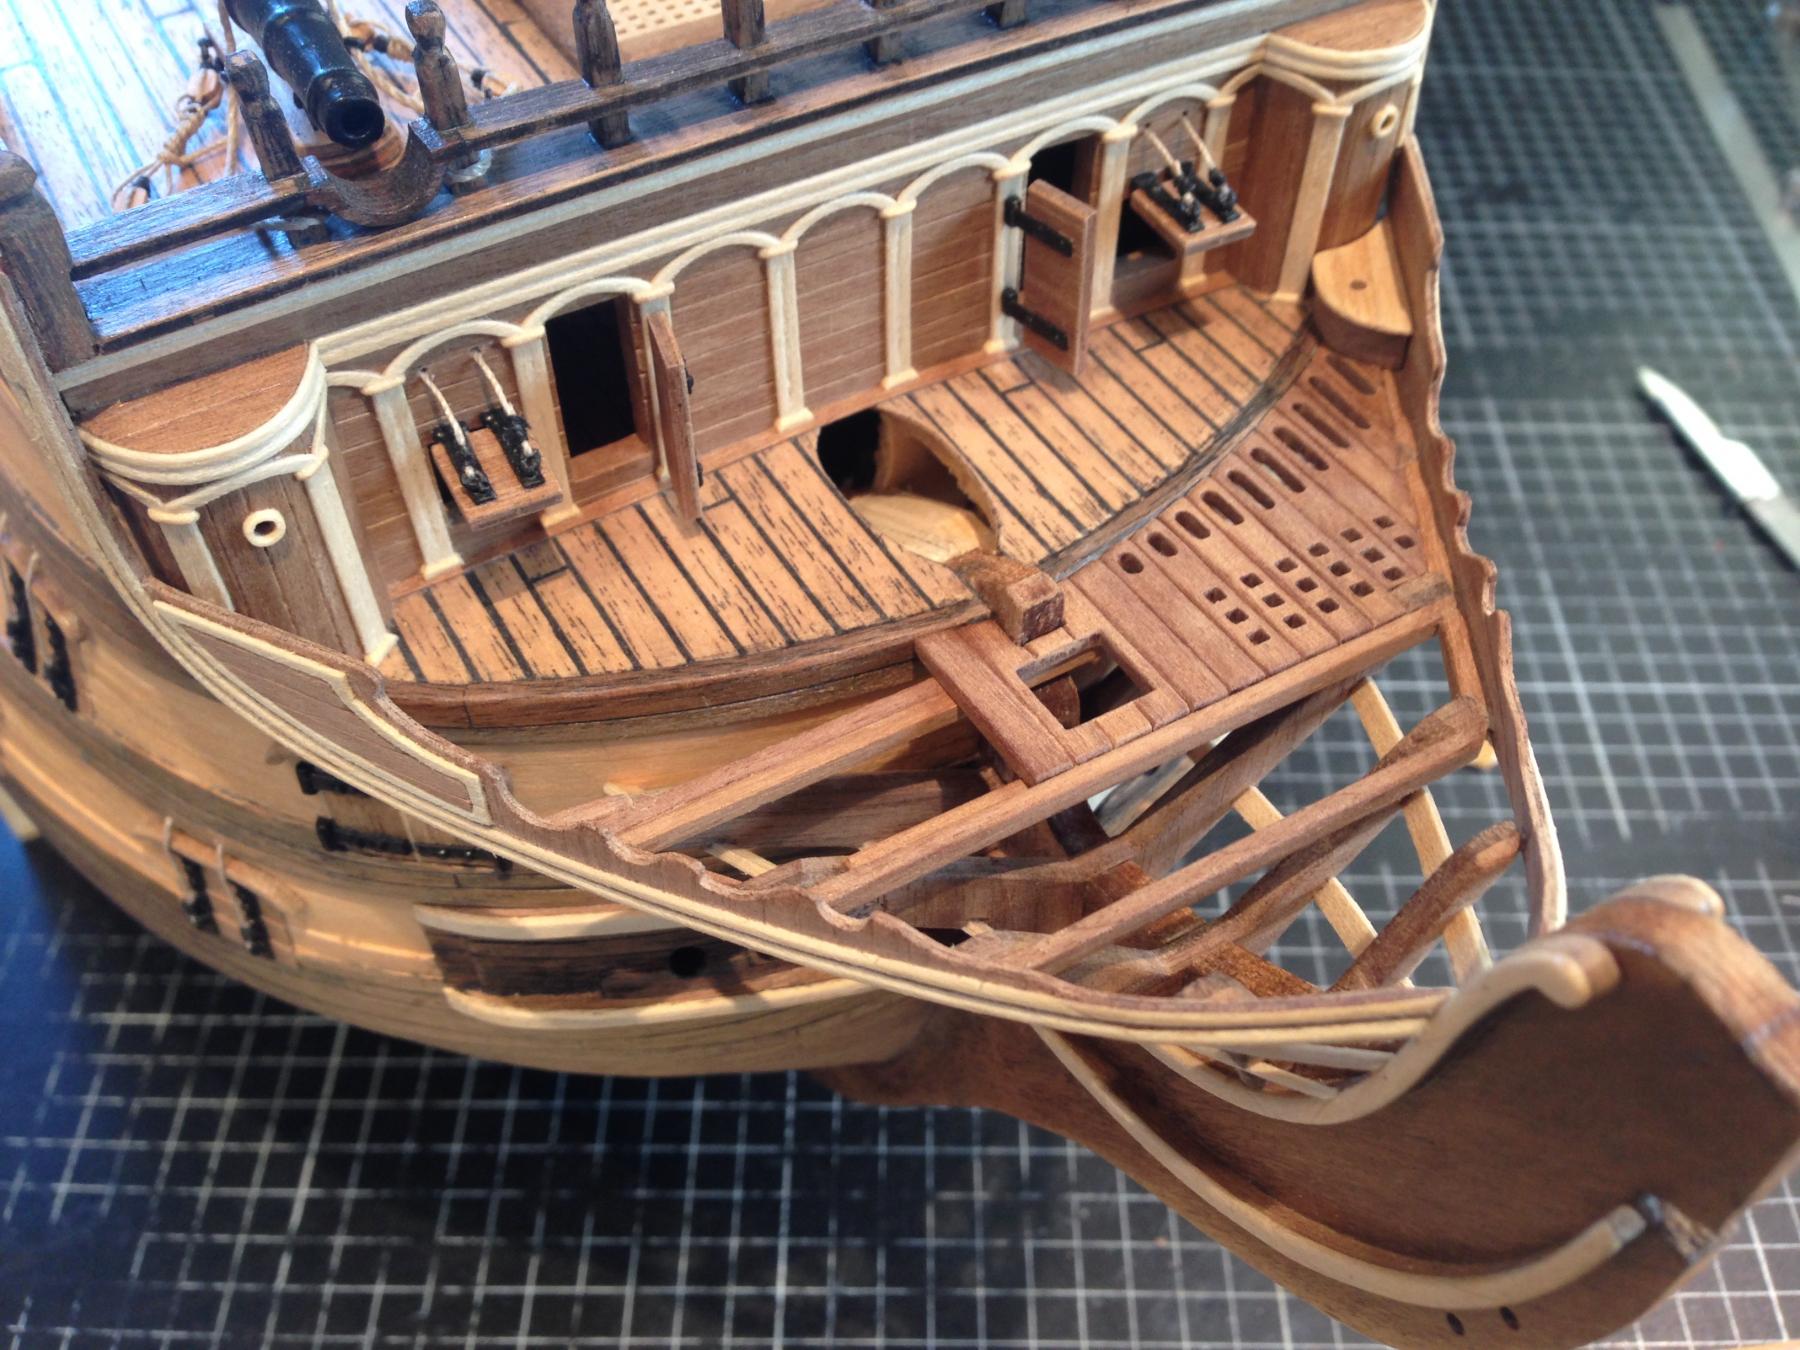
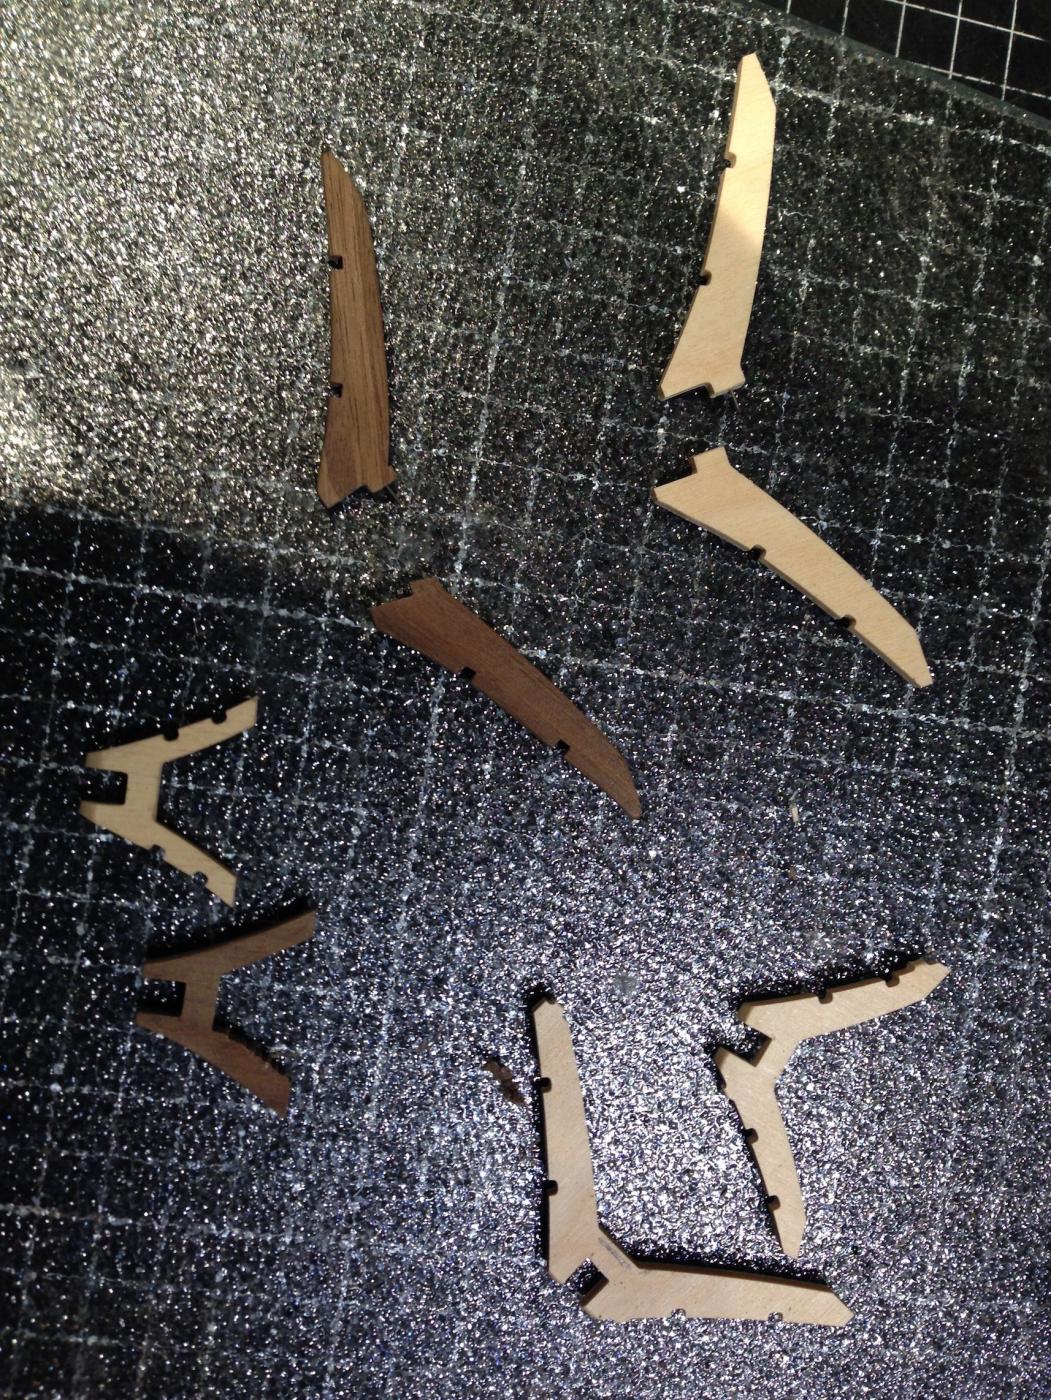
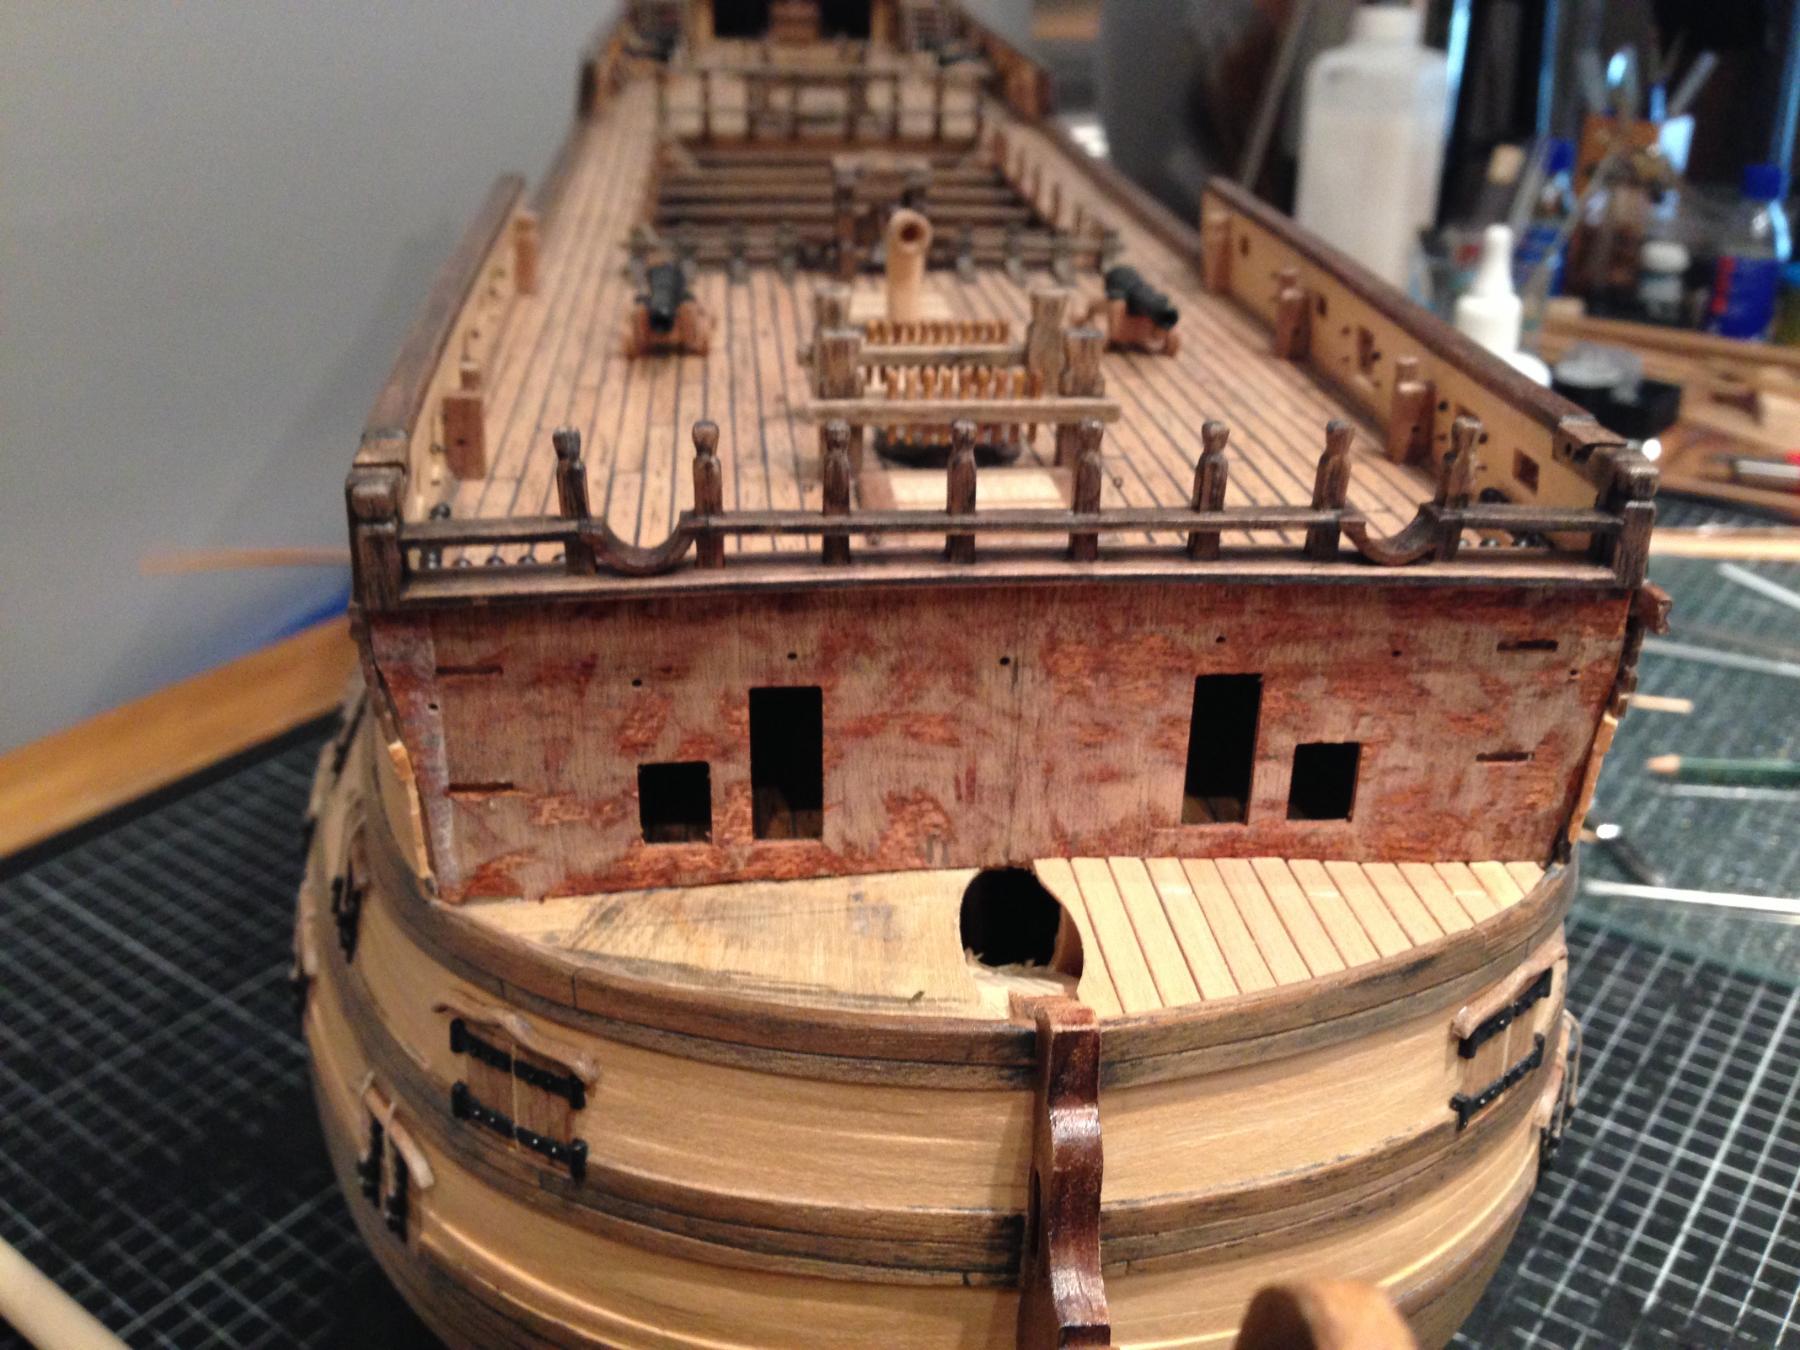
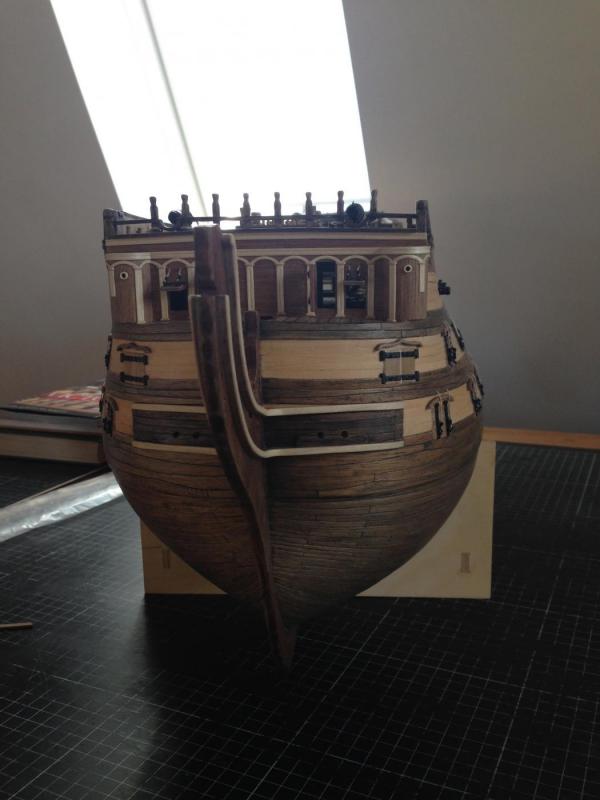
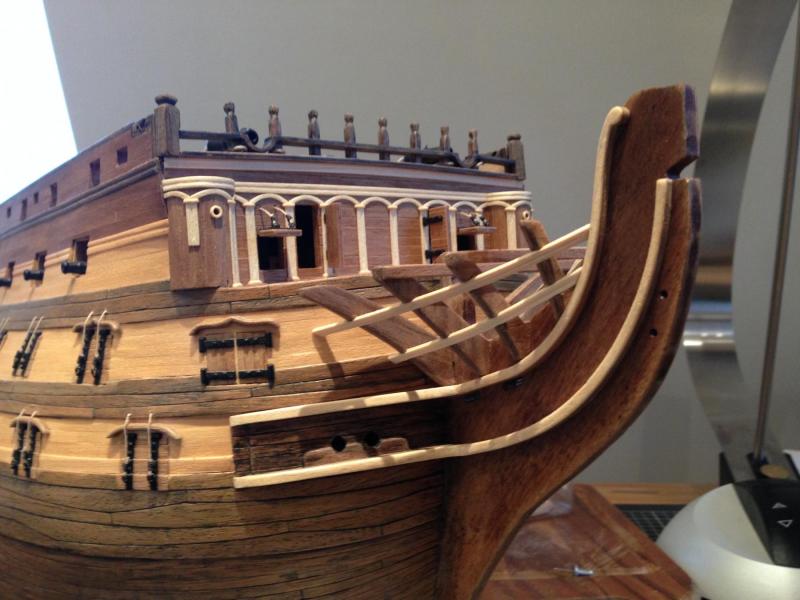
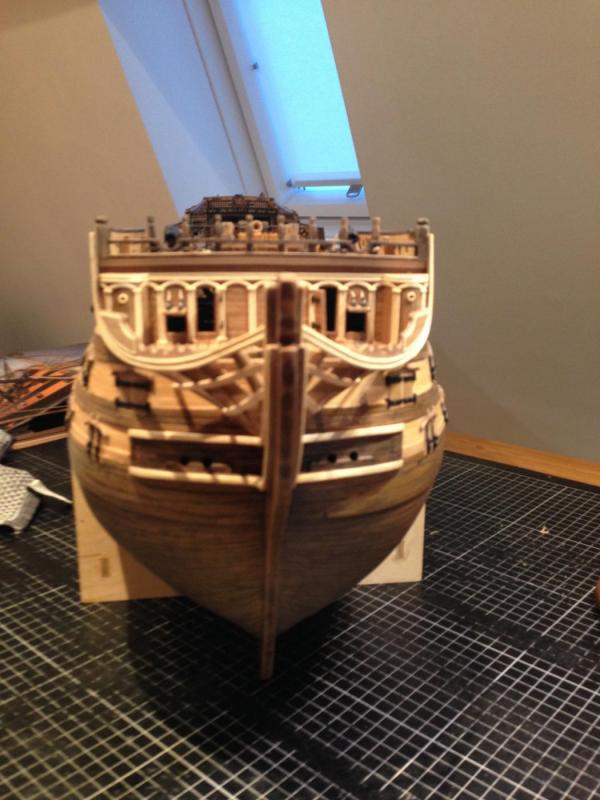
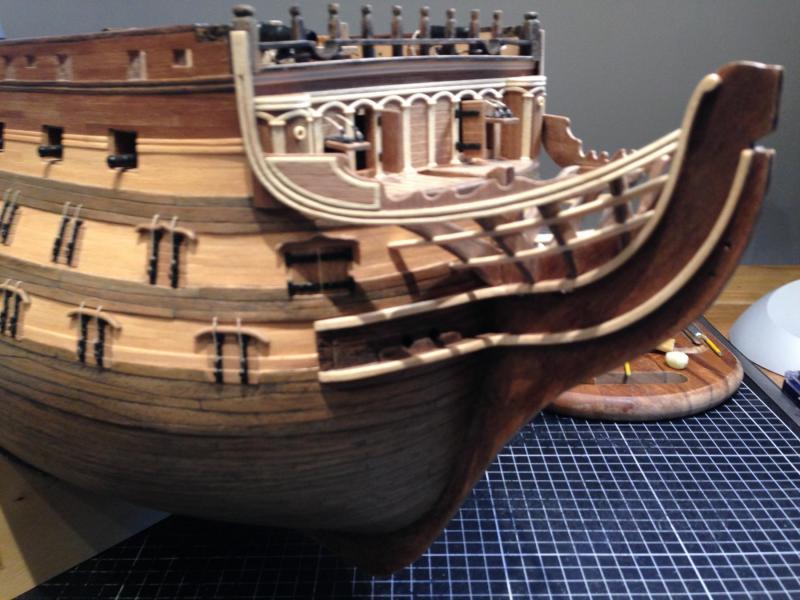
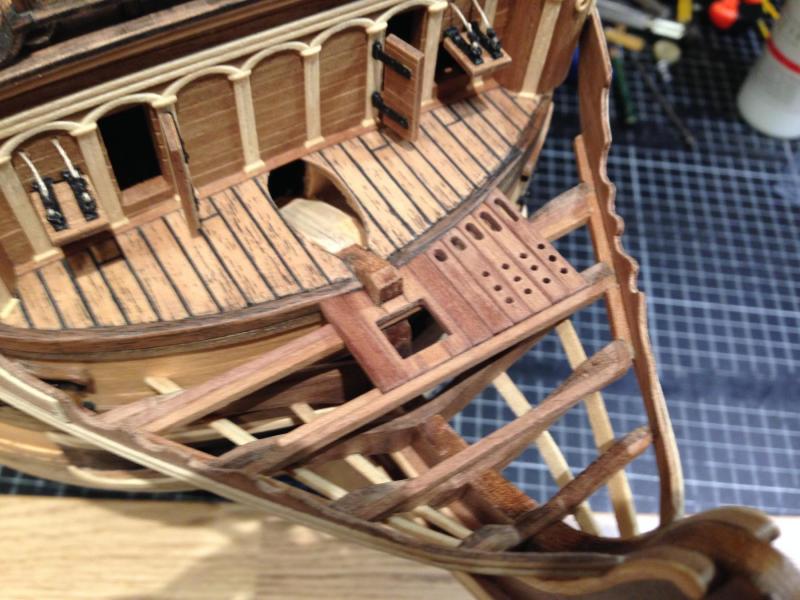
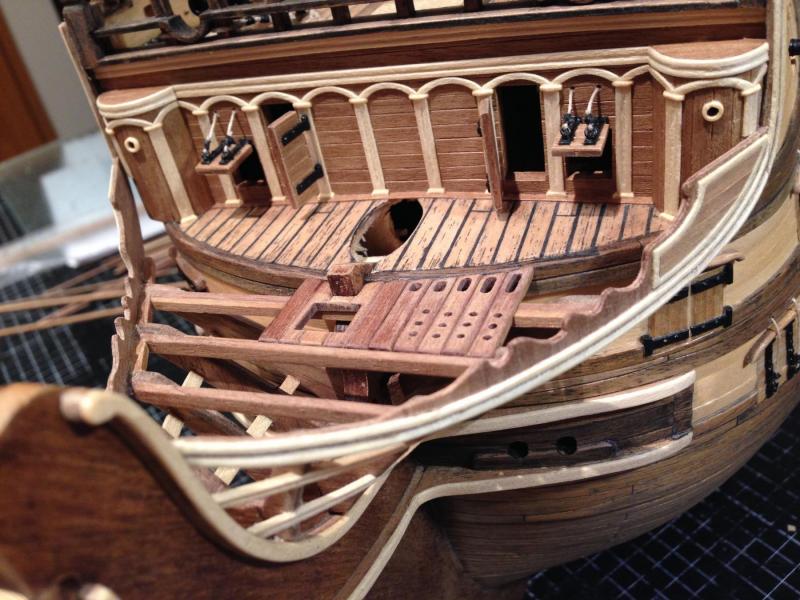
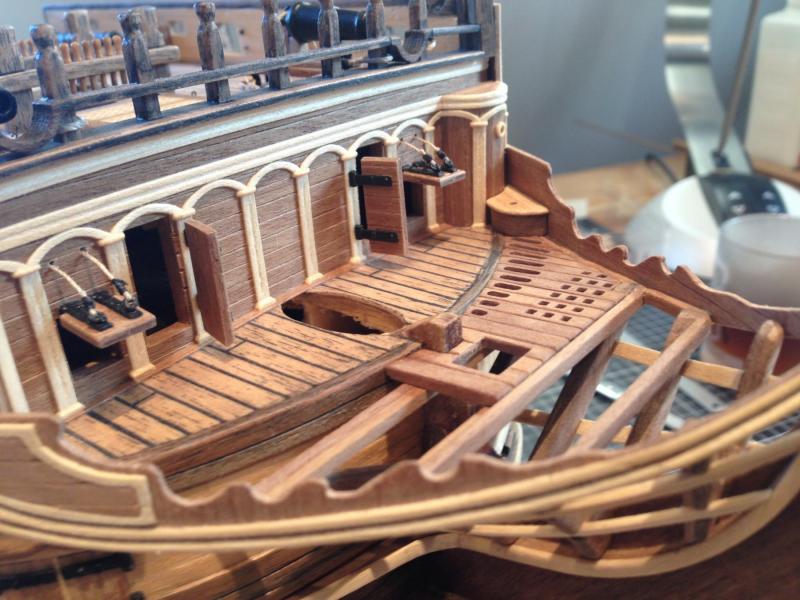
Happy new Year!!! I have started with the beakhead. I was most frightened of this part of my model. And - I really hate it, when I am right - it is the most difficult part so far. I had problems to understand the instructions. This forum with all of your posts and pictures really helped me much. Thank you for that !!! I decided to not use the parts in the kit, because I did not like the look of the wood or the parts did not fit. Of course that is my own fault, because I changed too much and builded things in my own way using different woods and no color. Please take a look at my pictures and tell me what you think. I am looking forward to your comments. A great new year and much success for your modeling!!! -Heinz-


-
Hello Simon, it´s been a while.. but nothing changed.. still a beautiful and clean work. I look forward to many beautiful updates! Glad that you are back on your Mercury, Simon :-) Best wishes for the new year -Heinz-
- 120 replies
-
- 2
-
-
- mercury
- victory models
- (and 1 more)
-
Thank you Ian! But please tell me, when will we see an update from your work? I start to get impatient :-) - Heinz -
-
Thank you, Graham and David. Your nice words are soooo welcome !!! :-)
-
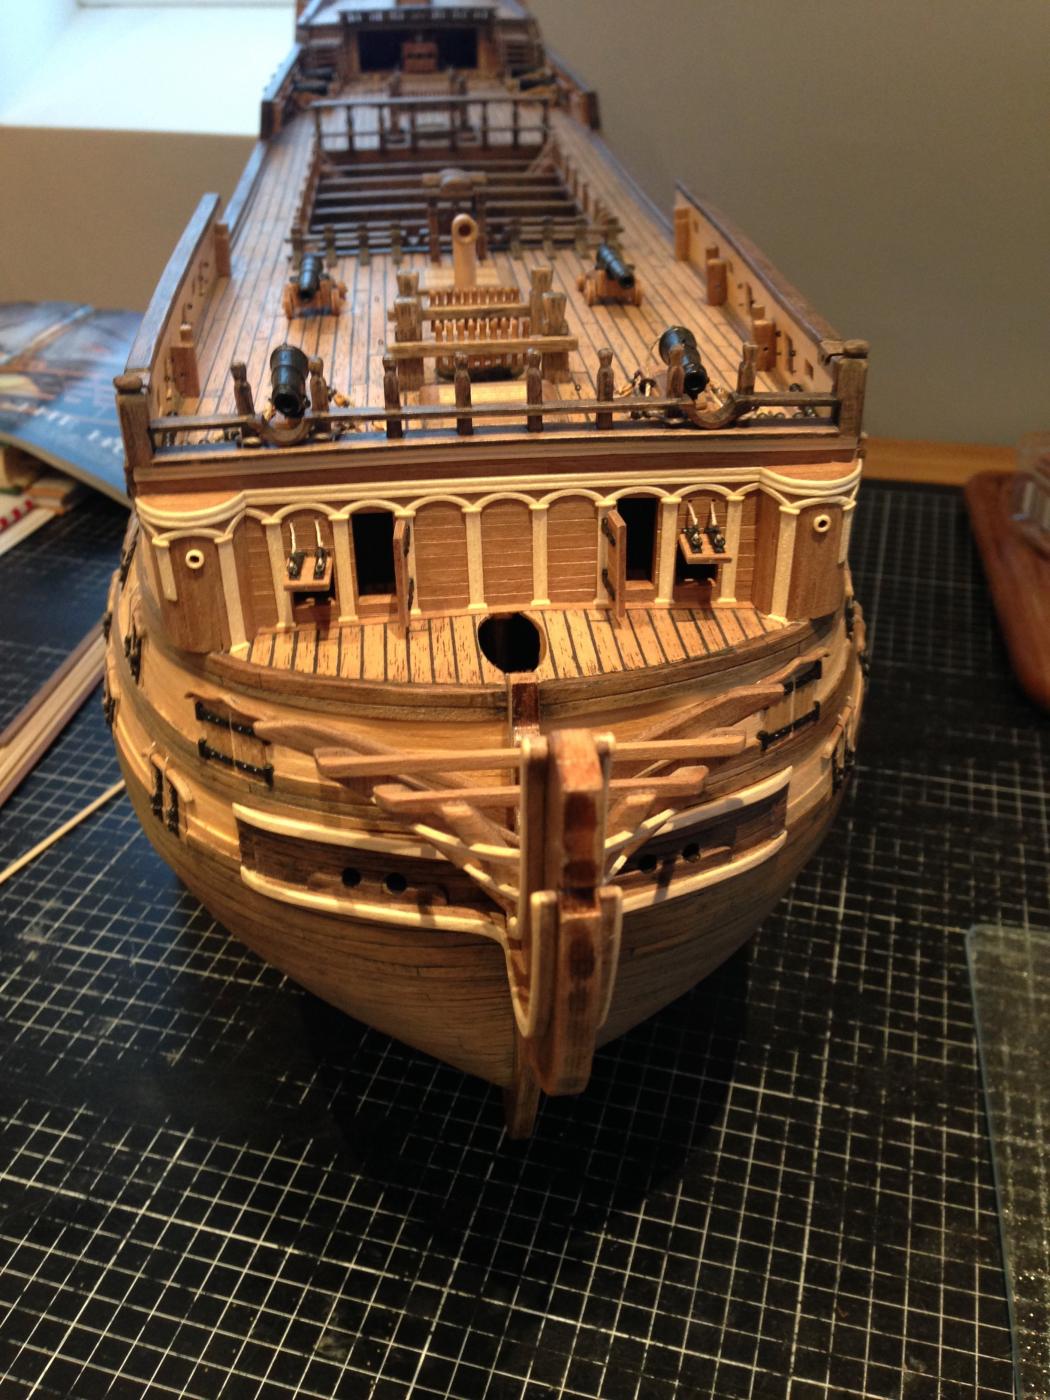
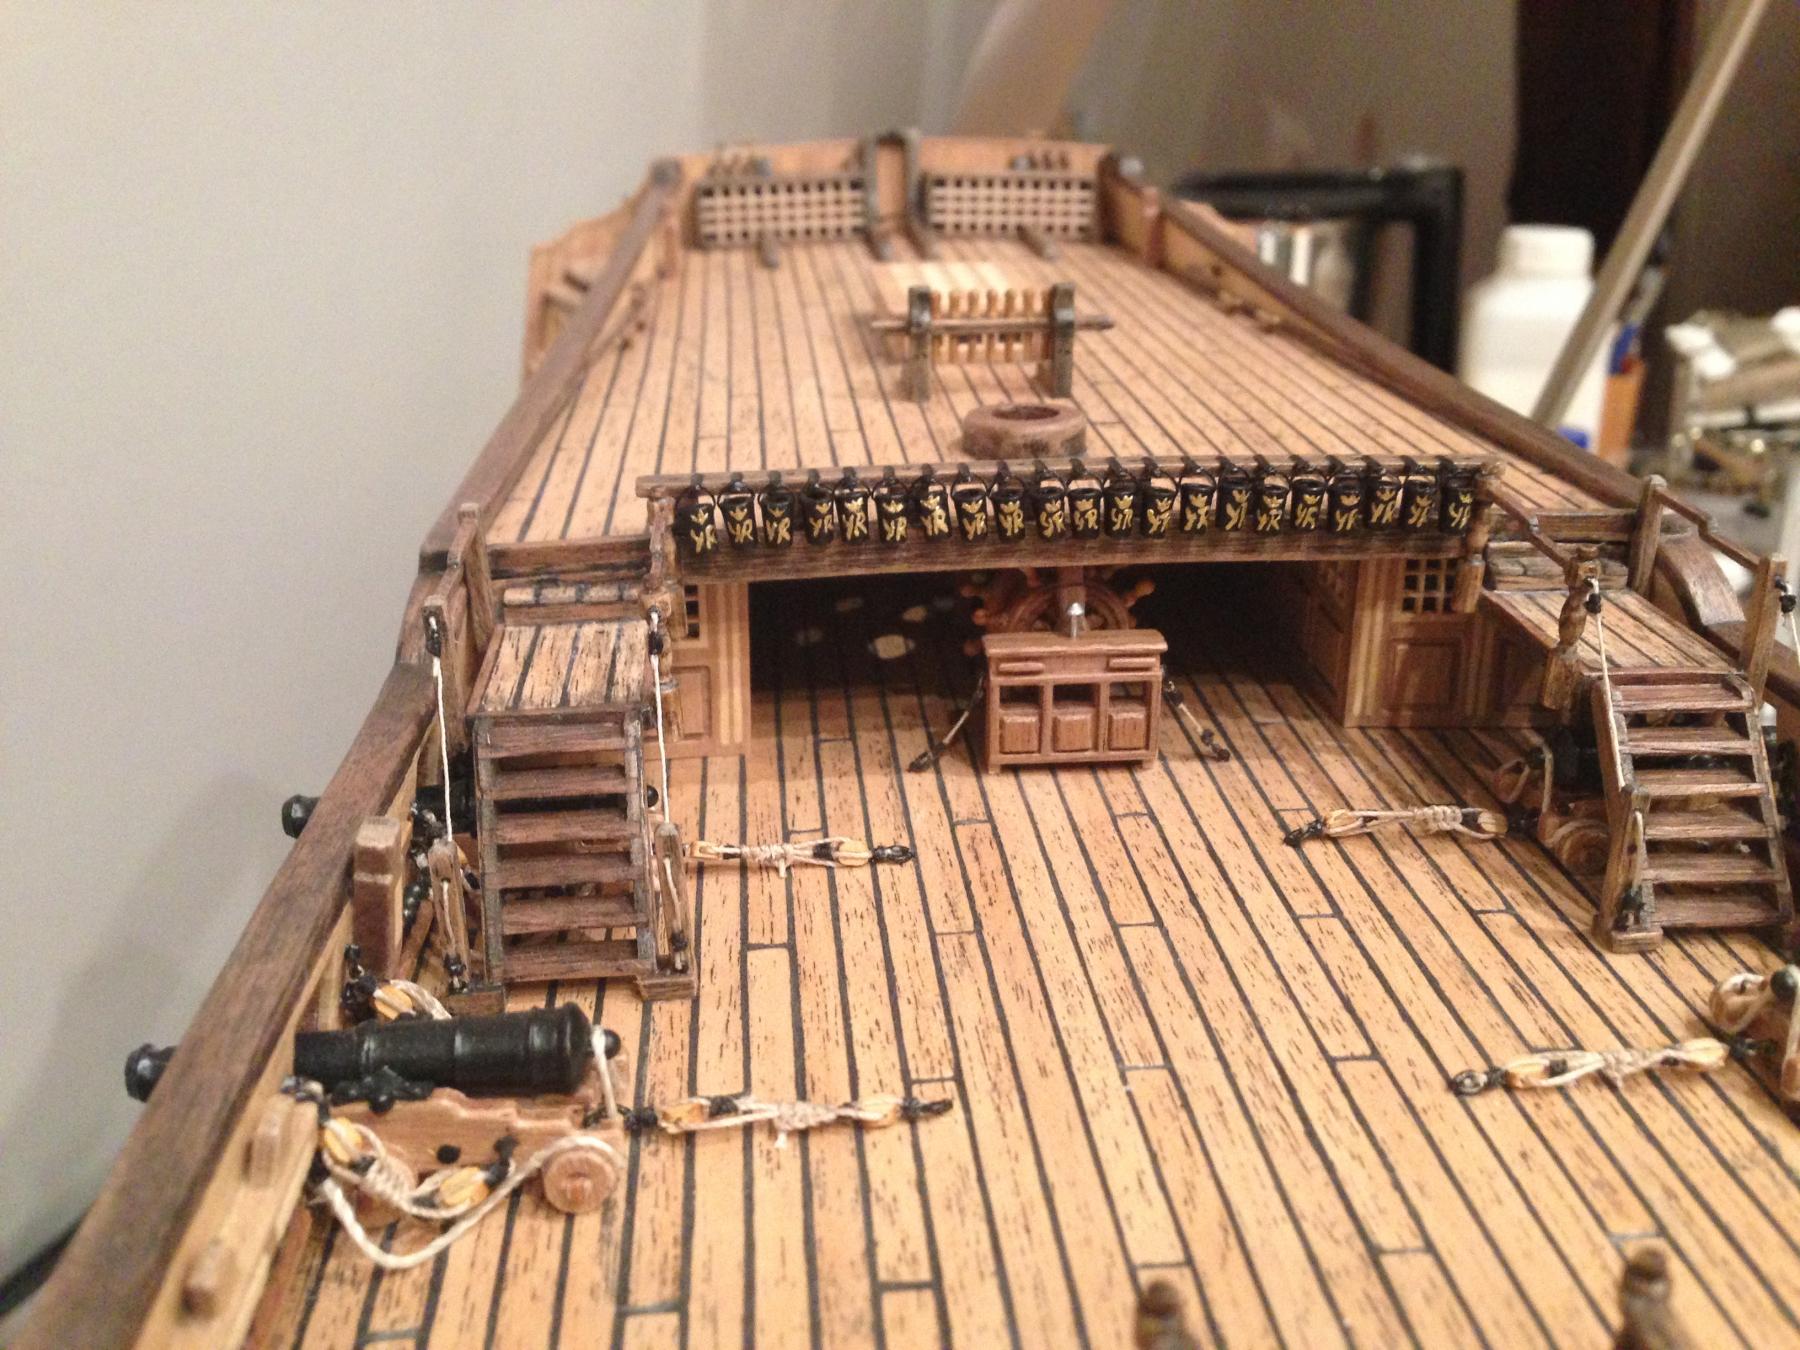
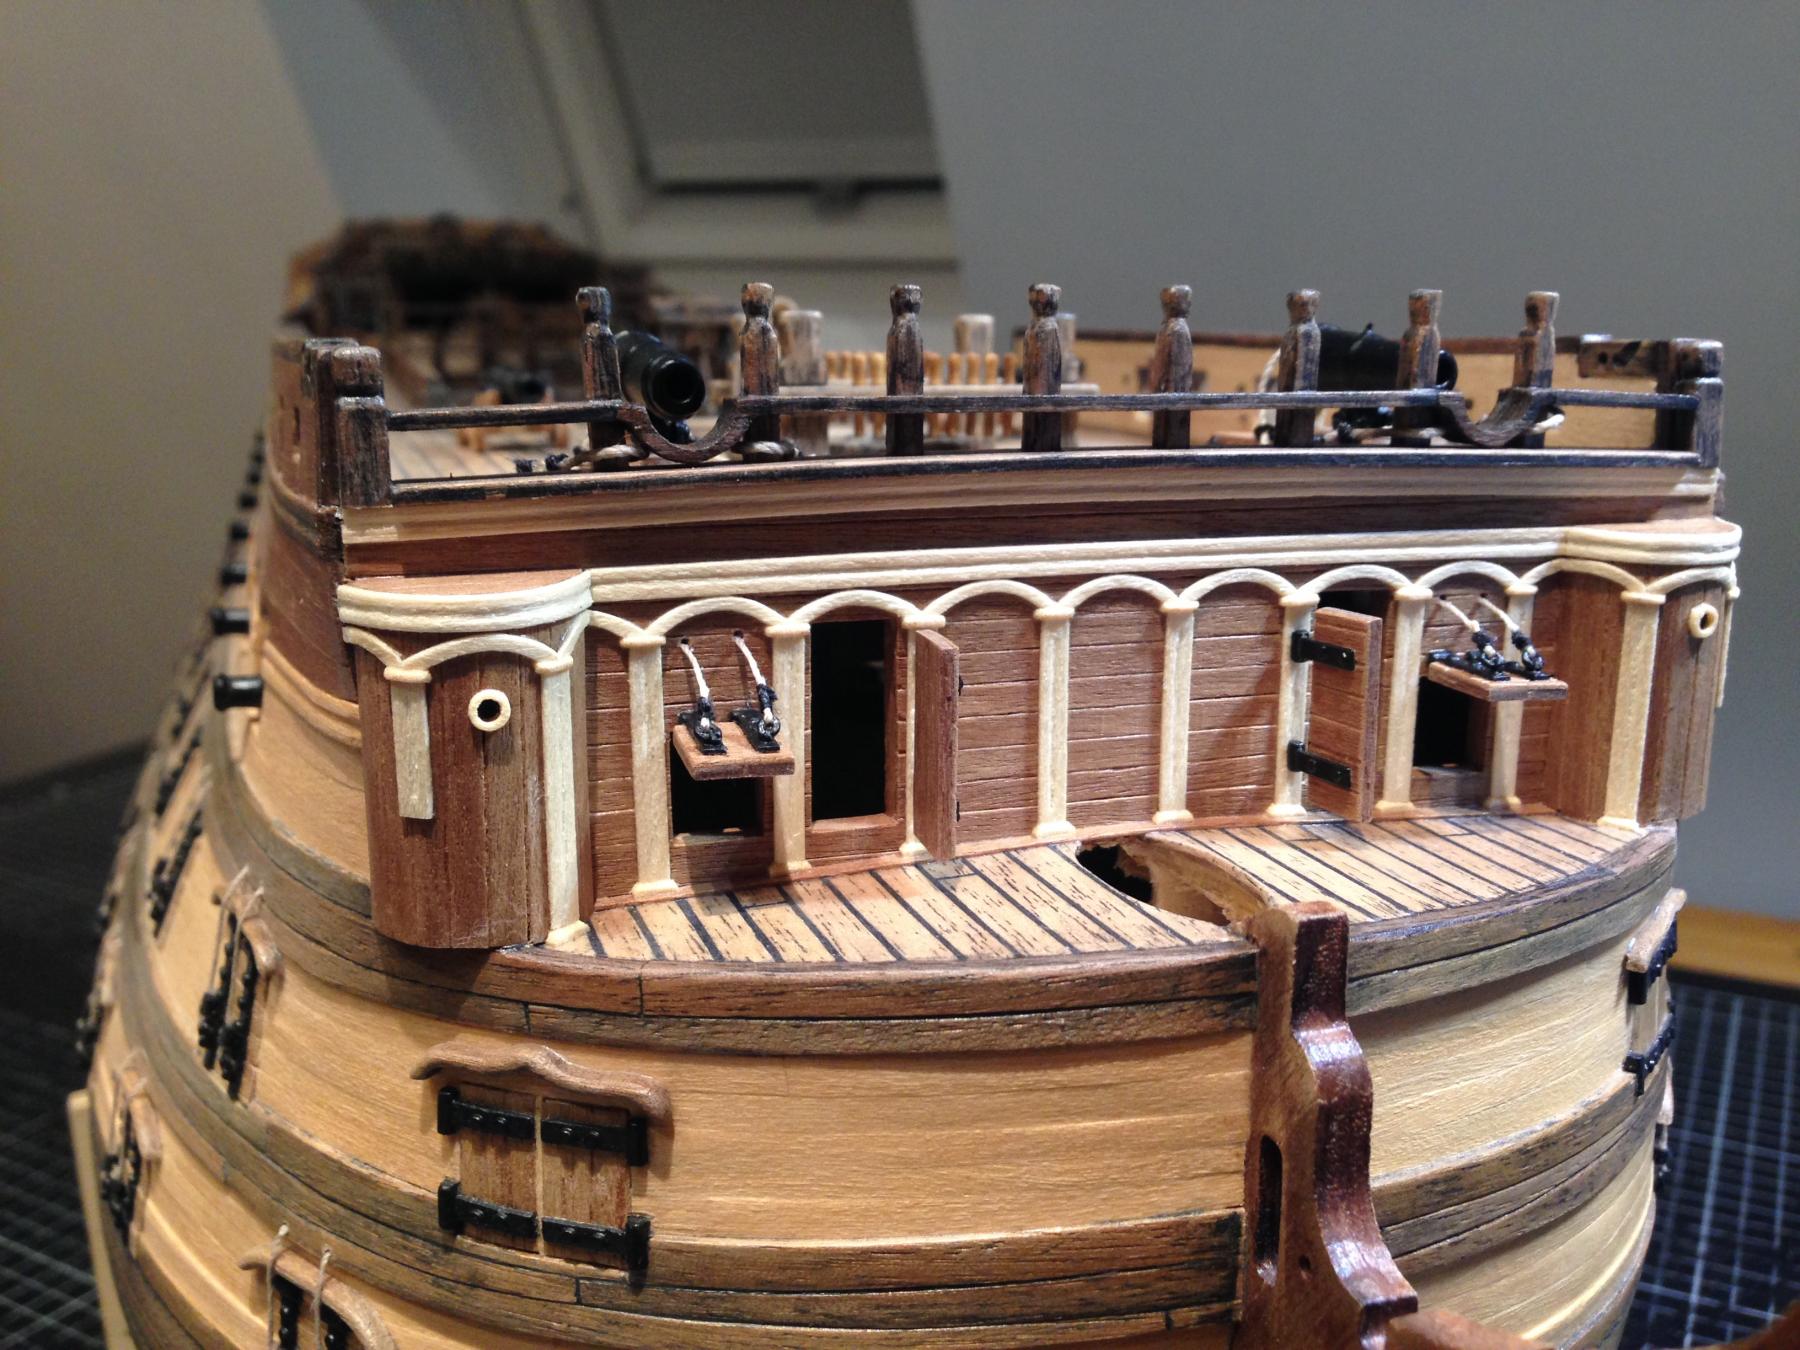
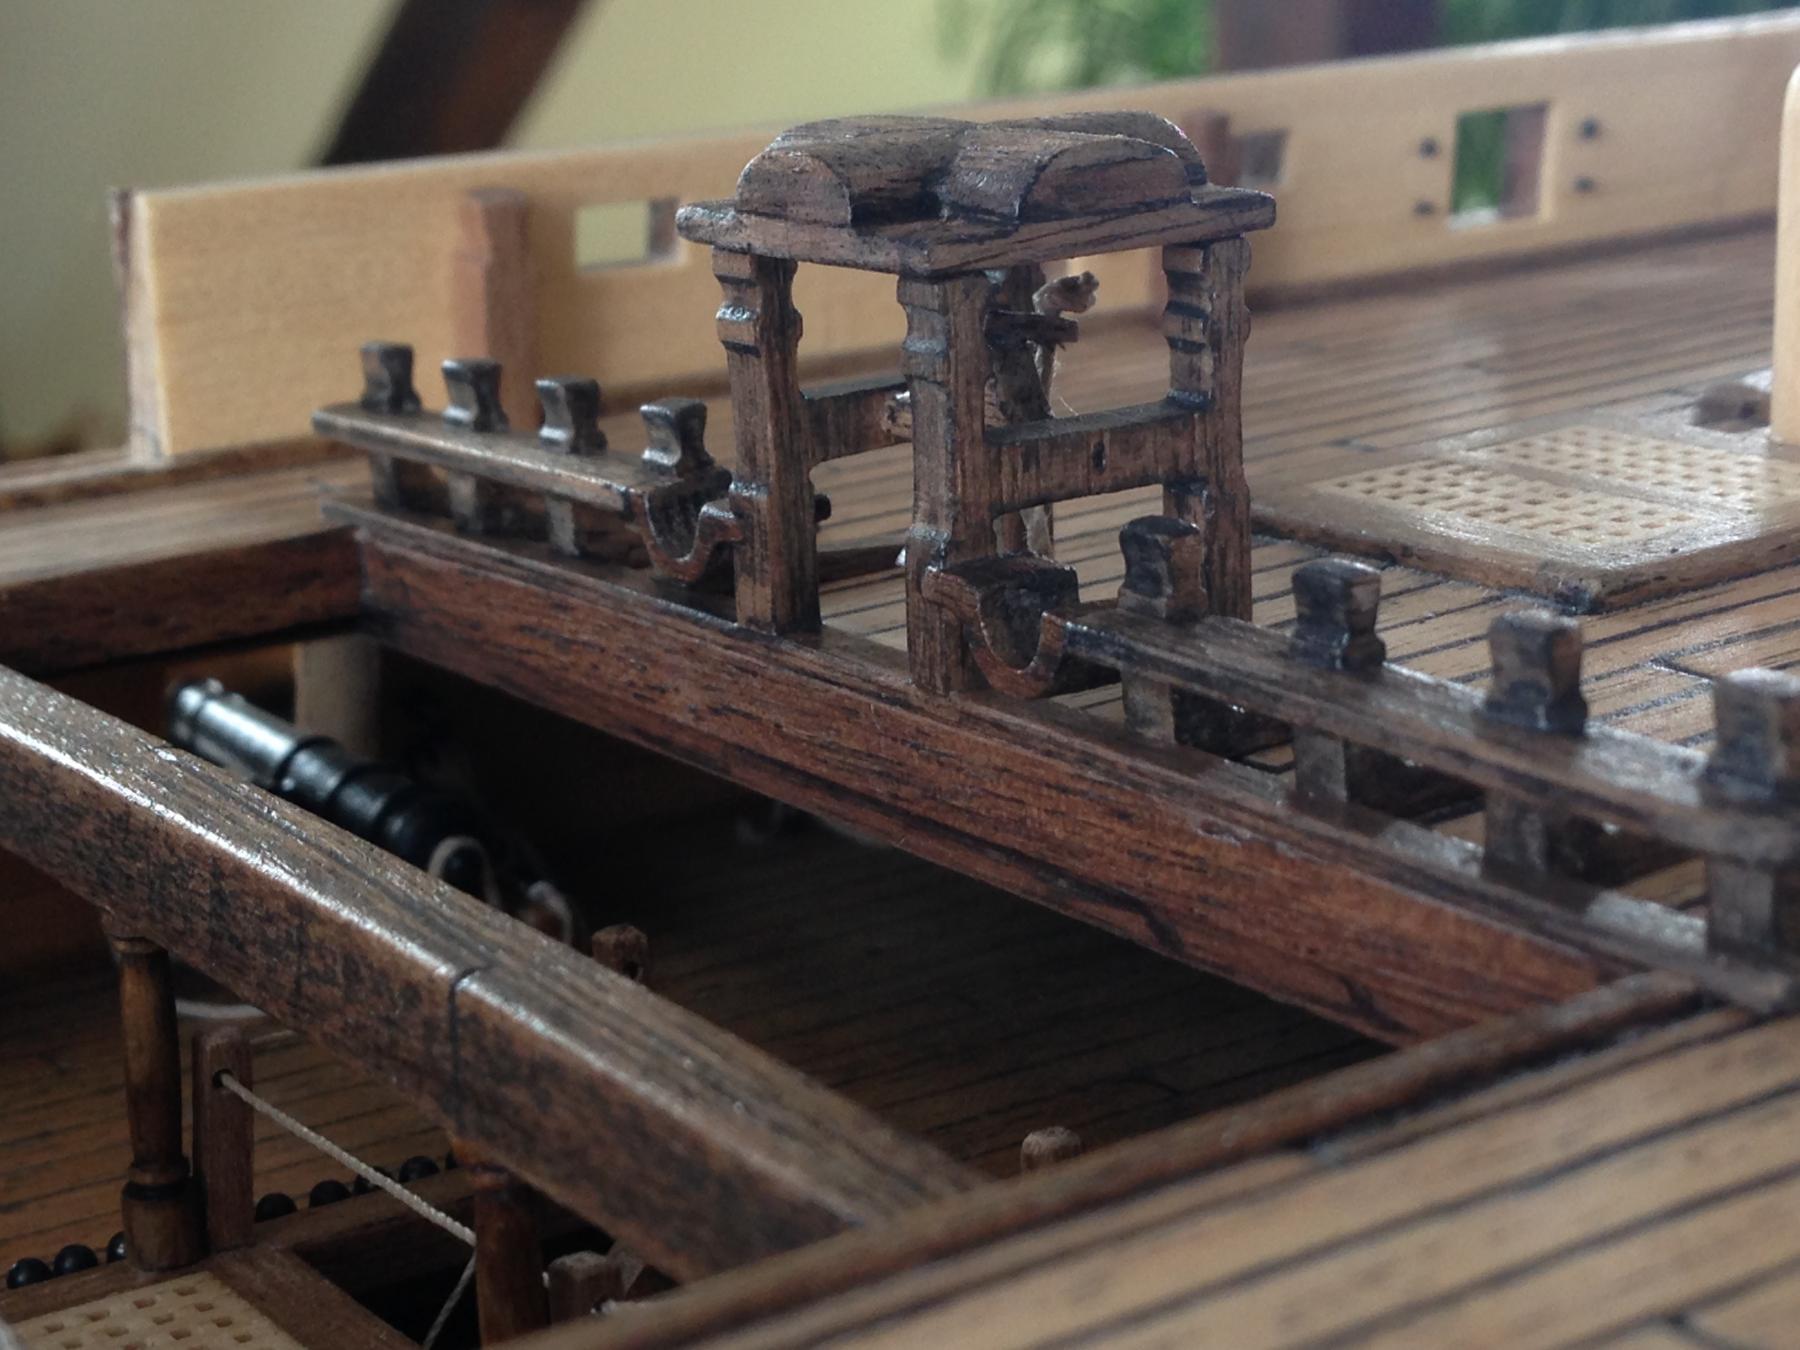
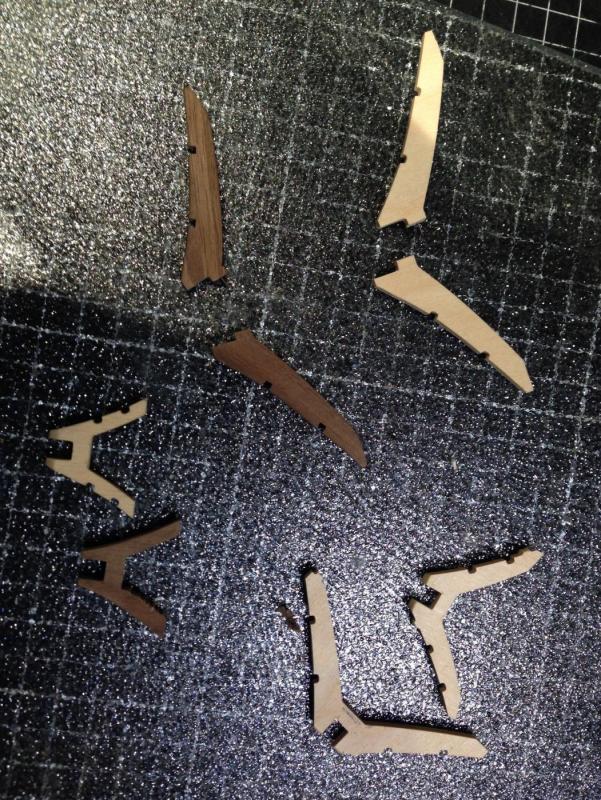
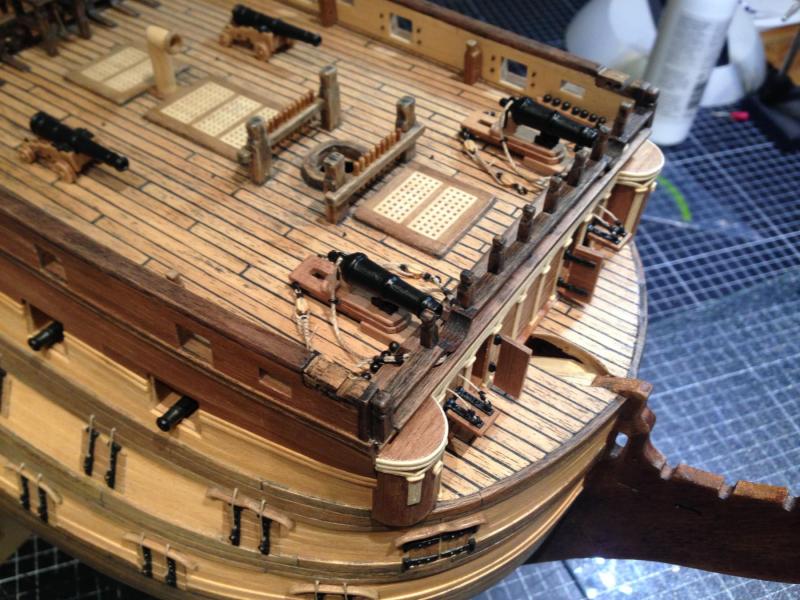
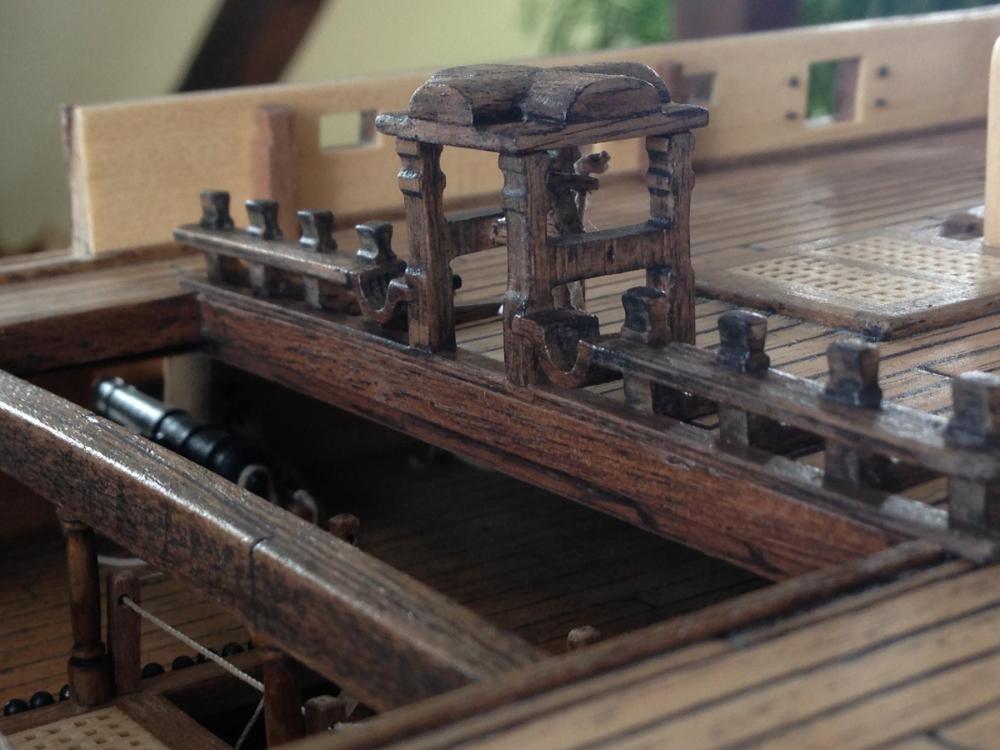
Hello friends, I had a few free days. Of course I used them to work on my model. The weather here don´t allow something else :-) As you can see in my pictures I built the stairs to the quarter deck. Again I tried to build everything from wood. Although I know that this is not original. But if you follow my blog you know, that I prefer that way. The next step was building the fire buckets. It was very difficult to make the logos on them, because they are so small. Even the smallest brush is too big. Finally I used the tip of a metal needle. But the tough and sticky gold color makes it impossible to create a clear logo. I did my best. Hopefully nobody looks too closely on it. After this I turned to the front and the roundhouses. Here, too, the basic principle was: no paint or sheet! But that means that I had to plank everything and try to build the bows with my yellow elderberry wood. What do you think about the result? I really like it :-) Finally I build the two carronades today. Best wishes and a happy sunday :-) - Heinz -


-
Paul, I have to agree with robert. These pictures look like promotional photos taken from a catalogue. WOW! I am very impressed and could not wait to see your Victory growing... :-) Best wishes -Heinz-
-
Thank you all for your nice words. It´s the best motivation to keep it on :-)))) Thank you, thank you, thank you! - Heinz -
-
Hello Karl Heinz, thanks a lot for your nice compliment. I´m very glad about that! I think we are both not the only guys who need to use the translator. But... who cares ? :-) Now you have made me curious. Are you german too? You write, that you translate from spanish, but your greetings and your name sound very german :-)))) No matter, you are very welcome! - Heinz -
-
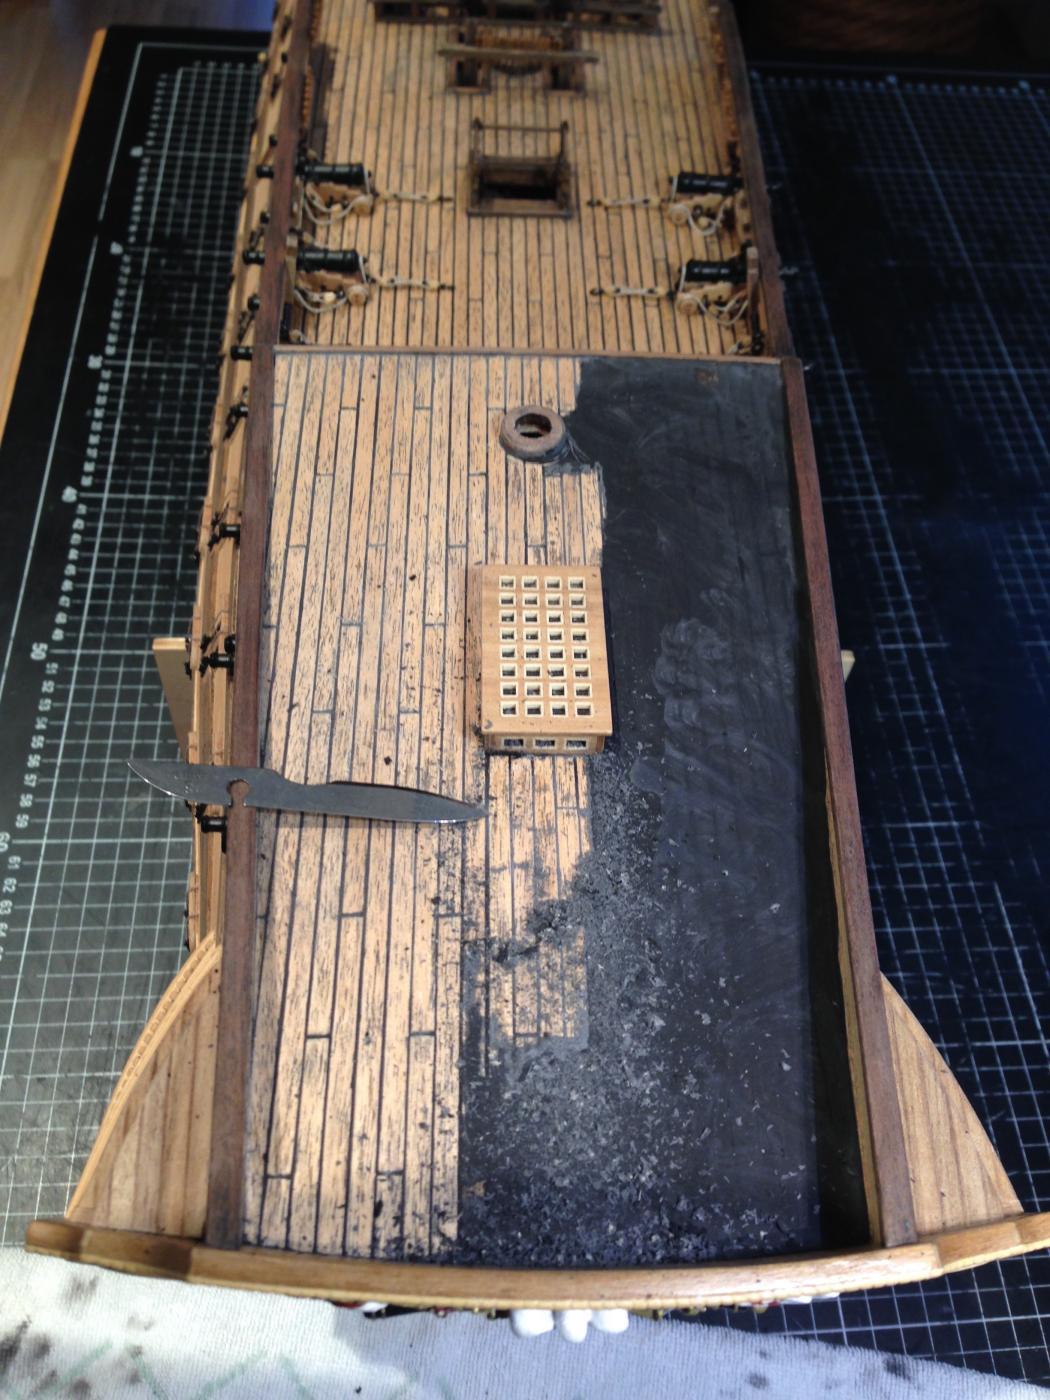
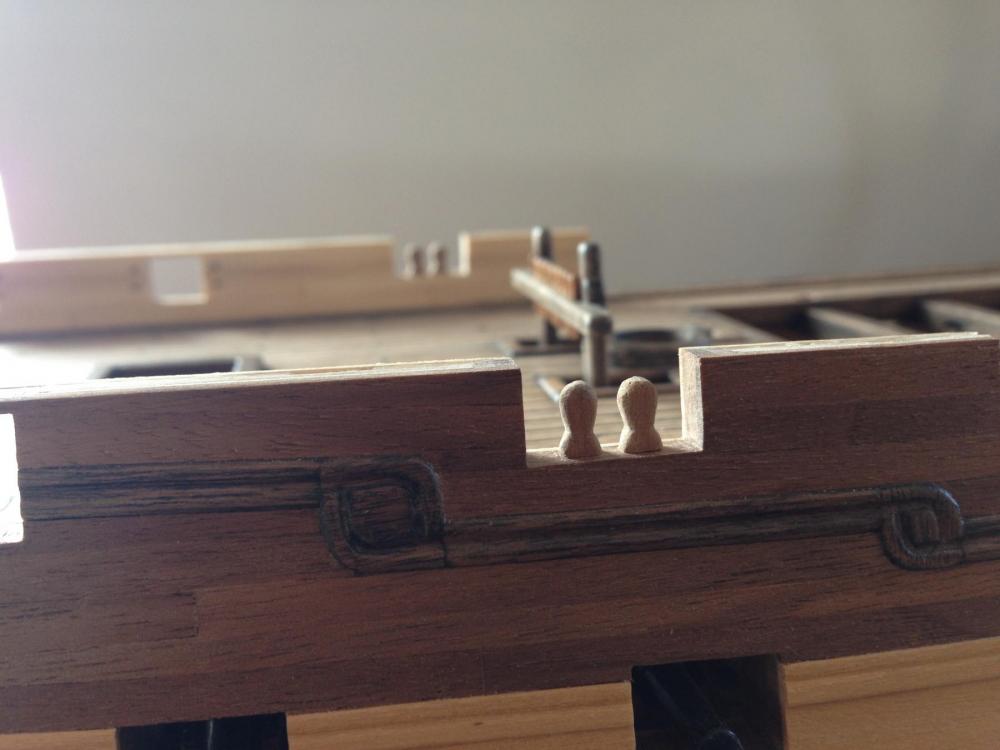
Hi Bob, you are right. I love that "aged effect". And because of that I don´t only use that method for caulking my planks. I prepare many pieces with the wood filler and make them look older. It looks great on the walnut wood. I should have used it more often. The next model I will do it :-) - Heinz -
-
Hello Don, thank you for your nice words. It´s black wood filler. Please look at the top of this site. There is a picture of it. -Heinz-
-
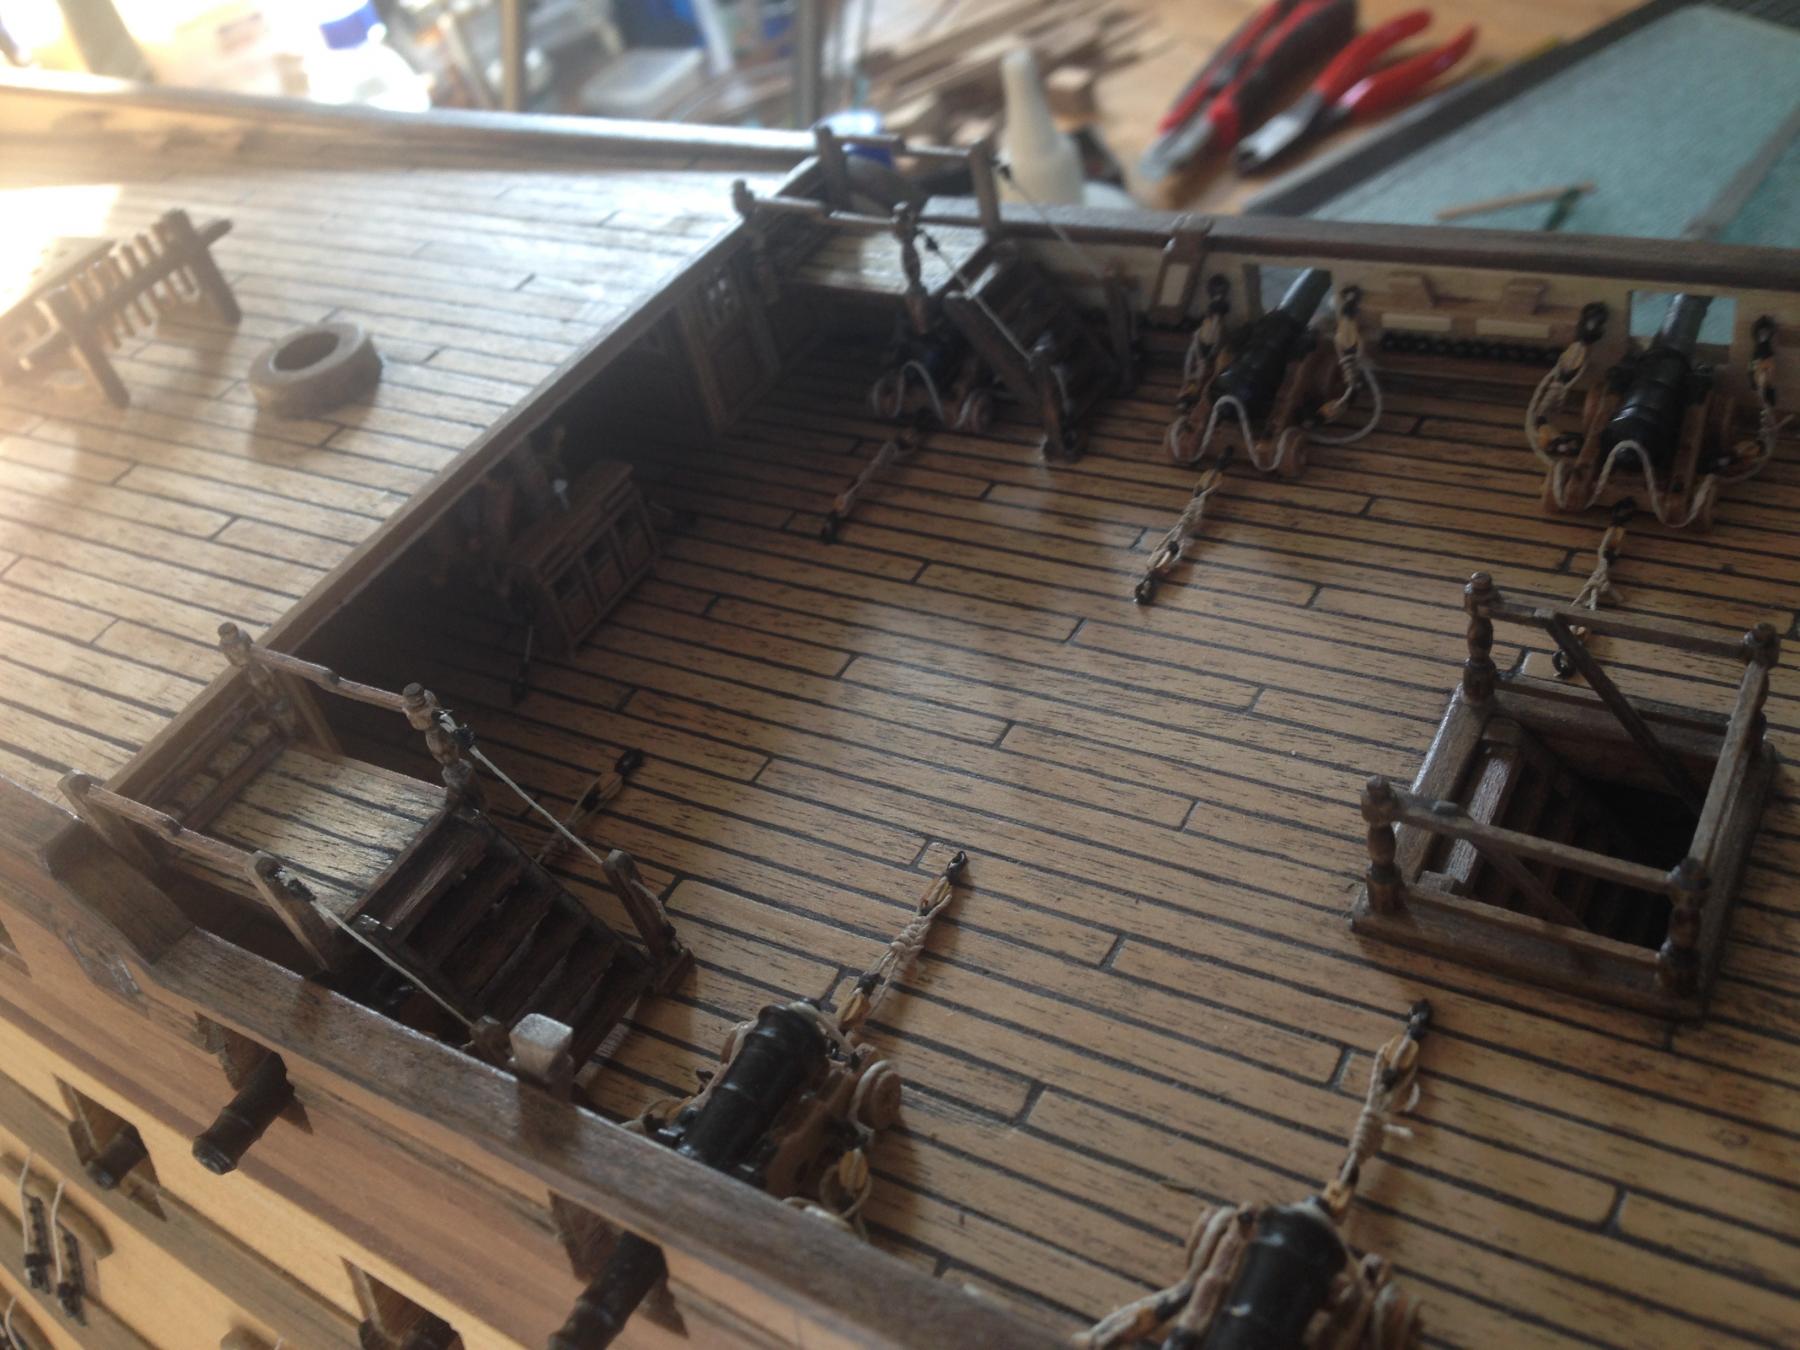
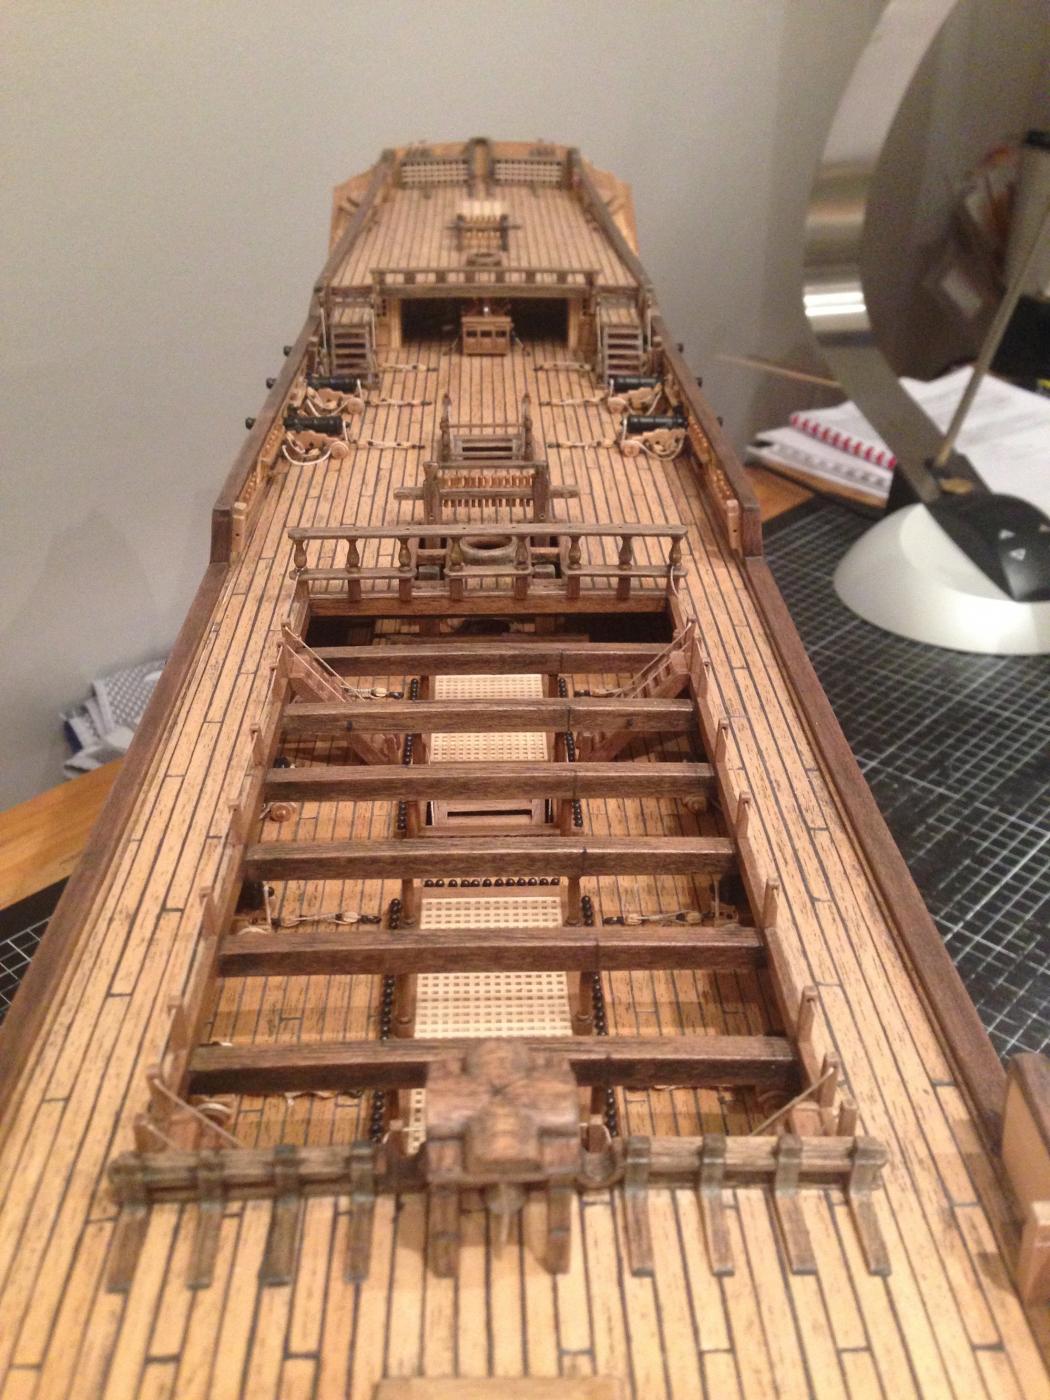
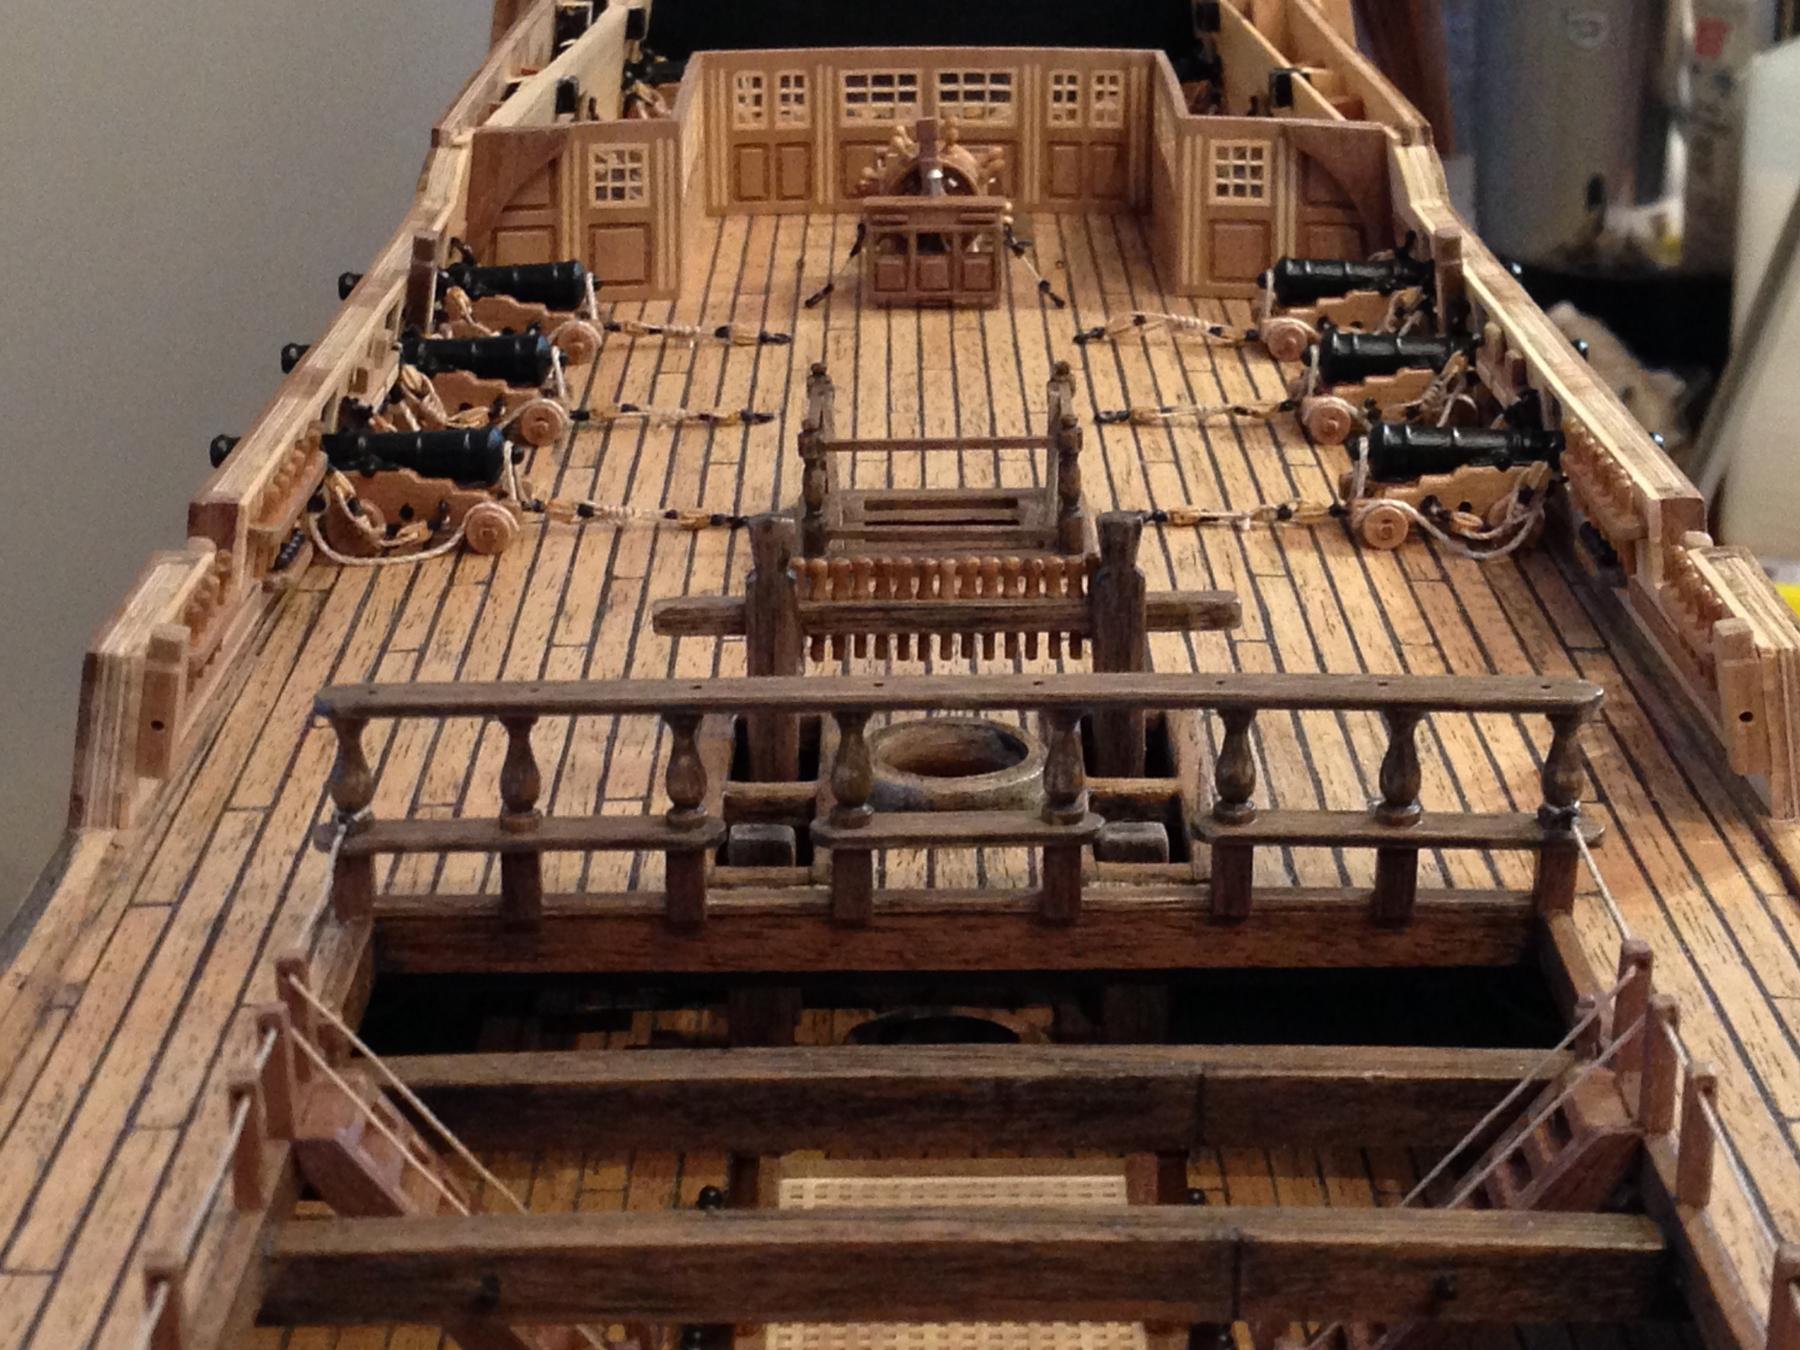
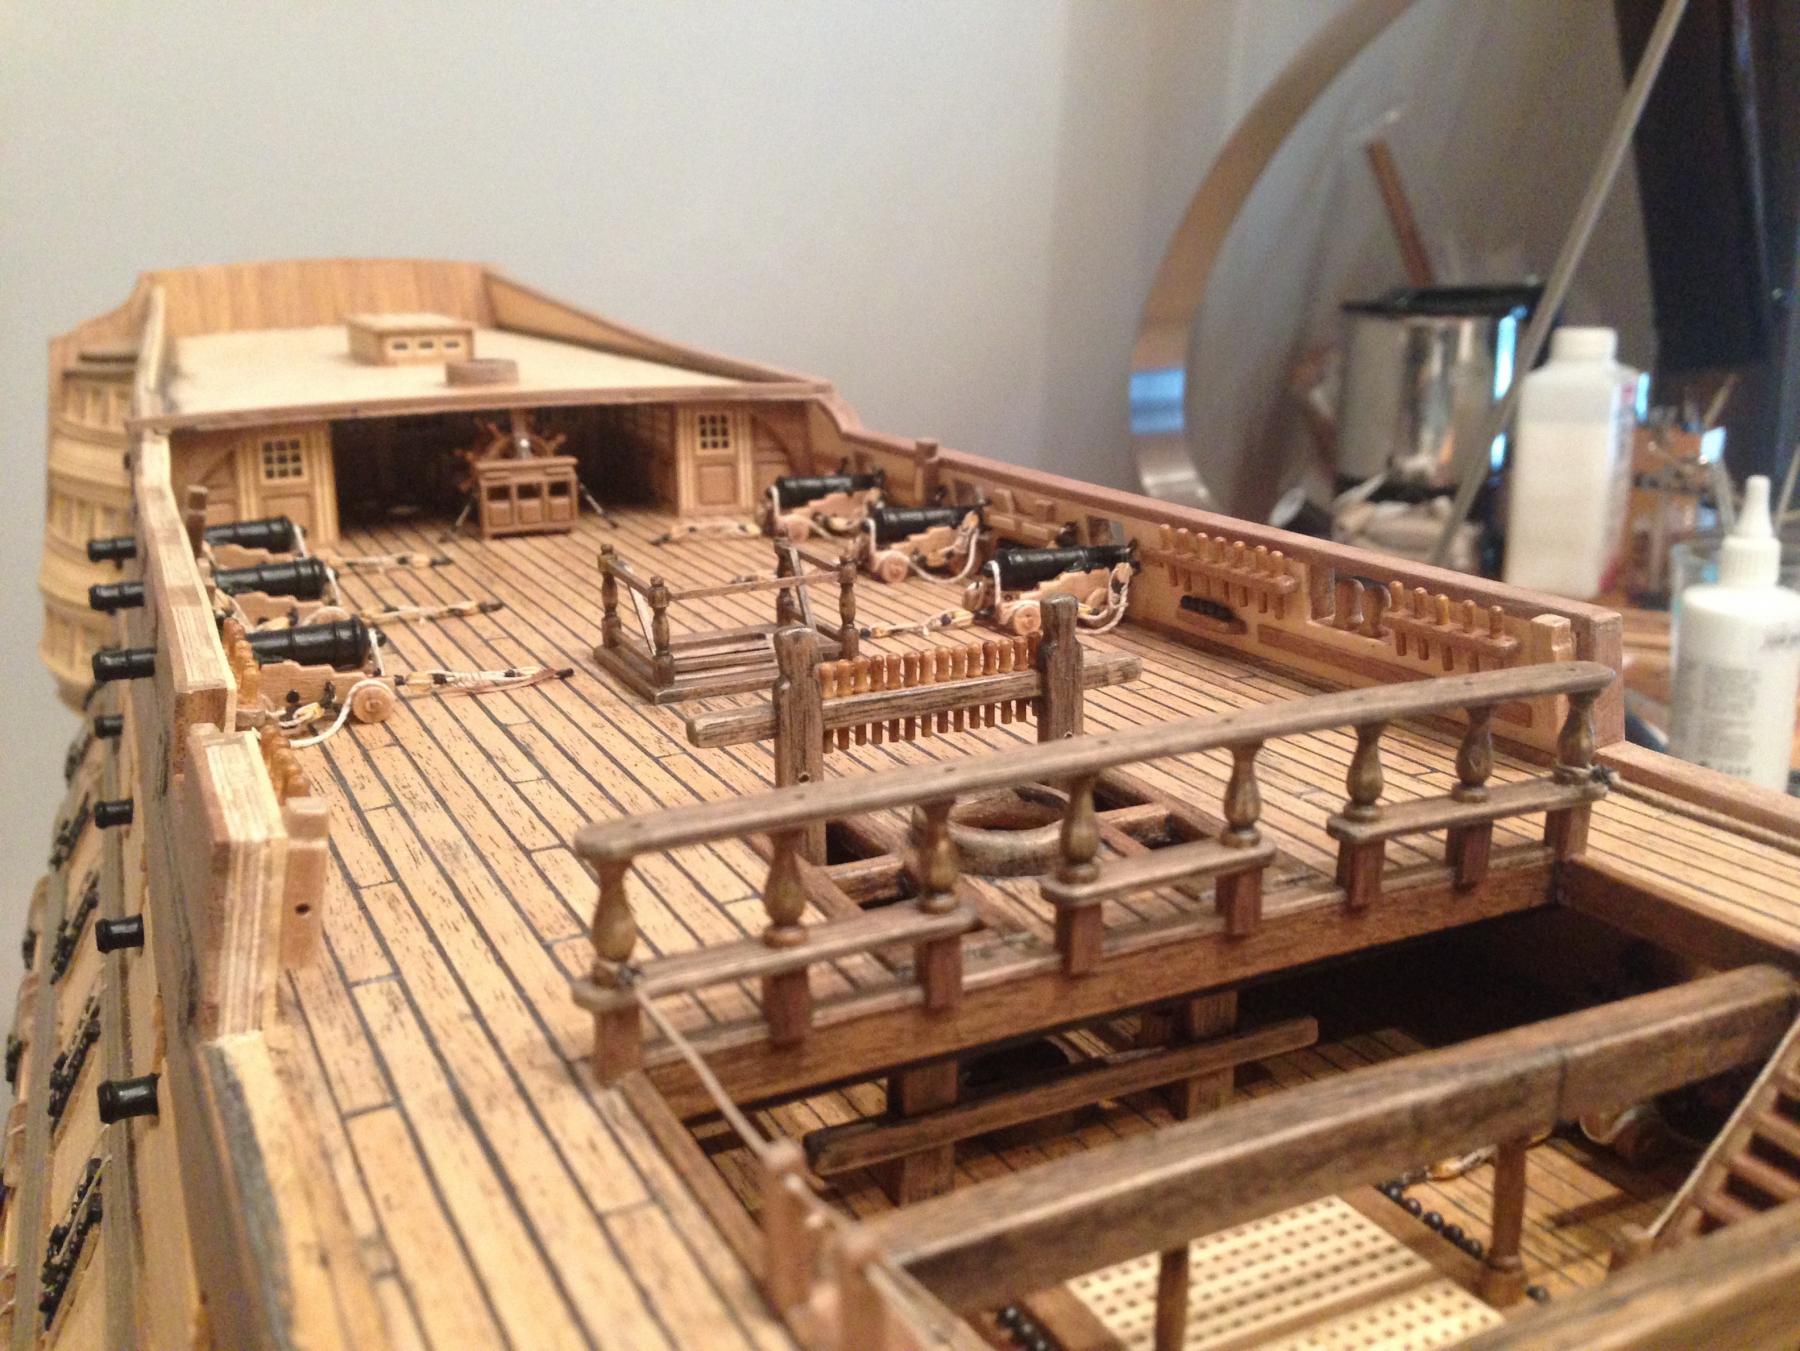
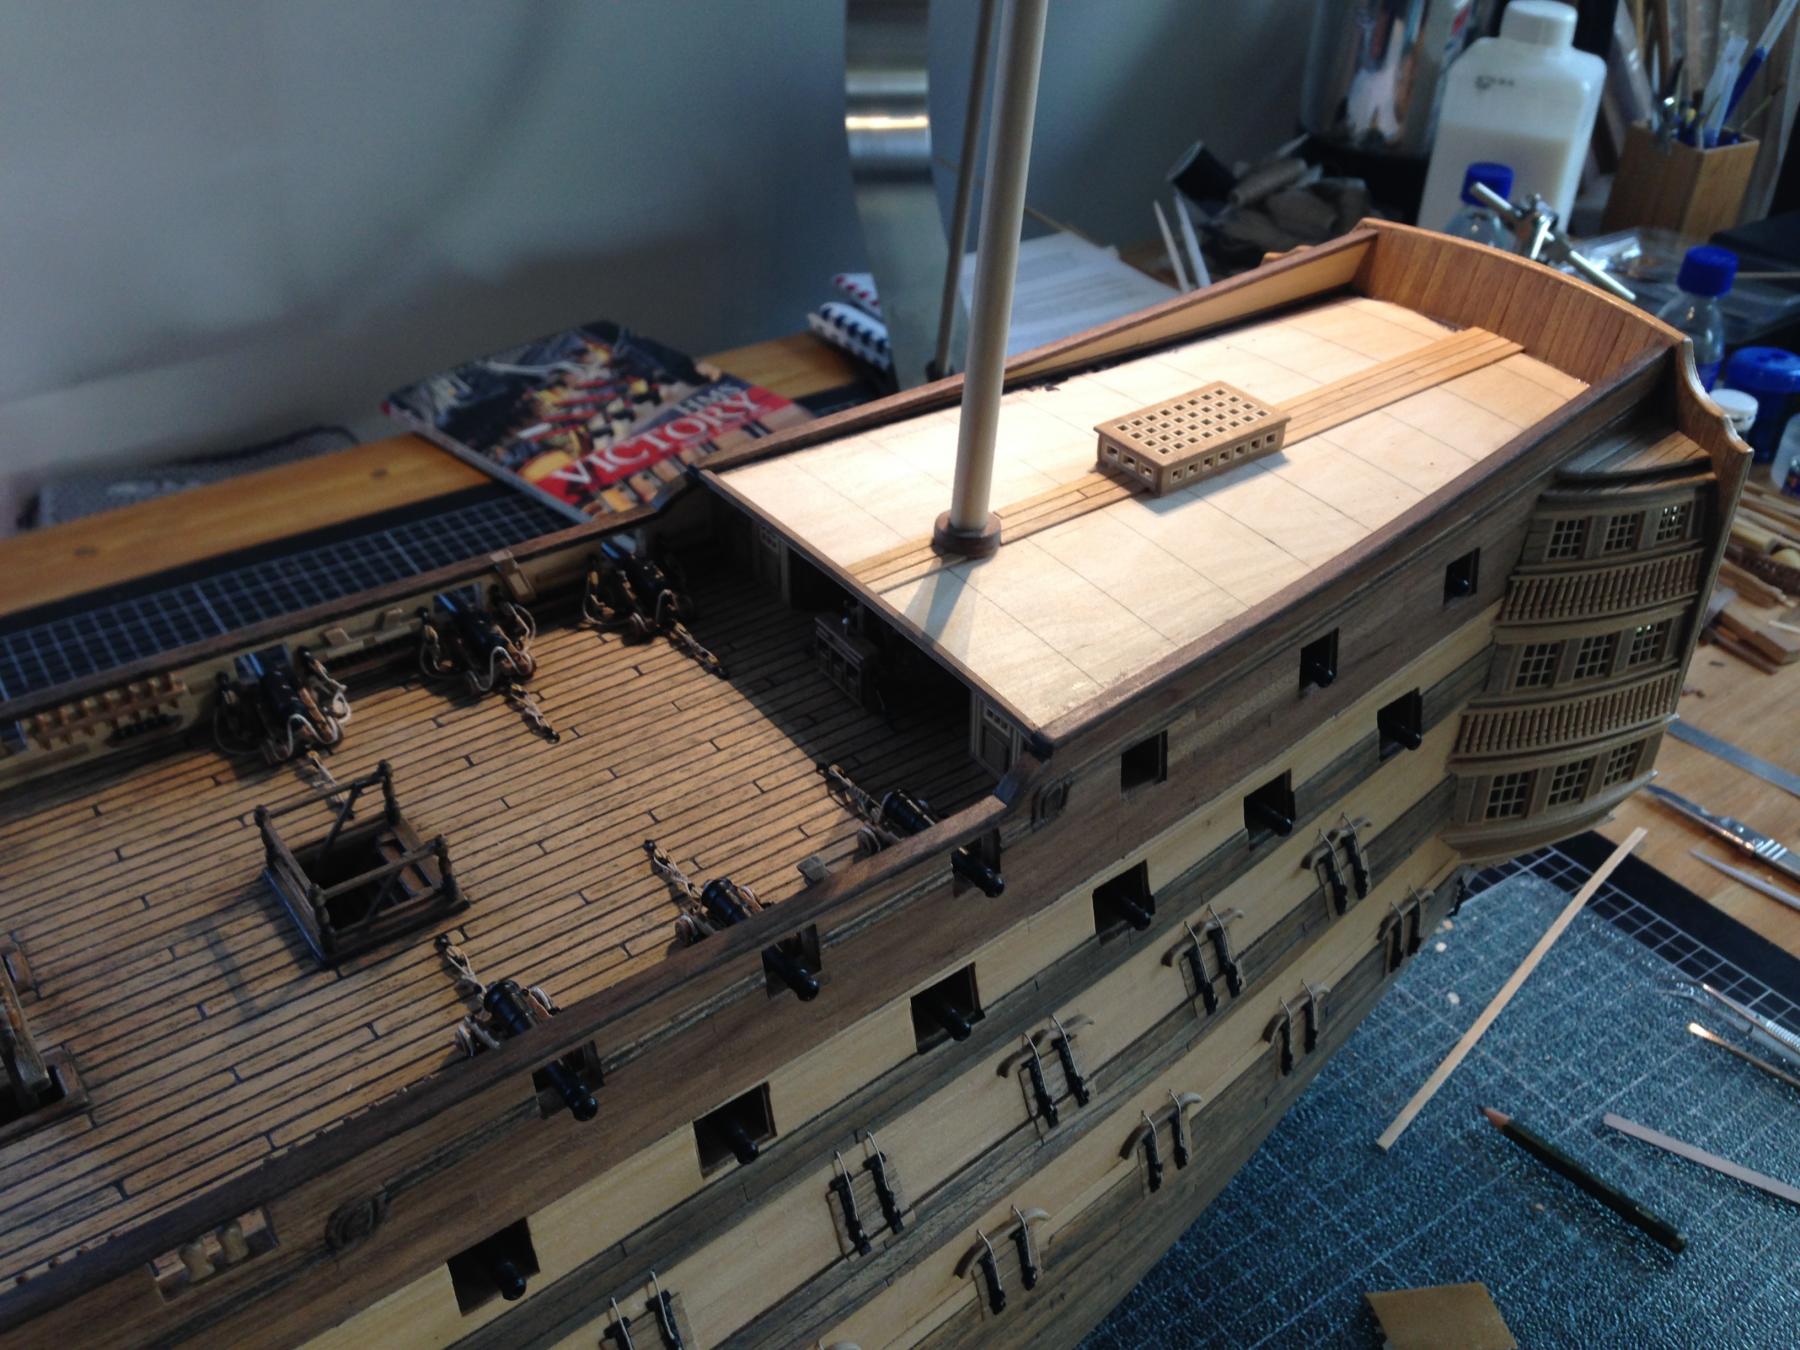
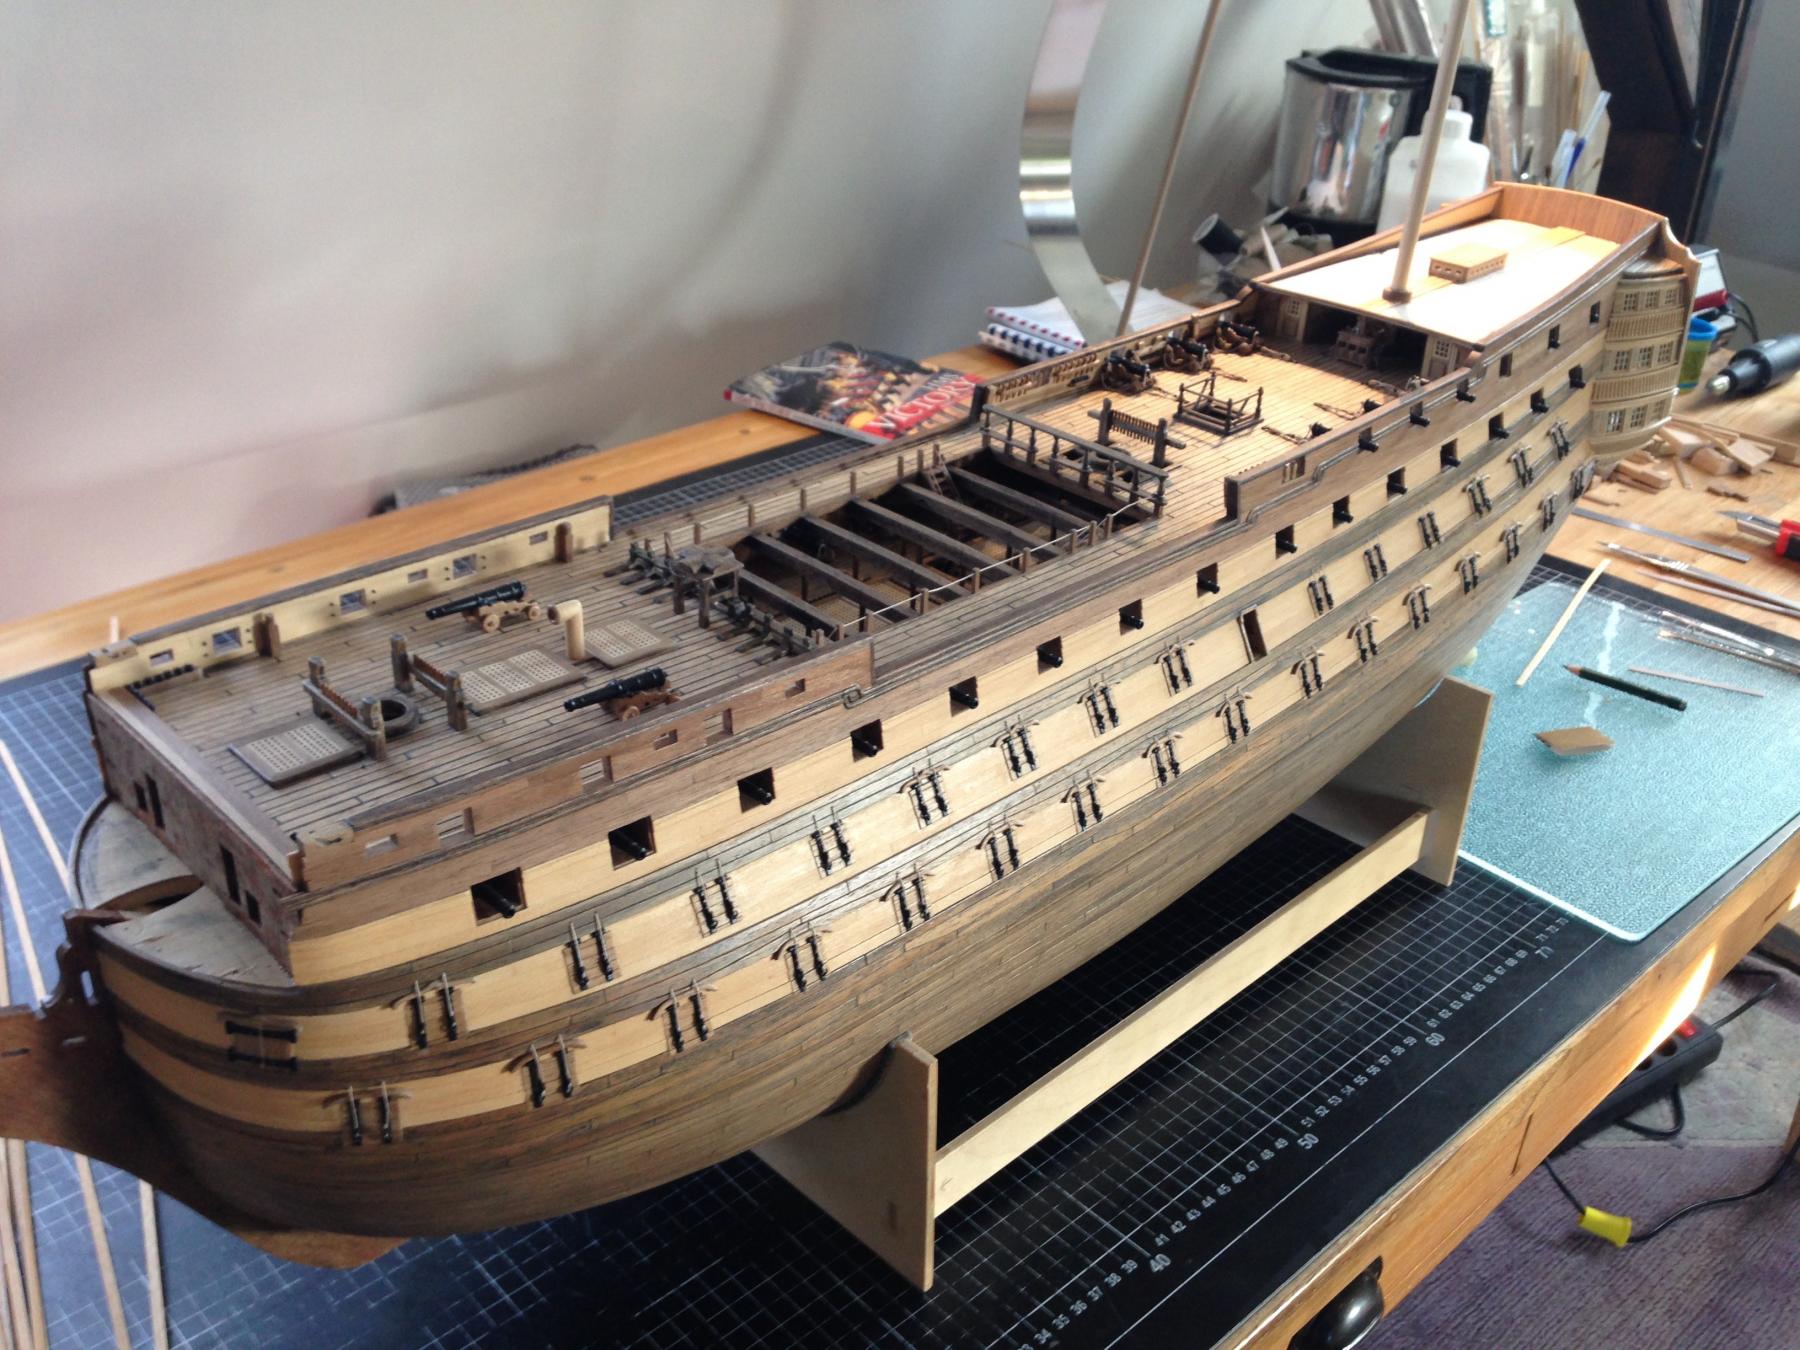
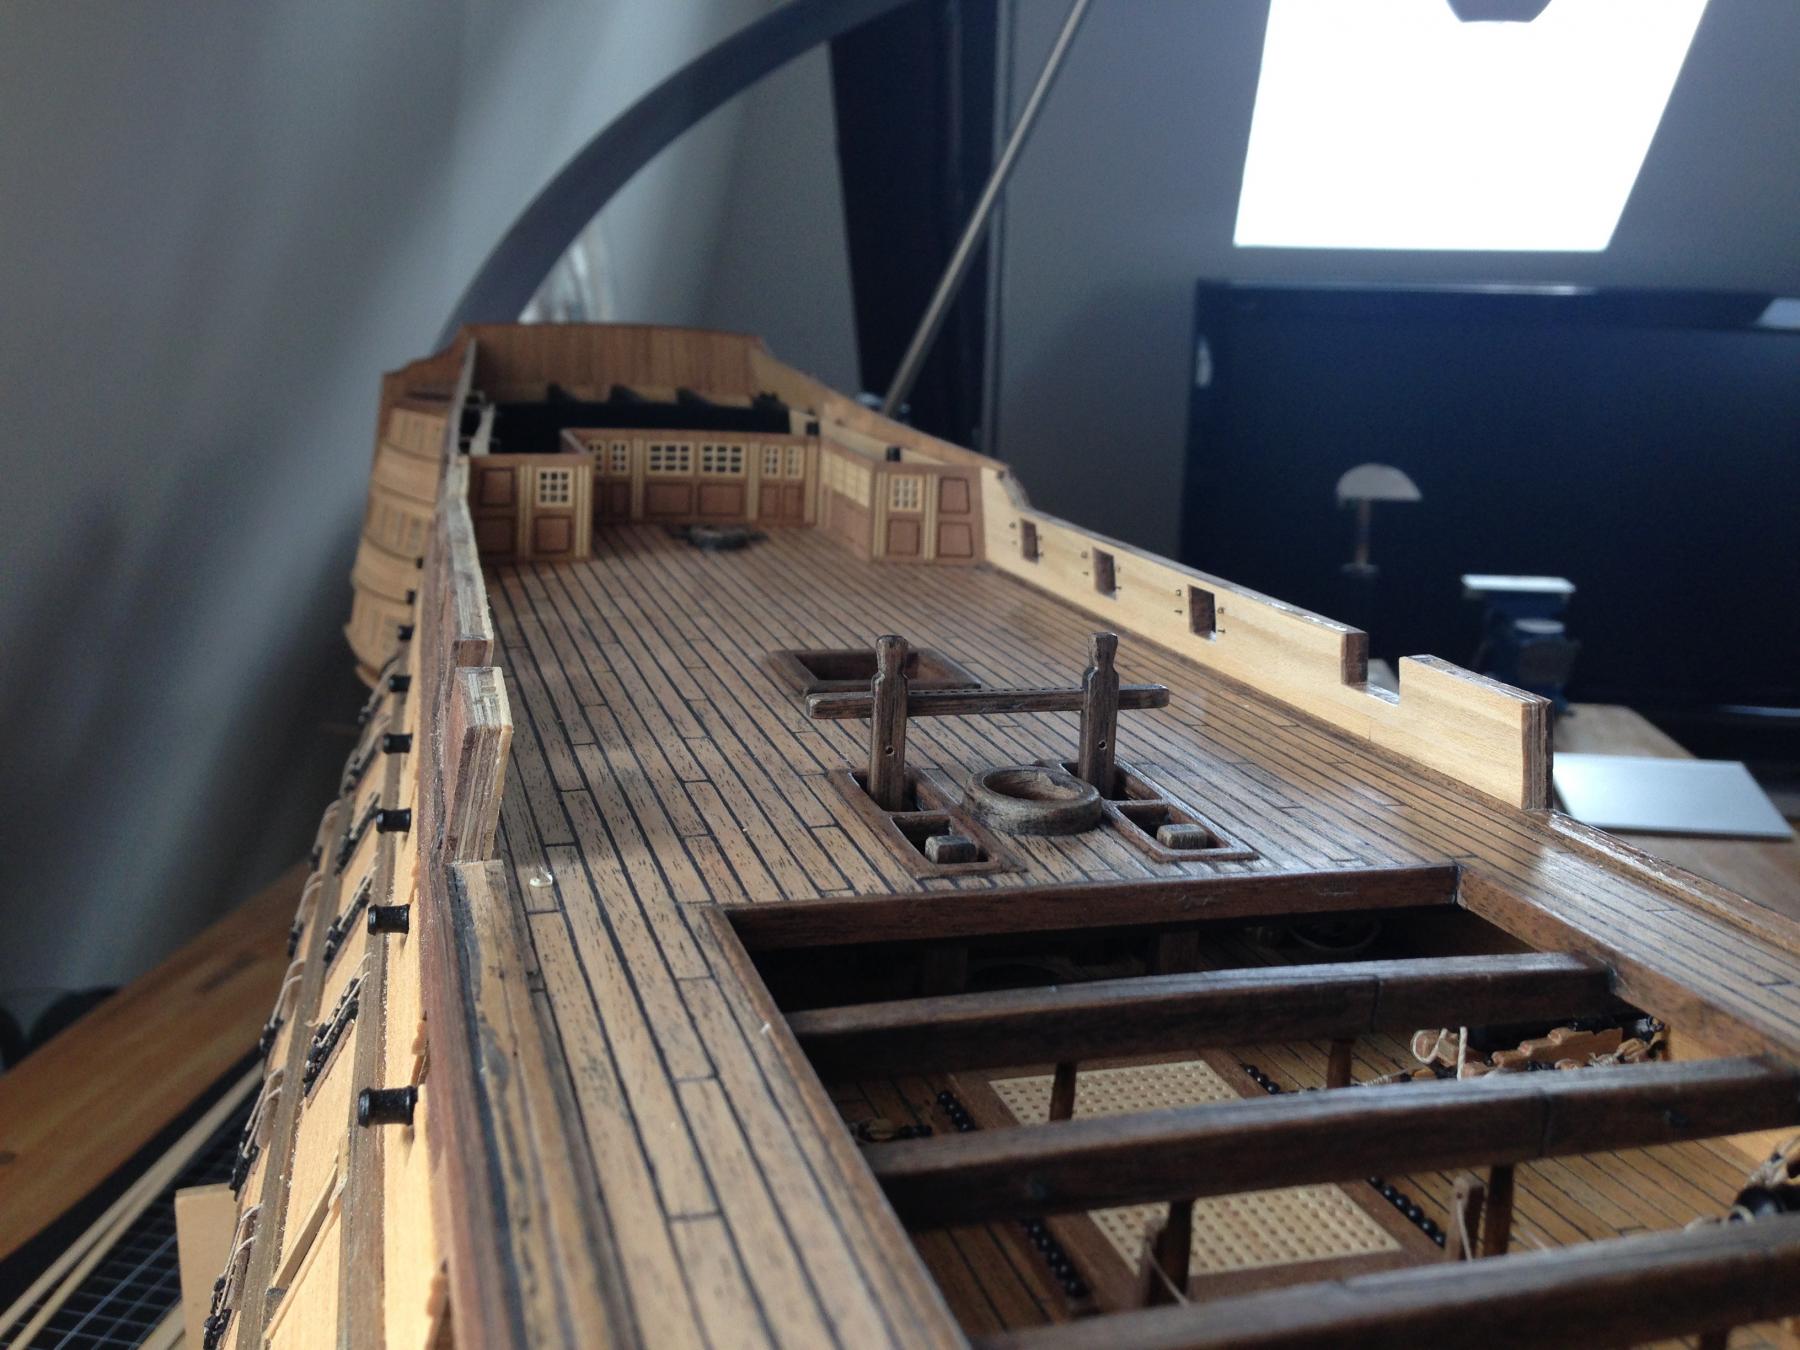
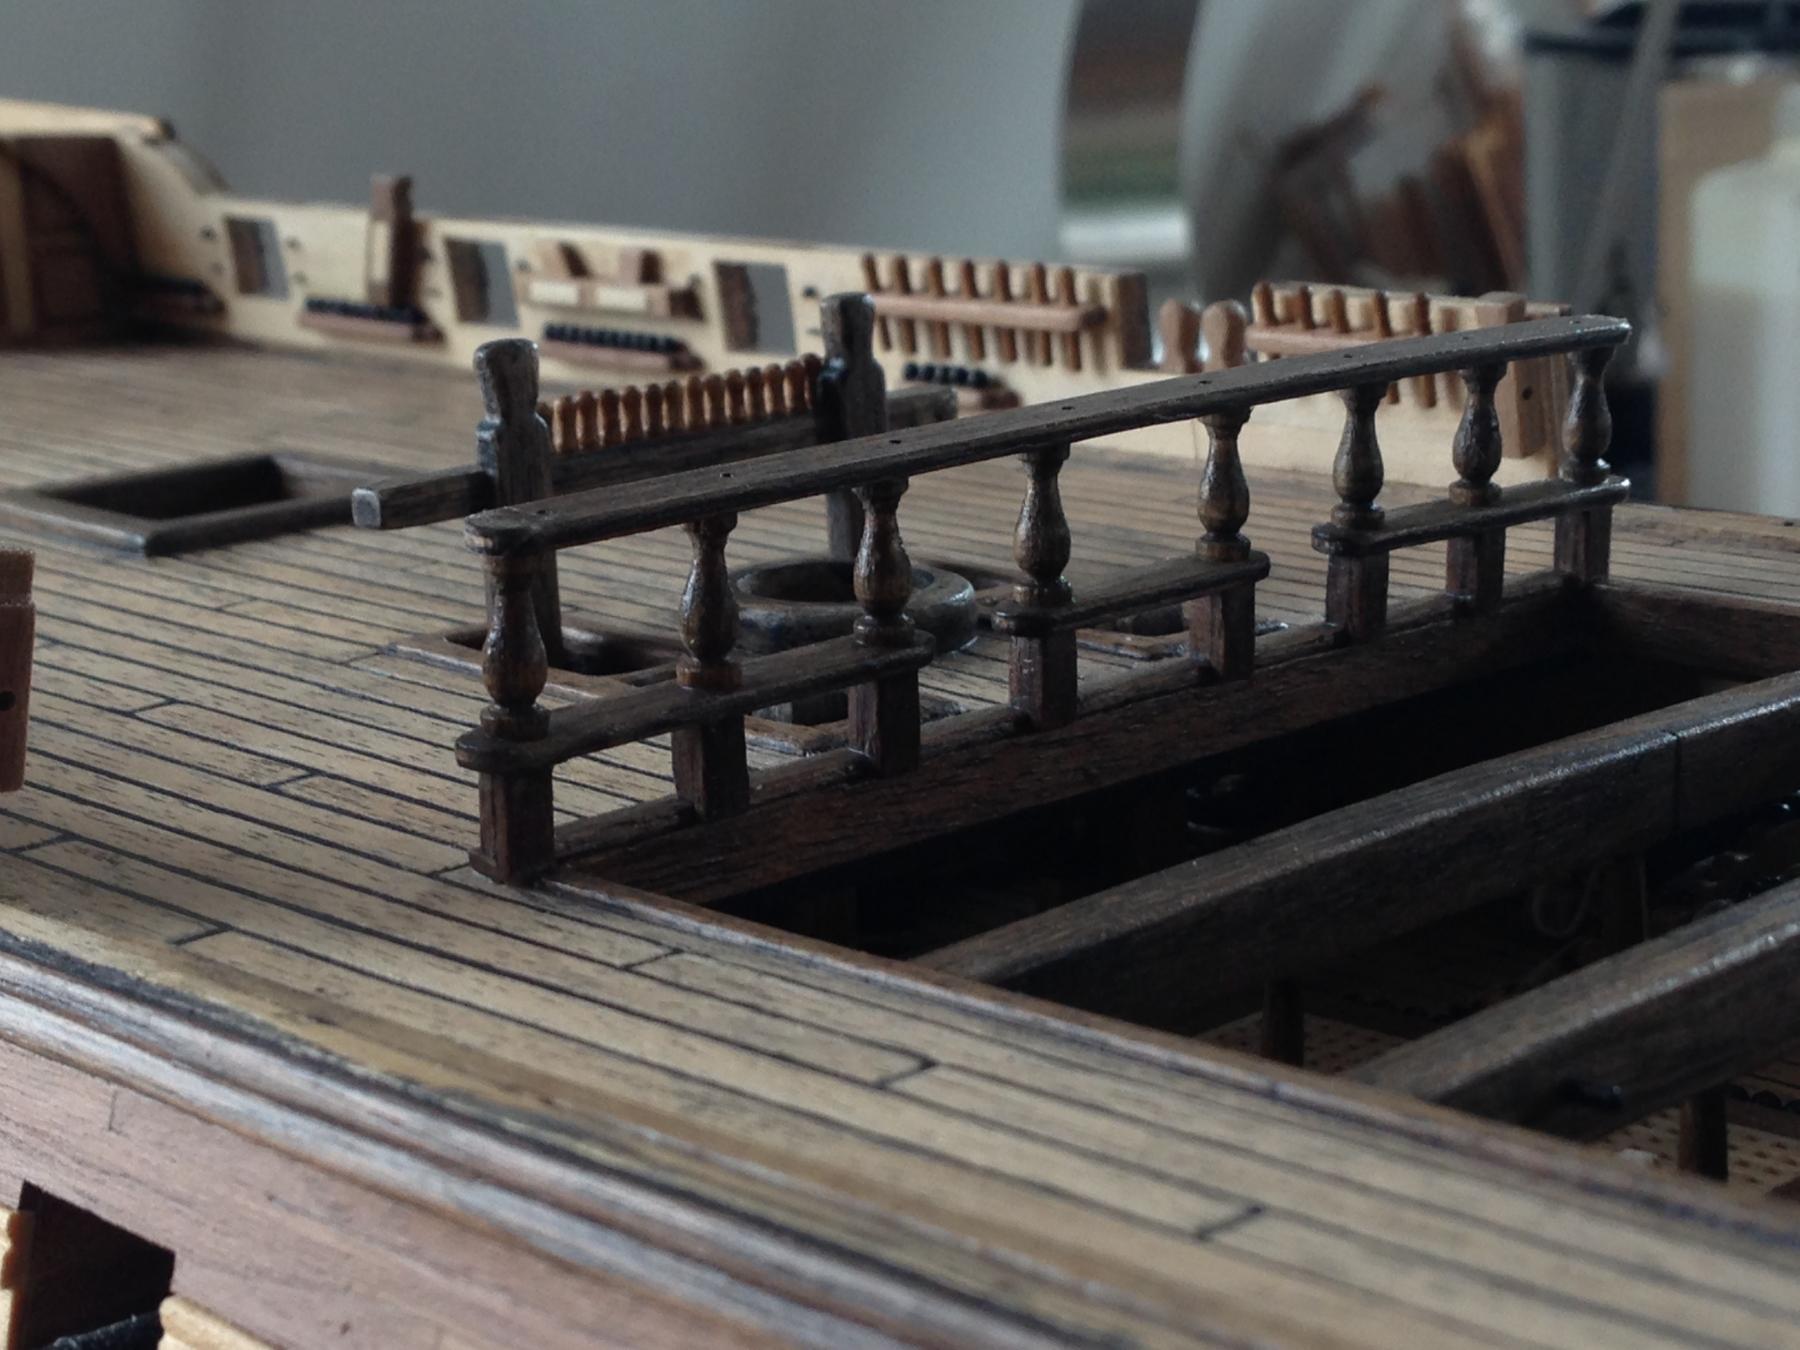
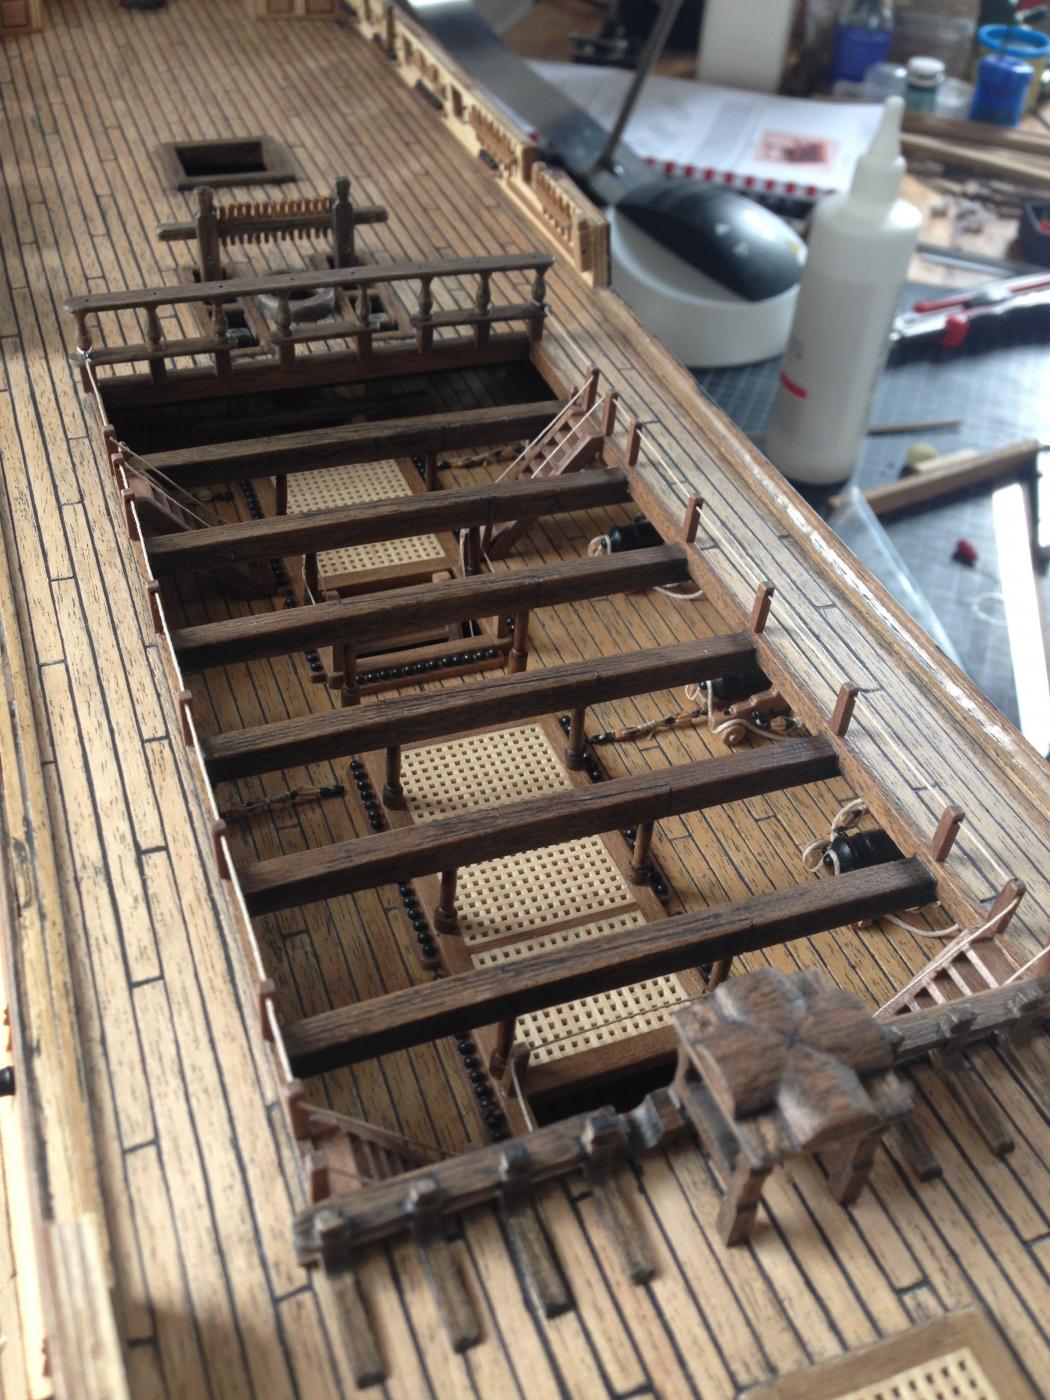
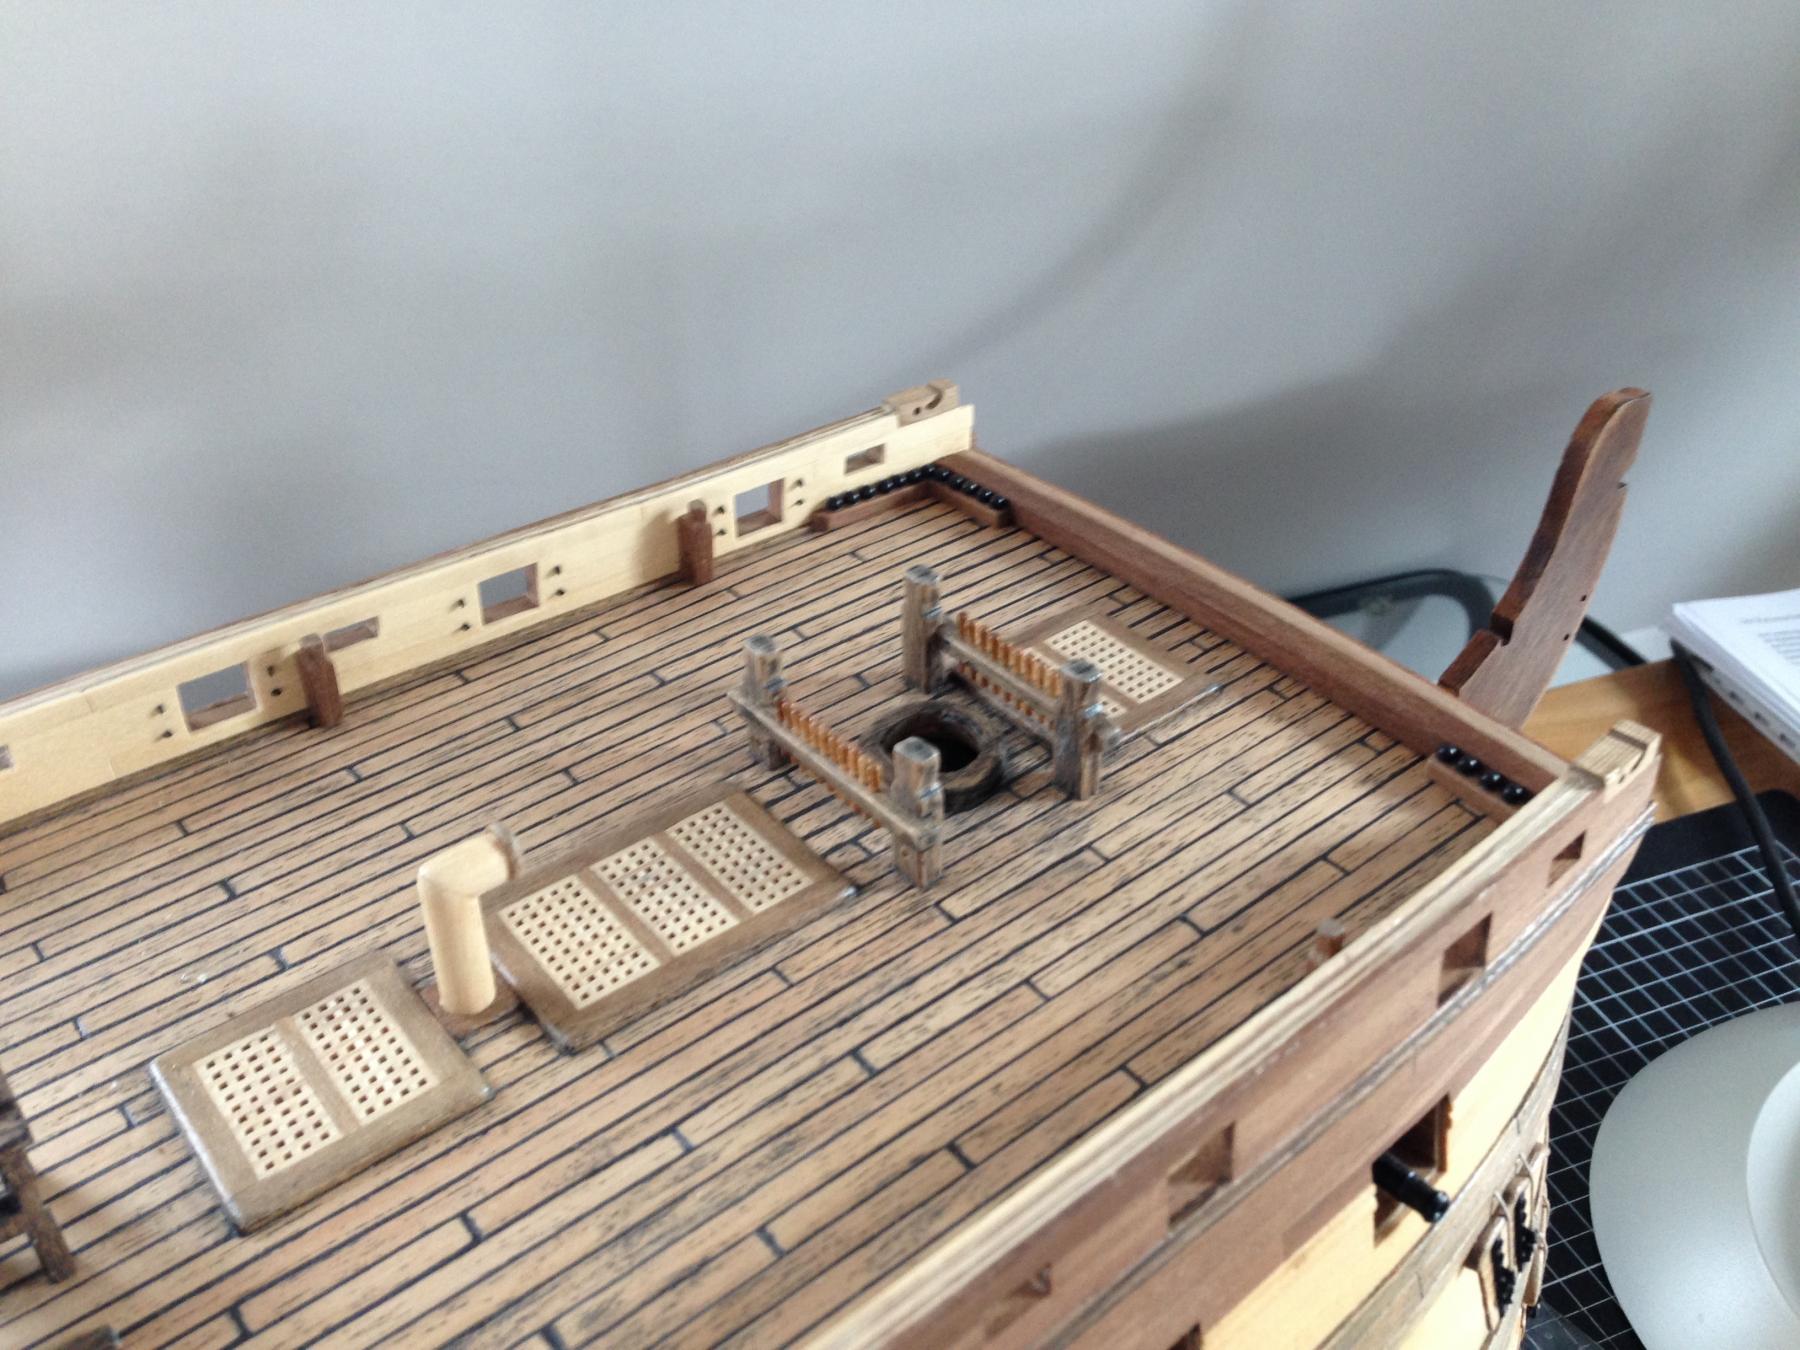
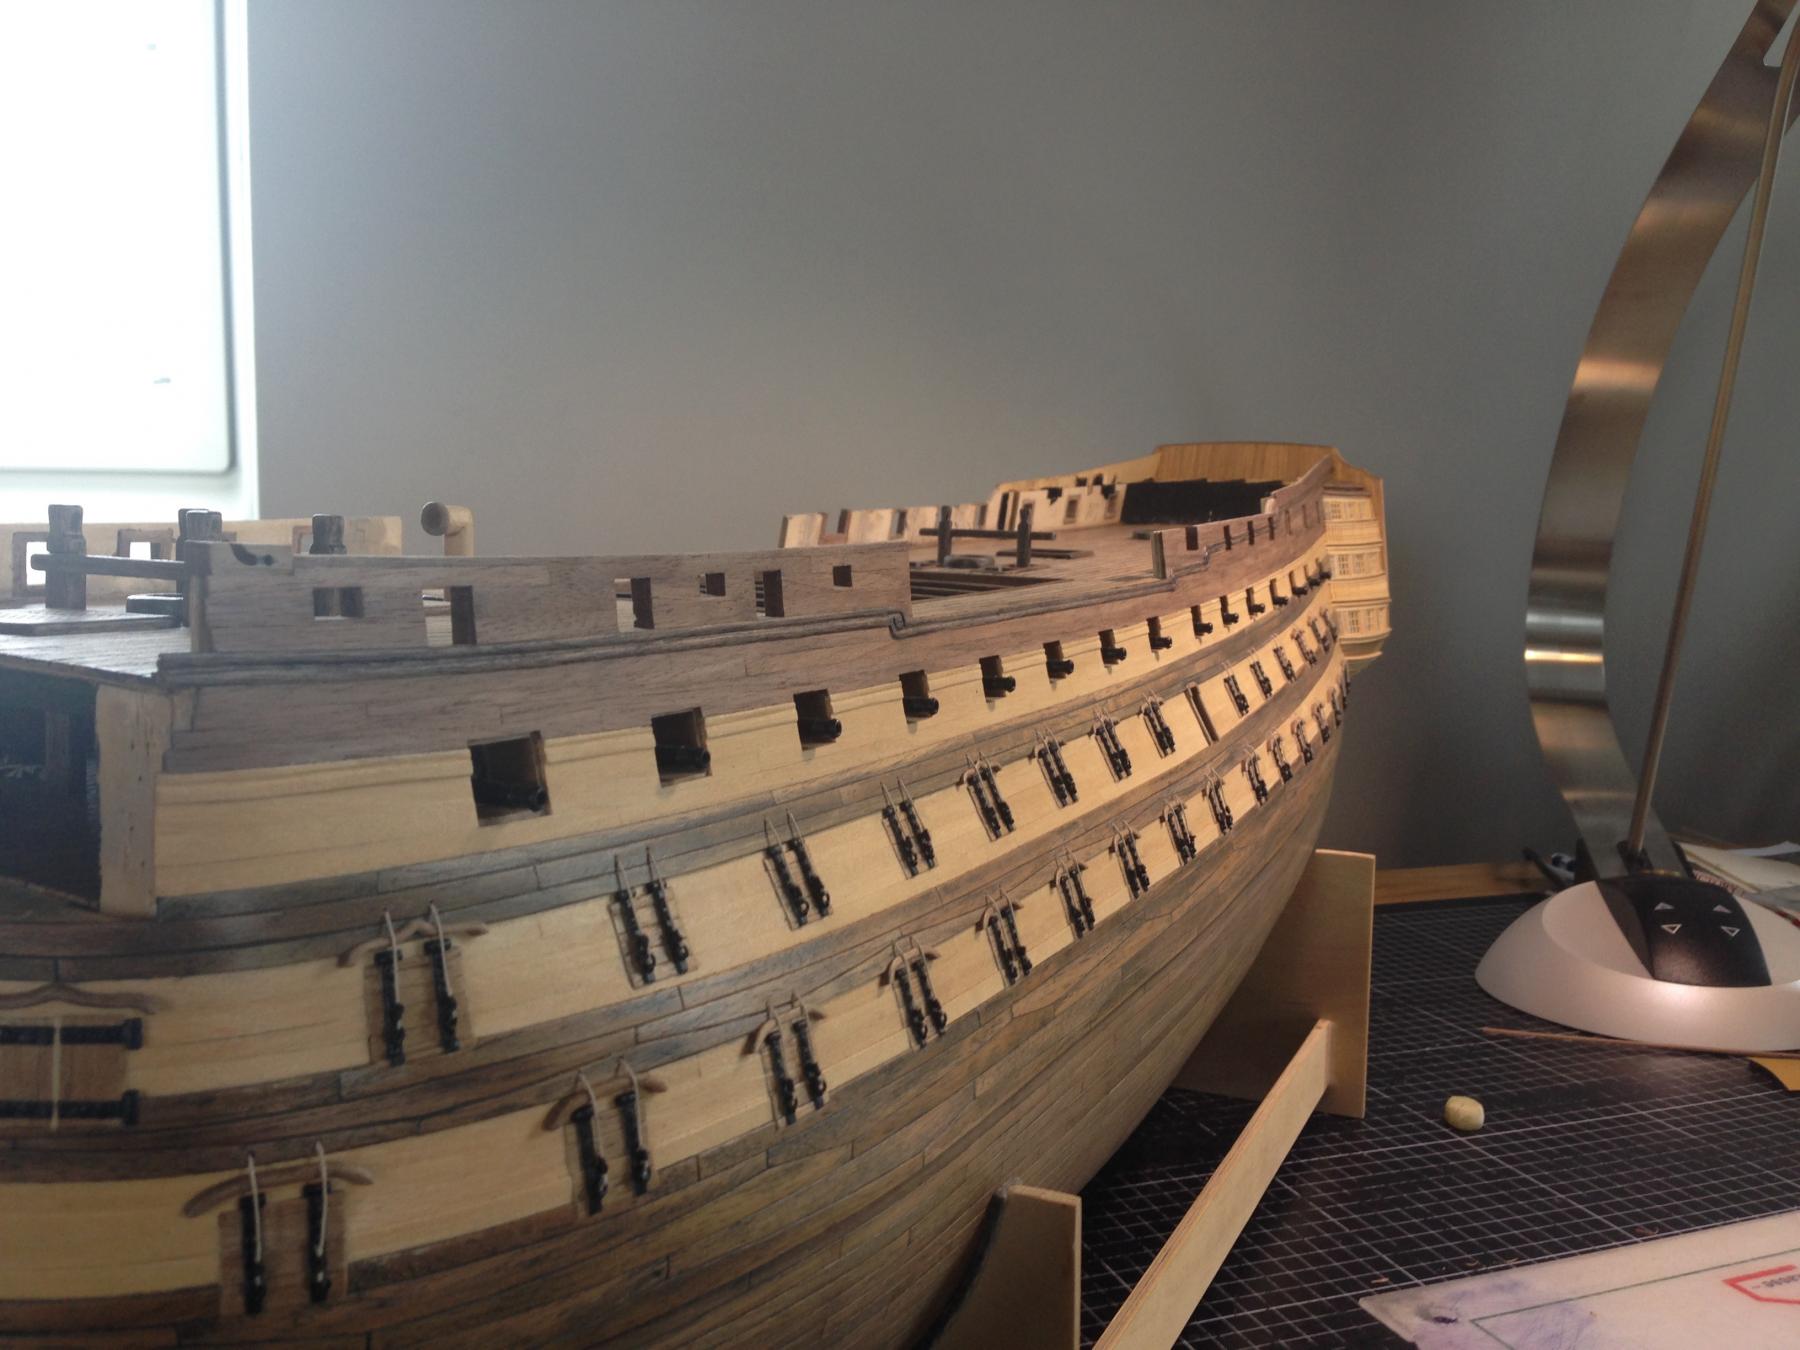
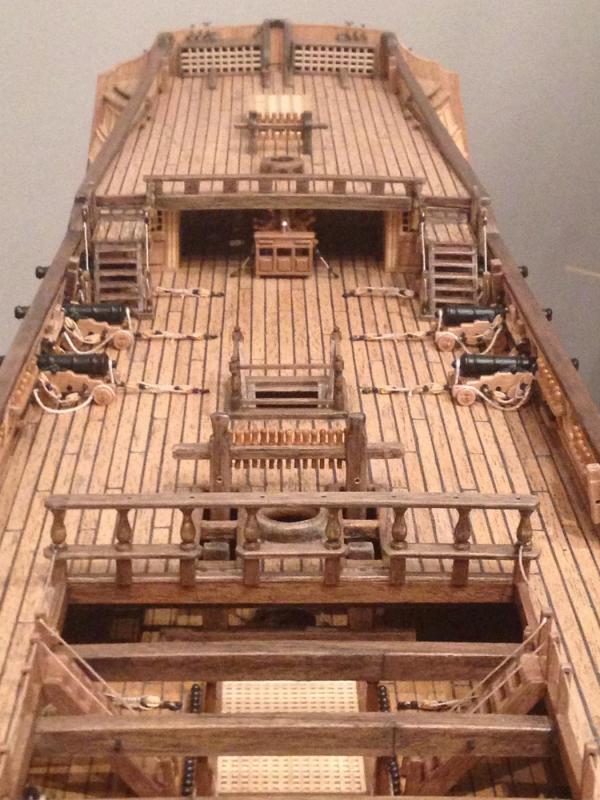
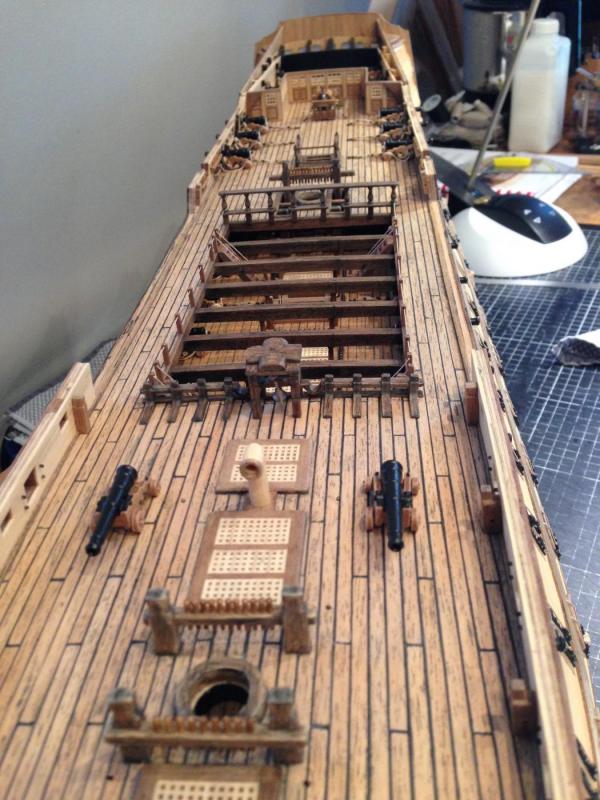
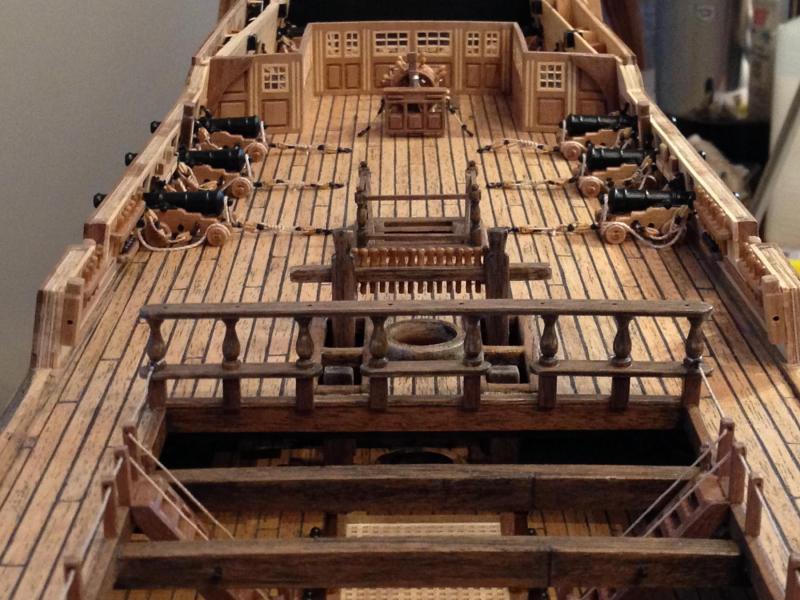
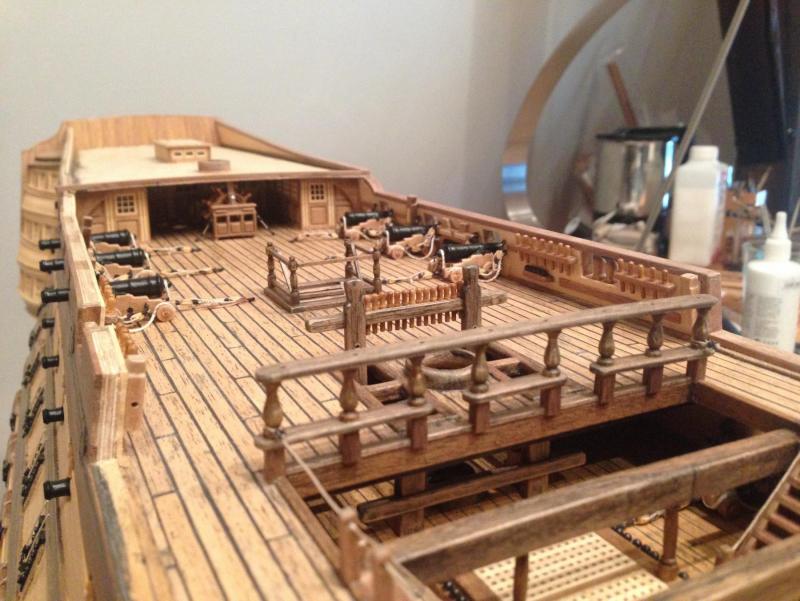
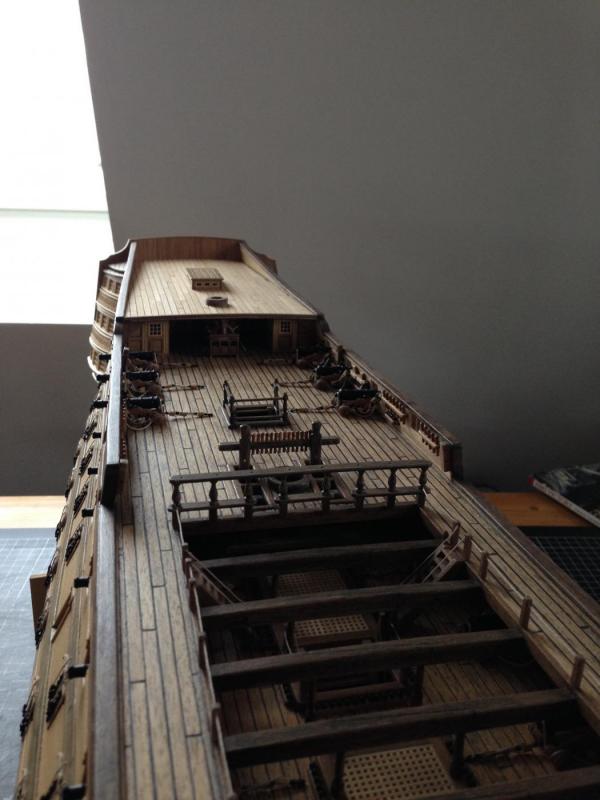
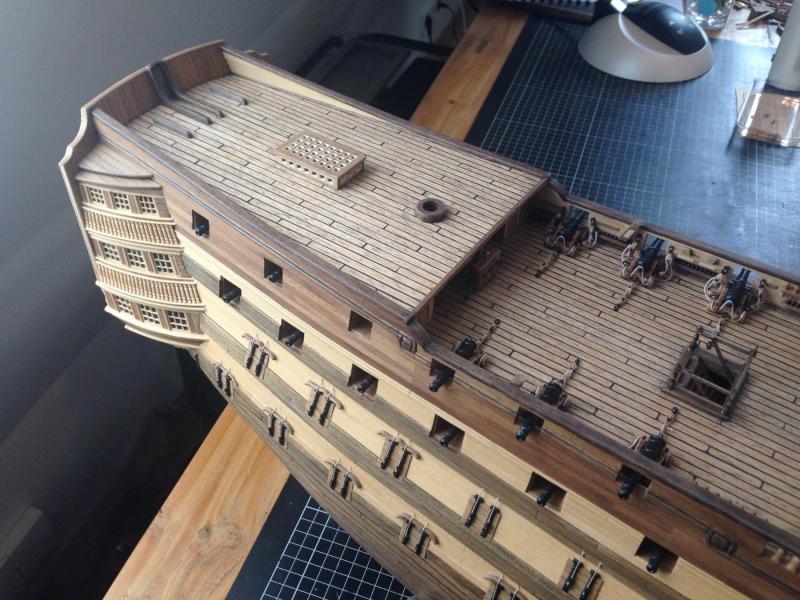
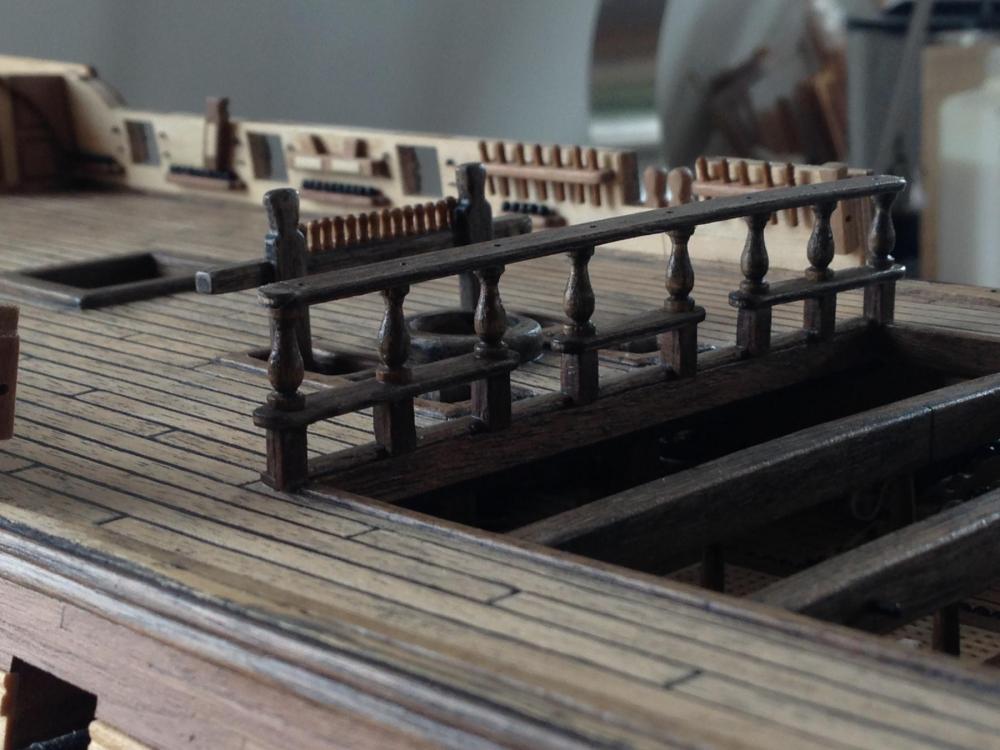
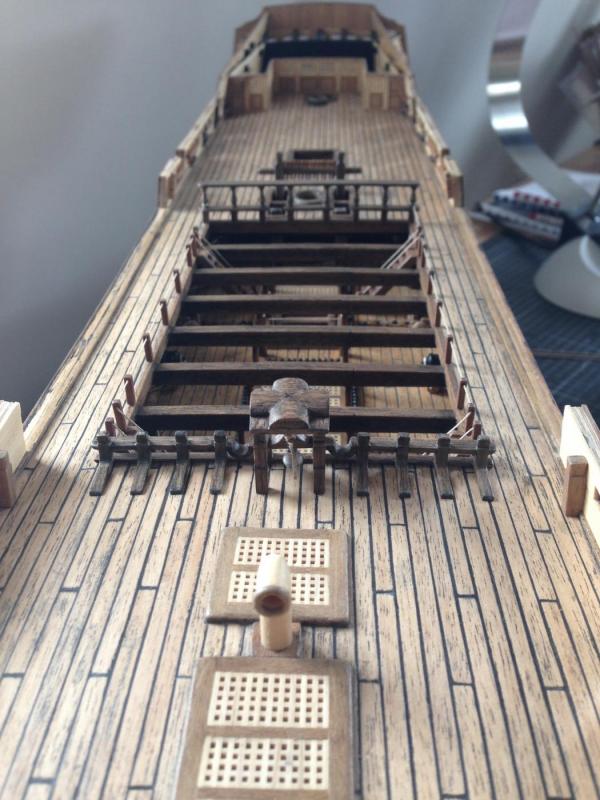
Hello friends, I think it´s time for a new update. All canons are on their places now and fixed. The handrail is finished. And the poop deck is at his place and planked. It sounds like easy and fast work, but it was so much to do. I am really happy with the result. What do you think about it? Many greetings to all my friends and modellers all over the world! :-) Have a nice week! -Heinz-


-
Thank you again, Ian. Without your nice words every time, it would be half the fun to build my model :-) - Heinz -
-
Hello modeling friends, just a small update with my recent photos :-) Best to all of you! -Heinz-


-
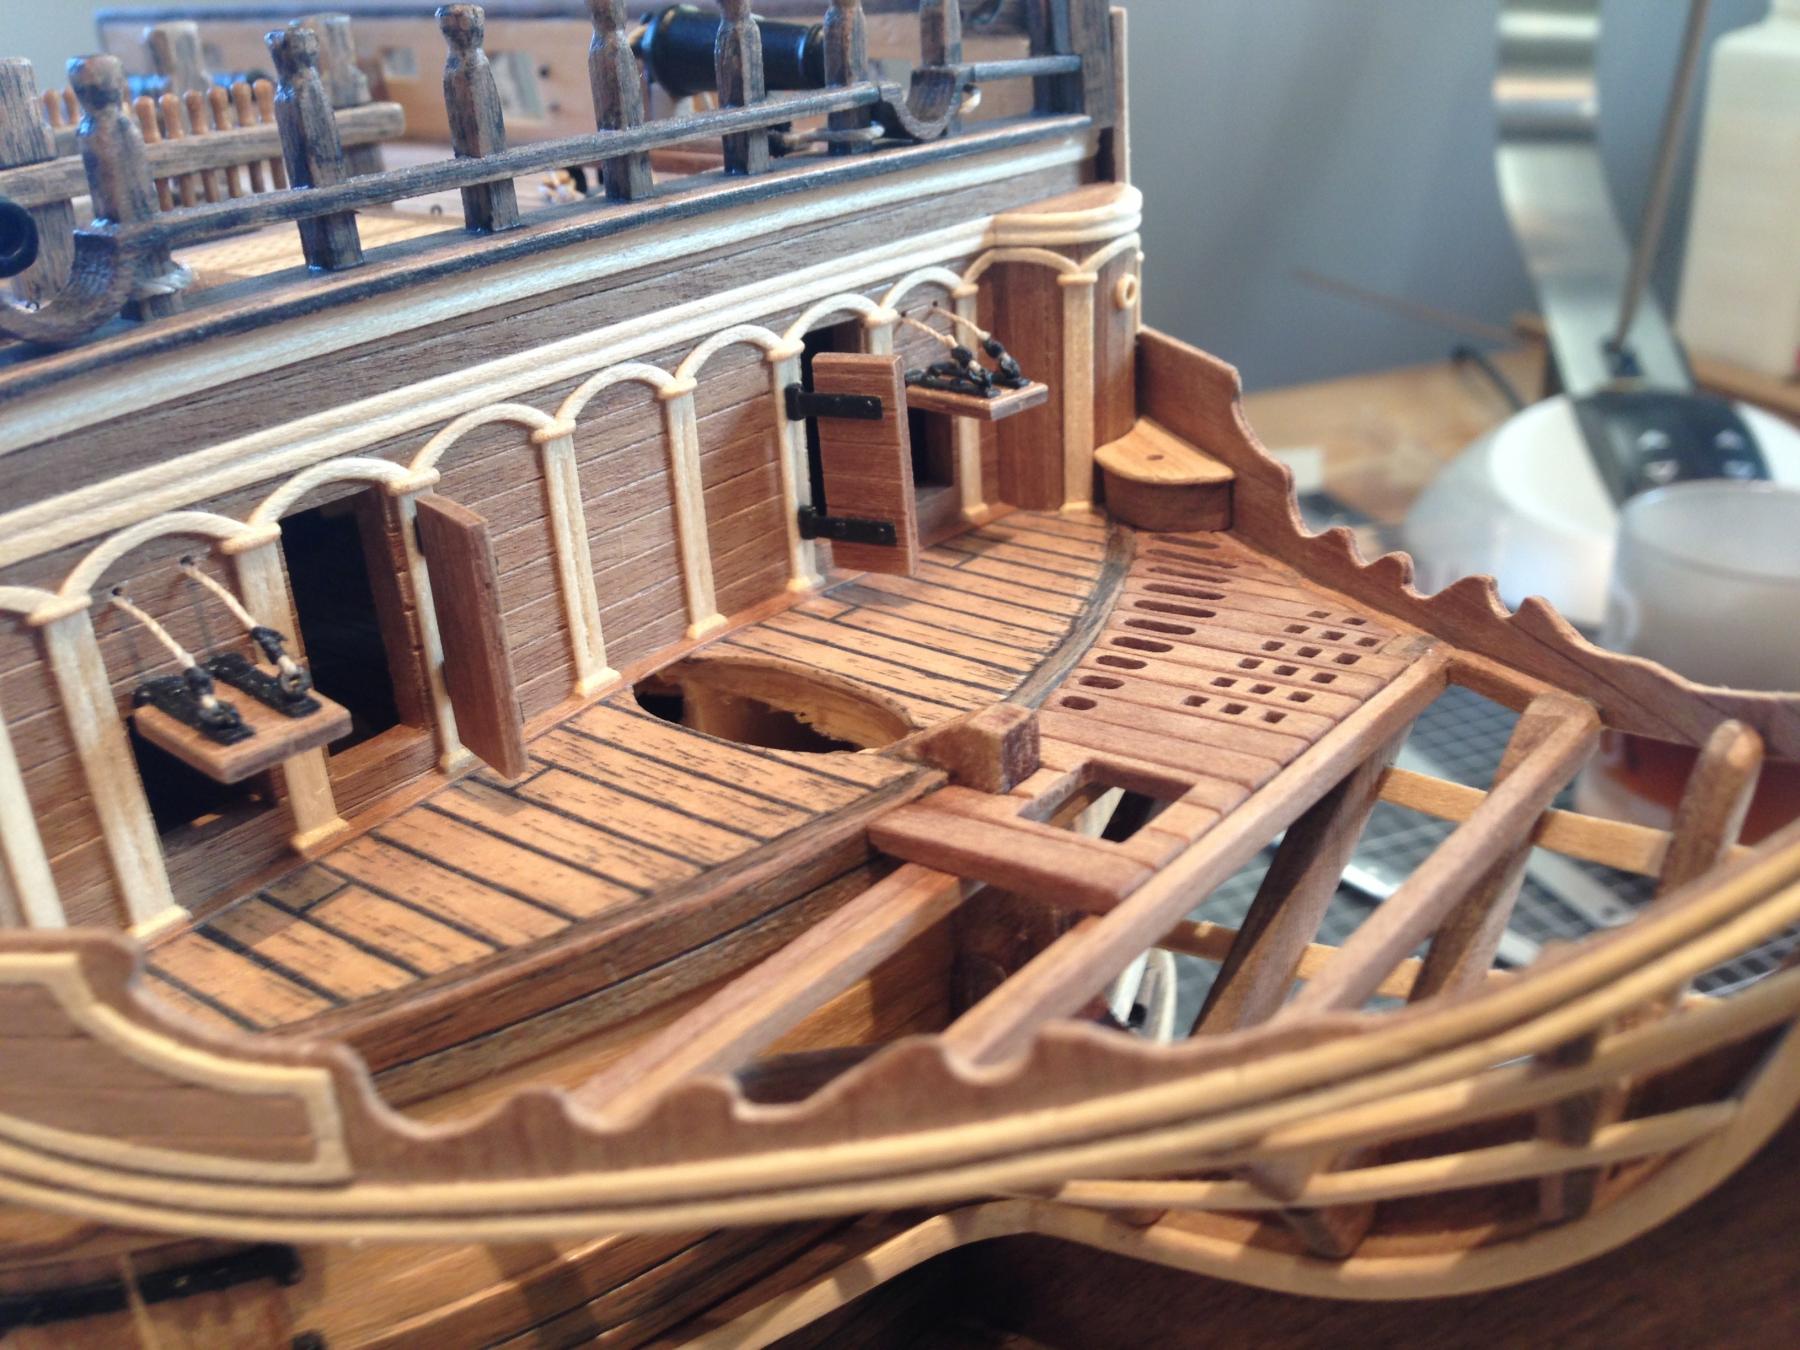
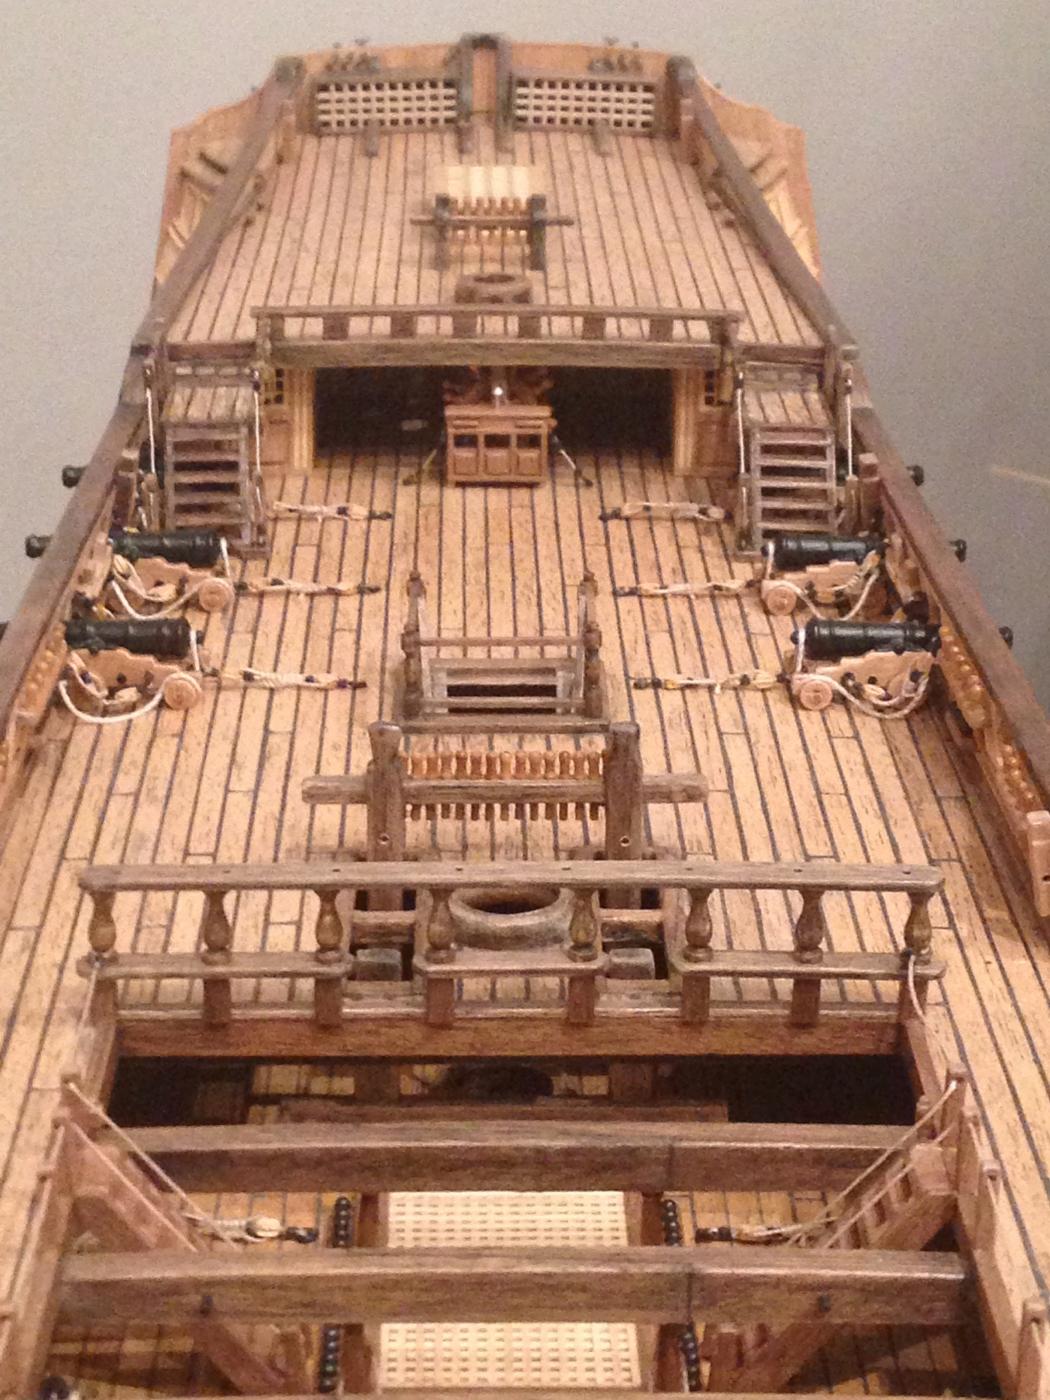
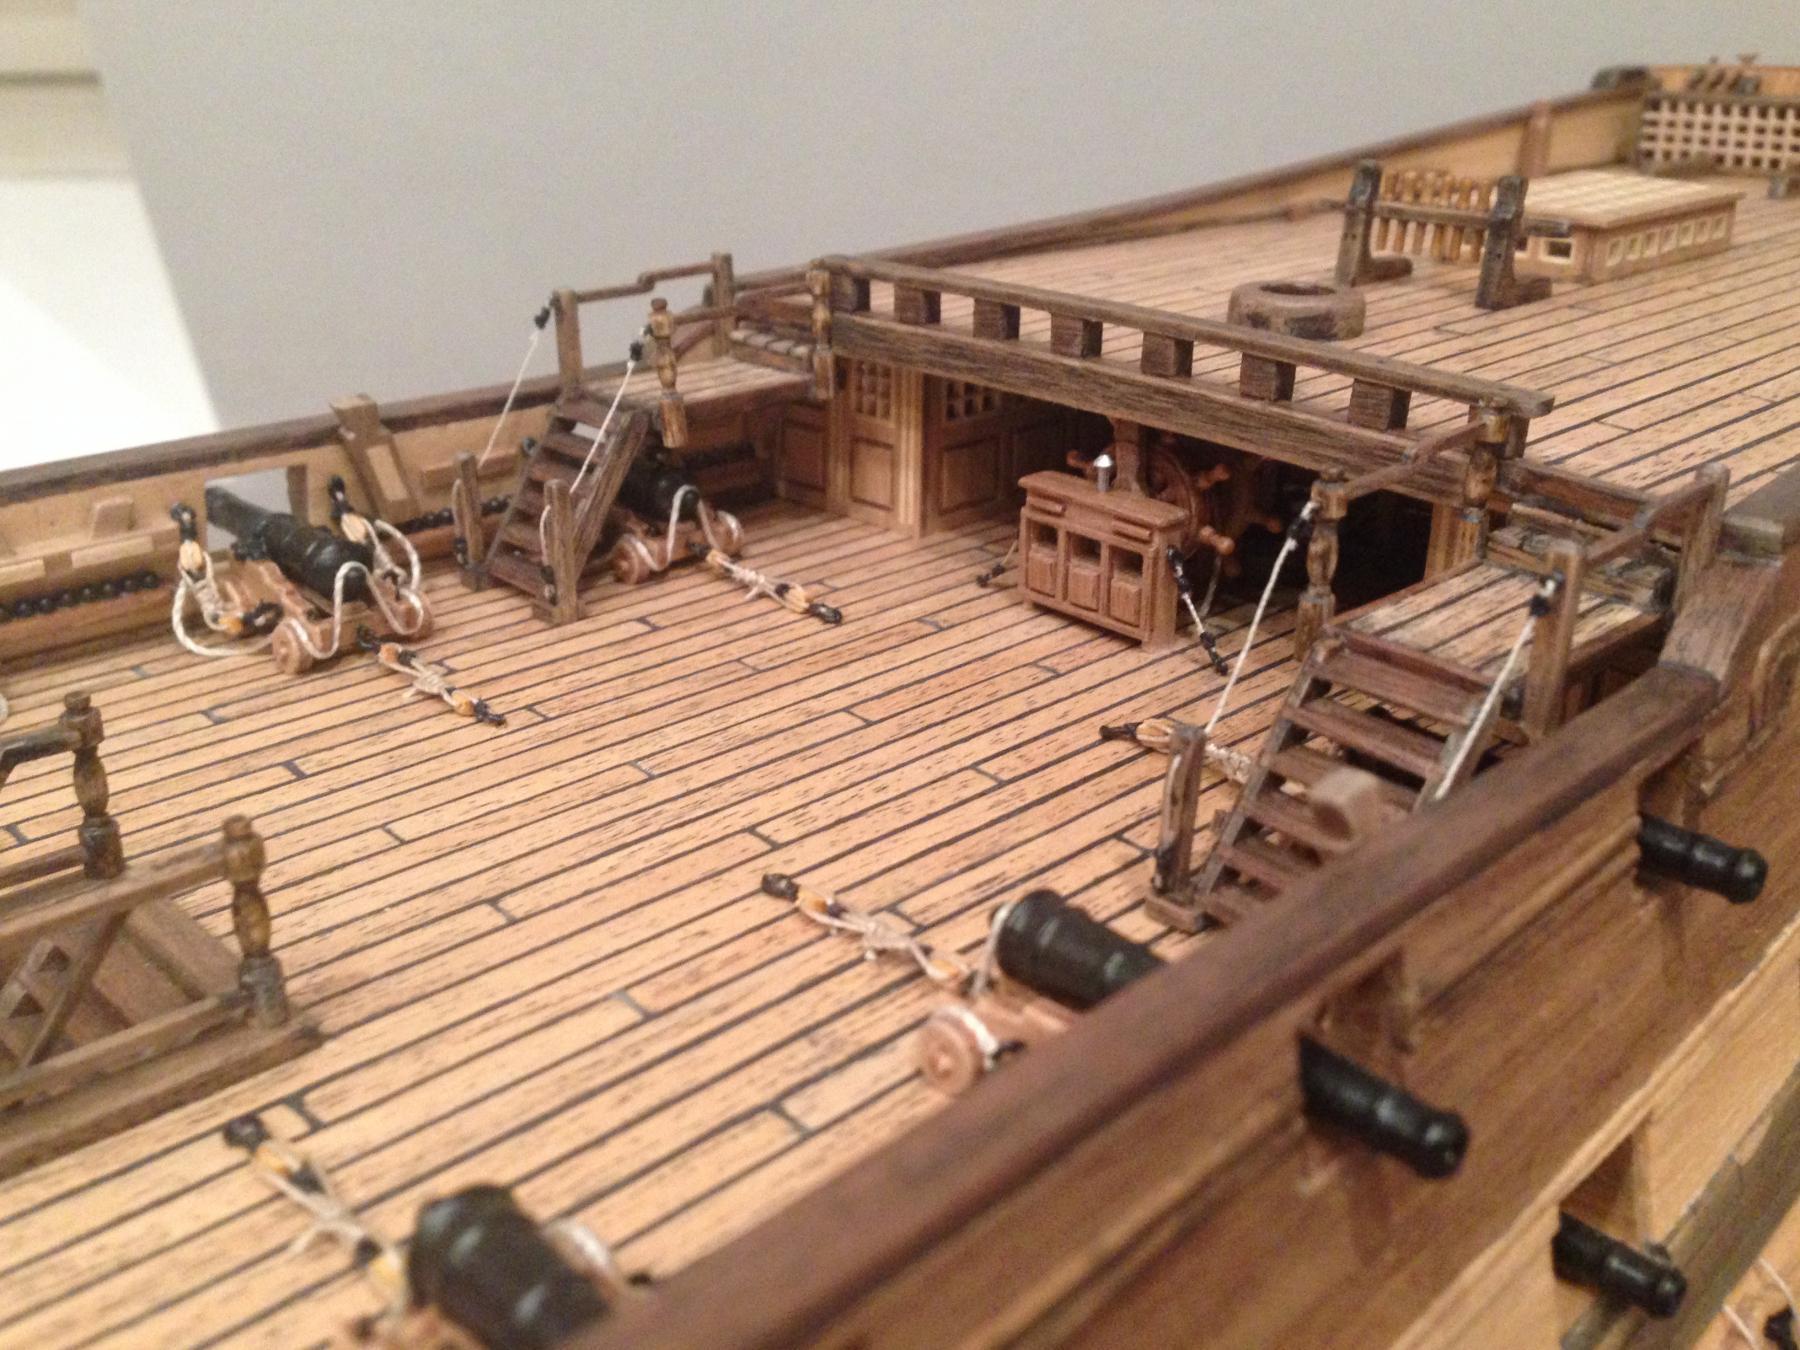
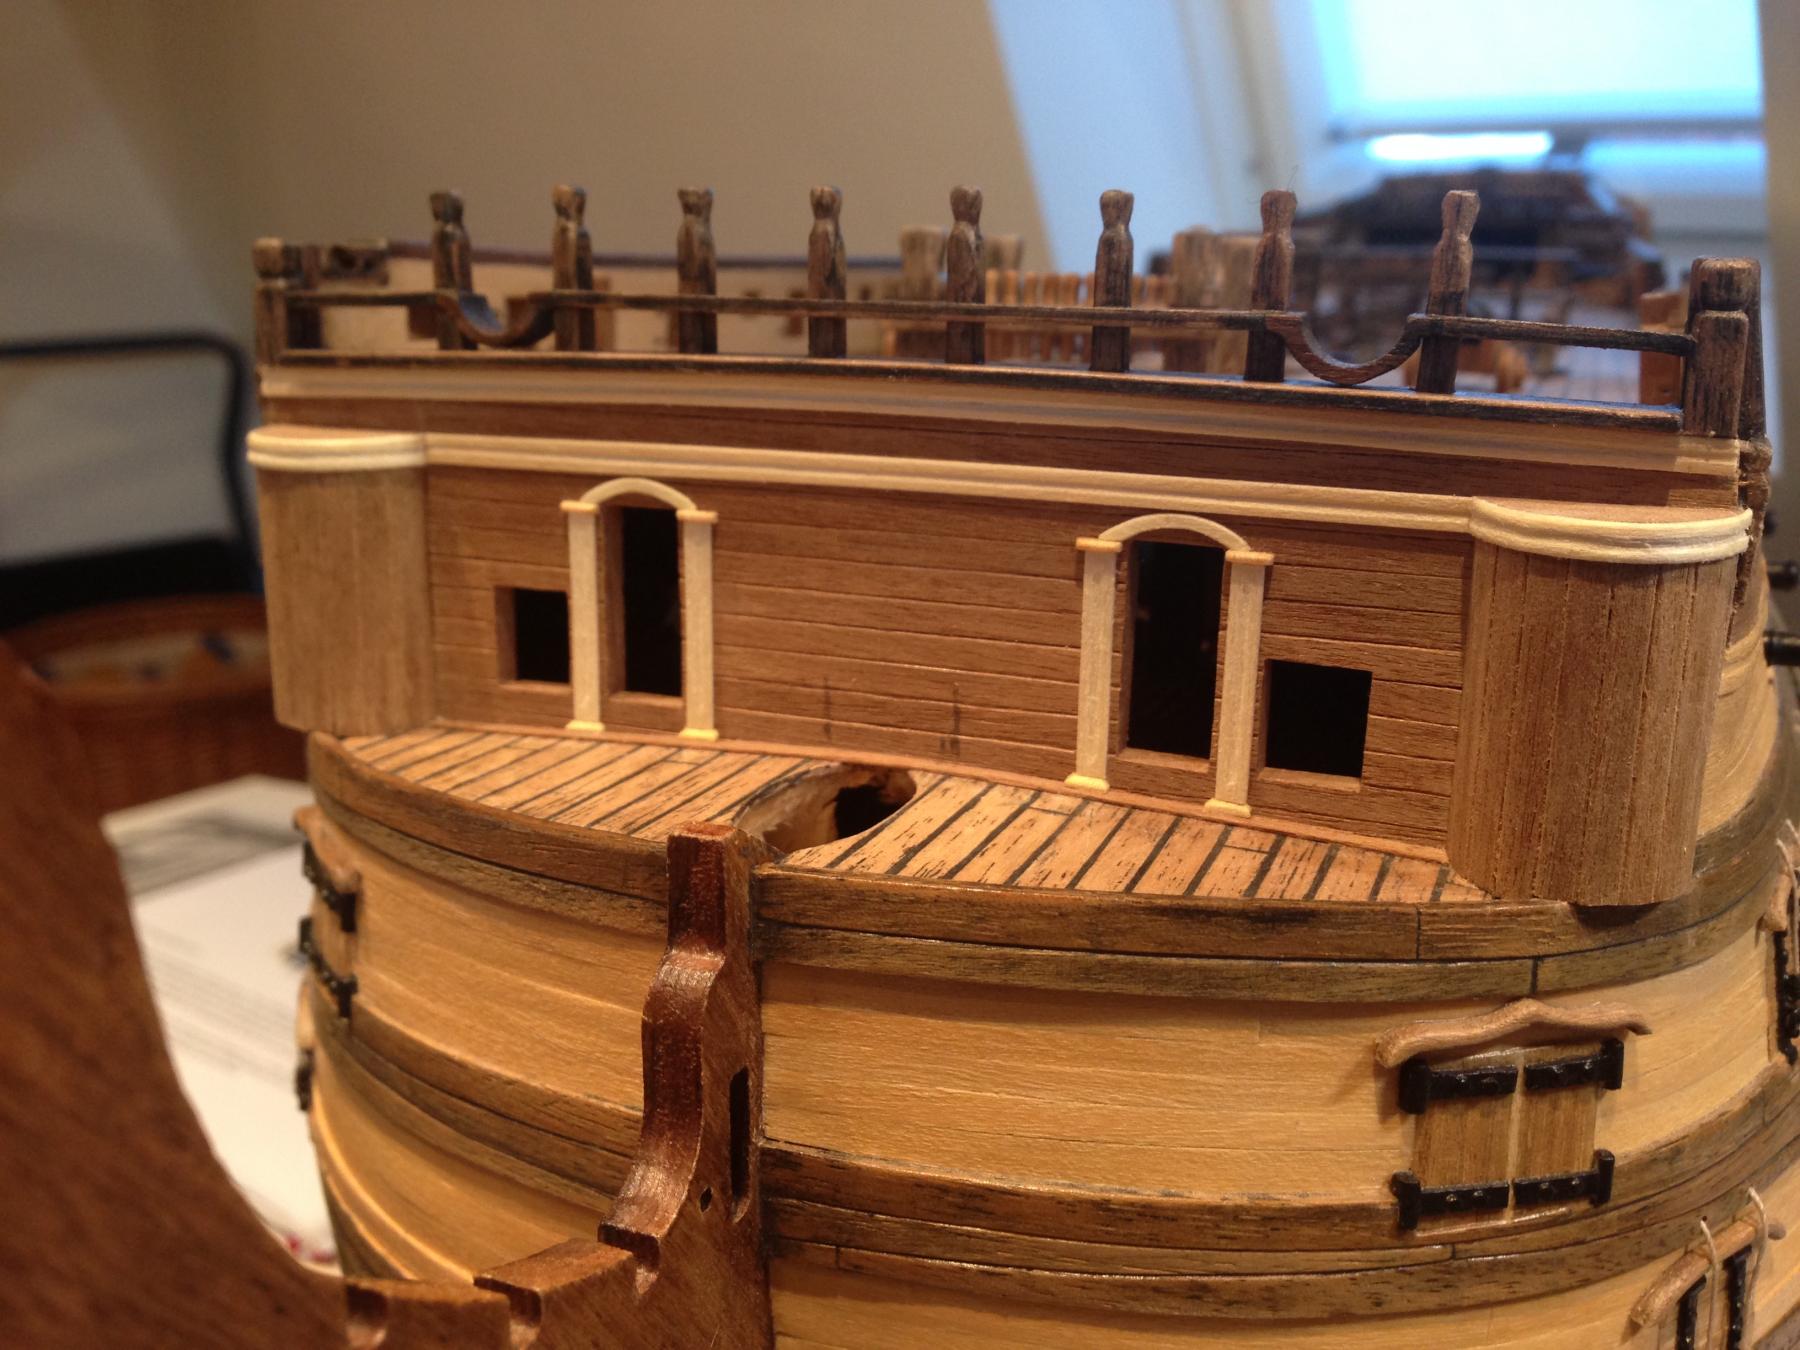
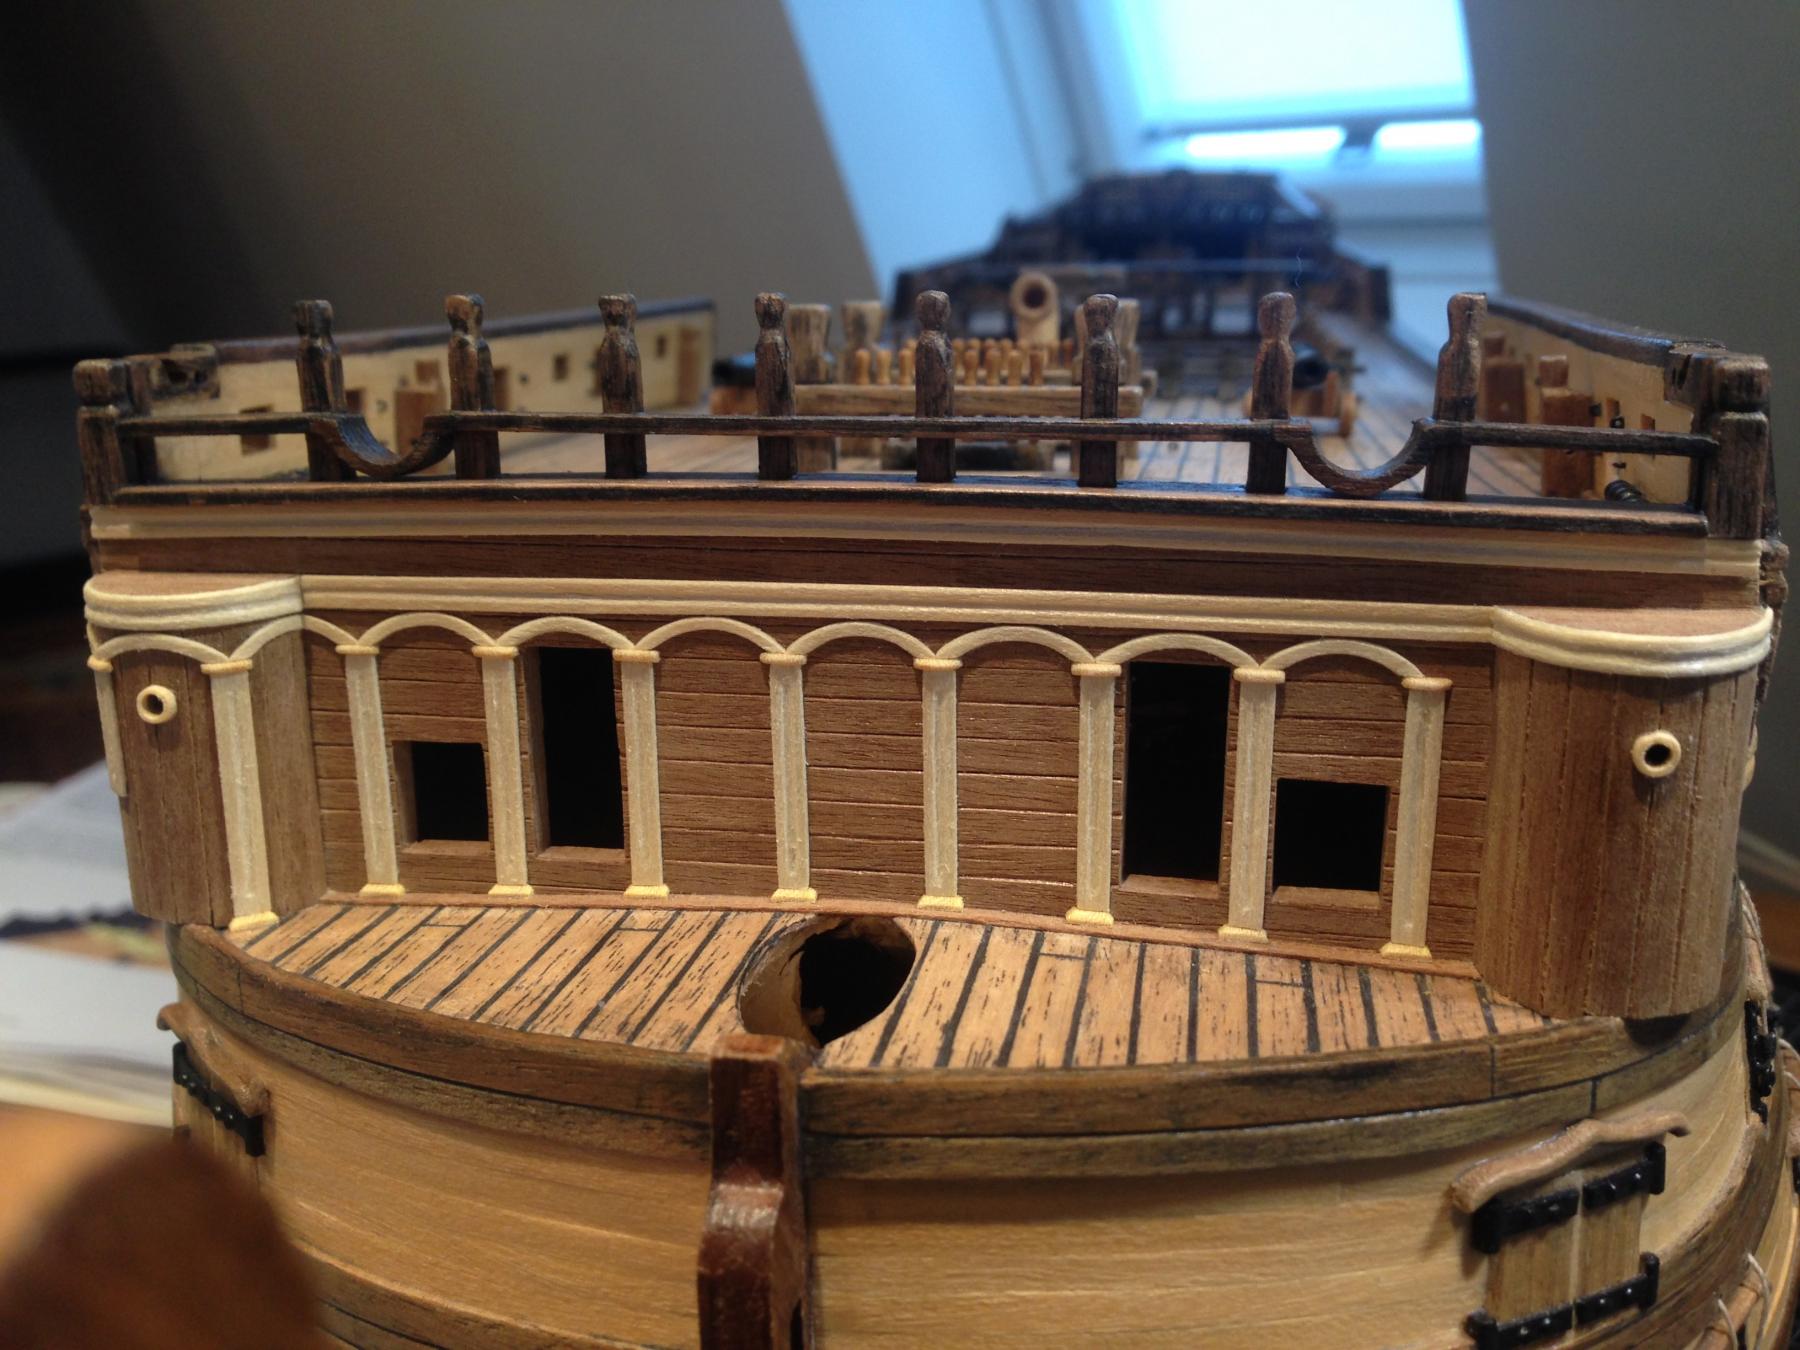
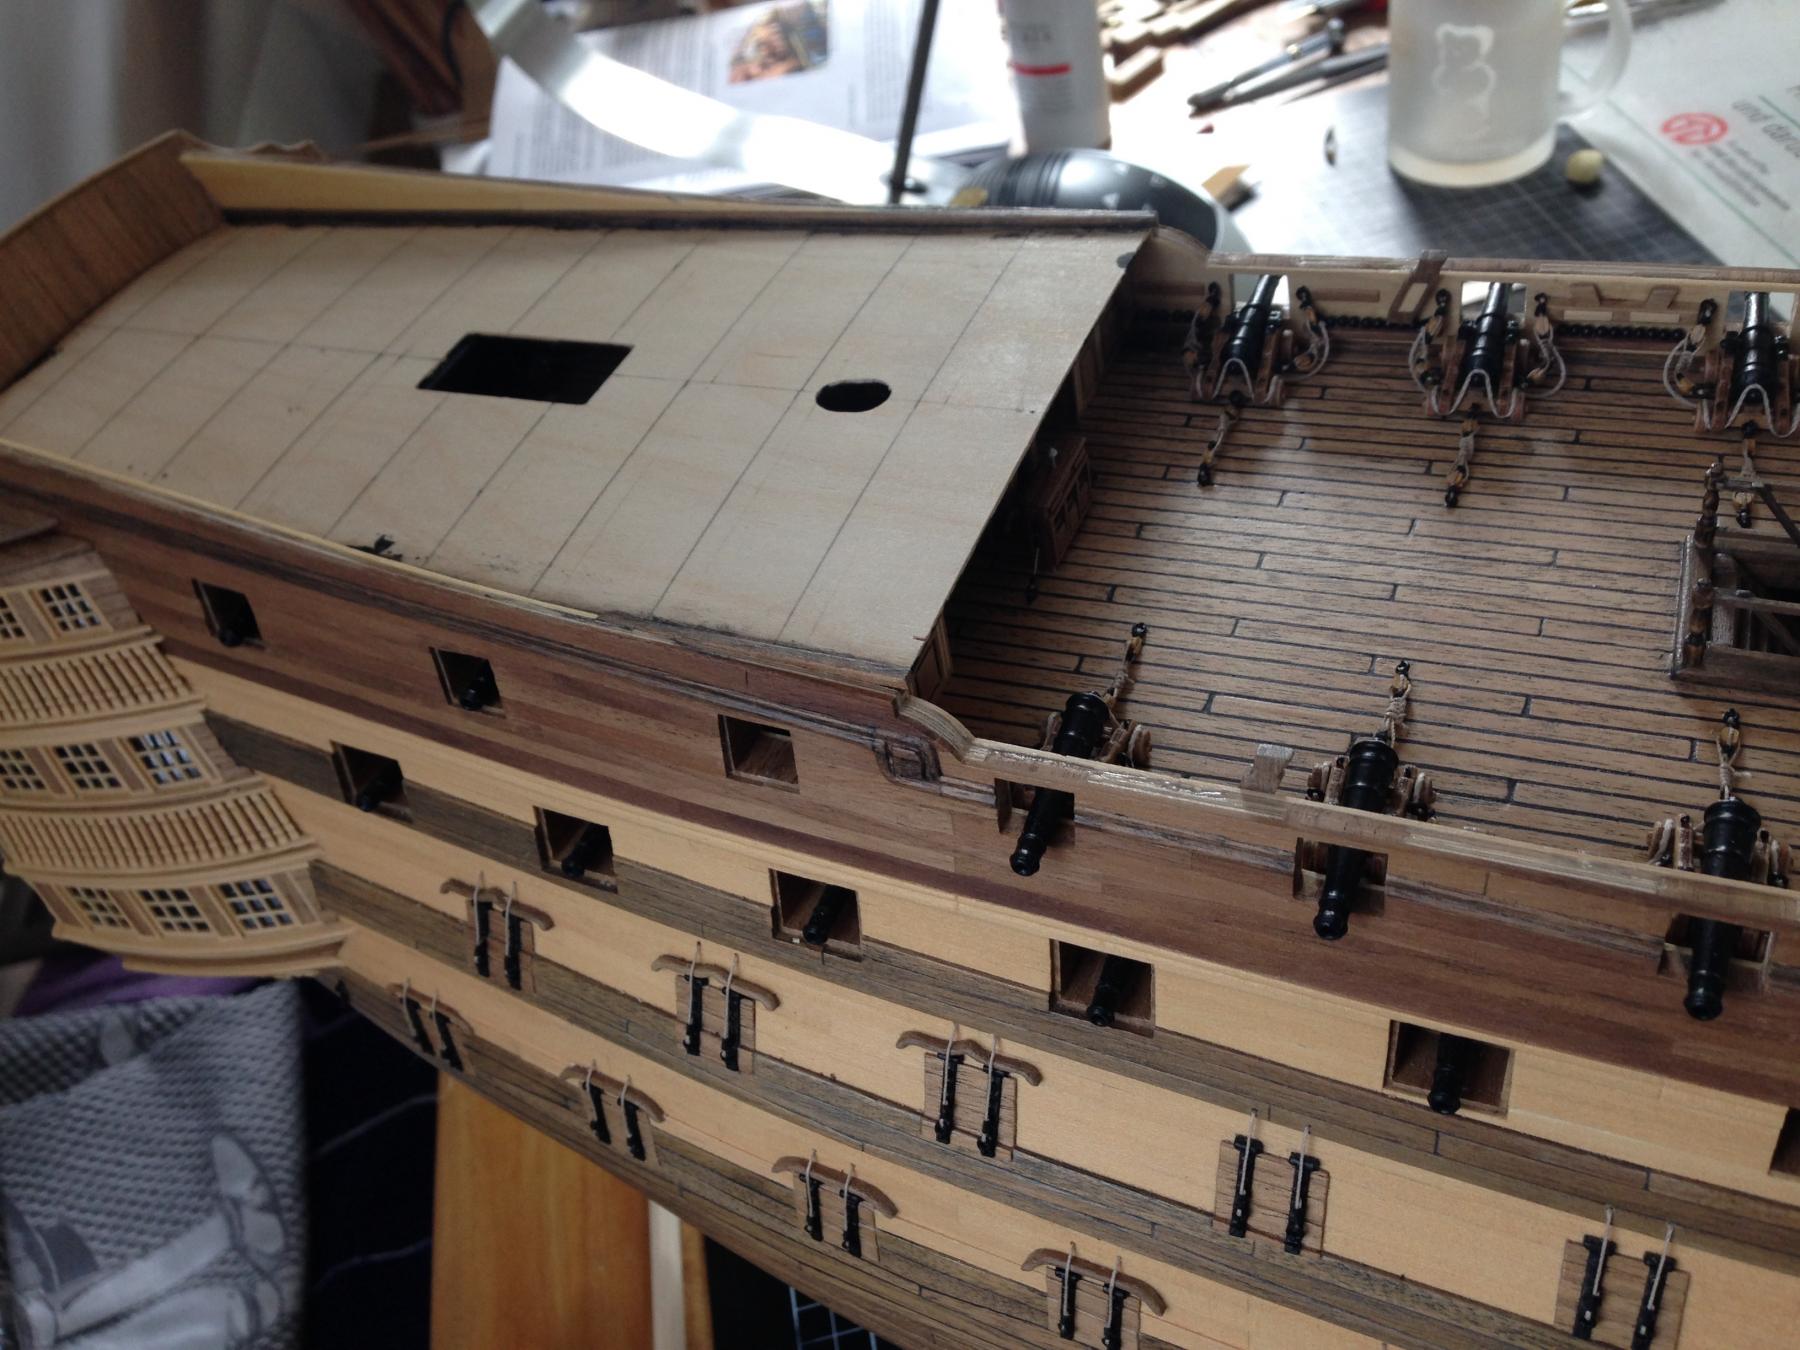
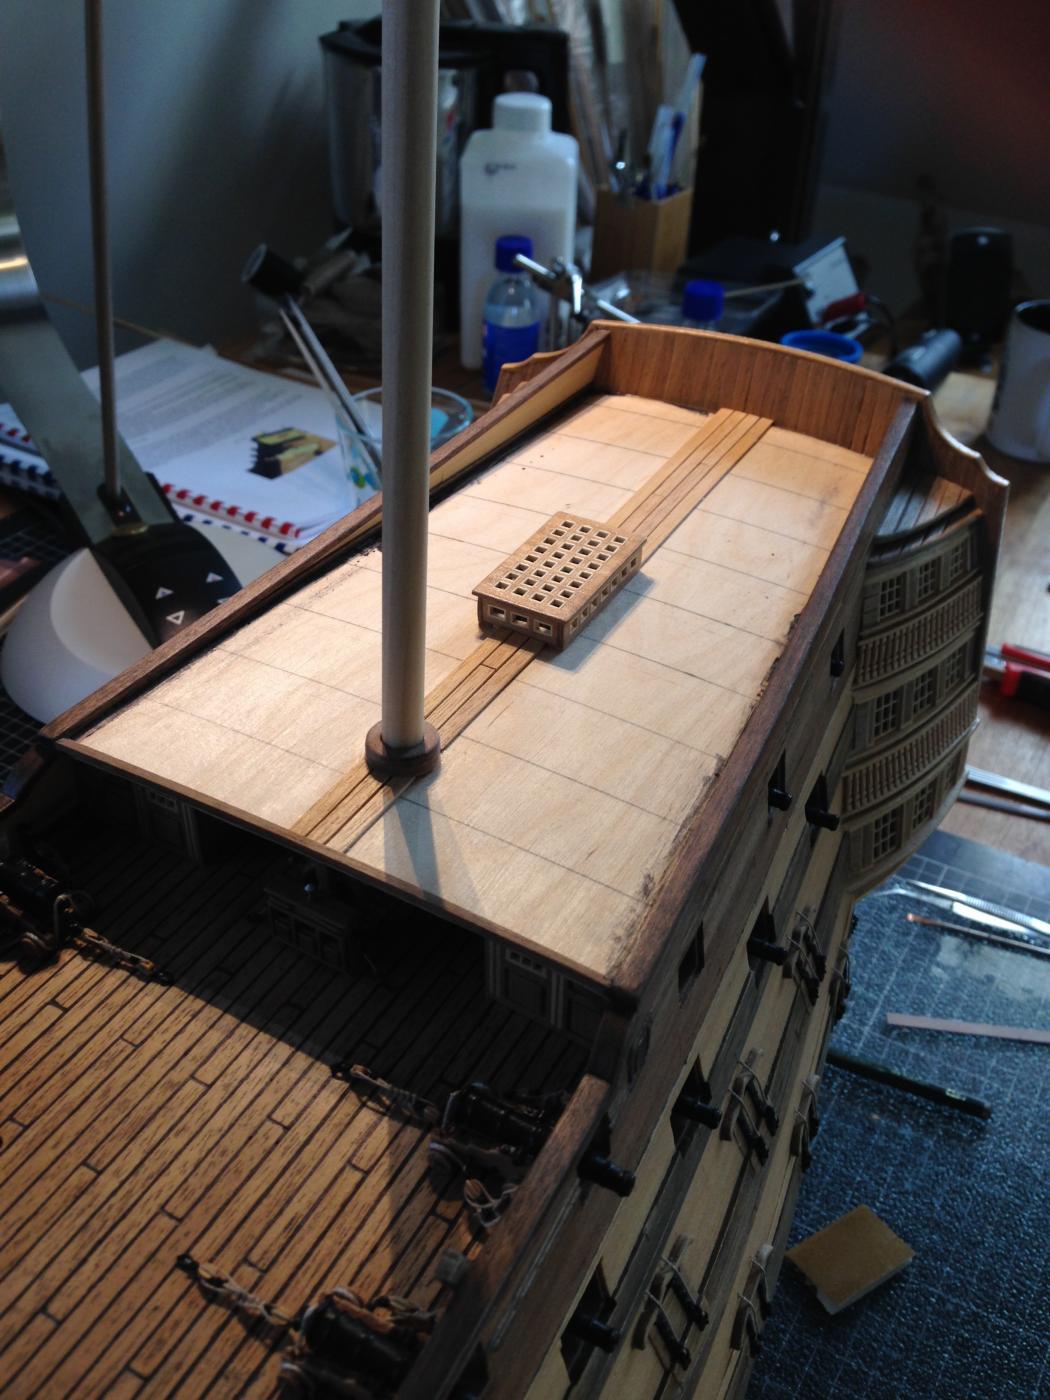
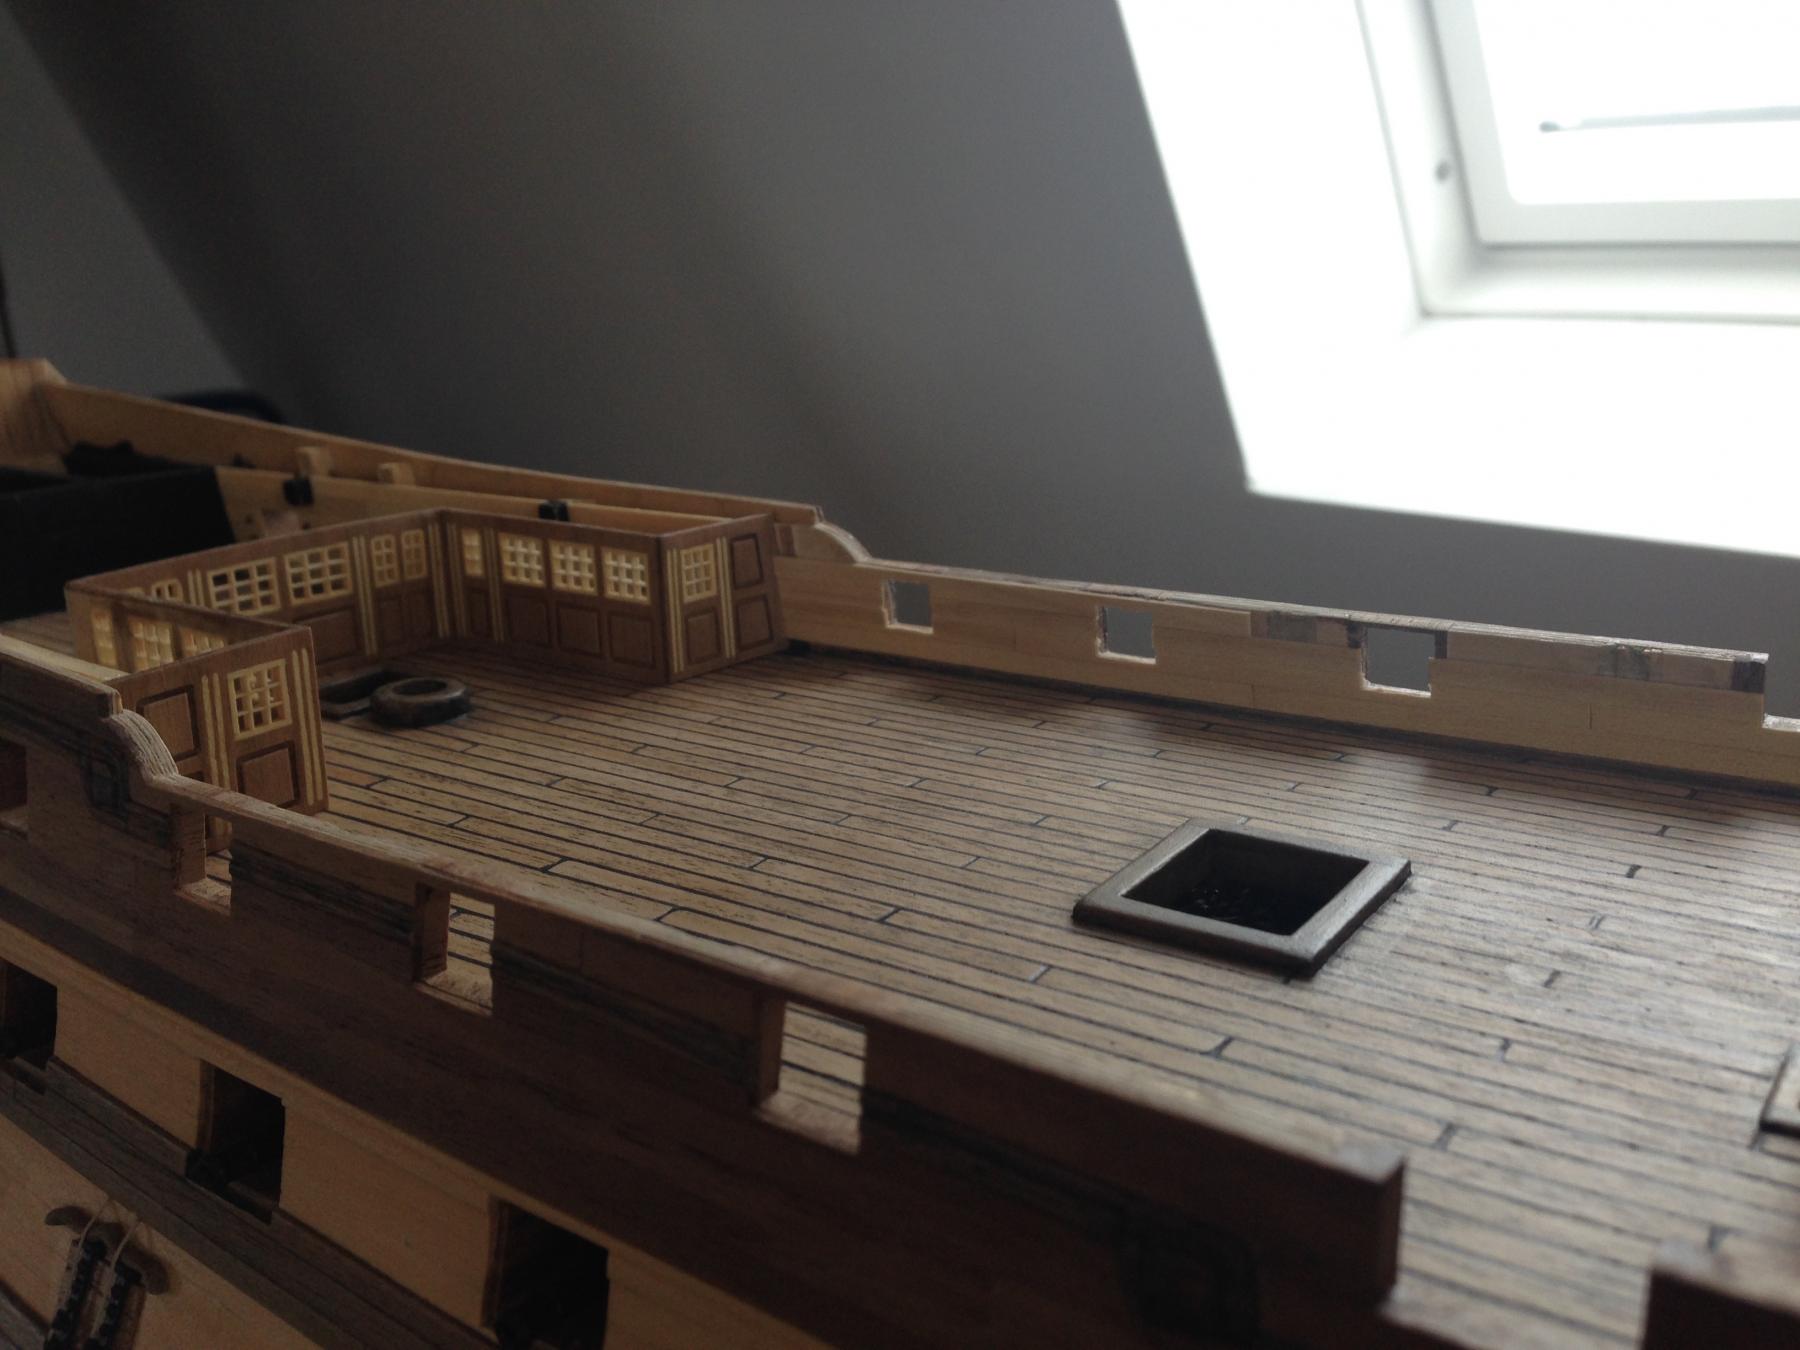
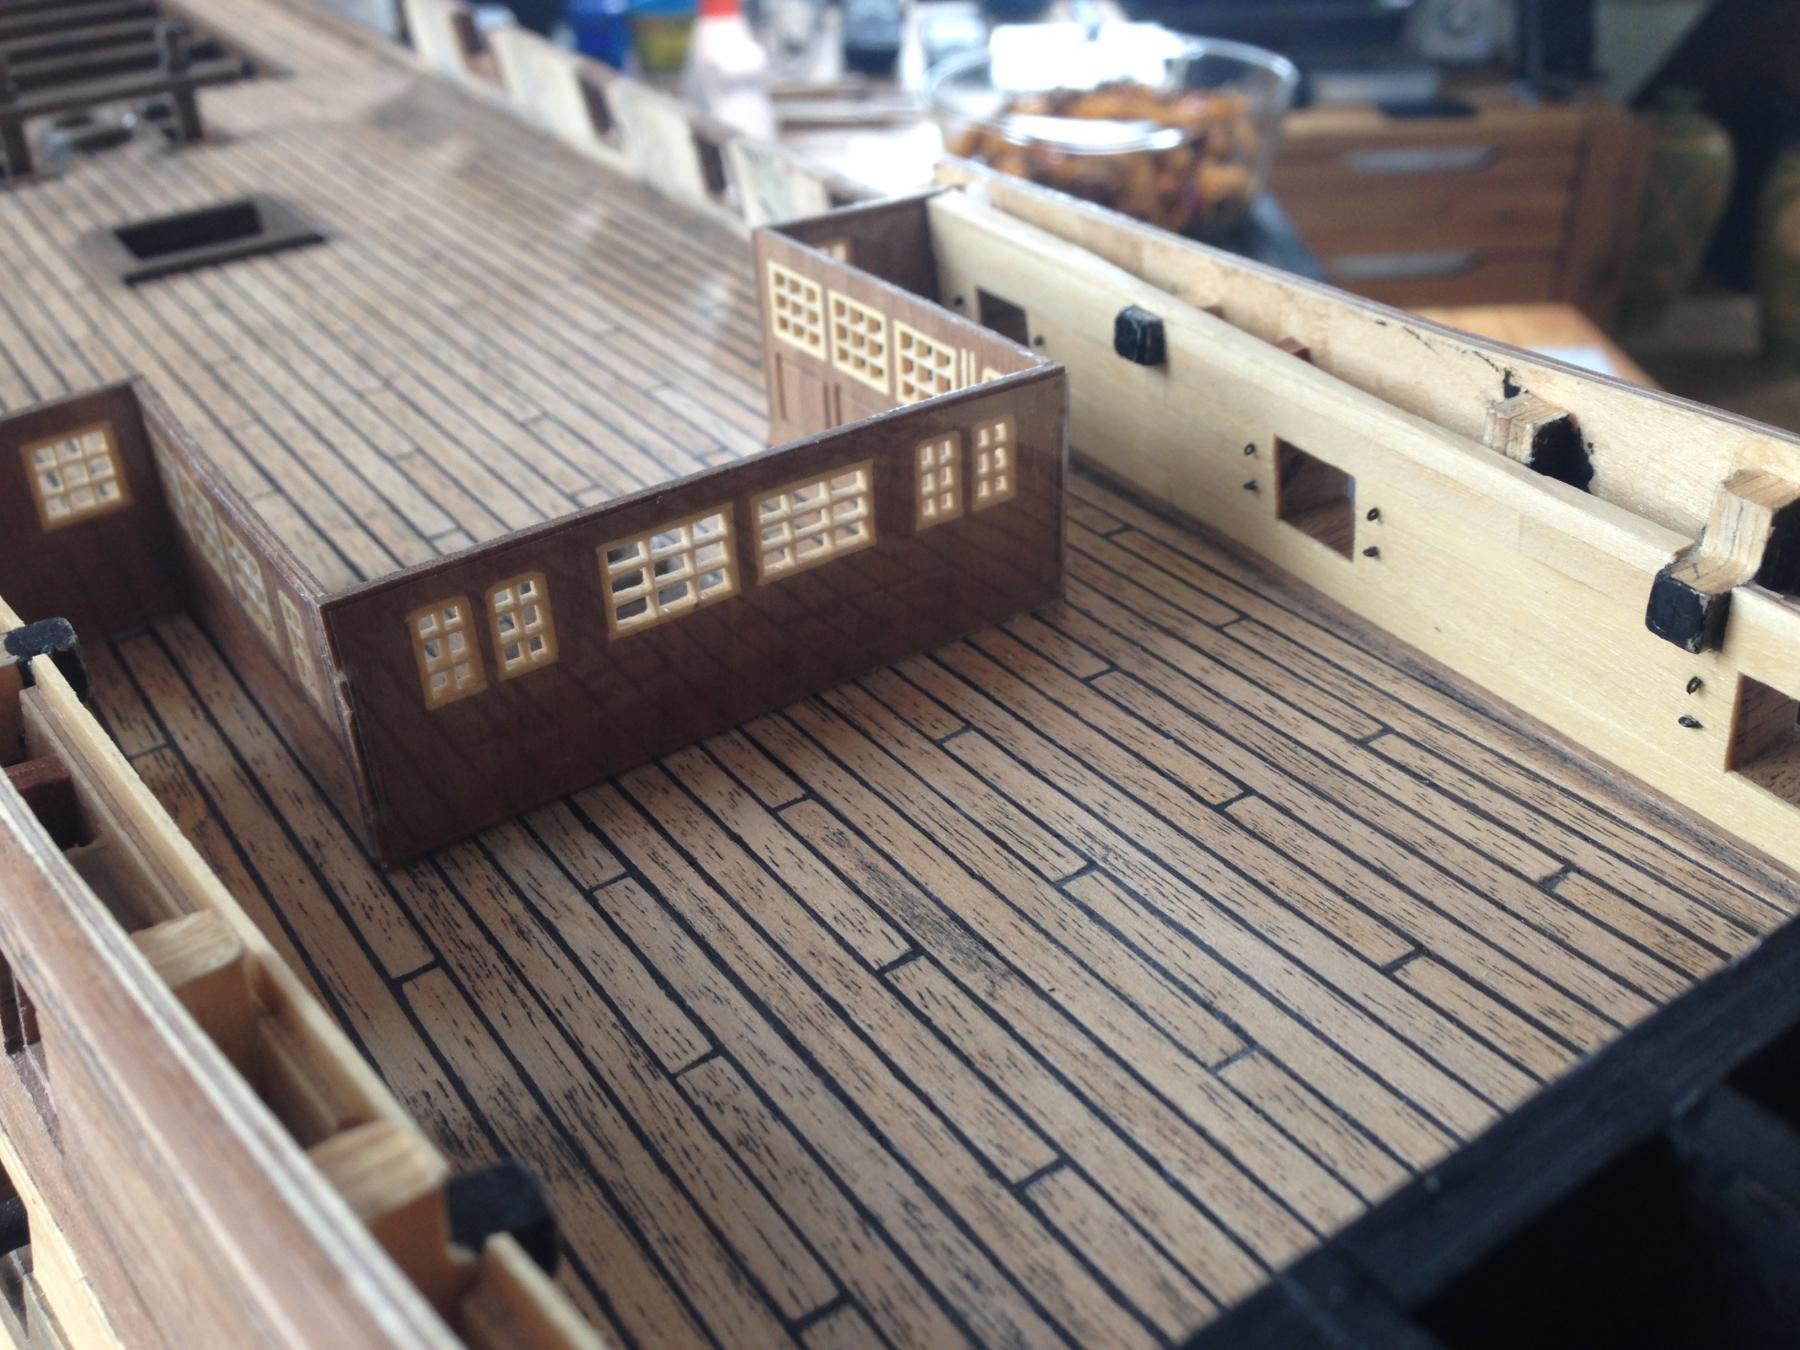
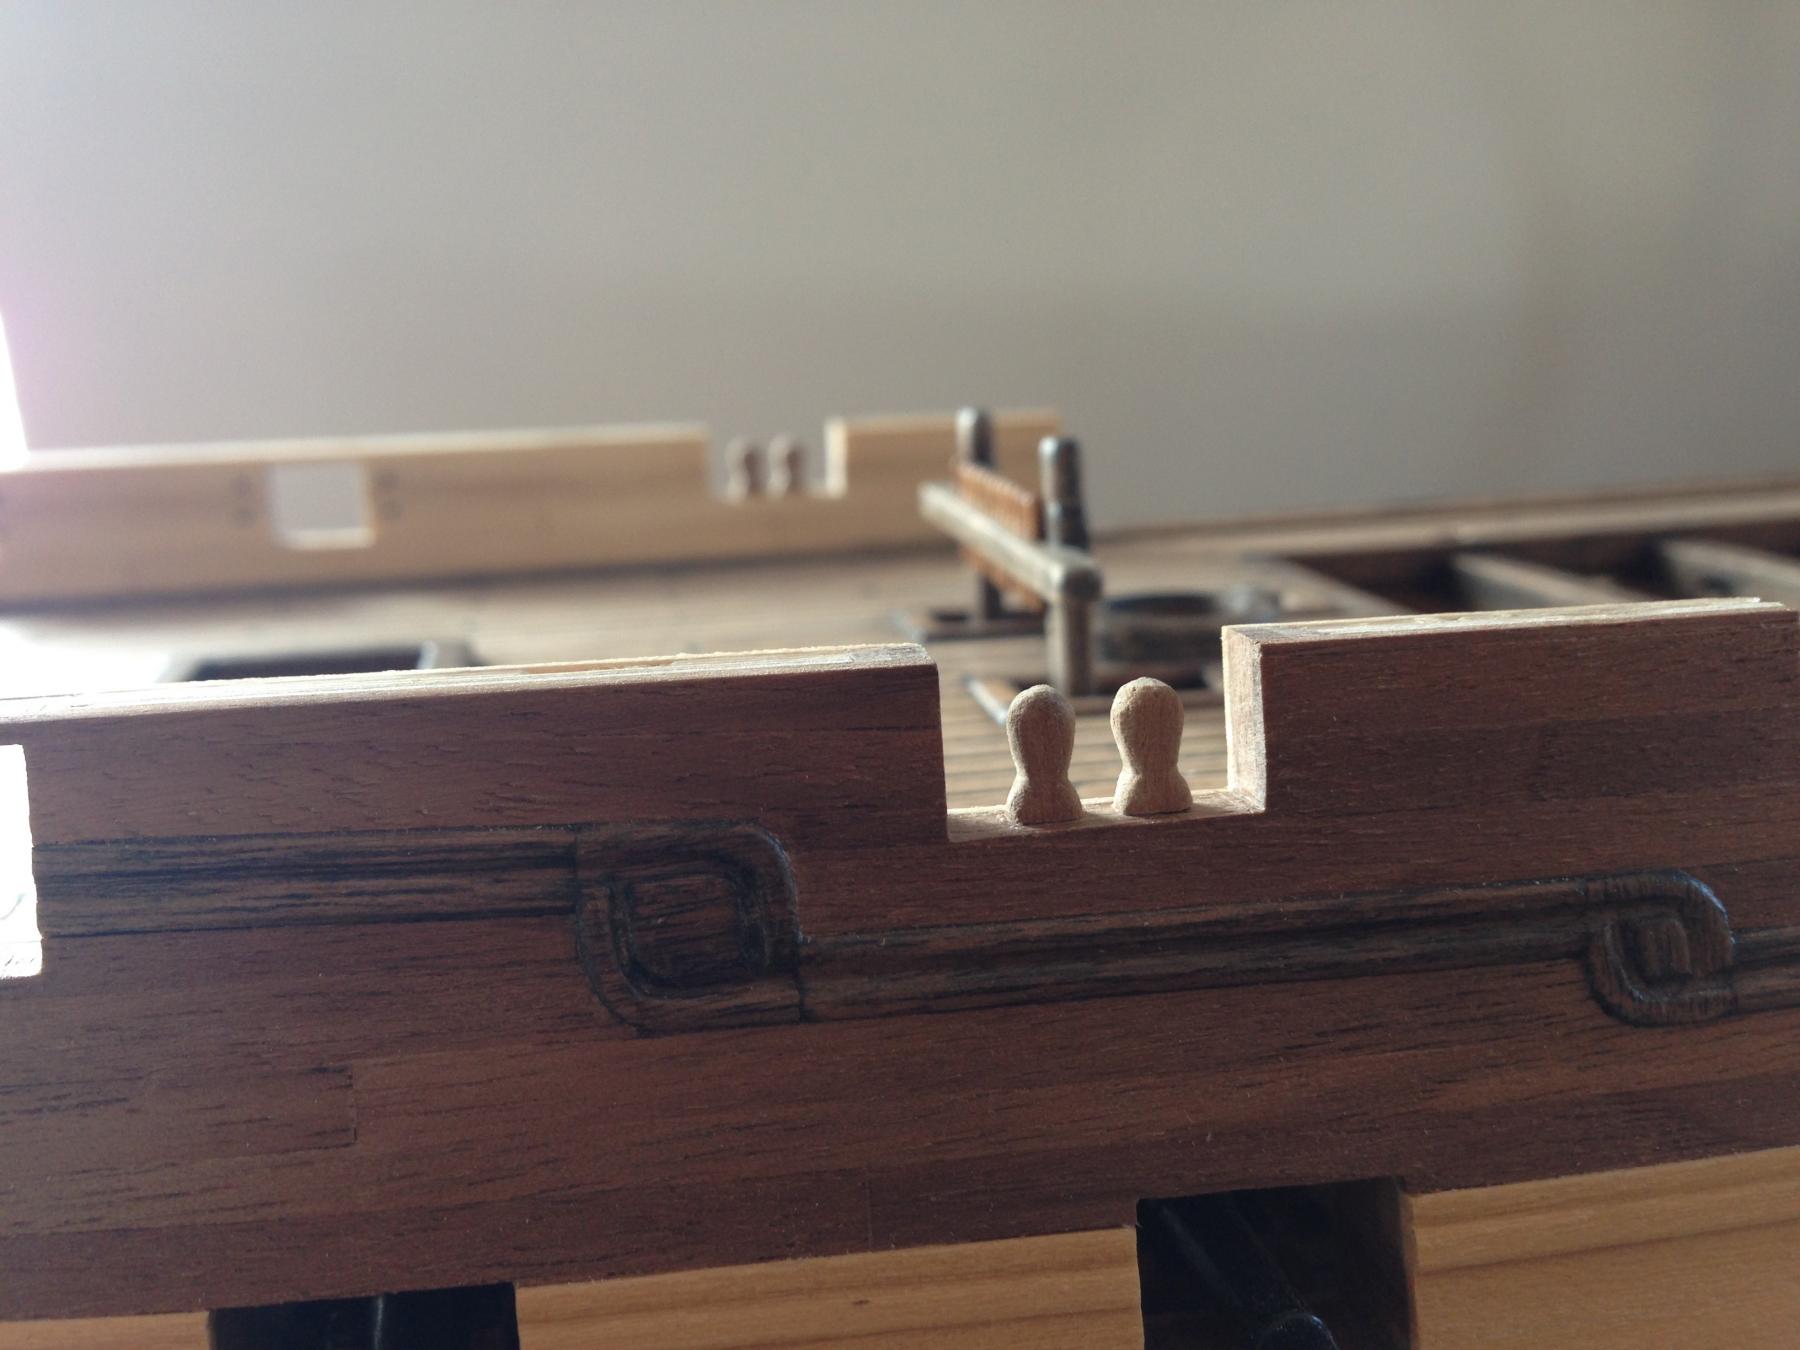
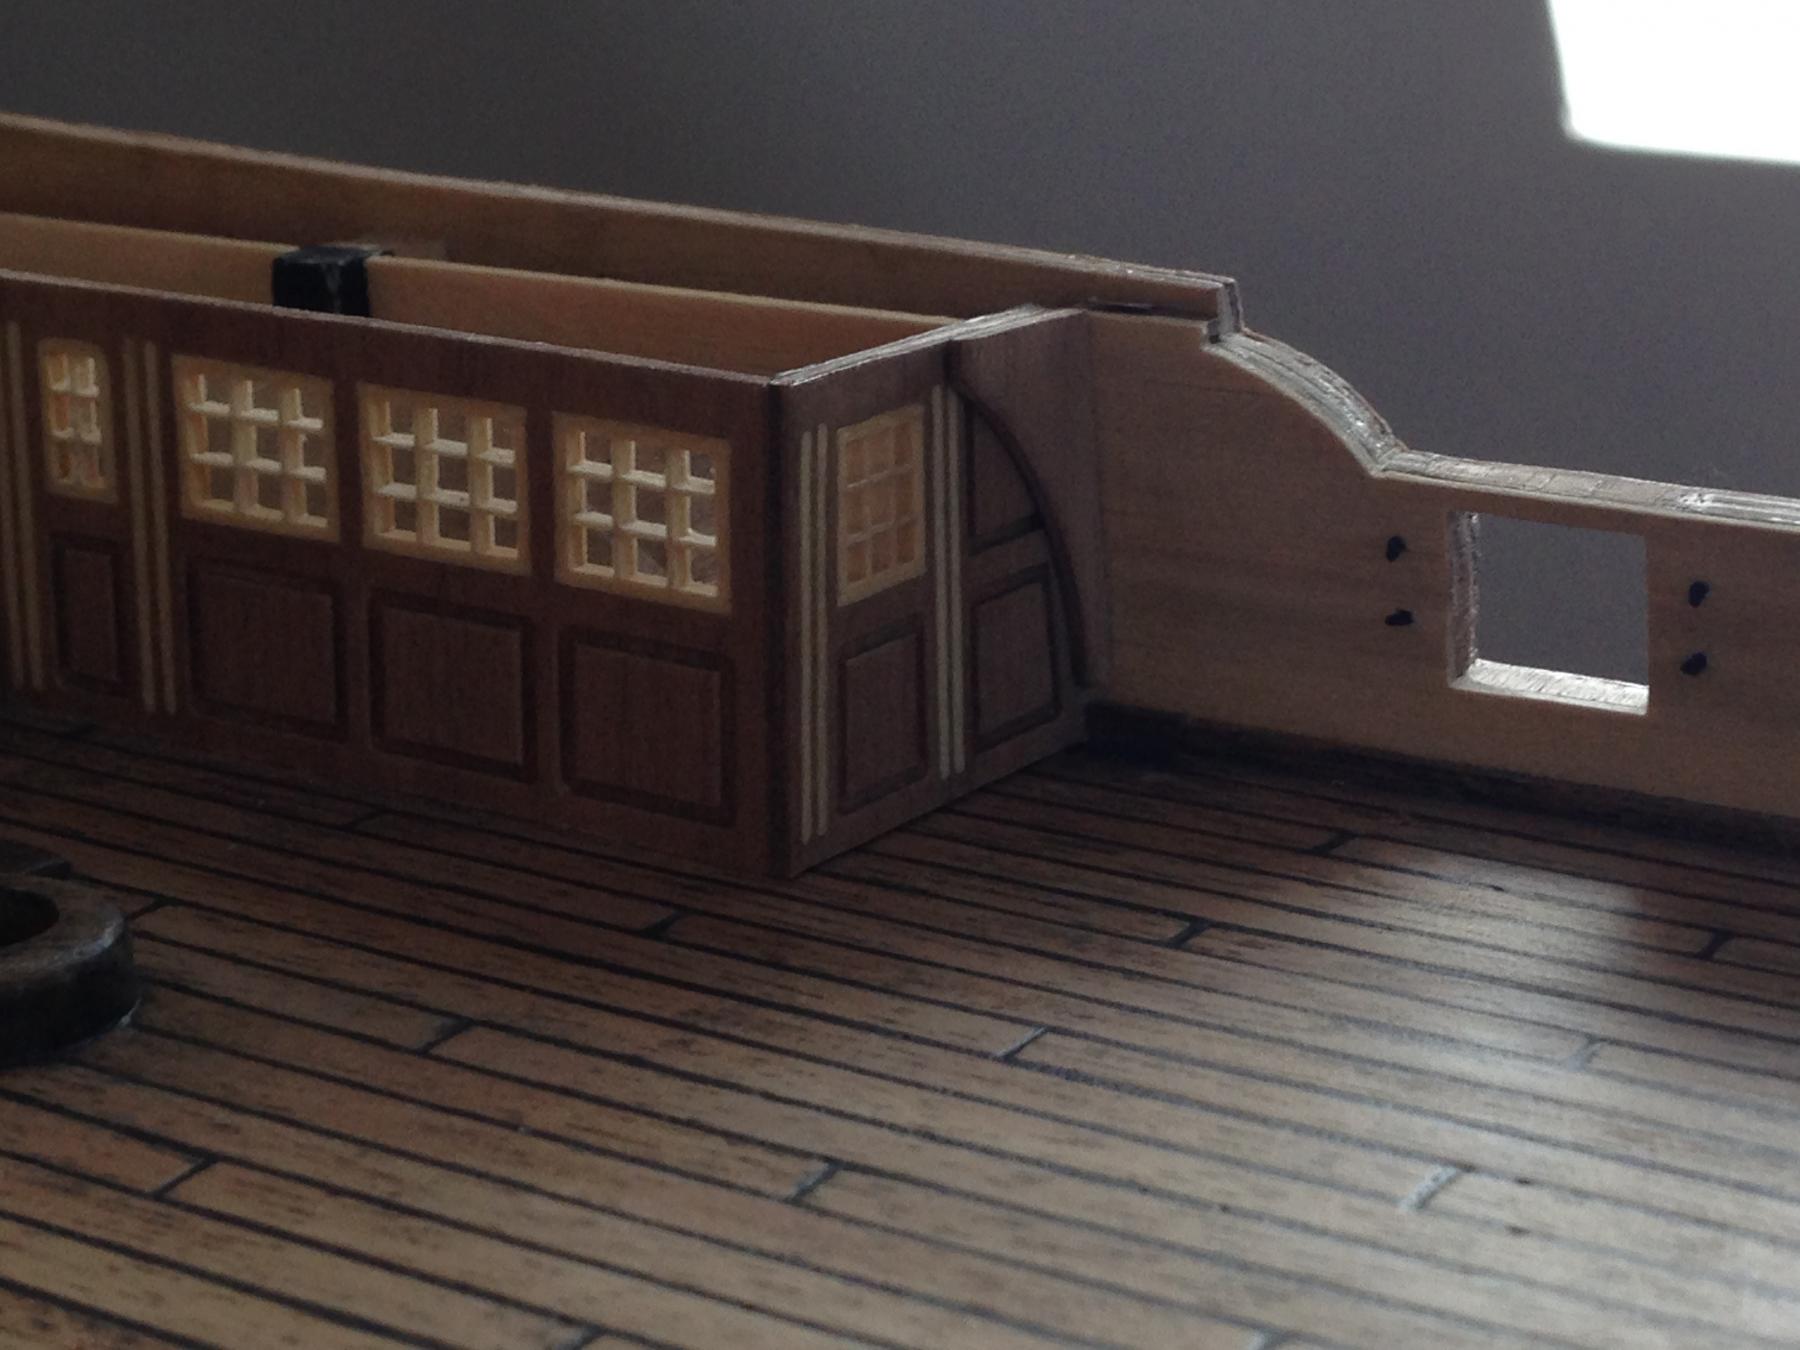
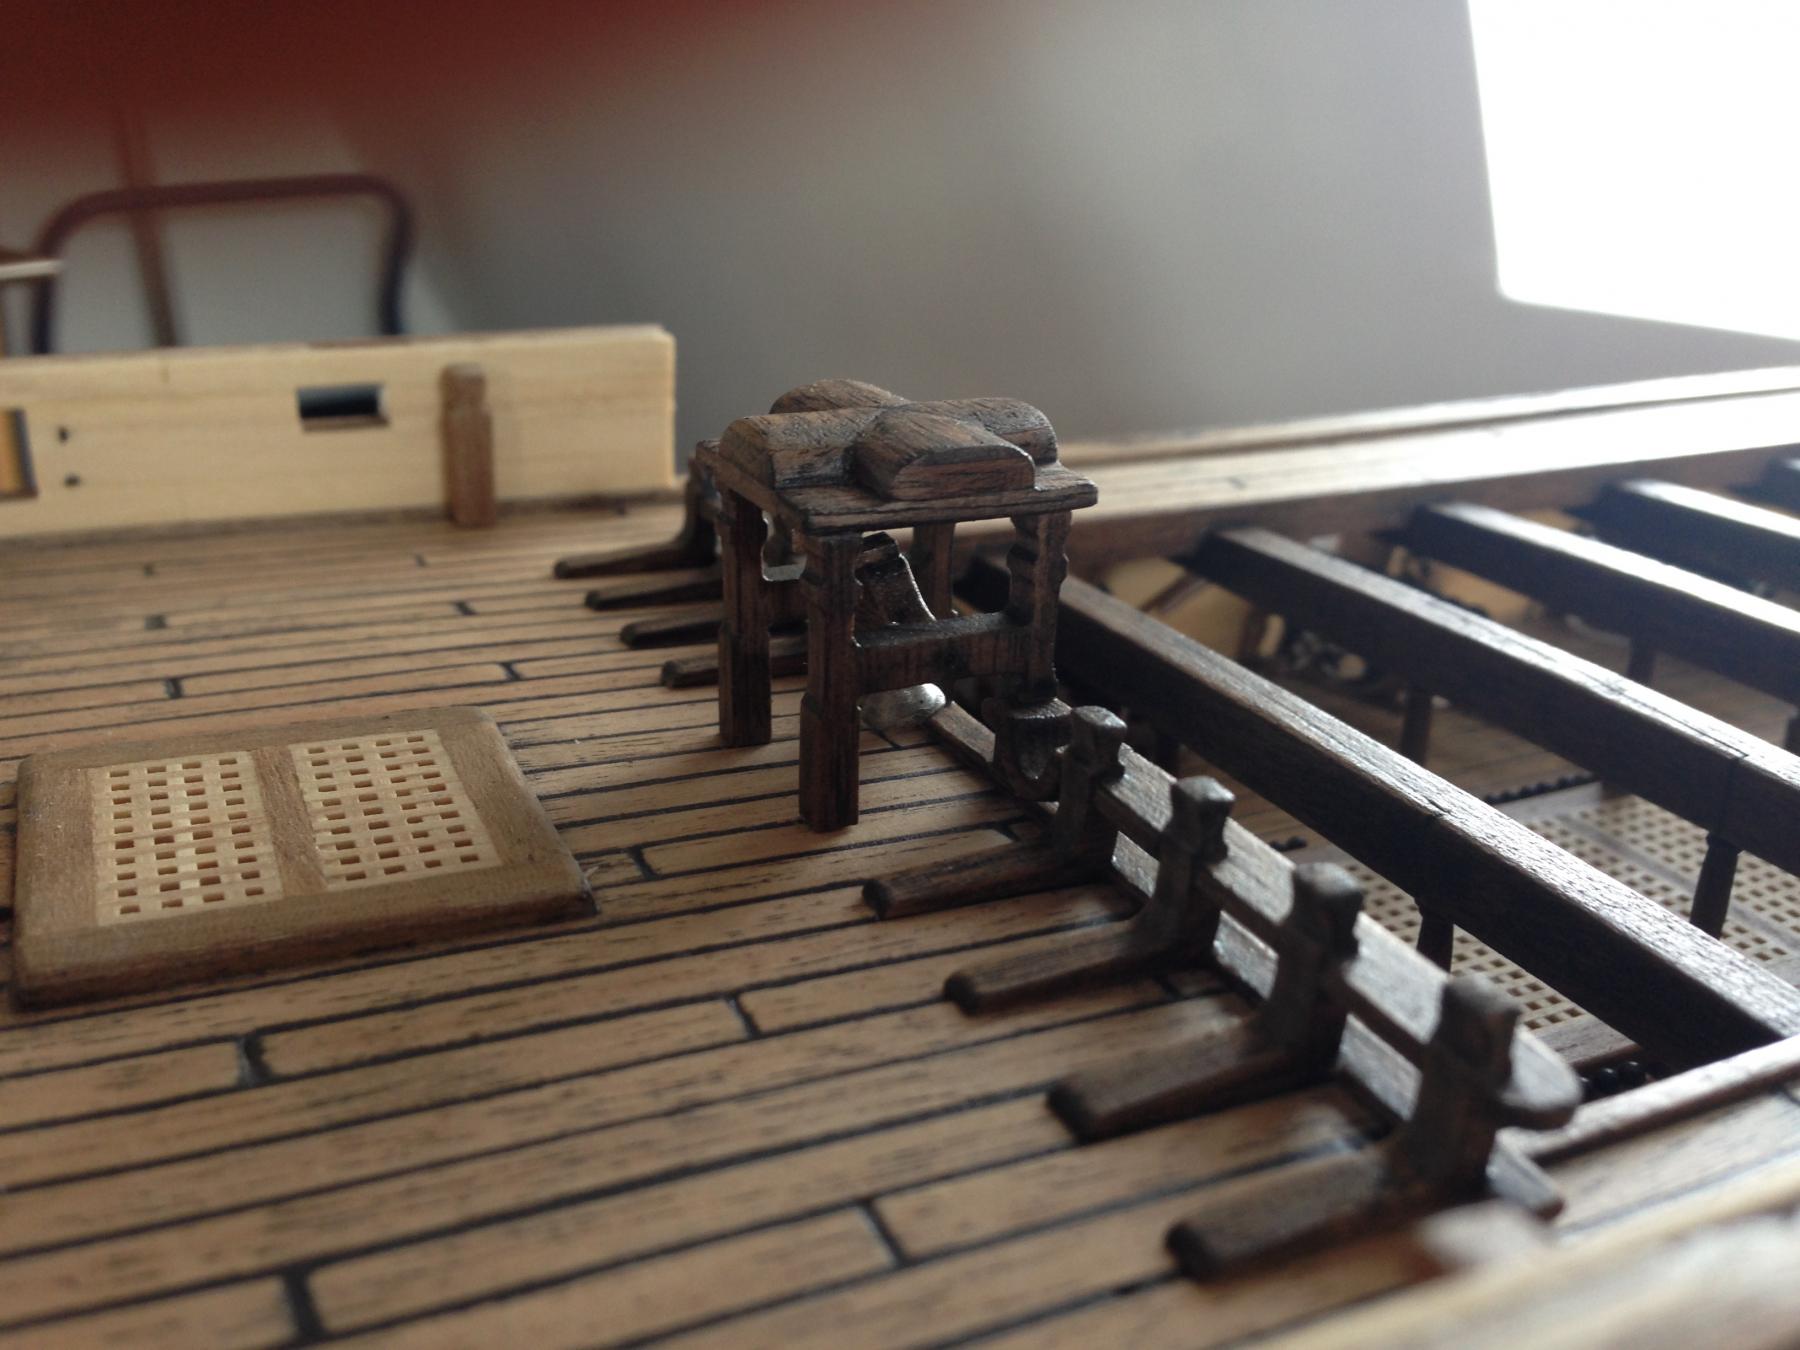
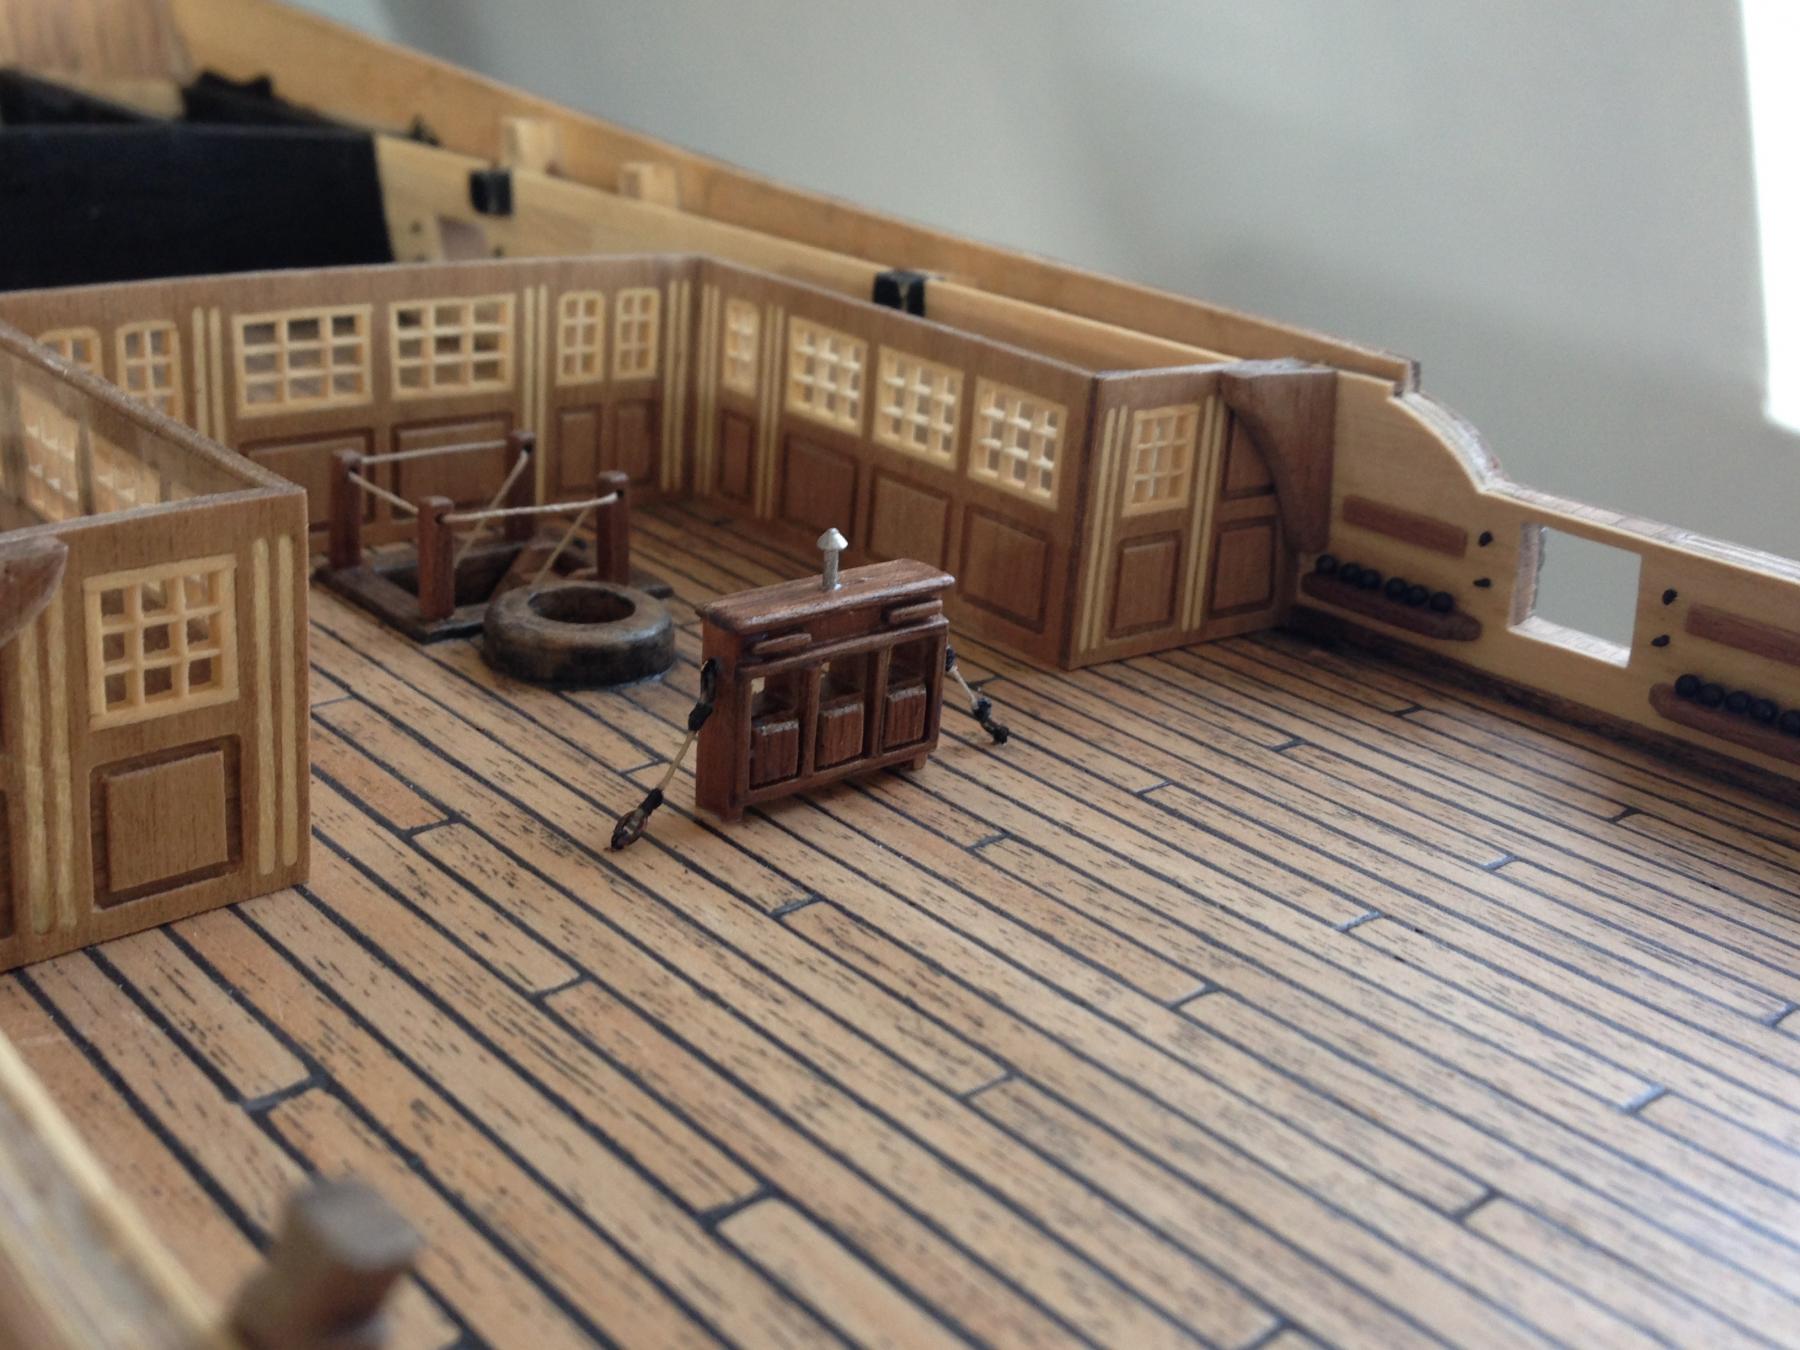
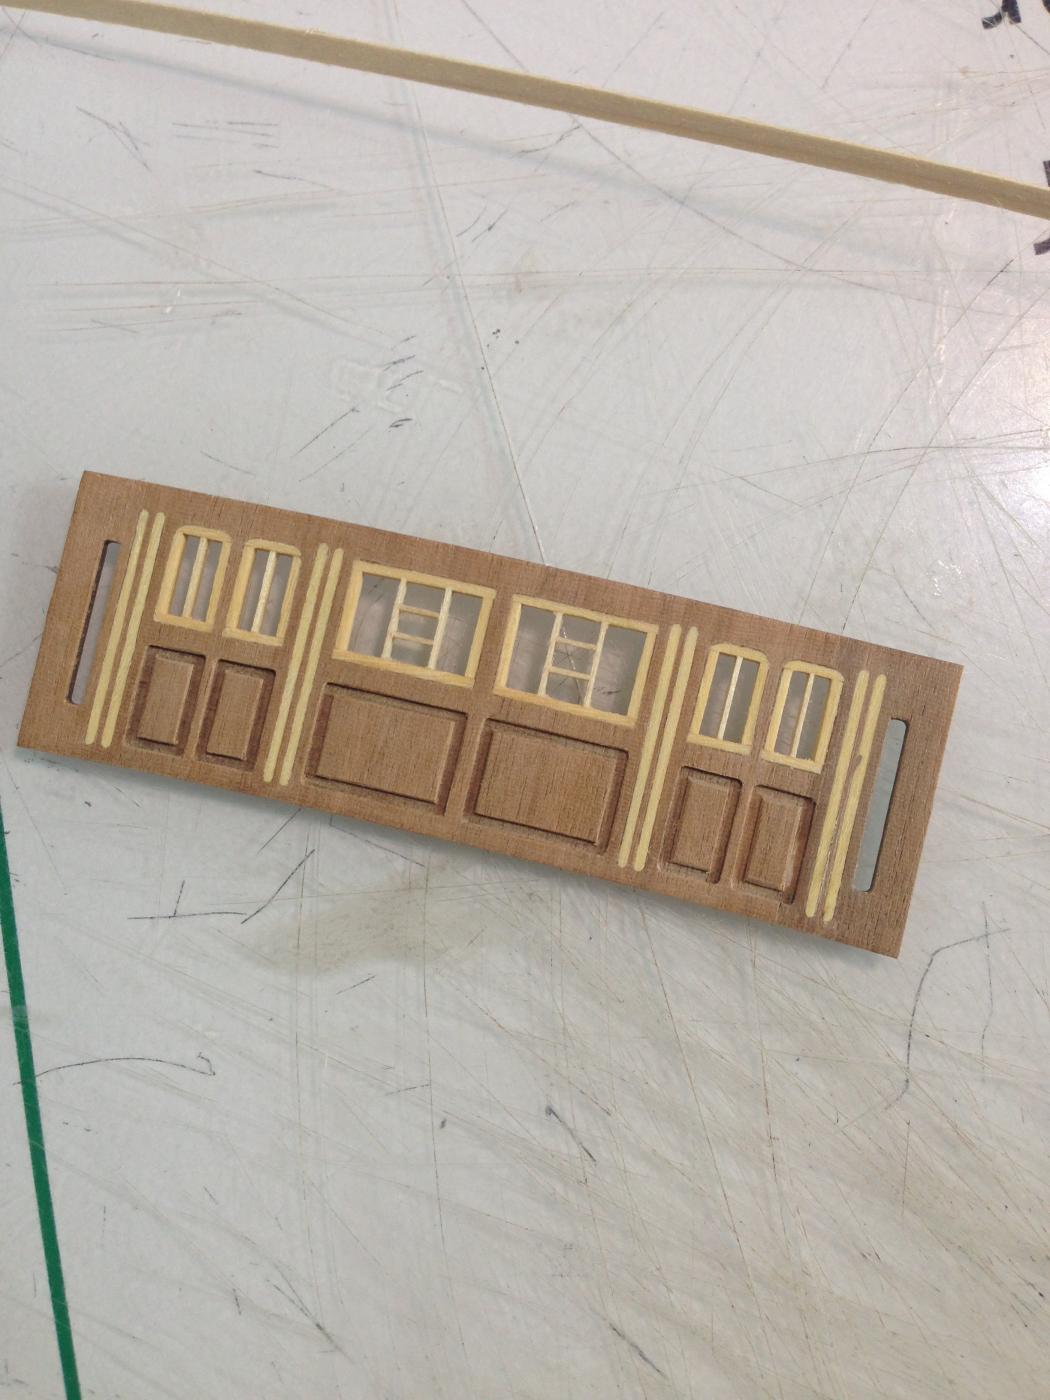
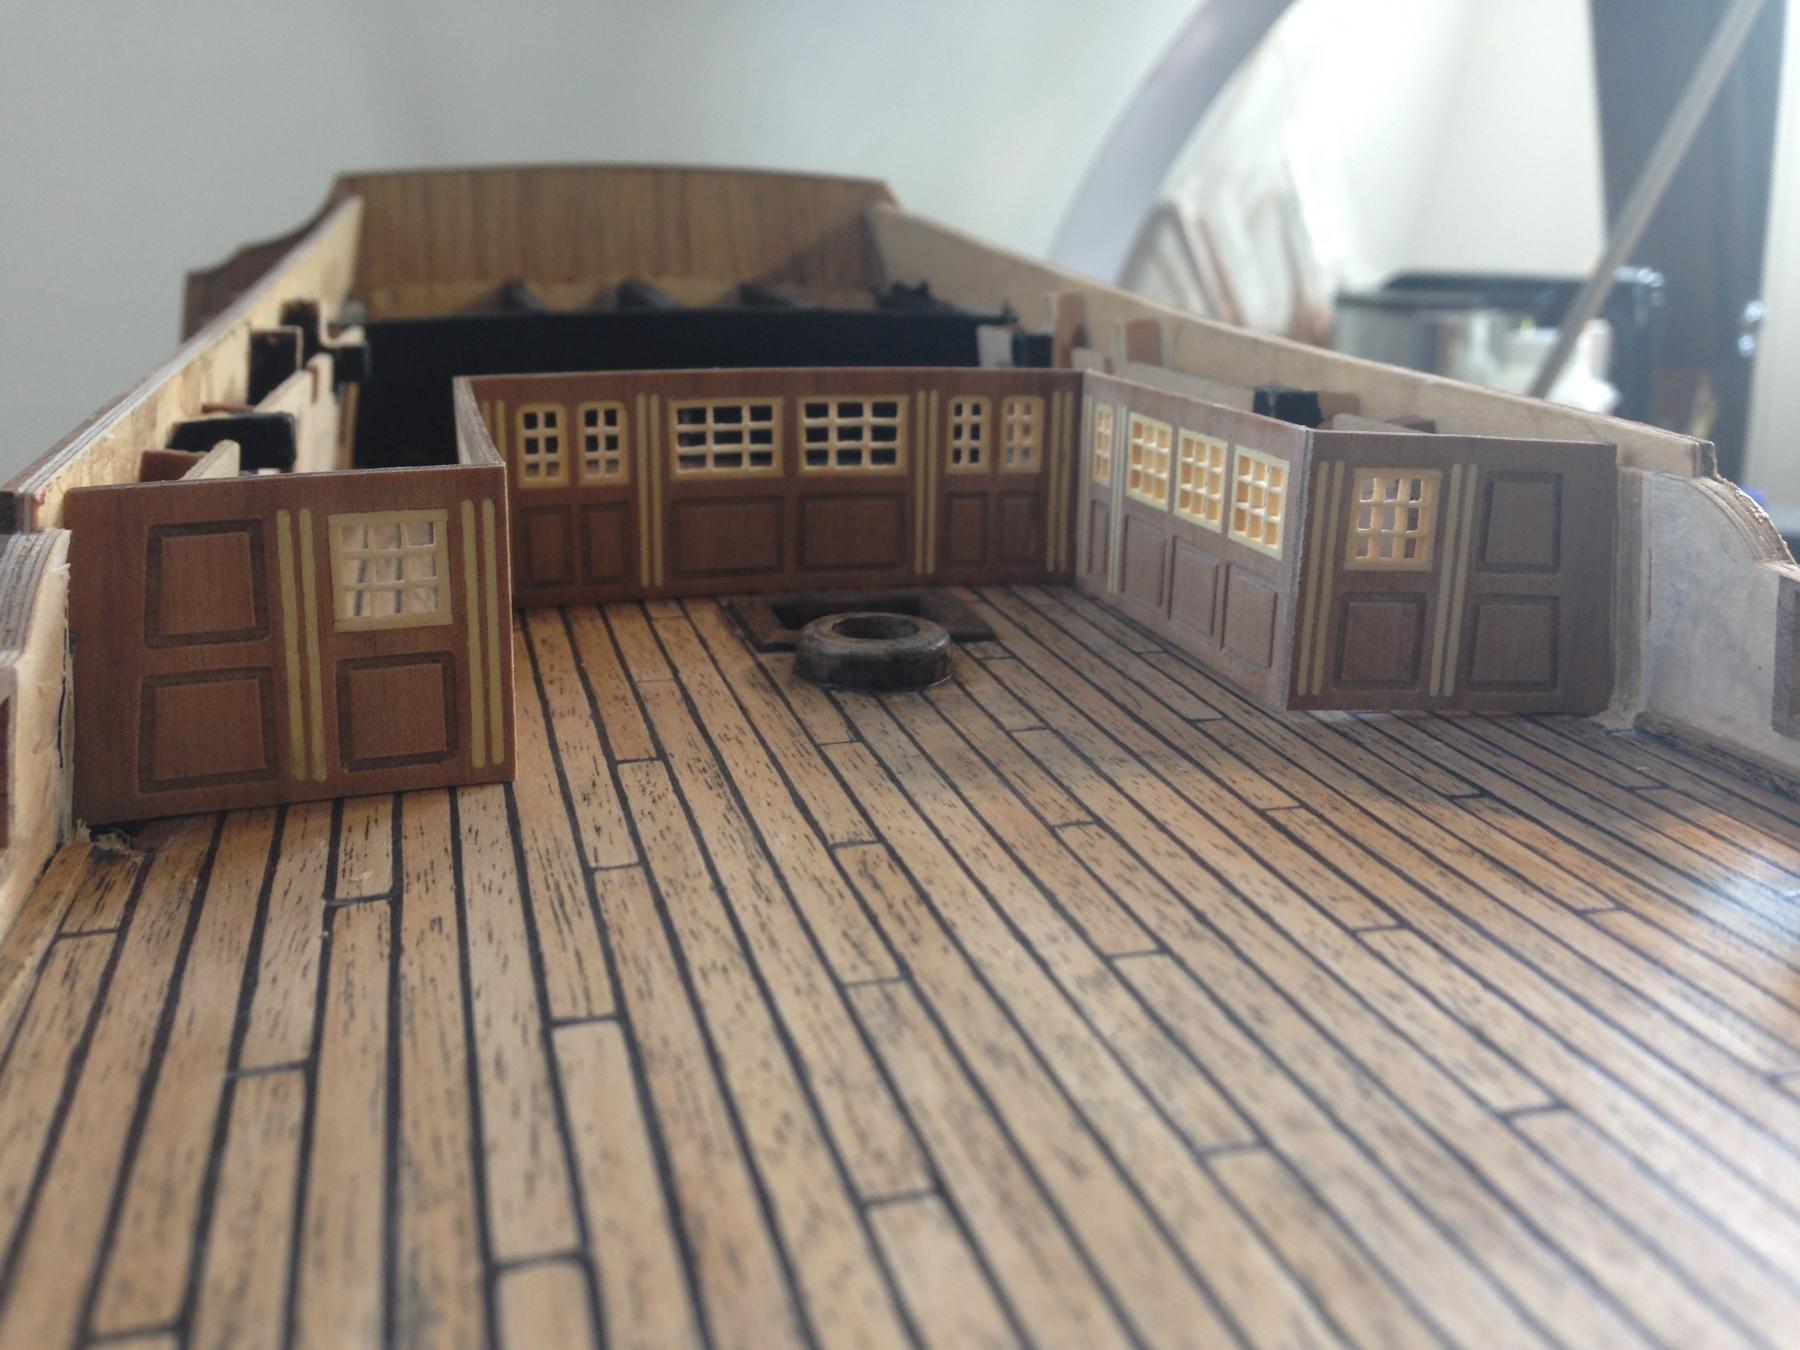
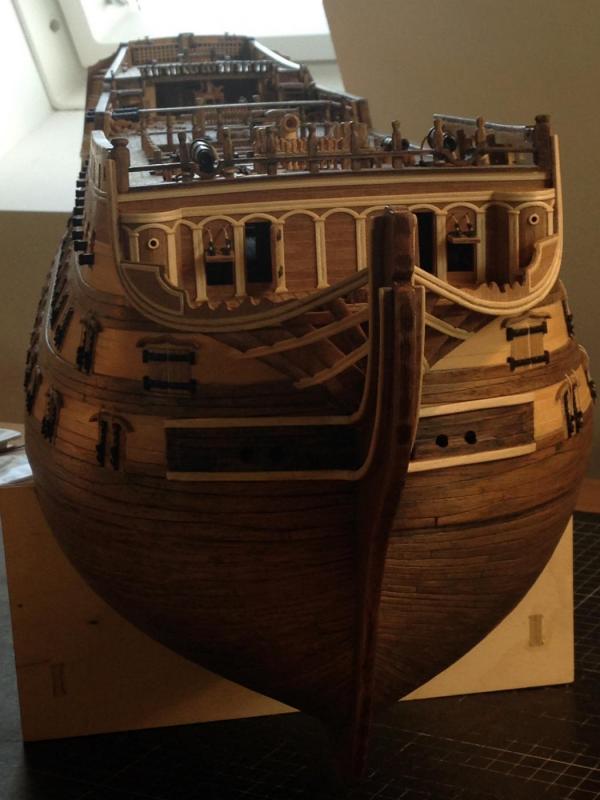
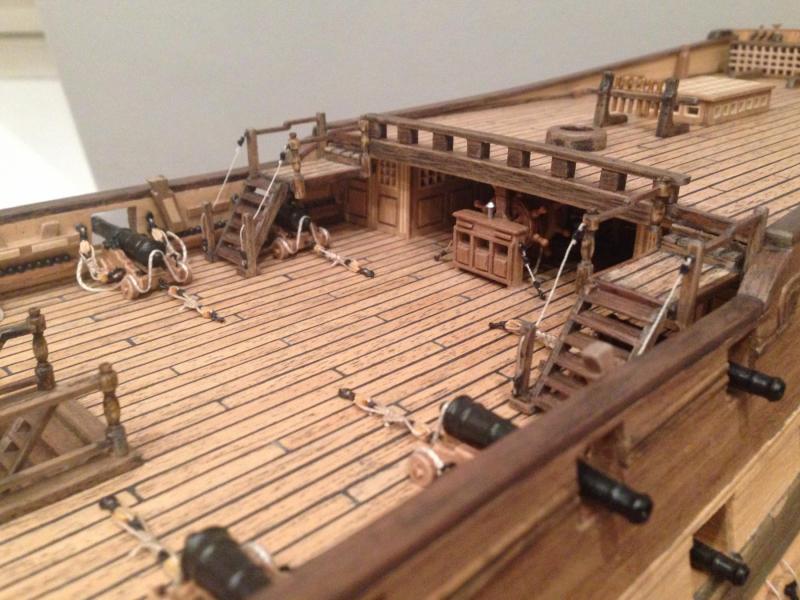
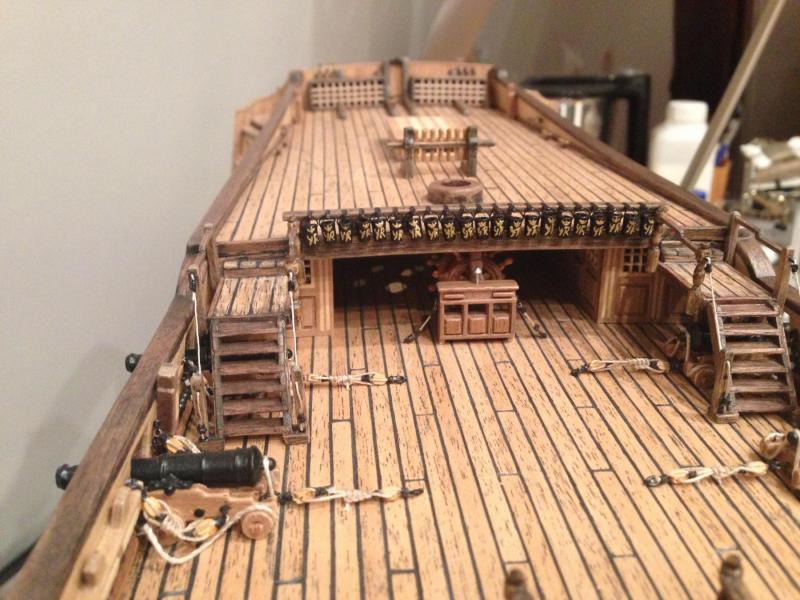
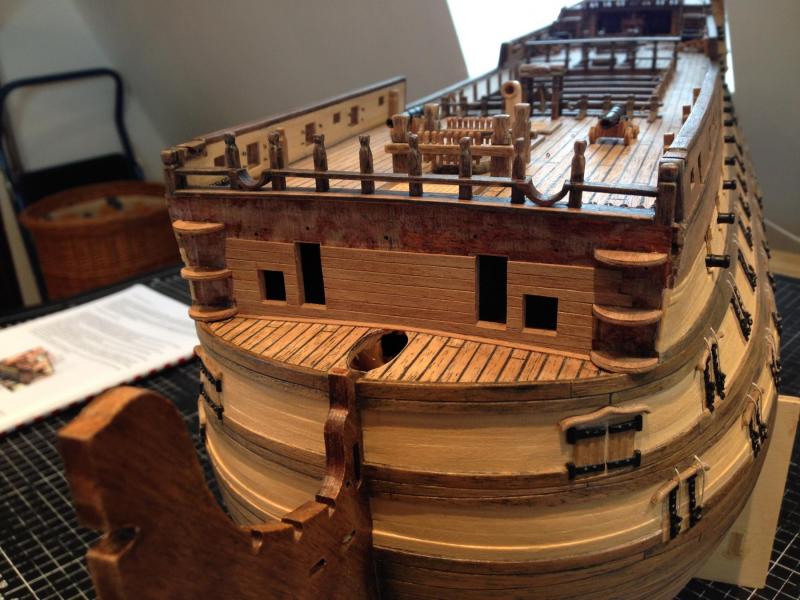
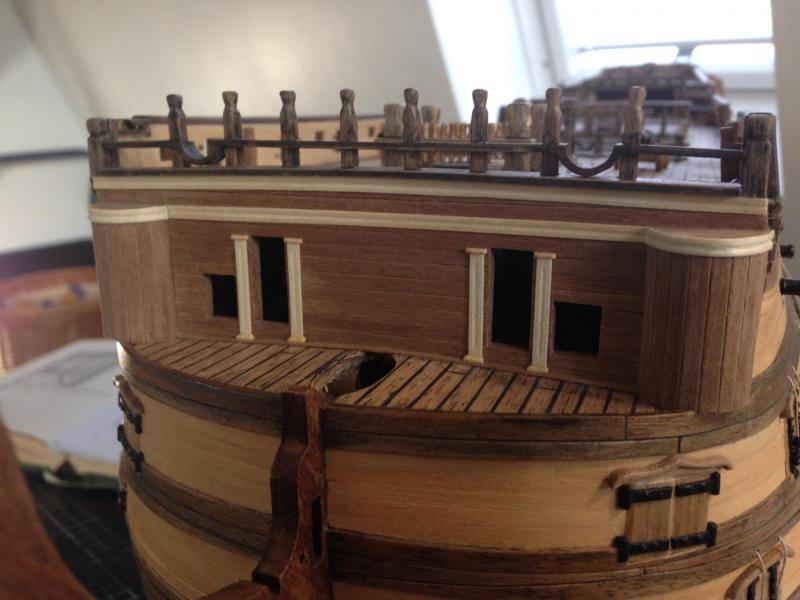
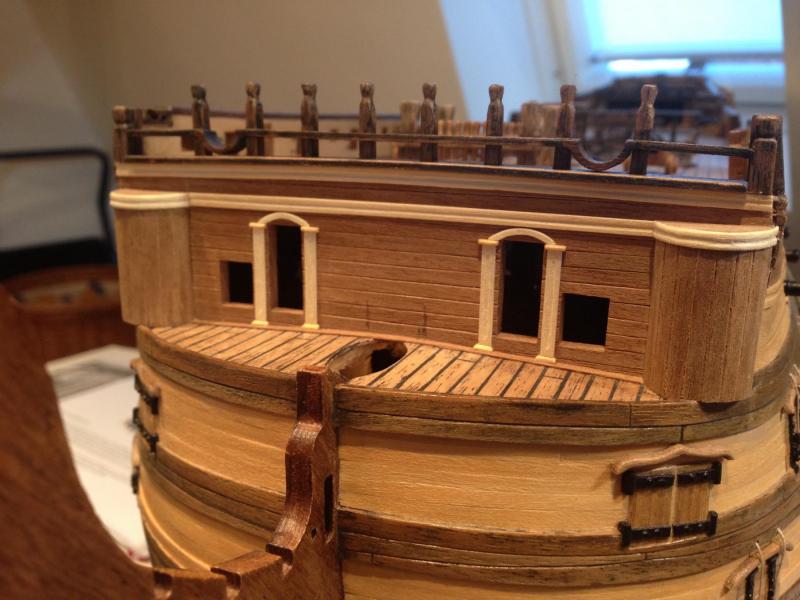
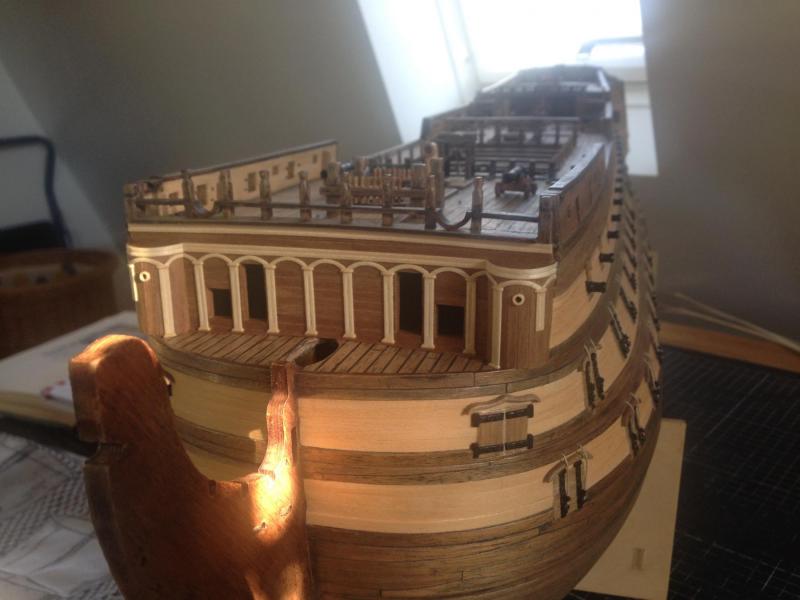
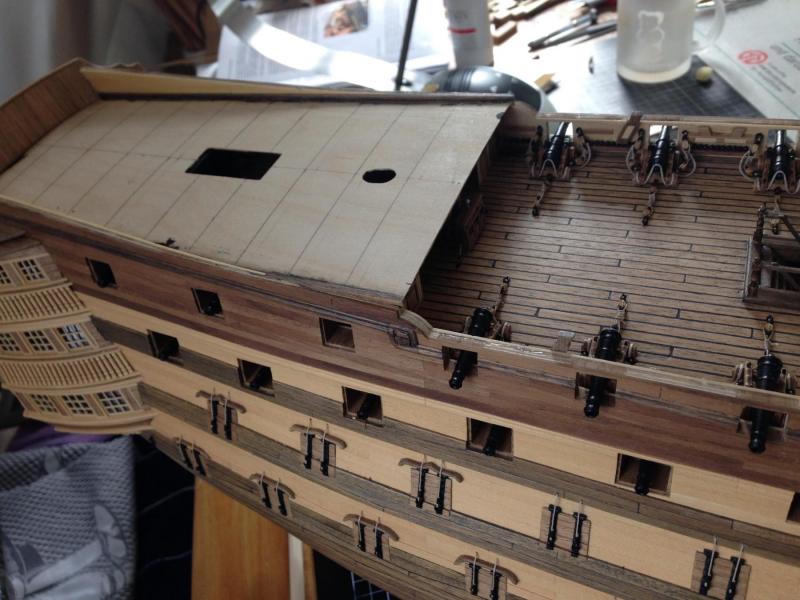
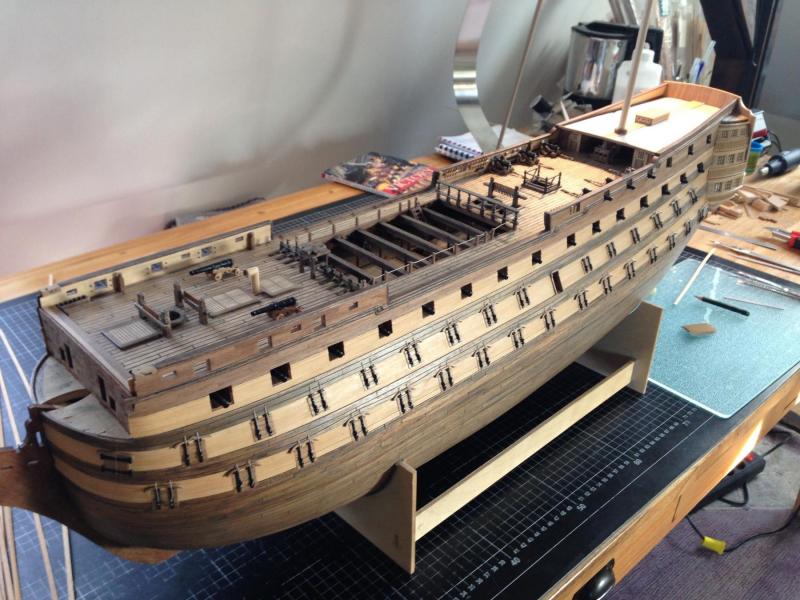
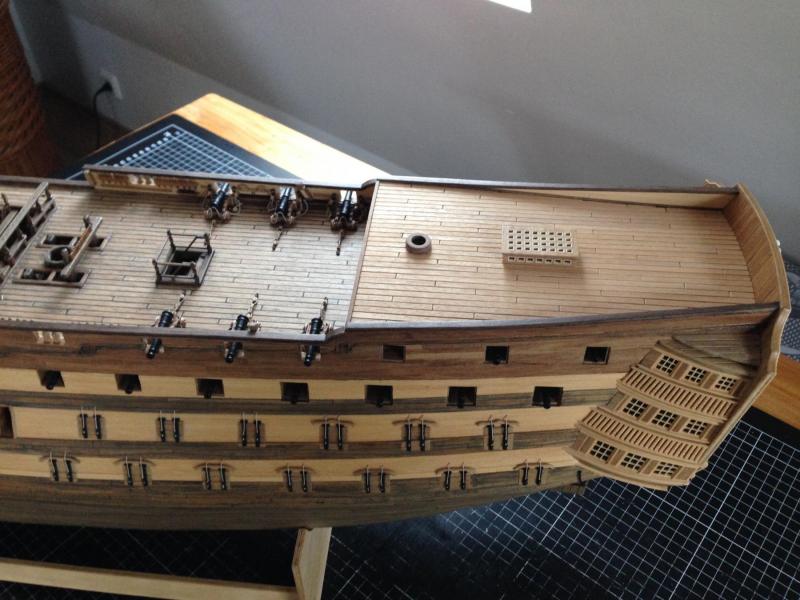
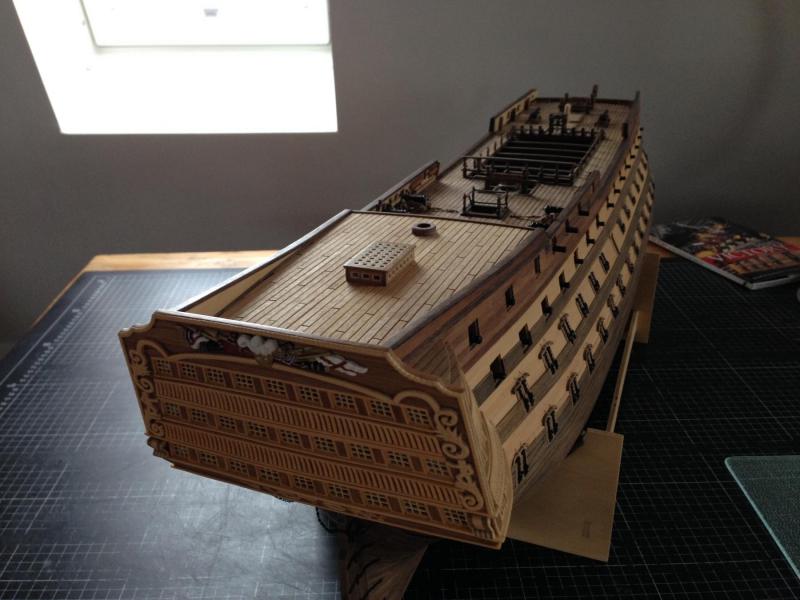
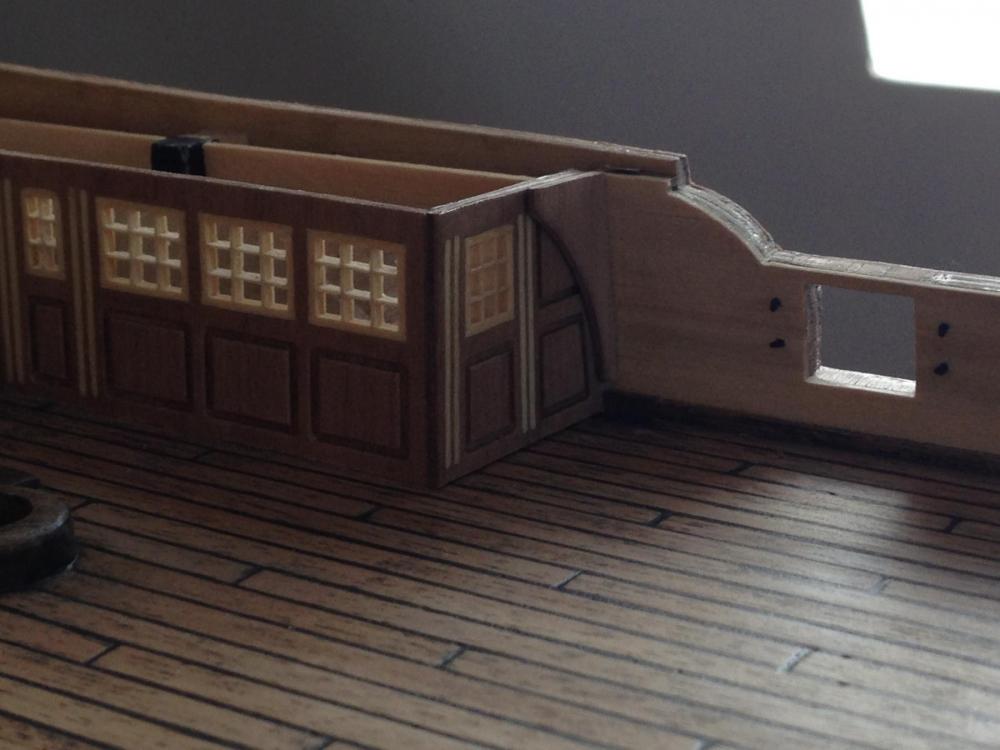
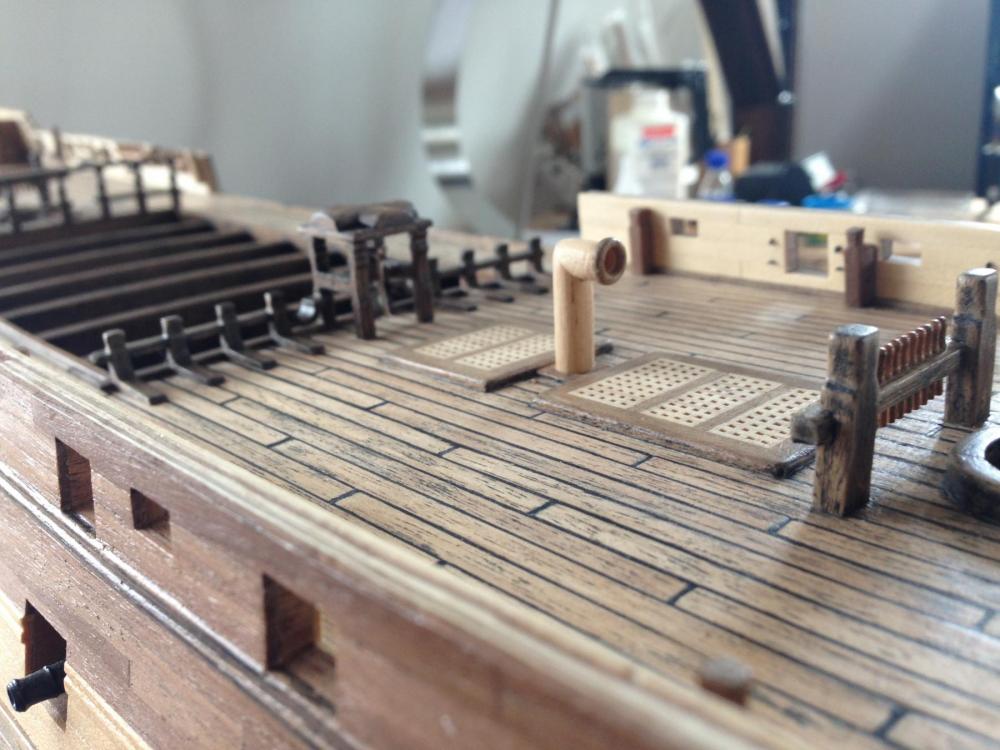
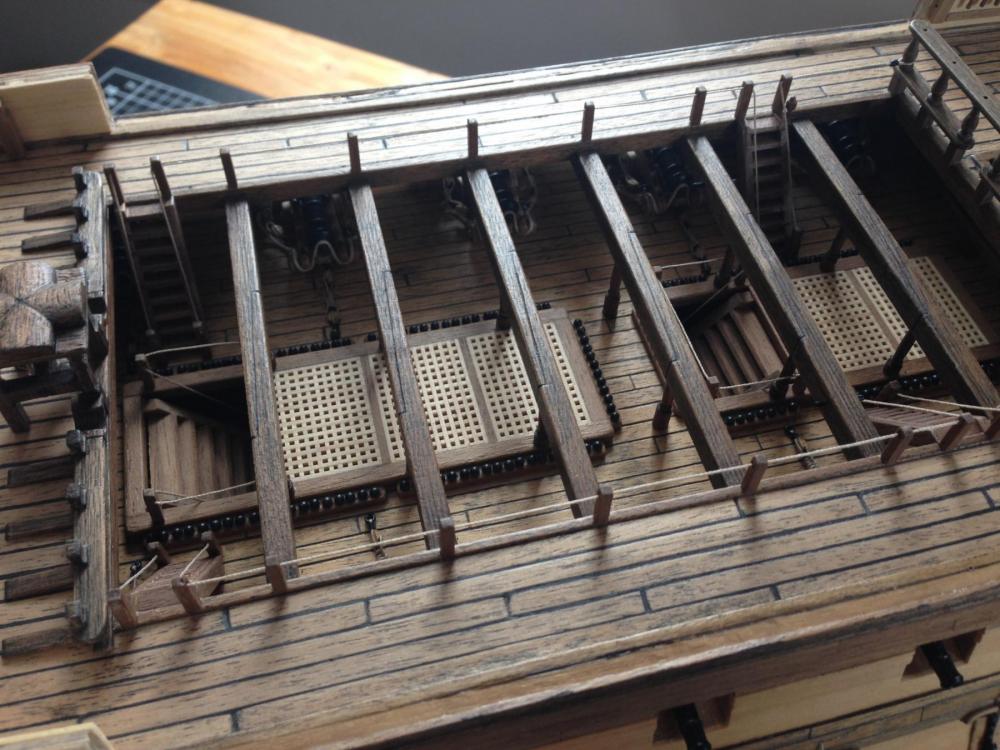
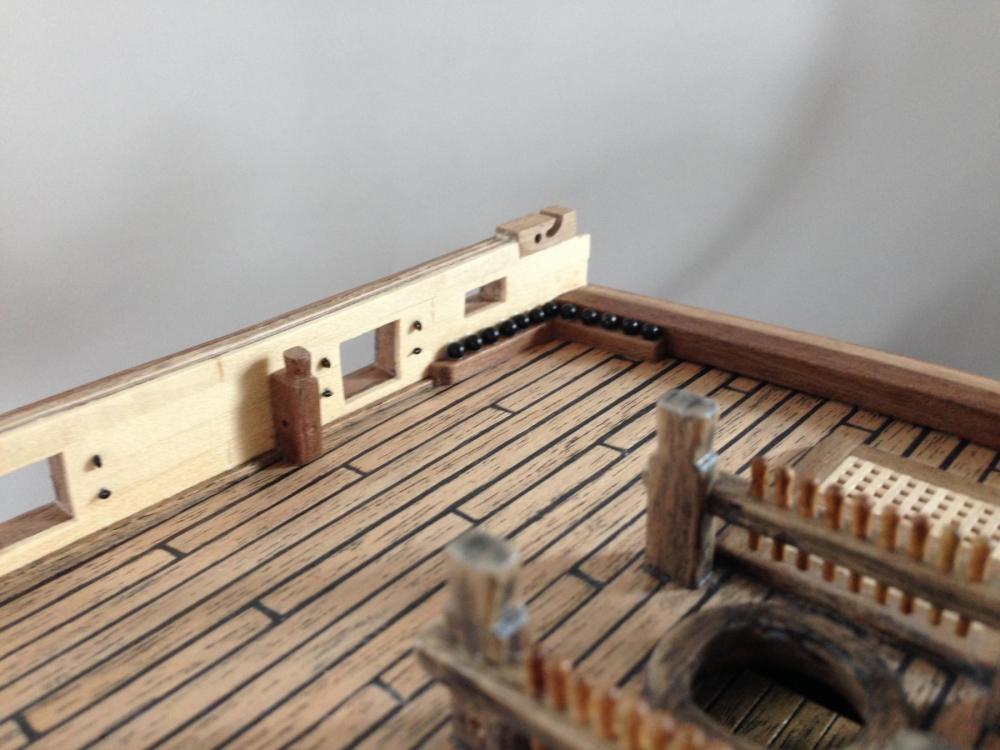
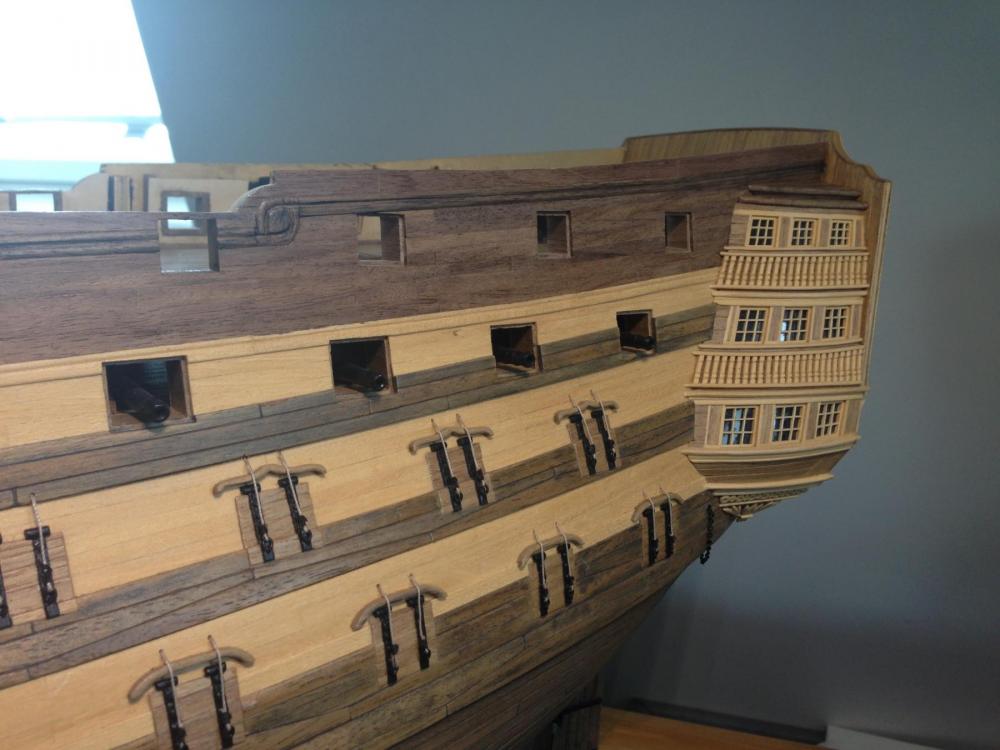
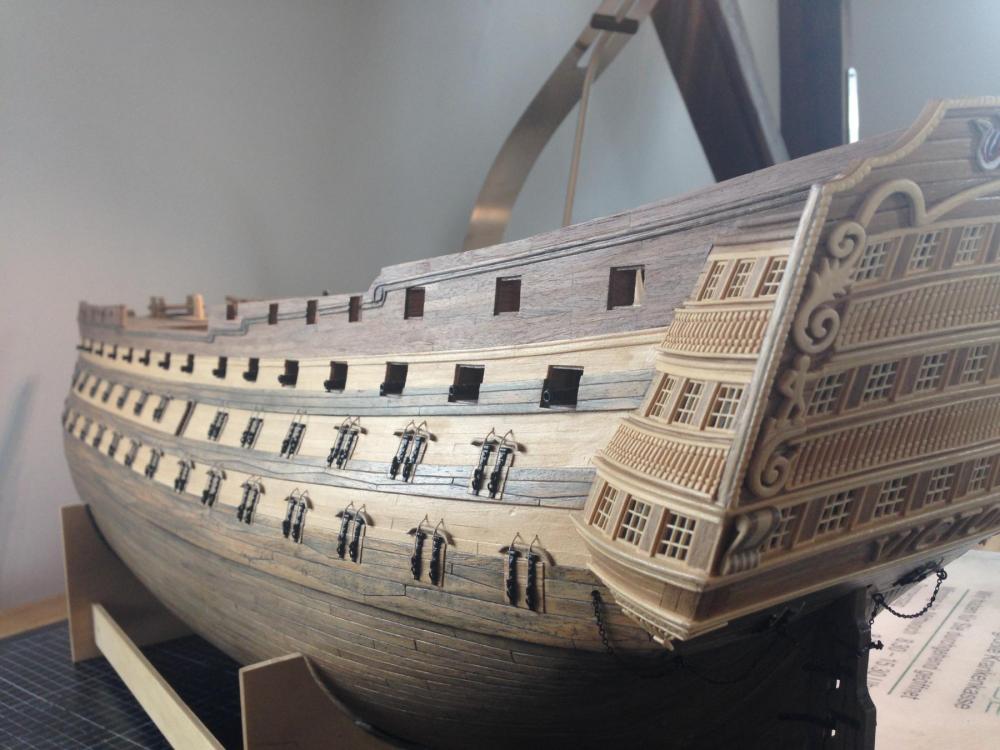
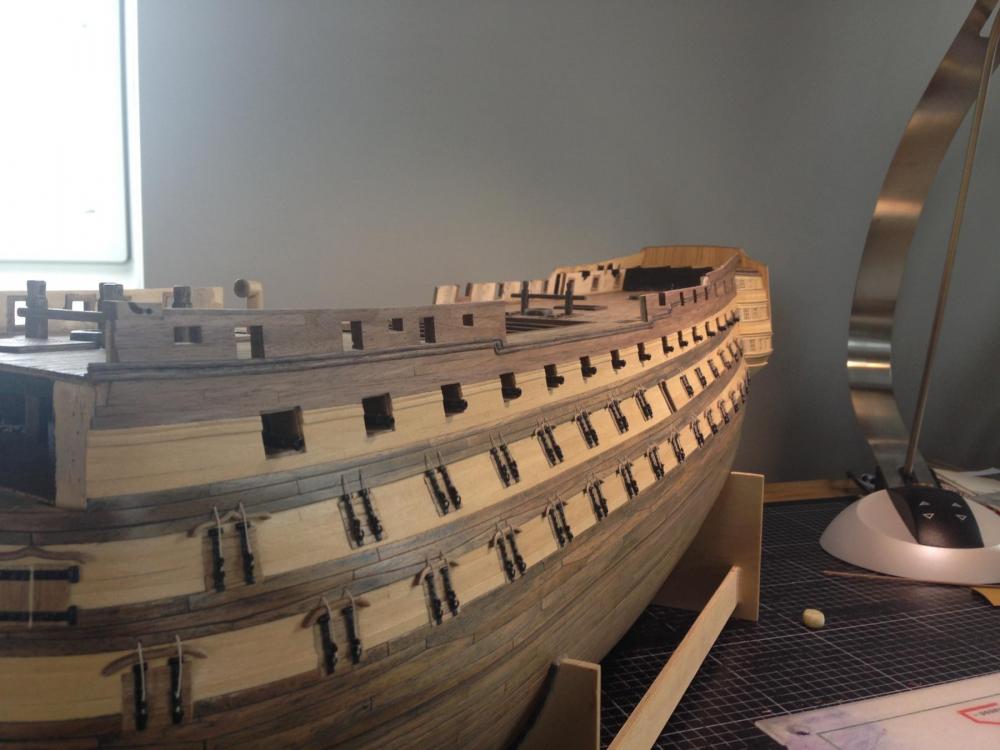
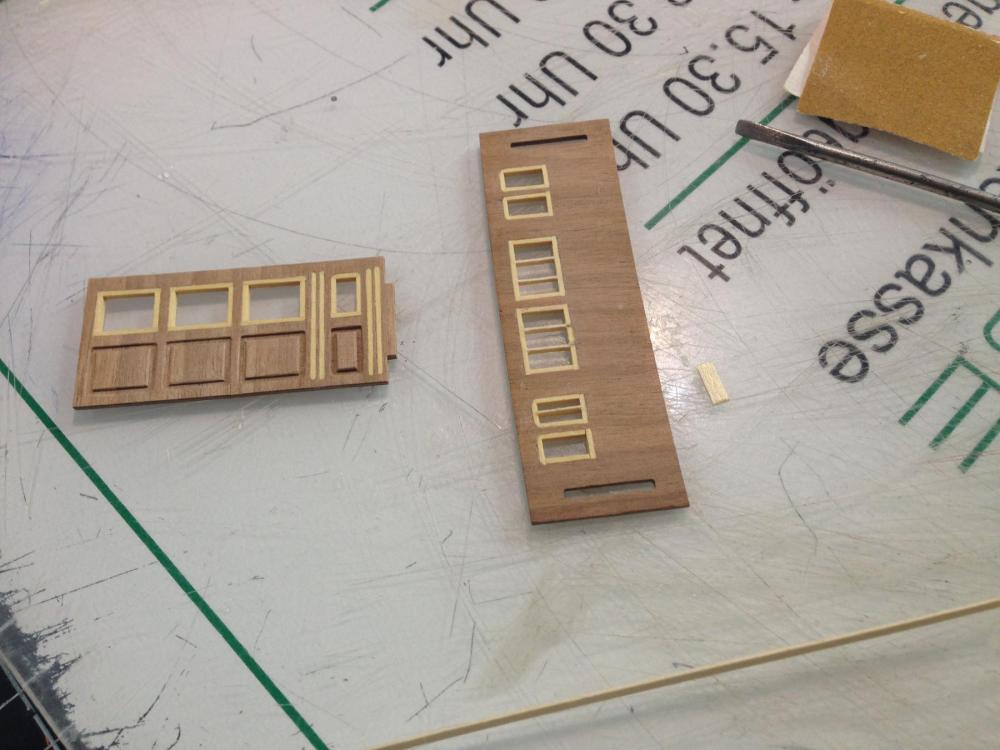
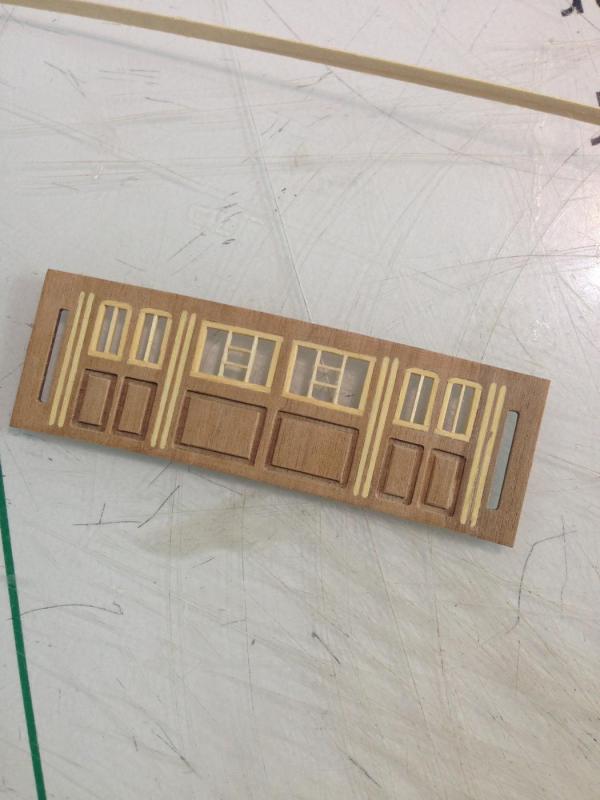
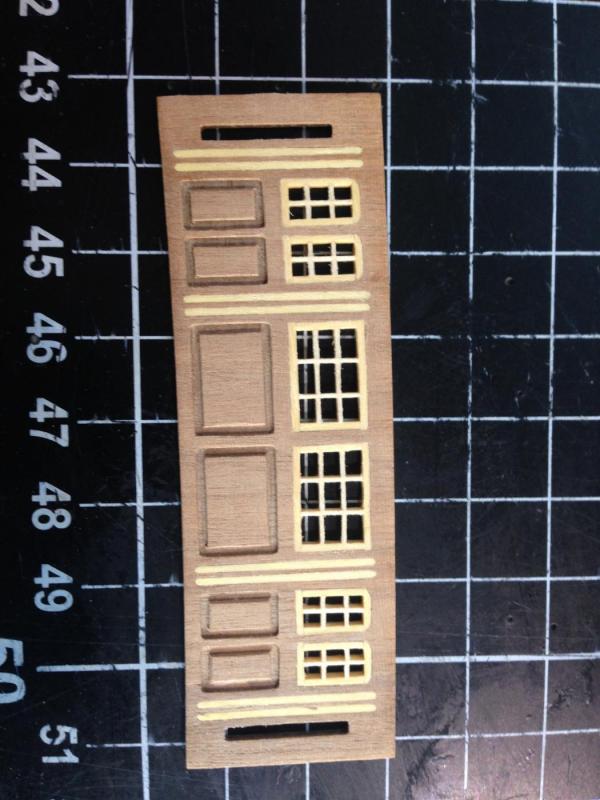
Hello friends, I want to show you a new update and what I have done in the last few weeks. As I told you, I decided to finish the planking of the hull. Again I have the situation, that I don´ t want to use the parts of the kit. There are several moldings to put on the planks that have to be made of wood. I study the Victory of Alexandru very carefully, because he does it in such an outstanding way. I try to copy his work. But - surprise - it´s not as easy as it looks :-) I had so many problems with it, I could not tell you. I decided to do it in my way, concerning to my skills. But even than I get some problems. First I had to find out, that my molding was invisible, because I used the same walnut-wood I used for the planking. The strips were a little bit thicker (1,5 mm instead of 1,00mm) but that was´t enough to have a visible contrast. The solution was to prepare them with my black wood filler and make them darker. Wood filler become a panacea for all my problems.... The next problem was the second and smaller molding. I simply don´t know how to do it and where to fix it. I have to admit that I was not able to build everything in the way that it fits perfectly and everything is exactly in the right position as it is written in the plans or on better models. So again I have to say: my model is inspired by the original, but it´s not a perfect copy. After finishing that part I returned to the upper deck and the walls (you can see in my pictures what I mean). Comparable to the stern I don´t wanted to use the sheet windows from the kit. I made new ones with my yellow wood. Also I had the idea to fill the vertical slits with that wood, to have a contrast and a little "eye-catcher". What do you think about it? Of course these parts are not fixed on the deck. I only placed them for the photo. Best wishes -Heinz-

-
Hello Boyd, I am happy to hear that you are back. Can´t wait to see the next steps on your model ! Best wishes -Heinz-
-
Hello Alexandru, I am excited about your model. I think your victory is the benchmark for all of us! With your outstanding work you have shown us, what is possible to do with wood. I want to say thank you for sharing your amazing skills with us. It was a pleasure to watch your Victory grow. I wish you all the best for you and your further projects!!! -Heinz-
-
Hello Ian! Finally an update with pictures from you :-) I'm still not sure what I should write to you. On the one hand, I find your idea very interesting. And I like the wood very much. On the other hand, the contrast with the other timber is very large. It draws attention to this point. But the real eye-catcher was supposed to be the stern with the windows and the decorations. I am afraid it could be too much at the end... I am very curious to see how it goes on and what the final result will look like. Once again an unusual and very clean work! I will follow it very carefully! My best wishes and greetings to you! -Heinz-
- 191 replies
-
- 1
-
-
- victory
- caldercraft
- (and 1 more)
-
Thanks a lot, Ian ! I have 1 week to work; than I have 3 weeks of holiday. I am sure, my Victory will grow in this time . I will show you the result ! -Heinz-
- 191 replies
-
- 2
-
-
- victory
- caldercraft
- (and 1 more)
-
Hi Trev, welcome here on MSW! We all help each other and share our experiences. Simply do your best and don´t lose your patience. And only a few years later, you have a wonderful model :-) @Ian: I am glad to see you are back. Could not wait to see your progress!!! Best wishes -Heinz-
- 191 replies
-
- 3
-
-
- victory
- caldercraft
- (and 1 more)
-
congratulation, Gary! she looks so good. It´ s a pleasure to watch your model and your clean work. Best wishes to you! - Heinz -
- 85 replies
-
- 1
-
-
- finished
- caldercraft
- (and 1 more)