HOLIDAY DONATION DRIVE - SUPPORT MSW - DO YOUR PART TO KEEP THIS GREAT FORUM GOING! (Only 51 donations so far out of 49,000 members - C'mon guys!)
×

Heinz6672
-
Posts
205 -
Joined
-
Last visited
Content Type
Profiles
Forums
Gallery
Events
Everything posted by Heinz6672
-
 Hello Ian, really good work! I have always believed in you :-))) -Heinz-
- 191 replies
-
- 2
-

-
- victory
- caldercraft
- (and 1 more)
-
Just a very small update with 2 missing pictures of the pump and the clamps. The pump is made of oak and walnut without this ugly sheet handle; the clamps are made of walnut wood. I don´t use the pieces of the kit. I hope you like it! Best -Heinz-

-
Thank you for this, Ian! I am really curious to see how you manage the difficult parts of the hull. But when I see what you have done so far, I am quite sure you will do it in the very best way! Greetings and wishes! -Heinz-
- 191 replies
-
- 2
-
-
- victory
- caldercraft
- (and 1 more)
-
Hi Alexandru, when I see your model , I know that I am a bungler . Wonderful work . I admire you and your work !!! Thank you for sharing your work and time with us. You give so much inspirations! Best wishes for you and your Victory! -Heinz-
-
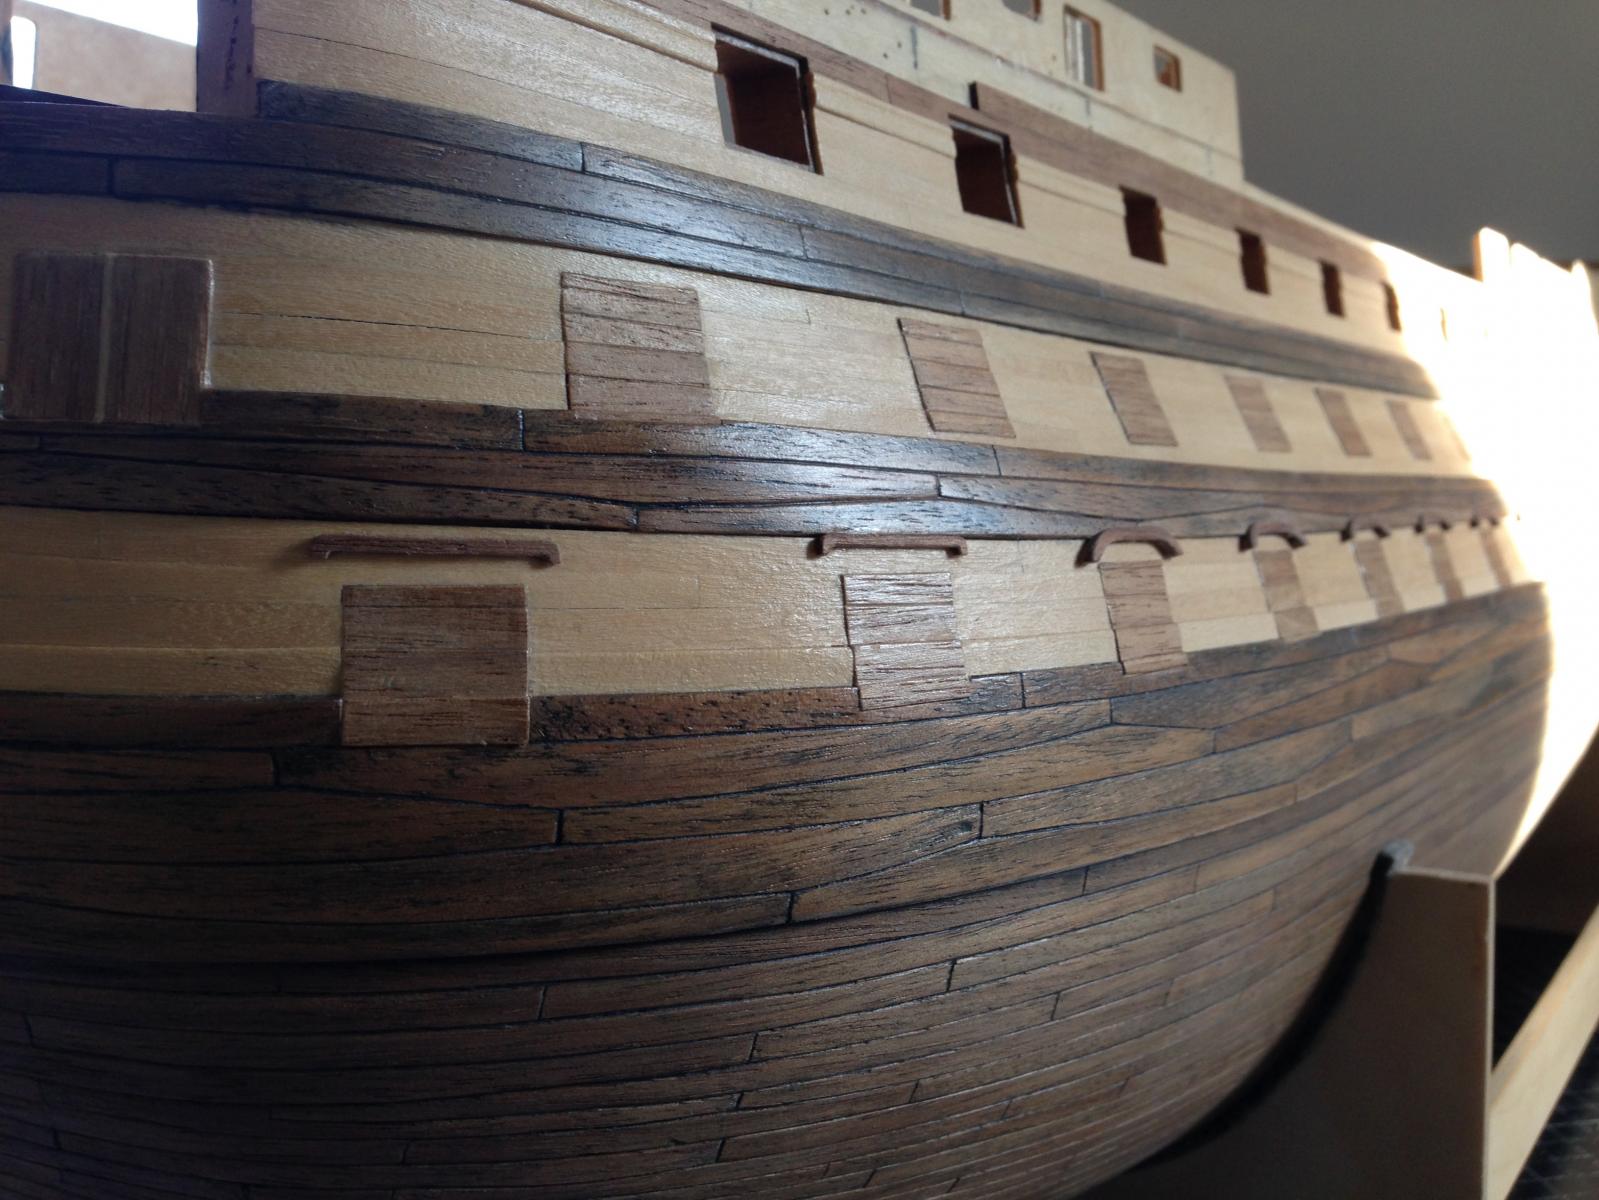
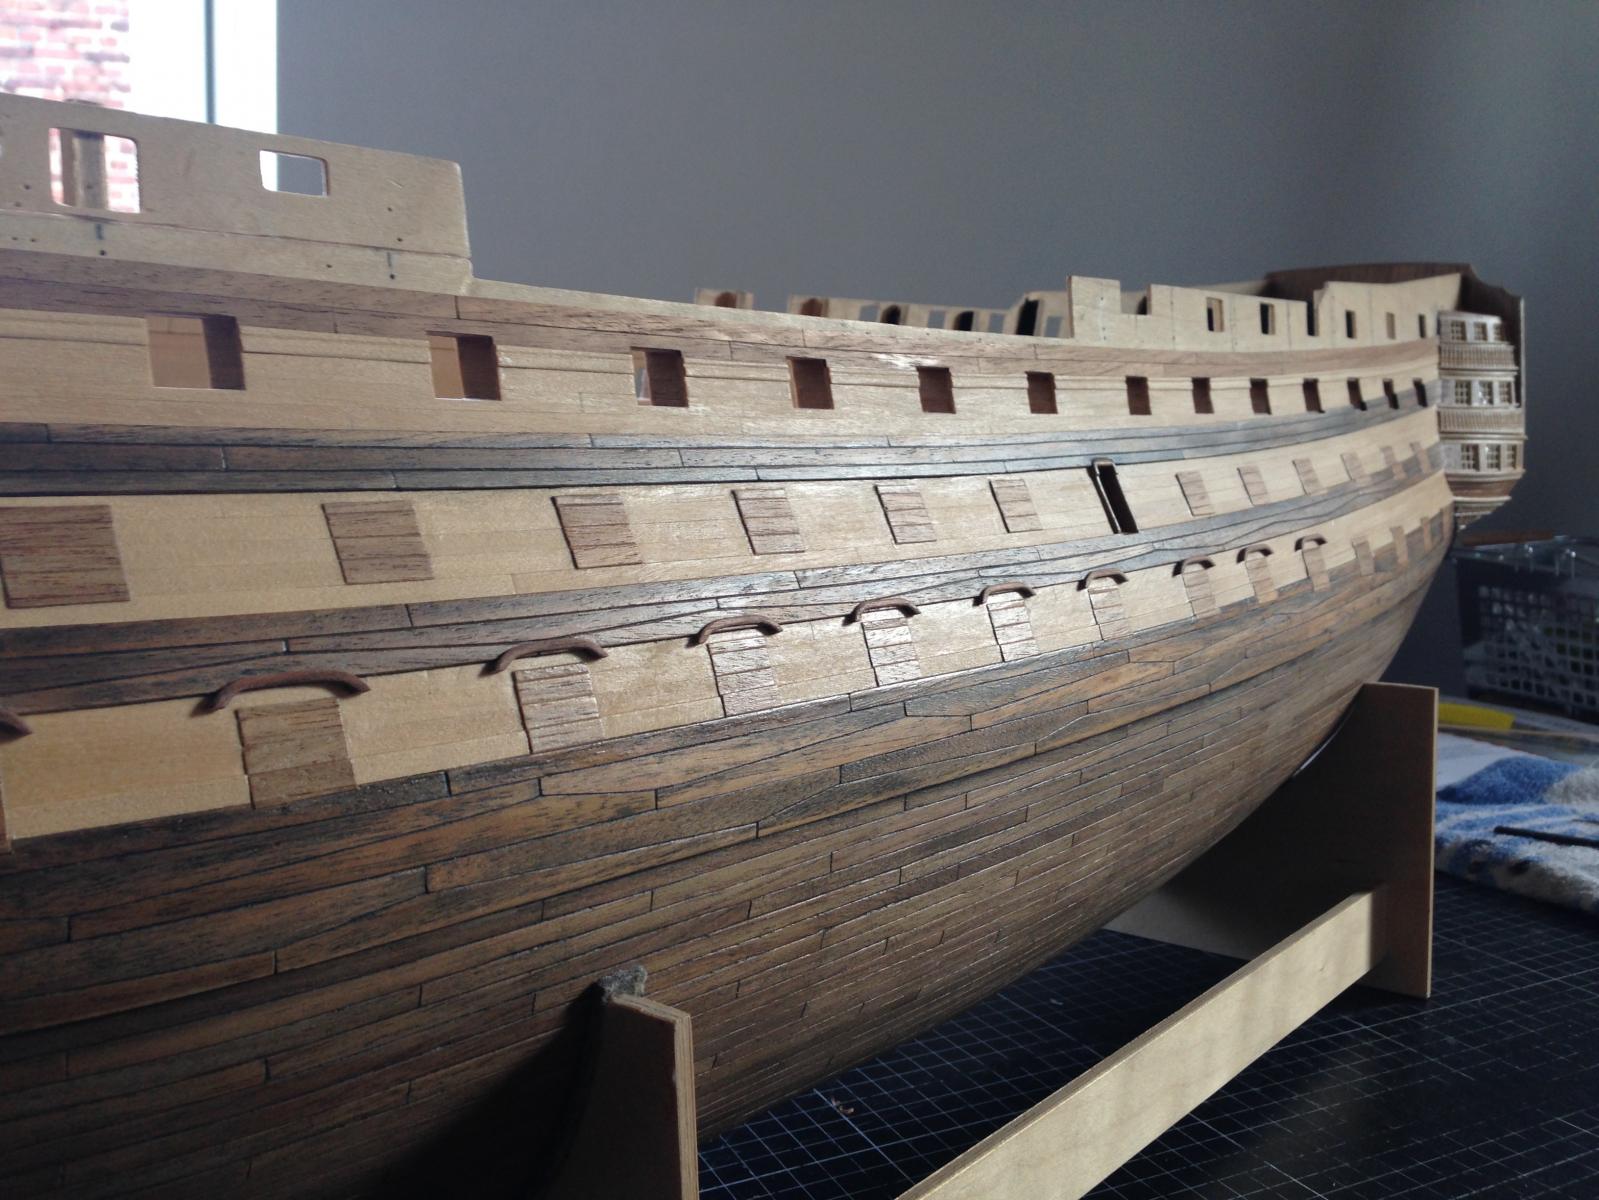
Hi Ian, thank you much for your kind words. You are right, the floor and ceiling board is not shown in the kit instruction. But I saw it on many pictures of the real Victory. And of course I saw it at the model of Gil Middleton. That is why I decided to make it like this. Did you notice that there is a walnut strip below the floor board? That should be the water way. It´s a 2x2 mm piece. I have made it before planking the deck, so there is only a very little part of it visible. I love this detail :-) Of course I will blackening the barrels. I have only down the first steps on the cannons. But I am very glad that you already like them at this point of making . -Heinz-
-
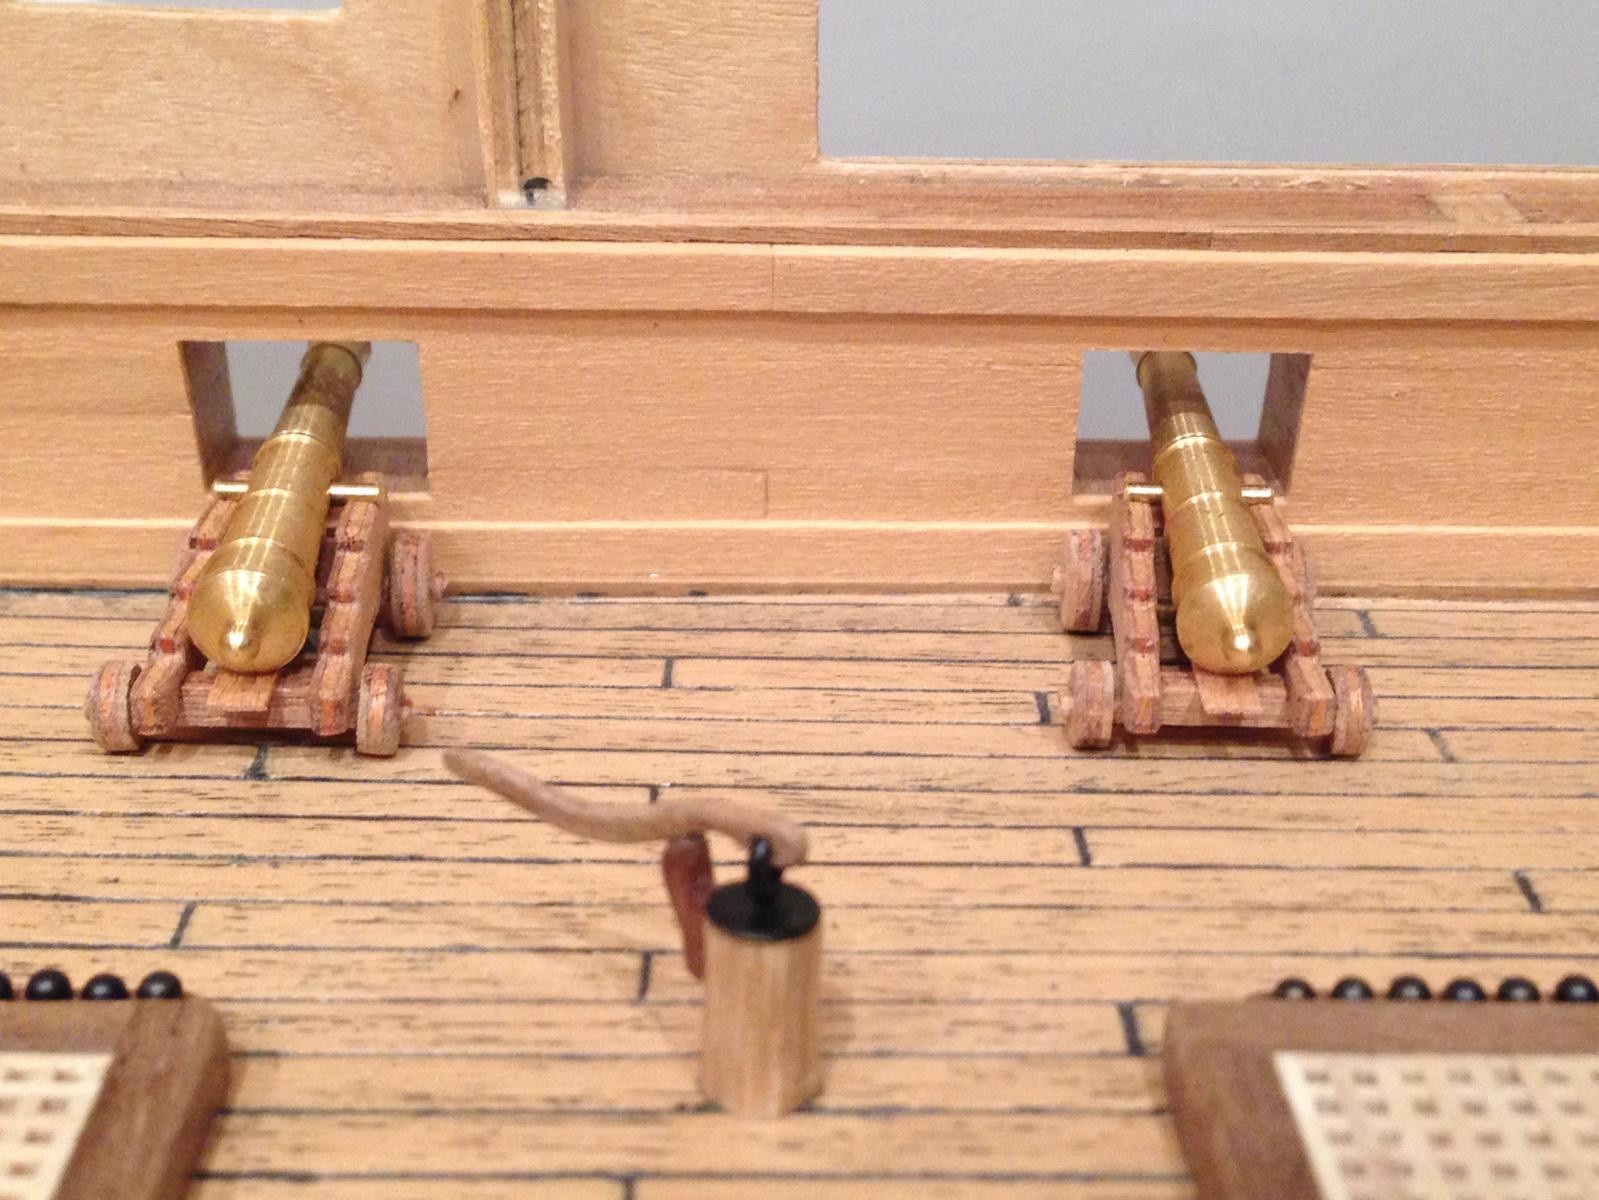
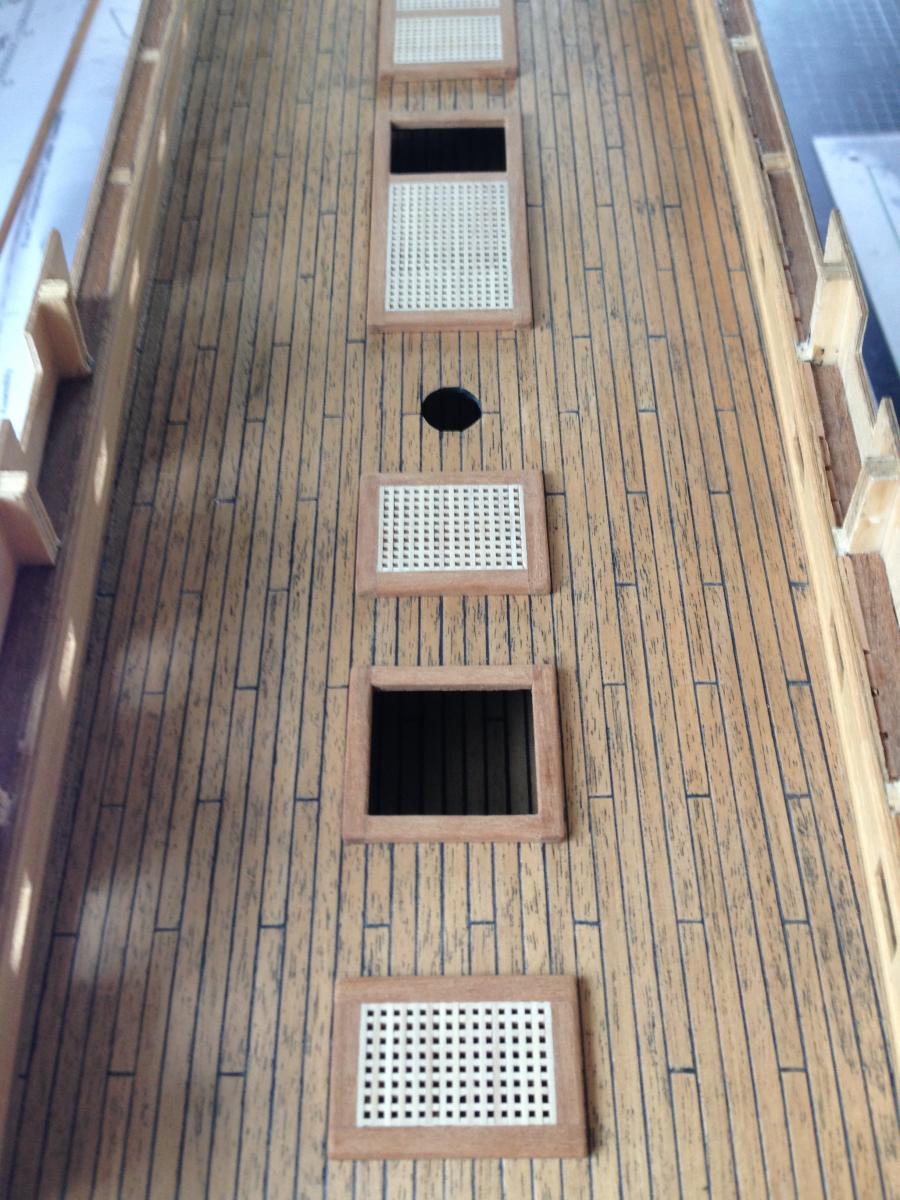
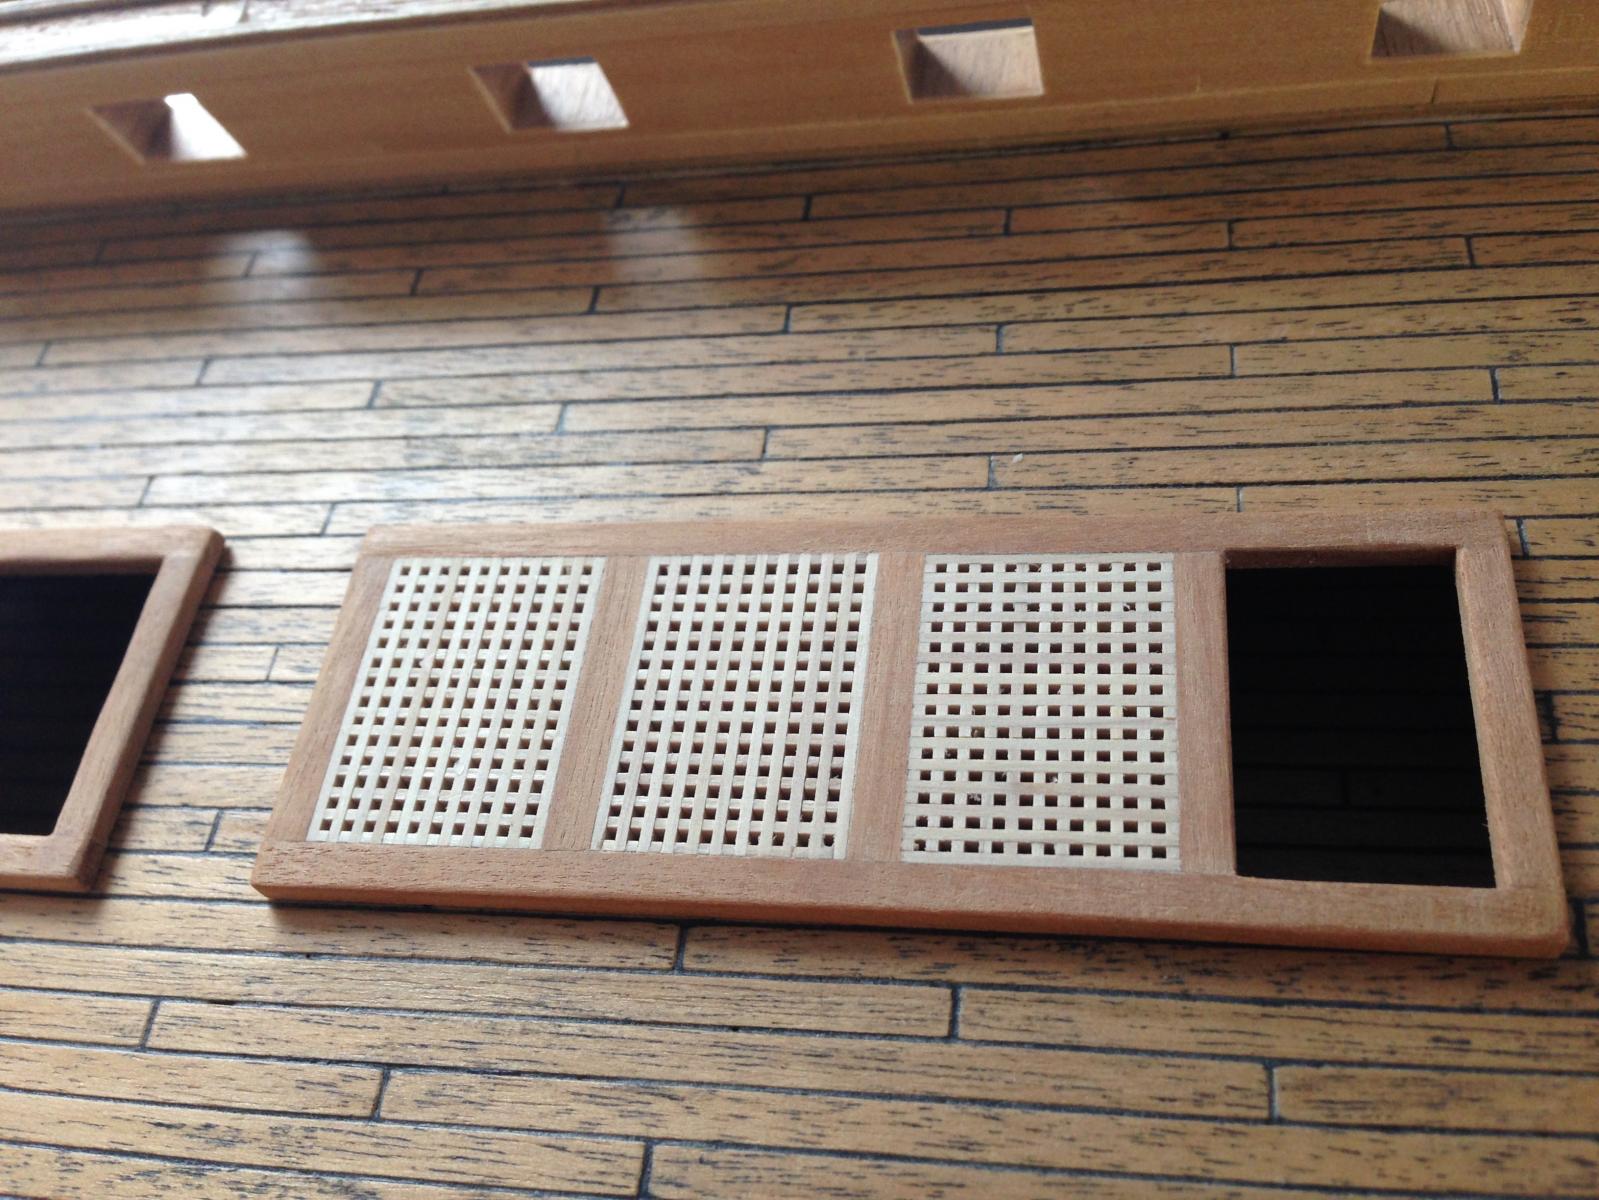
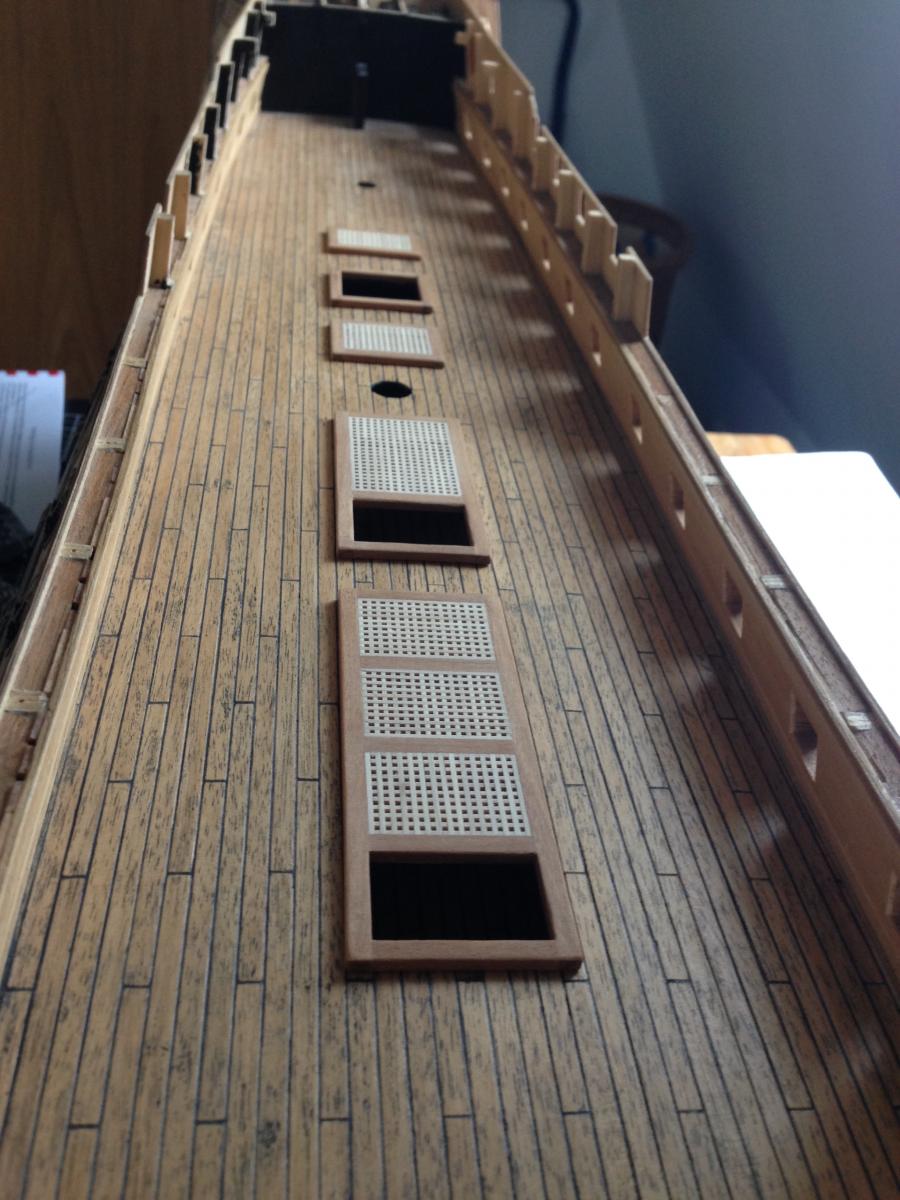
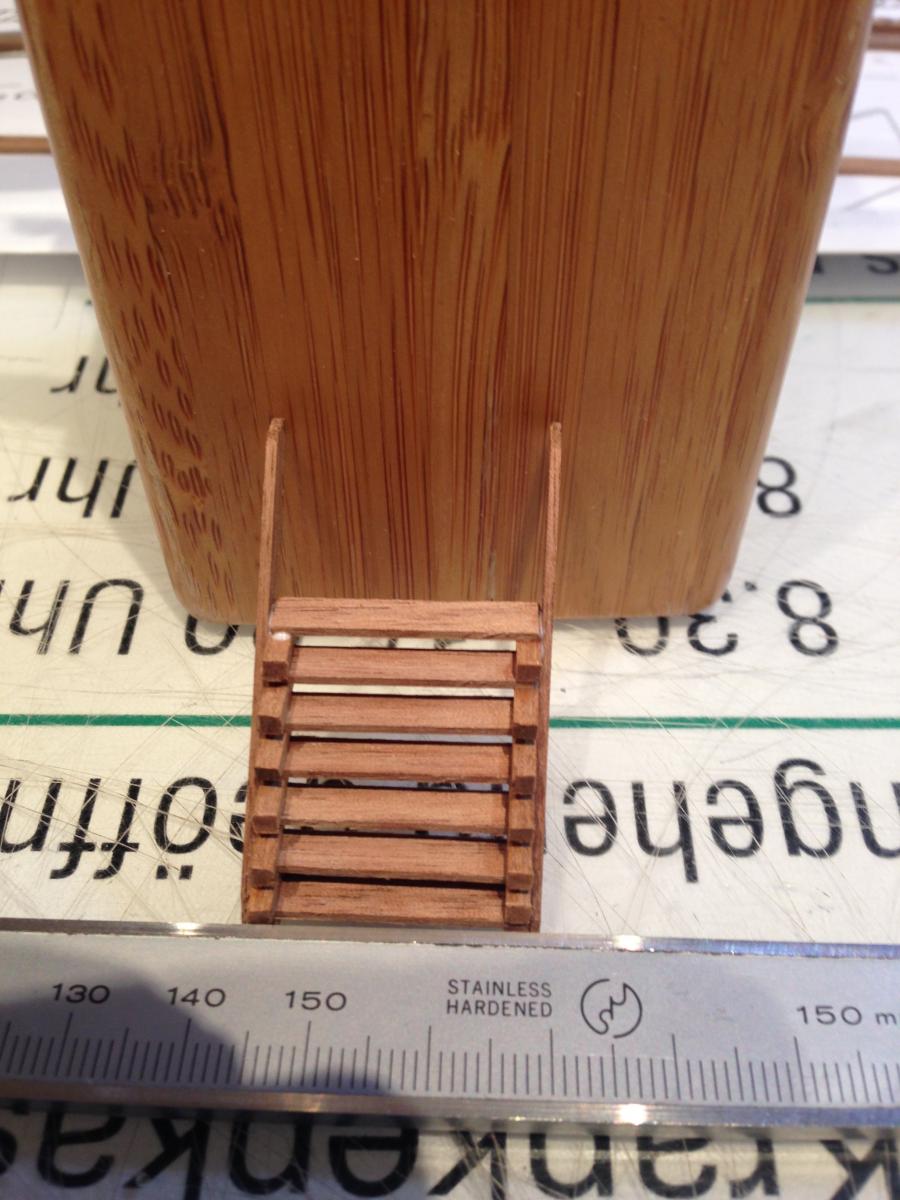
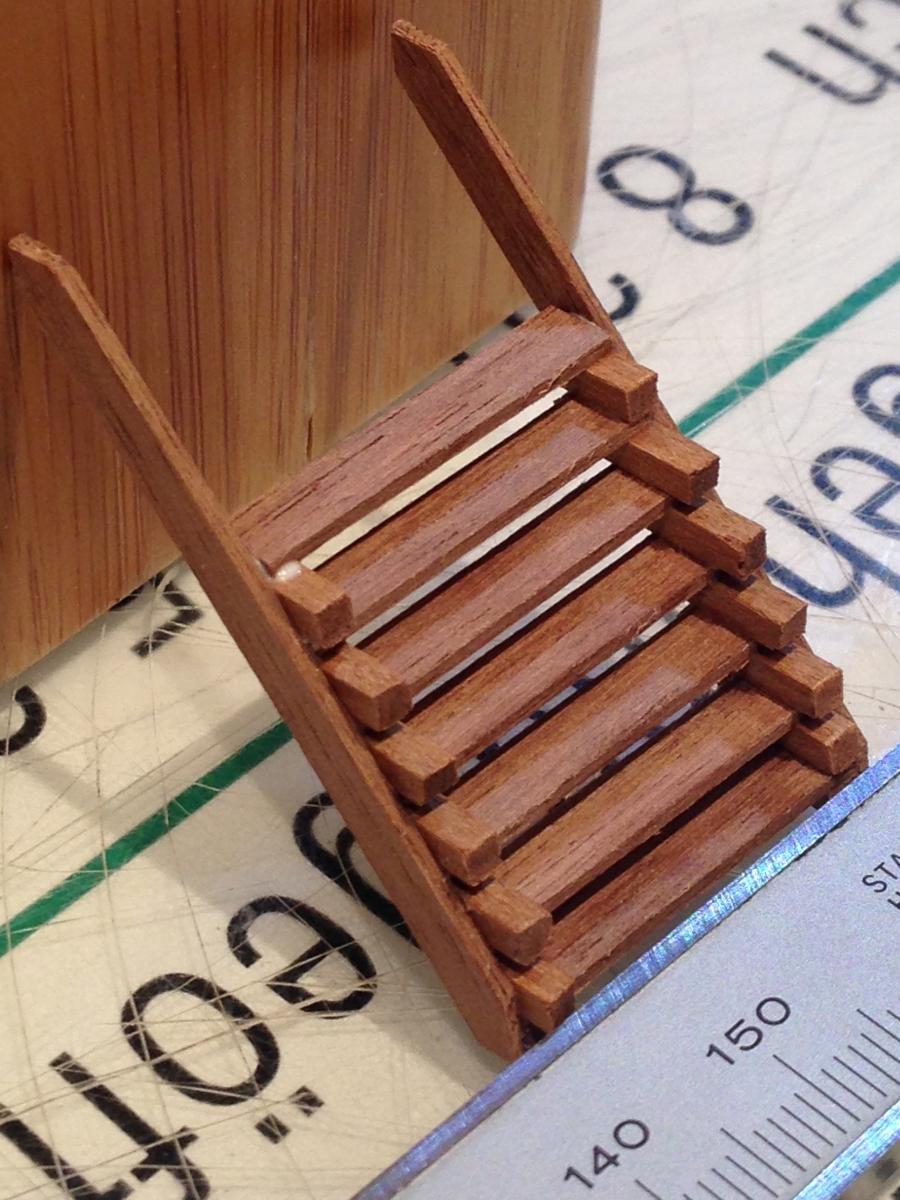
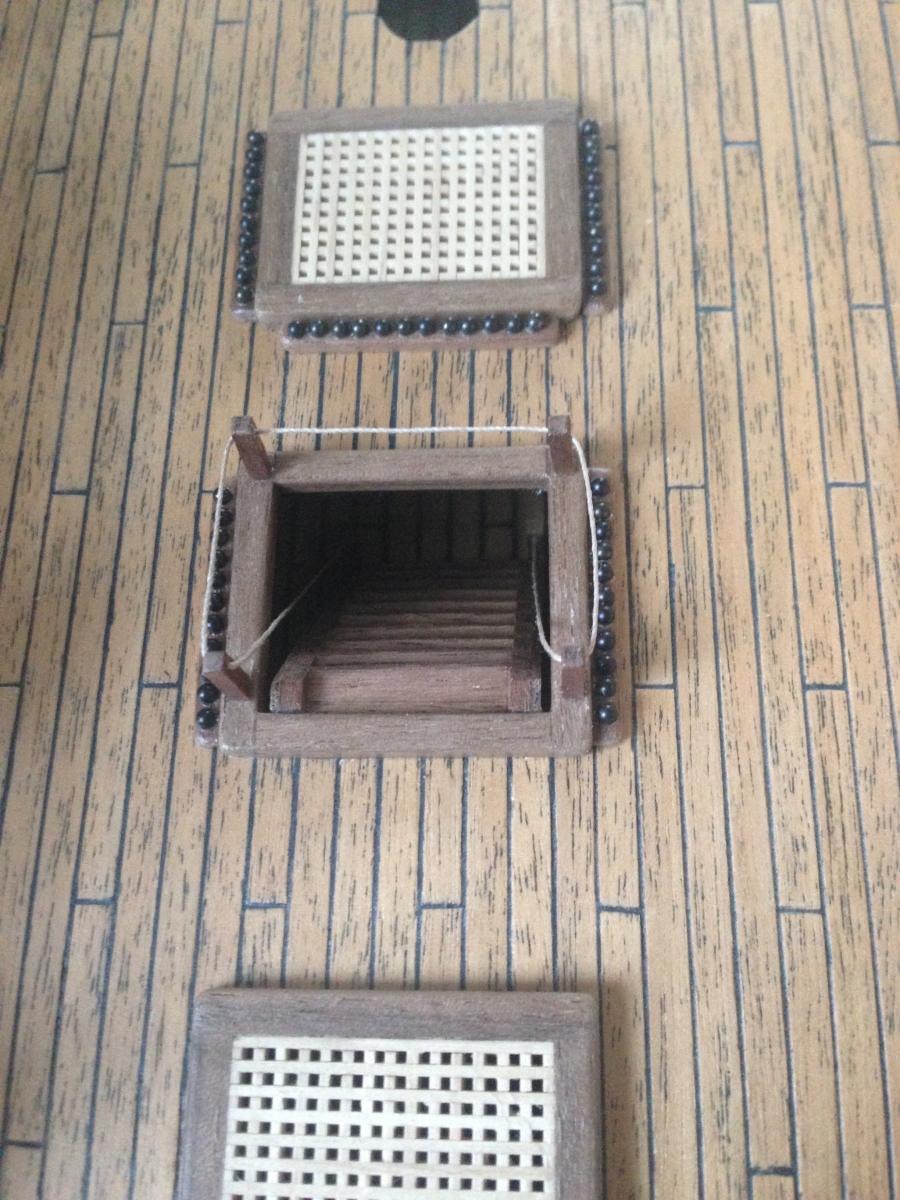
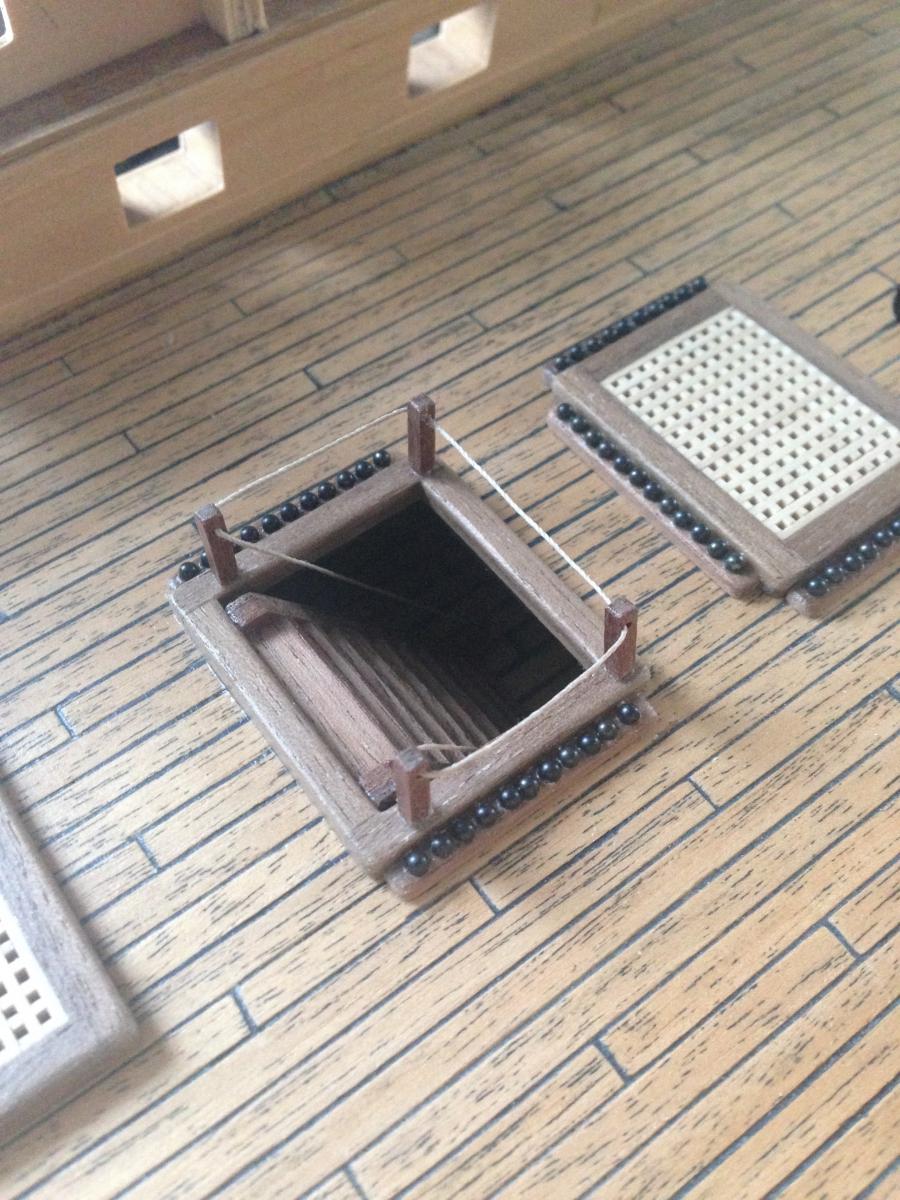
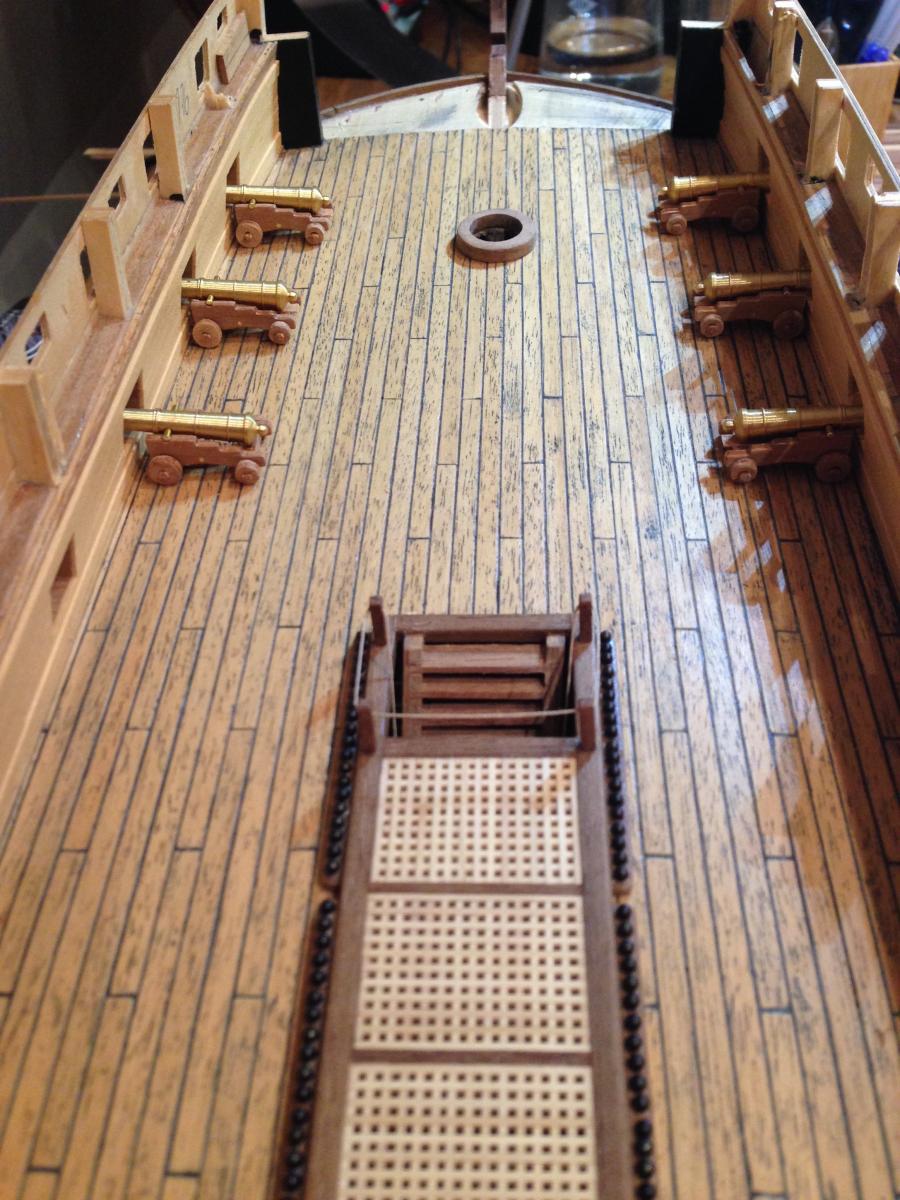
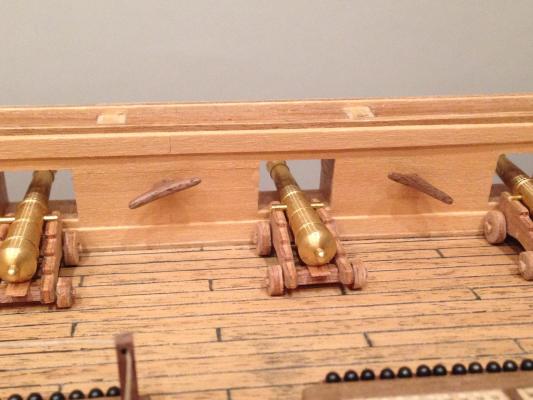
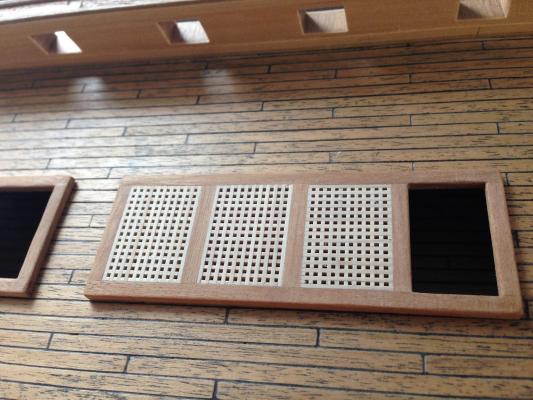
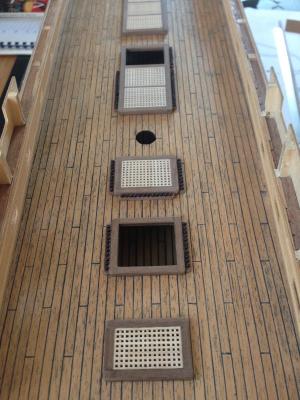
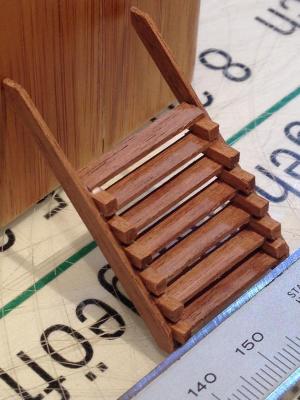
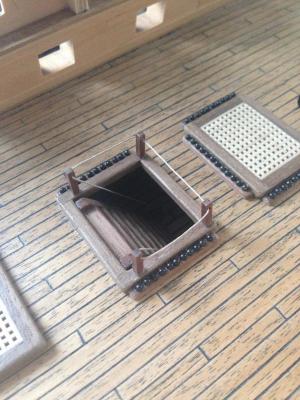
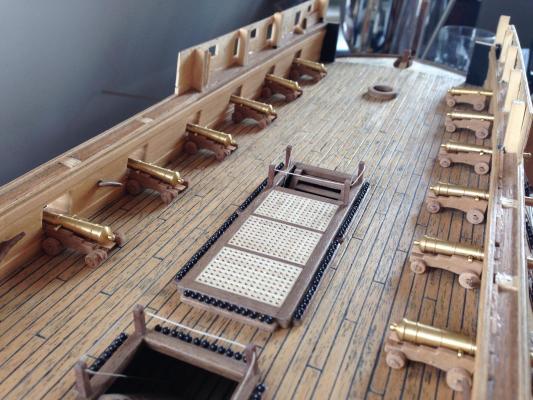
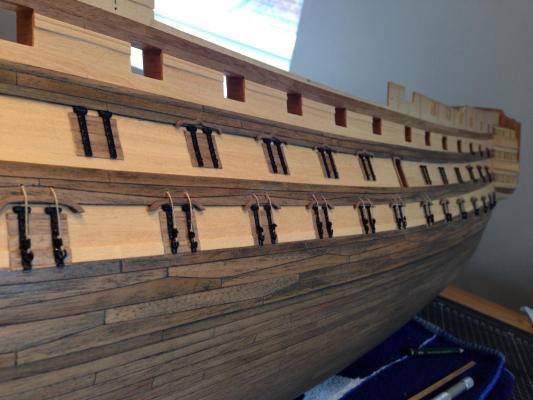
Hello friends! I would like to show you, what I have done in the last weeks. As you can see, I have started with the gratings on the upper deck. First I have made them with the wood from my kit. It does not look bad, but nevertheless I was not really happy. The color seems to be too bright. I had the idea to work it with the black wood putty, but that does´t work well. In contrast to the planks of my deck, the frames only look dirty and not old and used. The strips for the cannonballs does´t look good too. They had a different color than the frames. And the color changes in the middle of the strips. I decided to make them all with my own dark walnut wood. I did the same with the stairs. Unfortunately I did the frames with false measurements, so I did it a third time :-). But now I am happy with the result! Now I have started with the cannons. I am still at the beginning. But I love to see them standing on my deck :-) Best wishes to all of you and a happy sunday!!! -Heinz-


-
Hello Ian, every time I have to say, that I like to follow your blog and it´s a pleasure to see your Victory growing. I am sure you will pass me soon, my friend :-) I see that you use a jig like it´s been posted in "the anatomy of nelson´s ships" from C Nepean Longridge (remember the picture I post in your blog). I am very curious to see how it works. I have to admit, that I wasn't very successful with this technic, because the curvature of the hull make every plank different to the other. Every plank is unique. Some more, some less. I think that it´s not the right way to make all planks similar with the same dimensions. I have made the best experiences with making a drawing on the first planking and build every single plank. But it´s not my intension to confuse you. Maybe I make mistakes and overlook things. Anyway I wish you much success and send you my best wishes and compliments for your work!!! -Heinz -
- 191 replies
-
- 2
-
-
- victory
- caldercraft
- (and 1 more)
-
Hello Kevin, I really love your Victory. There seems to be so much "live" in it. Especially the first picture! WOW!!! Want to make it as my background image on my mac :-)))) Best wishes for you and your good work! - Heinz -
- 1,319 replies
-
- 4
-
-
- caldercraft
- Victory
- (and 1 more)
-
Is the Caldercraft HMS Victory still the best?
Heinz6672 replied to yangliyuan's topic in Wood ship model kits
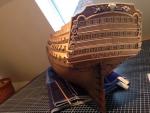
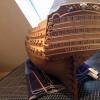
Hello Yang, I could not seriously say, that the caldercraft kit is the best for building a victory, just because I have no experiences with other kits. But I can tell you, that the kit is really good. Very good! I would like to invite you to take a look at my build log. Because I am someone using the kit as a basis. But I go a different way in building my Victory. I use different woods to imitate the color. And I try to build her without using these millwork sheet parts. Of course, this means that I have to buy additional wood - it makes my Victory more expensive - but this is ok for me. Best wishes to you - Heinz - -
Hello Ian, good work, as always :-) It´s very interesting to see how two people make the same things in different ways. It seems I have make myself too much work for the same result... I am not sure if we talked about the gunports before. Will you build them open or close (like mine)? If you build them open, how will you put the frames in the ports? Many modelers build them flush with the 2.planking. But that is not right. They have to be behind the 2.planking, as a support for the lids. I did not find a solution to build them exactly following the bending of the hull, when the 2.planking is already done. So I started with the frames, sanding them on the 1.planking and then build the 2 planking. That means that I have to cut out the gunports before I glue the 2.planking. A lot of work... I am very interested how you solve my problem. Best wishes from me! - Heinz -
- 191 replies
-
- 3
-
-
- victory
- caldercraft
- (and 1 more)
-
avsjerome2003, Ian, Boyd, many many thanks for your kind words! They are oil for my engine . Boyd, I had to look your build log over again. I did not realized, that you left the ropes of your gunport.That is too pity. I really hope you will try it again. If I can help you with my pictures... I would be very proud! I do not think my skills are so much better than that from you or other modelers. Maybe sometimes I have different ideas on how I'm doing things. And maybe this is because I am not so experienced and have to find these new ways. No nonsense, I needed 2 or 3 hours to make the first rope. I did not know how to hold it and how to wrap around the black cord. I have a picture in my head, of how it should look. And than I try to make it this way. So many times I sit here the whole day, don´t know how to make things. And at the end of the day I only know how it does NOT work. Boyd, you have build a very good model. And for me it´s so much incentive to watch your build log (and of course those from all other modelers too). For me, these models are alive. In my head I see them moving on the water, see the action on deck and the gunports opening, etc. Now I a get to the point, I can see this on my model too. That is what I tried to explain in my last review. What I try to say: Boyd, please try it again to make the ropes on your gunports. maybe it´s more difficult, because your gunports are open. But you see the result. I think you agree when I say that it´s worth another try :-) Thanks again to all of you! - Heinz -
-
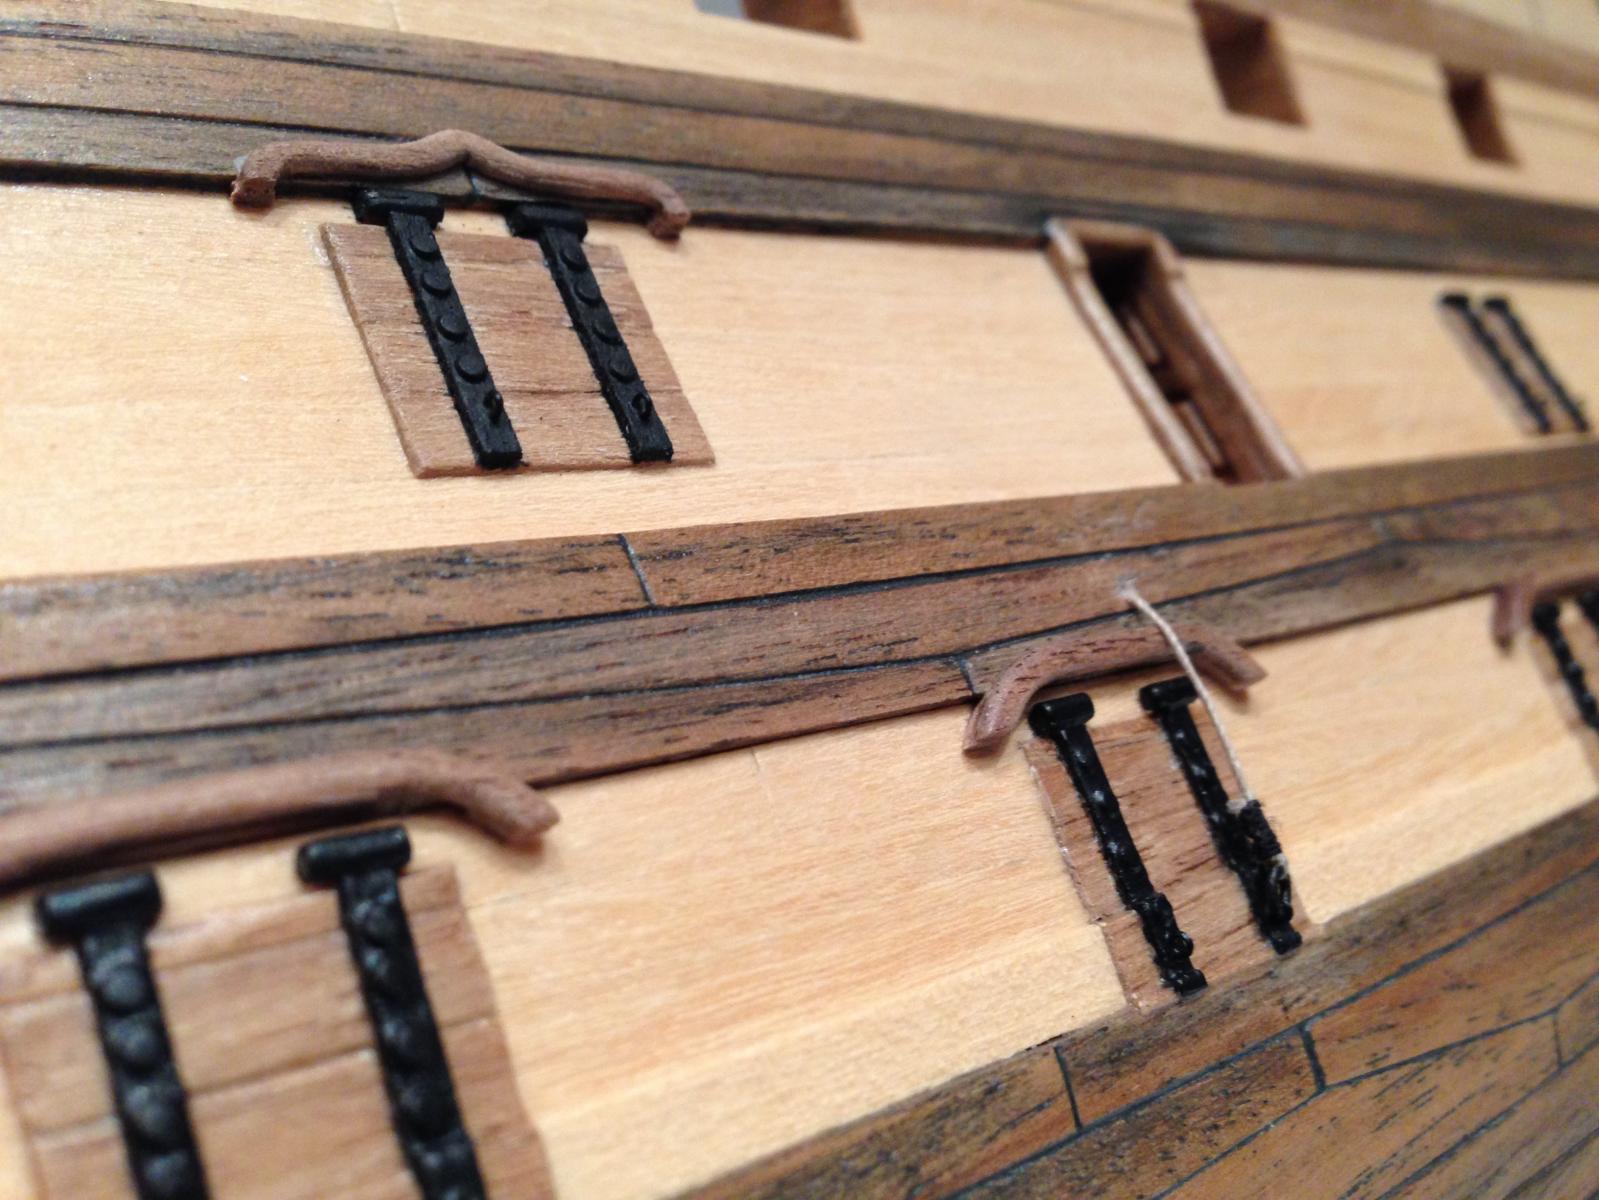
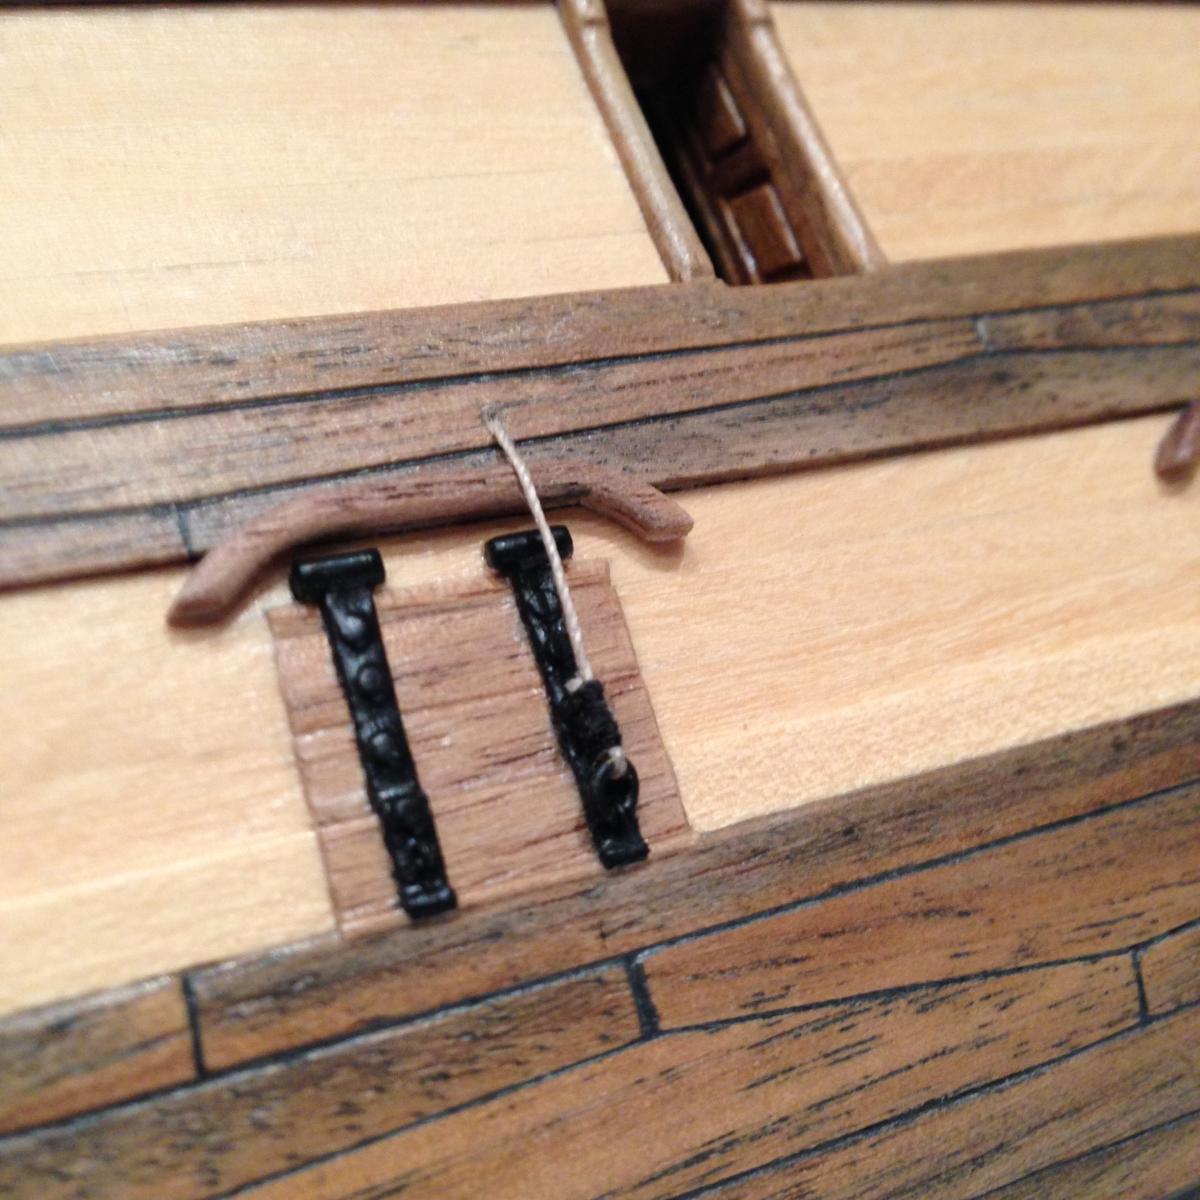
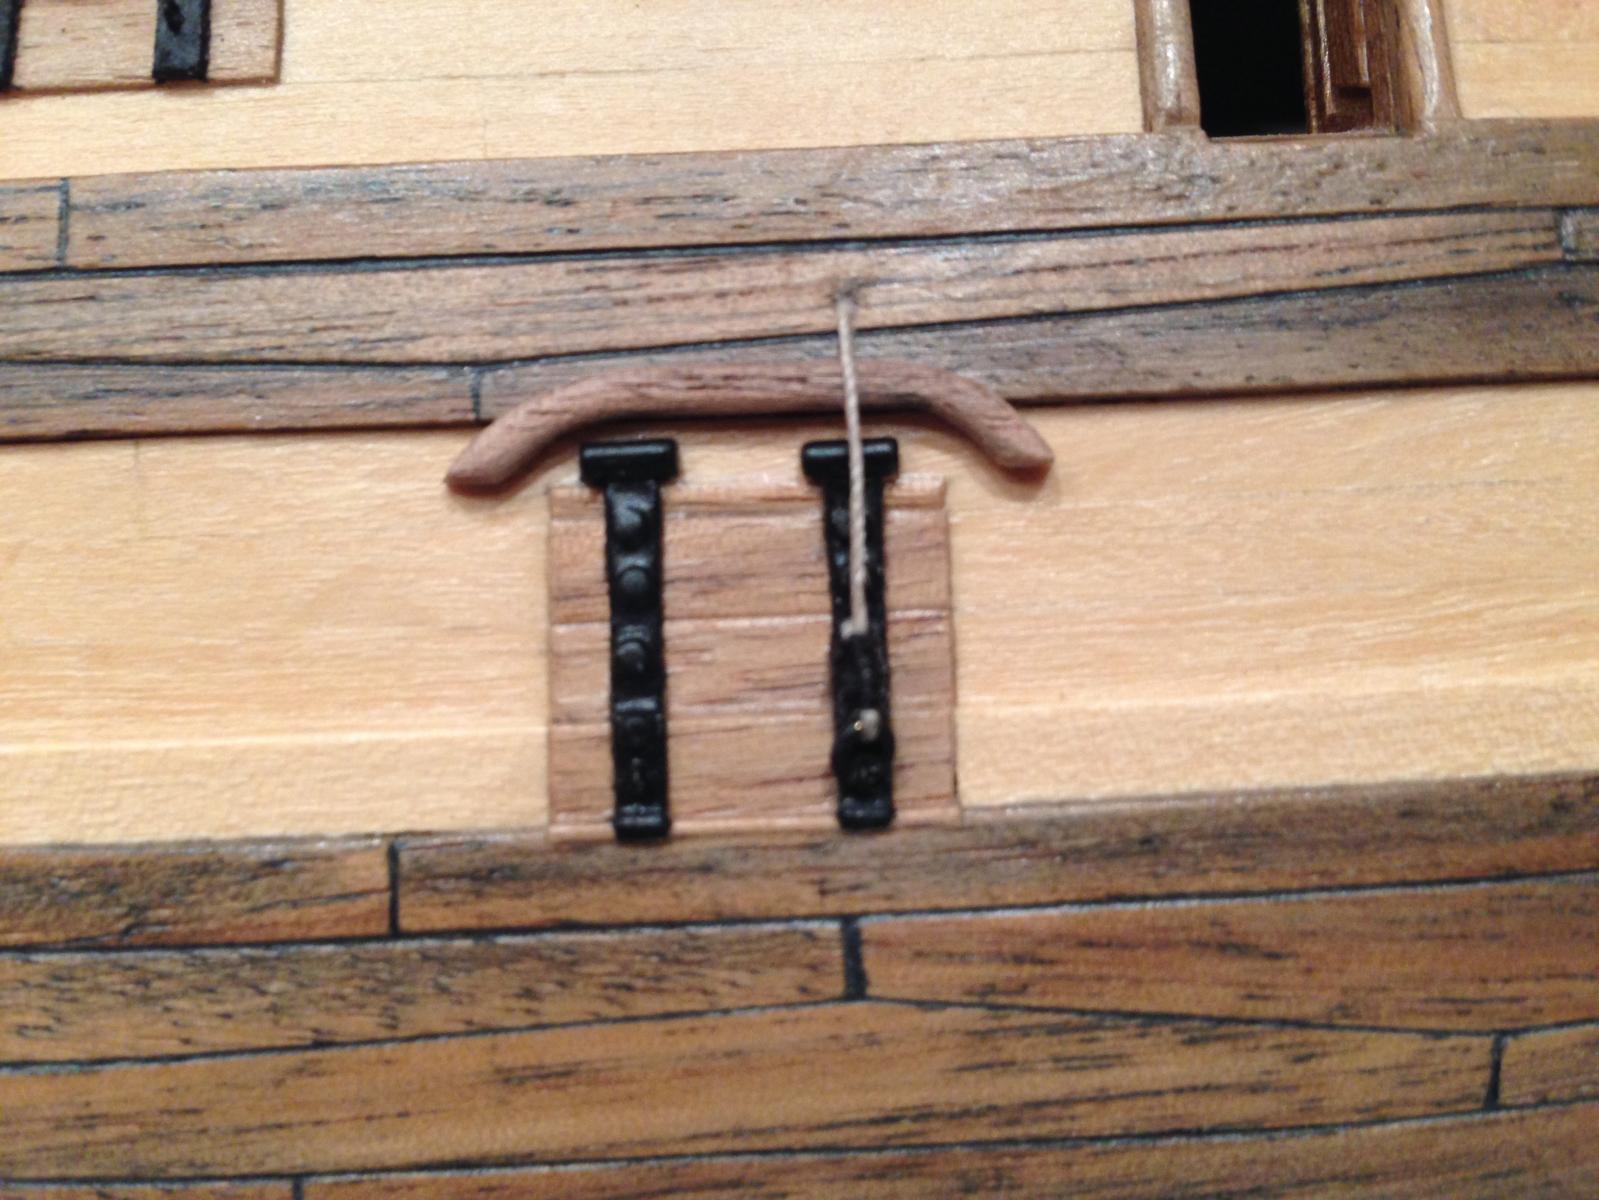
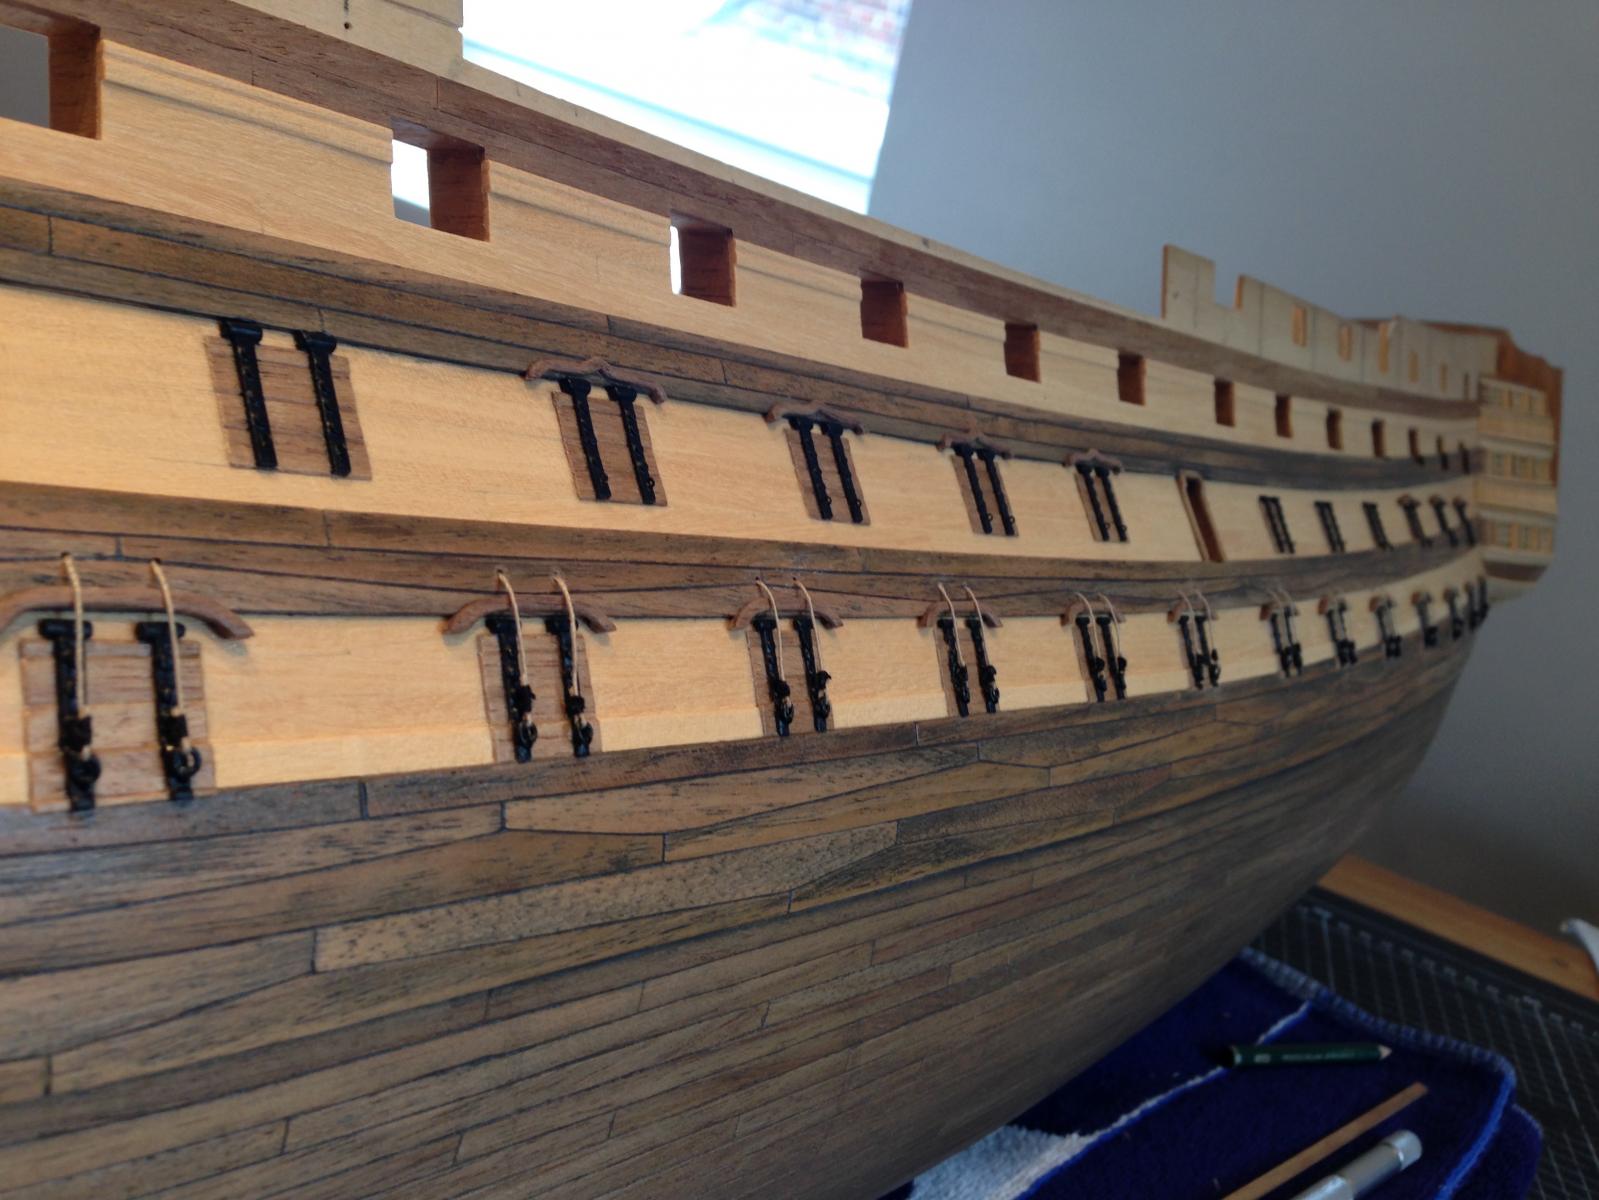
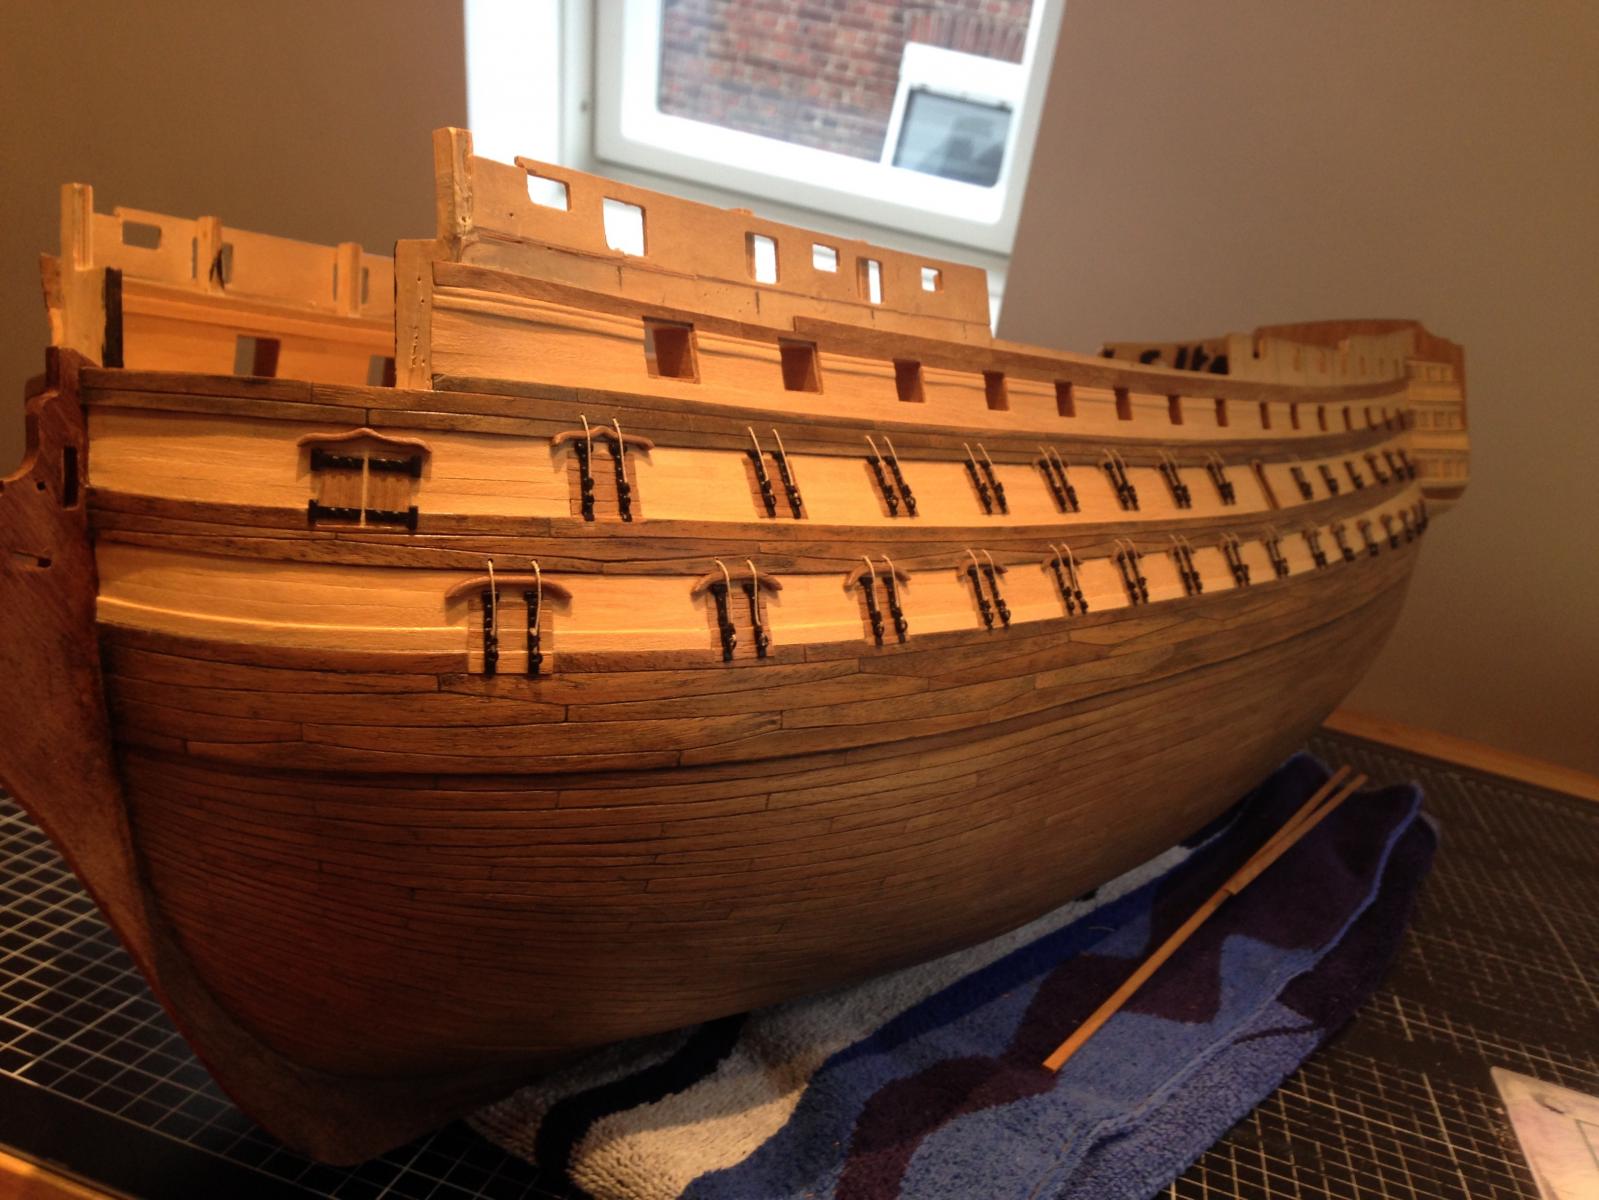
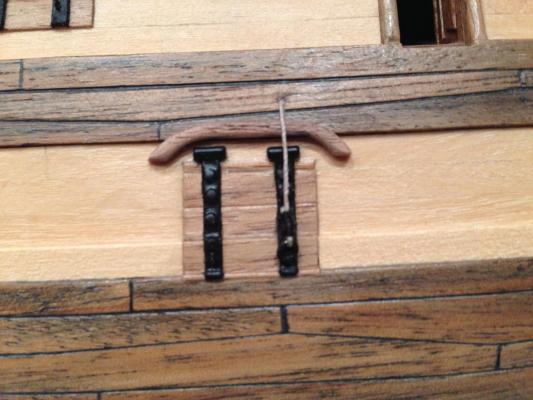
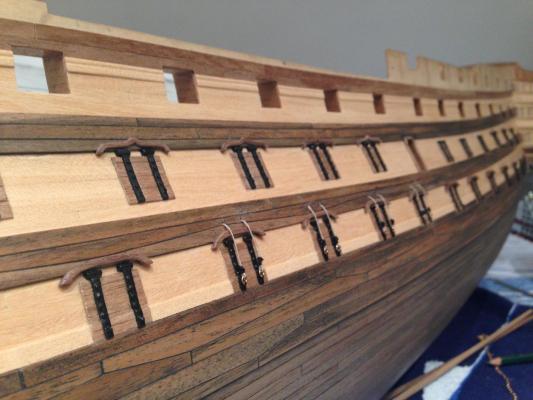
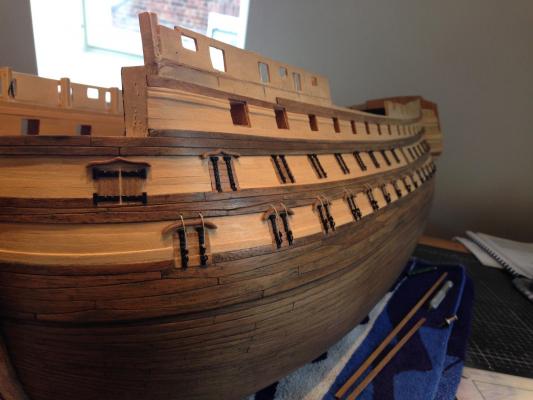
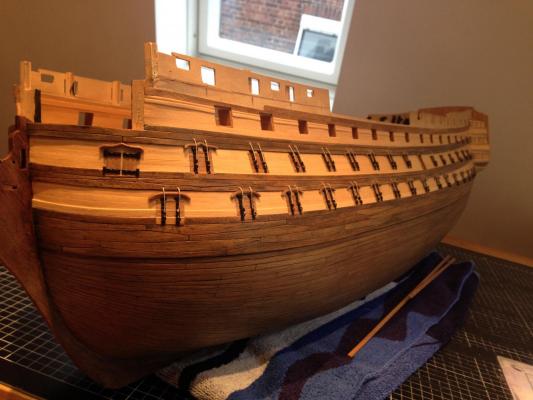
Hello modellers, I finished the gunports on the backboard side. The hinges are slightly larger, than the original. But nevertheless I am very happy with the result.This also applies for the cords , which I have attached to a small ring at the bottom. The rings are made from an old anchor chain of another model. I painted them black. Unfortunately they are not clearly visible, because of the black background. With every step I take, I feel my model gets more alive. I don´t know how to explain. But I am sitting here at the table, my head on the tabletop, and staring on my model. I would not be surprised if the gunports would suddenly open :-) Does anyone know this? Or am I going crazy? Greetings and the best wishes for the weekend - Heinz - I would not be surprised if the cannon gates would suddenly openable .'m sitting here at the table , my head on the tabletop√ I'm sitting here at the table , my head on the tabletop I'm sitting here at the table , my head on the tabletop


-
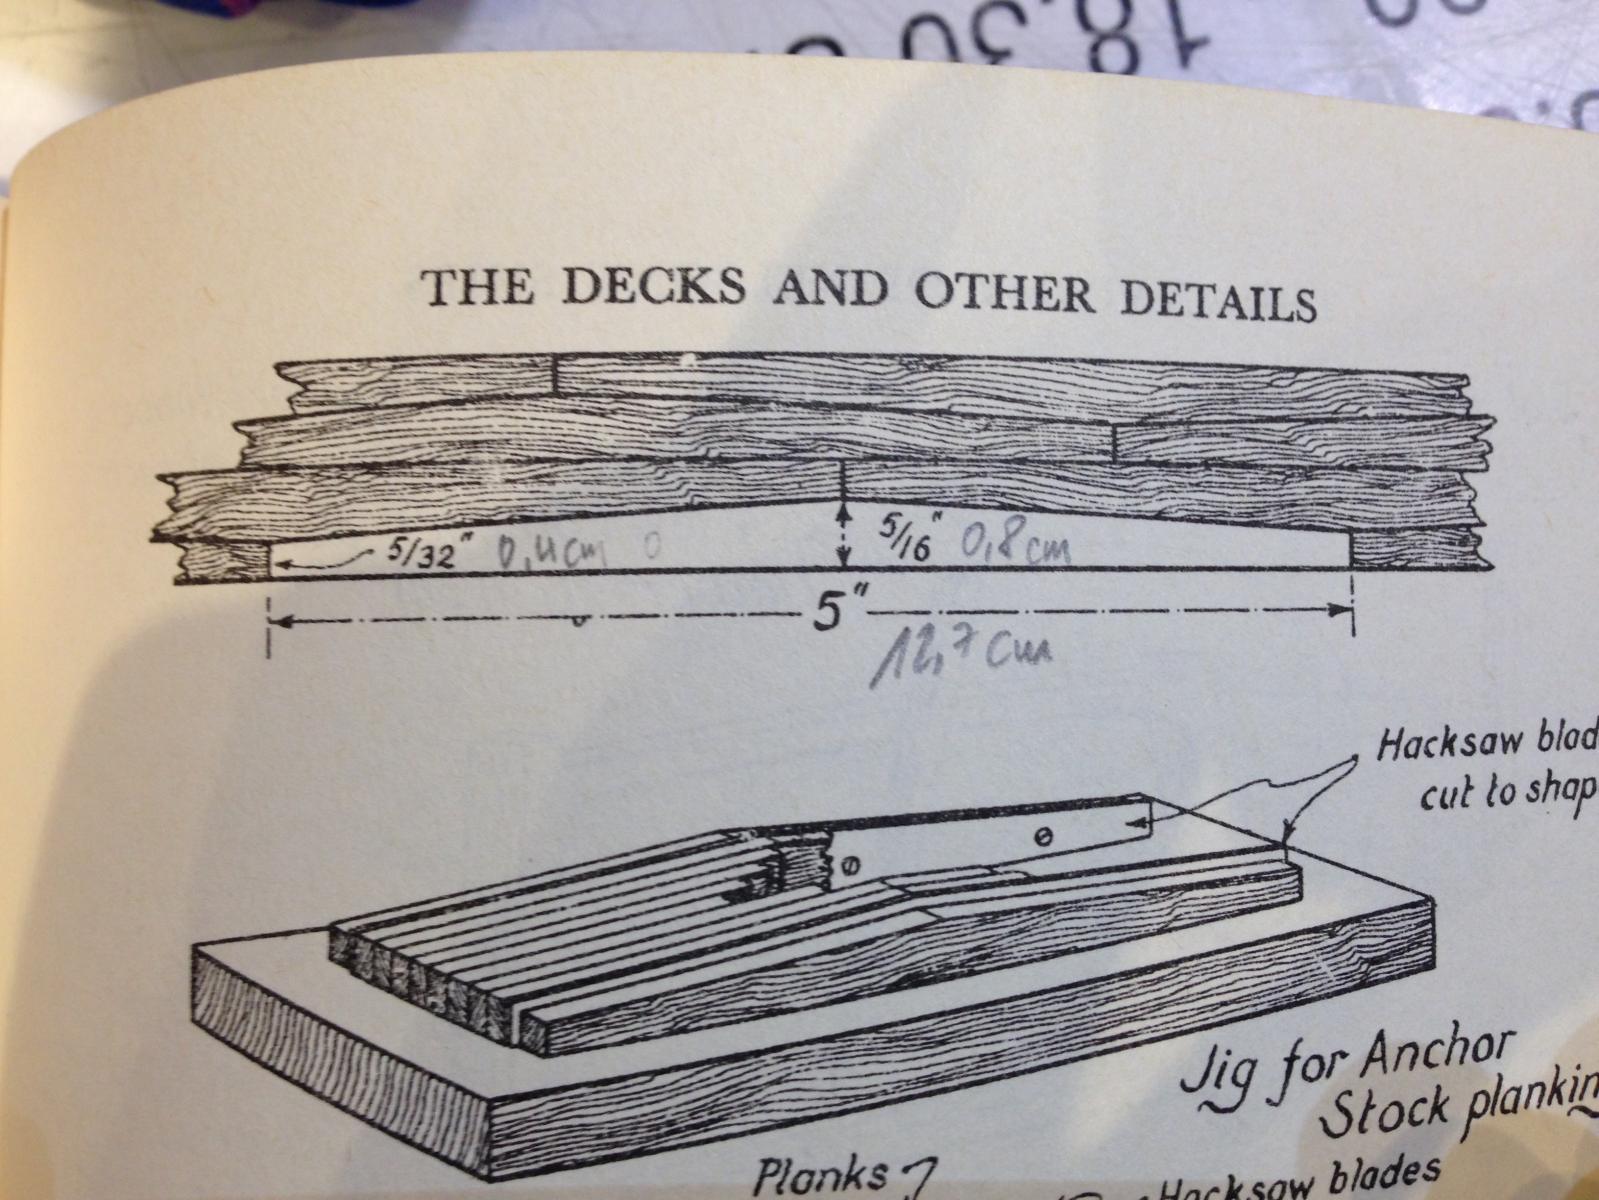
Hello Ian, I am not sure if I understand you correctly. The measurements you can see on the picture (12,7 ; 0,8 ; 04 cm) are the results of my calculations. So if you ask me, you just have to use this size. 1000x16x2 mm is the wood I use to build them; nothing more. But my wales are made on the first planking. This means you can not use the same wood, because you make the wales on your second planking. It has to be thinner. And yes, the anchor stock length is the same as the normal planking length on my model. But I could not say that this has to be. I think in real life they use the wood in the way they get it. I don´t think that the complete hull is made of similar planks. Wood was very expensive. So they use every length. I only make this because of optical reasons. It look much better in my opinion. I am glad if I can help you, my friend! - Heinz -
- 191 replies
-
- 2
-
-
- victory
- caldercraft
- (and 1 more)
-
Hello Ian, I make a photo from a picture from "the anatomy of nelson´s ships" from C Nepean Longridge. You can see the measurements in cm I used for my model. To get them, I calculate the proportion of the hight and width from this picture and convert them on the measurements of my model. The result is, that the number of pieces I use is similar to the plans of Longridge. How I make them: the same way I make every plank on my model. First I make a drawing on the model (on the first planking) and use this as a template to make every single plank. I found out that it does´t make sense to build maybe 10 planks the same way. They want fit, because the hull is curved and the wales too. So I have to build every plank as a unicum. To build them I used walnut wood 1000 mm x 16 mm x 2 mm I hope this will help you :-) Greetings ! - Heinz -

- 191 replies
-
- 3
-
-
- victory
- caldercraft
- (and 1 more)
-
Hello Ian, I am very impressed! Gratulation to this wonderful work. It´s very exciting to watch the progress of your model! It reminds me on my own Victory and the problems I had to solve... :-) Keep on the very good work. It´s much fun to follow it !!!! Best wishes - Heinz -
- 191 replies
-
- 2
-
-
- victory
- caldercraft
- (and 1 more)
-
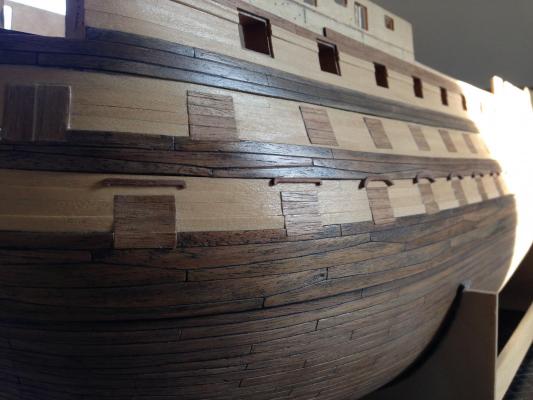
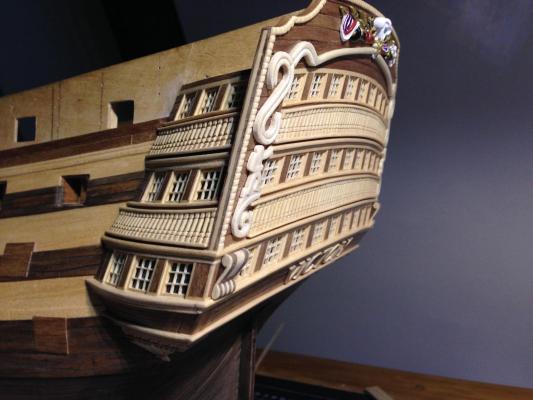
Good evening to my friends all over the world :-) ! Again I have to say thank you for all your nice comments!!! After finishing the chain on the rudder (sorry, the picture is too large to upload - I will make a new one for the next update) I started with the bows over the gun-ports. Of course I could not use the sheet pieces of the kit. I have to remake them with wood. I used the sheet pieces as a stencil and build nearly 10 of them. I was´t really happy with the look. Compared with the original, the waves look to angular. I decided to build them more curvy. On the first picture you can see my first attempt (the 2 bows in front) and beside them the new ones. I think the new ones are a little bit bigger than the originales are. But - in my opinion - they look good. A nice new-year-eve to all modelers! And a successful new year! - Heinz -
-
Hello Simon, if you ask me... it looks too good for a "first-planking-Job". I will follow your topic carefully Keep on the good work! Merry Christmas to you! - Heinz -
- 120 replies
-
- 4
-
-
- mercury
- victory models
- (and 1 more)
-
Hello Dimitris, it can not believe how fast your Amerigo grows. Do you have more than 24 hours per day??? And no matter how well I look, I could not find a piece that is not build clean. I already say this, but I have to repeat it: it´s so much fun to watch your progress. A beautiful model of a beautiful ship! Merry Christmas to you!!! - Heinz -
-
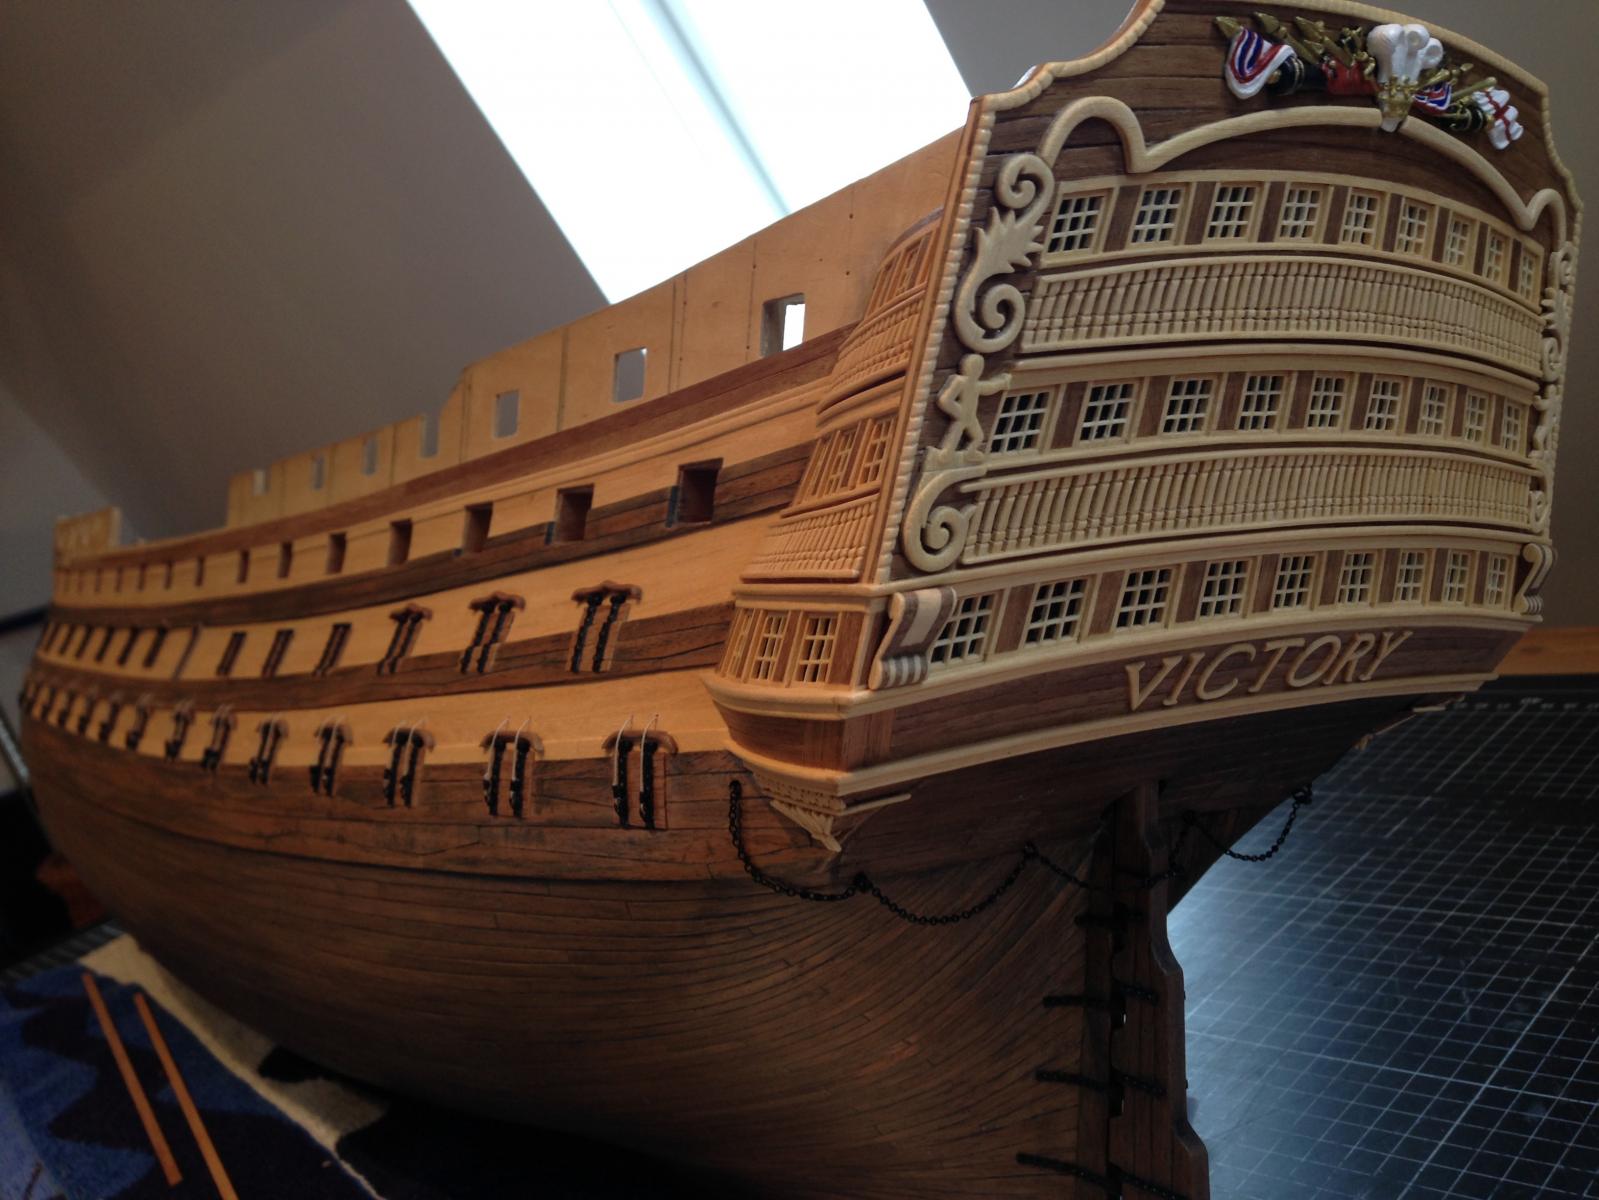
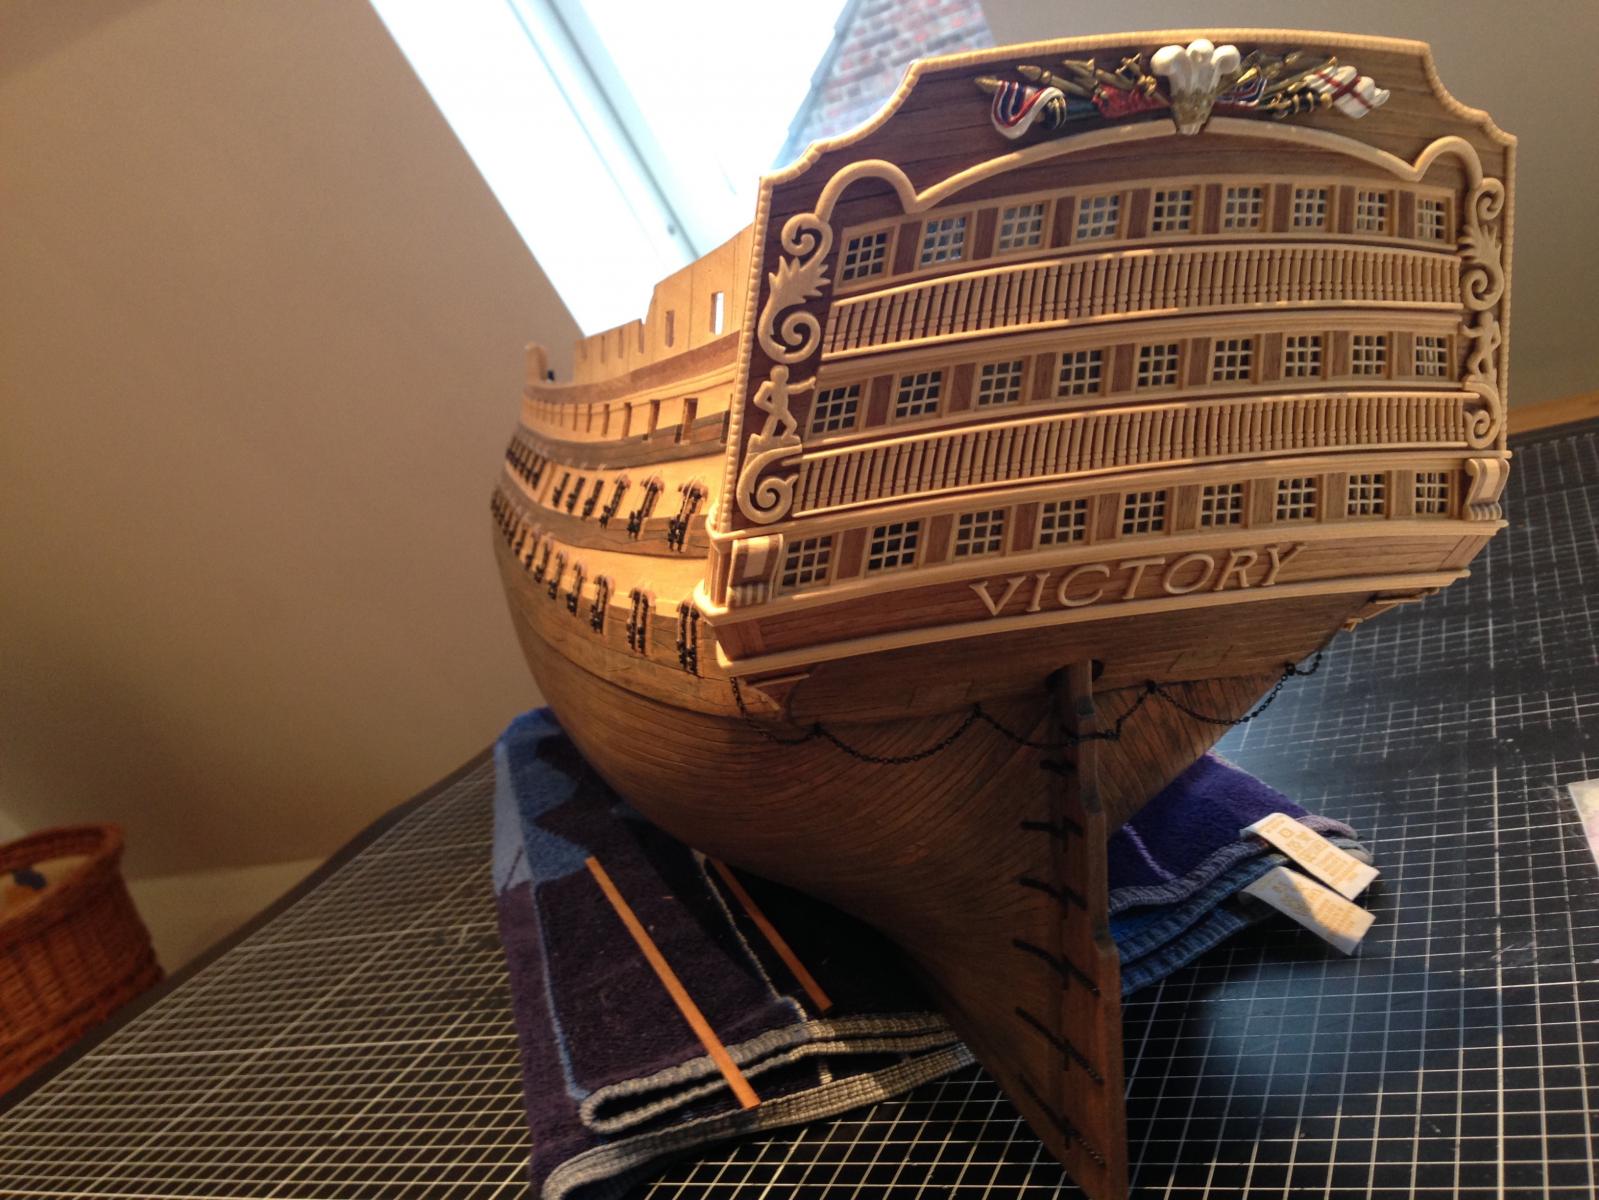
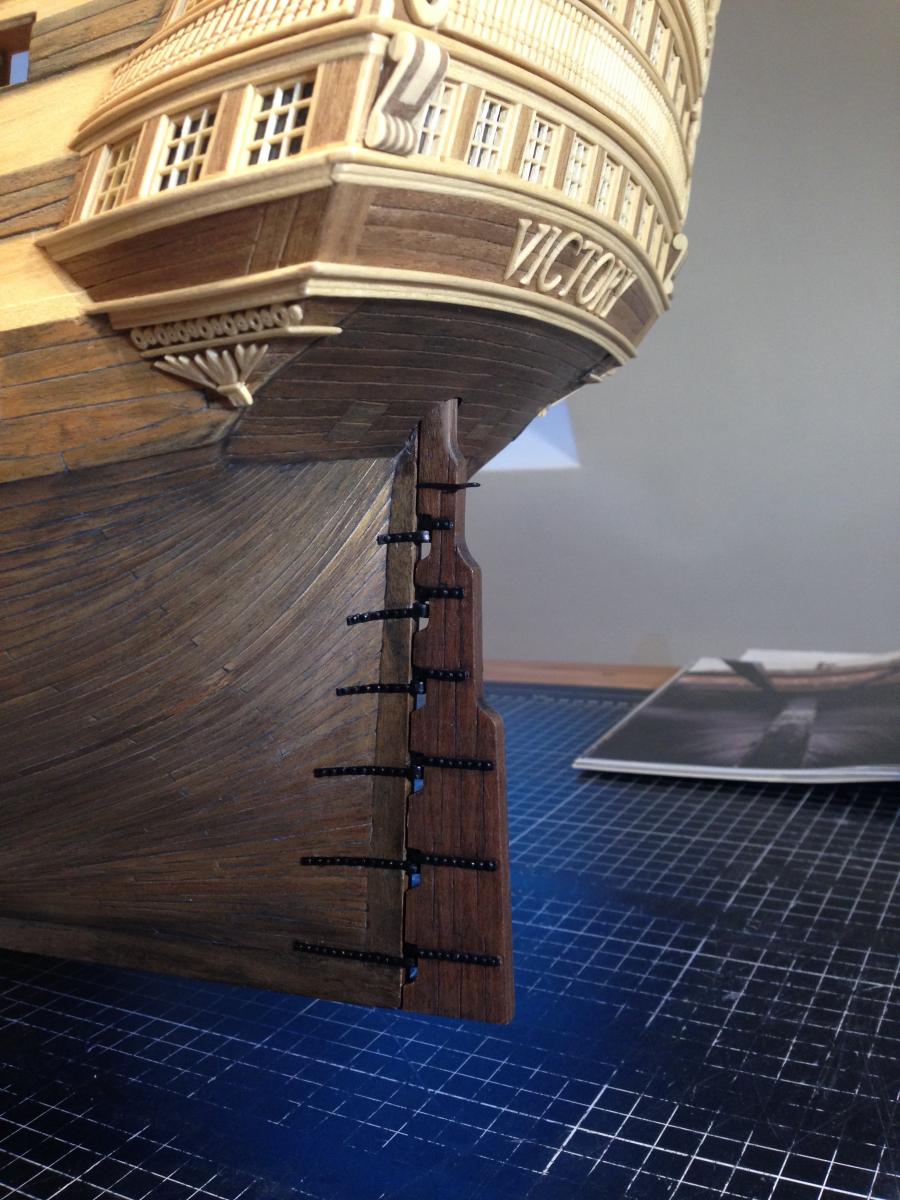
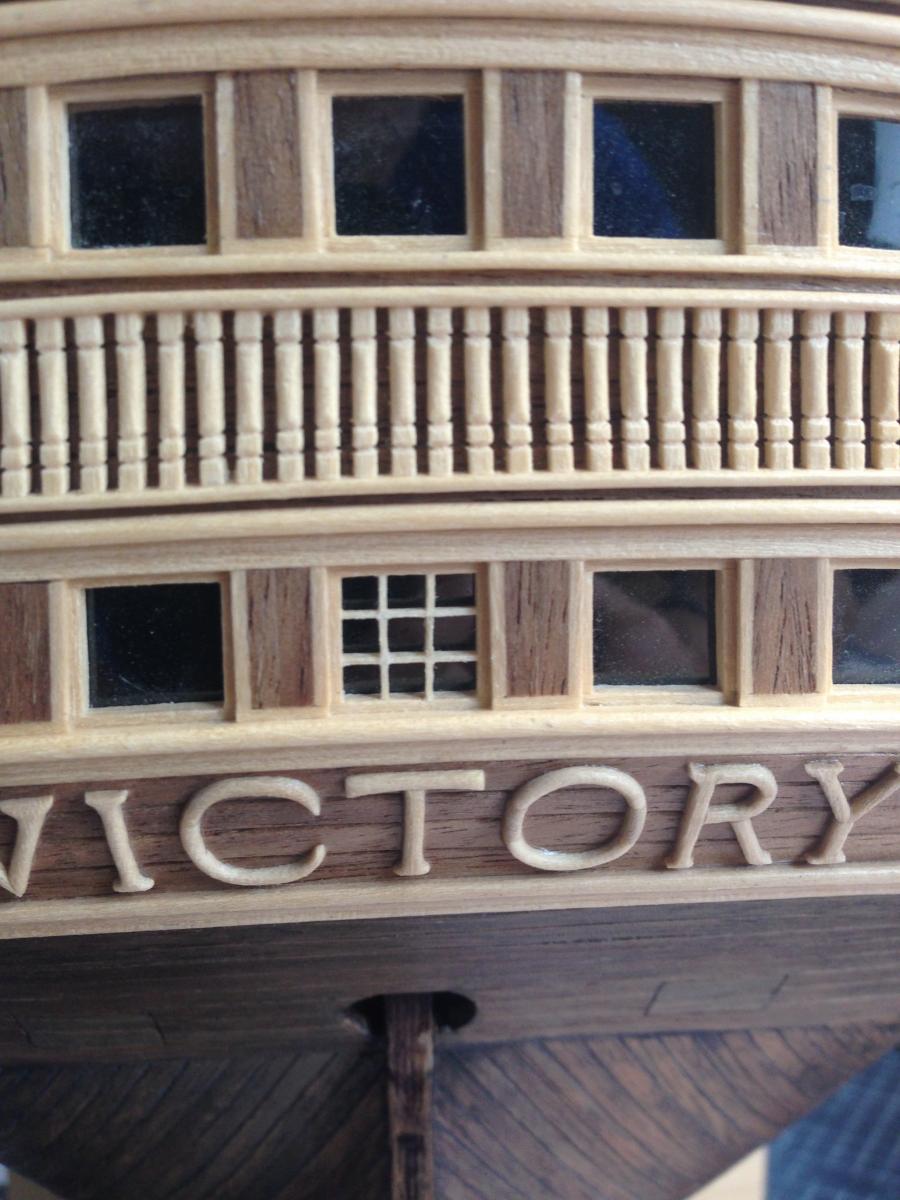
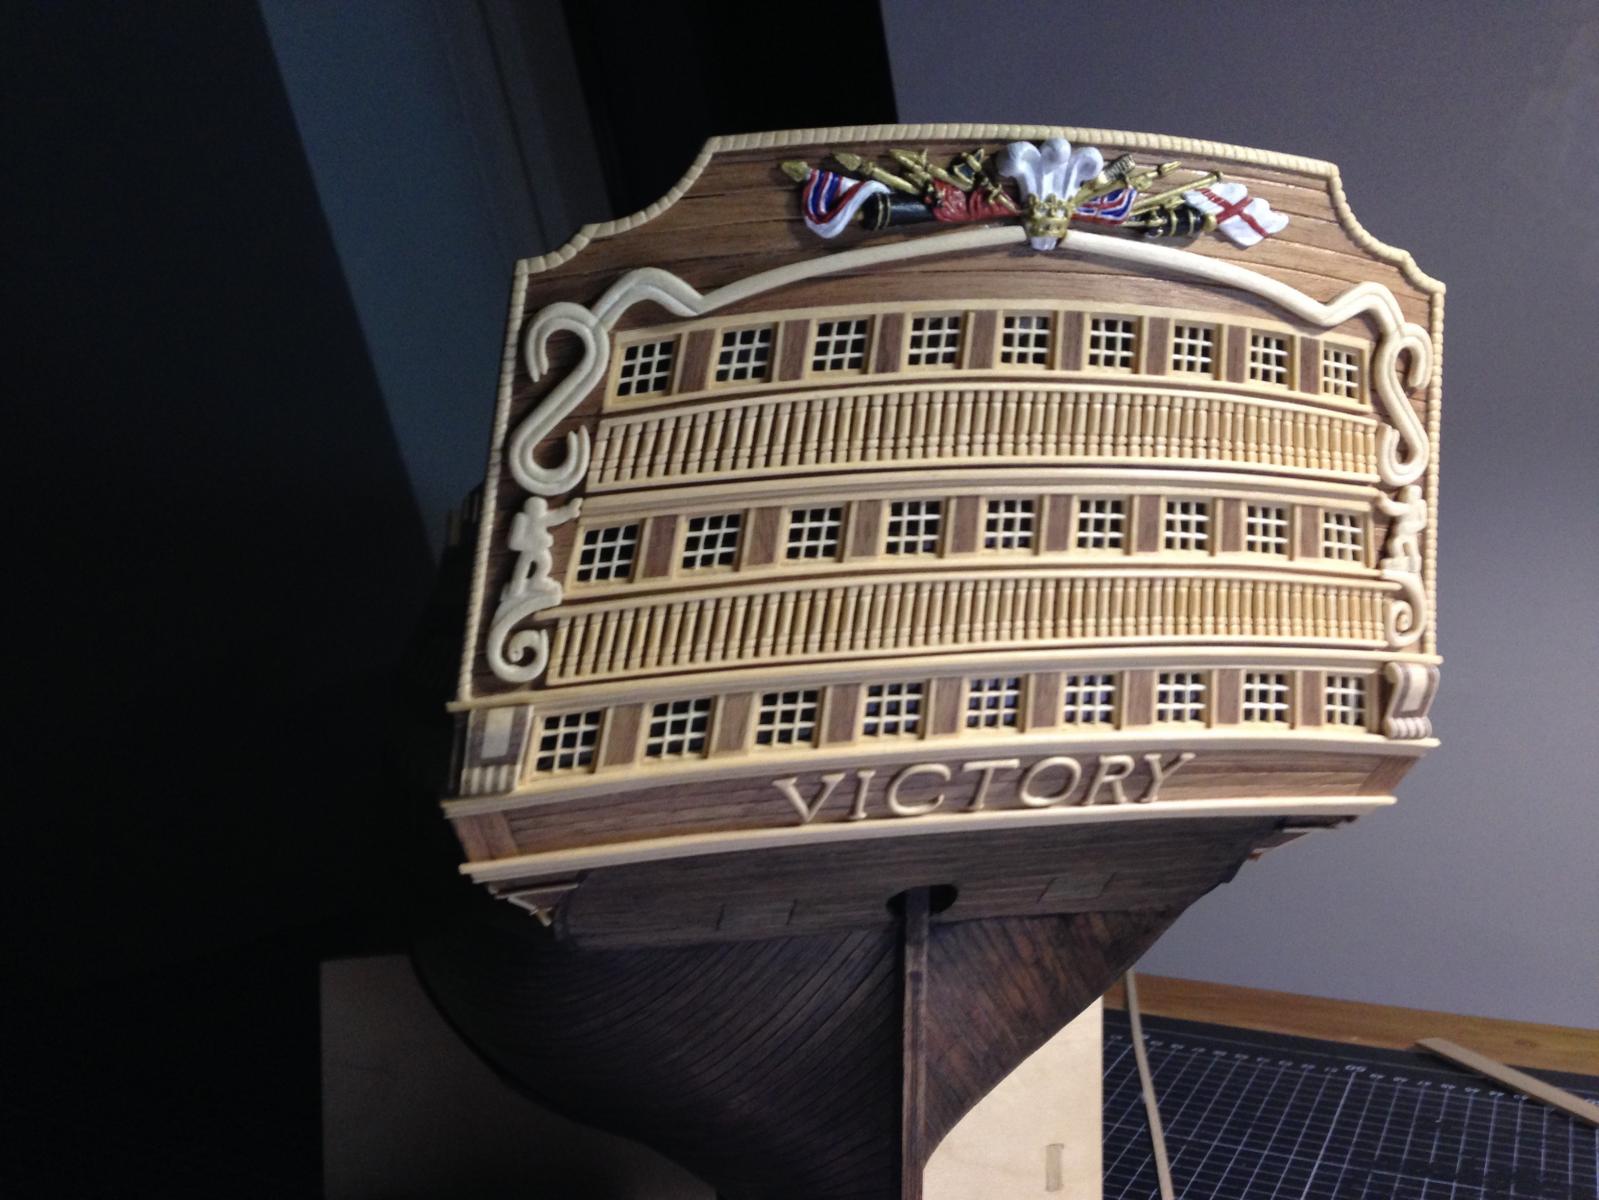
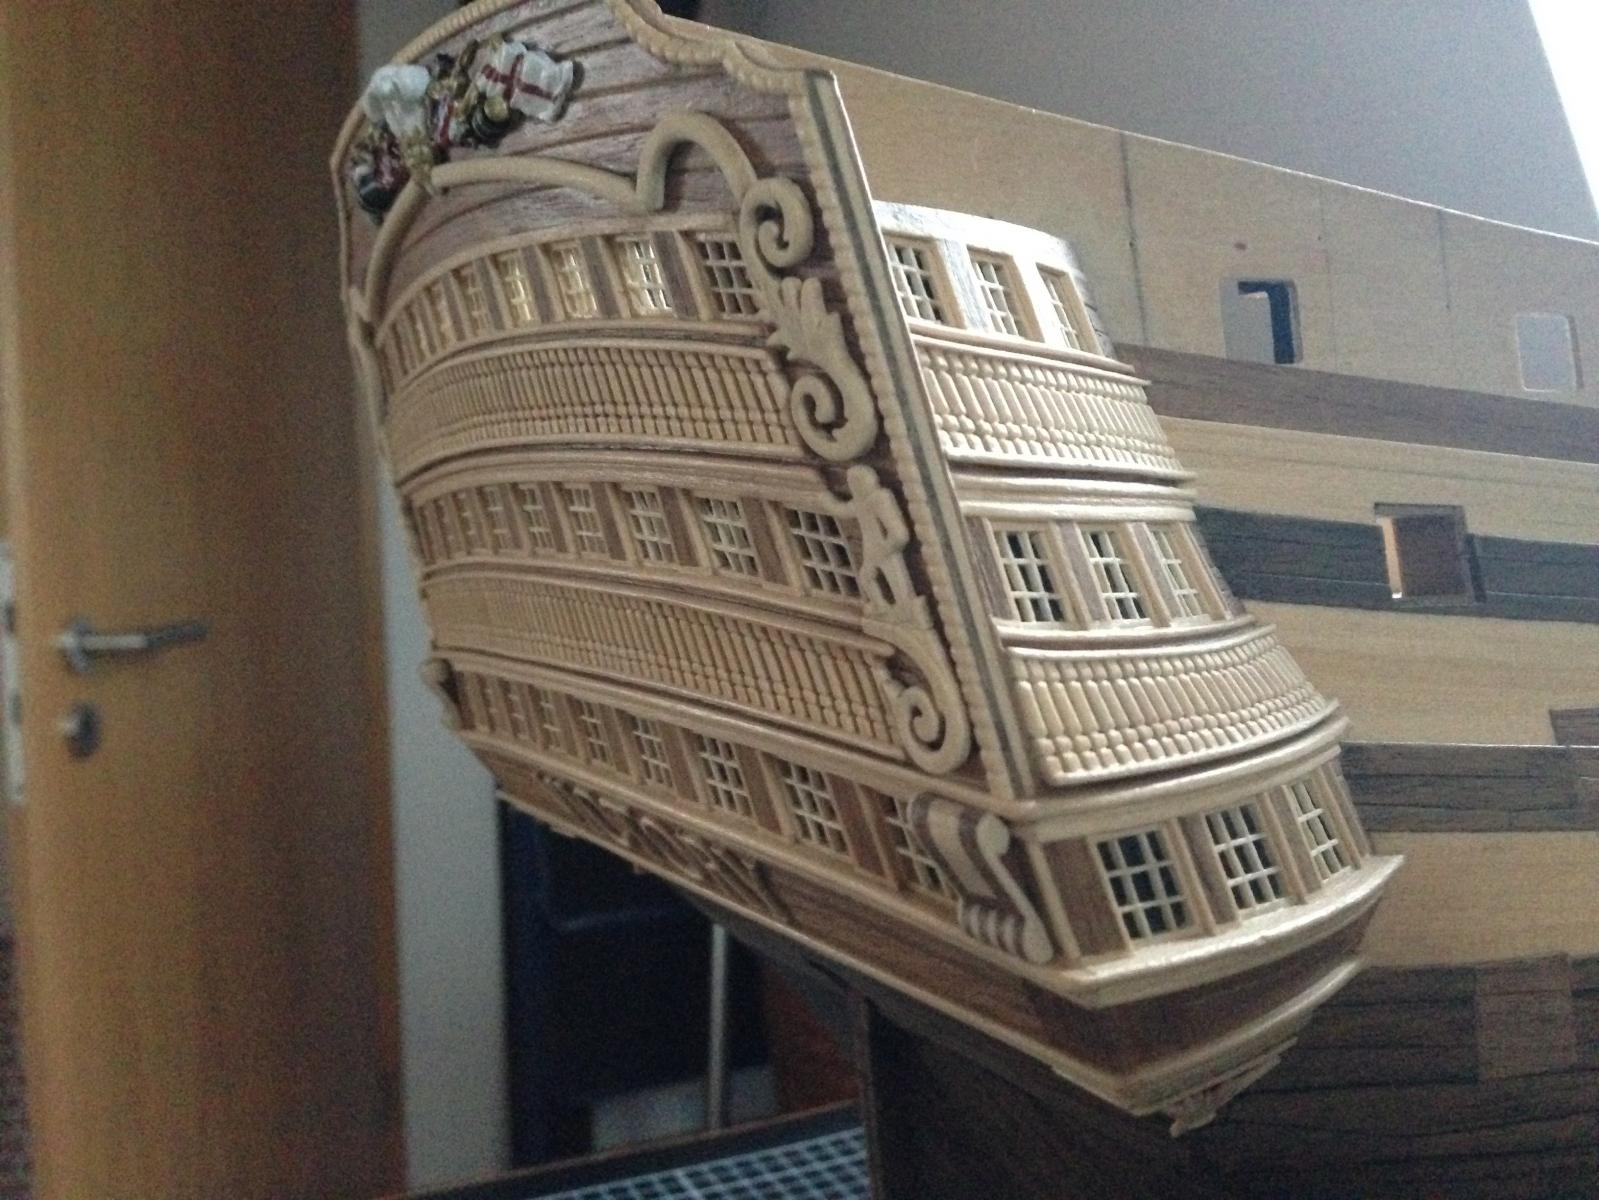
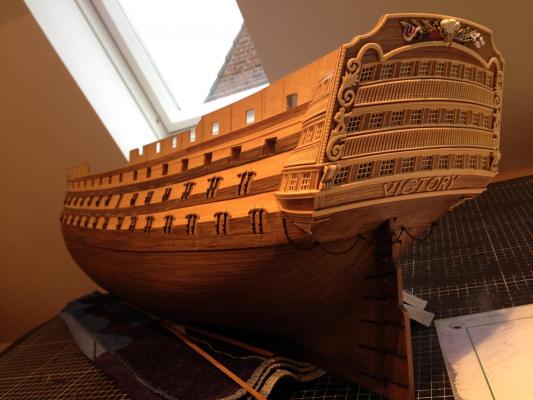
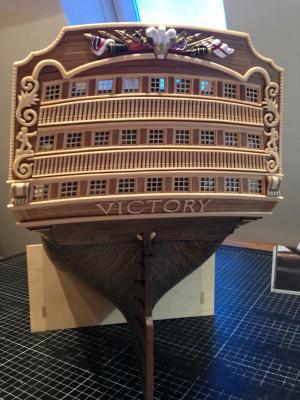
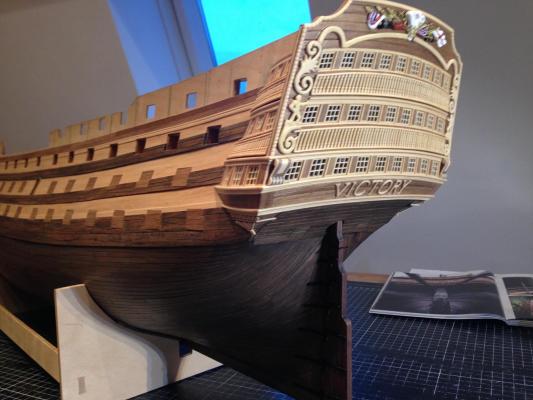
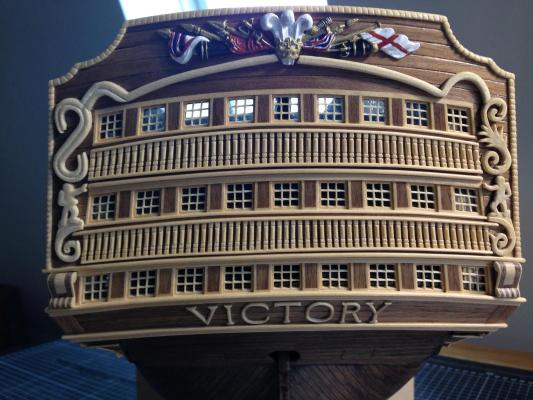
Hello modellers ! shortly before Christmas , I would like to post a little update . As you can see on the picture I finished the stern. I really like the result with the new ornaments.Have you noticed that the right man has become a little thinner ? I had to rework him a little. I wish it would be so easy for us to lose a few pounds :-))) . The next step I took was the rudder. Unfortunately I could not find any good drawings in my plans and books. So I looked here in some postings. I found some very interesting pictures. Without you, I would not be able to build a raft... not thinking about a Victory... I used that piece from the kit. I wanted it to look as if it would be made up of several pieces. That´s why I applied my technique with the slits. And I use the black wood filler to make them more visible. I hope you can see it on my pictures. They seem to be a little dark this time. I wish you all a merry christmas and good luck with your models! All the best - Heinz - P.S.: Dec. 9. was the 2 birthday of my Victory. To celebrate this day a friend wanted to hit a bottle of champagne on its hull...he is no longer my friend...lol To celebrate the day a friend wanted to hit a bottle of champagne on its hull . To celebrate the day a friend wanted to hit a bottle of champagne on its hull . That's why I applied my technique with the slits in the wood .√v That's why I applied my technique with the slits in the wood . That's why I applied my technique with the slits in the wood . That's why I applied my technique with the slits in the wood . That's why I applied my technique with the slits in the wood .

-
Hello Boyd, to watch your victory gives me so much inspiration. Wow, she is a beauty. Keep on your good work!!! Best wishes - Heinz -
-
Hello Ian, today I have the time to tell you, that I really like the result of your planking job. I could not help you answering your question whether to seal it now or later. Are you planing to work out the spaces between the planks and fill them with wood filler like I have done it? Your work is so clean you don´t have to do this. Otherwise it will underline the running of the planks and make them more visible. Maybe there is another point interesting for you: the black wood filler make the wood look older and used. The color of the wood changes (it´s getting a little bit darker) and make differences disappear. I am thinking on the few planks in the bow, you know? Best wishes for you and your model!
- 191 replies
-
- 4
-
-
- victory
- caldercraft
- (and 1 more)
-
Dimitris, again I have to say, it´s so much fun to watch the progress of your model! It looks so realistic...I want to enter the sea with you :-) - Heinz -
-
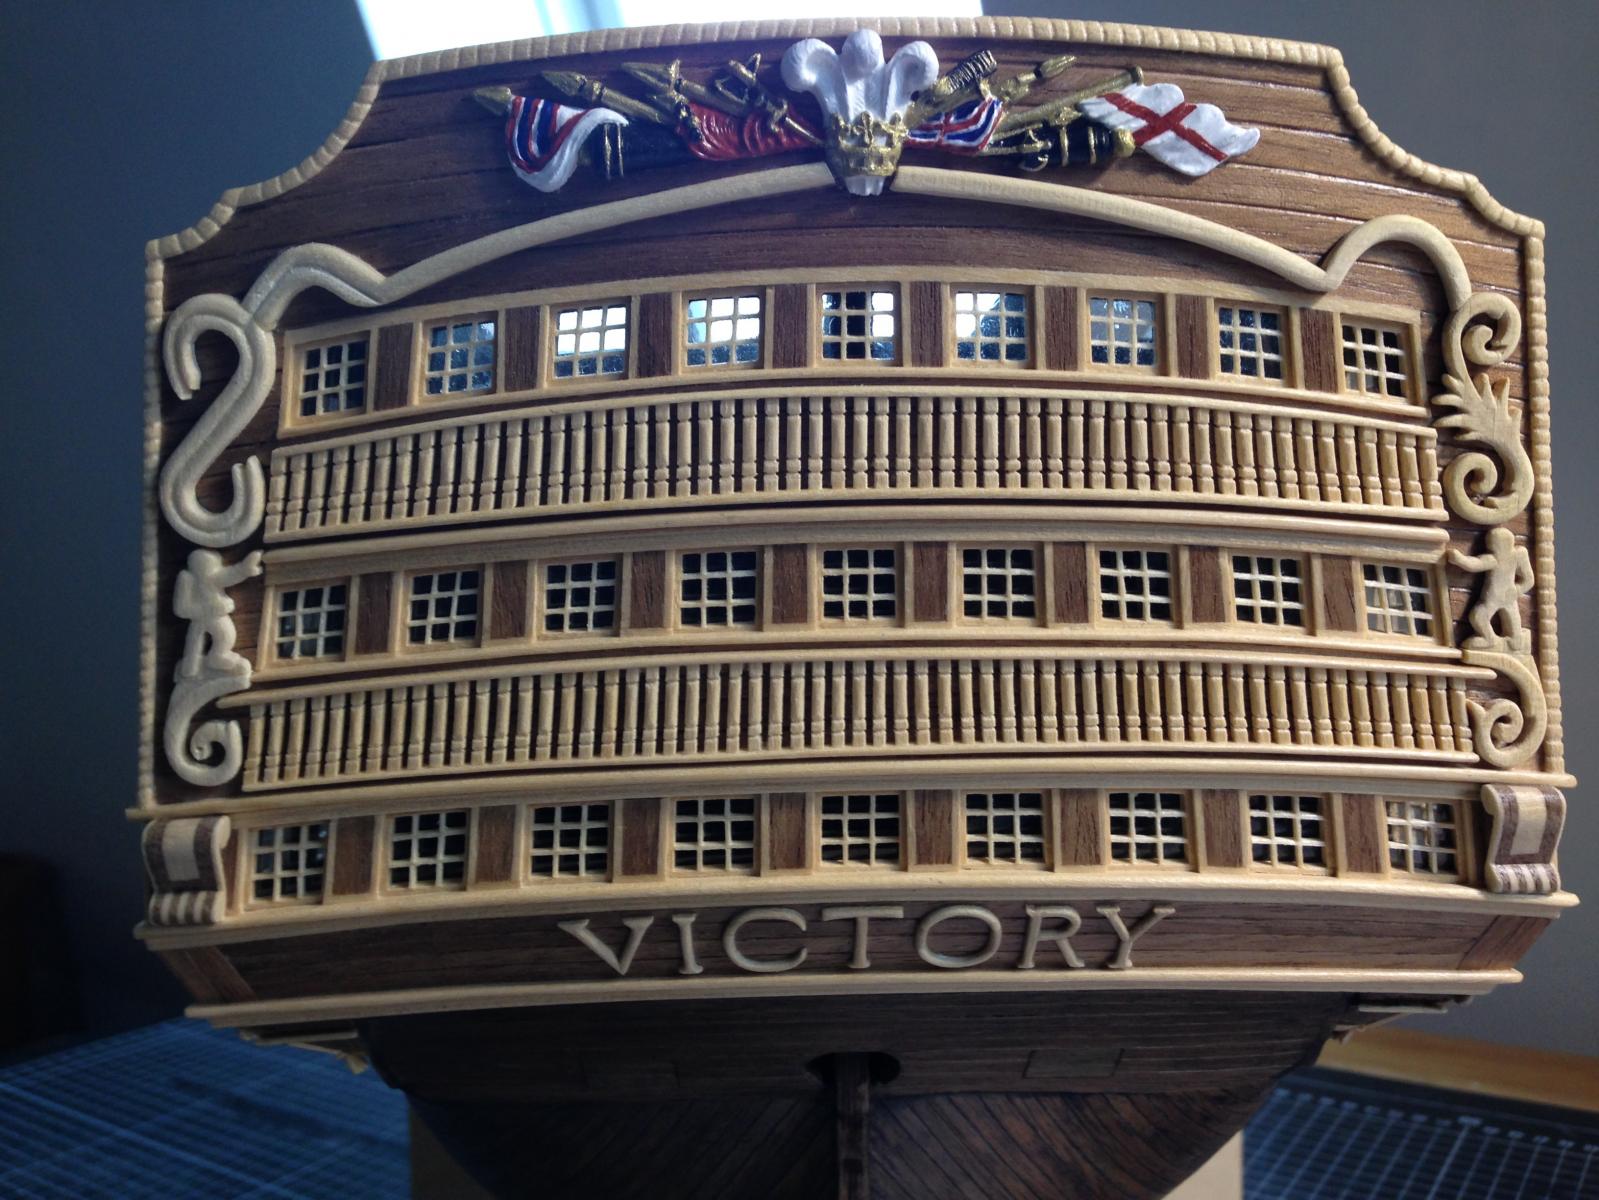
Hello friends! I finished the windows. Oh God, these little parts... But now it´s done :-) As I told you before, I was not really happy with the ornaments. The color of the new wood is a brighter than all the other strips of my elderberry wood. And it always breaks when I tried to build little details. NMBROOK gave me some advices how to resolve this problem. (Thanks again, Nigel :-) ). But I had another idea to try it with my old and small elderberry strips. First I glue some strips parallel to get a smooth surface, for example 3 x 4 cm. In the second step I glue a second ply on the back in a 90 degree angel. The wood fibers run transversely to each other. This gives the piece of wood much more hardness to work out small details. Look at the last 2 pictures. I have made the new ornaments on the right side in this way. There are no color differences and no broken and repaired places anymore. The ornaments look much more like the original ones. Don´t you think so? I hope I can manage the left side in the same way... Have a nice weekend and greetings to all of you - Heinz -


-
Hello Ian, Very clean and excellent work! Congratulation!!!! - Heinz -
- 191 replies
-
- 3
-
-
- victory
- caldercraft
- (and 1 more)
-
Hi Ian, no problem. Feel free to ask me. I am proud that someone wants my advice here :-) Concerning the keel, please take a look at post no. 39 on my topic. There you can see 2 pictures showing you that I started planking from both sides. First I started at the keel going up for 5 or 6 planking lines. And then I started from the waterline going down till I reached the lines below. I did not groove into the keel or do something like that. I have to say that I did not follow the instructions of the kit. And the only reason for it, was the fact, that I did not read them carefully enough. The instruction tells you to first (double-)plank your ship and put the keel on it at last. I put the keel on it before I start my first (!) planking (look at post no. 4). I had to work very carefully to not damage or dirty the keel. On the other hand it helps me with my second planking, cause I had a kind of border to push my planks on it. It works like a stop for the planks and hold them on position. Maybe the same effect like a groove. The same happened on the area below the stern (I mean the area with the 2 gun ports). I planked this area, although the instructions from the kit don´t tell me to do this. As a result I have my border for the up-coming planks (last picture on post no. 36). Ian, I hope I could answer your questions well. :-))) - Heinz -